The best all-in-one art kit for beginners
187Pcs Professional All-in-One Art Painting Kit
Everything you need to start painting. Includes brushes, paints, easel, and more. Highly rated by readers.
Shop on Amazon →As an Amazon Associate, we earn from qualifying purchases.
Simple Macrame Keychain Projects bring a tidy boost of handmade charm and personality to everyday essentials.
Tiny knots and textured cotton cords turn a plain metal ring into tactile little keepsakes that travel everywhere.
These simple macrame keychain ideas fit gifting, small swaps, or a quick craft break while building steady confidence with each knot.
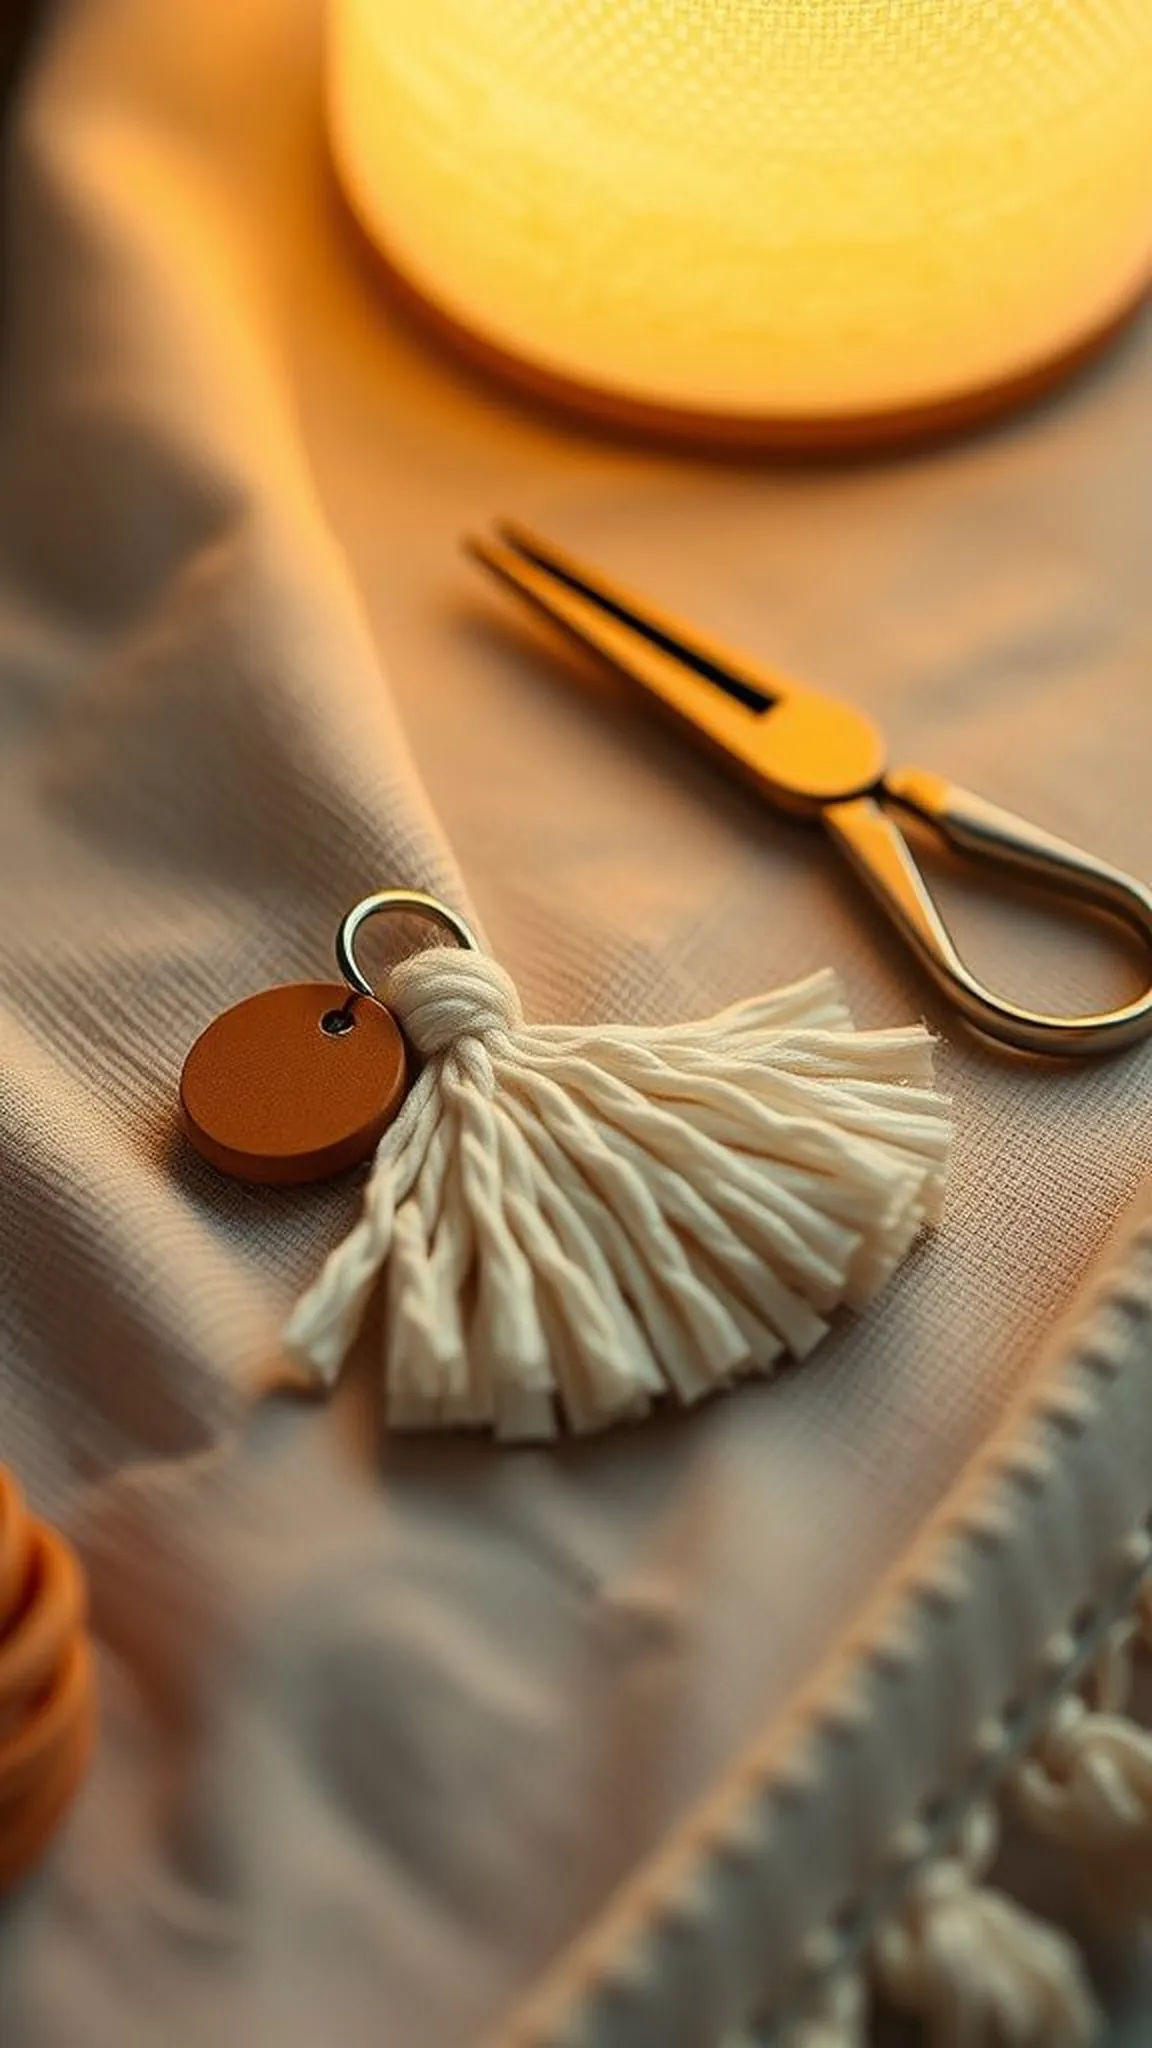
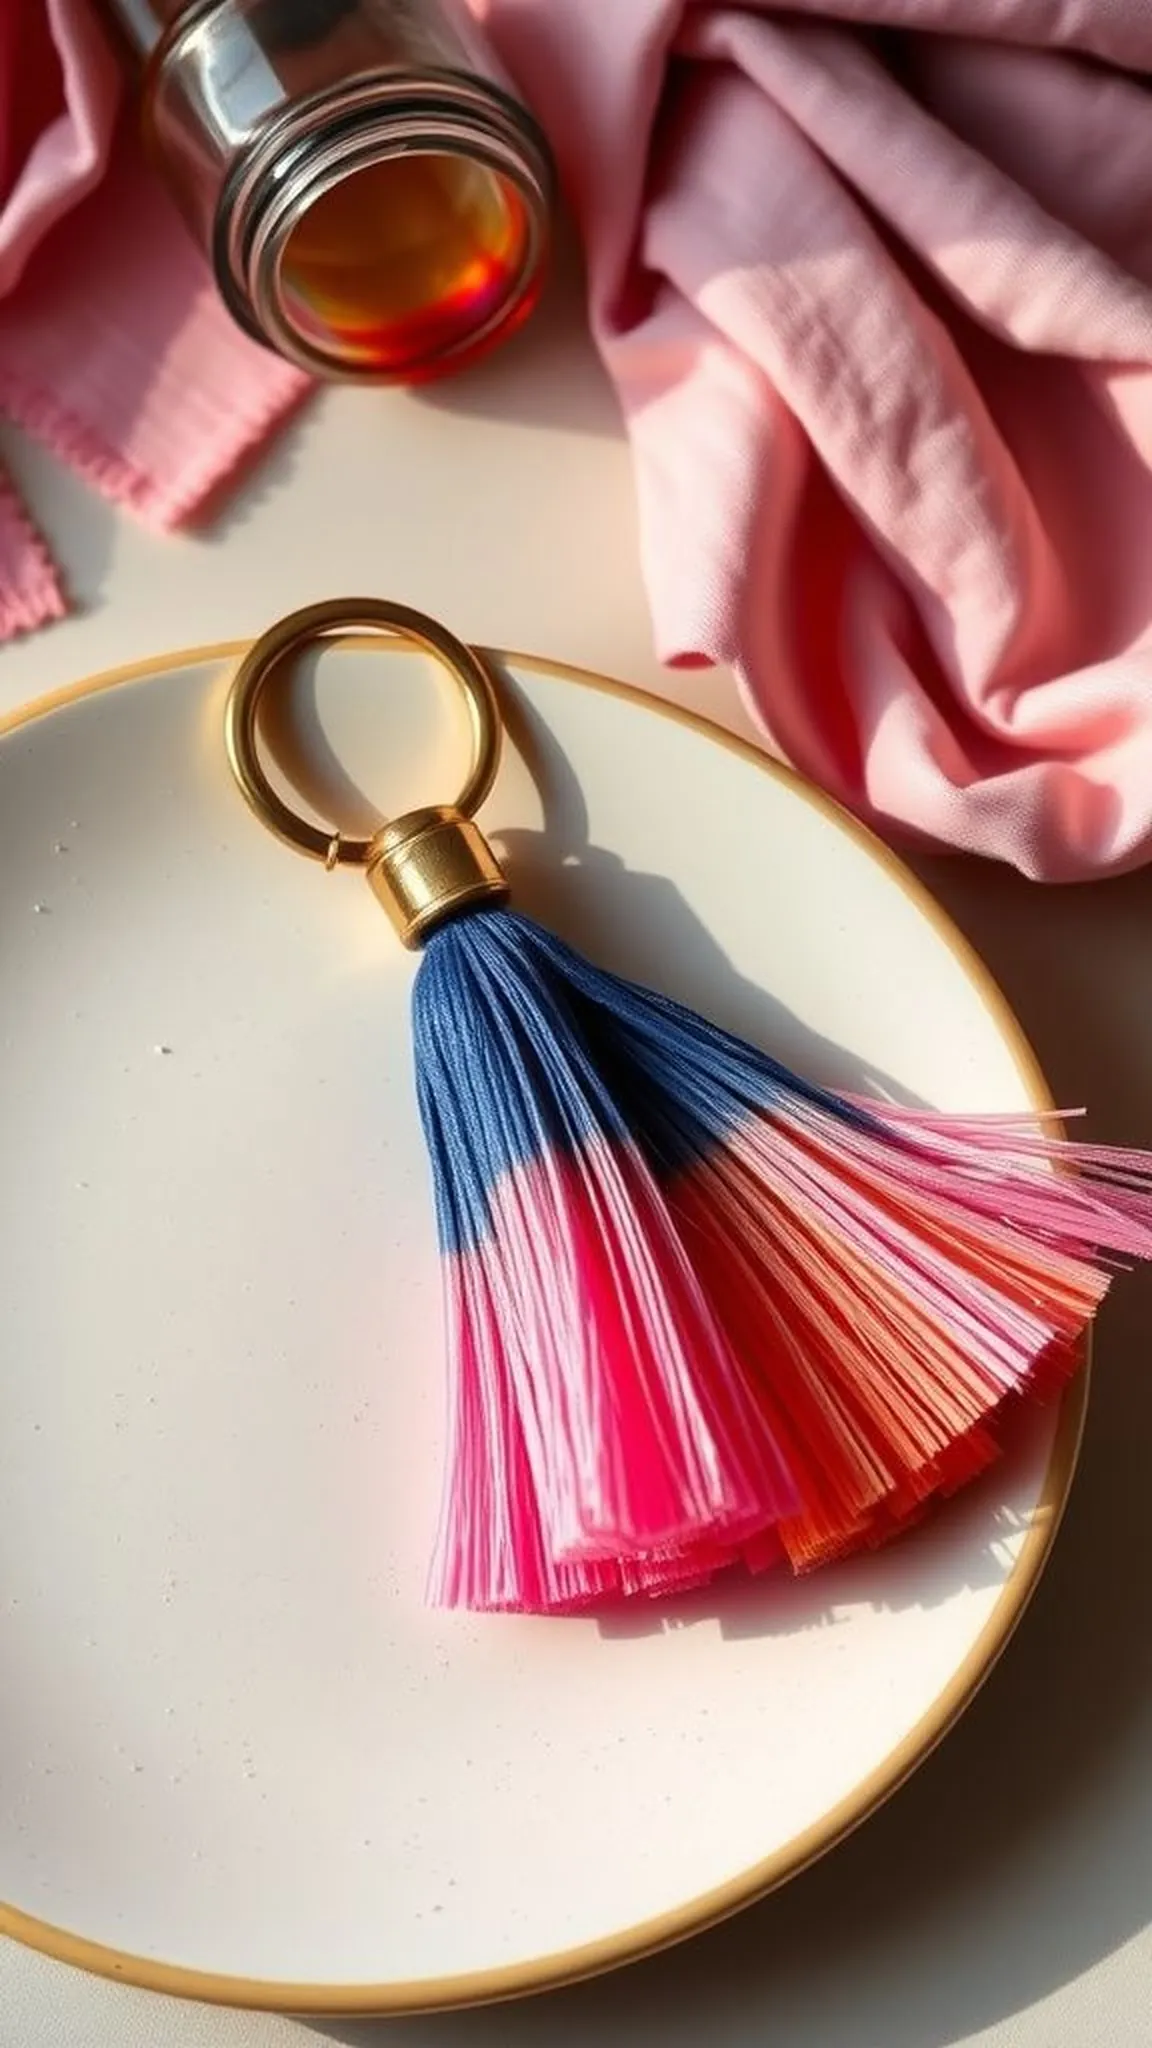
Lark’s head loop with tassel charm
⏱️ 30 min · 🟢 Beginner
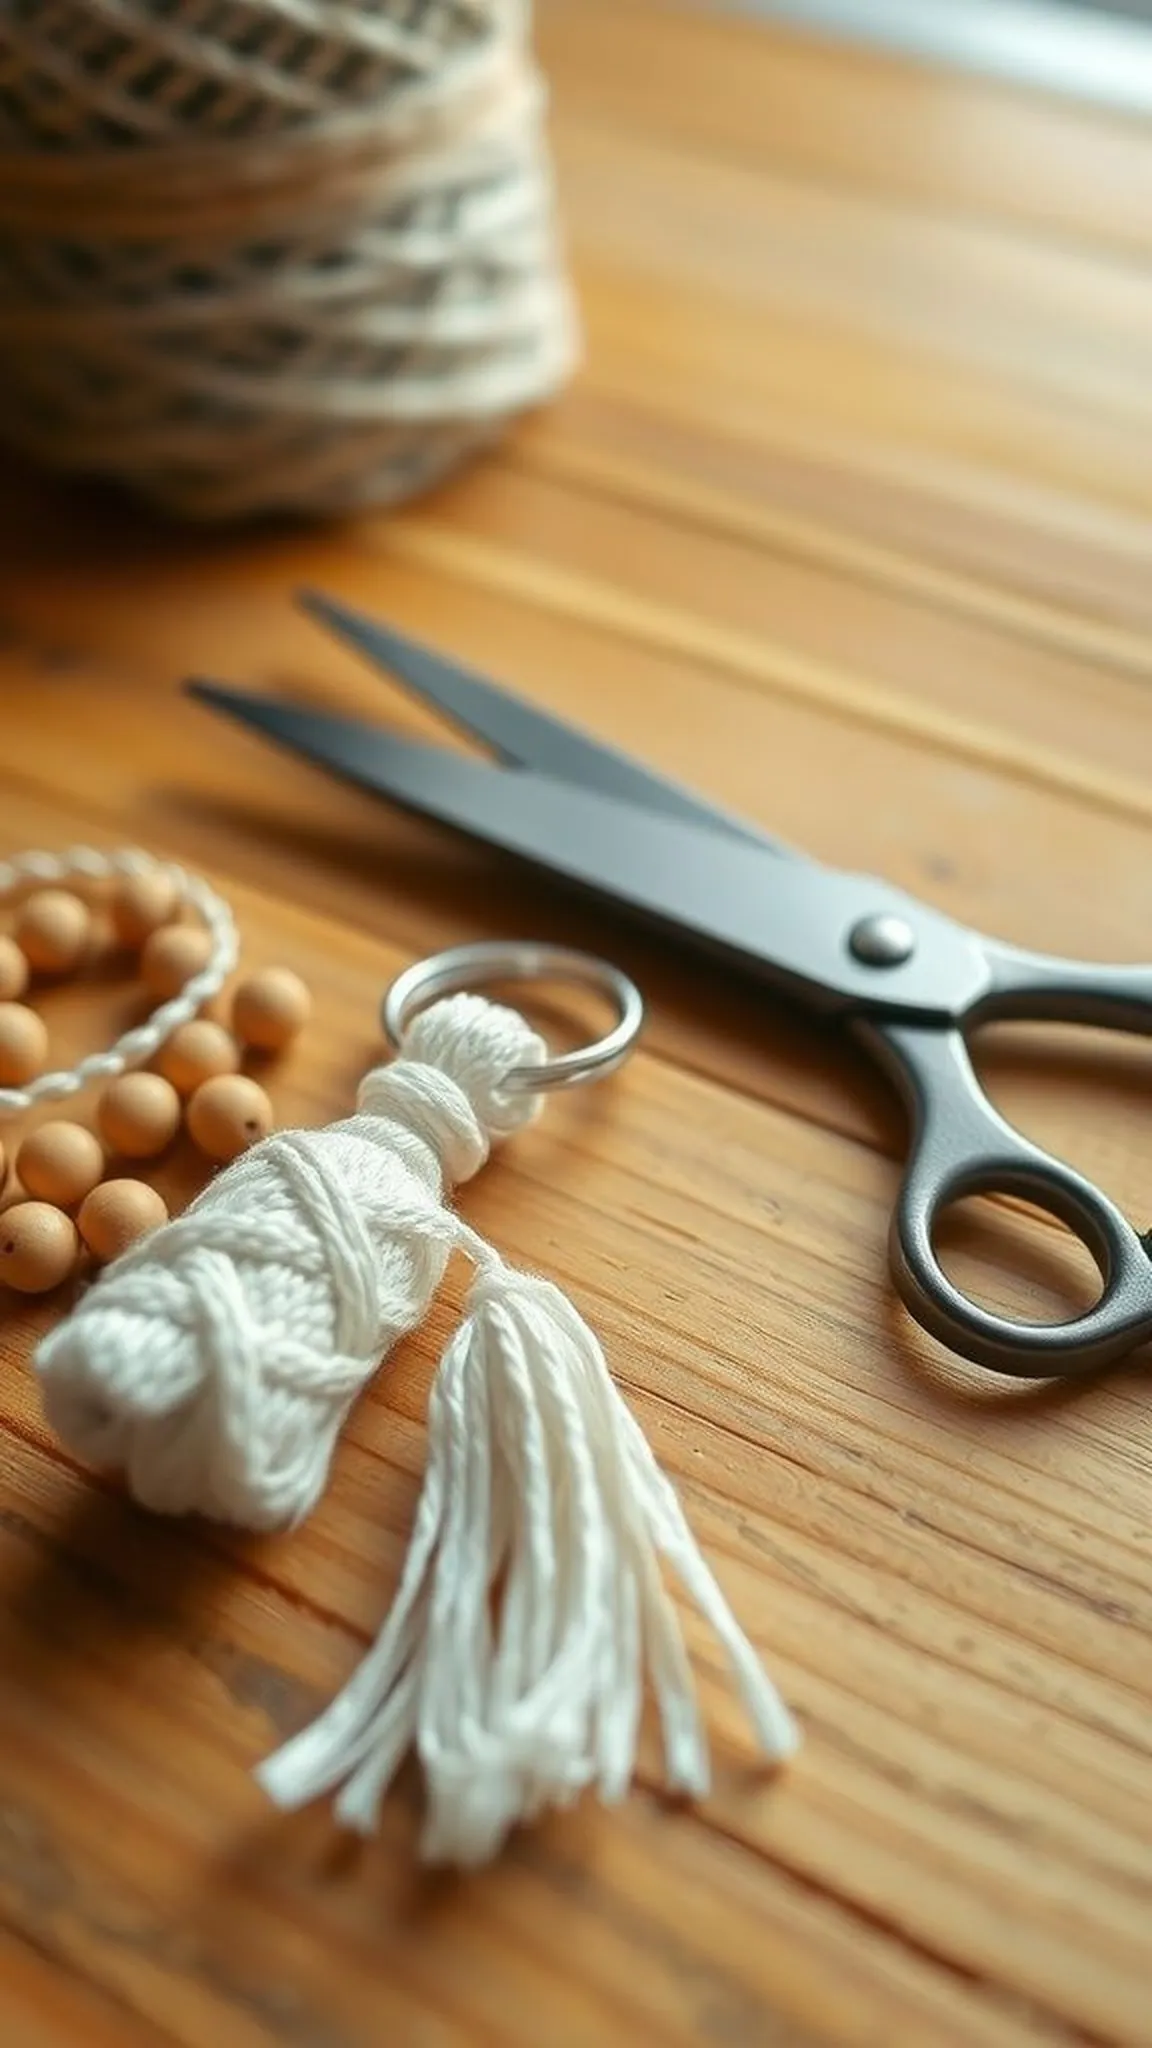
A simple lark’s head loop settles neatly around a sturdy metal ring, offering a tidy base for a tassel.
Soft cotton fibers fan into a gentle fringe that rustles with movement and catches warm afternoon light.
The contrast between a smooth split ring and a fuzzy tassel adds a cozy, handcrafted punctuation to keys or a zipper.
Pro Tip: Choose a slightly thicker cord to hide small variations in knot tension and keep the tassel full and plush.
How to Make This
- Measure and cut four equal lengths of cotton cord about fifteen to twenty centimeters longer than the finished tassel.
- Fold cords in half and loop them around the key ring with a lark’s head knot to form the tassel base.
- Gather the ends together and bind near the top with a short cord wrap, then trim the fringe to shape.
Avoid: A frequent beginner mistake is cutting cords too short, which makes finishing messy and tight around the ring.
Try Also: Swap natural cotton for bright embroidery thread, slide one or two wooden beads above the tassel, or trim the fringe into a neat V shape.
Products & Materials
Items Used
- cotton macrame cord 2mm
- split key rings 25mm
- wooden beads 8mm
- sharp scissors
“Tiny tassel lark’s head keychain for cozy handmade charm.”
Spiral half-knot corkscrew macrame keychain
⏱️ 45 min · 🟠 Intermediate
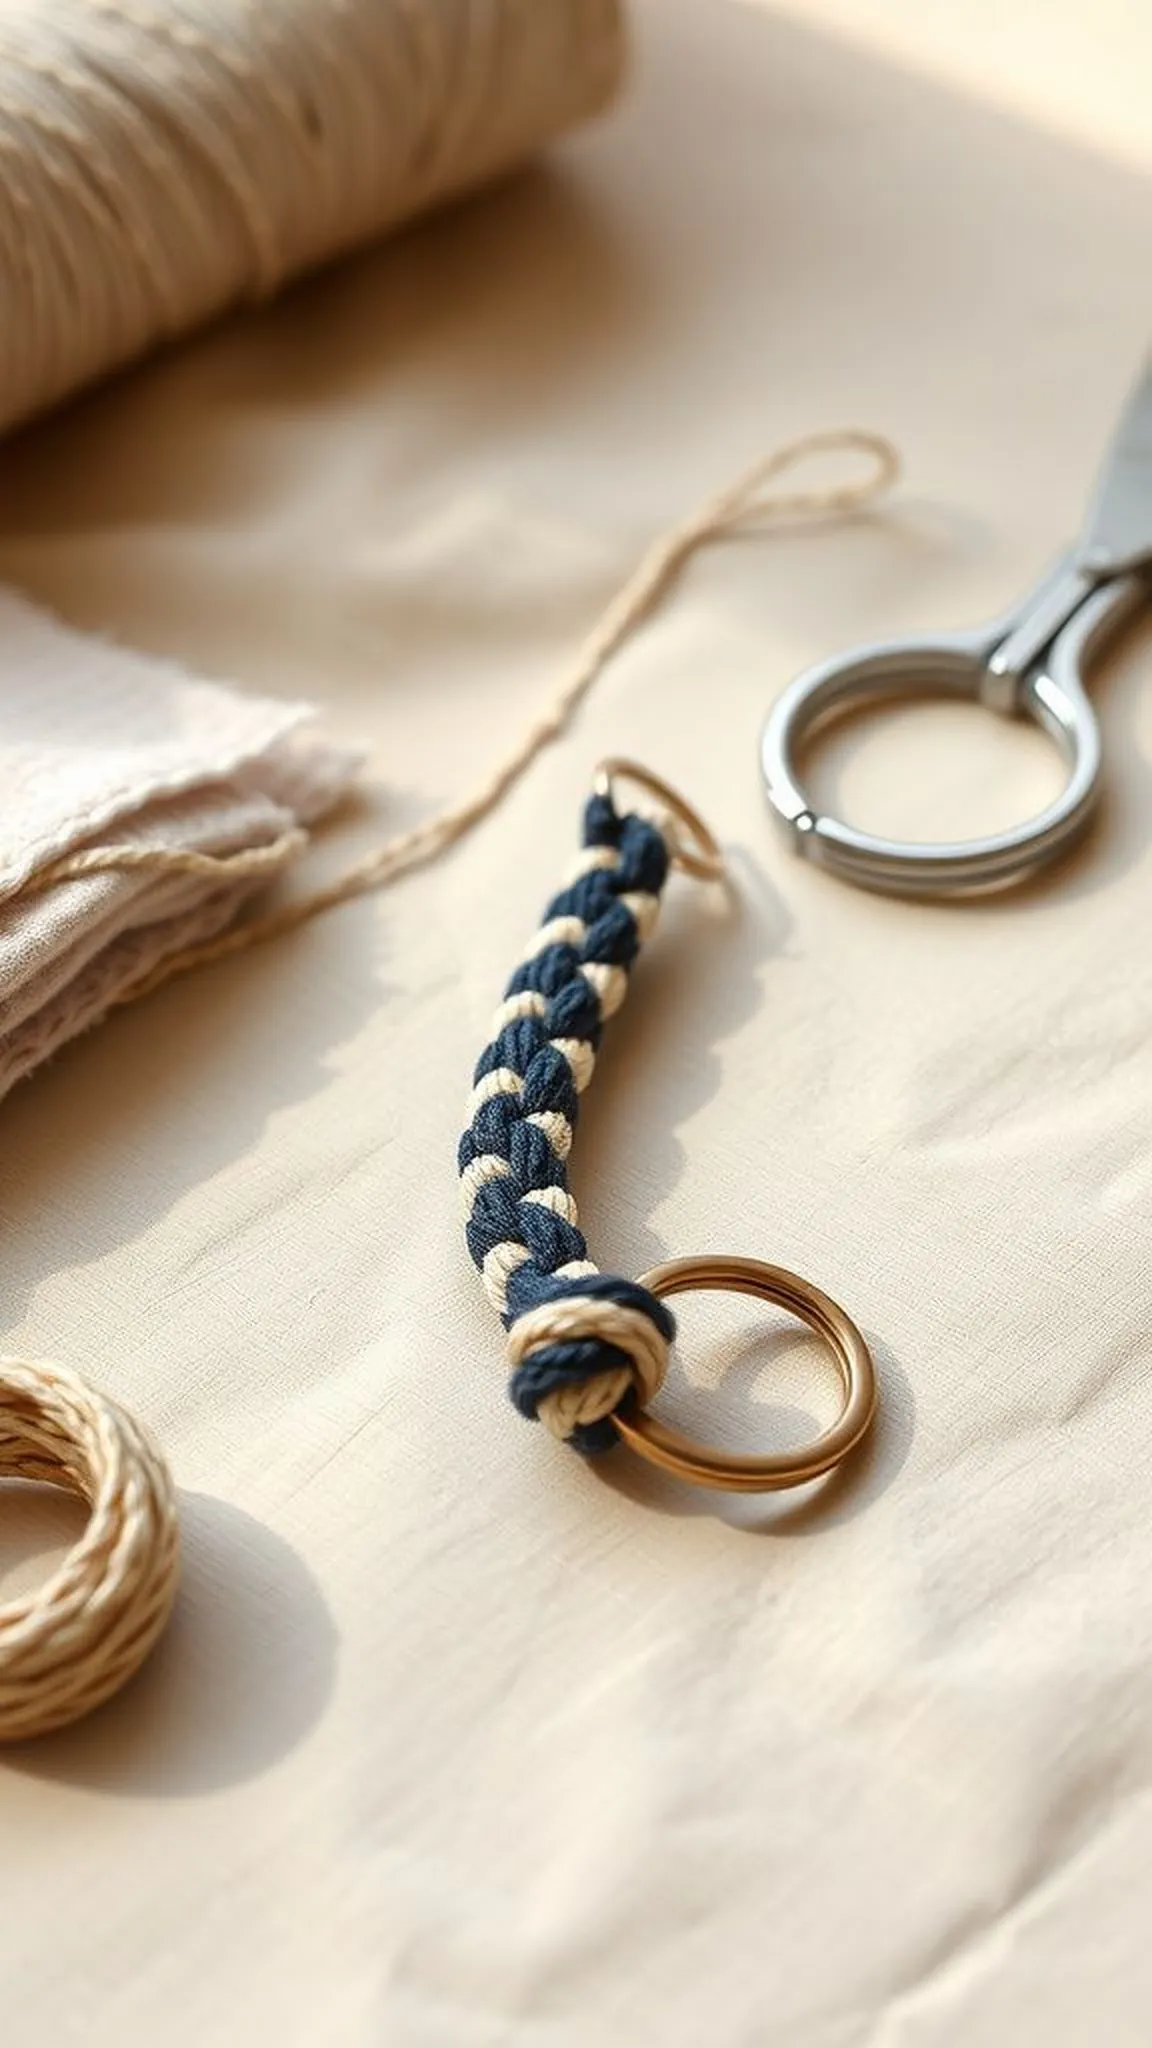
A spiral formed by repeating half-knots rides like a little corkscrew along the cord, creating a lively twisted column of texture.
The coil responds to touch, giving the key fob a playful spring and a pleasing rhythmic pattern in close view.
Color changes in the cord or a single bead threaded into the twist brighten the silhouette and invite a second look.
Pro Tip: Maintain steady tension on the anchor cord so the spiral stays even and the finished column does not flop to one side.
How to Make This
- Cut four long cords, secure one pair as anchors and work the other pair in repeating half-knot wraps down the length.
- Continue alternating sides until the spiral reaches the desired length, then tighten the last knots and trim excess.
- Finish by looping the anchor cords through a split ring and securing with a tight overwrap.
Avoid: A frequent oversight is uneven tension, which causes the spiral to lean; consistent hand pressure keeps the twist uniform.
Try Also: Try two contrasting colors for a candy-cane effect, add tiny beads between twists, or shorten the spiral for a compact pull.
Products & Materials
Items Used
- cotton macrame cord 2mm
- split key rings 25mm
- sharp scissors
“Twisted spiral keychain with lively half-knot texture.”
Flat square-knot key fob with bead accent
⏱️ 40 min · 🟢 Beginner
A short strip of alternating square knots forms a tidy flat fob that lies comfortably against a palm or pocket seam.
A single wooden bead threaded into the center row adds a warm dot of contrast against the woven bands.
The finished piece feels pleasantly dense beneath the fingertips, the pattern catching glints of light along its ridges.
Pro Tip: Work knots on a stable flat surface and gently smooth rows with a finger to keep the pattern aligned and compact.
How to Make This
- Cut four cords of equal length and secure them to a clipboard or tape the top to the table to hold tension.
- Form alternating square knots across a short section until the fob reaches the desired width and length.
- Slide a wooden bead onto the center cords, finish with a few more knots, and trim ends neatly before attaching to a key ring.
Avoid: A frequent problem is allowing rows to drift; keeping the knot sequence consistent preserves the flat rectangular shape.
Try Also: Use two shades to create stripes, replace the wooden bead with a metallic spacer, or shorten the fob into a compact tag.
Products & Materials
Items Used
- cotton macrame cord 3mm
- wooden beads 10mm
- split key rings 30mm
- clipboard or masking tape
“Flat square-knot fob with a single bead accent.”
Save time and printer ink with 50+ printable templates and step-by-step instructions in one ad-free guide.

Beaded row charm with tiny wooden beads
⏱️ 25 min · 🟢 Beginner
A row of beads threaded through alternating cords creates a beaded stripe that sits low and subtle on a keyring.
Warm wooden beads add a gentle weight that swings slightly and makes a soft clacking sound when moved.
The tactile rhythm of cord and bead repeats offers both visual and audible small comforts while carrying keys.
Pro Tip: Pre-sort beads by hole size and threadability to prevent frustration and to keep the beading stage smooth and calm.
How to Make This
- Cut four cords, secure them at the top and plan the bead placement down the center two cords.
- Slide beads one at a time onto the center strands and lock them in place with simple overhand or half knots at intervals.
- Finish with a neat wrap above the last bead and loop the assembly onto a split key ring.
Avoid: A frequent snag happens when bead holes are too small for the cord, causing stops and frayed fibers during threading.
Try Also: Mix bead sizes for texture, swap wood for glass beads for shine, or space beads farther apart for a airy effect.
Products & Materials
Items Used
- cotton macrame cord 2mm
- wooden beads 6mm
- split key rings 20mm
- sharp needle or beading awl
“Understated beaded macrame charm with natural wooden beads.”
Chevron micro fob with color change
⏱️ 1 hour · 🟠 Intermediate
![]()
A compact chevron pattern emerges when two contrasting cords form mirrored V shapes across a short panel.
The sharp angles create a satisfying graphic look that feels neat and made with care in hand.
Color contrast and tidy rows make the little fob read like a tiny woven flag on a metal ring.
Pro Tip: Switch colors at a consistent point within each row so the chevron points stay aligned and the design reads crisp.
How to Make This
- Prepare four cords in two contrasting colors and secure them at the top to maintain even tension.
- Work mirrored knots outward in alternating sequences to build the chevron point over a short span.
- Finish with a firm binding knot and attach the short panel to a split ring for a bold miniature badge.
Avoid: A frequent issue is shifting the color change too early, which makes chevrons look off-center rather than symmetrical.
Try Also: Try three colors for a layered chevron, use thinner cord for delicate detail, or pair with a tiny tassel at the base.
Products & Materials
Items Used
- cotton macrame cord 2mm assorted colors
- split key rings 25mm
- sharp scissors
“Mini chevron key fob with bold color contrast.”
Round Josephine knot charm with tiny loop
⏱️ 2-3 hours · 🔴 Advanced
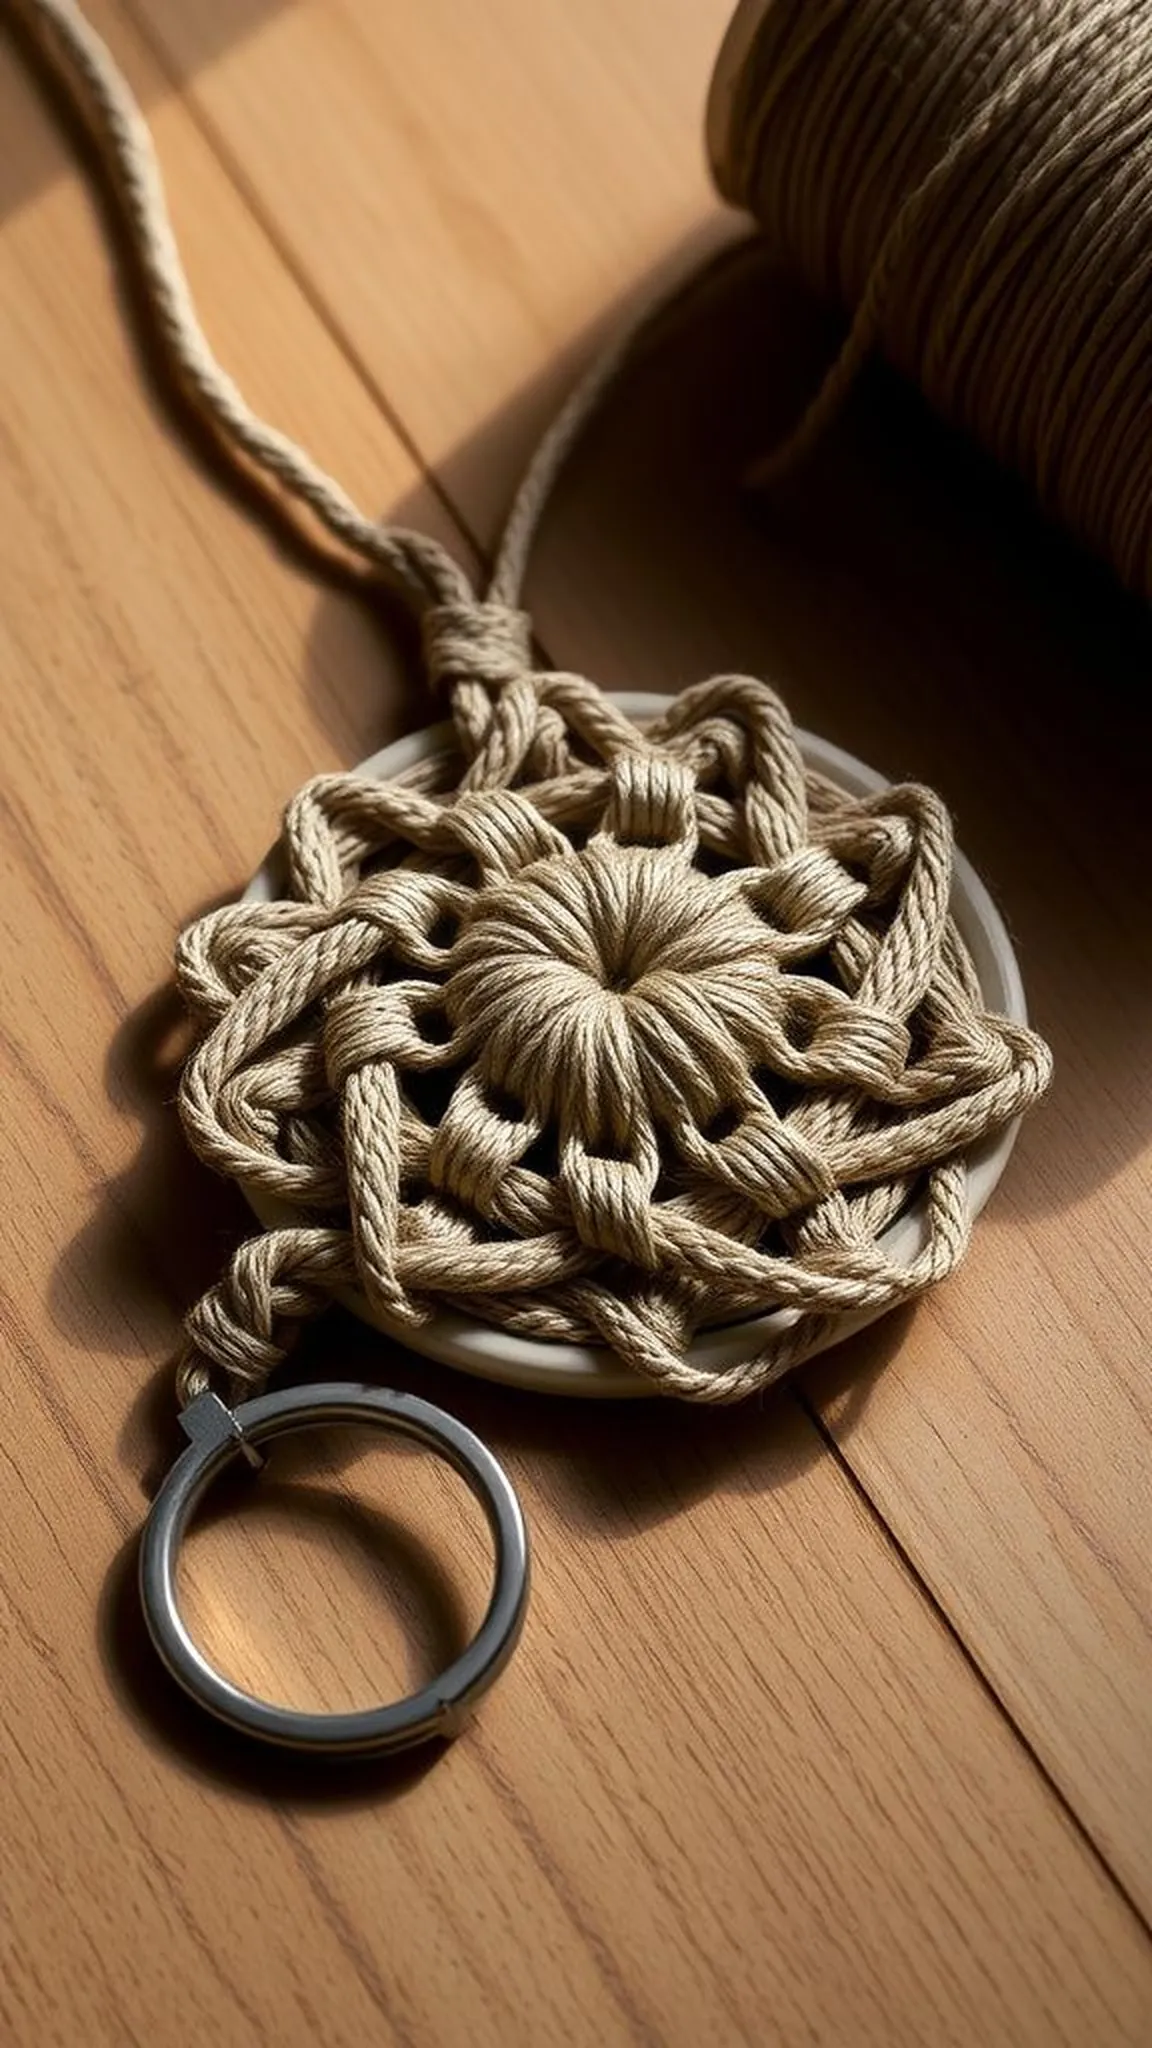
A rounded Josephine style knot forms a decorative knot medallion that reads like a tiny ornamental button on a keyring.
Its interlaced loops create a compact, slightly domed surface that catches light along each curve.
The result is delicate and sculptural, a small statement that rewards a patient hand and close inspection.
Pro Tip: Loosen and re-seat the woven loops before tightening completely to ensure the medallion keeps a neat rounded profile.
How to Make This
- Cut several equal cords and lay out a symmetrical knotting plan so loops mirror across the center.
- Weave the Josephine-style loop sequence carefully, adjusting each loop before pulling snug to maintain the domed shape.
- Secure the base with a tight binding, tuck ends cleanly, and slip the piece onto a split ring through a short loop.
Avoid: An early misstep is pulling loops too tight too soon, which flattens the domed look and hides the knot detail.
Try Also: Try a two-tone medallion by switching strands mid-weave, add a small bead at the center, or make a pair for matching charms.
Products & Materials
Items Used
- cotton macrame cord 1.5mm
- split key rings 20mm
- sharp scissors
“Intricate Josephine knot medallion for sculptural charm.”
Mini fan fringe keychain with layered texture
⏱️ 30-45 min · 🟢 Beginner
A small fan fringe spreads out like a palm of soft fibers, offering a burst of texture at the end of a keyring.
Layered cord lengths create a subtle gradient of movement that brushes the surface of fabric when carried.
The little fan feels airy yet substantial, a playful accent that brightens daily carry with gentle motion.
Pro Tip: Trim the fringe while resting on a flat surface to achieve an even edge and to prevent accidental angled cuts.
How to Make This
- Gather several cord pieces at varied lengths and secure them with a tight wrap at the base to form a fan.
- Attach the wrapped base to a split ring and arrange the fibers outward to create the fan shape.
- Comb or smooth the fringe lightly and trim across the bottom for a uniform finish.
Avoid: A frequent oversight is trimming the fringe freehand without support, which can lead to an uneven edge and a lopsided fan.
Try Also: Layer two shades of cord for an ombré fan, add a tiny bead cluster at the base, or make a longer fan for a purse charm.
Products & Materials
Items Used
- cotton macrame cord 2mm
- split key rings 25mm
- sharp scissors
“Mini fan fringe macrame keychain for soft movement.”
Heart motif keychain for sweet gifts
⏱️ 1 hour · 🟠 Intermediate
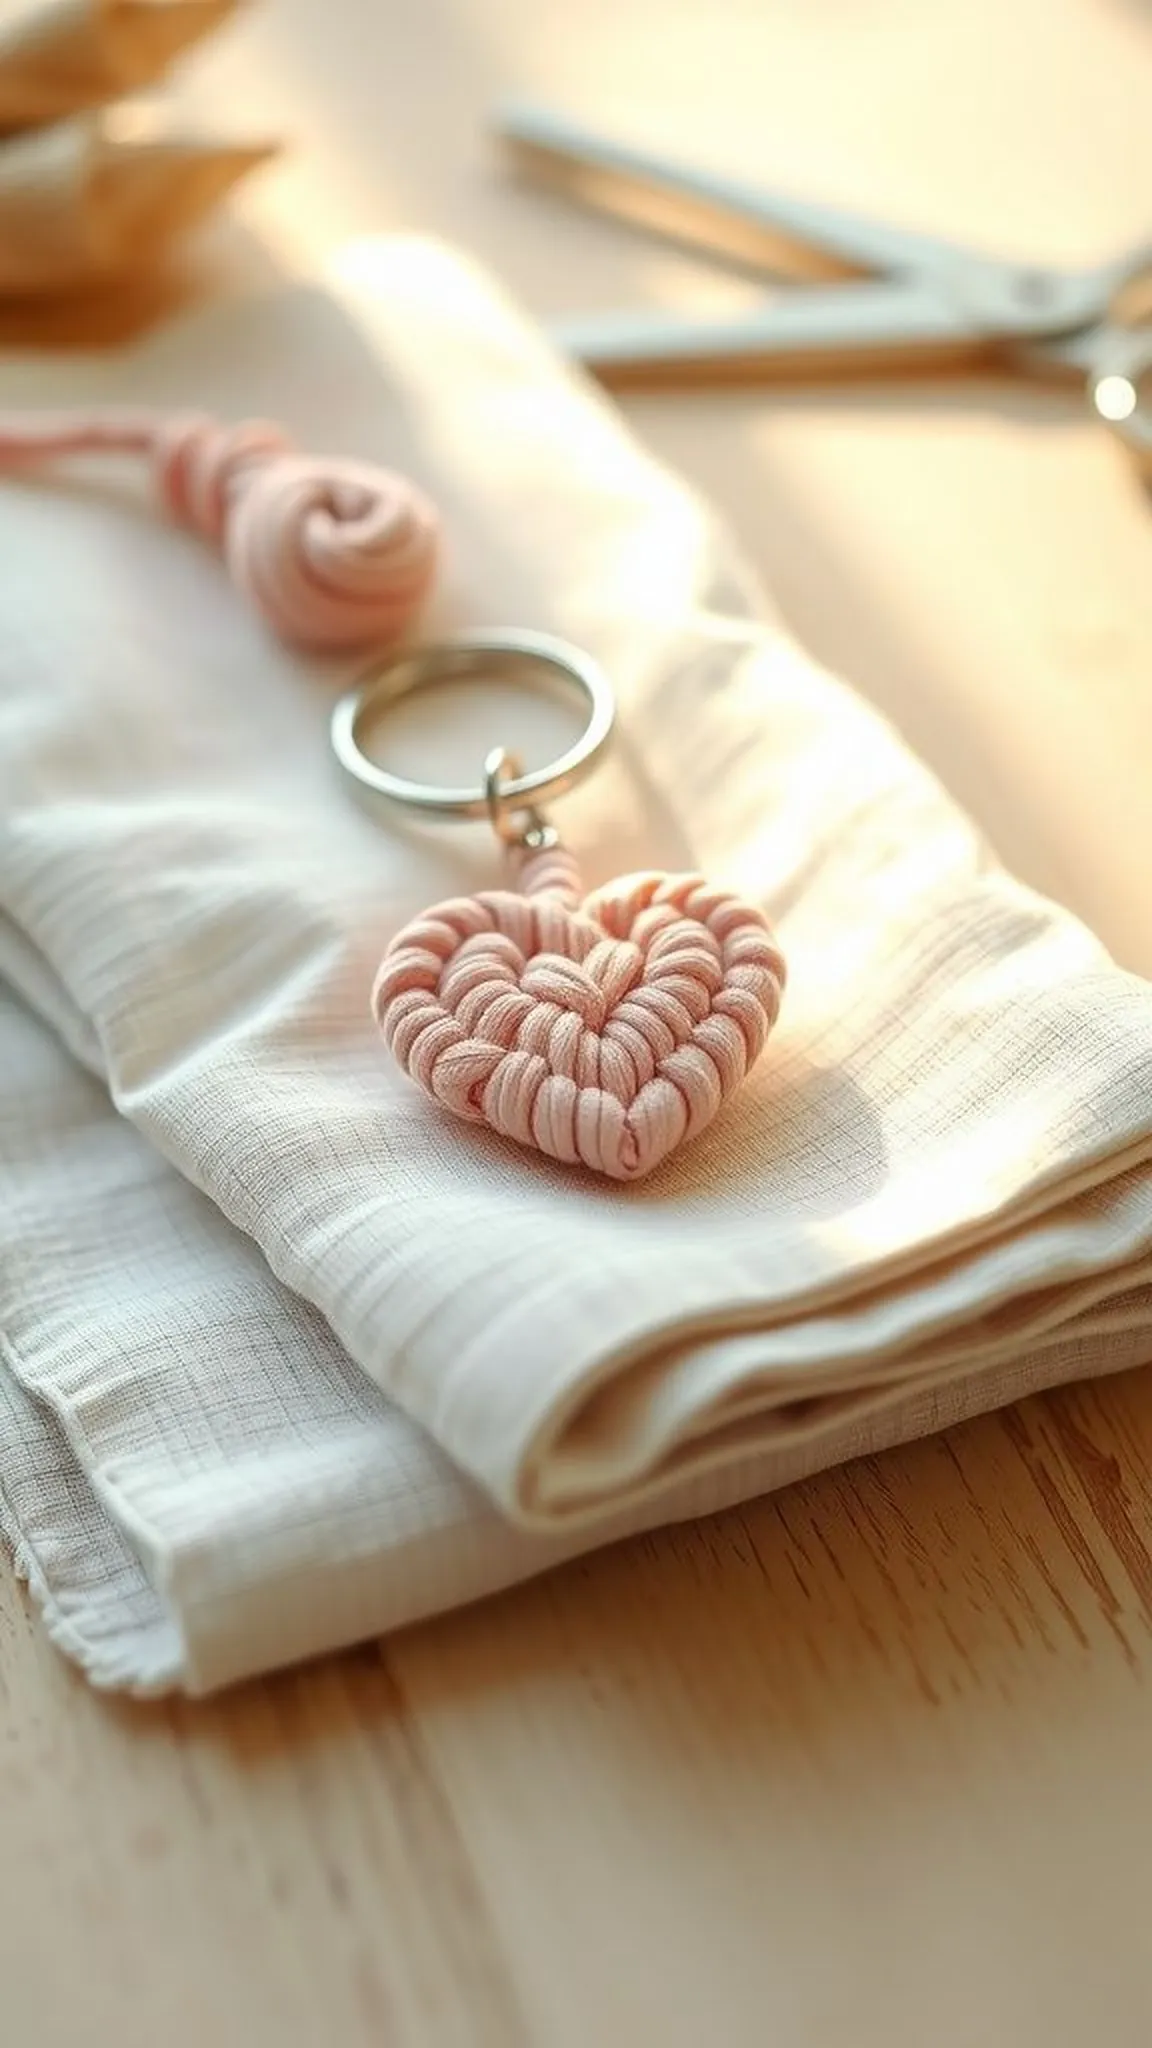
A little heart motif emerges from a pair of curved knot rows that meet at a tidy point, creating a sentimental silhouette.
Its soft curves read as warm and friendly, especially in a muted cotton hue or pastel palette.
The charm sits flat against a bag and brings a touch of handmade affection to everyday carry.
Pro Tip: Shape knots gently while forming the heart to keep rounded curves and avoid sharp cornering at the meeting point.
How to Make This
- Arrange cords symmetrically and work mirrored knot sequences to outline the heart curves on both sides.
- Adjust tension frequently to keep curves even and tighten only after the shape looks balanced.
- Secure the base, tidy the ends, and slip the finished heart onto a split ring for gifting.
Avoid: A frequent issue is tightening one side before the other, which makes the heart askew rather than perfectly mirrored.
Try Also: Make a pair of hearts in matching or contrasting colorways, add a small bead at the center, or create a stacked double-heart cluster.
Products & Materials
Items Used
- cotton macrame cord 2mm pastel
- split key rings 25mm
- sharp scissors
“Sweet heart-shaped macrame keychain for heartfelt gifts.”
Wrapped cord minimalist keyring design
⏱️ 20 min · 🟢 Beginner
A single cord wrapped tightly around a metal ring produces a tidy, minimalist band that reads modern and calm.
Tactile ridges from the wrap offer a satisfying grip and a quiet rhythm when fingers pass over the surface.
The finished look is simple and refined, ideal for someone who prefers a pared-back handmade accent.
Pro Tip: Keep each wrap snug and parallel to its neighbor so the band looks continuous and avoids gaps or overlaps.
How to Make This
- Select one long cord and anchor it to the split ring with a secure loop or lark’s head.
- Wind the cord tightly and evenly around the ring for the desired width, keeping wraps parallel.
- Finish with a neat binding knot or a tiny dab of clear fabric glue and trim the tail close.
Avoid: A frequent slip is leaving wraps uneven, which creates visible gaps and a less polished band appearance.
Try Also: Use a leather cord for a rugged vibe, add a thin metallic thread for subtle shine, or wrap two thinner cords together for texture.
Products & Materials
Items Used
- cotton cord 2mm natural
- split key rings 30mm
- clear fabric glue small tube
“Clean wrapped cord keyring for minimalist style.”
Woven diamond charm with negative space
⏱️ 2 hours · 🔴 Advanced

A tiny diamond motif built from alternating knots leaves intentional gaps that form airy negative space within the shape.
Edges read crisp while the interior breathes, balancing density with openness in a pleasing miniature geometry.
Held close, the charm shows off tiny shadow patterns where cords overlap and where light slips between knots.
Pro Tip: Pause frequently to view the motif against light so the negative spaces align and the diamond center stays visually open.
How to Make This
- Lay out symmetrical cords and plan the negative spaces before knotting to ensure the diamond center remains open.
- Work alternating knot sequences to build the diamond edges while leaving the interior cords relaxed.
- Secure the outer rows, tidy ends, and attach the piece to a split ring through a short loop.
Avoid: A frequent mistake is overtightening inner cords, which closes up the negative space and makes the diamond look dense.
Try Also: Make a larger diamond by adding more rows, introduce a tiny bead in the center, or use two colors for an outlined effect.
Products & Materials
Items Used
- cotton macrame cord 1.5mm neutral
- split key rings 20mm
- sharp scissors
“Airy woven diamond key charm with elegant negative space.”
Braided wristlet macrame keychain for hands-free carry
⏱️ 1 hour · 🟠 Intermediate

A short braided wristlet combines practicality and comfort, letting keys hang like a small looped wrist cuff.
The braid feels dense and warm in hand, with cord fibers that soften over time with use.
A well-proportioned wristlet keeps keys close while showing off a tidy braid and neat finishes.
Pro Tip: Make the wristlet slightly looser than a wrist measurement to prevent strain when slipping it on or taking it off.
How to Make This
- Measure a length of three or four cords and fold to create the desired wrist circumference with extra for knotting.
- Braid or plait the cords evenly until the bracelet reaches the planned length, then secure both ends with tight binding knots.
- Attach one end to a split ring and tuck or trim tails cleanly for a comfortable finished loop.
Avoid: A frequent error is braiding too tightly, which reduces flexibility and makes the wristlet hard to slide into place.
Try Also: Add a clasp for removable wear, incorporate a beaded section for sparkle, or use leather cord for a sturdier wristlet.
Products & Materials
Items Used
“Braided wristlet keychain keeps hands free in style.”
Color-dipped tassel keychain with subtle ombré
⏱️ 45 min · 🟢 Beginner
A small tassel gets a dipped color wash at the tips for a shabby-chic ombré effect that reads playful and modern.
The dyed tips show soft irregular edges where dye met fiber, adding a handcrafted imperfect beauty to the piece.
The contrast between undyed tops and saturated bottoms gives each tassel a little personality and motion when carried.
Pro Tip: Test dye strength on a short cord scrap first to judge saturation and to avoid deeper color than intended on the final tassel.
How to Make This
- Assemble and wrap a tassel from several cords, keeping the top section protected from dye with a temporary barrier.
- Dip the tassel tips into a shallow dye bath for a brief time, remove and rinse until the desired shade appears, then dry flat.
- Secure the dyed tassel to a split ring with a short wrapped neck and trim the fringe when fully dry.
Avoid: A frequent slip is over-dipping, resulting in a darker tip than planned and less of a gentle gradient effect.
Try Also: Try two-tone dipping for a bold look, sprinkle metallic thread into the wrap, or dye only one side for asymmetry.
Products & Materials
Items Used
“Dip-dyed tassel keychain with soft ombré tips.”
Button loop closure key fob with vintage charm
⏱️ 35 min · 🟢 Beginner
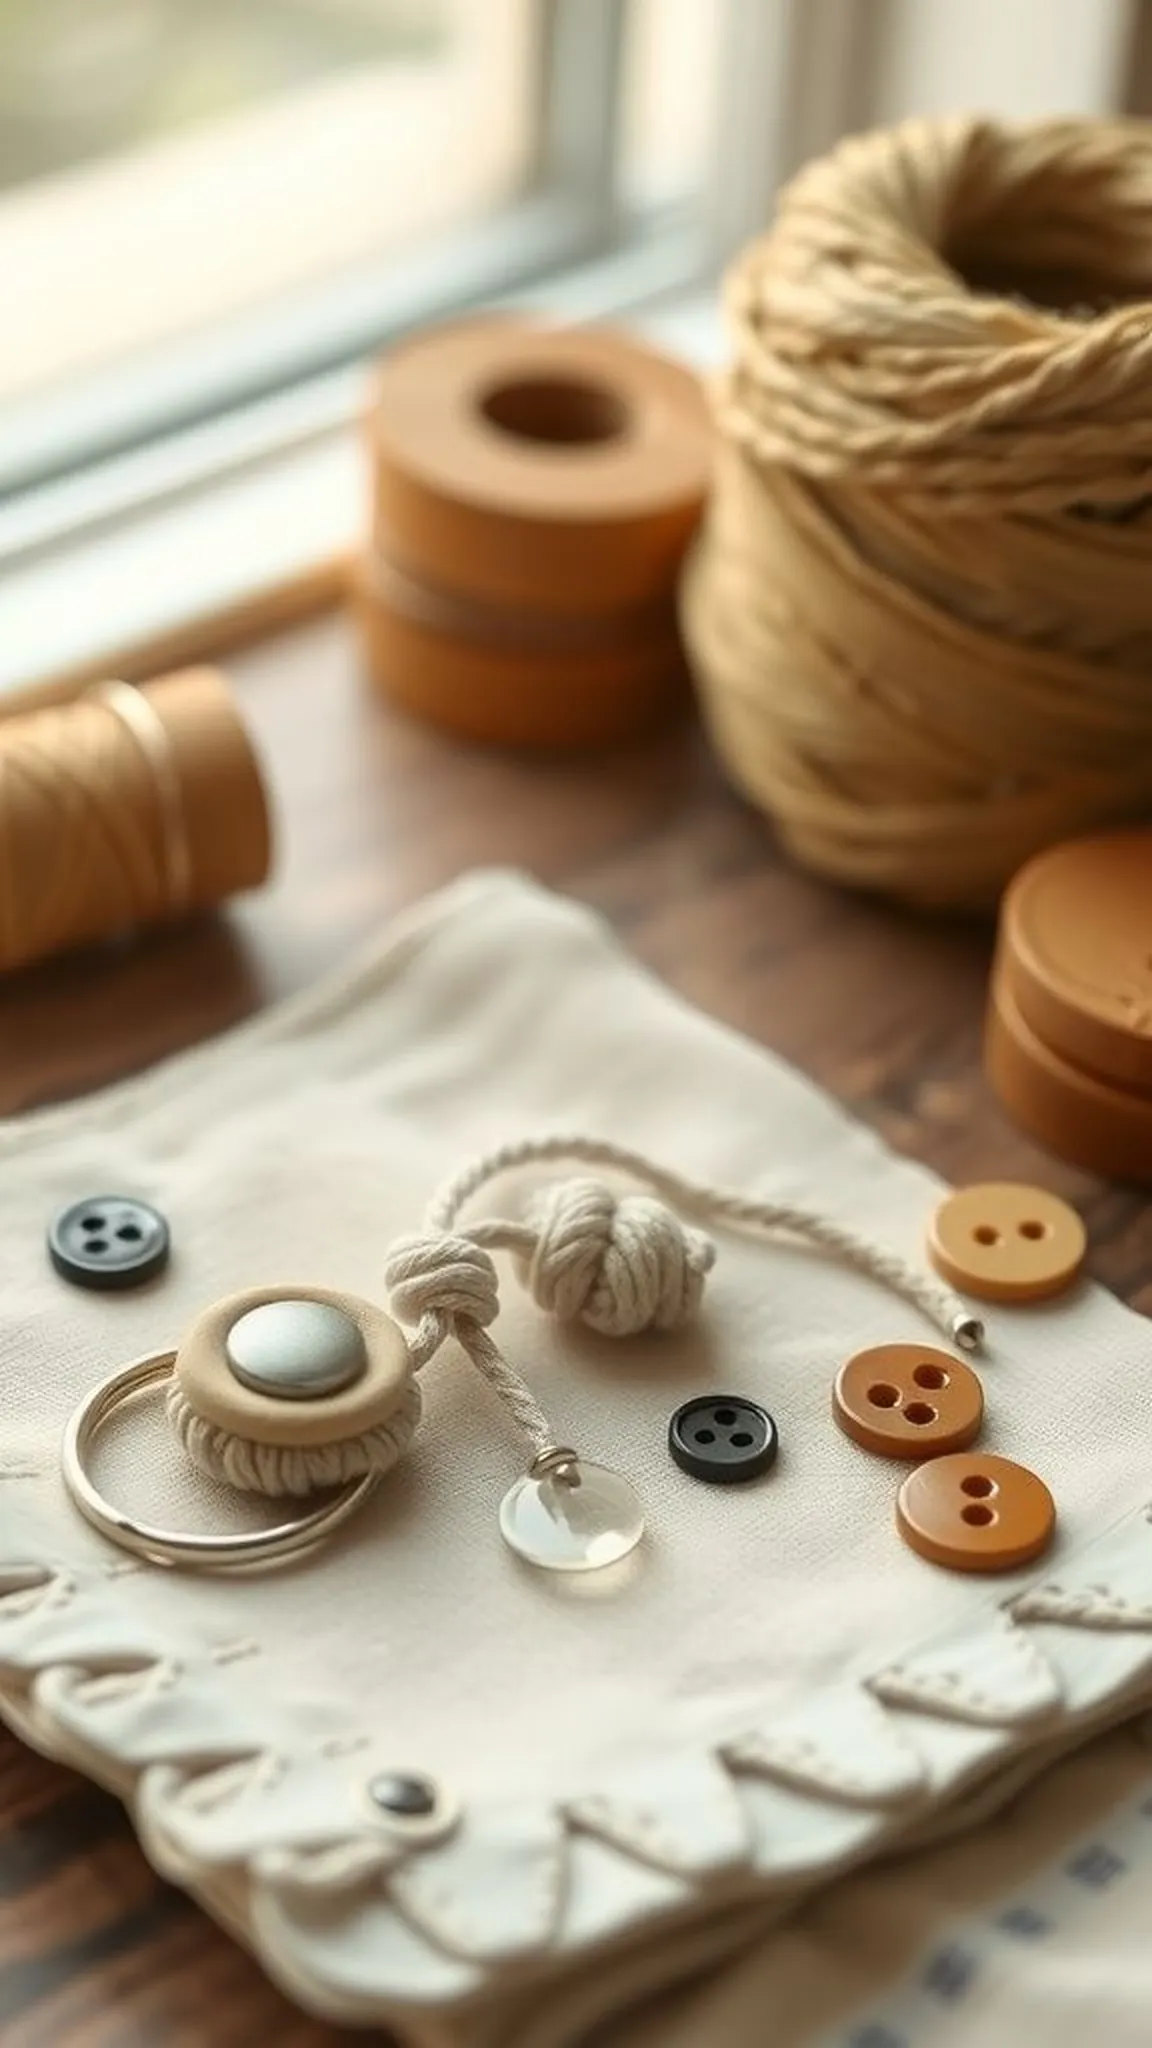
A tiny loop that slips over a button creates a neat closure that keeps a short key fob tidy and contained.
The small button adds a little vintage punctuation, its texture and sheen contrasting with cotton cord.
This style reads like a miniature strap that snaps into place, feeling satisfying to open and close each time.
Pro Tip: Choose a button slightly larger than the loop diameter so the closure holds securely without forcing the loop stretched thin.
How to Make This
- Create a short macrame strip and leave two long ends to form a loop that fits over the chosen button.
- Sew or knot a small vintage-style button near the opposite end, testing loop fit before final trimming.
- Finish by tidying ends and slipping the loop over the button to secure keys to the fob.
Avoid: A frequent mistake is choosing a button too small for the loop, causing strain and potential fraying over time.
Try Also: Use a metallic button for shine, replace with a snap for easier closure, or add a tiny charm beside the button.
Products & Materials
Items Used
- cotton macrame cord 2mm natural
- vintage buttons assorted
- split key rings 20mm
“Charming button-loop key fob with vintage flair.”
Leather cord and macrame knot hybrid keyring
⏱️ 40 min · 🟠 Intermediate

A leather cord paired with macrame knots blends rustic toughness with soft woven texture for a stylish hybrid look.
The leather spine lends structure while the knotted cotton details provide contrast and tactile interest.
Altogether this pairing offers a small, sturdy accessory that reads both rugged and handcrafted together.
Pro Tip: Pre-burnish leather edges gently before knotting to prevent fraying and to create a smoother transition where cord meets leather.
How to Make This
- Cut a short length of leather cord as the base and attach a pair of cotton cords for knotting detail.
- Tie a series of decorative knots along the cotton strands beside the leather spine until the desired length is reached.
- Secure ends cleanly and loop the leather through a split ring for a durable connection.
Avoid: A frequent oversight is neglecting leather thickness; a too-thin strip can wear quickly where knots rub against it.
Try Also: Use suede for a softer feel, swap cotton for waxed linen for durability, or add a metal slider for an industrial edge.
Products & Materials
Items Used
- leather cord 2mm
- cotton macrame cord 2mm
- split key rings 30mm
“Rugged leather and soft macrame unite in a stylish keyring.”
Alternating knot tassel with bead cluster
⏱️ 1 hour · 🟠 Intermediate
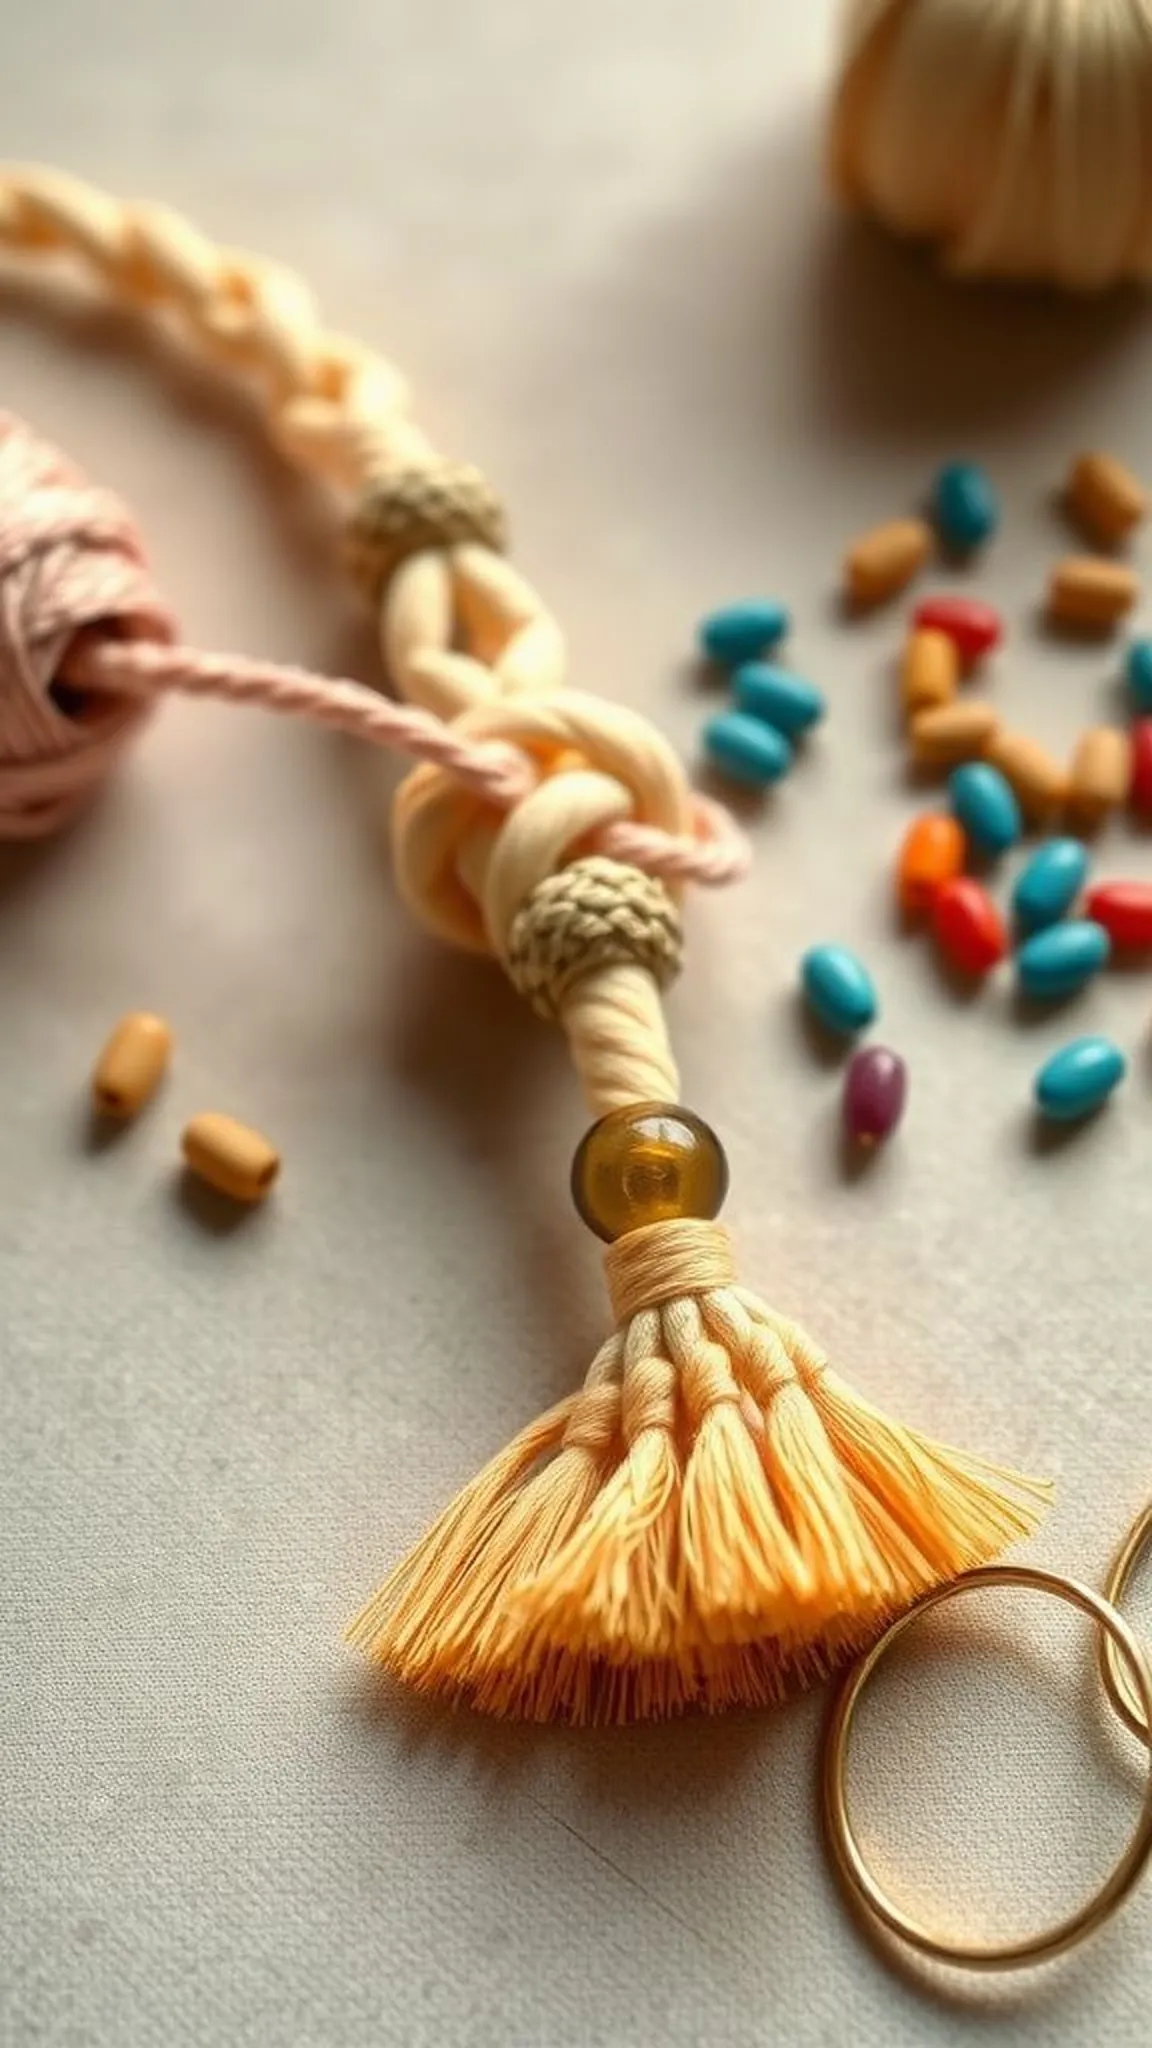
Alternating knots create a stepped texture that flows into a tassel finished with a tiny cluster of beads for a jingling edge.
The bead cluster adds a small metallic sound that punctuates each swing of the keychain.
Visually the sequence of knots leads the eye down toward the playful bead fringe for a lively finish.
Pro Tip: Thread beads onto strands before finishing knots to avoid wrestling beads onto tightly knotted cord later in the process.
How to Make This
- Cut several cords and work alternating knot sequences down a short length, leaving free ends for the tassel.
- Thread small beads onto select ends and secure them in place with tight knots to form a clustered fringe.
- Wrap a short binding at the tassel neck, trim the ends to even length, and attach the whole piece to a split ring.
Avoid: A frequent error is adding beads after finishing, which can be difficult if knot spacing is too tight to pass beads through.
Try Also: Mix bead metals for contrast, place beads at irregular intervals for a boho feel, or keep beads minimal for a refined look.
Products & Materials
Items Used
- cotton macrame cord 2mm
- small metal beads 4mm
- split key rings 25mm
“Alternating knot tassel with a playful bead cluster.”