The best wireless charging pad for fast, universal charging
Anker 313 Wireless Charger Pad 10W Fast Charging
Compact and reliable. Works with most phones and devices. A reader favorite.
Shop on Amazon →As an Amazon Associate, we earn from qualifying purchases.
These traditional spiced molasses cookies are soft, chewy, and packed with deep flavor. Featuring warm scents in each mouthful and charming crinkled surfaces, they’re easy to prepare and perfect for celebratory occasions.
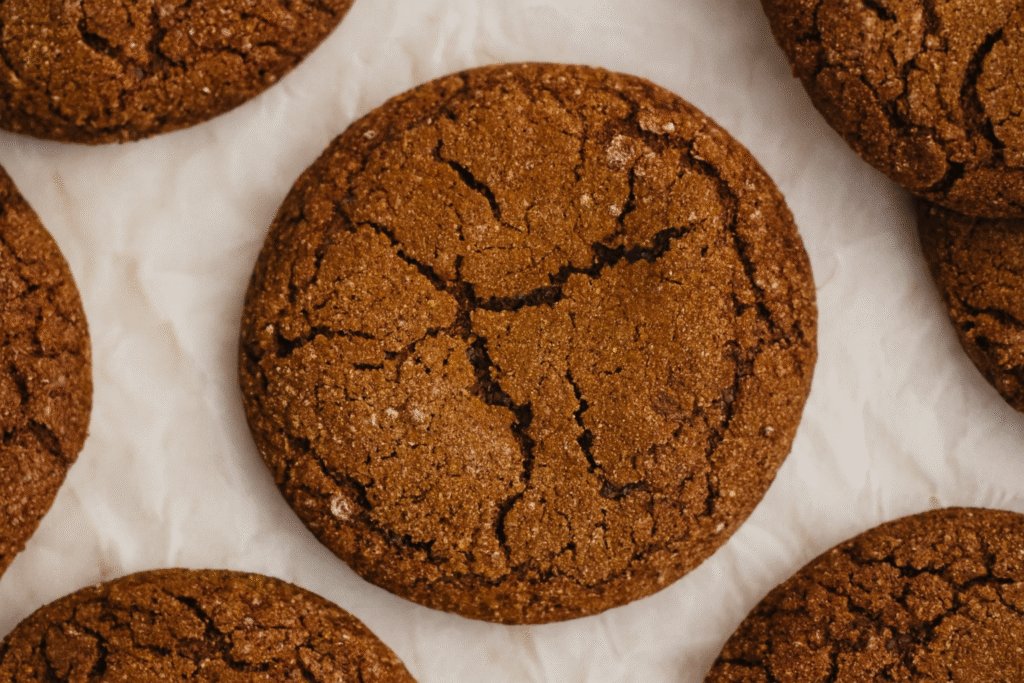
The season of cookies is undeniably my favorite time of the year! When I’m not feeling inspired to embellish elaborate cookies (such as ideal cut-out sugar varieties), I opt for a timeless favorite—molasses crinkle cookies. These flavorful delights remain delightfully tender for several days and are dusted with sugar, resulting in those characteristic crackled surfaces when baked.
The batter requires a short period to relax and cool, but the delay is absolutely justified. Cooking them at a slightly elevated temperature allows them to rise swiftly and then softly settle, creating those lovely creases and that delightful chewy consistency.
Reasons to adore these molasses crinkle cookies!
- You can create these using common kitchen essentials that are probably stored in your pantry.
- The mixture forms in roughly ten minutes, and afterward, it requires a brief chill in the refrigerator before it’s prepared for baking.
- Just prior to baking, every dough ball is rolled in granulated sugar, resulting in a beautiful shiny crust.
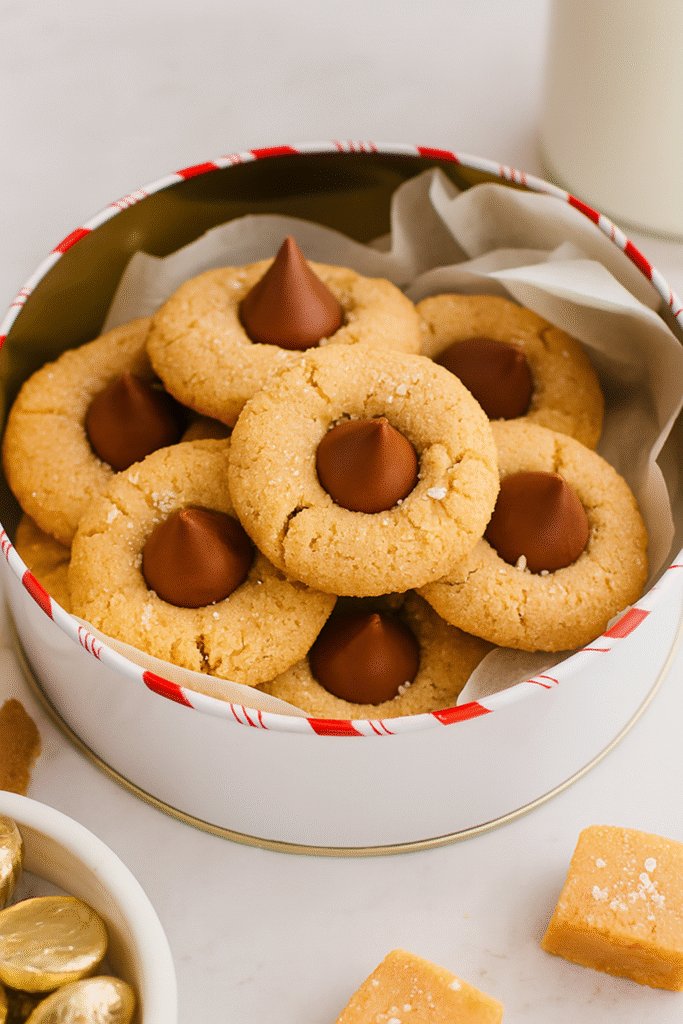
- You’ll have twenty-four cookies — perfect for distributing or presenting as gifts.
- These flavored delights are remarkably soft and maintain their chewy consistency for numerous days, thanks to a unique addition.
Ingredients Needed
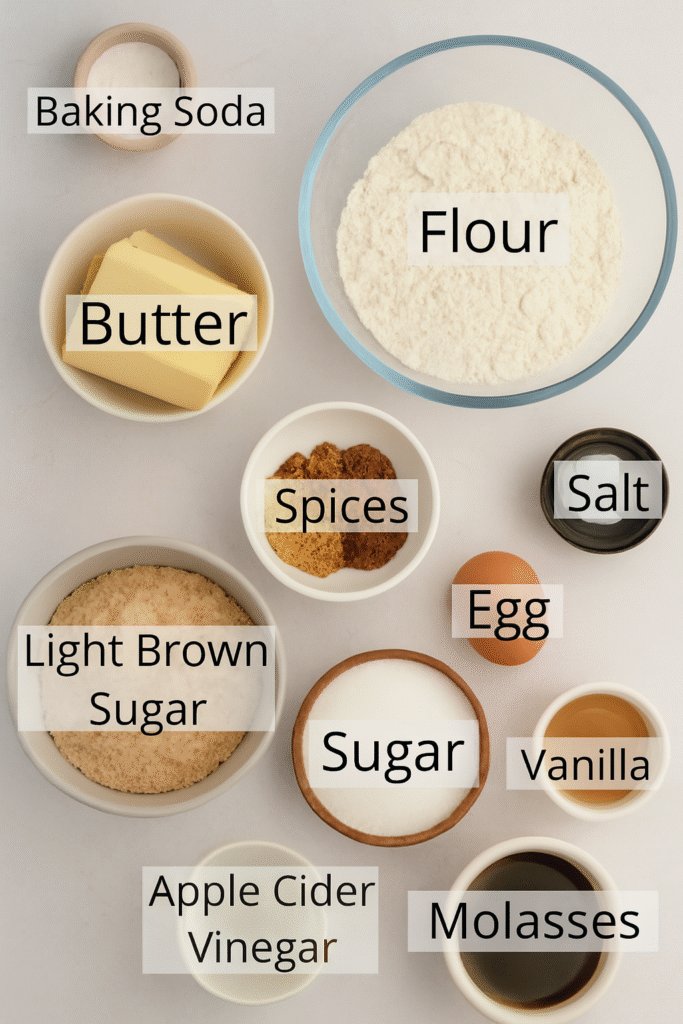
- Flour: Up to this point, I’ve utilized solely standard white flour. If you decide to try a gluten-free mix, I would be eager to know the results!
- Molasses: Ensure you select unsulphured molasses to achieve the best taste. If you’re in the UK, black treacle serves as an excellent substitute and performs wonderfully.
- I favor unsalted butter in the European style because its elevated fat levels provide a more indulgent flavor and a creamier consistency to the dough.
- Seasonings: The mixture I incorporate features ginger, cinnamon, nutmeg, cloves, and allspice. Using freshly ground spices will infuse your cookies with rich aroma and taste, whereas stale spices may render them dull and tasteless.
- Apple Cider Vinegar: This is the unexpected enhancer! It interacts with baking soda to produce a fluffier, somewhat softer cookie. I initially discovered this advice from Claire Saffitz’s “Dessert Person.” If you lack this ingredient, feel free to omit it — the cookies will still be delicious, although they might not puff up as much or develop as many attractive fissures.
Guidelines for Each Phase

Step 1: Take a mixing bowl—either medium or large is suitable—and combine all the dry ingredients: flour, baking soda, salt, and any spices listed in the recipe. After mixing thoroughly, set the bowl aside for future use.
Phase 2: Utilizing a stand mixer equipped with the paddle attachment (or a handheld mixer in a different large bowl), combine the softened butter and brown sugar. Whisk at medium to high speed for approximately one to two minutes, until the mixture turns smooth and fluffy.
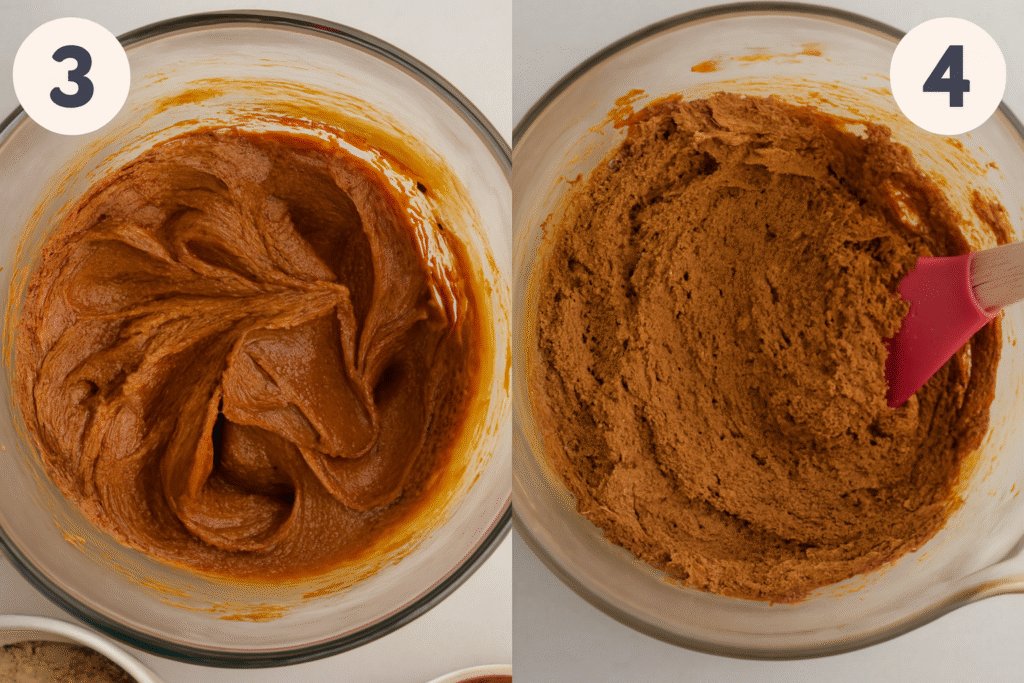
Step 3: Stop the stand mixer and utilize a spatula to scrape the mixture from the bowl’s edges. Incorporate the egg, dark syrup, vanilla extract, and apple cider vinegar. Mix on medium speed for about two minutes.
Step 4: Switch off the mixer once more and introduce the dry ingredients into the bowl. Mix on the lowest speed until fully combined and no dry flour is visible. Refrigerate the dough for approximately one hour to cool.
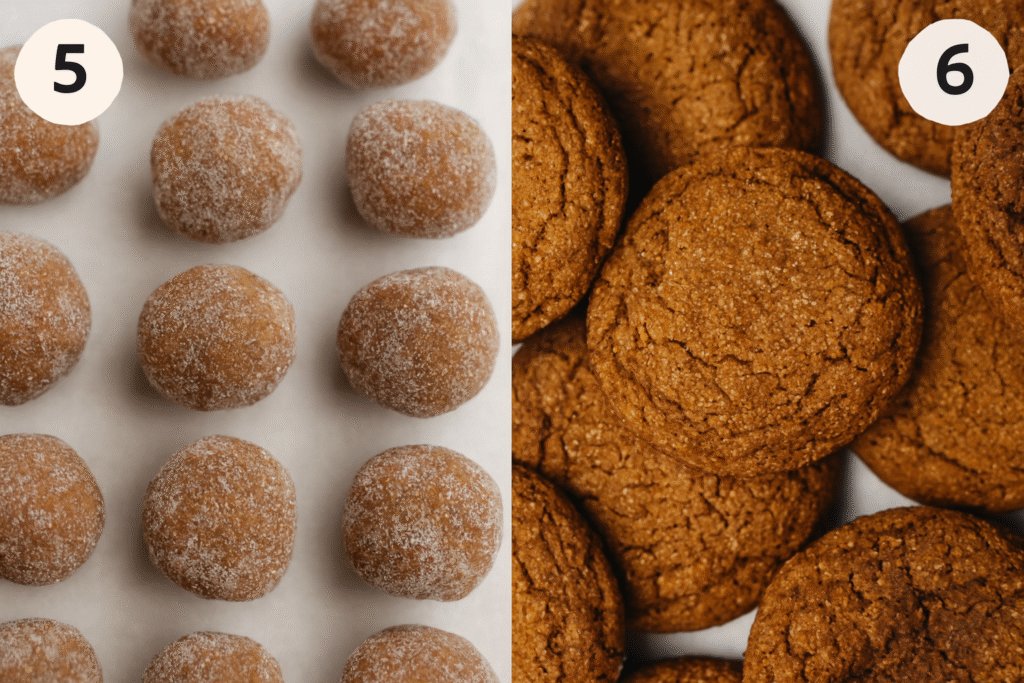
Step 5: Preheat your oven to 190°C (375°F) and line two baking sheets with parchment paper. Take approximately 1½ tablespoons of dough for every cookie, gently rolling it in your palms to create smooth spheres. Dredge each sphere in granulated sugar and arrange them roughly 3 inches apart on the lined sheets.
Step 6: Bake one tray at a time for 10 to 12 minutes, or until the cookies display solid edges and tiny cracks on the surface. Store the uncooked tray in the refrigerator while the initial batch is baking. Let the completed cookies sit on the tray for 15 minutes, then transfer them to a wire rack to cool completely.
Baking Advice and Techniques
- Measure Ingredients Accurately – Always utilize a digital kitchen scale and quantify everything in grams rather than cups. This guarantees your desserts come out consistently flawless, as it’s the most dependable approach for precision in baking.
- Fluff and Scoop Flour – When measuring with cups instead of a scale, softly aerate your flour using a spoon, then carefully fill the cup and even it out. Compressing the flour can result in cookies that are hard and brittle rather than soft and delicate.
- Allow Ingredients to Reach Room Temperature – Set out butter, eggs, and any other cold ingredients until they achieve room temperature prior to beginning. This facilitates a more consistent blend and results in a smoother, more homogeneous batter.
- Promote Increased Cracking – Should your cookies emerge with less crevices than desired, gently hit the baking sheet against the countertop right after pulling it from the oven. This jolt aids in forming those lovely, patterned cracks on the surface.
- Cool the Dough Initially – To achieve ideal crispy tops, place your cookie dough in the refrigerator prior to baking. The dough needs to be chilled when it meets the oven’s heat—this temperature difference allows the cookies to expand gradually and develop beautiful wrinkles.