
As an Amazon Associate I earn from qualifying purchases.
Upcycled sweater pillow crafts for chilly nights without a sewing machine turn worn knit into cozy, tactile home accents that feel lived in and warm. These no-sew sweater pillow projects bring soft ribs and fuzzy collars back into rotation as cushions for evening lounging.
Simple methods for upcycled sweater pillows focus on texture and comfort rather than intricate stitching, letting recycled knits define shape and mood. The resulting sweater pillow designs pair well with heavy blankets and low lamplight for an inviting cold-weather corner.
Hands-on, approachable approaches to sweater pillow making without a sewing machine celebrate visible seams and patchwork charm as part of the aesthetic. Each idea highlights stretch, cuff details, and cable patterns to emphasize cozy warmth on couches and beds.
Cozy envelope cushion from sweater sleeve cuff
⏱️ 45 min · 🟢 Beginner
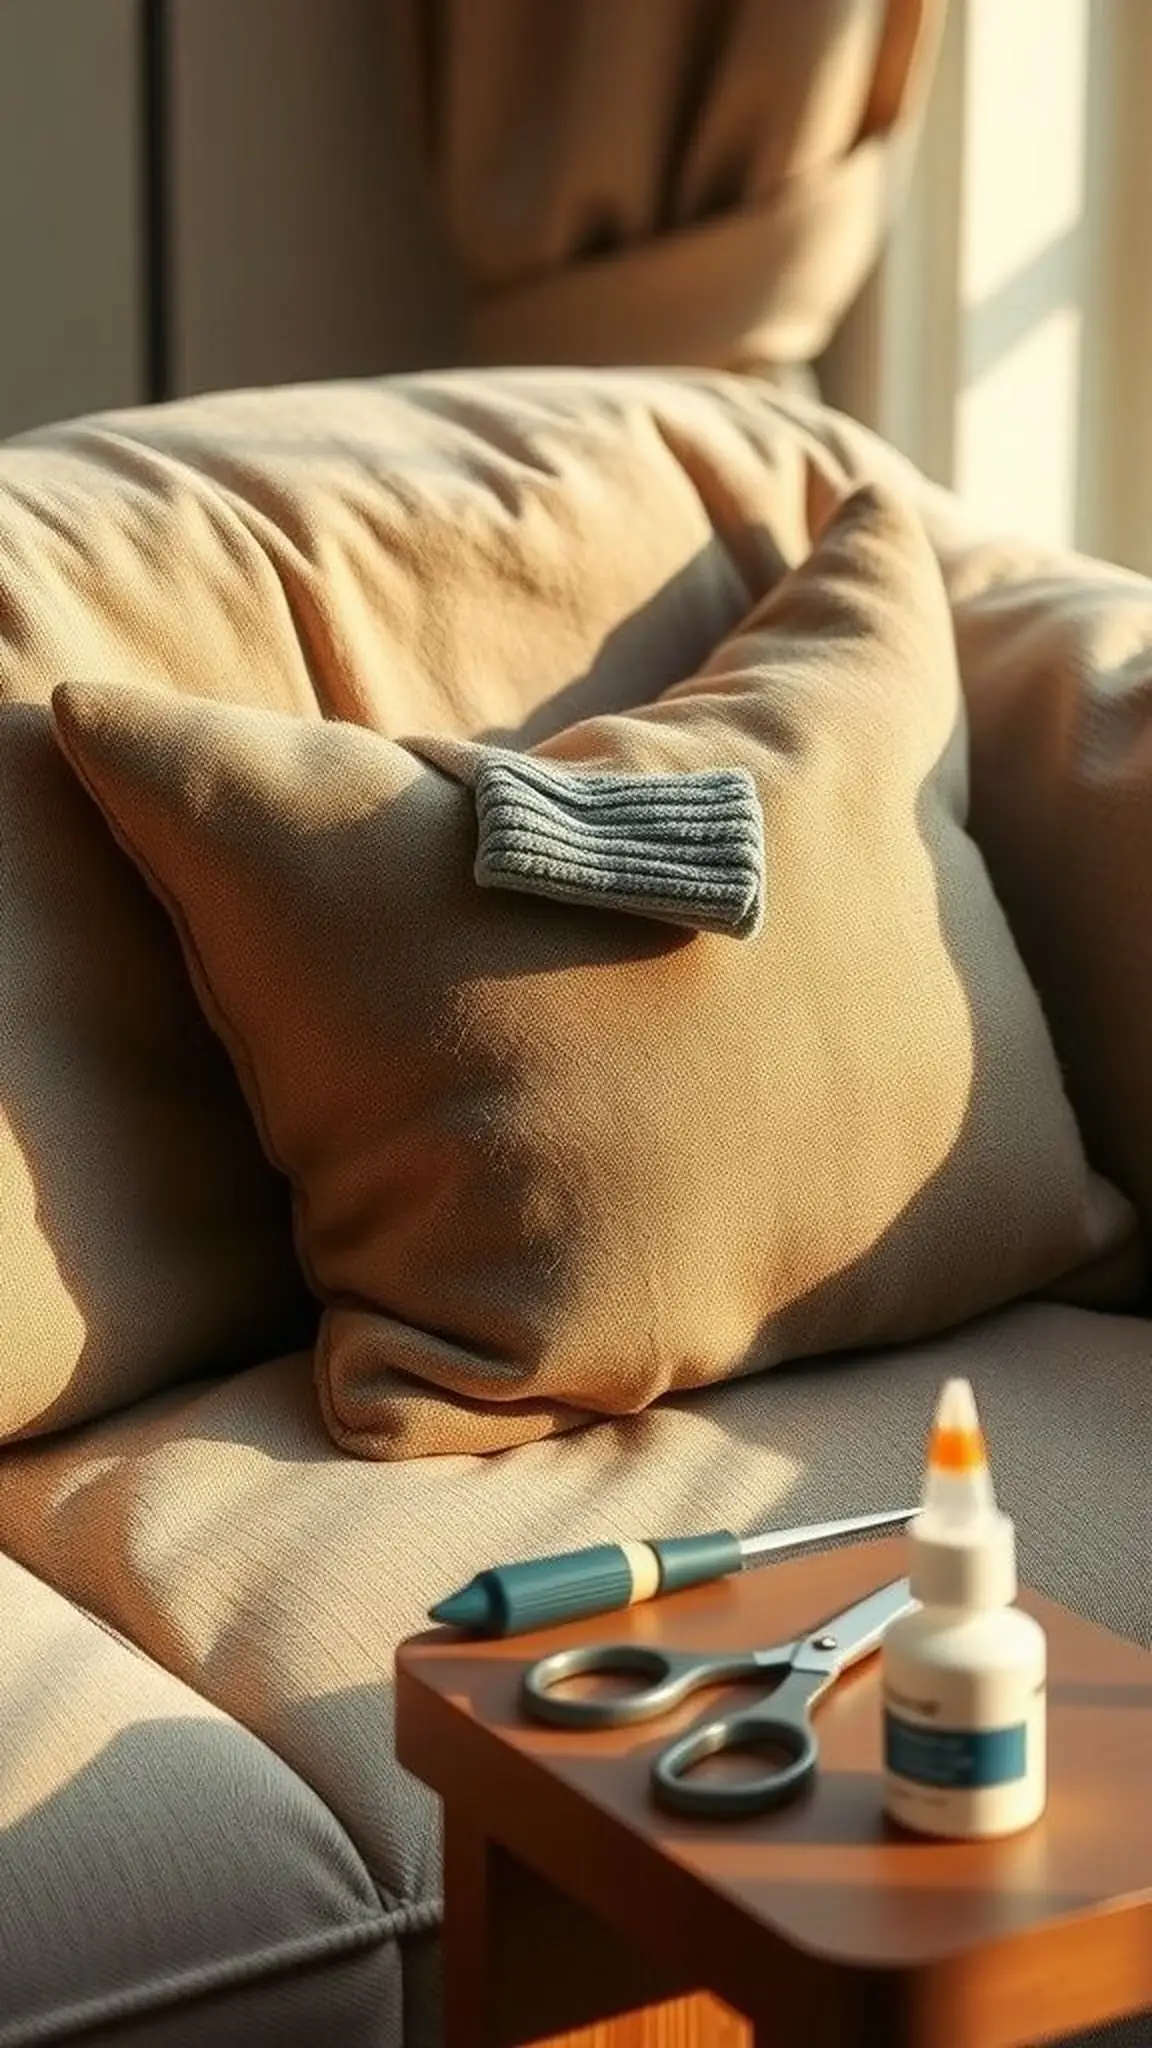
The ribbed cuff forms a snug, tactile sheath that hugs a small pillow insert with soft resilience. Wooly fibers and faint pill marks add visual history and a lived-in softness that invites touch.
Edges show gentle fuzz and the knit holds subtle texture under afternoon light, suggesting warmth without stiffness. A muted color palette pairs with wooden tones and low lighting for an intimate corner vibe.
The surface offers a quiet, comfy presence that feels like borrowing warmth from a favorite sweater that remembers past seasons. Cozy imperfections and slight stretch create a relaxed cushion silhouette that settles into sofas and chairs.
Pro Tip: Choose a slightly larger pillow insert so the cuff stretches comfortably without creating tight bulges or uneven corners.
How to Make This
- Remove a sleeve from the sweater by separating the seam and sliding it off an edge to form a tube.
- Tuck a pillow insert into the sleeve so the cuff forms a natural closure around one end.
- Apply fabric glue along the remaining open edge and press edges together until set, finishing with a neat seam line.
- Trim any loose threads and massage the knit for even distribution of the insert inside the cuff.
Avoid: A frequent beginner error is choosing an insert that is too small, which leaves the sleeve looking limp and underfilled. Selecting the wrong density of stuffing can also make the cushion appear uneven and saggy.
Try Also: The cuff can be dressed with a row of buttons or a band of contrasting fabric for a casual accent. A chunky wool cuff from a cardigan offers more texture than a fine gauge jumper for a rustic look.
Products & Materials
Items Used
- old wool sweater
- pillow insert
- fabric glue
- fabric scissors
“Turn a sweater sleeve into a cozy no-sew pillow cuff.”
Buttoned cardigan front turned into a plush pillow
⏱️ 1 hour · 🟠 Intermediate
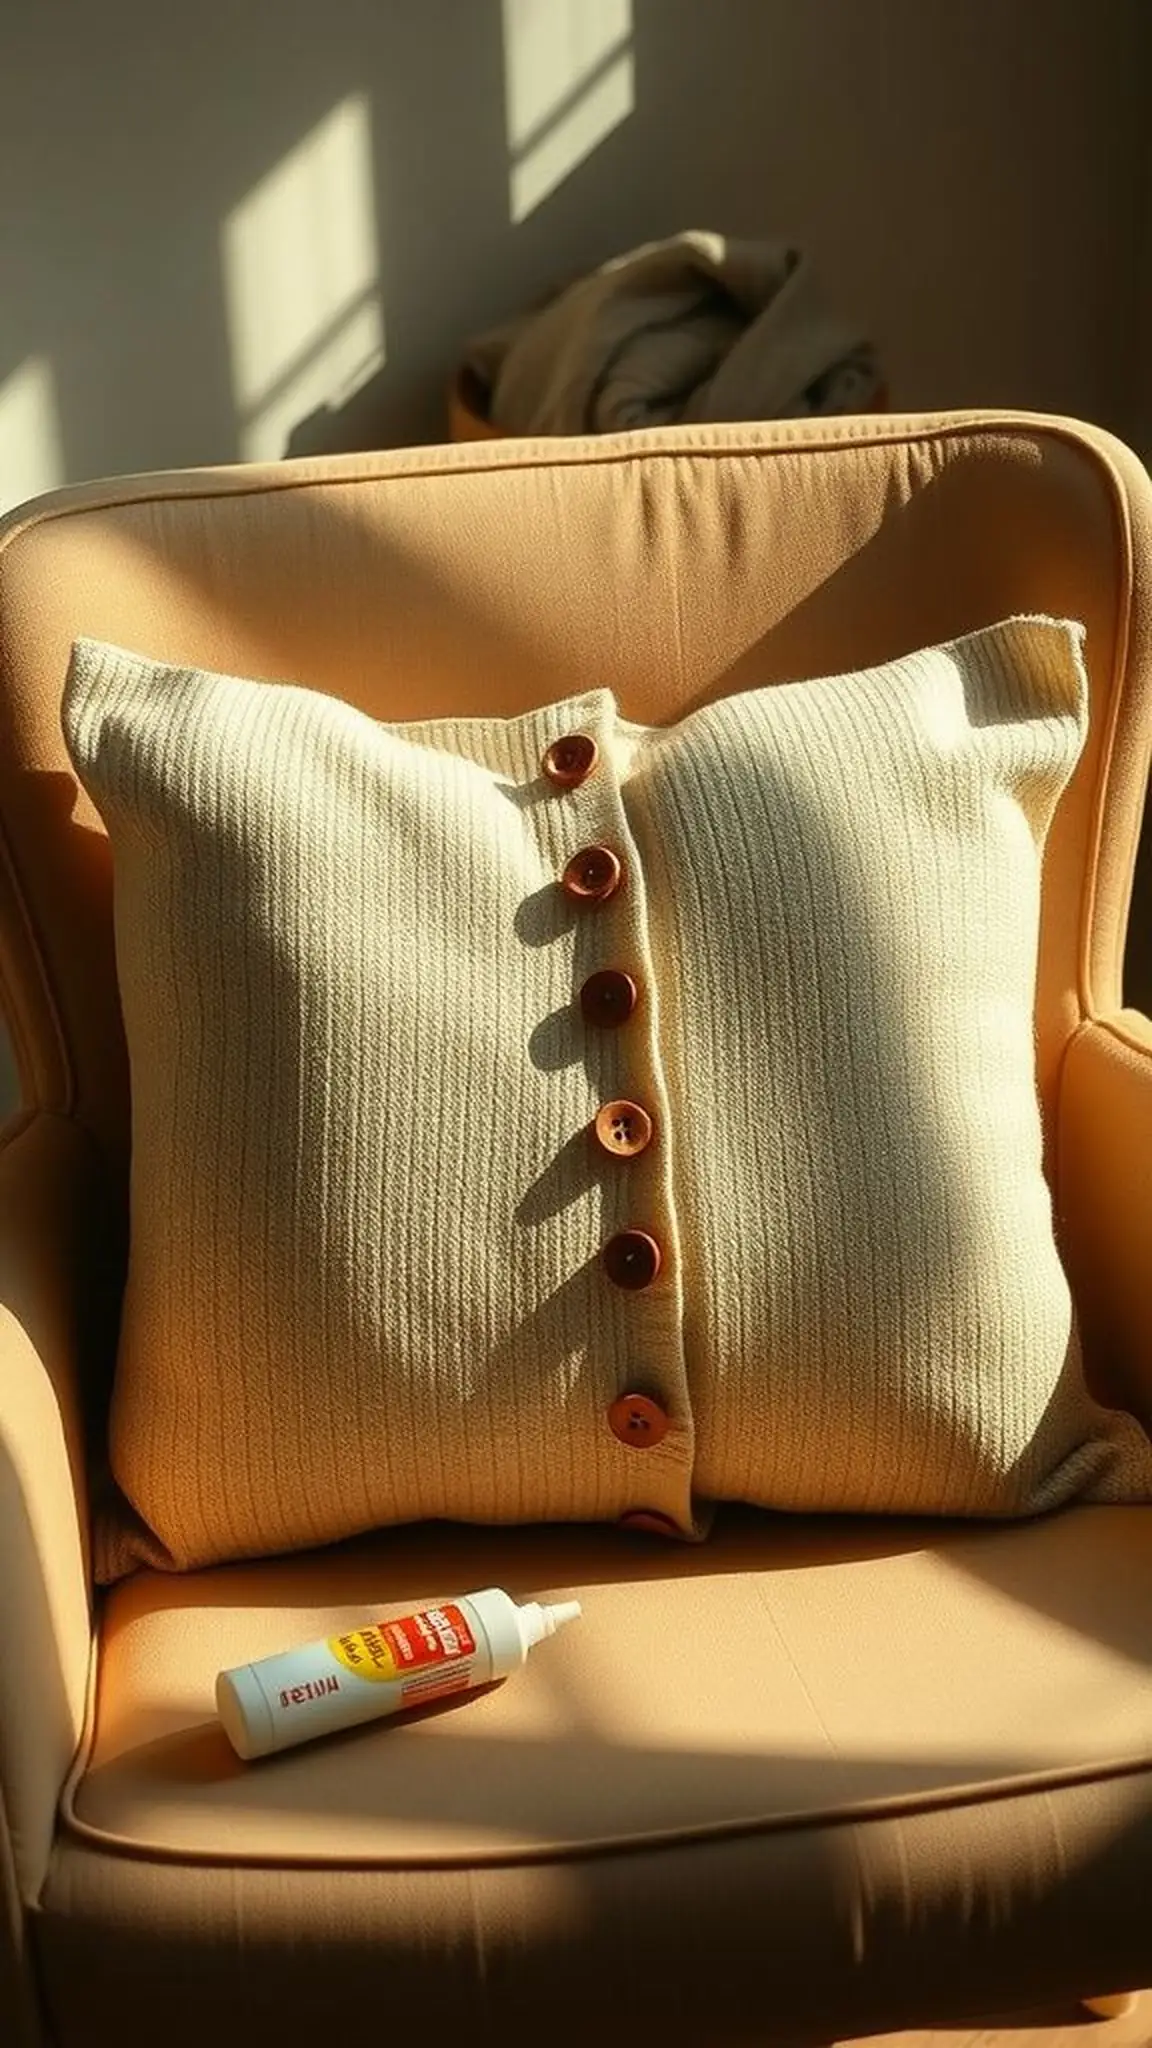
A cardigan front becomes a framed focal point when buttons and buttonholes remain part of the face, offering a tactile row of vintage details. Soft button weight and slightly stretched buttonholes lend character while maintaining a comforting surface.
The knit shows gentle horizontal ribs and a contrast between body and trim that catches lamp glow. Button shadows and tiny folds suggest the pillow was once living as clothing and now keeps a quieter purpose.
Surface texture varies between smooth stockinette and nubby patches where the knit wore thinner over time, creating a lived-in aesthetic. Overall, the pillow radiates casual warmth and textile nostalgia without sharp edges or rigid formality.
Pro Tip: Keep the original button row intact for an instant decorative edge and secure any loose button threads before finishing the seams.
How to Make This
- Lay the cardigan front flat and align edges around a pillow insert to gauge coverage.
- Fold edges inward to create a neat envelope and secure with fabric glue along the inner hem to hold shape.
- Slip the pillow insert inside and fasten buttons to close the front for a finished look.
Avoid: A frequent beginner slip is ignoring loose button stitching, which can lead to buttons pulling free later. Overfilling the insert can cause the button band to gap awkwardly under tension.
Try Also: Buttons can be swapped for mismatched vintage finds for eclectic charm or a removable pocket can be left in place for a small book or remote. A cropped cardigan front makes a great square cushion while a long cardigan suits a lumbar pillow.
Products & Materials
Items Used
“Make a button-front cardigan into a charming no-sew cushion.”
Braided fringe edge for a rustic lumbar pillow
⏱️ 1-2 hours · 🟠 Intermediate
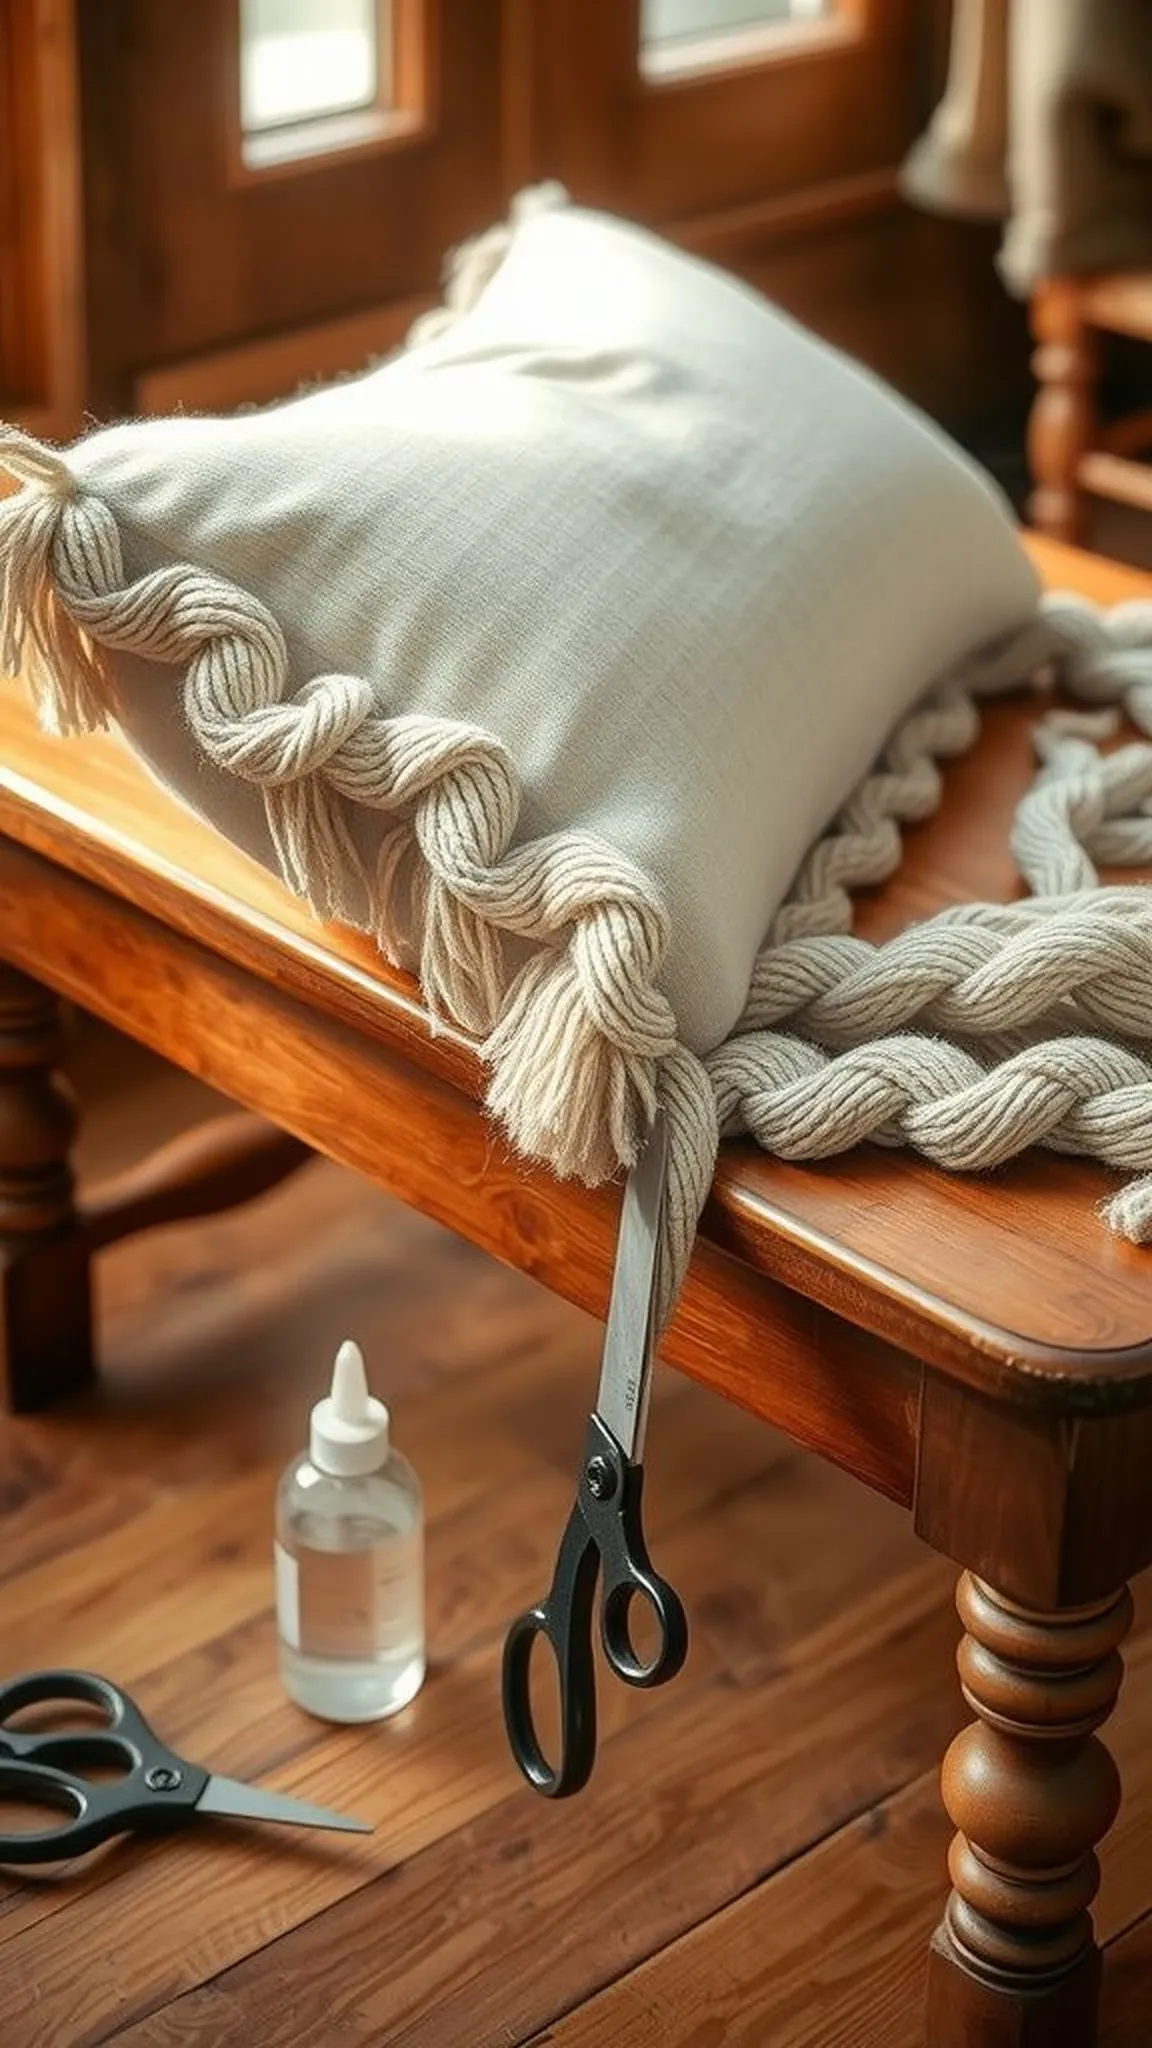
The fringe translates sweater yarn into cascading texture that frames a long lumbar pillow with gentle movement. Each braided strand catches light differently, creating a playful rhythm across the length of the cushion.
Yarn ends carry tiny fuzz and a soft halo that feels warm against fingertips and looks inviting on a bench or sofa. The contrast between the smooth body of the sleeve and the lively fringe adds visual interest without fuss.
Overall balance between bulk and negative space keeps the pillow from feeling heavy while preserving tactile appeal for chilly corners. The braided edge encourages fingers to trace along its length on slow evenings.
Pro Tip: Leave the yarn ends slightly longer than needed so braids drape naturally and can be trimmed for uniform length after setting glue.
How to Make This
- Cut multiple equal-length yarn strands from sweater hems to form fringe bundles.
- Group three strands per bundle and braid each bundle until the desired length is reached, securing ends with a dot of fabric glue.
- Align braided bundles along one edge of a pillow cover created from sweater sections and adhere them with fabric glue in a regular pattern.
- Allow all glued areas to fully dry before fluffing the pillow.
Avoid: A common misstep is braiding strands that are too thin, which can make the fringe look sparse and fragile. Choosing yarn from a fine gauge sweater may result in limp braids that lack body.
Try Also: Braid three small braids together for a chunky look or mix wool and acrylic strands for contrast. Fringe can run along both long edges for a symmetrical finish or only one edge for a casual accent.
Products & Materials
Items Used
- old sweater yarn
- pillow insert lumbar
- fabric glue
- sharp scissors
“Create a braided fringe lumbar pillow from sweater yarn for rustic charm.”
Save time and printer ink with 50+ printable templates and step-by-step instructions in one ad-free guide.

Just $19.99 — lifetime access
Cable-knit patchwork square for a cozy centerpiece
⏱️ 2-3 hours · 🔴 Advanced
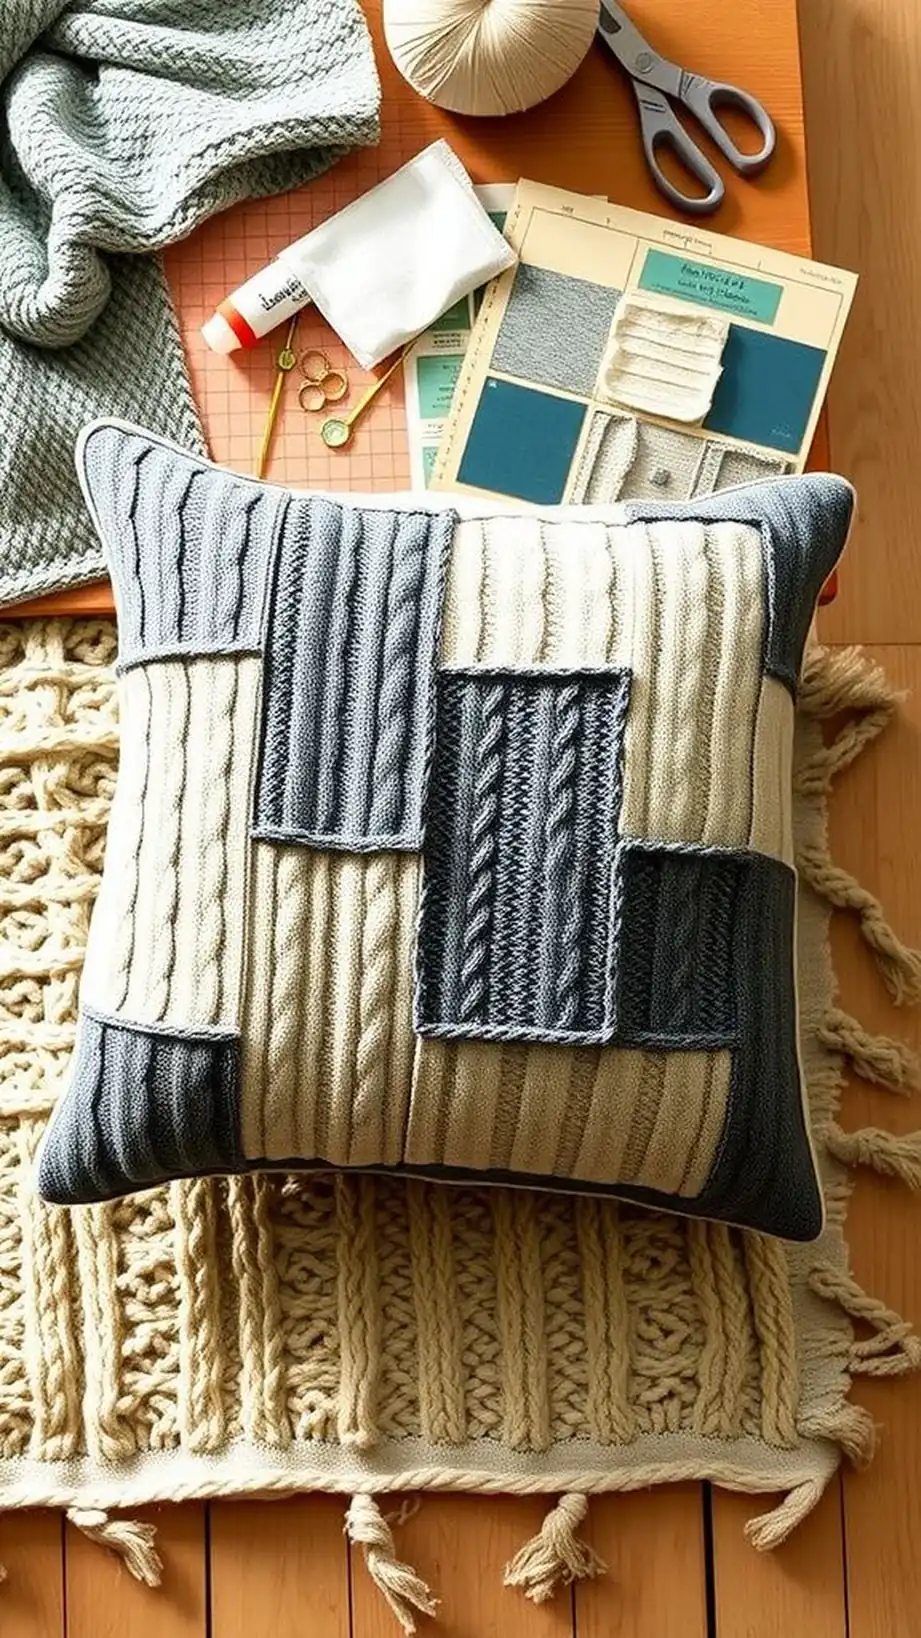
Patches of cable-knit, seed stitch, and rib combine to create a mosaic of tactile panels that read like a slow afternoon of mending. Raised cables cast soft shadows and invite running fingers along winding patterns.
This patchwork pillow makes a strong visual anchor on a muted sofa, signaling warmth and handcrafted personality. The interplay of stitches rewards close inspection and cozy evenings with texture as a focus.
Pro Tip: Arrange patches by gauge and color before bonding, placing heavier cable pieces near the center to avoid edge sagging over time.
How to Make This
- Gather sweater panels and flatten them to create uniform patch sizes for a square cover.
- Arrange panels into a pleasing layout and temporarily secure edges with fabric glue to hold position.
- Adhere adjacent patch edges with fabric glue, reinforcing seams at pressure points, and allow to dry fully.
- Place a square pillow insert inside and press panels for an even surface before final setting.
Avoid: A frequent error is mixing panels of wildly different stretch, which can cause puckering as the cover settles. Neglecting to pre-press edges leads to uneven seams and a lumpy appearance.
Try Also: Make a rectangular lumbar version by arranging patches into a long strip or limit the palette to three coordinating colors for a calmer look. Adding a border of plain knit can frame busy patchwork nicely.
Products & Materials
Items Used
- assorted sweater panels
- pillow insert
- clear fabric glue
- rotary cutter
“Patch together cable-knit panels for a textured, no-sew throw pillow.”
Faux-zip closure made from sweater hem and zipper trim
⏱️ 1 hour · 🟠 Intermediate
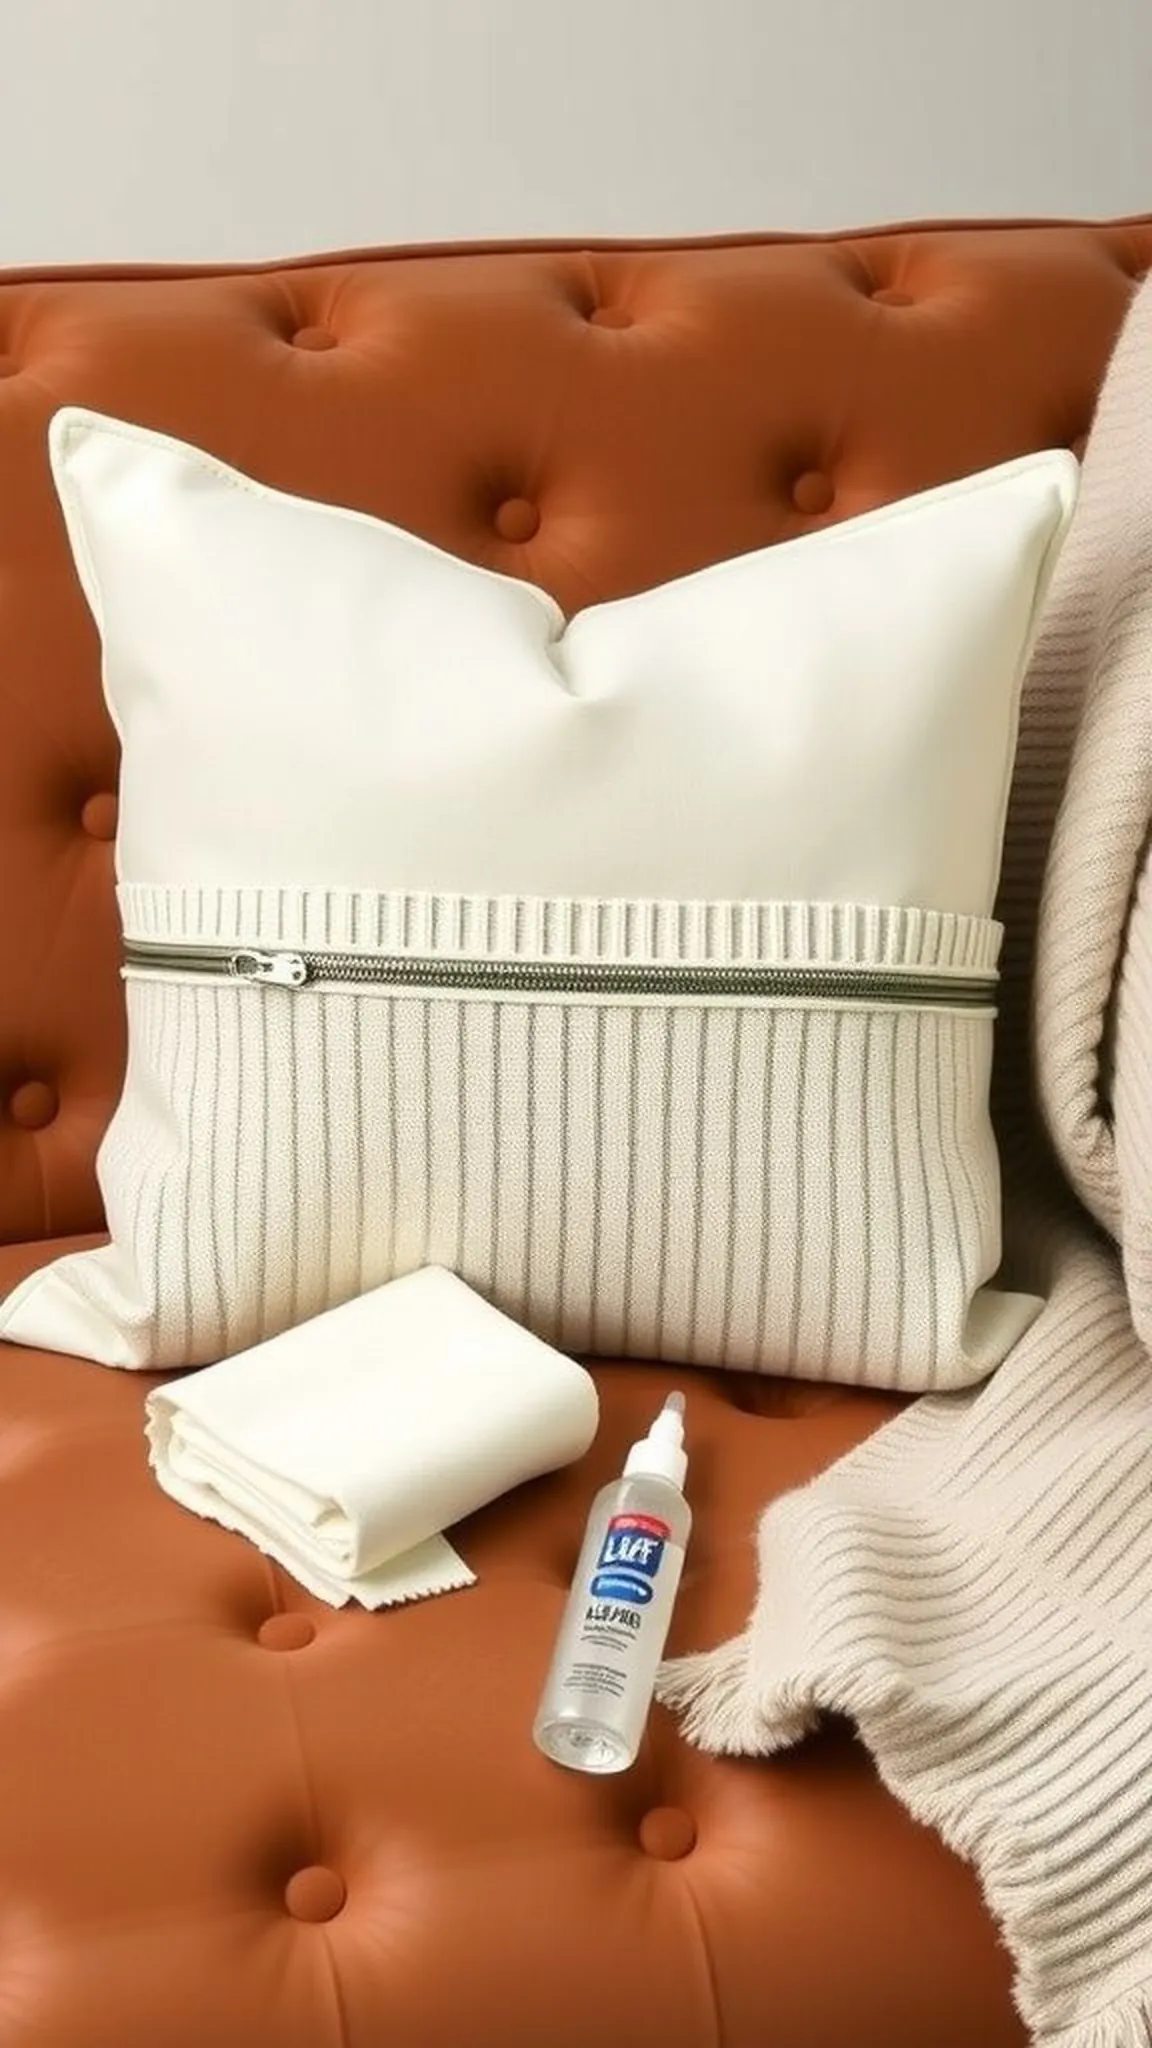
A removed zipper layered under a sweater hem gives the illusion of a zippered cushion while keeping everything simple and tactile. The metal teeth catch light subtly against wool and create a crisp line across the surface.
The hem lays flat with a slight wave from the knit stretch, adding a tailored edge without stiffness. Together, zipper trim and knit create a mixed-material accent that reads modern yet cozy.
The overall effect is a neat closure line that pleases the eye and echoes clothing details found in everyday wear. Texture contrast between smooth metal and fuzzy fibers keeps the pillow interesting in any seating arrangement.
Pro Tip: Choose a lightweight zipper and align its teeth with the knit grain to prevent puckering along the closure line.
How to Make This
- Remove a zipper from an old garment or obtain a lightweight separating zipper to act as closure trim.
- Position the zipper along a sweater hem on the pillow cover and secure with fabric glue to mimic a seam.
- Tuck the raw hem edge over the zipper trim and adhere lightly so the zipper remains visible but covered.
- Insert the pillow form and smooth the knit to settle the faux zip into place.
Avoid: A frequent mistake is using a bulky zipper that overwhelms fine-gauge knit and creates awkward bulging. Not aligning the zipper with the knit grain can cause the hem to twist or ripple.
Try Also: A contrasting brass zipper adds industrial flair while a matching zipper keeps the look refined and subtle. For a softer finish, hide the zipper under a folded placket of sweater trim.
Products & Materials
Items Used
“Add a faux zipper trim to a sweater pillow for modern detail.”
Cuff pocket pillow with a handy stash pocket
⏱️ 30 min · 🟢 Beginner
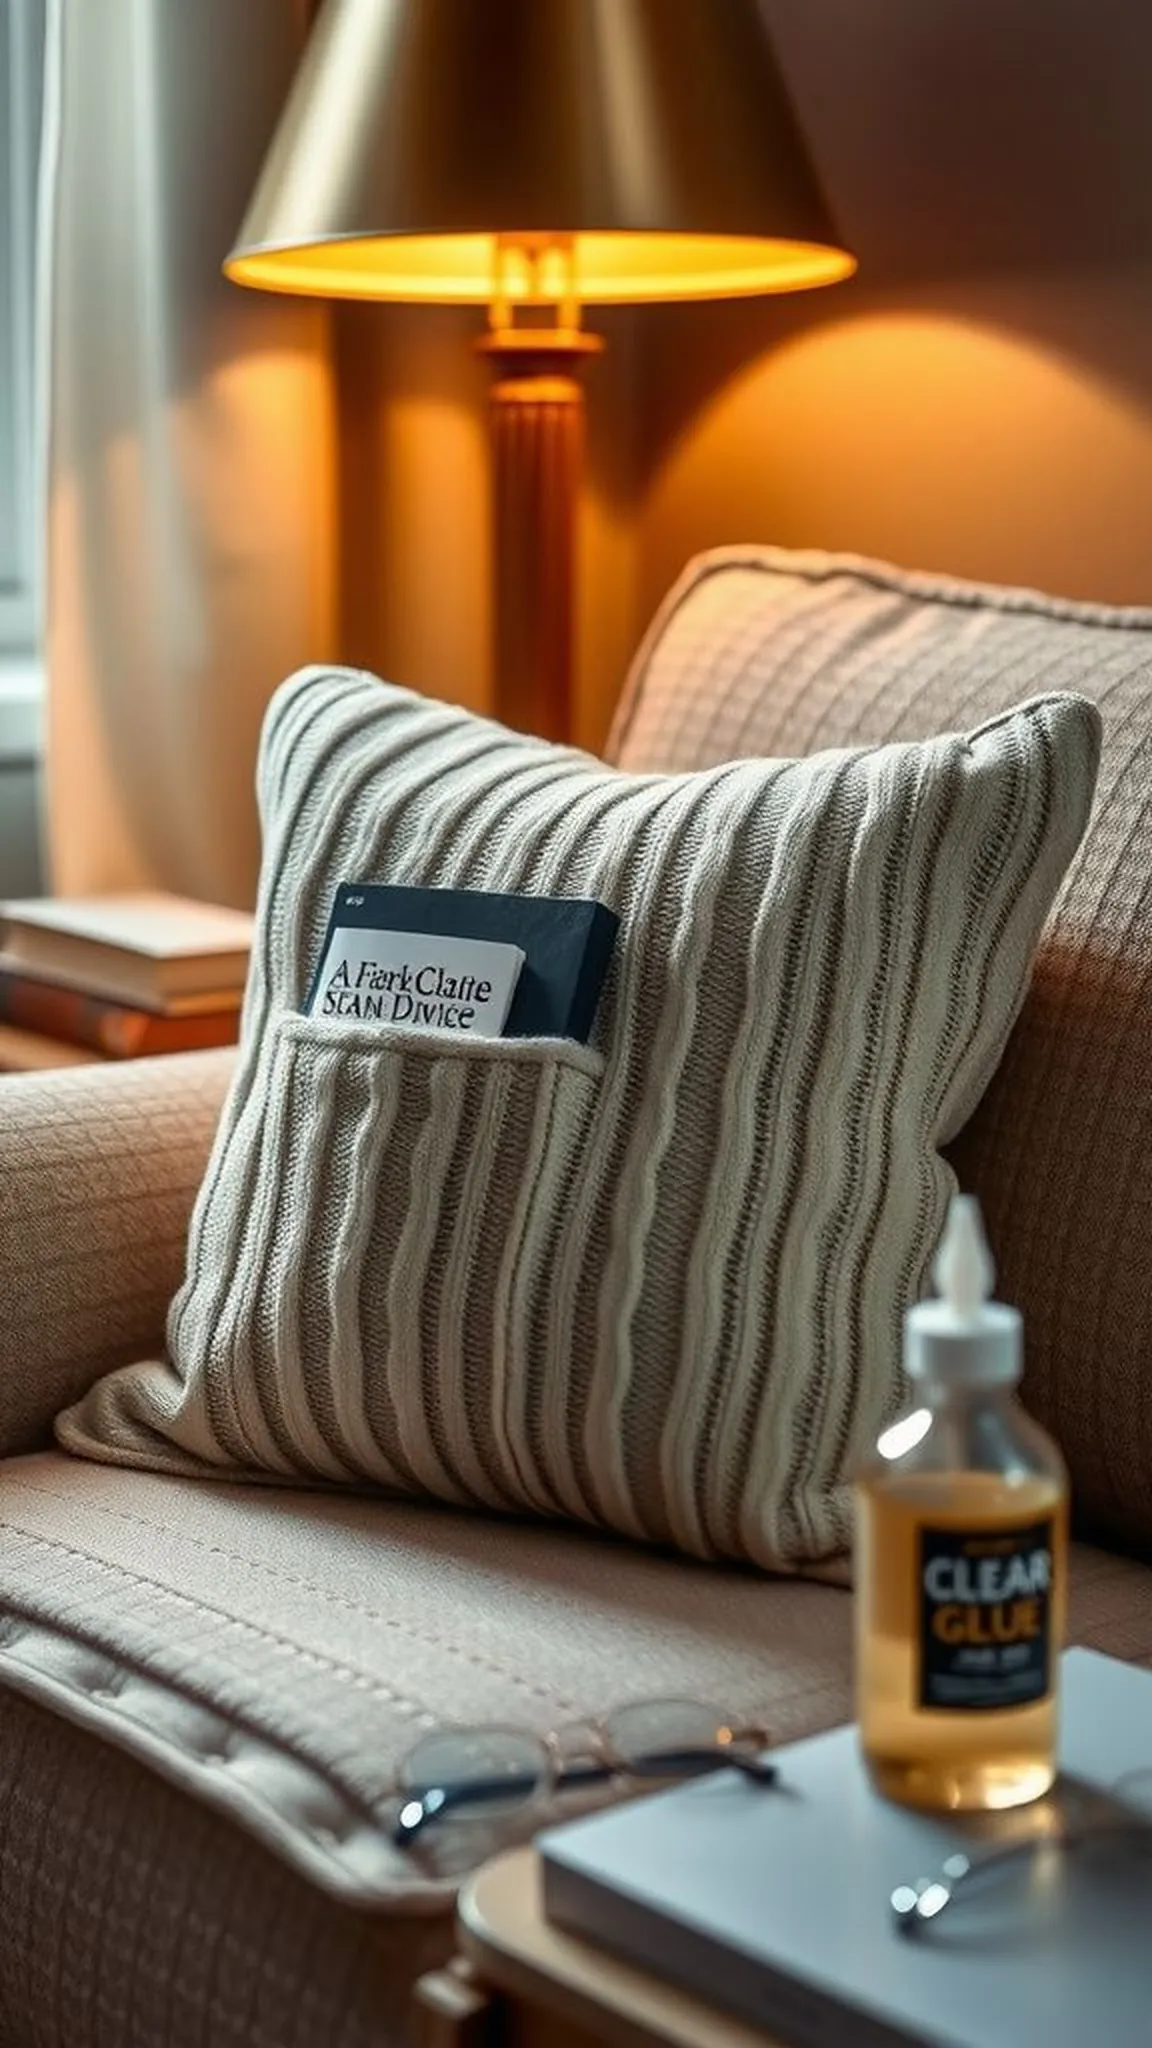
A sweater cuff transforms into a practical pocket on a pillow surface, offering a cozy little pouch for remotes or a paperback. The cuff edge keeps contents secure while adding a tactile nook that feels reassuring on a chilly evening.
The knit cuff retains elasticity and presents a neat contrast against a plain sweater body, giving the pillow a playful utilitarian note. Soft edges and familiar garment memory make the pocket feel like a tucked secret from an old coat.
The pocket invites small rituals such as slipping in spectacles or a phone, giving the pillow an extra purpose beyond comfort. Textural contrast between the cuff and background fabric adds depth and everyday charm to a sofa vignette.
Pro Tip: Reinforce the pocket base with a small strip of glue along the lower seam to prevent sagging after repeated use.
How to Make This
- Trim a cuff from the sweater and position it on the pillow front where a pocket will be most accessible.
- Secure the sides and bottom of the cuff to the pillow fabric with fabric glue, leaving the top open as the pocket entrance.
- Press firmly and allow adhesive to cure before placing objects inside the pocket.
Avoid: A frequent oversight is leaving the pocket base unsecured, which leads to sagging when items are stored. Selecting an overly thin cuff may cause the pocket to stretch out of shape quickly.
Try Also: Turn two cuffs into side pockets for a longer pillow or add a small button closure for extra security. Use a sweater elbow patch as a decorative pocket for a vintage look.
Products & Materials
Items Used
“Make a cozy pillow with a functional sweater cuff pocket.”
No-sew braided sleeve pillow with rustic charm
⏱️ 1 hour · 🟢 Beginner
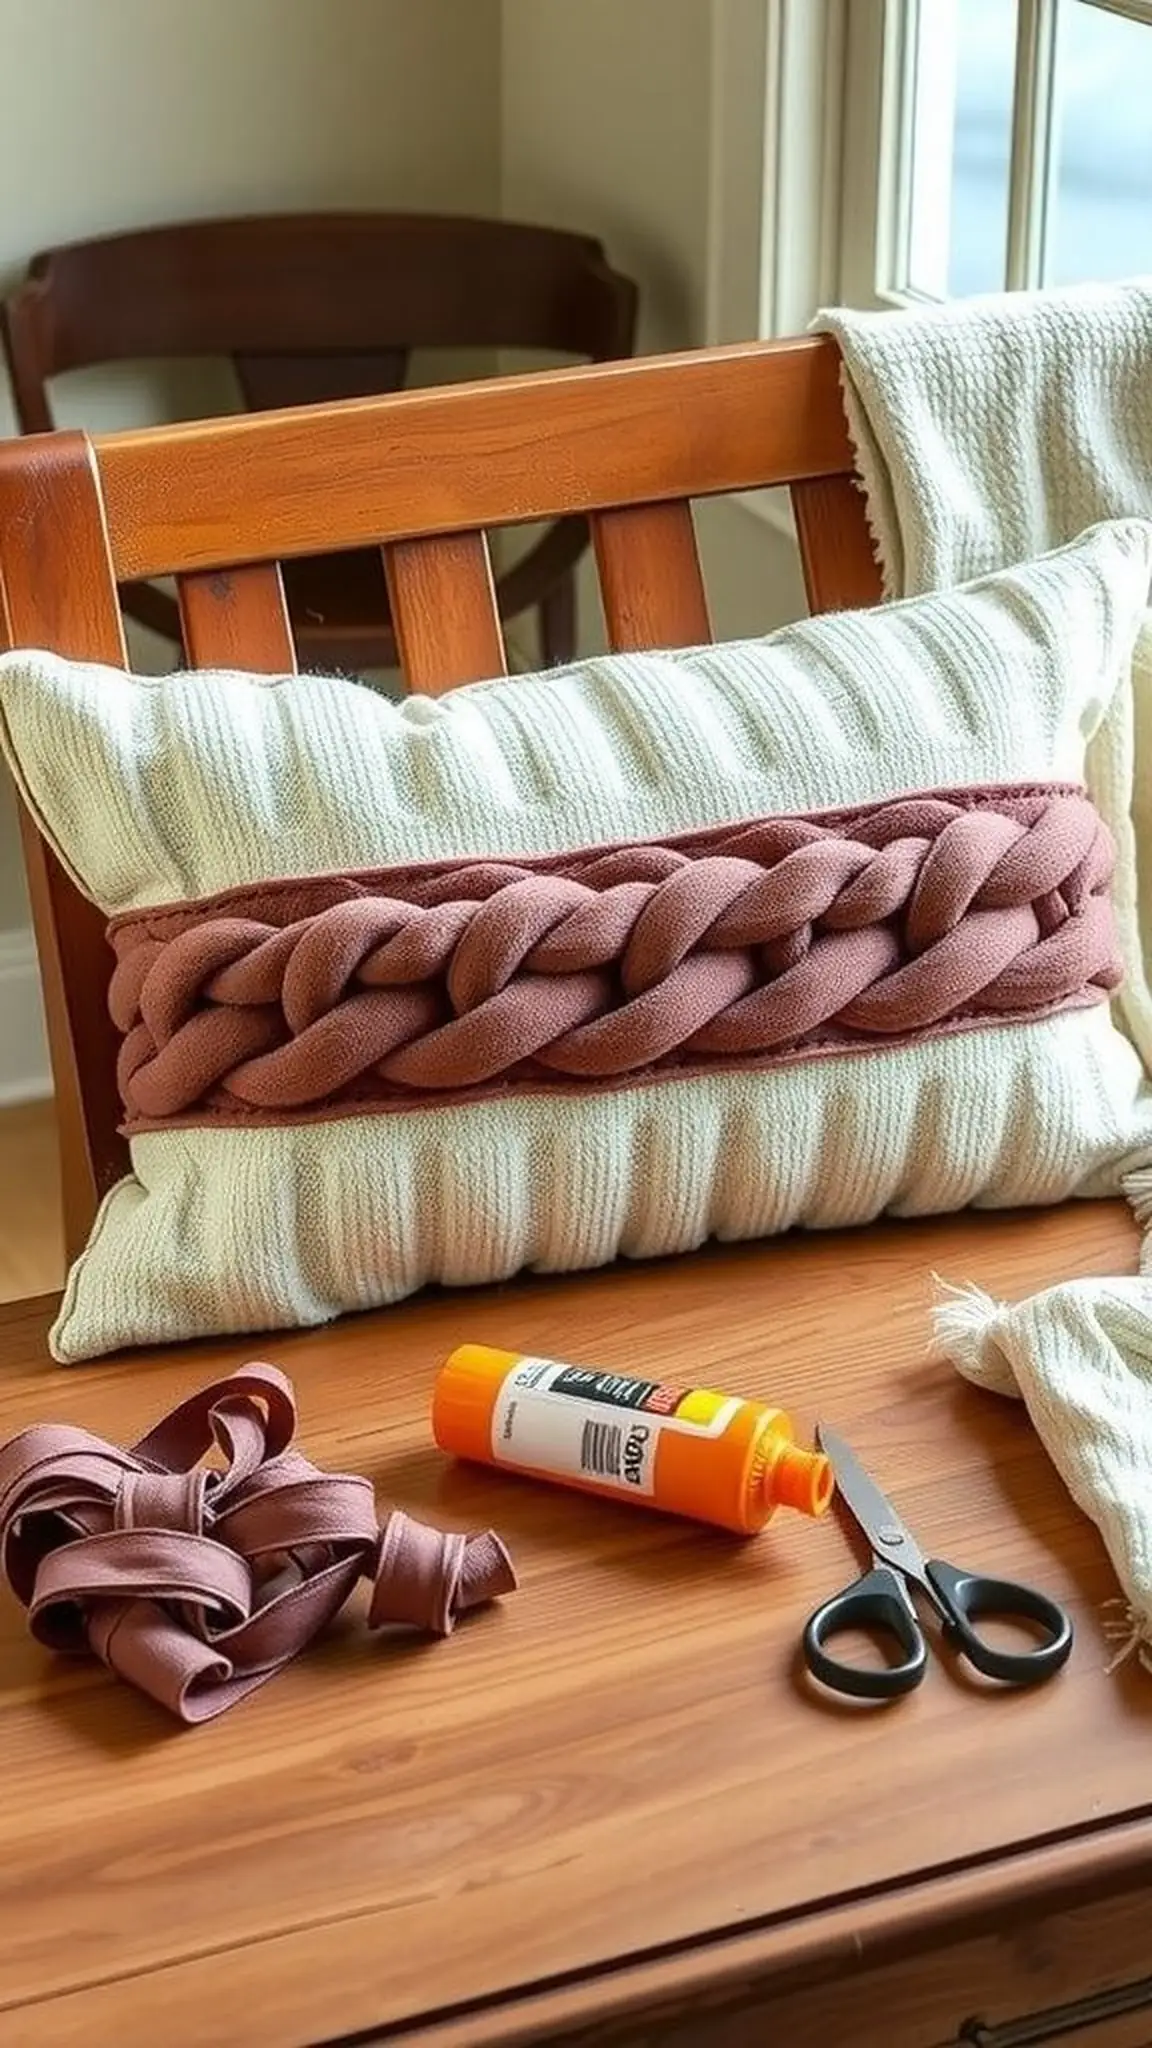
A sweater sleeve braided across the surface creates a relaxed band that reads like a worn belt hugging the cushion. Natural fibers soften under fingers and braided ridges throw small, inviting shadows in warm light.
The overall feel is slightly bohemian and very tactile, with the braid providing rhythm across a plain pillow face. Subtle color shifts in the yarn add depth and an improvised, handmade quality.
This style pairs well with layered throws and a low-lit reading nook because the braid adds both visual weight and soft contrast. The braided element suggests motion and invites hands to follow its path along the pillow.
Pro Tip: Braid with three evenly tensioned strips to prevent lumps and maintain a smooth, consistent band across the pillow surface.
How to Make This
- Slice a long strip from the sweater body lengthwise to create three equal strips for braiding.
- Braid the three strips together tightly and secure each end with a dab of fabric glue.
- Lay the braid across the pillow cover and attach with fabric glue along its underside to hold position.
Avoid: A frequent mistake is braiding strips of unequal width, which results in an uneven, lumpy braid. Failing to secure braid ends properly can cause unraveling over time.
Try Also: Create two parallel braids for a double-band look or make a braided border around the entire pillow for full texture. Combine contrasting colors for a striped effect.
Products & Materials
Items Used
- sweater body strip
- pillow insert
- fabric glue
- fabric scissors
“Add a braided sweater strip for a no-sew rustic pillow accent.”
Pom-pom trimmed throw pillow using sweater yarn
⏱️ 1-2 hours · 🟢 Beginner
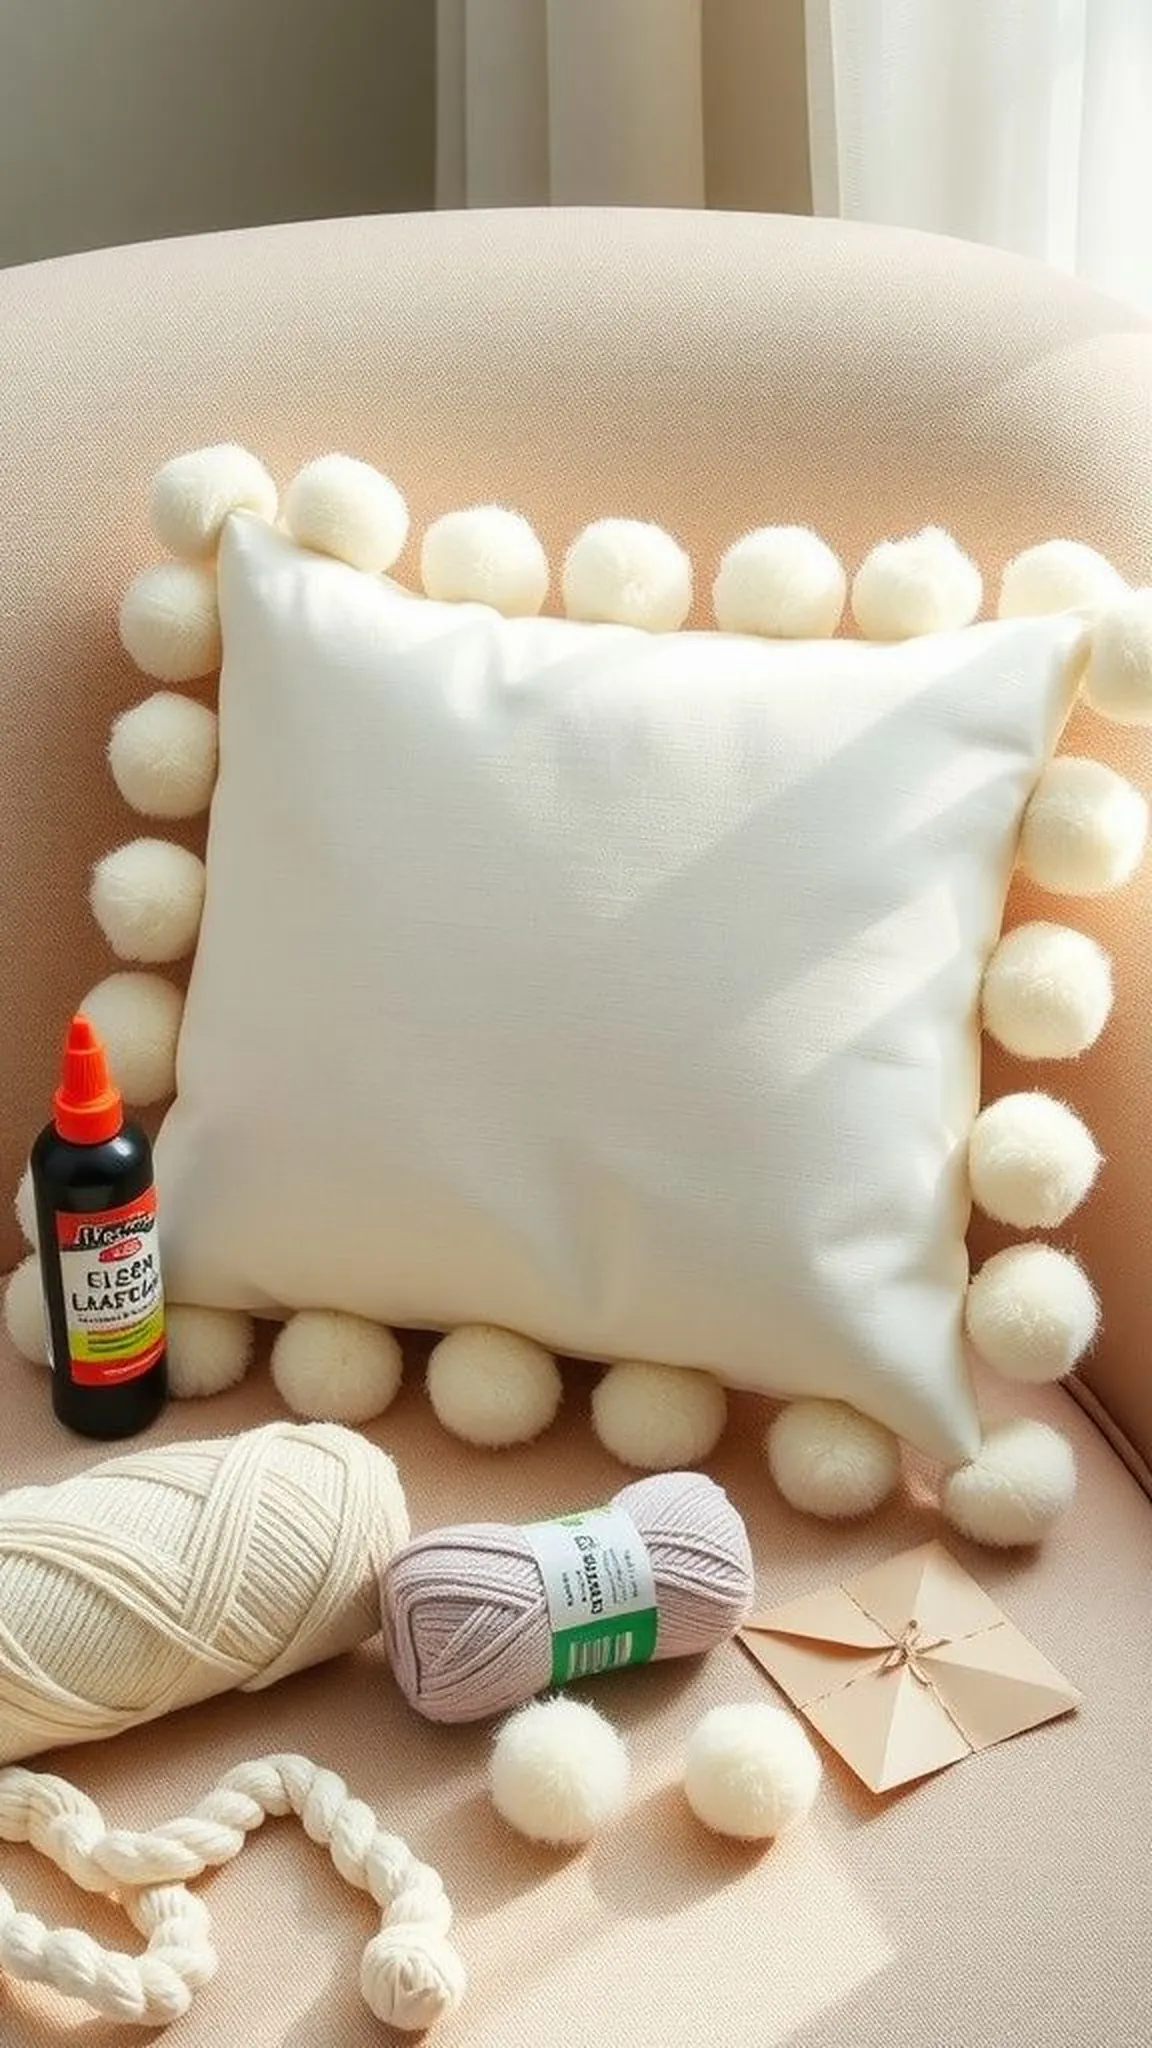
Sweater yarn repurposed into playful pom-poms frames a pillow with buoyant little clouds that bob with the slightest movement. The pom-pom halo softens edges and adds a whimsical, tactile border against the main knit body.
Each pom-pom catches light on its tiny strands, producing a lively edge that contrasts with a calm center. The hand-formed texture reads cozy and casual, perfect for a laid-back reading nook.
Overall, the pillow gains personality through the series of small, fuzzy accents that feel unexpectedly luxurious. Pom-poms can vary slightly in size, giving a hand-crafted, relaxed finish that suits layered décor.
Pro Tip: Make pom-poms a touch denser than expected so they retain shape after trimming and occasional use on furniture.
How to Make This
- Wind sweater yarn around a small cardboard template until thick, then tie the center and cut loops to form a pom-pom.
- Trim pom-poms to even out fluff and glue them along the pillow perimeter with fabric glue.
- Allow pom-poms to set and then shake gently to round them before final placement.
Avoid: A frequent error is under-winding yarn which produces sparse pom-poms that fall apart quickly. Trimming too aggressively can leave uneven tufts and spoil the round silhouette.
Try Also: Cluster pom-poms in corners for a subtle effect or create a full pom-pom field across the pillow for maximum whimsy. Mix yarn weights for varied texture and color depth.
Products & Materials
Items Used
- sweater yarn scraps
- pillow insert
- fabric glue
- cardboard pom pom template
“Frame a pillow with sweater yarn pom-poms for playful texture.”
Elbow patch accent pillow with contrasting knit
⏱️ 1 hour · 🟠 Intermediate
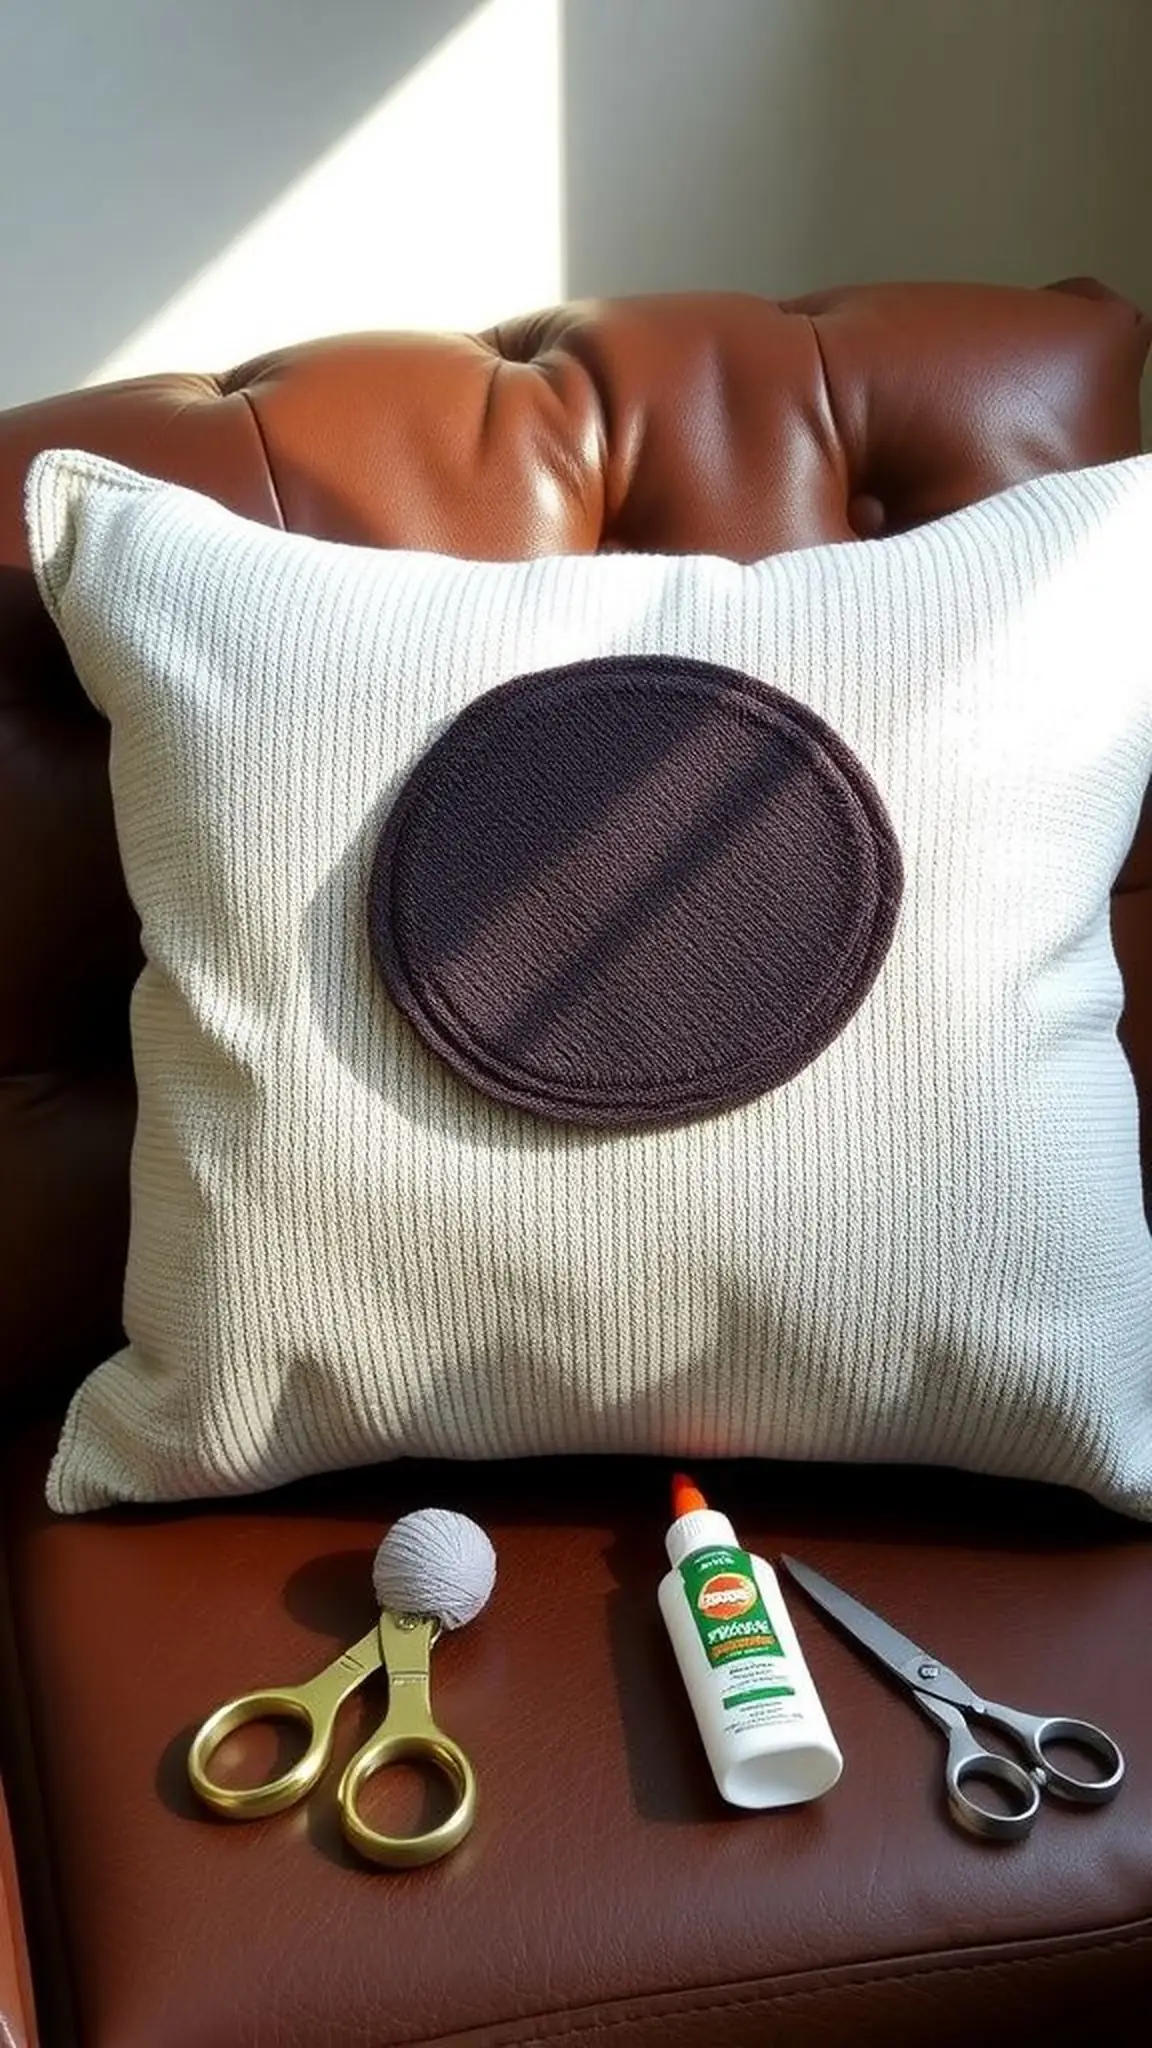
A contrasting elbow patch sourced from a sweater adds a fashionable nod to heritage tailoring right on a throw pillow. The patch supplies a focal point with a different stitch pattern and color that stands out against the main field.
The hand feels the change in knit density when fingers pass over the patch, creating a small deliberate interruption in texture. Light plays differently across the patch, bringing attention to its rounded shape and subtle relief.
The overall effect reads like a story detail taken from a well-worn jacket and translated into home comfort. Pairing soft neutrals with a darker patch offers a pleasing visual counterpoint for sofas and reading chairs.
Pro Tip: Position the patch slightly off-center for a relaxed, modern composition and glue the edges well to prevent peeling at stress points.
How to Make This
- Cut a rounded patch from a contrasting sweater piece and smooth edges with scissors.
- Place the patch onto the pillow surface and press firmly while applying fabric glue around the perimeter.
- Hold in place until adhesive sets and then insert the pillow form to check placement and firmness.
Avoid: A frequent oversight is placing the patch dead center, which can feel too formal for relaxed décor. Skimping on adhesive around the edges leads to lifting after a few uses.
Try Also: Use leather-look fabric for a mixed-material accent or make several small patches in a grid for a dotted pattern. Choose a brighter color for a pop against neutral knits.
Products & Materials
Items Used
- contrasting sweater patch
- pillow insert
- fabric glue
“Add a contrasting elbow patch for a tailored pillow accent.”
Faux-fur collar accent pillow for luxe texture
⏱️ 2 hours · 🔴 Advanced
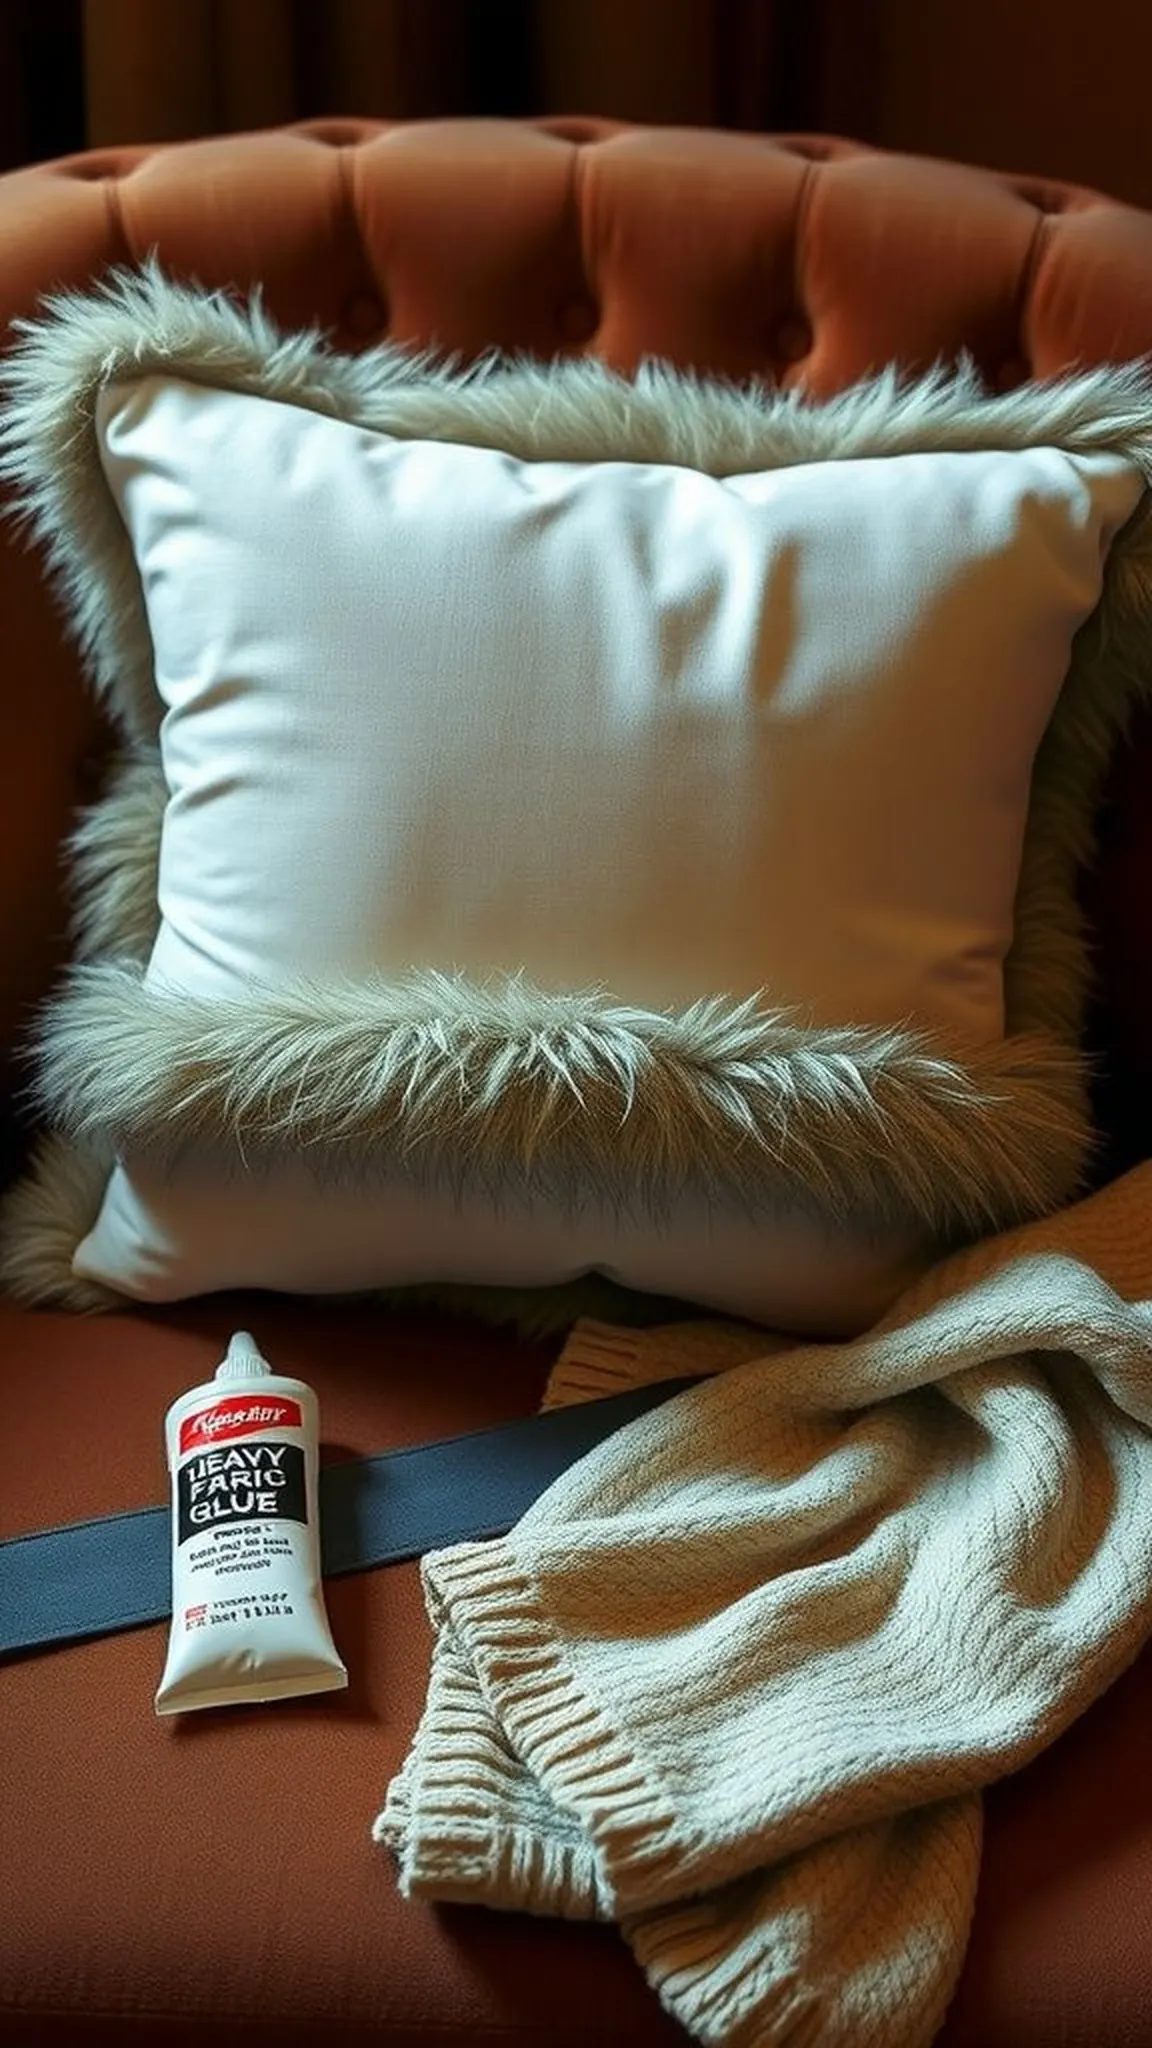
A faux-fur collar from an old neckline becomes a sumptuous trim that lifts a sweater pillow into a luxe statement piece. The fur edge provides a deep, pillowy outline that feels indulgent and sheltering to the touch.
The contrast between smooth knit and plush fur plays beautifully in low light, the fur reflecting subtle highlights and adding depth. Small hairs catch easily on fingers, delivering a tactile richness that draws attention in a room.
Overall, the piece reads like a cozy throw with couture influences, ideal for an accent chair that needs a bit of drama. The fur adds visual warmth and invites curling up beneath a blanket on chilly nights.
Pro Tip: Trim any excess backing from the faux-fur and secure the fur base to the knit with a strong fabric adhesive designed for plush materials.
How to Make This
- Remove the faux-fur collar from the garment and trim its backing to a neat strip sized for the pillow edge.
- Lay the fur strip along the pillow perimeter and apply a heavy-duty fabric glue to the fur base.
- Press fur to the knit cover evenly and allow extended drying time to ensure a firm bond.
Avoid: A frequent error is leaving too much backing, which can create lumps under the fur and an uneven edge. Choosing a low-quality adhesive may result in the fur detaching after light use.
Try Also: Use a smaller fur collar as a corner accent or add a narrow leather strip alongside the fur for mixed texture. Select a neutral fur tone for subtlety or jewel tones for a bold statement.
Products & Materials
Items Used
- faux-fur collar
- heavy-duty fabric glue
- pillow insert
“Upgrade a sweater pillow with a faux-fur collar for luxe warmth.”
Layered cuff and fringe for boho square pillow
⏱️ 1-2 hours · 🟠 Intermediate
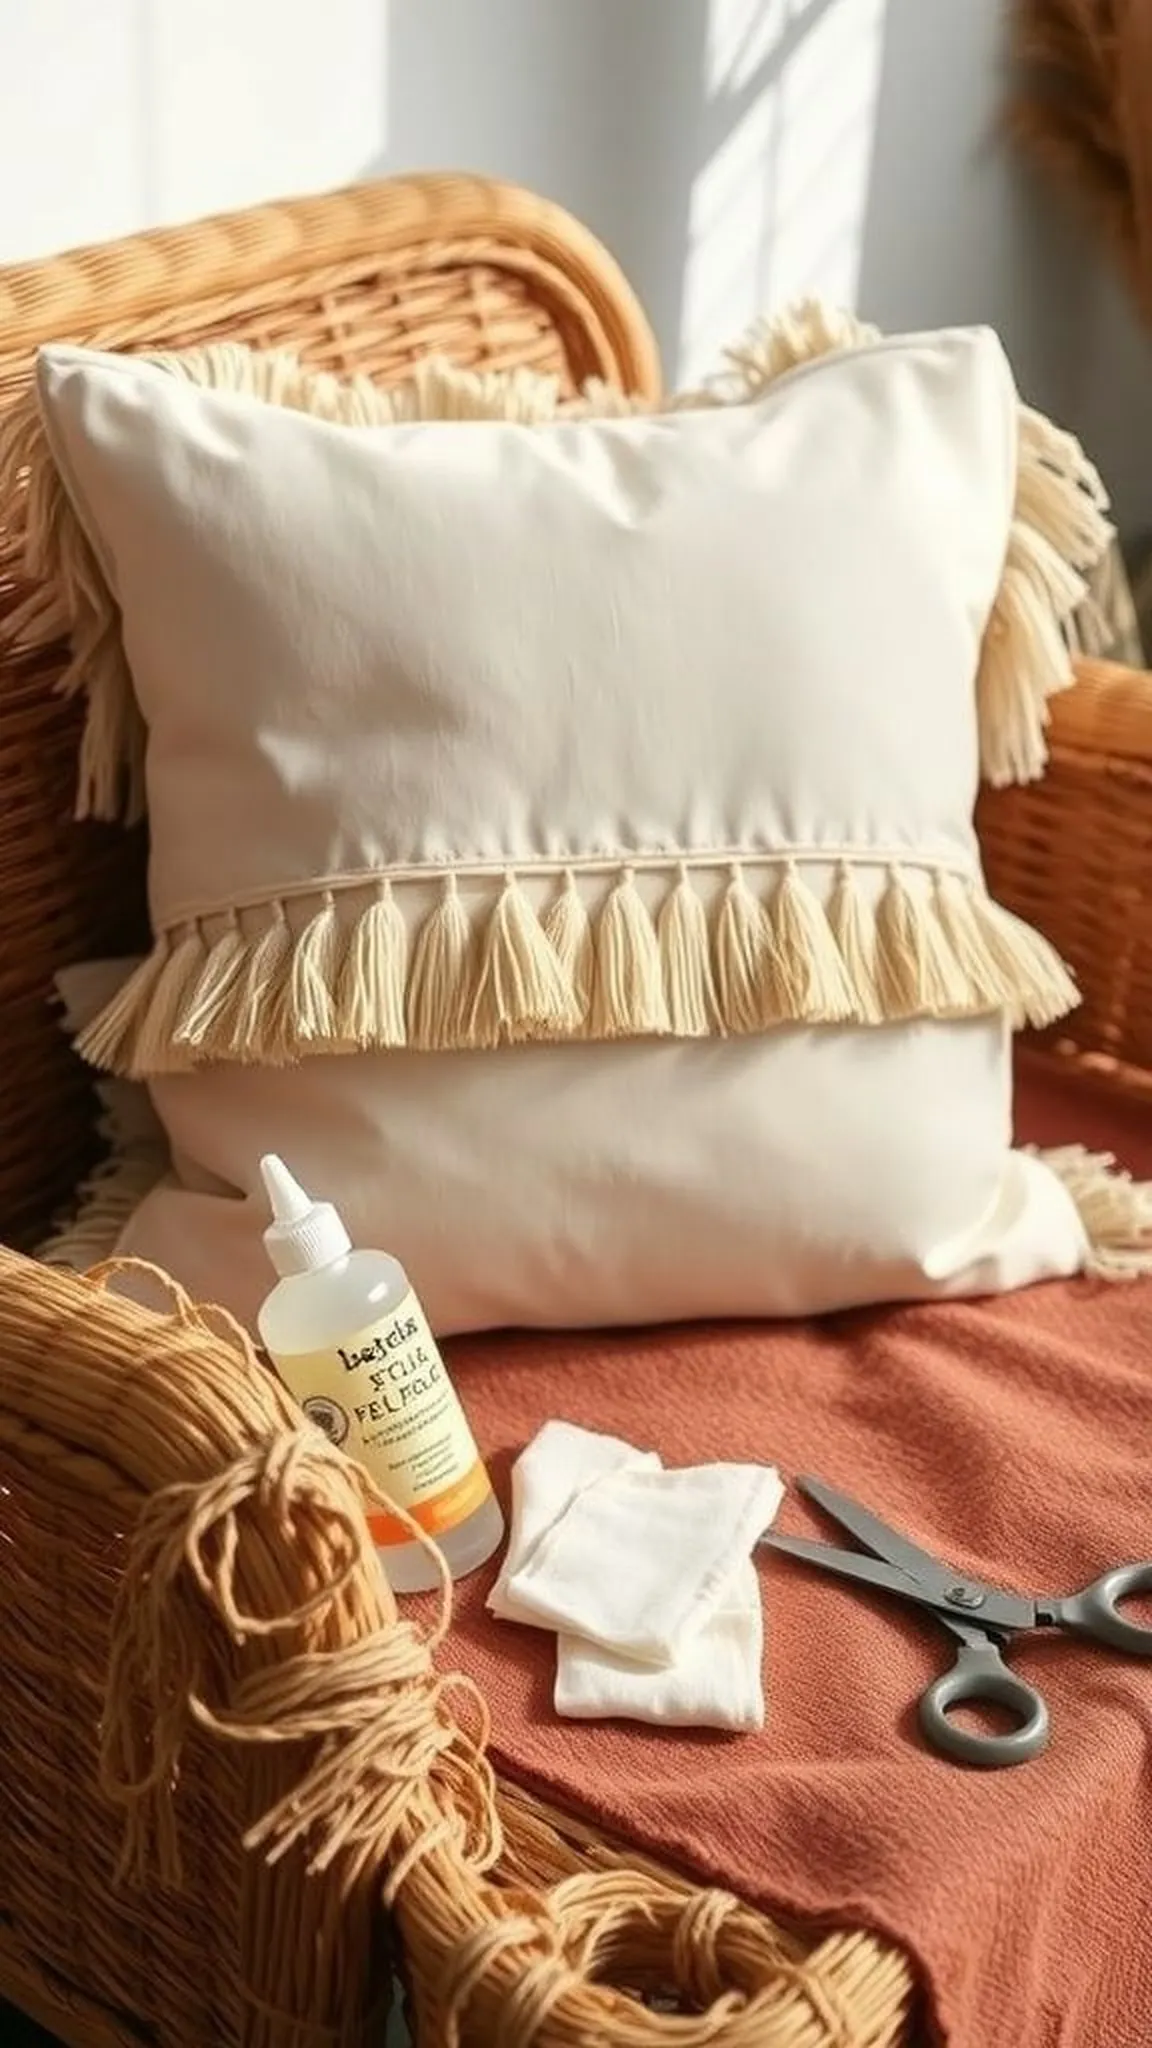
Layering a cuff over a fringe band introduces depth while keeping the surface inviting and textural. The fringe peeks beneath the cuff, creating a dynamic interplay of straight ribs and fluttering yarn edges.
Colors and gauges contrast to make the layered elements pop, with warm tones marrying rustic fibers and soft drape. Light moves across the layers, revealing small shadows and a sense of slow domestic craft.
The finished pillow feels relaxed and slightly eclectic, pairing well with woven throws and natural wood surfaces. Hands enjoy the alternating sensations of fringe and firm cuff as the pillow is arranged and rearranged.
Pro Tip: Glue the fringe first, allow it to dry, then position the cuff over it to hide glue lines and create a cleaner layered look.
How to Make This
- Prepare a fringe band from sweater yarn and glue it along the pillow edge where desired.
- Allow the fringe to set fully, then position a cuff horizontally over the fringe and secure its sides with fabric glue.
- Fluff the pillow and adjust fringe length for uniform appearance once all glue is dry.
Avoid: A frequent mistake is adding the cuff before the fringe dries, which can trap glue and make the layers look messy. Overloading the fringe with glue can stiffen it and reduce its natural movement.
Try Also: Try alternating fringe colors for a striped border or place multiple cuff bands across a long pillow for a stacked look. Use thin leather strips between layers for contrast.
Products & Materials
Items Used
“Layer cuff and fringe for a boho-inspired knitted pillow.”
Pocketed sweater-back pillow with hidden storage
⏱️ 1 hour · 🟠 Intermediate
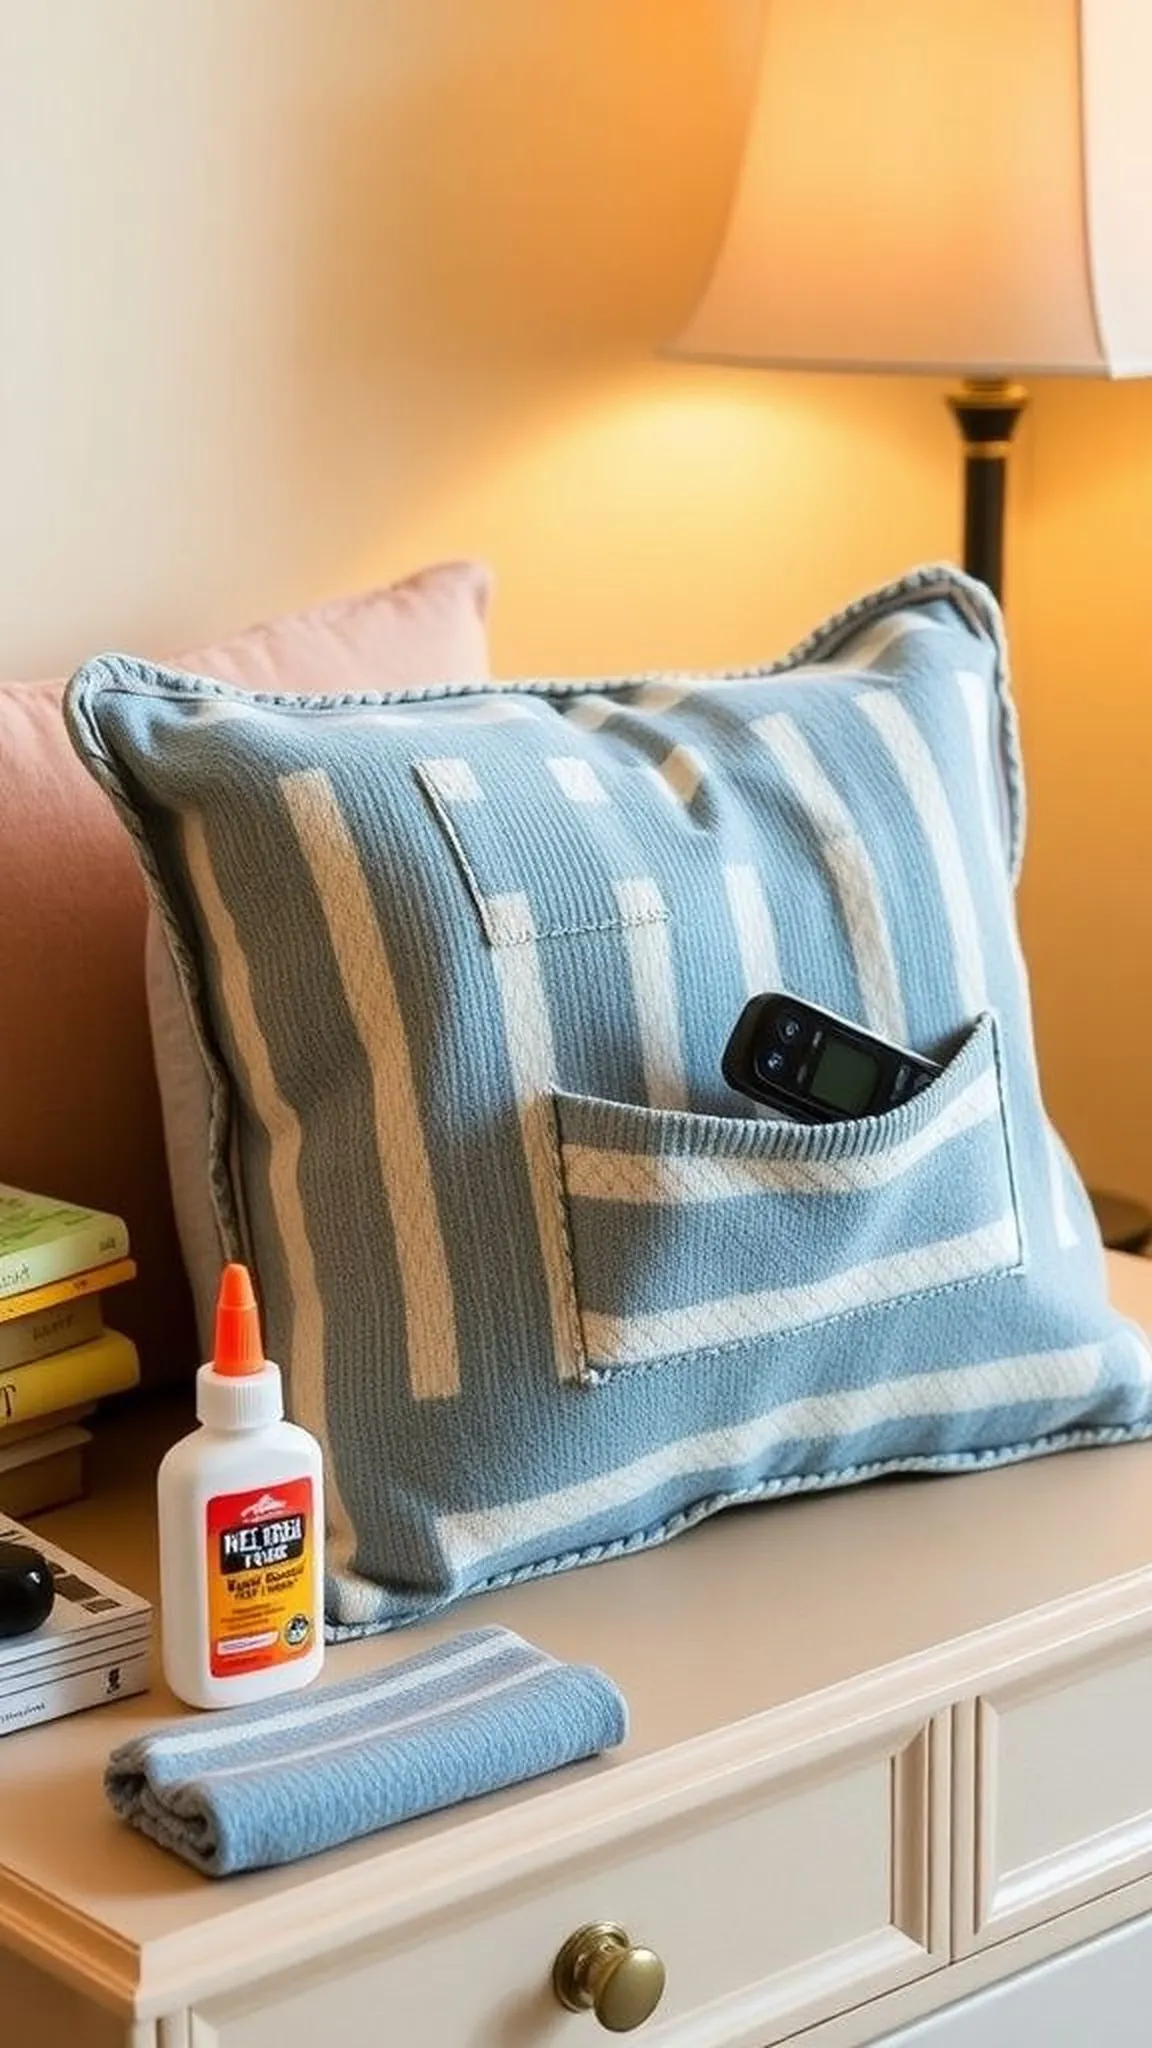
The back of a sweater often contains a subtle panel perfect for forming a hidden pocket that doubles as discreet storage. Knit depth and seam lines disguise the pouch so the pillow remains clean and uncluttered while holding small items.
Soft stitches and the sweater’s original hem create a natural opening that feels smooth under hand and blends into the pillow silhouette. The tucked pocket keeps remote controls or a pair of glasses within welcome reach while preserving overall comfort.
The pocket adds an unexpected utility to a decorative piece, making the pillow both pretty and practical for evening routines. Texture and function meet in a quiet, domestic detail that rewards familiarity.
Pro Tip: Press the pocket opening flat and glue along the inner edges to create a tidy entry that resists sagging with use.
How to Make This
- Cut a sweater back panel large enough to cover a pillow and leave an intact hem section for the pocket opening.
- Position the panel over a pillow insert and secure side seams with fabric glue, leaving the hem as an access pocket.
- Reinforce pocket edges with additional glue so stored items do not cause the opening to stretch out.
Avoid: A frequent oversight is relying on a thin hem that stretches out once items are placed inside, creating a floppy pocket. Inadequate reinforcement at the pocket base leads to early sagging.
Try Also: Create two staggered pockets for separation or add a faux-button closure for visual interest. Use a heavier gauge sweater back for sturdier storage.
Products & Materials
Items Used
“Hide a practical storage pocket in a sweater-back pillow cover.”
No-sew lumbar roll from a sweater sleeve
⏱️ 40 min · 🟢 Beginner
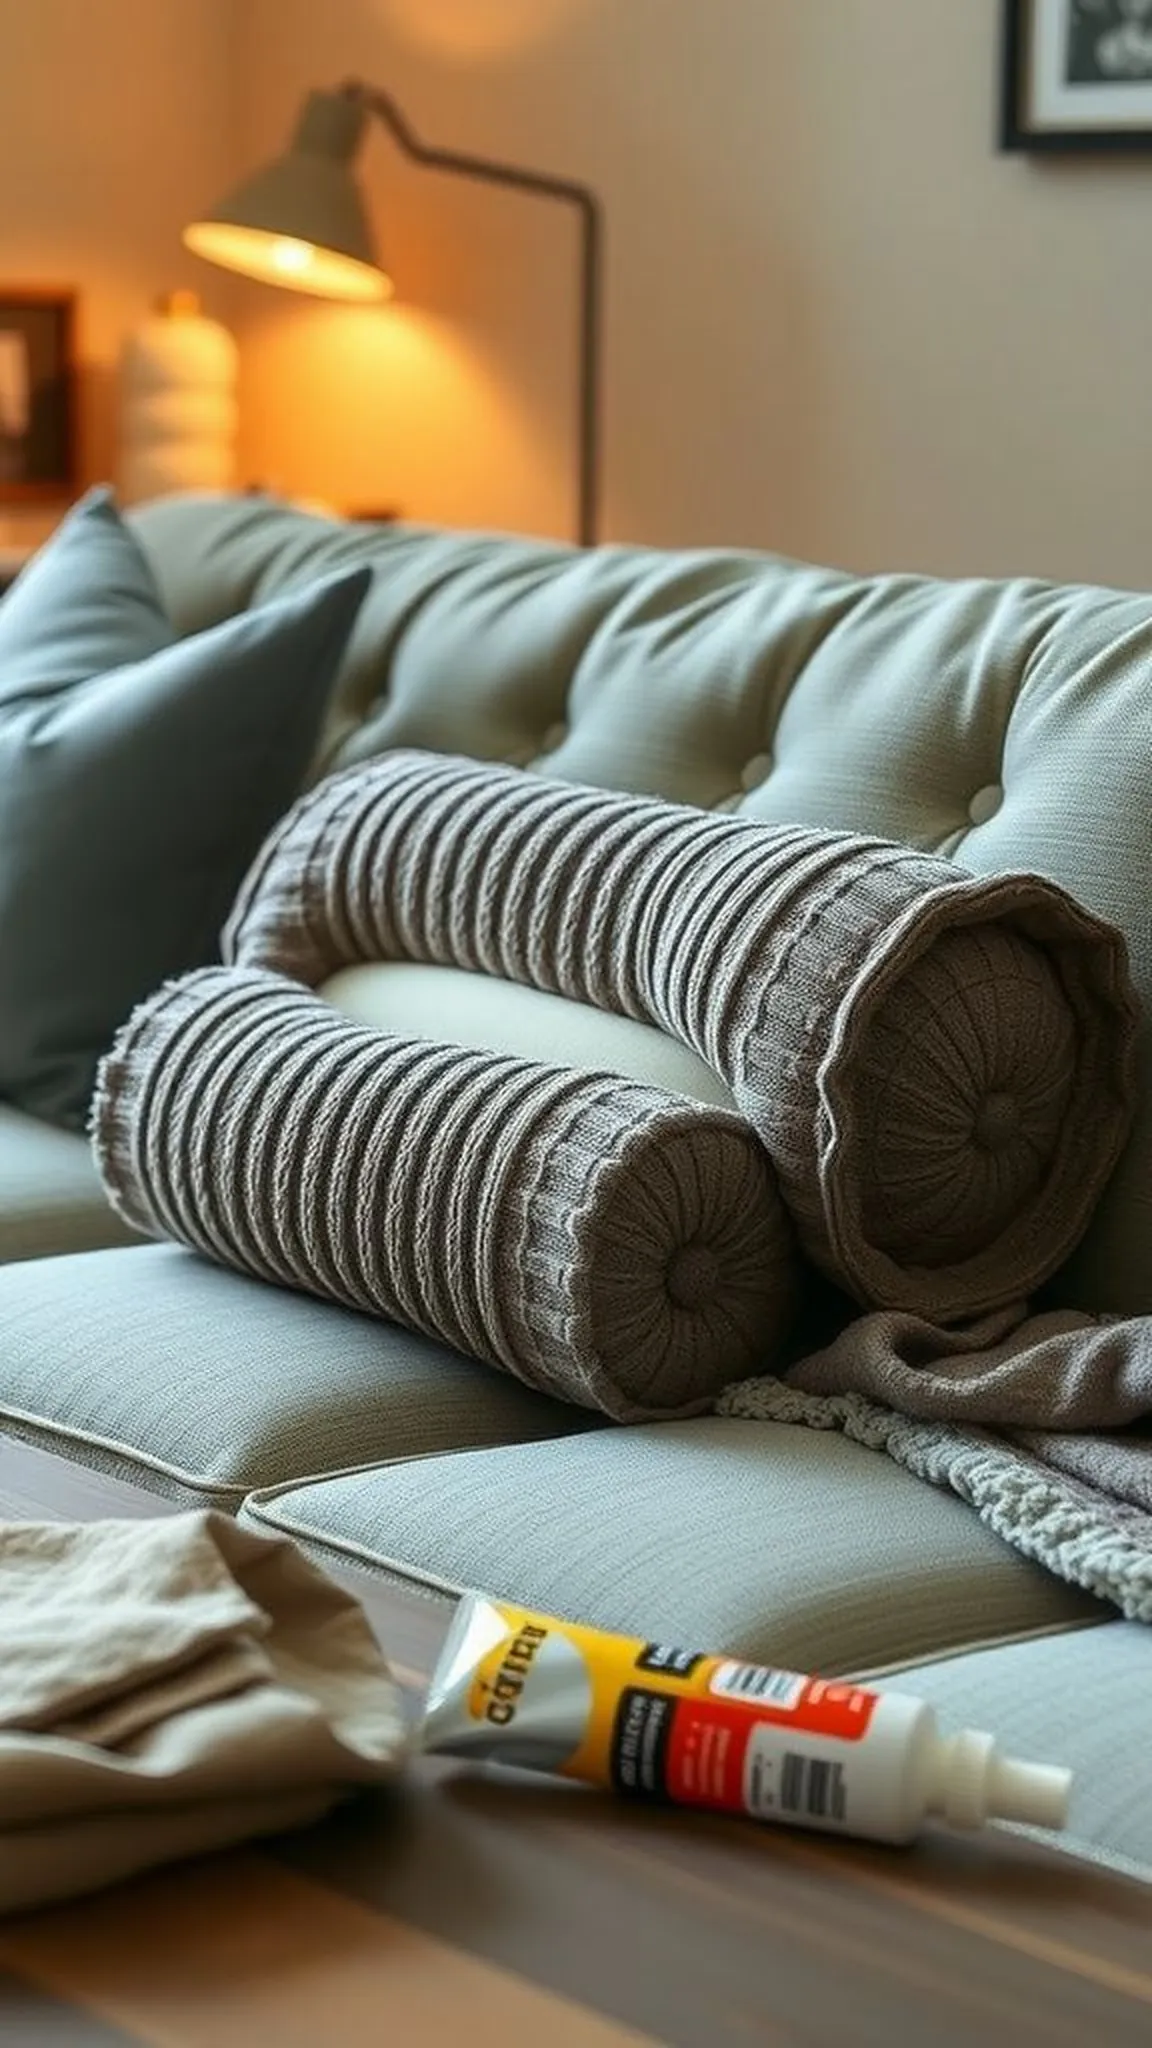
A narrow sweater sleeve becomes a comforting lumbar roll that supports lower backs with soft knit and forgiving stretch. The cylindrical shape reads tidy yet lived-in, with a gentle give when leaned against.
Texture variations from ribbing to smooth stockinette offer subtle sculptural interest while remaining soft to the touch. The finished roll nestles neatly across a couch or bed, adding an elongated accent among square cushions.
The roll feels especially welcoming when paired with a chunky throw and muted tones for a restful palette. Its compact form makes it easy to move and tuck into new seating arrangements as needed.
Pro Tip: Stuff the sleeve firmly but allow a little give so the lumbar roll retains bounce and avoids becoming overly rigid.
How to Make This
- Slide a long pillow insert or a tight bundle of polyfill into a sweater sleeve to create a cylinder.
- Secure both open ends of the sleeve with fabric glue, forming neat, flat closures.
- Massage the filling to distribute evenly and adjust firmness to preference.
Avoid: A frequent error is underfilling, which makes the roll slump and lose supportive shape. Overfilling can make the ends bulge and create an awkward silhouette.
Try Also: Use two contrasting sleeves stitched together at the center for a two-tone roll or add a thin braided band around the middle for emphasis. A narrower roll suits desk chairs while a plumper one fits sofa use.
Products & Materials
Items Used
- sweater sleeve
- bolster pillow insert
- fabric glue
“Make a supportive lumbar roll from a sweater sleeve without sewing.”
Minimalist inset pocket pillow with visible seam
⏱️ 1 hour · 🟠 Intermediate

A narrow inset pocket with a visible seam line offers a minimalist approach that celebrates the sweater’s original construction details. The exposed seam reads intentional and modern while keeping the surface uncluttered.
The tactile seam provides a linear ridge to rest hands on, and the knit around it remains soft and inviting. Muted hues emphasize shape and line more than color, lending the pillow a quiet, architectural presence in a room.
The result is a refined cushion that feels curated rather than fussy, fitting a variety of décor styles from rustic to Scandinavian. The pocket provides a low-profile utility while contributing to the overall composition.
Pro Tip: Align the original sweater seam with the pillow center for a clean, balanced look and reinforce it with glue for stability.
How to Make This
- Cut a rectangular panel from the sweater leaving the original seam intact as the pocket opening.
- Position the panel over a pillow insert and glue the side edges to form an inset pocket.
- Smooth the seam and let adhesive cure fully before using the pillow to prevent shifting.
Avoid: A frequent oversight is misaligning the seam which throws off the pillow’s balance and visual symmetry. Skipping reinforcement along stress points causes the pocket to widen over time.
Try Also: Keep the seam raw for a rustic edge or cover it with a narrow leather strip for a refined contrast. Make a pair of matching inset pillows for a coordinated sofa set.
Products & Materials
Items Used
- sweater panel with seam
- pillow insert
- fabric glue
“Create a sleek no-sew inset pocket pillow with a visible seam.”
No-sew patch pocket pillow with button closure
⏱️ 1 hour · 🟠 Intermediate
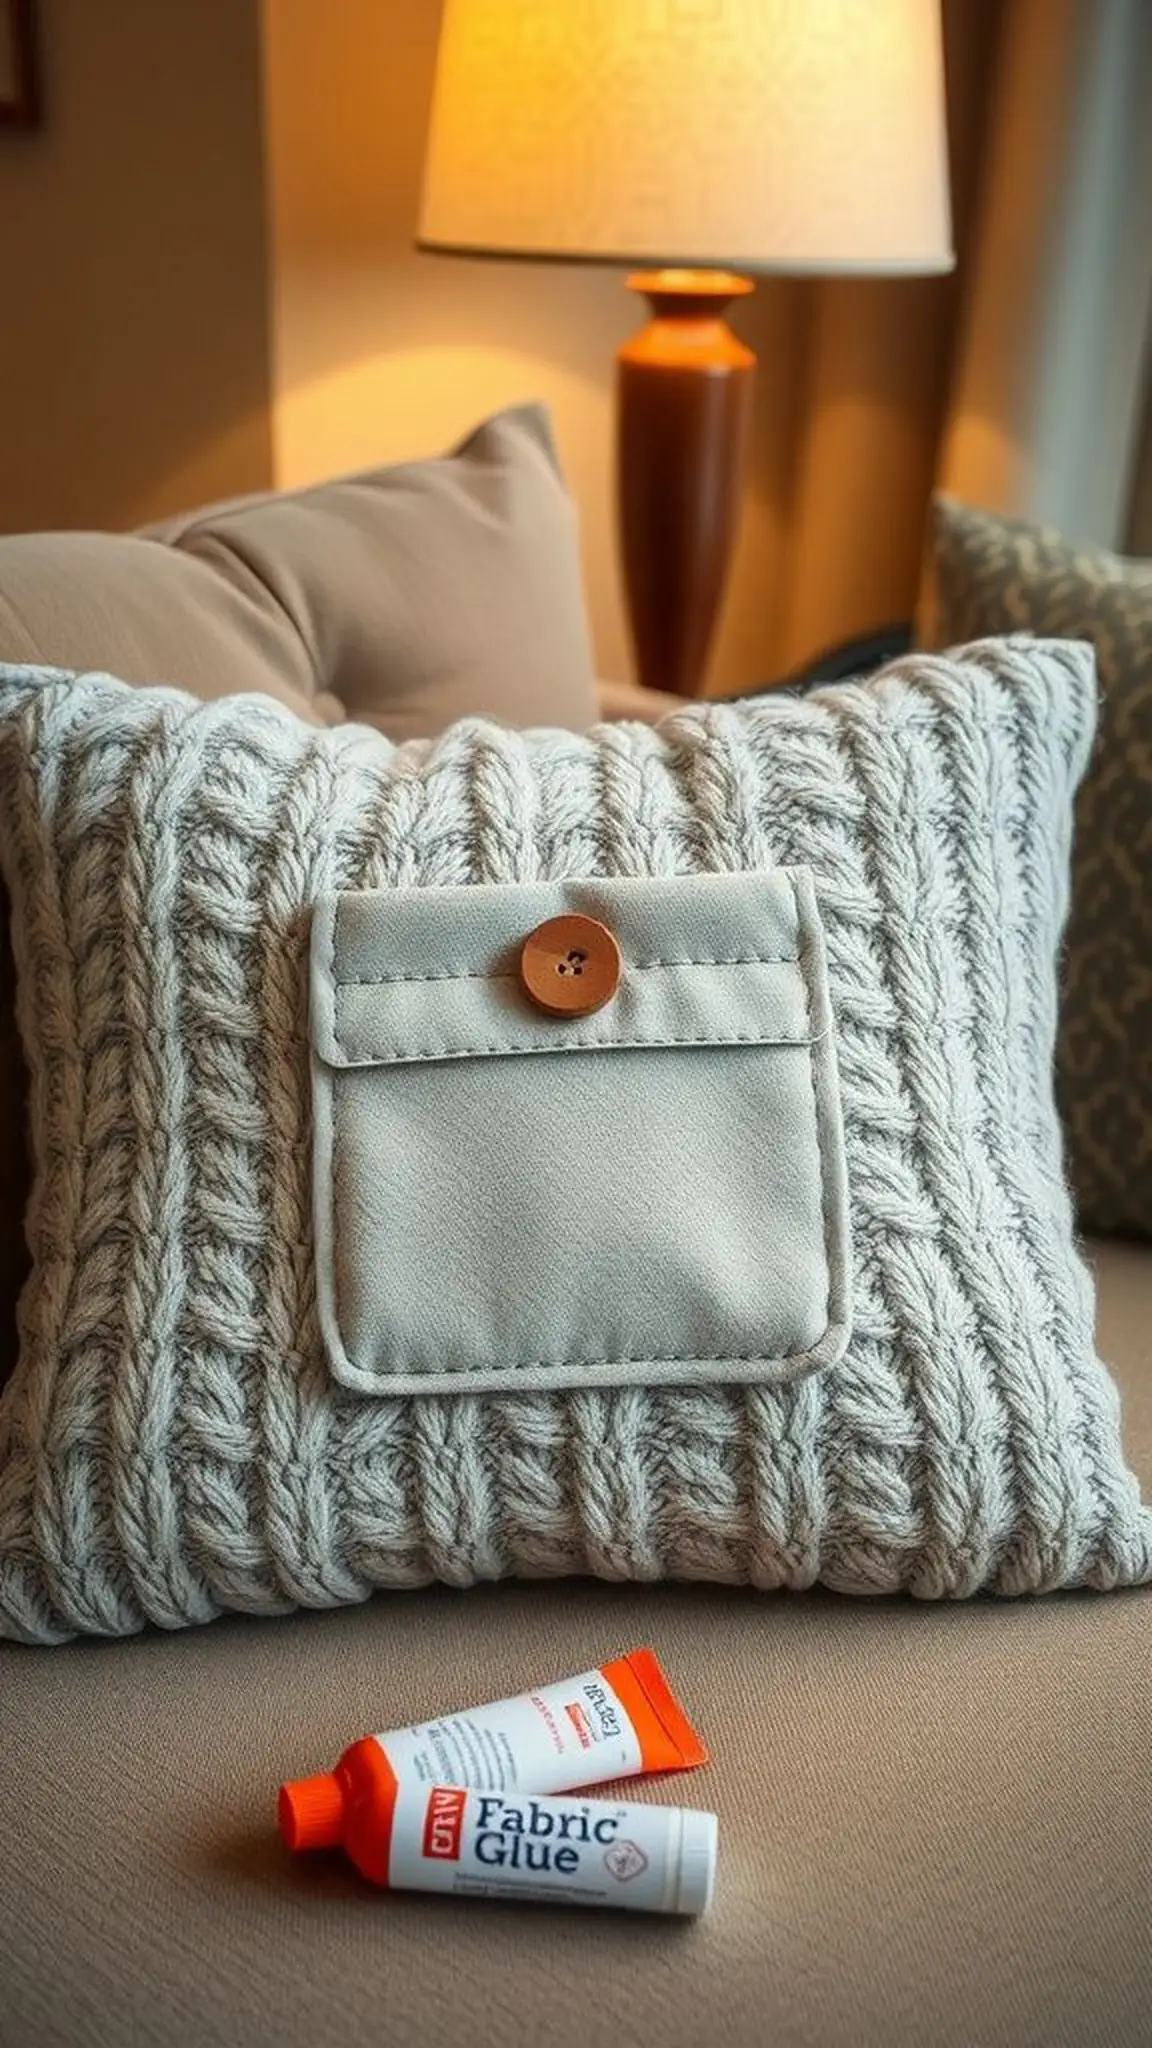
A patch pocket with a buttoned flap reads like a small garment fragment offering both decoration and a little storage. The button sits atop soft knit folds that create charming little pleats beneath it.
Textures range from smooth stockinette to slightly fuzzy pilling, and the flap edge adds a neat graphic line to the pillow face. Light catches on the button and on the slight elevations of the pocket, giving a quietly curated appearance.
The piece brings a sense of domestic detail to everyday seating, as if borrowed from a well-worn cardigan left nearby. Practicality and softness combine to form a pillow that feels intimate and useful.
Pro Tip: Sew or glue the button onto a small reinforced patch before attaching to prevent it pulling through the knit over time.
How to Make This
- Cut a rectangular pocket and a small flap from sweater fabric and prepare a button for closure.
- Affix the flap top edge to the pillow front with a thin line of fabric glue and secure the pocket sides leaving the top open.
- Attach the button to the pocket front and create a small buttonhole slit in the flap to fasten.
Avoid: A frequent issue is placing the button too close to the top edge, making closure awkward and prone to slipping. Using a lightweight button on a heavy knit can cause tension and fabric distortion.
Try Also: Make two smaller pockets side by side for extra storage or use a toggled cord closure for a rustic feel. Mix knit and woven pocket materials for contrast.
Products & Materials
Items Used
- sweater pocket piece
- button
- fabric glue
- pillow insert
“Add a buttoned patch pocket to a sweater pillow for charm and function.”
