
As an Amazon Associate I earn from qualifying purchases.
Easy Road Trip Hairstyles make mornings stress-free with travel-ready looks that survive long drives and quick stops. Easy Road Trip Hairstyles like low buns, messy scrunchie buns, braids, and scarf-tied ponytails keep hair tidy without fuss. Easy road trip hairstyles focus on fast steps, minimal tools, and comfy accessories so styling holds from sunrise to sunset.
These easy road trip hairstyles show that easy road trip hair can look polished with little effort and a couple of trusty elastics and clips.
Quick Scrunchie Messy Bun For Drivers
⏱️ 5 min · 🟢 Beginner
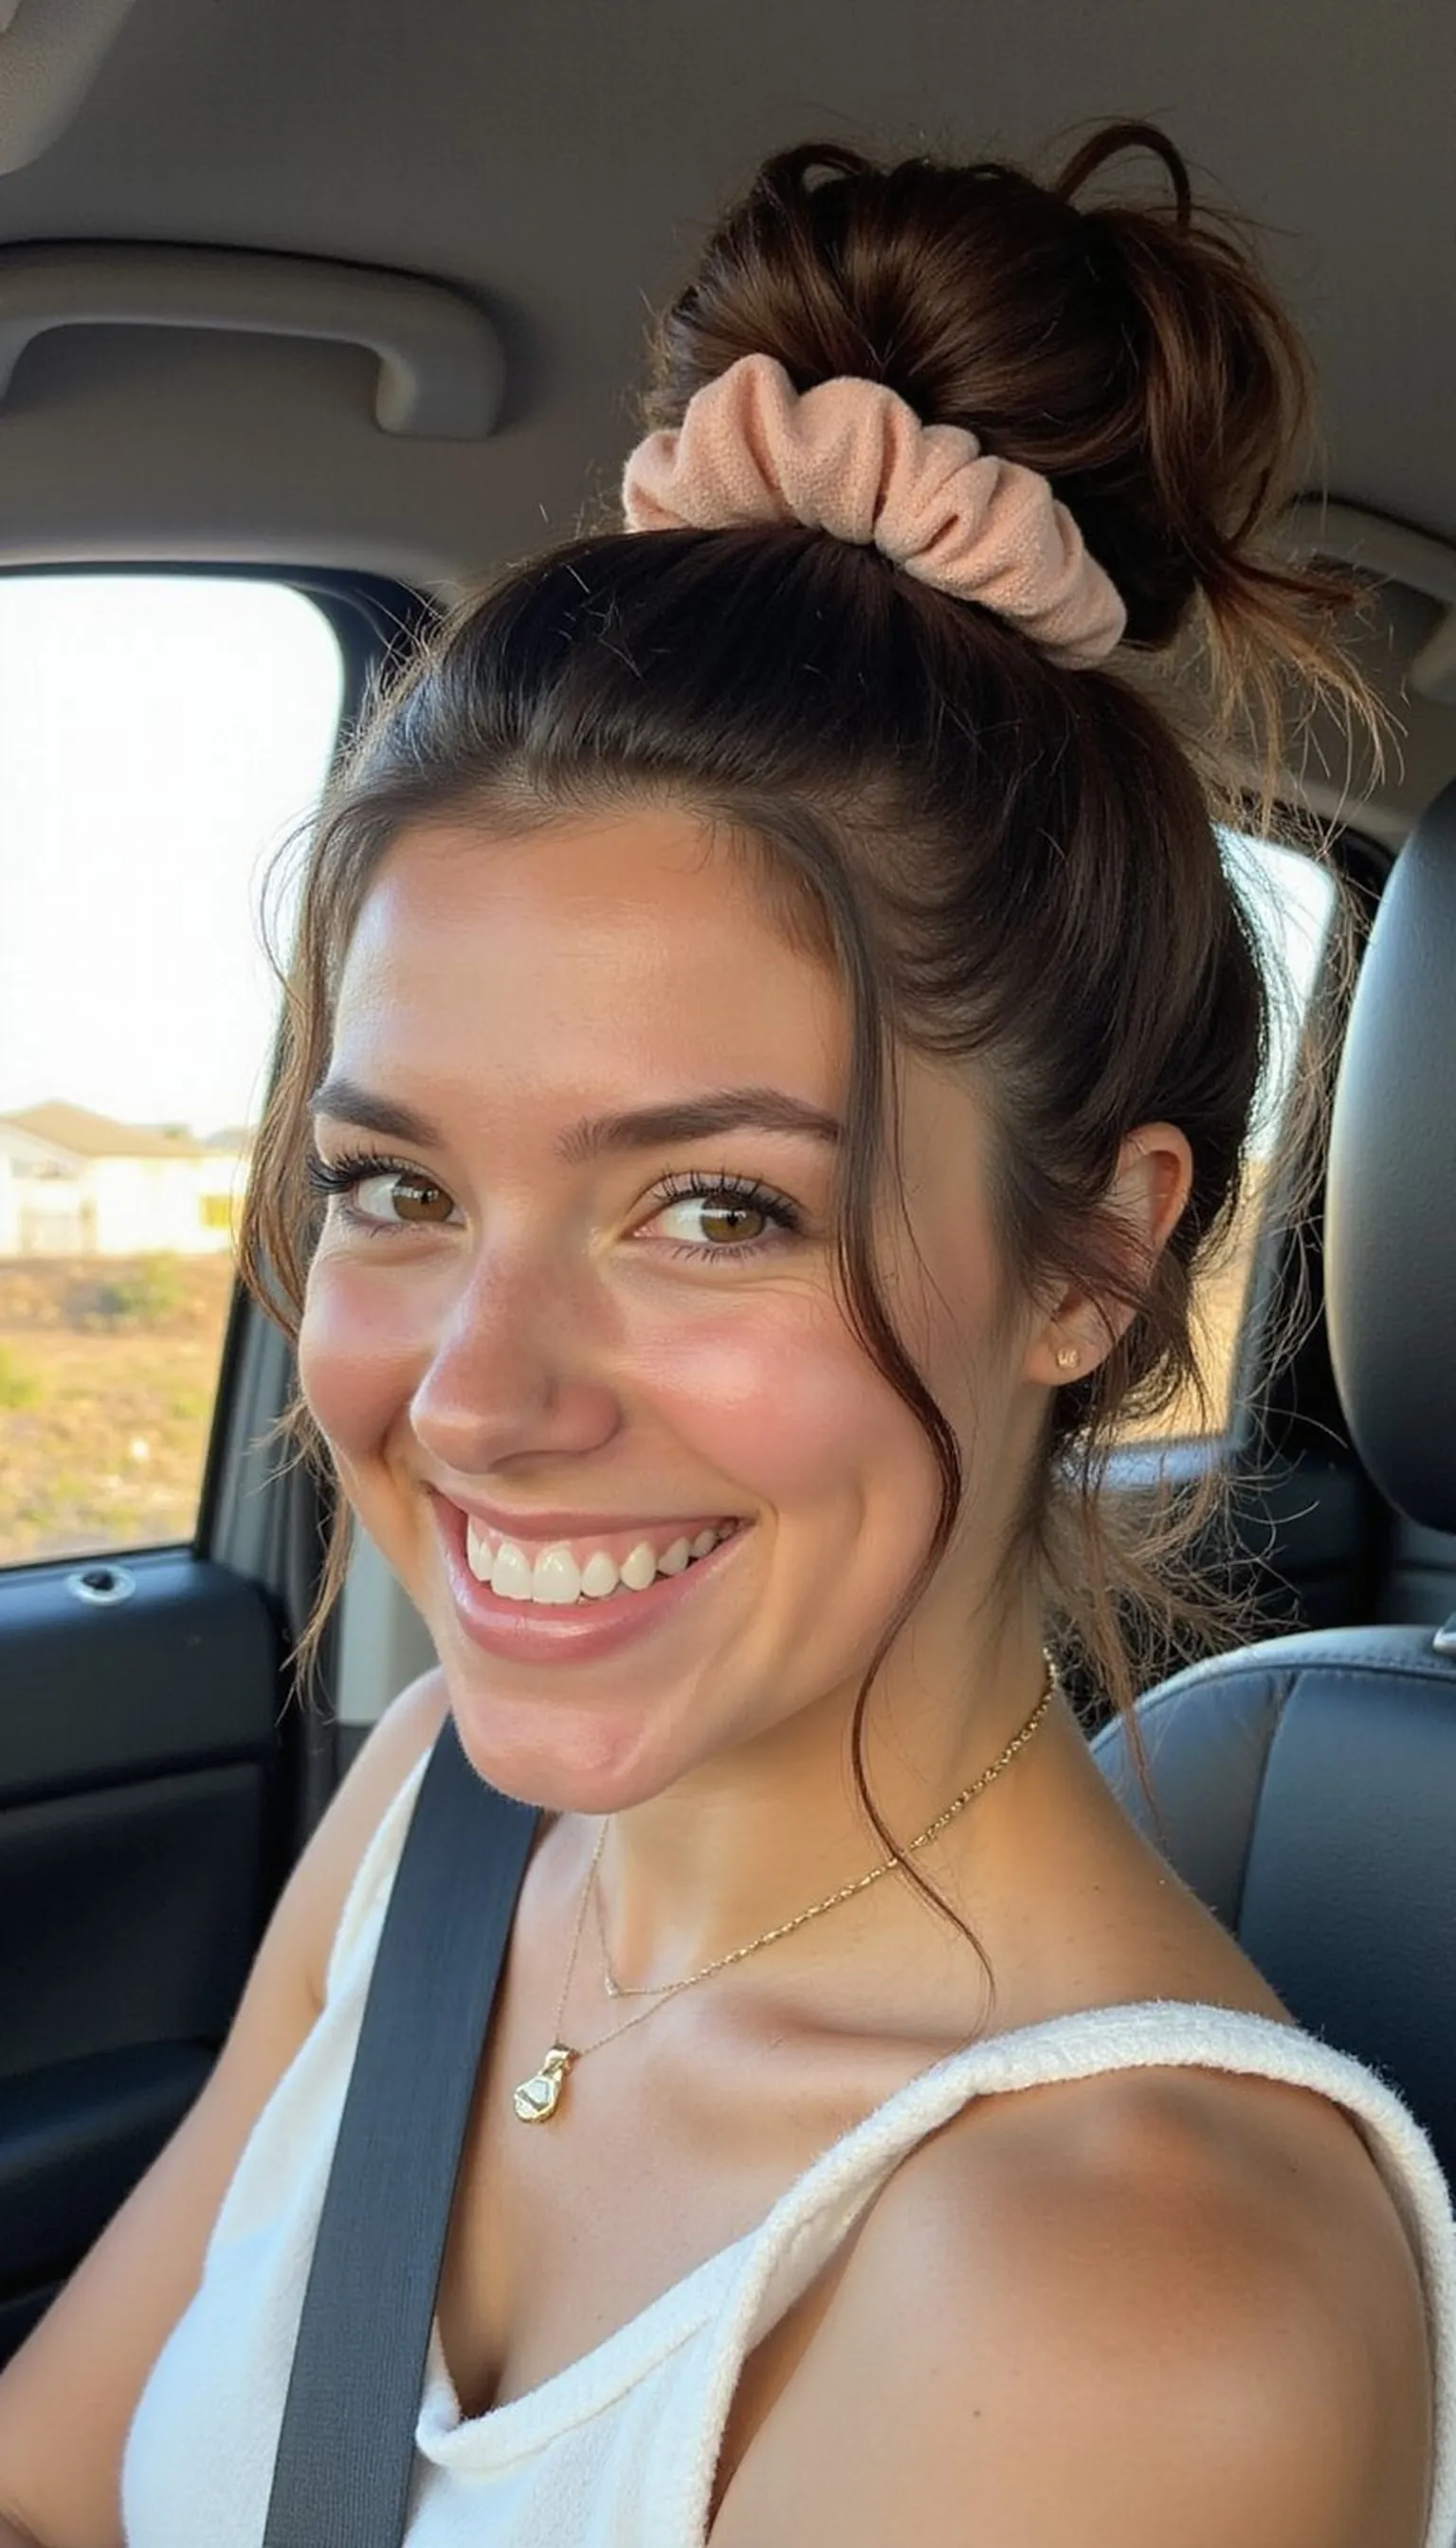
A scrunchie messy bun is perfect for road trips when quick fixes are needed between stops. Pull hair into a high or mid bun and wrap a soft scrunchie for an undone, comfy look that hides frizz and holds on windy stretches. This hairstyle works for straight, wavy, and slightly curly hair and still looks great after hours in a car. Add a few face-framing pieces for softness and loosen the bun with fingers for that effortless, relaxed vibe.
💇 Styling Tips ▶
Styling Tips
- Use a soft scrunchie to avoid dents and breakage.
- Loosen the bun gently with fingers for a lived-in look.
- Tuck short layers with bobby pins to keep them neat.
⚠️ Avoid: Tying the scrunchie too tightly can cause scalp tension and dents; keep it snug but relaxed. Avoid over-smoothing, which flattens natural texture.
🔄 Try Also: Try a low scrunchie bun at the nape for cooler cabin air, or twist two sections into a looped bun for extra hold and interest.
🛒 Products & Materials ▶
Items Used
📌 “Fast, comfy messy bun with a scrunchie for road-ready hair.”
• • •
Wrapped Scarf Low Ponytail For Style
⏱️ 7 min · 🟢 Beginner
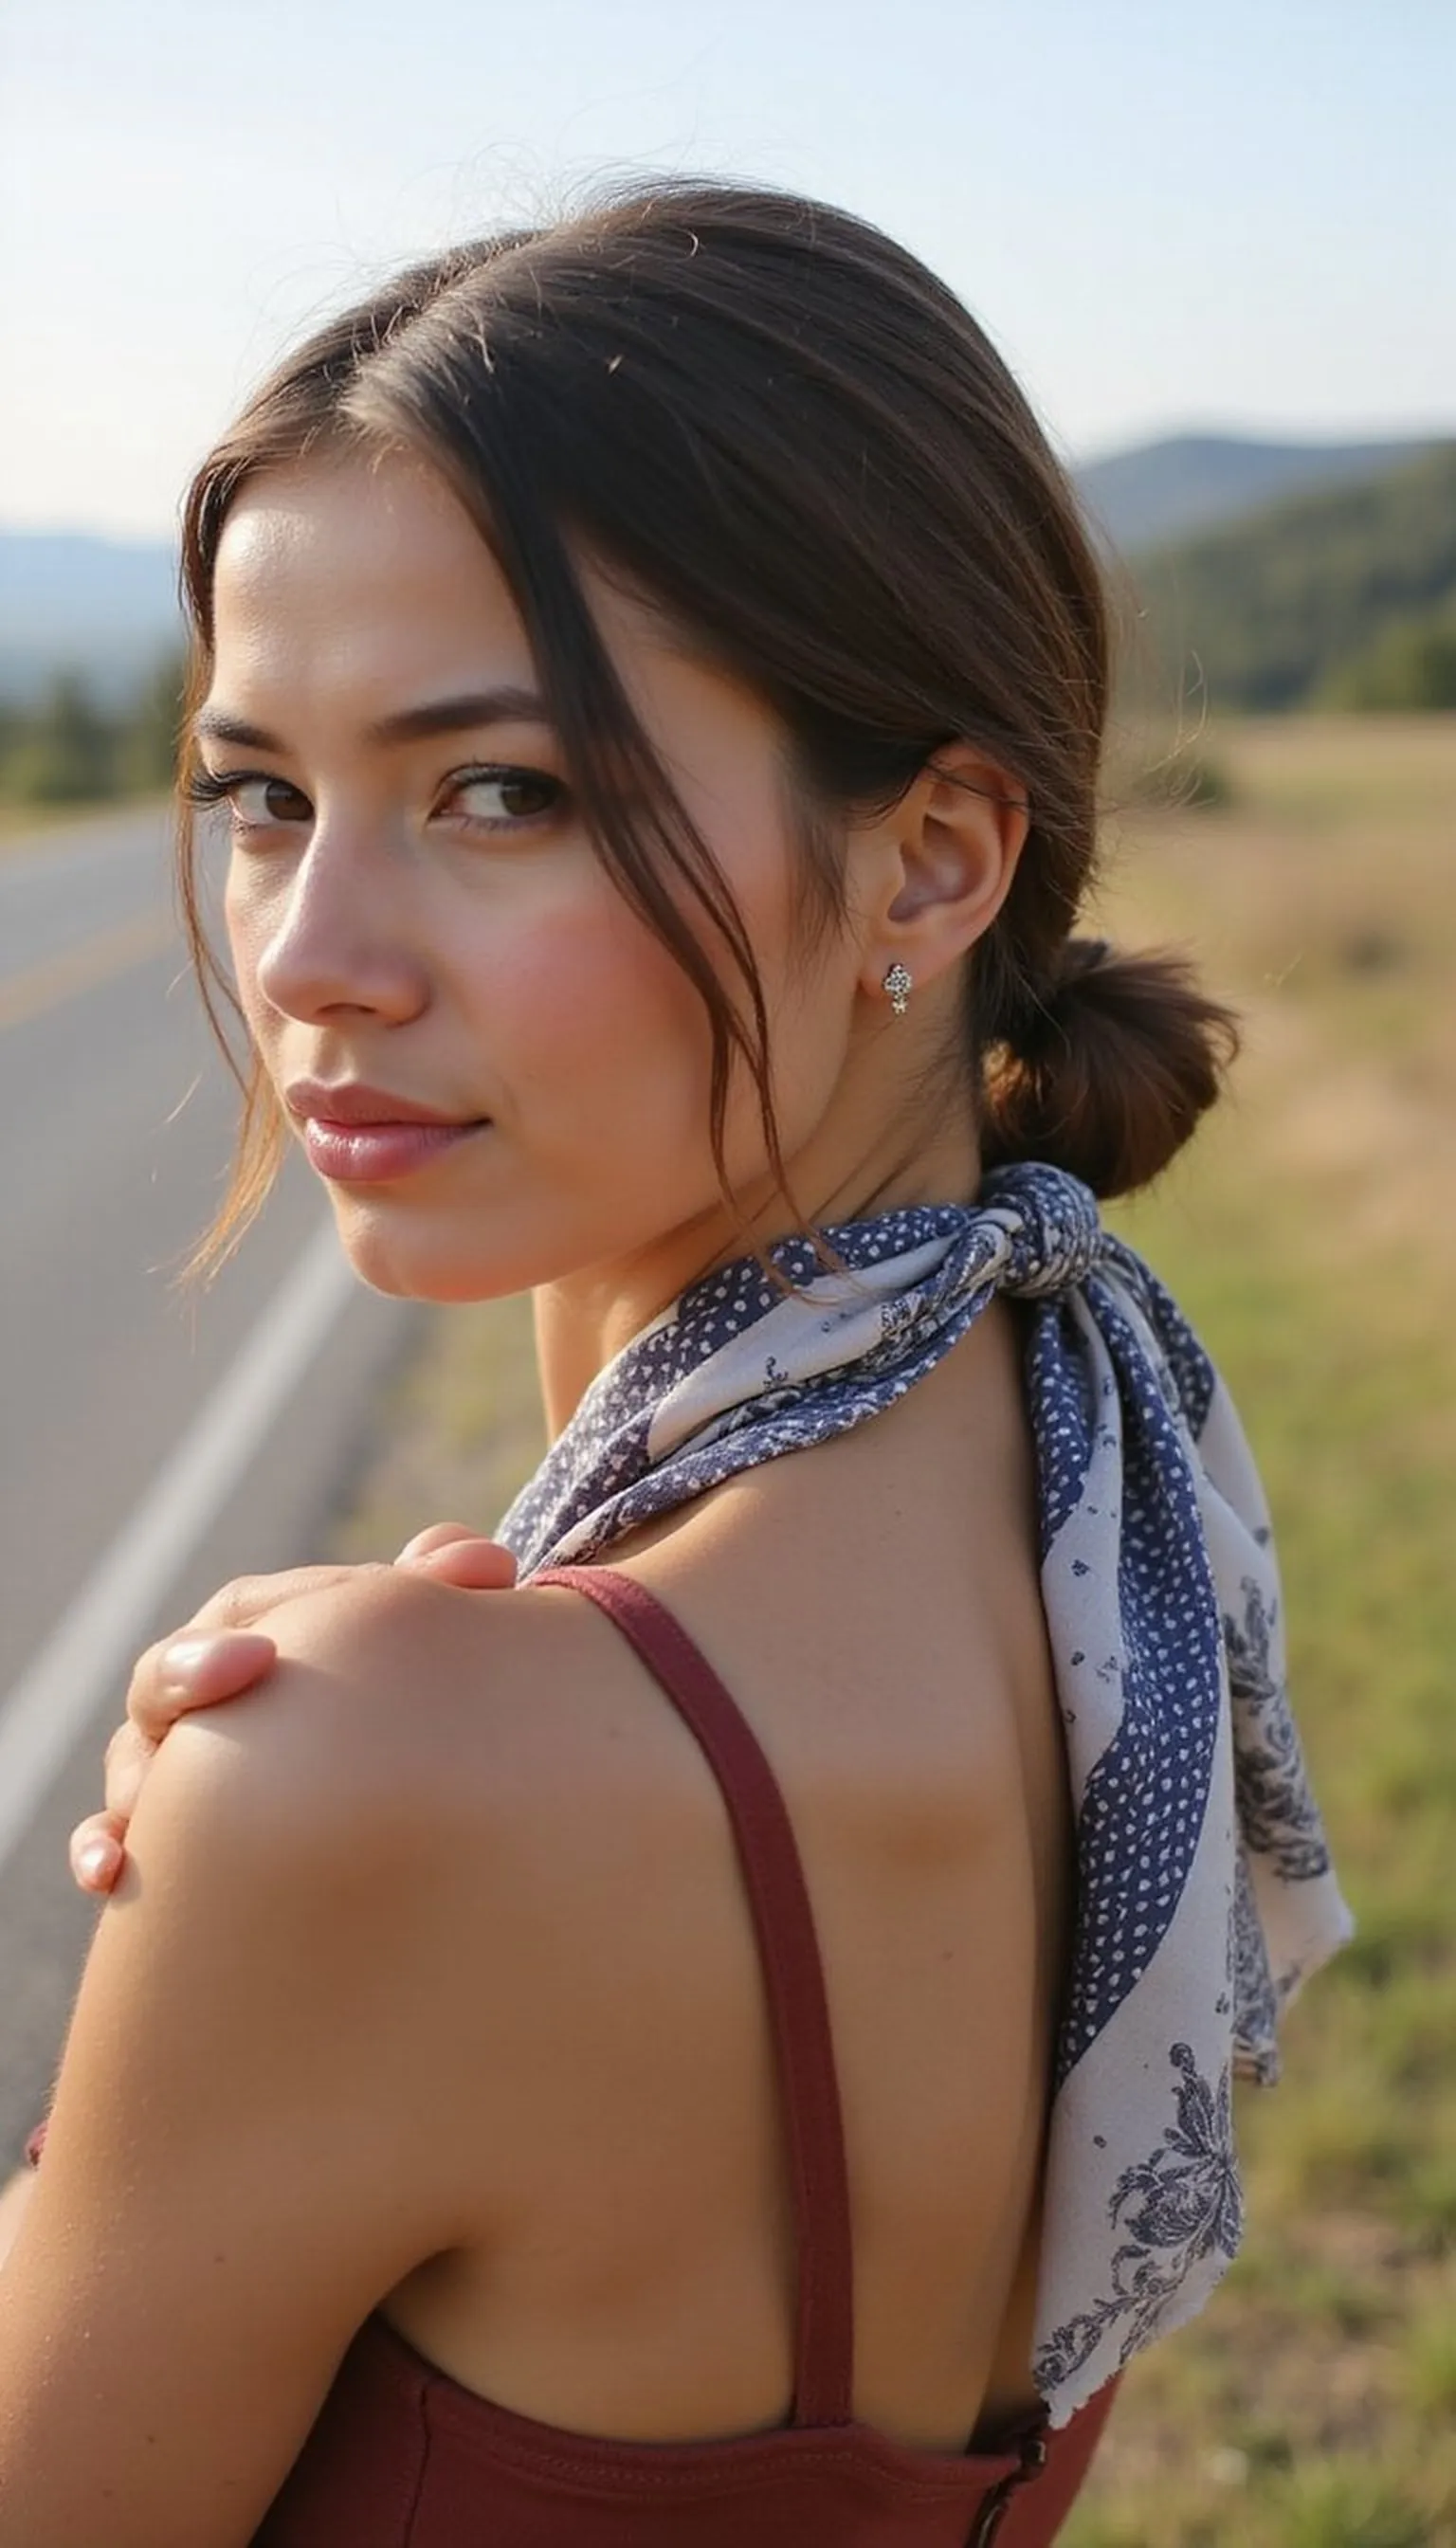
A wrapped scarf low ponytail adds instant flair without much effort and keeps hair controlled during long drives. Smooth hair into a low ponytail, tie a hair elastic, then wrap a silk or cotton scarf around the base and knot it for a chic, retro touch. The scarf protects hair from rubbing and adds a pop of color for photos at pit stops. This look suits medium to long hair and works with straight hair or soft waves for a polished, travel-friendly finish.
💇 Styling Tips ▶
Styling Tips
- Use a snag-free hair tie before wrapping the scarf to prevent slippage.
- Tuck scarf ends under the knot for a cleaner finish.
- Lightly mist with hairspray to tame flyaways on windy routes.
⚠️ Avoid: Wrapping too tightly can pull the ponytail out of place or create tension; keep the scarf snug but gentle. Don’t use heavy fabrics that slide.
🔄 Try Also: Create a high scarf-wrapped ponytail for extra lift or loop the scarf through a braid for boho charm on the road.
🛒 Products & Materials ▶
Items Used
📌 “Chic low ponytail wrapped with a scarf—great for scenic pit stops.”
• • •
Effortless Half-Up Top Knot With Pins
⏱️ 6 min · 🟢 Beginner
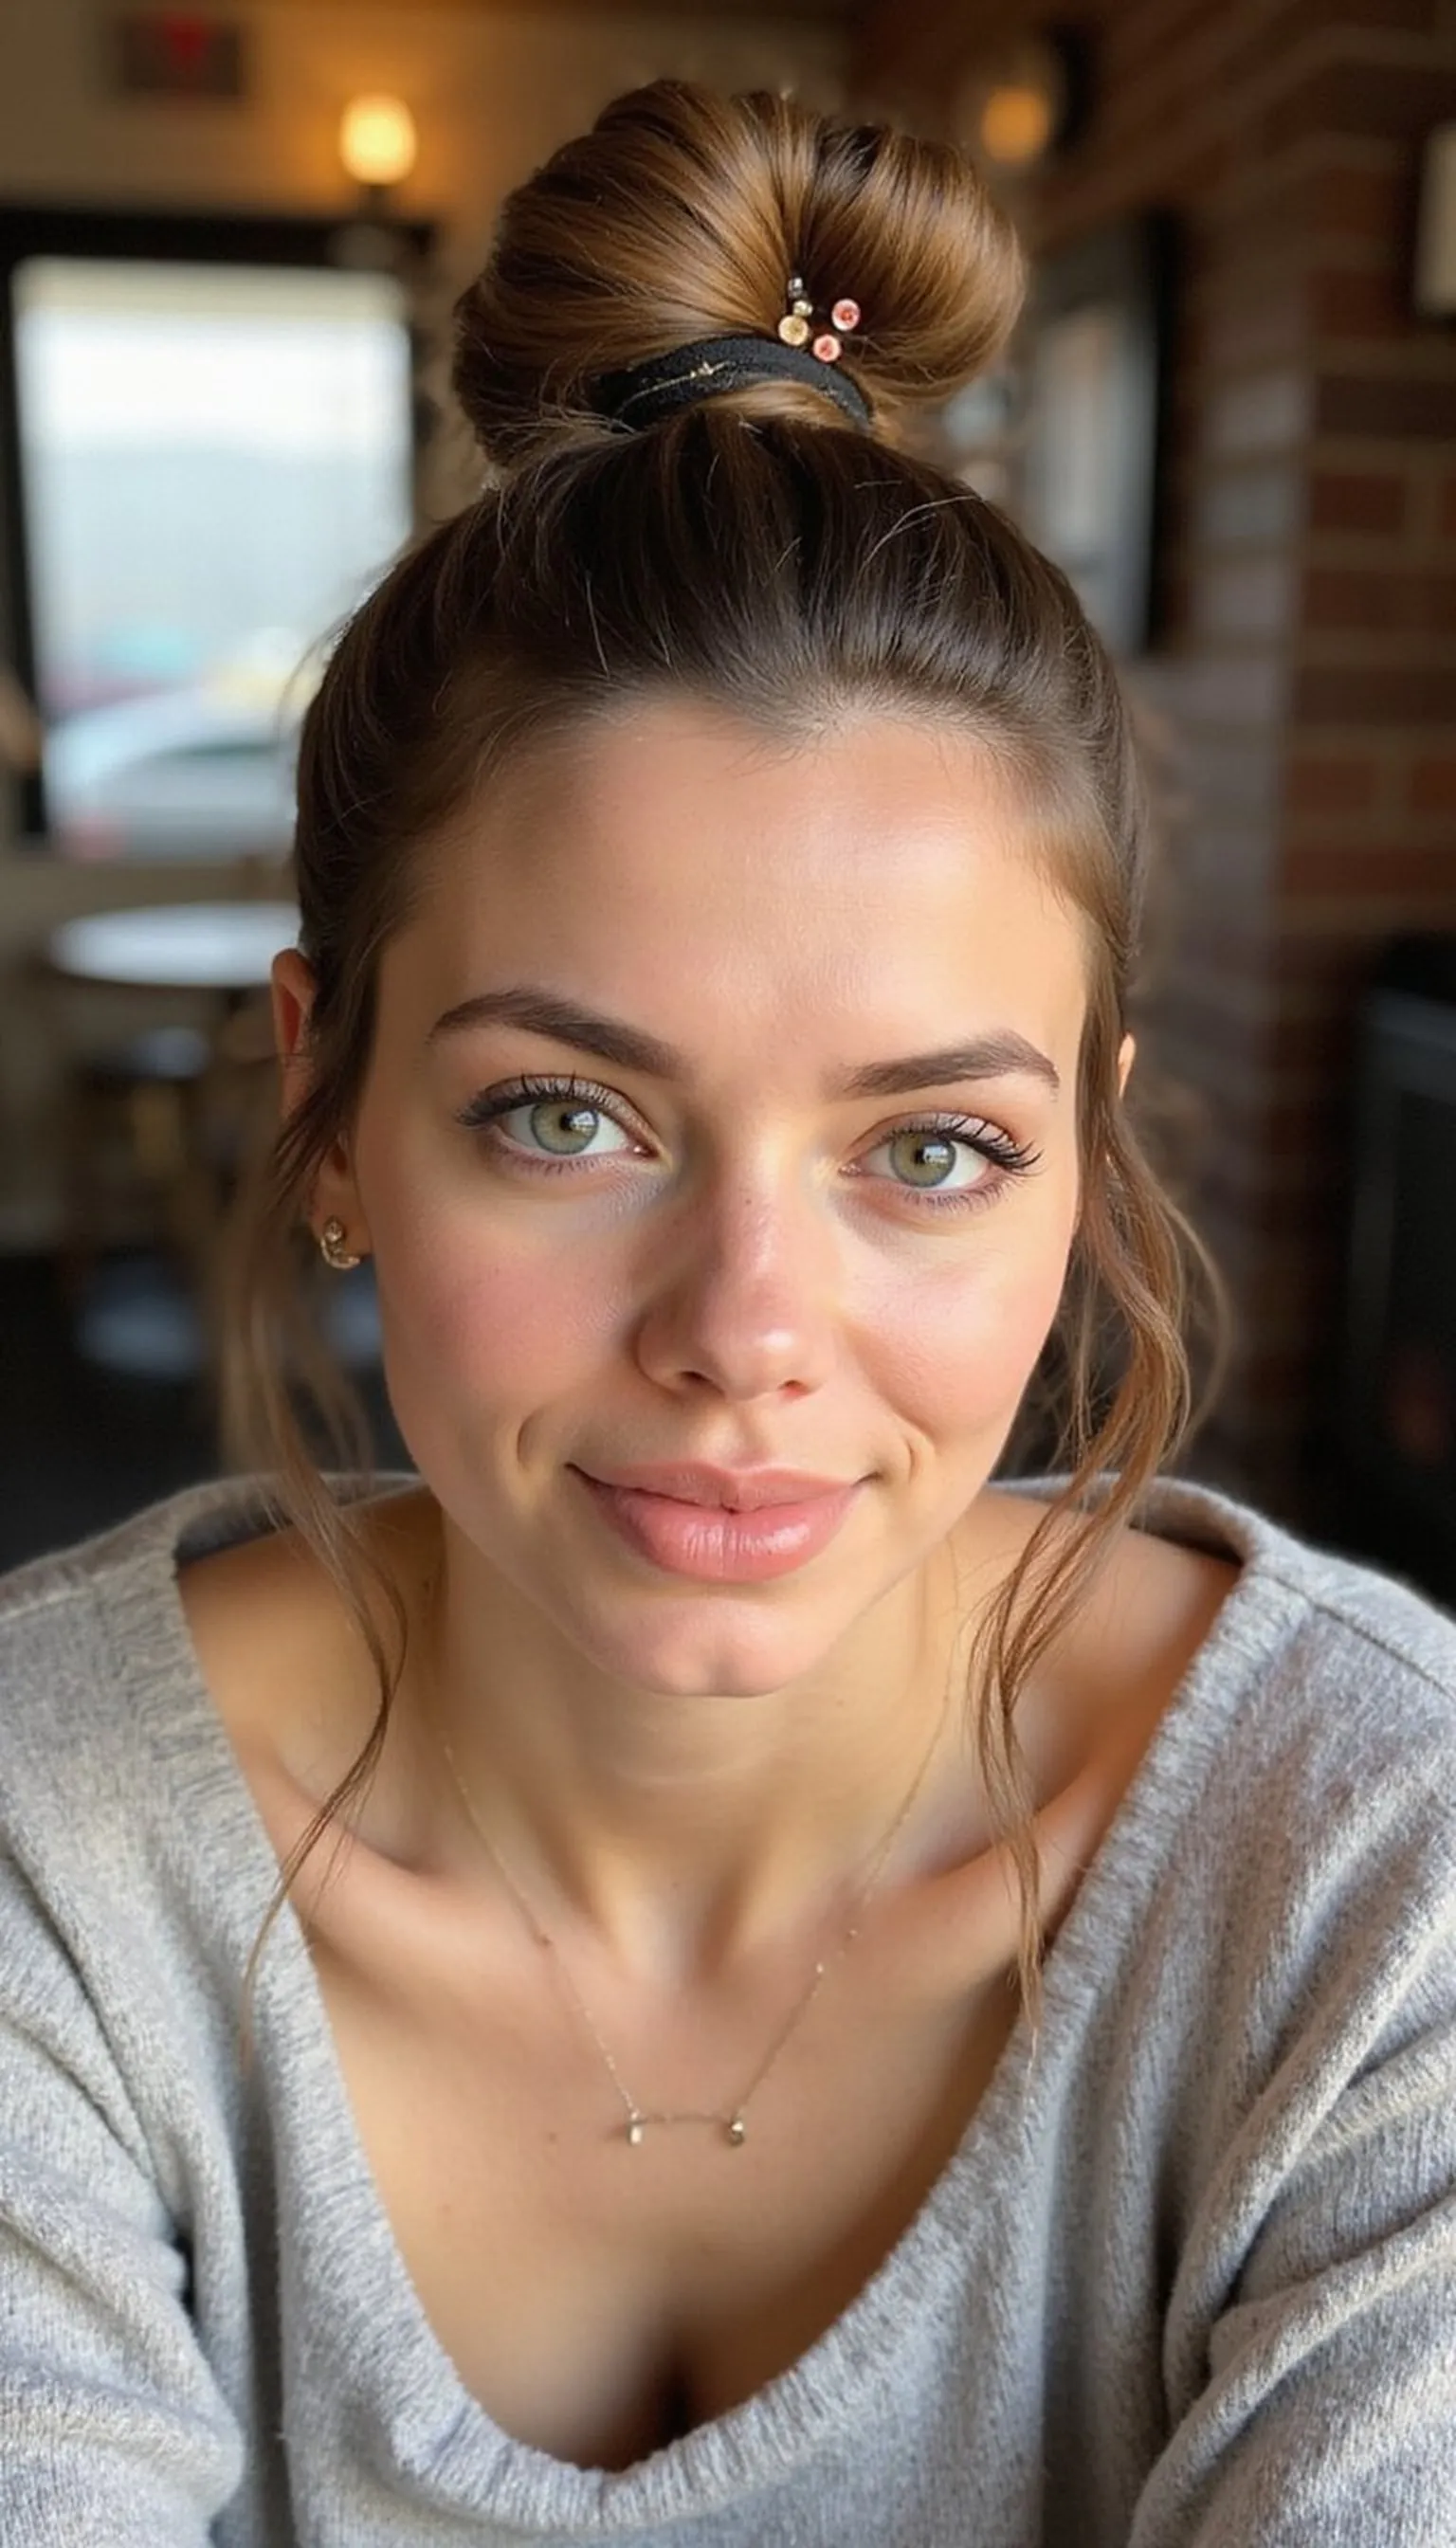
The half-up top knot keeps hair out of the face while leaving length down for movement during drives. Pull the top half into a small knot, secure with a small elastic, and hide the base with bobby pins for a tidy finish. This look adds volume at the crown and works well with natural texture or a quick wave. It’s a great choice for selfies at scenic stops because it feels styled without full effort and holds comfortably under a baseball cap or sunglasses.
💇 Styling Tips ▶
Styling Tips
- Backcomb the crown slightly for lift before knotting.
- Use bobby pins to secure loose bits and hide the elastic.
- Spritz light-hold hairspray for long-lasting shape.
⚠️ Avoid: Using a tiny elastic without backcombing can make the knot look flat; add small lift at roots first. Avoid over-tightening the knot.
🔄 Try Also: Try a low half knot for a softer look or add a small braid into the top section for texture and interest.
🛒 Products & Materials ▶
Items Used
- bobby pins
- small hair elastic
📌 “Half-up top knot that boosts volume and keeps hair off the face.”
• • •
Get 75+ ad-free, high-resolution printable tutorials for salon-quality results every single morning.
One printable guide · $19.99 · yours forever
Braided Side Pony That Survives Wind
⏱️ 12 min · 🟠 Intermediate
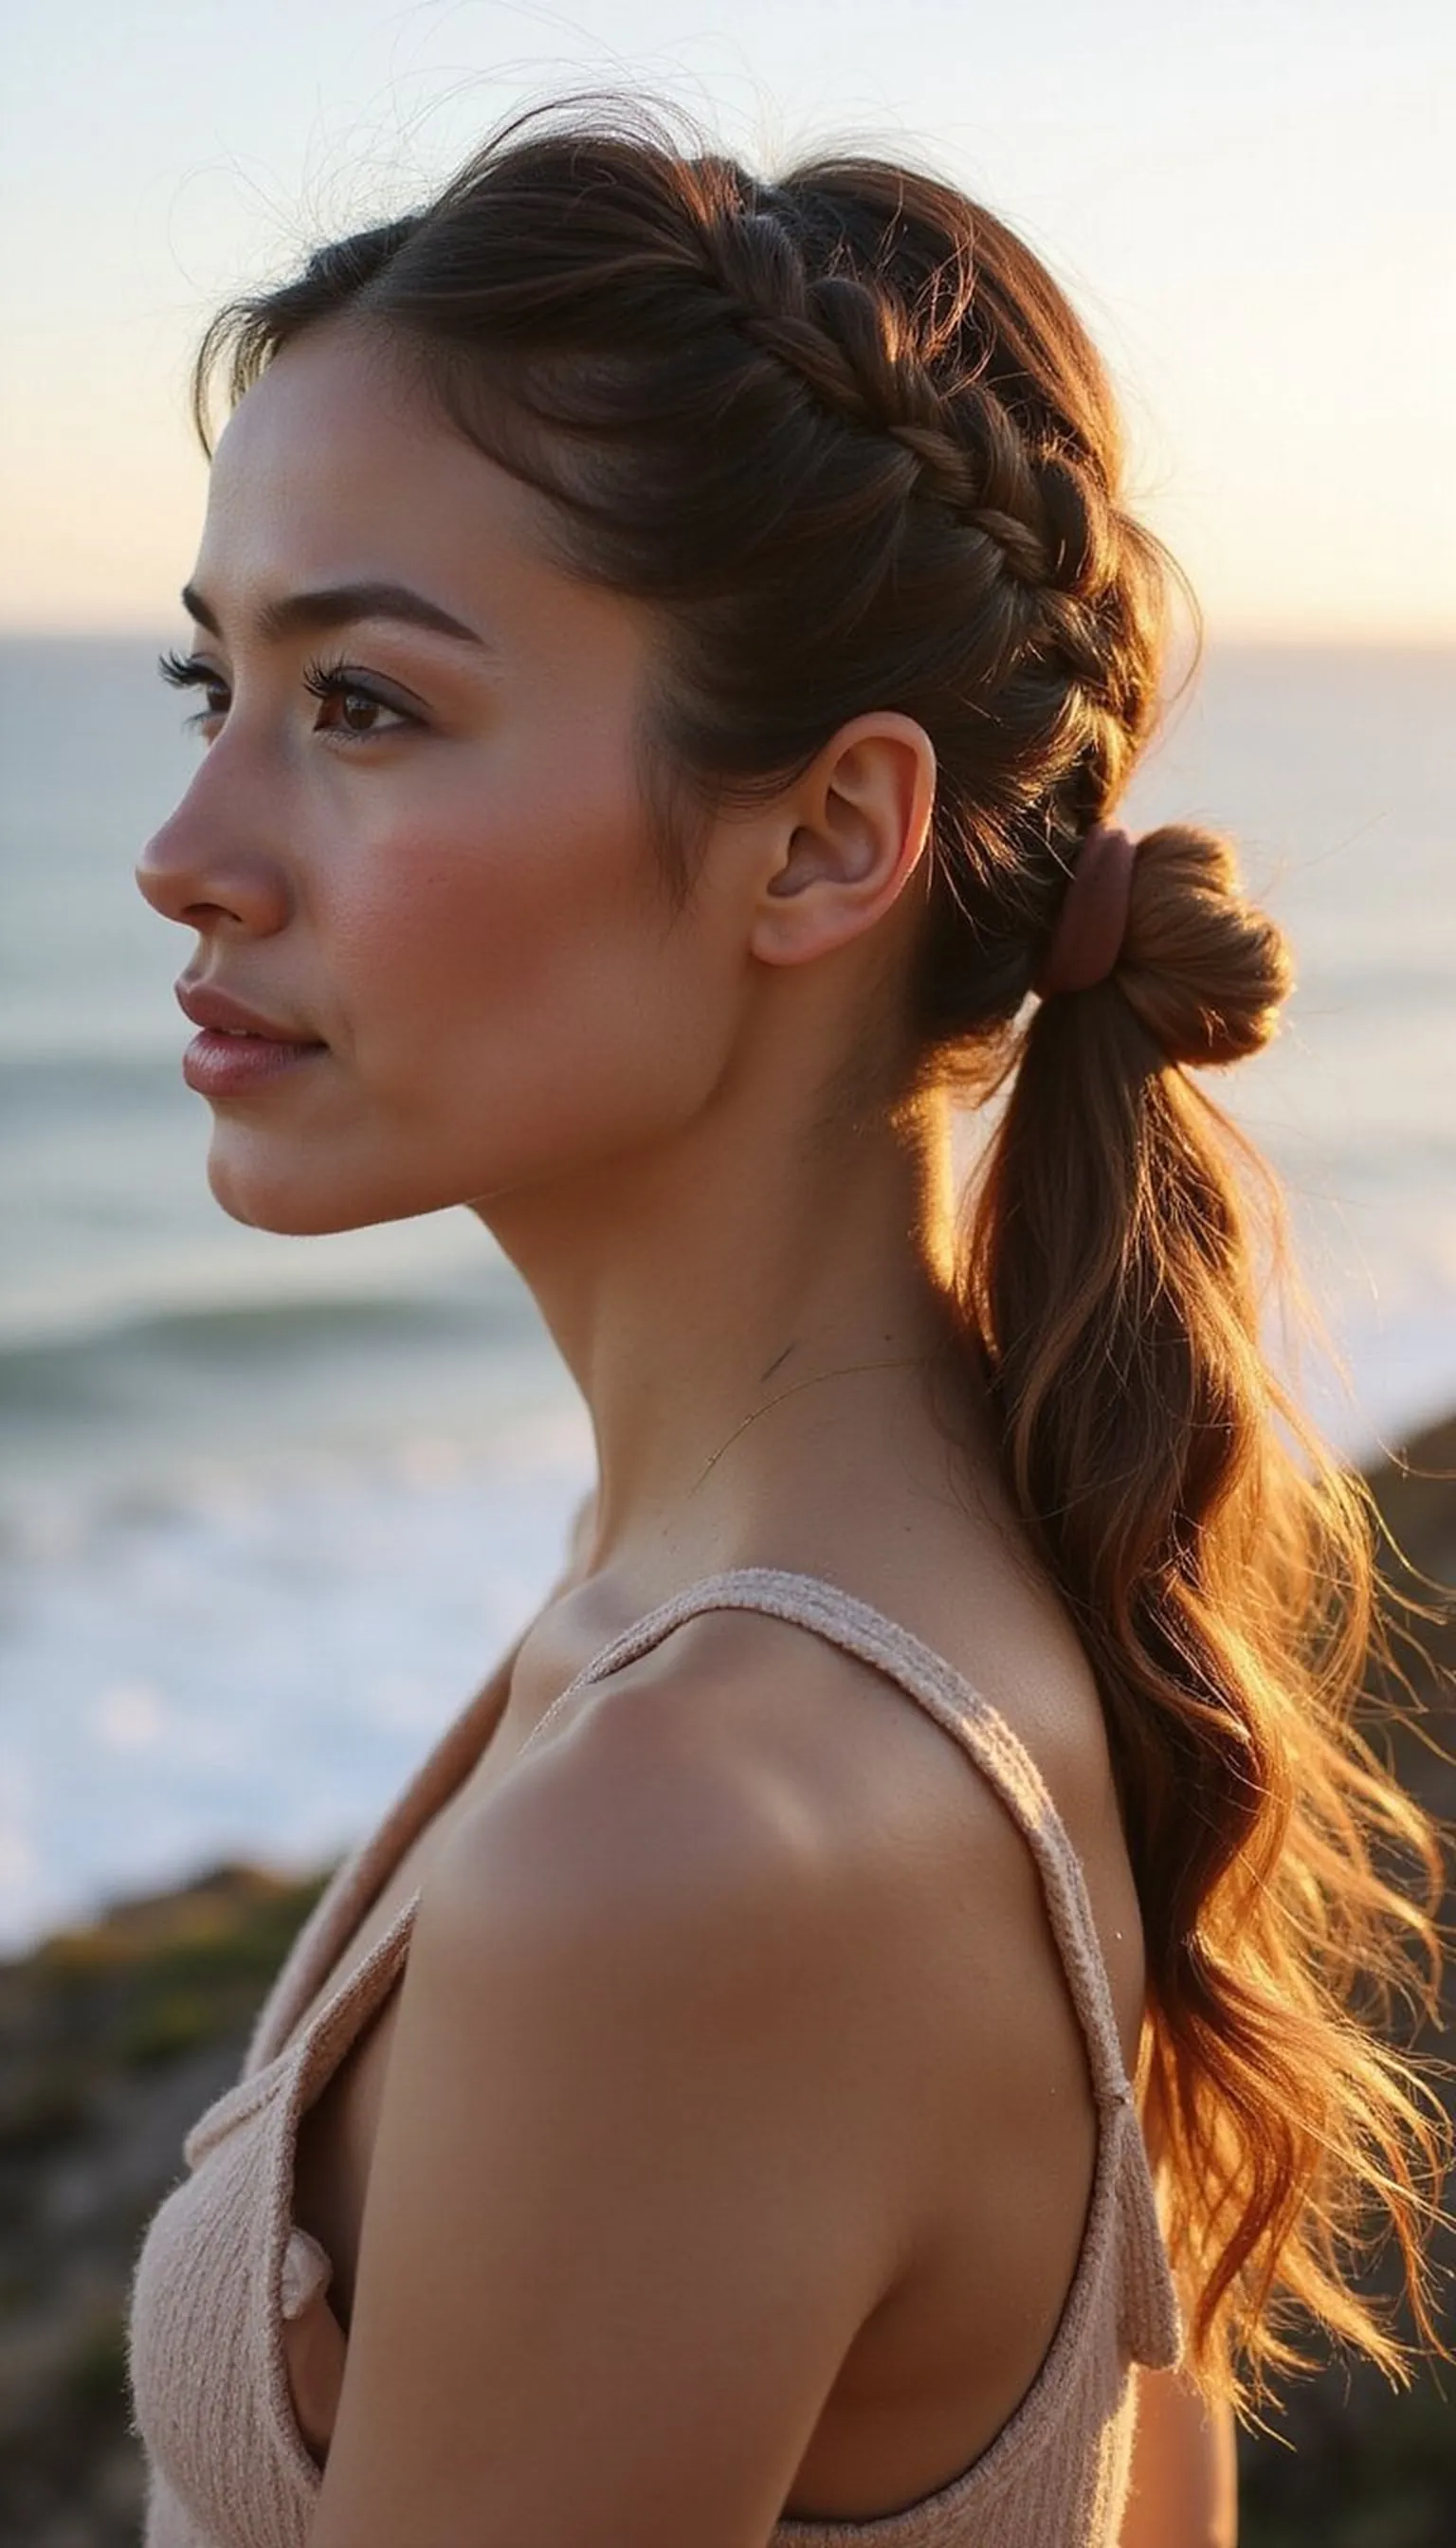
A braided side pony pairs strength and charm for open-window driving or coastal routes. Sweep hair to one side, braid loosely, then secure at the end with an elastic and wrap a small section around the base for a tidy look. This style reduces tangles and stays put through breezy stretches. Suits medium to long hair, and with a little texturizing it looks fuller and more lived-in. Perfect for grabbing quick photos without worrying about frizz or flyaways at rest stops.
💇 Styling Tips ▶
Styling Tips
- Add texture spray before braiding for grip and fullness.
- Loosen braid links gently to create a softer silhouette.
- Secure the base with an elastic and hide it with a small wrap.
⚠️ Avoid: Braiding too tightly makes the style stiff and uncomfortable on long trips; keep tension even but relaxed. Avoid skipping texture prep.
🔄 Try Also: Swap to a fishtail side braid for a woven look or do two side braids for sporty symmetry on active days.
🛒 Products & Materials ▶
Items Used
📌 “Side braid ponytail that stays neat on windy road trips.”
• • •
Secure Fishtail Braid For Long Drives
⏱️ 15 min · 🟠 Intermediate

The fishtail braid is a polished option that resists frizz during long car days and holds shape even after hours of motion. Start with a low or side fishtail, working with slightly textured hair for easier weaving, then secure the tip with a small elastic. Gently pancake the braid to create width and softness for an effortless, voluminous appearance. This look photographs well at stops and keeps hair contained for hikes or picnics after driving. Add a few pins near the nape for extra security on bumpier roads.
💇 Styling Tips ▶
Styling Tips
- Prep hair with light texturizing spray for grip before braiding.
- Use a tiny elastic to secure the braid tip discreetly.
- Pancake the braid by loosening each section for a fuller look.
⚠️ Avoid: Making the braid too tight creates tension and a thin braid; keep strands loose for comfort. Avoid skipping texture prep for slippery hair.
🔄 Try Also: Turn the fishtail into a low bun by twisting and pinning, or create two fishtails for a playful double-braid look.
🛒 Products & Materials ▶
Items Used
📌 “Long-lasting fishtail braid for neat, photogenic travel hair.”
• • •
Double Dutch Braids For Active Road Days
⏱️ 18 min · 🟠 Intermediate

Double Dutch braids are a sporty, secure choice for hikes, biking, or any active stops on a road trip. Braid close to the scalp for a neat finish that resists bouncing, then finish each braid with elastics and optionally wrap the ends around themselves for neatness. This hairstyle keeps hair out of the face and won’t tangle in gusts of wind. It also looks sharp in photos right off the car. Works best on medium to long hair and holds for a full day with the right prep.
💇 Styling Tips ▶
Styling Tips
- Apply light texturizing mist before braiding for grip.
- Keep parting clean for symmetrical braids.
- Finish ends with small elastics and spritz lightly for hold.
⚠️ Avoid: Starting the braid too far back reduces root support and makes the style slump; begin close to the hairline. Avoid skipping a texturing step for silky hair.
🔄 Try Also: Convert the braids into twin buns at the nape for extra security, or braid halfway and let the rest flow for a hybrid look.
🛒 Products & Materials ▶
Items Used
📌 “Sporty double Dutch braids that stay put on active road trips.”
• • •
Low Twisted Bun With Bobby Pin Hold
⏱️ 10 min · 🟠 Intermediate
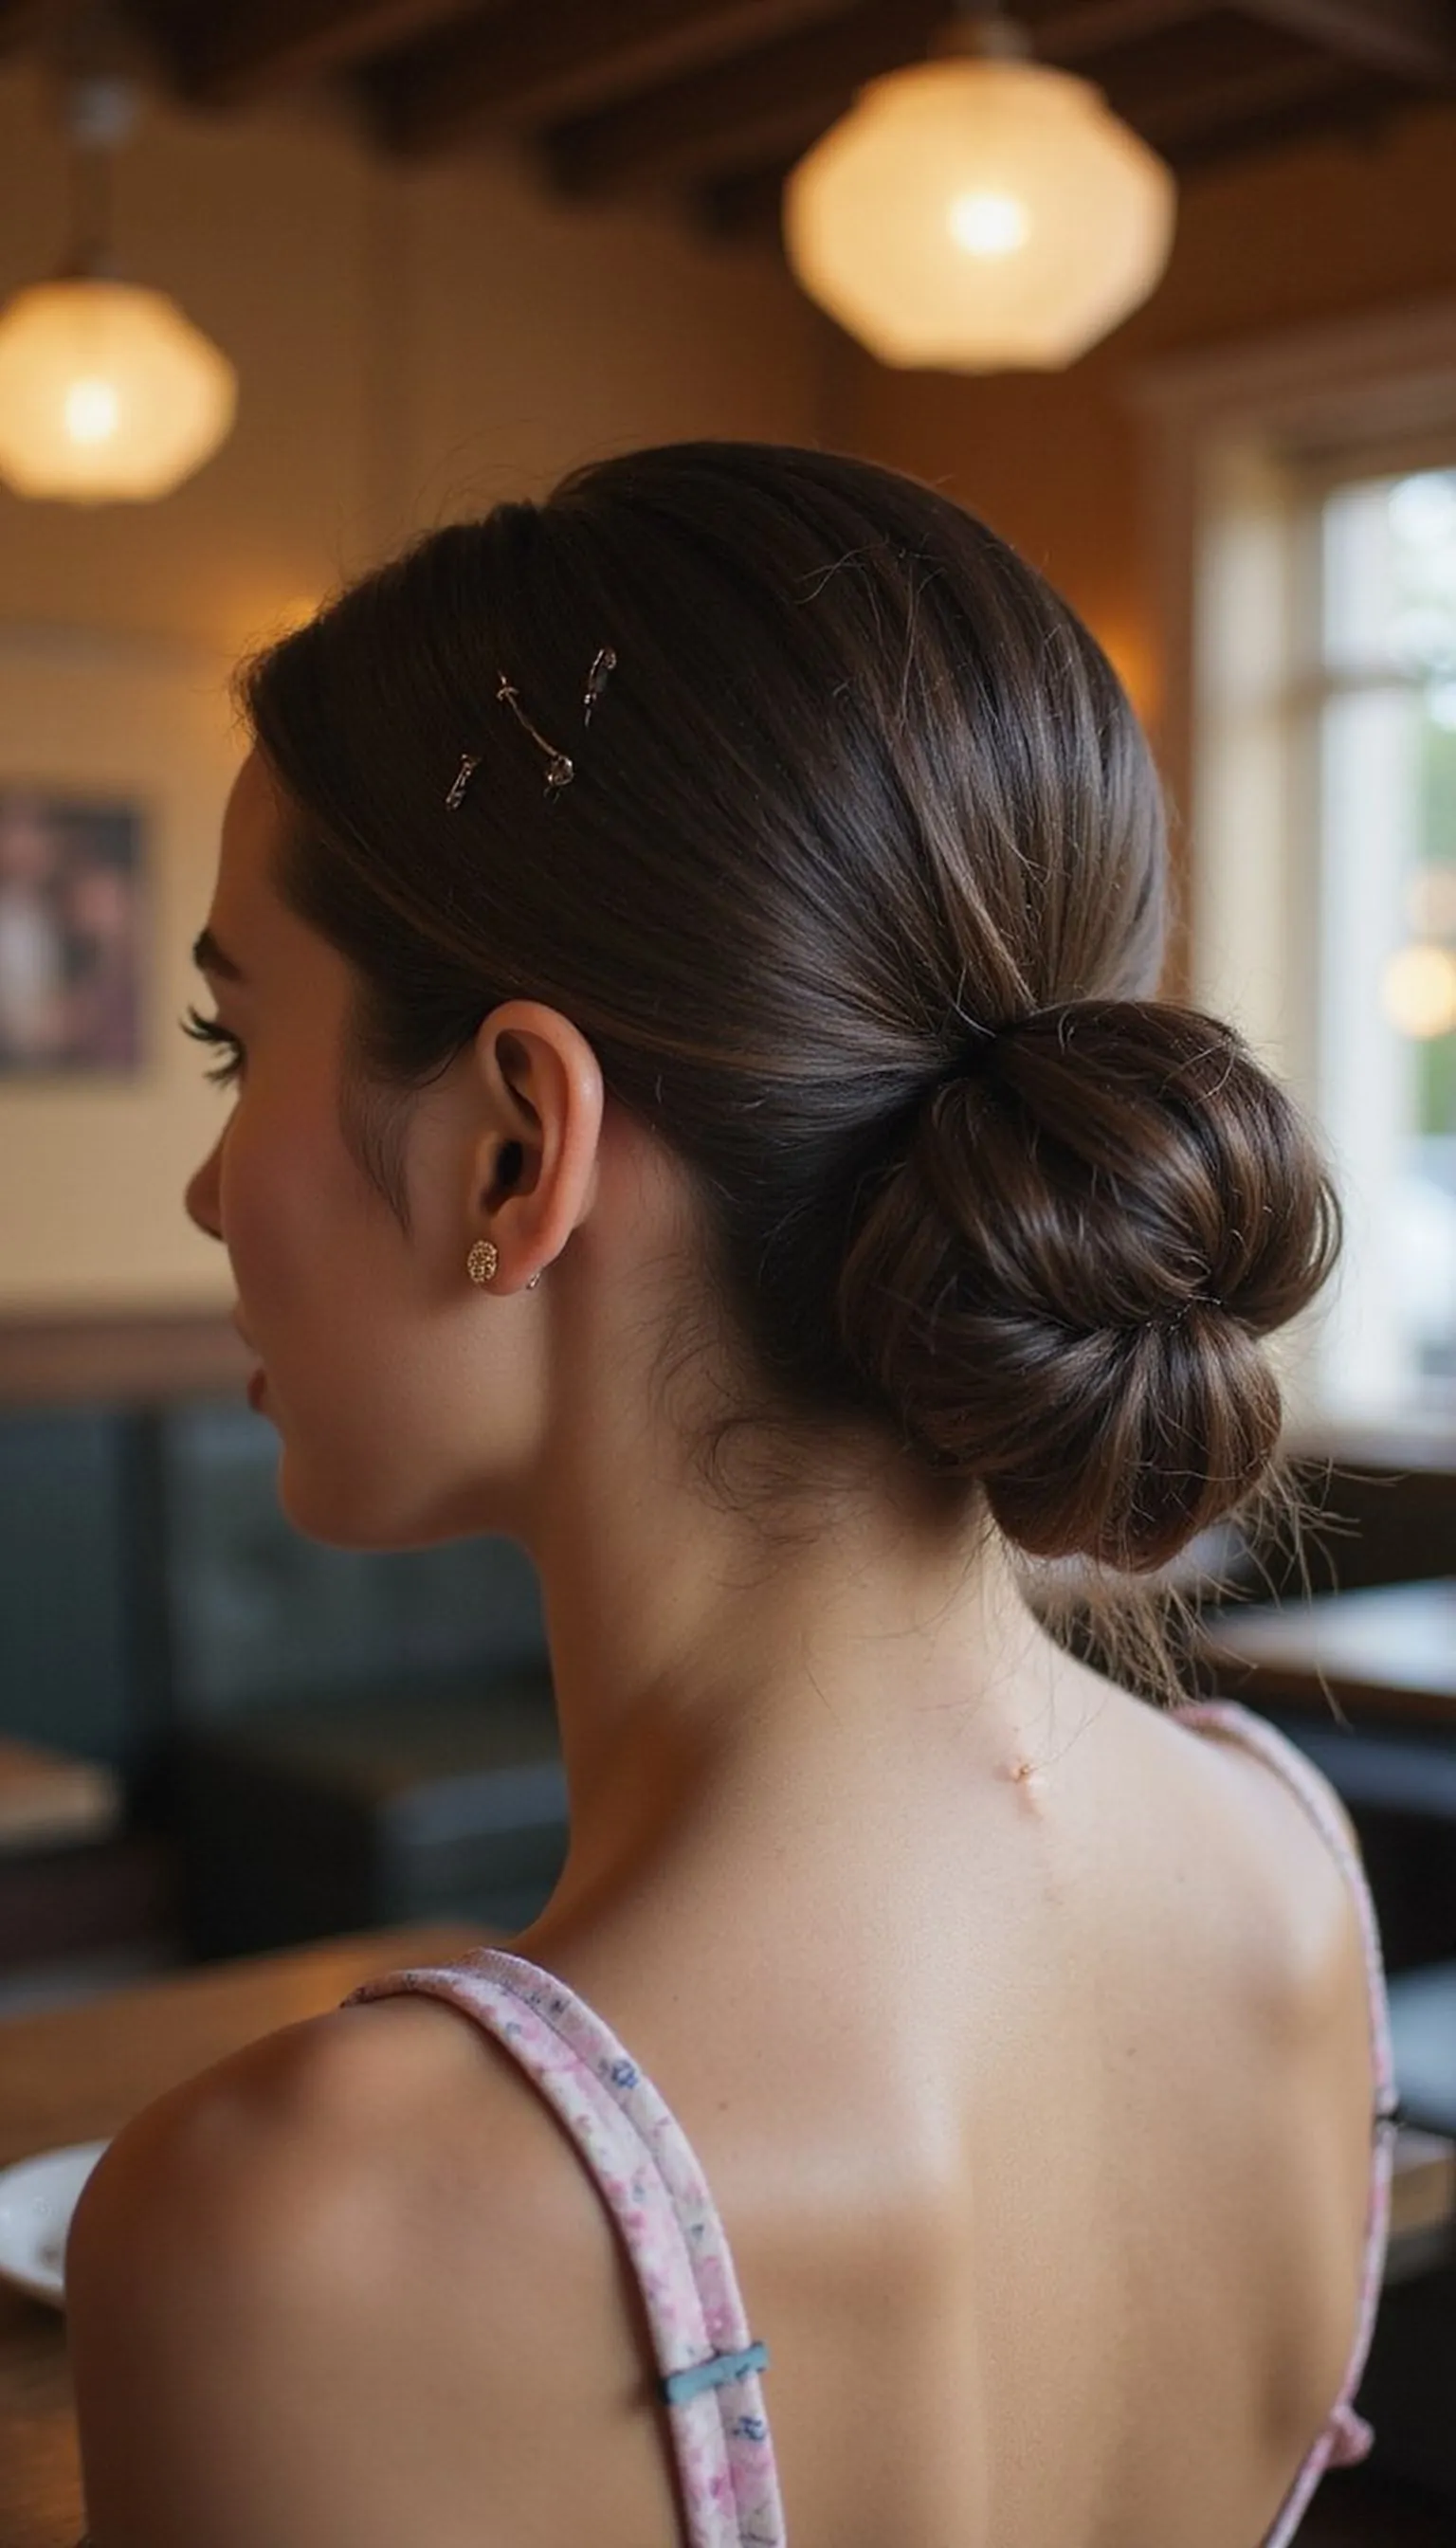
The low twisted bun is an elegant pick for evenings out after a long drive or for roadside dinners. Twist hair into a low coil at the nape and pin sections invisibly with several bobby pins for a smooth, secure finish. Adding a little texture spray helps pieces grip and prevents slippage during the ride. This style keeps hair tidy under scarves or hats and still looks polished when taken down. Great for medium to long hair and for packing into weekend-ready luggage.
💇 Styling Tips ▶
Styling Tips
- Create a soft side part for a more romantic silhouette.
- Insert bobby pins in a crisscross for stronger hold.
- Finish with light hairspray to tame flyaways on dusty routes.
⚠️ Avoid: Using too few pins leads to slipping; anchor each section well. Avoid making the bun overly tight, which causes discomfort during long stretches.
🔄 Try Also: Make it messier for casual nights by pulling a few face-framing strands, or smooth everything for a sleek dinner-ready bun.
🛒 Products & Materials ▶
Items Used
📌 “Low twisted bun secured with bobby pins—elegant, travel-friendly hair.”
• • •
Claw Clip Hourglass Updo For Fast Style
⏱️ 3 min · 🟢 Beginner
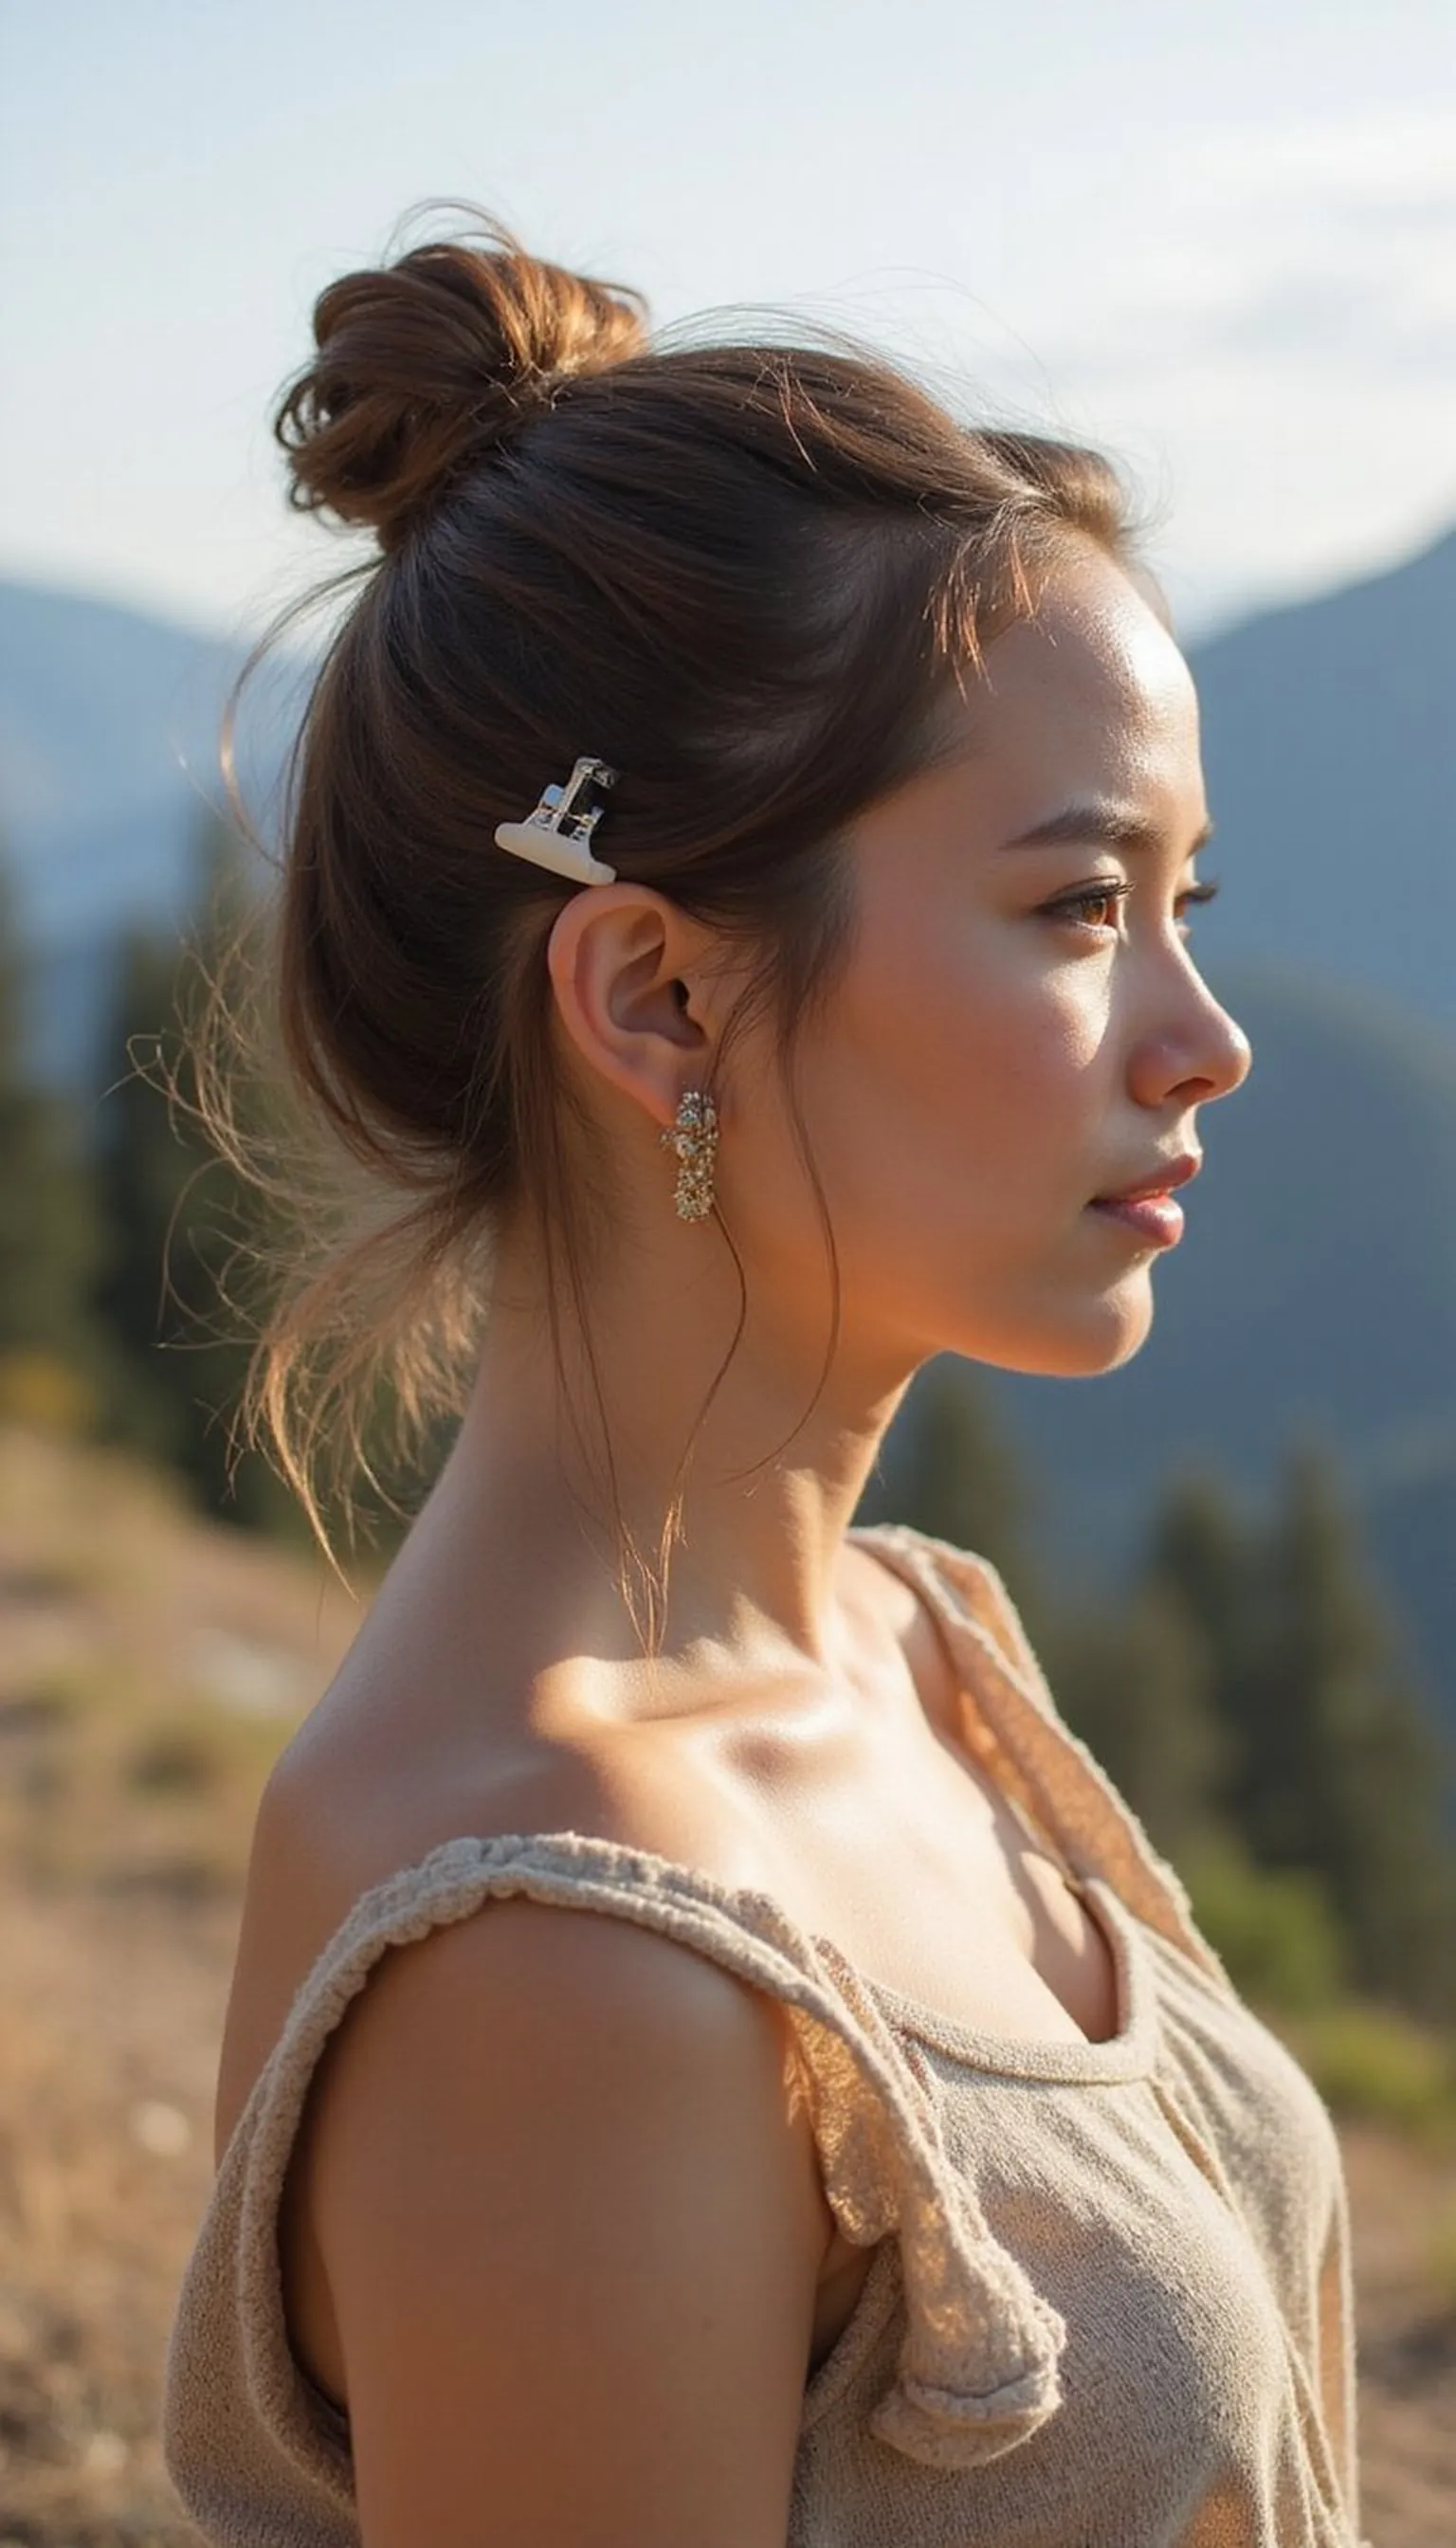
The claw clip updo is the ultimate grab-and-go road trip hairstyle—quick, secure, and flattering. Gather hair at the center or slightly higher, twist softly, and clamp a medium or oversized claw clip over the twist to lock everything in. This look hides imperfect days and protects hair from rubbing on jackets or seats. It suits all hair types and lengths that reach the shoulders or longer, and it’s roomy enough to be comfortable on long stretches while still looking chic at the next stop.
💇 Styling Tips ▶
Styling Tips
- Choose a sturdy claw clip that matches hair thickness for a secure grip.
- Leave a few strands loose for softness around the face.
- Use a wide-tooth pick to add volume before clipping if needed.
⚠️ Avoid: Using a clip too small for thick hair can cause slipping; pick size based on hair volume. Avoid overly tight twists that create tension.
🔄 Try Also: Wear the clip lower at the nape for a softer profile or off-center for a modern, asymmetrical look.
🛒 Products & Materials ▶
Items Used
📌 “Instant updo with a claw clip—fast, comfy, and road-ready.”
• • •
Bandana-Boho Waves For Beach Pit Stops
⏱️ 8 min · 🟢 Beginner
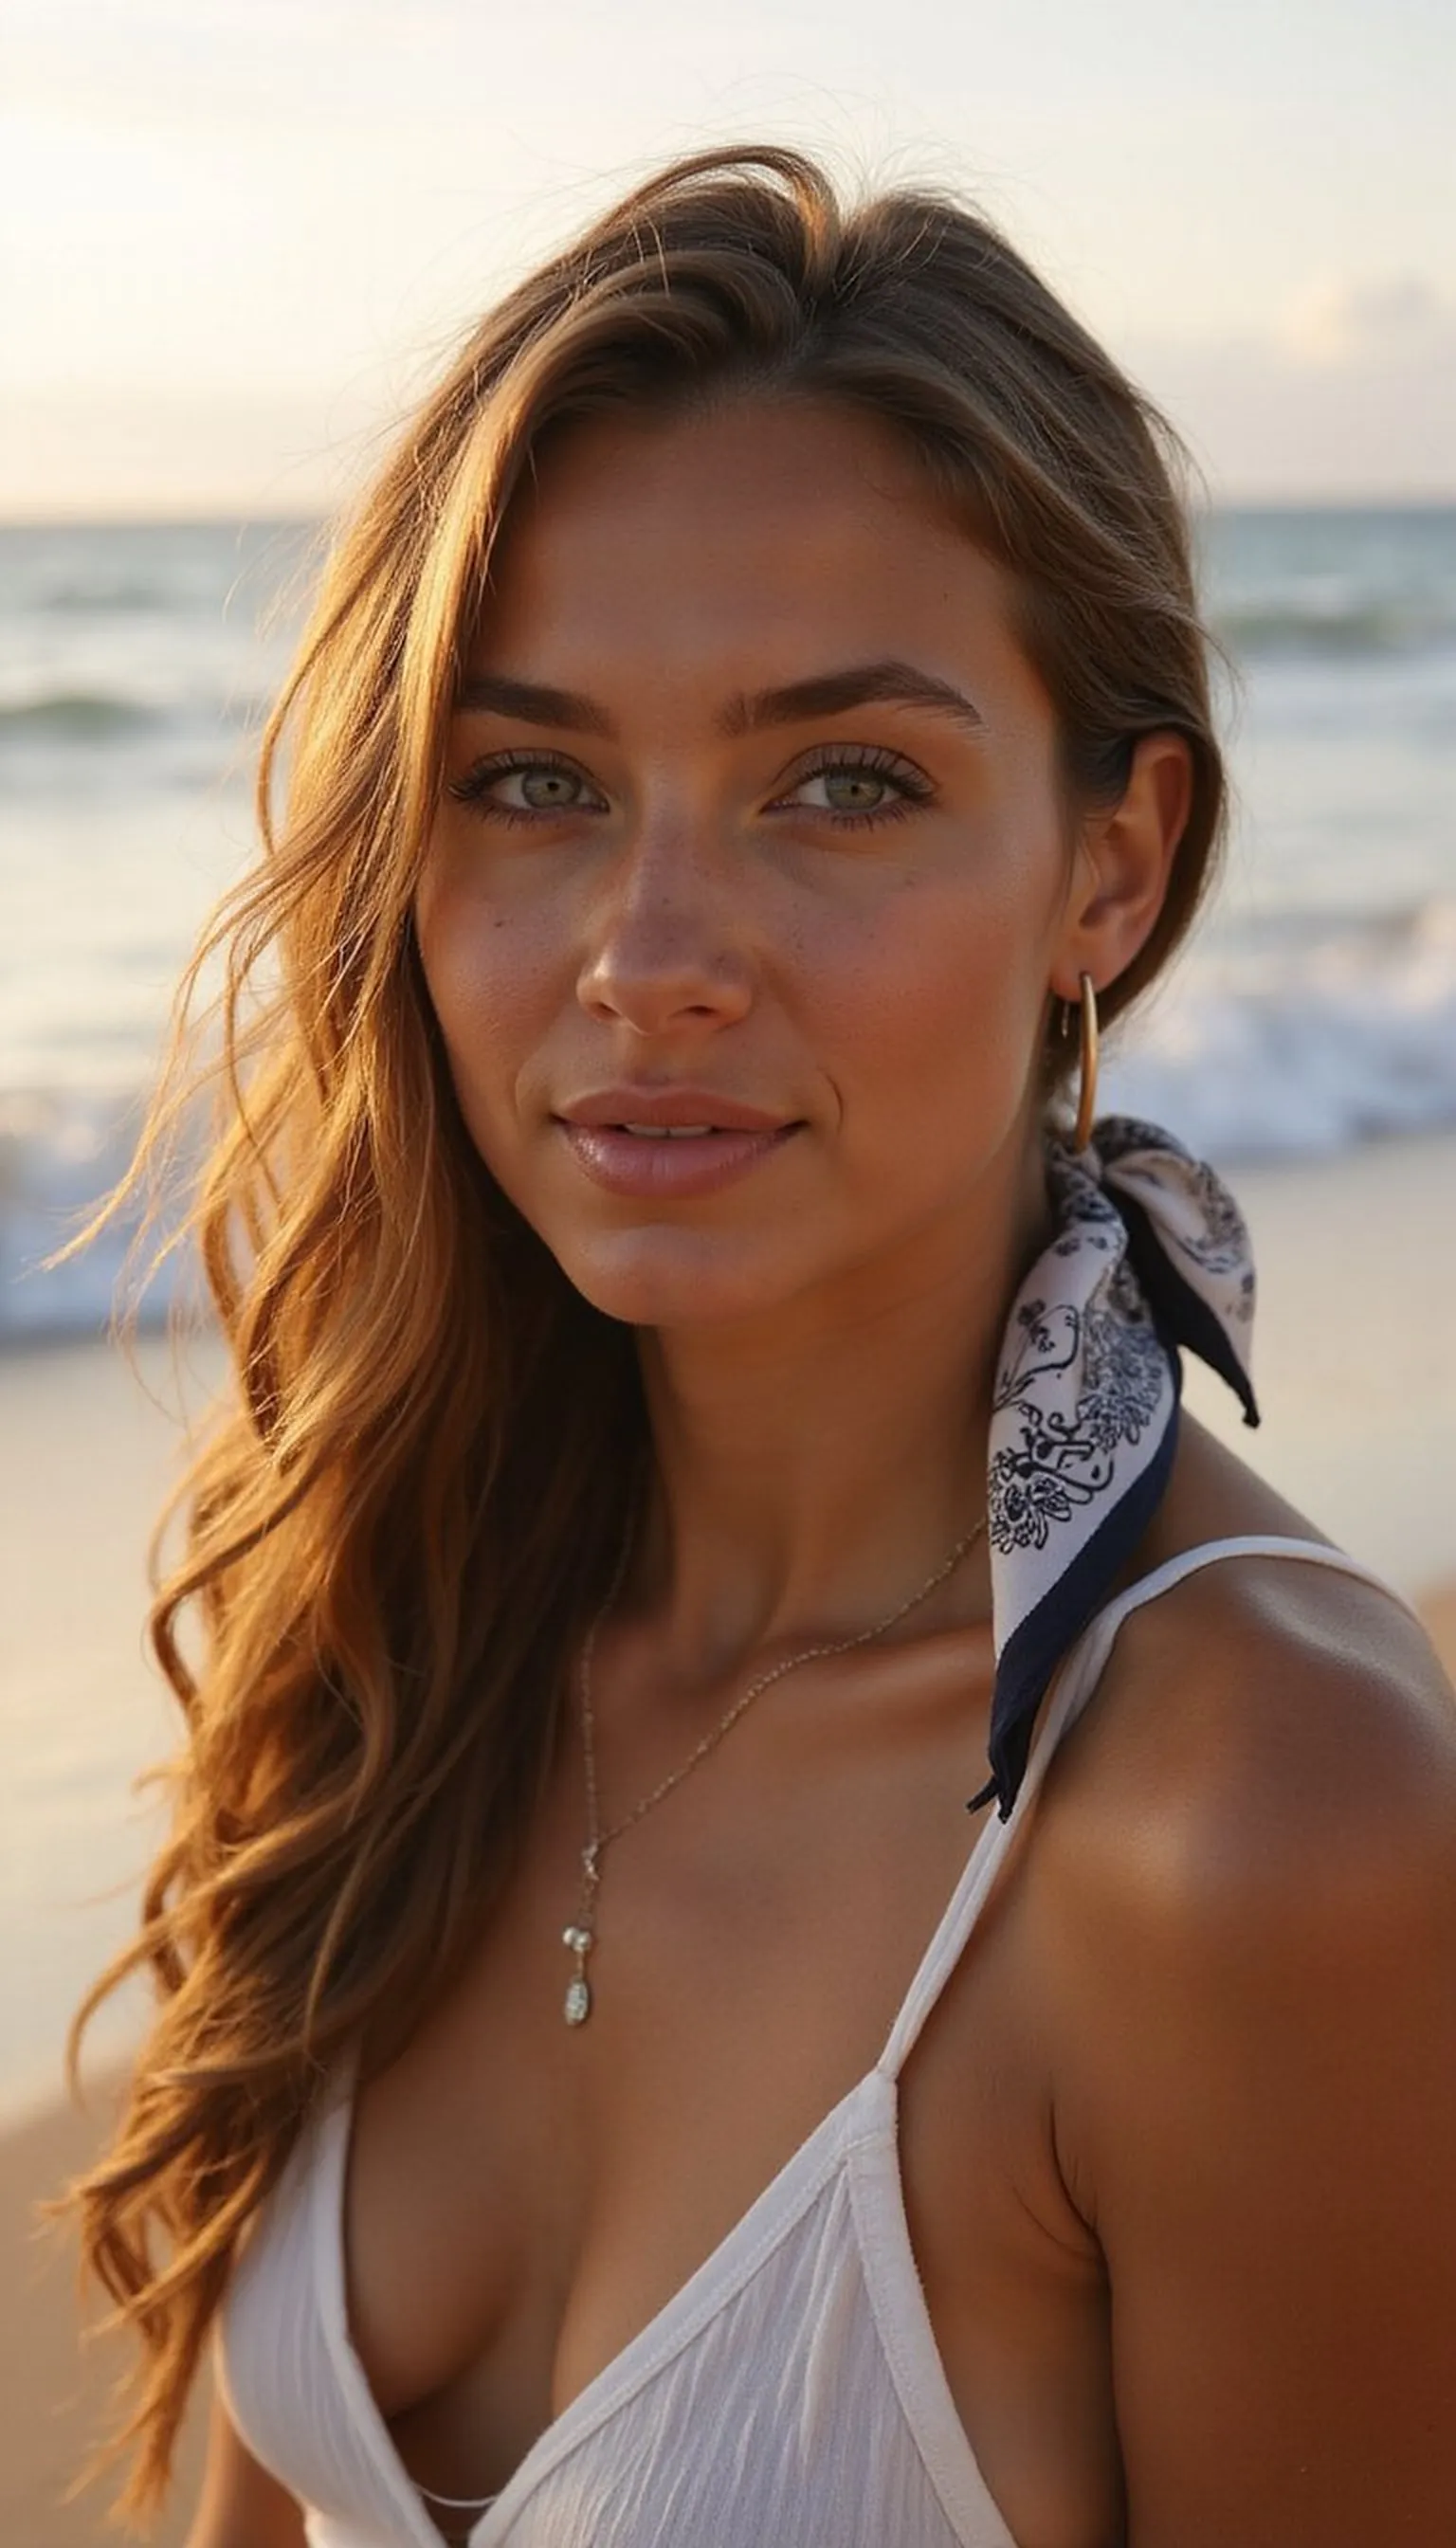
Bandana-boho waves combine soft texture and a playful scarf for a laid-back, beachy road-trip vibe. Create loose waves with fingers or a quick braid-overnight method, then fold a bandana and tie it at the top or nape depending on preference. The bandana protects hair from wind and adds instant personality to travel photos. This style is forgiving of imperfect texture and works on second-day hair, making it ideal when traveling between sandy beaches or lakeside campsites and wanting an easy, photo-ready look.
💇 Styling Tips ▶
Styling Tips
- Tie the bandana over the crown for a retro feel or around the nape for a boho twist.
- Use sea salt spray for tousled, lived-in waves.
- Loosen braids gently if waves feel too tight after sleeping.
⚠️ Avoid: Tying the bandana too tightly causes forehead creasing; keep it snug but relaxed. Avoid heavy products that weigh waves down.
🔄 Try Also: Try a headband-style bandana for a vintage mood or tie a smaller square as a neck scarf for after-sun style.
📌 “Boho bandana with beachy waves—cute and travel-friendly.”
• • •
Textured Ponytail With Volume For Photos
⏱️ 6 min · 🟢 Beginner
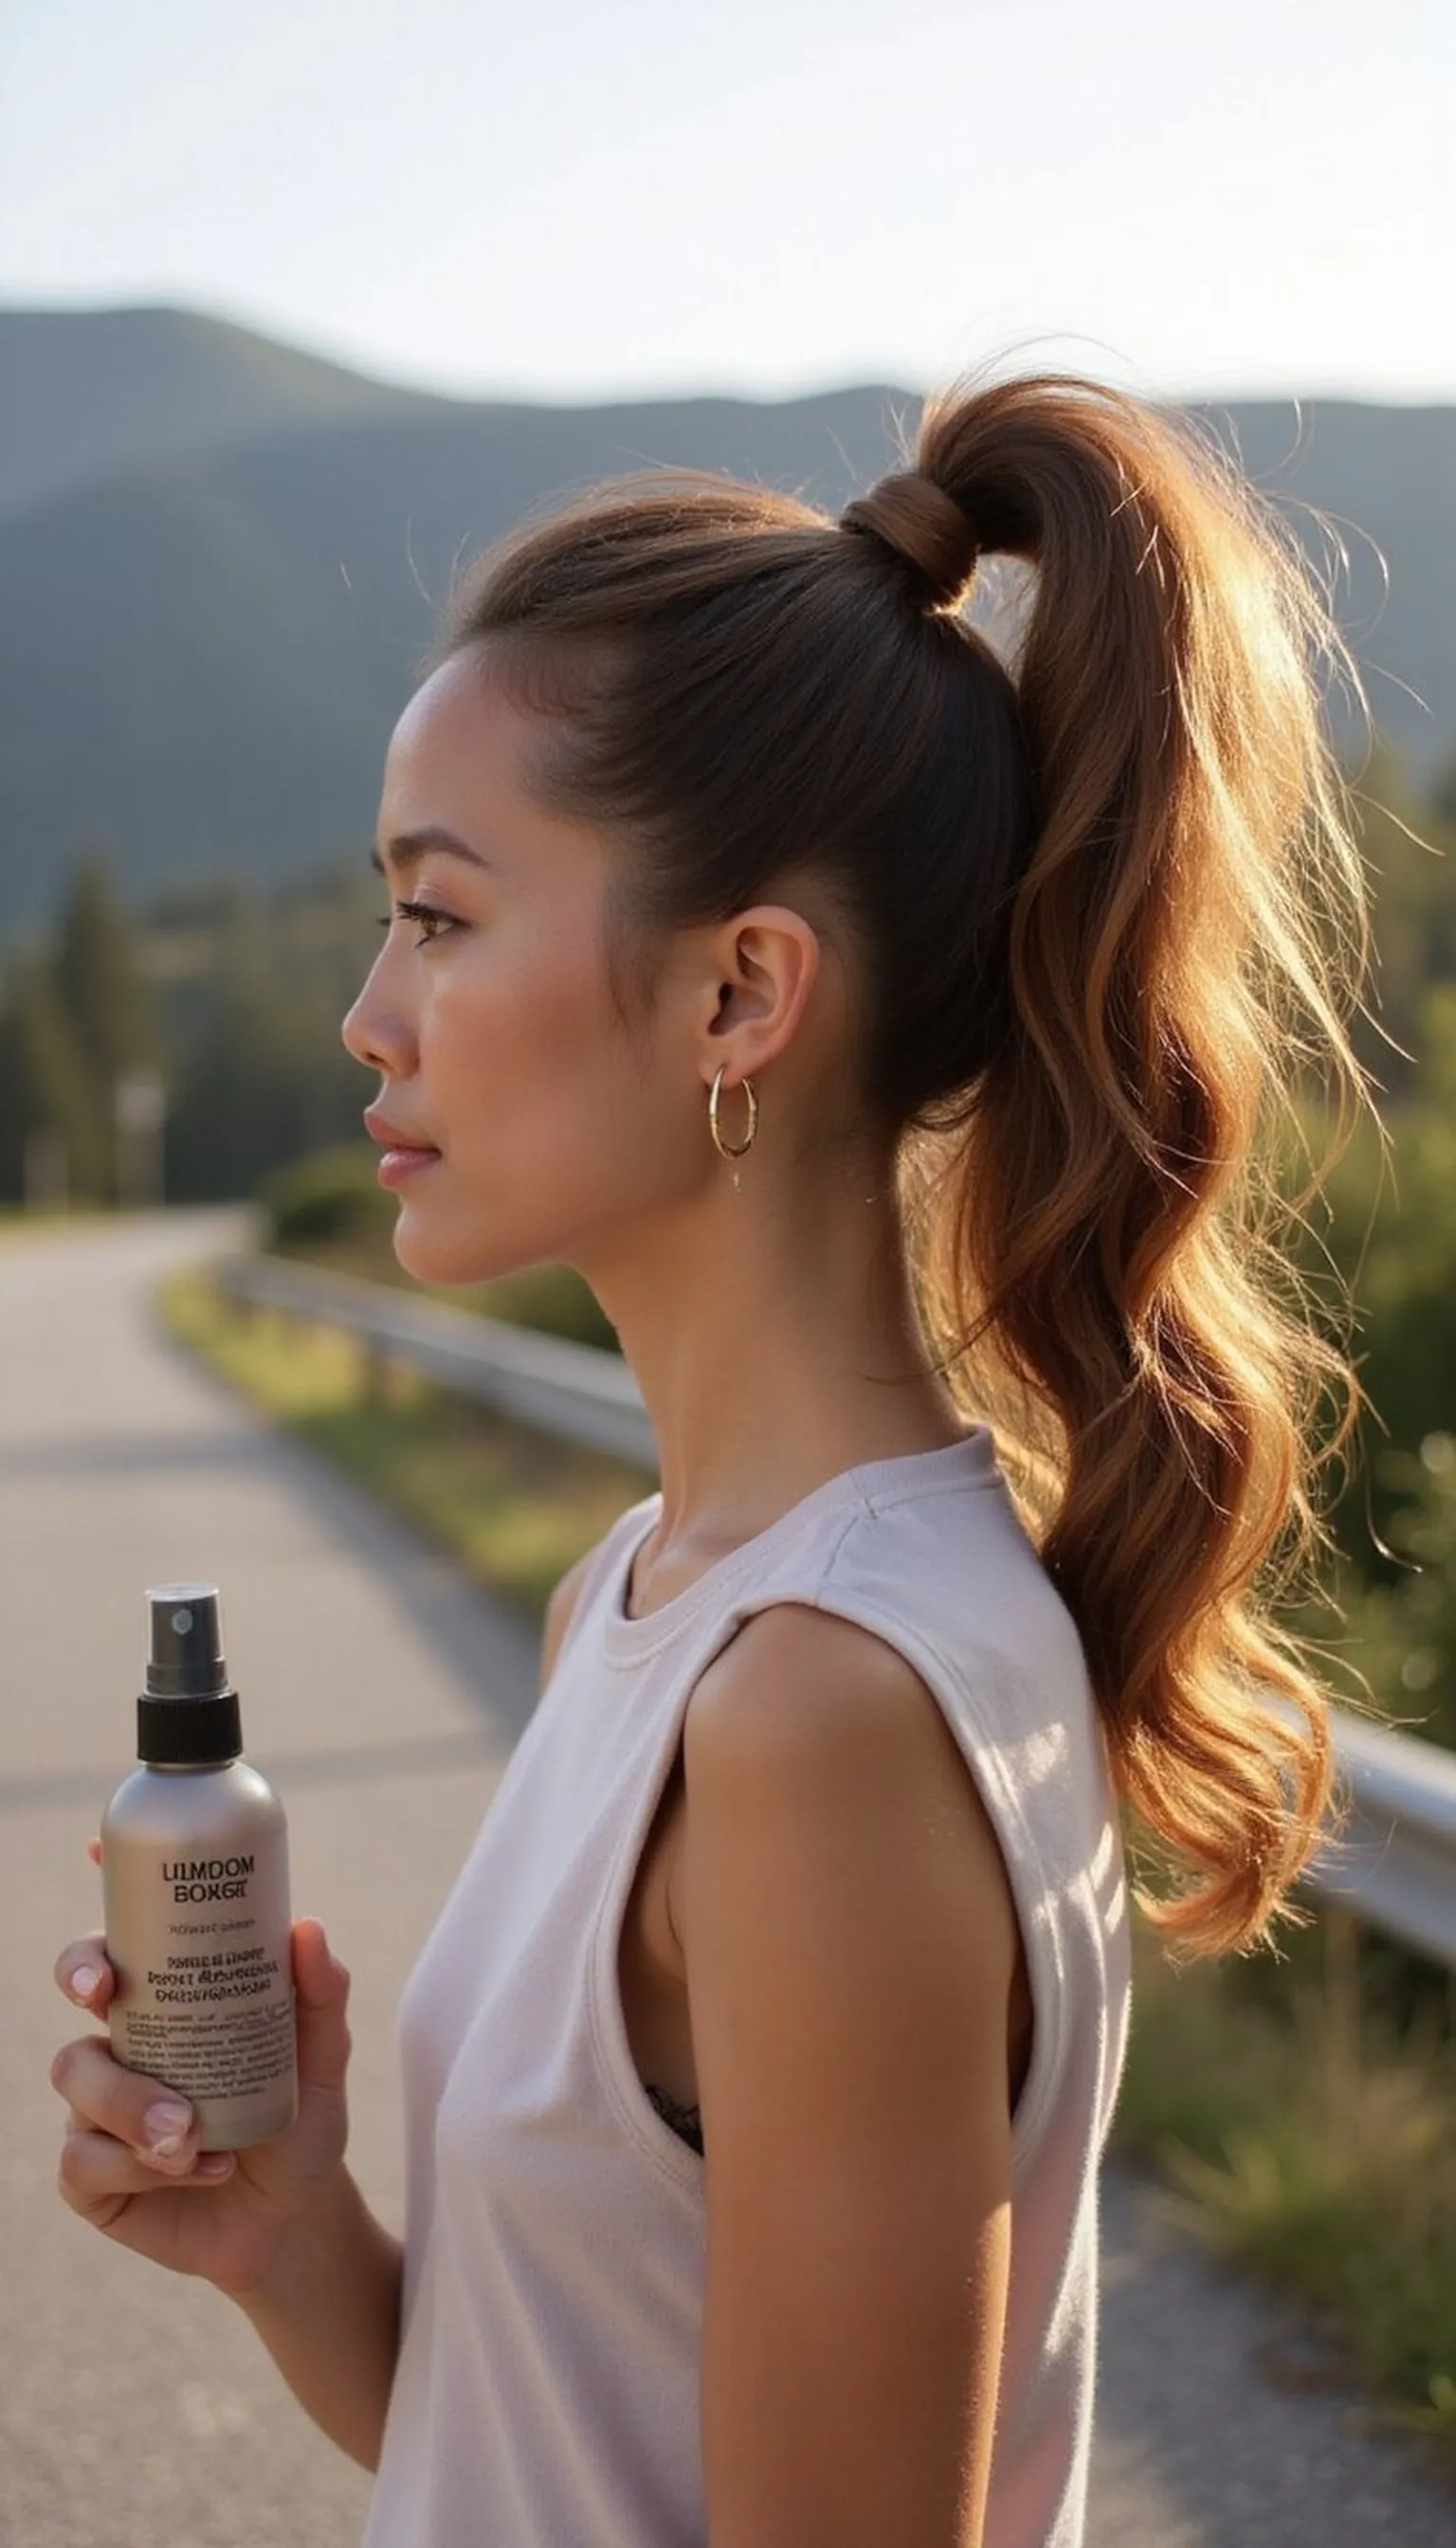
A textured ponytail with volume creates a polished look that still feels effortless for rest-stop photos and quick detours. Tease lightly at the crown or use fingers to lift roots, then secure a mid or high ponytail with a strong elastic. Spritz a little texturizing spray through the lengths for grip and movement, then pull at the crown and ponytail to create shape. The result looks like intentional style without the fuss and holds up well under hats or headbands between destinations.
💇 Styling Tips ▶
Styling Tips
- Backcomb the crown gently for instant lift before tying.
- Spray texturizing spray mid-shaft for sustained grip and separation.
- Wrap a small section of hair around the elastic to finish the look.
⚠️ Avoid: Over-teasing can cause matting and damage; tease just enough for lift. Avoid heavy products that flatten the style.
🔄 Try Also: Make a low textured ponytail for a softer silhouette or add a braid into the front section for interest.
🛒 Products & Materials ▶
Items Used
📌 “Voluminous textured ponytail that looks polished and stays put.”
• • •
Sleek Low Bun With Simple Headband
⏱️ 12 min · 🟠 Intermediate

The sleek low bun paired with a headband adds refinement to a road trip outfit for nights out or dinner stops. Smooth hair to the nape, twist into a neat bun, and secure with pins, then add a simple headband for contrast and hold. This minimizes flyaways and keeps hair controlled under collars or jackets. Works best with straight or smoothed hair and creates a chic profile in photos. It’s a reliable option when packing space is tight but style matters.
💇 Styling Tips ▶
Styling Tips
- Use a smoothing brush to create a clean finish before wrapping the bun.
- Place the headband just behind the hairline for a polished look.
- Secure with hidden pins and finish with light hairspray for longevity.
⚠️ Avoid: Placing the headband too far back can create slippage; position it near the hairline. Avoid over-brushing which removes natural movement.
🔄 Try Also: Swap a thin bejeweled headband for evening glam or choose a wide fabric band for daytime comfort and coverage.
🛒 Products & Materials ▶
Items Used
- headband
- bobby pins
📌 “Elegant low bun with a headband—polished and travel-ready.”
• • •
Two Mini Space Buns For Playful Comfort
⏱️ 8 min · 🟢 Beginner
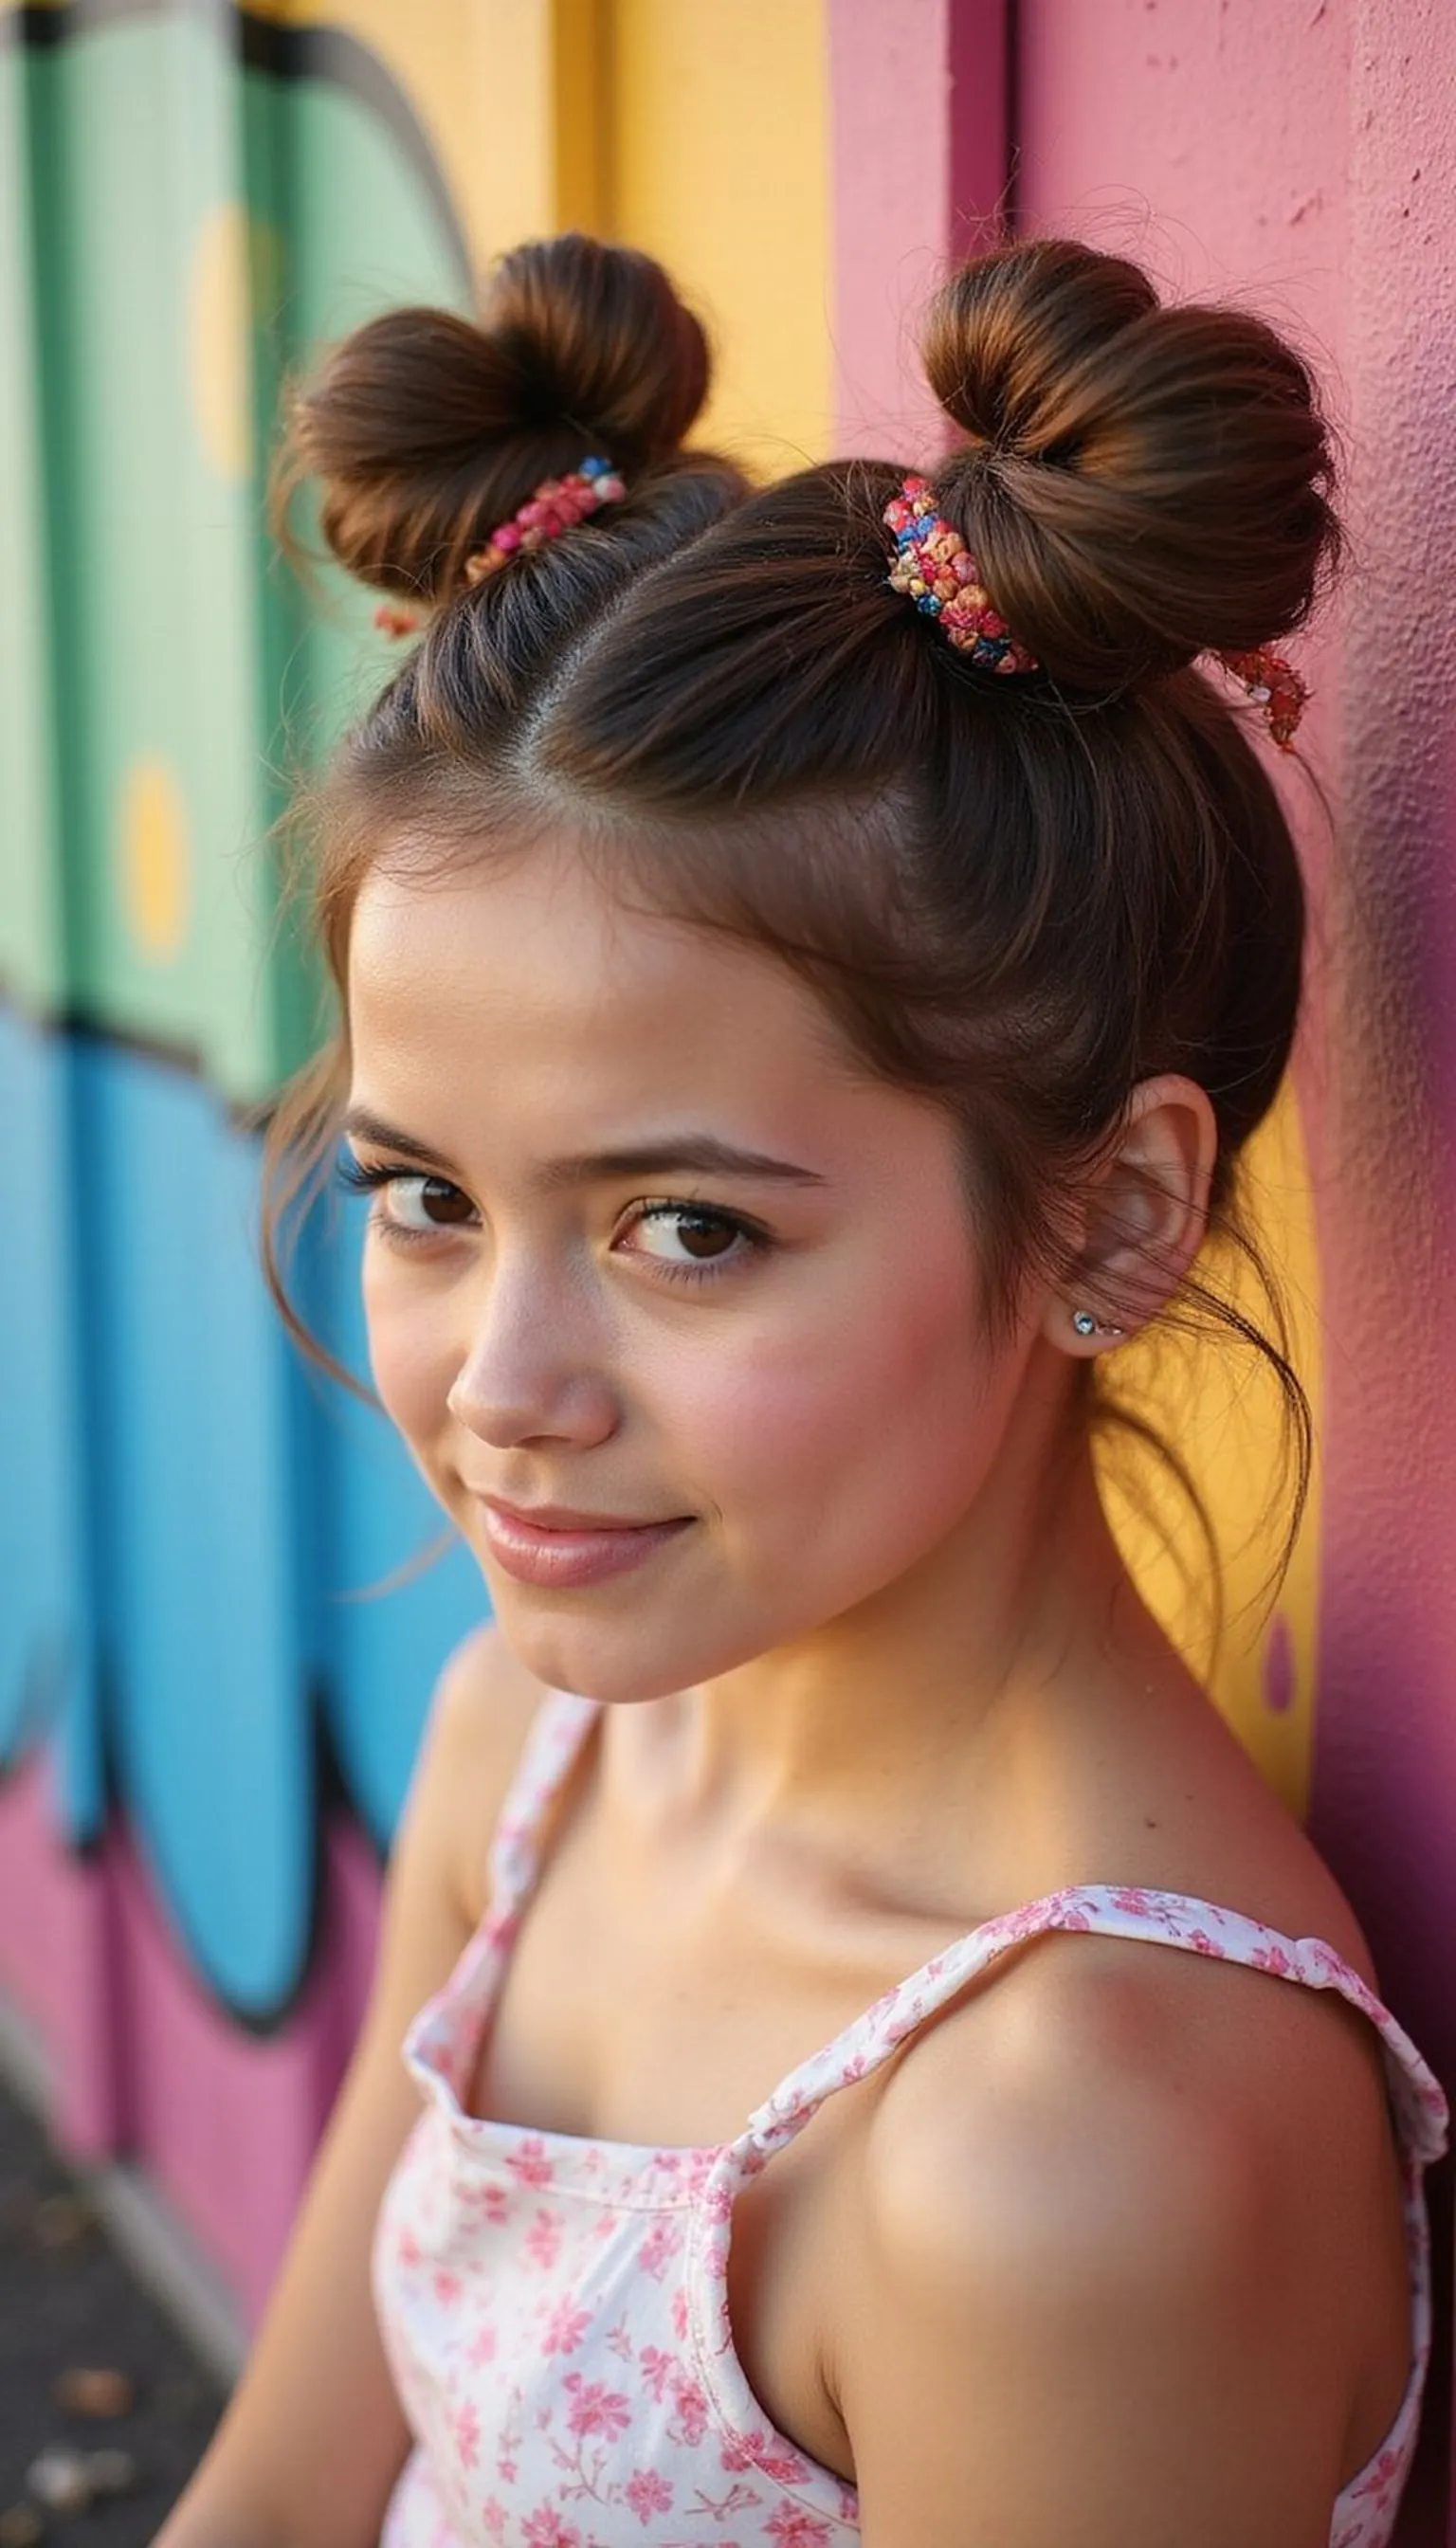
Mini space buns are playful, keep hair secure, and fit easily under caps for sun protection between stops. Part hair down the middle, twist two small buns high or mid-head, and secure each with elastics and bobby pins. Pull out a few baby hairs for a soft frame and loosen each bun for a relaxed finish. This look suits medium to long hair and is perfect for festival-esque road trips or casual days exploring towns along the route.
💇 Styling Tips ▶
Styling Tips
- Create clean parting with a comb for symmetry.
- Use small elastics that match hair color to hide anchors.
- Secure stray hairs with bobby pins and a light mist of spray.
⚠️ Avoid: Putting buns too tight leads to irritation during long drives; keep them comfortably secure. Avoid oversized elastics that make the buns bulky.
🔄 Try Also: Position buns lower for a softer look or add tiny braids into each section before coiling for texture.
🛒 Products & Materials ▶
Items Used
- small hair elastic
- bobby pins
📌 “Cute mini space buns that stay comfy and camera-ready on the go.”
• • •
Effortless Halo Braid For Picture Days
⏱️ 20 min · 🔴 Advanced

The halo braid is a romantic, crown-like style ideal for scenic stops and photo ops where the hair needs to look deliberate yet natural. Braid along the hairline or create a large braid wrapping the head, pinning ends underneath for a seamless finish. This style secures hair away from the face while framing features beautifully. It works on medium to long hair and looks extra pretty with loose waves left at the back. Good prep with light texturizer helps the braid hold its shape on long drives.
💇 Styling Tips ▶
Styling Tips
- Start with a clean parting and light texturizer for grip.
- Pin the braid underside for a neat crown effect.
- Loosen braid gently for a softer, fuller halo.
⚠️ Avoid: Making the braid too tight can cause scalp sensitivity; aim for a firm yet comfy tension. Avoid skipping pins under the ends, which can cause unraveling.
🔄 Try Also: Create a double halo for an intricate look or braid half the crown for a half-halo with flowing lengths behind.
🛒 Products & Materials ▶
Items Used
📌 “Romantic halo braid that frames the face for dreamy travel photos.”
• • •
Messy Sock Bun For Long Hair Convenience
⏱️ 7 min · 🟢 Beginner

The sock bun is a travel classic for long hair because it creates a full bun instantly and tucks hair away neatly. Slide a hair donut or rolled sock over a ponytail, spread hair around it, and pin or wrap the ends until the bun looks balanced. It’s breathable, comfortable for naps in the car, and compact enough for quick bathroom touch-ups. Perfect for long afternoons of driving when hair needs to be out of the way but still ready for dinner or walks at the next stop.
💇 Styling Tips ▶
Styling Tips
- Choose a donut size based on hair volume for the best shape.
- Use a couple of pins to anchor the bun securely.
- Loosen pieces for softness and a relaxed silhouette.
⚠️ Avoid: Using a donut that’s too small makes the bun look flat; select the right size for hair volume. Avoid pulling the bun too tight.
🔄 Try Also: Make a low sock bun at the nape for a sleeker look or add a scarf tied around the bun for a playful accent.
🛒 Products & Materials ▶
Items Used
📌 “Full sock bun that tucks long hair away for comfy travelling.”
• • •
Slicked-Back Wet Look For Minimal Fuss
⏱️ 5 min · 🟢 Beginner
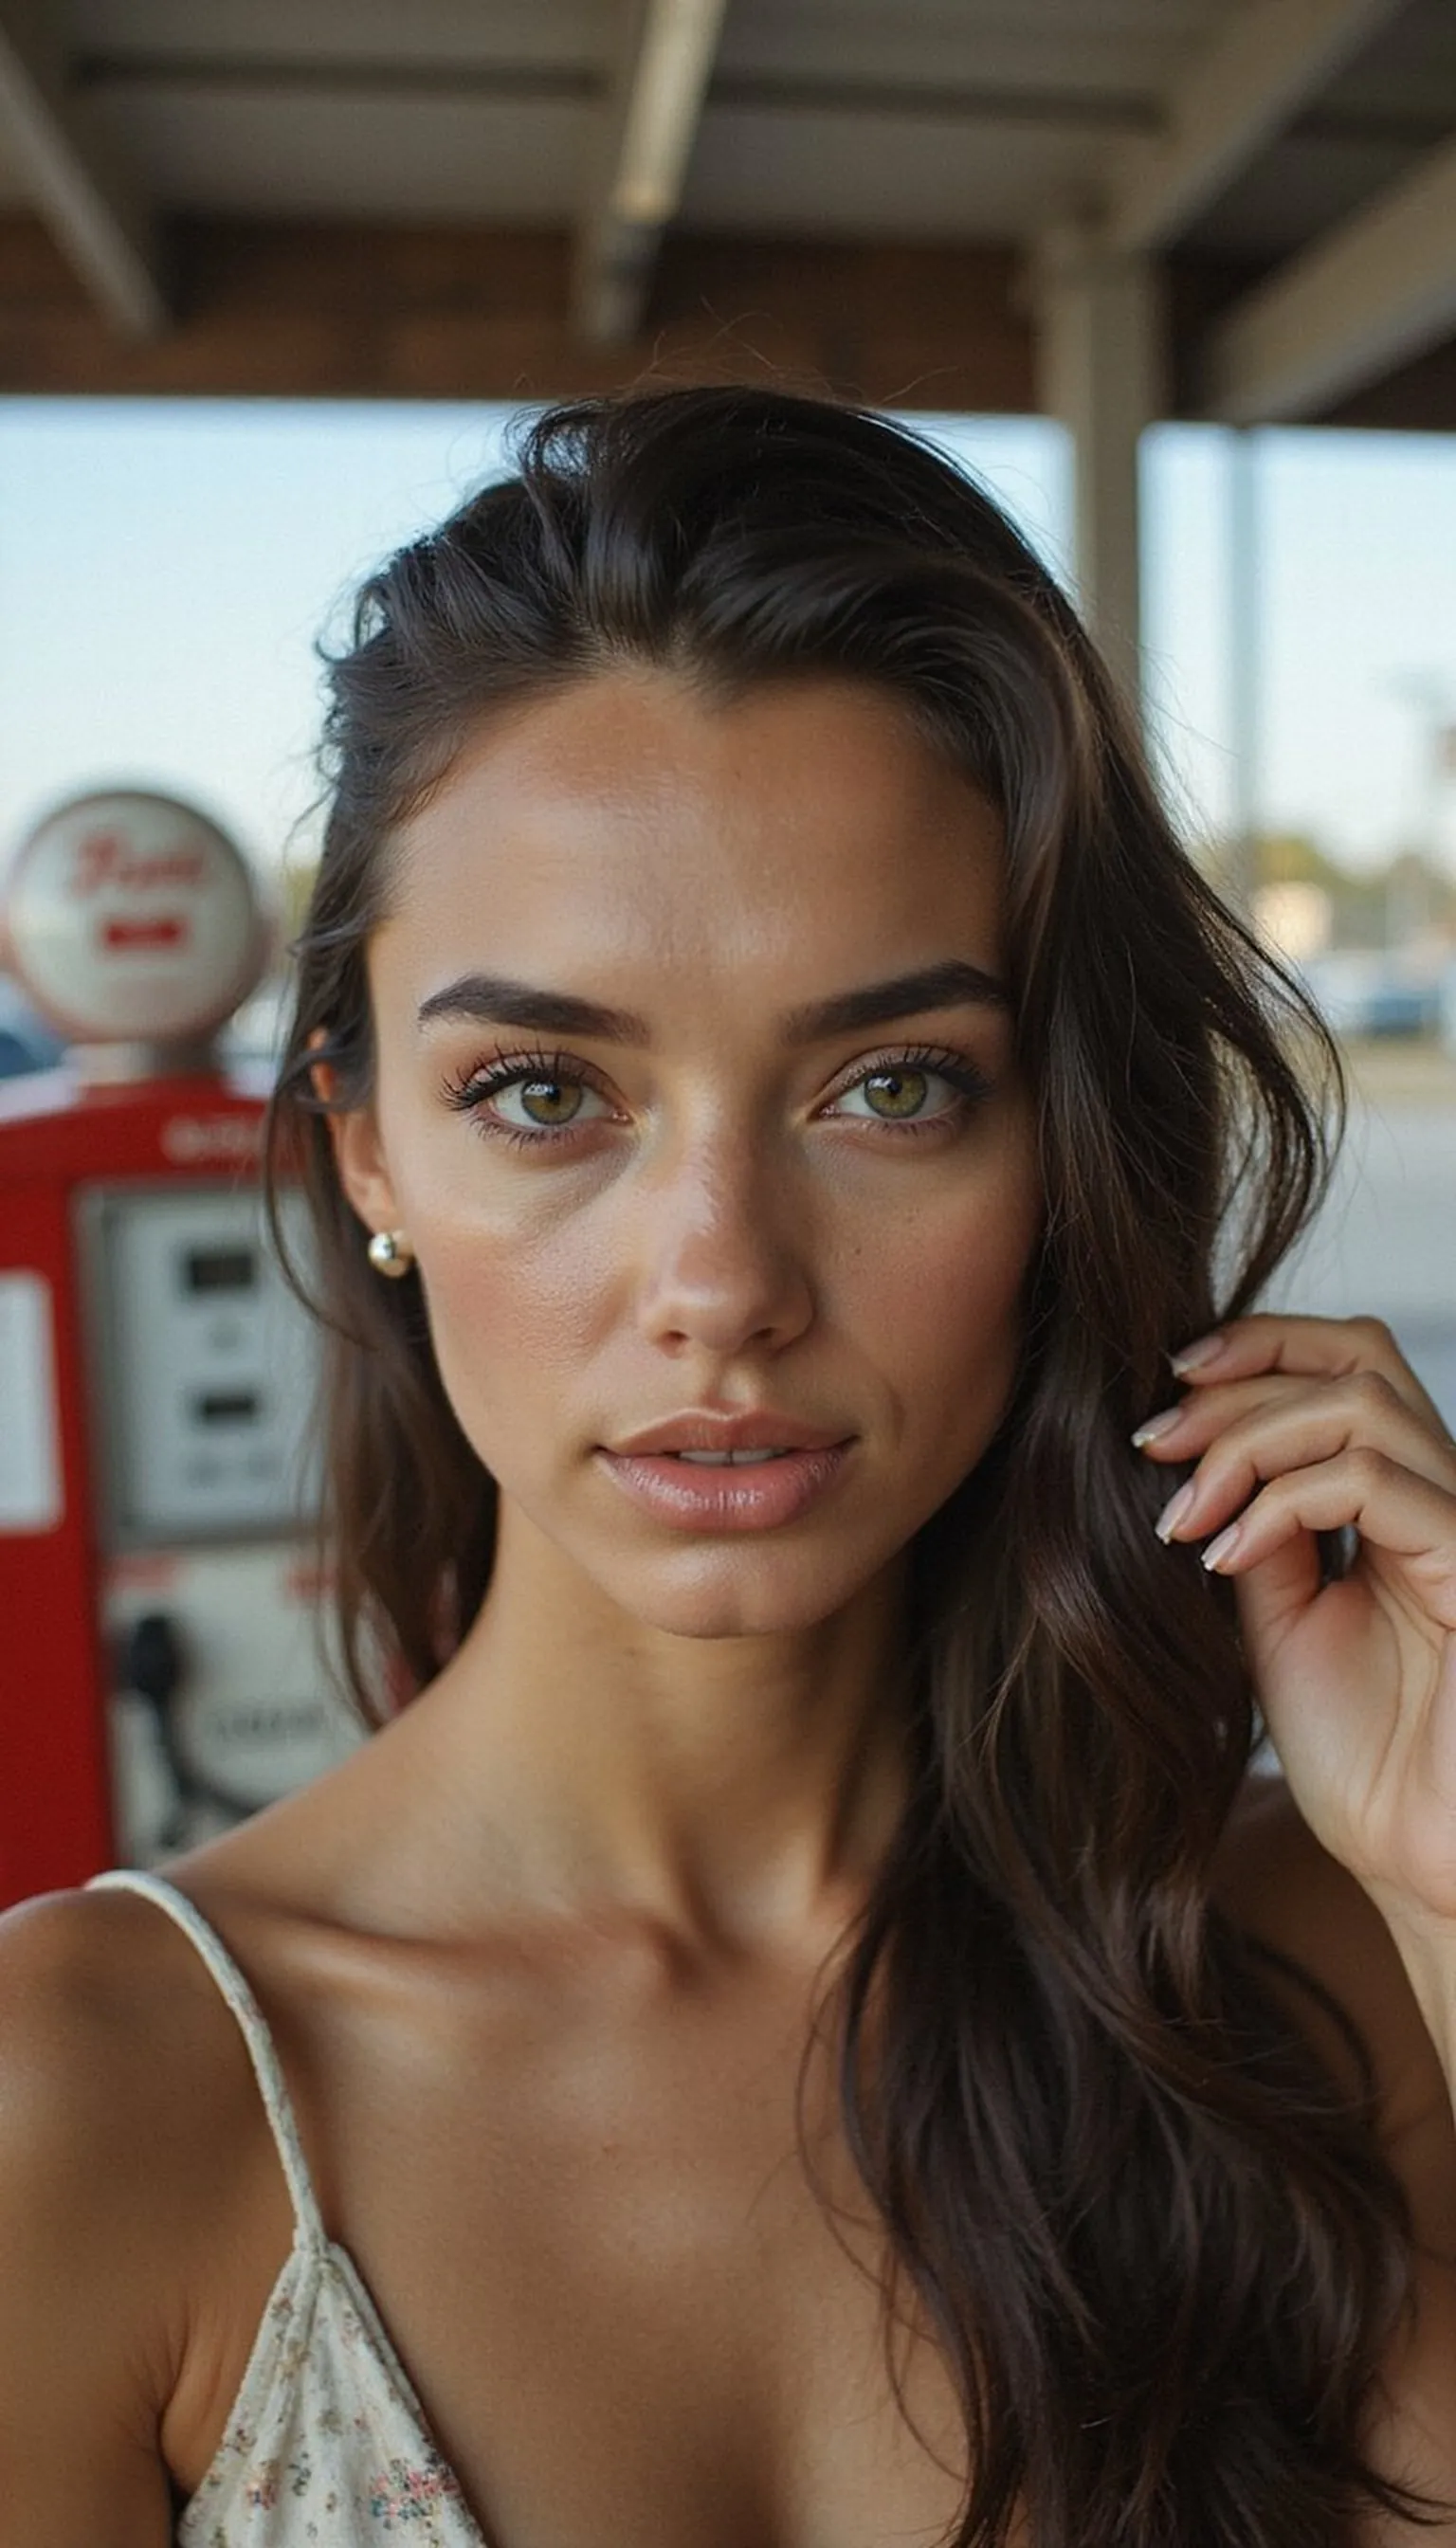
The slicked-back wet look is perfect for short trips or times when lightweight styling is preferred. Smooth a small amount of gel through hair and comb back for a sleek, high-shine finish that stays close to the head and resists wind. This style works well on short to medium lengths and stays put under hats or sunglasses. It’s quick to do before hitting the road and looks modern and intentional in photos taken at rest stops or gas station selfies.
💇 Styling Tips ▶
Styling Tips
- Work gel through damp or dry hair depending on desired shine.
- Comb back in sections for an even, polished finish.
- Use a small comb to refine edges and smooth down baby hairs.
⚠️ Avoid: Using too much gel creates a stiff, crunchy look; start small and add more if needed. Avoid touching the hair too often to keep it smooth.
🔄 Try Also: Combine with a low bun by slicking hair back and twisting into a neat knot, or leave it down for a dramatic, wet-look vibe.
🛒 Products & Materials ▶
Items Used
- styling gel
- comb
📌 “Slicked-back wet look—quick, shiny, and perfect for minimal styling.”
