
As an Amazon Associate I earn from qualifying purchases.
DIY Camping Crafts bring cozy personality to any campsite with hands-on charm, and DIY camping crafts turn simple supplies into useful gear. Weekend-ready DIY camping crafts include lanterns, markers, and gear pouches so DIY camping crafts feel practical and playful. Easy-to-tweak DIY campsite crafts and outdoor DIY camping crafts brighten nights and organize packs, while DIY camping decorations add personality to trails.
These DIY camping crafts fit small packs and busy schedules, ready for the next outing.
Mason jar solar lantern for campsite ambiance
⏱️ 30 min · 🟢 Beginner

I remember the first evening the jar glowed; the warm, honeyed light pooled on the picnic board and softened the crunch of pine needles. The glass caught little flecks of dust and made the solar cell look like a tiny moon. The wire hanger had a faint metallic scent after work, and pebbles at the bottom added weight and a pleasing clink.
It felt like a small, portable campfire lamp that fit in a backpack pocket, brightening a table without roaring heat or smoke.
📋 How to Make This ▶
- Place a thin layer of small pebbles into the jar to add weight and texture.
- Set a solar tea light into the jar opening and check that the lid sits flush for charging.
- Wrap galvanized wire around the jar neck and form a sturdy hanger, twisting the ends securely.
- Position the jar where it will receive daylight so the solar cell charges for evening use.
⚠️ Avoid: A frequent beginner mistake is winding the hanger too tightly, which can crack the jar lip or twist the solar lid out of alignment.
🔄 Try Also: A colored jar gives a tinted glow, a cluster of smaller jars makes a lantern group, and sand at the base offers a beachy mood.
🛒 Products & Materials ▶
Items Used
- mason jar
- solar tea light
- galvanized wire
- small pebbles
📌 “Warm mason jar lanterns create soft campsite light and compact charm.”
• • •
Painted river rock campsite markers everyone notices
⏱️ 45 min · 🟢 Beginner
Those smooth river stones felt cool in hand and took paint like a small canvas. Color pops against moss and dirt, and the matte acrylic finish softened rough edges. Bright shapes and arrows contrasted with surrounding greens, and the scent of paint lingered faintly on fingers for a short while.
Laying markers along a trail made the site feel organized and homey without fuss. The stones had a tactile weight that made placement satisfying, and wet paint edges shimmered briefly before the finish dulled the sheen.
📋 How to Make This ▶
- Select smooth river rocks and wipe them clean to remove grit and wet spots.
- Paint simple symbols or bright colors on each rock and allow full drying time between coats.
- Apply a clear acrylic sealer to protect the painted surface from rain and wear.
- Place the markers along the campsite perimeter or at trail junctions for visibility.
⚠️ Avoid: A frequent beginner mistake is painting without wiping rocks first, which can make the paint flake when exposed to moisture.
🔄 Try Also: Use glow-in-the-dark paint for night markers, small printed icons for gear spots, or stack stones for a mini cairn look.
🛒 Products & Materials ▶
Items Used
- smooth river rocks
- acrylic paint set
- clear acrylic sealer spray
- paintbrush
📌 “Bright painted rocks make clear, charming campsite markers for trails.”
• • •
Paracord survival bracelet that packs light and strong
⏱️ 1 hour · 🟠 Intermediate
Wearing the woven paracord felt oddly reassuring, like a small tether back to comfort. The nylon had a smooth, slightly plasticky feel, and each knot added thickness that sat comfortably against skin. The buckle clicked solidly and the bracelet curled into a neat coil when taken off.
It looked utilitarian on the wrist, with subtle color contrast between core strands and outer weave. There was a faint scent of polymer from fresh cord, and unraveling a bit revealed tightly braided inner strands ready to be repurposed in an emergency.
📋 How to Make This ▶
- Cut a suitable length of paracord and melt the ends slightly to prevent fraying.
- Attach the cord to one side of the buckle and create the chosen cobra or fishtail weave until the desired length is reached.
- Secure the cord to the opposite buckle side, trim excess, and seal any frayed ends with a lighter.
⚠️ Avoid: A frequent beginner mistake is underestimating required cord length, leaving the bracelet tight or short when finished.
🔄 Try Also: Mix two colors for a striped effect, add a small whistle buckle for function, or scale up the weave into a shoulder strap.
🛒 Products & Materials ▶
Items Used
- paracord 550
- side-release buckle
- lighter
- scissors
📌 “Compact paracord bracelet: practical wear that stores emergency cord neatly.”
• • •
Save time and printer ink with 50+ printable templates and step-by-step instructions in one ad-free guide.

Just $19.99 — lifetime access
Punched tin can lanterns for rustic camp lighting
⏱️ 45 min · 🟢 Beginner
The tin gave off a metallic chime when it met the hammer, and the finished can projected a patterned glow that felt both playful and cozy. Bright pinpricks of light created shadow dances on nearby trees, while the can edges had a cool, silvery shine. The scent of heated metal barely lingered after a little while, and sand inside steadied the can on uneven ground.
The perforations made the can feel like a tiny planetarium, scattering starlike dots across the picnic blanket.
📋 How to Make This ▶
- Empty and clean a tin can, removing any labels and residue for a smooth working surface.
- Transfer or trace a simple pattern onto the can and create holes along the design with a hammer and nail.
- Place a candle or LED inside, add a small layer of sand for stability, and set the can on a level surface.
⚠️ Avoid: A frequent beginner mistake is leaving sharp metal burrs at the rim; this can cause snags or small cuts while handling.
🔄 Try Also: Try a cluster of cans hung at different heights, solar LED inserts for flameless light, or painted exteriors for colored projections.
🛒 Products & Materials ▶
Items Used
- empty tin can
- hammer
- nail set or nails
- tea light candle or LED
- sand
📌 “Punched tin can lanterns throw starry light and bring rustic charm.”
• • •
Twig photo frame with campsite-sourced charm
⏱️ 1 hour · 🟢 Beginner
The twigs had little ridges that caught light and a faint resinous pine scent that seemed to hold a memory of the woods. The frame looked handmade in an honest way, branches meeting at imperfect angles that made it feel personal. Bark textures created contrast against the smooth photo inside, and the overall weight was pleasantly light.
It looked at home propped on a cooler or hanging from a tent pole. The natural palette of browns and greys made colors in the photo pop with an earthy backdrop.
📋 How to Make This ▶
- Gather straight twigs of roughly the same thickness and lay them out to form a rectangle slightly larger than the chosen photo.
- Trim twig ends to align corners and bind intersections securely with twine or strong craft glue.
- Attach a simple backing to hold the photo in place and add a hanging loop if desired.
⚠️ Avoid: A frequent beginner mistake is choosing green or flexible twigs that warp later, causing the frame to misalign.
🔄 Try Also: Add a thin strip of birch bark as an accent, stain a few twigs for contrast, or create a collage with smaller twig pieces.
🛒 Products & Materials ▶
Items Used
- straight twigs
- twine
- craft glue
- cardboard backing
📌 “Rustic twig frames bring a handcrafted, woodland feel to campsite photos.”
• • •
Log tealight holder for cozy camp table warmth
⏱️ 1 hour · 🟠 Intermediate
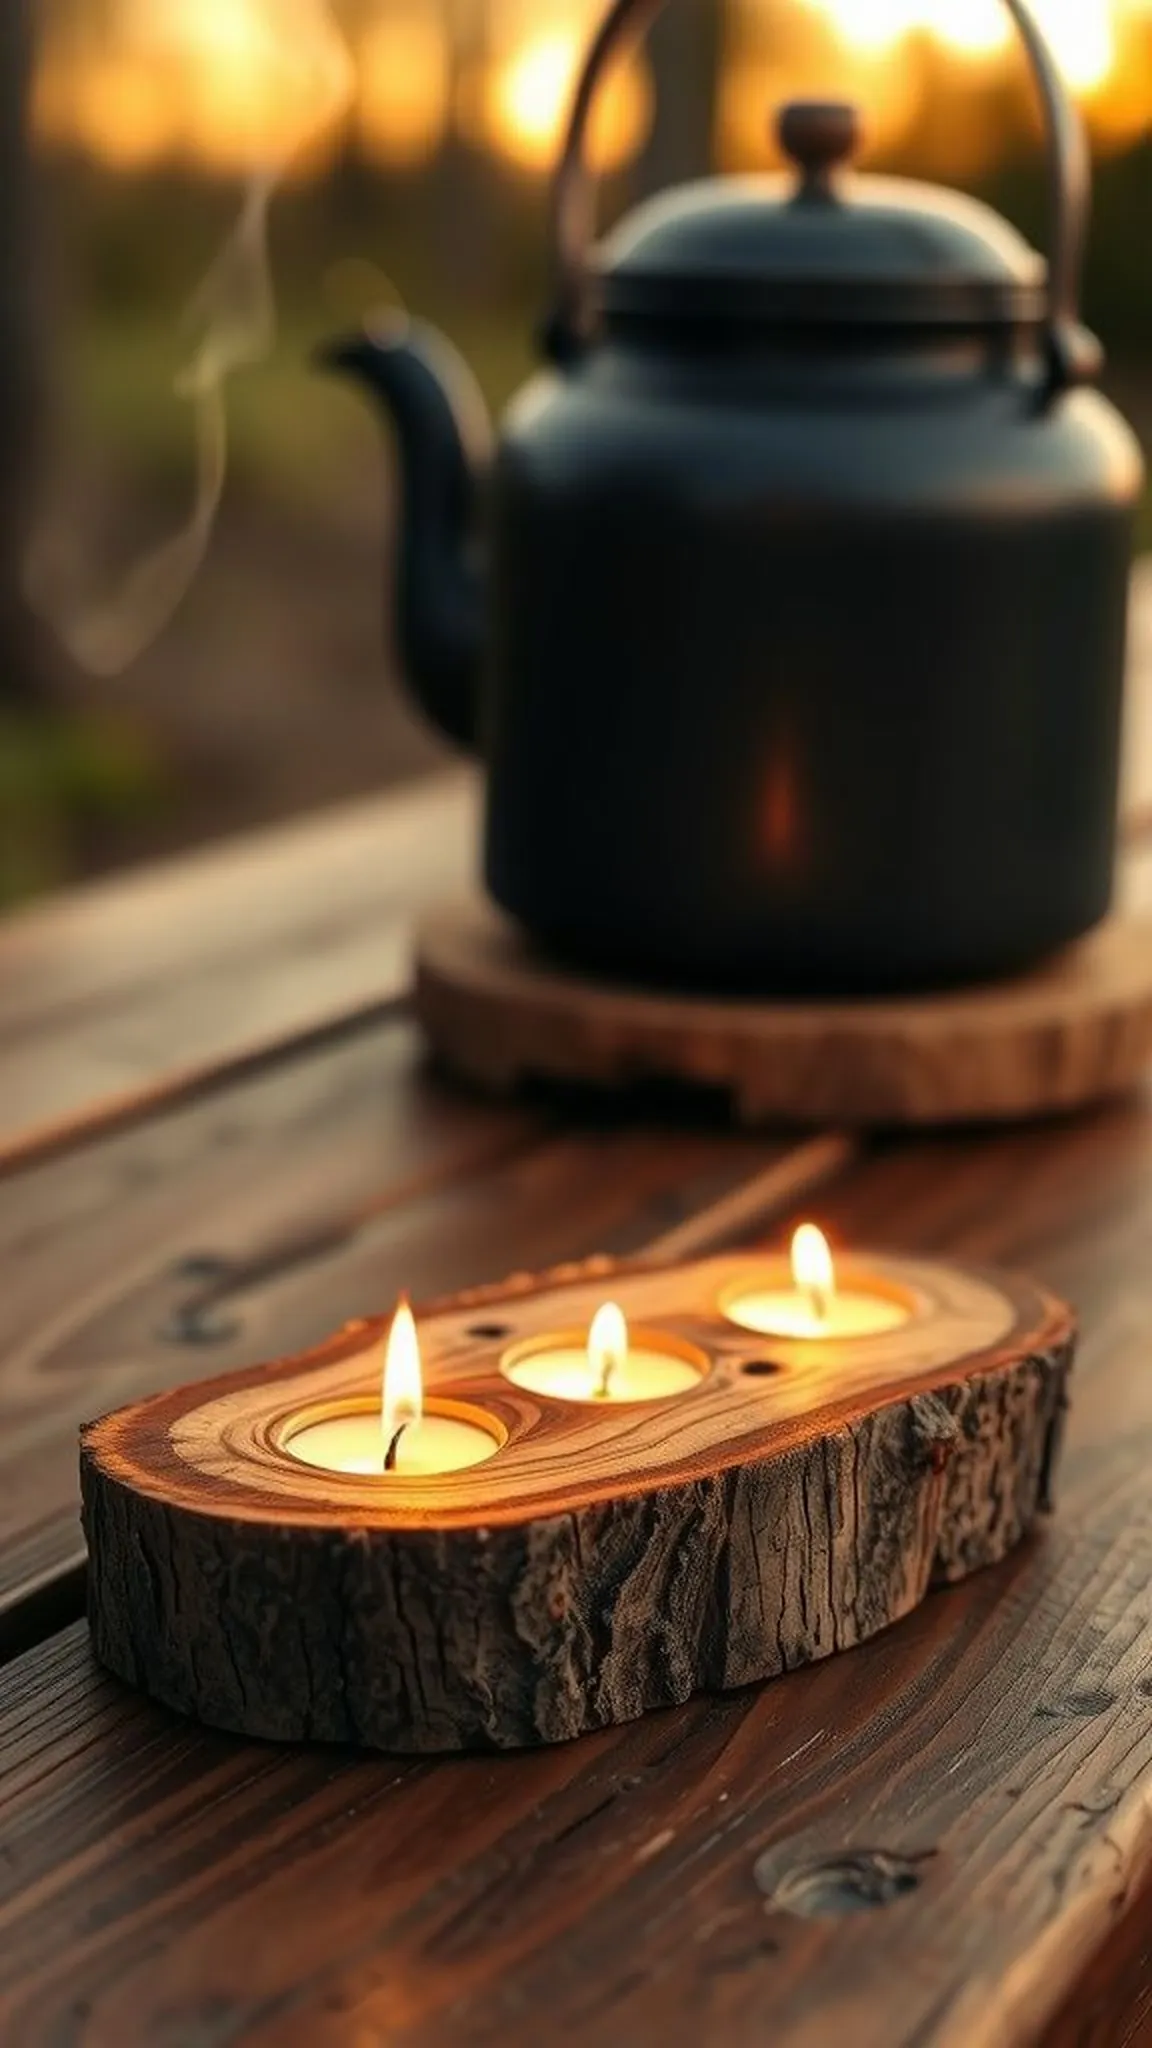
The log slice smelled faintly of sap and earth, and the round cavities held little pools of candlelight that flickered with the breeze. The rough outer bark provided a tactile contrast to the smooth, sanded tops, and small sawdust flecks clung to fingers during preparation. The wood gave the holder a grounding presence on a picnic table, and when several sat together they created a soft row of amber reflections.
Each cavity had gentle scorch marks around the edge where candlelight had warmed the timber.
📋 How to Make This ▶
- Select a dry wood slice of appropriate thickness and sand the top surface until smooth and level.
- Mark and drill shallow round cavities sized for standard tealight cups, keeping spacing even across the slice.
- Wipe away sawdust and place tealights in the cavities for a stable, warm cluster of lights.
⚠️ Avoid: A frequent beginner mistake is drilling too deep, which can cause the tealight flame to be too close to the wood surface.
🔄 Try Also: Group multiple log slices of different diameters for a tiered effect, or inset small glass votives instead of bare tealights.
🛒 Products & Materials ▶
📌 “Natural log tealight holder brings warm, woodsy glow to a campsite table.”
• • •
Canvas utensil roll that keeps gear organized
⏱️ 1 hour · 🟢 Beginner
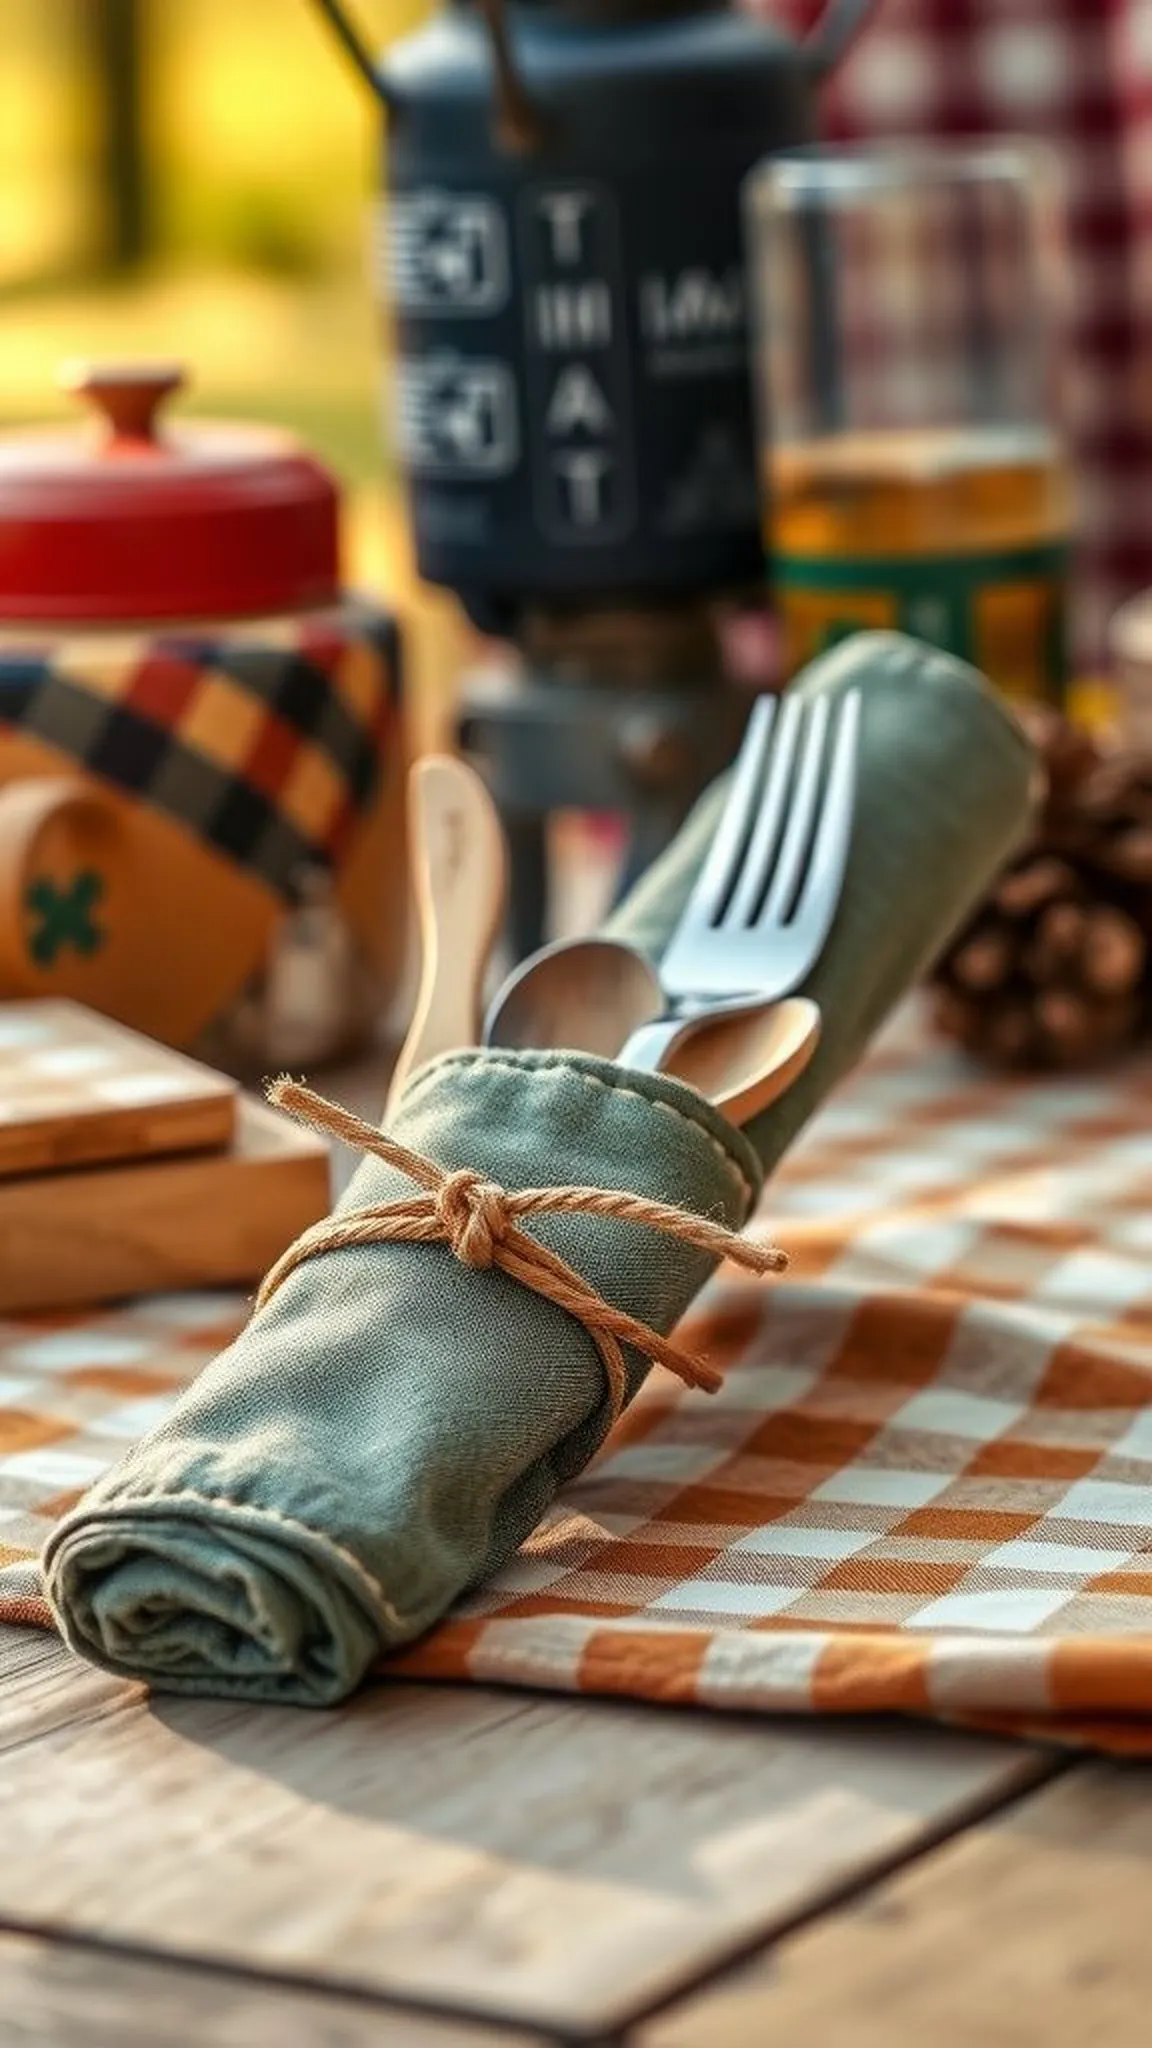
The canvas had a sturdy, almost workwear feel and softened slightly after a couple of folds. Pockets created snug homes for metal spoons and spatulas, and the roll looked tidy when tied with leather thong. Linen thread left a faint raised seam that caught light along the edge.
When unrolled on a picnic table, utensils lay out in an orderly row that made breakfast feel calm. The scent of fabric wash lingered faintly, and creased edges gave the roll a lived-in, practical charm.
📋 How to Make This ▶
- Cut a piece of canvas to desired roll dimensions and hem the long edges for a neat finish.
- Measure and sew vertical pocket lines to create snug compartments sized for utensils, leaving a top opening.
- Attach a leather thong or ribbon at one end to secure the roll when bundled for transport.
⚠️ Avoid: A frequent beginner mistake is making pockets too tight, which can strain seams when inserting thicker utensils.
🔄 Try Also: Add a waterproof backing for wet conditions, create a smaller roll for cutlery, or include a tiny zip pocket for matches or seasonings.
🛒 Products & Materials ▶
Items Used
- canvas fabric
- thread and needle
- leather thong
- scissors
📌 “Sturdy canvas utensil roll keeps camping cutlery neatly organized and portable.”
• • •
Glow-in-the-dark trail stones for nighttime wayfinding
⏱️ 2 hours · 🟠 Intermediate

The glow paint had a faint chemical scent that faded quickly, and after charging in daylight the stones emitted a soft, milky light like tiny moons on the ground. The finish on the stones was slightly tactile, with a faint grain where brush strokes overlapped. Lining them along a path created a gentle line of luminescence that felt safer than a headlamp beam and more atmospheric than a flashlight.
The contrast between dark earth and pale glow had a quiet magic, turning the familiar trail into something a touch theatrical.
📋 How to Make This ▶
- Choose smooth stones and clean them fully to remove dust and damp spots.
- Apply multiple thin layers of glow-in-the-dark paint, allowing adequate drying between layers for a brighter result.
- Place stones in direct sunlight to charge and arrange them along the trail before nightfall.
⚠️ Avoid: A frequent beginner mistake is applying one thick coat, which can peel; thinner layered coats hold longer and glow more evenly.
🔄 Try Also: Mix glow paint with clear resin for glossy pebbles, use small painted stakes for higher visibility, or create patterns for campsite entrances.
🛒 Products & Materials ▶
Items Used
- smooth stones
- glow-in-the-dark paint
- paintbrush set
📌 “Soft glowing trail stones guide nighttime footsteps with gentle, hands-free light.”
• • •
Pinecone wax firestarters for quick camp ignition
⏱️ 45 min · 🟢 Beginner
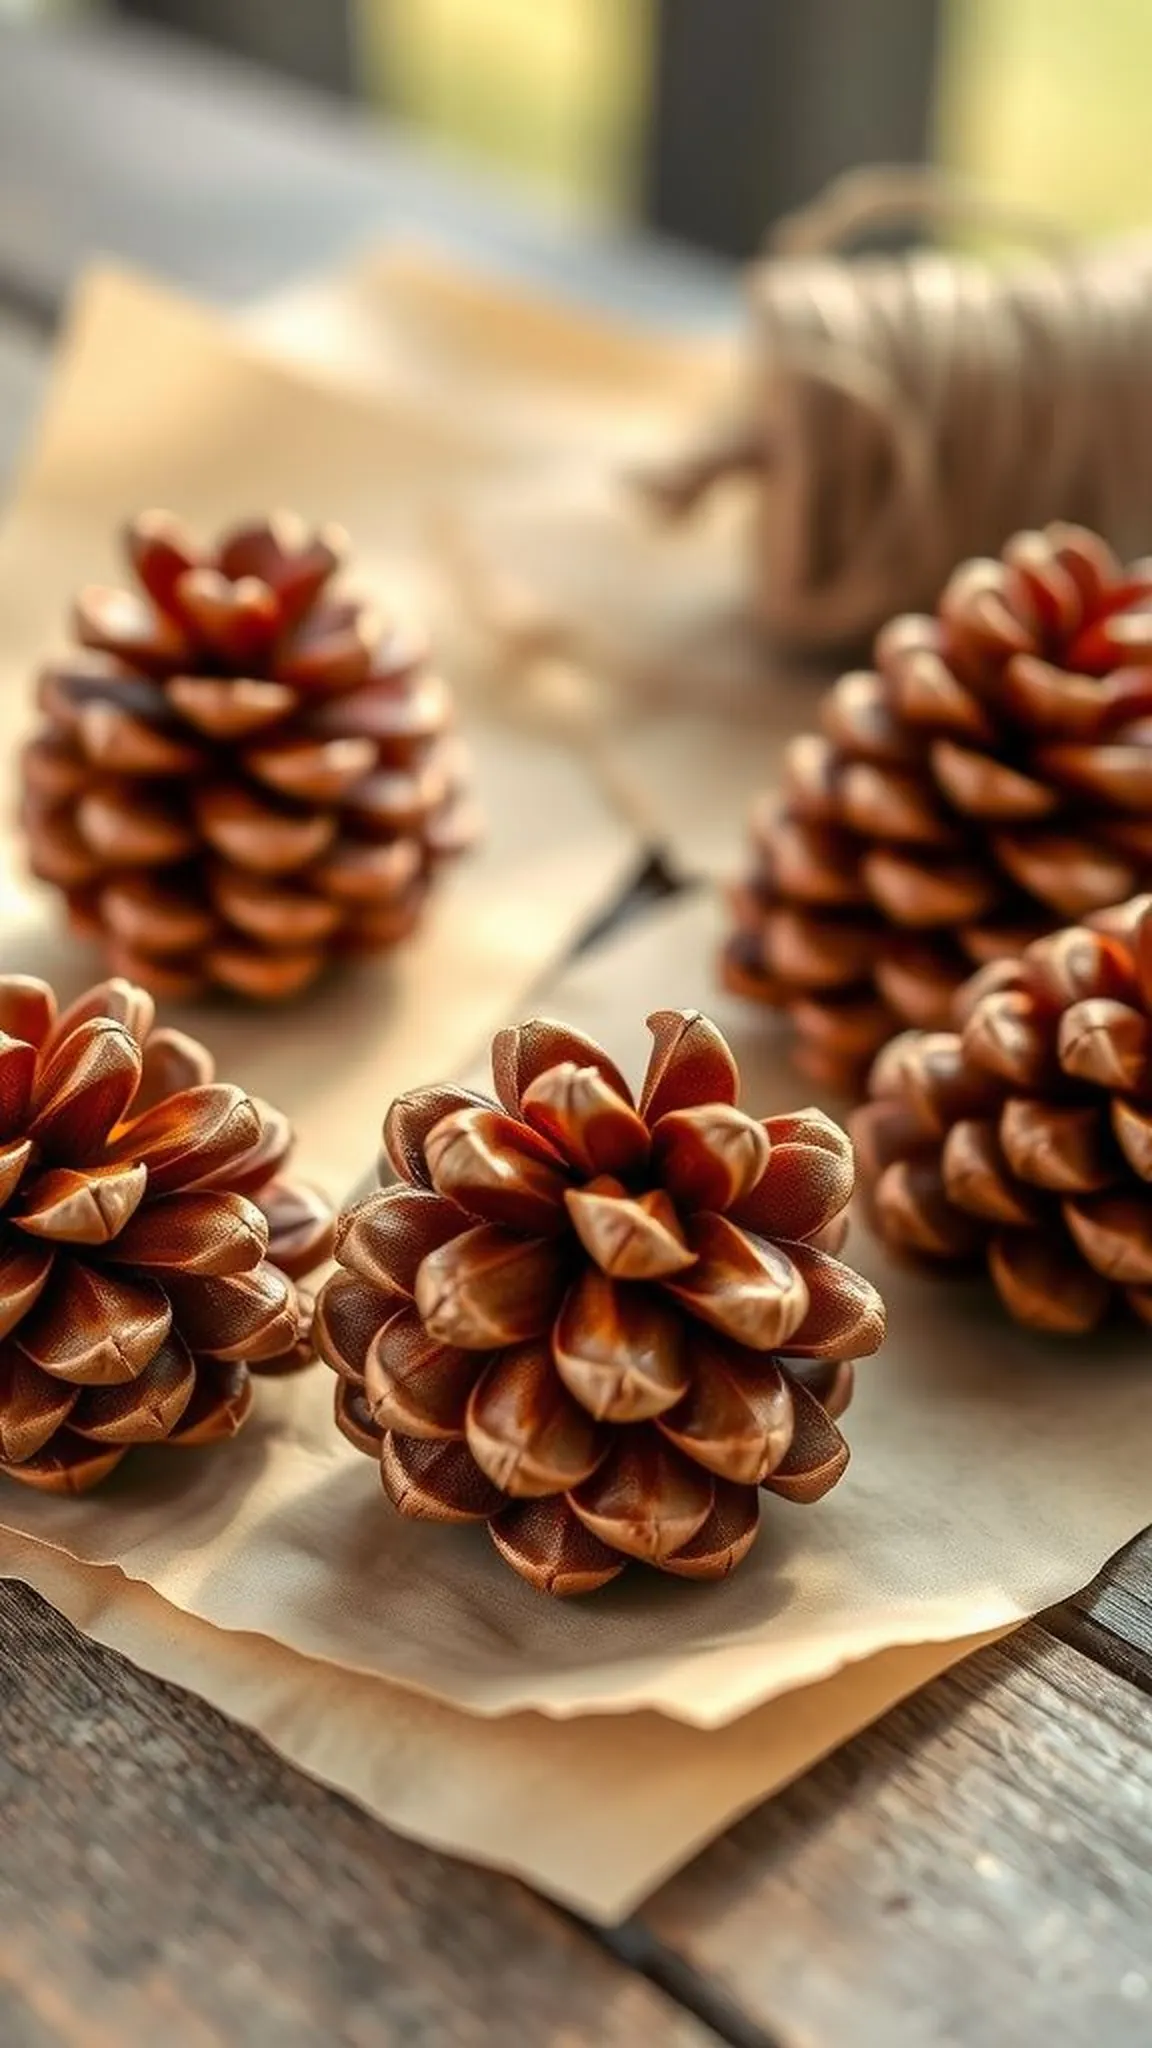
The pinecones felt papery and dry, and once coated they had a glossy sheen that caught the low light. The scent of pine mixed with the faint sweet wax, evoking late-autumn forests. When lit, they burned with a steady orange edge and made fire-starting feel less fussy on damp mornings.
The tactile pattern of scales gave the wax a pleasing ripple, and each starter was small enough to tuck into a gear compartment. The finished batch had a comforting, utilitarian look with a handmade touch.
📋 How to Make This ▶
- Melt wax in a double-boiler setup and keep it at a low, steady temperature for safe handling.
- Dip or spoon wax over dry pinecones until scales are evenly coated, then set on parchment to harden.
- Store finished starters in a breathable bag away from heat until ready to use.
⚠️ Avoid: A frequent beginner mistake is dipping damp pinecones, which can trap moisture and cause poor burning performance.
🔄 Try Also: Nestle a mica or natural fiber wick into the center for longer burn, scent with a drop of essential oil, or press small twigs into the wax for easier ignition.
🛒 Products & Materials ▶
Items Used
- pinecones
- beeswax or paraffin
- parchment paper
📌 “Hand-dipped pinecone firestarters make morning fires quick and mess-free.”
• • •
Map-covered wooden coasters with travel charm
⏱️ 1 hour · 🟢 Beginner
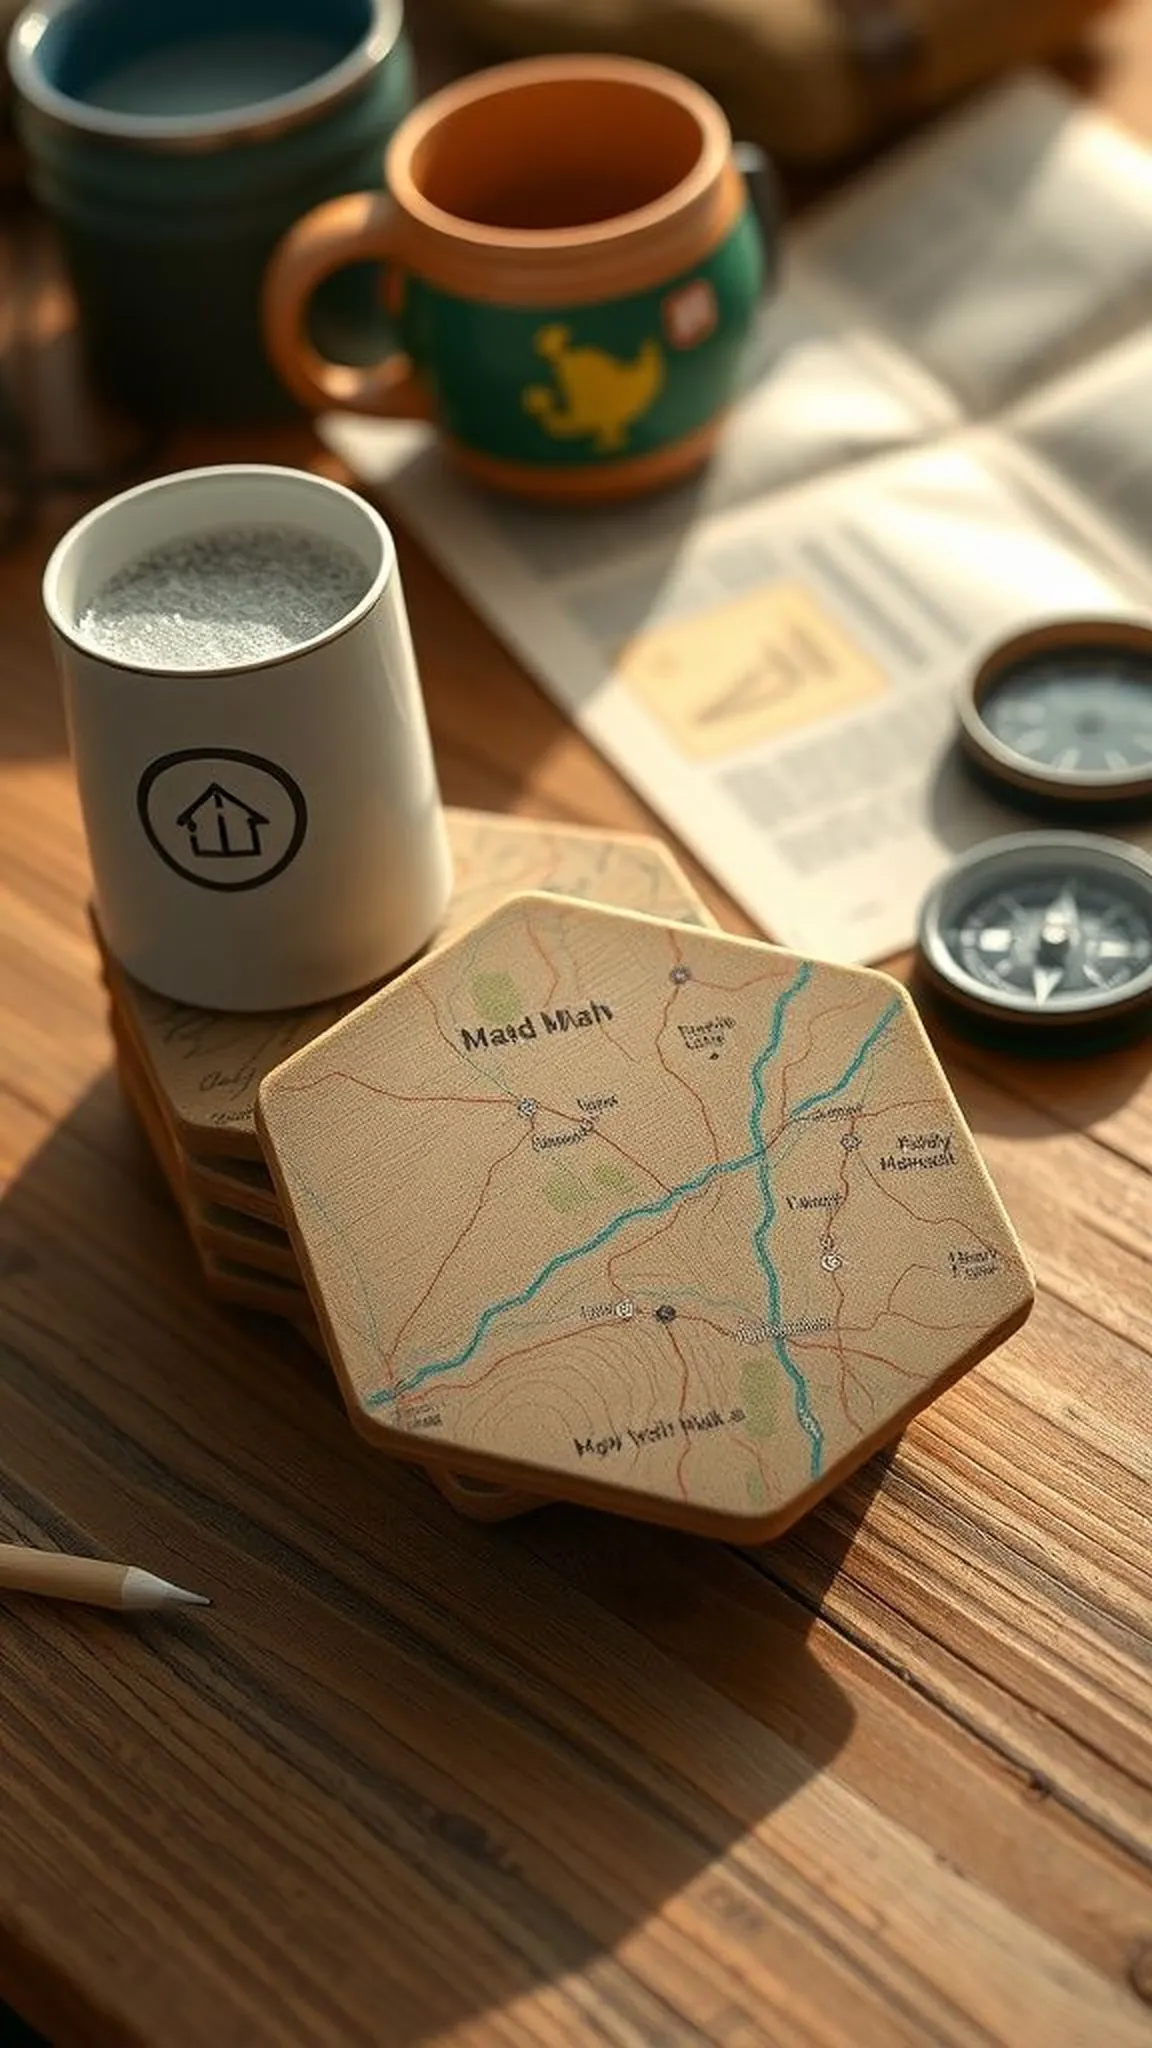
The paper map added tiny color and printed lines that made each wood round feel like a miniature landscape. The glue gave a faint adhesive smell that faded as the surface dried to a smooth matte. The coaster edges revealed layered wood grain beneath the paper, and spilled coffee left a neat ring that contrasted with printed highways.
When stacked, they made a small, satisfying tower that whispered of routes taken and nights under stars. The tactile mix of paper grain and timber warmth invited fingers to linger.
📋 How to Make This ▶
- Cut map sections to fit wooden coaster rounds and test placement for best design alignment.
- Apply adhesive to the wood surface, smooth the map piece down carefully, and allow proper drying time.
- Seal the top with a clear waterproof finish to protect against spills and wear.
⚠️ Avoid: A frequent beginner mistake is leaving the map overhanging the edge, which can lift and peel after use.
🔄 Try Also: Use old guidebooks for vintage charm, highlight campsite coordinates, or create a set with different regional maps.
🛒 Products & Materials ▶
Items Used
📌 “Map-covered coasters turn wood rounds into tiny travel memories and spill-ready surfaces.”
• • •
Tin-can spice rack for efficient campsite flavoring
⏱️ 1 hour · 🟠 Intermediate
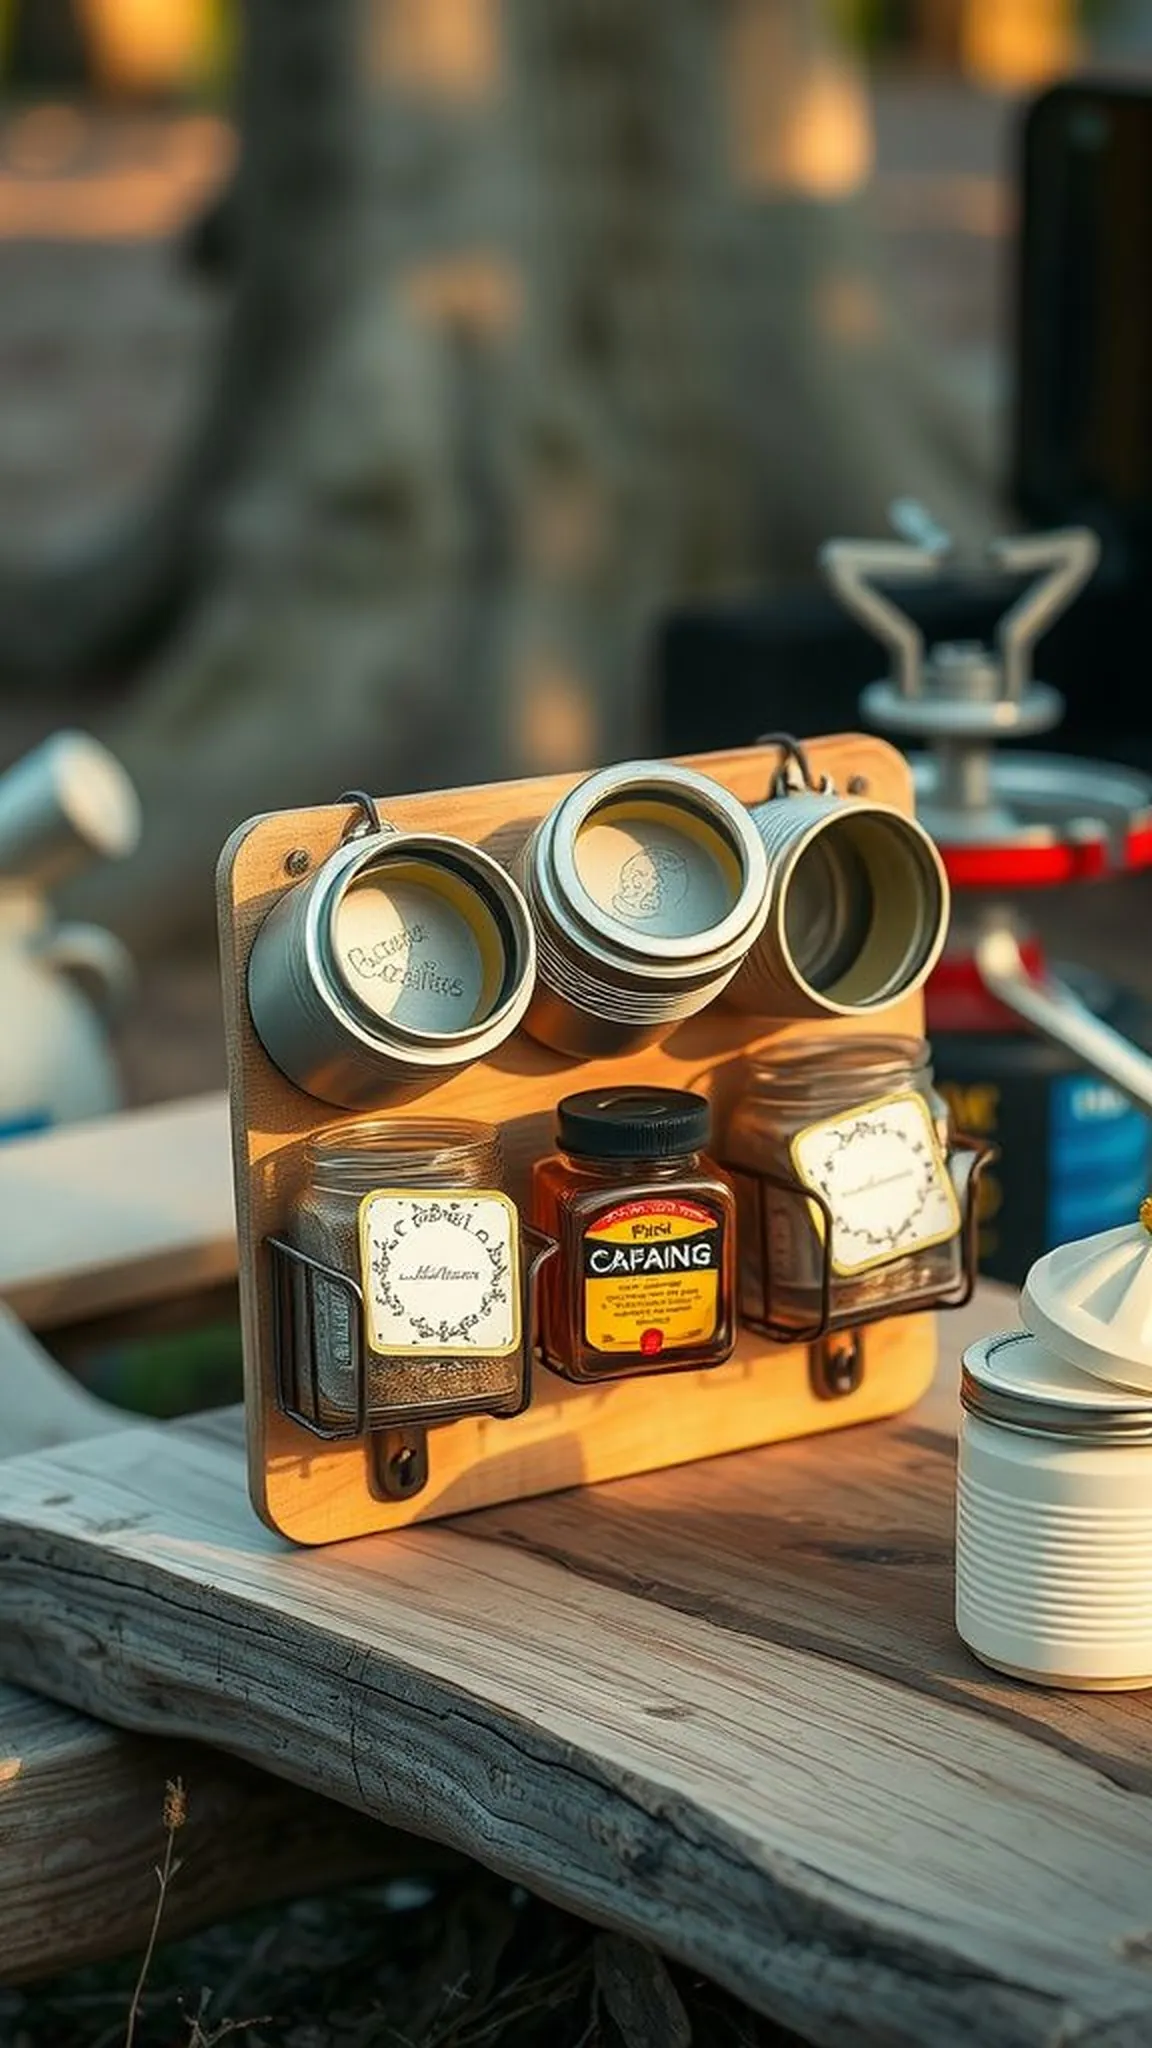
A row of bright tin tops lined a plank like tiny metal moons, each labeled and gleaming faintly. The plank smelled faintly of cut wood, and the cans clinked softly when nudged. Having spices within arm’s reach made cooking feel organized and calm rather than a scramble.
The painted labels had small chips from handling that added character, and the whole rack looked at home above a camp stove or inside a kitchen tote. Opening a can revealed familiar scents that carried across the cooking area and lifted simple ingredients.
📋 How to Make This ▶
- Clean small tin cans and remove labels, then align them along a wooden plank to determine spacing.
- Secure the cans to the plank so they sit evenly and add hinges or a latch if a closing mechanism is desired.
- Fill with lightweight spice containers and label each lid for quick identification near the cooking area.
⚠️ Avoid: A frequent beginner mistake is spacing cans too tightly, which can make lid access awkward when reaching for a jar.
🔄 Try Also: Mount the rack inside a cooler lid, paint each can a different color for quick identification, or hang the rack with leather straps.
🛒 Products & Materials ▶
Items Used
- small tin cans
- wooden plank
- small spice jars
- labels
📌 “Compact tin-can spice rack keeps favorite seasonings organized for campsite meals.”
• • •
Driftwood wind chime that sings with the breeze
⏱️ 1 hour · 🟢 Beginner
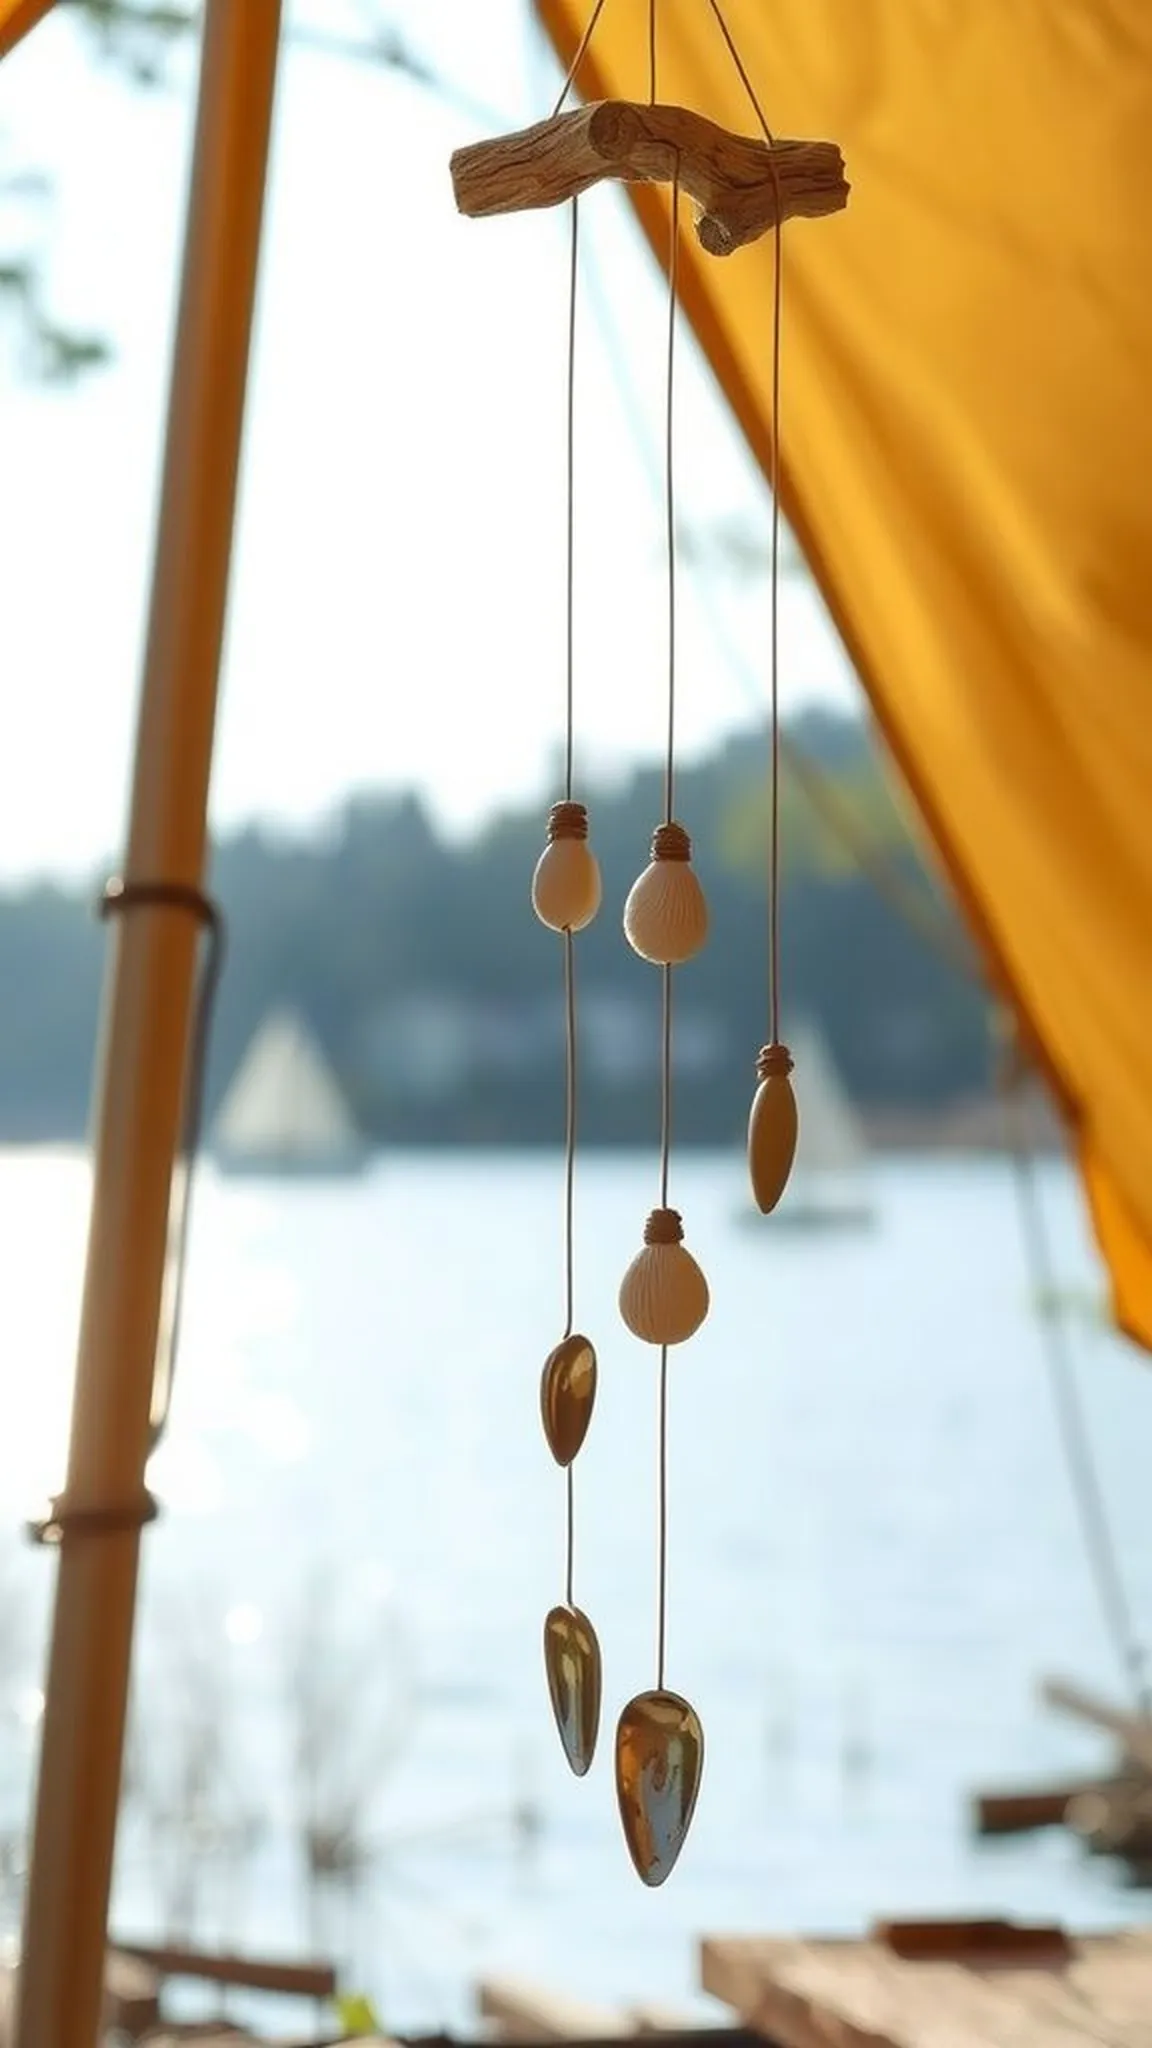
The driftwood pieces had a sand-worn smoothness and a pale bleached tone that felt like summer light. Metal keys and shells chimed with a light, watery ring that blended into ambient rustling leaves. Each hanging element moved independently, creating a layered, irregular melody that was different every hour.
The rope knots had a salty scent and a snug feel where they bound wood to cord. Hung from a porch or low branch, the chime cast gentle shadows and added a coastal memory to inland campsites.
📋 How to Make This ▶
- Select a sturdy driftwood piece as the top and drill or notch holes for hanging lines.
- Attach varied elements like shells, small spoons, or metal pieces on cords of different lengths and secure them along the driftwood.
- Hang the assembled chime from a branch or beam where breezes create soft movement.
⚠️ Avoid: A frequent beginner mistake is clustering heavy pieces too close, causing a dull sound instead of a light, ringing tone.
🔄 Try Also: Use reclaimed cutlery for a bright metallic sound, add glass beads for color, or include a small bell as a central accent.
🛒 Products & Materials ▶
Items Used
- driftwood piece
- natural cord
- assorted metal pieces or shells
- drill or awl
📌 “Coastal driftwood chimes add gentle, shifting music to any campsite breeze.”
• • •
Chalkboard campsite sign to mark your home base
⏱️ 30 min · 🟢 Beginner
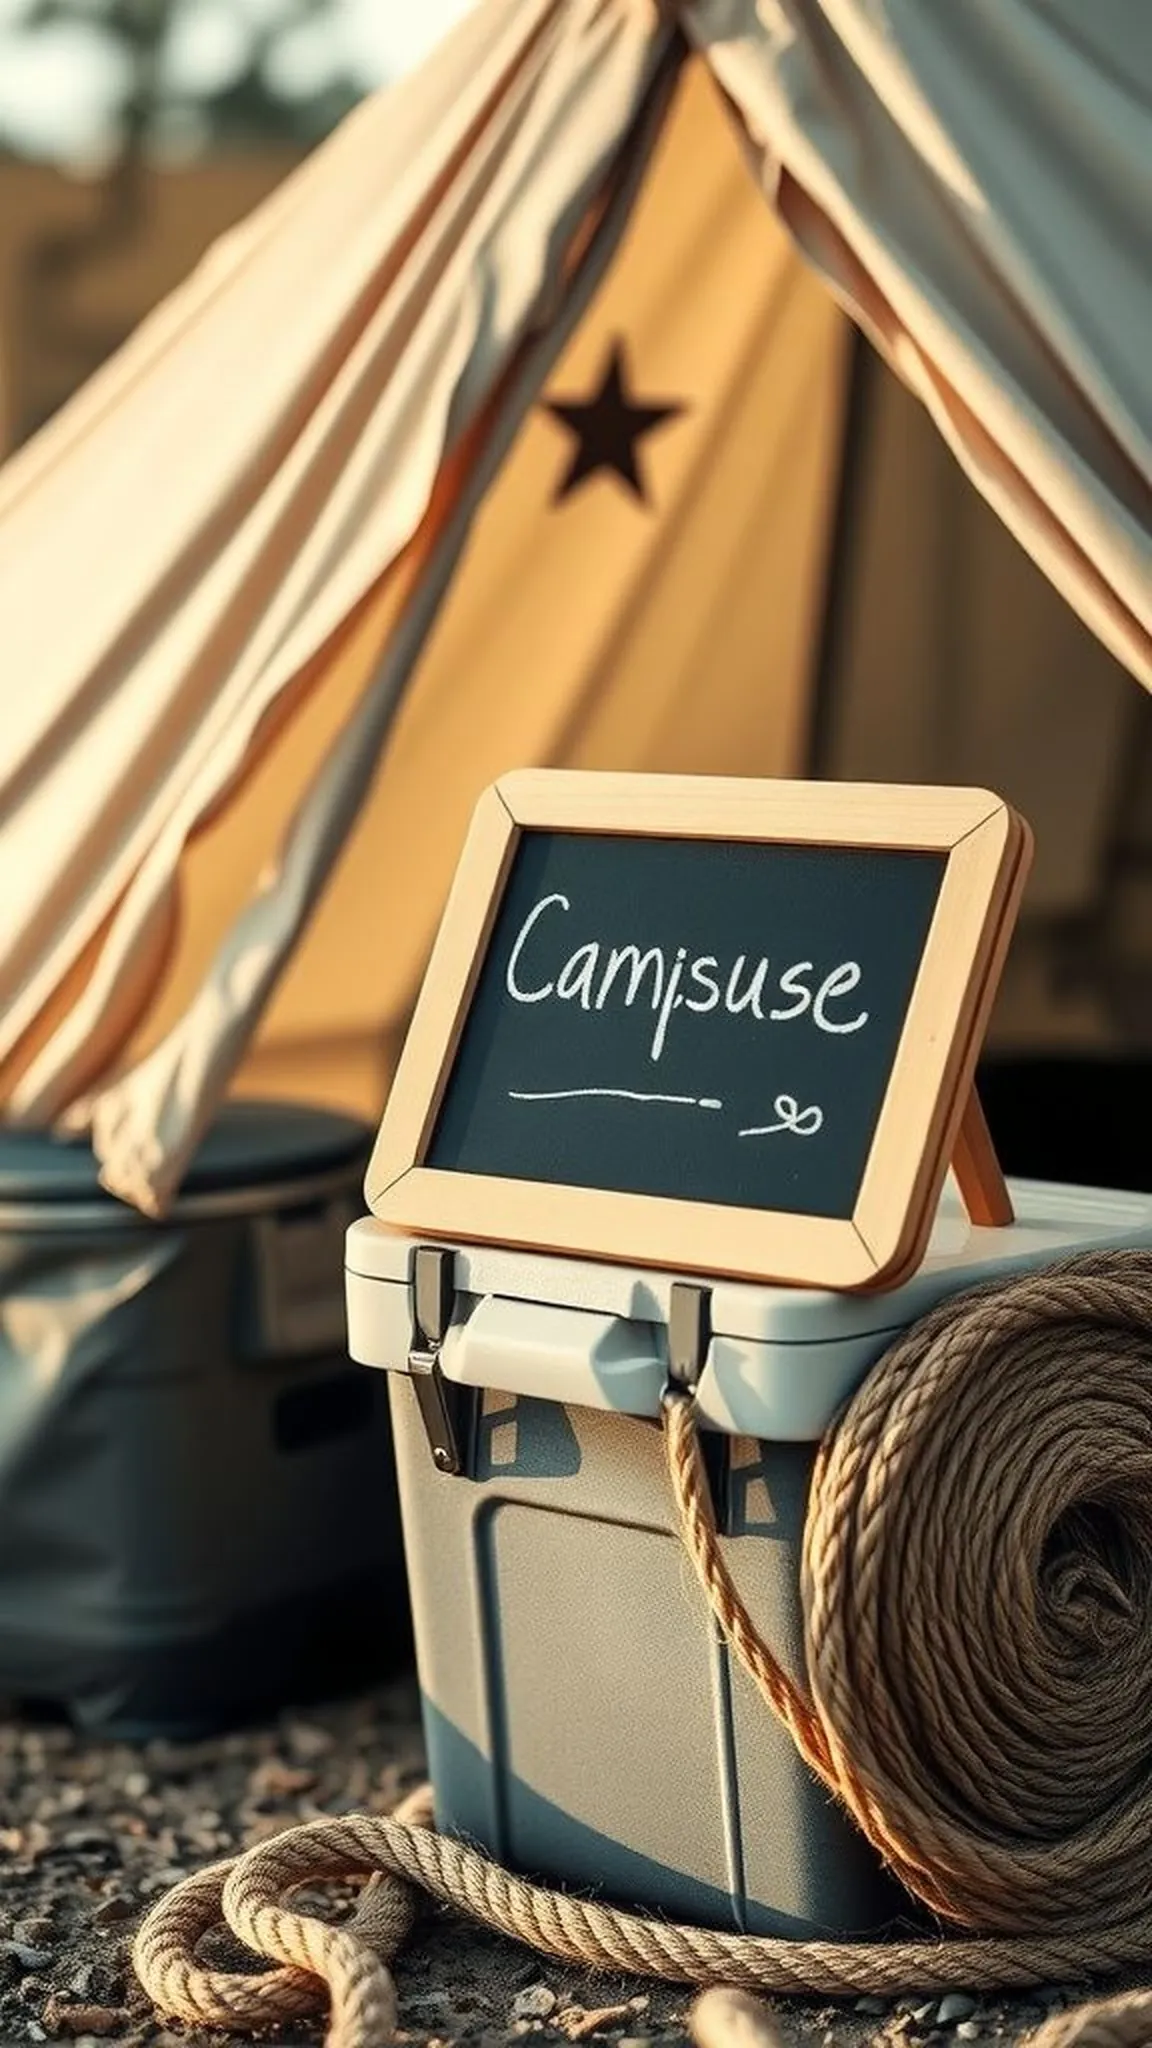
Writing a friendly name on the sign felt like claiming a small patch of outdoors without fuss. The black surface took chalk with a soft rasp and erased cleanly when the design changed. Framing the board with rough wood gave it a cabin-like presence that fit a picnic table or tent stake.
Scent of chalk dust lingered lightly and the matte finish absorbed light rather than reflecting it. When propped at the campsite entrance it created a welcoming first impression, and doodles from friends added personality overnight.
📋 How to Make This ▶
- Prime a small wooden board with chalkboard paint and allow it to dry completely.
- Attach a simple frame or hang loop so the sign can be displayed at eye level.
- Write campsite name or welcome message with chalk and refresh as needed.
⚠️ Avoid: A frequent beginner mistake is skipping primer coats, which can make the chalk finish uneven and harder to clean.
🔄 Try Also: Use colored chalk for festive messages, create a menu board for camp meals, or make tiny individual place signs for a group site.
🛒 Products & Materials ▶
📌 “Friendly chalkboard signs mark the campsite with charm and easy customization.”
• • •
Cork keychain compass for quick direction checking
⏱️ 20 min · 🟢 Beginner
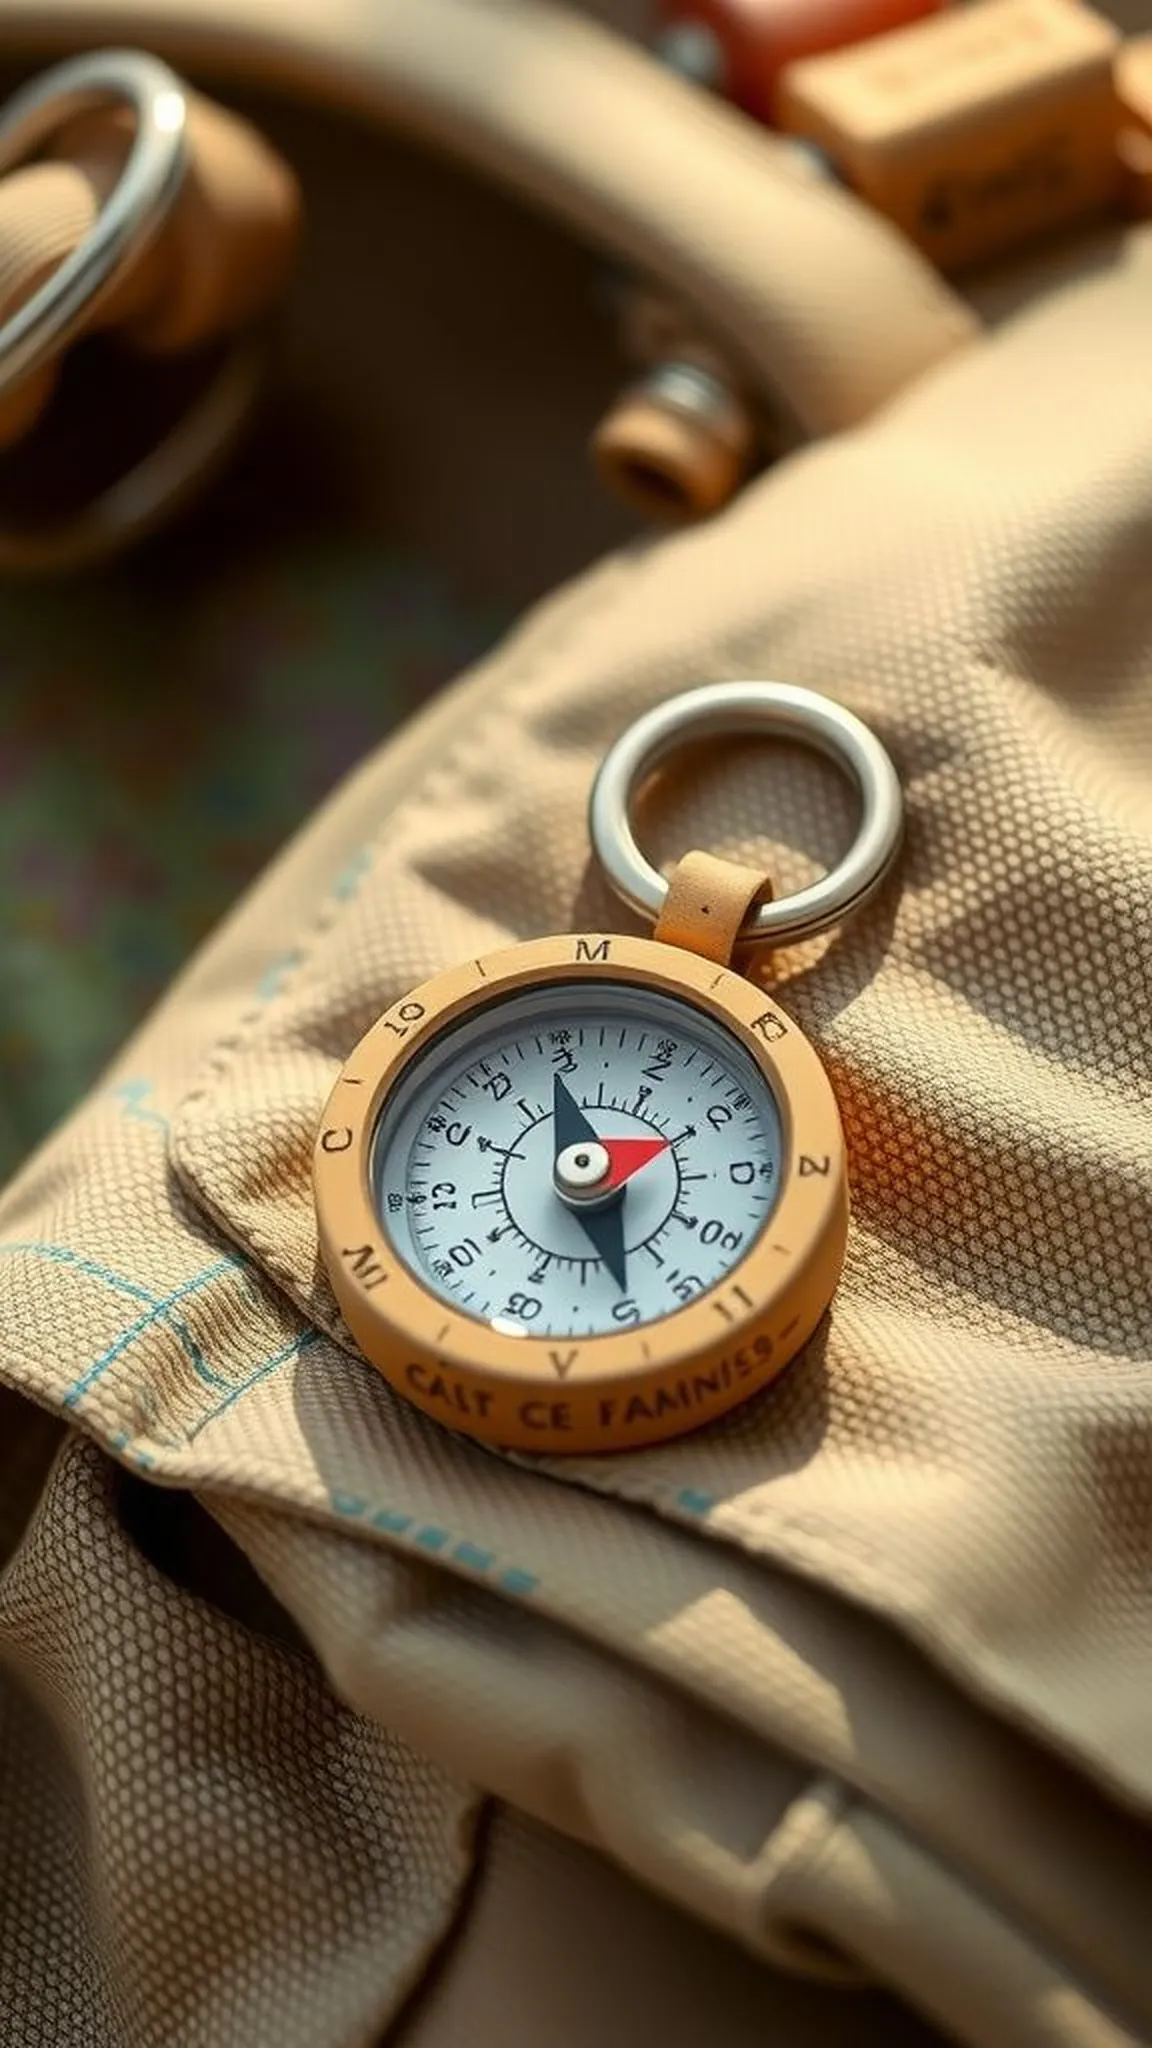
The cork had a dry, slightly springy feel and took to a tiny drilled hole like a tiny button. The compass face sat flush and had a glossy sheen that caught sunlight, while the metal keyring added a cool contrast. Holding the keychain, the compass needle wavered before settling and the whole piece felt like a tiny navigational charm.
The smell of cork was faintly organic, and the compact size meant it rode comfortably on a pack strap without jangling too much. It felt reassuring to have a basic bearing at hand.
📋 How to Make This ▶
- Drill a centered shallow hole into a wine cork to fit the compass depth.
- Press a small compass into the hole and secure with a waterproof adhesive, wiping excess clean.
- Insert a split ring through a drilled top hole and attach to keys or gear for easy access.
⚠️ Avoid: A frequent beginner mistake is inserting the compass too shallowly, which can allow it to rotate or fall out during use.
🔄 Try Also: Paint the cork with waterproof sealant for durability, add a small bead for color, or make a set with different compass styles.
🛒 Products & Materials ▶
📌 “Tiny cork compass keychain keeps a simple bearing handy while packing light.”
• • •
Waterproof match tin emergency kit for the pack
⏱️ 20 min · 🟢 Beginner
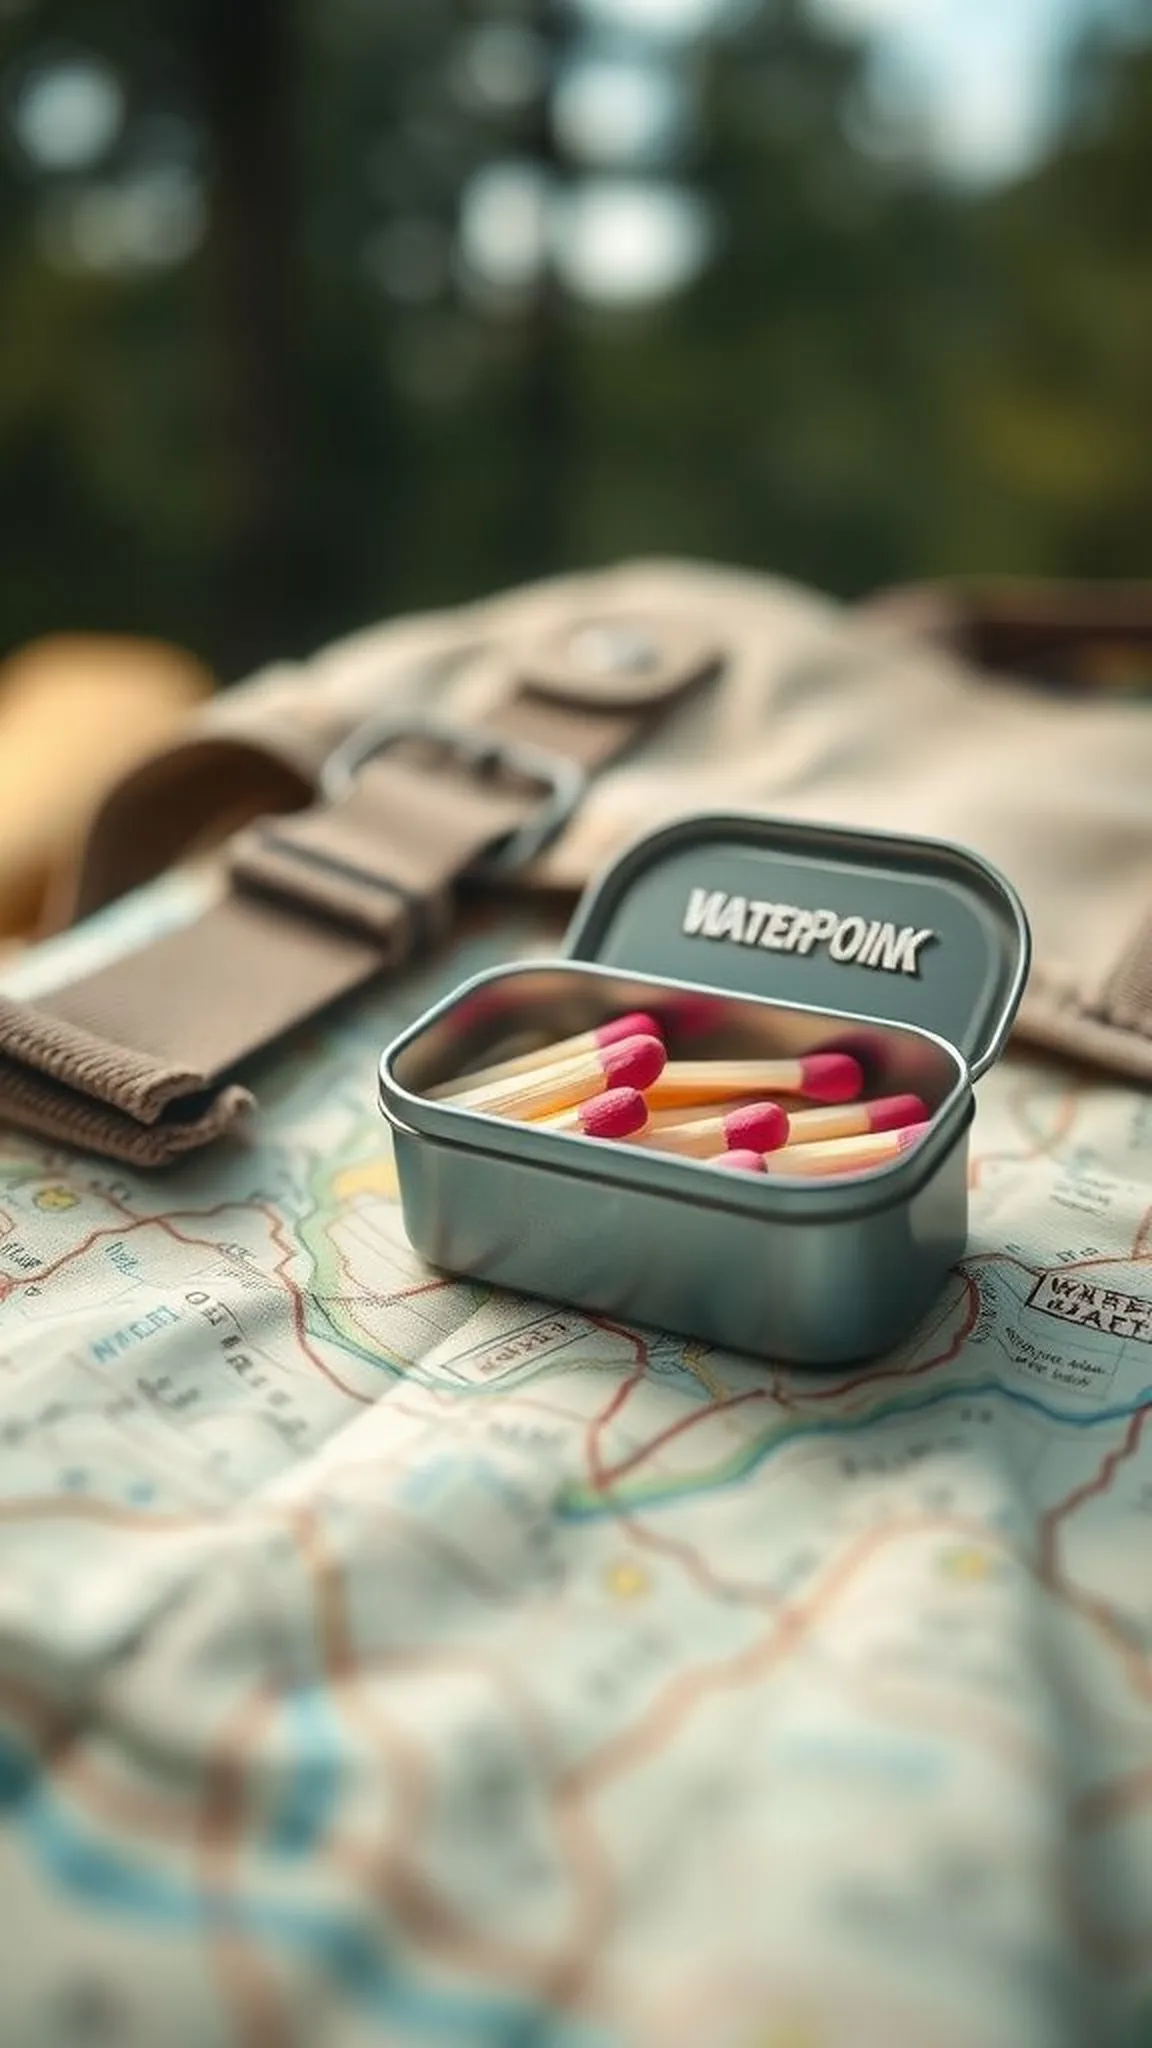
The small tin felt solid and cool in hand, a tidy rectangle that slipped easily into a inner pocket. Inside, the smell of waterproofed matches was faintly smoky and reassuring. The arrangement of matches, a tiny striker strip, and a bit of tinder made the kit feel compact and purposeful.
The metal lid closed with a muted click that promised dryness inside, and the tin’s edges had a slight patina from handling. Tucked near other essentials, it conveyed preparedness without bulk, a quiet comfort on the trail.
📋 How to Make This ▶
- Choose a small metal tin and line the interior with waterproof material for extra protection.
- Place waterproof matches, a striker strip, and a small bundle of tinder inside the tin, arranging for easy access.
- Seal the tin and label it clearly before stashing in an inside pack pocket for emergencies.
⚠️ Avoid: A frequent beginner mistake is placing the kit in an exposed pocket where impact can pop the lid, risking moisture or spillage.
🔄 Try Also: Add a tiny compass or mini whistle for multi-functionality, include a firesteel instead of matches, or attach the tin to gear with a carabiner.
🛒 Products & Materials ▶
📌 “Slim waterproof match tin keeps emergency fire-starting gear compact and protected.”
