
As an Amazon Associate I earn from qualifying purchases.
Upcycled glass bottle crafts turn empty bottles into charming home pieces, and upcycled glass bottle crafts can become painted vases, glowing pendant lights, whimsical terrariums, or rustic garden torches. These upcycled glass bottle crafts bring color, texture, and gentle light to shelves and outdoor nooks. Simple materials make upcycled glass bottle crafts approachable for weekend projects, while upcycled glass bottle crafts also make thoughtful gifts that feel handmade and personal.
Soft ombré painted bottle vases for shelves
⏱️ 1 hour · 🟢 Beginner
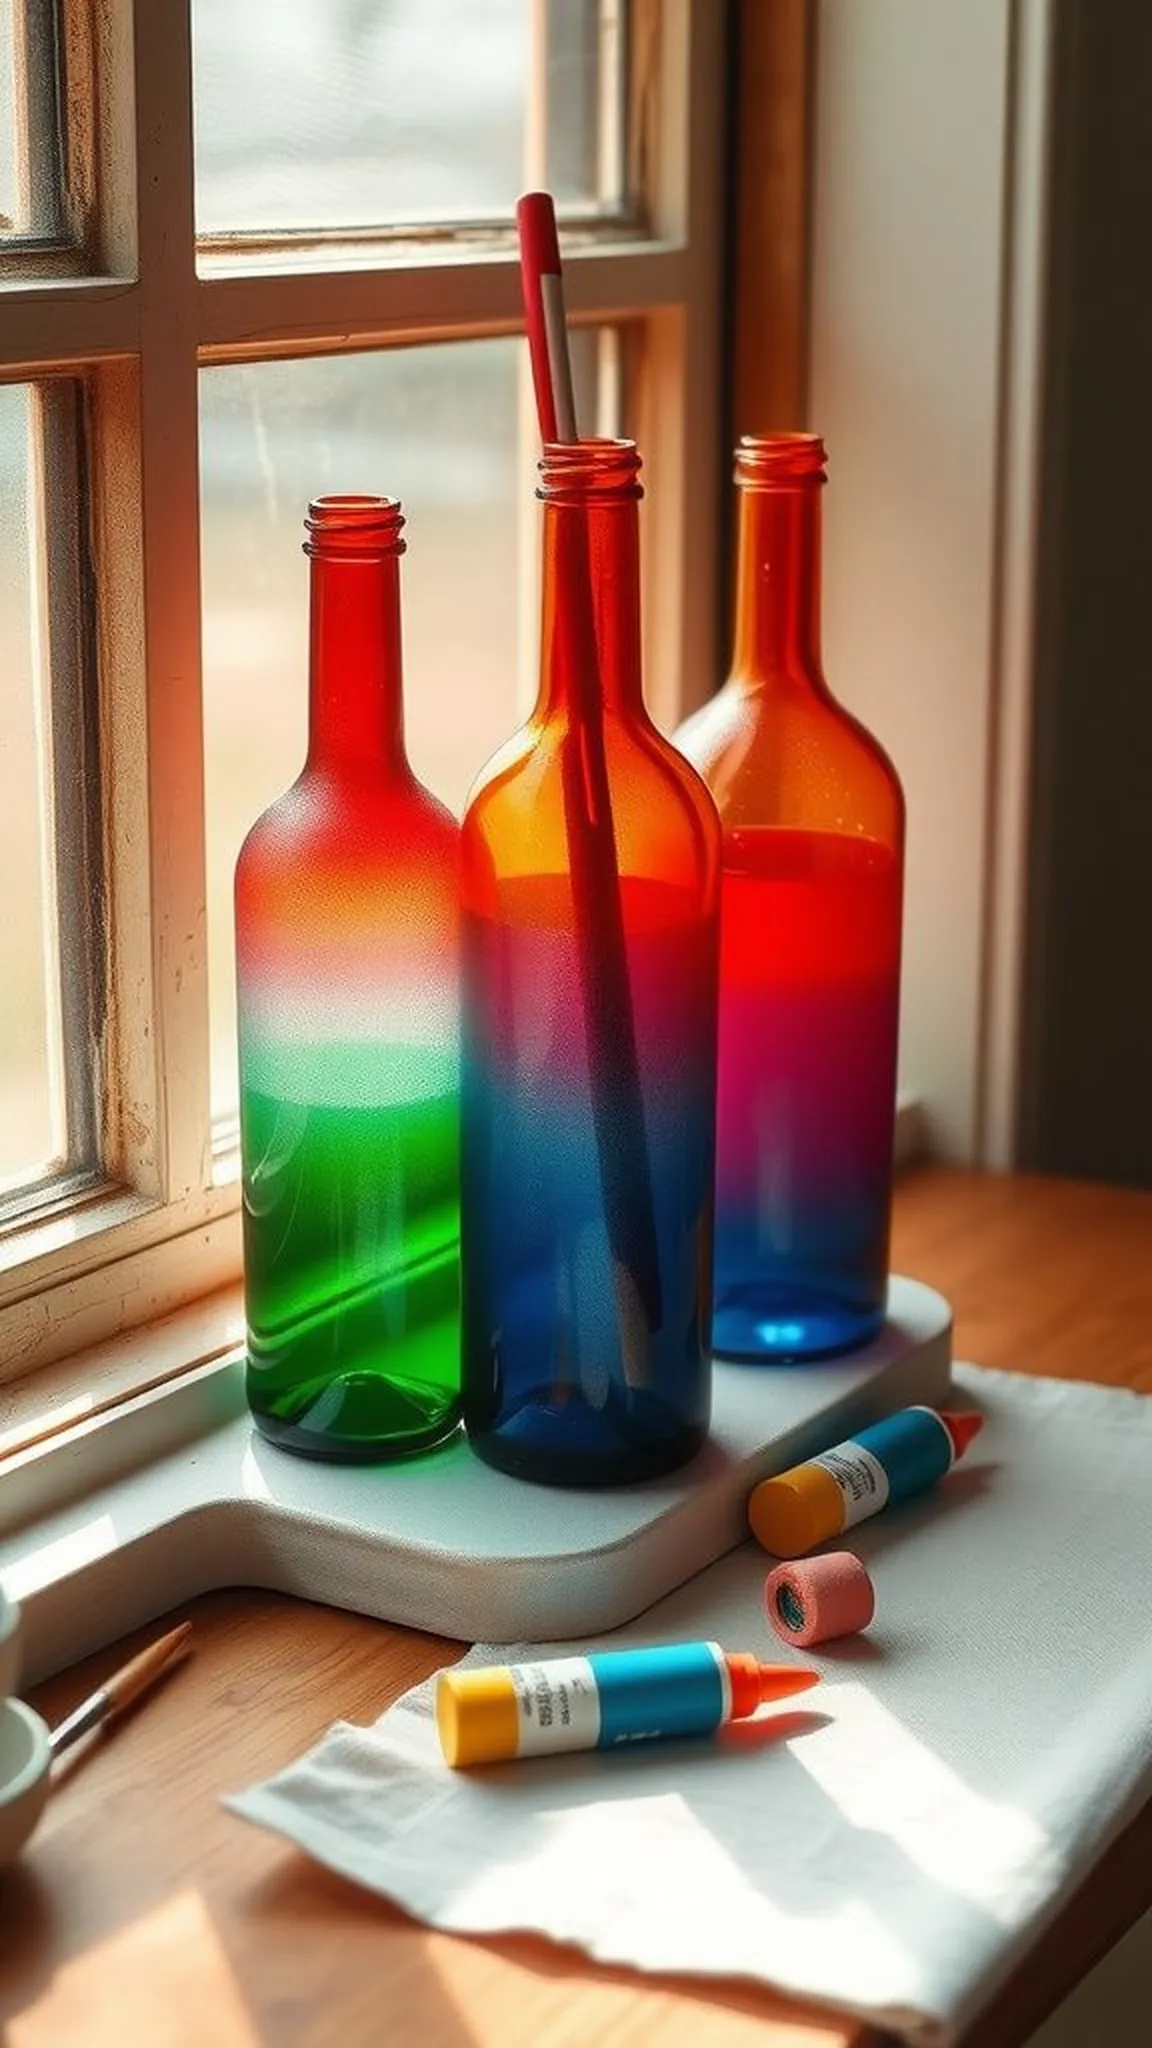
There is a quiet joy in holding a glass bottle that has shifted from clear to color, the ombré blending catching the light in a way that feels like stained glass without the fuss. The smooth glass gives a cool, slippery counterpoint to the matte paint finish, and the little ridges at the neck throw tiny highlights when sunlight slips past. Seeing three bottles lined on a windowsill, towels under them, and drips of paint pooling into interesting rings brings a casual, studio-at-home vibe that hints at summer bouquets and lazy afternoons.
📋 How to Make This ▶
- Clean empty glass bottle and remove labels and residue for a smooth painting surface.
- Prime bottle lightly with frosted spray if a softer finish is desired and let dry fully.
- Layer acrylic paint from darkest to lightest with sponges for gradual blending.
- Seal painted surface with a clear matte spray for durability and a uniform finish.
⚠️ Avoid: A frequent beginner mistake is overloading the brush or sponge which causes visible drips and pooling of paint on the glass. Allowing each paint layer to dry fully prevents smeared transitions.
🔄 Try Also: Try metallic tones with a satin finish for evening table accents, or frosted translucent paint for subtle, diffused light when paired with small bouquets.
🛒 Products & Materials ▶
📌 “Charming ombré bottle vases that brighten any windowsill.”
• • •
Converted bottle pendant light with warm bulb
⏱️ 2 hours · 🟠 Intermediate
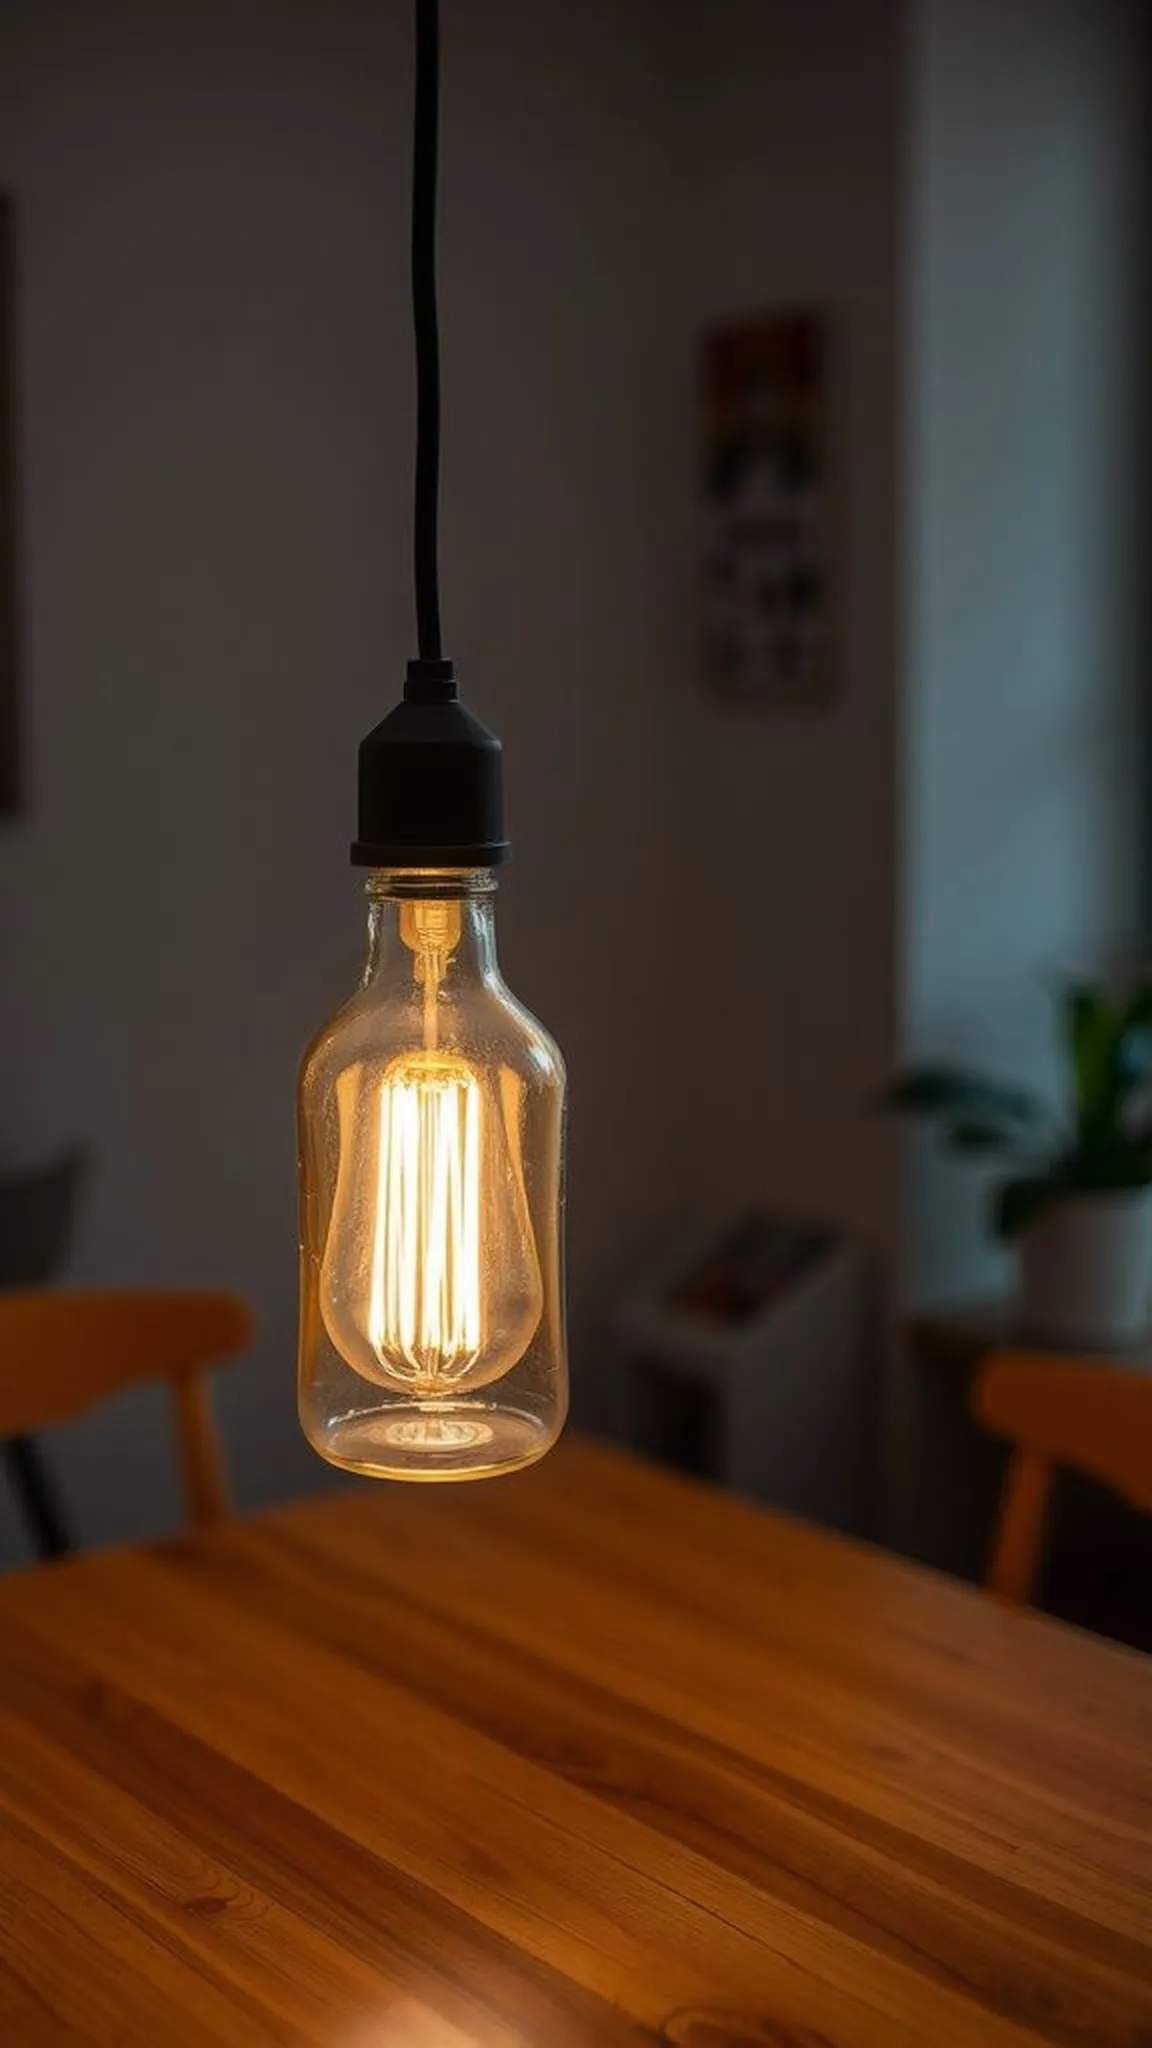
Watching a clear bottle become a pendant light gives the room an intimate shift; the hollow glass catches the filament glow and throws warm reflections across a table surface. The metal of the socket adds a tactile contrast with the cool transparency of the glass, and the cord hangs with a relaxed line that feels intentionally casual. There is a hint of workshop pride in the small imperfections where the bottle meets the lamp socket, an honest, hand-finished look that reads like thoughtful lighting rather than a store purchase.
📋 How to Make This ▶
- Select a clean glass bottle with the base intact and remove any labels and adhesive residue.
- Fit a pendant lamp kit socket through the bottle opening and secure according to kit instructions.
- Install a low-heat LED filament bulb and test the pendant for stable wiring and balanced hanging.
- Adjust cord length and hang above a dining table or reading nook at desired height.
⚠️ Avoid: A frequent error is choosing a bulb that gives off too much heat which causes discomfort and potential safety issues. Checking bulb wattage and socket ratings prevents overheating.
🔄 Try Also: Cluster three varied-height bottle pendants for an eclectic chandelier, or frost the lower half of the bottle for diffused light and a softer glow.
🛒 Products & Materials ▶
Items Used
- clear glass wine bottle (empty)
- pendant light socket kit with cord
- LED filament bulb
📌 “DIY bottle pendant light that warms any corner with soft glow.”
• • •
Windowsill herb planters made from necks of bottles
⏱️ 45 min · 🟢 Beginner
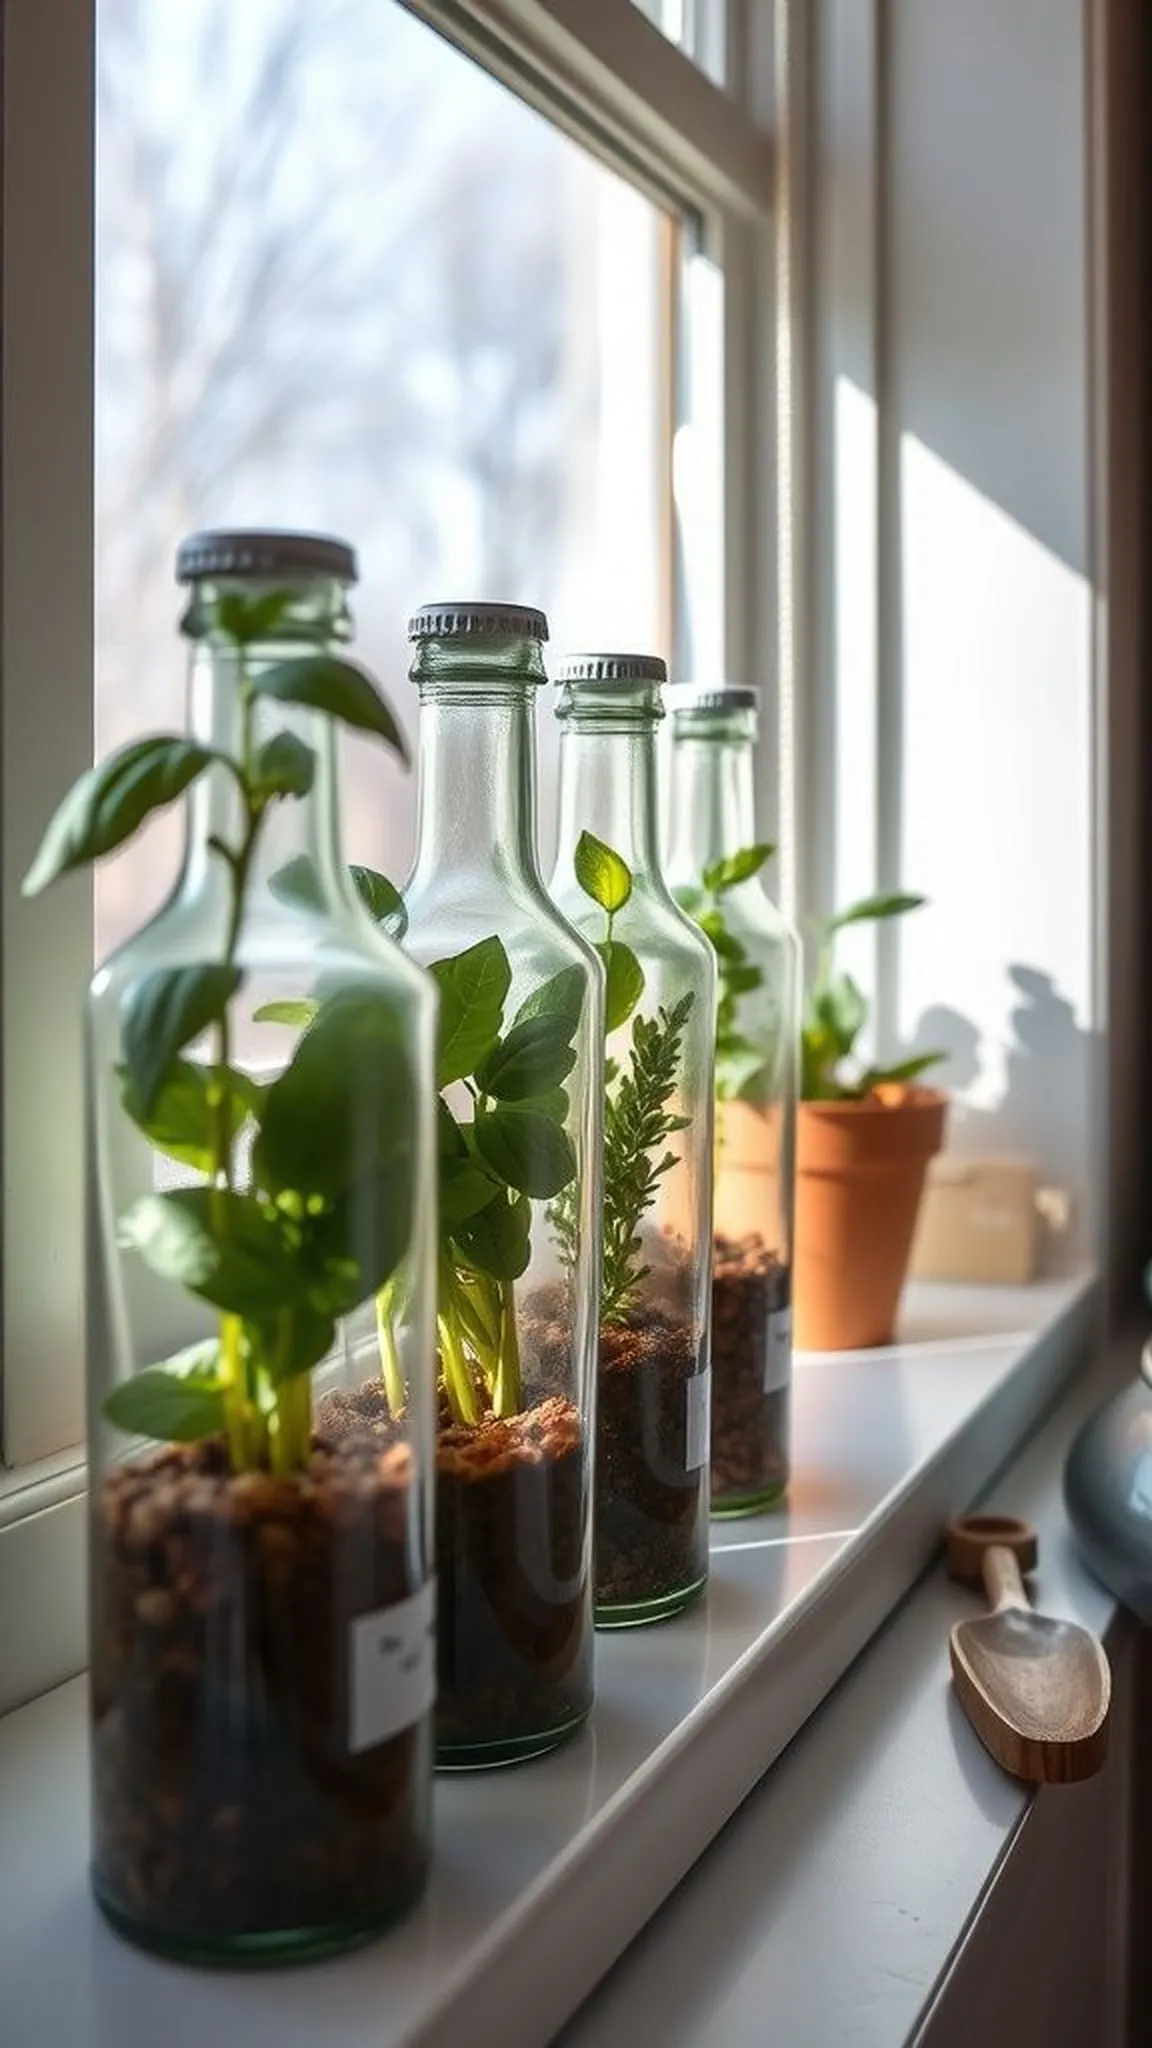
Those skinny bottle neck planters feel like tiny urban gardens arrayed along a sunny sill. The glass brings a cool shine against the green leaves, and the soil line visible through the glass offers a little glimpse of plant life progress. When herbs unfurl their scent on a warm morning, the combination of citrusy basil or sharp mint with sun-warmed glass feels quietly luxurious.
The bottles sit like a small army of patients, each one promising future snips for cooking and tea.
📋 How to Make This ▶
- Clean short-necked glass bottles and create drainage by layering small pebbles in the base.
- Fill with potting mix appropriate for herbs and nestle a small herb plug into each bottle.
- Water sparingly and place the bottles on a bright windowsill with indirect sun.
- Rotate bottles occasionally for even light exposure and snip leaves as herbs grow.
⚠️ Avoid: A frequent mistake is overwatering in narrow bottles which leads to soggy roots and slow growth. Light watering and good drainage media keep plants healthy.
🔄 Try Also: Group bottles by herb type for themed cooking corners, or paint bottle tops for a decorative two-tone planter look.
🛒 Products & Materials ▶
📌 “Tiny herbal windowsill planters made from recycled bottle necks.”
• • •
Save time and printer ink with 50+ printable templates and step-by-step instructions in one ad-free guide.

Just $19.99 — lifetime access
Cut bottle floating candle centerpiece for dinner
⏱️ 2-3 hours · 🔴 Advanced
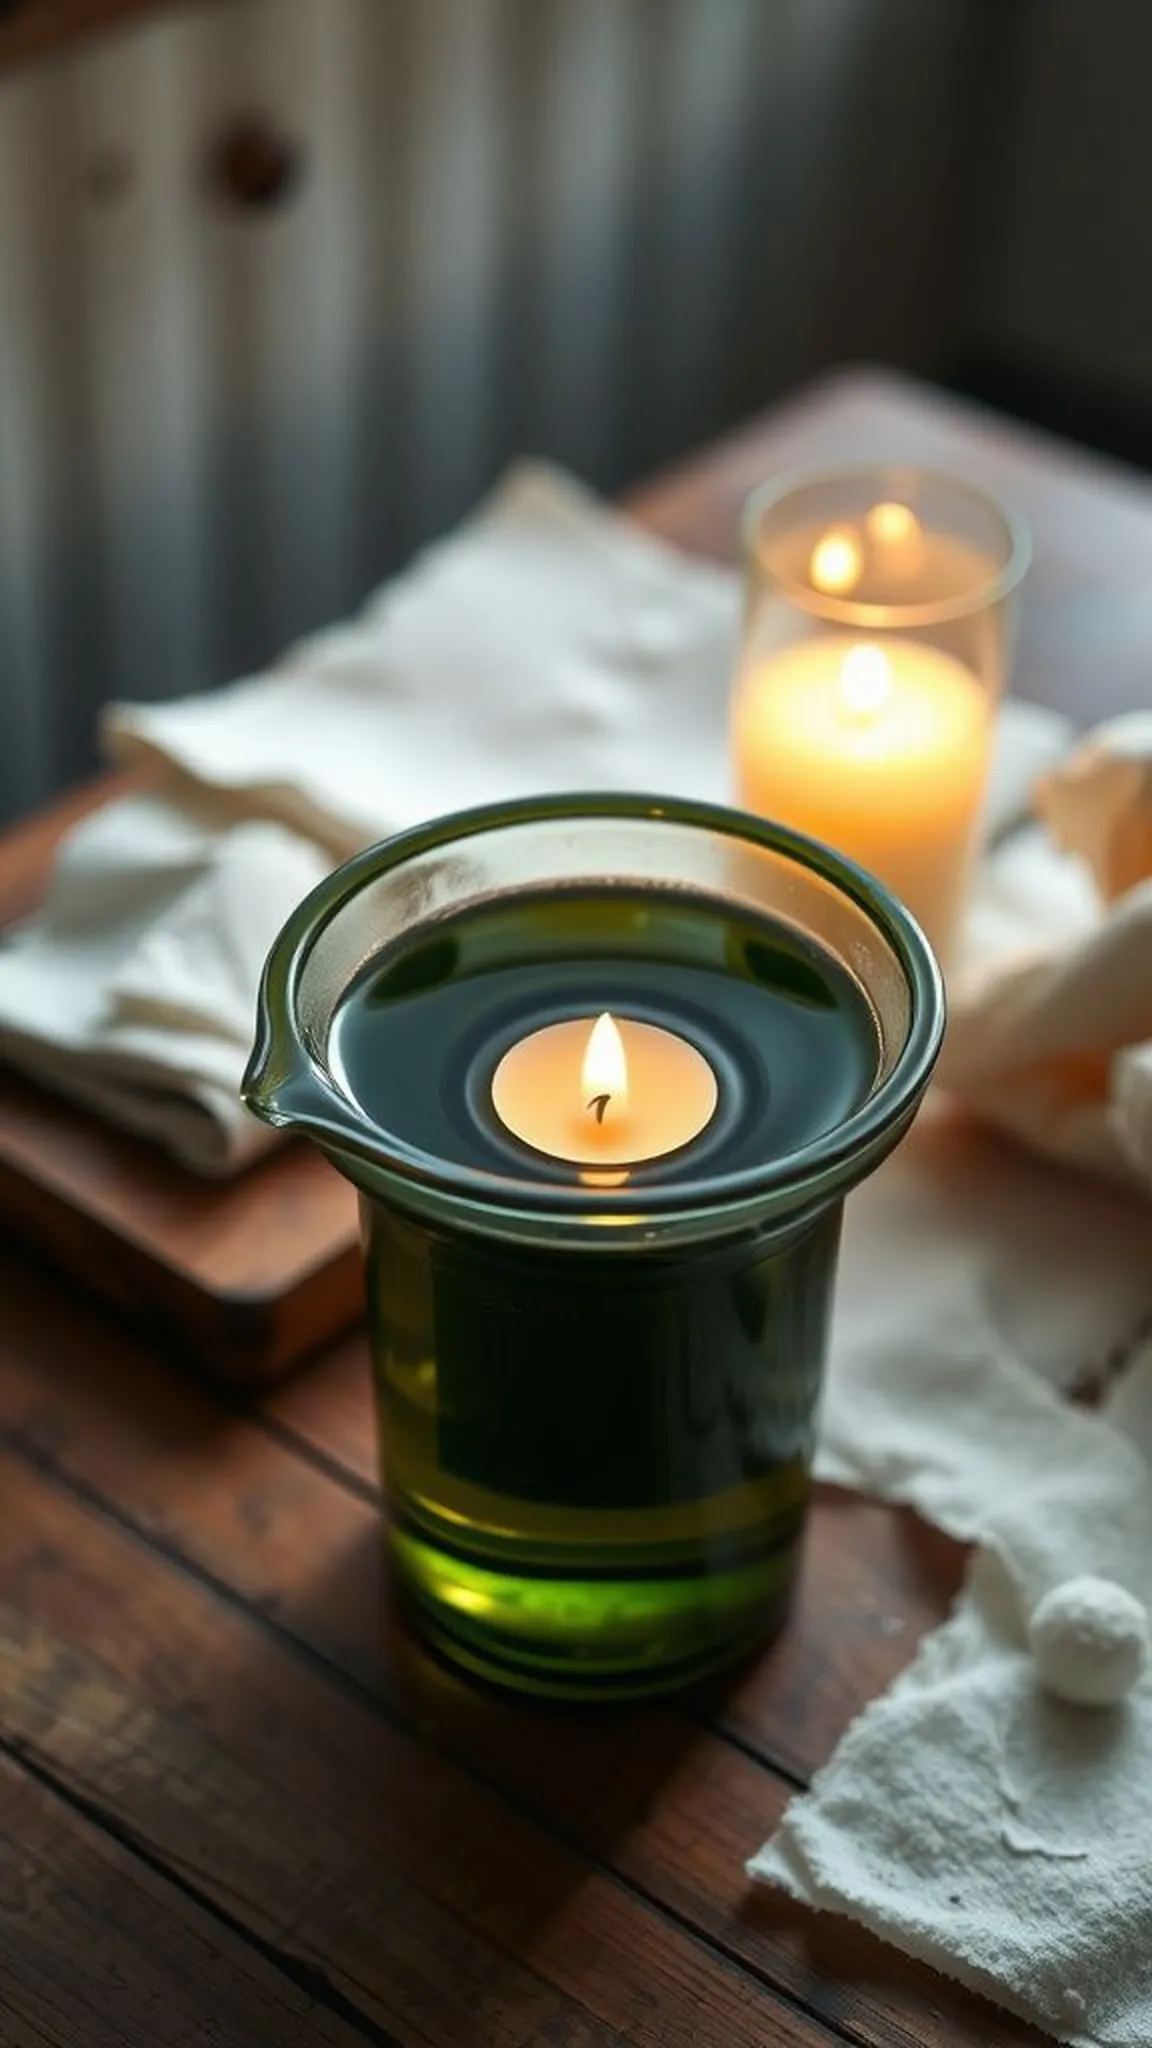
A bottle transformed into a floating candle holder has a soft, molten edge where the glass was opened, the water line mirroring candlelight like a private pond. The tactile sensation of the rim and the way the flame trembles inside the curved glass gives the centerpiece a calm, meditative energy. When placed in the middle of a table, the glass amplifies reflections from nearby plates and napkins, and the steady, contained flame feels both decorative and quietly ceremonial in a friendly dinner setting.
📋 How to Make This ▶
- Score and separate the bottle to create a clean rim using a glass cutting method suitable for bottles.
- Smooth the cut edge with progressively finer sandpaper until edges are dull and safe to handle.
- Fill the hollow base with water and set a floating candle into the water for a soft centerpiece glow.
- Place on a heat-resistant surface and monitor candle while lit for safety.
⚠️ Avoid: A frequent error is leaving a rough, sharp edge after cutting which risks chips or injury. Thorough sanding and inspection of the rim avoids accidents.
🔄 Try Also: Tint the interior with a watercolor wash for colored light, or float small flower heads alongside the candle for a botanical touch.
🛒 Products & Materials ▶
📌 “Elegant floating candle centerpieces made from upcycled bottles.”
• • •
Stylish soap dispenser from a recycled bottle
⏱️ 30 min · 🟢 Beginner
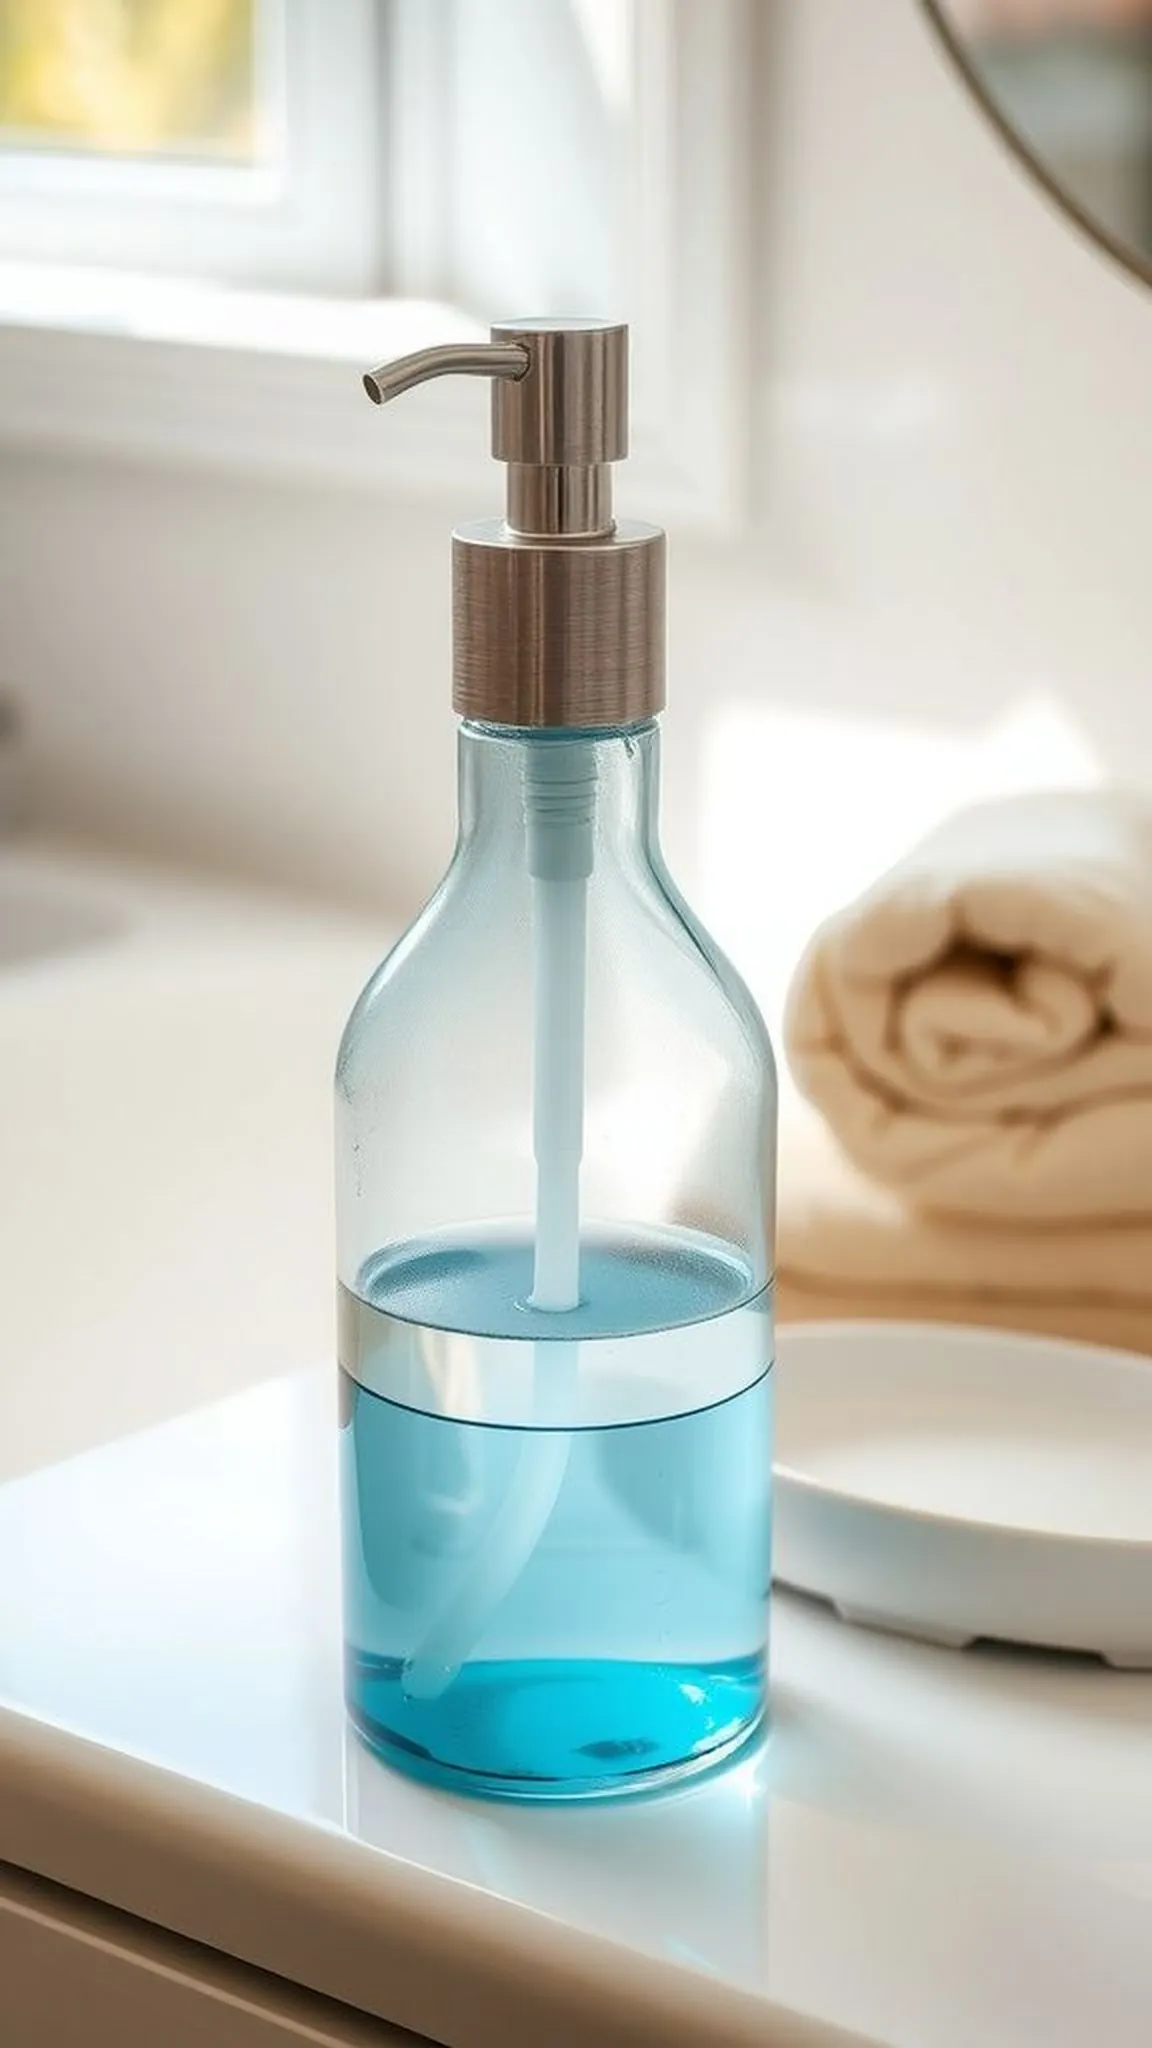
A familiar bottle reborn as a soap dispenser offers small, daily satisfaction with every pump. The weight of the glass feels reassuring in hand and the pump mechanism adds a practical, slightly industrial edge. Watching thick soap glide through the neck into a palm has an oddly pleasant rhythm, and a simple label or tied twine gives the piece a homemade store-bought charm.
Placed by a sink, the recycled bottle brings a tidy, curated look to an otherwise functional corner.
📋 How to Make This ▶
- Select a bottle with a neck compatible with a pump dispenser and remove any remaining label residue.
- Insert a pump dispenser that fits the bottle opening and secure until snug.
- Fill with liquid soap and prime the pump by pressing until soap dispenses smoothly.
- Add a small decorative tag or label if desired for a personalized touch.
⚠️ Avoid: A frequent hiccup is picking a pump with the wrong thread size which causes wobbling or leaking. Checking neck measurements prevents mismatched fittings.
🔄 Try Also: Use amber bottles for hand lotion to hide thick soaps, or add essential oils to clear soap for a scented sink display.
🛒 Products & Materials ▶
Items Used
- glass bottle with standard neck
- pump dispenser with screw collar
- liquid hand soap refill
📌 “Simple recycled bottle soap dispenser for a polished sink setup.”
• • •
Chiming bottle wind mobile for the porch
⏱️ 1-2 hours · 🟠 Intermediate

A group of glass bottles singing in the breeze adds an unexpected musical layer to a porch. The sound is a soft, hollow chime when the glass contacts driftwood or metal, and the suspended bottles sway with the tempo of wind gusts. Colors in the glass refract and scatter sunbeams across the porch floor, and the mobile casts moving shadows that are almost hypnotic on lazy afternoons.
The whole piece feels like a slow conversation between weather and object, warm, lived-in, and pleasantly unpredictable.
📋 How to Make This ▶
- Gather assorted glass bottles and select a sturdy driftwood or metal ring for the mobile frame.
- Fasten durable cord to each bottle neck at varied lengths and secure to the frame so bottles hang freely.
- Hang the mobile from an overhead hook where gentle breezes can animate the bottles.
- Check movement and adjust lengths to create pleasing rhythmic chimes without heavy collisions.
⚠️ Avoid: A frequent oversight is clustering heavy bottles too close together which causes loud bangs and potential breakage. Spacing bottles at different lengths reduces collisions.
🔄 Try Also: Include a few frosted bottles for softer light play, or mix colored glass for a stained-glass mobile effect.
🛒 Products & Materials ▶
Items Used
- assorted glass bottles (varied sizes)
- natural driftwood or metal hoop
- durable outdoor cord or twine
📌 “Delightful bottle wind mobile that jingles and reflects sunlight.”
• • •
Mini succulent planters from bottle bottoms
⏱️ 40 min · 🟢 Beginner
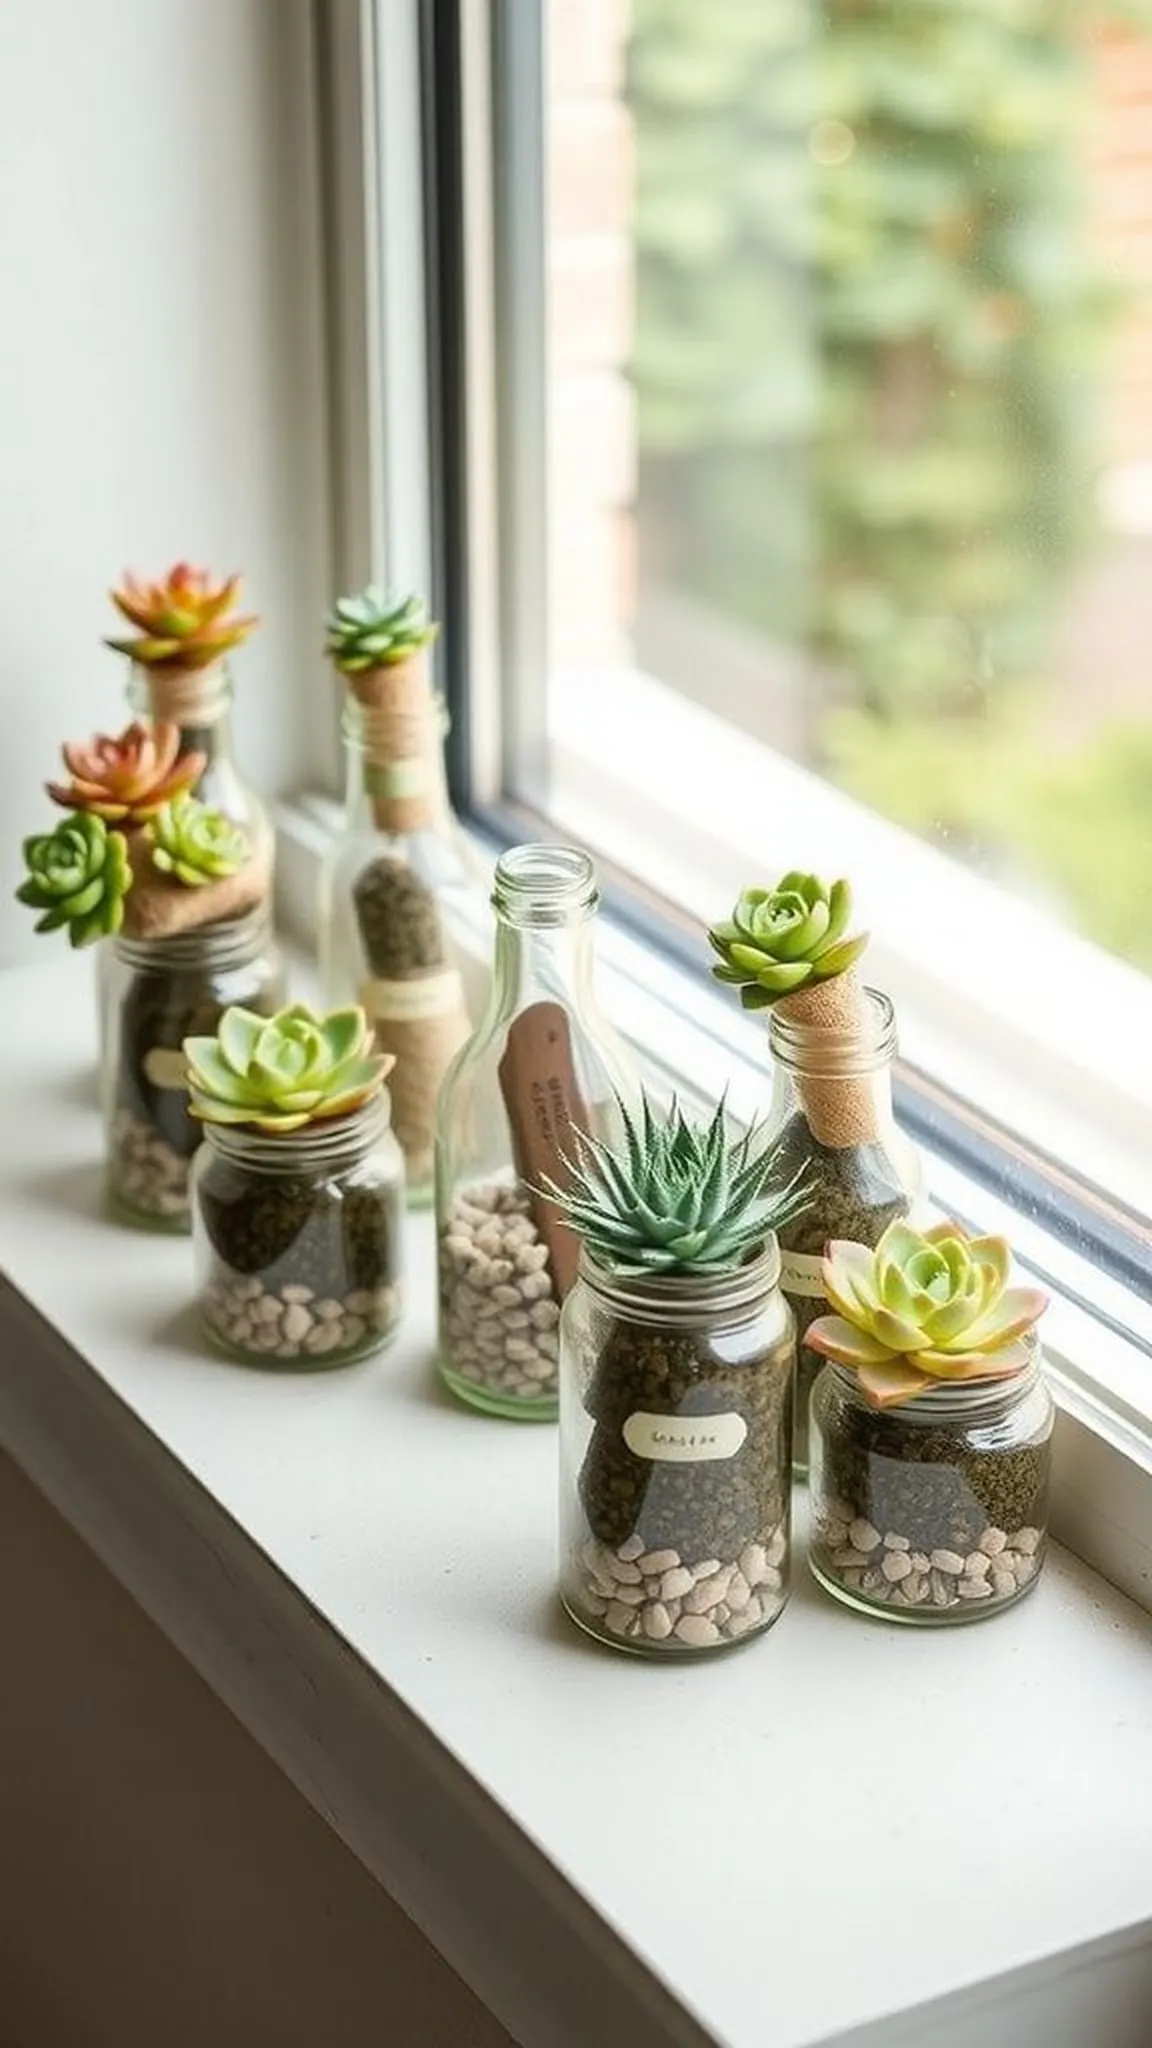
Tiny succulents in bottle-bottom planters feel like pocket-sized landscapes, each one a little island of texture. The thick glass rim frames the plant like a natural aquarium for slow-growing beauty, and the matte soil contrasts with the glossy glass interior. Touching the fleshy leaves brings a mild, comforting resistance and the arrangement nestled on a desk offers a compact, low-fuss green moment during work hours.
The whole cluster radiates calm and a pleasingly measured, handmade aesthetic.
📋 How to Make This ▶
- Create bottle-bottom planters by separating bottle bases and smoothing edges for safe handling.
- Add a thin layer of drainage pebbles, followed by a suitable succulent potting mix.
- Plant small succulent pups gently and position planters in bright, indirect light.
- Water sparingly and observe for signs of over-moisture, adjusting watering frequency accordingly.
⚠️ Avoid: A frequent issue is overwatering these small planters which causes root rot in tight glass containers. Sparse watering and good drainage choices keep succulents healthy.
🔄 Try Also: Cluster planters of different glass tints for tonal interest, or pair with tiny labeled tags for a miniature garden display.
🛒 Products & Materials ▶
📌 “Charming succulent planters made from recycled bottle bottoms.”
• • •
Twine-wrapped bottle luminaries with fairy lights
⏱️ 45 min · 🟢 Beginner
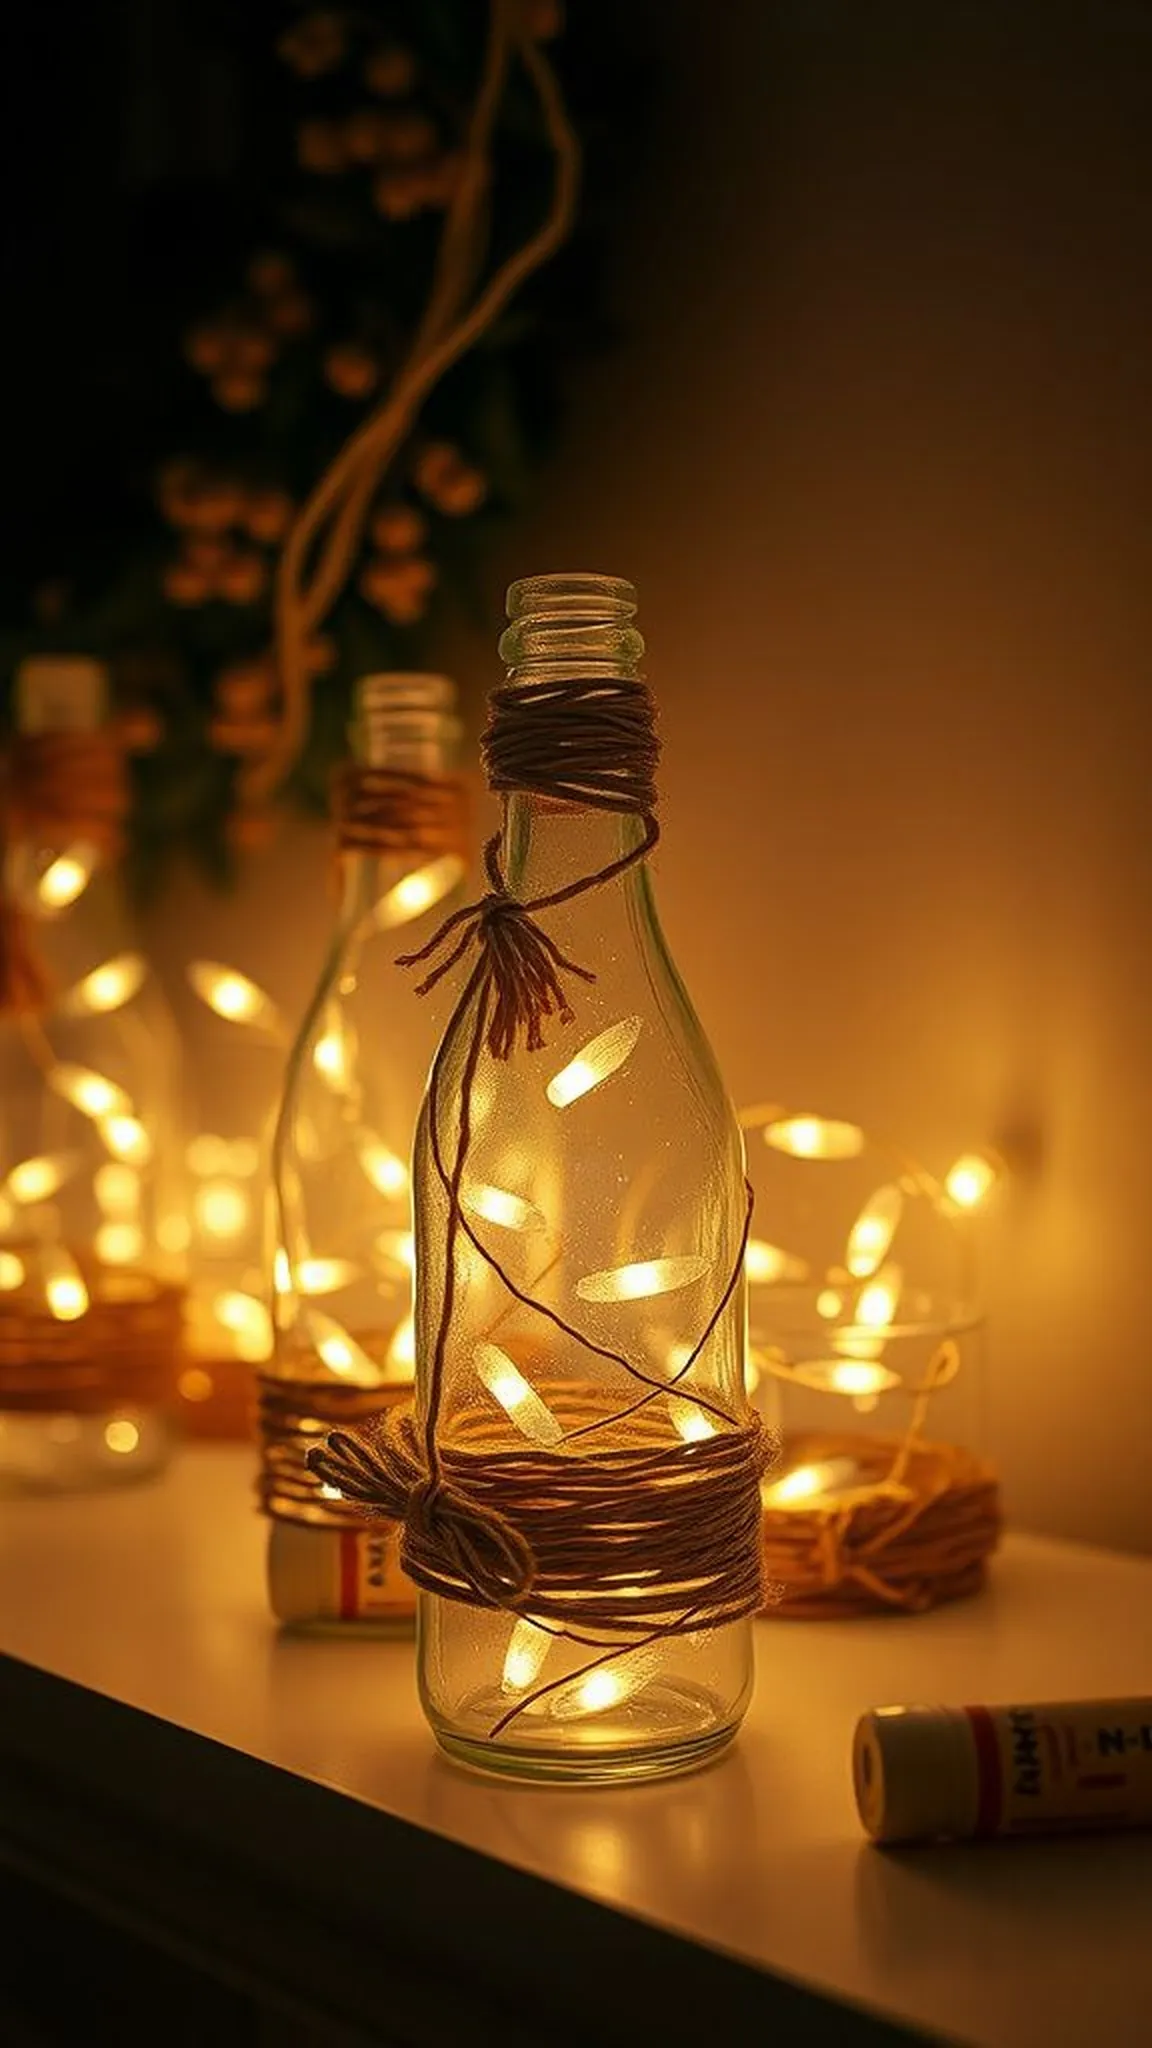
Twine wrapped around bottles softens the glass and introduces a tactile, beachy sensibility, while tiny fairy lights inside lend a warm star-like glow. The natural fibre contrasts with the smoothness of glass and the glow peeks through gaps to create pinprick highlights. Sitting on a mantel, these luminaries read like a collection of small campfires, each one a contained glow that invites conversation.
The scent of the twine and the hush of evening make the display especially cozy during late-night wind-downs.
📋 How to Make This ▶
- Prepare clean bottles and a length of natural twine for wrapping around the bottle body.
- Wrap twine snugly from base toward the neck, securing ends with a discreet knot or adhesive.
- Insert a string of battery-operated fairy lights into each bottle and hide battery pack behind the bottle.
- Arrange luminaries on a mantel or table and switch lights on for warm ambiance.
⚠️ Avoid: A frequent slip is leaving the battery pack visible which distracts from the glow; tucking it behind the bottle keeps the look tidy. Loose twine can unravel, so wrapping snugly helps maintain shape.
🔄 Try Also: Use colored twine or add small shells between wraps for a seaside mood, or alternate clear and frosted bottles for varied light diffusion.
🛒 Products & Materials ▶
Items Used
- clear glass bottle (various sizes)
- natural jute twine
- battery-operated fairy lights
📌 “Cozy twine-wrapped bottle luminaries glowing with fairy lights.”
• • •
Citronella bottle torches for backyard evenings
⏱️ 1 hour · 🟠 Intermediate
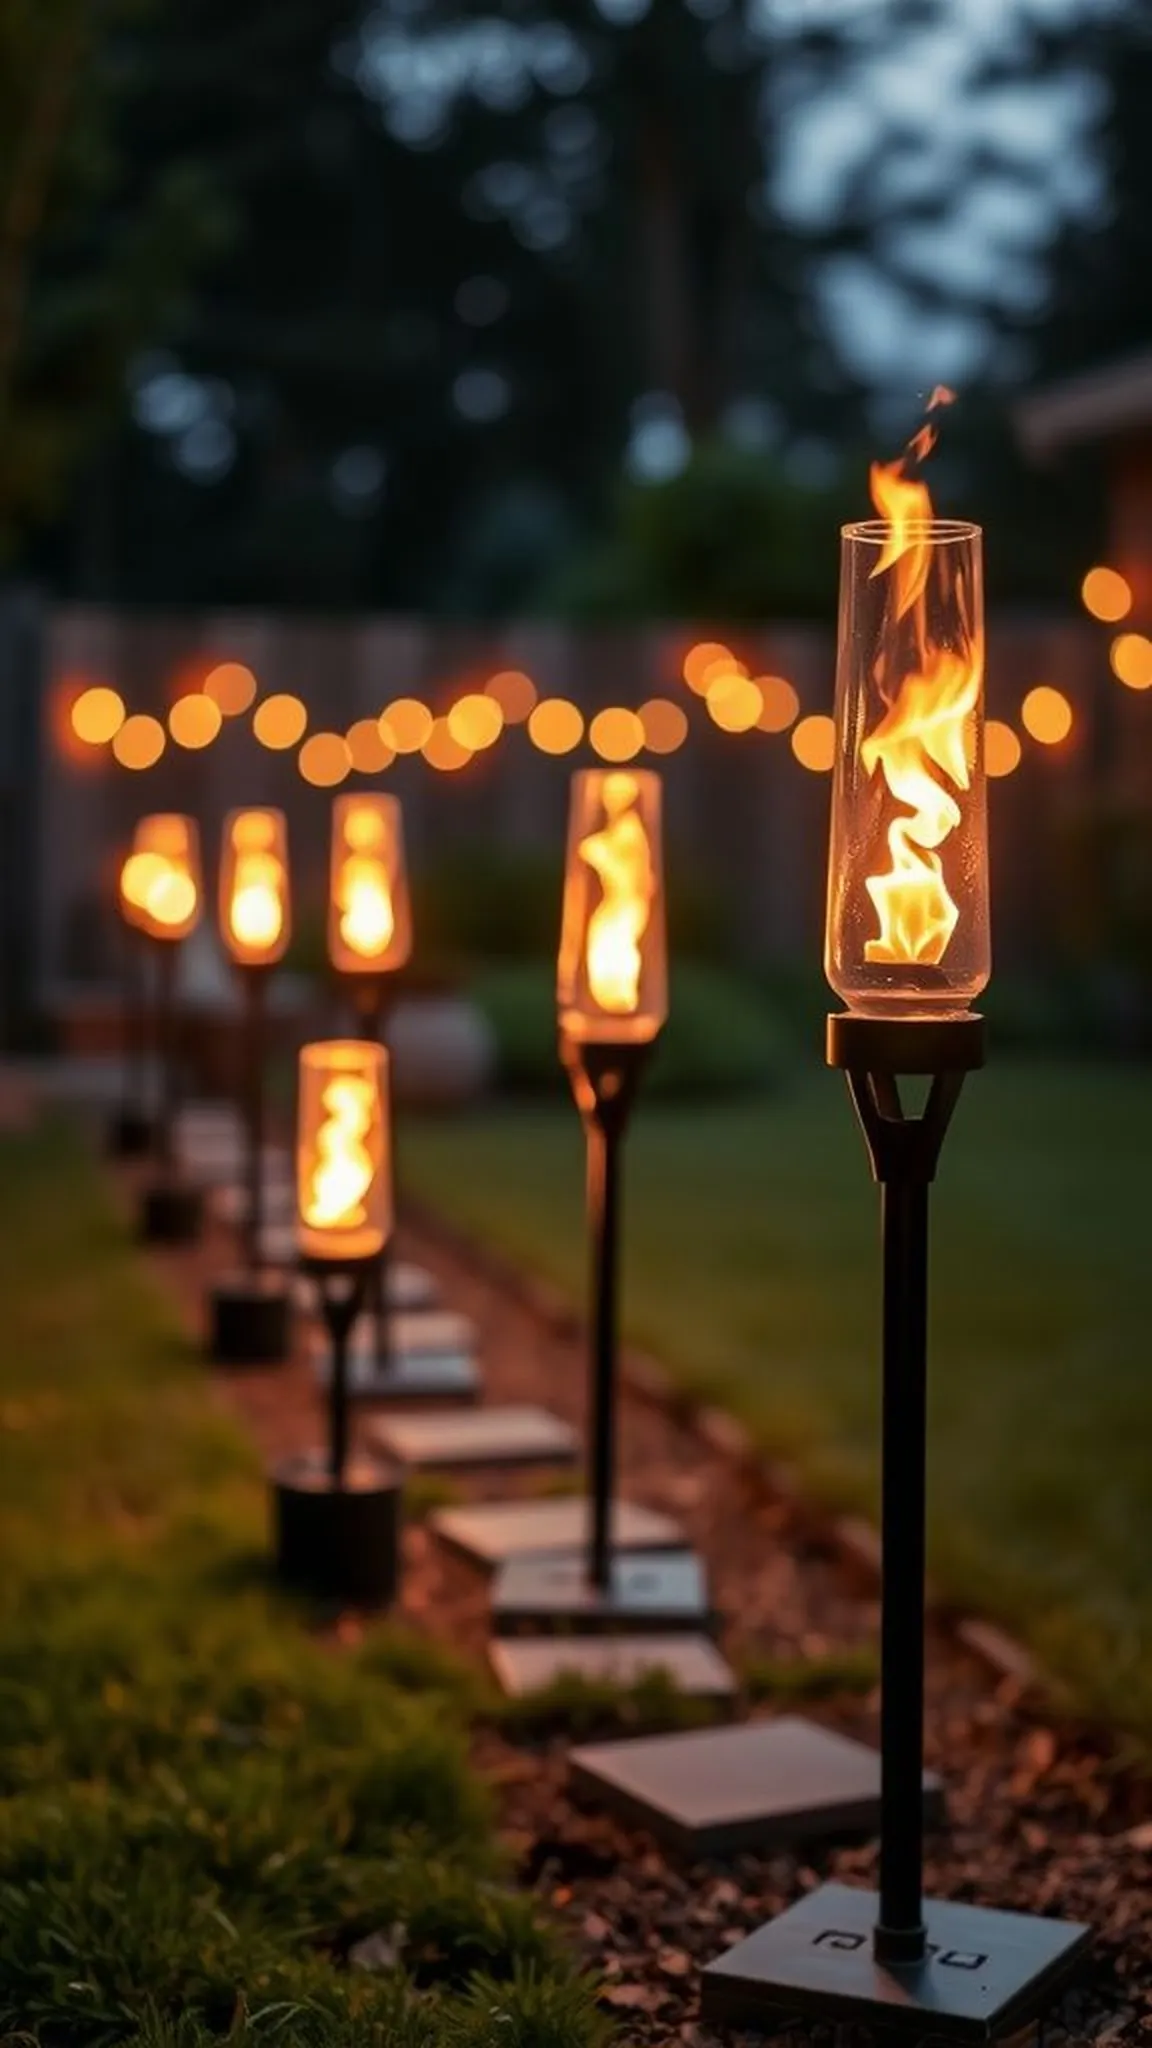
A row of glass bottle torches along a garden path adds ritual to evening hours; the flickering flame feels elemental against dark leaves and the bottle silhouette creates a primitive lantern shape. The amber flame reflects inside the bottle neck producing a concentrated point of light that reads as both functional and atmospheric. There is a tangible sense of ceremony when lighting a torch before a backyard dinner, a small act that cues relaxation and hospitality for guests gathering beneath the stars.
📋 How to Make This ▶
- Select sturdy glass bottles and fitted wick assemblies designed for bottle torch use.
- Pour citronella or lamp oil into the bottle reservoir leaving space at the top.
- Insert wick assembly, allow wick to soak briefly, then light to ensure steady burn.
- Place torches in secure holders along pathways or around seating areas, monitoring flames while lit.
⚠️ Avoid: A frequent oversight is overfilling the bottle which increases spill risk; leaving air space prevents overflow. Placing torches too close to plants or fabrics risks catching embers, so spacing matters.
🔄 Try Also: Use amber glass bottles for warmer flame color, or cluster torches in groups of three for a decorative focal point.
🛒 Products & Materials ▶
Items Used
- sturdy glass bottle for torch
- bottle wick torch kit
- citronella lamp oil
📌 “Upcycled bottle torches that set a mellow backyard mood.”
• • •
Mosaic glass bottle votives with colorful shards
⏱️ 2-3 hours · 🔴 Advanced
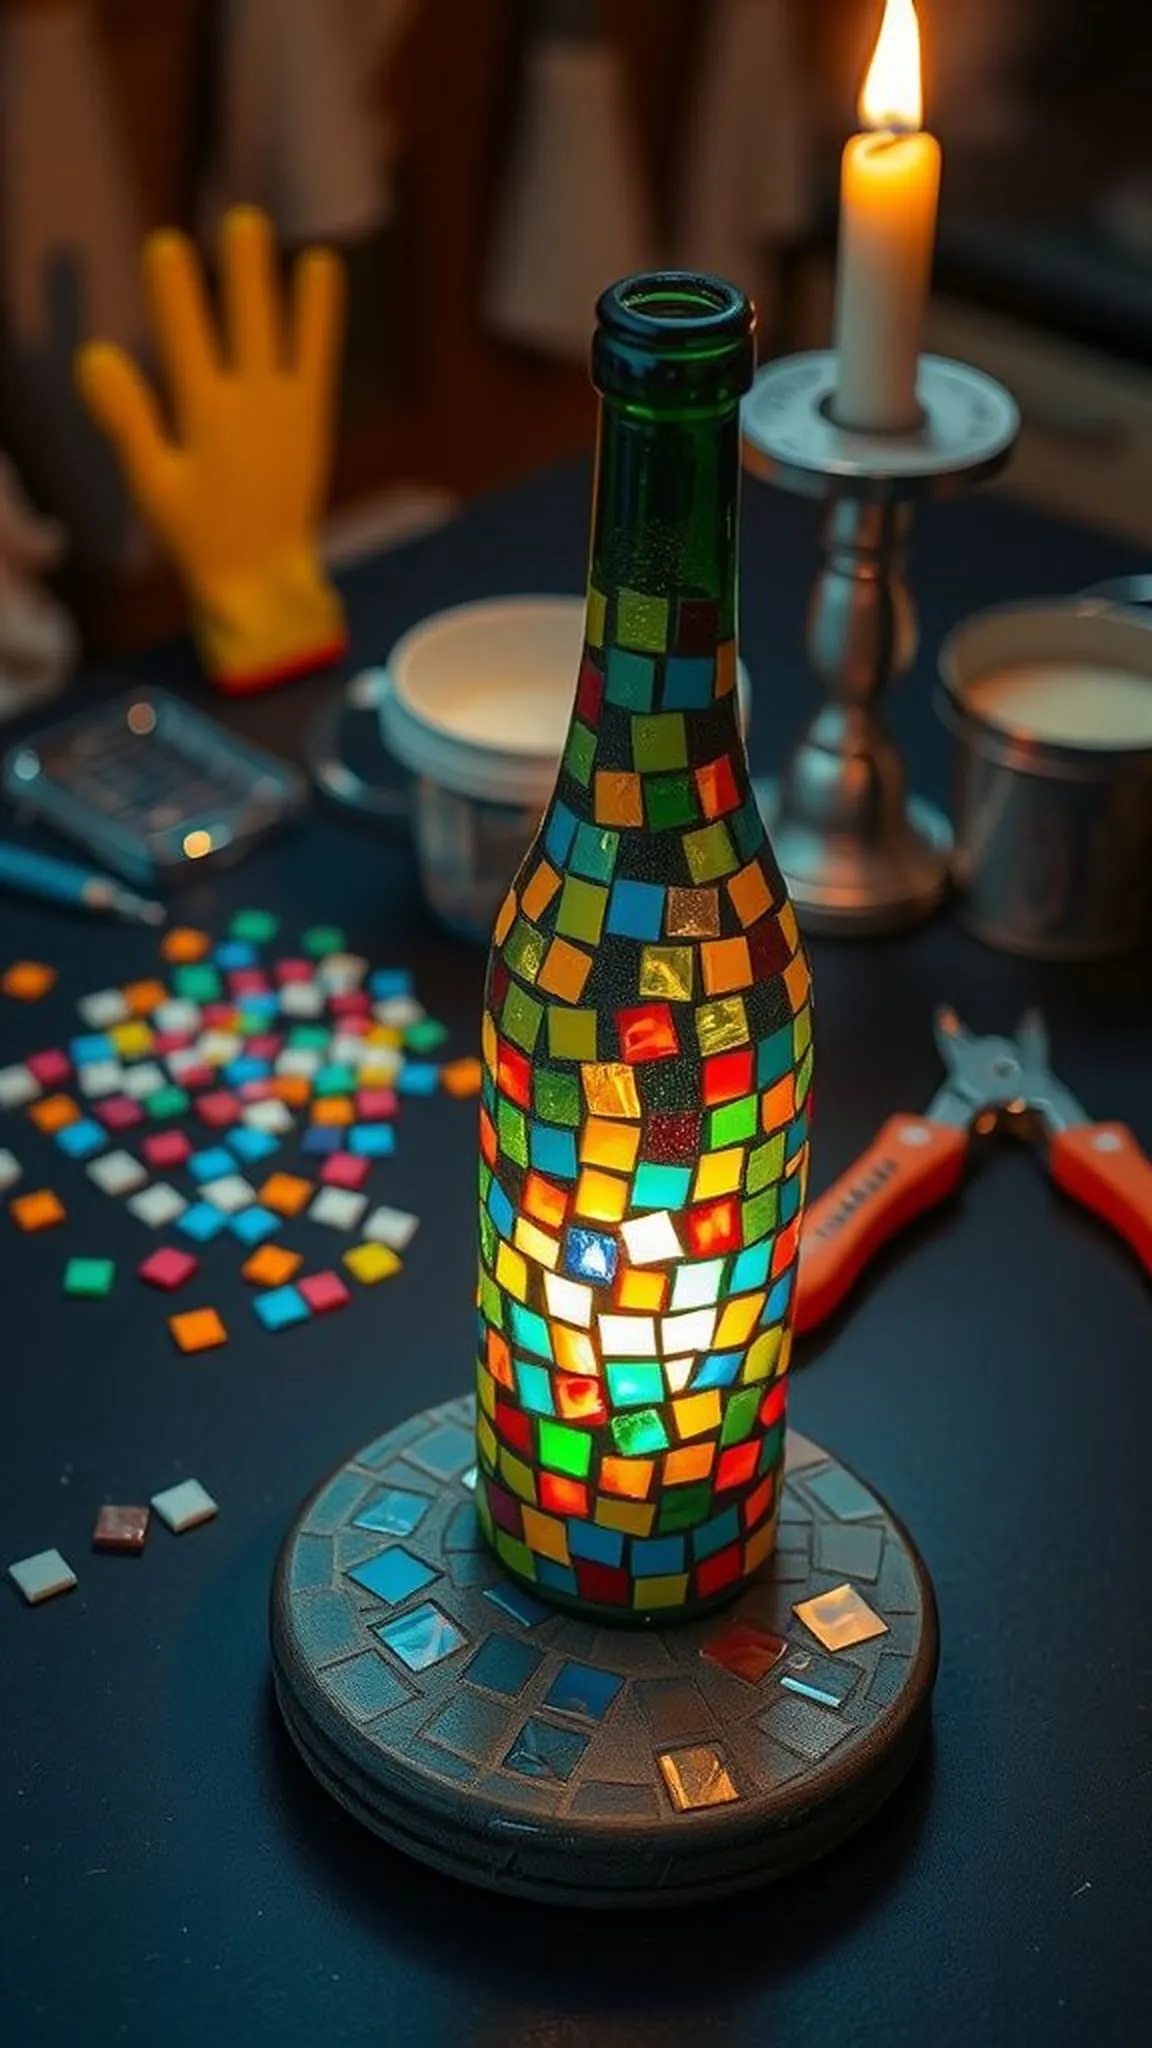
A bottle clothed in mosaic shards becomes a jewel that catches and refracts light into playful fragments. The tactile surface is rough and beautiful, the tiny glass pieces creating a tactile map of color and texture that begs to be turned in hand. Sitting by candlelight, the mosaic throws kaleidoscopic patterns across nearby walls, and the weight of the layered grout gives the piece a hand-forged solidity.
The process leaves dust and small cuts of color on the workbench, a messy but satisfying souvenir of creation.
📋 How to Make This ▶
- Break colored glass into small shards using safe glass-breaking techniques and sort pieces by color and size.
- Apply mosaic adhesive to bottle and press shards into place creating a balanced pattern.
- Once adhesive cures, spread grout over the mosaic, pressing into gaps and wiping excess with a damp sponge.
- Allow grout to set fully then buff the surface for a clean, bright finish before placing a candle inside.
⚠️ Avoid: A frequent error is not wearing proper protection when handling shards, increasing risk of cuts; gloves and goggles are essential. Rushing grout curing leads to weak seams and flaking.
🔄 Try Also: Create geometric patterns for a modern look or random jewel tones for a bohemian effect; add metallic tiles for extra shimmer.
🛒 Products & Materials ▶
📌 “Vibrant mosaic bottle votives that scatter colorful candlelight.”
• • •
Bird feeder from a bottle with small perch
⏱️ 1 hour · 🟠 Intermediate
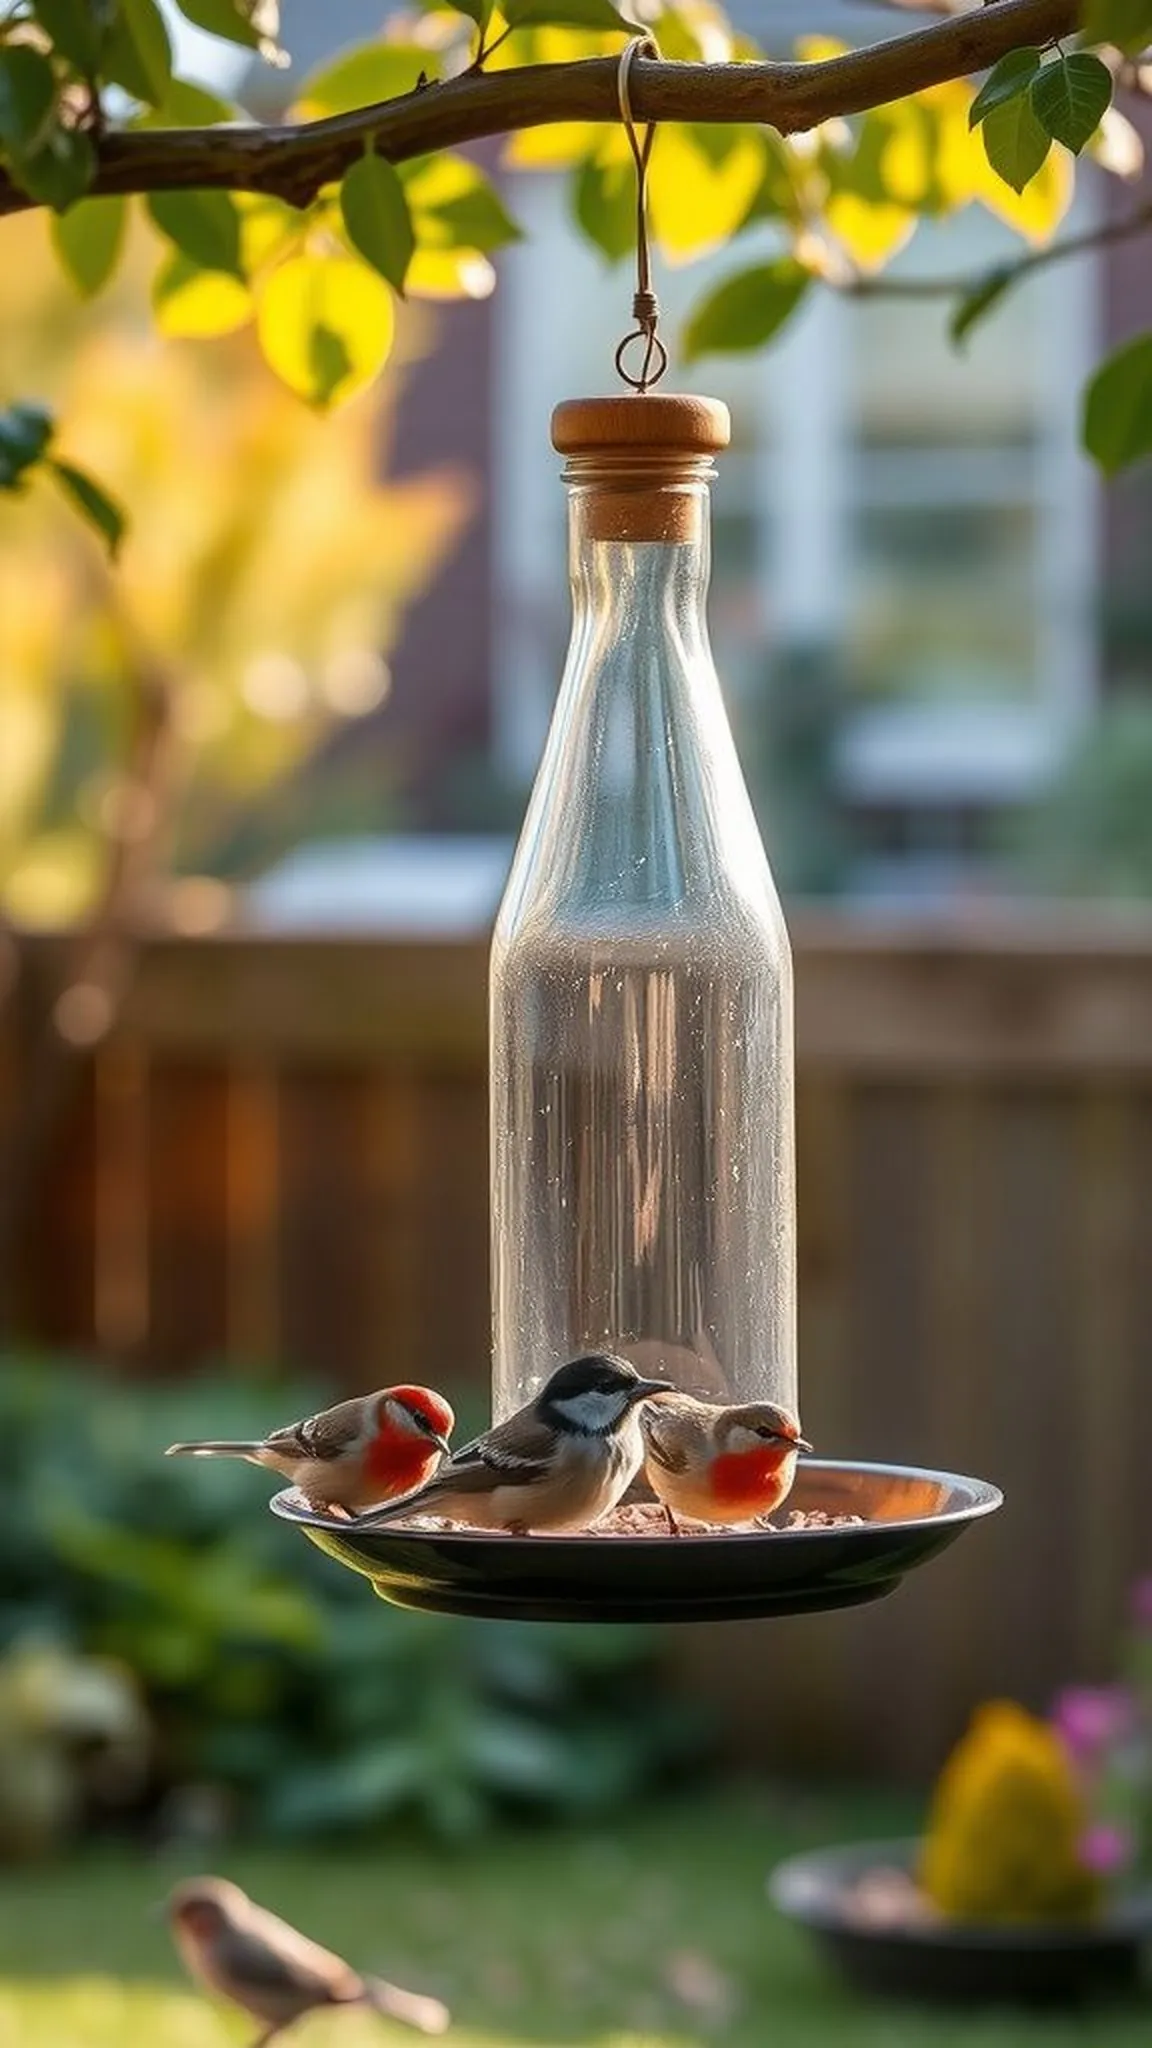
A bottle bird feeder invites feathered visitors with a soft clink as birds alight on the perch. The clear glass reservoir shows seed levels and the little scattering of seed beneath it becomes part of the garden’s quiet economy. Watching sparrows and finches consult the feeder brings a slow-clock pleasure, and the small perch offers a landing stage that feels almost theatrical.
In the early light, the bottle picks up dew and the whole setup reads as a modest, attentive gift to the neighborhood wildlife.
📋 How to Make This ▶
- Choose a sturdy glass bottle and a wooden or metal perch designed to fit through a bottle neck or feeder adapter.
- Install a feeder cap or adapter to support the perch and allow controlled seed flow.
- Fill the bottle with birdseed and hang or mount the feeder where birds feel safe from predators.
- Monitor and refill seed as needed, keeping the feeder clean to prevent mold or spoilage.
⚠️ Avoid: A frequent oversight is placing the feeder too close to shrub cover where predators can hide; an open but sheltered location works better. Using an unstable perch scares birds away.
🔄 Try Also: Add a squirrel baffle for protection or paint the bottle with outdoor-friendly paint for visual attraction.
🛒 Products & Materials ▶
Items Used
- sturdy glass bottle
- wooden perch rod
- feeder cap adapter
- bird seed mix
📌 “Simple glass bottle bird feeder with a charming little perch.”
• • •
Sealed bottle terrarium with tiny ecosystem
⏱️ 2 hours · 🔴 Advanced
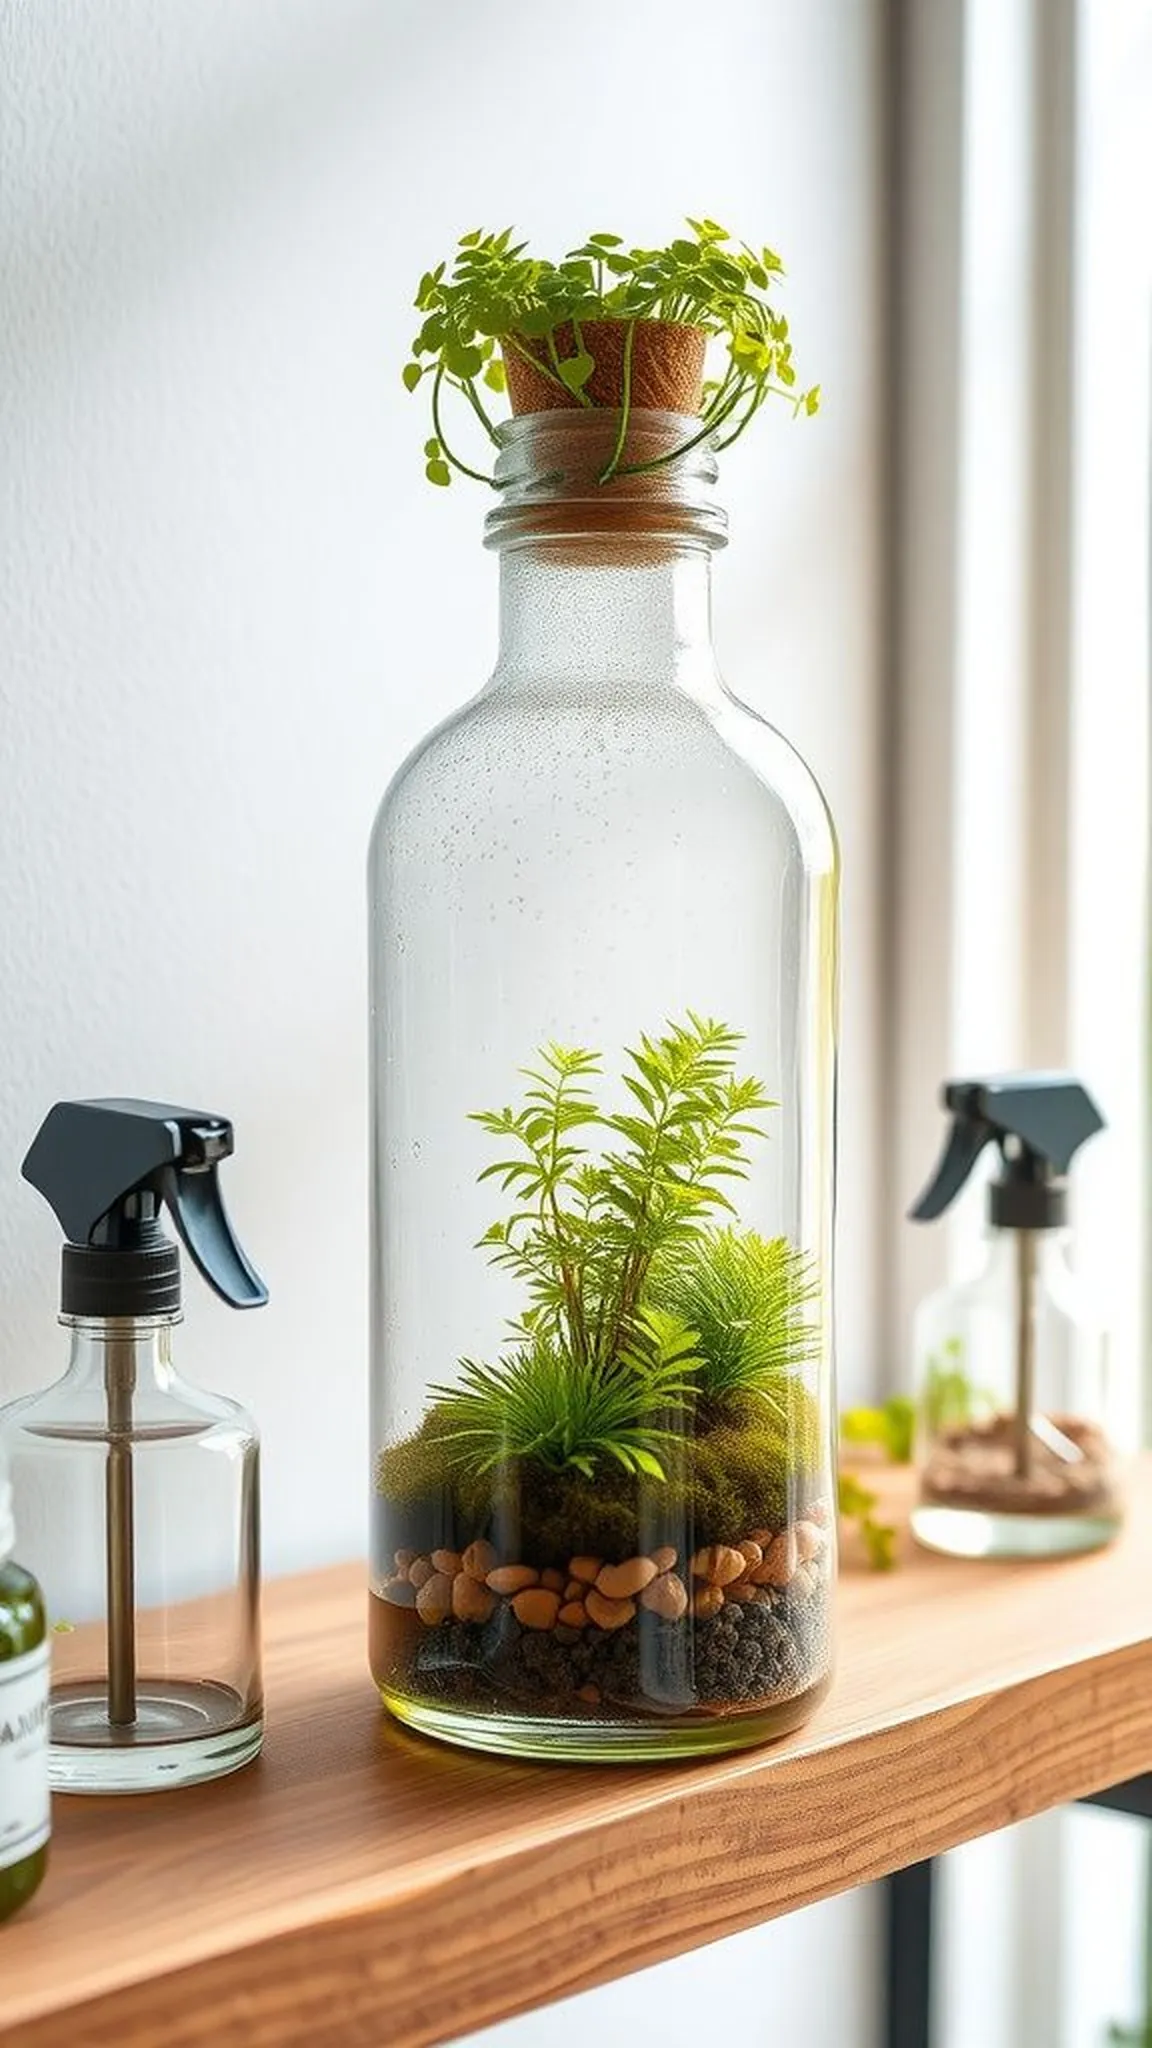
A sealed bottle terrarium feels like a miniature planet neatly contained behind glass. The moistened air inside carries the faint scent of earth and moss, and the tiny ferns and pebbles arrange into a scaled landscape that invites long looks. Watching condensation patterns develop and settle is oddly satisfying, and the cup of life inside seems both fragile and resilient.
The little sealed world requires patience and restraint, offering a quiet visual reward when sunlight filters through its glass dome.
📋 How to Make This ▶
- Clean a wide-mouthed clear bottle and add a drainage layer of pebbles or activated charcoal.
- Add a thin layer of well-draining soil suitable for terrarium plants and arrange small humidity-loving plants.
- Lightly mist the interior and seal the bottle with a cork or glass lid to create a closed environment.
- Place terrarium in bright indirect light and monitor moisture levels, opening briefly only if excess condensation persists.
⚠️ Avoid: A frequent problem is choosing plants that require dry conditions which fail in sealed moisture-rich environments; selecting mosses and ferns prevents imbalance. Overcrowding leads to poor air circulation inside the bottle.
🔄 Try Also: Create a desert-style open terrarium with succulents in a cut bottle base, or add tiny figurines for a whimsical miniature scene.
🛒 Products & Materials ▶
Items Used
- large wide-mouthed glass bottle
- activated charcoal for terrariums
- terrarium soil mix
- small humidity-loving plants
📌 “Tiny sealed bottle terrarium: a miniature, self-sustaining ecosystem.”
• • •
Cluster bottle chandelier for an entryway
⏱️ 3 hours · 🔴 Advanced
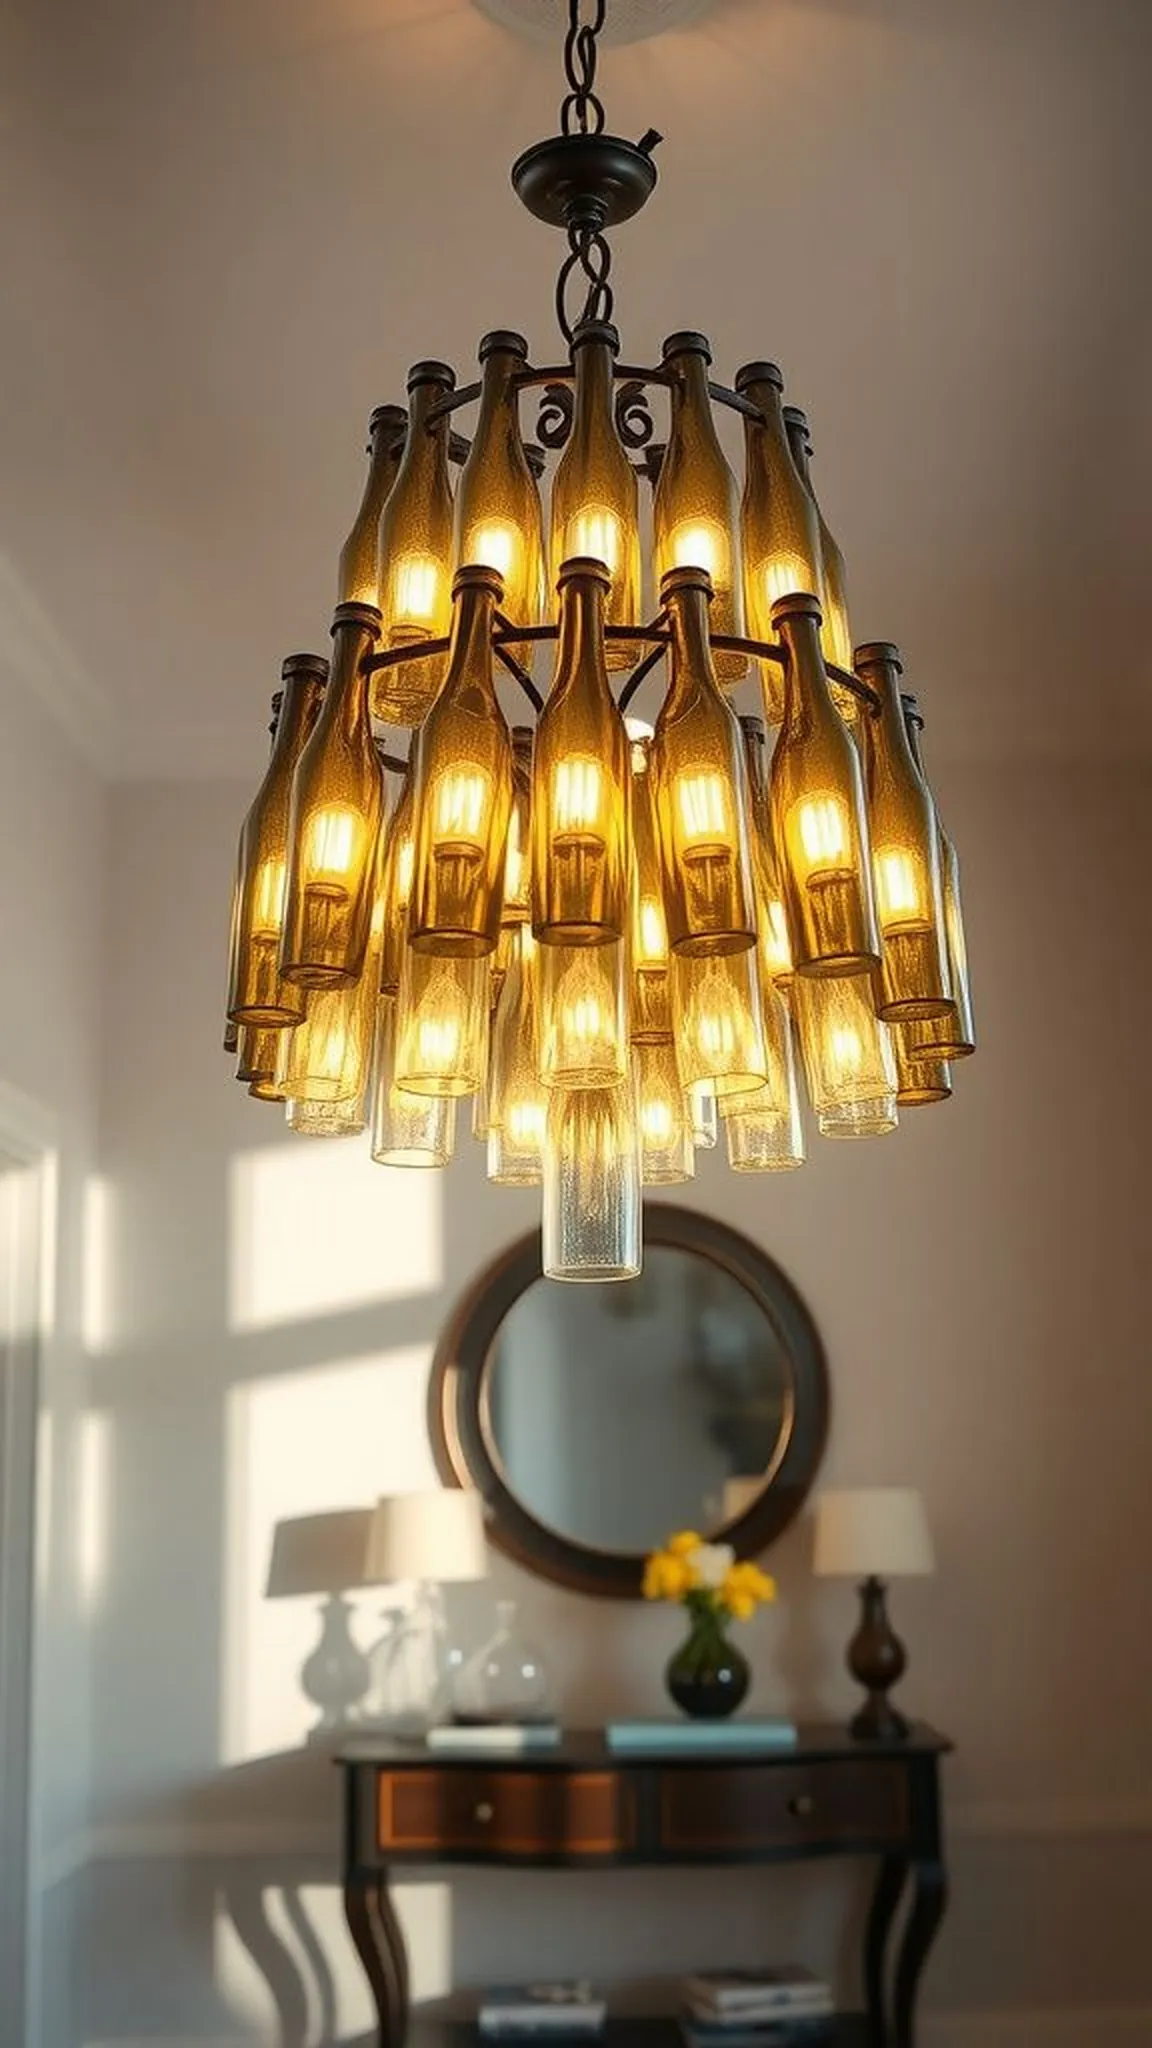
A cluster chandelier made from bottles creates a focal point that feels both industrial and romantic, the grouped glass shapes reflecting light like hanging jewels. The collective silhouette reads as a sculptural installation, and the subtle differences in bottle necks and glass thickness give visual rhythm. At night, the collection of bulbs nestled in glass casts layered shadows and warm pools of light across the foyer.
The sight of passerby heads tilted up toward the fixture is a small, satisfying proof of the piece’s presence.
📋 How to Make This ▶
- Collect uniform or complementary bottles and arrange a mounting plate with multiple pendant sockets for the cluster.
- Fit each bottle with a socket assembly and bulb, securing connections and balancing lengths for an even cluster.
- Install the chandelier to a ceiling junction box following electrical safety guidelines and secure all fixtures.
- Test lighting and adjust bottle positions for an even visual spread and safe clearance above heads.
⚠️ Avoid: A frequent mistake is underestimating fixture weight which strains ceiling anchors; confirming weight limits and proper anchors avoids sagging. Mismatched socket ratings can cause uneven brightness or overheating.
🔄 Try Also: Mix clear and amber bottles for layered warmth, or stagger heights dramatically for a sculptural effect over a stairwell.
🛒 Products & Materials ▶
📌 “Striking bottle cluster chandelier that elevates any entryway.”
• • •
Message-in-a-bottle keepsakes for memory jars
⏱️ 20 min · 🟢 Beginner
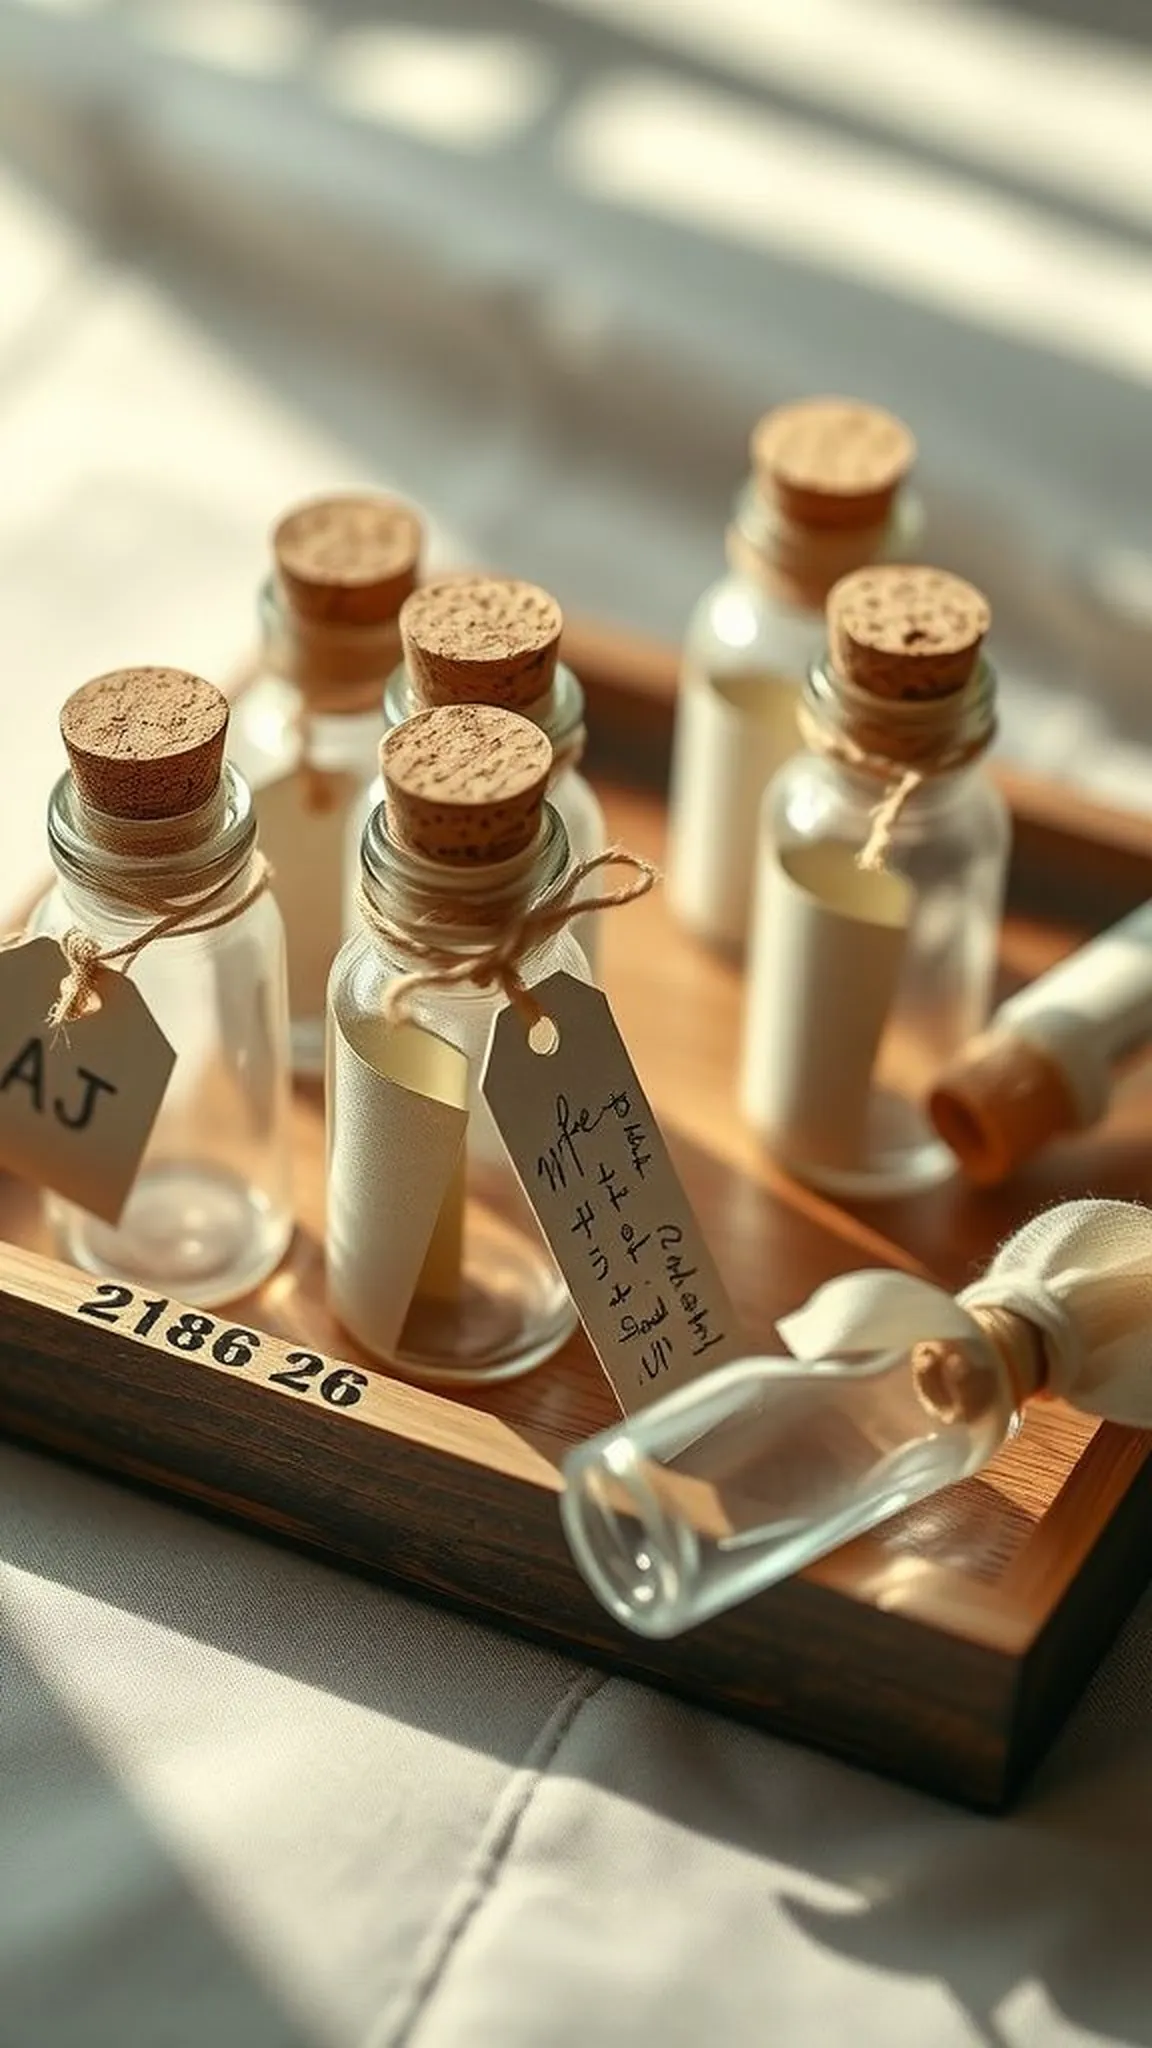
A small message folded into a bottle feels like a private time capsule, the glass sealing a memory in miniature. The texture of paper against the smooth glass and the faint smell of ink create a delicate, intimate object meant to be handled gently. Topped with a cork and perhaps a bit of ribbon, the bottle reads like a tiny treasure from a seaside walk or a holiday note, an object that gathers meaning as it sits on a shelf among photos and postcards.
📋 How to Make This ▶
- Clean a small clear bottle and select acid-free paper for writing the message.
- Fold the message tightly and insert it into the bottle, then seal with a cork stopper.
- Optionally decorate the bottle with twine or a small tag indicating date or occasion.
- Store the bottles upright in a cool, dry place or display on a shelf as keepsakes.
⚠️ Avoid: A frequent slip is using non-archival paper that discolors over time; archival paper preserves messages longer. Overstuffing the bottle makes it hard to retrieve notes later.
🔄 Try Also: Include tiny dried flowers or a small photo inside, or paint the bottle neck for a pop of color.
🛒 Products & Materials ▶
📌 “Sweet message-in-a-bottle keepsakes for tiny sentimental treasures.”
• • •
Frosted decal painted bottles for silhouette luminaries
⏱️ 1 hour · 🟠 Intermediate

Frosted decals on glass create a dreamy backdrop for silhouette images that appear like shadow puppets when lit from within. The etched-looking surface softens light and provides a beautiful contrast with darker silhouettes of botanicals or animals. When a candle or small bulb throws light through the bottle, the silhouettes become crisp highlights against the milky glass, giving a quiet, storybook quality to evening rooms.
The tactile matte finish invites fingers to trace designs while the glow remains gentle and mood-setting.
📋 How to Make This ▶
- Clean bottles and apply frosted glass spray or adhesive frosted decal to the desired area.
- Place silhouette decals or cut shapes onto the frosted area and smooth out bubbles.
- Light a small LED tea light inside to reveal the silhouette effect through the frosted glass.
- Position luminaries in a dimmed room to maximize silhouette contrast and mood.
⚠️ Avoid: A frequent misstep is leaving air pockets under decals which blurs silhouette edges; pressing decals firmly avoids this. Using high-heat candles next to frosted adhesive can loosen decorations.
🔄 Try Also: Create seasonal silhouettes for holidays or swap decals for hand-drawn stencils for a personalized look.
🛒 Products & Materials ▶
Items Used
- clear glass bottle
- frosted glass spray or adhesive film
- silhouette decal stickers
- LED tea light candle
📌 “Frosted silhouette bottle luminaries with soft, storybook glow.”
