
As an Amazon Associate I earn from qualifying purchases.
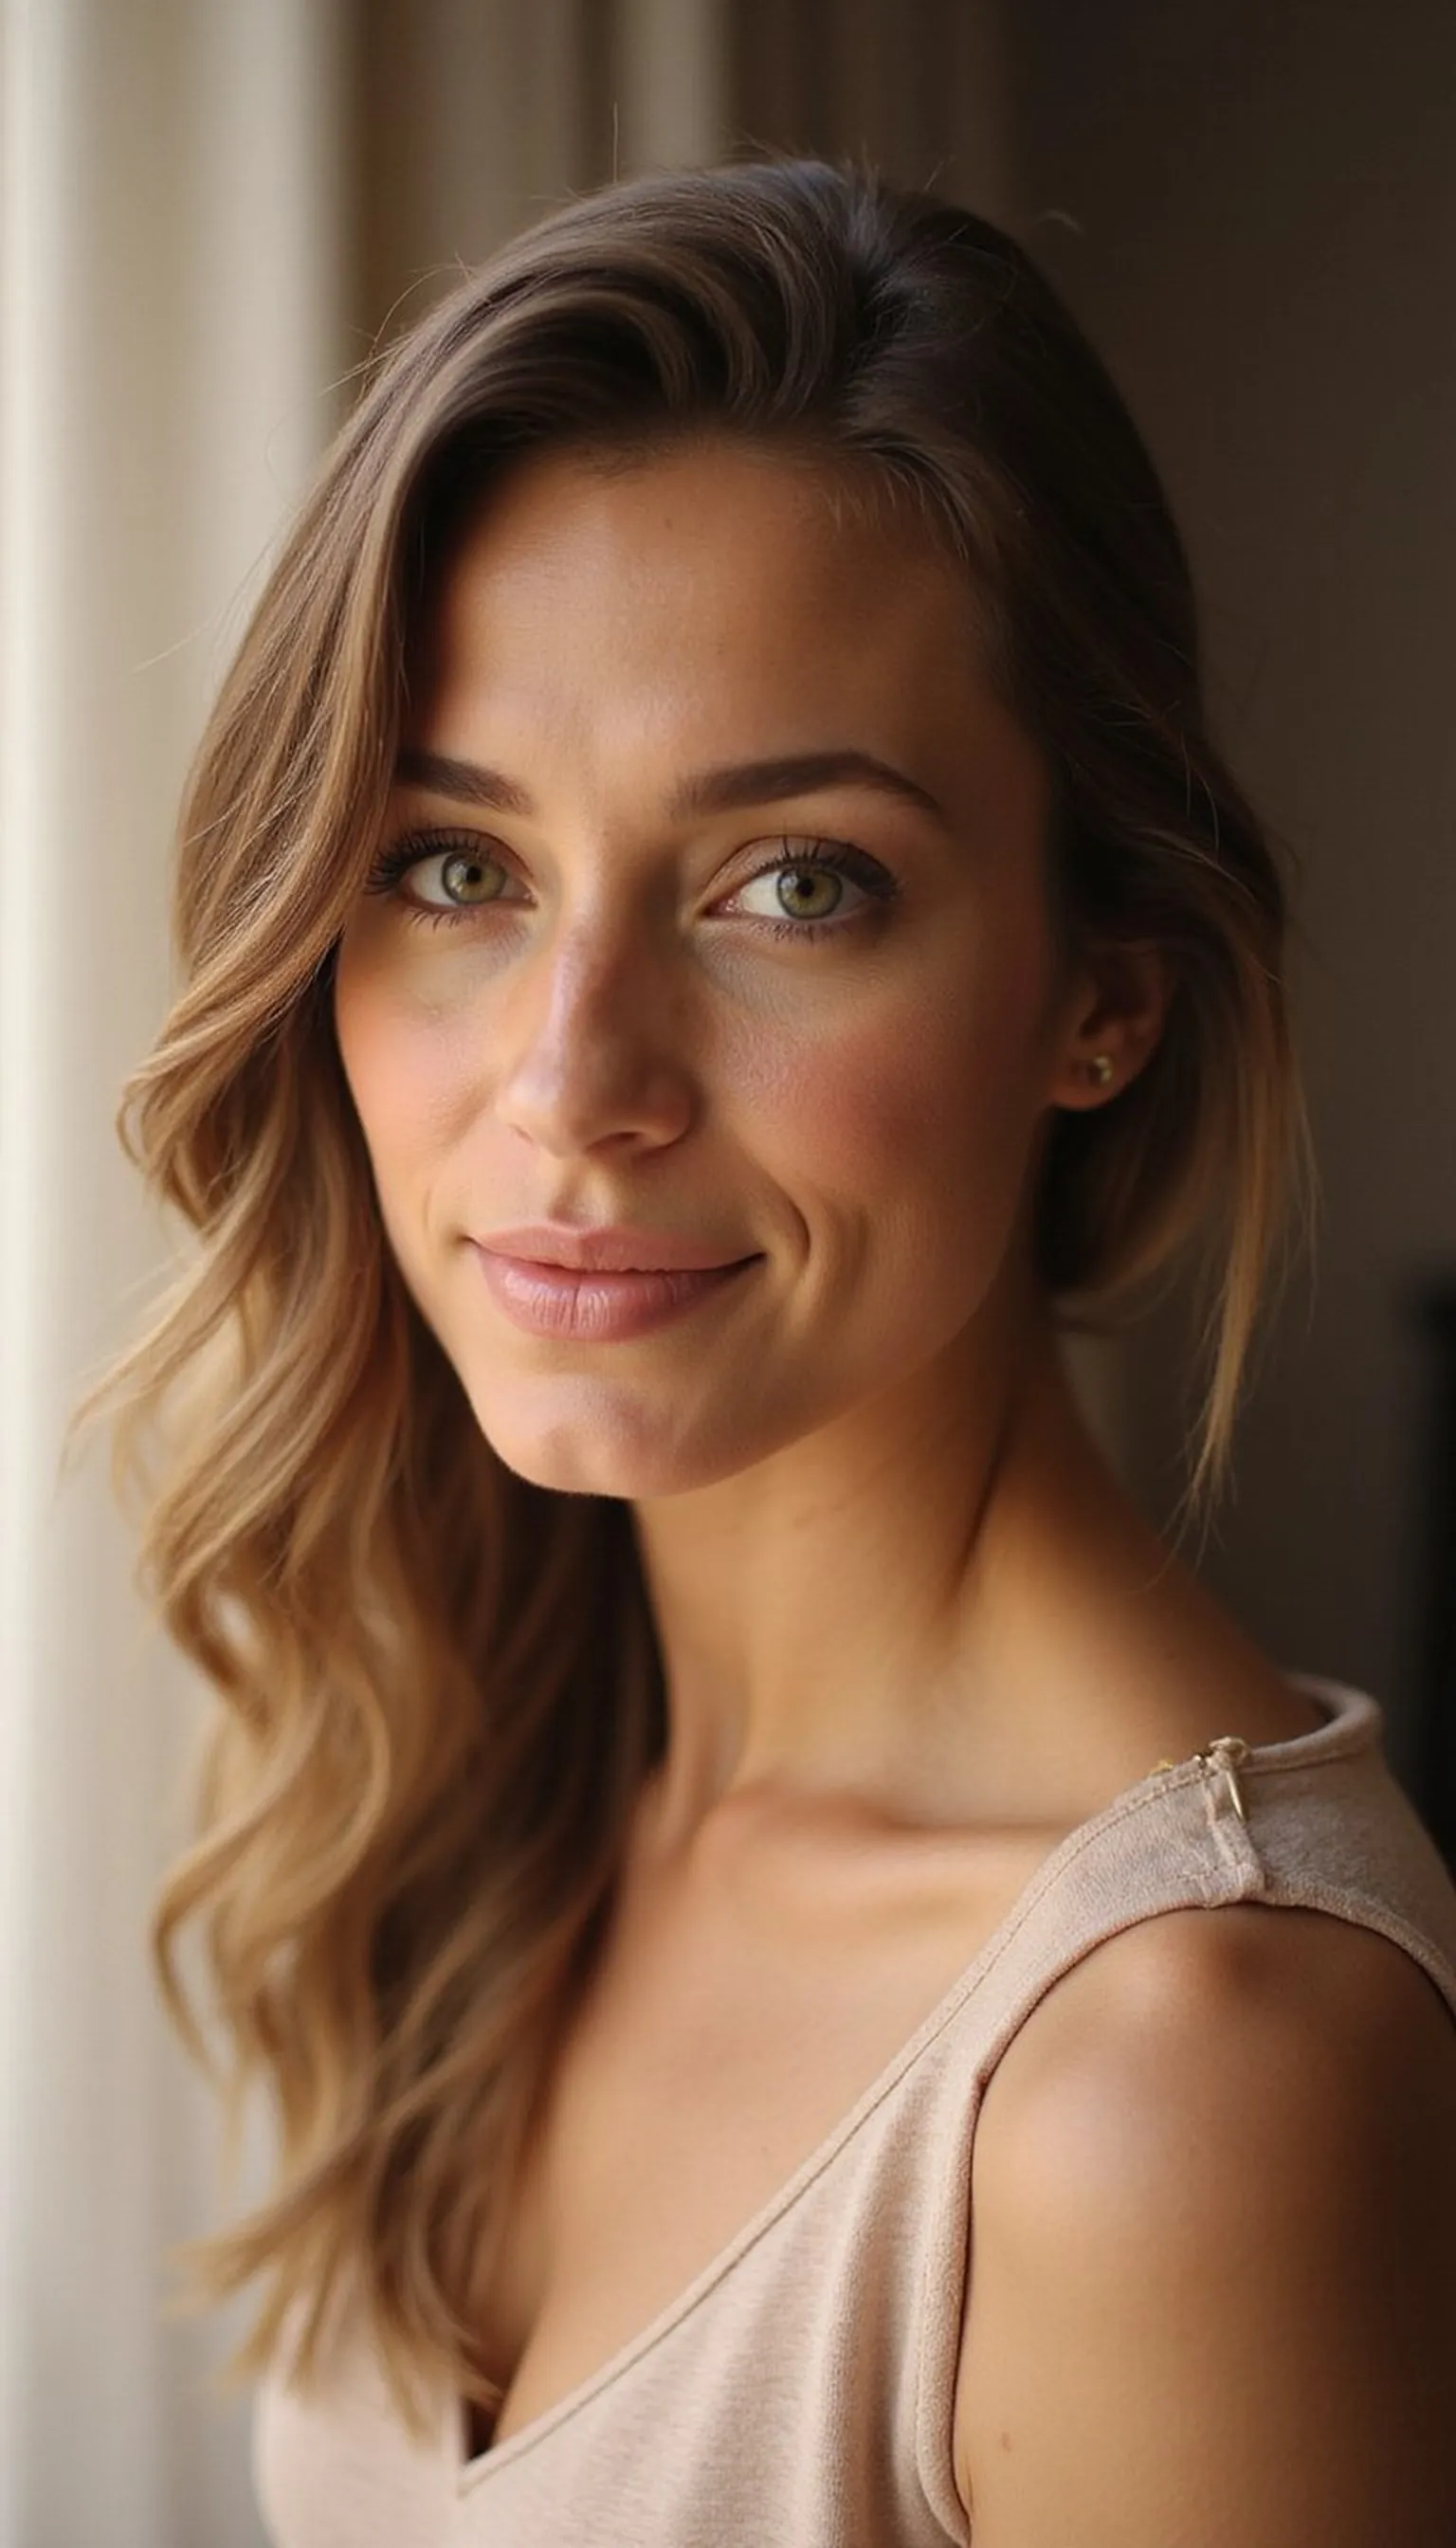
Quick Hairstyles For New Moms One-Handed offers fast, stylish ideas made for holding a baby and staying neat. Each one-handed hairstyle focuses on ease, tidy results, and minimal fuss during a busy day.
These one-handed mom hairstyles fit rushed mornings, late-night feeds, and short outings with a calm, polished finish. Options range from clipped half-up looks to easy top knots that work on many hair textures.
Short step cues and small tool suggestions make it simple to copy each look in minutes between tasks. The quick one-handed techniques help new parents feel pulled together without extra time or stress.
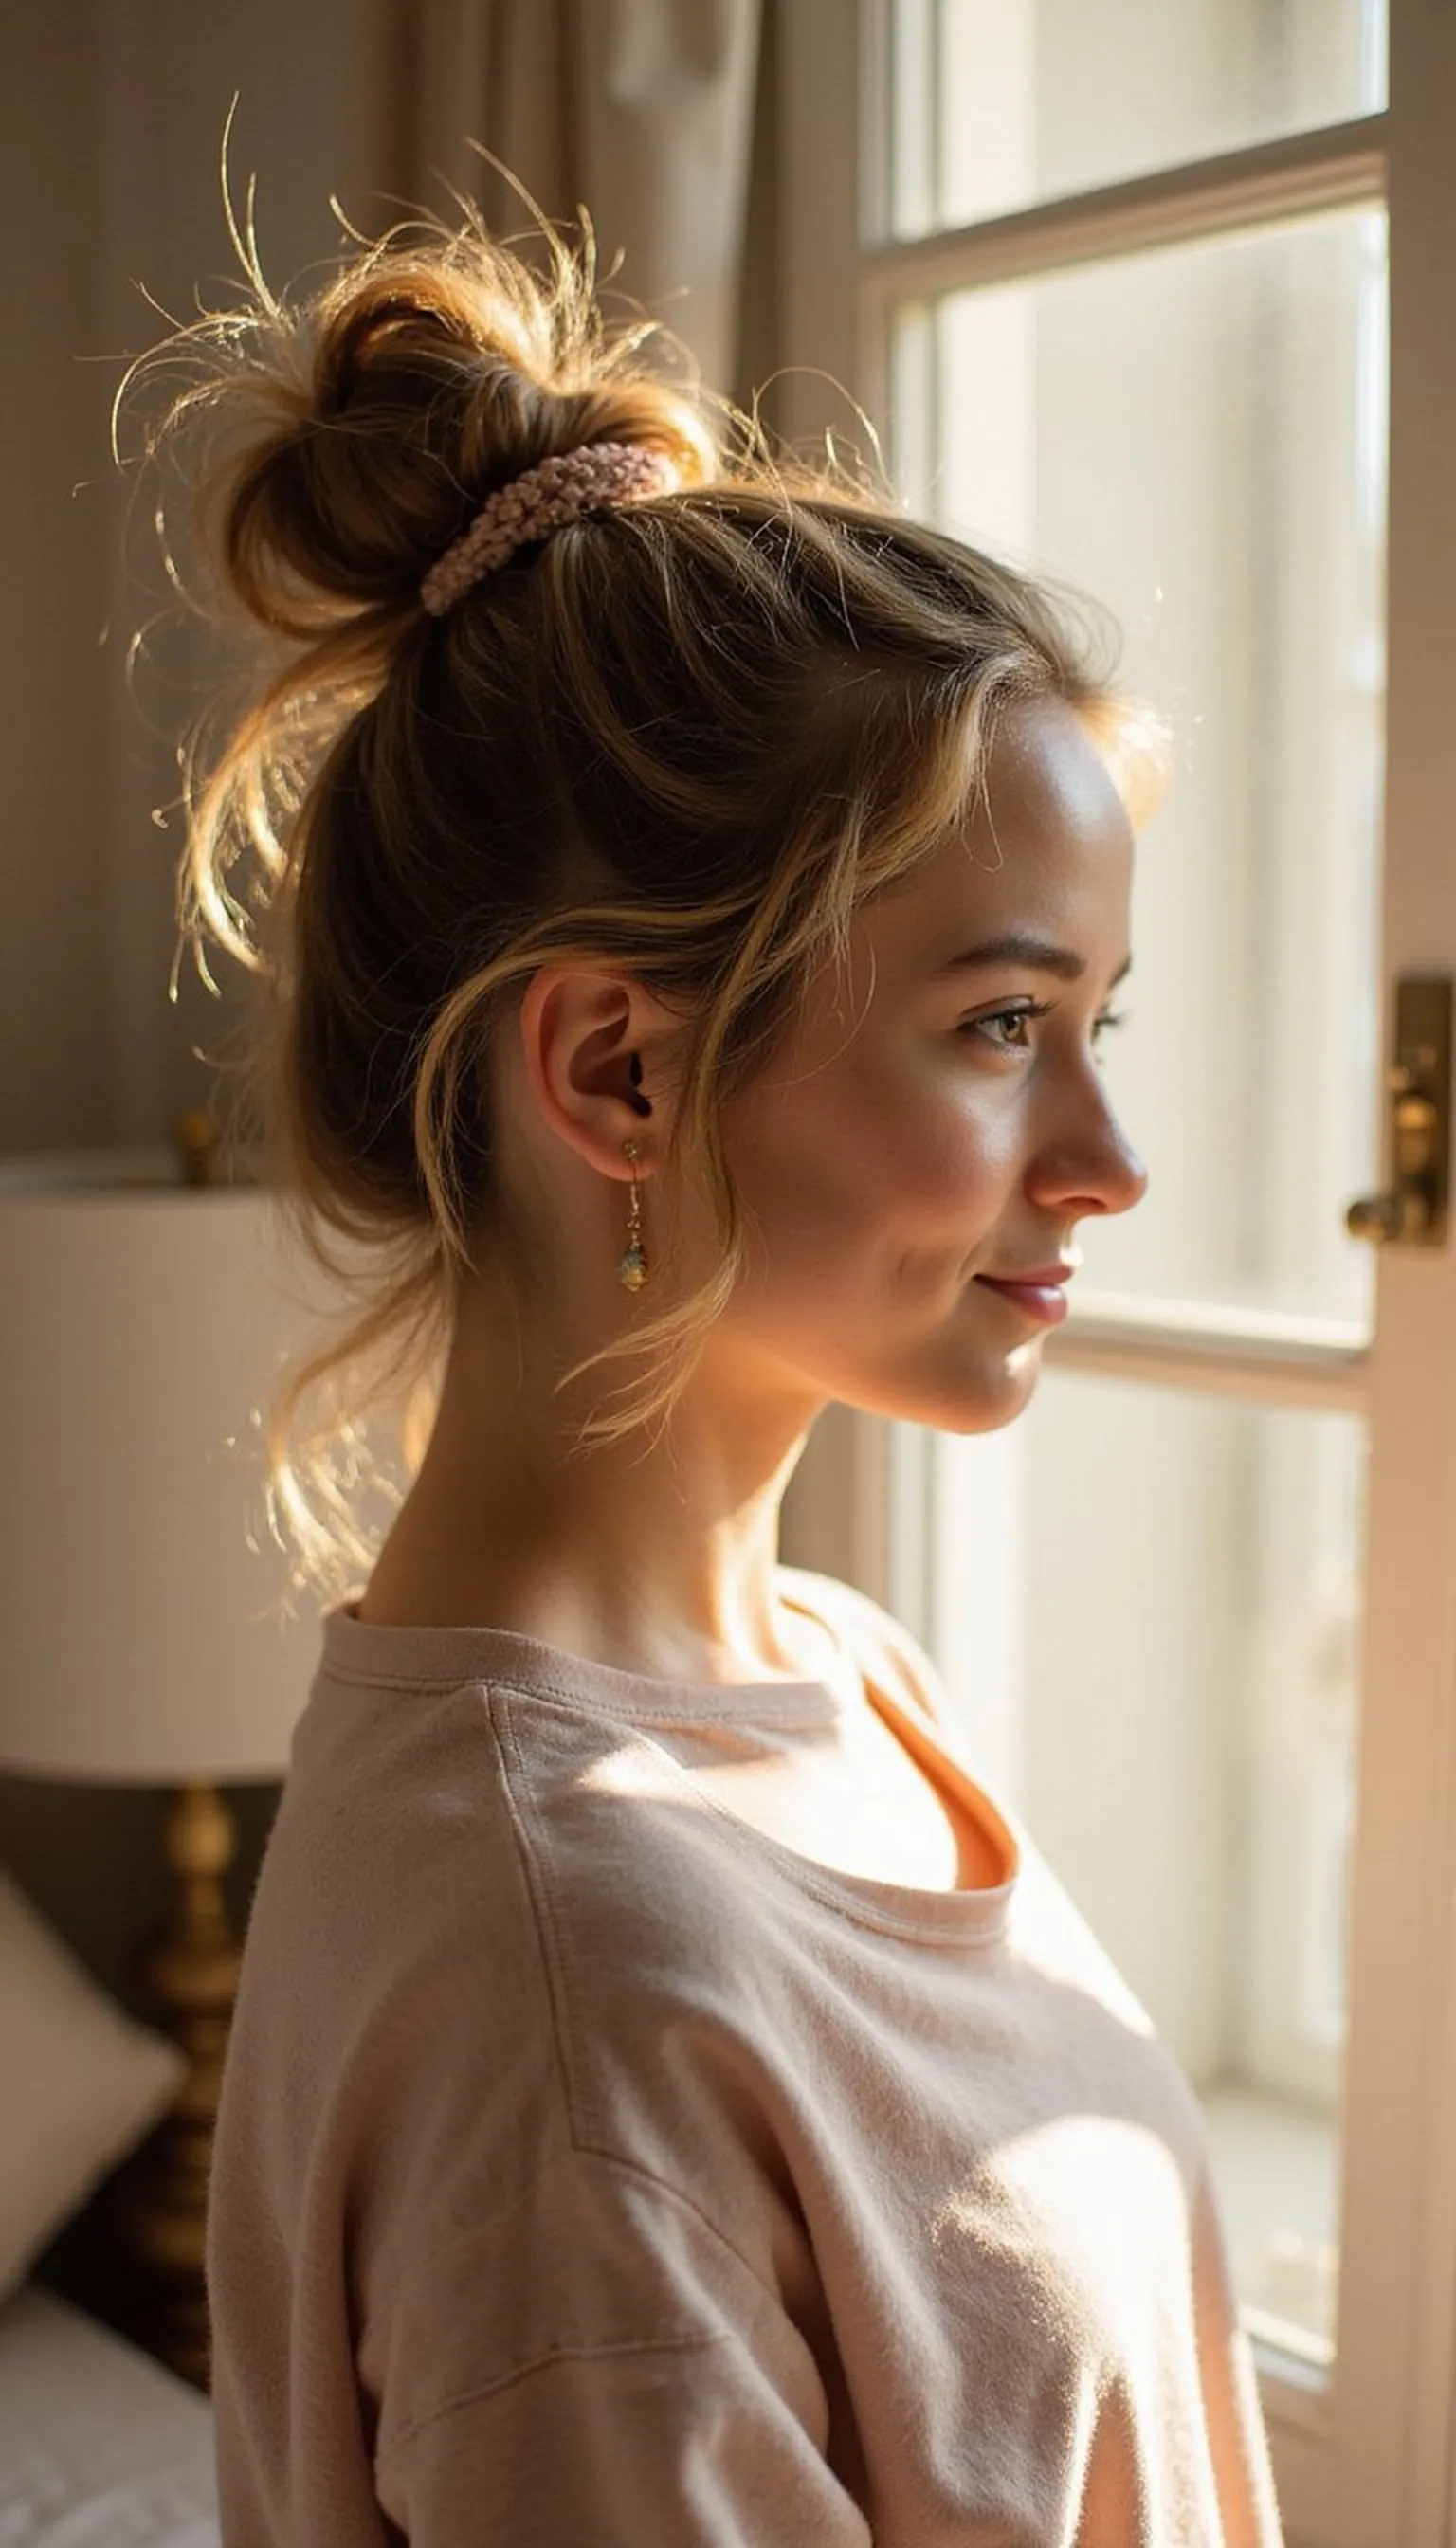
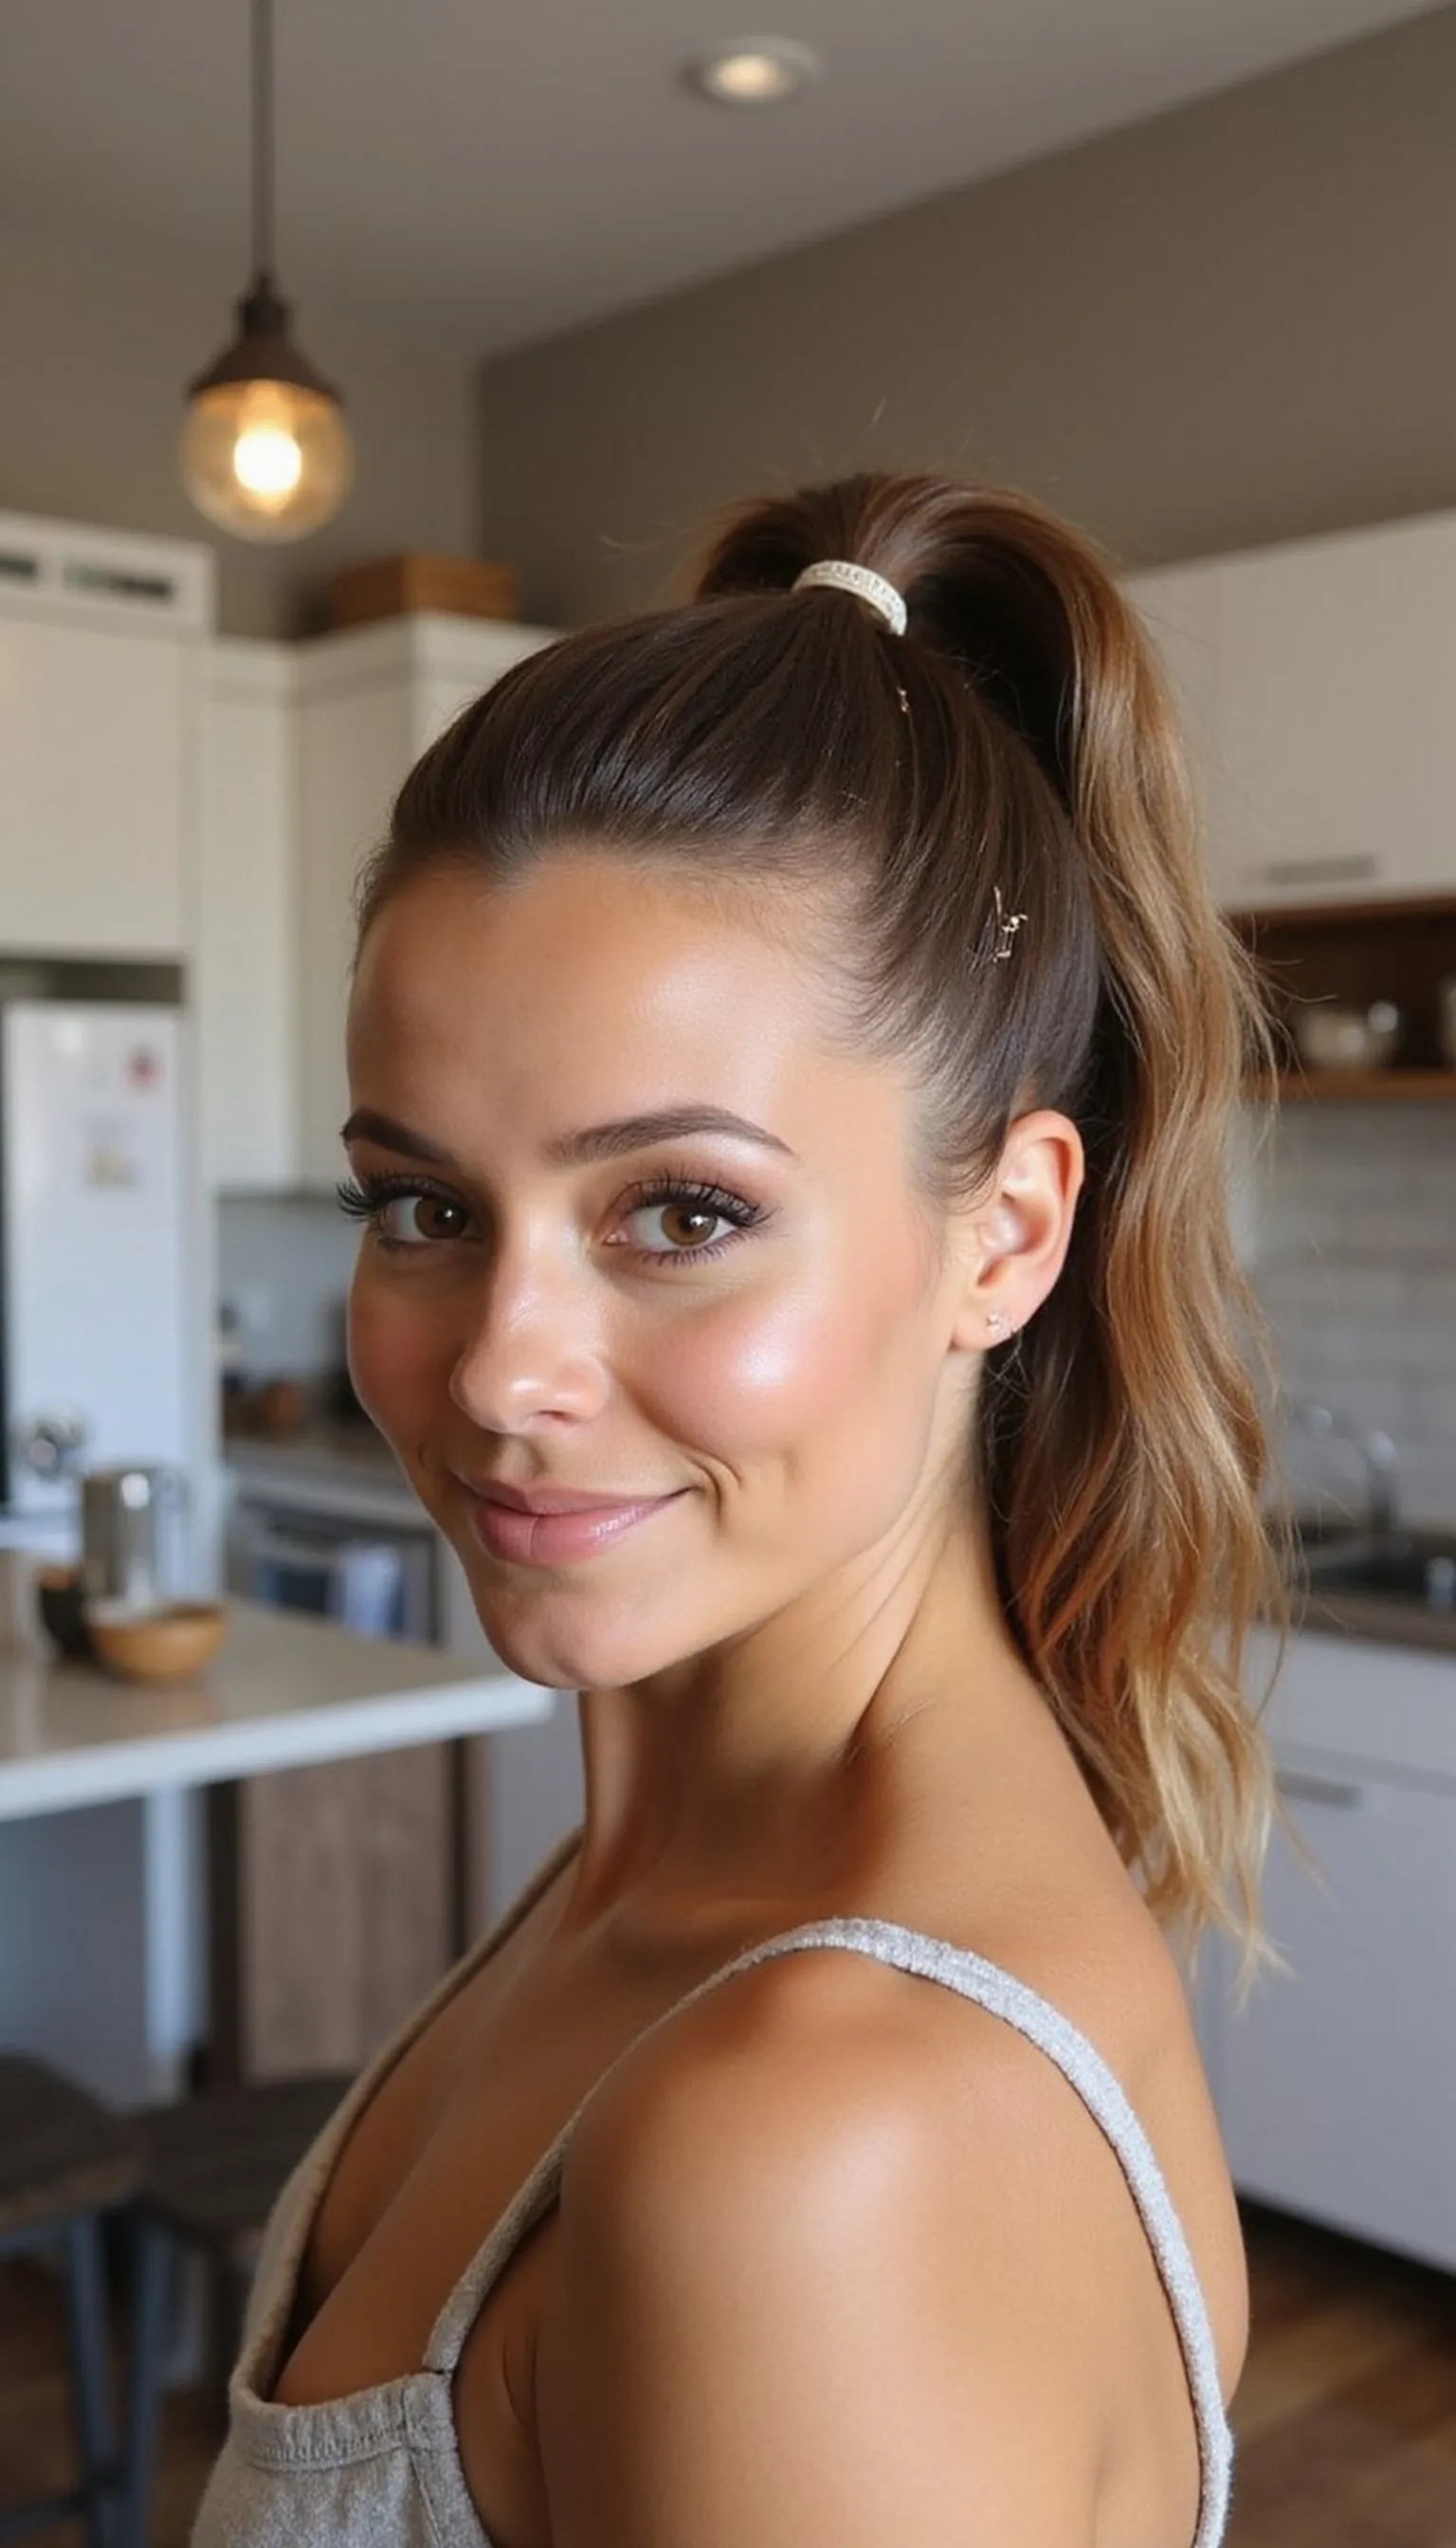
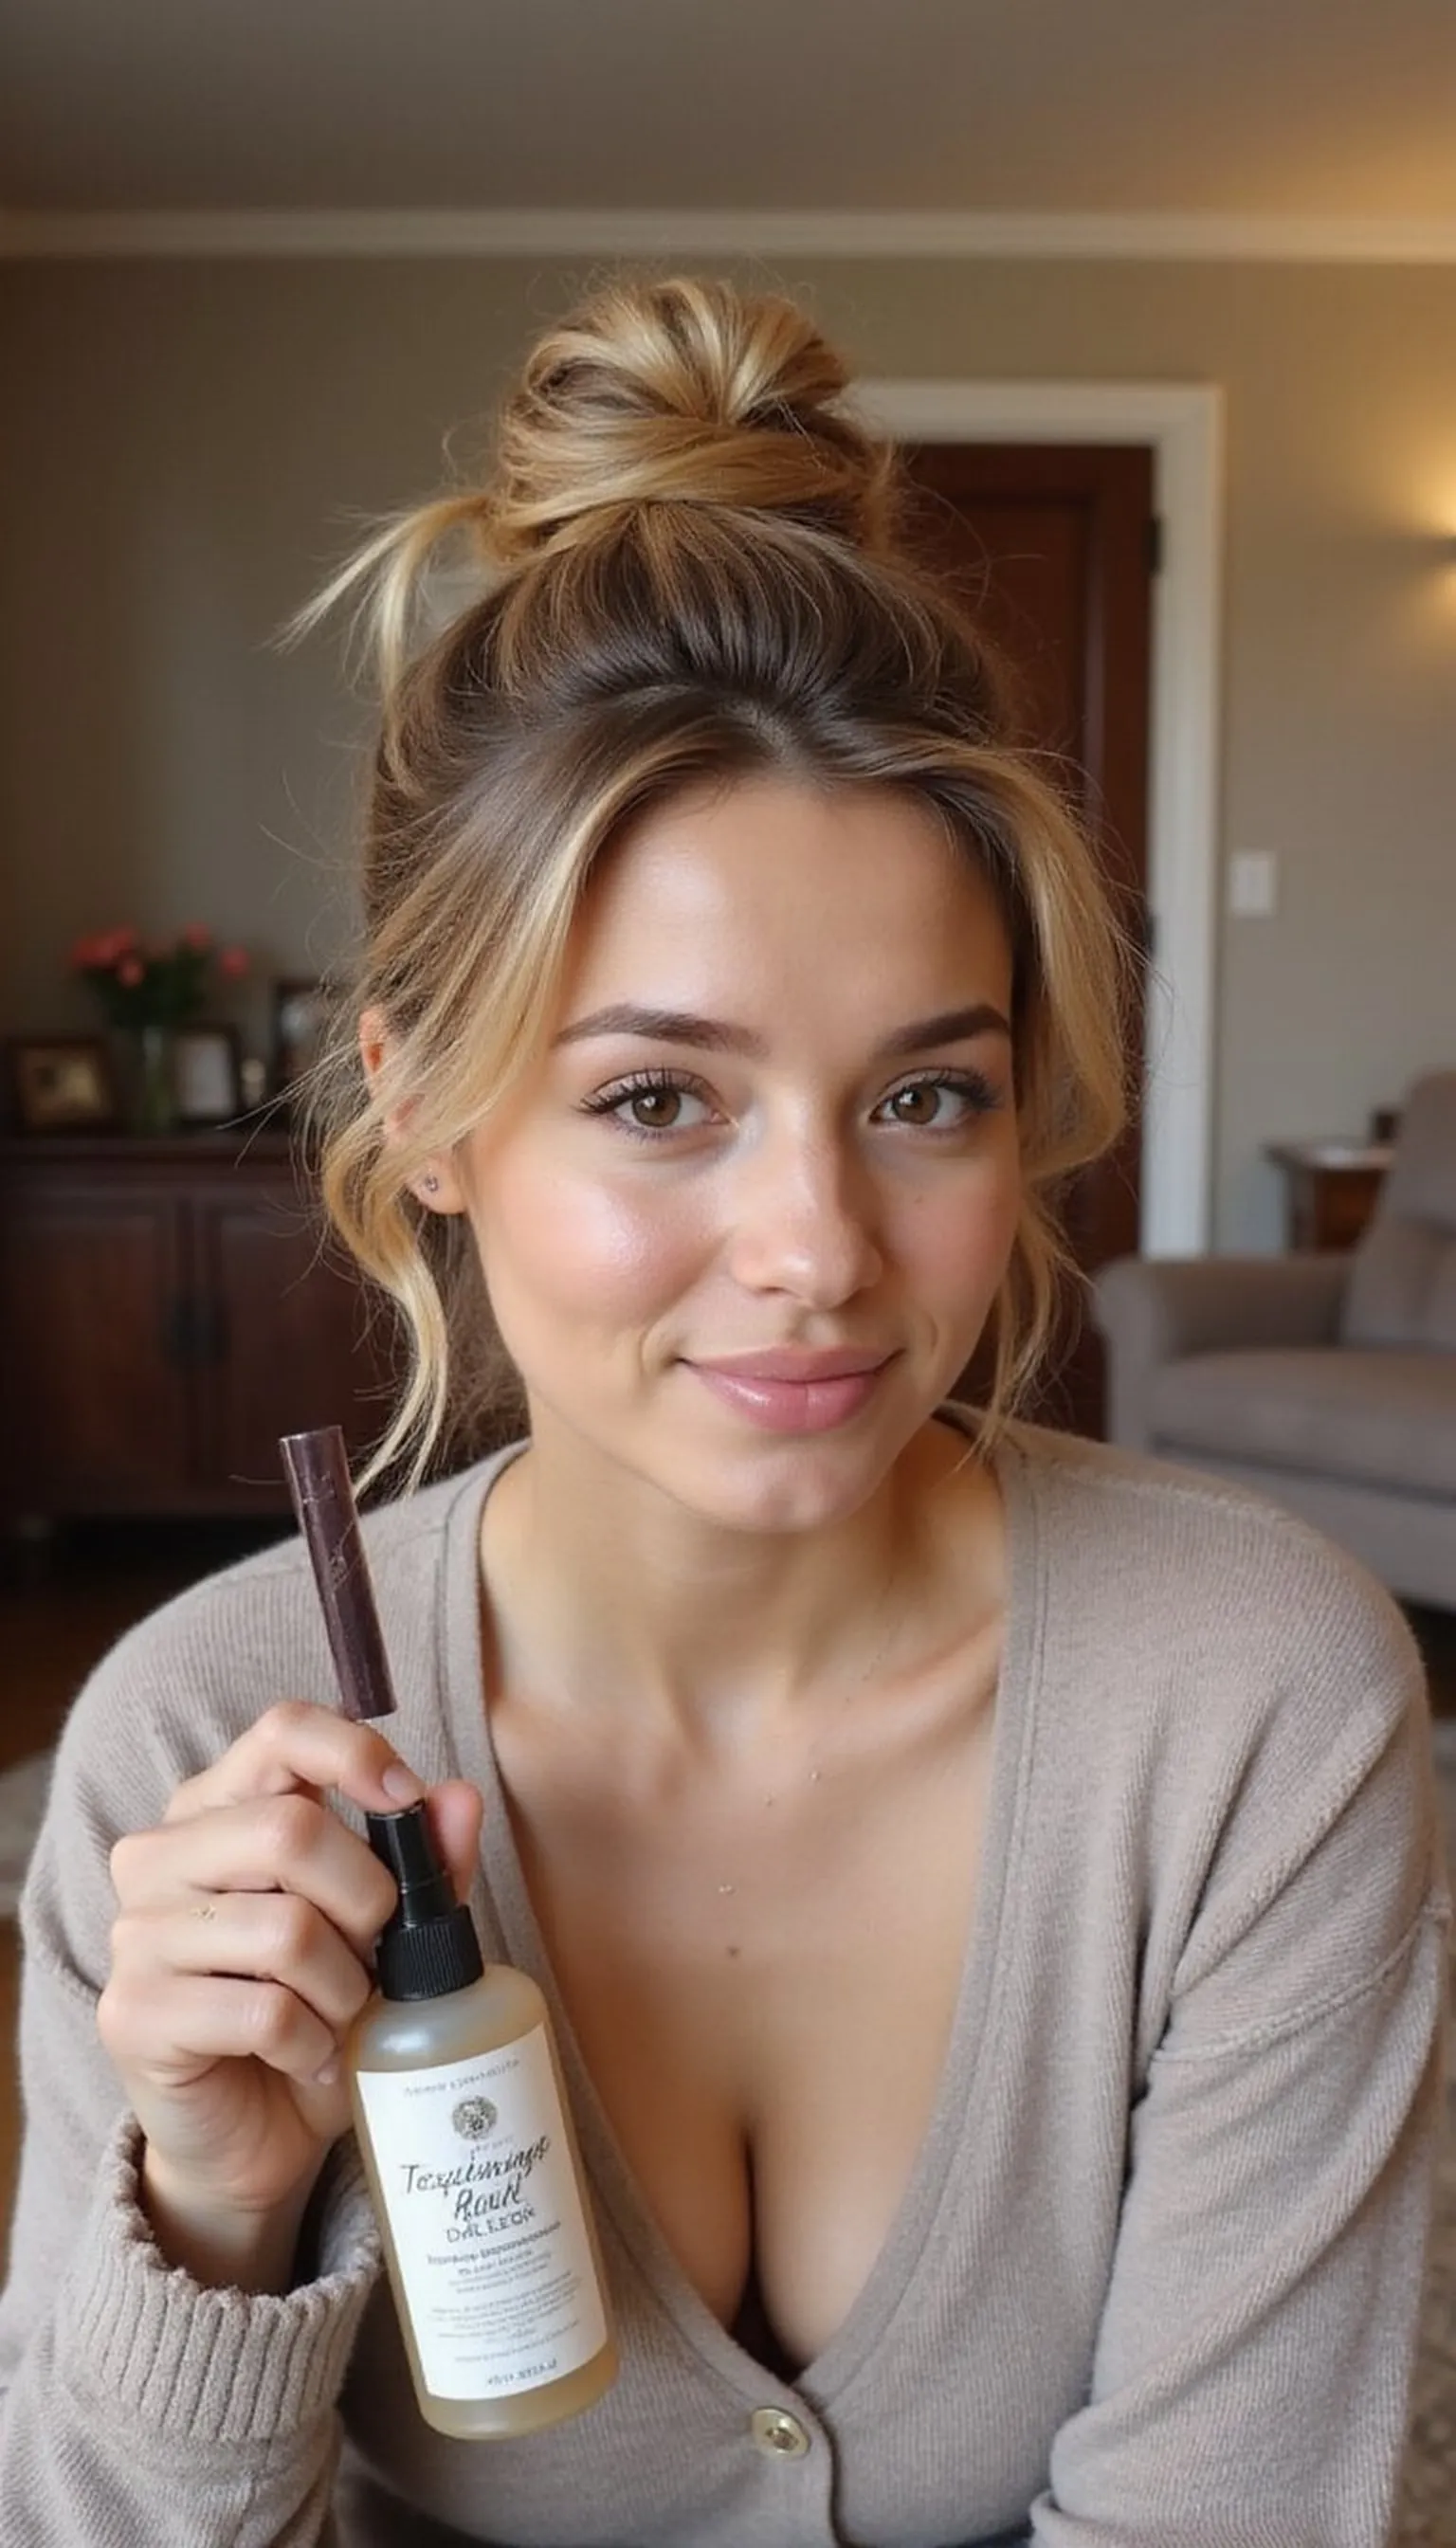
One-Handed Top Knot With Scrunchie
⏱️ 2 min · 🟢 Beginner
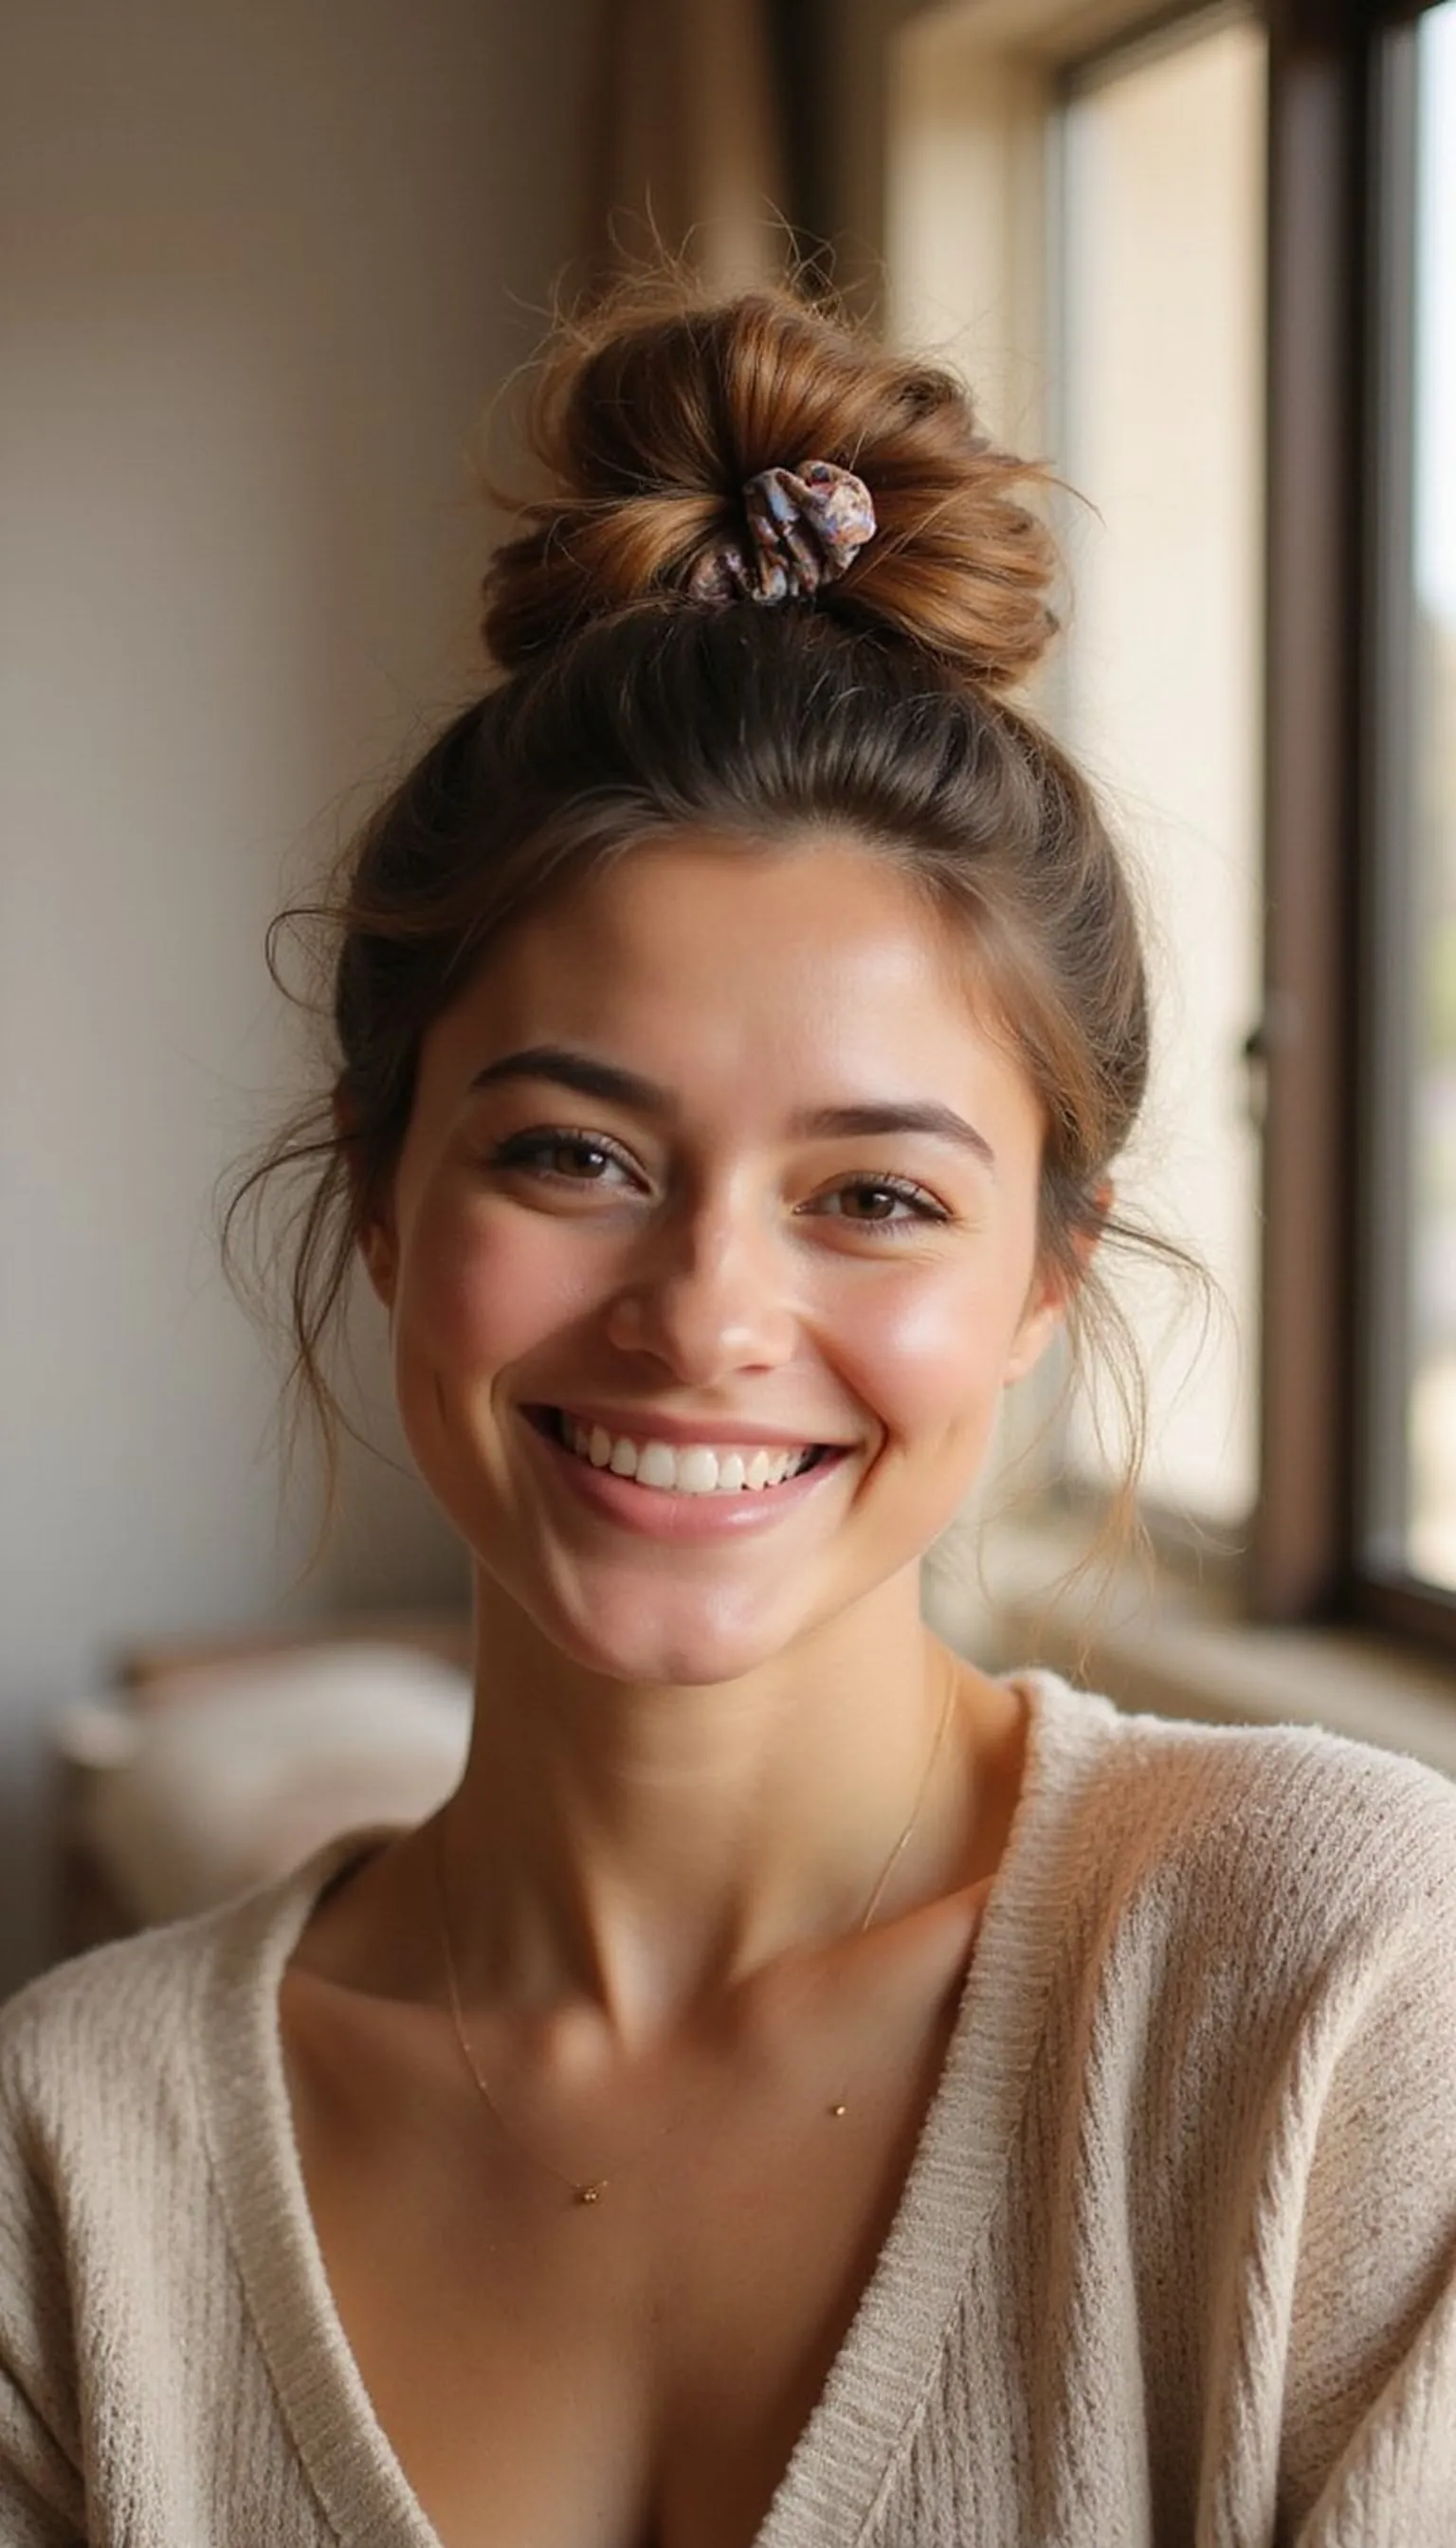
A high one-handed top knot with a scrunchie gives instant lift and keeps hair out of the way during feeds. The look reads casual-chic and suits straight, wavy, or slightly textured hair.
Gather hair upward using one hand, twist the tail around the base, and loop the scrunchie over the knot two or three times for security. A few face-framing pieces softened with fingers finish the effortless vibe.
This style works well on second-day hair when grip is better and strands hold shape more easily. It’s a fast reset when leaving the house or calming down after a long day.
Styling Tips
- Use a soft scrunchie to prevent dents and slippage.
- Loosen the knot slightly for added volume and softness.
- Slip in a bobby pin if the knot feels loose.
Pro Tip: Choose a slightly textured scrunchie to add grip and prevent the knot from sliding down during wear.
Avoid: Twisting too tightly creates scalp tension and a stiff look that feels uncomfortable. Avoid pulling the knot so snug that it flattens natural volume.
Try Also: Twist a small top knot for a delicate look, or place the knot off-center for a playful, asymmetrical vibe.
Products & Materials
Items Used
“Fast one-handed top knot with a scrunchie for busy mornings.”
Low Loop Ponytail One-Handed Trick
⏱️ 3 min · 🟢 Beginner
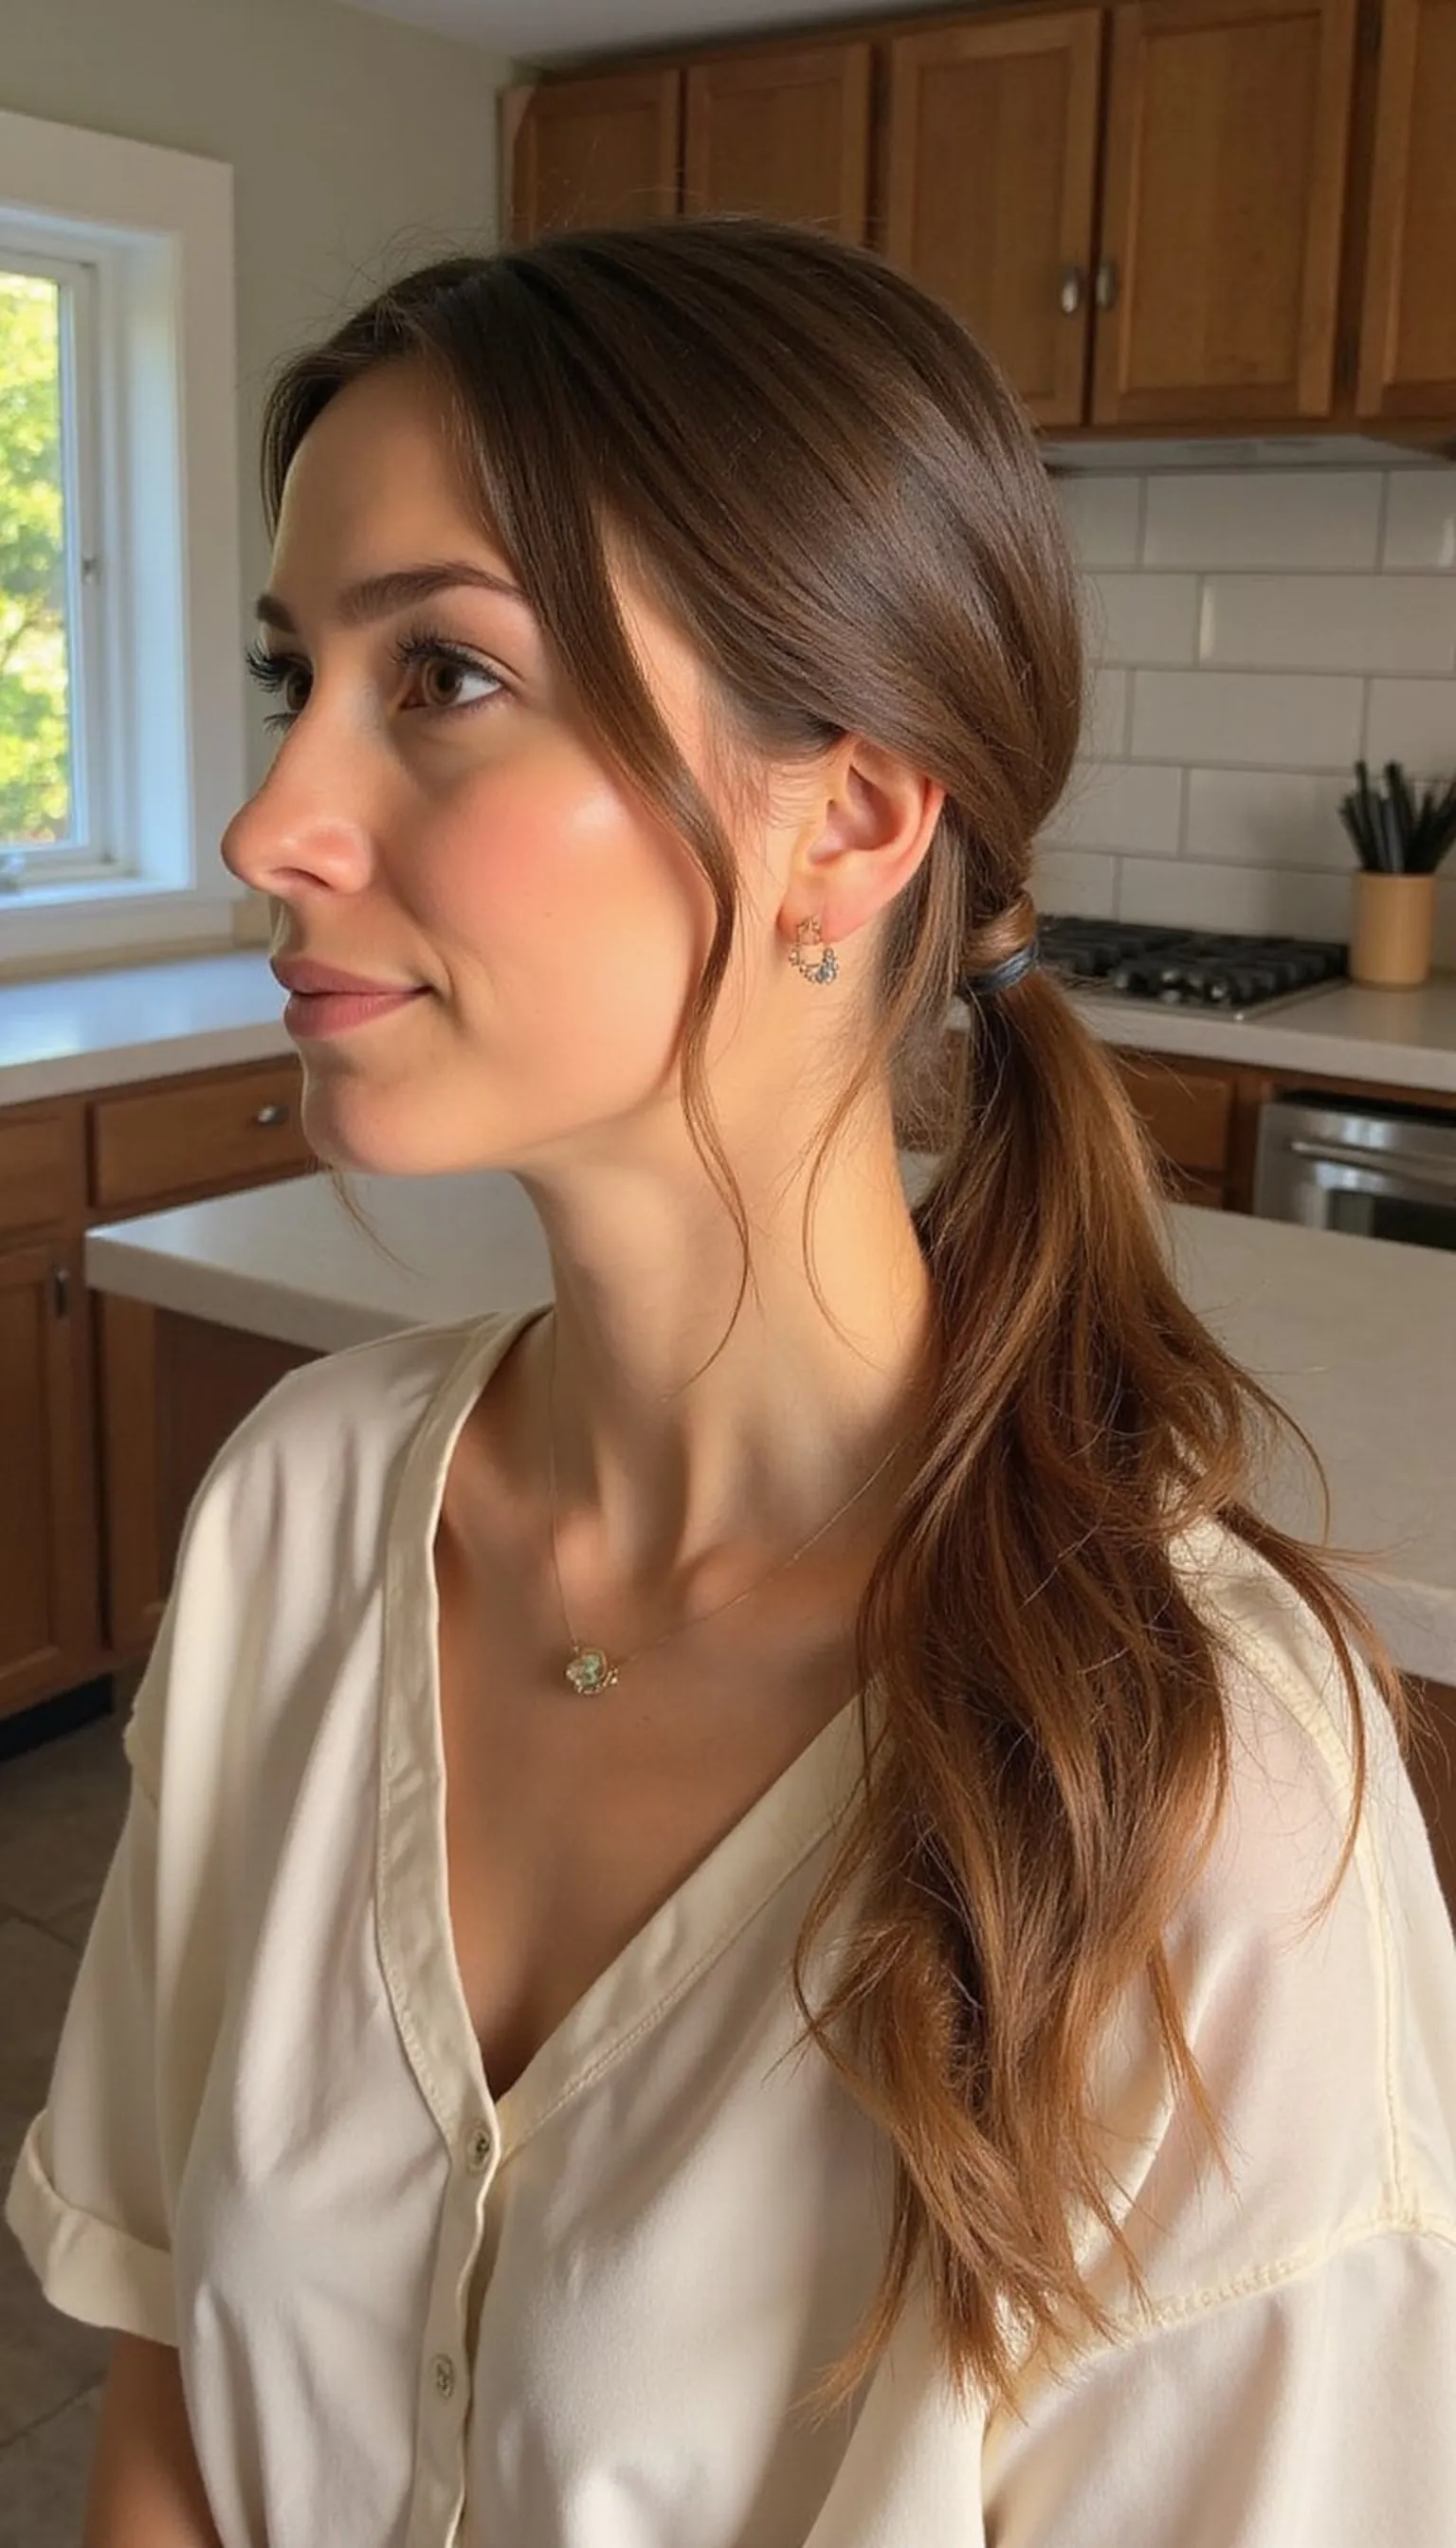
The low loop ponytail technique uses a simple elastic loop to secure hair quickly with one hand. This creates a soft, undone pony that stays tidy while nursing or holding a baby.
Form a low pony with one hand, wrap the elastic once and pull the tail through the loop halfway to create a sleek looped effect. Tuck or loosen strands for a lived-in finish that flatters most face shapes.
This look is gentle on fragile strands and works well on medium to long hair lengths. It’s a neat everyday option that reads intentional without much fiddling.
Styling Tips
- Use a thin elastic for a clean loop shape.
- Loosen the loop slightly to soften the silhouette.
- Tuck short pieces with a bobby pin for neatness.
Pro Tip: Wrap the elastic once, then pull hair only halfway through the loop for a secure, airy ponytail shape that holds all day.
Avoid: Pulling the tail completely through the loop makes a tight knot that flattens the style. Leave some hair in the loop for the airy look.
Try Also: Place the looped pony at the nape, or shift it to the side for a relaxed low side pony variation.
Products & Materials
Items Used
- hair elastic
- bobby pins
“Easy low loop ponytail for one-handed control and soft hold.”
Claw Clip Half-Up One-Handed Style
⏱️ 1 min · 🟢 Beginner
The claw clip half-up keeps hair off the face in an instant using one hand and a single clip. This bit of lift reads polished and is extremely comfortable when multitasking with a baby.
Sweep the top section back, twist slightly with one hand, and secure with a claw clip at the crown. Let a few tendrils fall forward for a soft, modern finish that complements many hair lengths.
Works best on slightly textured or second-day hair for grip and hold. Swap clip sizes to change the look from subtle to bold.
Styling Tips
- Choose a medium-sized claw clip for most hair volumes.
- Roughen hair slightly with fingers for more grip.
- Face-frame a few strands for softness around the temples.
Pro Tip: Place the clip just above the crown to lift roots without pulling hair too tightly against the scalp.
Avoid: Using a clip too small will let hair slip and feel loose. Pick a size that matches your hair thickness for reliable hold.
Try Also: Use a clear claw for a subtle look, or a large statement clip to make the half-up feel elevated.
Products & Materials
Items Used
“Speedy claw clip half-up that’s perfect for one-handed styling.”
Get 75+ ad-free, high-resolution printable tutorials for salon-quality results every single morning.
One printable guide · $19.99 · yours forever
Side Sweep Secured With Bobby Pins
⏱️ 2 min · 🟢 Beginner
A quick side sweep pinned with bobby pins creates a polished look while keeping one hand free. This method tucks hair behind the ear or pins across the crown for a tidy profile.
Sweep hair sideways with one hand, twist a small section, and anchor it discreetly using two crossed bobby pins. The finished effect is refined and stays put through feedings and short outings.
This style flatters layered cuts and bangs by clearing the face without full updos. It is easily refreshed by loosening a few strands for a softer appearance.
Styling Tips
- Cross two bobby pins in an X for extra hold.
- Use pins that match hair color to stay invisible.
- Spritz a light finishing spray where pins sit for grip.
Pro Tip: Insert bobby pins with the ridged side down into the hair to improve grip and keep the style secure longer.
Avoid: Placing pins too far apart can let the sweep fall loose. Anchor the section with two pins close together for stability.
Try Also: Try pinning from the forehead hairline back, or create a soft twisted roll before securing for added texture.
Products & Materials
Items Used
“Clean side sweep pinned with bobby pins for a neat one-handed fix.”
Headband Tuck For Quick Volume
⏱️ 3 min · 🟢 Beginner
The headband tuck is a simple one-handed trick that disguises flat roots and adds instant volume. It’s ideal for new moms who want a polished look without fussing with elastics.
Place a stretchy headband over the hairline, gather the top layer with one hand, and gently tuck it back over the band in sections. This creates a softly rolled crown and keeps hair away from the face.
This technique works especially well on medium-length hair and on second-day texture. Swap a thin band for a wider one to change the drama and lift.
Styling Tips
- Use a fabric headband that matches your outfit for an elevated touch.
- Rough up roots slightly before tucking for more volume.
- Pull a few face-framing strands out for softness.
Pro Tip: Stretch the headband gently and tuck in small sections to build gradual volume without creating bumps.
Avoid: Tucking too large a section at once can create uneven rolls that slip. Work in smaller sections for a smoother finish.
Try Also: Use a velvet headband for textured depth, or a thin elastic band for a subtler lift and less bulk.
Products & Materials
Items Used
“Headband tuck adds instant volume and keeps hair one-handed tidy.”
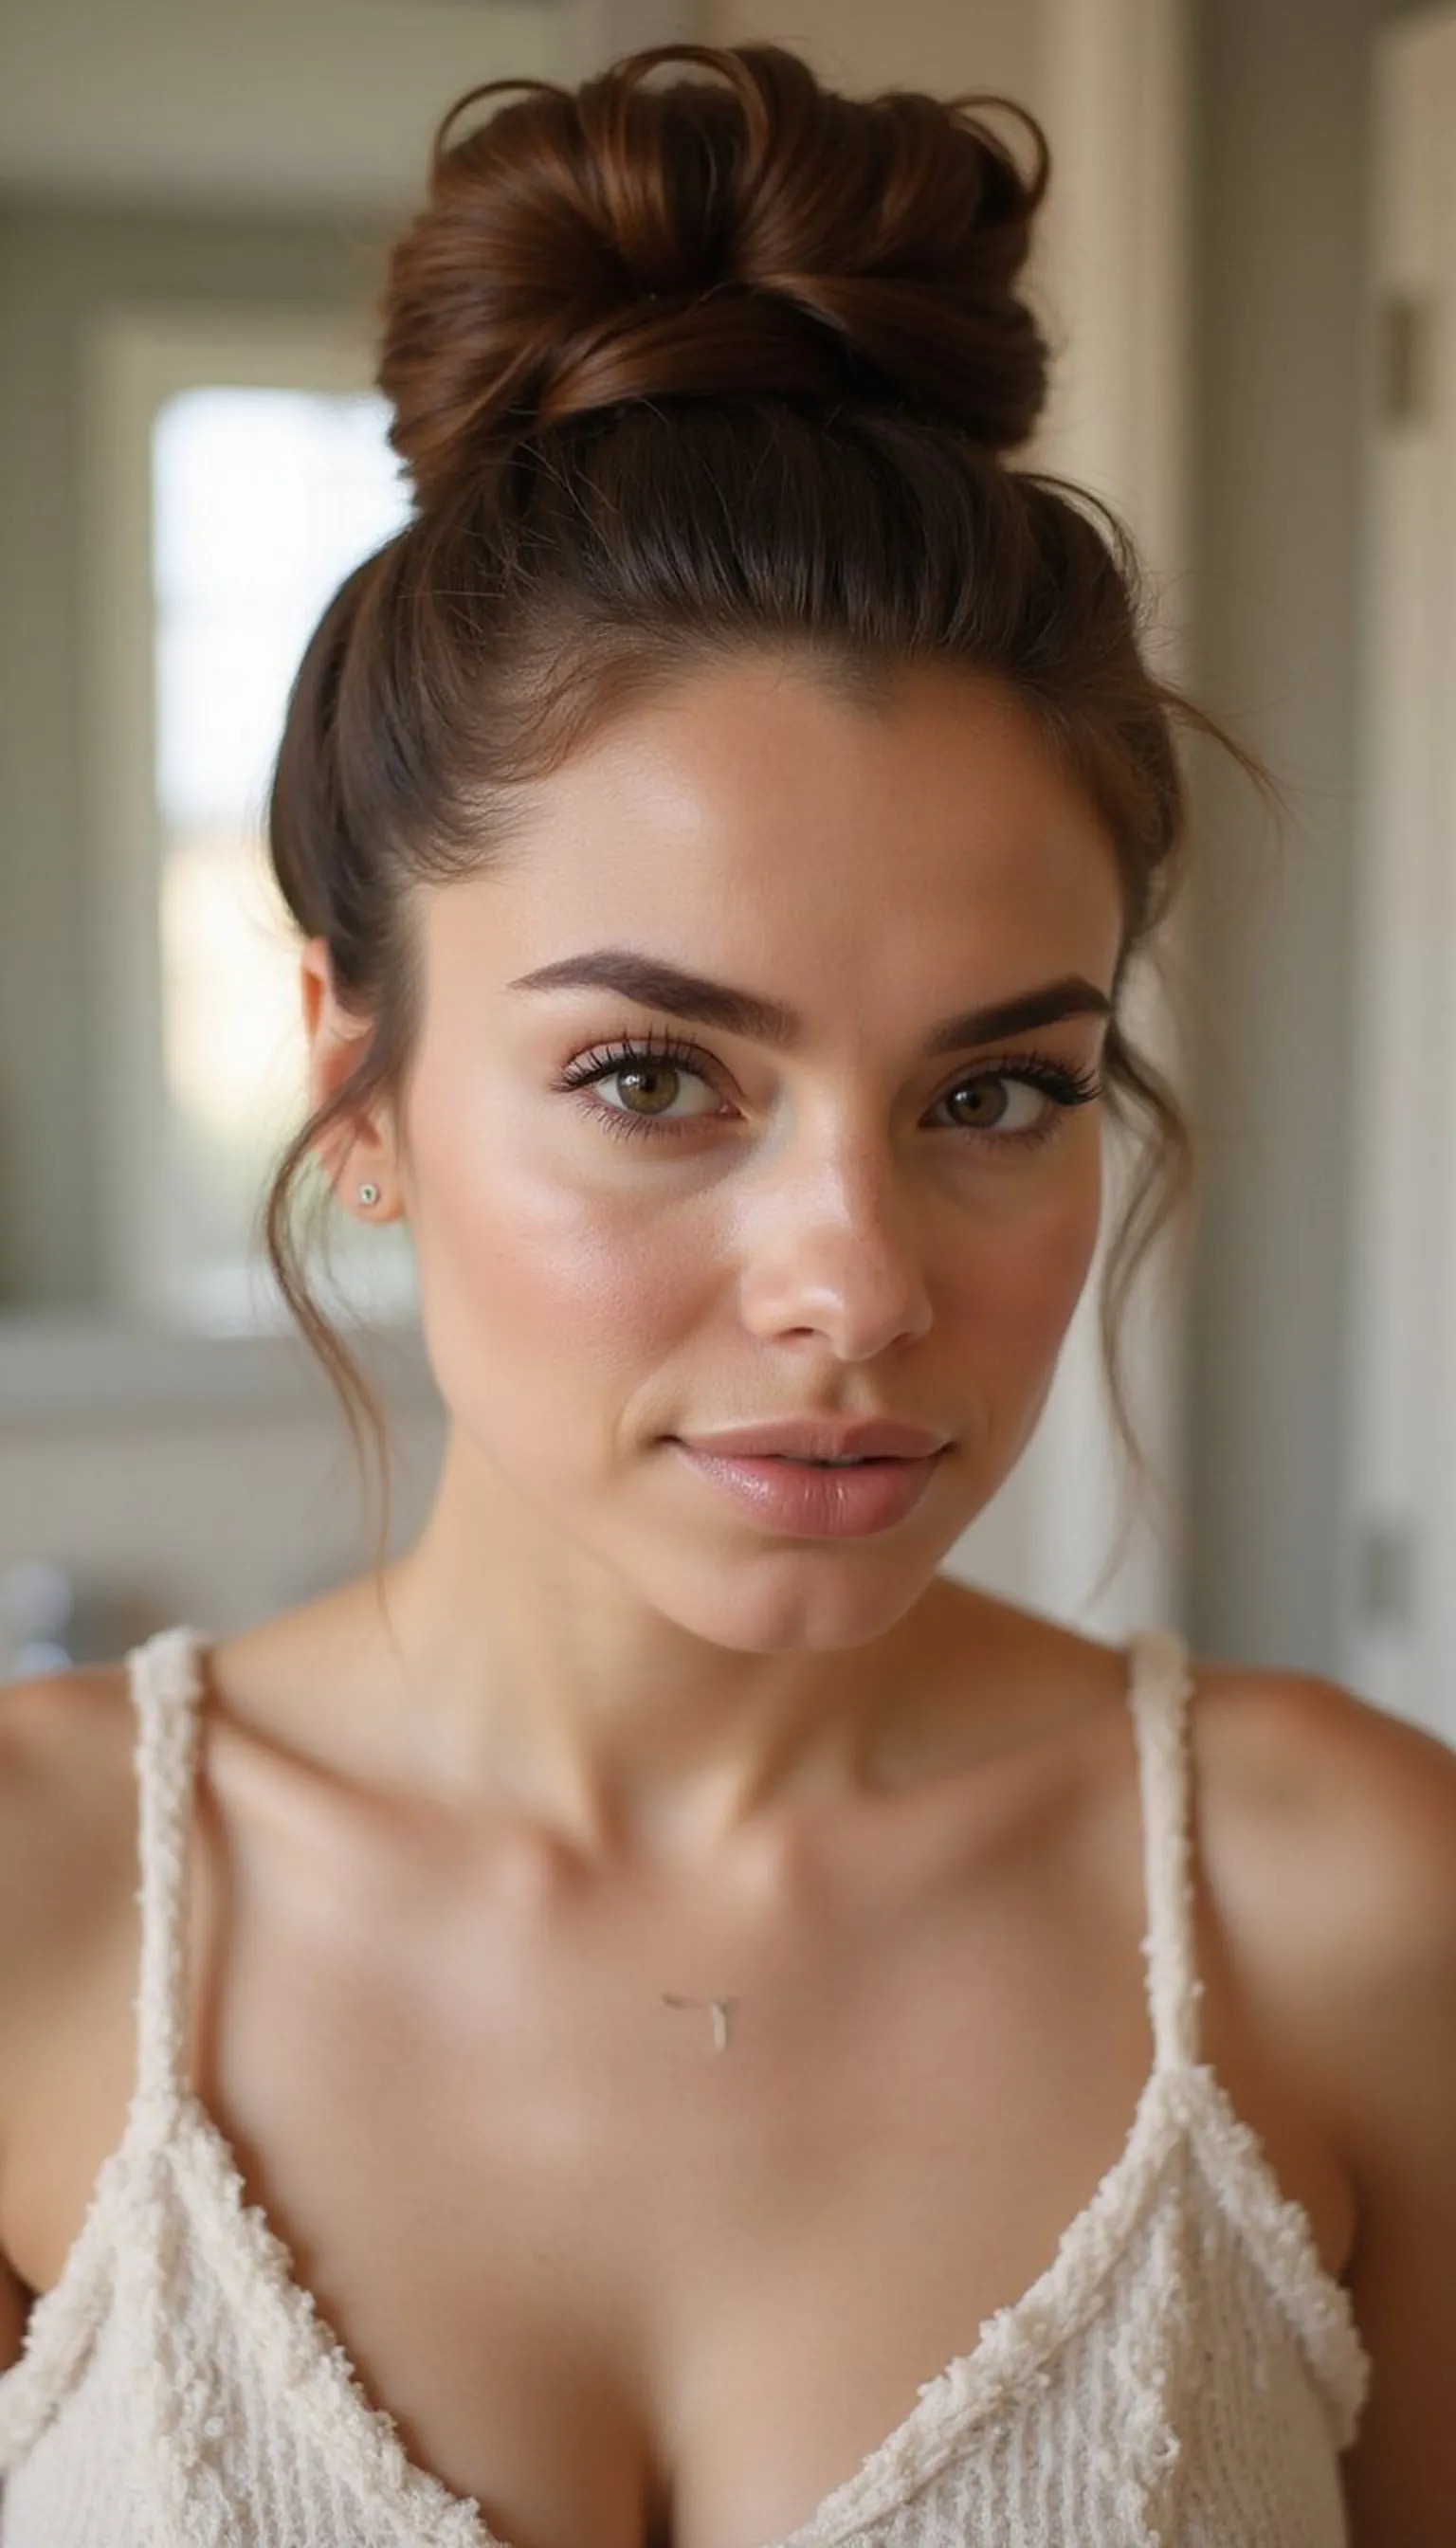
Messy Mini Bun With Hair Tie
⏱️ 2 min · 🟢 Beginner
A messy mini bun made with a small hair tie is fast, gentle on strands, and easy to do one-handed. This playful bun reads relaxed while keeping hair off the neck and out of the way.
Gather mid-height hair using one hand, loop a small elastic around once, twist the tail and tuck it into the elastic to form a mini bun. Pull lightly at the bun edges to create texture and a slightly undone finish.
This is great for shorter hair lengths that won’t reach a full top knot. It’s a quick fix when moving between feeds and errands.
Styling Tips
- Use a small, snag-free elastic to prevent breakage.
- Loosen the bun gently for a lived-in texture.
- Spritz with a little dry shampoo for grip on slippery hair.
Pro Tip: Wrap the elastic once for looser hold, then tuck the tail into the loop to form a secure mini bun that still looks undone.
Avoid: Using a tight elastic can cause creases and breakage on delicate strands. Opt for softer elastics to protect hair health.
Try Also: Place the mini bun at the nape for low styling or slightly off-center for a playful twist.
Products & Materials
Items Used
“Cute messy mini bun using a small hair tie for quick one-handed styling.”
Twisted Low Bun With Clip Secure
⏱️ 5 min · 🟠 Intermediate
A twisted low bun secured with a small clip keeps hair sleek and controlled using one hand for the final tuck. This polished low bun works for occasions when a little more refinement is wanted.
Gather hair at the nape, twist the length into a loose coil, and anchor it with a small decorative clip that clicks into place with one hand. The twist adds movement and hides the clip for a seamless finish.
This suits medium to long hair and looks elegant with both straight and wavy textures. It’s a neat choice for quick outings or video calls when time is tight.
Styling Tips
- Start with slightly damp or textured hair for easier twisting.
- Choose a clip with a firm clasp to keep the bun secure.
- Tame flyaways with a light touch of smoothing balm.
Pro Tip: Twist hair loosely to avoid a flat coil and secure the bun with the clip placed horizontally for stronger hold.
Avoid: Making the twist too tight removes natural movement and can feel restrictive. Keep it relaxed for a softer shape.
Try Also: Try a low knotted bun before clipping, or use two small clips for a more decorative finish.
Products & Materials
Items Used
“Elegant twisted low bun clipped in place for a tidy one-handed finish.”
Sleek One-Handed High Ponytail
⏱️ 5 min · 🟠 Intermediate
A sleek high ponytail can be created fast with one hand plus a smoothing brush for light polish. This pulled-back look is streamlined and keeps hair tidy while moving through the day.
Brush hair up with one hand against the head, secure with a strong elastic, and wrap a small section of hair around the base to hide the band. Smooth any bumps with fingers and a little finishing serum for shine.
This approach flatters finer textures and works well for medium-length hair. It presents a pulled-together silhouette that still feels comfortable holding a baby.
Styling Tips
- Use a strong elastic to prevent slippage with active movement.
- Wrap a thin strand around the band to hide the elastic and add polish.
- Smooth edges with a boar-bristle brush or fingers.
Pro Tip: Secure the elastic firmly, then wrap a thin strand around the base and pin it beneath with a bobby pin for a clean finish.
Avoid: Overbrushing can create static and flyaways that steal the sleek look. Smooth gently to maintain natural movement.
Try Also: Make it higher for a playful look, or lower at the crown for a more relaxed silhouette.
Products & Materials
Items Used
- strong hair elastic
- bobby pins
“Sleek high ponytail made one-handed for a polished everyday look.”
Braided Front Twist With Bobby Pins
⏱️ 8 min · 🟠 Intermediate
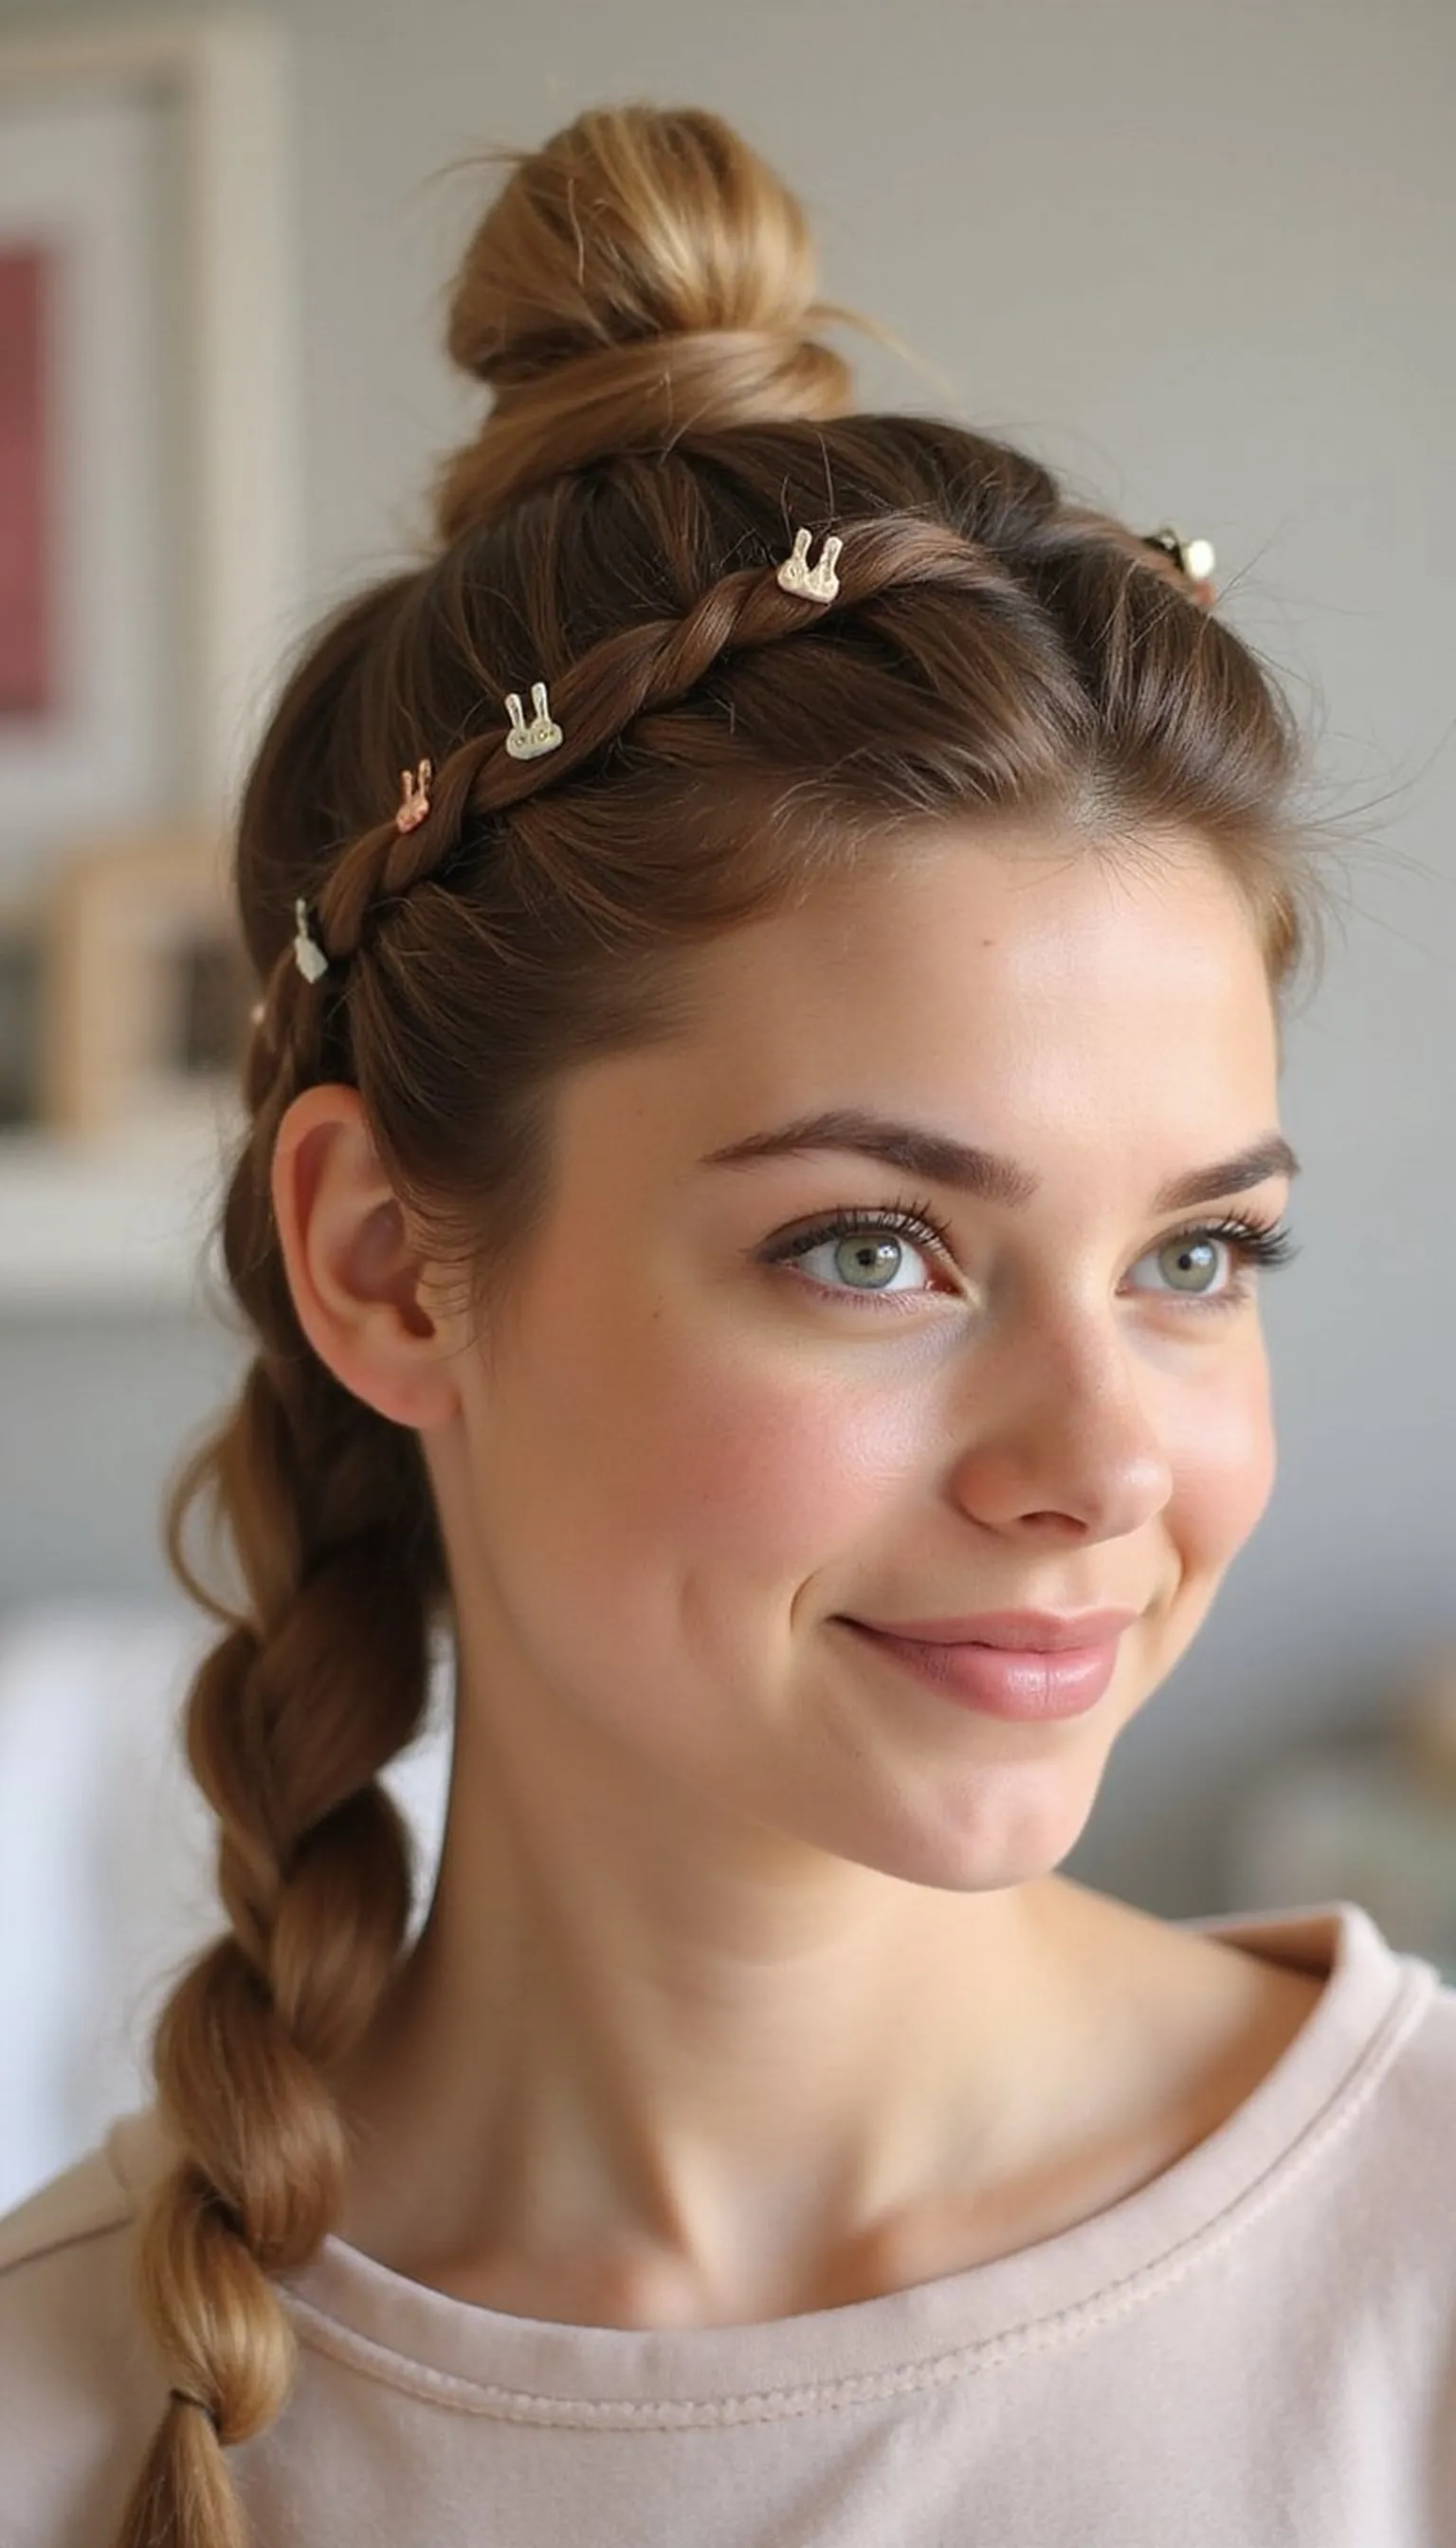
A small front twist braid pinned with bobby pins clears hair from the face and looks feminine and pretty. This one-handed finish tucks the braid behind the ear or across the crown for secure styling.
Take a narrow front section, twist or braid it away from the face, then anchor it behind the ear using a couple of bobby pins. The braid adds texture and interest without requiring a full-time commitment to braiding.
This suits medium to long hair and works well on layered cuts that need control. It’s a gentle way to keep hair tidy during feeds or outings without heavy styling.
Styling Tips
- Start with a small section to keep the twist quick and manageable.
- Cross bobby pins for stronger hold under movement.
- Loosen the braid slightly for a soft, romantic finish.
Pro Tip: Keep the front section small and secure the twist with crossed bobby pins for a durable hold that stays comfortable.
Avoid: Making the braid too tight creates tension at the hairline and can be uncomfortable. Aim for a gentle twist for comfort.
Try Also: Do a tiny Dutch braid for more texture, or turn the twist into a soft rope braid before pinning.
Products & Materials
Items Used
“Pretty front twist braided and pinned for a neat, wearable look.”
Bandana Tuck For Casual One-Handed Style
⏱️ 2 min · 🟢 Beginner
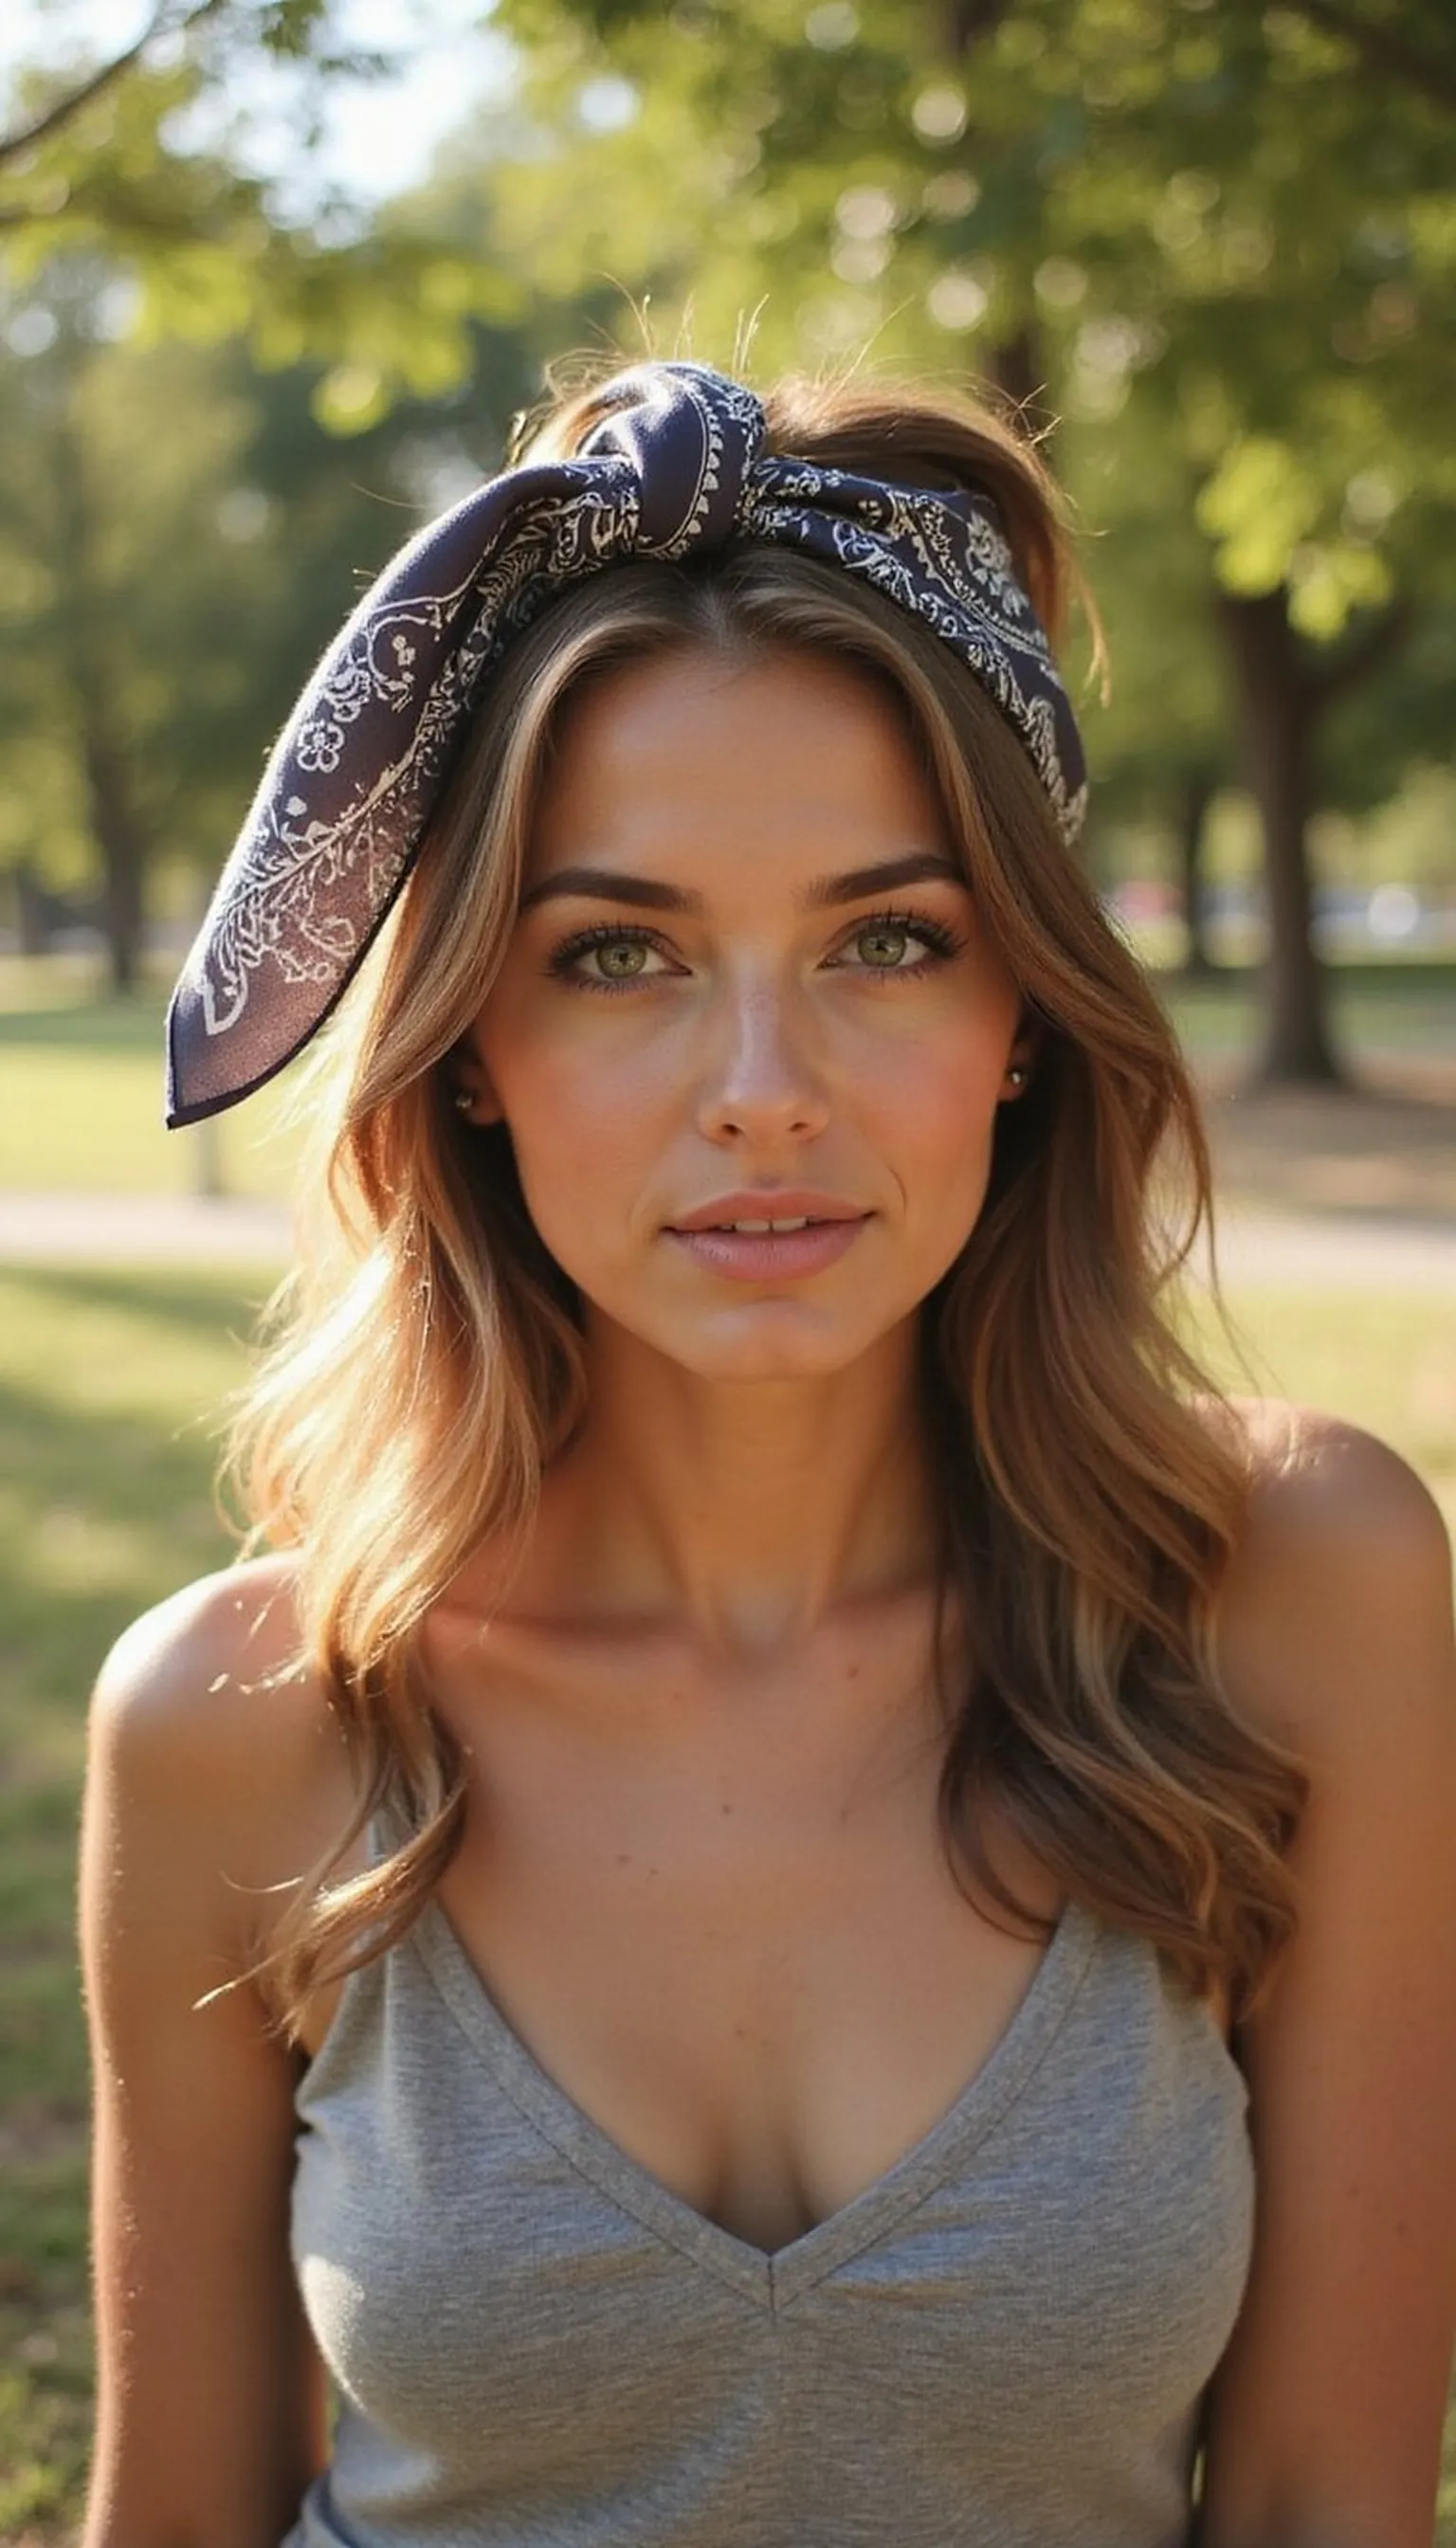
A bandana tuck creates an easy pulled-back look while adding color and keeping hair neat with one hand. This accessory-forward style disguises messy hair days and adds instant personality.
Fold the bandana into a thin band, place it at the hairline, then gather the top section and tuck or twist it under the band with one hand. The result is a tidy crown and a playful, laid-back finish.
Works on many hair lengths and textures and is especially helpful on slick or growing-out bangs. Swap patterns to match outfits and mood quickly.
Styling Tips
- Fold the bandana to a width that feels comfortable across your forehead.
- Use a slightly grippy bandana fabric so hair stays tucked in place.
- Let a few wisps fall out for a soft, casual frame.
Pro Tip: Pick a bandana with a slightly textured cotton to hold the tucked hair more securely without slipping.
Avoid: Tucking too much hair at once can create bulges under the bandana. Work in smaller sections for a smooth profile.
Try Also: Tie the bandana into a top knot for more edge, or wear it as a headscarf for fuller coverage.
Products & Materials
Items Used
“Playful bandana tuck for one-handed, colorful hair control.”
Bubble Ponytail For Quick Texture
⏱️ 6 min · 🟠 Intermediate
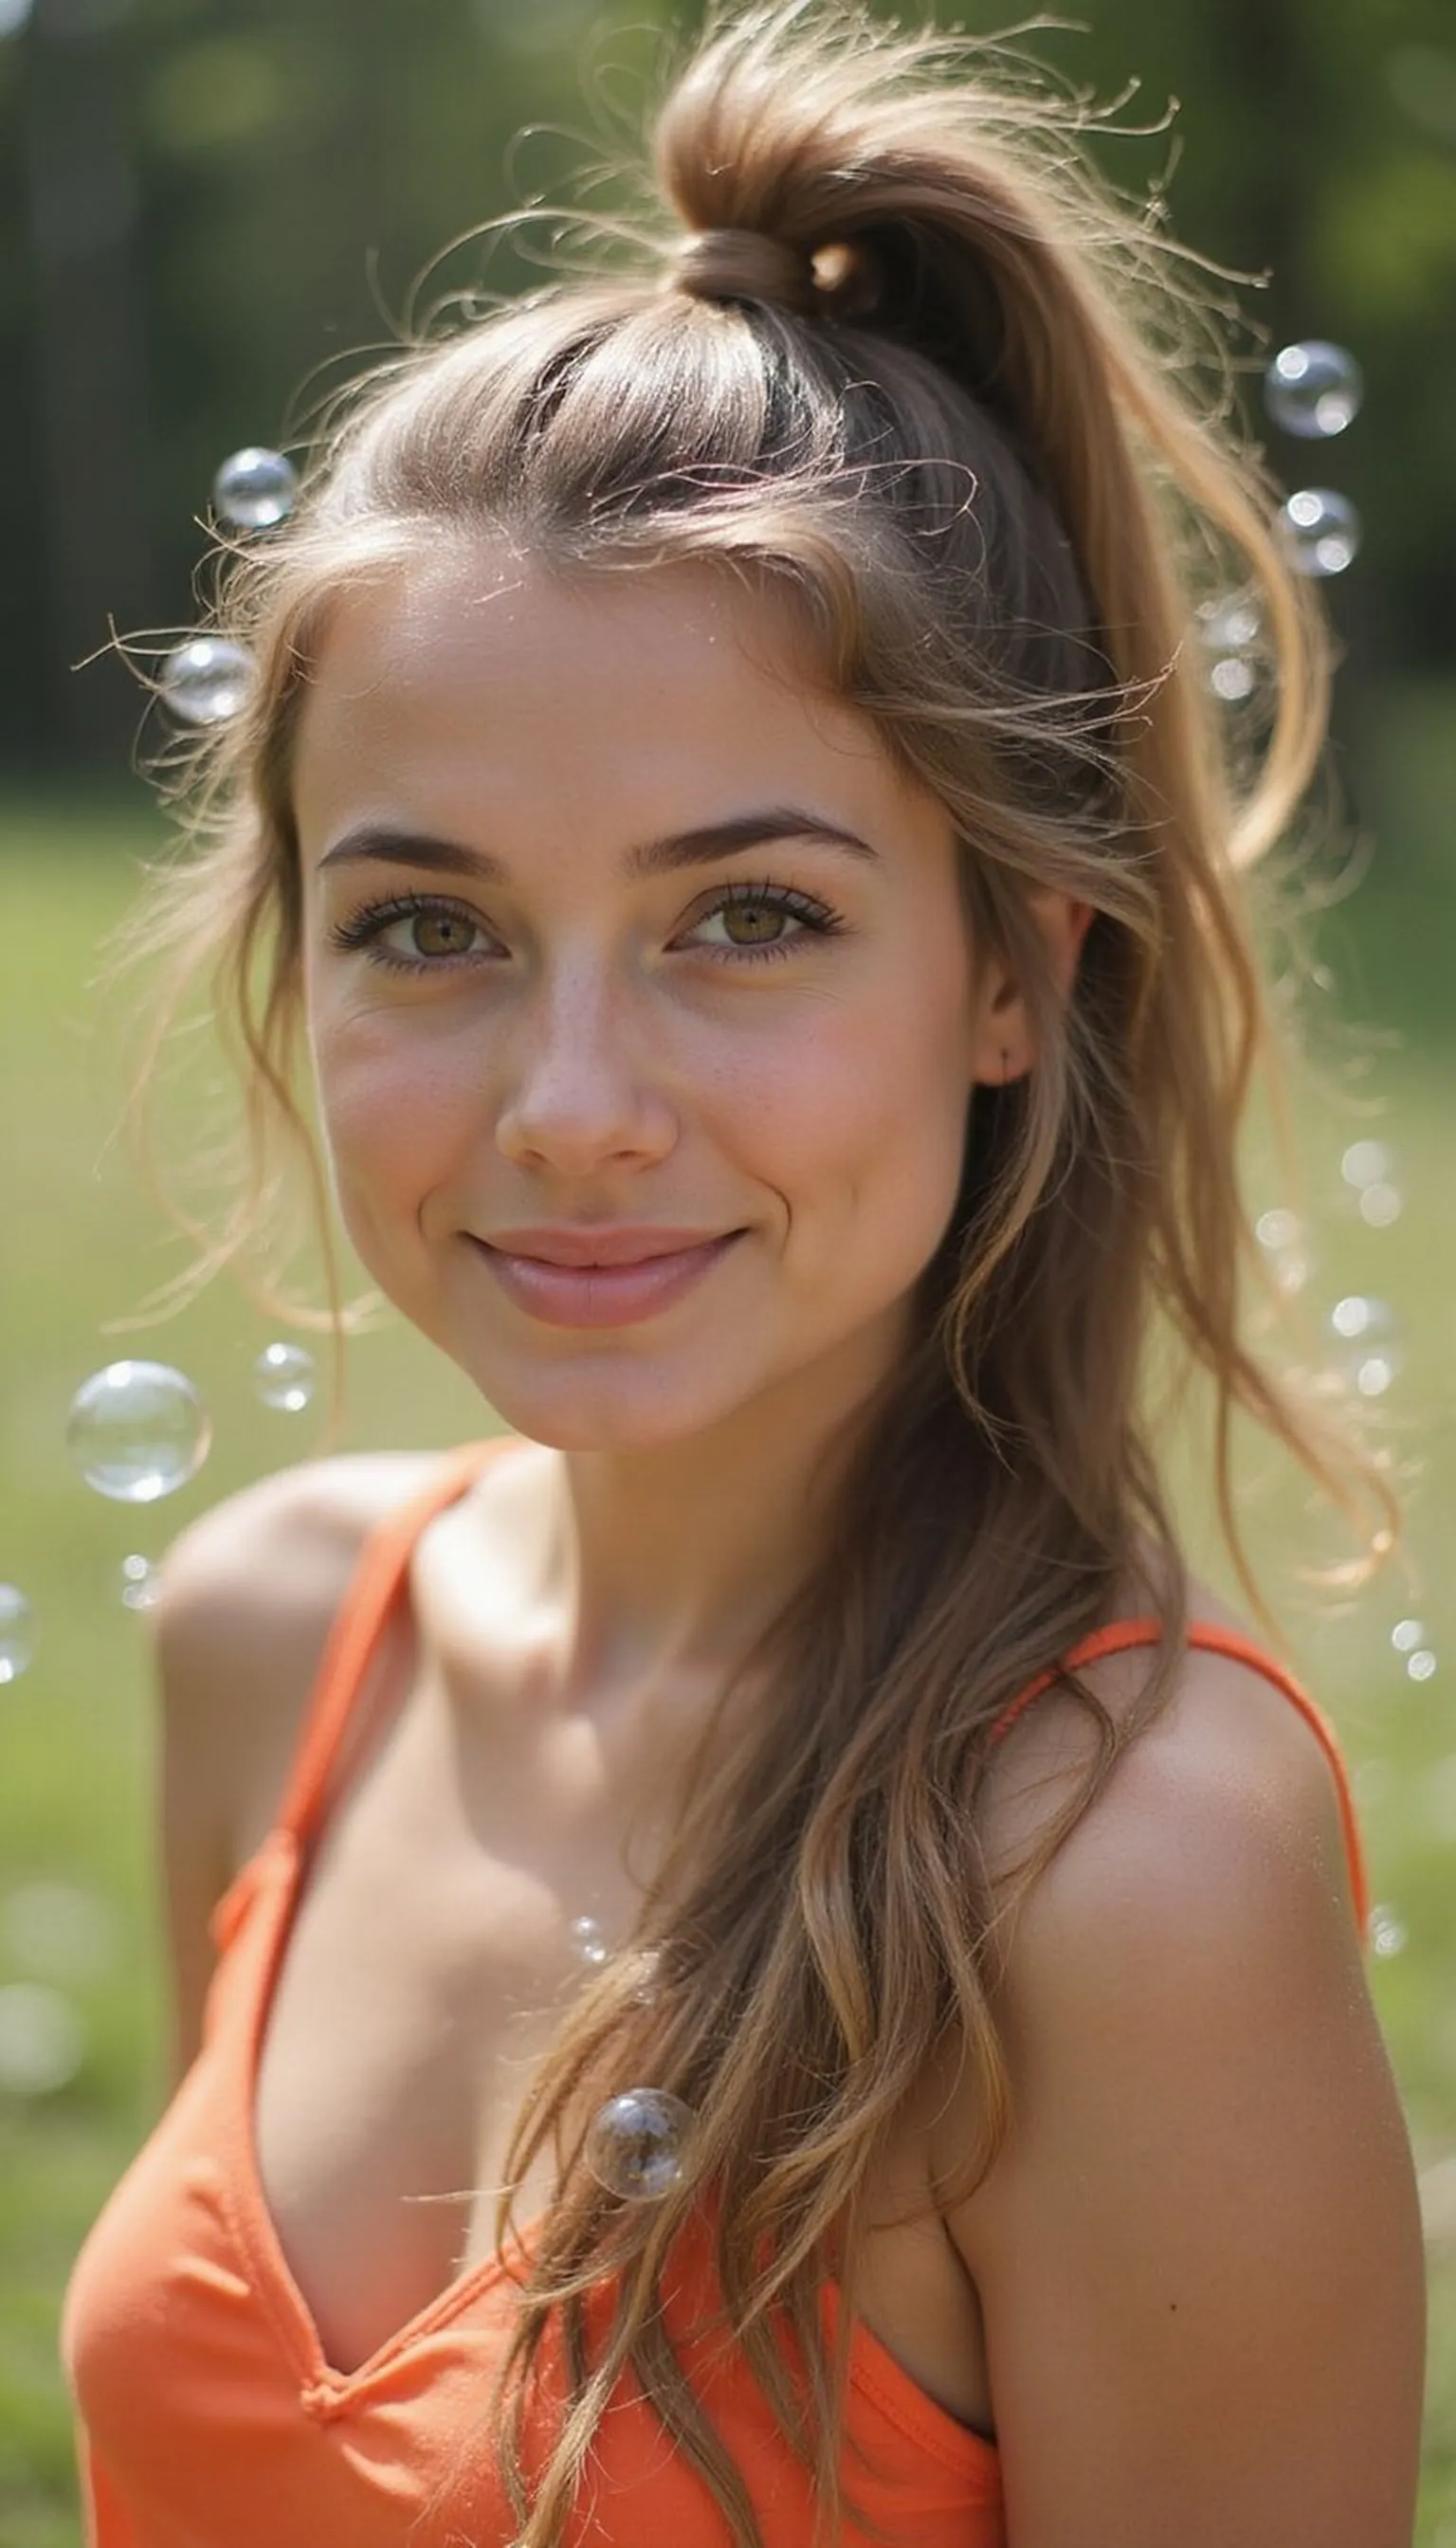
A bubble ponytail is a playful, secure style built from a series of elastics that can be adjusted with one hand. It creates volume and interest without heavy tools and stays comfortable for long wear.
Create a low or mid ponytail, then add small elastics every few inches and gently pull each segment to form rounded bubbles. The technique works well on medium-length hair and looks especially fun for busy days out with a little one.
This holds up through movement and can be dressed up by smoothing the top or pulling at bubbles for extra fullness. It’s an easy way to change a standard pony into something more graphic.
Styling Tips
- Use multiple thin elastics spaced evenly for clean bubbles.
- Pull each section gently to avoid flattening the base.
- Add texture spray before working for grip on silky hair.
Pro Tip: Place elastics about two to three inches apart and tease each section slightly before pulling to create round, uniform bubbles.
Avoid: Placing elastics too close compresses the bubbles and loses the voluminous effect. Keep spacing even for best results.
Try Also: Make a high bubble pony for a playful statement, or do a single large bubble for a subtler look.
Products & Materials
Items Used
“Fun bubble ponytail made one-handed for bouncy texture and hold.”
Half-Up French Twist With Clip
⏱️ 10 min · 🔴 Advanced
The half-up French twist gives a refined, tucked look that holds through activity and looks put together. It requires a little practice but can be finished with a single clip placed using one hand.
Create a gentle roll by gathering the top section, folding it inward toward the crown, and tucking until a smooth twist forms. Secure the roll with a medium clip that clasps the twist and adds decorative detail in one motion.
This works on medium to long hair and gives a chic, retro vibe that’s surprisingly life-ready. It’s a choice for outings that call for a neater silhouette while keeping care tasks simple.
Styling Tips
- Start with slightly textured hair so the twist grips better.
- Use a clip with a wide base to anchor the roll securely.
- Loosen the front edges slightly to soften the look.
Pro Tip: Roll the top section gently and place the clip horizontally to catch the twist’s base for the most hold and comfort.
Avoid: Rushing the roll often creates creases or unevenness that won’t sit flat. Take a moment to smooth as you tuck.
Try Also: Make the twist tighter for a sleek look, or softer and messier for a relaxed, lived-in feeling.
Products & Materials
Items Used
“Polished half-up French twist clipped in place for an elegant one-handed finish.”
Textured Low Knot For Effortless Hold
⏱️ 7 min · 🟠 Intermediate
A textured low knot tucks hair into a soft knot at the nape and can be finished with one hand using a clip or bobby pins. The texture makes the knot look intentionally undone and holds better through movement.
Create loose waves or tousle second-day hair for grip, then fold hair into a low knot and secure the base with a clip or a couple of pins. Pull a few face-framing pieces loose to balance the look and keep it approachable.
This style reads both casual and groomed depending on how tight the knot is pulled. It works well for medium to long hair and hides flyaways cleverly inside the knot.
Styling Tips
- Add texture spray before knotting to help hair hold shape.
- Secure with a clip for a faster one-handed finish.
- Loosen the knot edges for a softer silhouette.
Pro Tip: Build a bit of texture before knotting to give the hair something to hold onto and make the knot last longer.
Avoid: Trying to make the knot too tight removes the relaxed charm and can strain the scalp. Keep it gently secure instead.
Try Also: Make a tighter low bun for evenings, or a looser knot paired with a decorative clip for daytime polish.
Products & Materials
Items Used
“Soft textured low knot for a cozy, one-handed polished look.”
Quick Sock Bun For Sleek Volume
⏱️ 6 min · 🟠 Intermediate
A sock bun gives instant volume and a smooth finish, and with a bit of practice can be made one-handed at the final tuck. This look creates a full bun without backcombing and stays neat for hours.
Use a hair donut or rolled sock to form the base, pull hair through, and wrap the ends around the donut, tucking the tail under with one hand if needed. Smooth the top with fingers for a chic, tidy silhouette.
This suits medium to long hair and lifts second-day texture beautifully. It’s a great option for days that call for a cleaner, more structured bun.
Styling Tips
- Choose a donut size that matches desired bun fullness.
- Smooth hair over the donut to avoid lumps and bumps.
- Secure loose ends with bobby pins for extra hold.
Pro Tip: Use a hair donut or rolled sock sized to your hair volume, then wrap and tuck ends neatly for a full, even bun.
Avoid: Using a donut that’s too small makes the bun look cramped and uneven. Match the donut to your hair thickness for balance.
Try Also: Go for a low sock bun for understated polish or a higher version for more drama and lift.
Products & Materials
Items Used
“Full sock bun for sleek volume, finished one-handed when needed.”
Mini Topknot With Decorative Barrette
⏱️ 3 min · 🟢 Beginner
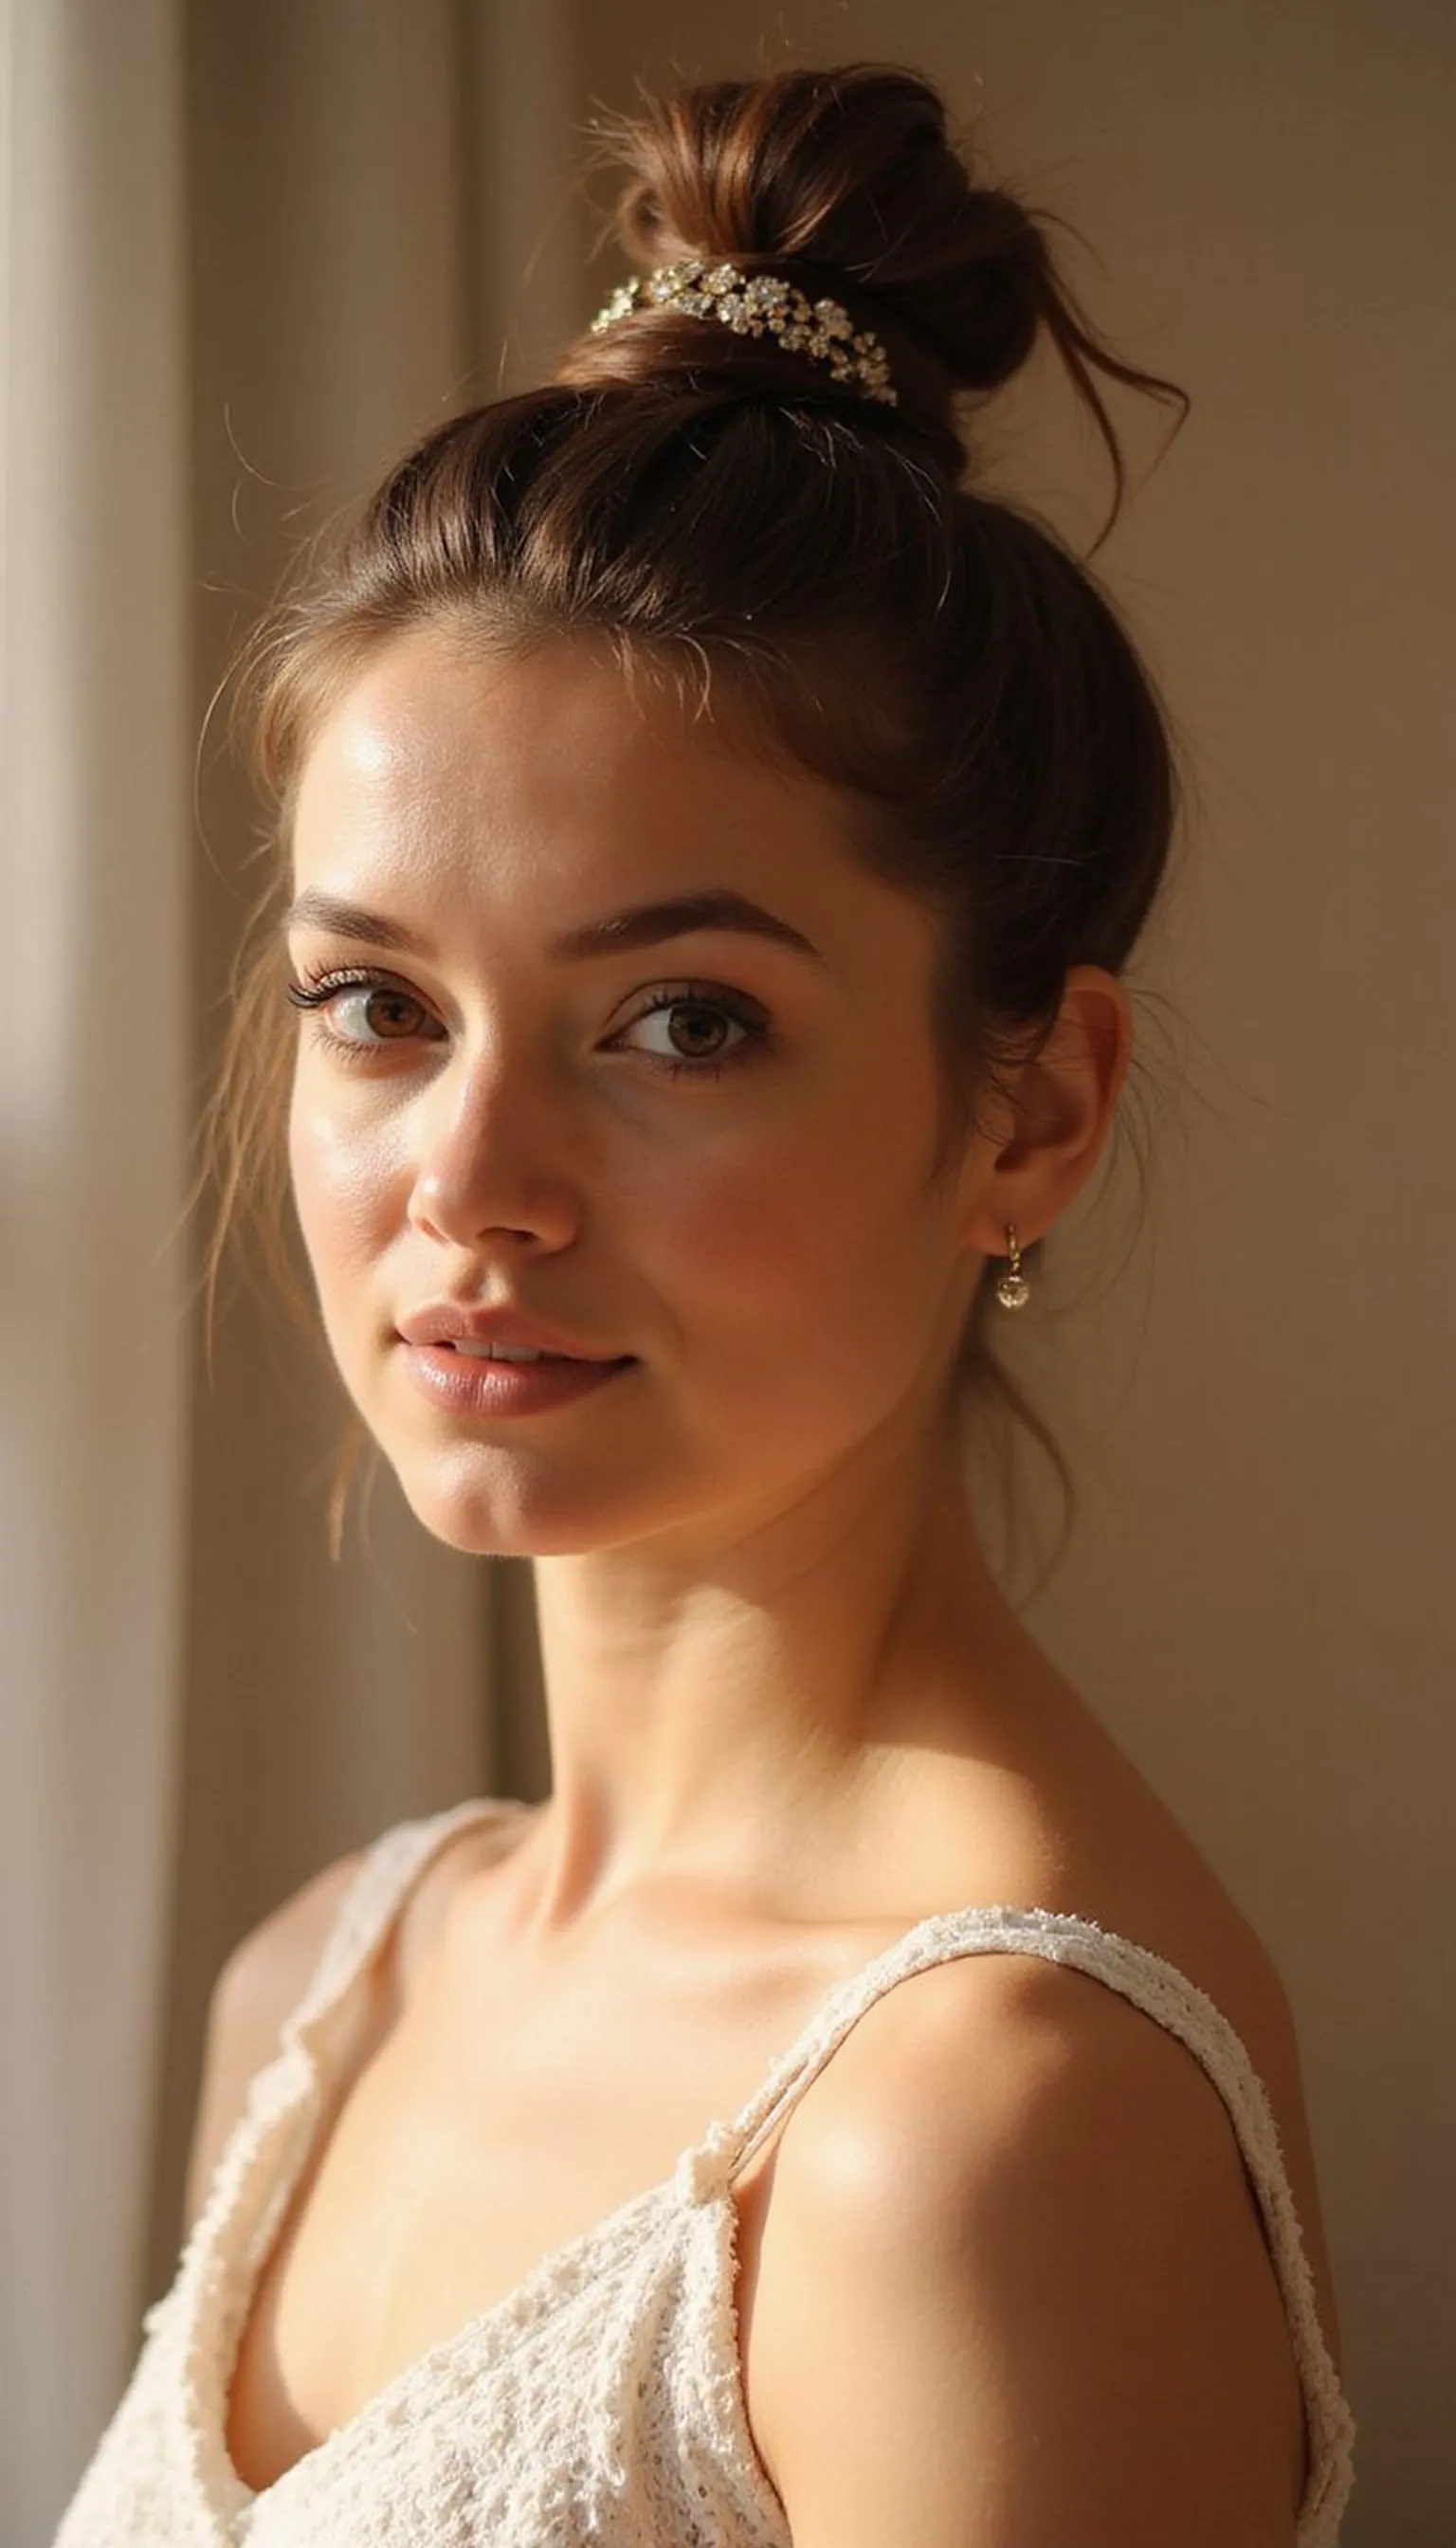
A mini topknot clipped with a decorative barrette adds instant charm and is easy to secure using one hand. This small knot keeps hair tidy while adding a jewelry-like accent to the look.
Gather a small section at the crown, twist into a mini knot, and finish by clipping a pretty barrette over the base to hold everything in place. The barrette makes placement faster and adds polish to an otherwise simple knot.
This style works great on shorter or layered hair that won’t reach a full top knot. It’s a quick lift that reads cute and intentional during busy days.
Styling Tips
- Pick a barrette with a firm clasp to secure the knot reliably.
- Keep the knot small for comfort and manageability.
- Let wisps fall freely for a soft, effortless frame.
Pro Tip: Secure the mini topknot with a decorative barrette placed over the knot’s base to lock the hair in place with minimal fuss.
Avoid: Using a weak clip will let the knot slip out quickly. Choose a barrette with a strong clasp for dependable hold.
Try Also: Use a pearl barrette for dressier occasions or a simple metal clip for everyday polish.
Products & Materials
Items Used
“Charming mini topknot clipped with a decorative barrette for quick flair.”
