
As an Amazon Associate I earn from qualifying purchases.
Sunlight filters through soft curtains as hair naturally falls into loose shapes with every slight movement. On lazy Sundays at home, hairstyles speak quietly but clearly — they’re simple yet surprisingly flattering, requiring minimal effort but offering calm confidence.
These no-fuss hairstyles for lazy Sundays blend ease with style, pairing well with cozy sweaters or just a casual tee. Gentle textures and quick twists are front and center here, capturing a mood driven by comfort and softness.
Finding the right balance between quick and stylish turns everyday hair into a low-key cool statement that doesn’t interrupt relaxation.
Effortless Low Bun With Tendrils Framing Face
⏱️ 5 min · 🟢 Beginner
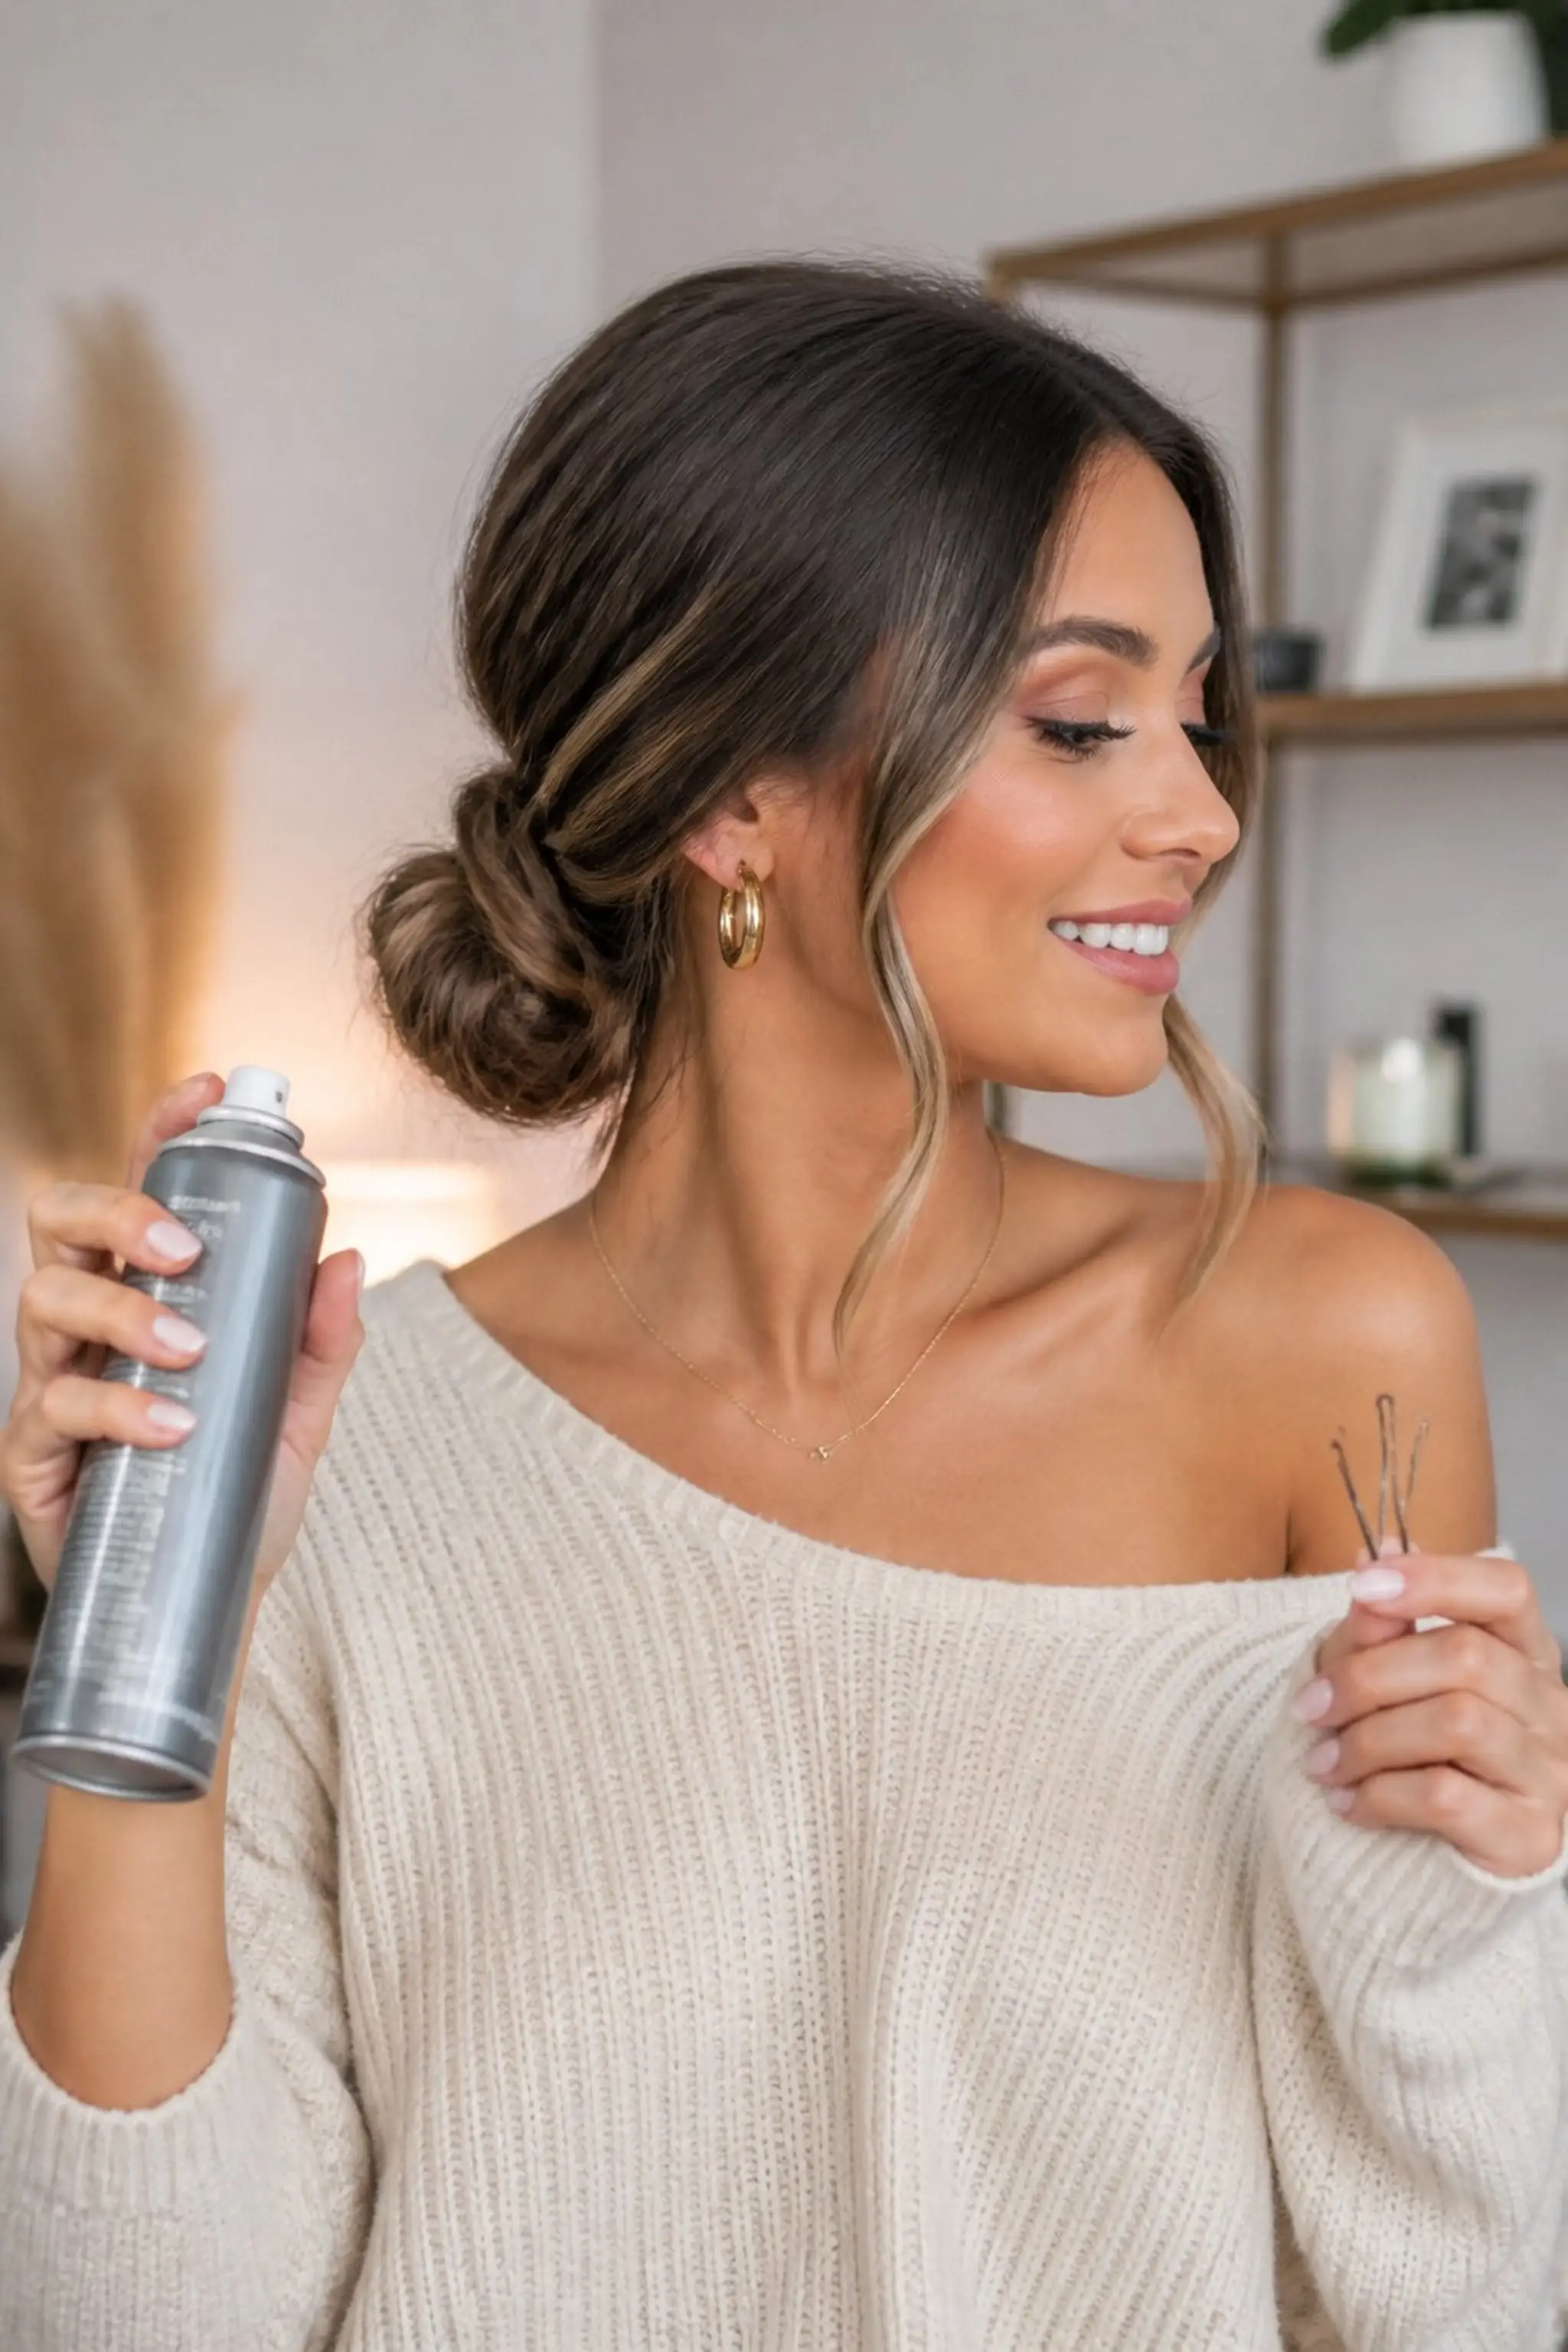
Soft tendrils loosely surround the face while the rest of the hair is gathered into a low bun at the nape. Strands are twisted gently, creating subtle motion without much fuss.
This style works well on hair that holds shape softly, especially with thin strands or wavy textures. About 5 hair pins keep the bun secure but relaxed enough to shift slightly with movement.
Styling Tips
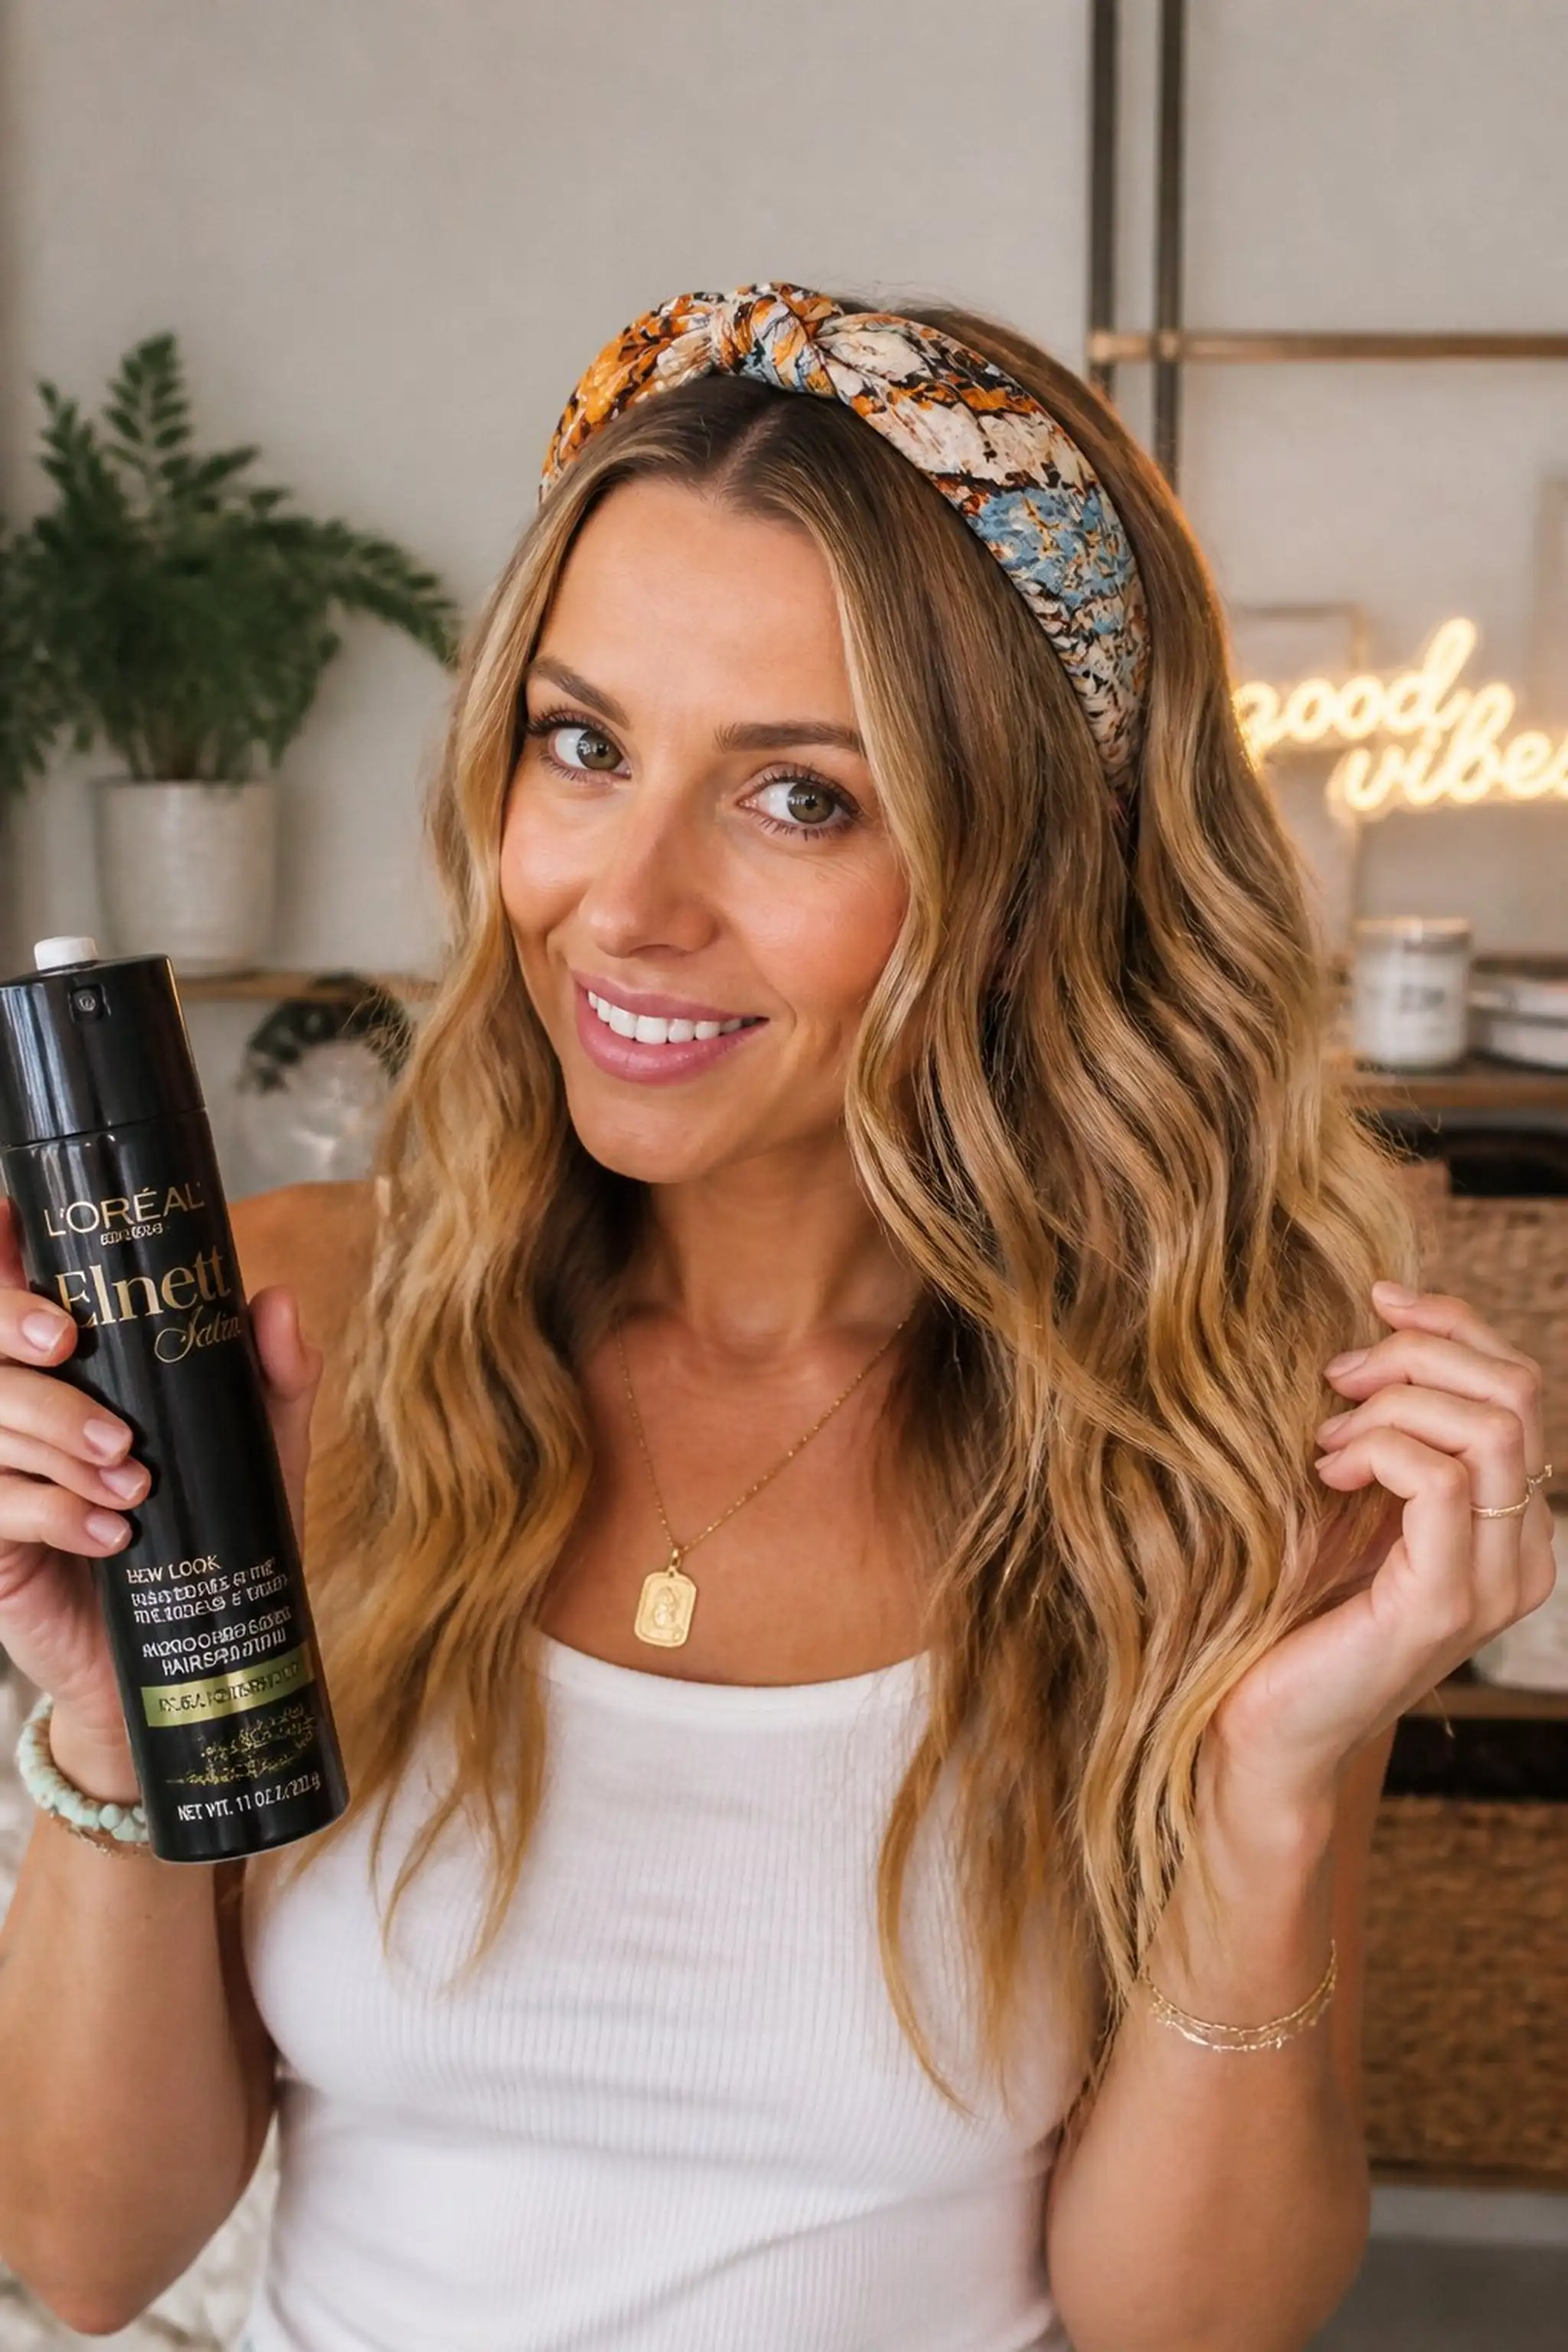
- Use a light texturizing spray to add grip.
- Pull just a few face-framing strands for softness.
- Secure the bun low to reduce tension on the scalp.
Pro Tip: Loosen the bun edges after pinning to add volume and avoid a tight look.
Avoid: Avoid over-pulling the hair into the bun, which can make the style look tight and uncomfortable.
Try Also: Try a twisted rope bun or switch tendrils for mini braids to add interest quickly.
Products & Materials
Items Used
- hair pins
- light texturizing spray
“Soft low bun with face-framing tendrils for easy Sunday style.”
Messy High Ponytail With Volume at Roots
⏱️ 7 min · 🟢 Beginner
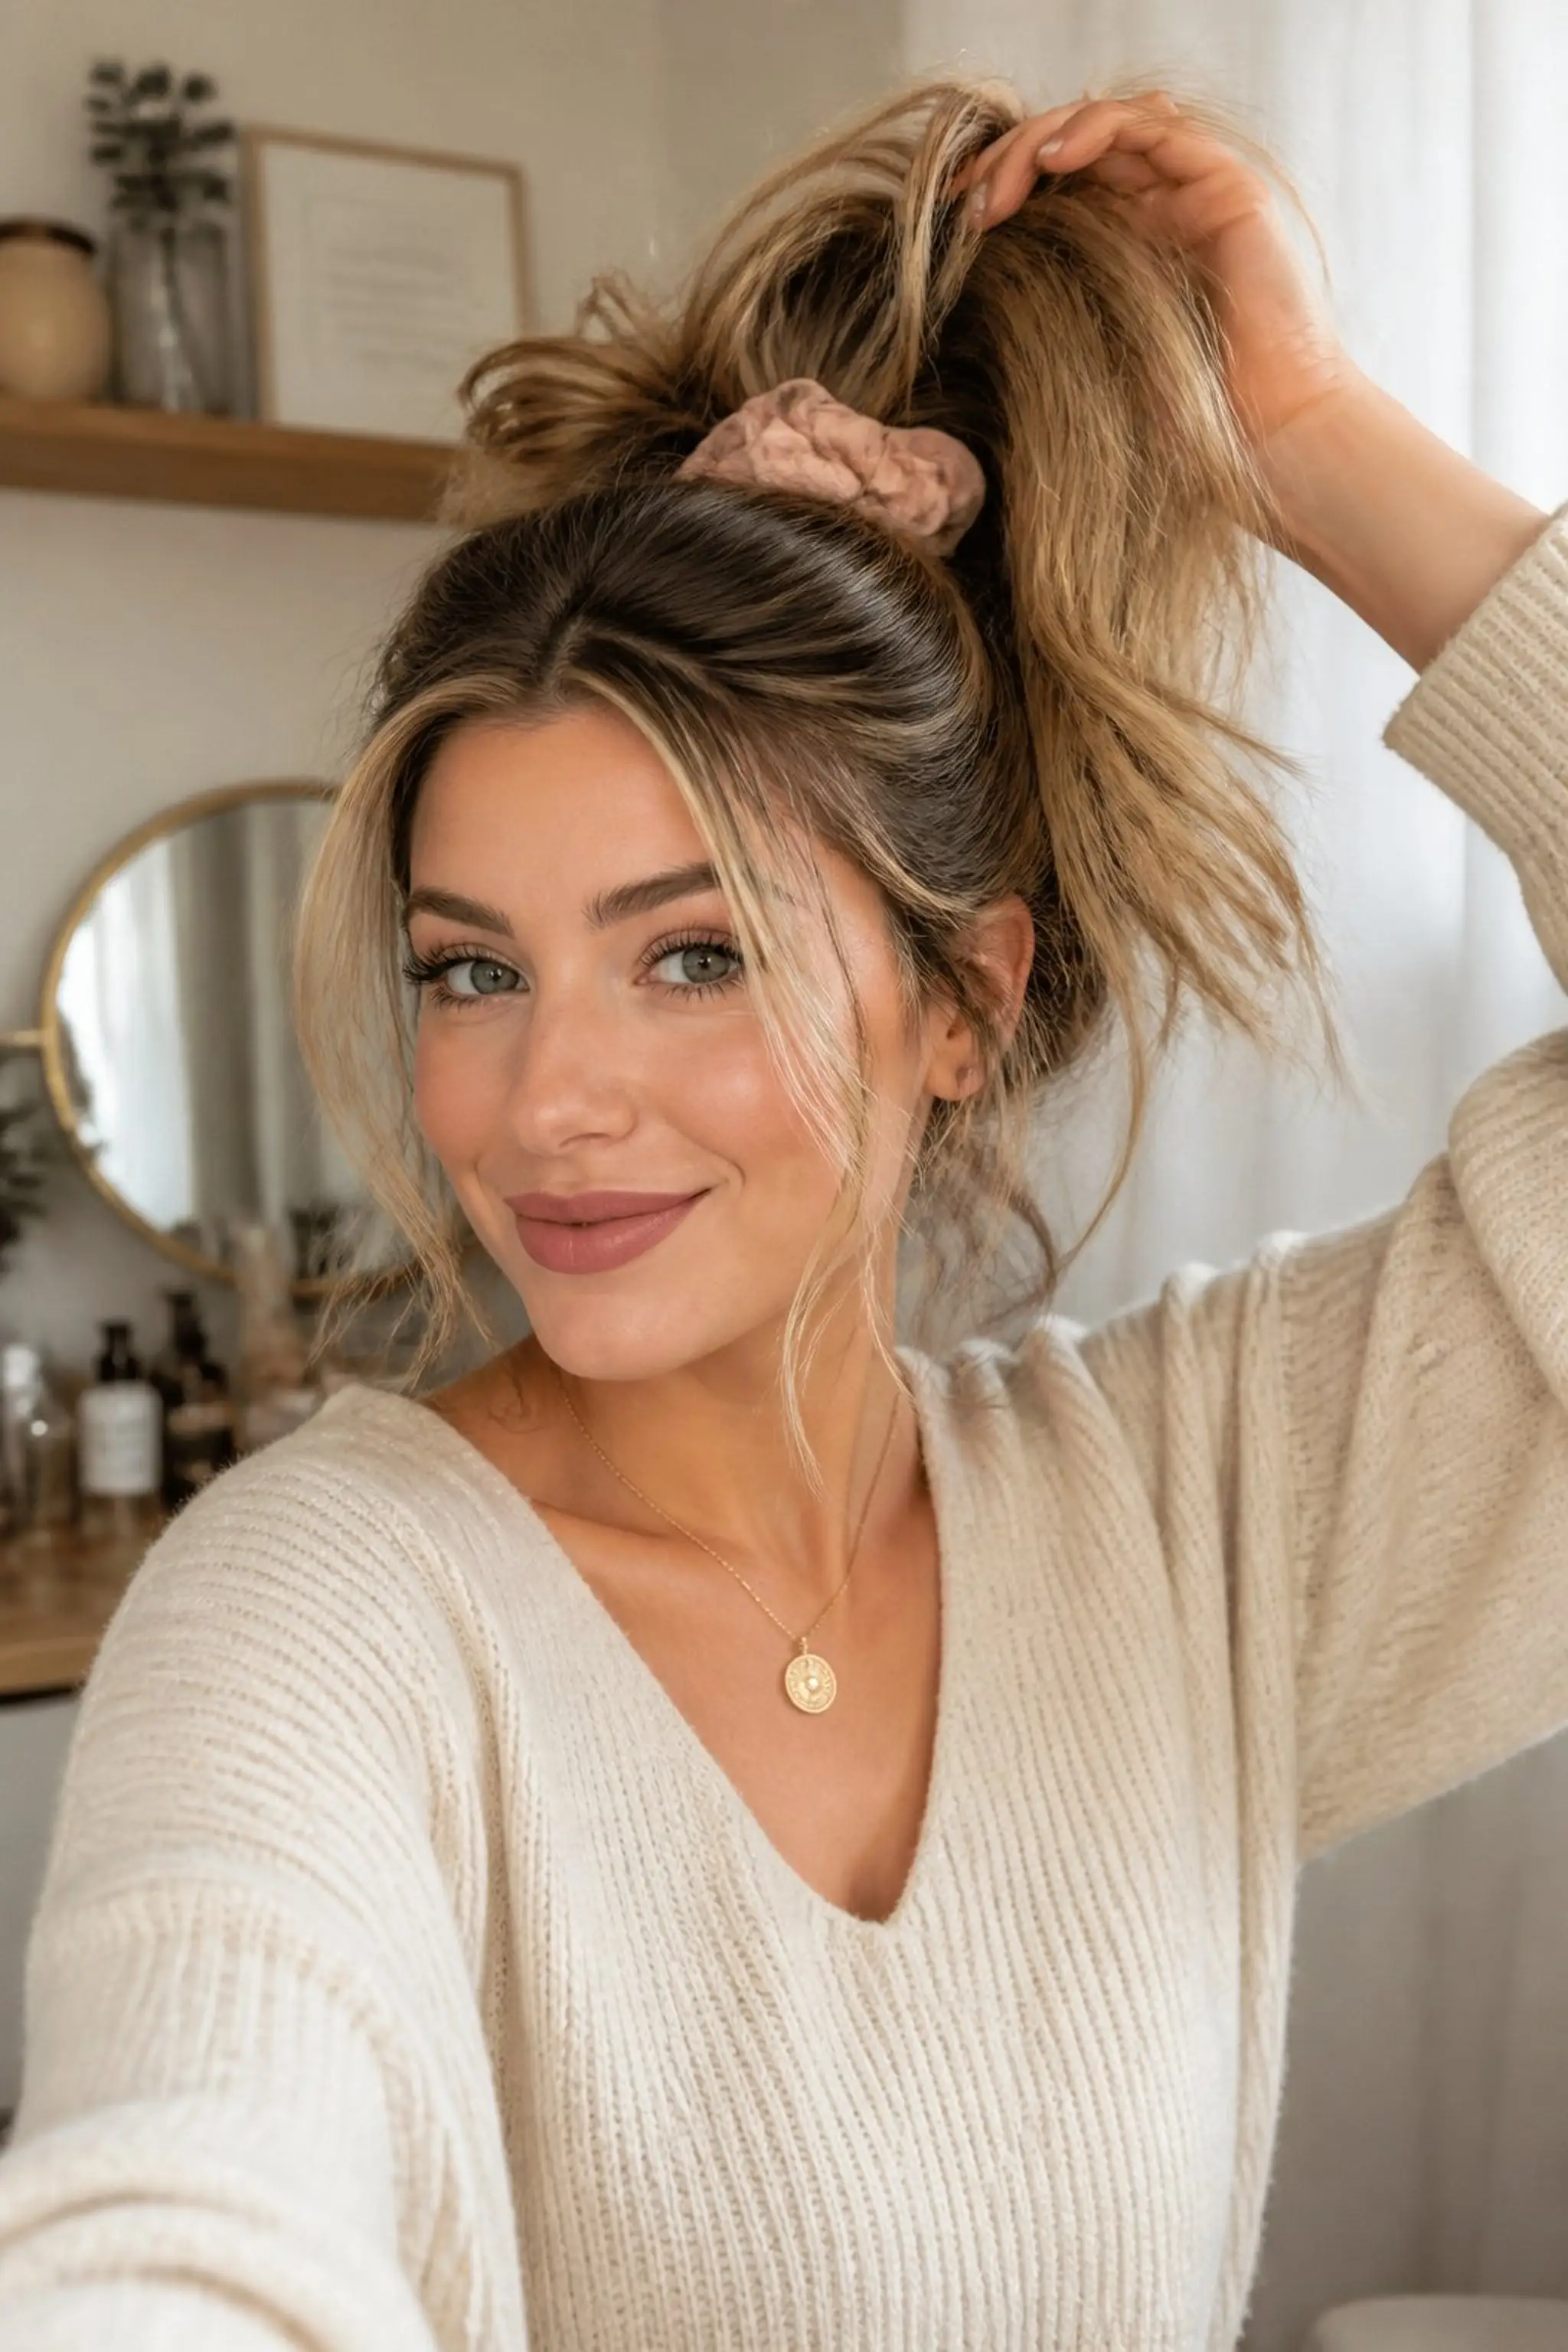
Loose strands escape the high ponytail, creating a textured silhouette with natural lift at the roots. The hair has a gentle matte finish that softens shine and boosts volume.
Teasing at the crown adds about 2 inches of height, helping this look balance playfulness with effortless shape. A soft fabric scrunchie keeps the ponytail secure without disrupting texture.
Styling Tips
- Lightly tease crown hair for root volume before gathering.
- Leave some strands loose around the forehead for a soft frame.
- Choose a scrunchie that matches hair color to blend seamlessly.
Pro Tip: Use a wide-tooth comb gently at roots to lift hair without damaging strands.
Avoid: Tying hair too tightly flattens root volume and can cause discomfort over time.
Try Also: Swap the scrunchie for a claw clip or wear the ponytail low for a chilled look.
Products & Materials
Items Used
“Playful high ponytail with bounce and loose strands for easy charm.”
Simple Half-Up Twist With Minimal Pins
⏱️ 6 min · 🟢 Beginner
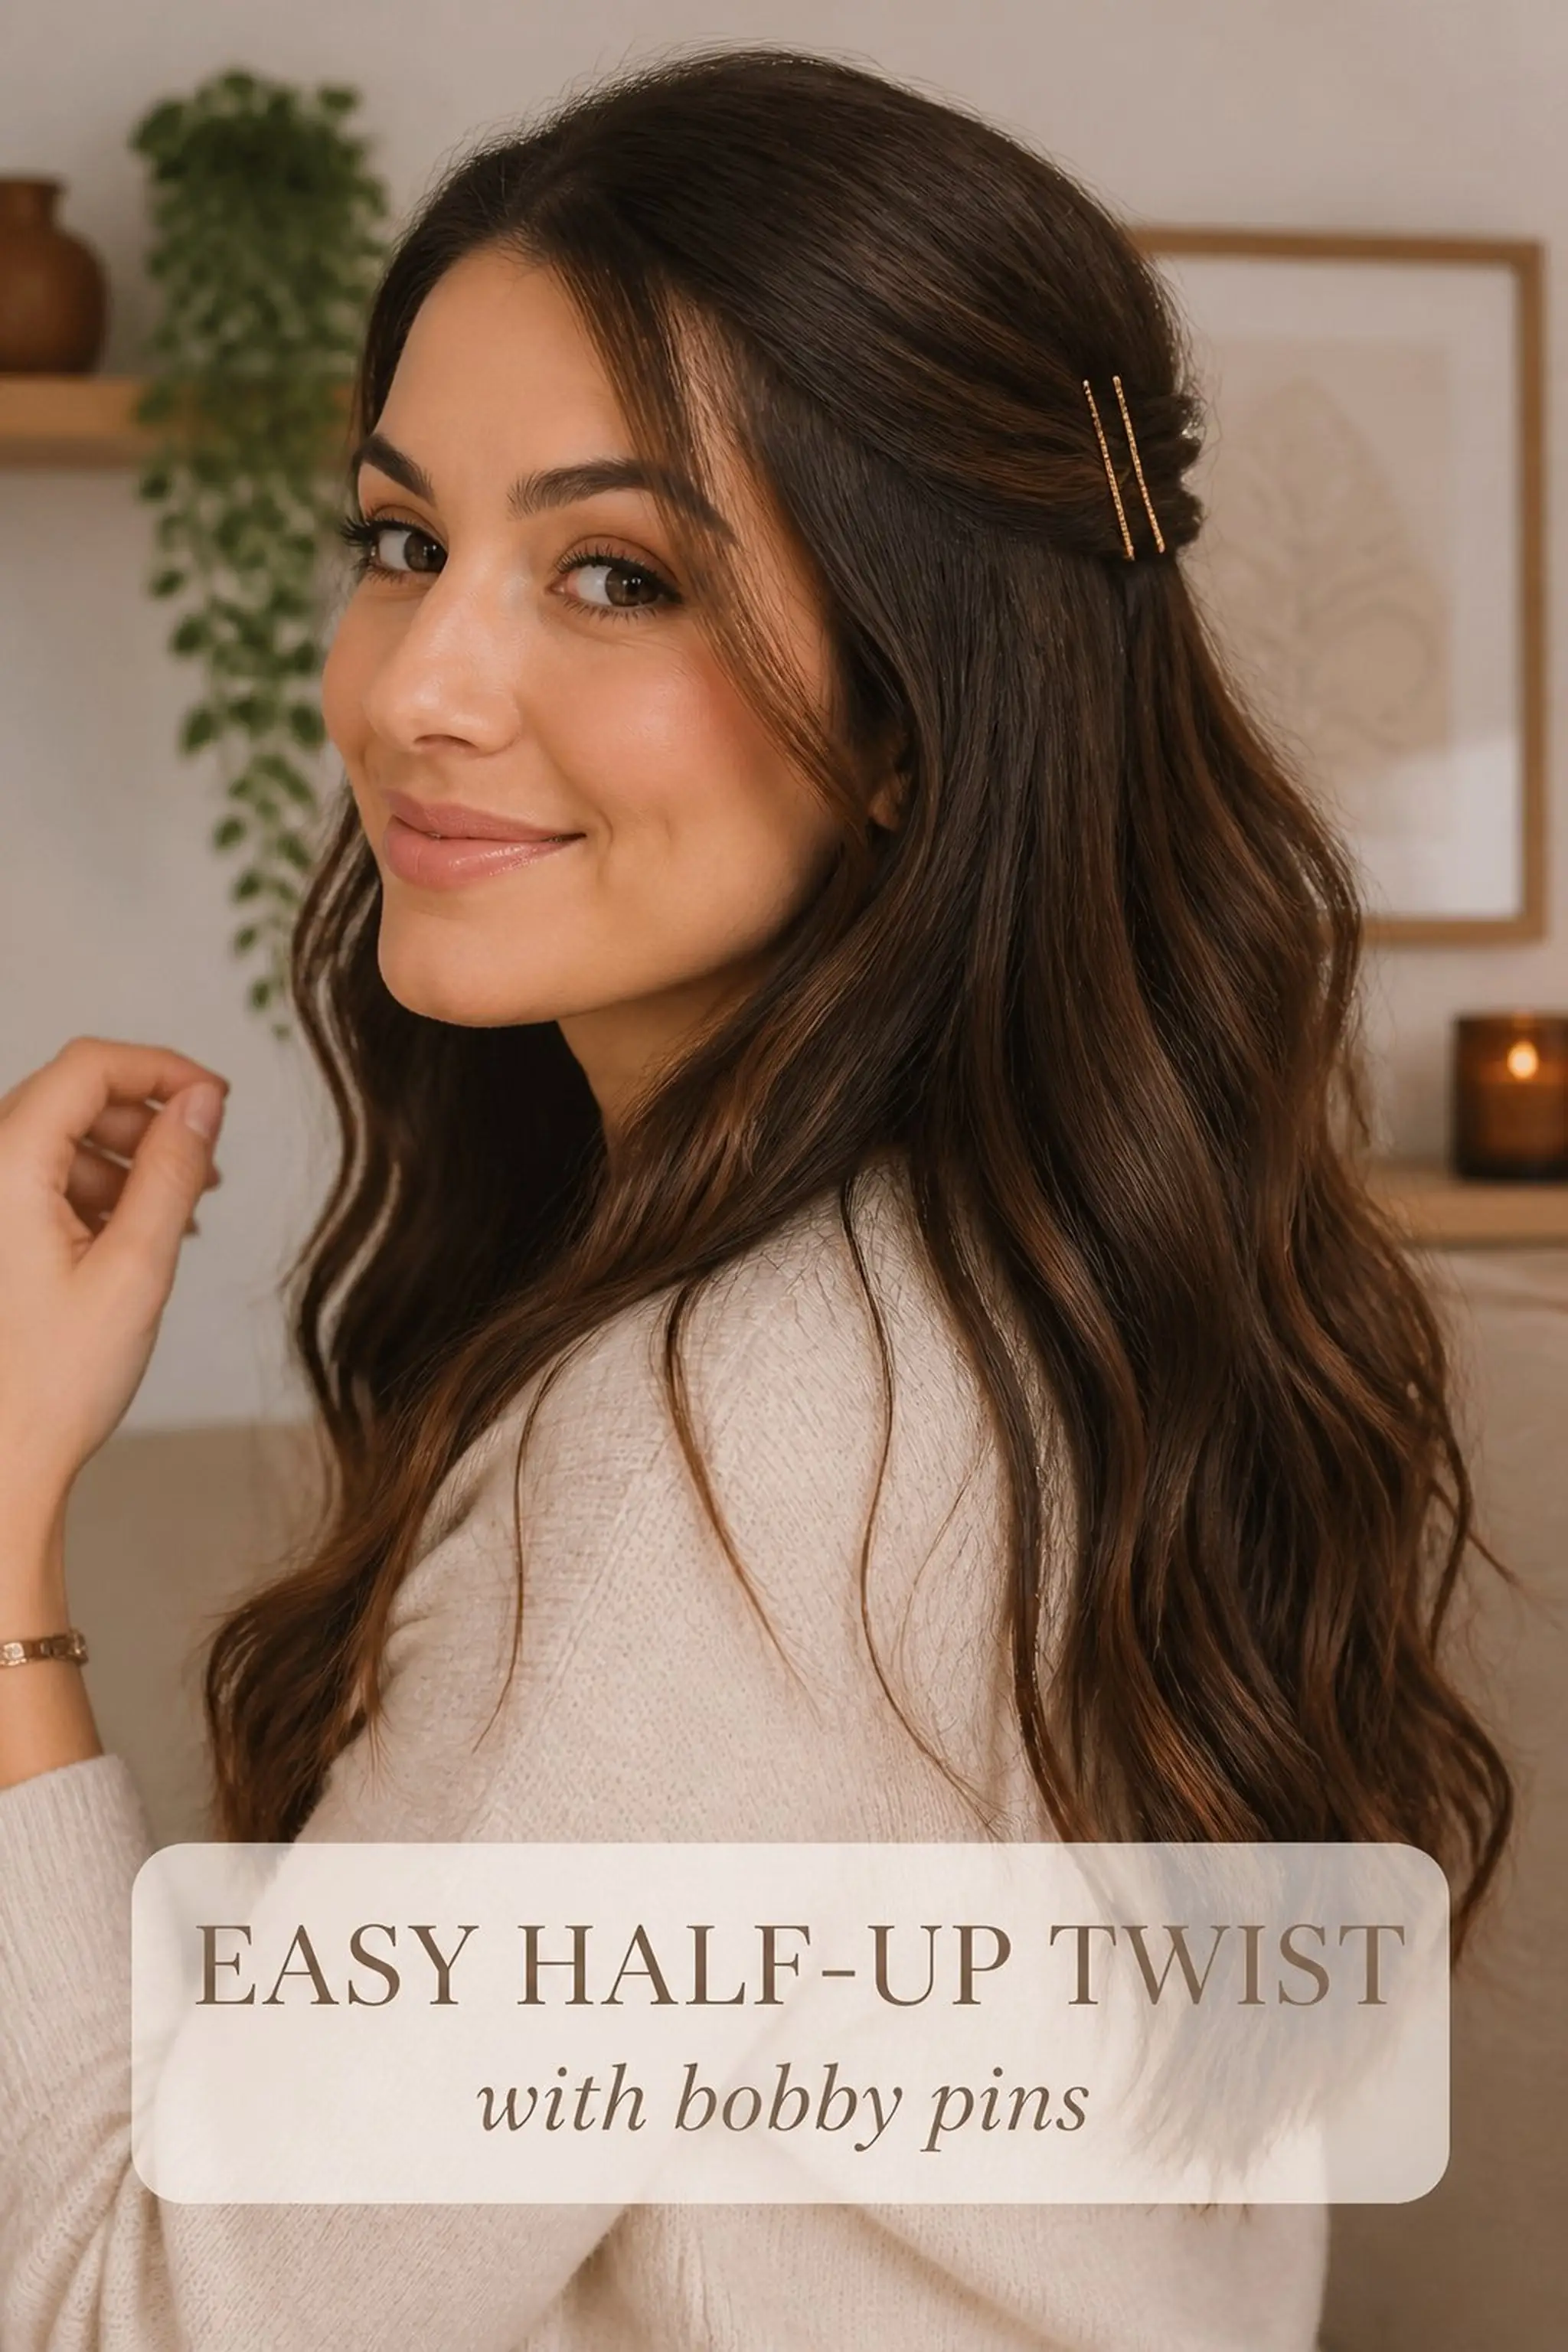
Two sections from the front are gently twisted back and pinned with small golden clips, leaving the rest of the hair flowing freely with soft waves.
This style works well for medium-length hair, using just 3 bobby pins that match hair color to keep the twists secure but discreet. Loose waves add natural dimension.
Styling Tips
- Create loose waves with a 1-inch curling iron for subtle texture.
- Pin twists slightly off center for a casual vibe.
- Choose bobby pins close to your hair shade for invisibility.
Pro Tip: Twist the sections away from the face to open up the forehead gently.
Avoid: Using too few pins can cause twists to slip out quickly during wear.
Try Also: Replace twists with mini braids or swap pins for small claw clips for easy swaps.
Products & Materials
Items Used
“Quick half-up twist with subtle waves and minimal pins.”
Get 75+ ad-free, high-resolution printable tutorials for salon-quality results every single morning.
One printable guide · $19.99 · yours forever
Loose Low Ponytail With Wrapped Hair Tie
⏱️ 8 min · 🟠 Intermediate
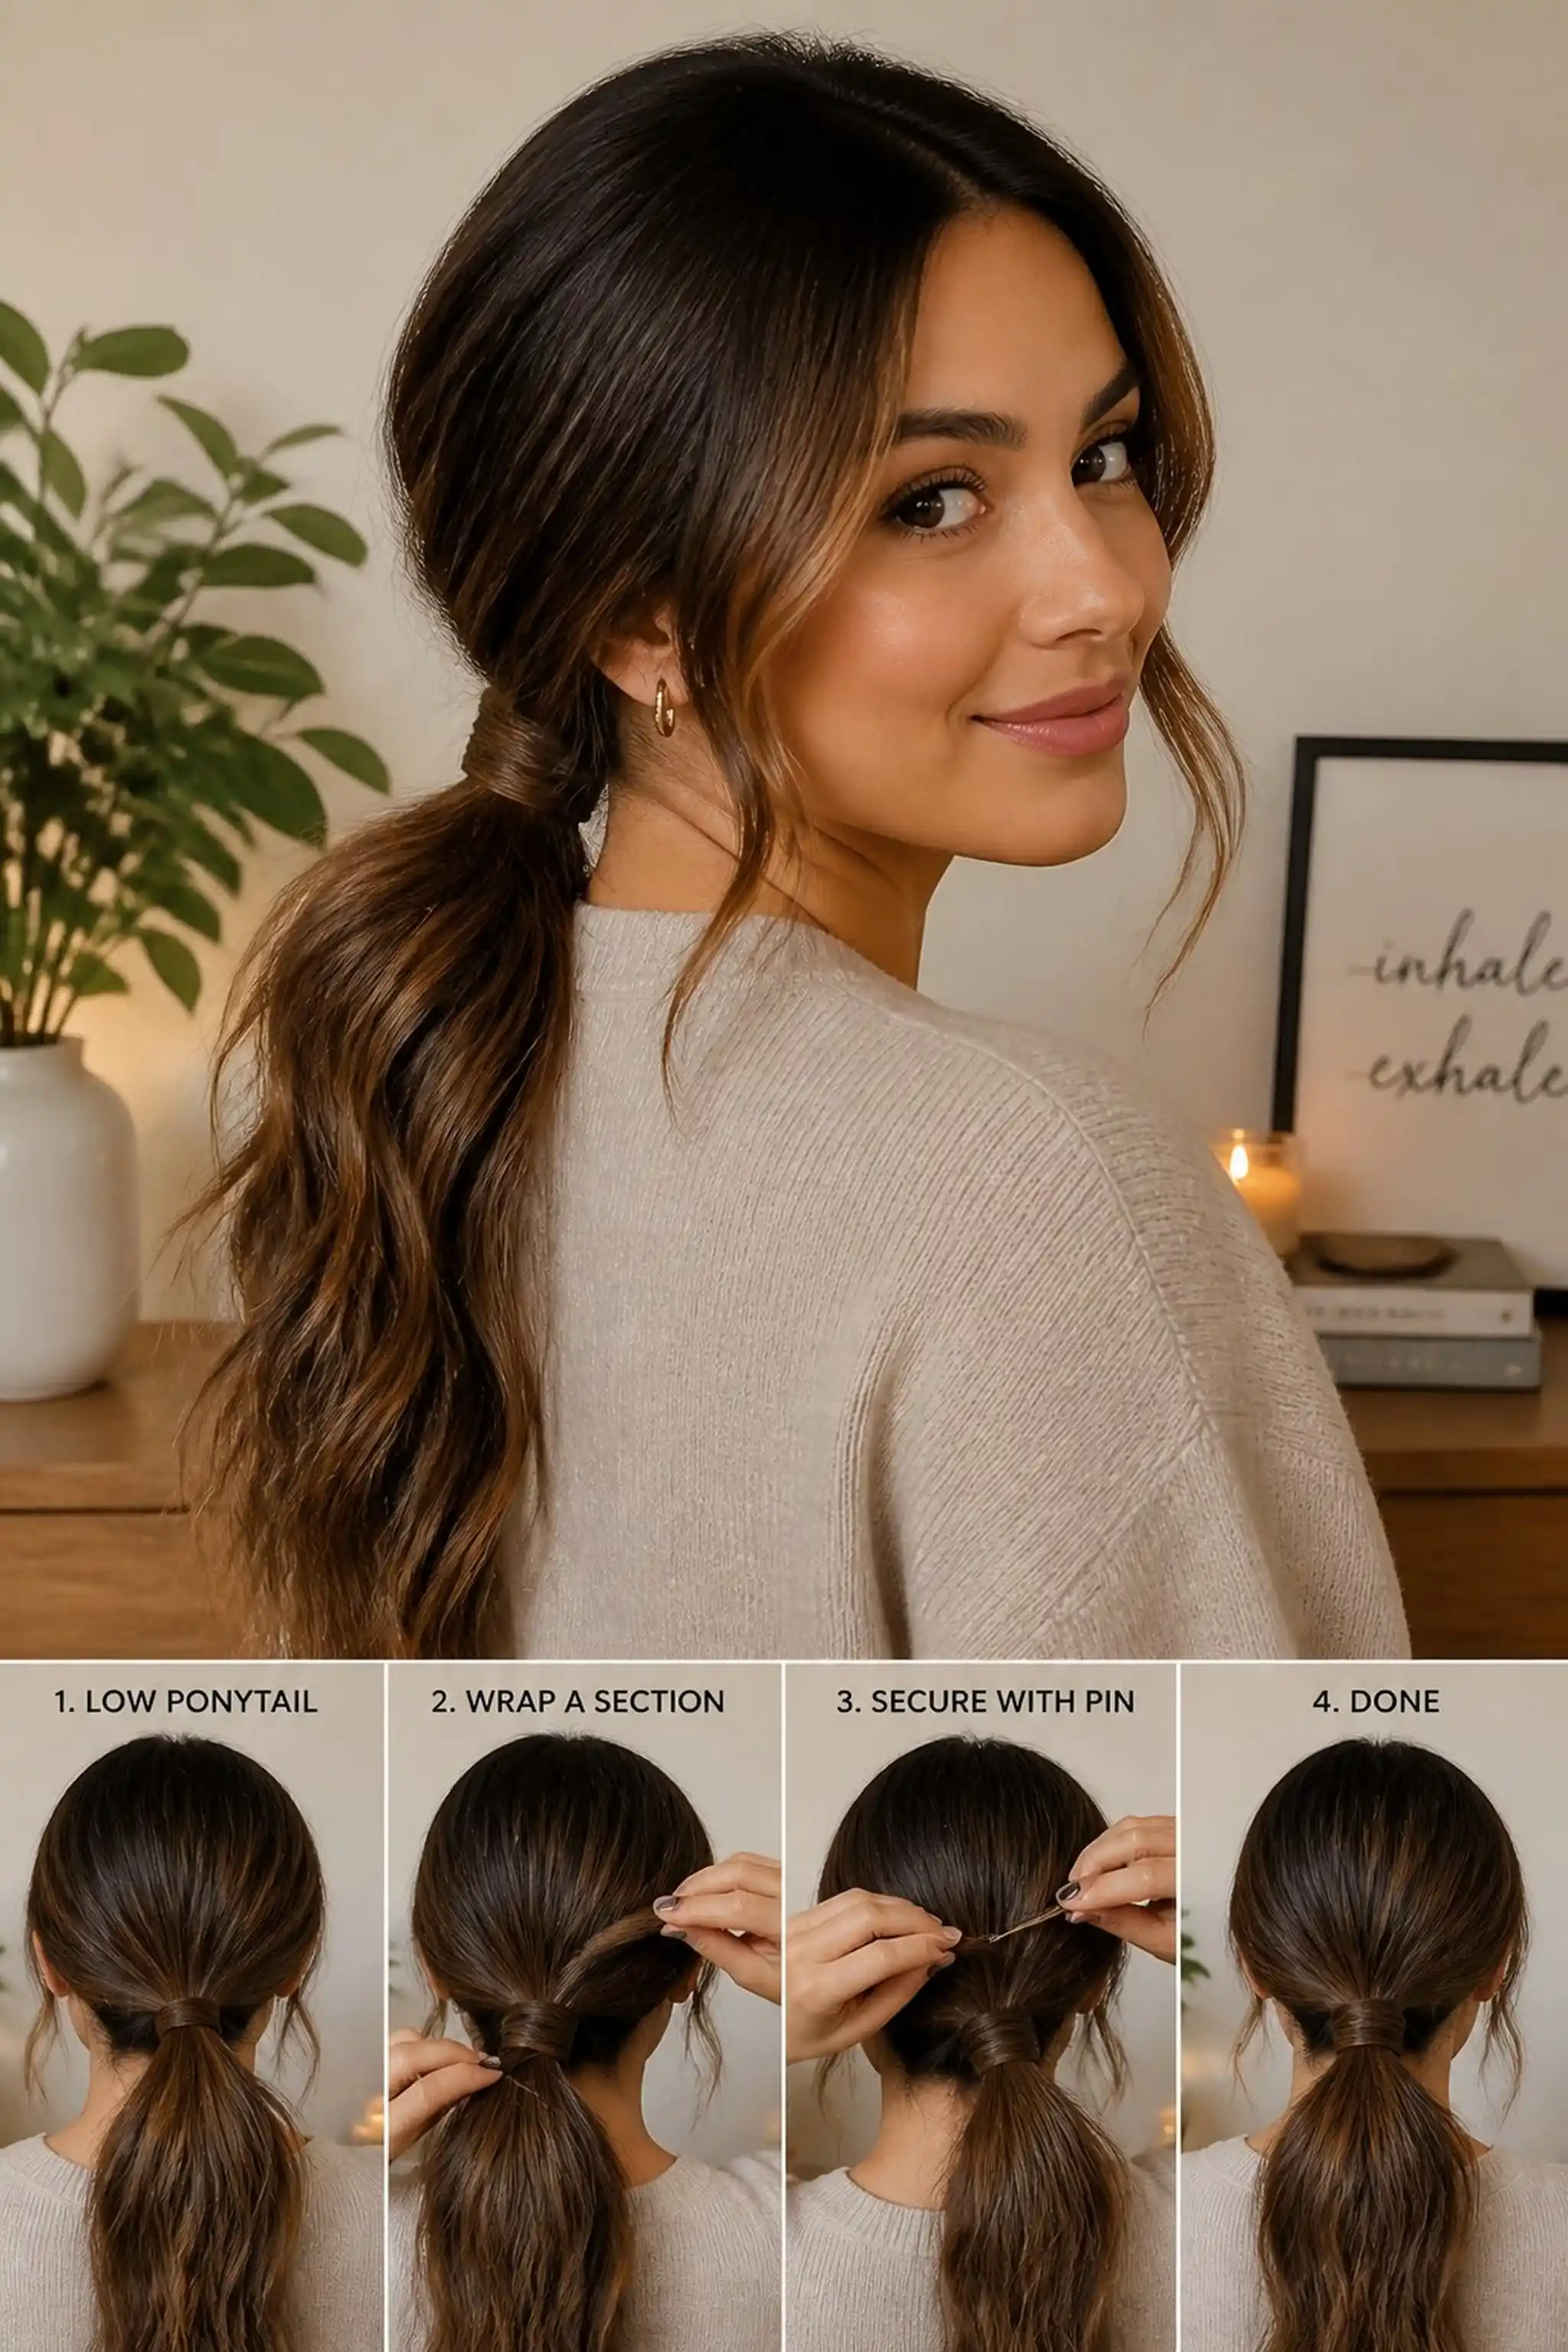
A soft low ponytail sits just above the nape, wrapped around the elastic band with a small section of hair for a polished touch. The hair catches light softly, showing off subtle layers.
Wrapping requires a 4-inch section of hair to conceal the band fully, making the look appear tidier without tight pulling. Works best on straight or lightly waved hair for smooth wraps.
Styling Tips
- Use a thin elastic band for less bulk under the wrap.
- Secure wrapped hair with a discreet pin tucked underneath.
- Keep the ponytail loose to maintain volume at the crown.
Pro Tip: Pull the wrapped hair section gently to hide the elastic while maintaining a soft finish.
Avoid: Wrapping too tightly can cause breakage or make the wrap look stiff instead of natural.
Try Also: Try adding subtle curls to the ponytail or switch the wrap for a colored ribbon for variety.
Products & Materials
Items Used
“Soft low ponytail with a sleek wrapped hair tie detail.”
Quick Braided Crown for Instant Style
⏱️ 12 min · 🟠 Intermediate
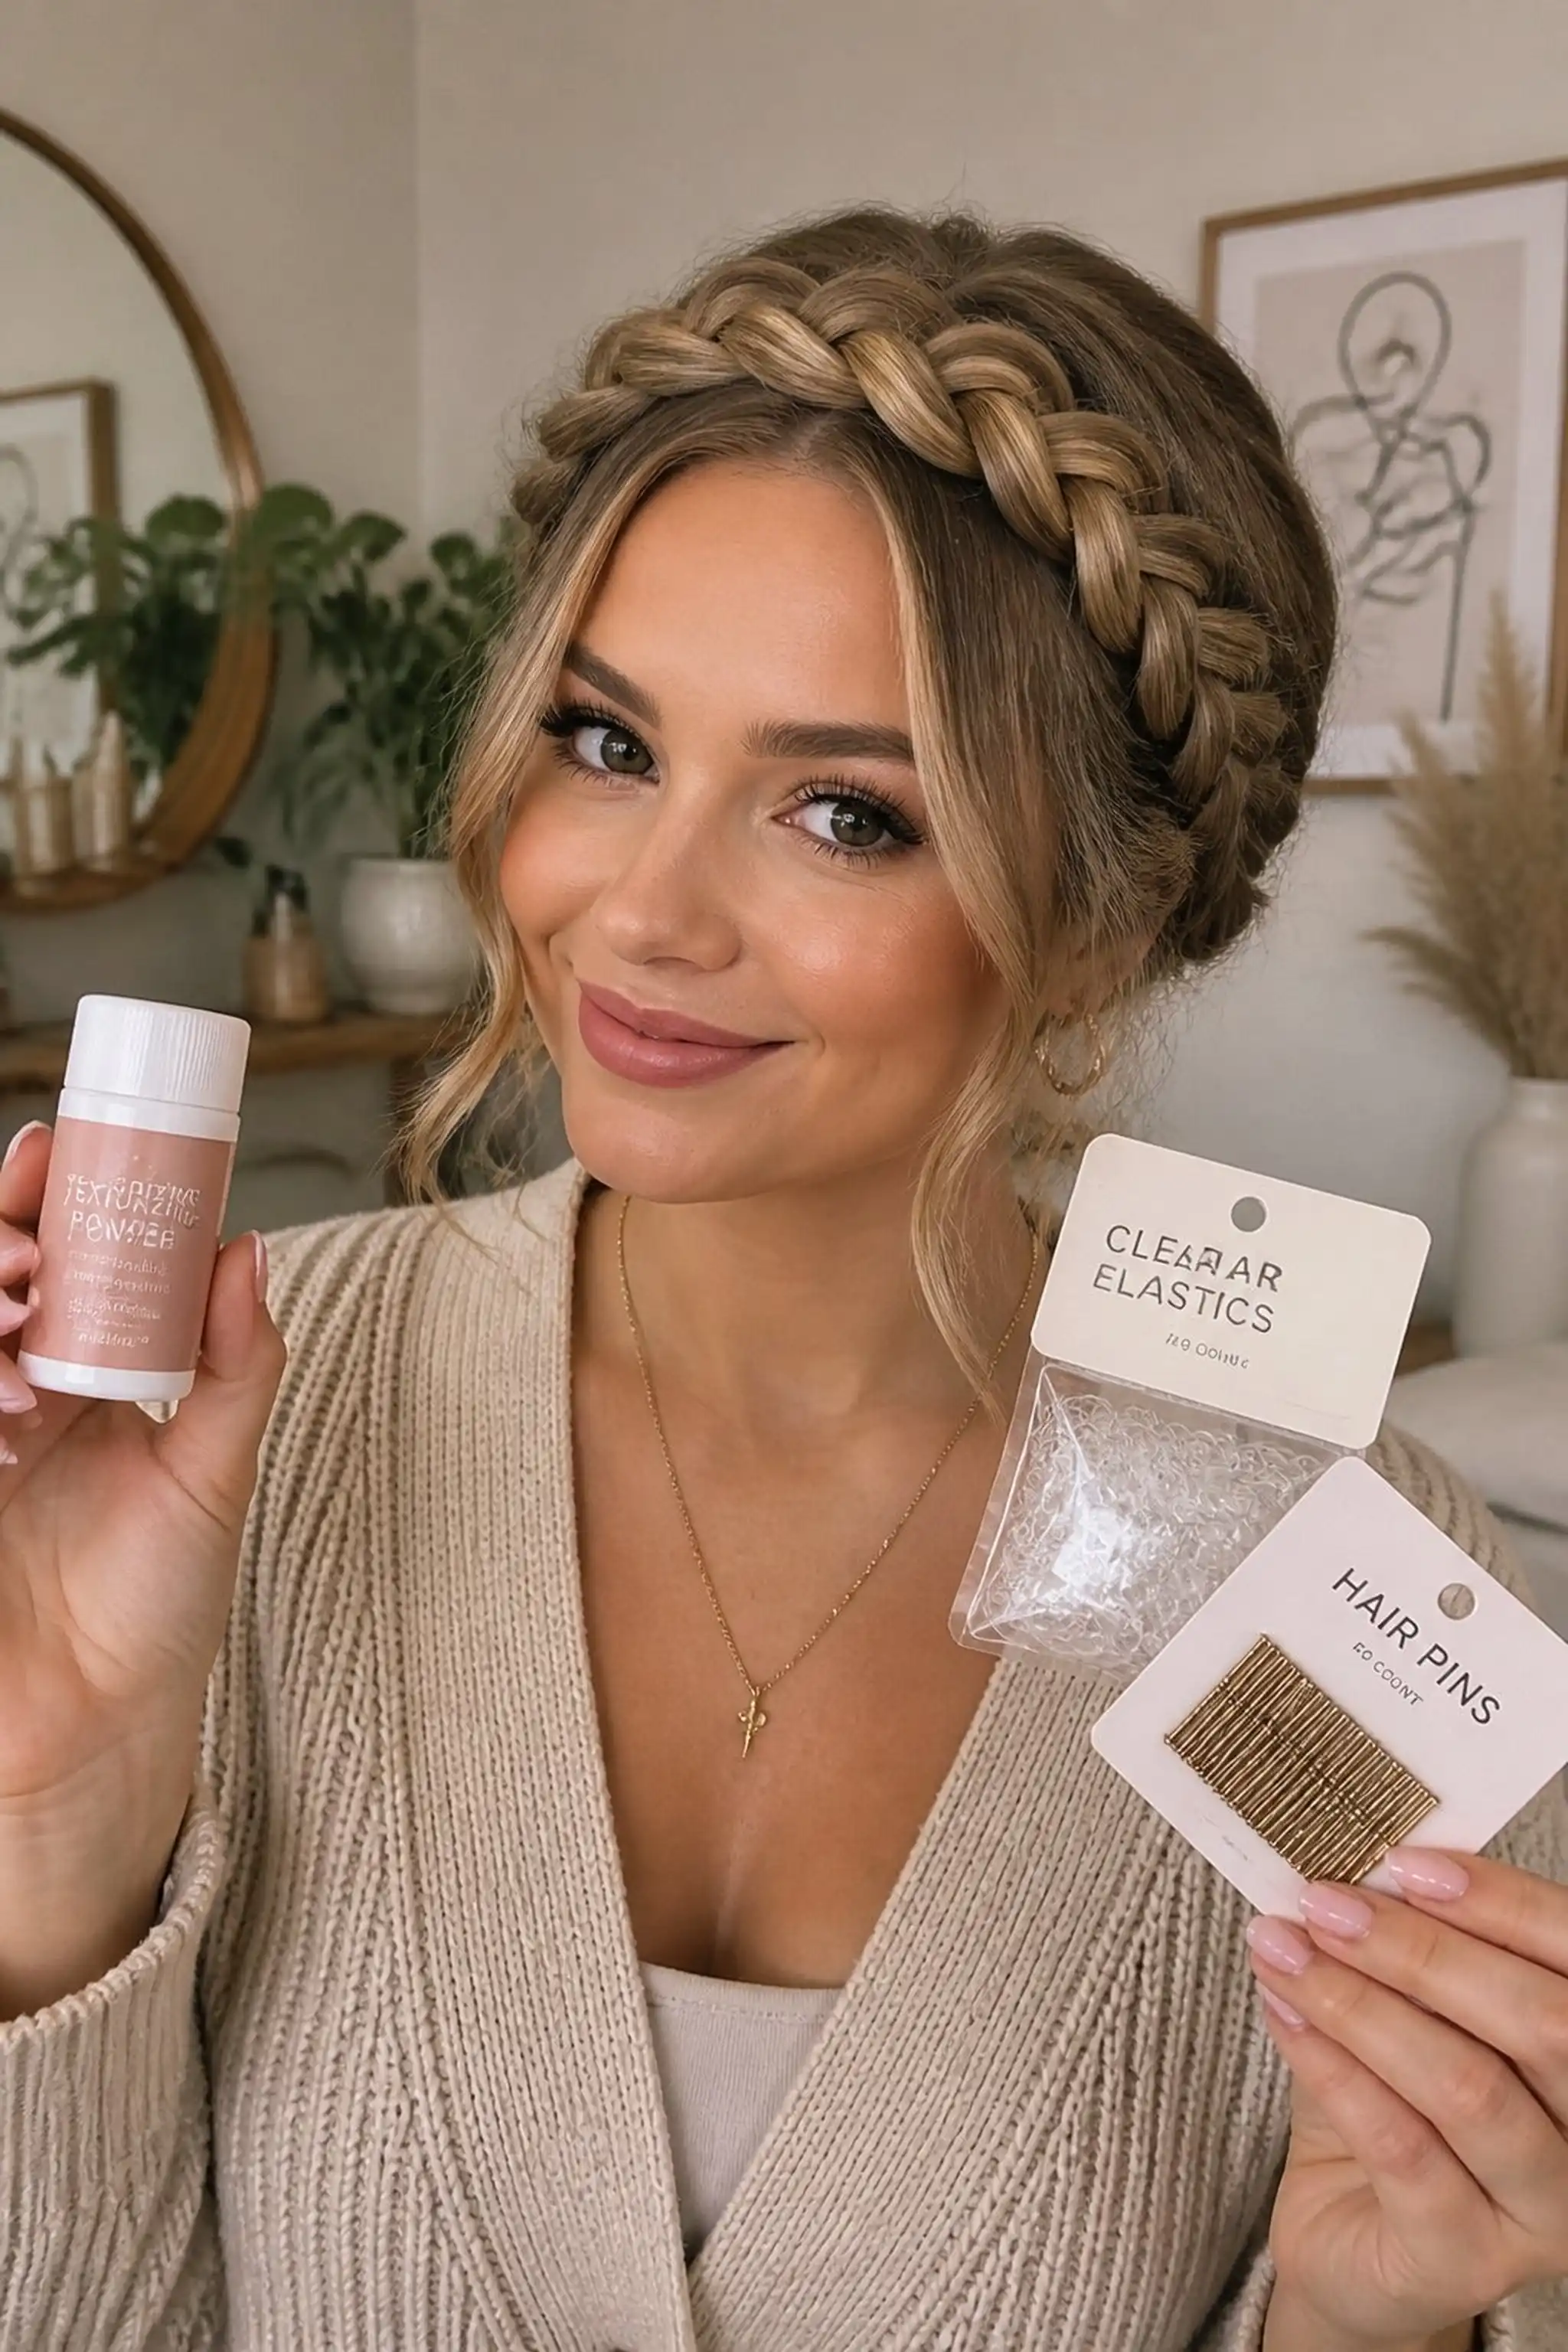
A thin braid wraps across the top like a crown, pulled softly for volume and loose enough to keep things casual. The braid reveals subtle highlights and contrasts nicely with the rest of the straight hair.
Crowning hair-size braids about 1 finger wide balance texture without heaviness. Using 5 to 6 pins ensures the braid stays secure but comfortable all day long.
Styling Tips
- Start braiding near the temple to frame the face nicely.
- Loosen the braid by gently tugging on links for softness.
- Mix in small clear elastics to hold braid ends discreetly.
Pro Tip: Apply a texturizing powder along the braid for enhanced grip and fullness.
Avoid: Making the braid too tight removes softness and can cause discomfort through the day.
Try Also: Try a double braid crown or add small fresh flowers for a delicate look.
Products & Materials
Items Used
- hair pins
- clear hair elastics
- texturizing powder
“Soft braided crown that adds quick elegance to any lazy day.”
Casual Top Knot With Natural Flyaways
⏱️ 4 min · 🟢 Beginner
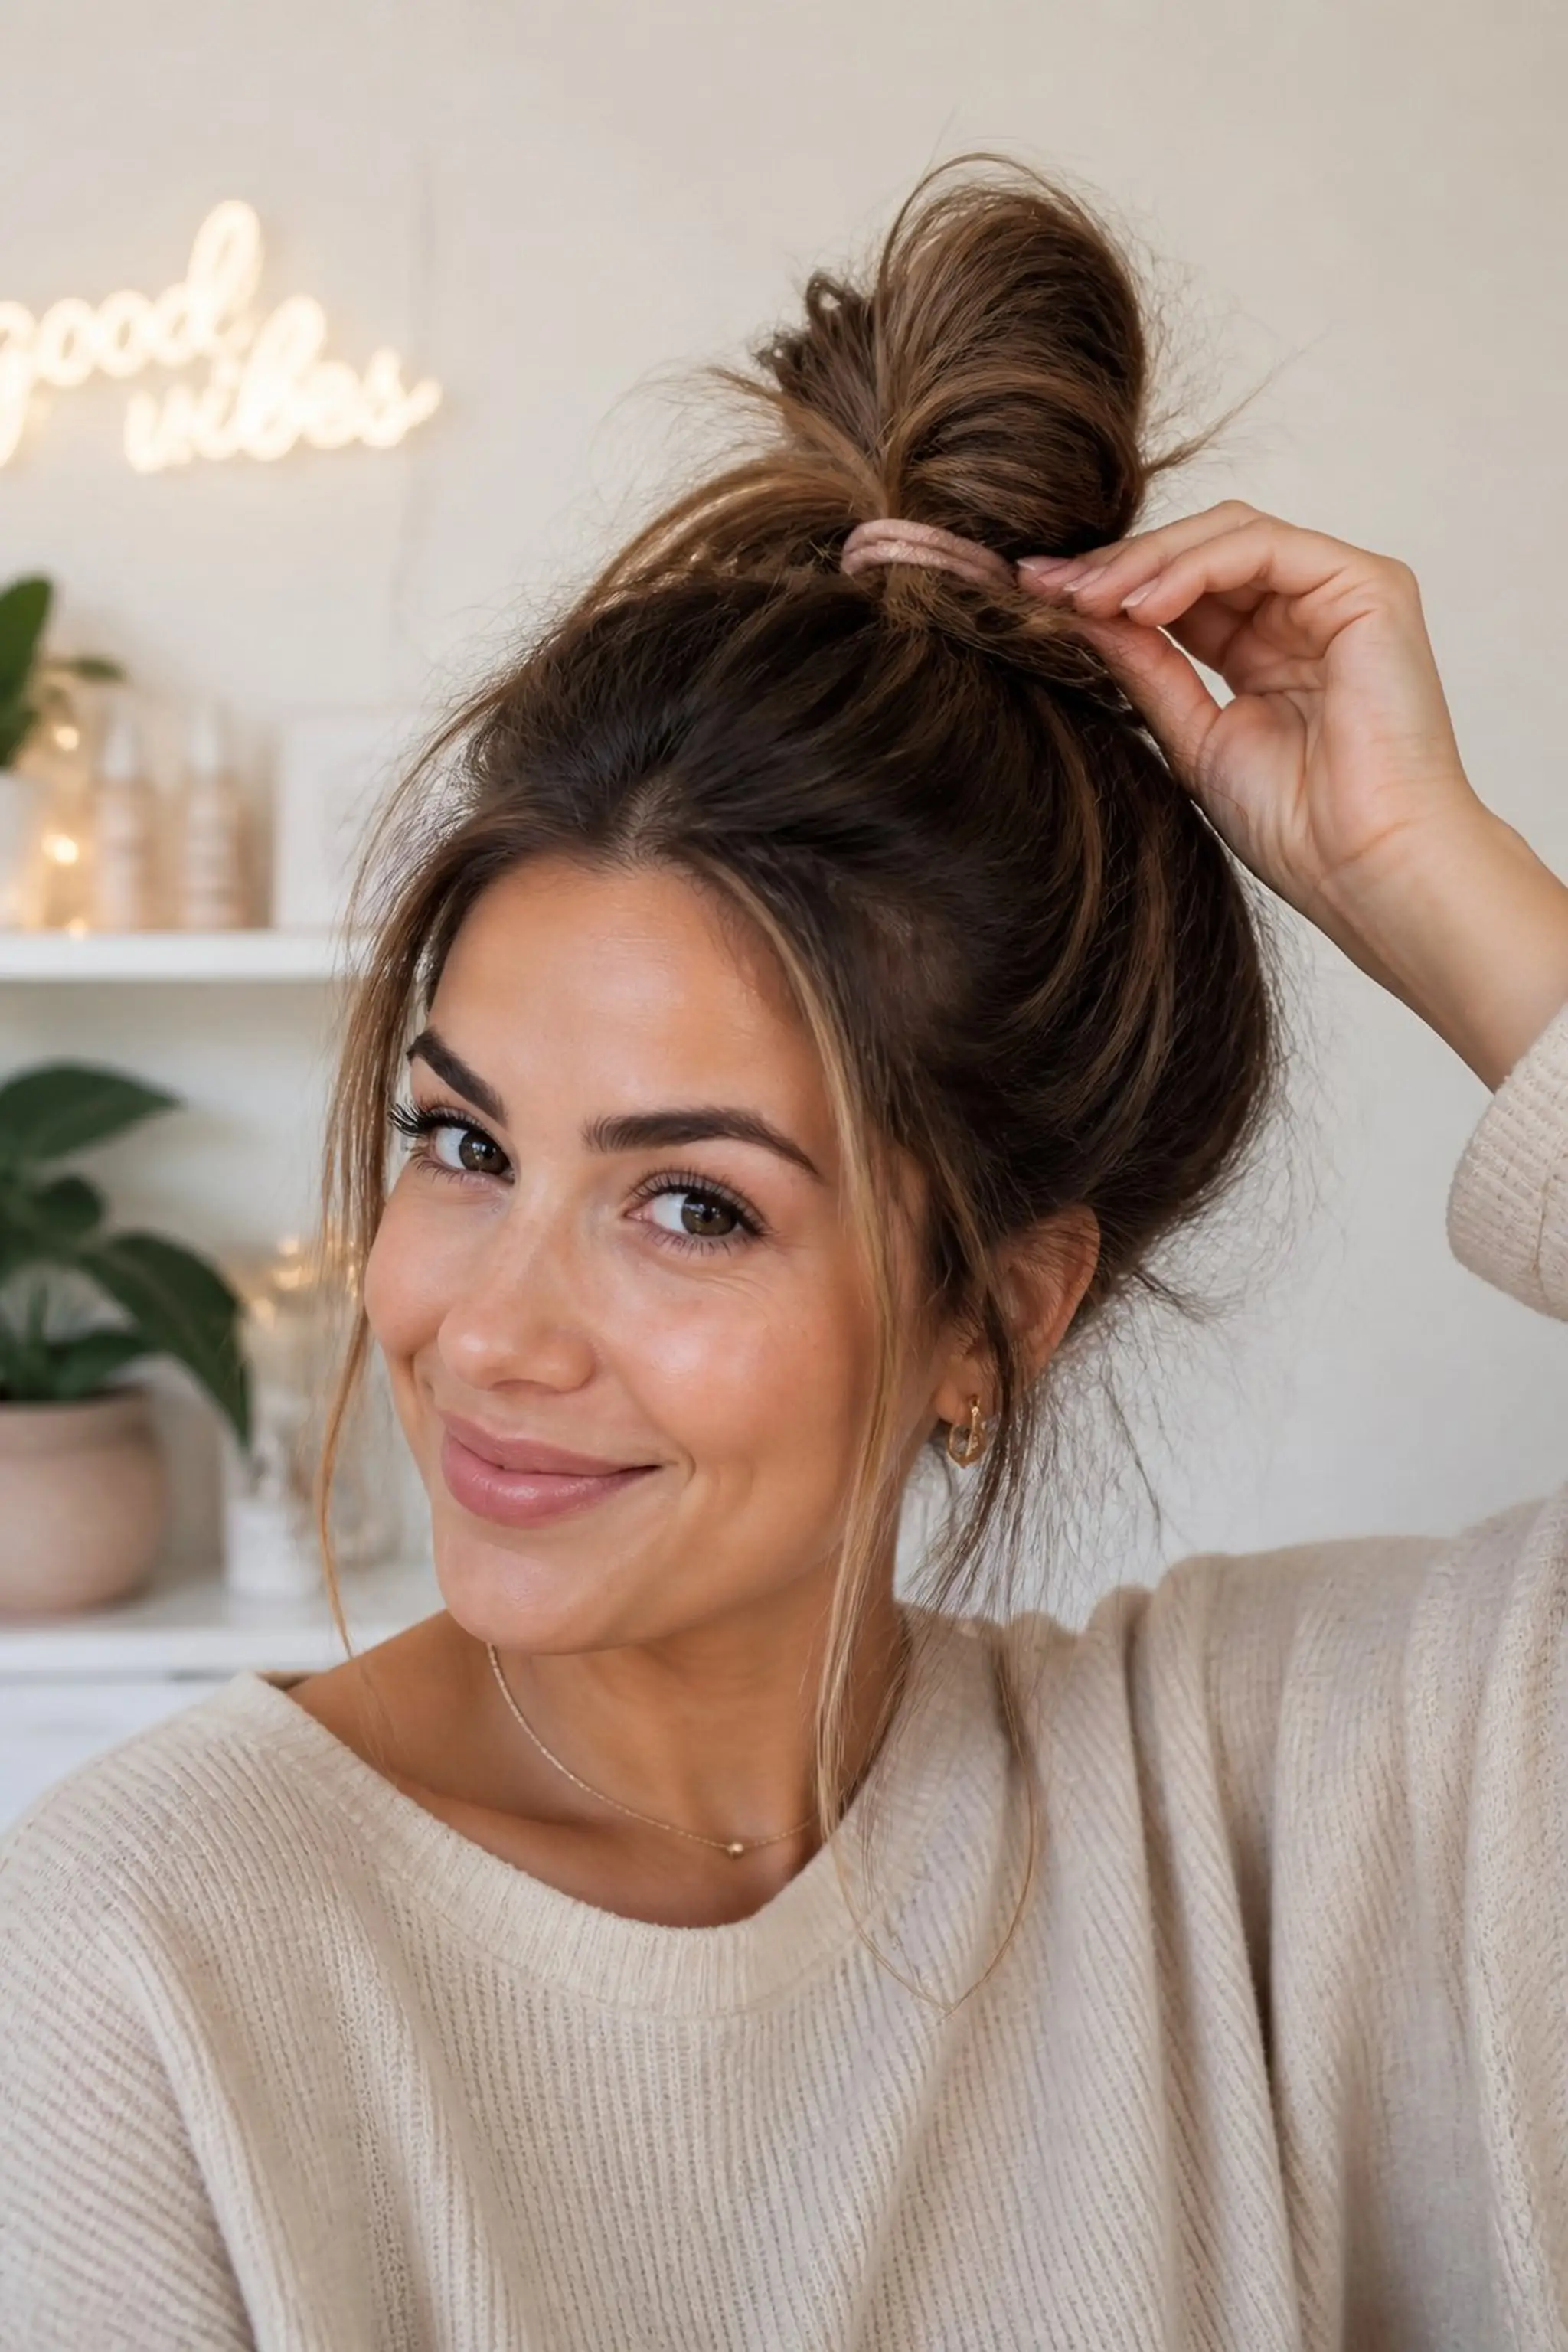
The hair is gathered high on the head in a loosely twisted knot, with flyaways and soft curls escaping around the edges. Its texture mixes smoothness and slight frizz for a relaxed vibe.
Elastic holds the knot tightly while flyaways provide natural dimension. Works well on hair that resists slicking down completely, especially with medium thickness.
Styling Tips
- Apply a little dry shampoo for grip before tying.
- Leave strands loose near ears and neck for softness.
- Use fingers rather than brushes to shape the knot for texture.
Pro Tip: Twist the hair loosely to avoid tension and keep the top knot bouncy.
Avoid: Tightly controlled knots can flatten hair texture and make flyaways look like frizz.
Try Also: Try a half top knot or secure the knot with a colorful scrunchie for a playful twist.
Products & Materials
Items Used
“Easy casual top knot with natural, soft flyaways around the face.”
Side Braid With Soft Waves and Loose Ends
⏱️ 15 min · 🟠 Intermediate

The braid starts at the temple, flowing loosely over one shoulder. Waves before and after the braid add fullness, while the ends are left unbraided, showing off natural hair texture.
A 3-strand braid about 2 inches wide works best for this look, with minimal pinning needed. The soft waves come from a 1.25-inch curling iron, which creates natural-looking S-shapes.
Styling Tips
- Curl hair first, then braid gently to hold wave shapes.
- Loosen braid sections slightly to create a fuller appearance.
- Secure ends with a clear elastic to keep focus on the texture.
Pro Tip: Spray a flexible hold hairspray lightly after curling to keep waves soft but lasting.
Avoid: Braiding damp or oily hair can flatten the waves and cause the style to fall out quickly.
Try Also: Try a fishtail braid or start the braid from the nape for a different look.
Products & Materials
Items Used
- clear hair elastic
- flexible hold hairspray
“Romantic side braid with natural waves and loose, textured ends.”
Quick Claw Clip Half-Up With Loose Layers
⏱️ 3 min · 🟢 Beginner
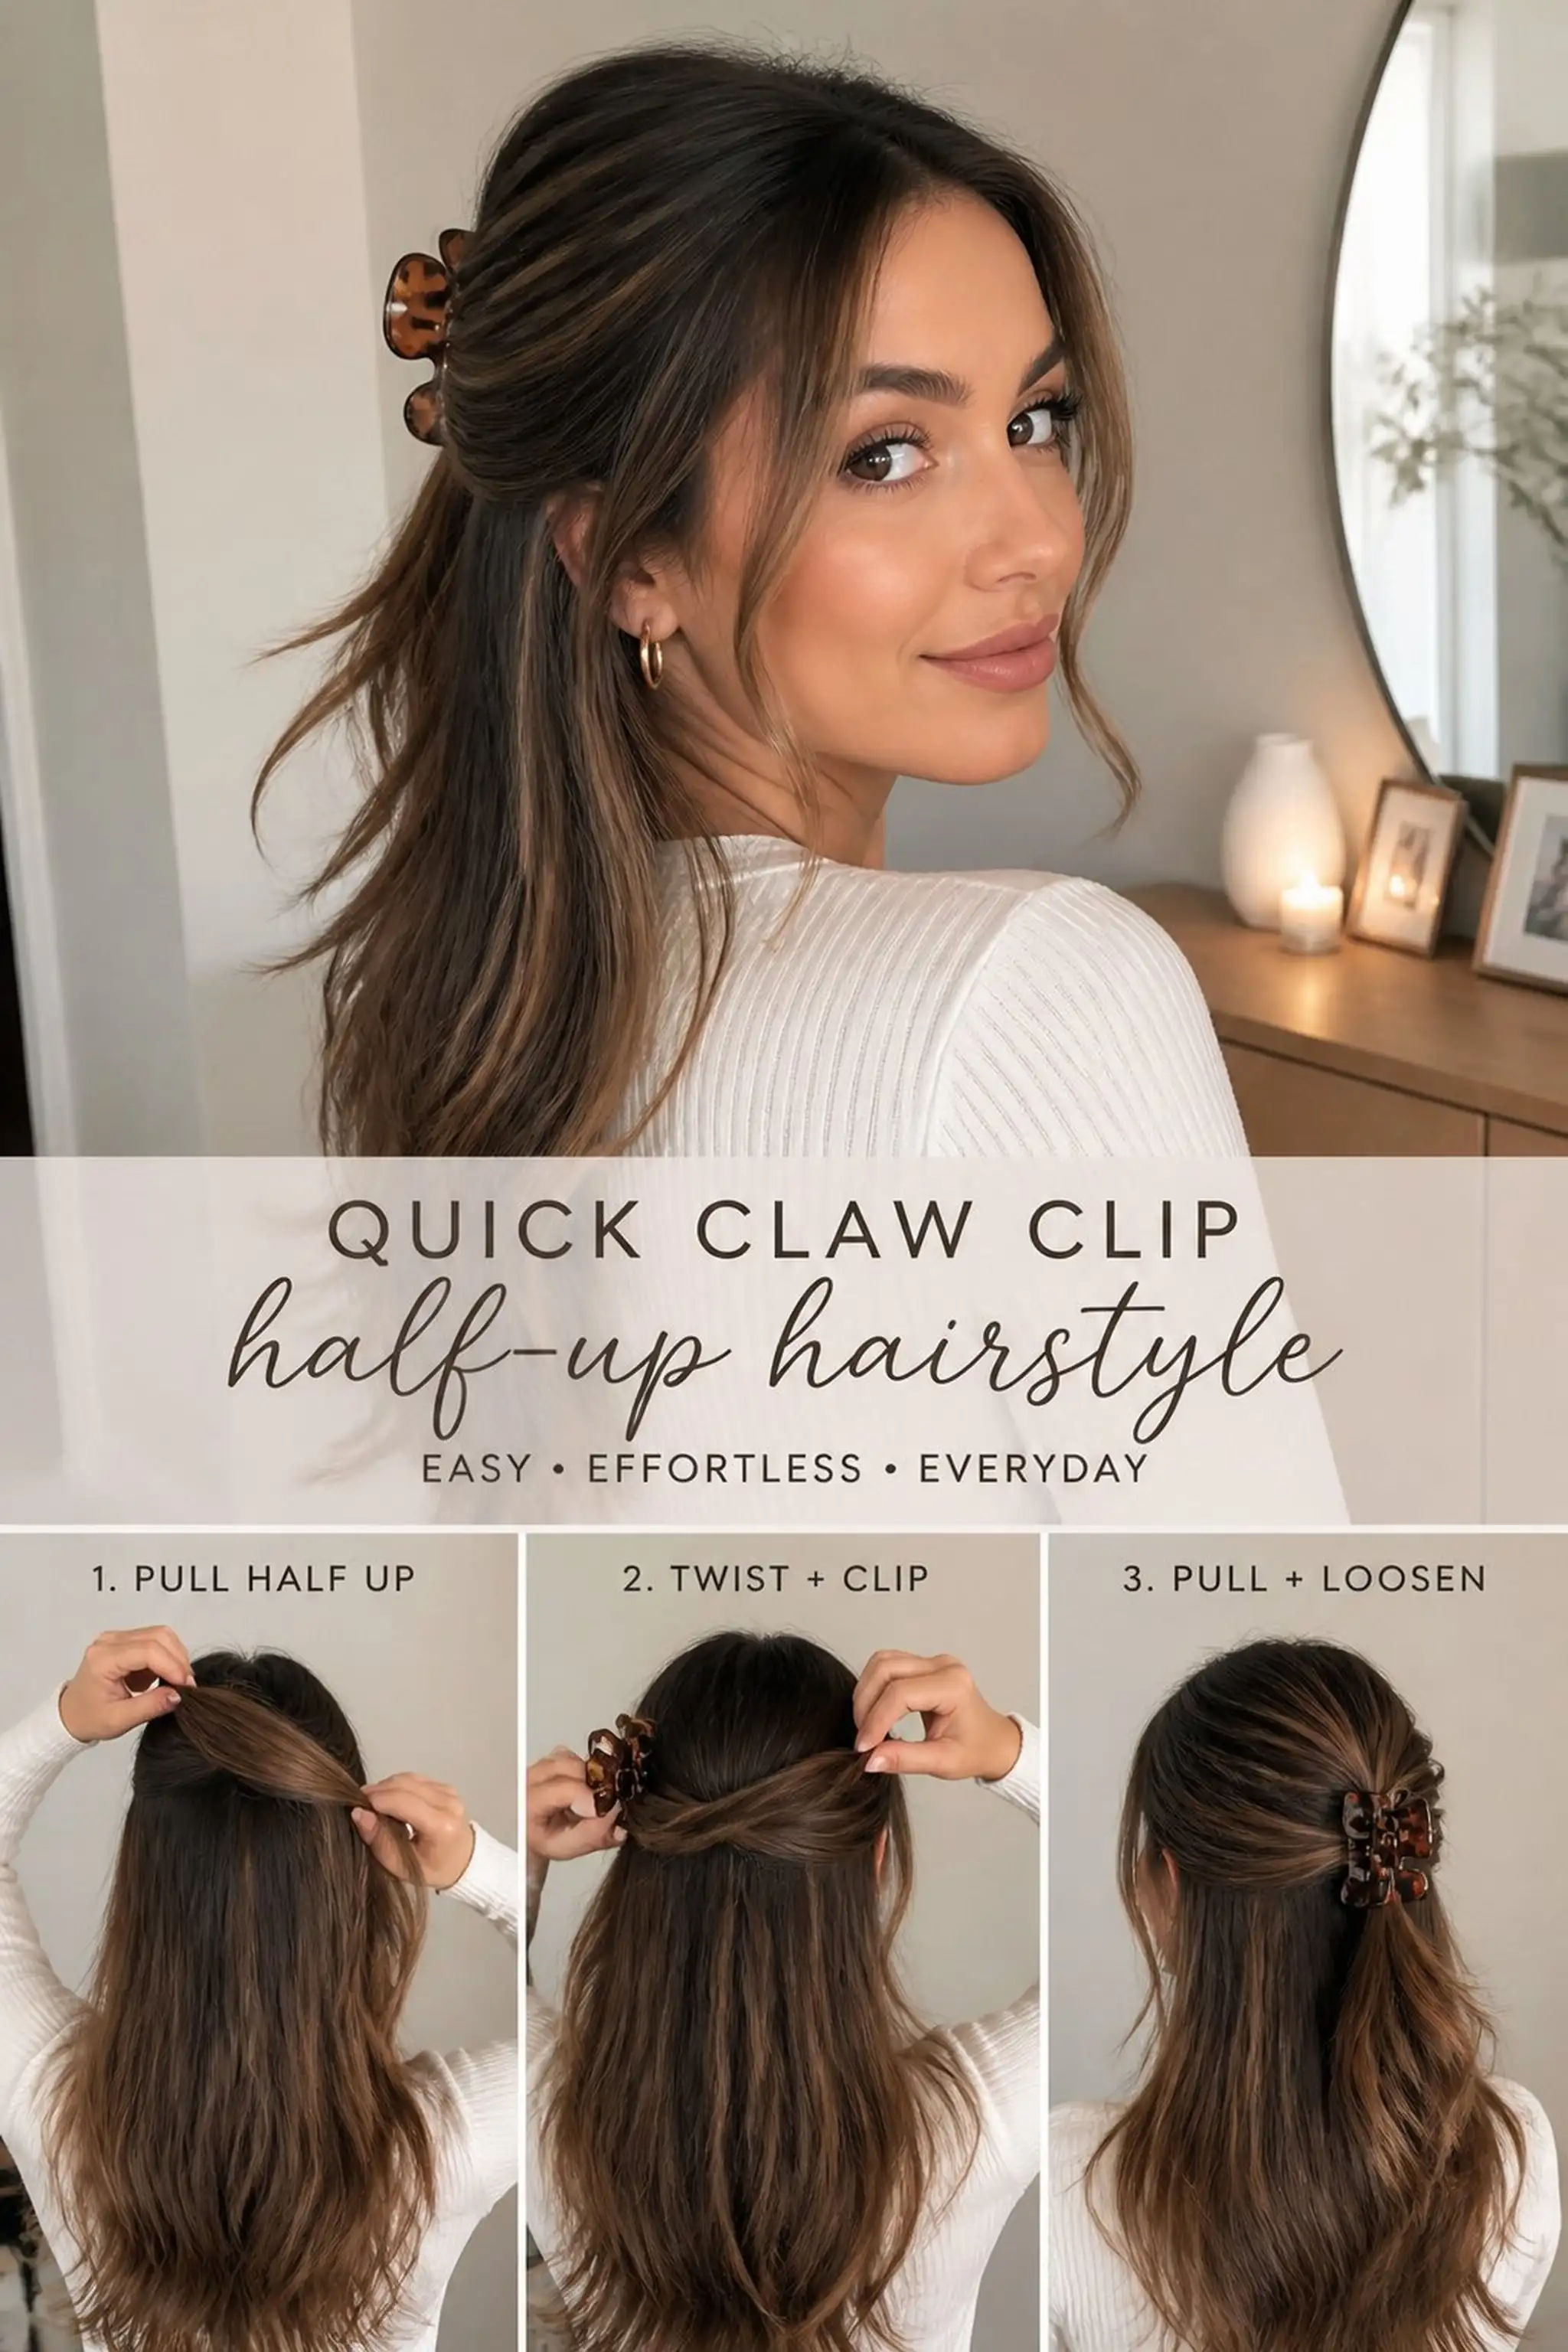
A large tortoiseshell claw clip gathers the upper half of hair loosely, allowing face-framing layers to fall freely. The hair’s natural shine reflects softly around the clip’s edges.
This style is perfect for medium to long straight or slightly wavy hair. The claw clip, around 3 inches wide, holds hair without flattening volume.
Styling Tips
- Pull hair back gently to avoid creating bumps.
- Leave layers around the face loose for framing.
- Use a clip size proportional to your hair thickness for hold.
Pro Tip: Turn the claw clip sideways for a tighter, more secure hold on thick hair.
Avoid: Clipping in thick hair too tightly can cause discomfort and breakage near the scalp.
Try Also: Try a smaller clip at the crown or add a few delicate hair pins underneath for added detail.
Products & Materials
Items Used
“Lazy Sunday half-up with a relaxed claw clip and soft layers.”
Twisted Headband Style with Loose Waves
⏱️ 10 min · 🟠 Intermediate
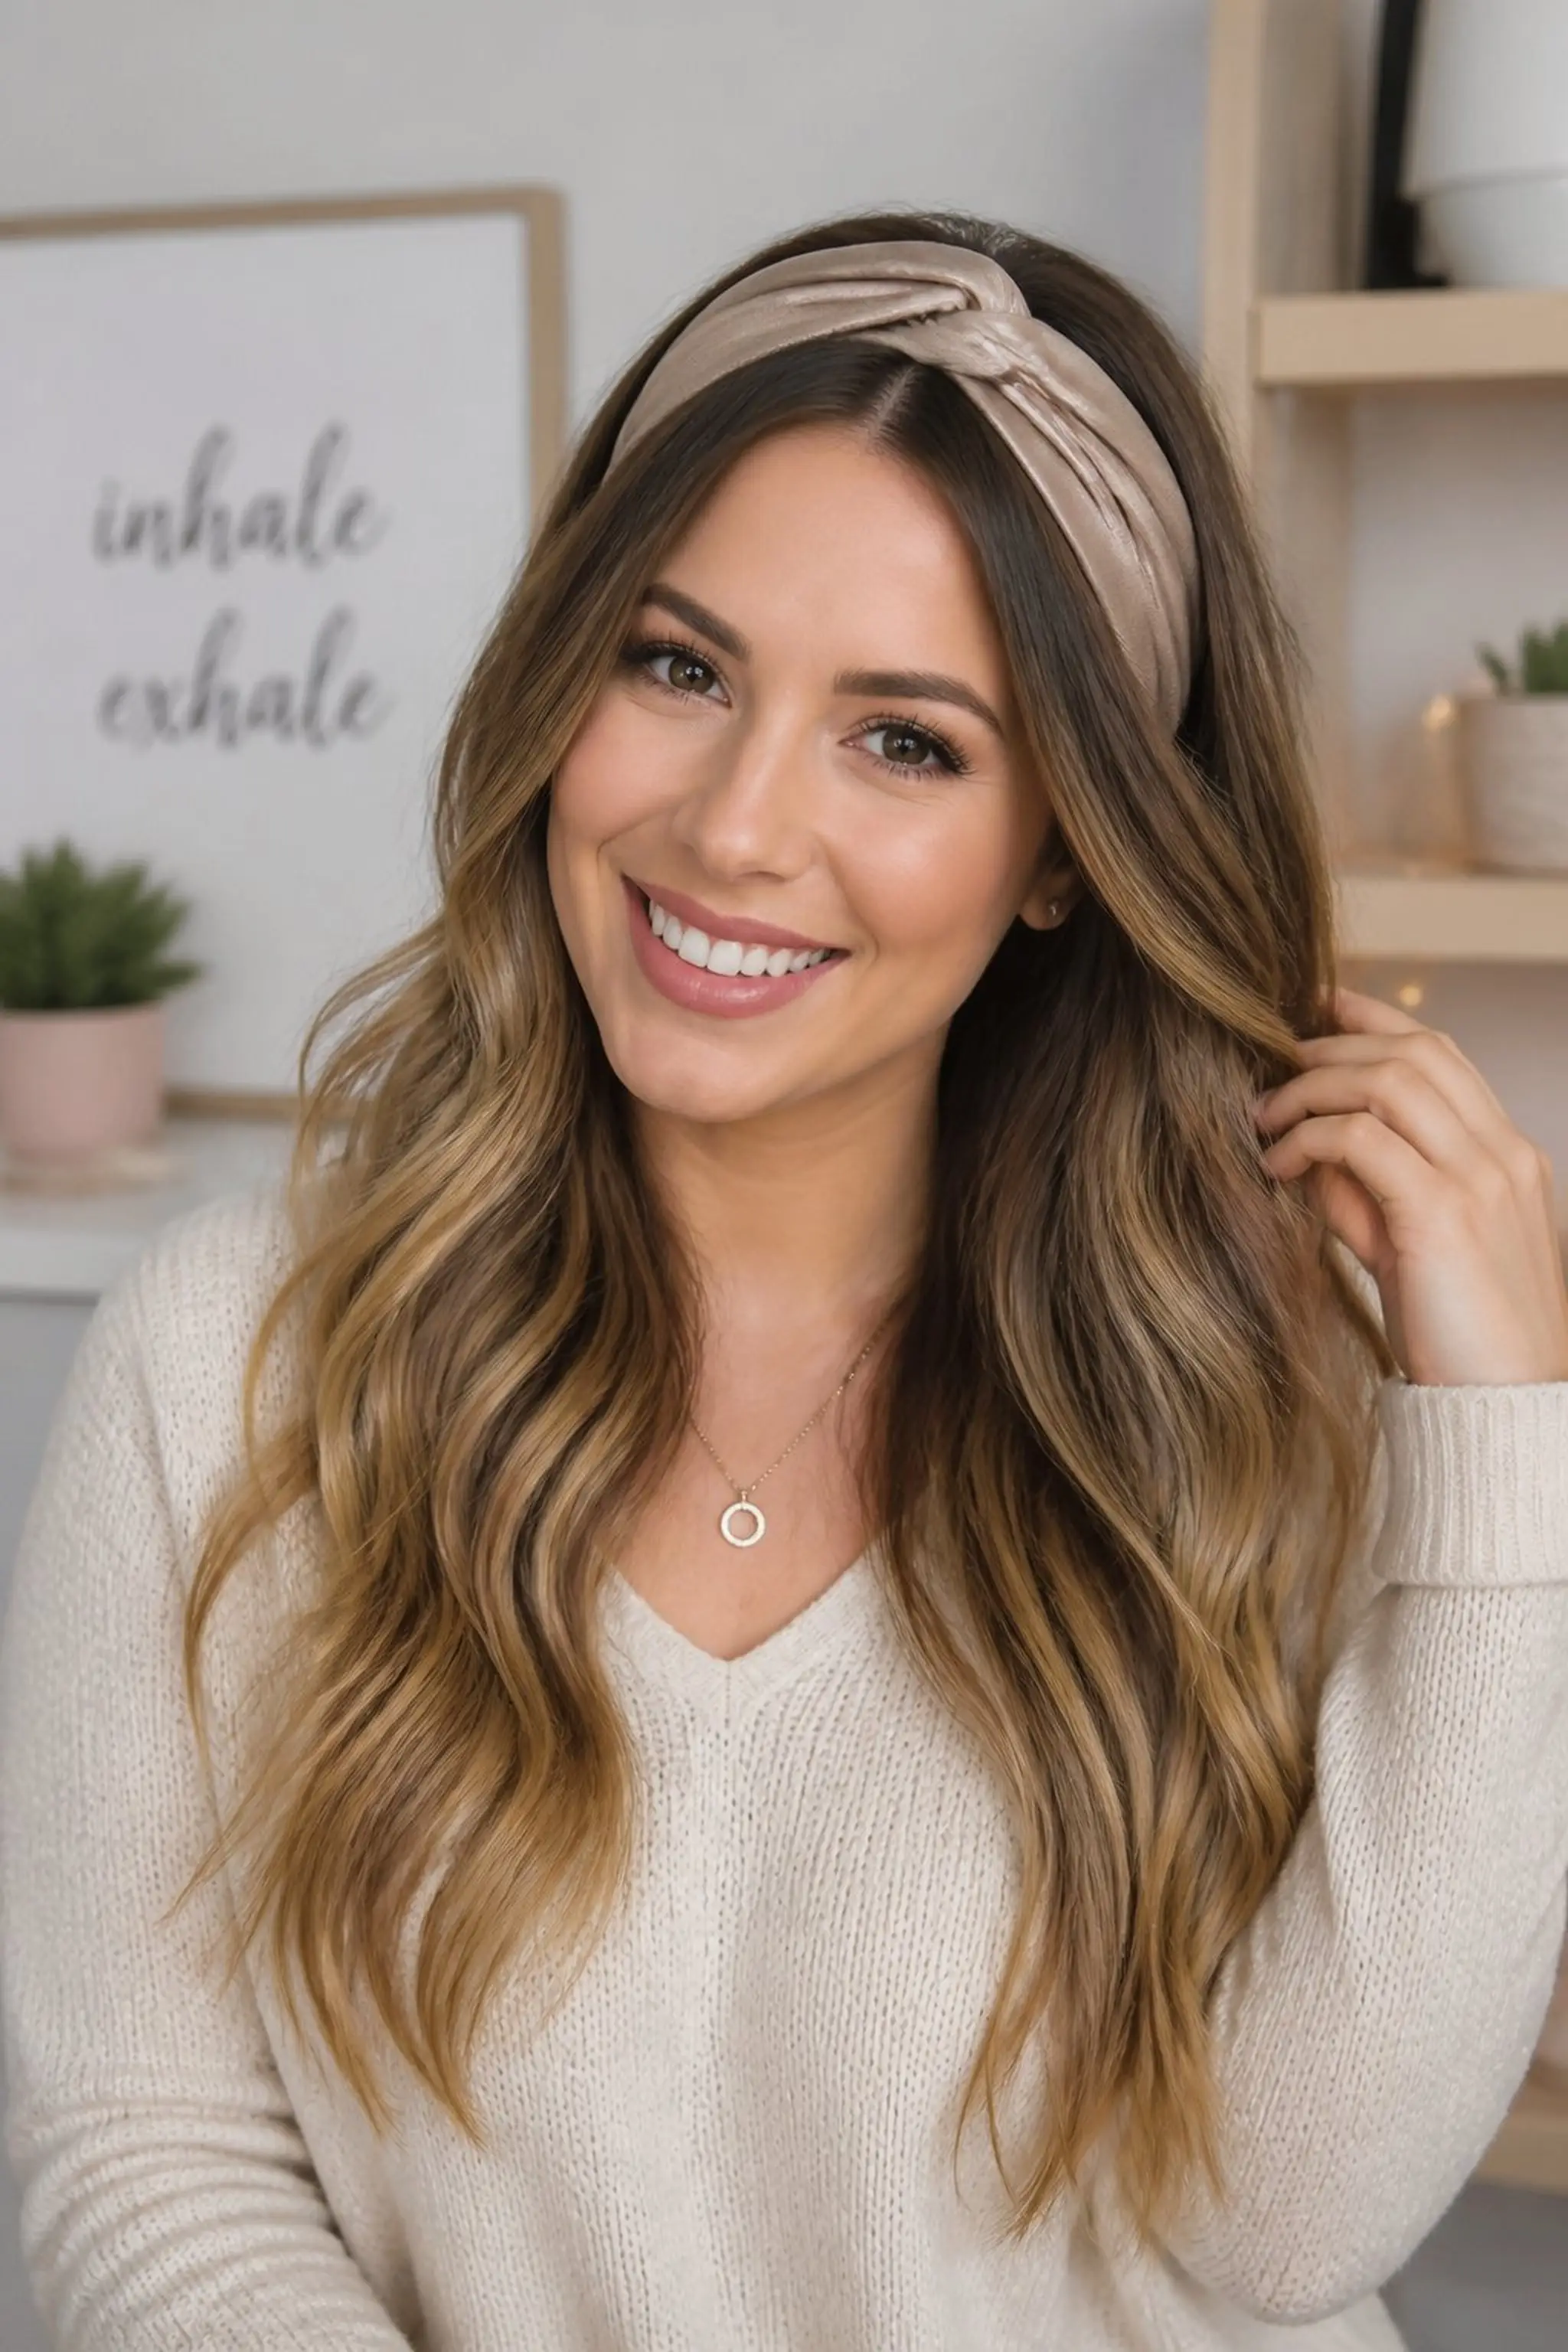
A fabric headband with a soft twist detail sits securely across the top of the head, pushing back loose waves that fall naturally below. About 3 inches wide, the headband fills the upper hairline without compressing volume.
This works well with wavy hair that holds shape after a 15-minute curl set or natural texture. The twist adds subtle depth and interest in front.
Styling Tips
- Use a soft texturizing spray before setting waves.
- Position the twist slightly off-center for a more relaxed look.
- Secure small pins underneath the headband if needed for extra grip.
Pro Tip: Place the headband just behind ears to lift hair at the crown without flattening.
Avoid: Pulling hair too tightly under the headband can create unwanted dents or tension points.
Try Also: Swap the twisted band for a knotted scarf or choose a thinner band for a lighter feel.
Products & Materials
Items Used
“Effortless twisted headband style enhancing soft, natural waves.”
Classic Low Side Bun With Loose Face Strands
⏱️ 10 min · 🟠 Intermediate
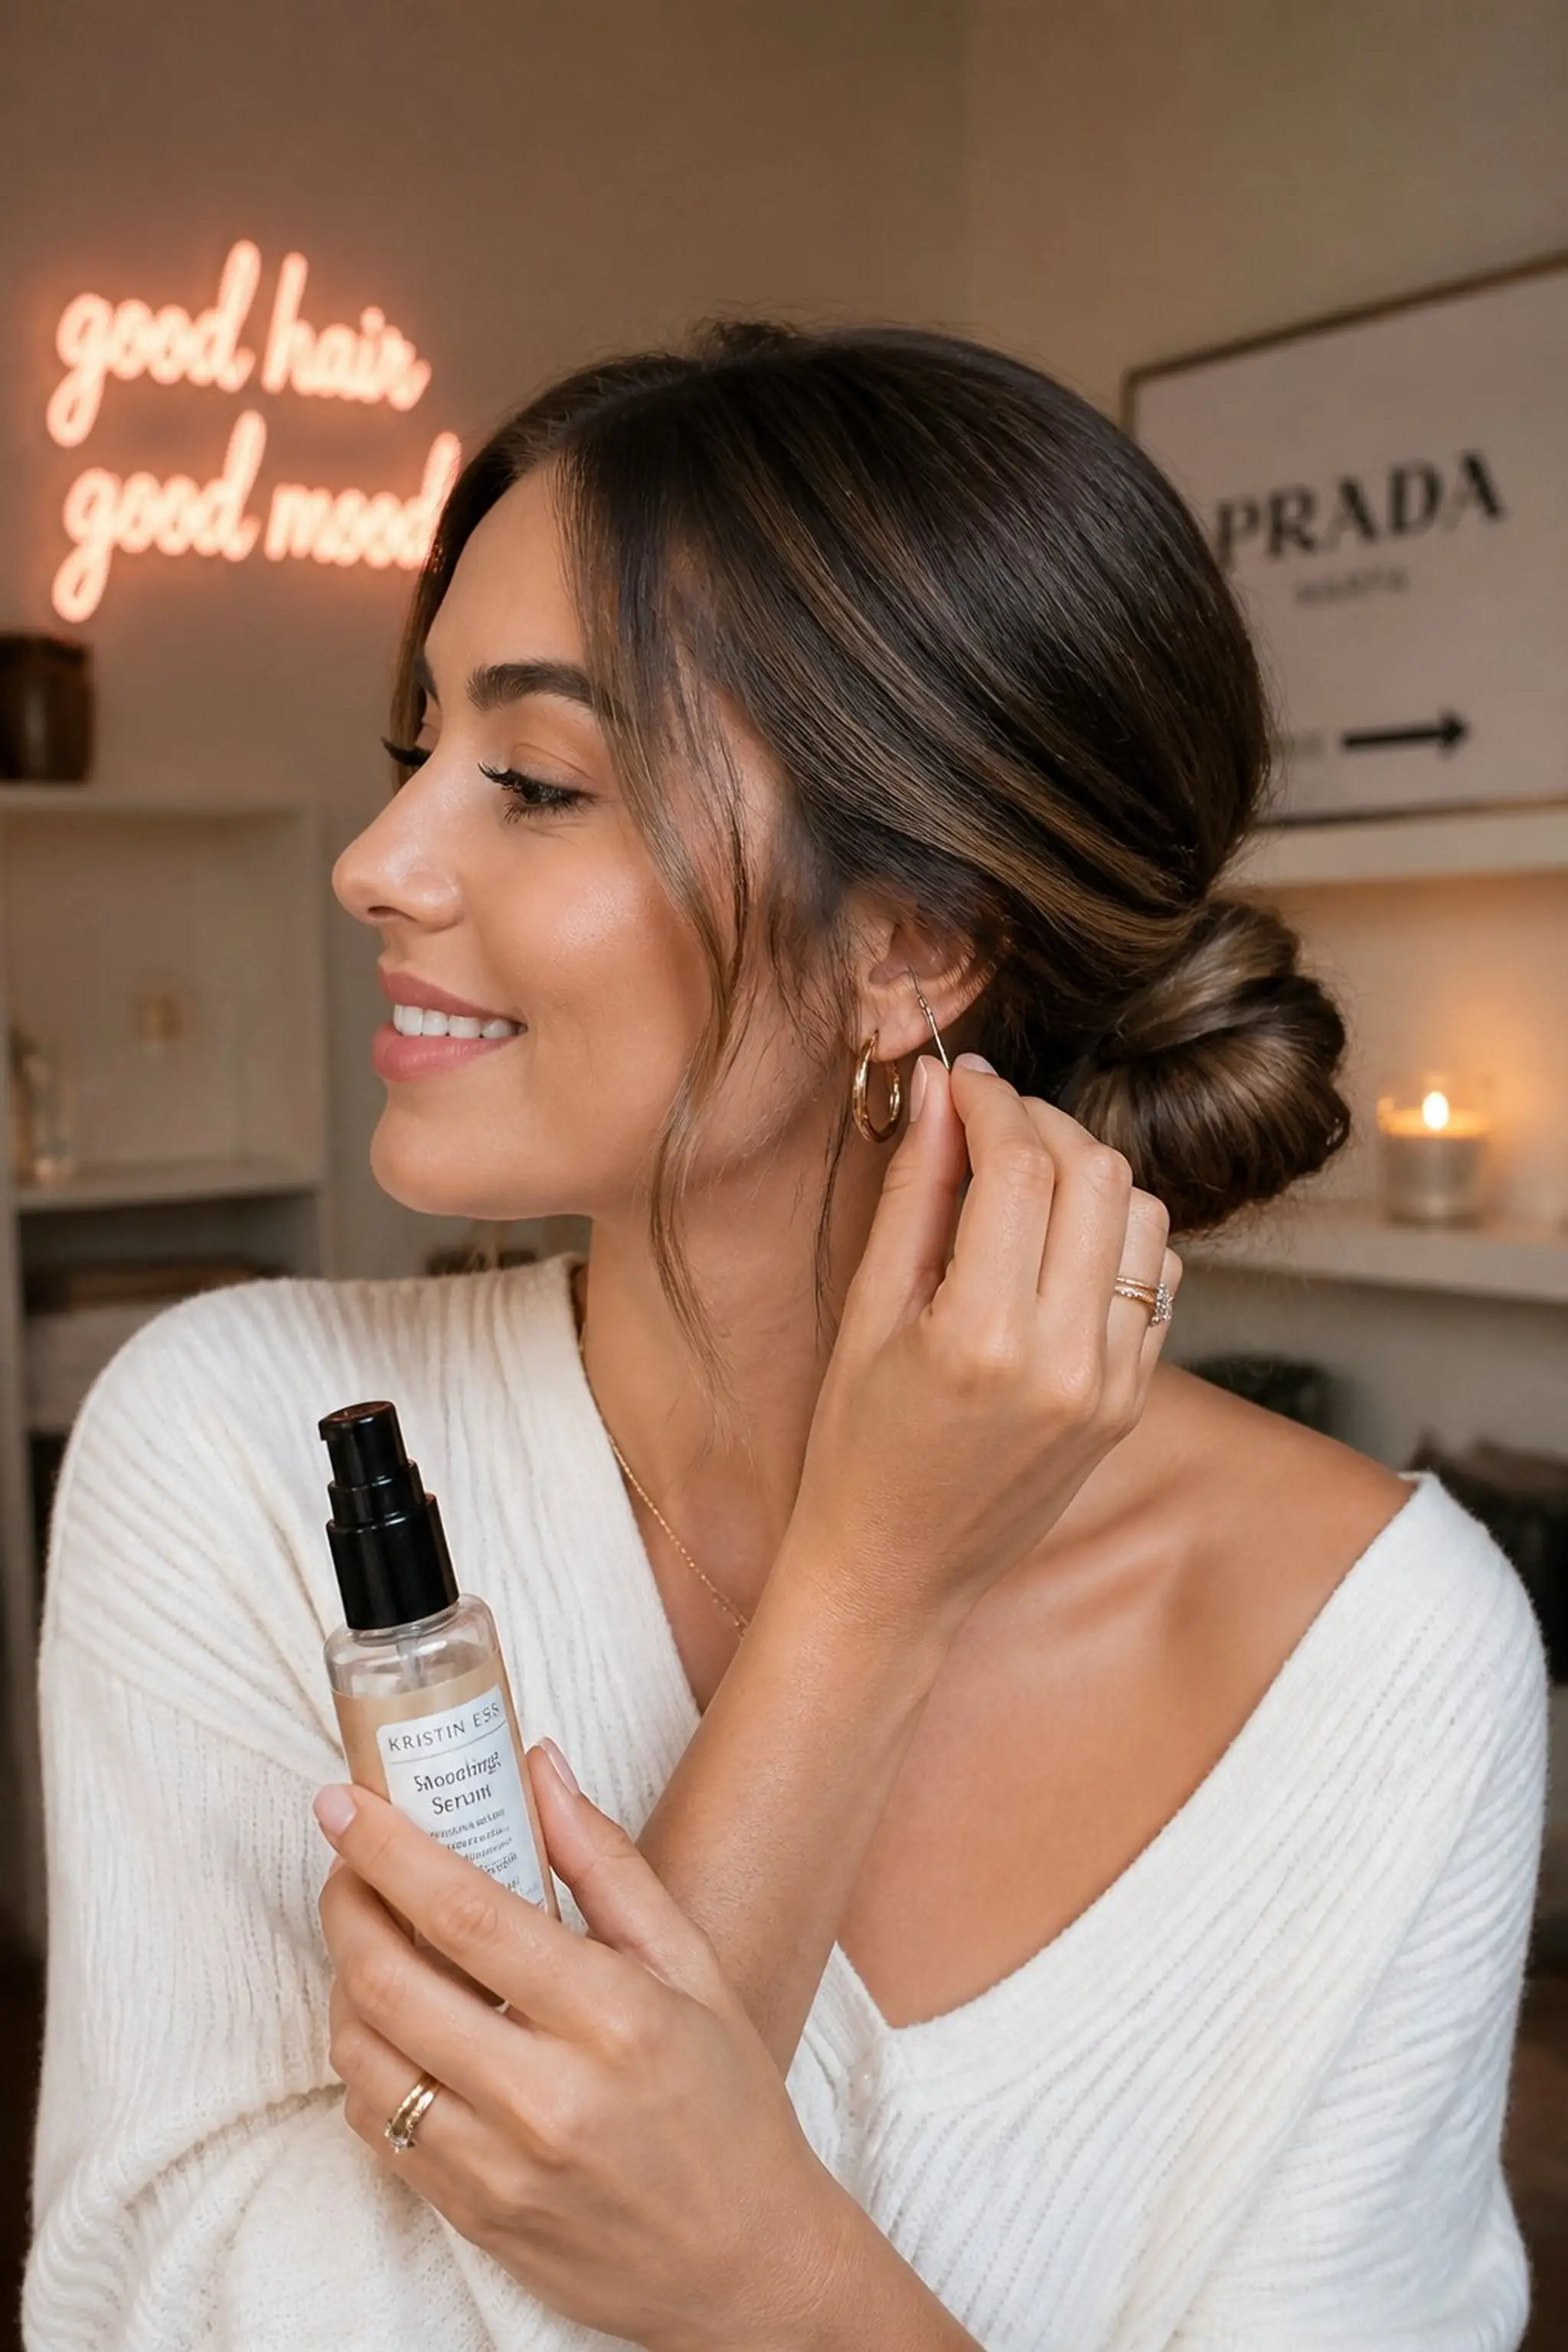
A low bun rests off to one side, loosely secured and finished with a few loosely curled strands falling near temples. The bun uses smooth hair strands tucked softly under without sharp edges.
This style suits hair with a smooth finish and takes about 5 pins spaced evenly to keep balance. The loose strands maintain softness that contrasts the polished knot.
Styling Tips
- Apply smoothing serum before styling to reduce frizz.
- Curl face strands with a small-barrel curling iron for shape.
- Pin the bun slightly below ear level for subtle asymmetry.
Pro Tip: Use a fine mist hairspray to tame flyaways near the face without stiffness.
Avoid: Pulling hair too tight into the bun removes softness and can cause scalp tension.
Try Also: Try a braided low side bun or add pearl pins for extra texture.
Products & Materials
Items Used
“Relaxed low side bun with soft curls framing the face.”
Natural Curls Pushed Back With Decorative Clips
⏱️ 6 min · 🟢 Beginner
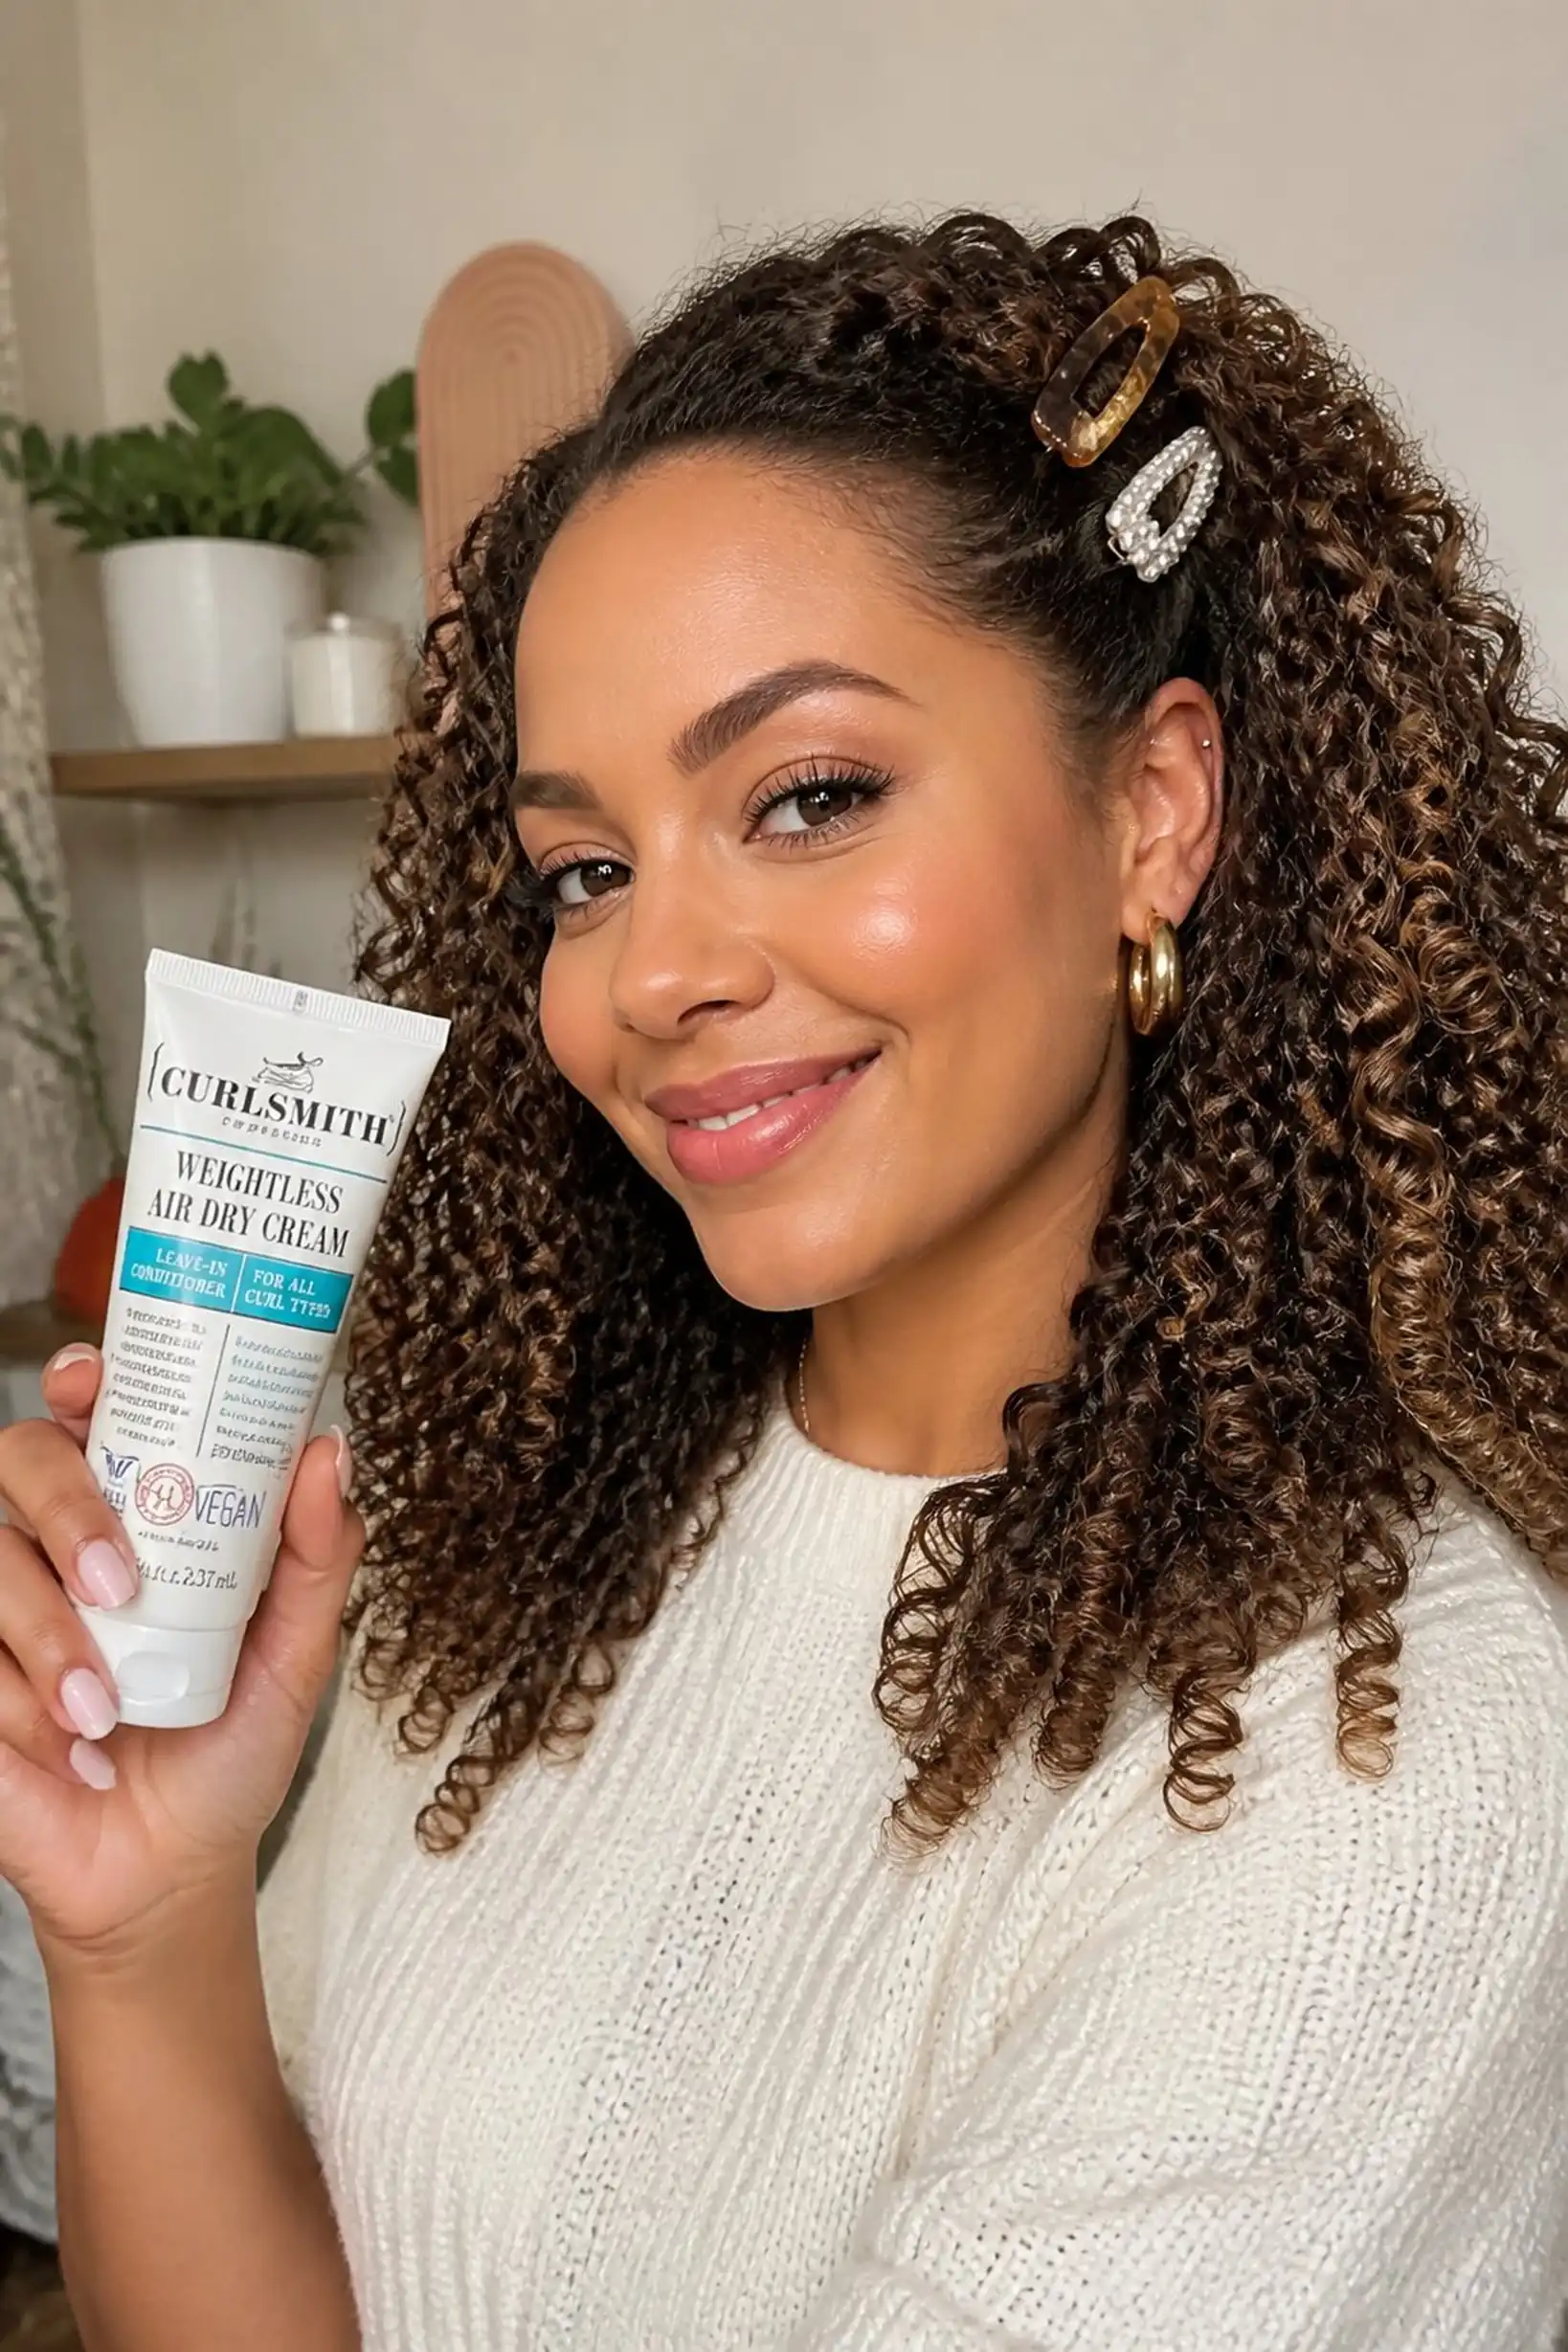
Big, natural curls are pinned back on one side with glossy decorative clips, allowing volume to frame the face while keeping hair away from the eyes. The curls have a defined shape from a leave-in curl cream.
About 3 clips spaced evenly hold curls back without crushing bounce, while enhancing hair’s natural depth and gloss.
Styling Tips
- Use a curl cream for definition before styling.
- Choose clips that contrast slightly with hair color for a subtle highlight.
- Pin back curls in stages to avoid flattening them.
Pro Tip: Apply small amounts of curl cream starting at mid-length for separation and shine.
Avoid: Overloading curls with product can weigh them down and reduce springiness.
Try Also: Swap clips for a side headband or twist back curls for a different look.
Products & Materials
Items Used
“Defined natural curls pinned back with chic decorative clips.”
Sleek Middle Part With Tucked-Behind Ears
⏱️ 5 min · 🟢 Beginner
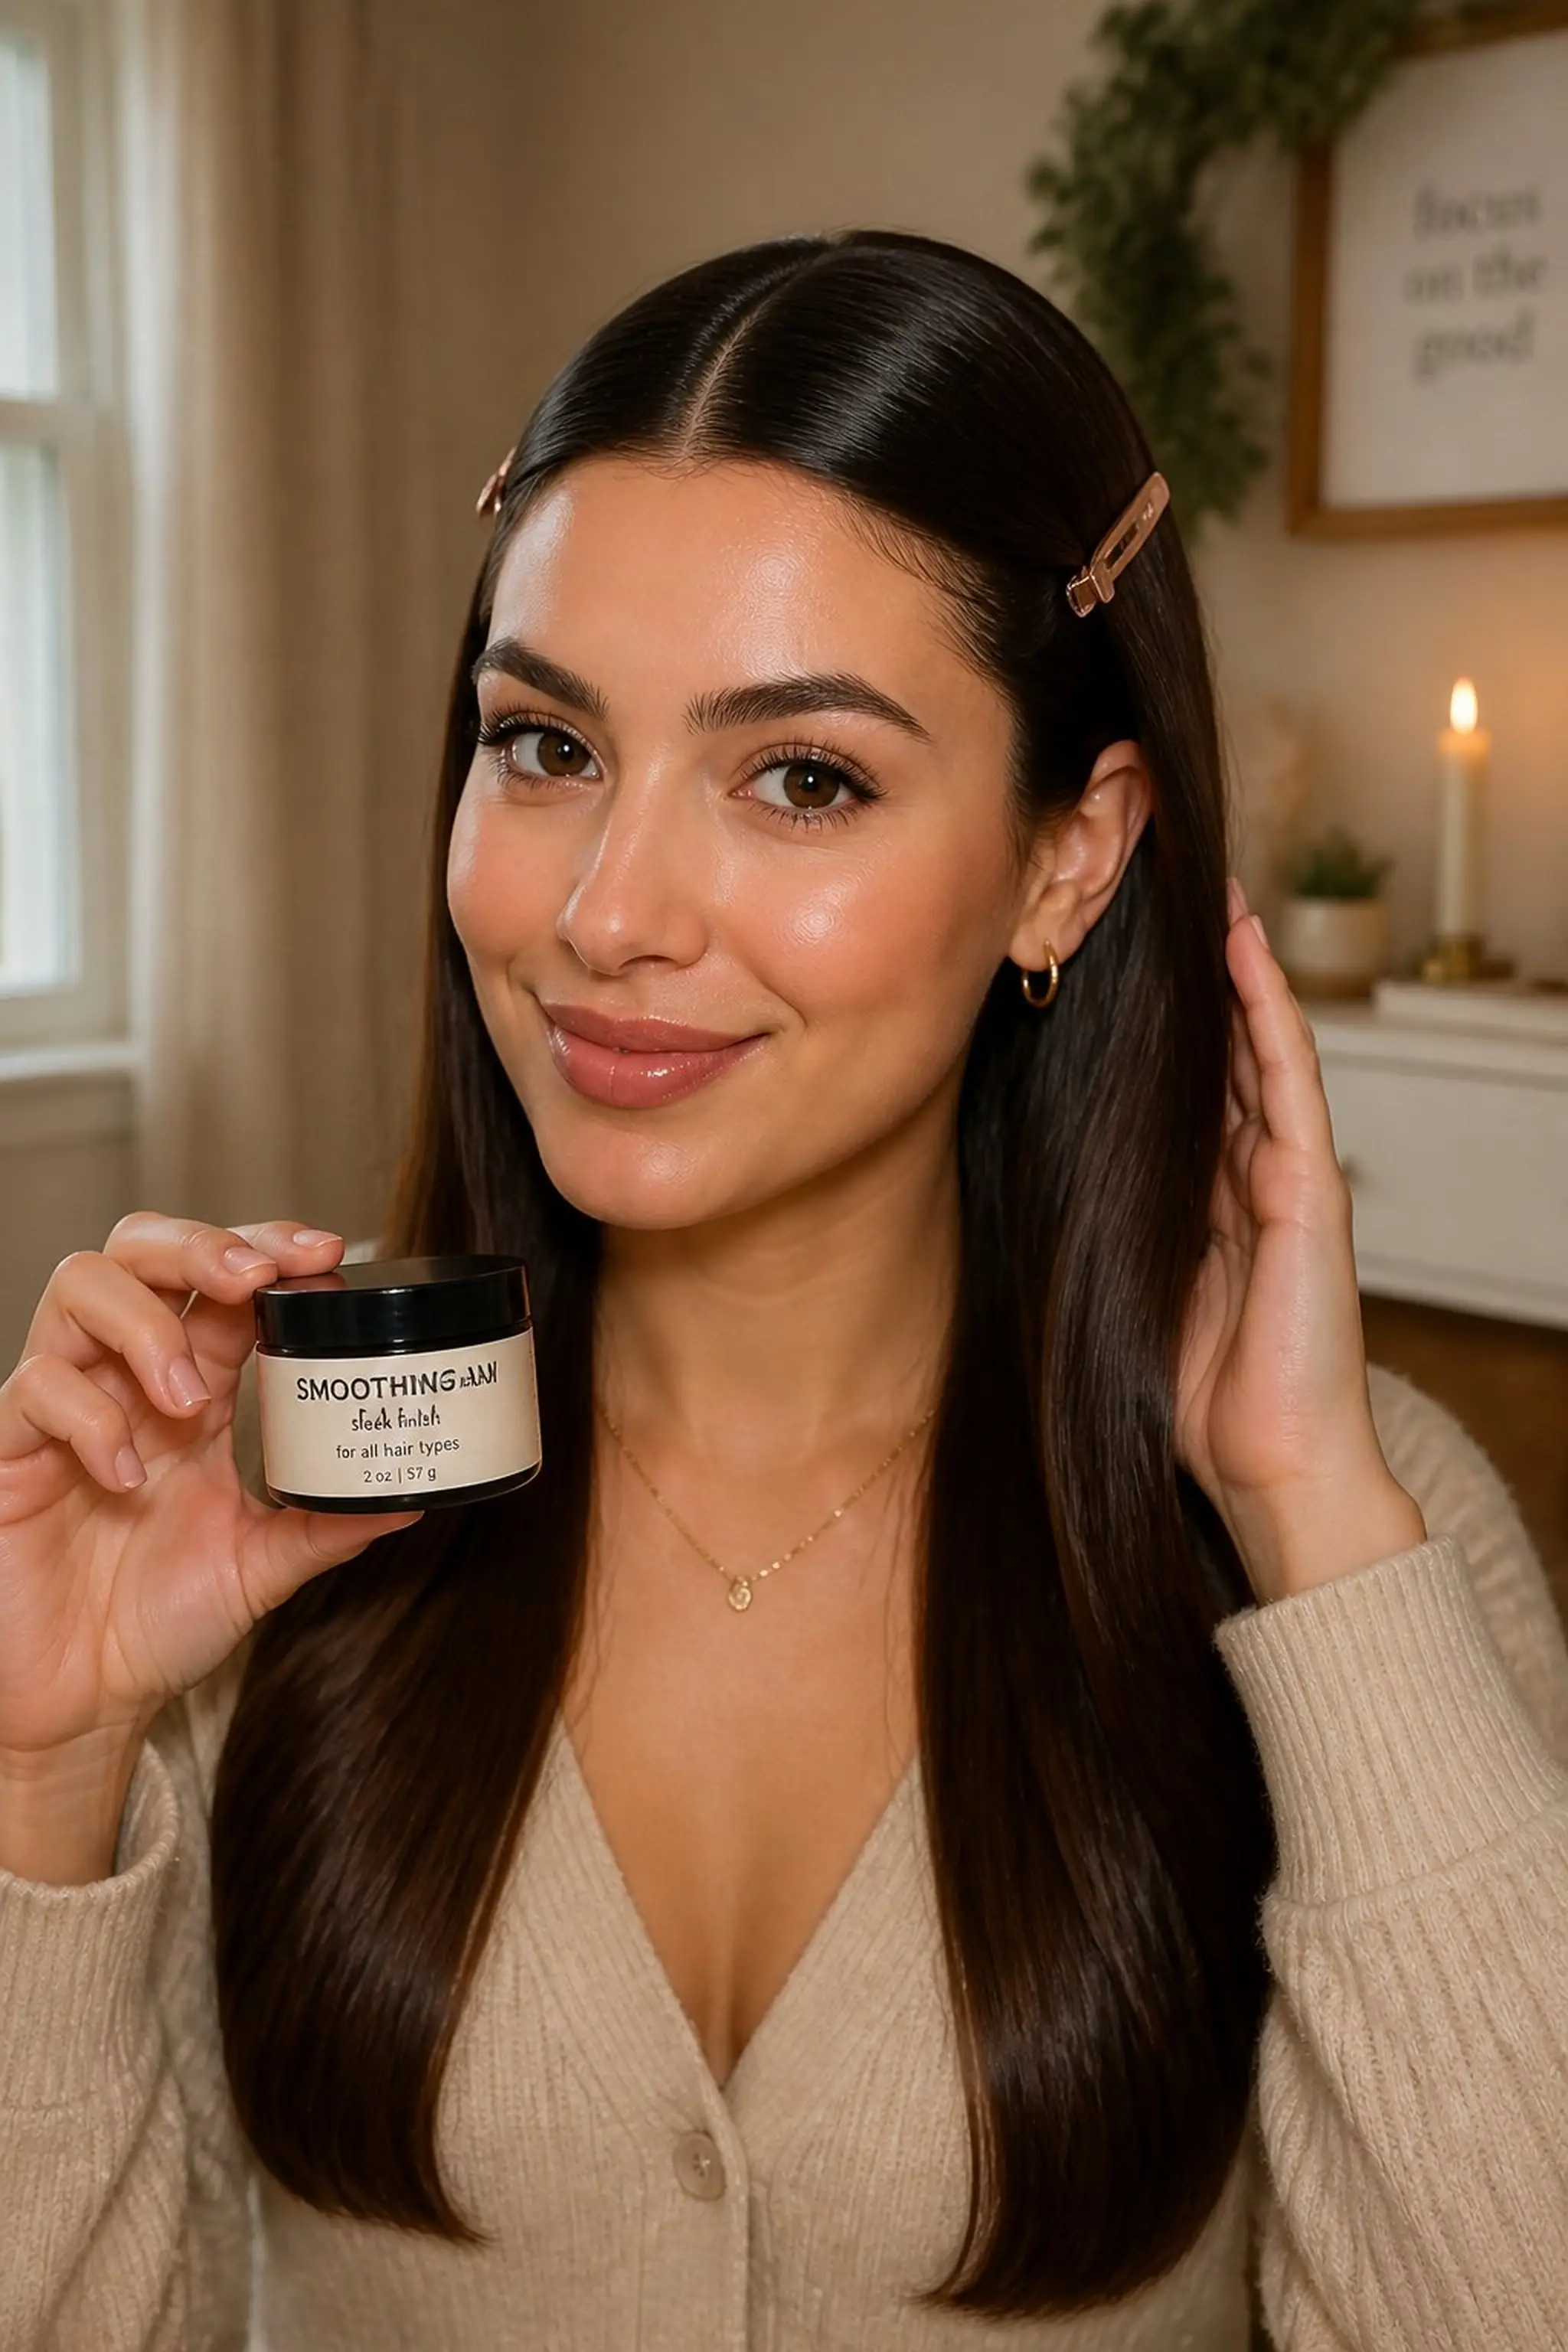
A sharp middle part guides straight hair tucked smoothly behind the ears. The strands exhibit a glossy finish, reflecting light evenly across the surface.
This style is great for fine hair that benefits from a fringe-free silhouette and minimal fuss. 2 to 3 small clips or pins invisibly secure hair behind ears to keep strands stable.
Styling Tips
- Use a smoothing balm for tame frizz and shine.
- Comb hair thoroughly to keep the middle part neat.
- Pin hair behind ears gently to avoid flattening volume.
Pro Tip: Finish with a light misting of shine spray for a polished feel without stiffness.
Avoid: Tucking hair too tightly can create unwanted dents and reduce natural volume.
Try Also: Try a slight side part with the same tuck or add small hoop earrings to highlight ears.
Products & Materials
Items Used
- small hair clips
- smoothing balm
“Clean middle part with sleek hair tucked behind ears for easy chic.”
Beachy Waves With Headband for Easy Flair
⏱️ 15 min · 🟠 Intermediate
Soft beachy waves spill over shoulders, caught in place by a colorful fabric headband with subtle stretch and a width of 2.5 inches. The waves shimmer faintly with light reflection on wave crests.
Using a 1.5-inch curling wand, waves are finger-combed for natural separation. The headband gently pushes hair back but still allows volume at the crown.
Styling Tips
- Use a sea salt spray to boost wave texture before styling.
- Position headband about an inch behind hairline to open the face.
- Finger-comb waves after curling for loose separation.
Pro Tip: Spray a light-hold hairspray to keep waves defined without stiffness.
Avoid: Using heavy products can weigh down waves, losing their natural bounce.
Try Also: Try a twisted knot headband or swap for a thin metallic band for subtle shine.
Products & Materials
Items Used
“Beachy waves paired with a colorful headband for laid-back flair.”
Twisted Low Pony With Soft Face-Framing Pieces
⏱️ 10 min · 🟠 Intermediate

A loose twist starts on each side just above the ears, merging into a low ponytail at the back. Face-framing pieces softly curl with a 1-inch iron, balancing structure and softness.
The twists use about 6 to 7 strands each to keep them thick enough for texture, and a medium-hold hairspray helps maintain shape without stiffness.
Styling Tips
- Start twists with dry, textured hair for grip.
- Secure ponytail with a matte elastic for a smooth finish.
- Use a medium heat curling iron on face pieces for shaping.
Pro Tip: Loosen twists slightly before securing to add fullness and keep softness.
Avoid: Making twists too tight can pull on hairline and create sharp lines rather than gentle curves.
Try Also: Try different twist directions or add decorative elastic bands for flair.
Products & Materials
Items Used
“Soft twisted low ponytail with gentle curls framing the face.”
Simple Low Twist Secured with Decorative Pins
⏱️ 9 min · 🟠 Intermediate
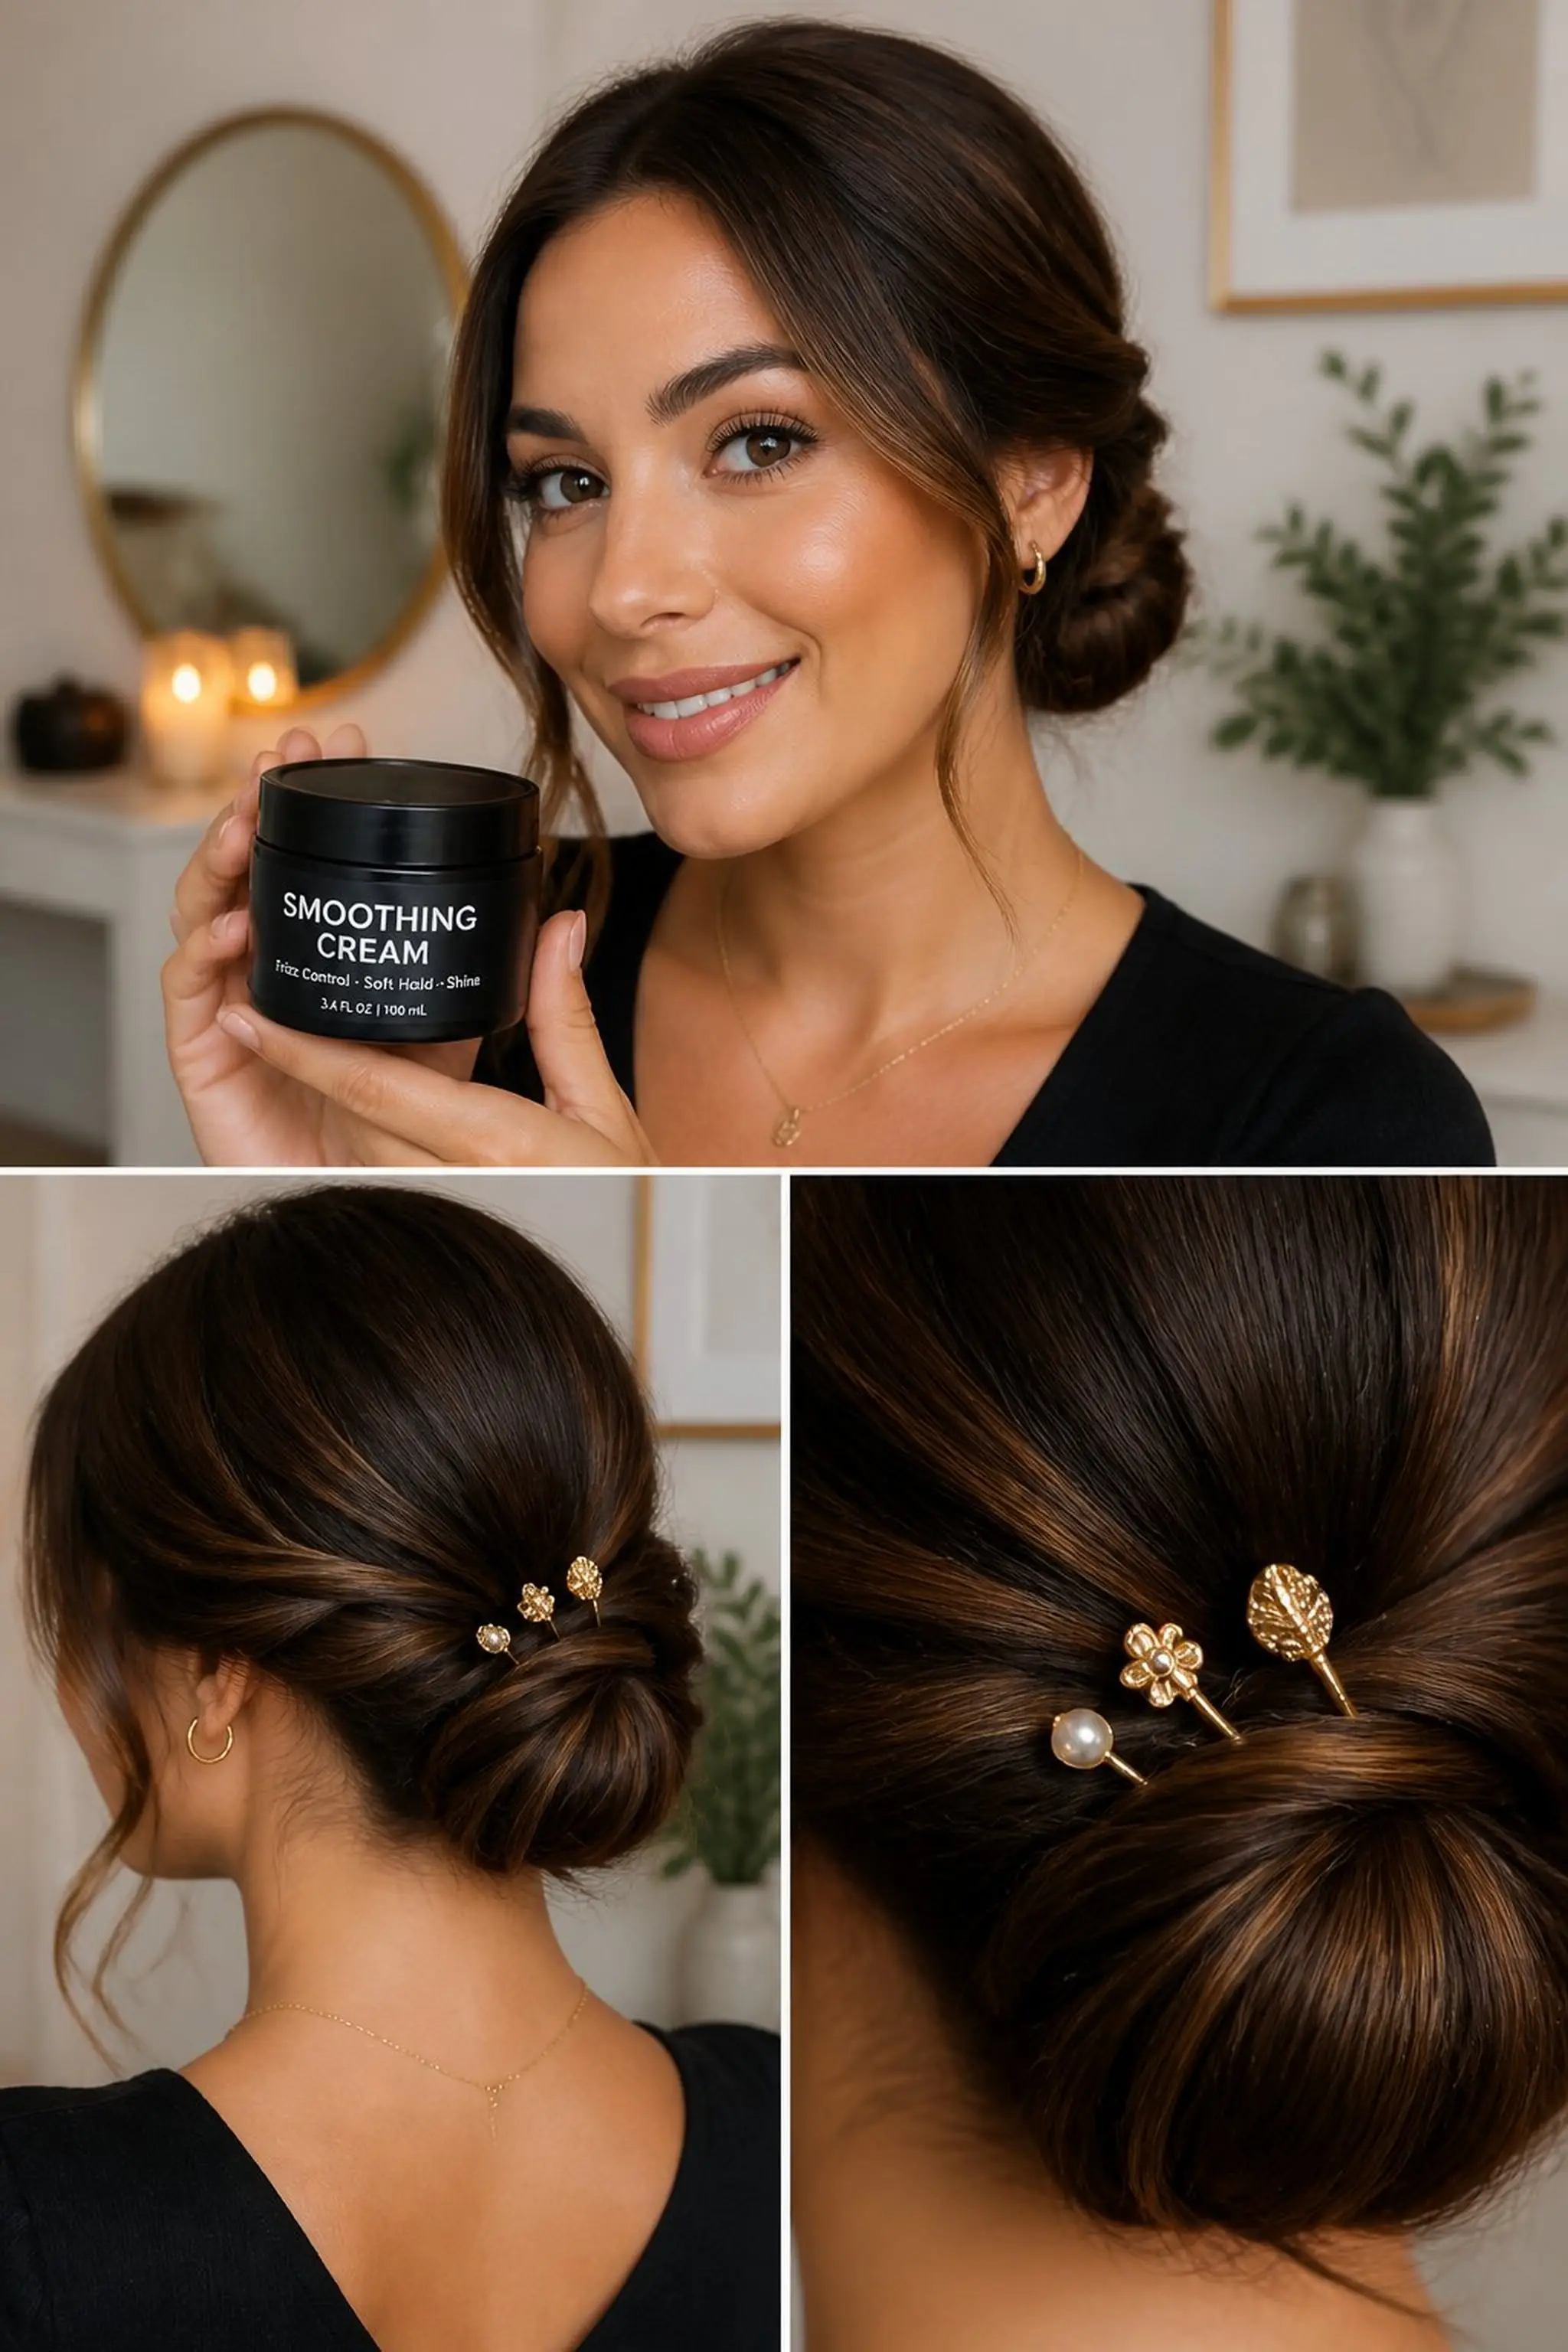
A low twist folds inward and is fastened with a cluster of decorative gold pins near the nape. Hair shows soft shine and smooth texture with slight wave at edges.
This style uses 4 to 5 pins, arranged asymmetrically to add interest without overwhelming the soft base. Target fine to medium hair for balance.
Styling Tips
- Use a smoothing cream before twisting for sleek finish.
- Secure pins in a fan shape for decorative effect.
- Leave subtle face strands loose for framing softness.
Pro Tip: Choose pins with flat backs to lie close to the scalp and avoid discomfort.
Avoid: Using too many pins can weigh down the style and look cluttered.
Try Also: Try twisting from one side only or pair pins with a thin headband.
Products & Materials
Items Used
- decorative gold pins
- smoothing cream
“Low twist with graceful gold pins for subtle sparkle.”
