The best all-in-one art kit for beginners
187Pcs Professional All-in-One Art Painting Kit
Everything you need to start painting. Includes brushes, paints, easel, and more. Highly rated by readers.
Shop on Amazon →As an Amazon Associate, we earn from qualifying purchases.
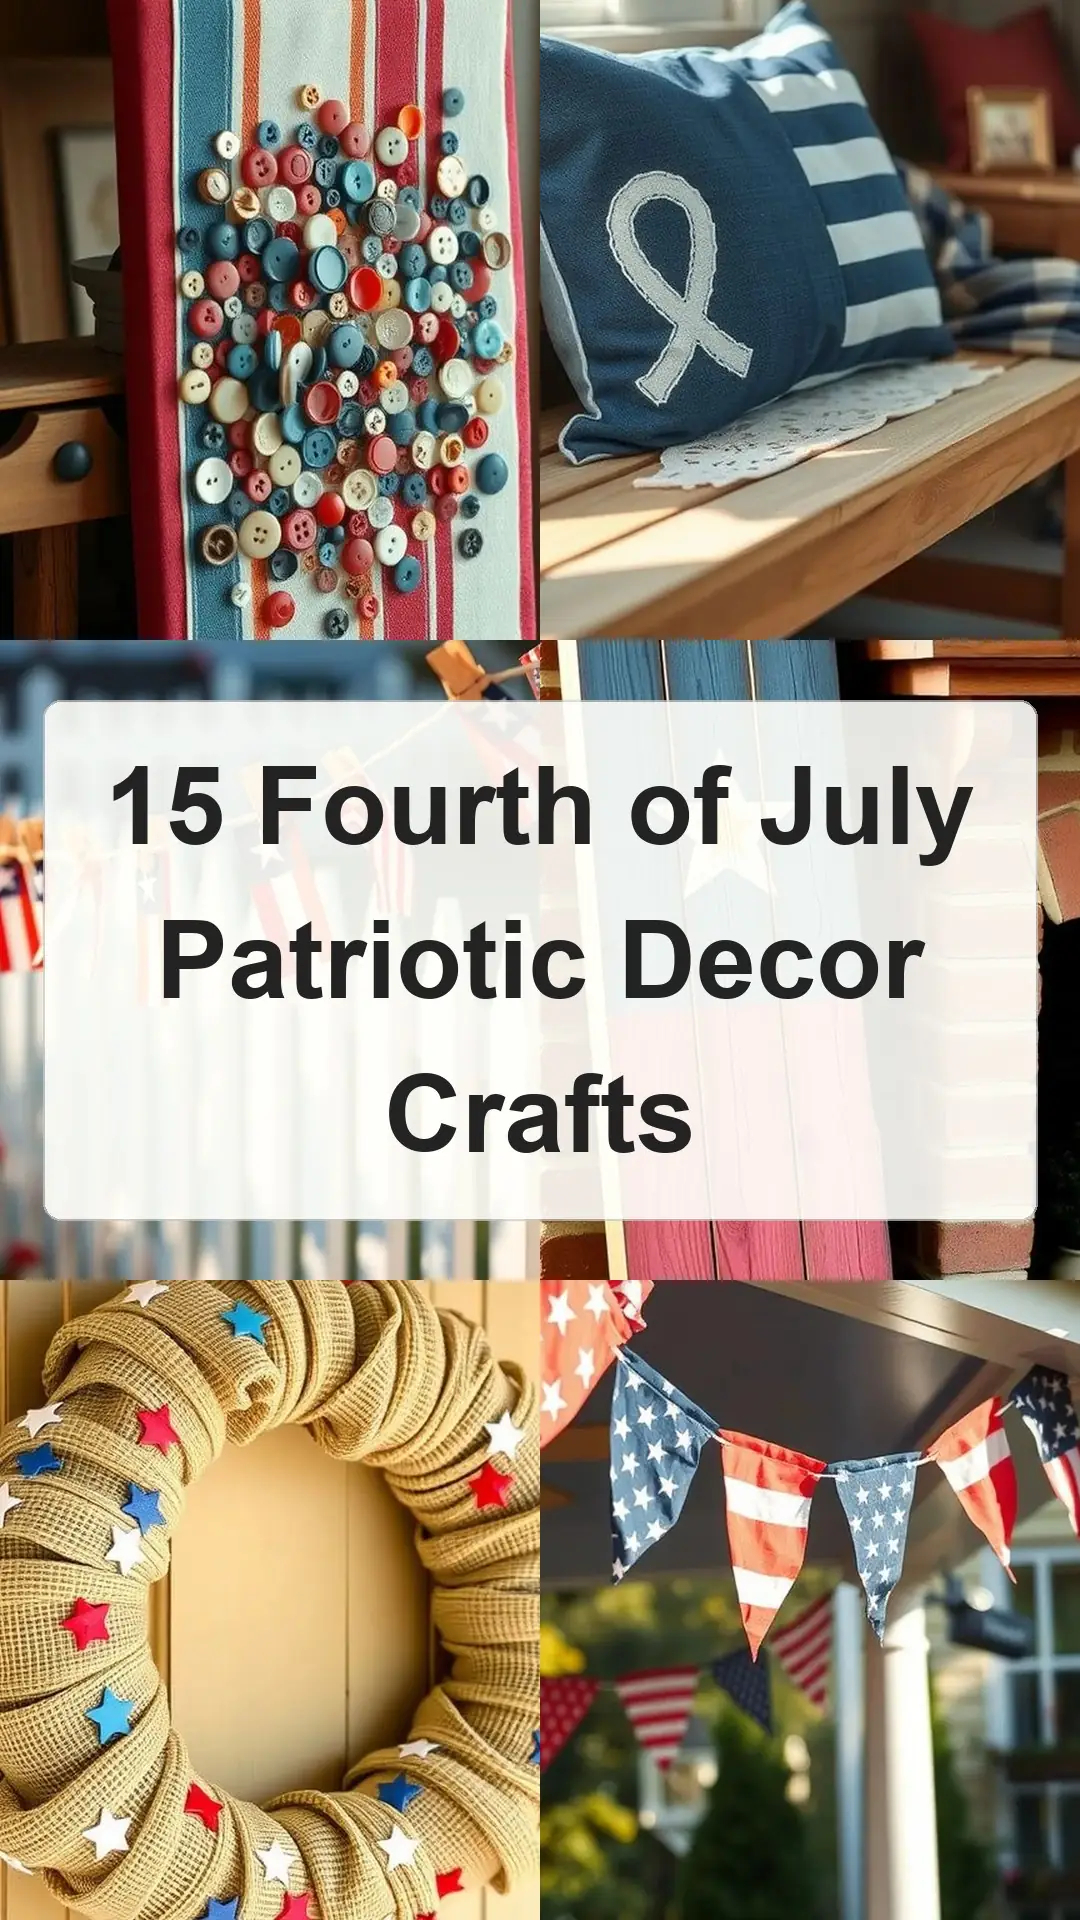
Fourth of July patriotic decor crafts brighten porches and tables with red, white and blue energy and homemade charm. Fourth of July patriotic decor crafts take simple jars, wood, fabric and ribbon into wreaths, banners, lanterns and tabletop displays that invite friendly gatherings. Fourth of July crafts and patriotic decor crafts blend rustic textures and bold color for porch accents and picnic centerpieces.
Fourth of July decor ideas and patriotic craft ideas make home entrances and backyard tables feel festive and welcoming.
Painted mason jar flag lantern with twine glow
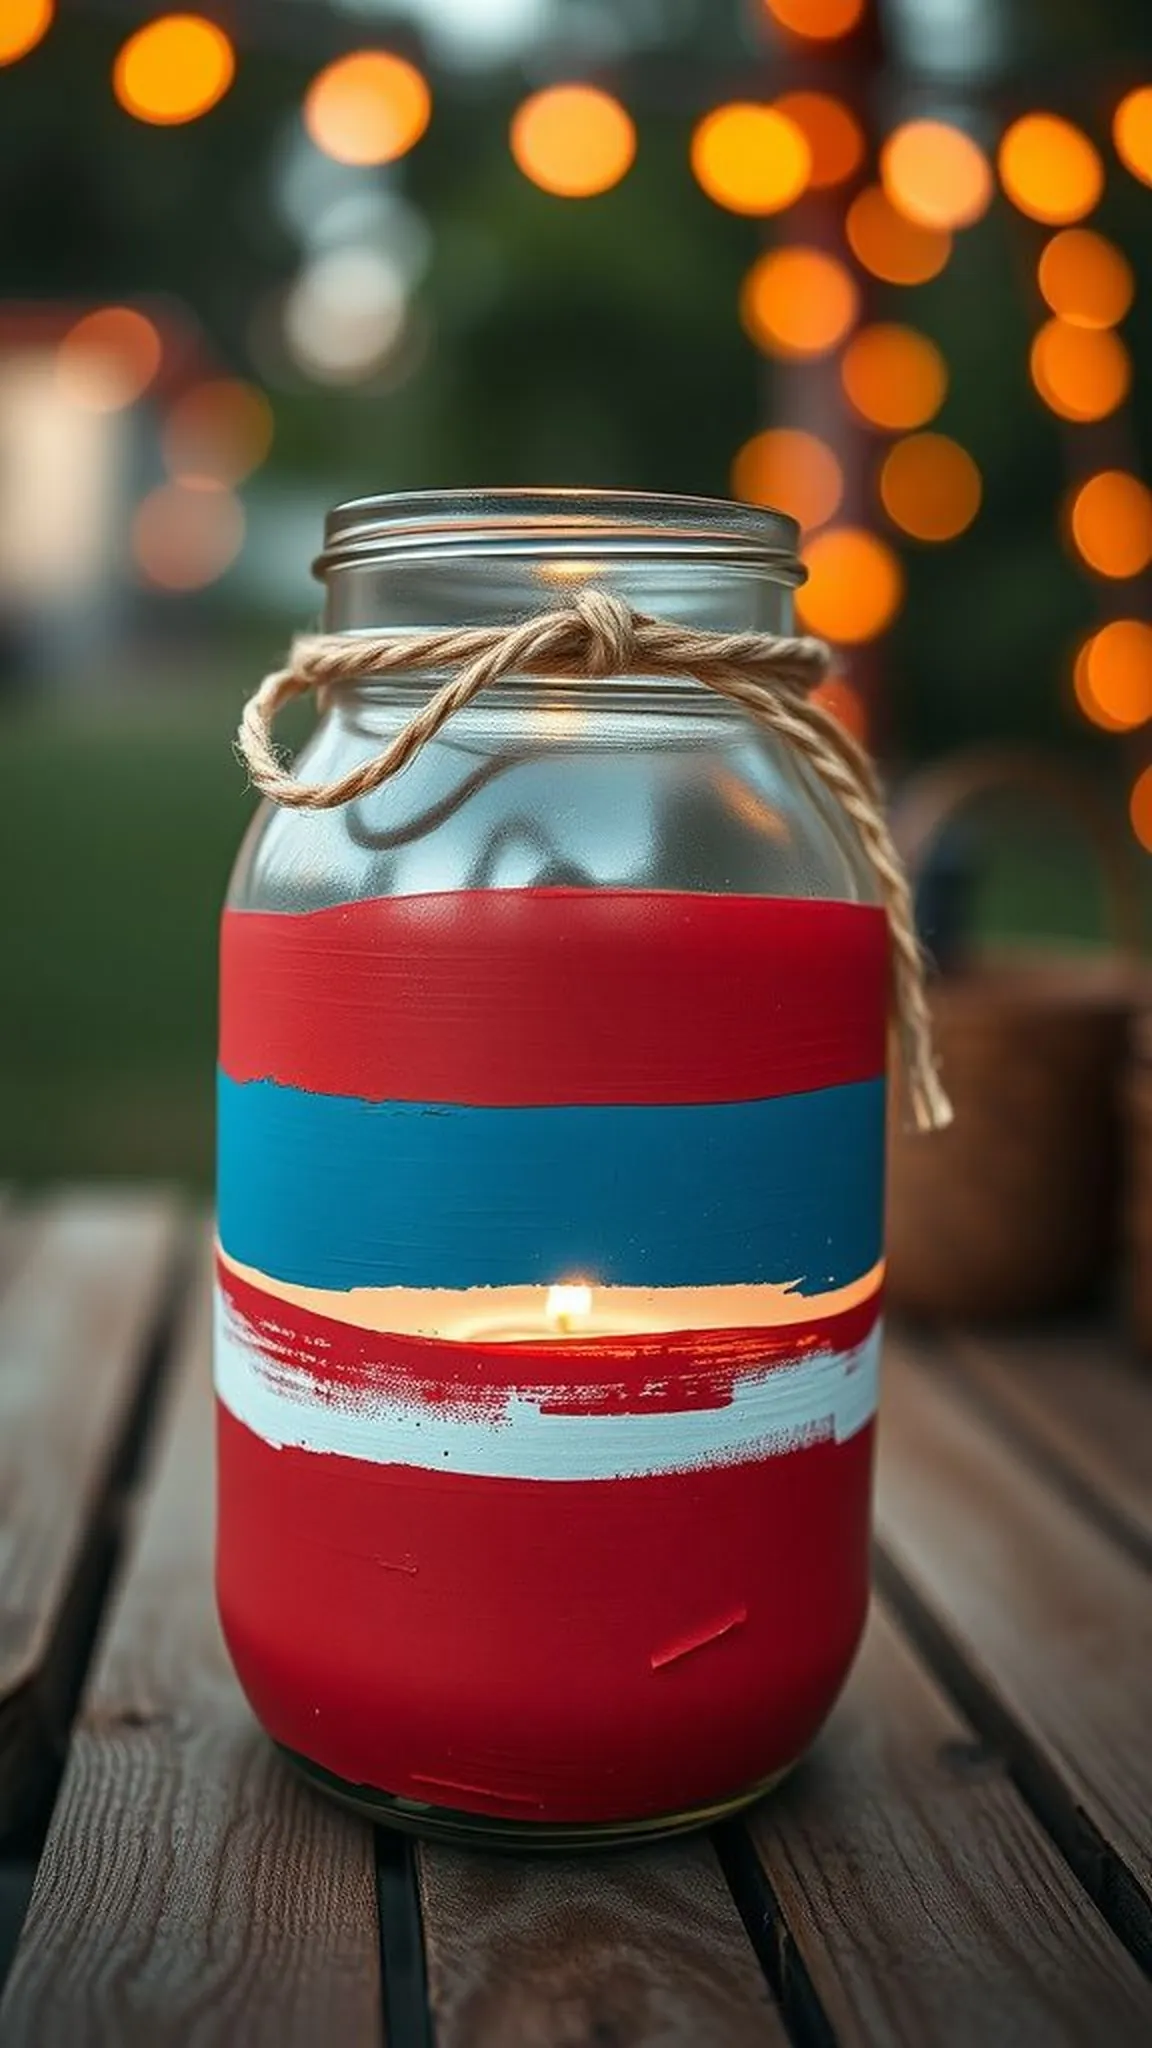
I always notice how the painted jar throws a soft amber halo across a picnic table, the red and blue bands catching evening light while the white stripe seems to calm the scene. The faint scratch of twine around the neck gives a rustic note and the tiny bubble of the glass lens adds depth. It feels like summer afternoons condensed into a little lantern, warm to look at and pleasantly familiar.
Neighbors glance over when these jars are lit, and the glow invites relaxed conversation and simple smiles.
Items Used
- mason jar (16 oz)
- acrylic paint set (red white blue)
- natural jute twine
- battery operated tea lights
Steps
- Wash and dry a clear mason jar and remove any labels from the glass.
- Brush red and blue acrylic paint in horizontal bands, leaving a white stripe between them for a flag look.
- Wrap natural twine around the jar neck and secure the end so it sits snugly.
- Place an LED tea light inside the jar and position jars along a table or steps.
Burlap stars and stripes wreath for the front door
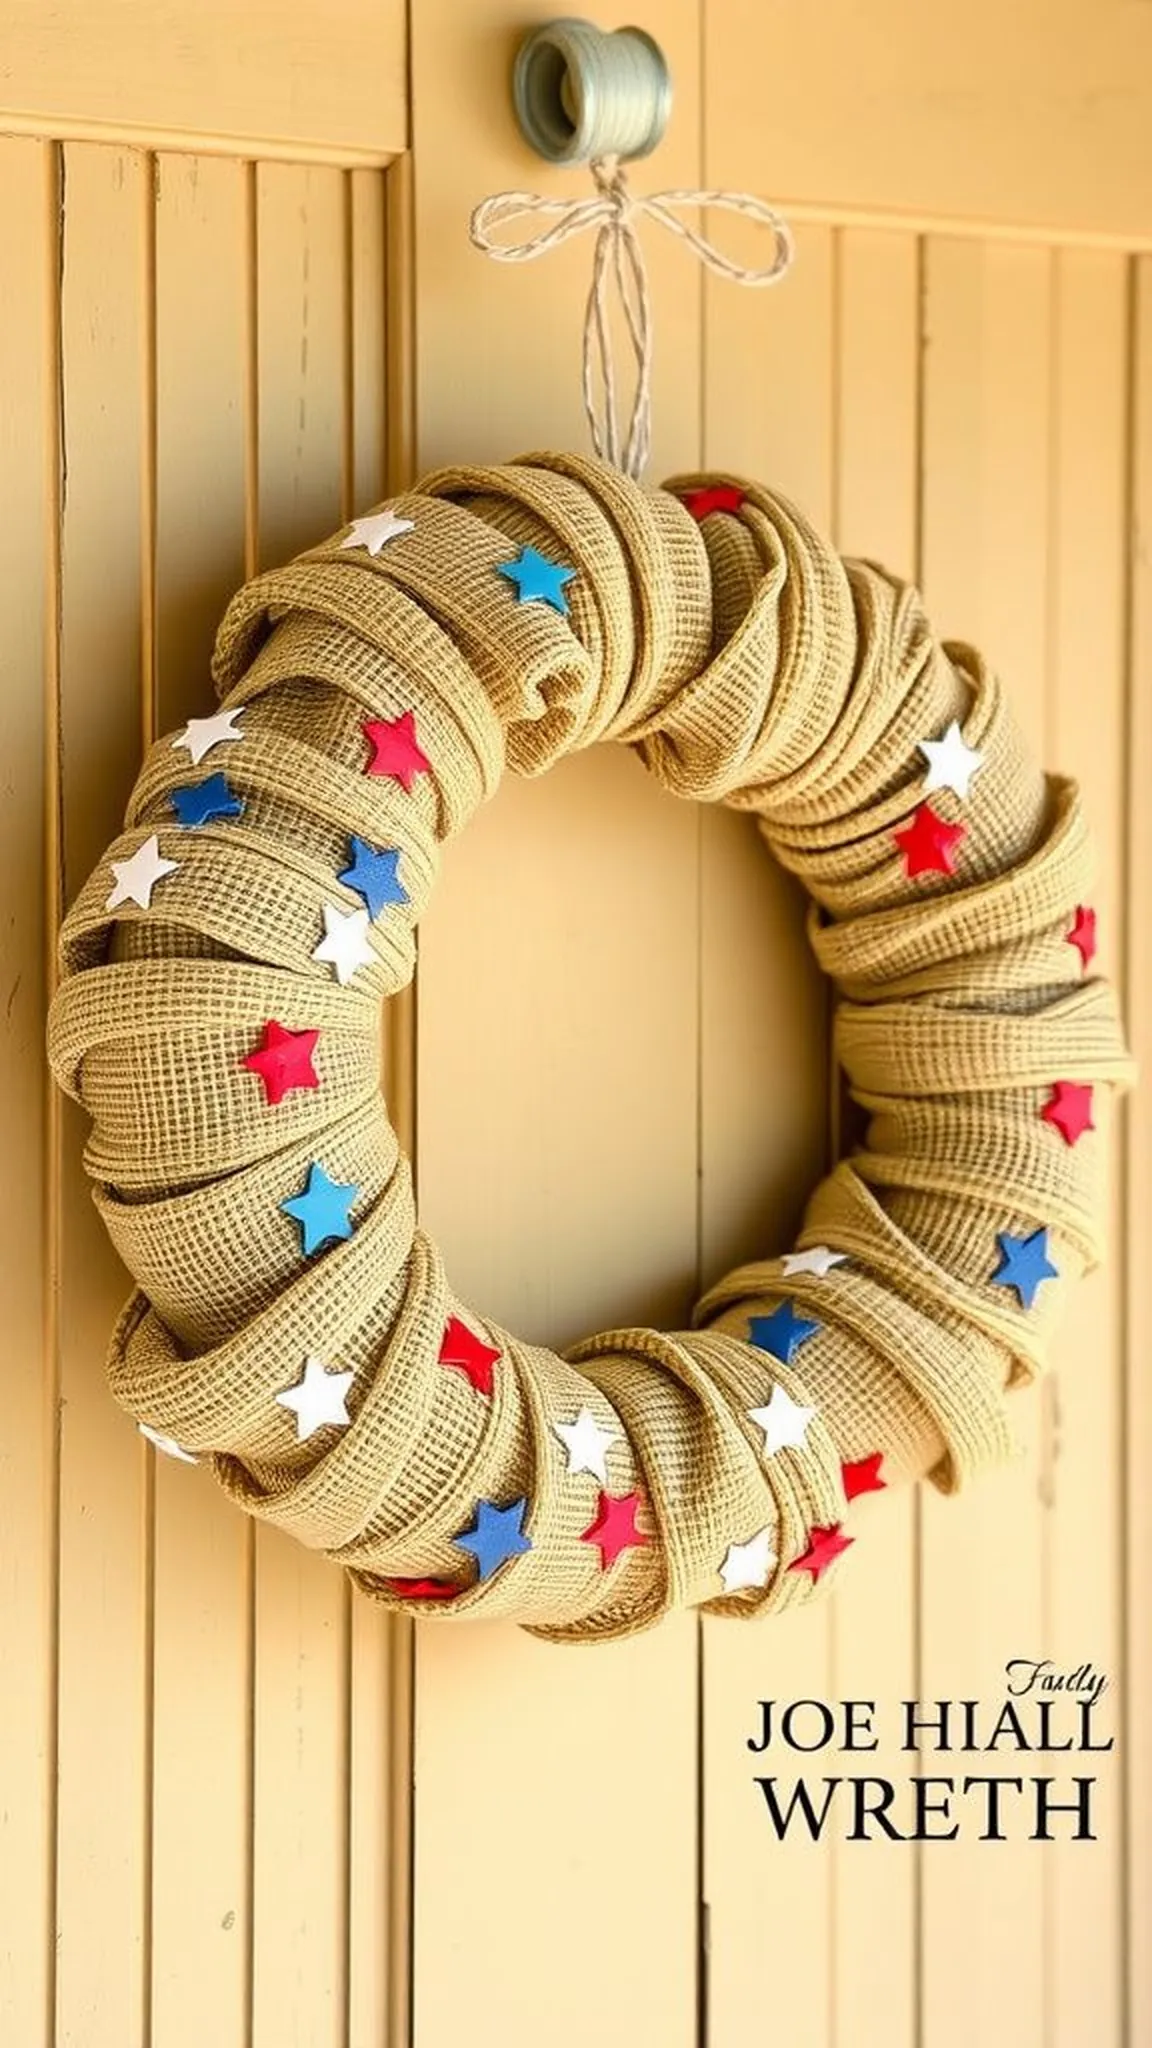
There is a comforting roughness to burlap when it is gathered into a wreath; the texture seems to hold memories of backyard barbecues and porch swings. Little wooden stars peek out from folds of burlap, their painted edges catching morning sun. A loop of wired ribbon adds a gentle sheen and a faint creak when the door moves.
The whole piece reads like a friendly handshake at the entry, salt-of-the-earth and quietly festive. It brings a calm, homemade identity to the doorway without shouting for attention.
Items Used
- wire wreath frame (18 inch)
- burlap roll
- wooden star cutouts
- wired ribbon red blue white
Steps
- Place a round wire wreath frame flat and tuck gathered strips of burlap through the loops until the frame is full and fluffy.
- Position small wooden star shapes across the wreath, spacing them by eye for an even visual rhythm.
- Paper ribbon is woven or looped into the wreath for color contrast and ends are tucked under burlap folds.
- Hang the wreath from a durable loop and adjust stars so they face slightly outward for depth.
Clothespin flag garland that dances in breeze
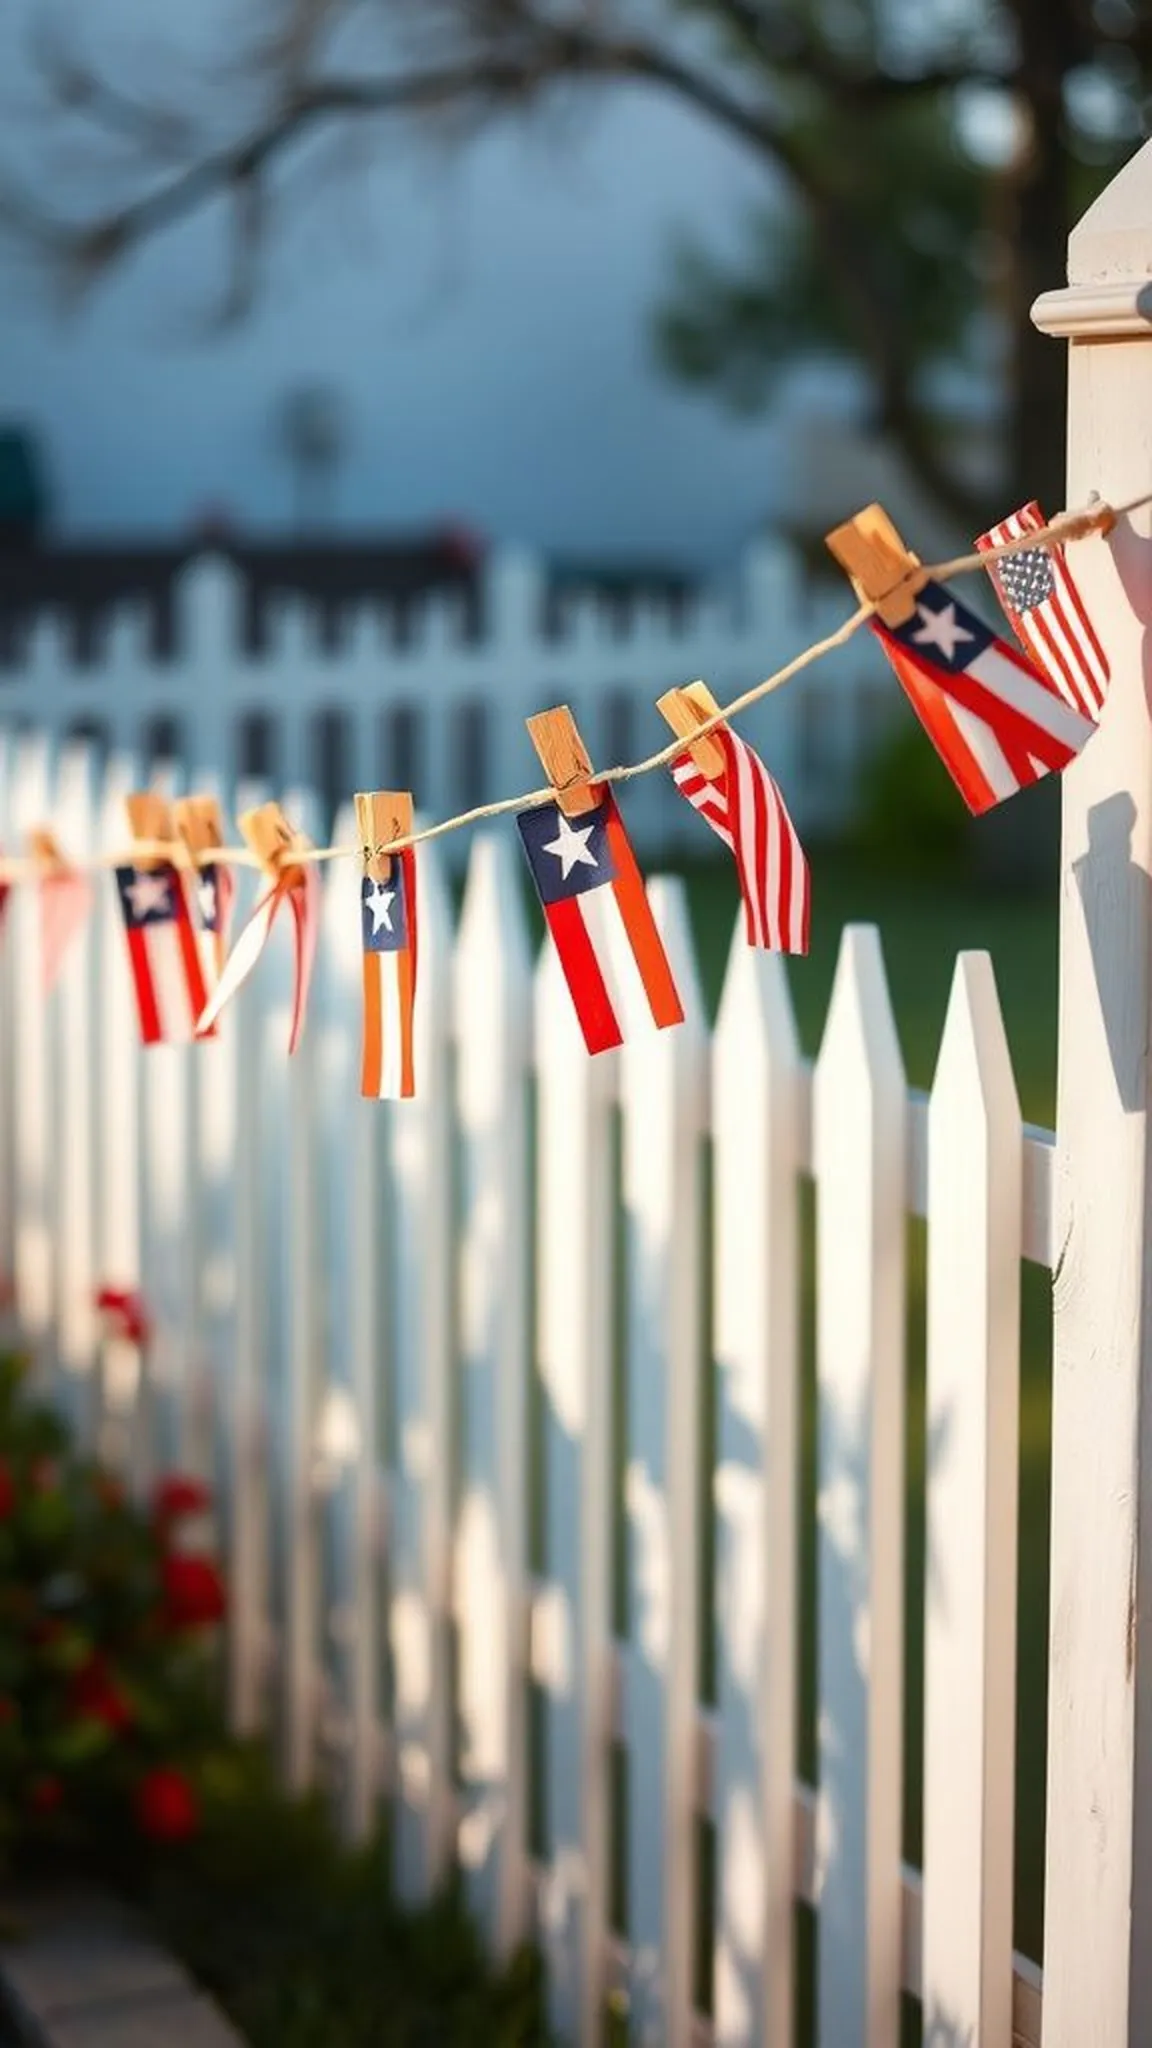
The clothespin garland breathes with every breeze, little flags bobbing like smiles on a string. The wooden pins hold tiny folded papers or fabric rectangles that show bands of red, white and blue; when sun hits them they shimmer a little at the edges. The sound of clothespins clicking together when the wind picks up is unexpectedly homey, like a rhythm from summer camps.
Hung across a fence or strung above a dessert table, the garland feels playful and low-key, the kind of detail that quietly livens a gathering.
Items Used
- mini wooden clothespins
- natural twine
- red white blue craft paper
- acrylic craft paint set
Steps
- Cut small rectangles of red, white and blue craft paper or fabric into flag shapes and let edges rest naturally.
- Paint or decorate wooden clothespins with a touch of color on the ends and allow them to dry.
- Stretch a length of natural twine taut and clip each miniature flag with a painted clothespin along the line.
- Hang the garland so flags have room to flutter and adjust spacing for a balanced look.
Save time and printer ink with 50+ printable templates and step-by-step instructions in one ad-free guide.

Weathered pallet flag sign for porch or mantel
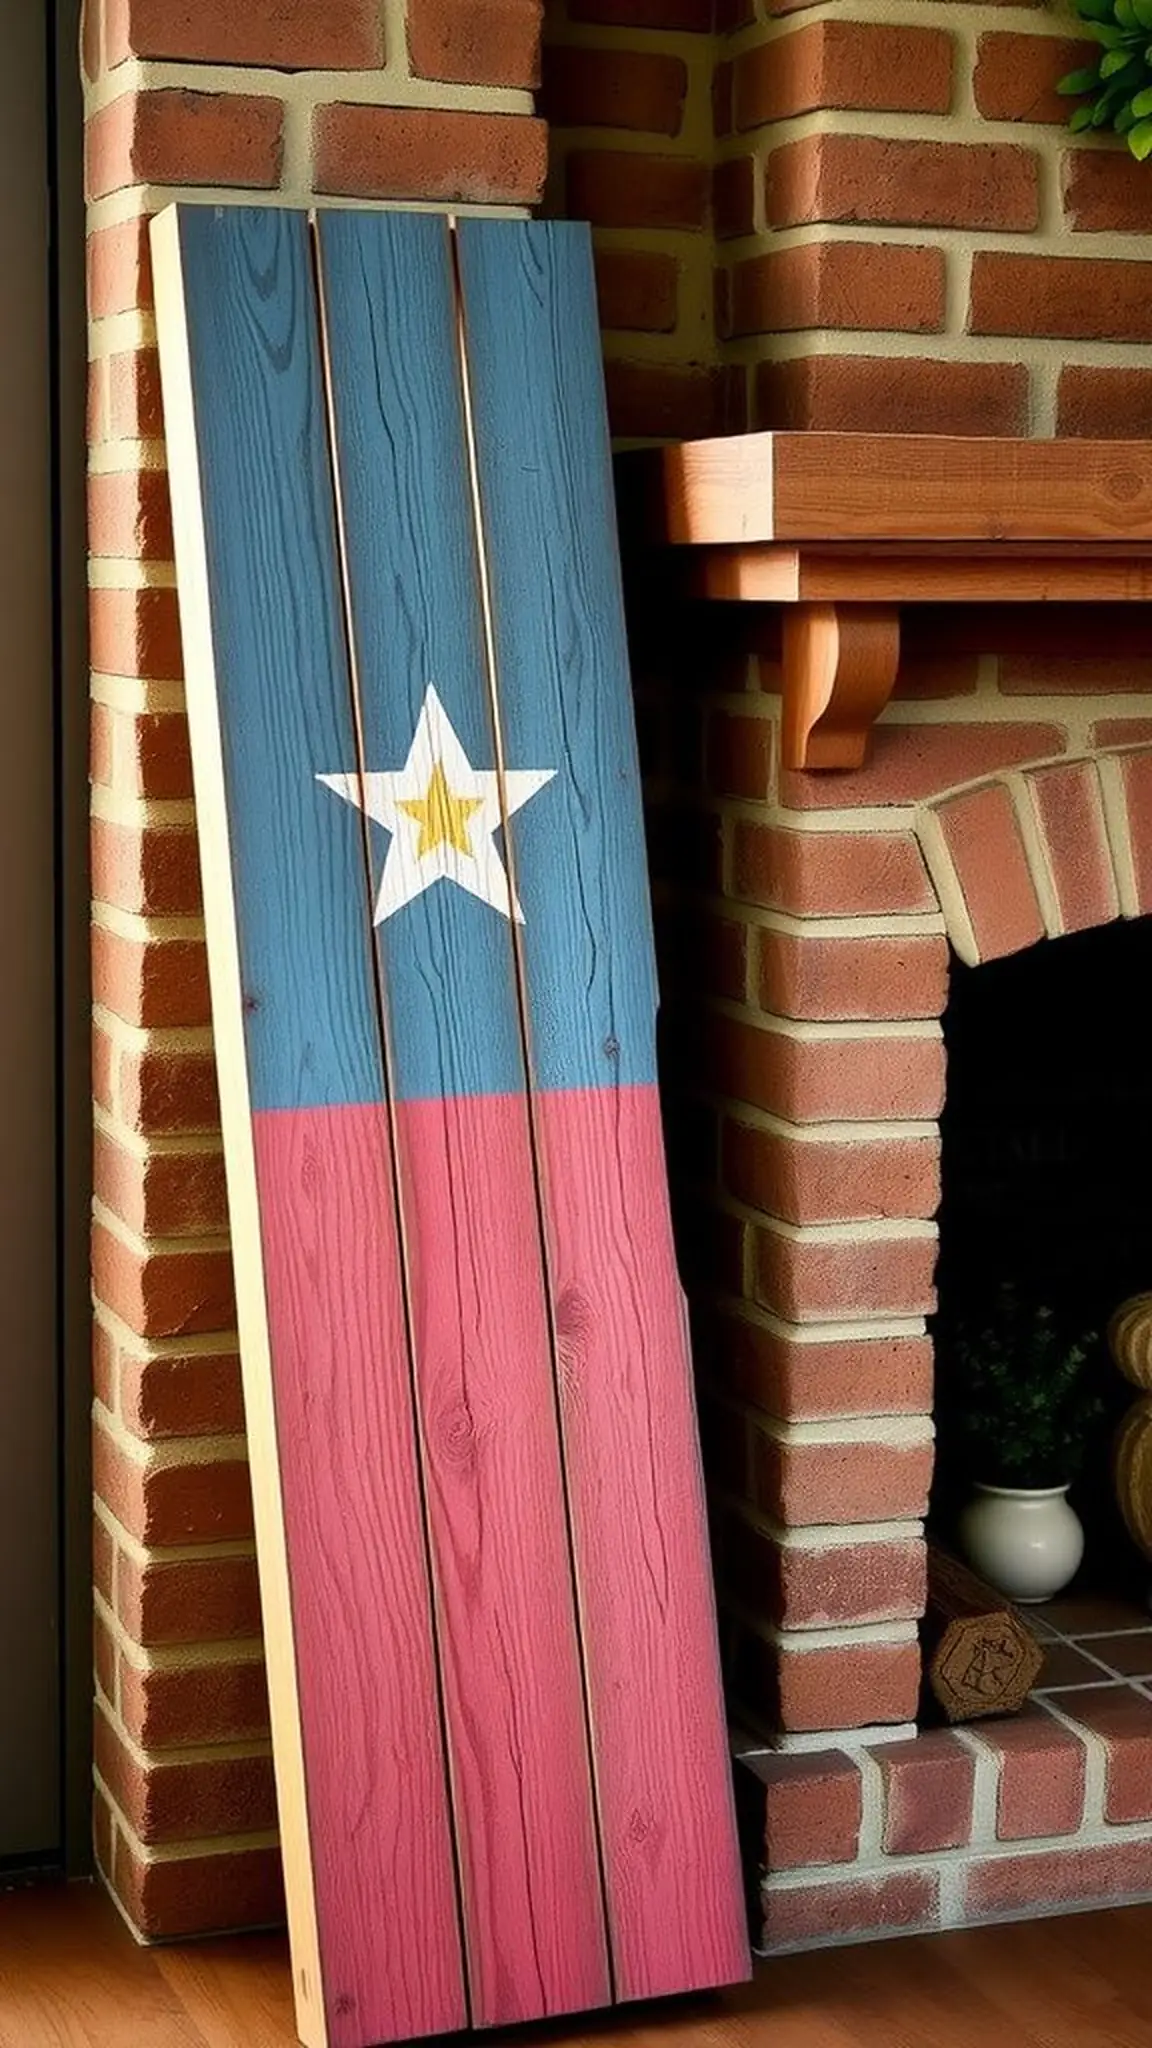
A pallet flag sign carries the whisper of old boards and road trips, the grain telling its own story beneath faded paint. The painted stripes curve around knots and small dents, giving the piece a lived-in personality that new materials seldom achieve. The muted reds and blues feel sun-washed, like fabric left to dry on a line, and the tiny rough edges add honesty to the look.
Rested against a mantel or leaning on a porch, it gives the house a relaxed, handcrafted presence that matches a lazy summer day.
Items Used
- reclaimed pallet wood planks
- acrylic exterior paint red blue white
- star stencil set
- sanding block
Steps
- Select a pallet-sourced wood plank and remove loose splinters so the surface feels even but worn.
- Sand lightly to soften sharp edges and reveal layers of grain.
- Brush horizontal bands of red and blue paint, leaving a central white area for the flag field.
- Add a field of small stars with a star stencil and finish with a light sanding for a weathered effect.
Tin can luminaries with star-patterned glow
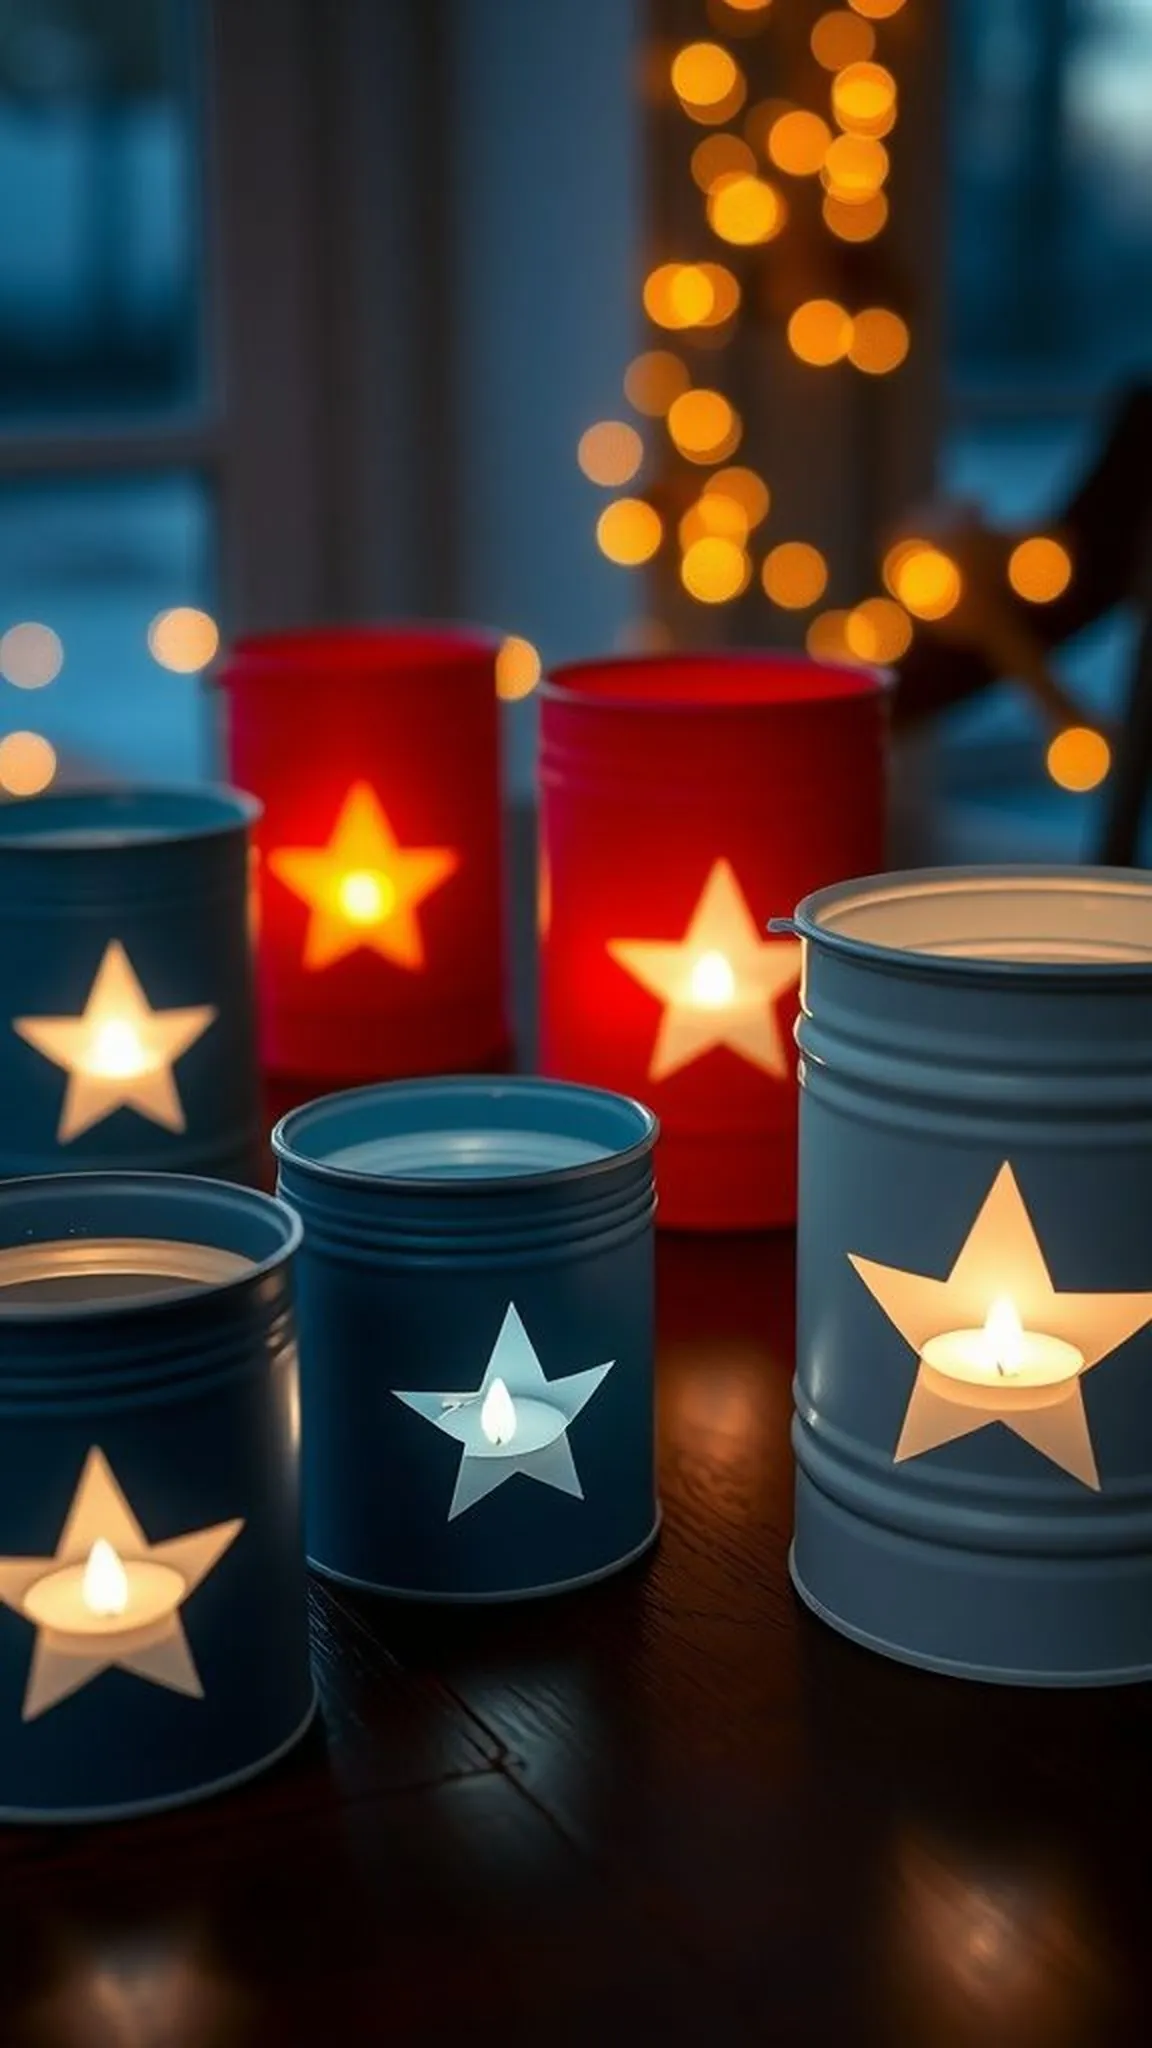
The tin can luminaries surprise with their sharp star silhouettes, tiny pinholes letting warm candlelight escape like playful constellations. The light flickers and the metal edges make a soft metallic whisper when shifted, adding an auditory note to the visual display. Spray paint ages the cans into matte finishes that play nicely with dusk, and the perforated stars cast delicate patterns across tabletops.
The cluster of luminaries reads like a small constellation, charming in its modesty and quiet enough not to overwhelm a conversation.
Items Used
- empty tin cans (cleaned)
- nail and hammer set
- spray paint red white blue
- battery operated votive candles
Steps
- Clean several empty tin cans and remove sharp lids so openings are smooth.
- Arrange a star template on the can and use a nail and hammer to create a pattern of star-shaped holes.
- Spray paint the cans in chosen colors and let them dry fully.
- Place battery tea lights or votive candles inside the cans and arrange them on a tray or along a walkway.
Button and fabric flag collage on stretched canvas
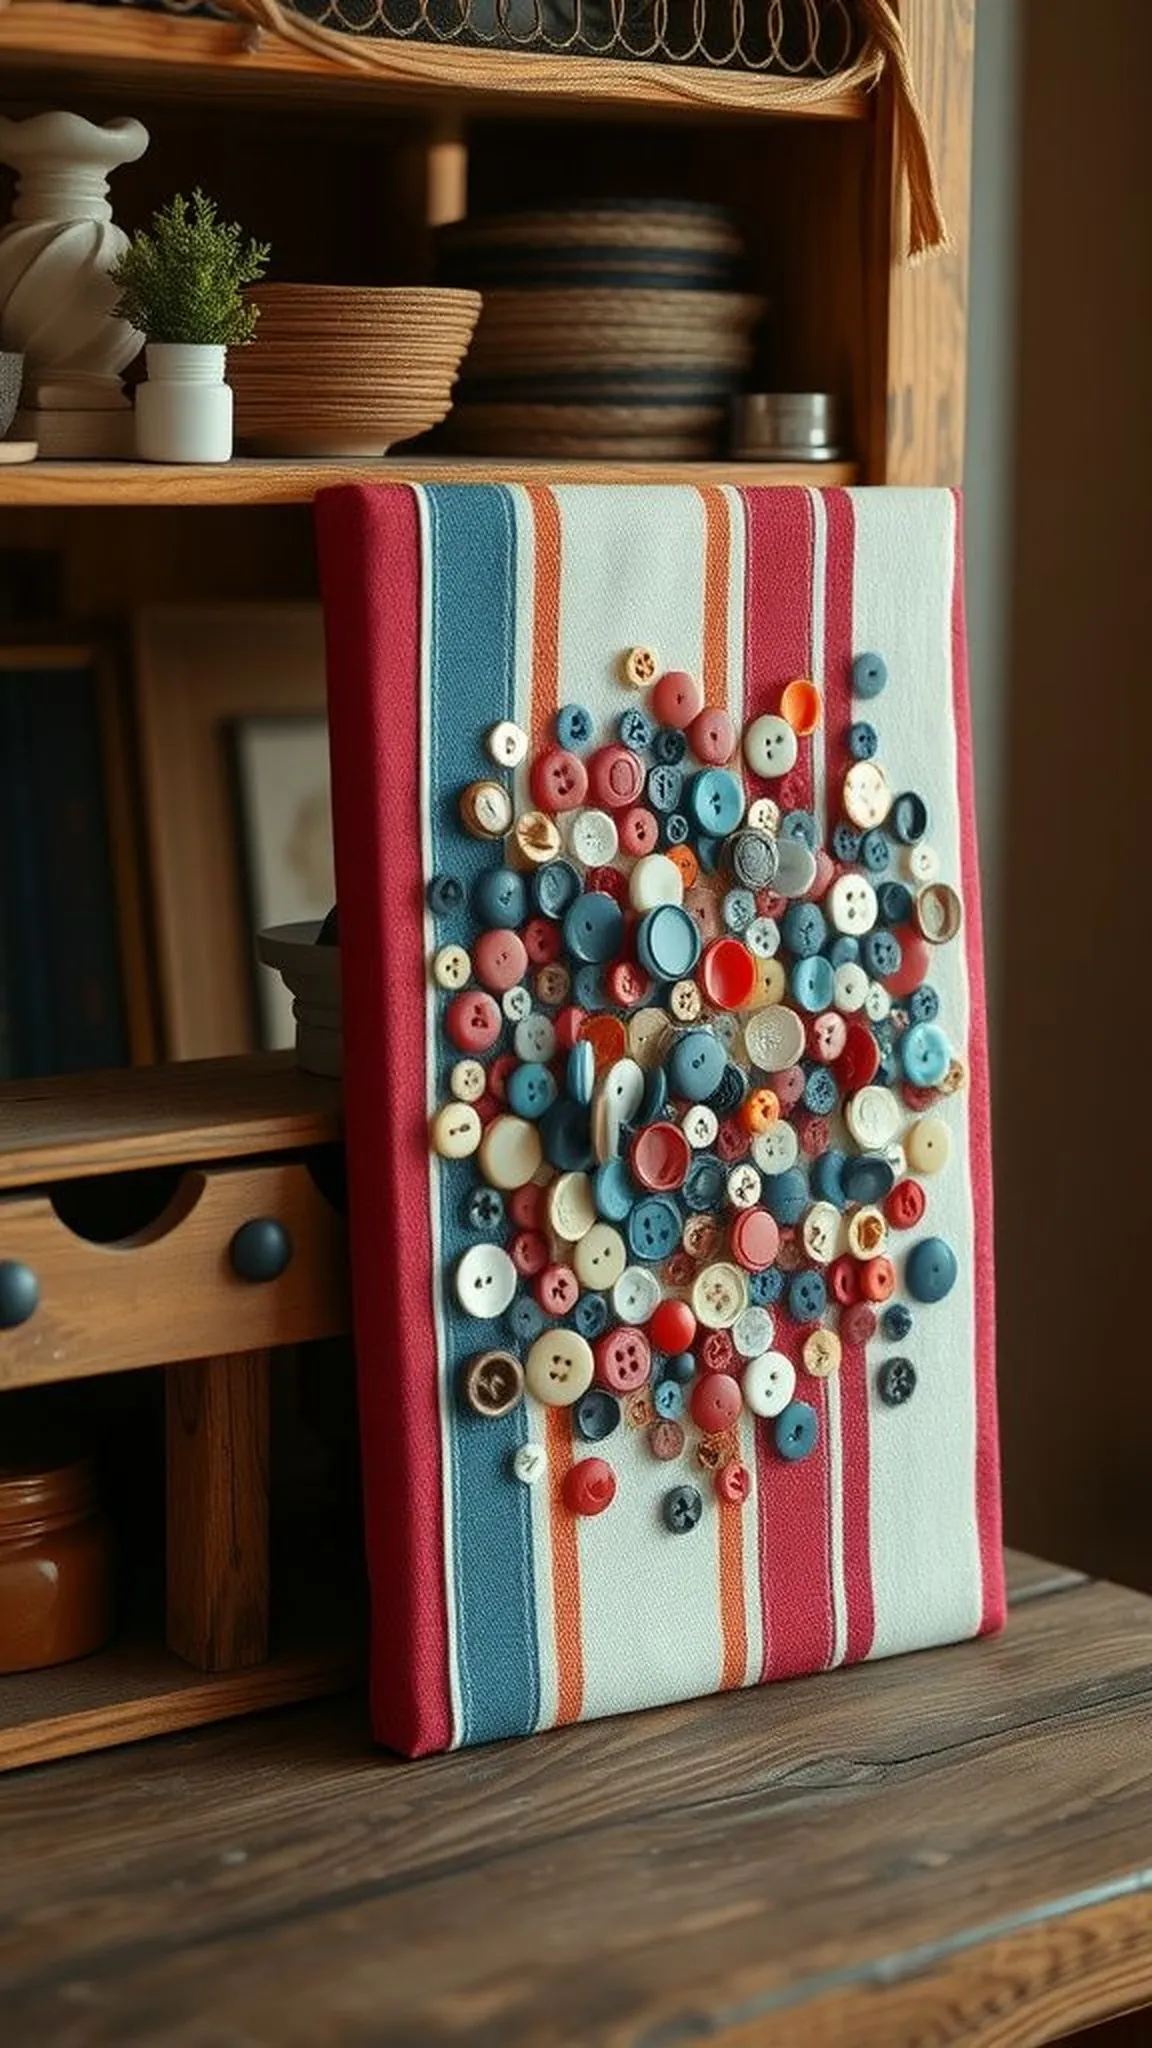
The collage feels tactile and a little shy, all those small buttons forming a field of color that invites touch. Fabrics of different weights and weaves sit next to each other, creating a patchwork of threads that catches light in small ways. Buttons cluster in playful places, some glossy, some satin, and the canvas edge frames the scene like a handmade portrait.
It carries a charming domesticity, like a quilt hung for display, and the layering rewards close inspection with little surprises in texture and color harmony.
Items Used
- stretched canvas panel (8×10)
- fabric scrap pack red white blue
- assorted craft buttons pack
- decoupage medium craft glue
Steps
- Stretch a canvas panel and choose fabric scraps in red, white and blue to arrange into flag-like zones.
- Lay the fabric pieces on the canvas to form stripes and the star field, letting edges overlap naturally.
- Affix a mix of buttons across the star field area and along stripes using strong craft adhesive and press gently.
- Seal the surface with a thin layer of craft glue or decoupage medium to protect the collage.
Paper firecracker napkin rings for picnic tables

There is a playful crinkle when these paper rings are nudged, a little reminder of slips of confetti and summers of playful noise. The colors pop against plain napkins and the ends of ribbon tails flutter with movement when plates are set down. Paper has a lightness that keeps the table feeling casual, and the cylindrical shapes nestle into place like tiny party favors.
When guests pick up a napkin, the tactile ribbon knot or fringe gives a satisfying small gesture that reads as both festive and friendly.
Items Used
- decorative cardstock or kraft paper
- red white blue tissue paper
- thin satin ribbon 1/8 inch
- scissors
Steps
- Roll small strips of decorative paper into tight cylinders and secure the seam so the tube holds shape.
- Wrap a band of tissue paper around both ends of each tube and twist gently to create a frilled effect.
- Tie a short length of thin ribbon around the center to form a napkin ring and trim ribbon ends as desired.
- Slide a folded napkin through the ring and place at each table setting.
Star-spangled fabric bunting banner across porch roofline
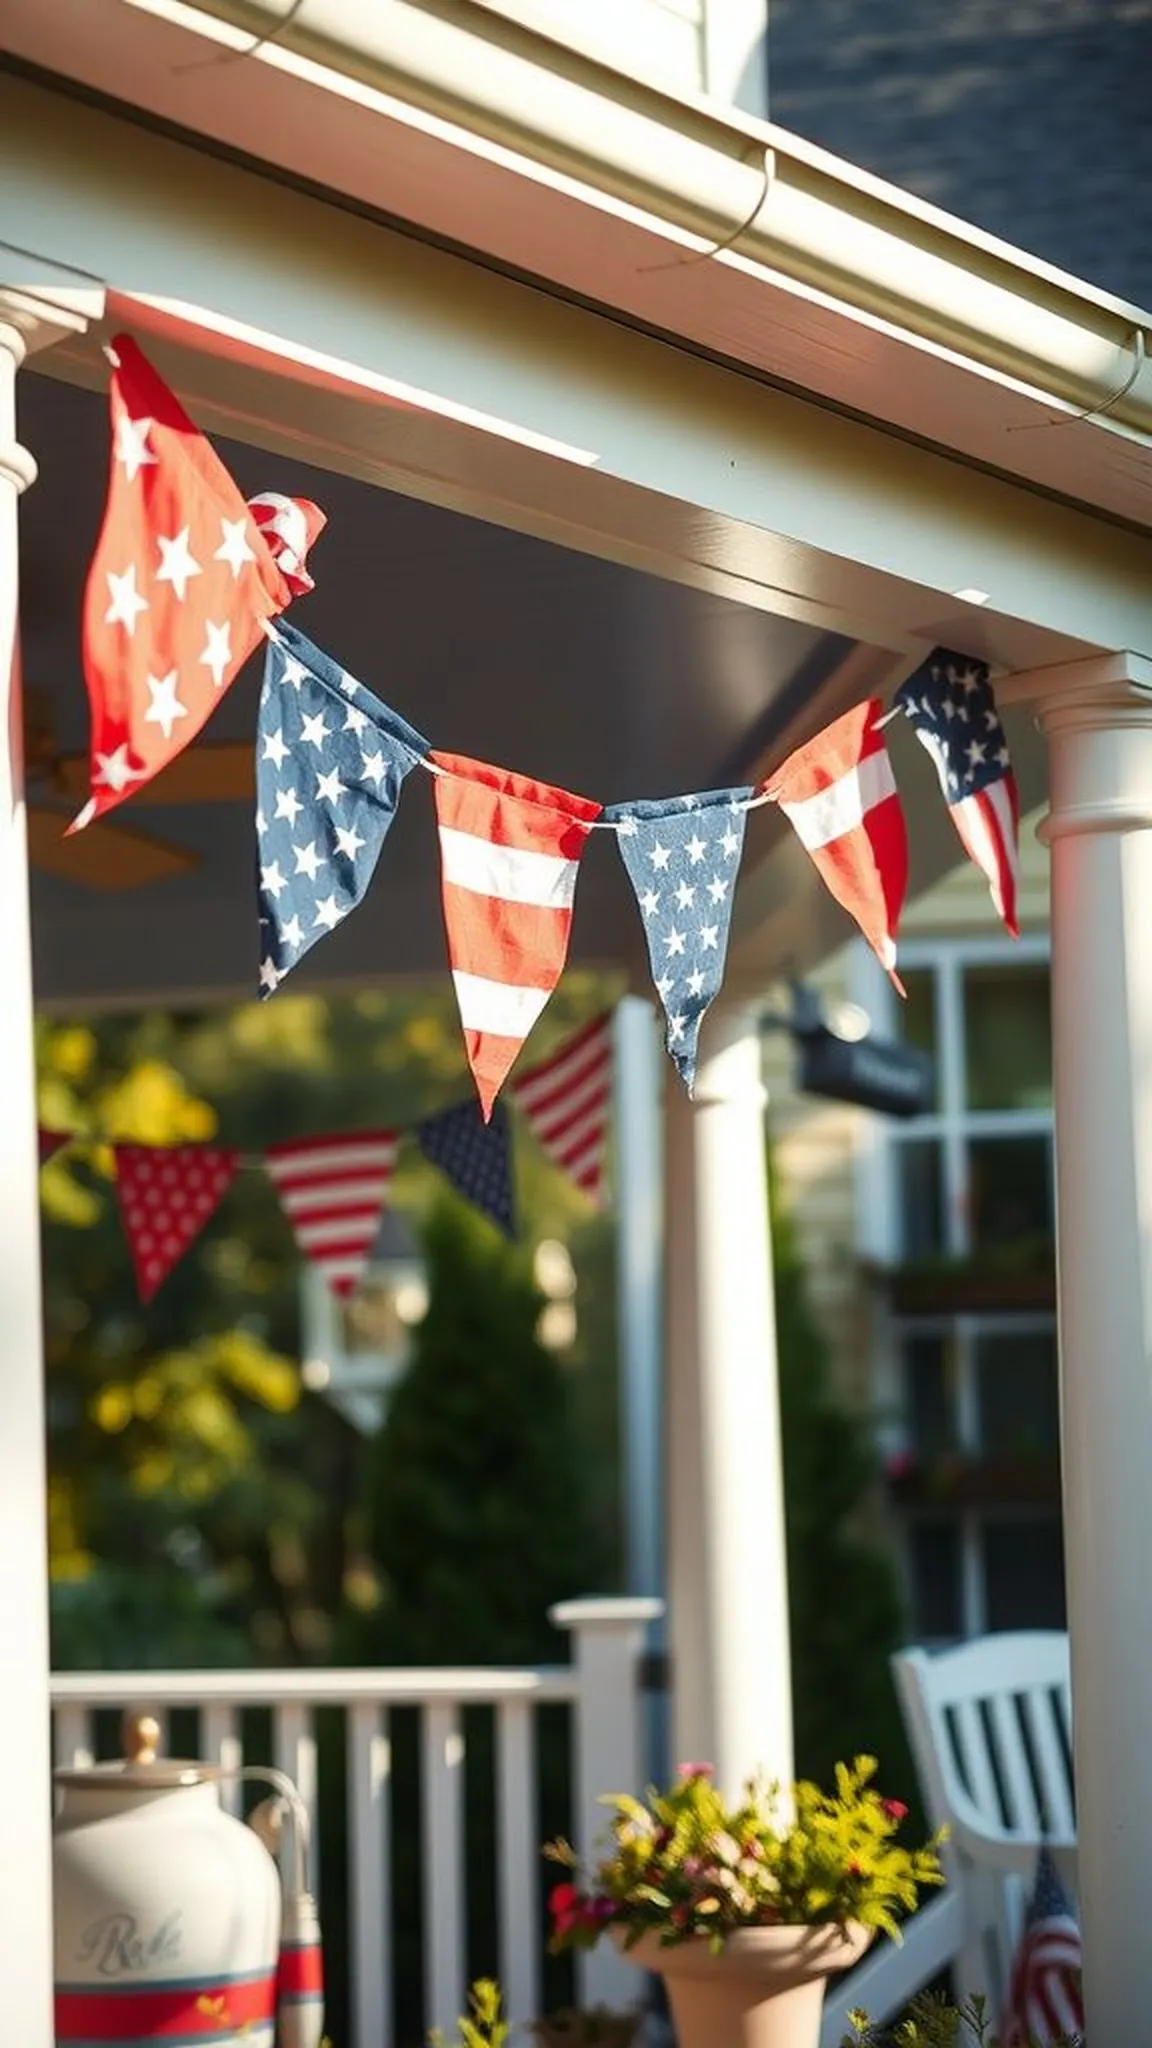
The fabric bunting flutters in a porch breeze like a line of small flags, the edges soft from stitching and the cotton catching light in a subtle sheen. Each triangular pennant has its own personality—some carry hand-printed stars, others have stripes that wobble slightly with the movement. The bunting creates a gentle rhythm along the eaves and the tactile seams and stitches make it feel hand-tended.
Seen from the sidewalk, the row of pennants reads like a welcoming note, an understated hello to neighbors passing by on summer evenings.
Items Used
Steps
- Cut matching triangular pennants from cotton fabric in alternating red white and blue patterns.
- Attach pennants to a length of bias tape or ribbon by folding the tape over the pennant tops and securing with fabric glue or a few stitches.
- Space the pennants evenly along the tape and let the edges hang freely for a soft fluttering effect.
- Hang the bunting along a porch rail or across a pergola, ensuring ends are anchored securely.
Patriotic centerpiece in a galvanized metal tray
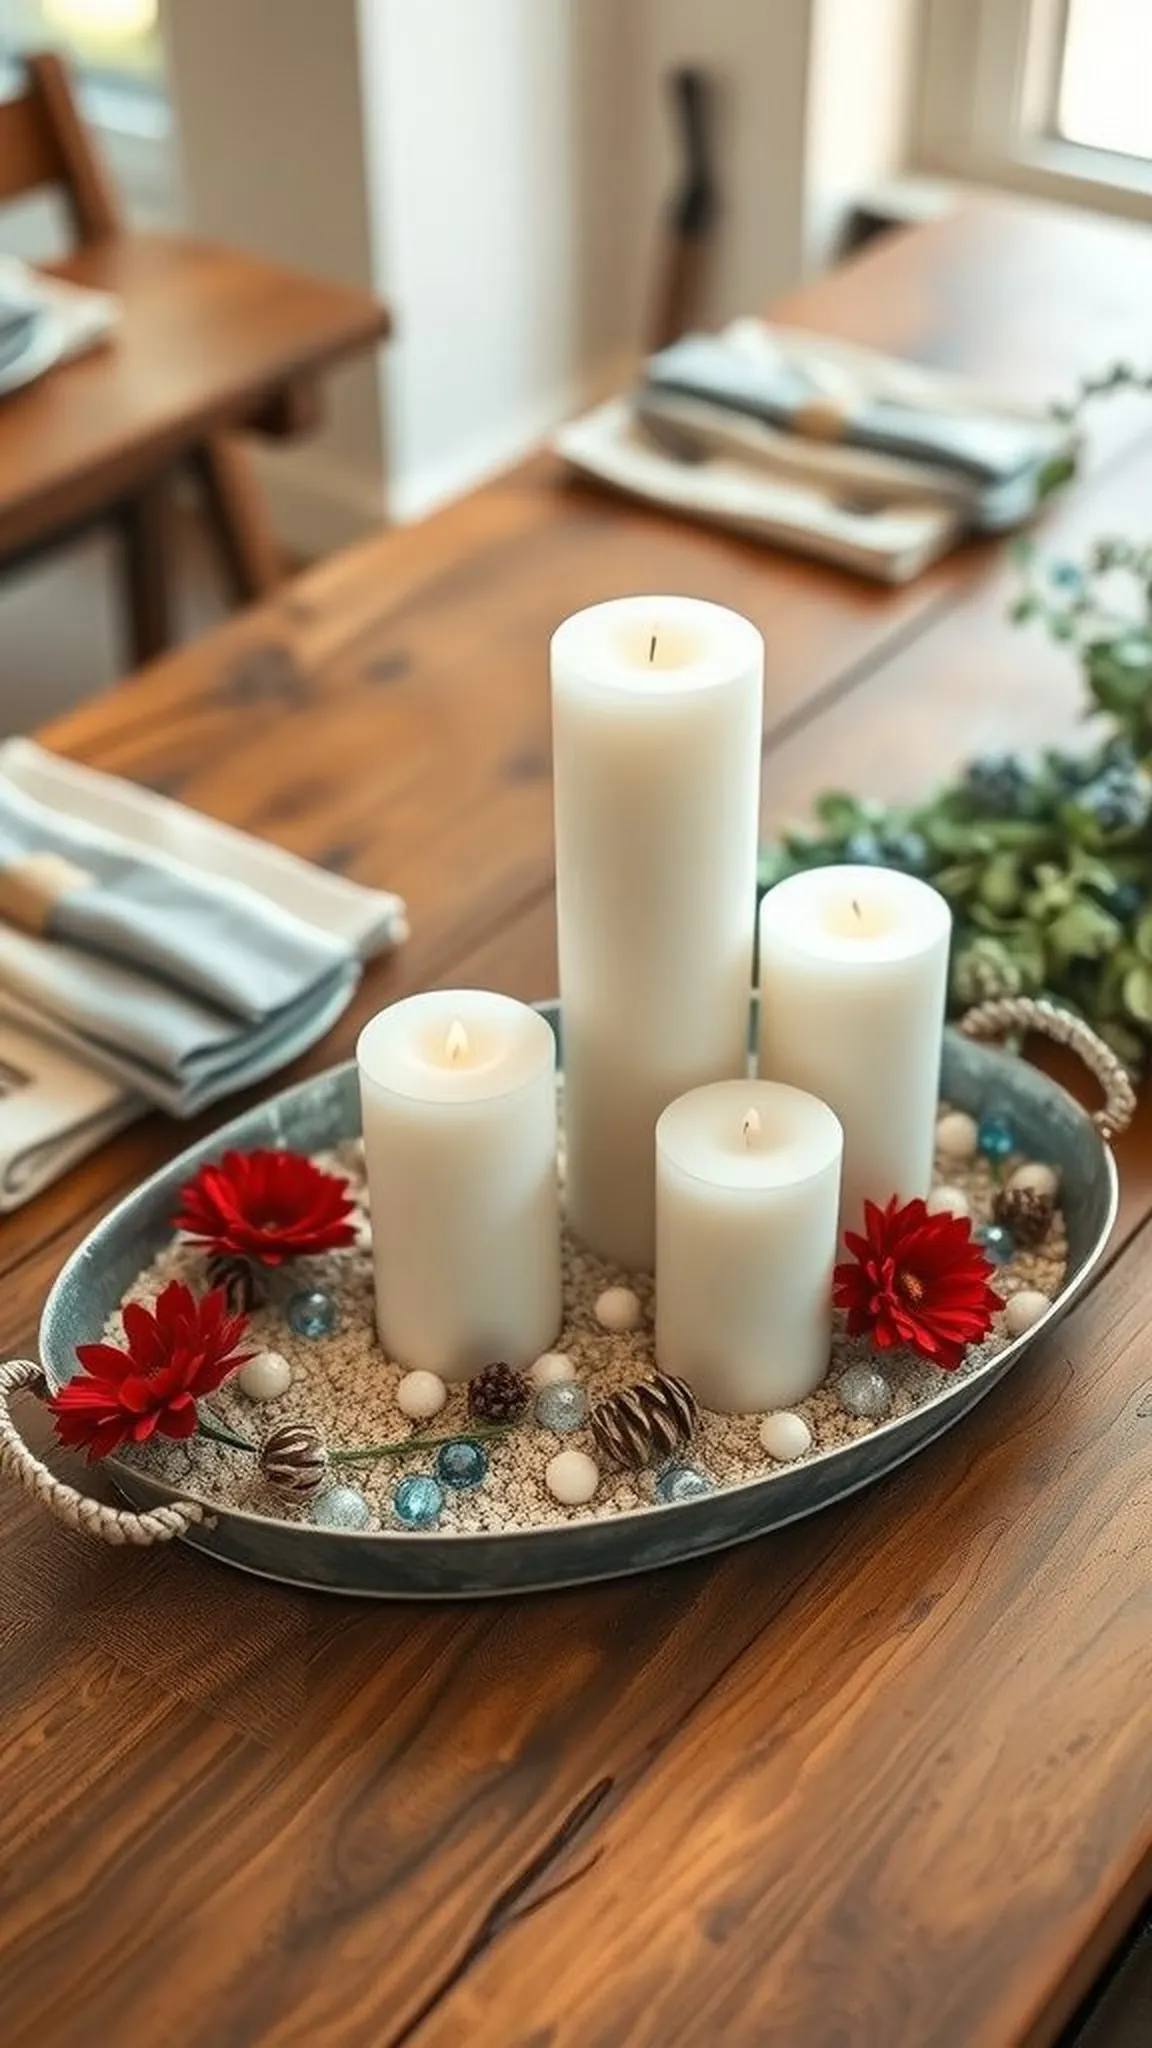
The galvanized tray has a cool weight that anchors the centerpiece, contrasting with the softness of blooms and the warmth of candlelight. Pillar candles sit amid glass beads and sand, their glow reflected in the tray’s muted sheen. Faux flowers in deep red and faded blue tuck in like small, patient companions, while sprigs of leafy green add a quiet freshness.
The mixture of metal, wax and petal creates a tactile tableau that looks composed without fuss, offering a low-key focal point that invites guests to gather around the table.
Items Used
- galvanized metal tray
- pillar candles assorted sizes
- decorative sand or glass beads
- faux floral stems red blue
Steps
- Place a layer of sand or decorative glass beads into the bottom of a galvanized metal tray to create a textured base.
- Arrange pillar candles of varying heights on the bed of sand or beads, spacing them to allow light to intermix.
- Tuck faux floral stems and sprigs of greenery around the candles so they sit securely among the filler.
- Set the tray in the center of a table or on a console for an anchored, rustic look.
Denim and lace flag pillow cover with texture

The mixed feel of denim and lace is unexpected but comforting; raw denim brings a cool, lived-in edge while lace offers delicate notes that soften the whole piece. The seams and frayed denim edges add honest texture, and the lace panels catch a sliver of late sun like a whisper. It sits casually on a porch bench or indoor armchair and gives the seating a layered personality that feels both familiar and thoughtfully put together.
Guests often reach to touch the fabric, surprised by the contrast between rugged denim and tender lace.
Items Used
- denim fabric or old jeans pieces
- lace trim yards
- pillow insert 18×18
- sewing thread and needle
Steps
- Cut denim pieces and lace strips to fit a pillow cover front, arranging them into horizontal flag-like bands.
- Sew or bond the fabric pieces together along seams so they form a single front panel with a slightly frayed denim edge.
- Attach a backing fabric with an envelope closure or zipper to complete the pillow cover.
- Insert a pillow form and fluff to position the textures prominently on a seat.
Paper rosette pinwheel display on a vintage ladder
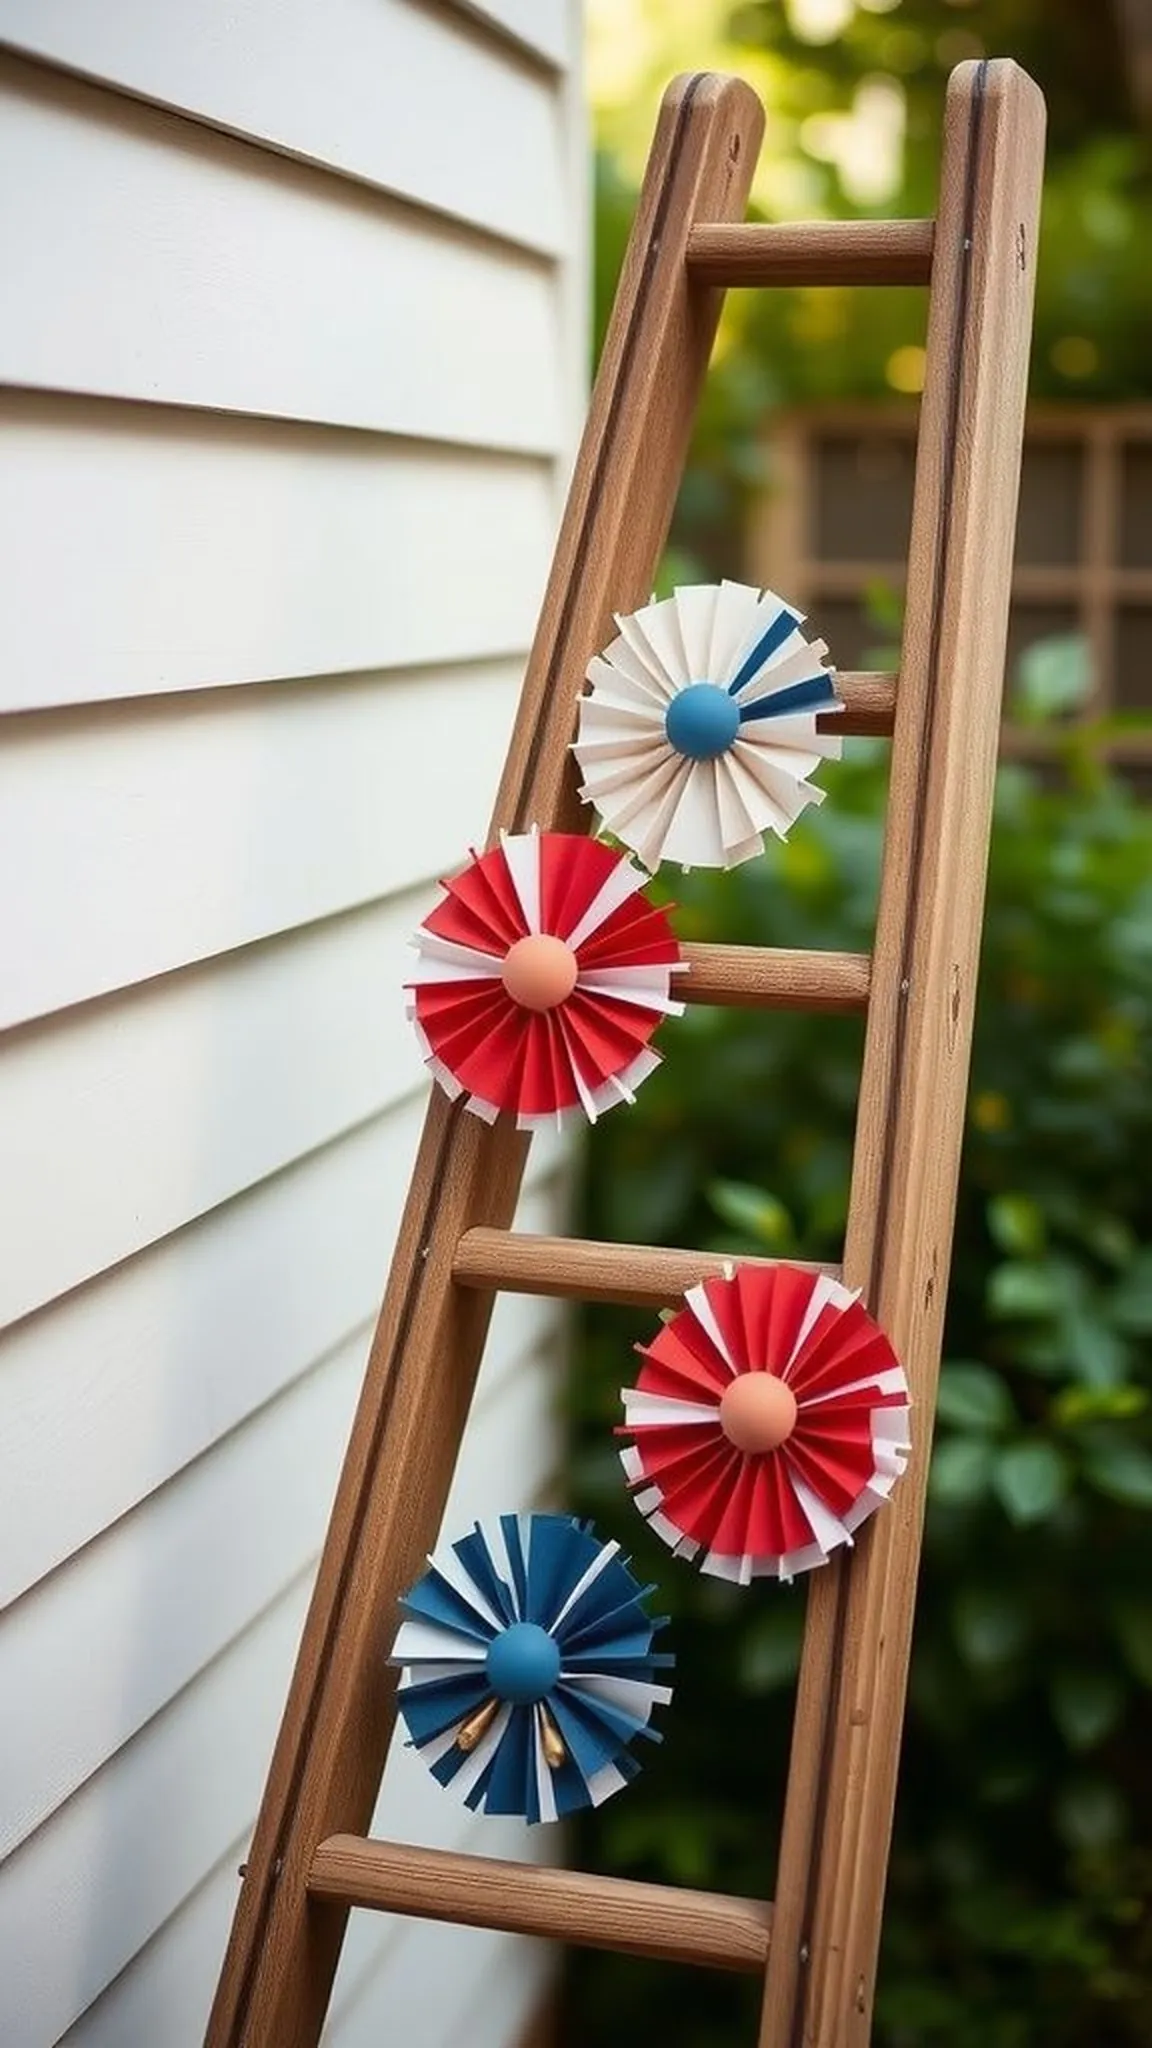
A ladder propped on its side becomes a stage for layered paper rosettes, each one catching light with a slight sheen where folds meet. The pinwheels rotate a fraction if a breeze sneaks by, and the stacked circles create a pleasant rhythm of color up the rungs. The paper textures range from matte to faintly glossy, and the brass brads at centers catch glints of sun.
The whole arrangement reads like a playful gallery, the kind of display that invites a slow stroll and a few admiring glances from neighbors passing by.
Items Used
- screened patterned scrapbook paper
- brass paper brads
- wooden dowel sticks 12 inch
- vintage wooden ladder (decor)
Steps
- Fold patterned paper into rosettes of varying diameters and secure centers with brass brads so the rosettes hold a circular shape.
- Attach a wooden dowel or stick to each rosette back to give a small handle or stem.
- Arrange rosettes along the rungs of a vintage wooden ladder, leaning the ladder at a gentle angle for visual flow.
- Cluster rosettes in groups and slightly overlap edges for a layered, gallery-like effect.
Rope-wrapped wooden star ornaments for tree or porch
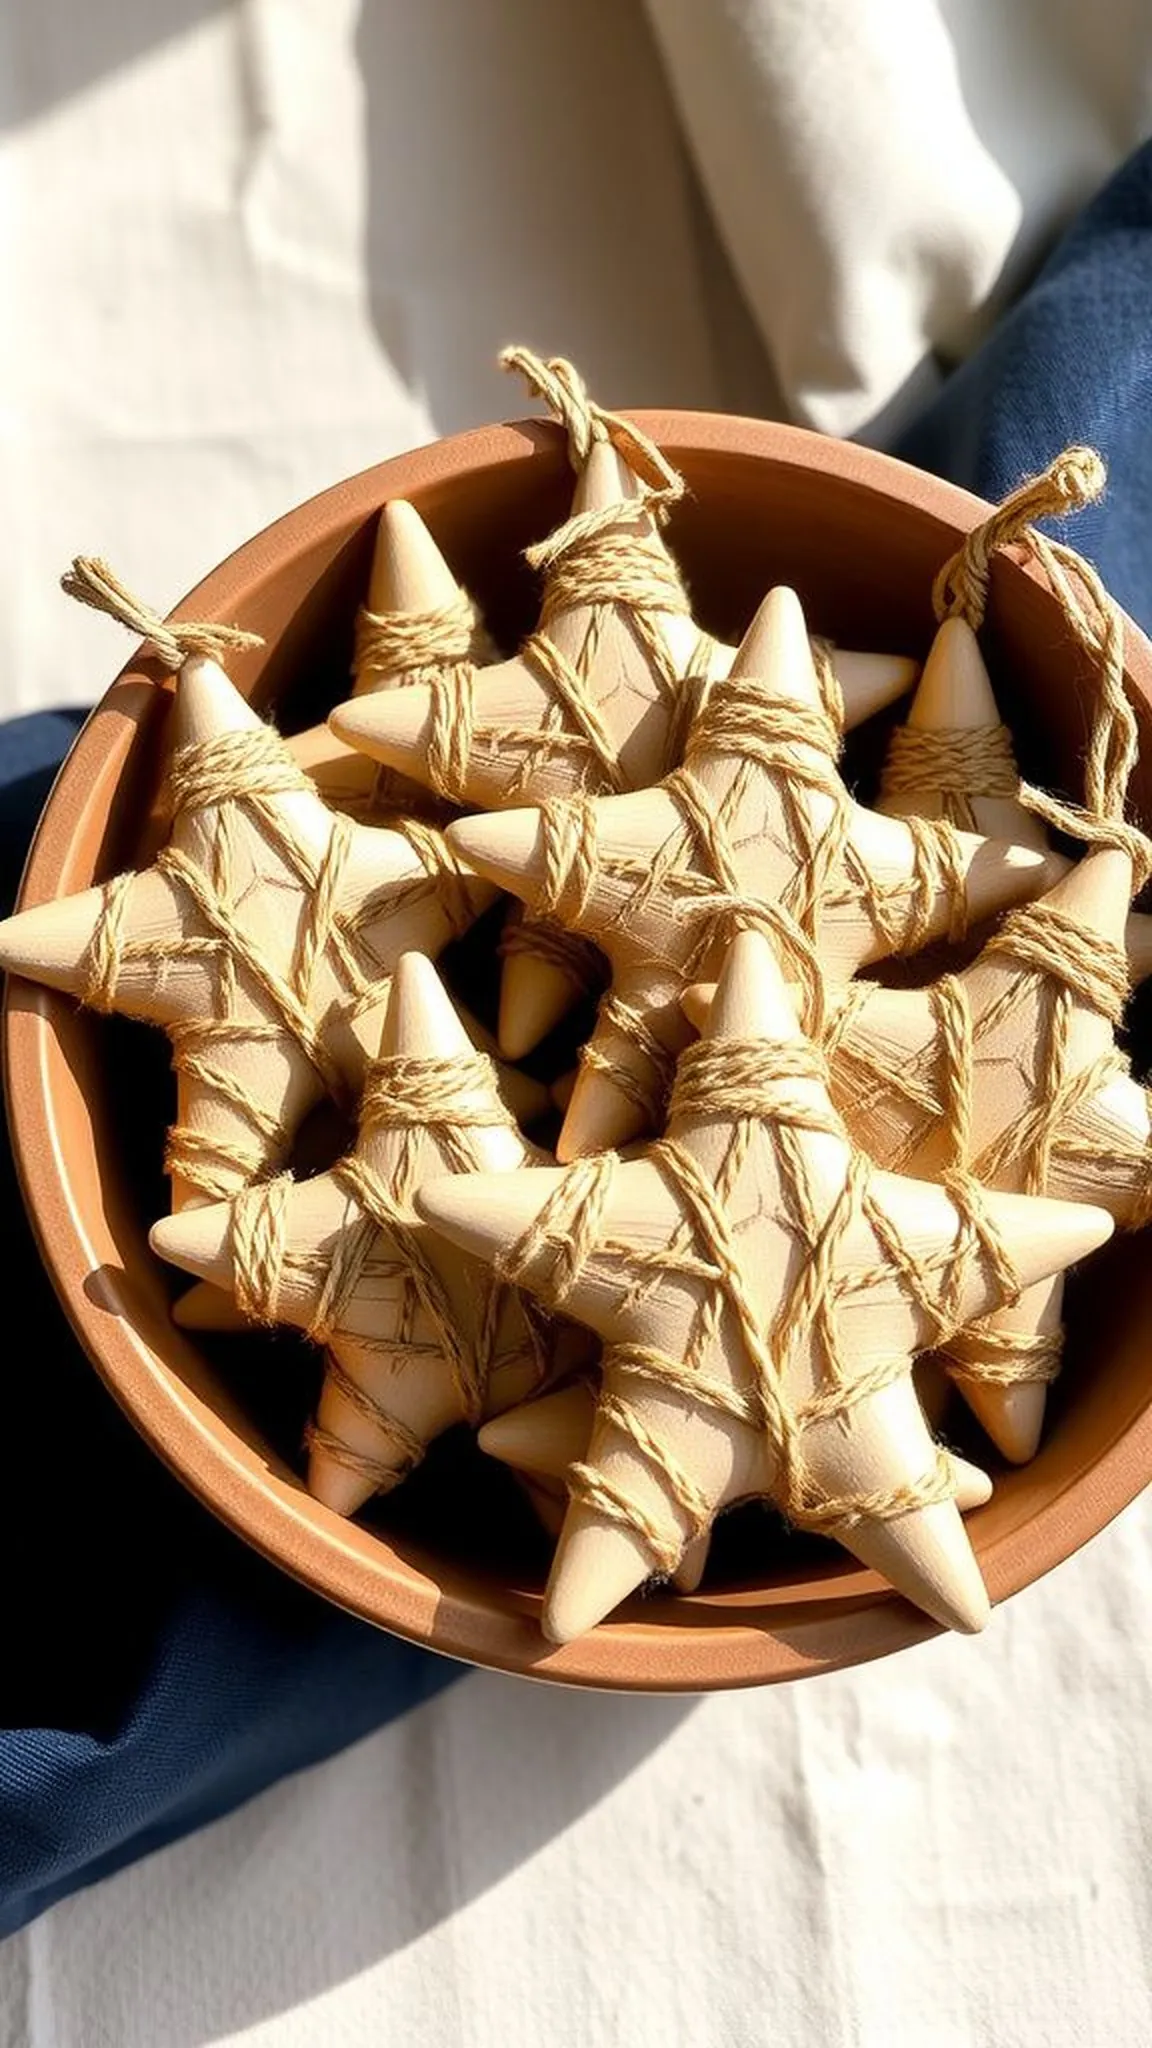
The rope-wrapped stars have a comforting weight, the jute fibers arranged in neat spirals that feel pleasant to the fingertips. The wood peeks through in places where the rope thins, and little knots at the tops lend a sailor-like charm. Hung from a porch beam or clustered in a bowl, they bring a natural, maritime hint that pairs well with navy and cream.
The scent of fresh rope is faintly present, and the stars read as quiet, thoughtful pieces rather than flashy accents.
Items Used
Steps
- Choose wooden star cutouts as a base and lay a length of jute rope ready for wrapping.
- Secure one rope end to the star back and wind the rope around the star edges, overlapping slightly for full coverage.
- Tuck or secure the rope tail at the back when the star is fully wrapped and add a small eye hook or loop of twine for hanging.
- Group several stars on a hook or string them together for a clustered ornament display.
Painted glass bottle vases with twine accents

Old glass bottles take on a new mood when painted in muted red and blue, their necks traced with twine that warms the cool glass. The paint feels slightly satin, letting the bottle silhouette remain evident while softening reflections. Small clusters of flowers sit in the mouths, the stems peeking through the painted glass like hidden threads.
When grouped on a windowsill or mantel, the bottles form a low skyline of color, and the combined matte and fibrous textures keep the arrangement approachable and pleasantly informal.
Items Used
- empty glass bottles (varied sizes)
- spray paint for glass red blue
- natural jute twine
- small faux flower stems
Steps
- Collect empty glass bottles, clean them thoroughly and let dry to ensure paint adheres smoothly.
- Apply spray paint or brush-on glass paint in red or blue, keeping strokes even for a soft satin finish.
- Wrap natural twine around bottle necks and secure the end so it forms a textured collar.
- Place a small cluster of fresh or faux flowers in each bottle and arrange as a grouped display.
Star-stenciled placemats with subtle farmhouse charm
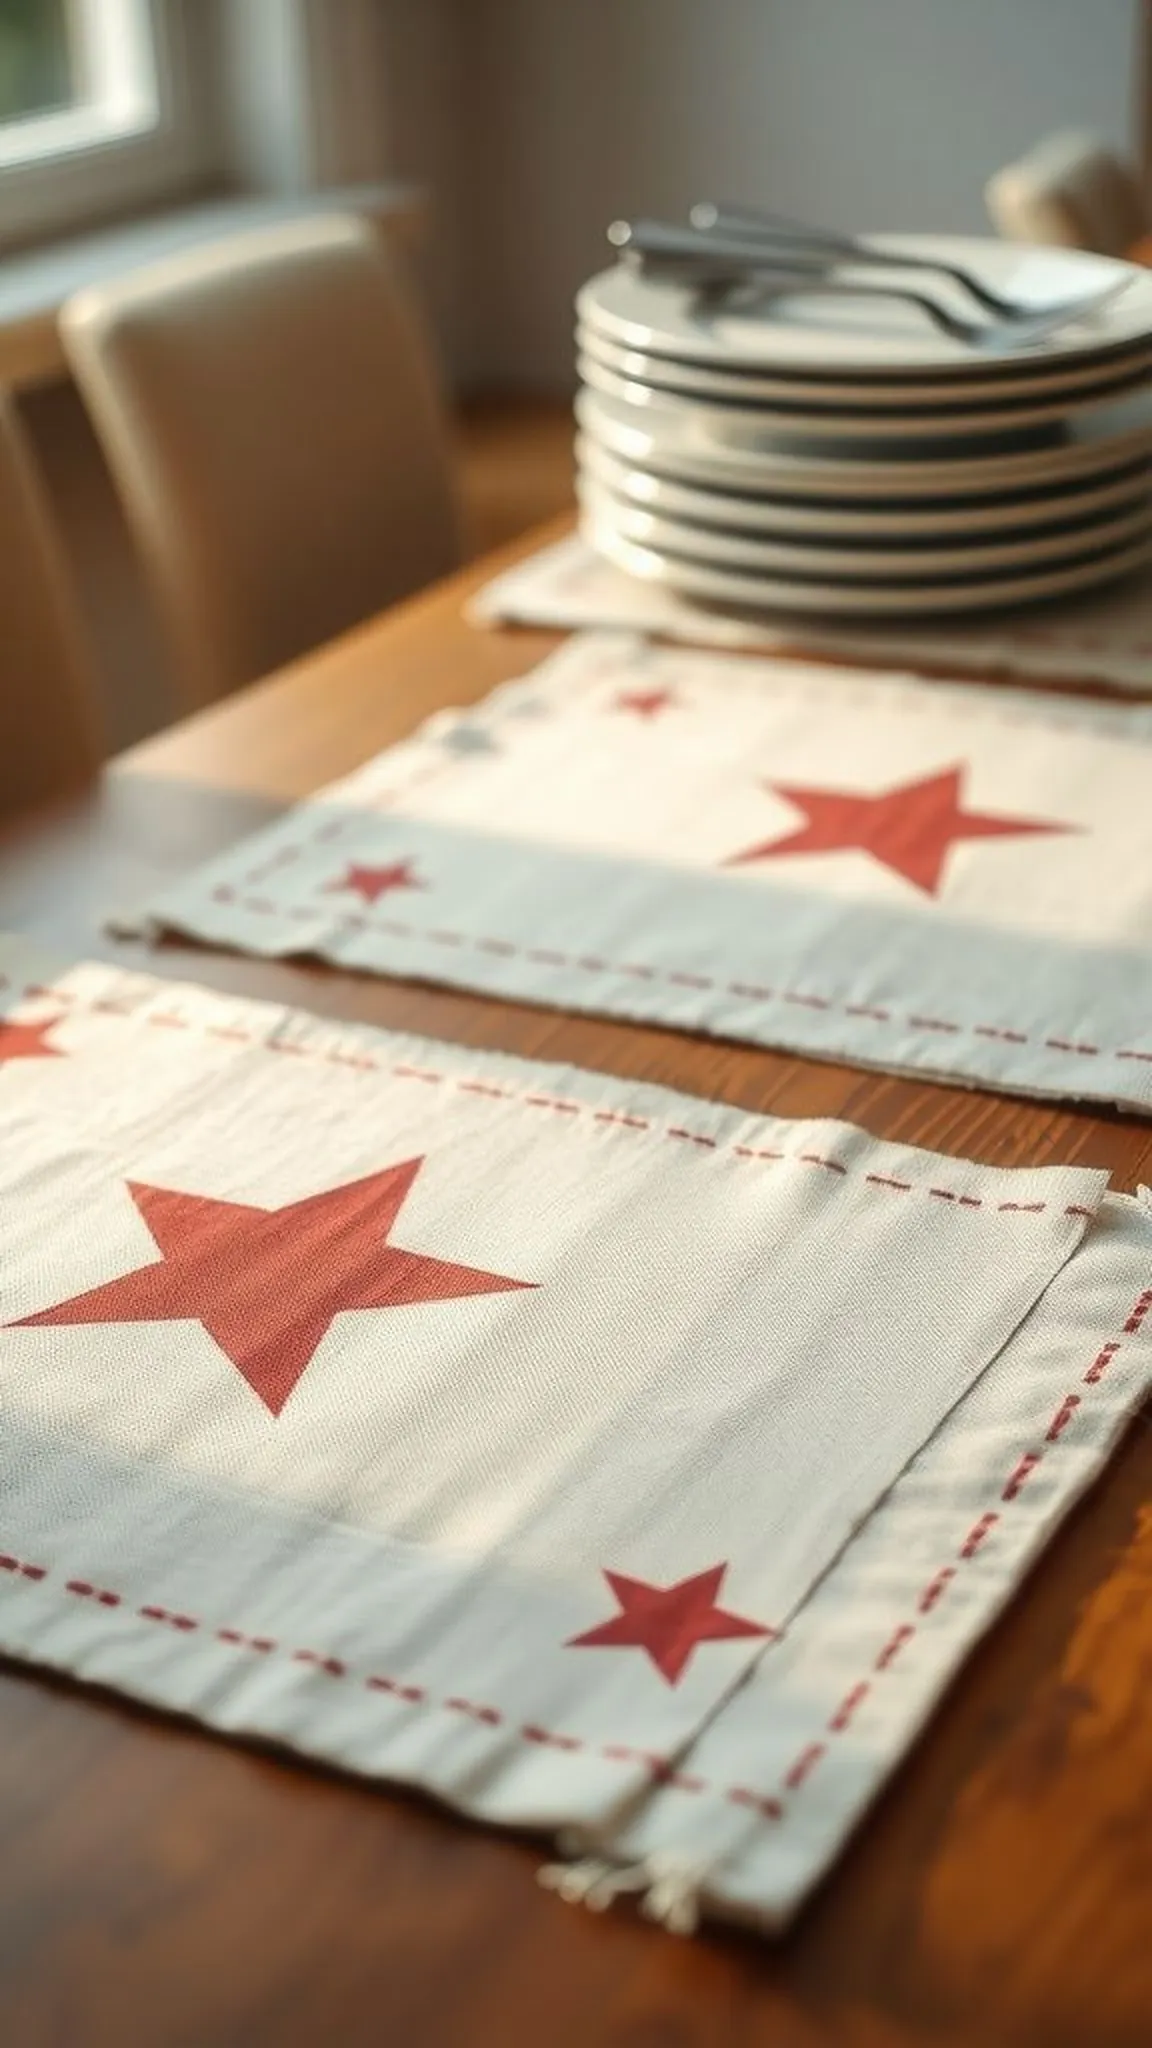
The stenciled stars sit quietly on the placemats, a soft repeat pattern that lends a little ceremony to everyday meals. The paint feels slightly raised where the stencil met fabric, and the edges have a tender fuzziness that speaks to handcrafting. When the table is set the mats frame plates without vying for attention, their neutral tones lifted by small red stars near the corners.
The result is an understated table layer that looks thoughtfully put together and ready for a leisurely meal with nearby friends.
Items Used
- canvas placemats set
- star stencil sheets
- fabric paint small jars
- sponge dauber pack
Steps
- Lay out plain canvas or kraft-style placemats on a protected surface and place star stencils where accents are desired.
- Lightly dab fabric paint through the stencils with a sponge dauber to create crisp star shapes, allowing paint to dry between placements.
- Repeat the stencil pattern across each placemat so they coordinate as a set.
- Once dry, stack and tie the placemats for storage or place them directly under plates for a finished table.
Decoupage serving tray with vintage flag print
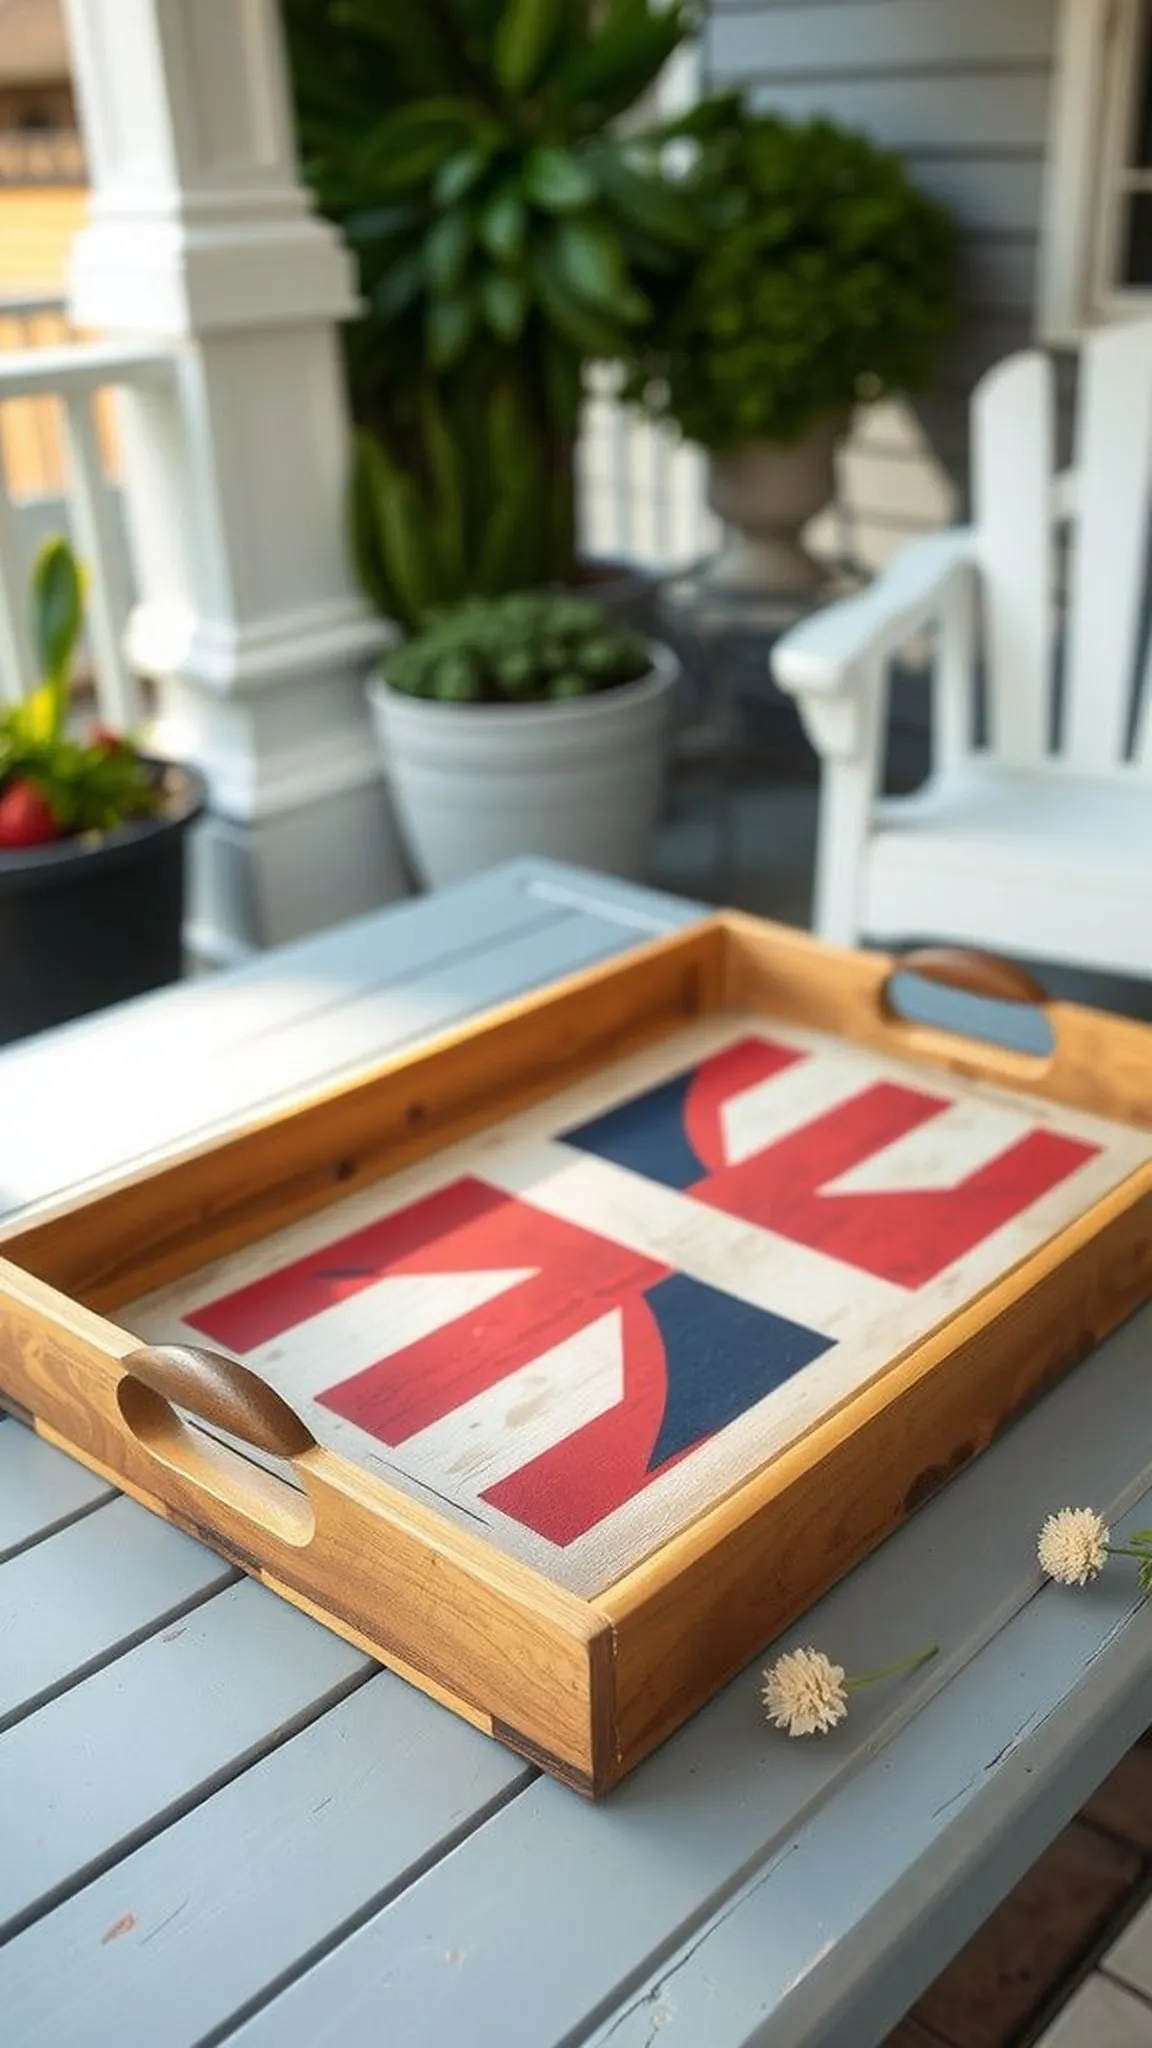
The wooden tray reads like a tiny scene when covered with a vintage flag print, the paper fibers settling under a thin sheen. The varnished surface has a soft glow that catches the eye without being glossy, and the worn paper edges add a nostalgic note. Handles peek out like quiet arms ready to pass appetizers, and the tray balances utility with ornamentation in a pleasing way.
It sits well on a coffee table or called-into-service for outdoor refreshments, bringing a curated, handmade accent that feels both pretty and purposeful.
Items Used
- wooden serving tray
- decoupage paper vintage flag print
- decoupage medium (mod podge)
- foam brush pack
Steps
- Sand a wooden serving tray lightly so the surface accepts the decoupage medium evenly.
- Position printed napkins or decoupage paper with a vintage flag motif over the tray surface and smooth out wrinkles by hand.
- Brush a thin layer of decoupage medium over the paper to seal it, letting the medium dry between coats for durability.
- Wipe any excess from handles and let the tray cure fully before placing items on it.