The best all-in-one art kit for beginners
187Pcs Professional All-in-One Art Painting Kit
Everything you need to start painting. Includes brushes, paints, easel, and more. Highly rated by readers.
Shop on Amazon →As an Amazon Associate, we earn from qualifying purchases.
Easy Crochet Dishcloth Patterns offer a quick, rewarding project for anyone who likes practical handmade pieces.
These dishcloth patterns bring a mix of soft texture and repeatable stitch motion that fits into short crafting moments by the sink.
This collection of crochet cloth ideas highlights approachable motifs, clear shaping notes, and yarn choices that lead to pretty, durable dishcloths for everyday use.
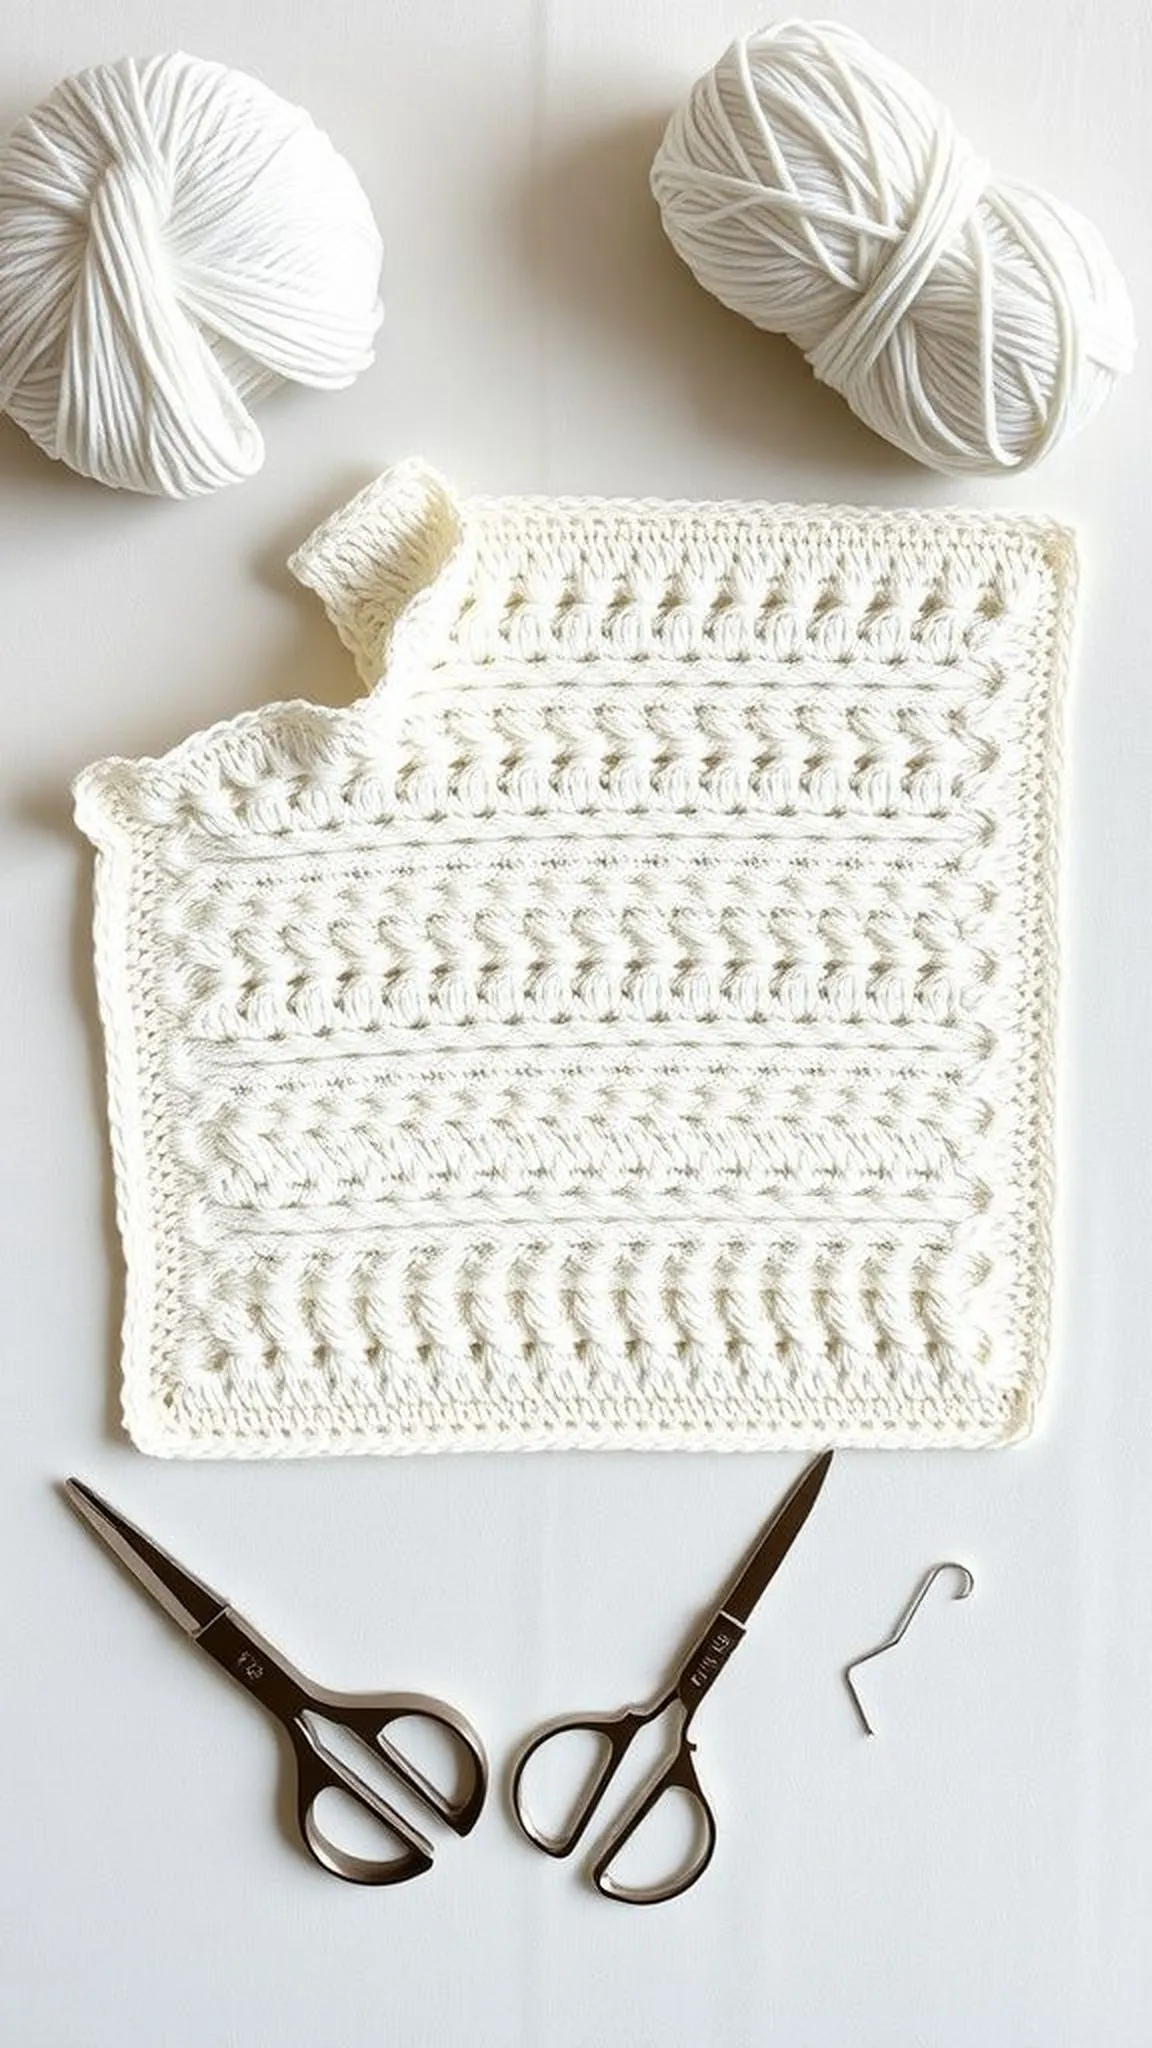
Simple single crochet square for kitchen cloths
⏱️ 30 min · 🟢 Beginner
A single crochet square becomes a dense, absorbent cloth with a pleasing, squishy feel under fingertips and a comforting weight when lifted.
The close stitches form a subtle grain that traps suds while keeping a tidy edge and a slightly ribbed appearance on both sides.
Bright cotton yarn gives a matte sheen and low fuzz that contrasts nicely with wood or metal sinks, while natural light reveals the tiny loops and snug stitch pattern.
Pro Tip: Pick 100% cotton yarn for absorbency and choose a slightly smaller hook for firmer stitch definition and longer lasting cloth edges.
How to Make This
- Chain a foundation row to the desired width using the chosen hook and cotton yarn.
- Work single crochet stitches across each row, turning at the end and maintaining even tension for a flat square.
- Continue until the piece is nearly square, then fasten off and weave in loose ends with a yarn needle.
Avoid: Many beginners hold yarn too loosely, which leads to uneven tension and floppy edges that don’t lie flat.
Try Also: Try a contrasting border color for a frame, substitute half double crochet for a plusher feel, or make two squares for washcloth sets.
Products & Materials
Items Used
- 100% cotton worsted weight yarn
- crochet hook 5.0 mm
- large eye yarn needle
- small embroidery scissors
“Dense single crochet dishcloth: absorbent, easy, and kitchen-ready.”
Moss stitch texture for ultra-absorbent cloths
⏱️ 45 min · 🟢 Beginner
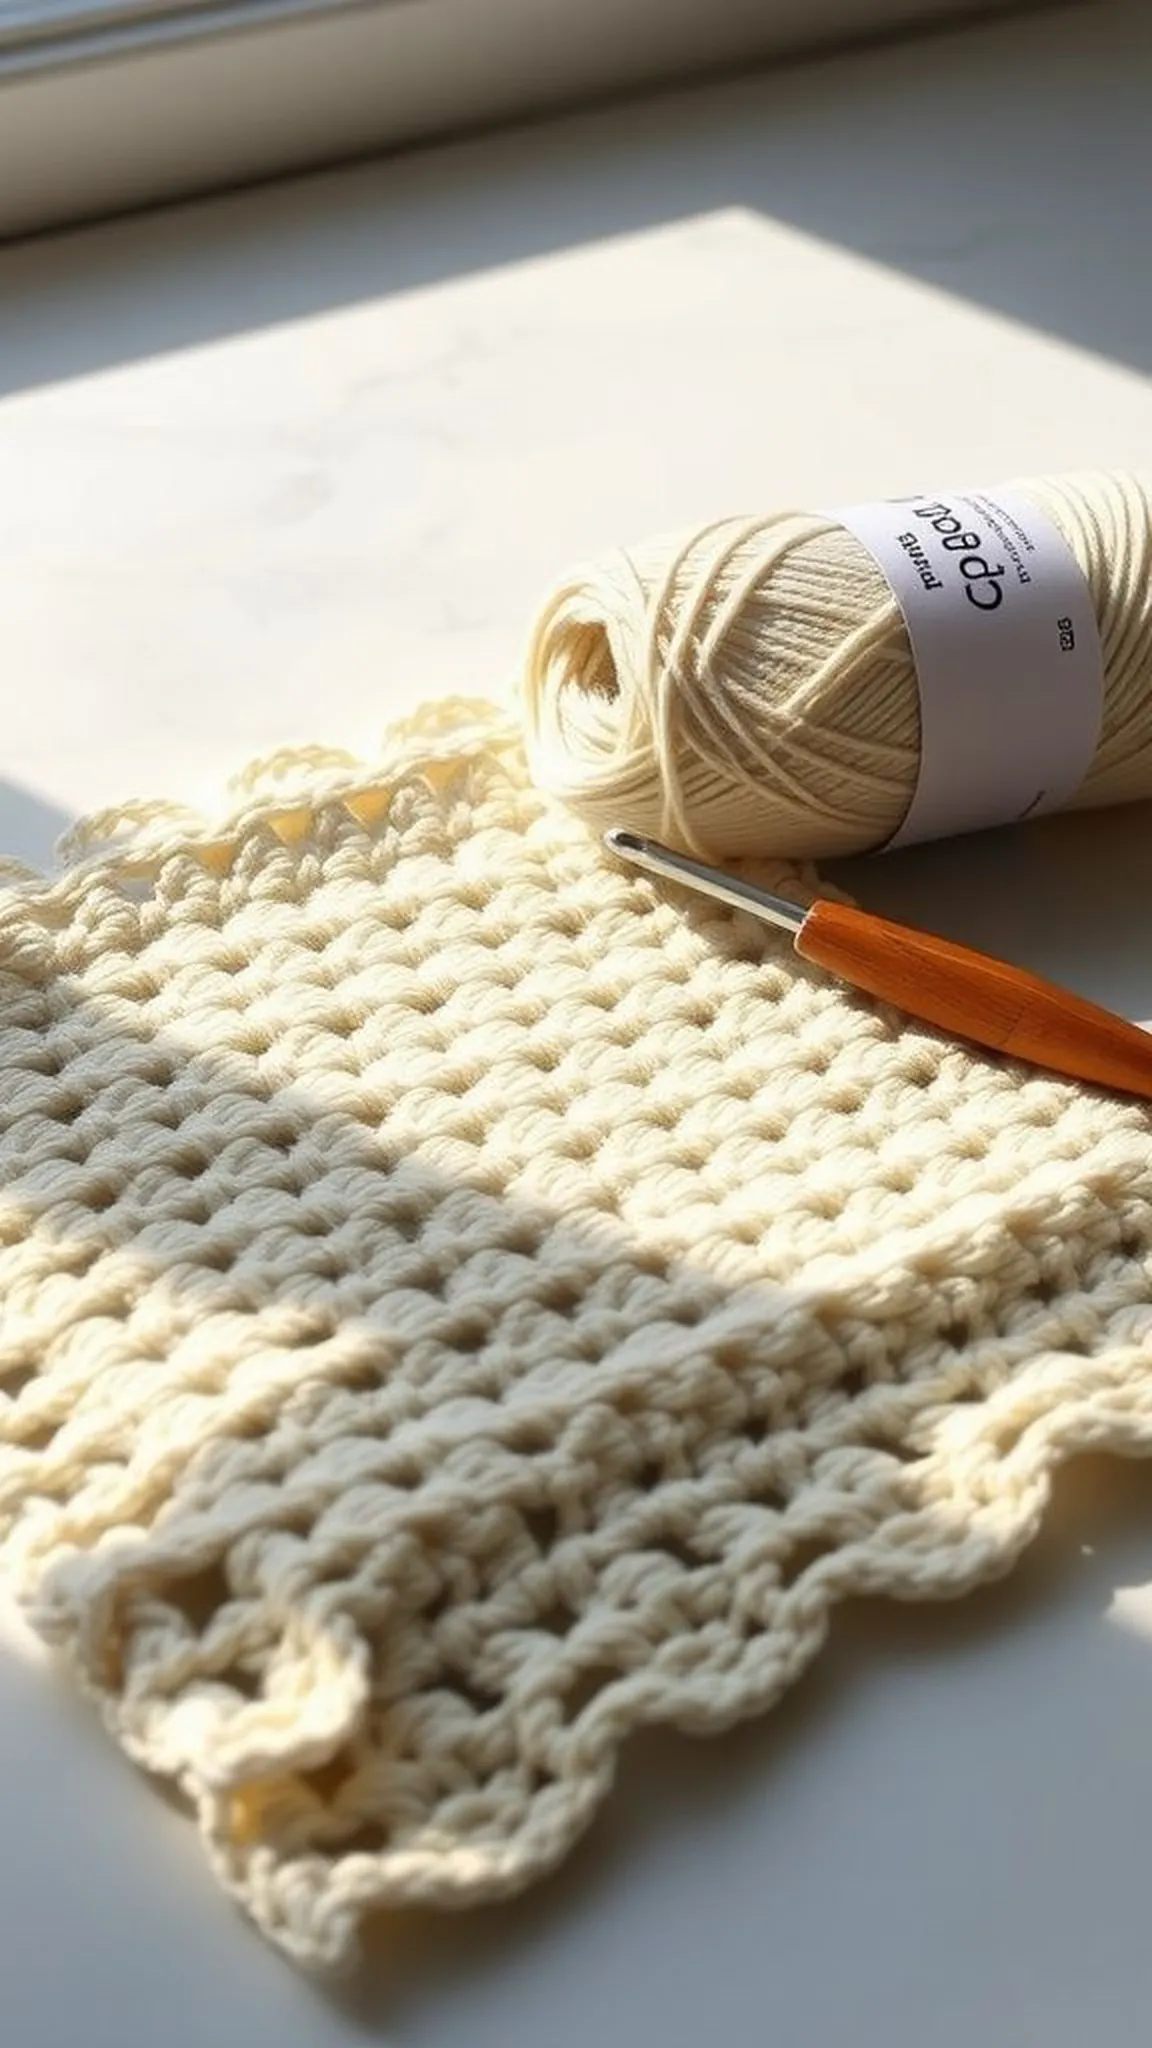
The moss stitch weaves a checkerboard-like texture that feels toothy and highly absorbent against wet surfaces, with a gentle chew under the fingers.
The alternating single crochet and chain gaps make a breathable fabric that dries quickly and holds suds beautifully while staying light to the touch.
Pro Tip: Keep a consistent hook angle and gentle yarn tension to maintain even moss stitch texture and balanced pocket size across the square.
How to Make This
- Chain an even number of stitches for the foundation to set the grid for the moss stitch.
- Alternate single crochet into chains then chain one across, working into the previous row’s spaces to build the textured grid.
- Repeat rows until the cloth reaches desired dimensions, finish with a tidy border and weave in ends.
Avoid: Beginners sometimes miss the skip-and-work rhythm, which creates uneven rows and a distorted checkerboard look.
Try Also: Change to two contrasting shades and alternate every few rows for a subtle plaid, or swap one row for a single crochet row for a firmer finish.
Products & Materials
Items Used
- 100% cotton worsted weight yarn
- crochet hook 5.0 mm
- large eye yarn needle
- small embroidery scissors
“Moss stitch dishcloth: toothy texture that traps suds and dries fast.”
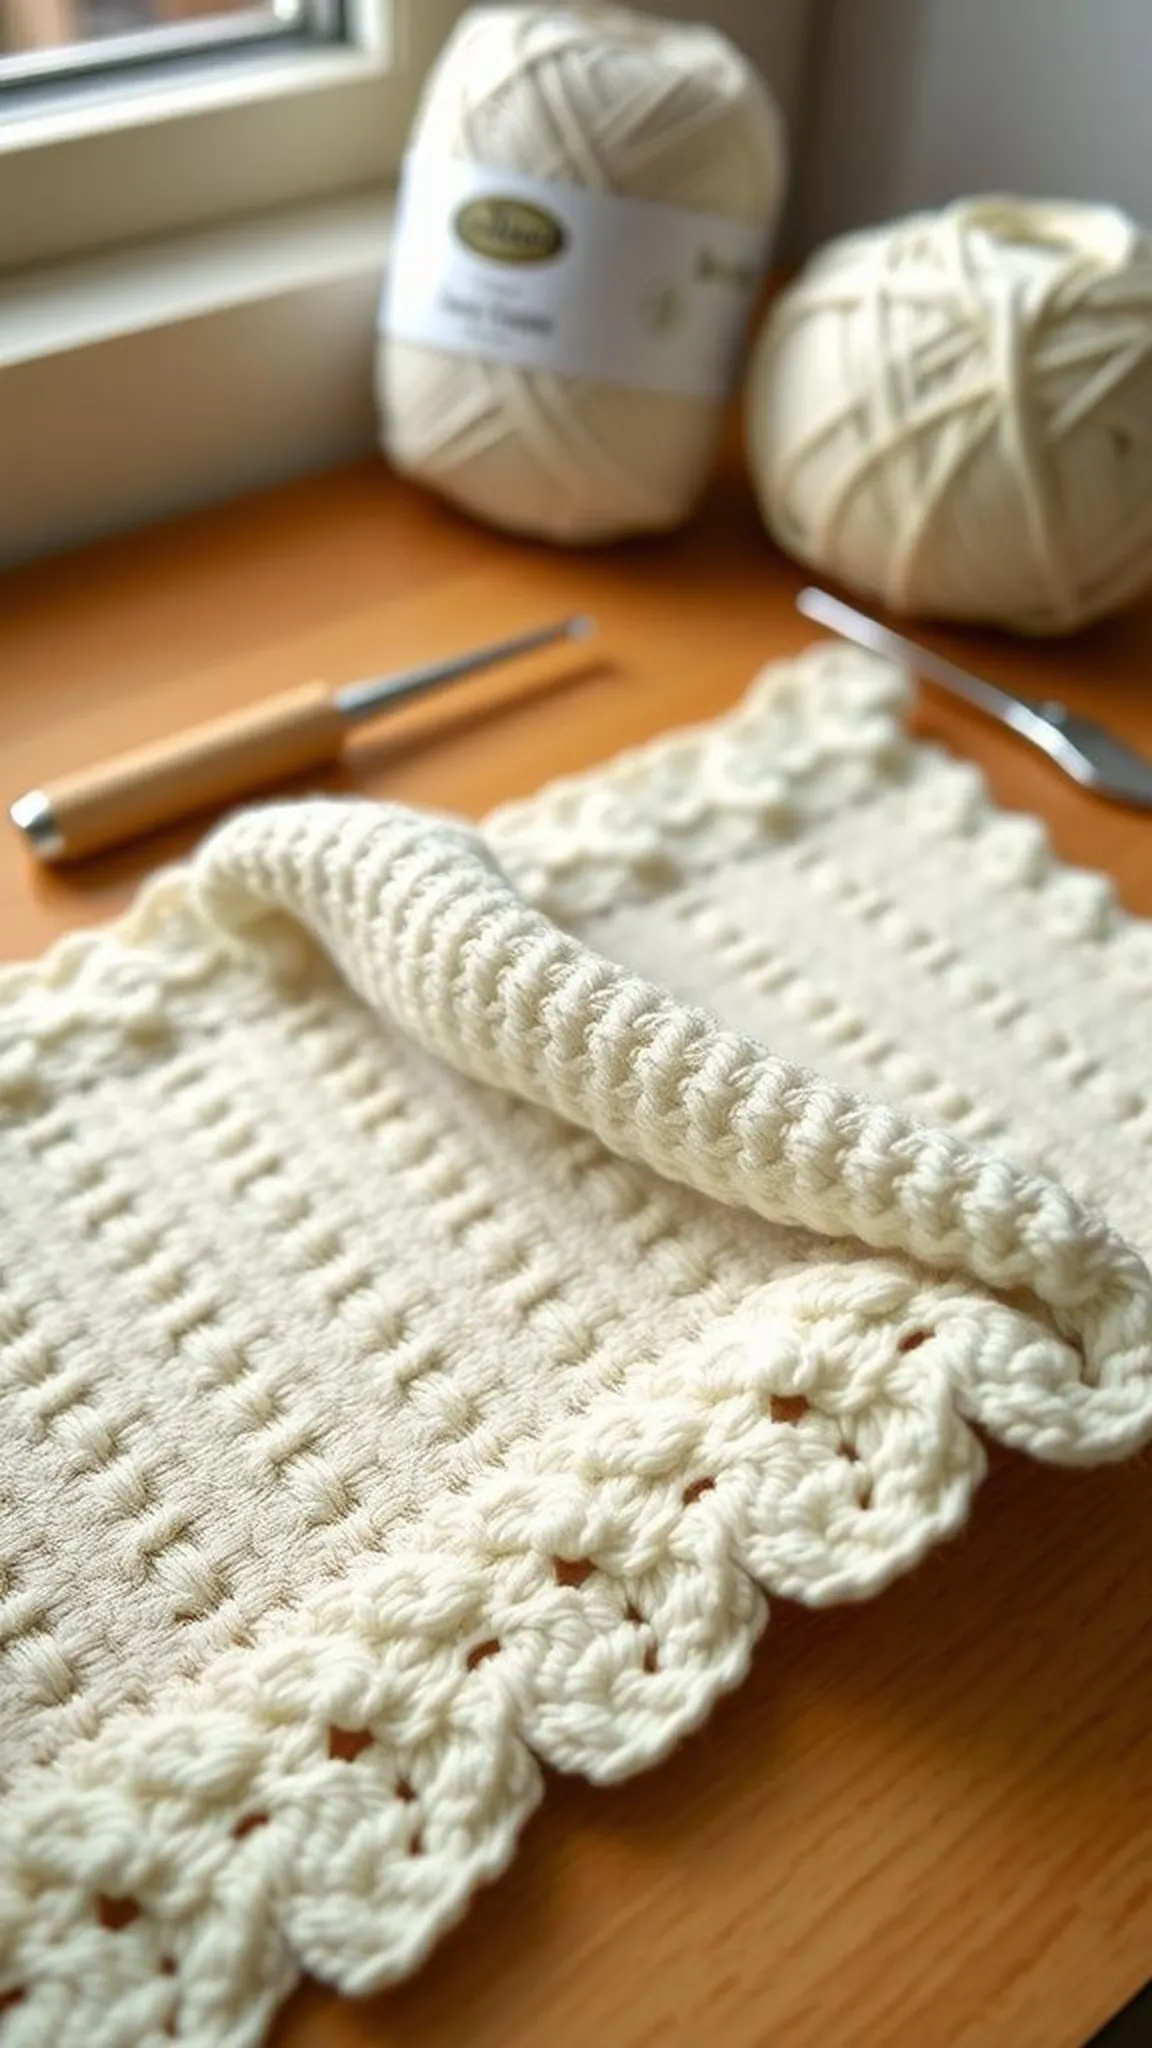
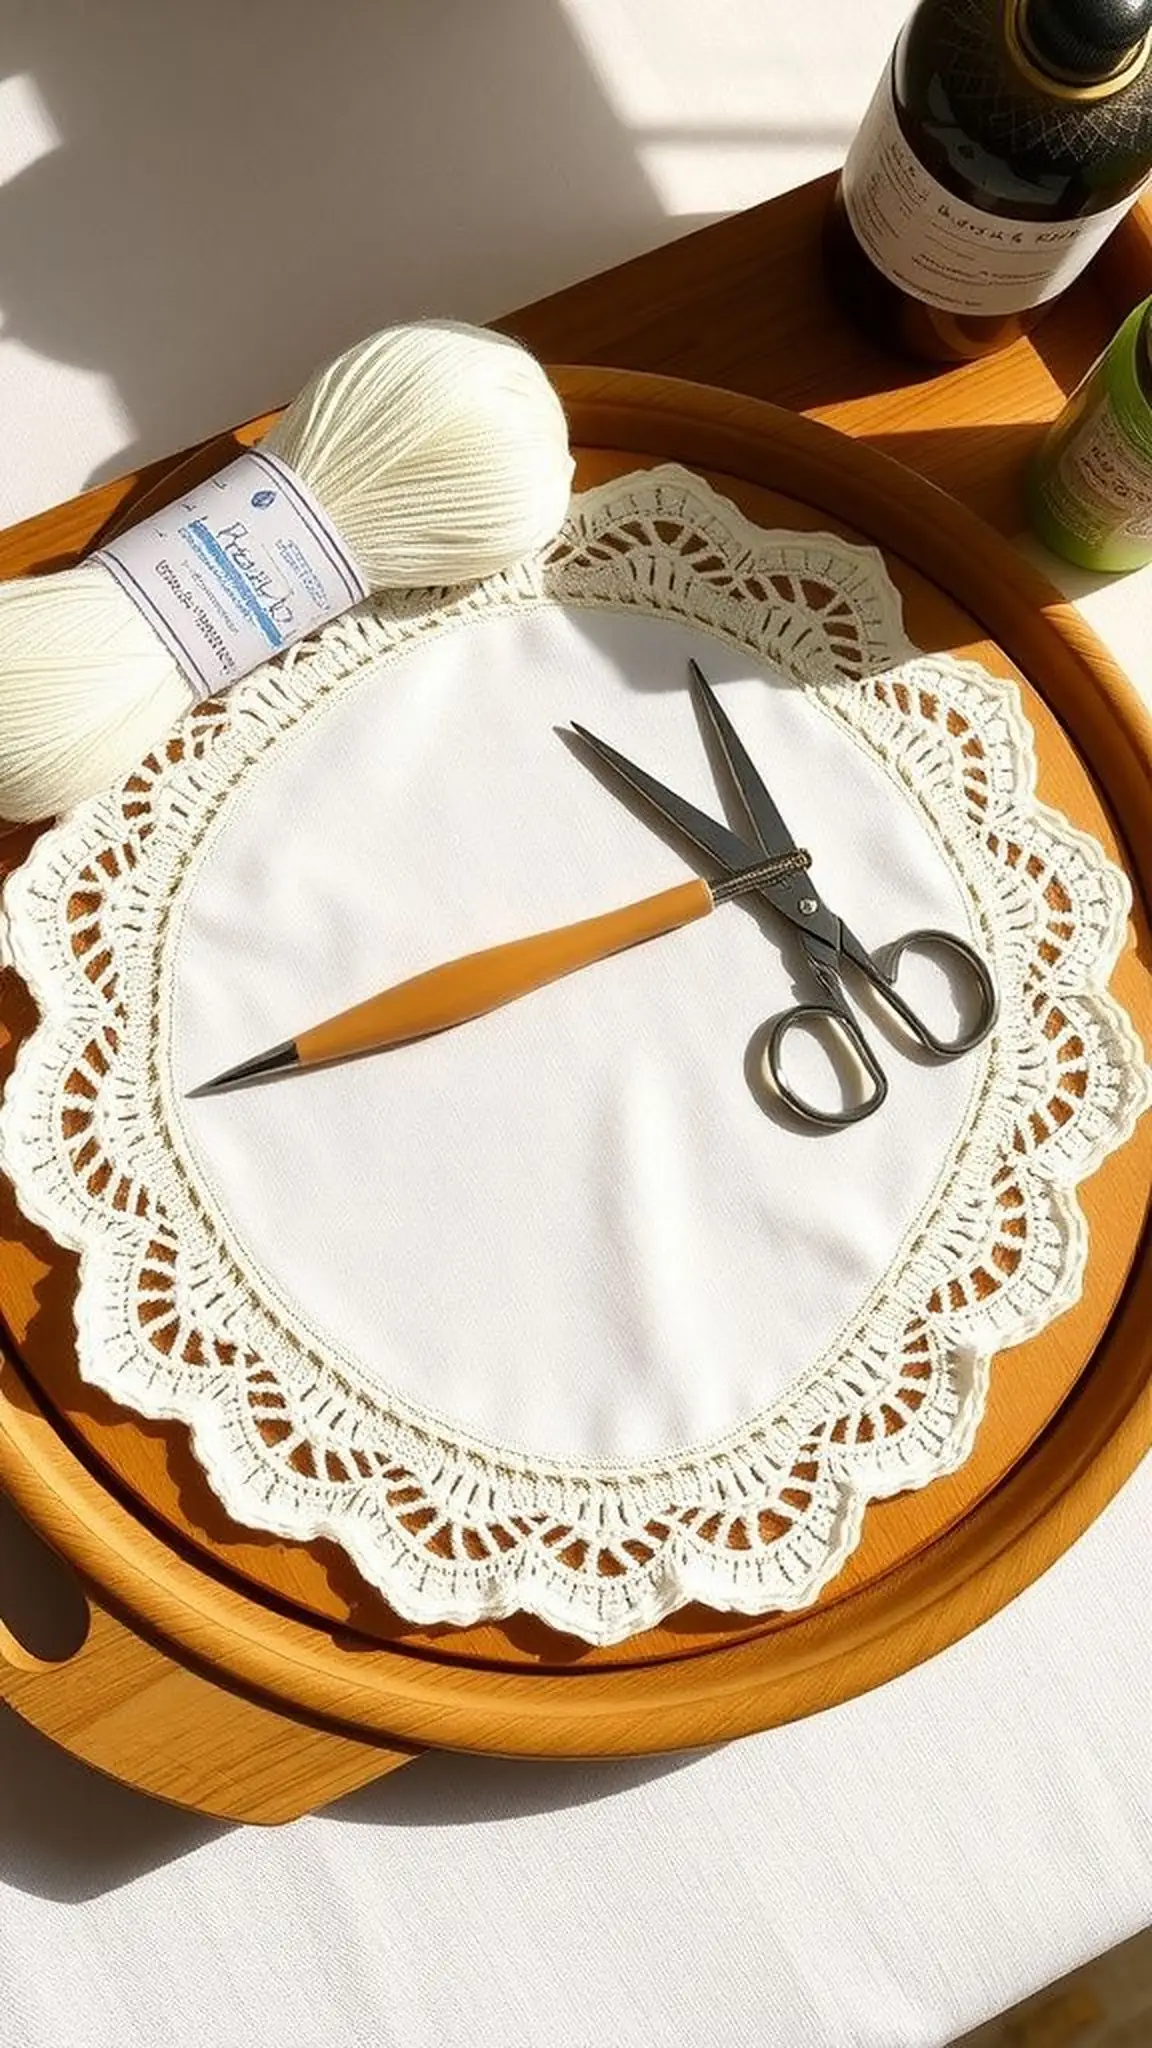
Lacy shell dishcloth for delicate kitchen touch
⏱️ 1 hour · 🟠 Intermediate

A shell stitch cloth offers airy scallops that feel soft and decorative while remaining practical for light dishwork and gentle polishing.
The lacy pattern creates tiny arches that catch light and water droplets, giving the piece a pretty, almost heirloom quality when displayed by a sink.
Fine cotton yarn and a slightly smaller hook produce crisp shell edges and a delicate drape, with shadowed holes that add visual interest when photographed.
Pro Tip: A slightly firmer tension keeps the shell arches neat and prevents the cloth from becoming floppy while preserving the lacy look.
How to Make This
- Chain a multiple that accommodates the shell repeat plus a few turning chains for the foundation.
- Work clusters of double crochet into grouped stitches to form the shells, spacing with single crochet or chain spaces as the pattern indicates.
- Maintain even gauge across rows and finish with a subtle border to define the scalloped edges.
Avoid: Starting with too heavy a hook can blur the shell definition and create a floppy fabric that lacks crisp arches.
Try Also: Swap double crochet clusters for half double crochet clusters for smaller shells, or add a narrow contrasting edge for a framed look.
Products & Materials
Items Used
“Lacy shell dishcloth: delicate arches and pretty sinkside style.”
Save time and printer ink with 50+ printable templates and step-by-step instructions in one ad-free guide.

Diagonal granny squares turned into practical cloths
⏱️ 1 hour · 🟢 Beginner
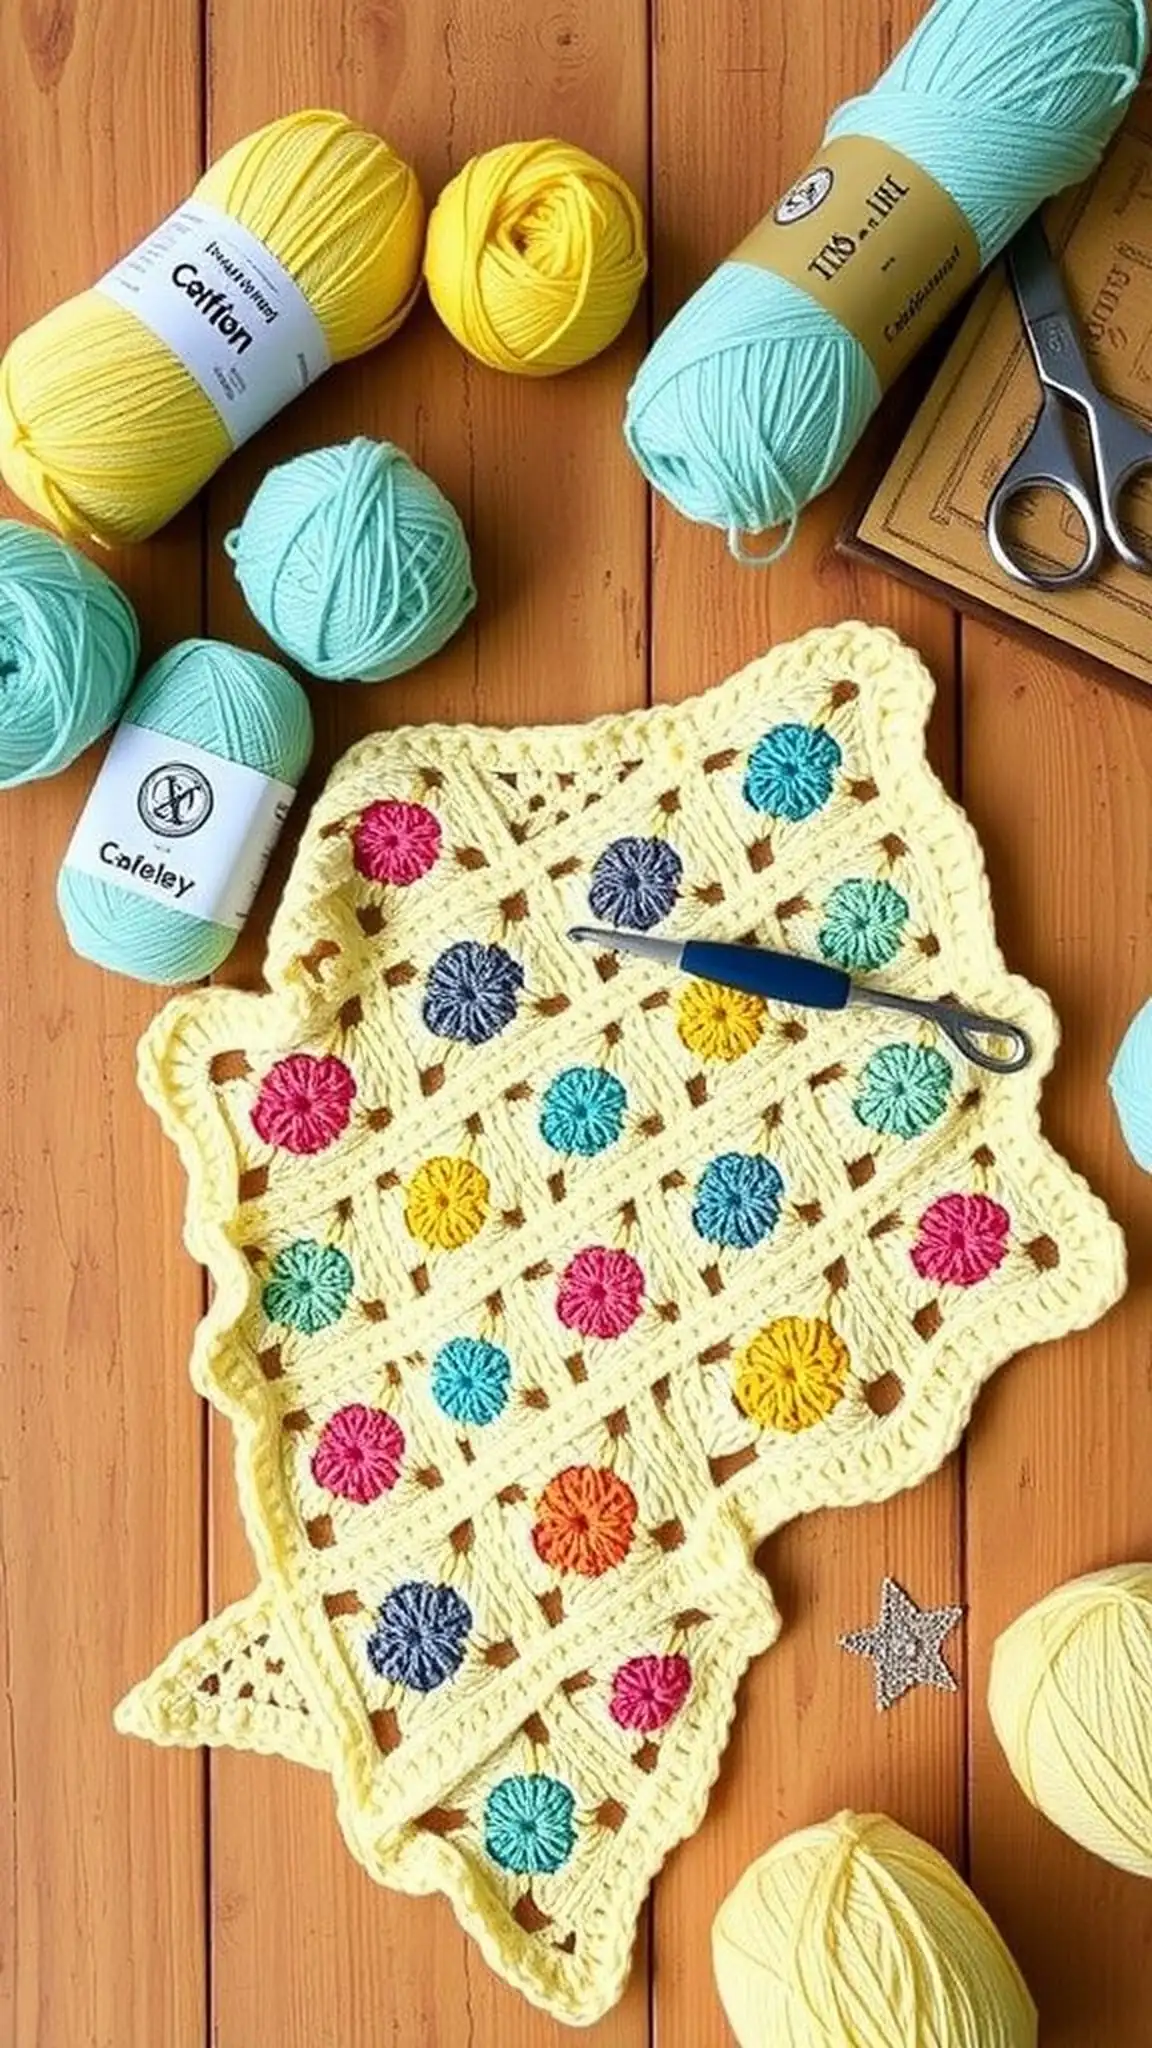
Diagonal granny cloths grow from a central cluster into a charming square that feels retro and cheerful on the countertop.
The clusters create a rhythmic, open texture with little holes that speed drying and give the piece a lively, handmade vibe.
Contrasting yarn stripes or a single pop color bring out the geometric lines, and a simple border rounds the look into a ready-to-use kitchen square.
Pro Tip: Keep corner clusters consistent and count chains at corners to maintain a neat, square shape as the granny expands diagonally.
How to Make This
- Start with a small loop or ring and work clusters outward in diagonal rounds, increasing at the corners to maintain shape.
- Change colors at the start of a new round to create stripes or keep the same color for a tonal look while watching the square’s symmetry.
- Continue until the cloth reaches desired size and finish with a single crochet border for stability.
Avoid: Uneven increases at the corners tend to make the cloth warp into an uneven shape rather than a tidy square.
Try Also: Try alternating two colors every other round for bold stripes, or make a multicolored mosaic by changing shades each round.
Products & Materials
Items Used
“Diagonal granny dishcloth: playful clusters and quick color stripes.”
Corner-to-corner C2C colorful square dishcloth
⏱️ 1-2 hours · 🟠 Intermediate
The corner-to-corner approach produces a neat diagonal grid with pixel-like blocks that are perfect for colorwork and simple charts.
The texture lies flat with a cozy drape and small, regular holes that let the cloth breathe while still picking up water efficiently.
Color changes create playful mosaics or subtle ombrés, and the finished square looks cheerful when stacked or draped over a faucet rail.
Pro Tip: Carry unused yarn along the back of the work with loose tension to avoid puckering while keeping color transitions tidy and compact.
How to Make This
- Begin at one corner and work mini blocks diagonally, increasing until the center line then decreasing symmetrically to the opposite corner.
- Change yarn colors at the start of new blocks to form patterns or gradients, keeping floats loose and tidy on the reverse.
- Finish with a row of single crochet around the edge to square off and anchor the colorwork.
Avoid: Tension that is too tight around carried strands can cause puckering and an uneven surface across the diagonal grid.
Try Also: Make bold pixel art with three contrasting colors, or choose two shades for a soft gradient effect across the diagonal blocks.
Products & Materials
Items Used
- 100% cotton worsted weight yarn
- crochet hook 5.0 mm
- large eye yarn needle
- small embroidery scissors
“C2C dishcloth: diagonal color blocks with modern kitchen charm.”
Waffle stitch dishcloth with deep, squishy ridges
⏱️ 1-2 hours · 🟠 Intermediate
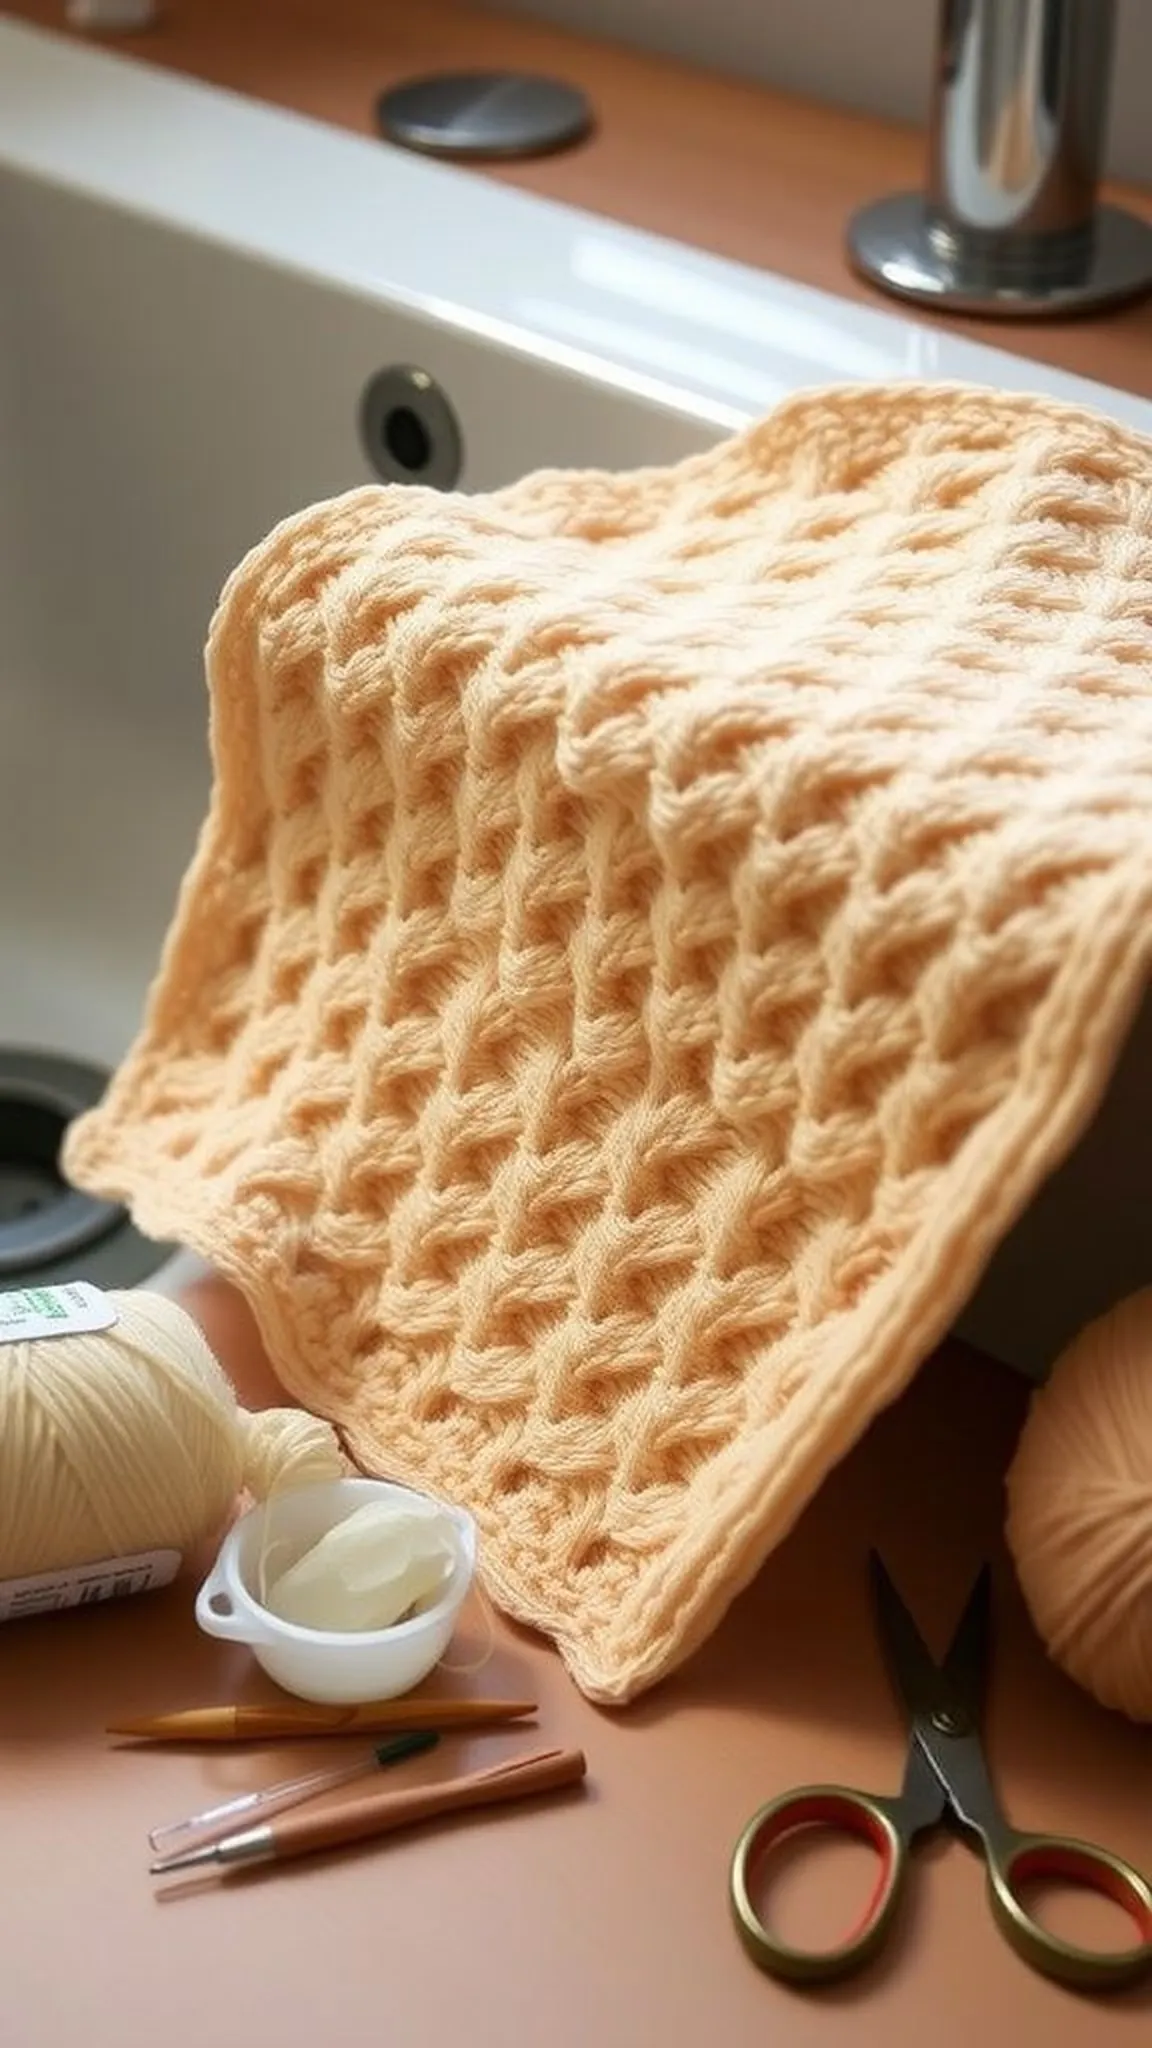
The waffle stitch builds a deep, tactile grid of raised squares that feel pillowy and grab moisture with satisfying efficiency.
Raised ridges cast small shadows across the surface, giving the cloth a handmade, artisan look that invites touch and use.
When photographed near a sink, the ridged fabric reads as comforting and practical, with inviting thickness and clear stitch definition.
Pro Tip: Work through front and back post stitches carefully to keep the waffle grid pronounced and avoid flattening the raised squares during making.
How to Make This
- Chain a multiple that matches the waffle stitch repeat and work a foundation row of double crochet to set the base.
- Alternate front post and back post stitches across rows to form the raised grid, keeping tension steady for even height.
- Continue the pattern until the cloth reaches size goals, then finish with a firm border to hold the texture.
Avoid: Skipping a post stitch or uneven tension makes the waffle bumps inconsistent and flattens the intended pillow-like texture.
Try Also: Try a two-tone waffle by working raised squares in a contrasting color, or make a smaller washcloth with a tighter hook for extra density.
Products & Materials
Items Used
“Waffle stitch dishcloth: deep, pillowy texture perfect for scrubbing.”
Raised bobble cloth with pillowy surface
⏱️ 1-2 hours · 🟠 Intermediate

Bobble stitches pop from the fabric and create soft, rounded nubs that add a playful, tactile surface to a dishcloth.
The texture reads as cozy and sculptural, with tiny shadows and highlights that change as the cloth bends and dries.
Plush cotton and moderate hook size make the bobbles feel substantial without adding too much bulk, yielding a cloth that cleans with a pleasing grip.
Pro Tip: Keep each bobble stitch consistent by working the same number of partial stitches into each bobble and maintaining relaxed tension throughout.
How to Make This
- Chain a foundation and work a base of single or half double crochet to set an even ground fabric.
- Form bobbles by working multiple partial stitches into the same space and completing them together, spacing as desired across rows.
- Maintain regular spacing and finish with a border to protect the bobbles and stabilize the cloth edges.
Avoid: Making bobbles with different stitch counts causes uneven lumps and an irregular surface rather than a consistent dotted texture.
Try Also: Scatter bobbles for a confetti look, line them up in rows for a striped texture, or reduce bobble size by using fewer partial stitches.
Products & Materials
Items Used
- 100% cotton worsted weight yarn
- crochet hook 5.0 mm
- large eye yarn needle
- small embroidery scissors
“Bubbly bobble dishcloth: playful texture with a soft, scrubby feel.”
Half double crochet striped kitchen cloth idea
⏱️ 45 min · 🟢 Beginner
Half double crochet creates a plush, mid-height fabric that shows stripes clearly and feels cushioned in the hand.
Striping with two or three shades gives a simple, graphic look that reads well when stacked or rolled by a sink.
The finished piece has a cozy hand and a slightly dense drape that aids scrubbing while maintaining visible line definition between colors.
Pro Tip: Carry color neatly along the side for tidy stripes and catch carried yarn every few inches to prevent loose floats across the back of the cloth.
How to Make This
- Chain a foundation row and work half double crochet stitches across to build a dense, plush fabric.
- Change colors at the end of a row to create clean stripes, fastening off or carrying yarn as preferred.
- Continue alternating stripe widths until the cloth reaches the desired size, then finish with a bordering row.
Avoid: Loose color carries create messy floats on the reverse that can snag and distort the stripe alignment.
Try Also: Try wide bands for bold color blocking, or narrow stripes for a refined vintage look with three complementary shades.
Products & Materials
Items Used
- 100% cotton worsted weight yarn
- crochet hook 5.0 mm
- large eye yarn needle
- small embroidery scissors
“Striped half double crochet dishcloth: cushioned texture with clean color lines.”
Filet mesh cloth for lightweight, quick drying
⏱️ 30 min · 🟢 Beginner
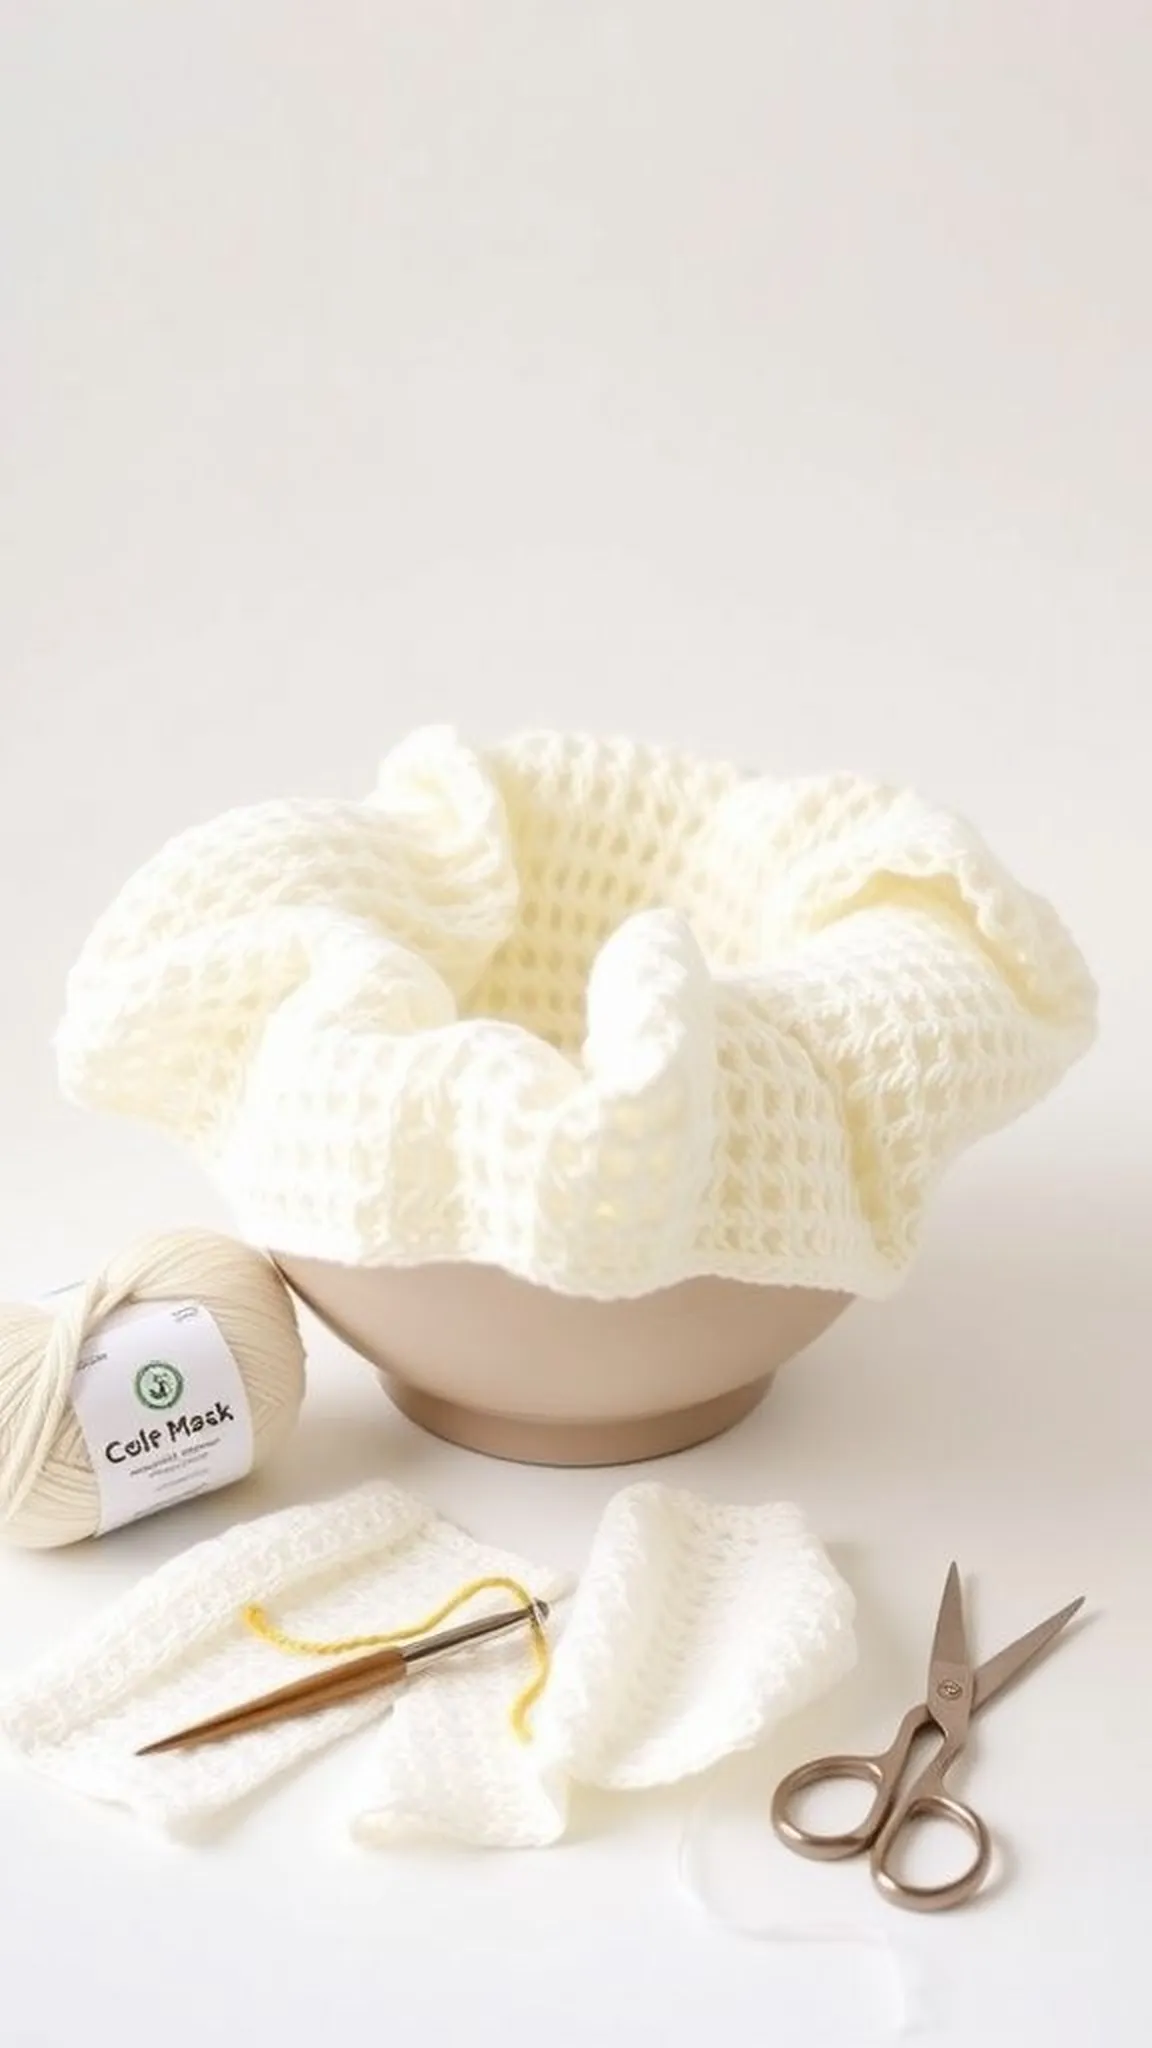
Filet mesh creates a lightweight cloth with an open grid that breathes and dries in a flash after use.
The airy holes give a delicate, lacy appearance while still offering utility for gentle wiping and polishing tasks.
Pale cotton yarn or low-sheen colors emphasize the net effect, and the cloth folds compactly for easy storage between uses.
Pro Tip: Use a slightly smaller hook than usual for the yarn to give the mesh a neater, more stable look without losing its airy character.
How to Make This
- Chain a foundation suited to the mesh repeat and work a base row of double crochet or treble to anchor the grid.
- Alternate chains and double crochet into spaces to form the open filet squares across each row.
- Continue until the cloth reaches the desired size, then add a single crochet edging to stabilize the mesh.
Avoid: Too large a hook can make the mesh floppy and unreliable for wiping, losing the grid’s neatness.
Try Also: Create framed motifs by leaving deliberate solid blocks, or add a narrow scalloped edge for a pretty finish.
Products & Materials
Items Used
- 100% cotton worsted weight yarn
- crochet hook 4.5 mm
- large eye yarn needle
- small embroidery scissors
“Filet mesh dishcloth: airy, fast-drying and delightfully light.”
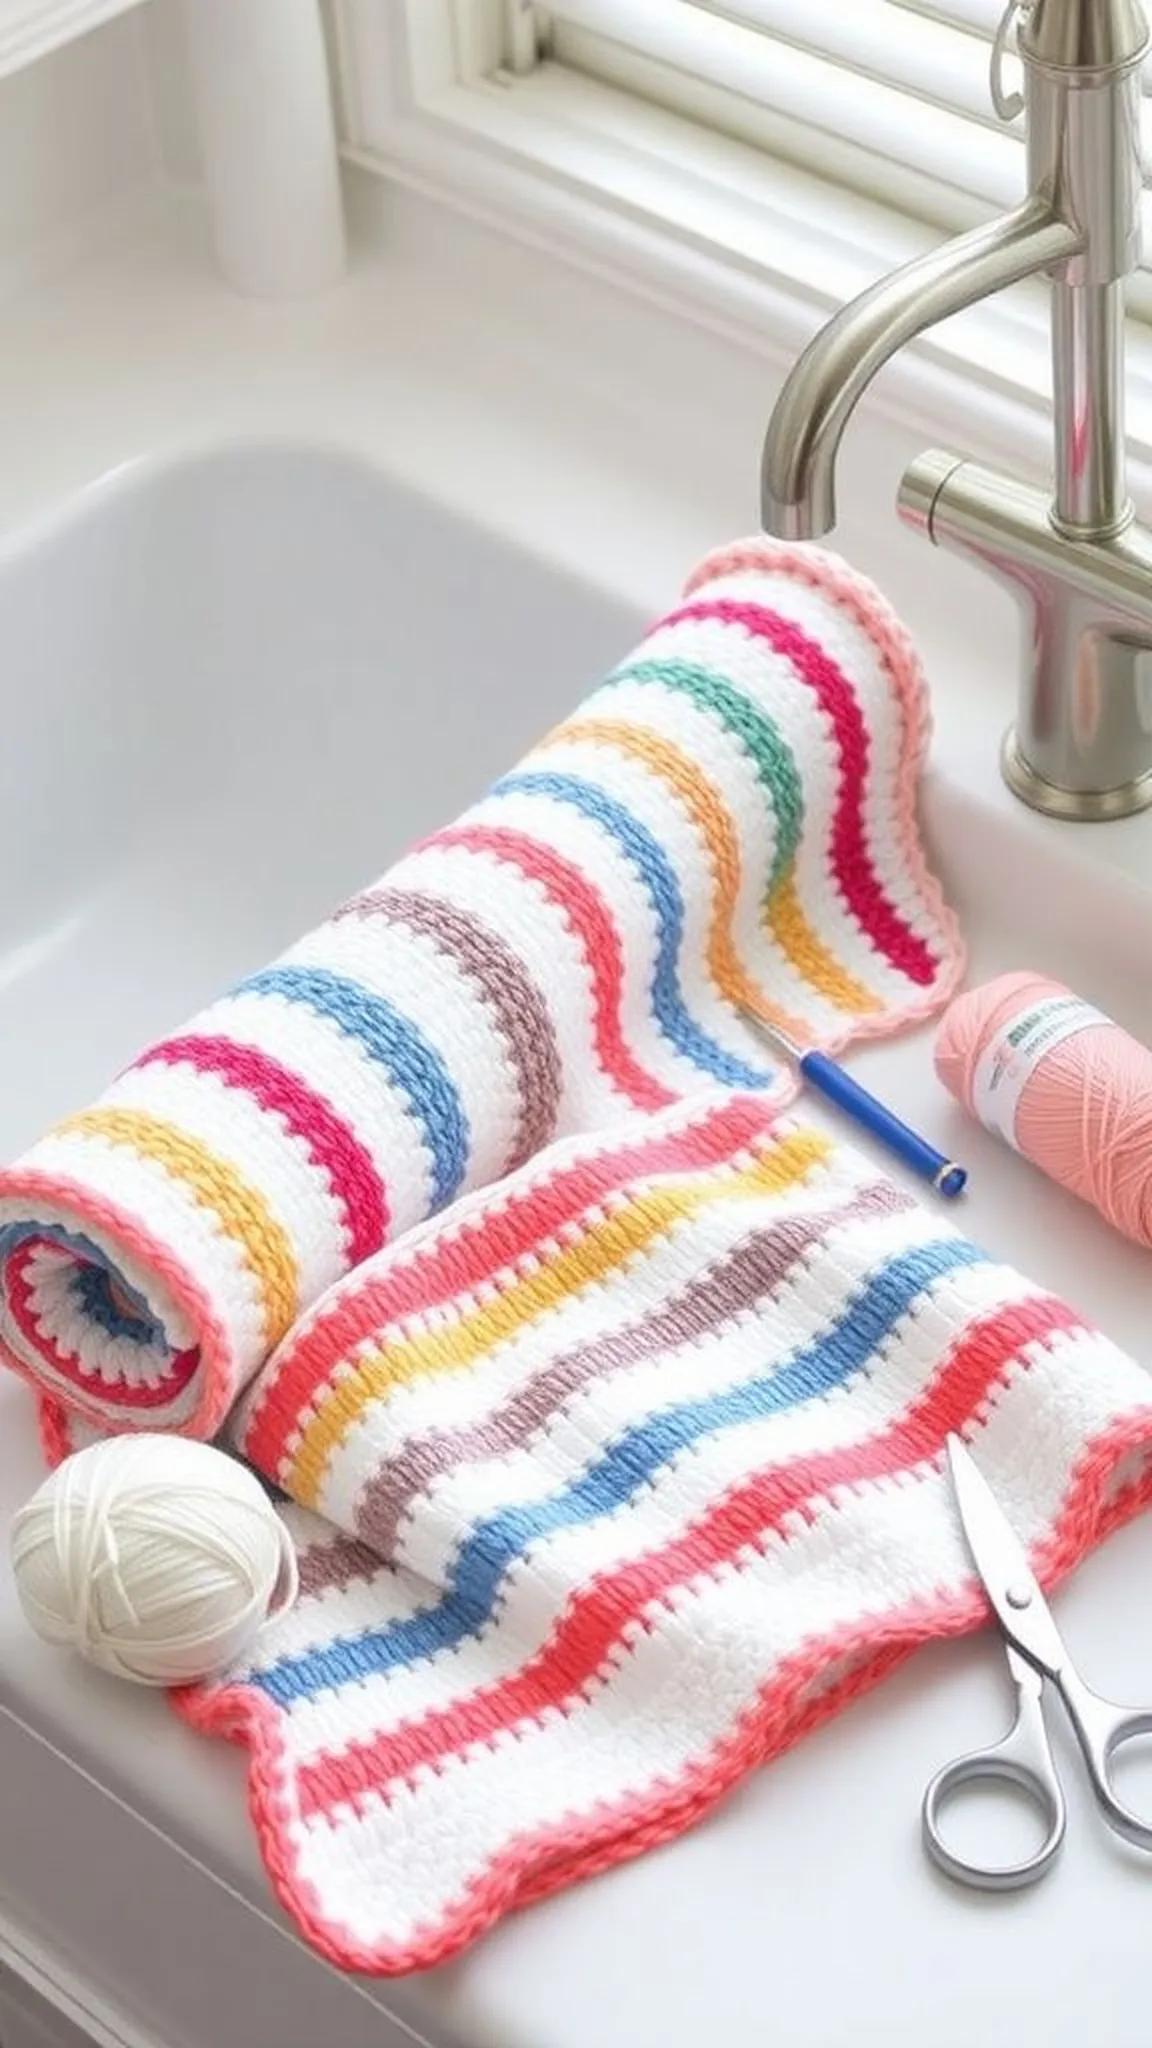
Chevron ripple cloth with gentle wave texture
⏱️ 1-2 hours · 🟠 Intermediate
![]()
The chevron ripple forms soft waves that feel lively and sculptural while offering effective scrubbing ridges across its peaks and valleys.
Long color bands emphasize the movement, with shadowed valleys that change tone as the cloth flexes or dries.
When grouped in a stack, the chevron lines create a rhythmic, modern look that pairs well with solid kitchen linens.
Pro Tip: Watch increases and decreases at the peaks and troughs for a crisp chevron; consistent stitch counts keep waves even across the cloth.
How to Make This
- Chain a foundation that matches the ripple repeat and begin alternating increases and decreases to form peaks and valleys.
- Work rows in alternating colors if desired, ensuring each peak gets the correct number of stitches for even shaping.
- Continue until reaching the desired size and finish with a tidy border to hold the chevrons in place.
Avoid: Missing a decrease or increase in a row causes the ripple to drift, breaking the chevron alignment across the cloth.
Try Also: Soften the look with tonal yarns, or use three shades for a sunset stripe effect across the waves.
Products & Materials
Items Used
- 100% cotton worsted weight yarn
- crochet hook 5.0 mm
- large eye yarn needle
- small embroidery scissors
“Chevron ripple dishcloth: rhythmic waves and sculpted scrub surface.”
Herringbone reversible dishcloth in dense fabric
⏱️ 2-3 hours · 🔴 Advanced
The herringbone stitch yields a dense, woven-looking fabric that feels durable and drapes with a slanted, twill-like texture across the square.
Both sides of the cloth look polished and nearly identical, offering reversible utility and an upscale handmade appearance.
The diagonal ribs catch light at an angle, creating a sophisticated surface that reads like woven linen while remaining soft enough for daily use.
Pro Tip: Maintain relaxed tension when pulling through loops for the herringbone stitch to prevent a fabric that becomes overly rigid or difficult to manipulate.
How to Make This
- Chain a foundation and work rows of herringbone half double crochet or the chosen herringbone entry, keeping stitch count consistent.
- Keep a loose, steady tension to allow the distinctive slanted ribs to form without compressing the fabric.
- Continue to the desired size and finish with a firm border that preserves the reversible look.
Avoid: Too tight a tension during this stitch makes the cloth stiff and less comfortable to use or fold.
Try Also: Work a narrow border in contrast for a tailored look, or make a smaller square for gift-ready coasters using the same stitch.
Products & Materials
Items Used
- 100% cotton worsted weight yarn
- crochet hook 5.5 mm
- large eye yarn needle
- small embroidery scissors
“Reversible herringbone dishcloth: woven look with sturdy, elegant texture.”
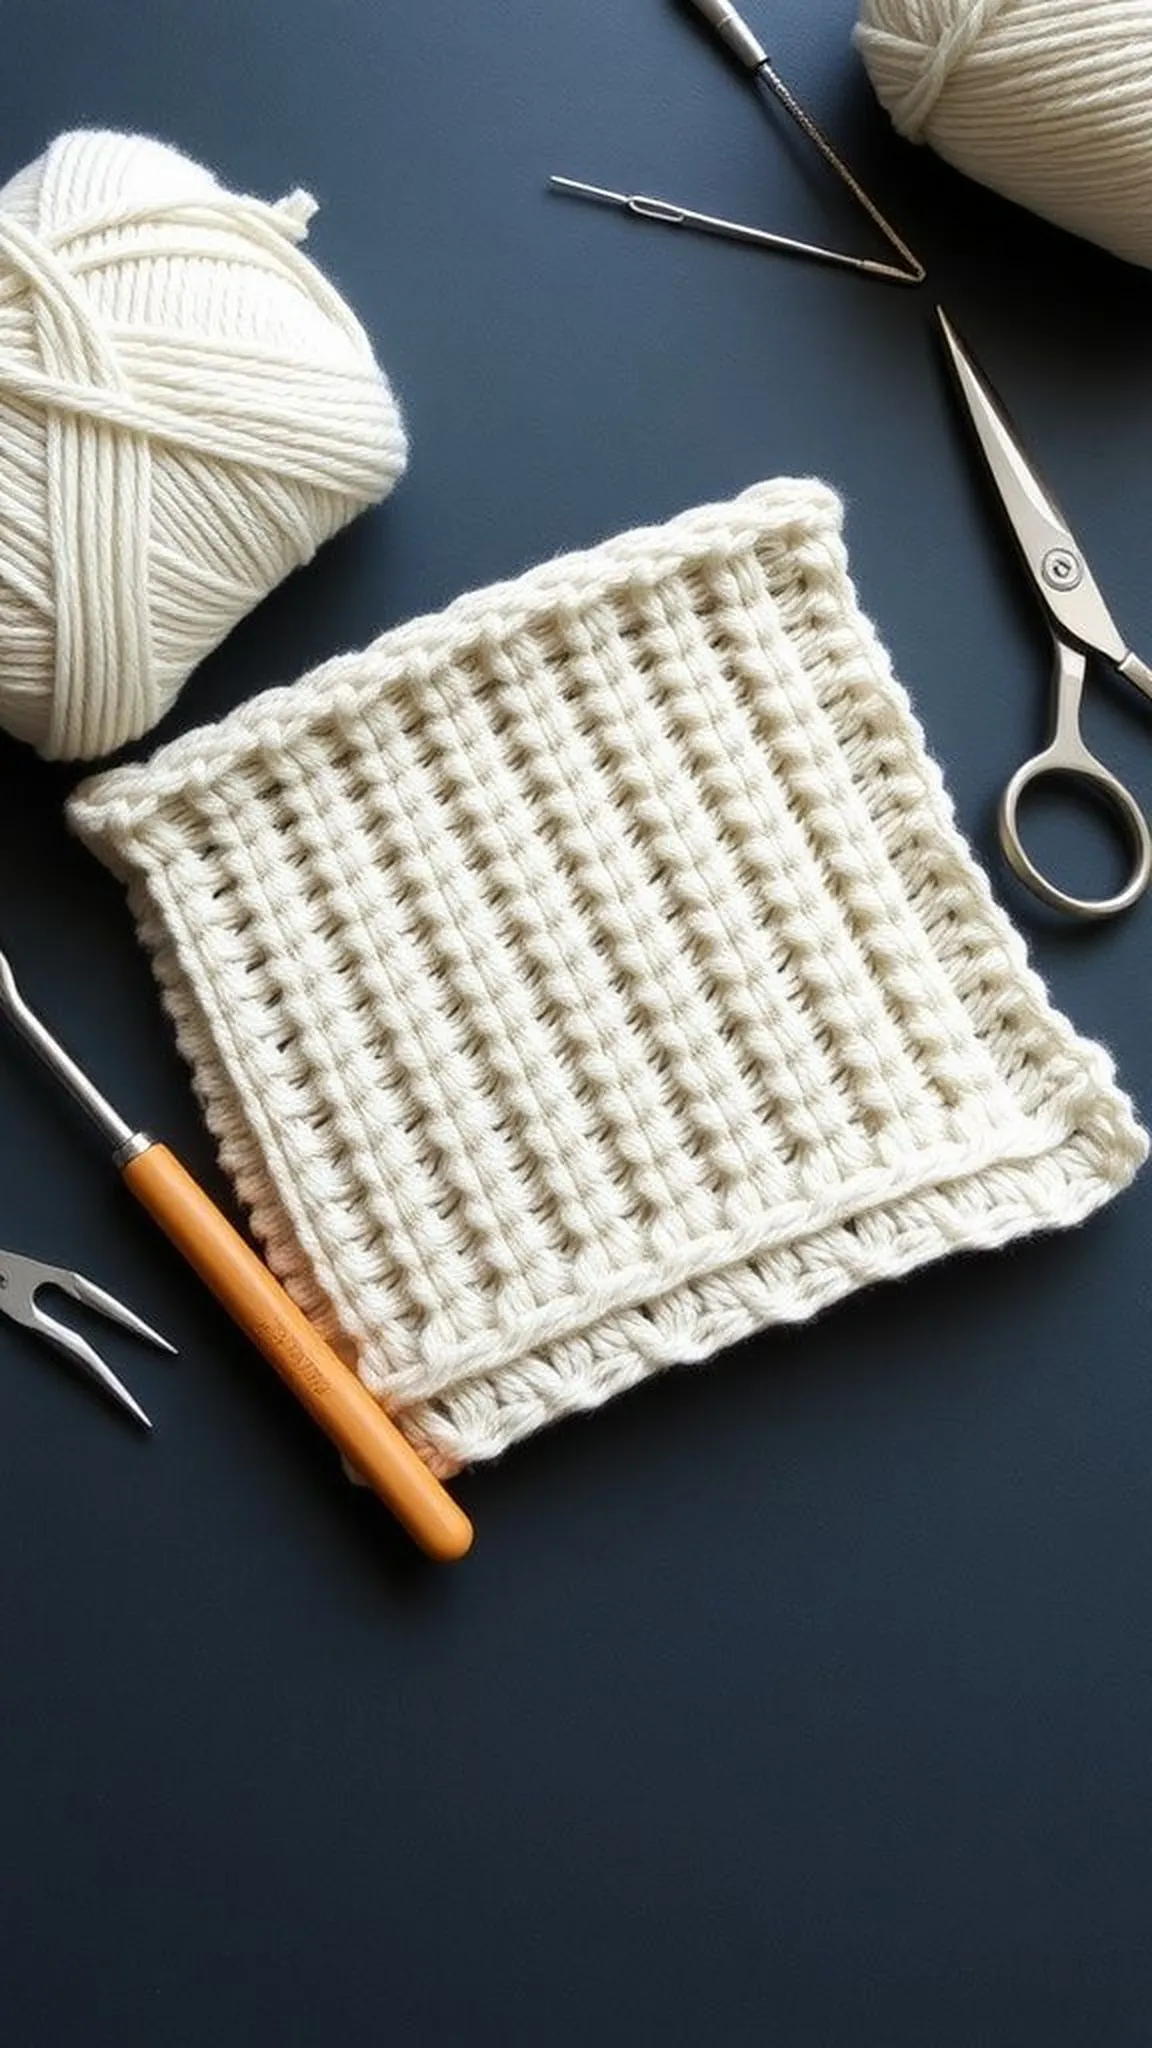
Tunisian simple stitch square for modern cloths
⏱️ 1-2 hours · 🟠 Intermediate
Tunisian simple stitch produces a fabric that reads like knitting with a subtle vertical texture and a dense hand that excels at wiping.
The hook-holding craft creates close, even loops that form a sturdy cloth with a slightly squished, pleasingly warm surface.
Neutral cotton or soft pastels bring out the subtle vertical lines and make the cloth look modern and tactile on kitchen surfaces.
Pro Tip: Keep the working loops on the hook uniform and avoid pulling too tightly during the forward pass to preserve the even vertical texture.
How to Make This
- Use a Tunisian crochet hook to pick up loops across the foundation row, keeping them on the hook for the return pass.
- Work the return pass by drawing yarn through loops in the pattern indicated to build the dense Tunisian fabric.
- Repeat forward and return passes until the square reaches target dimensions and finish by binding off neatly.
Avoid: Holding the return pass too tight squeezes the fabric and reduces the signature vertical texture and drape.
Try Also: Try alternating a few rows of Tunisian simple stitch with regular crochet for striped texture, or use a lighter yarn for a finer cloth.
Products & Materials
Items Used
- 100% cotton worsted weight yarn
- Tunisian crochet hook 5.0 mm
- large eye yarn needle
- small embroidery scissors
“Tunisian simple stitch dishcloth: knit-like fabric with modern texture.”
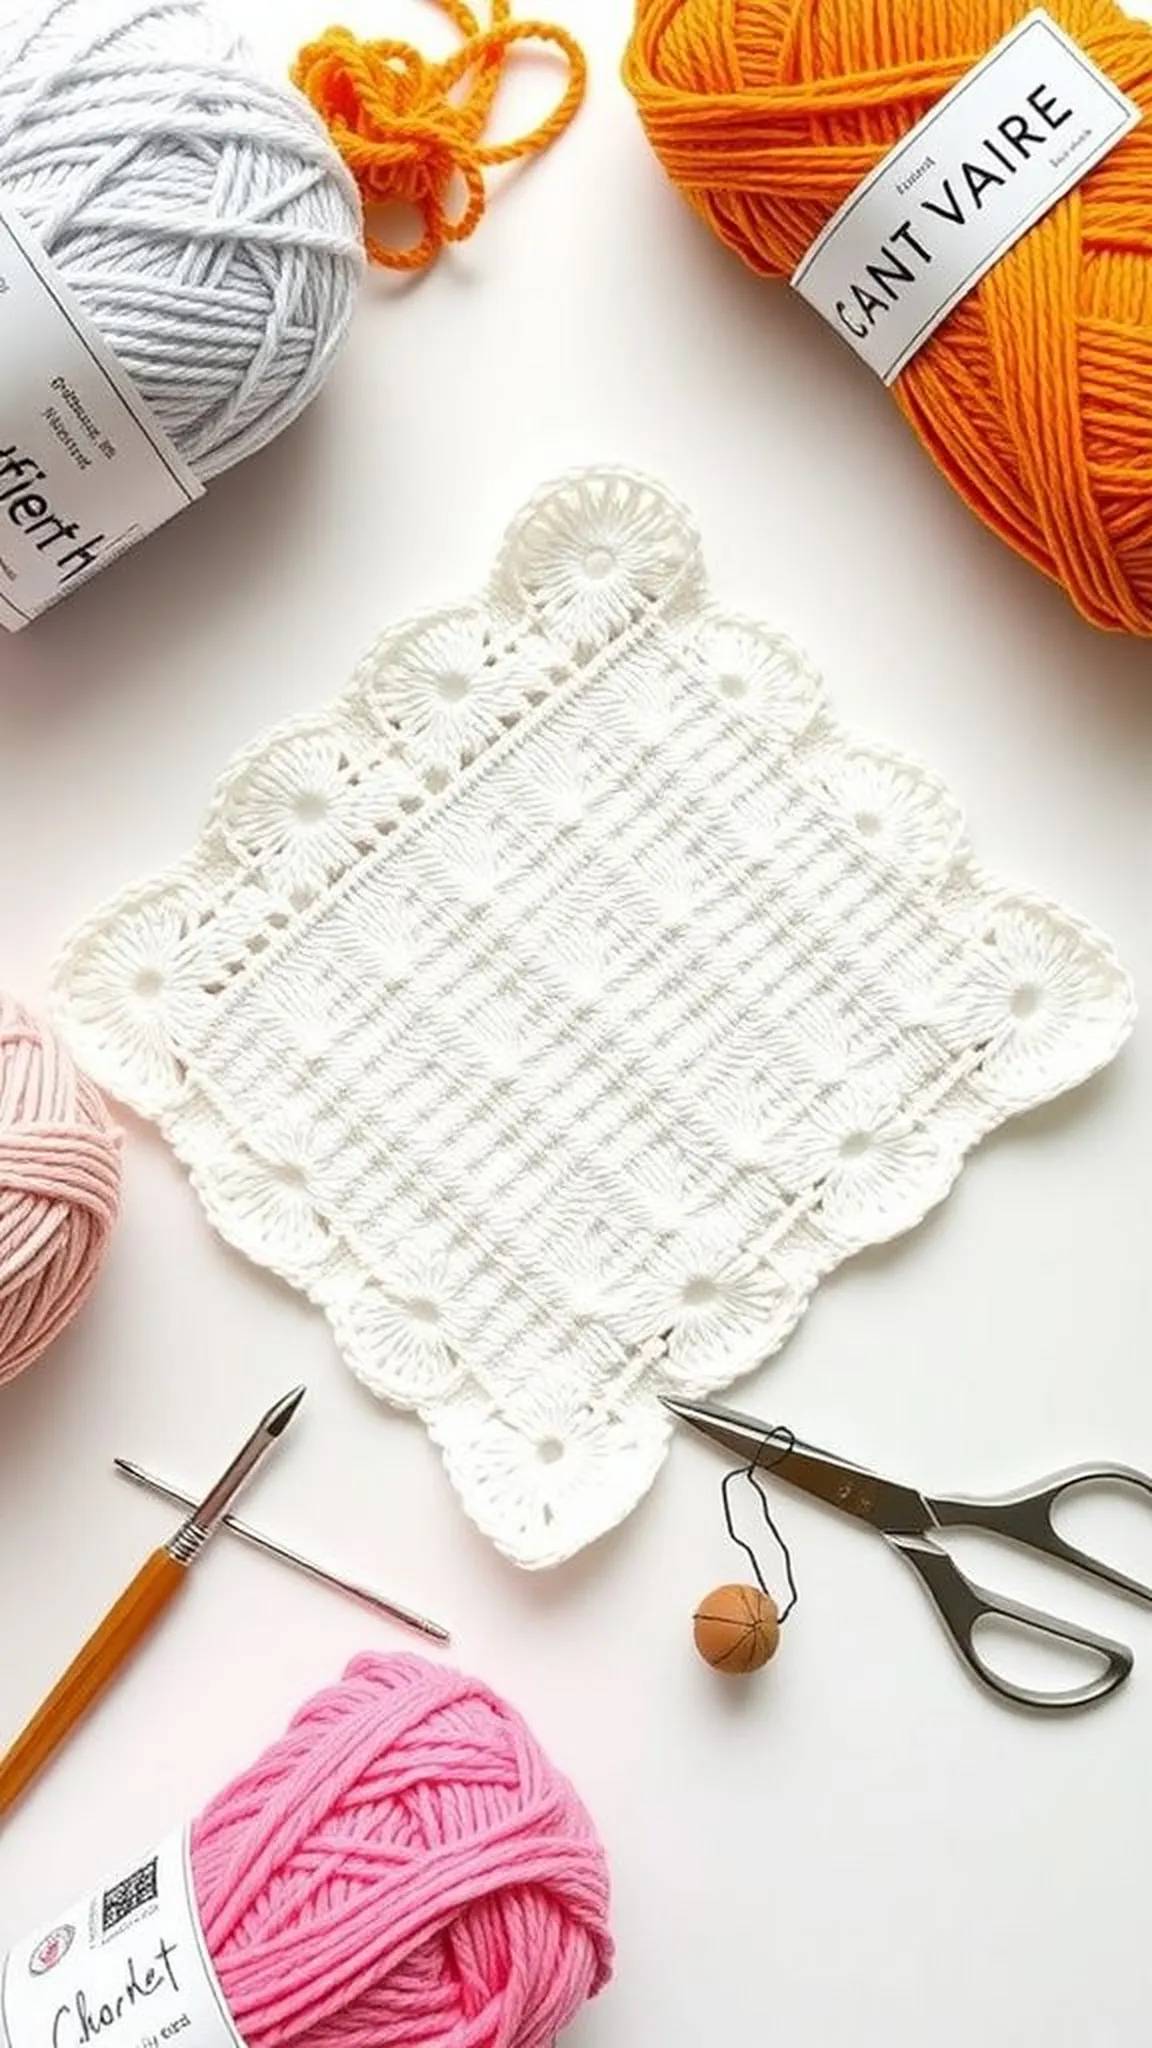
Scalloped edge dishcloth, pretty finish without fuss
⏱️ 45 min · 🟢 Beginner
A simple scalloped edge adds a feminine, finished frame to any plain square and feels elegant draped on a faucet or stacked in a basket.
The tiny arches create soft shadows and a sweet silhouette that elevates the cloth beyond purely utilitarian items.
Delicate color choices and neat stitches make the scallops read as handmade detail, lending warmth to everyday kitchen moments.
Pro Tip: Choose a slightly smaller hook for the edge than the body of the cloth to keep scallops crisp and prevent a wavy perimeter.
How to Make This
- Complete the base dishcloth and join yarn at a corner to begin the scalloped edging.
- Work groups of stitches into edge spaces to form small scallops, spacing them evenly around the perimeter.
- Slip stitch into the base to anchor each scallop and fasten off neatly when the round is complete.
Avoid: Uneven spacing or inconsistent stitch counts in the scallops leads to a lopsided border that looks unbalanced.
Try Also: Make larger scallops for a bold frame, or alternate two edge colors for a delicate picot-like contrast.
Products & Materials
Items Used
- 100% cotton worsted weight yarn
- crochet hook 4.0 mm
- large eye yarn needle
- small embroidery scissors
“Scalloped edge dishcloth: pretty finishing detail for everyday linens.”
Textured basketweave cloth with cozy woven look
⏱️ 1-2 hours · 🟠 Intermediate
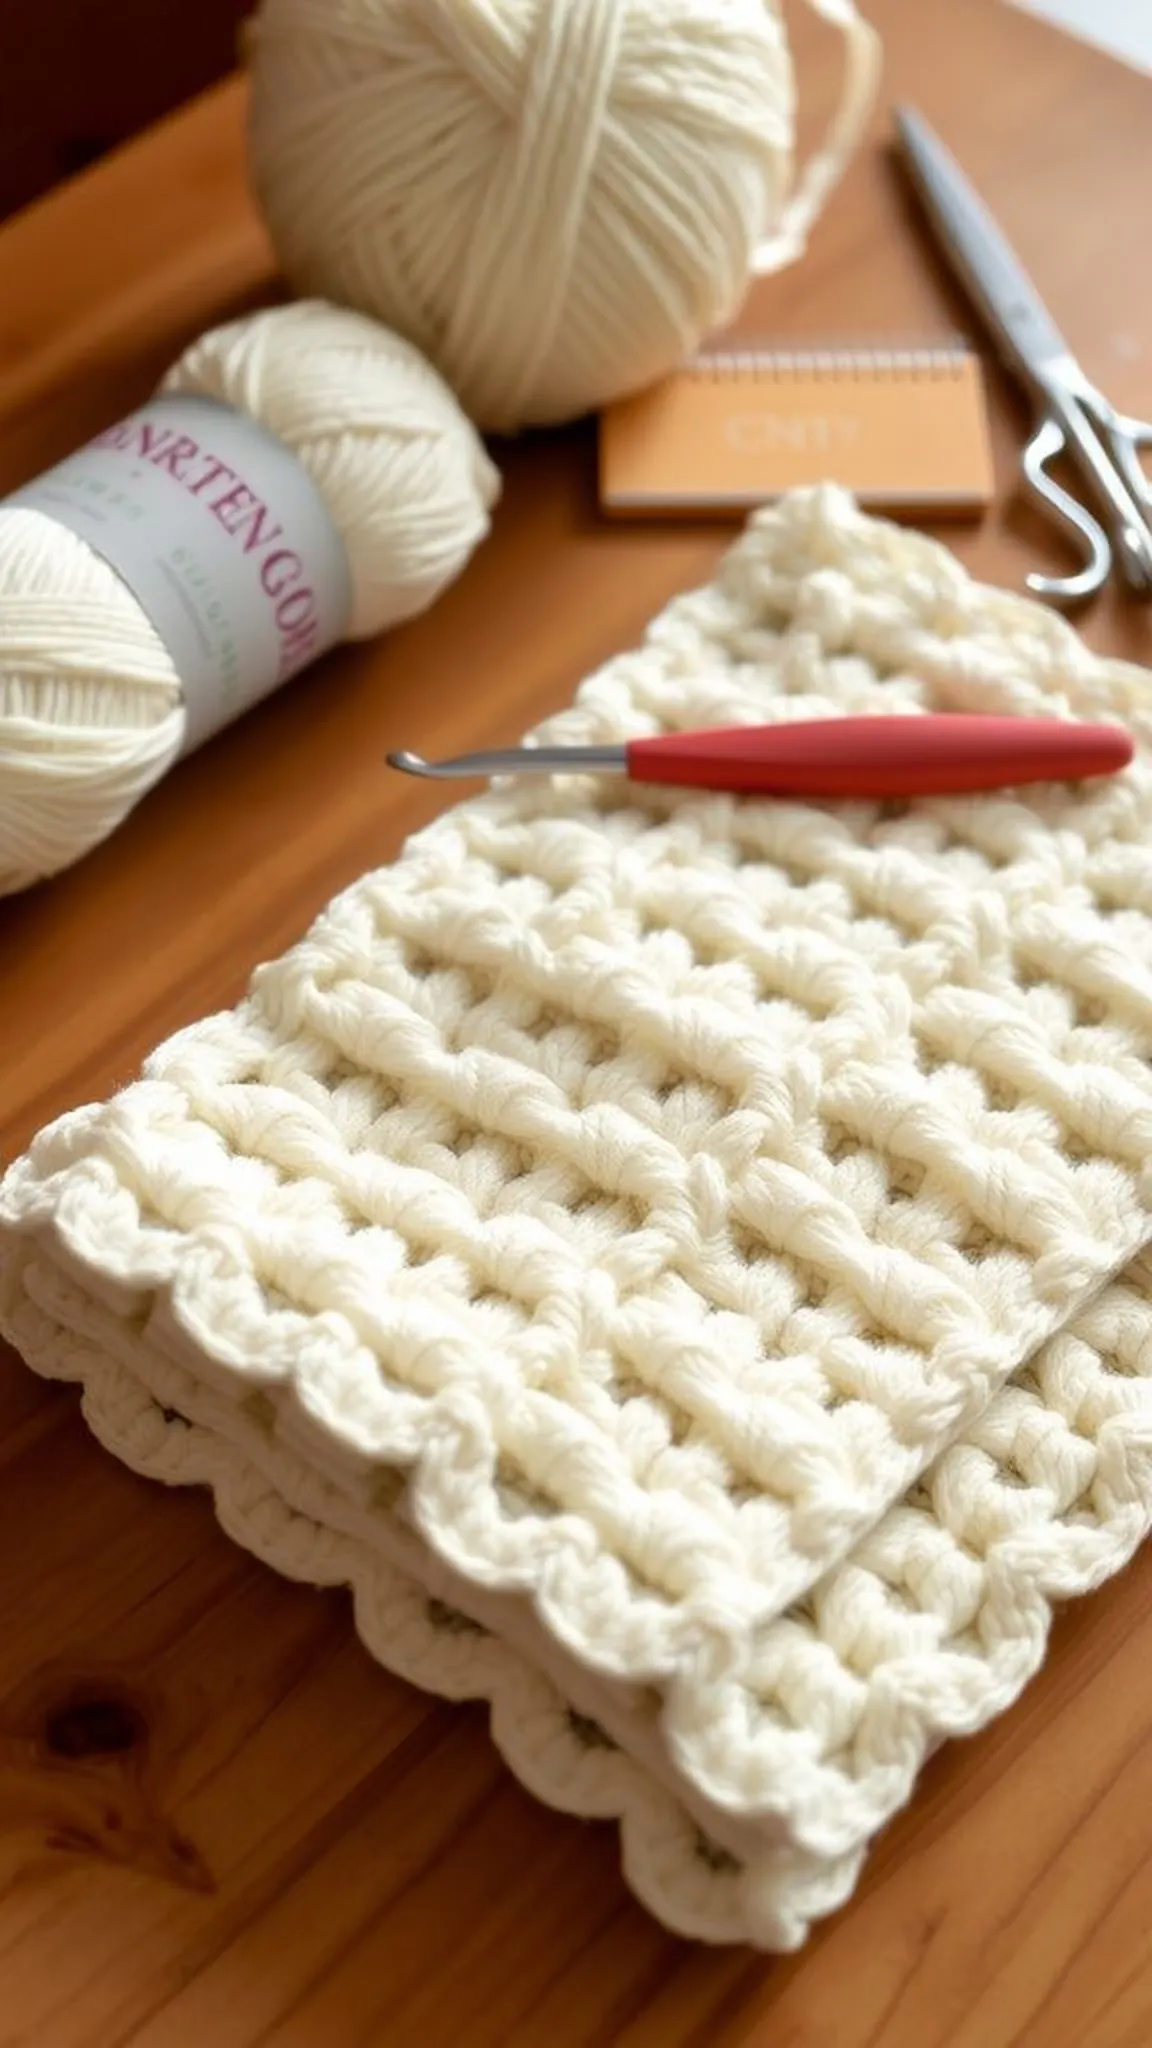
The basketweave stitch gives the illusion of woven strips, creating a dense fabric with alternating raised and recessed bands that feel pleasantly chunky.
The tactile grid offers excellent grip for scrubbing and a warm, structured appearance that reads like a tiny textile placemat.
Neutral yarns emphasize the woven effect while colored yarns bring a modern, graphic dimension to the surface.
Pro Tip: Alternate front and back post stitches evenly and count repeats carefully to keep the woven bands aligned and the surface flat.
How to Make This
- Chain a foundation that fits the basketweave repeat and work a base row of double or half double crochet.
- Use front post and back post stitches in repeating blocks to create the illusion of woven strips across rows.
- Continue alternating blocks until the cloth reaches the desired size and finish with a firm border.
Avoid: Mismatched post stitch counts make the woven bands slip out of alignment, creating an uneven checkerboard rather than neat strips.
Try Also: Make a compact coaster-sized square by reducing repeats, or try bold color bands for a graphic woven stripe effect.
Products & Materials
Items Used
- 100% cotton worsted weight yarn
- crochet hook 5.5 mm
- large eye yarn needle
- small embroidery scissors
“Basketweave dishcloth: woven visual texture with sturdy scrub power.”
Chevron mini stripes for small quick cloths
⏱️ 30 min · 🟢 Beginner
![]()
Mini chevrons use quick repeats to make a small cloth that looks intricate but works up quickly for gifting or testing a new color combo.
The narrow peaks and valleys create a lively surface with subtle movement and tidy point definition along the edges.
Bright contrasting stripes read crisp in photos, while subtle hues lend a relaxed, vintage feel to the finished square.
Pro Tip: Mark peak points with a removable marker or stitch sensation to ensure chevrons remain aligned and maintain consistent shaping.
How to Make This
- Chain a foundation matching the chevron repeat and begin alternating increases and decreases across each row.
- Change colors every few rows for mini stripes, maintaining stitch counts to keep the chevrons aligned.
- Continue until the cloth reaches the desired size, then add a simple border to finalize the edges.
Avoid: Skipping a decrease or increase on any row shifts the whole pattern and causes crooked peaks and valleys.
Try Also: Make a set of small cloths in alternating palettes for a coordinated kitchen bundle, or do narrow tonal stripes for a subtle look.
Products & Materials
Items Used
“Mini chevron dishcloth: quick, striped waves for small cozy sets.”