The best all-in-one art kit for beginners
187Pcs Professional All-in-One Art Painting Kit
Everything you need to start painting. Includes brushes, paints, easel, and more. Highly rated by readers.
Shop on Amazon →As an Amazon Associate, we earn from qualifying purchases.
There is a surprising amount of charm hiding in Dollar Store DIY Craft Projects when small items meet a dash of imagination. Simple supplies often turn into cozy gifts, tabletop accents, or playful decor that brighten ordinary corners with cheerful textures and unexpected color.
I remember a rainy afternoon sorting through cheap beads, ribbons, and odd buttons and ending up with a tiny keepsake that warmed the room. Dollar Store DIY Craft Projects felt like quiet victories that afternoon and kept me smiling while the rain pattered against the window.
Mason jar fairy light luminary with ribbon
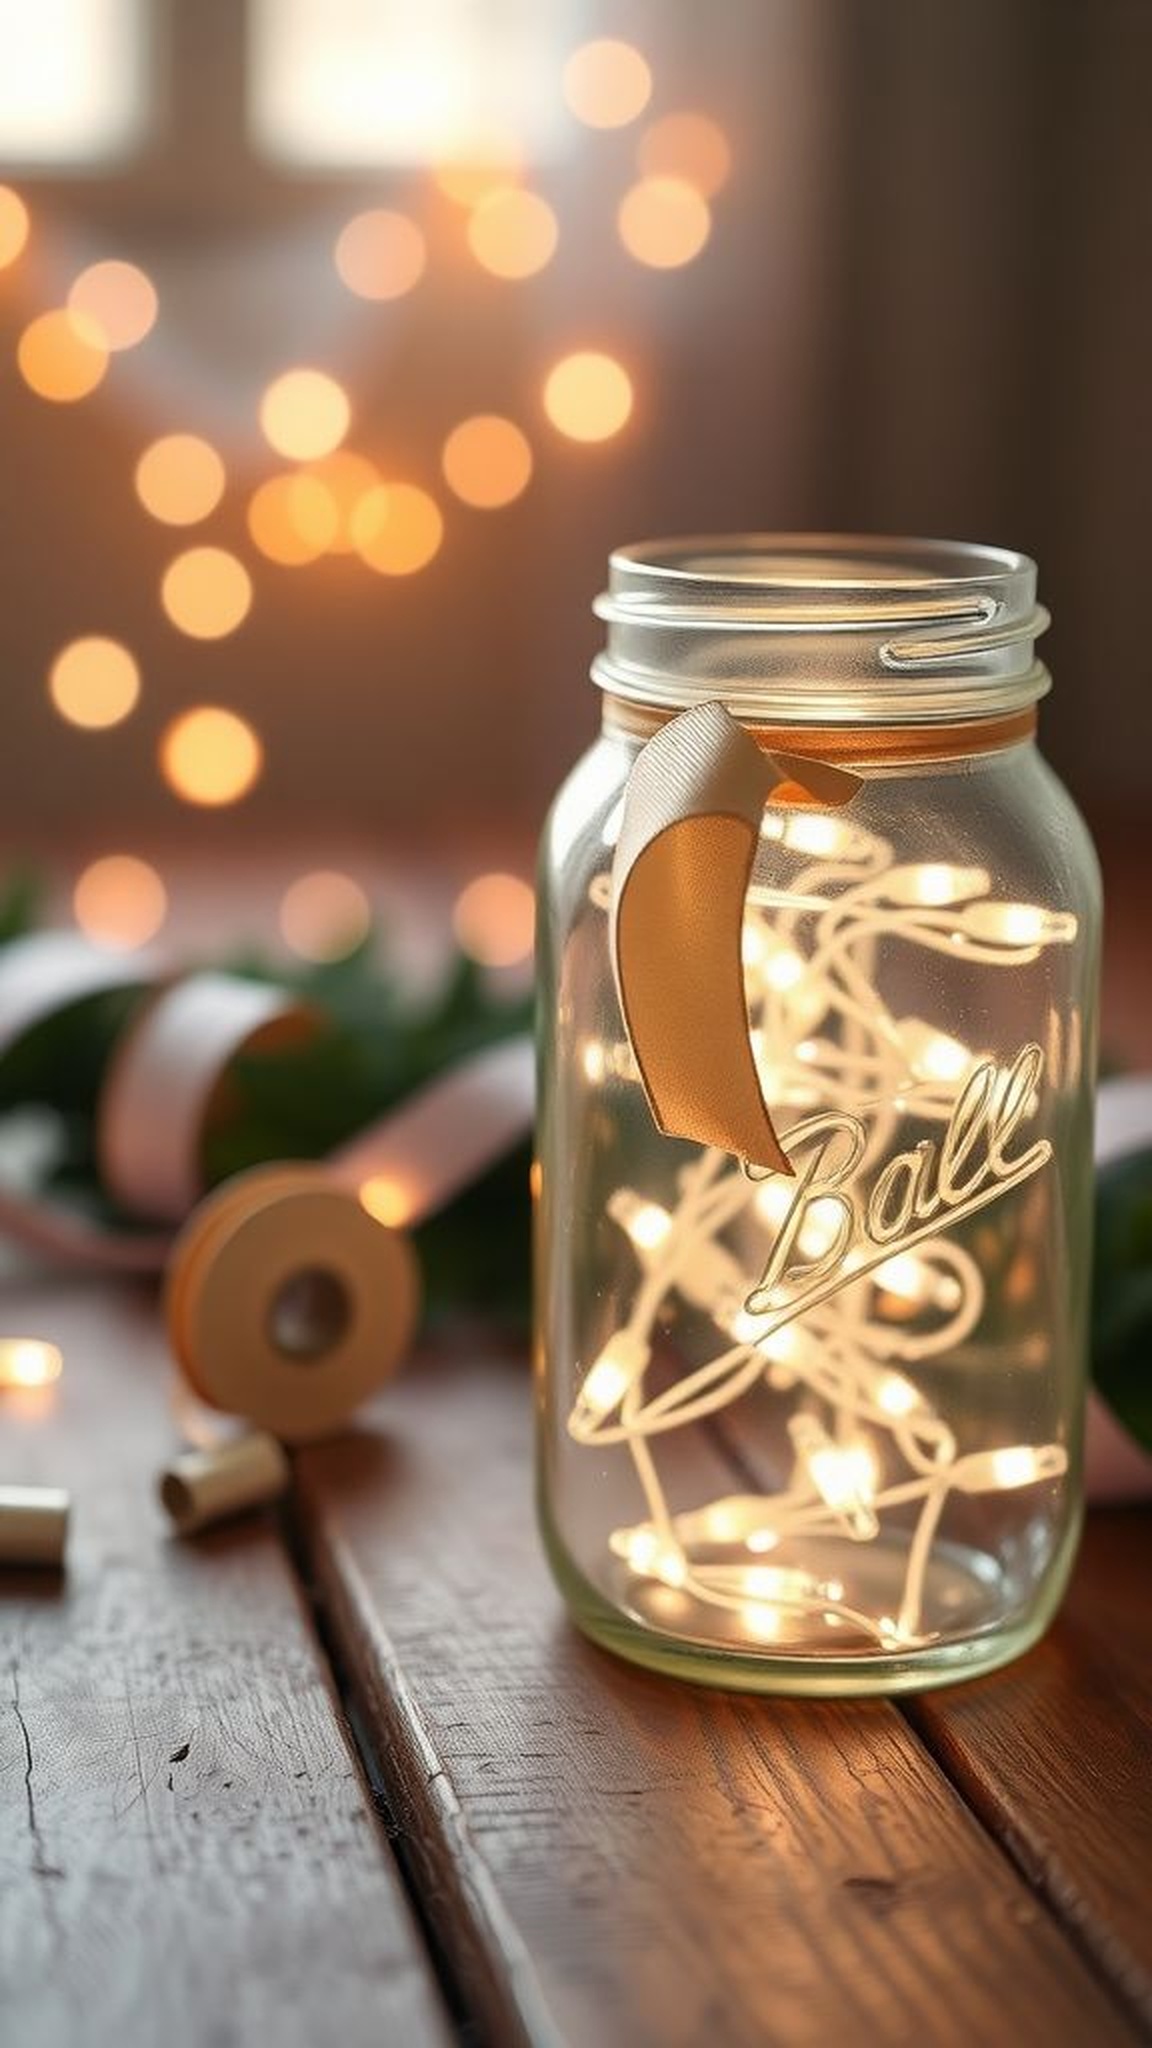
A chilled glass jar warmed by tiny lights reads like a small, private festival on the windowsill. The glow slips across ribbed glass and catches soft ribbon fibers, creating gentle highlights and shadow play.
The battery pack hums faintly, and the ribbon adds a tactile contrast to the smooth rim. A few faux sprigs tucked in bring a herb-scent memory to mind even when the material is plastic.
This jar lived on a side table and turned late-night reading into a cozy ritual, the kind that makes ordinary evenings feel softer.
Steps
- Place a battery string of micro lights inside the jar and arrange them so light spreads evenly.
- Fasten a ribbon around the jar neck and knot it, adjusting tails for a balanced look.
- Tuck a few faux herb sprigs or small dried flowers beside the lights to add texture.
- Set the battery pack behind the jar or hide it beneath a coaster for a neater appearance.
Colored terra cotta herb pots with stenciled names
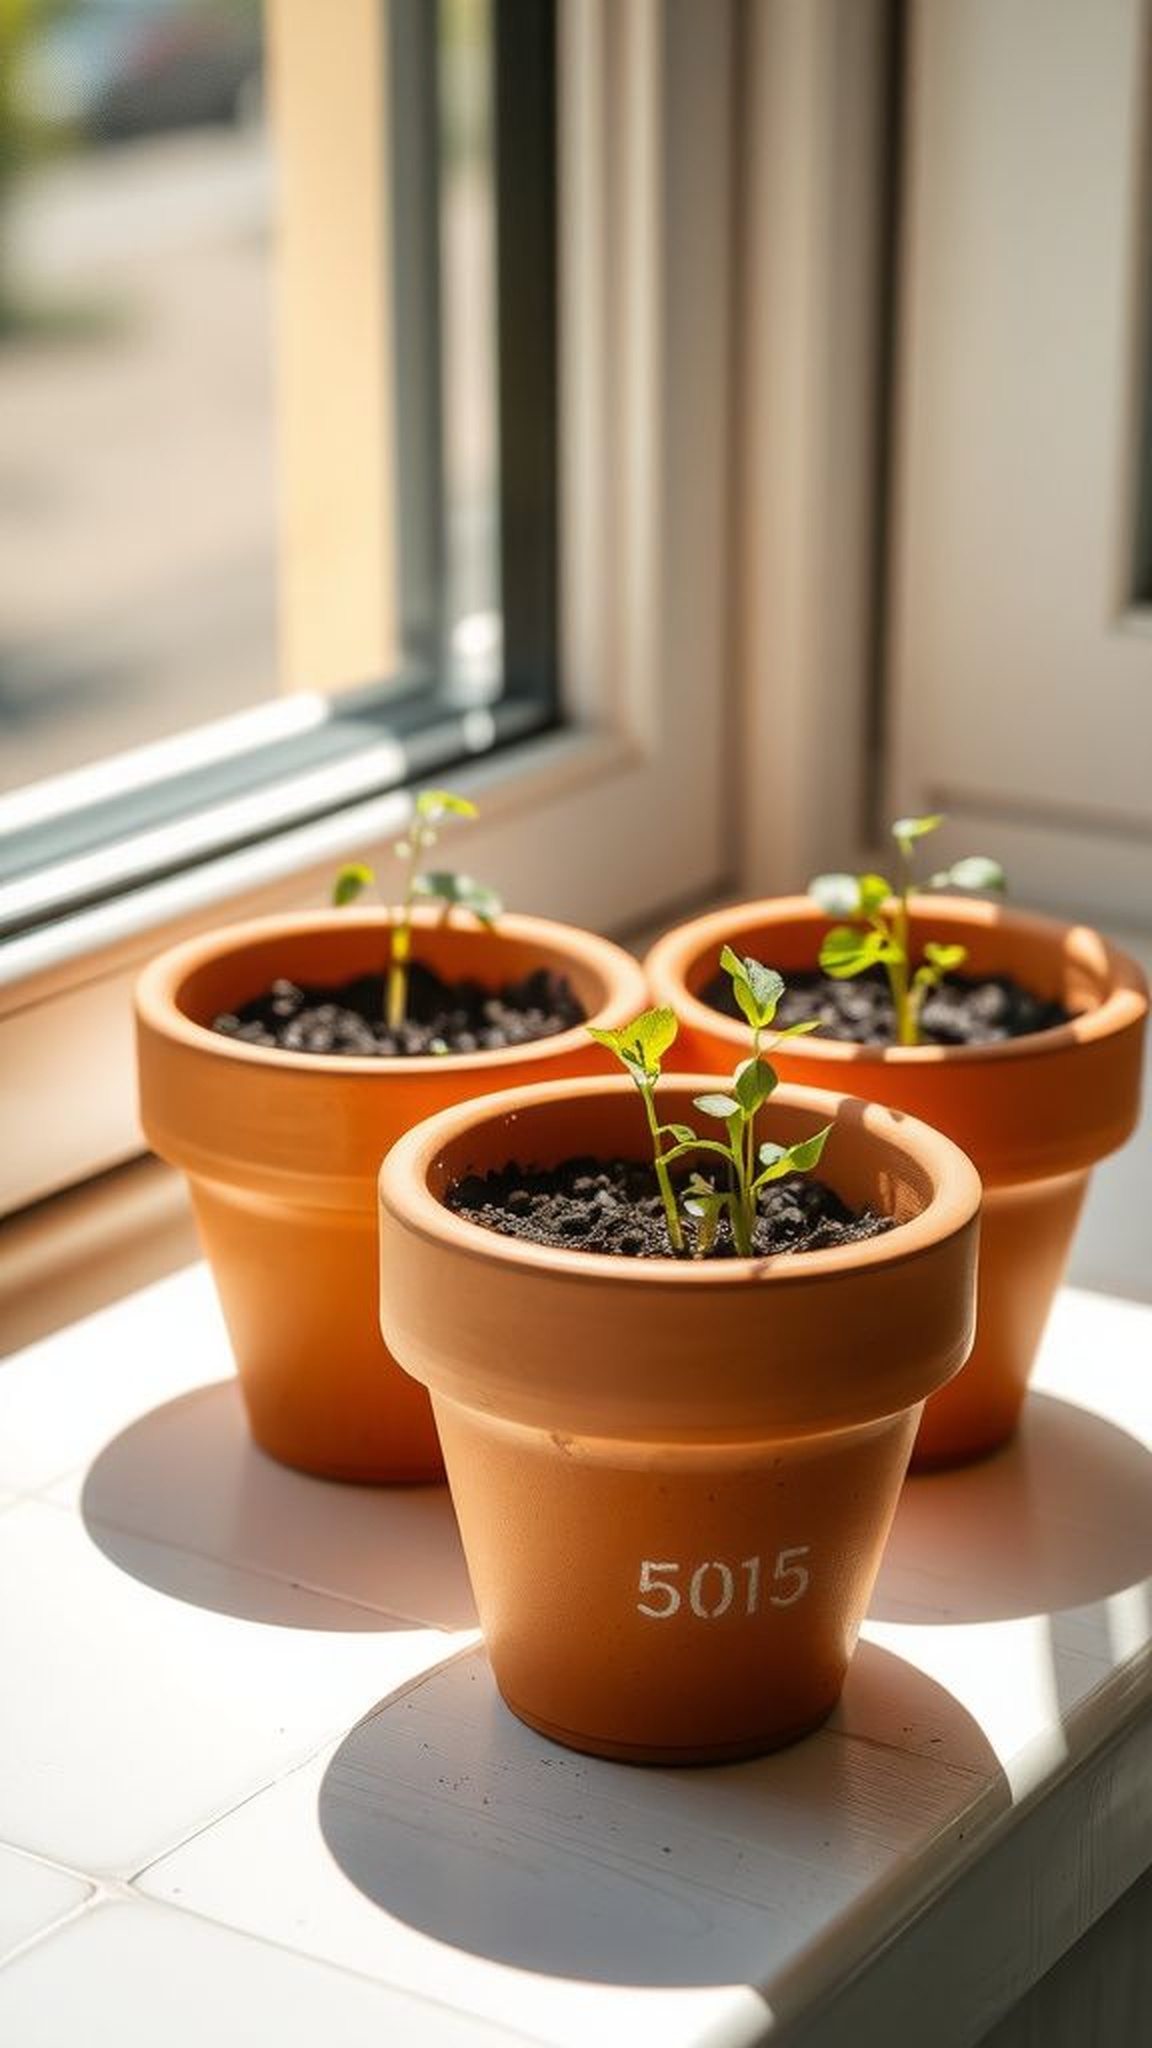
Chunky clay pots brightened with soft color washes brought a tiny urban garden to a sunny kitchen corner. The surface felt slightly gritty under fingertips, and the stenciled letters had a handmade wobble that made each pot feel like a friend.
Damp soil gave off an earthy perfume while little green shoots pushed up lively shadows on the painted surface. A faded sticker from the store became a badge of thrift, and arranging the pots in a crooked line felt more charming than perfect symmetry.
Those pots made watering feel like a gentle ritual.
Steps
- Apply a thin color wash of acrylic pigment to the outside of each pot, allowing texture to show through.
- Position a stencil, hold it steady, and dab color over the letters with a sponge for crisp edges.
- Let the pigment dry fully before filling with potting mix and seedlings.
- Group the pots on a sunny sill so herbs catch morning light and cast tiny shadows.
Washi-tape wrapped mini planters full of charm
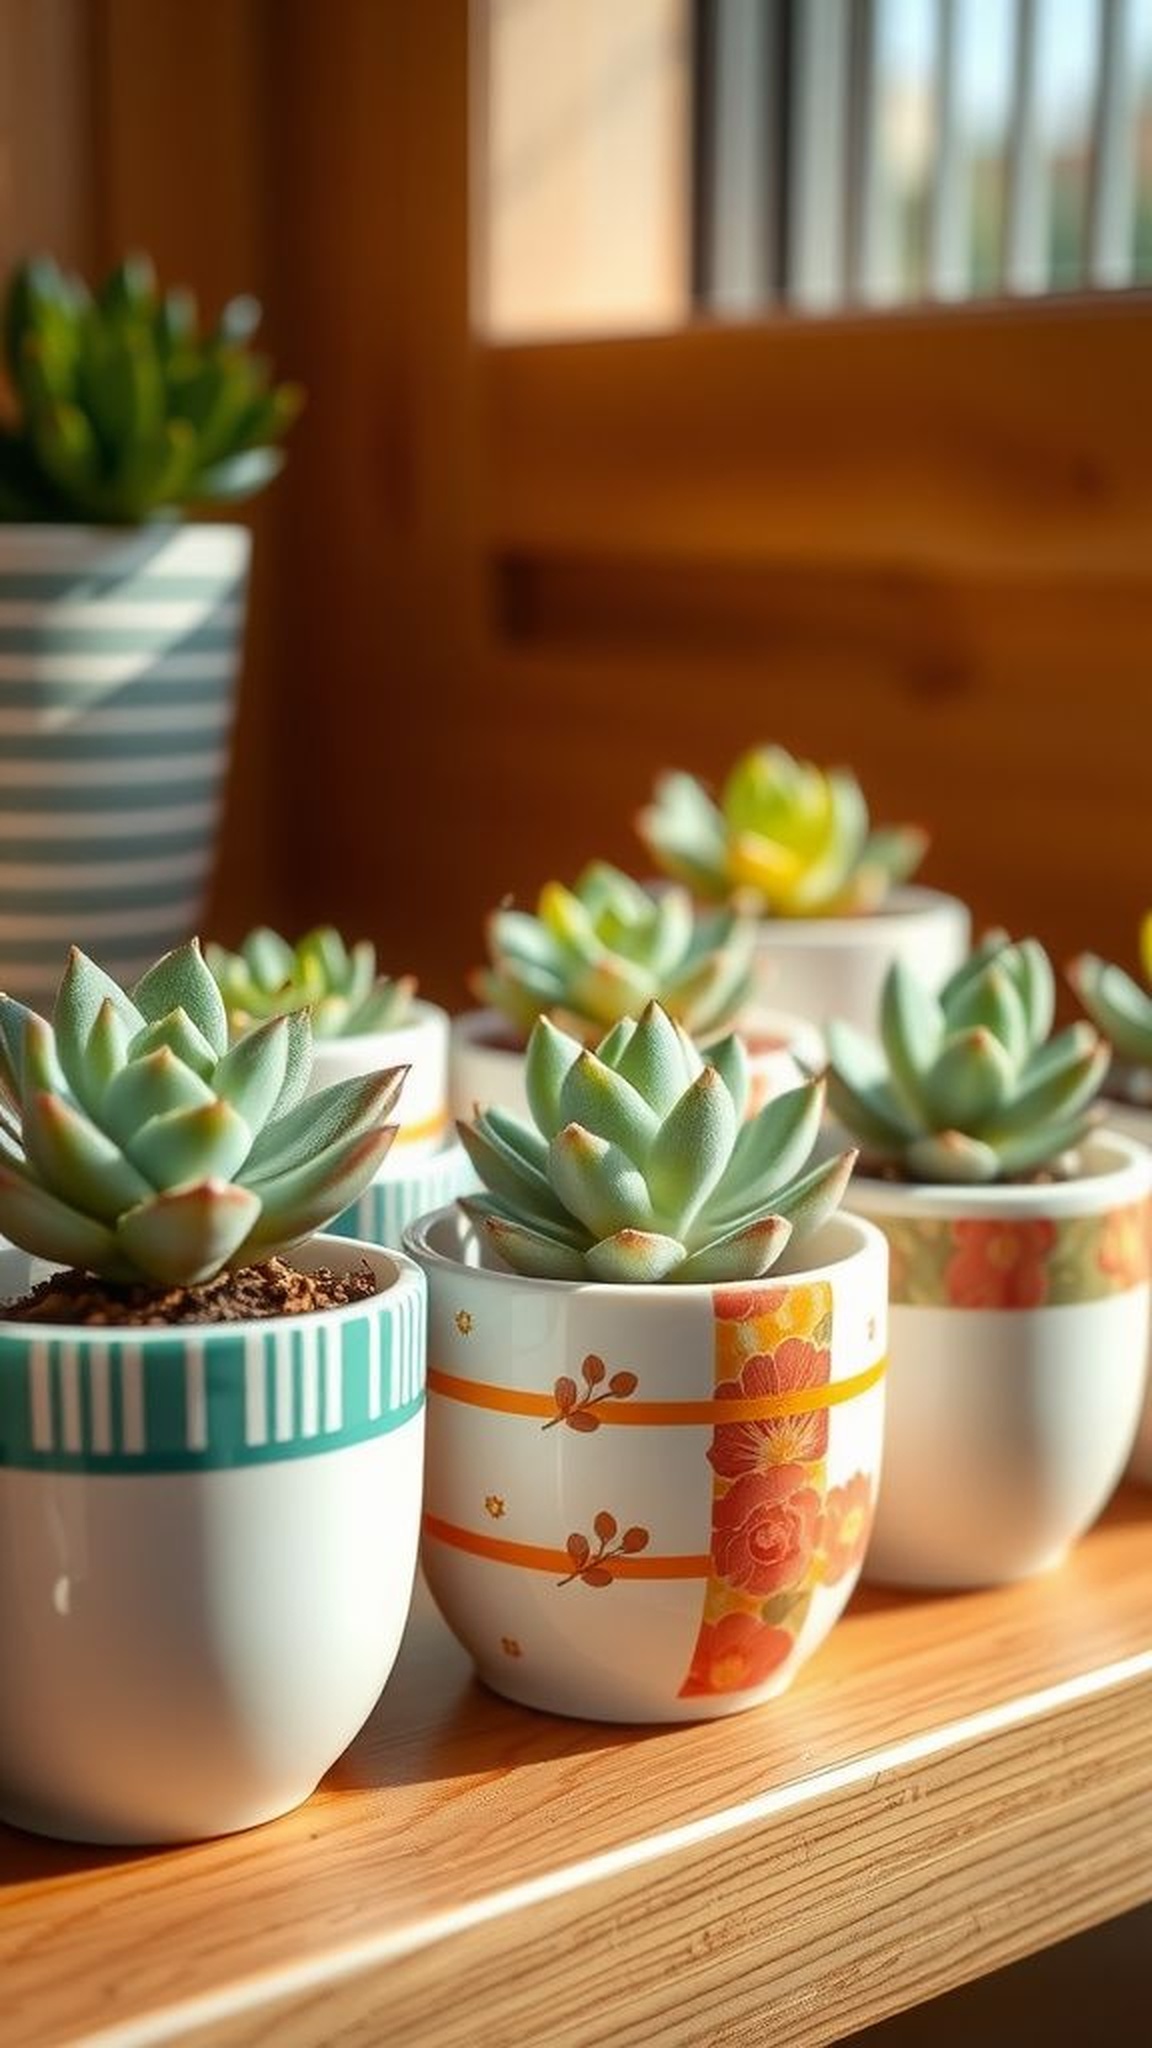
A cluster of tiny planters got an instant personality boost with bright patterned tape snug around their middles. The tape edges caught light and flashed tiny geometric and floral motifs, adding a playful rhythm to the grouping.
Handling one, the smooth tape contrasted with the cool ceramic and the damp weight of soil. The overall look felt casual and cheerful, like a borrowed pattern from a lively vintage textile.
These planters sat by a sink where water splashes left little rainbows on the tape, and each stripe seemed to smile back.
Steps
- Select a range of patterned washi tape and wrap bands around the planter bodies, smoothing seams gently.
- Layer tapes for contrast, aligning patterns so they read well together from a single viewpoint.
- Add soil and a small plant, then place on a saucer to catch any overflow.
- Rotate the planters occasionally so sunlight touches each pattern evenly.
Save time and printer ink with 50+ printable templates and step-by-step instructions in one ad-free guide.

Upcycled picture frame serving tray with leather handles
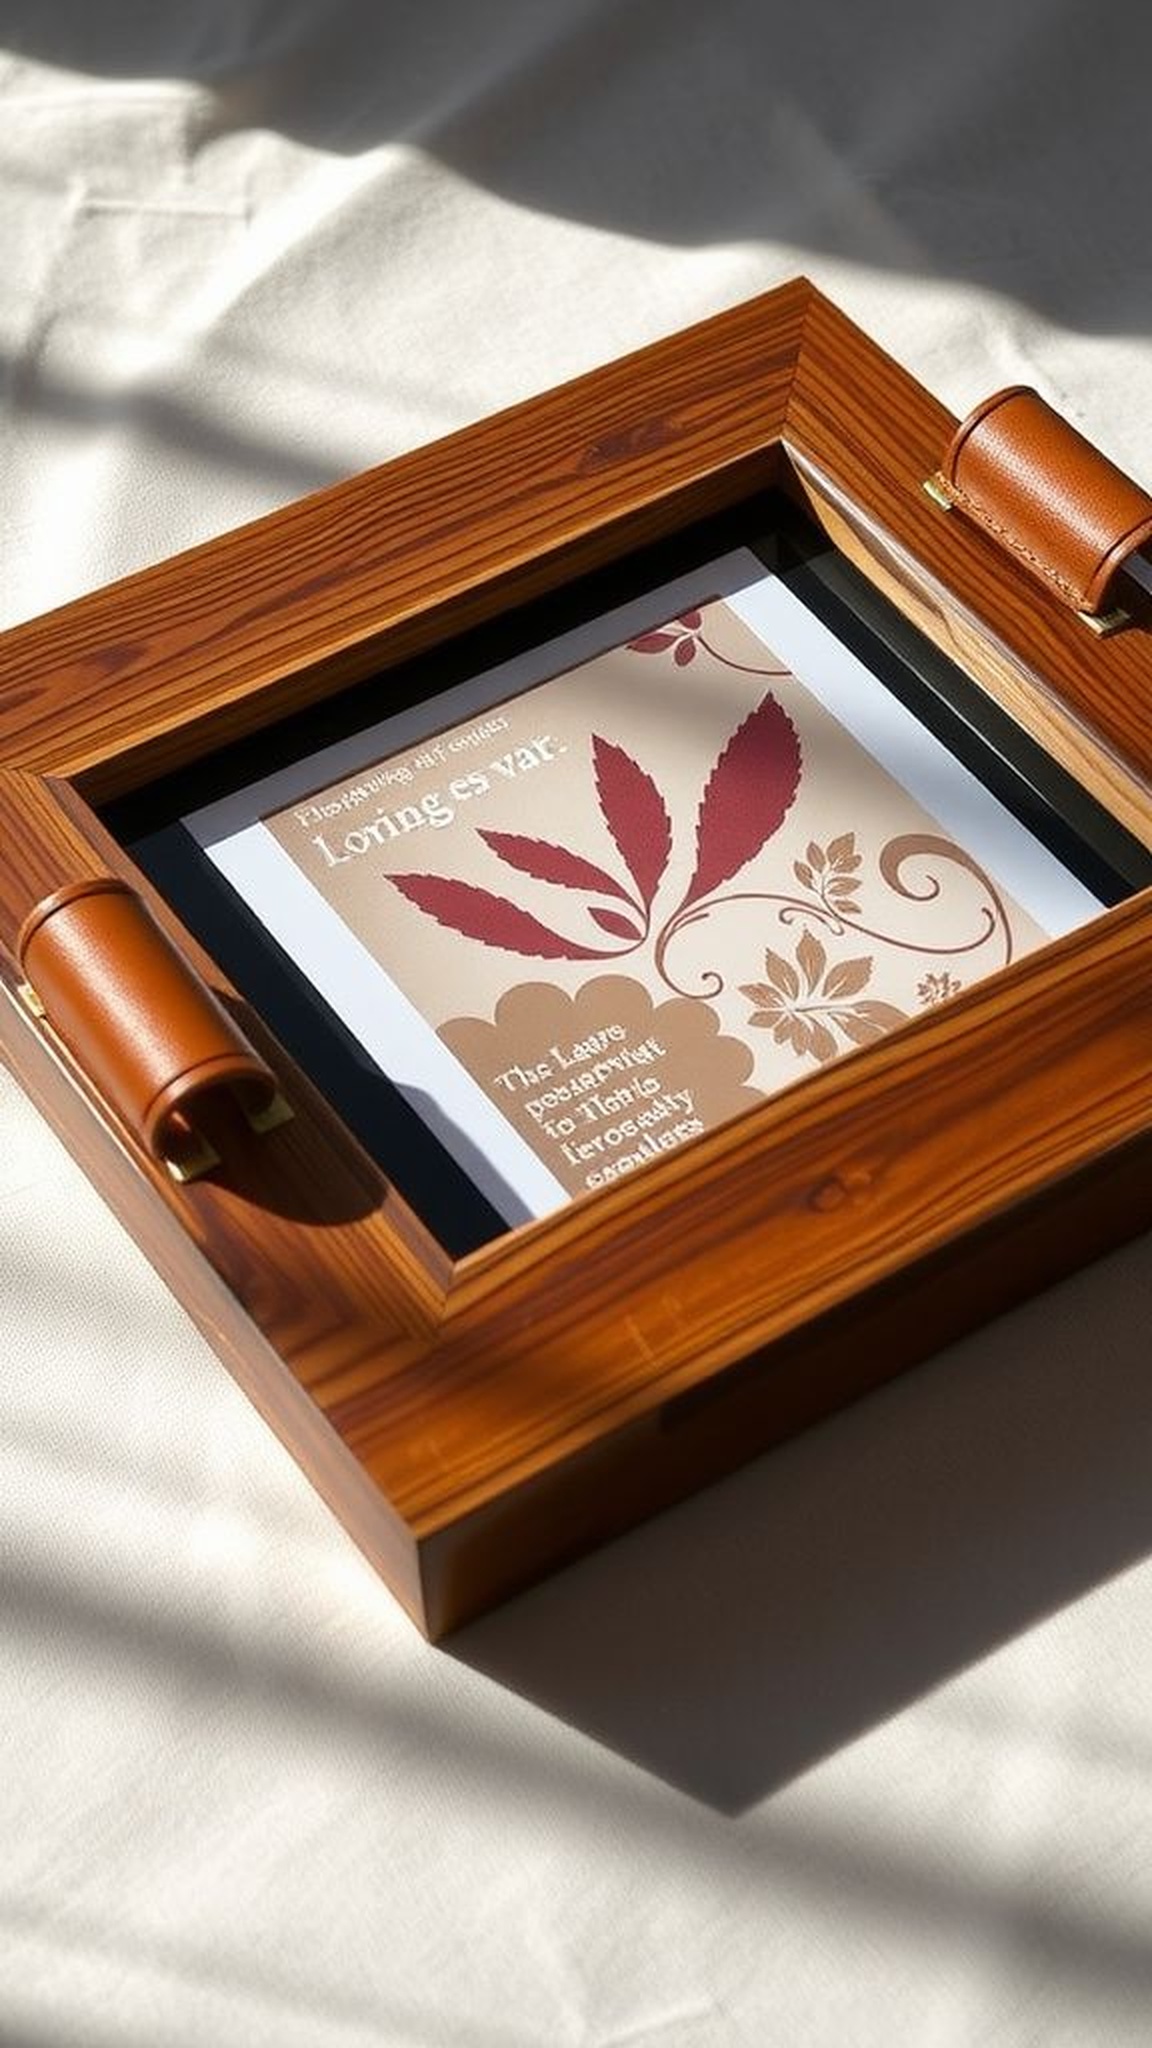
An old picture frame reinvented itself as a low-profile tray that carried mugs and crumbs with quiet style. The glass reflected the room like a tiny lake while the frame’s edge showed cheerful scuffs that hinted at prior life.
Leather tab handles added warmth and a tactile promise of grip, the grain cool under the fingertips. Holding the tray felt sturdy and unexpectedly refined, and the rim caught a spill with a polite little lip.
On lazy mornings it ferried breakfast across carpet and left a small trail of happy smudges.
Steps
- Remove the backing, replace the photo with a decorative paper insert, and secure it flat under the frame lip.
- Fasten short leather tabs on opposite sides of the frame with small screws or strong adhesive for handles.
- Seal the insert edge if desired to prevent moisture from seeping between glass and paper.
- Carry cups and plates carefully, letting the tray serve as a petite tabletop centerpiece.
Clothespin floral wreath in soft pastels
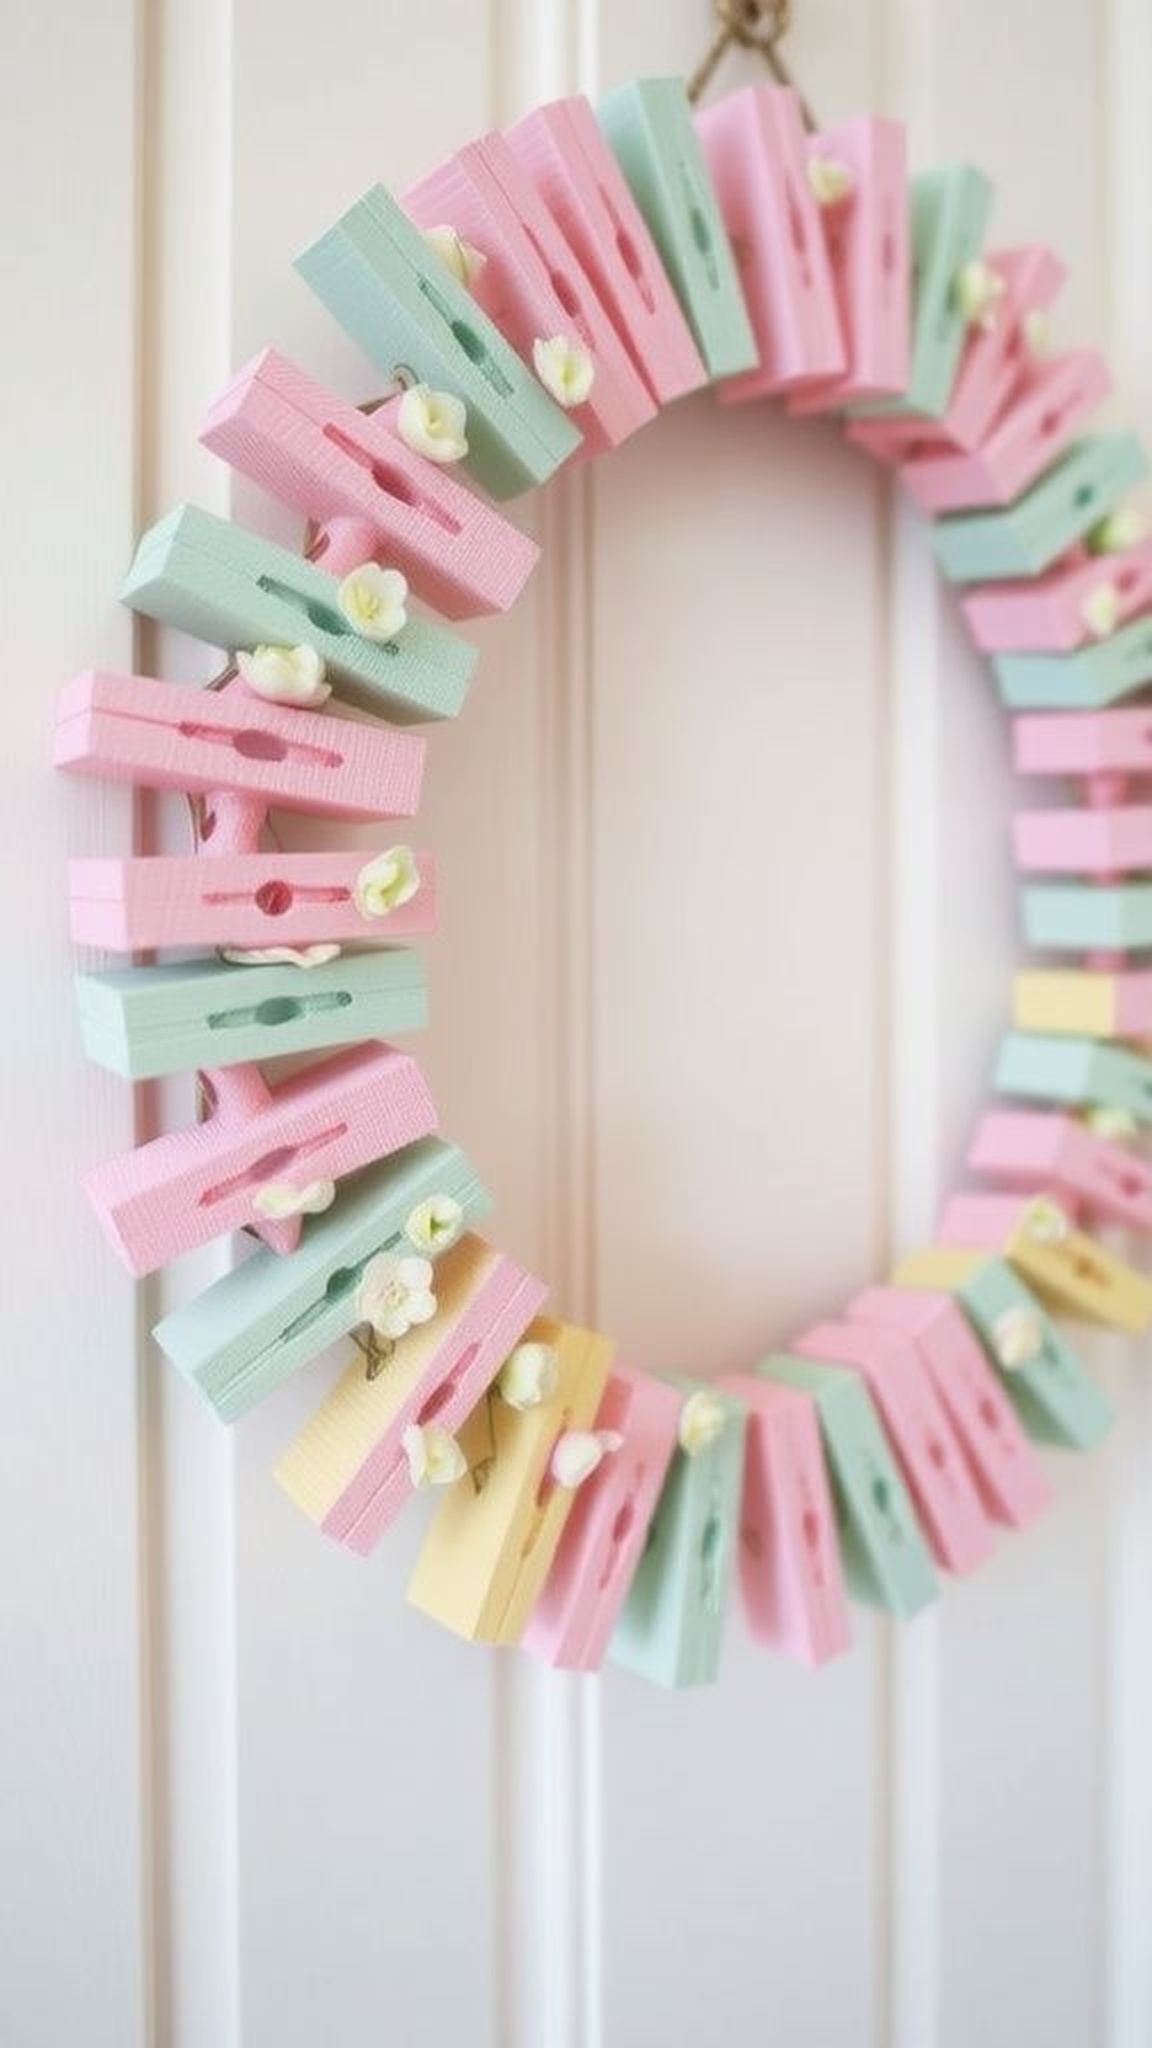
A ring of clothespins tightened around a wire base became a halo of tiny petals when pastel paint and powdered chalk were blended over them. Each clipped piece created a radial rhythm that felt both rustic and deliberately playful.
The smell of citrus cleaning solution lingered faintly from an earlier rinse and the tactile click of a clothespin still echoed in memory. Hung on an interior door, the wreath offered a delicate, slightly fuzzy outline that caught breezes and brushed against passing sleeves.
Guests often paused to run a finger along the painted edges.
Steps
- Arrange wooden clothespins around a circular base, spacing them evenly for a full silhouette.
- Add soft color to each clothespin with a sponge or brush, blending chalk pigment for a matte finish.
- Glue small silk or paper flower centers into the pin gaps to suggest blossoms.
- Hang on a light hook where the wreath can catch a draft and move gently.
Ribbon and bead bookmarks with playful tassels
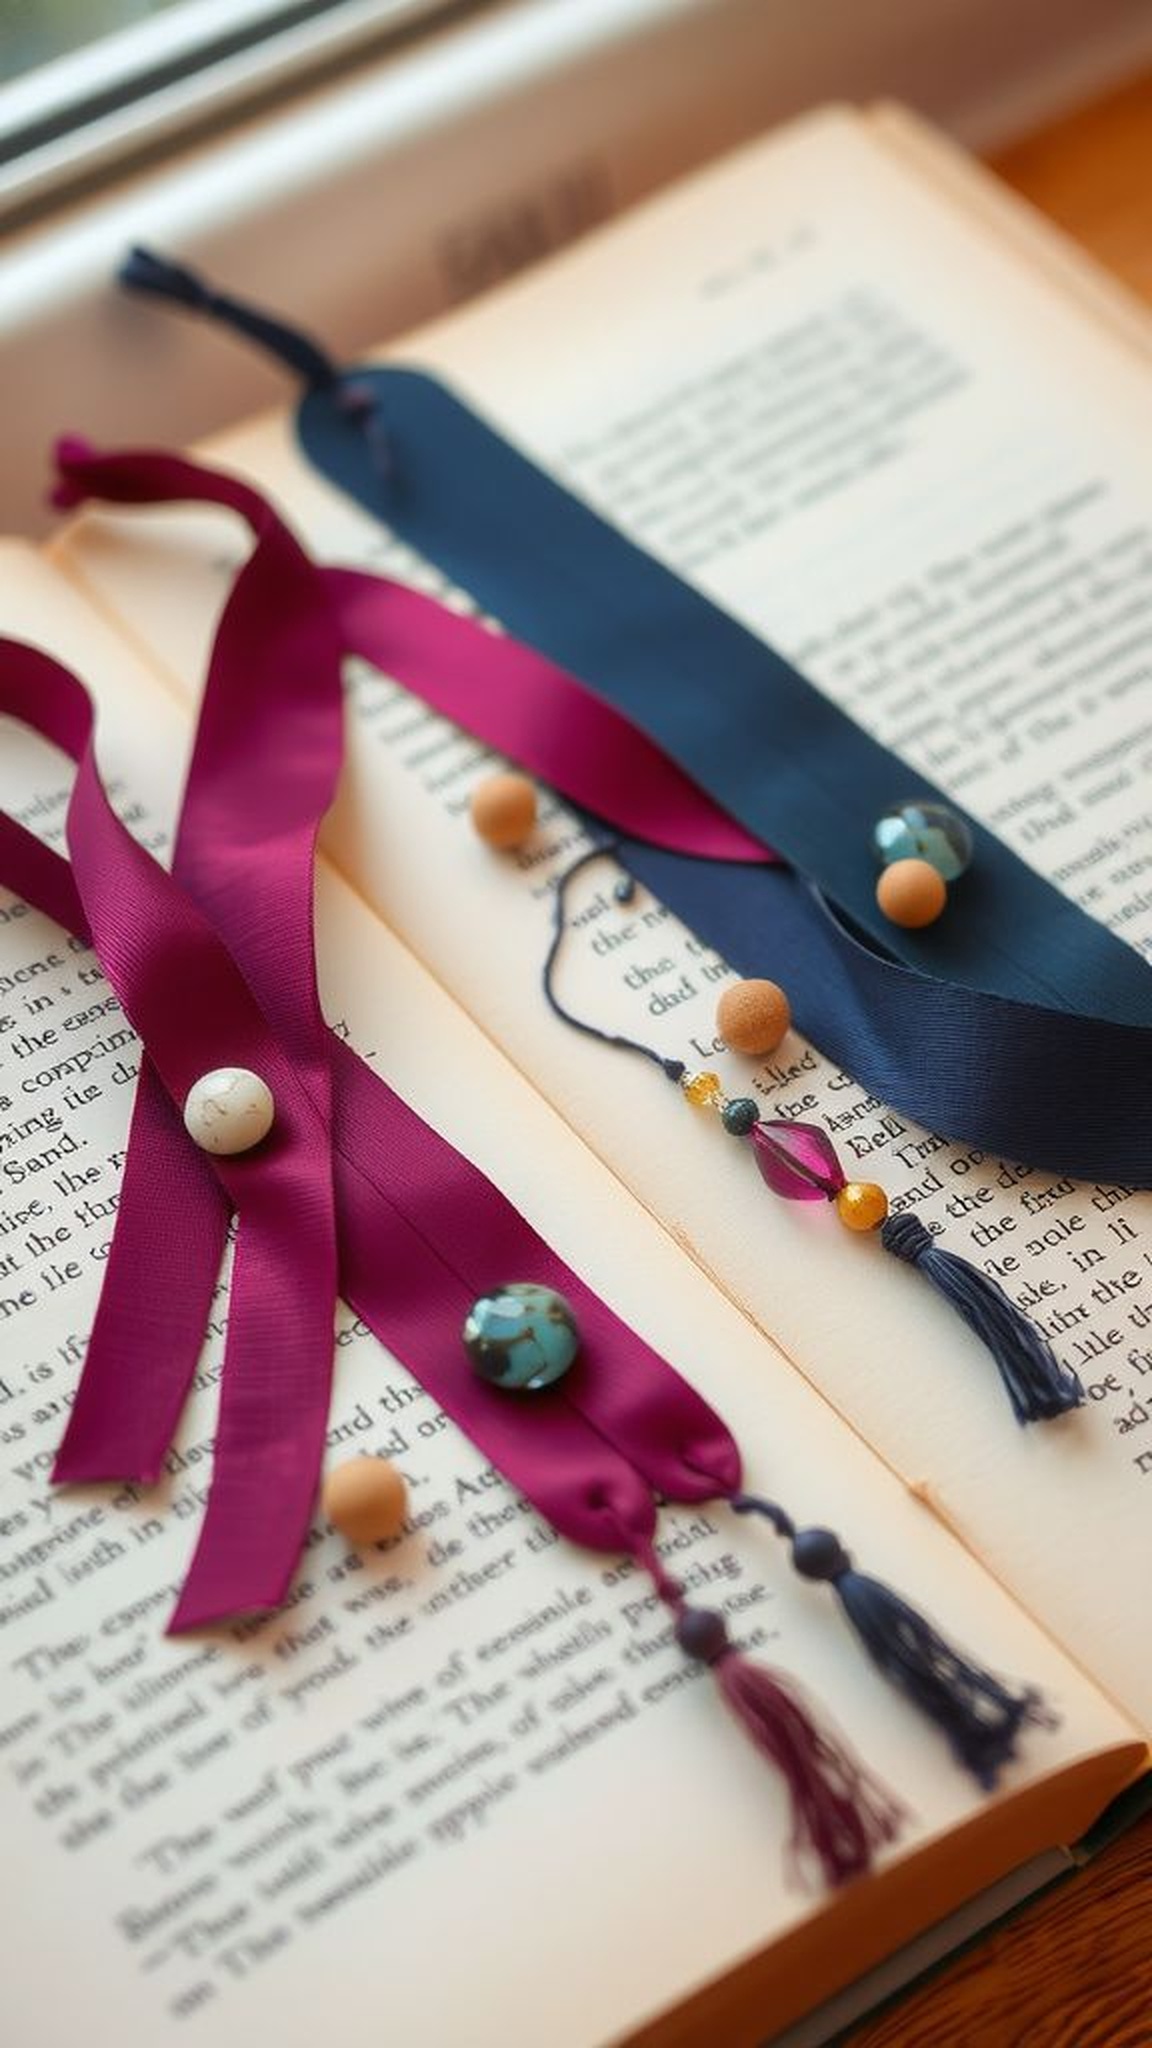
A strip of grosgrain ribbon looped with cheerful beads made reading feel like a small ritual again. The ribbon rubbed warmly between fingers, and the bead clink became a secret percussion as pages turned.
Tassels fluttered with a soft swish when the book was closed, carrying a faint scent of the craft table. These bookmarks rested in the seam of novels and journal pages, introducing a tiny ritual of returning to a page.
They felt handcrafted without being precious, and handing one to a friend almost felt like passing along a little promise.
Steps
- Cut ribbon lengths to preferred bookmark size and seal edges lightly to prevent fraying.
- Thread beads onto a thin cord and knot at the end, leaving a short tail for a tassel effect.
- Secure the beaded cord to the ribbon end with a small clamp or adhesive for a finished look.
- Slip between pages and enjoy the soft weight as a gentle page marker.
Mosaic coaster made from broken tiles and beads
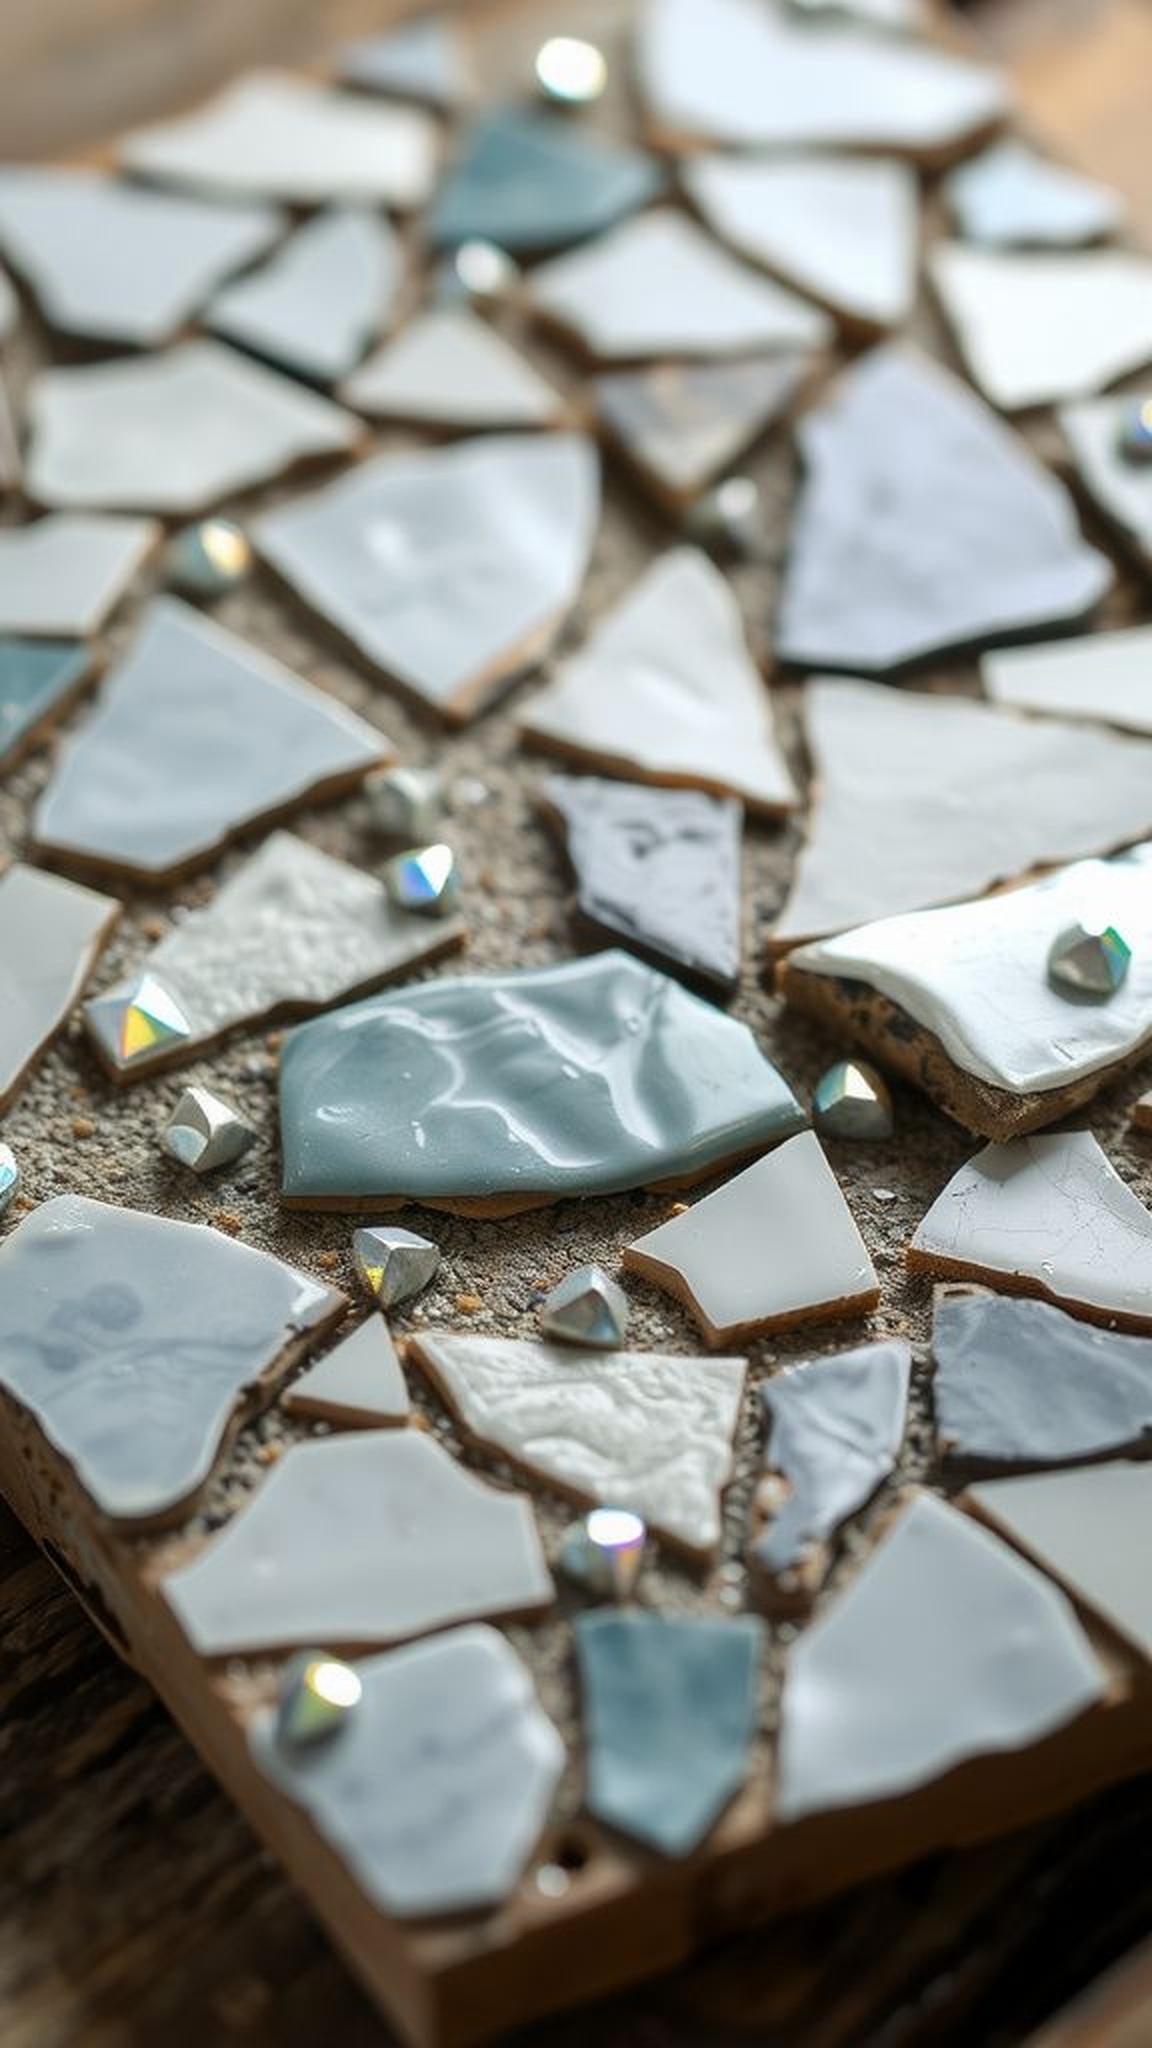
The tabletop gained a tiny constellation where broken bits of tile met glass beads. Irregular edges created a tactile map, and grout lines formed delicate rivers between shards.
Cold ceramic against warm hands felt pleasingly contradictory when a cup was set down, and the beads winked in lamp light like little accents. The coaster became a small artifact of afternoons spent tinkering, a durable little island for mugs and glasses.
It sat boldly amid mismatched cups and softened accidental drips with a confidence that felt quietly decorative.
Steps
- Arrange tile shards and beads on a flat base until the composition reads well to the eye.
- Adhere the pieces onto the base with a thick craft adhesive, leaving small gaps for grout.
- Mix grout to a creamy consistency and press it into the gaps, wiping excess with a sponge.
- Allow to cure fully, then buff the surface for a clean finish suitable for tabletop use.
Bottle cap magnets recalling seaside memories
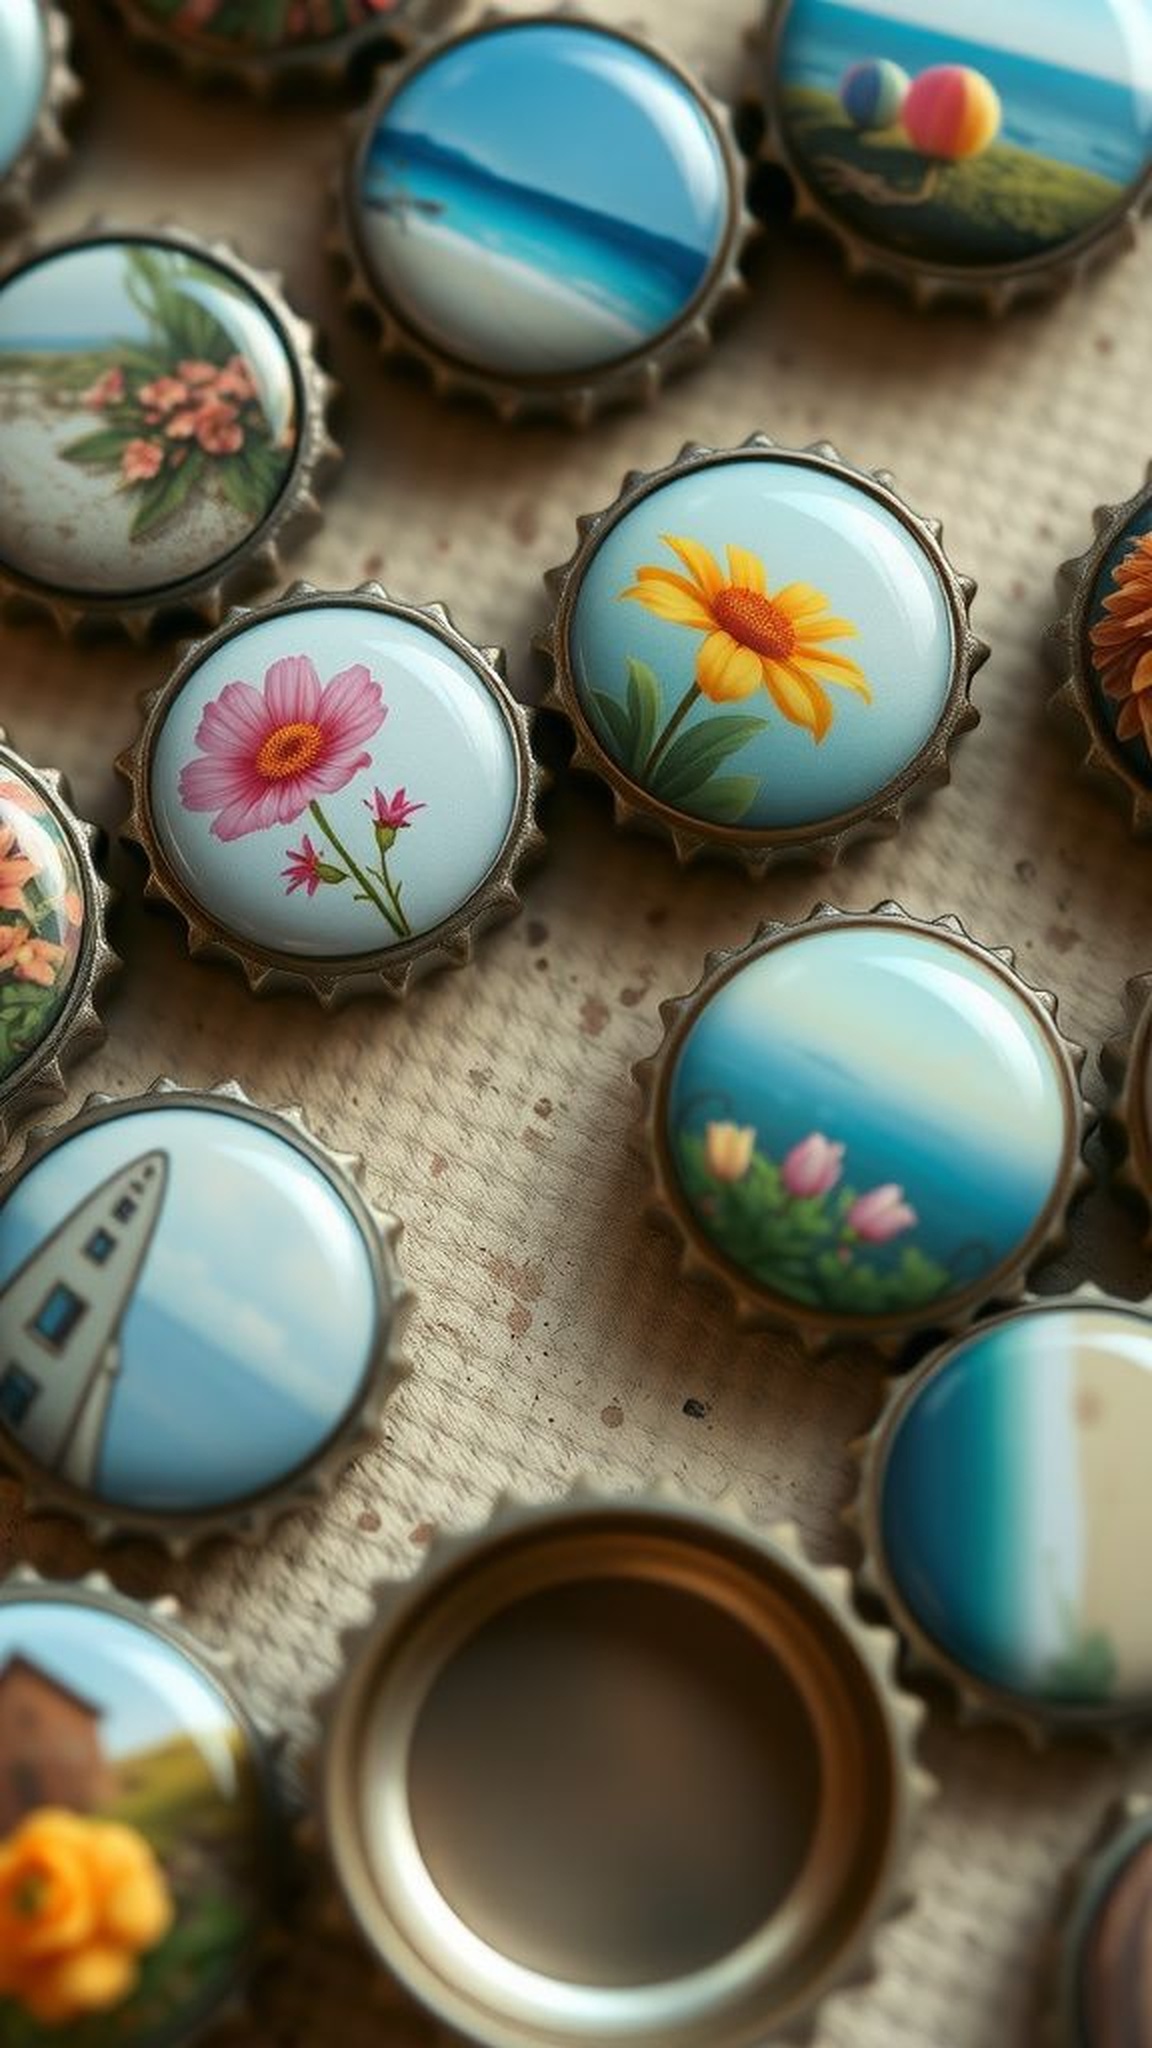
Tiny metal caps became little memory frames when small images and a glossy finish sat inside each well. The edges were cool to the touch and the mini scenes summoned shoreline afternoons and sticky ice cream palms.
Attaching a magnet turned each cap into a humble story-picker for the fridge, where grocery lists met tiny waves and shells. Handling them felt reassuring, like sorting through a box of postcards.
When the light hit the glossy surface, the images popped with a miniature clarity that made the whole refrigerator feel friendlier.
Steps
- Press a small image or patterned paper into the bottle cap bowl and trim edges to fit neatly.
- Add a clear resin or epoxy layer over the image to create a glossy, protective surface and let it level.
- After full curing, glue a round magnet to the back of the cap and let set.
- Arrange the magnets on metal surfaces for a playful, story-like display.
Mini terrarium in a recycled fishbowl centerpiece
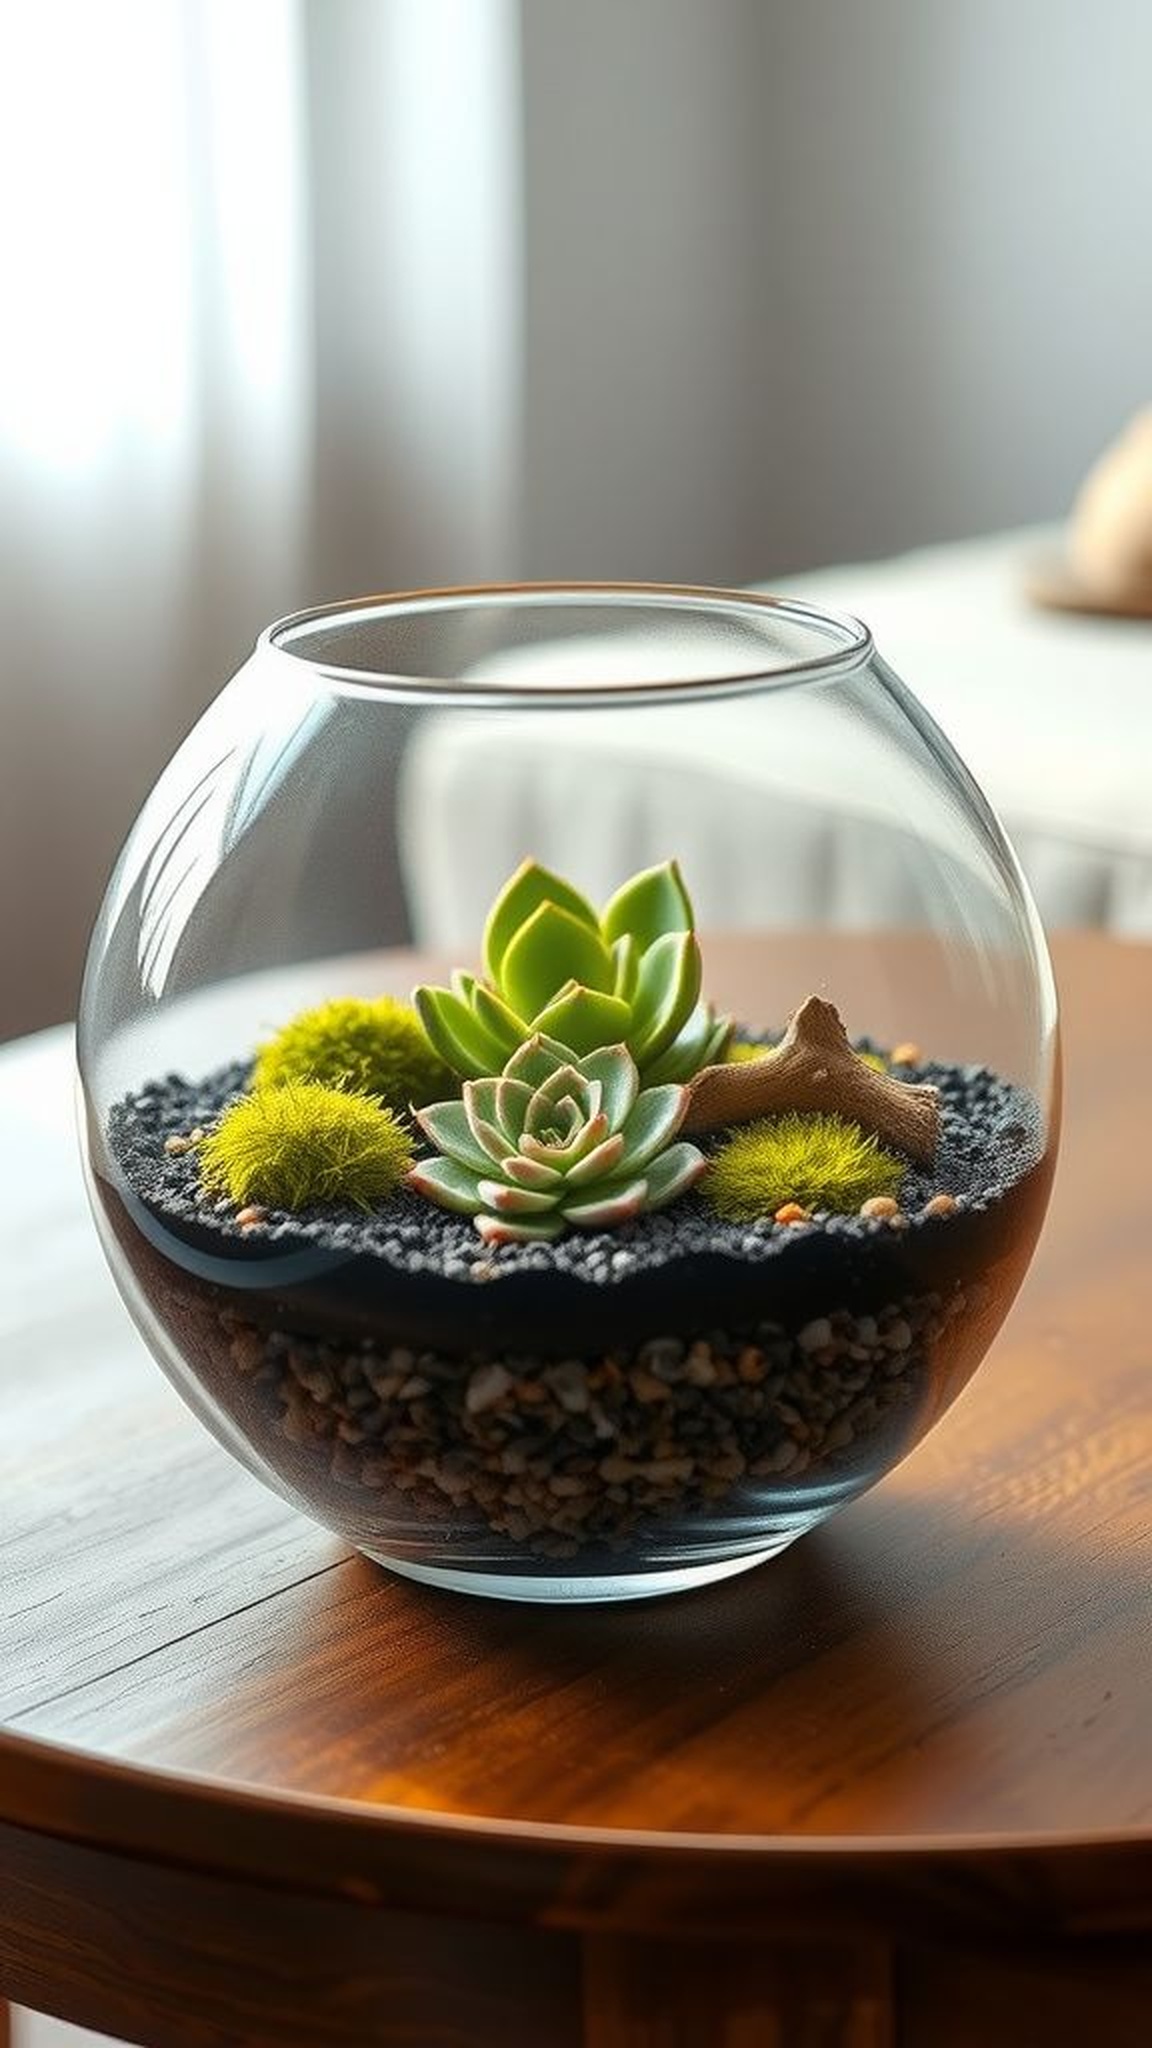
A small glass bowl held a sweet, contained world where pebbles, moss, and miniature plants lived in layered quiet. Damp soil smelled of cool earth and peaty invitation, and the glass curved like a lens that magnified tiny leaf textures.
Tiny figurines or a bit of driftwood created scale and a sense of narrative. The terrarium sat on a coffee table and invited low-attention care, the kind that fits into busy days.
Watching a fog form on the glass in the morning felt oddly meditative, as if time slowed for the tiny garden.
Steps
- Layer small pebbles and activated charcoal at the bowl base for drainage and freshness.
- Add a thin layer of succulent or terrarium soil, then position small plants and moss with gentle spacing.
- Place a tiny decorative element like a miniature driftwood piece or figurine for scale.
- Mist lightly and set in bright, indirect light, checking moisture occasionally to keep the microclimate stable.
Foam letter wall art with textured fabrics
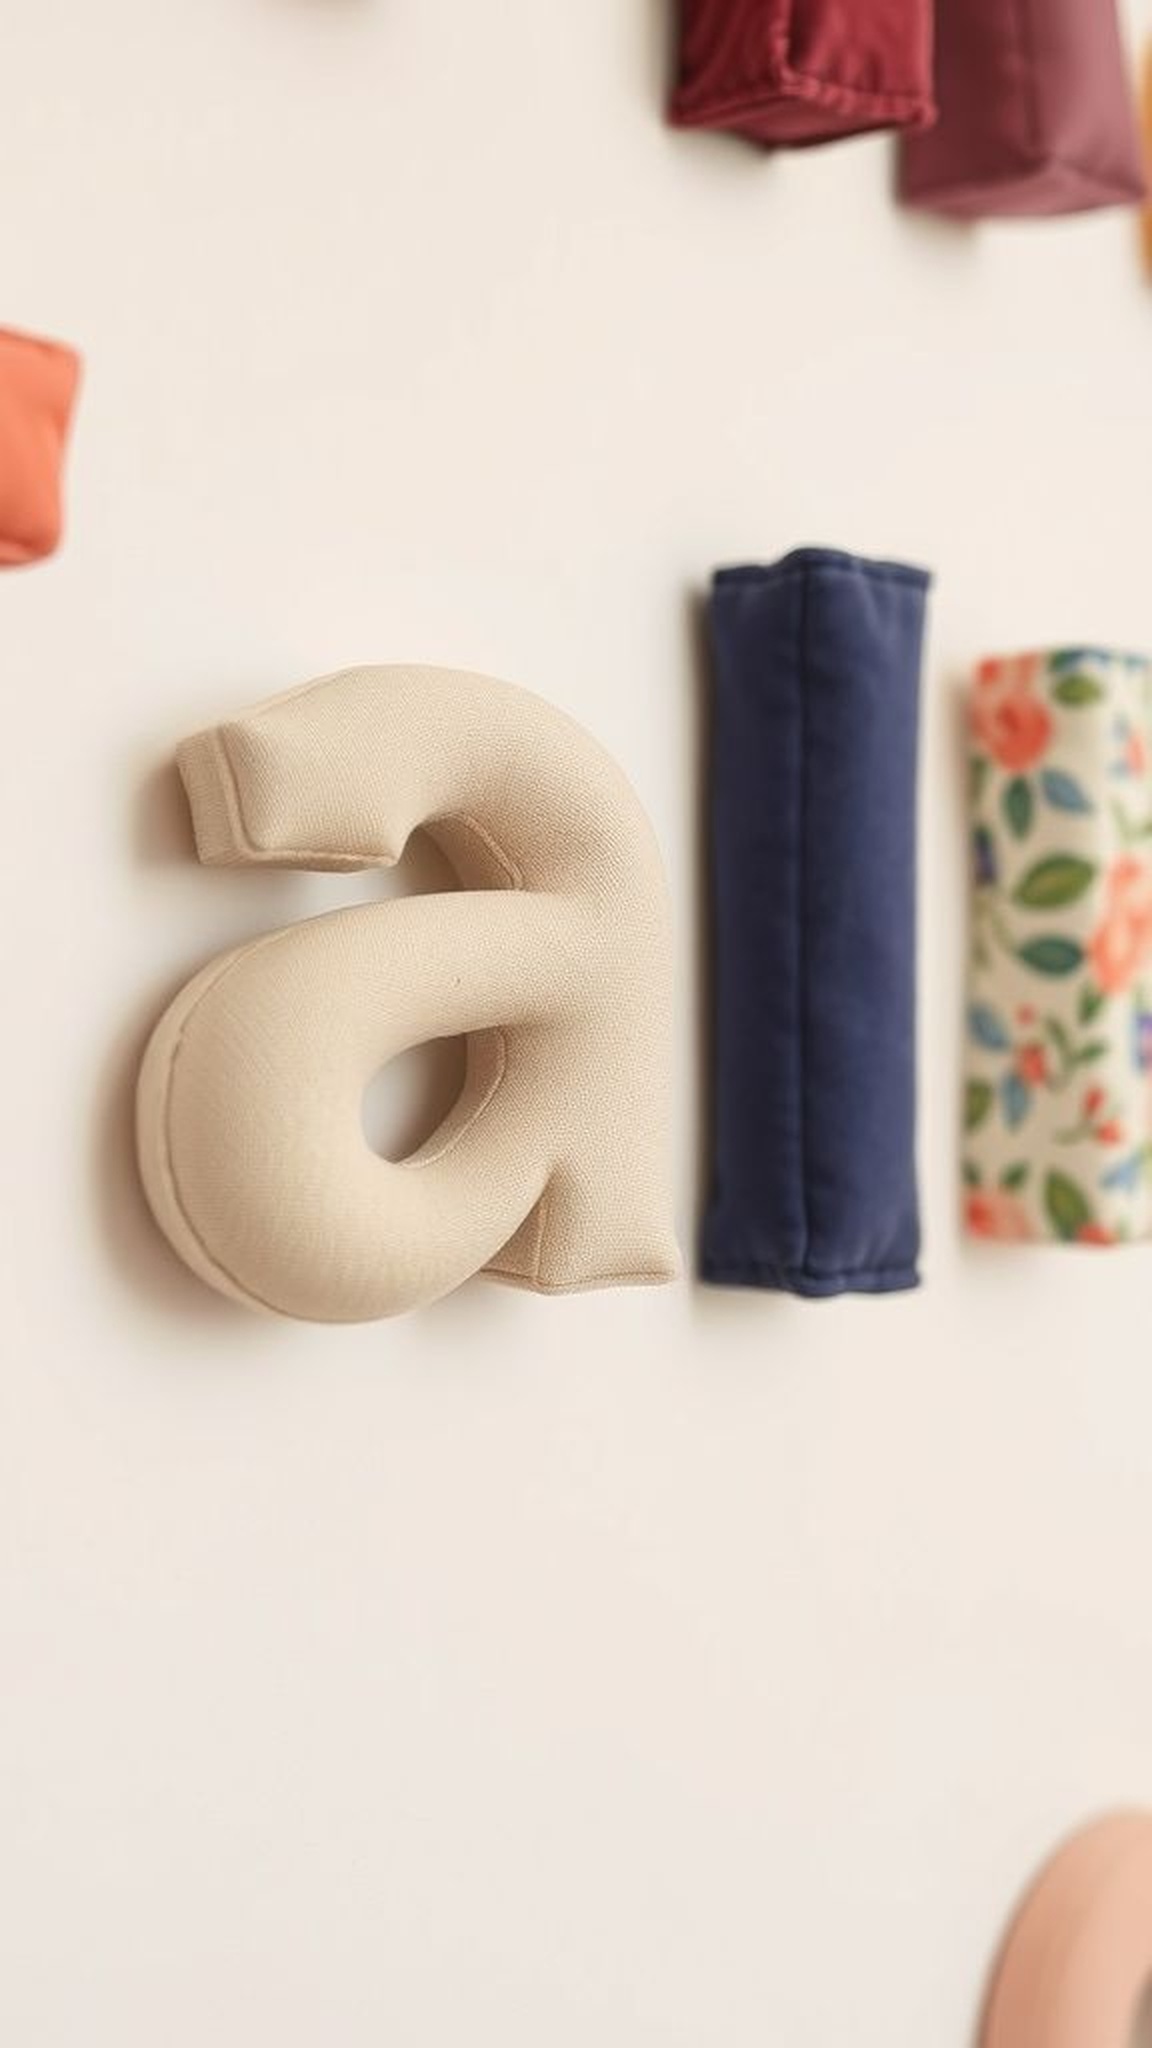
Large foam letters covered in bits of fabric turned a blank wall into something playful and tactile. Each letter offered a patchwork of textures that invited a fingertip linger: velvet patches, linen swatches, and a scatter of sequins catching room light.
The letters carried a hand-sewn charm and the slight unevenness made the arrangement feel entirely human. From across the room the installation read like a friendly headline, while up close it revealed tiny stitches and subtle color shifts.
It breathed warmth into a study corner and made the wall feel less like a wall and more like a curated mood.
Steps
- Select foam letters and arrange fabric scraps over them to plan a pleasing color and texture layout.
- Adhere the fabric onto the foam surfaces with a flexible craft adhesive, smoothing gently to avoid bubbles.
- Trim excess fabric around edges for a neat silhouette and tuck seams for a finished appearance.
- Hang letters on the wall with removable mounting hardware suitable for the wall type.
Glitter shaker greeting cards with confetti windows
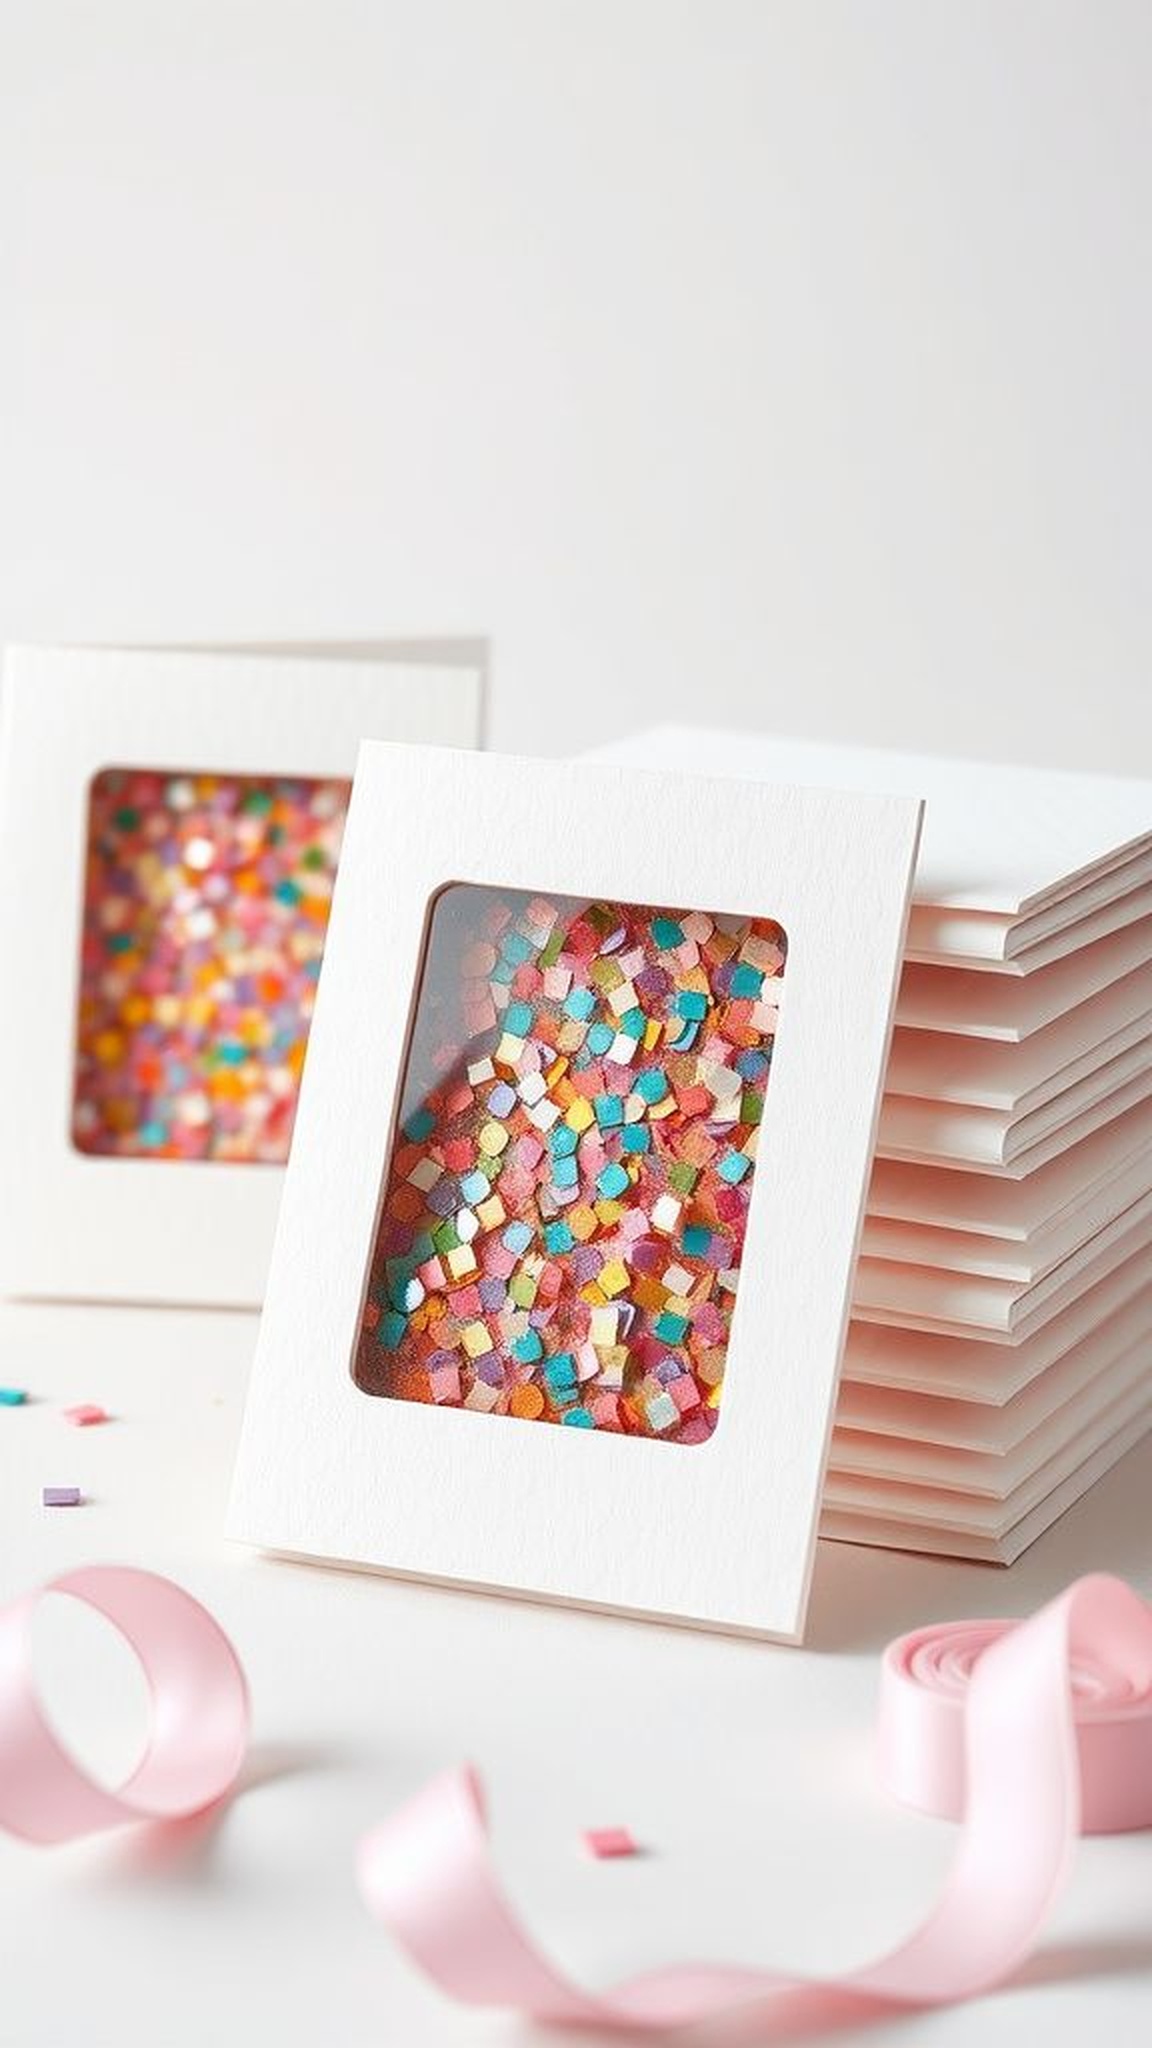
A clear window holding tiny glitter and confetti made each card feel like a pocket of celebration. The glitter moved with a soft whisper when envelopes were nudged, and the confetti colors created a small, cheerful storm behind translucent plastic.
The card stock had a reassuring weight and the glued window shimmered like a tiny aquarium. Writing a note inside felt important, as if the card itself had staked a claim on a happy sentiment.
These cards arrived folded into mailboxes and left small, unexpected smiles on kitchen counters.
Steps
- Cut a window from card front and adhere a clear plastic backing to create an enclosed pocket.
- Pour a small mix of glitter and confetti into the pocket, ensuring colors play well together.
- Seal the edges with strong adhesive so the pocket stays closed during handling.
- Add a handwritten note inside and present the card folded with the shaker window on display.
Pom-pom garland with cozy yarn textures
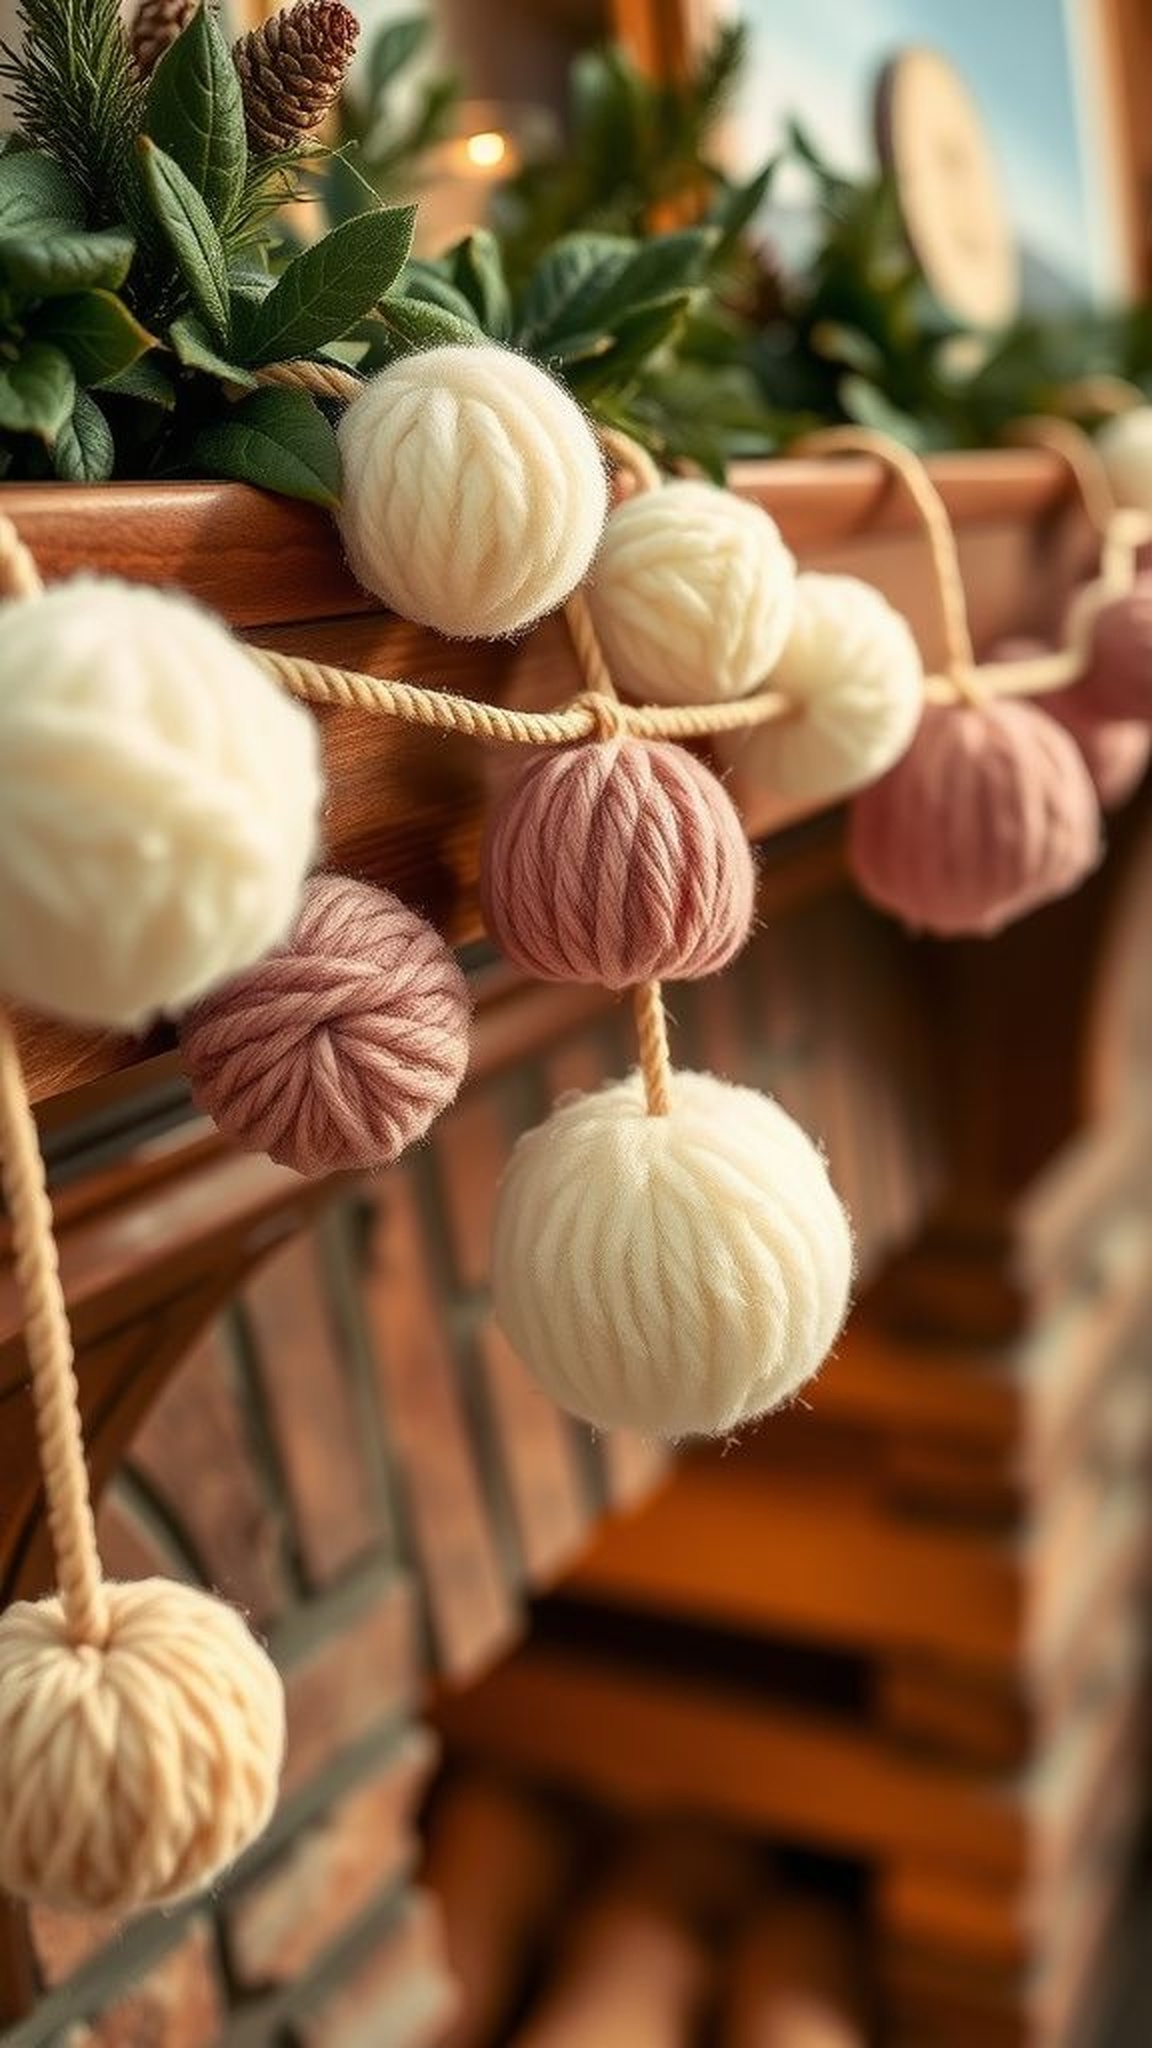
A long strand of fluffy pom-poms draped over a mantel and turned the room into something instantly softer. Each pom-pom had a skein of air trapped inside, making the garland feel light when lifted yet cozy when it brushed a shoulder.
The yarn smelled faintly of wool and craft-store freshness, and the palette of muted neutrals offset a bright throw pillow nicely. The garland moved with a gentle, sleepy rhythm if a window opened, catching light and casting small fuzzy shadows on the wall.
It looked like a party that never quite ended, in the best way.
Steps
- Form pom-poms from yarn in chosen colors, trimming for consistent roundness and fluff.
- Thread the garland cord through the center of each pom-pom, spacing them to taste for fullness.
- Knot the cord ends and add small loops for hanging on hooks or nails.
- Drape across mantels or pin to a wall for a soft decorative sweep.
Glittered utensil holder turning spoons into display
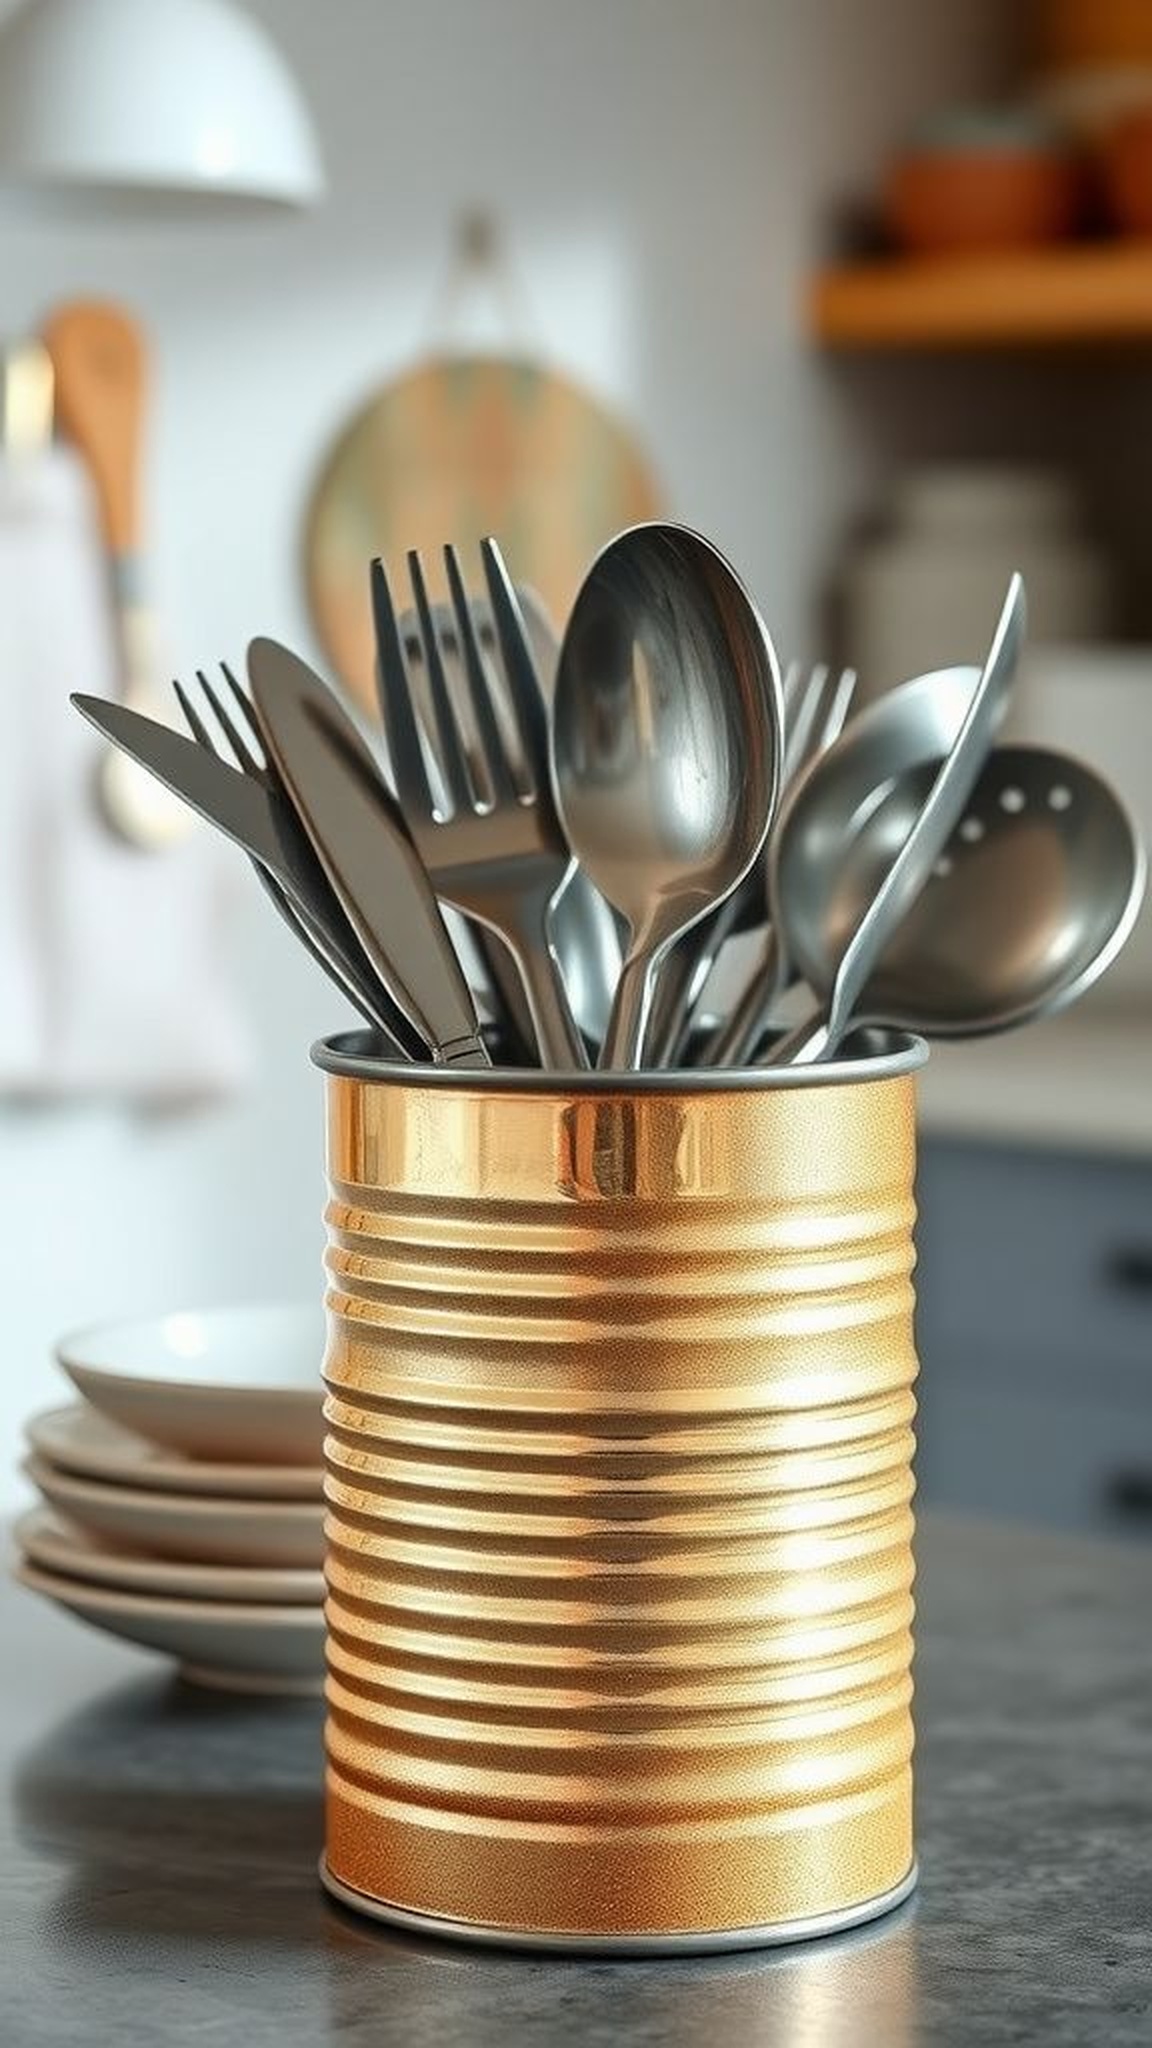
A simple tin can transformed into a small stage when splattered with glitter that caught kitchen light. The rim felt faintly metallic against fingertips and the glittered surface shimmered like a well-loved paper lantern.
Cutlery clustered inside like a tiny forest of polished handles, reflecting flecks of sparkle. The holder sat next to a stove and survived occasional steam and splashes with a resigned charm.
It brightened muddled counters and made even mismatched utensils feel intentional, like chosen accents rather than thrown-together tools.
Steps
- Clean and dry a metal can, then apply a thin layer of craft adhesive across the exterior surface.
- Sprinkle fine glitter over the adhesive, tapping off excess to reveal an even shimmer.
- Seal the glitter with a clear, water-resistant sealer so it withstands kitchen use.
- Place utensils inside and enjoy the added sparkle on everyday tasks.
Decoupaged napkin tray with layered patterns
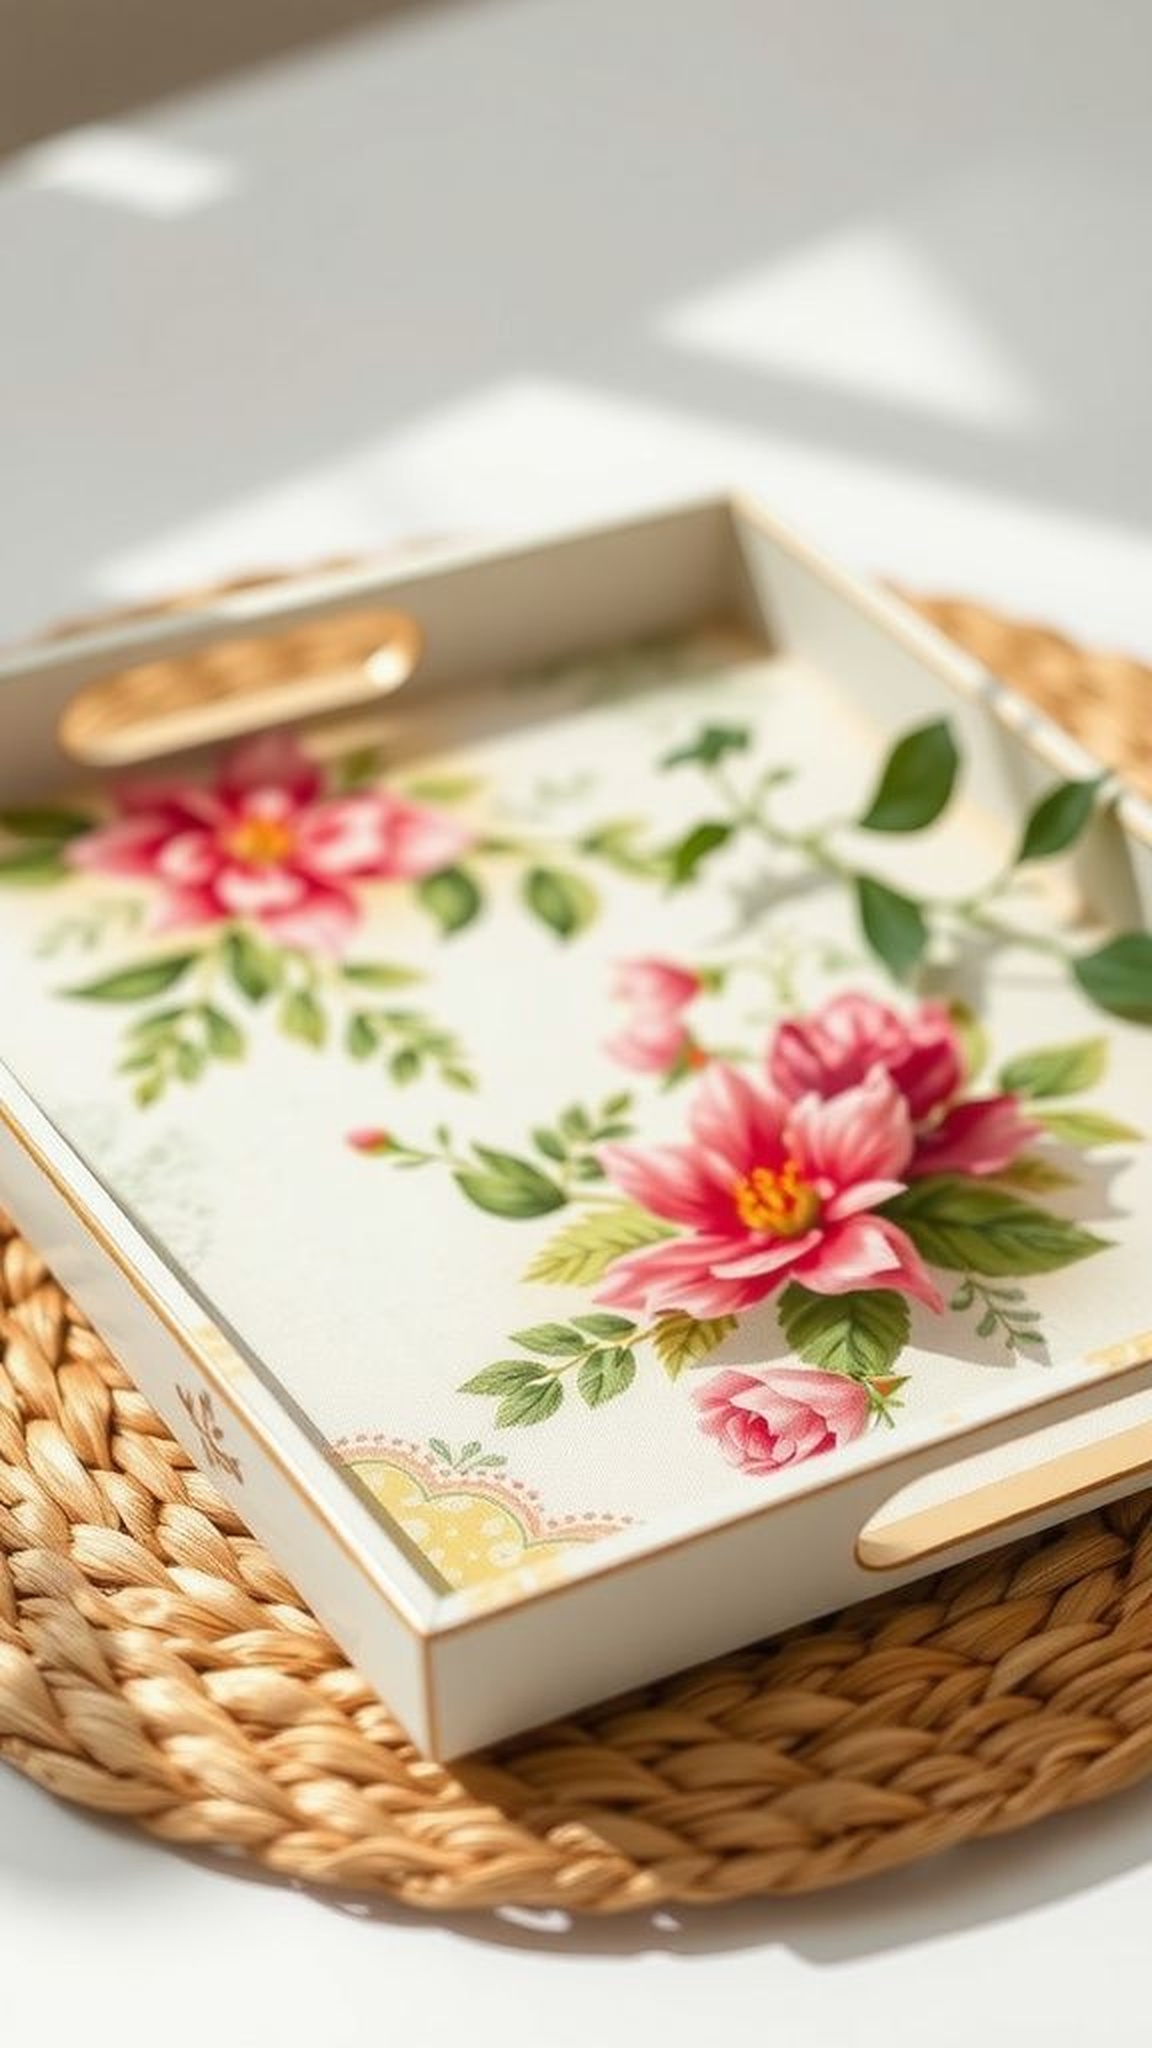
An everyday serving tray gained a layered personality when delicate napkin papers overlapped like a collage. The surface felt slightly rippled where layers met, and colors mingled in unexpected ways—subtle florals next to bold geometrics.
The tray lifted after a hands-on session and seemed lighter, as if the added pattern had redefined its purpose. Passing a cup across it felt ceremonial and friendly, a small parade of textures and printed inks.
The finish gave the tray a soft sheen and protected it from coffee rings, so it stayed in gentle rotation for casual hosting.
Steps
- Arrange patterned napkin layers on the tray surface until the composition reads as a cohesive collage.
- Apply thin coats of a decoupage medium over the napkins, smoothing gently as each layer dries.
- Continue layering and sealing until the entire surface is covered and protected.
- Let the tray cure fully before placing cups or plates on top.
Salt crystal candle holder with beachy vibes
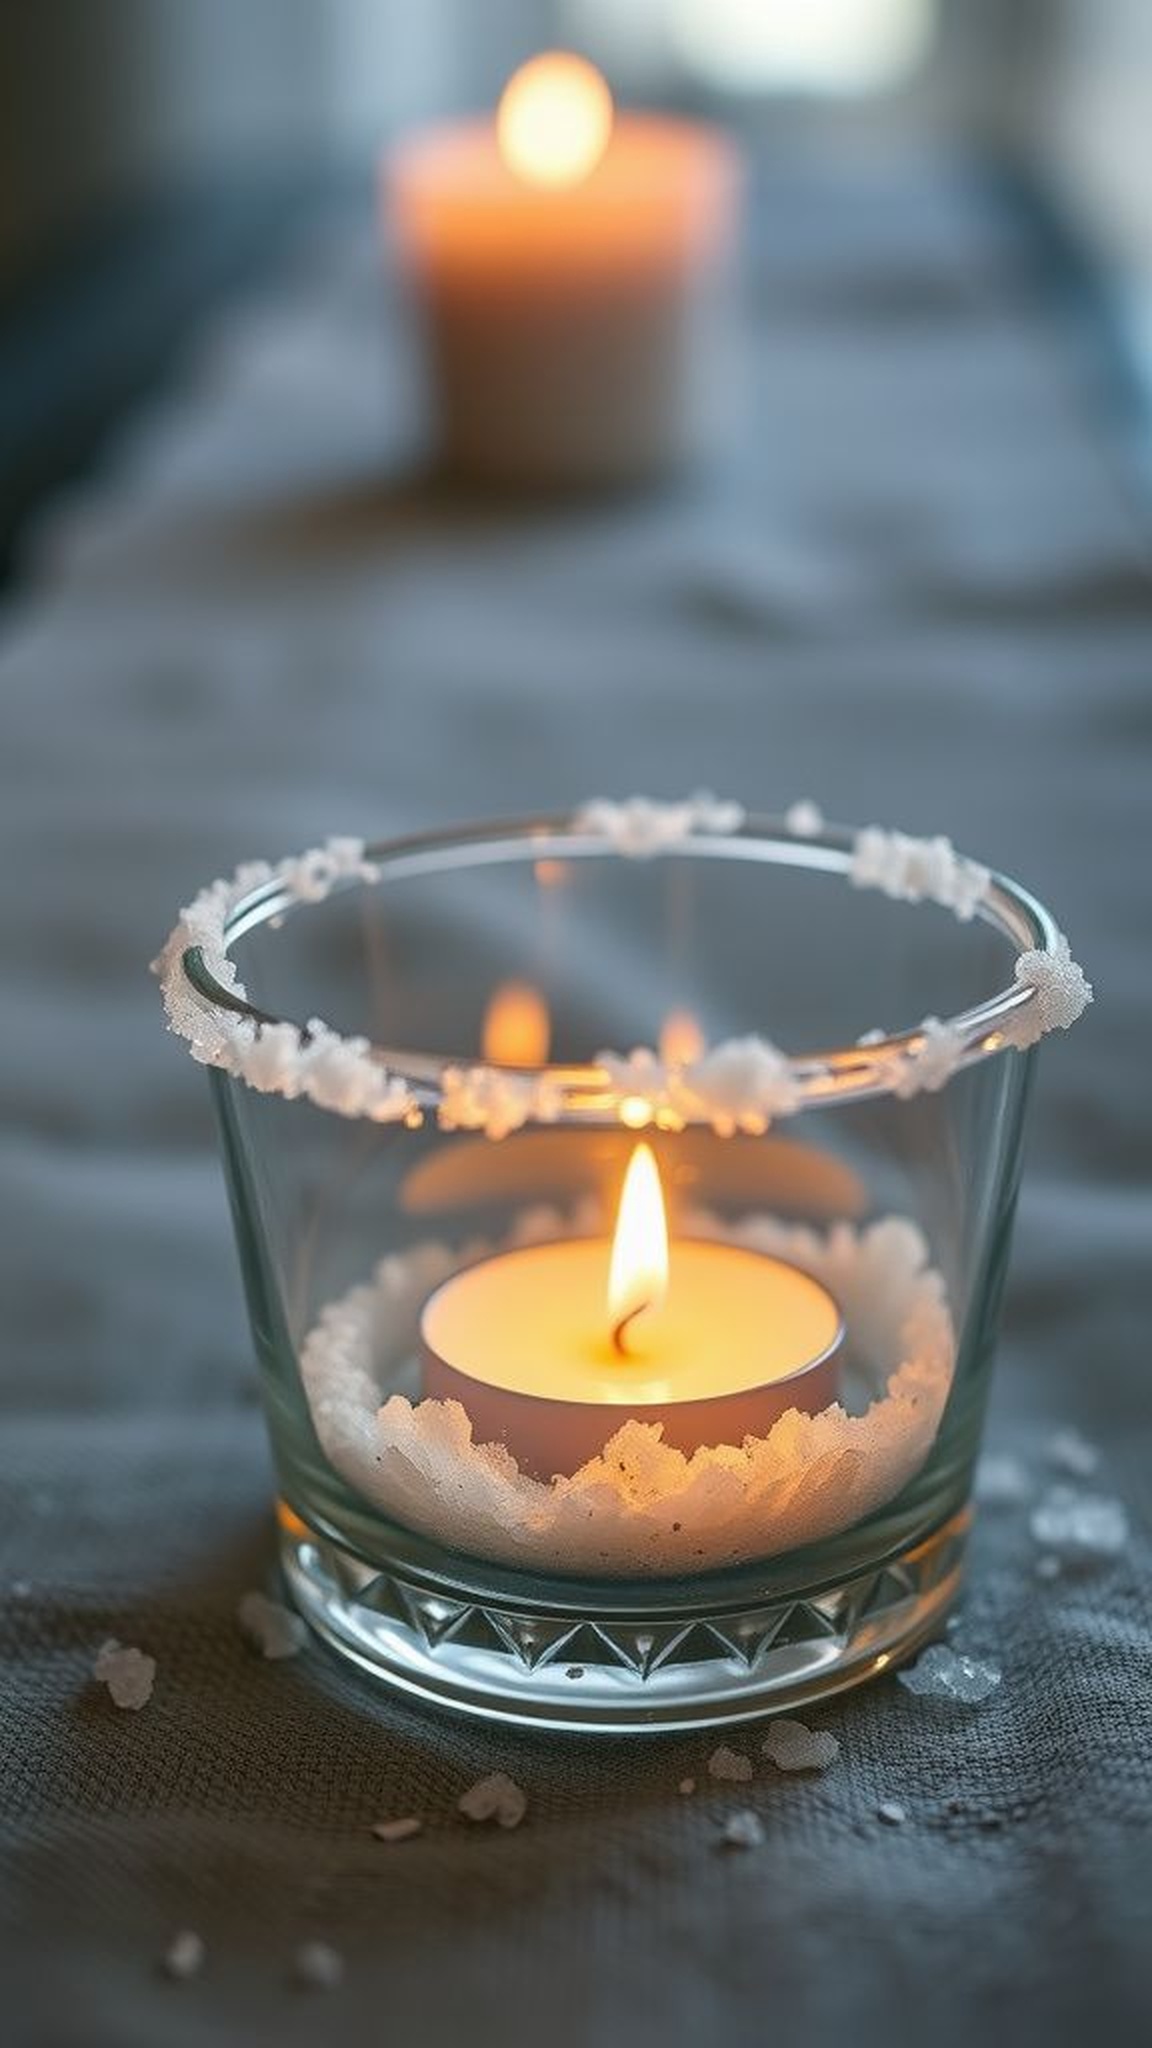
Coarse salt crystals glued around a glass votive refracted candlelight into tiny prisms that felt nostalgic and marine. The crystals created a rough coastline around the rim while the flickering flame inside sent fragile sparks through the facets.
When a candle was lit, the aroma of wax combined with the mineral coolness of salt to evoke shore memories and late-summer evenings. The holder sat on a linen runner and made a modest tea light look ceremonious.
The light quality changed the room, turning the ordinary act of lighting a candle into a small, reflective pause.
Steps
- Spread a narrow band of thick craft adhesive around the outside of a glass votive.
- Roll or tap the adhesive band into coarse sea salt so crystals adhere evenly around the rim.
- Let the adhesive cure fully before placing a tea light inside the holder.
- Light the candle in a safe spot and enjoy the refracted glow through the crystal edge.
Button mosaic wall heart from mixed colors
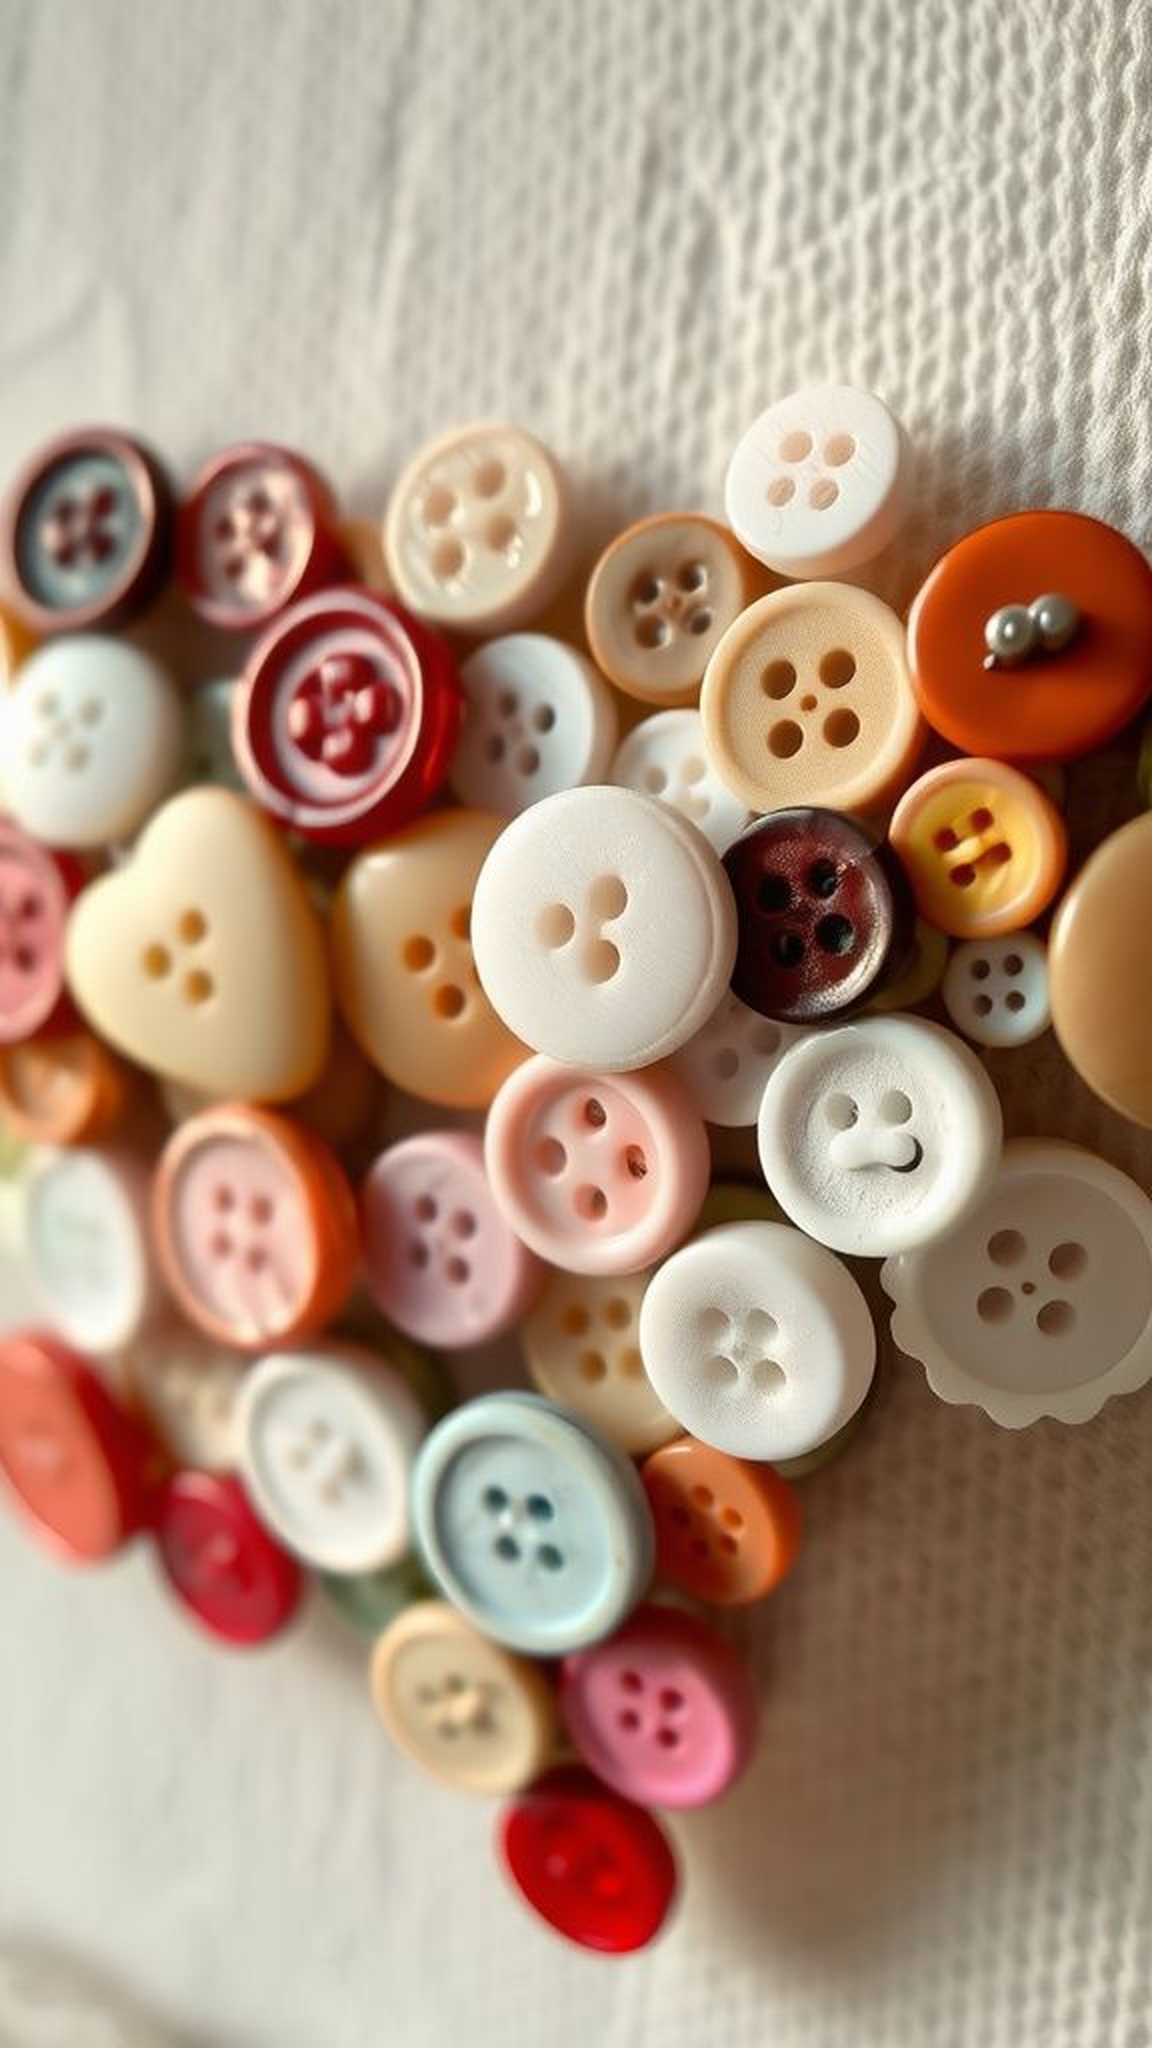
A heart formed entirely from buttons felt like a stitched memory pool, every round disc holding a tiny history. Some buttons were glossy and cool, others matte with thread holes that suggested long-ago garments.
The overall surface was tactile and slightly bumpy, catching lights differently across its curve. Hung over a bed or desk, the heart became a focal point and invited a closer look at individual buttons.
The arrangement suggested thrifted afternoons and lopsided perfection, and a fingertip drifted over the piece as if reading a braille of punctuated color notes.
Steps
- Arrange buttons on a heart-shaped base to balance colors and sizes before committing to placement.
- Affix each button to the base with a strong craft adhesive, maintaining a snug fit to eliminate gaps.
- Fill any small voids with tiny buttons or bead accents for a unified surface.
- Attach hanging hardware to the back and display on a wall where it can be admired up close.
Corkboard memo board with color-washed frame accents
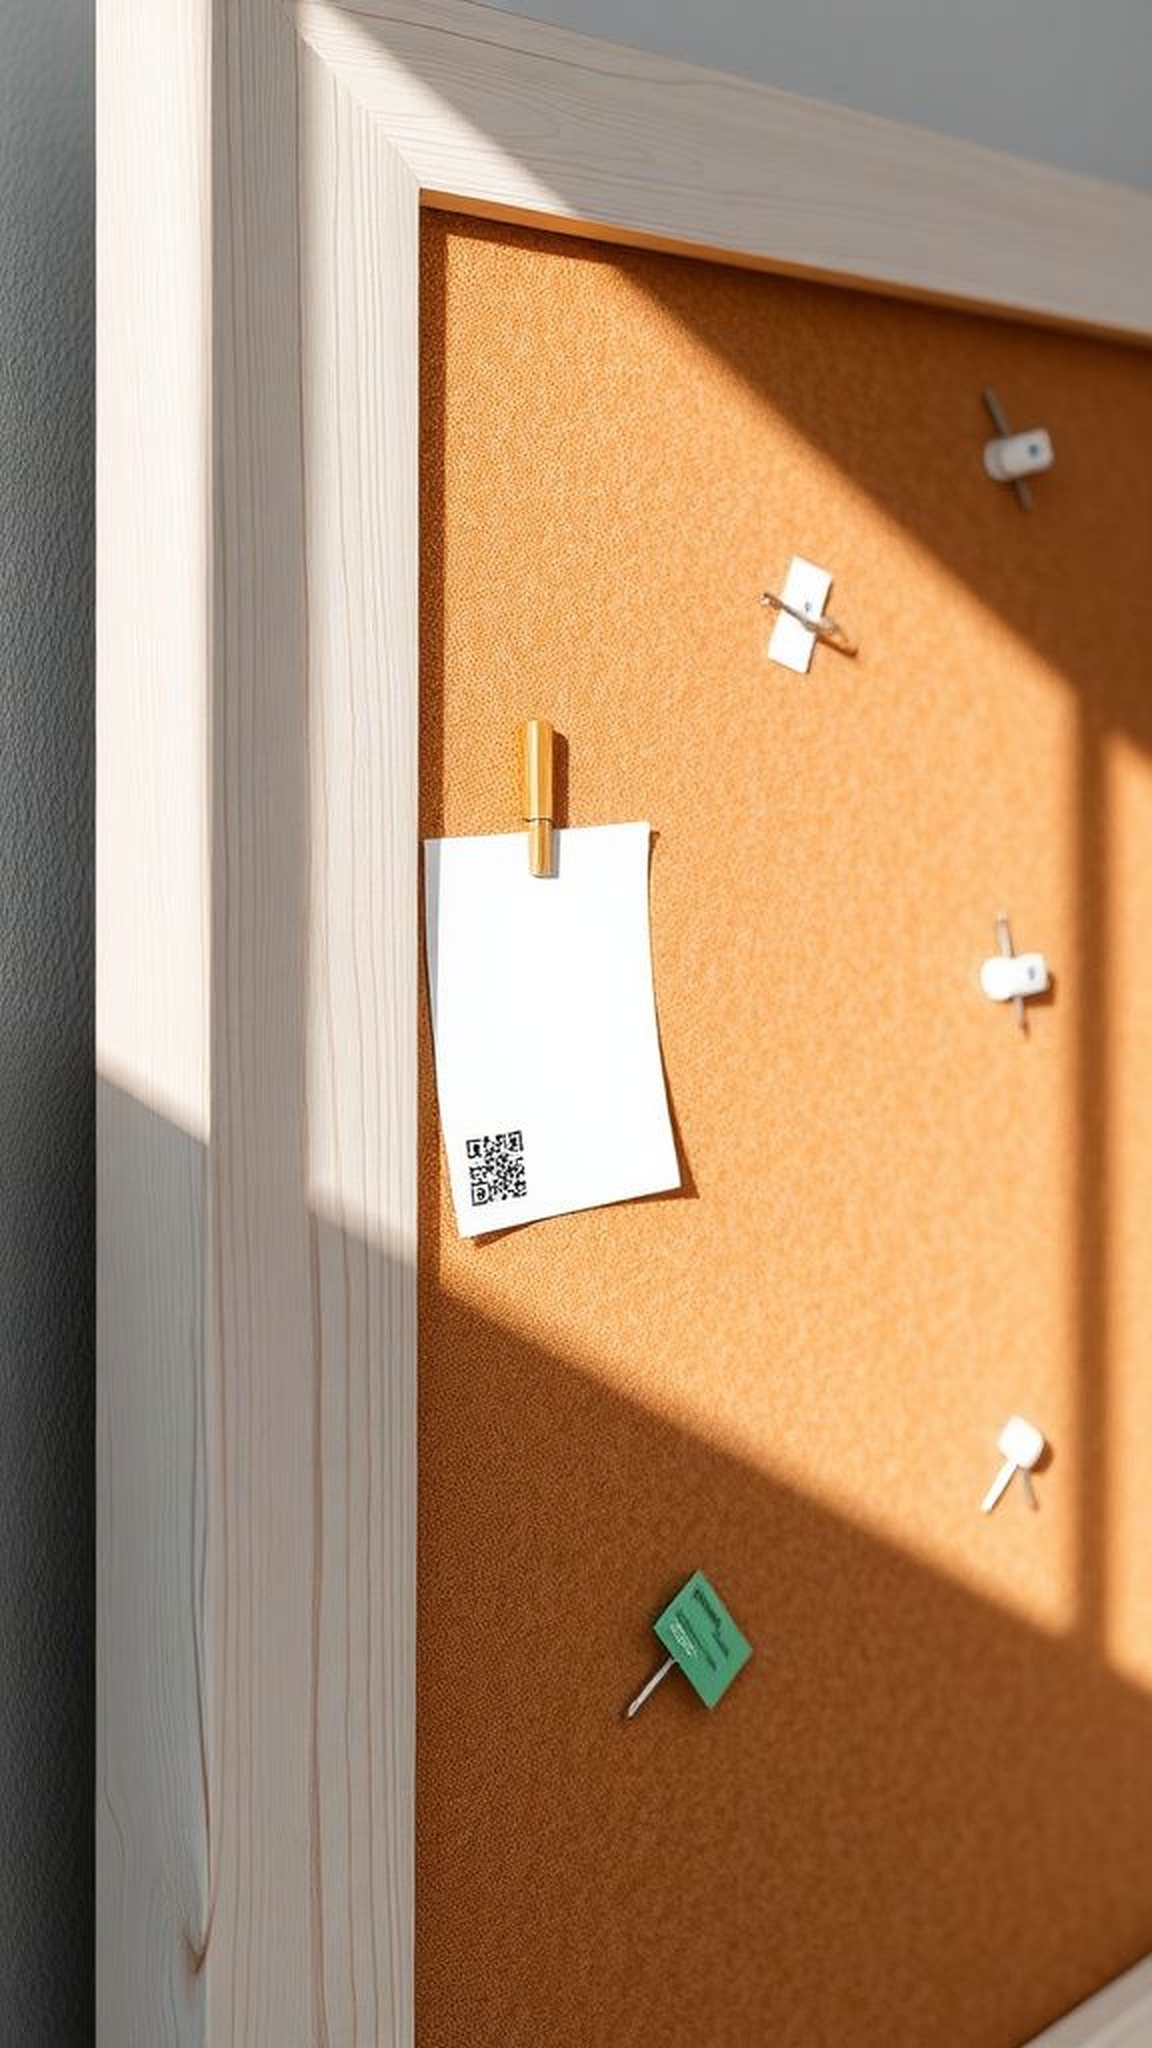
A humble cork slab gained personality when its frame received a subtle color wash that softened knots and grain. The board welcomed pins and paper scraps with a quiet practicality, while the washed frame introduced a hint of coastal palette without shouting.
Thumbtacks sank with a satisfying little give and the smell of cork carried a dry, woody angle that felt notebook-familiar. This board lived by the entryway, holding grocery scrawls and ticket stubs.
Its combination of function and a careful color whisper made passing by the wall feel slightly more intentional.
Steps
- Trim the cork to fit inside the chosen frame, ensuring snug edges for a clean finish.
- Apply a light color wash to the wooden frame so grain remains visible and let dry.
- Insert the cork into the frame and secure the backing with small tacks or adhesive.
- Pin notes, lists, and keepsakes with thumbtacks and position the board near an entry or desk.
Key holder using hardware hooks and a small board
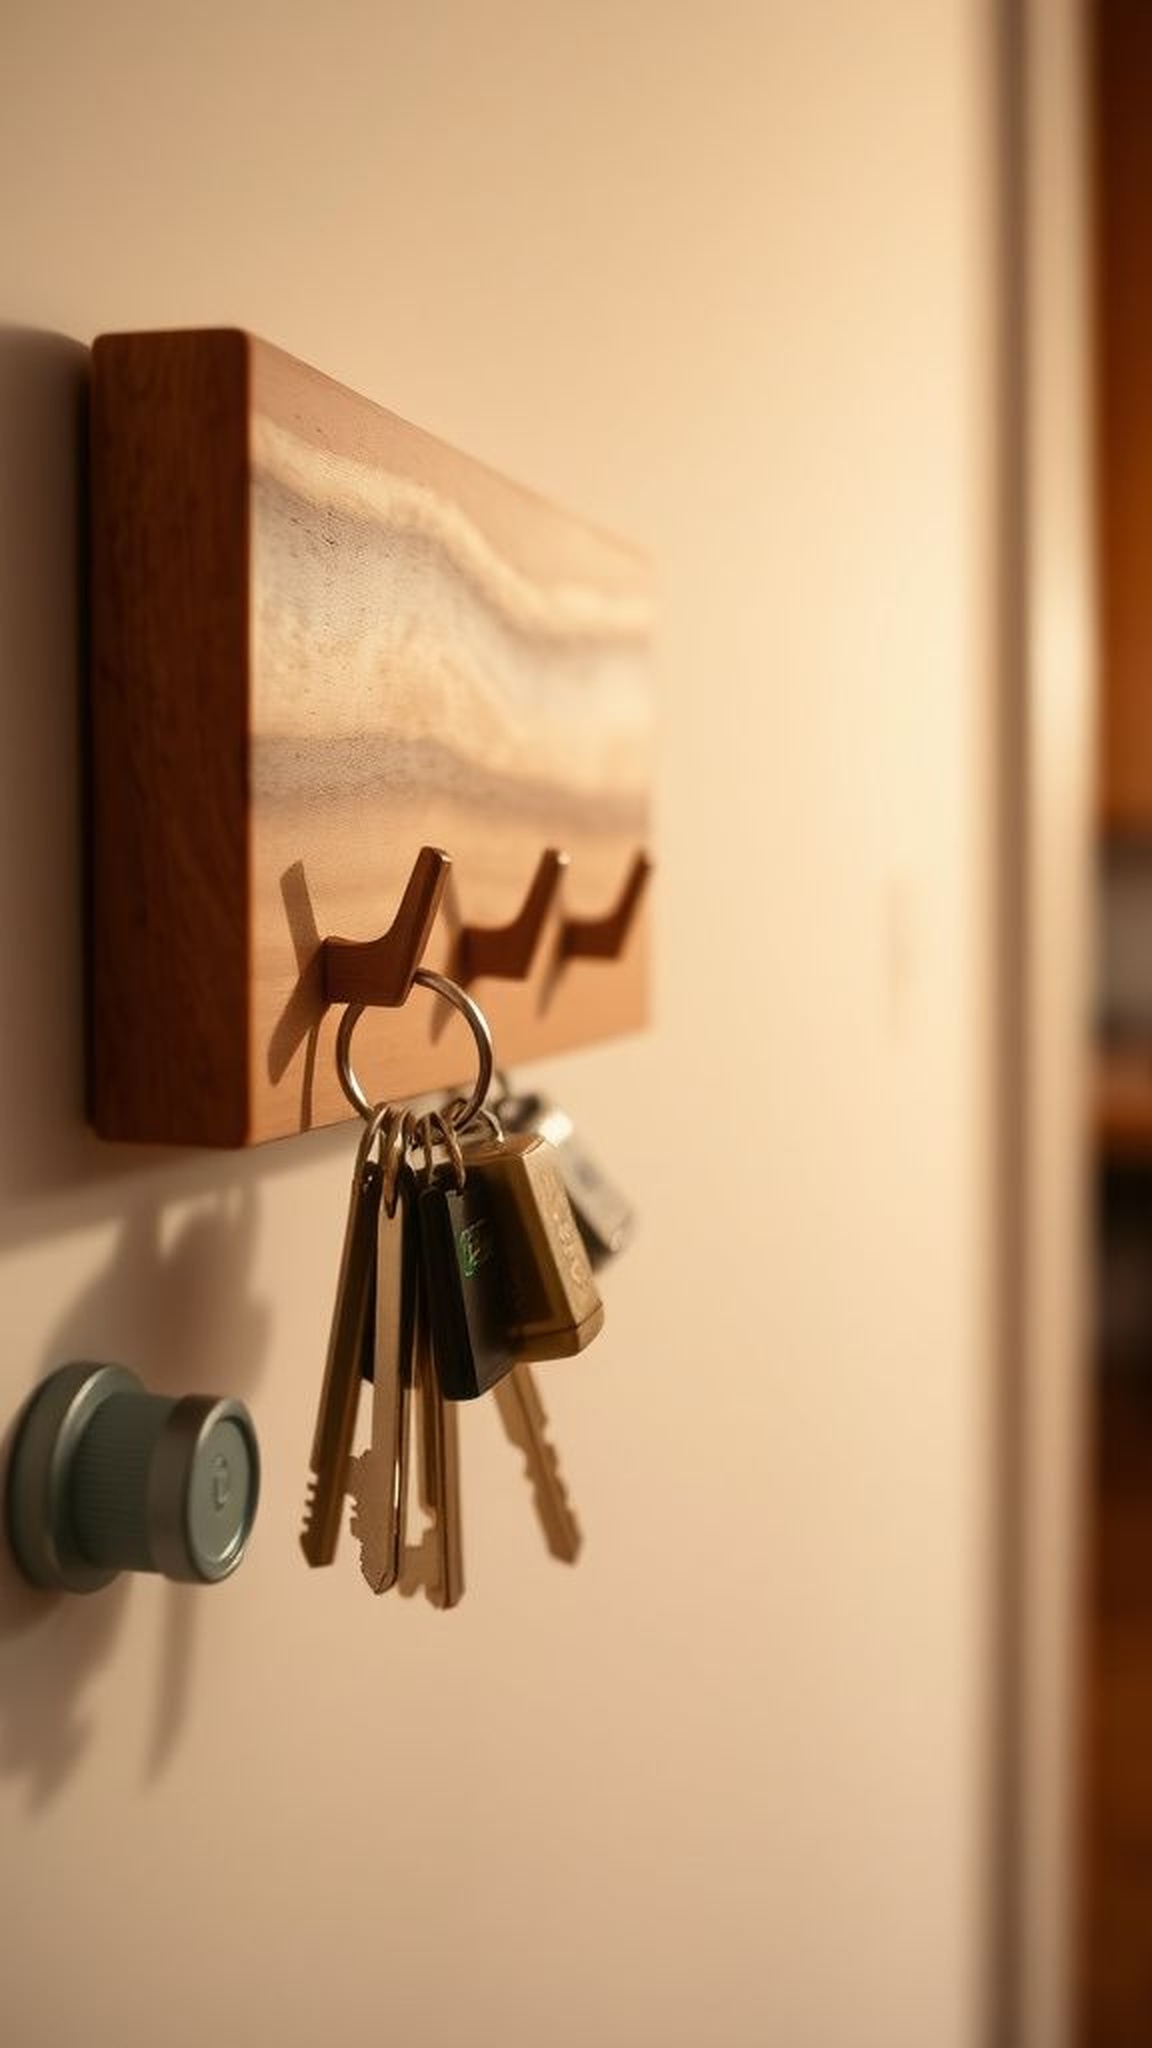
A narrow board adorned with tiny hardware hooks turned the chore of key-finding into a small pleasure. Each hook offered a glint of brass or nickel and felt cool when fingers brushed past.
The board’s patina and the light scuffs around mounting holes suggested repeated mornings and quick glances. Hanging here made routine exit-and-return moments smoother, and the rhythmic row of keys chimed faintly when picked.
The whole setup felt tidy without being fussy, a humble station that quietly said, ‘this is where things live,’ and kept the front hall quieter and less frantic.
Steps
- Select a narrow board and mark evenly spaced positions for small hardware hooks.
- Fasten the hooks into the board securely, checking alignment so keys hang straight.
- Attach wall mounting hardware to the back of the board suitable for the wall type.
- Hang the board near the entry and place keys on the hooks for easy reach.
Burlap gift bag with stamped motifs and ribbon
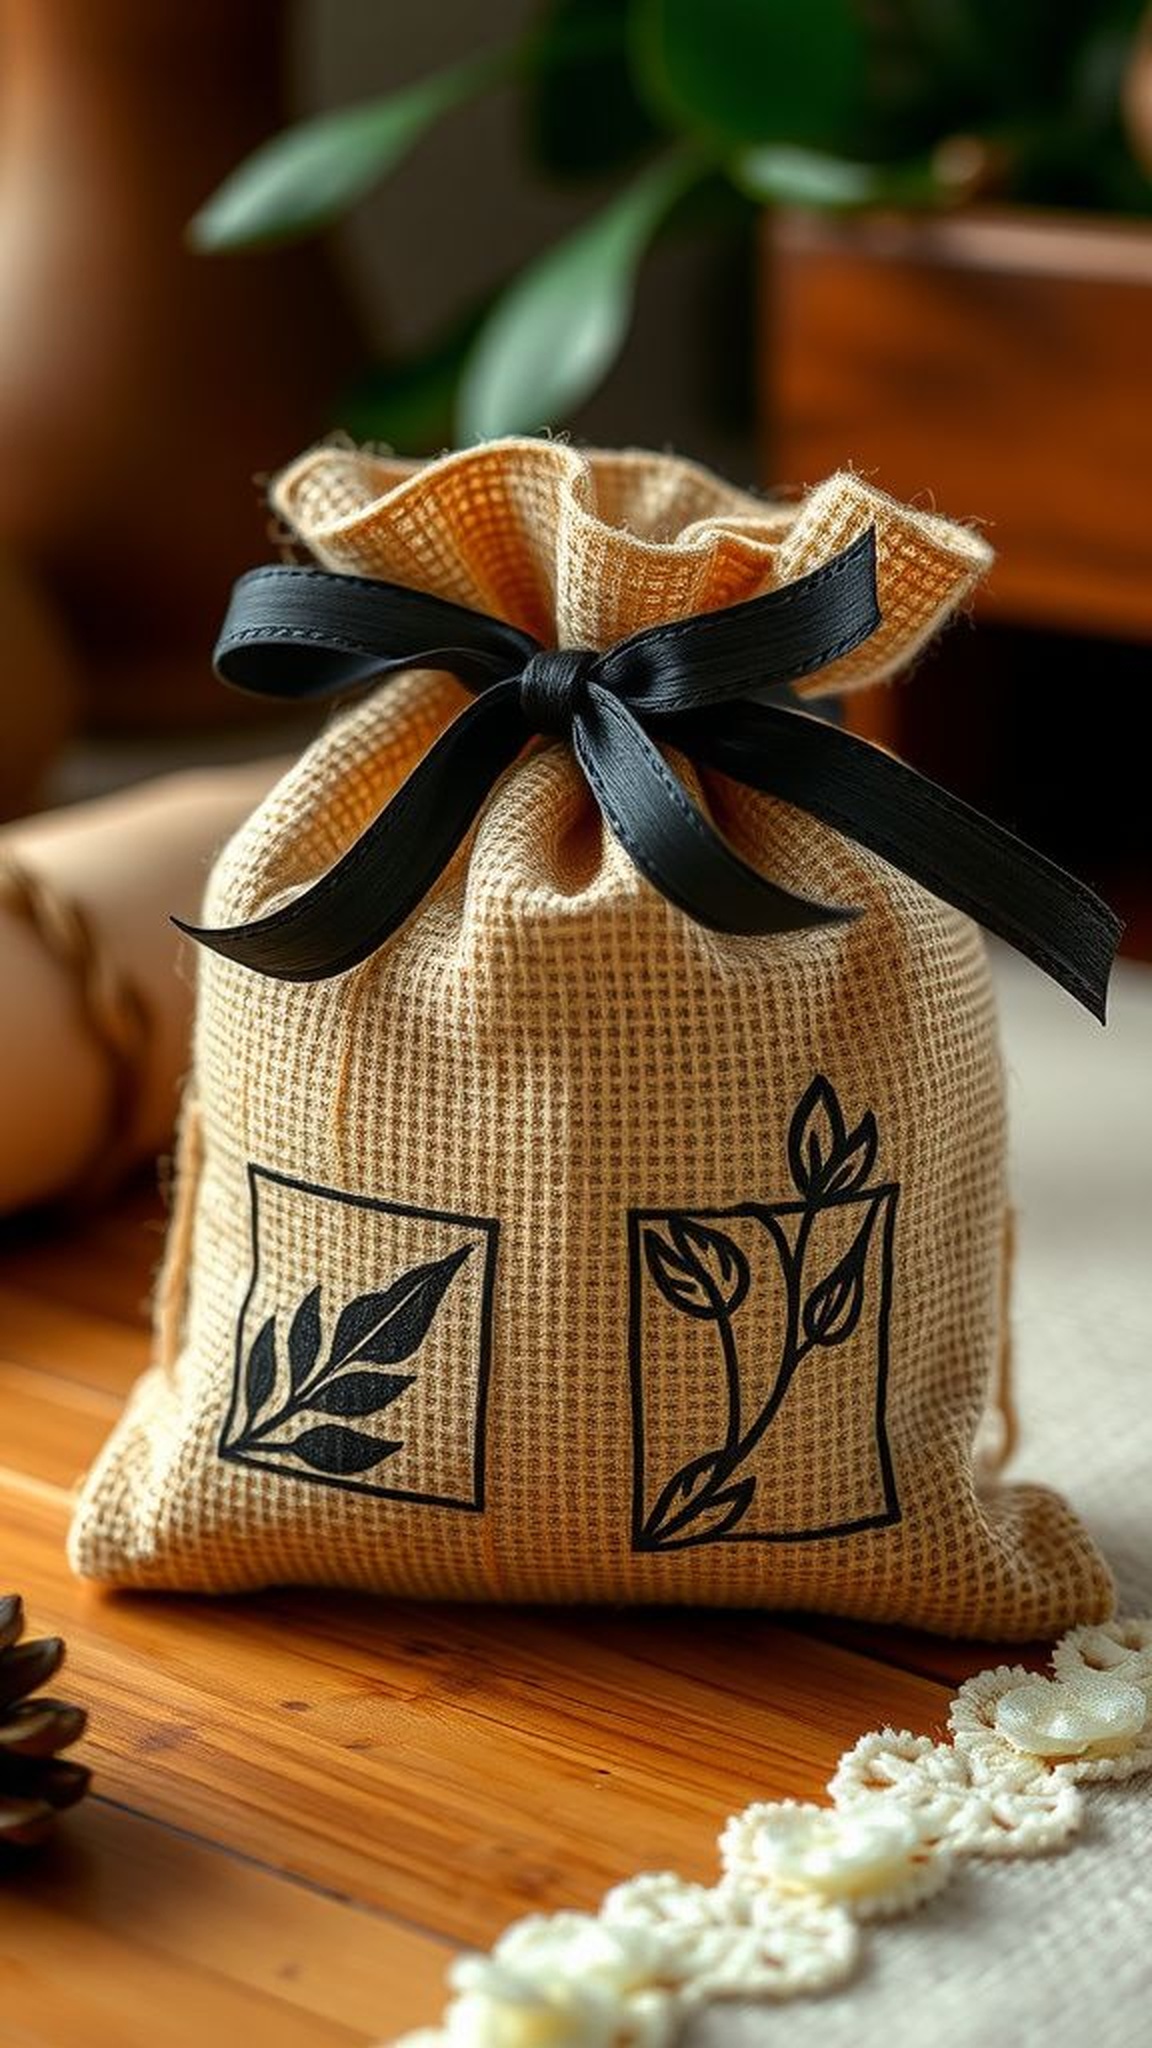
A small sack of coarse burlap folded around a tiny gift had a tactile, rustic presence that felt thoughtfully undone rather than polished. Inked stamps left imperfect impressions that read like friendly handwriting, and the ribbon tied at the neck offered a velvet contrast to the rough weave.
The bag carried a faint, earthlike scent and crinkled softly when handed across a table. Gifting something wrapped this way felt intimate, as if the wrapping itself were part of the present.
The recipient often paused to rub a thumb across the stamped motif, reading the texture as well as the ink.
Steps
- Cut a burlap rectangle sized for the gift and sew or adhesive-seal side seams to form a simple pouch.
- Press rubber stamps into ink pads and apply motifs across the exterior, allowing impressions to dry.
- Thread a ribbon through the top edge and gather the sack closed, knotting the ribbon to secure.
- Tuck a small note inside before tying the final bow.
Jewelry organizer from an ice cube tray and felt
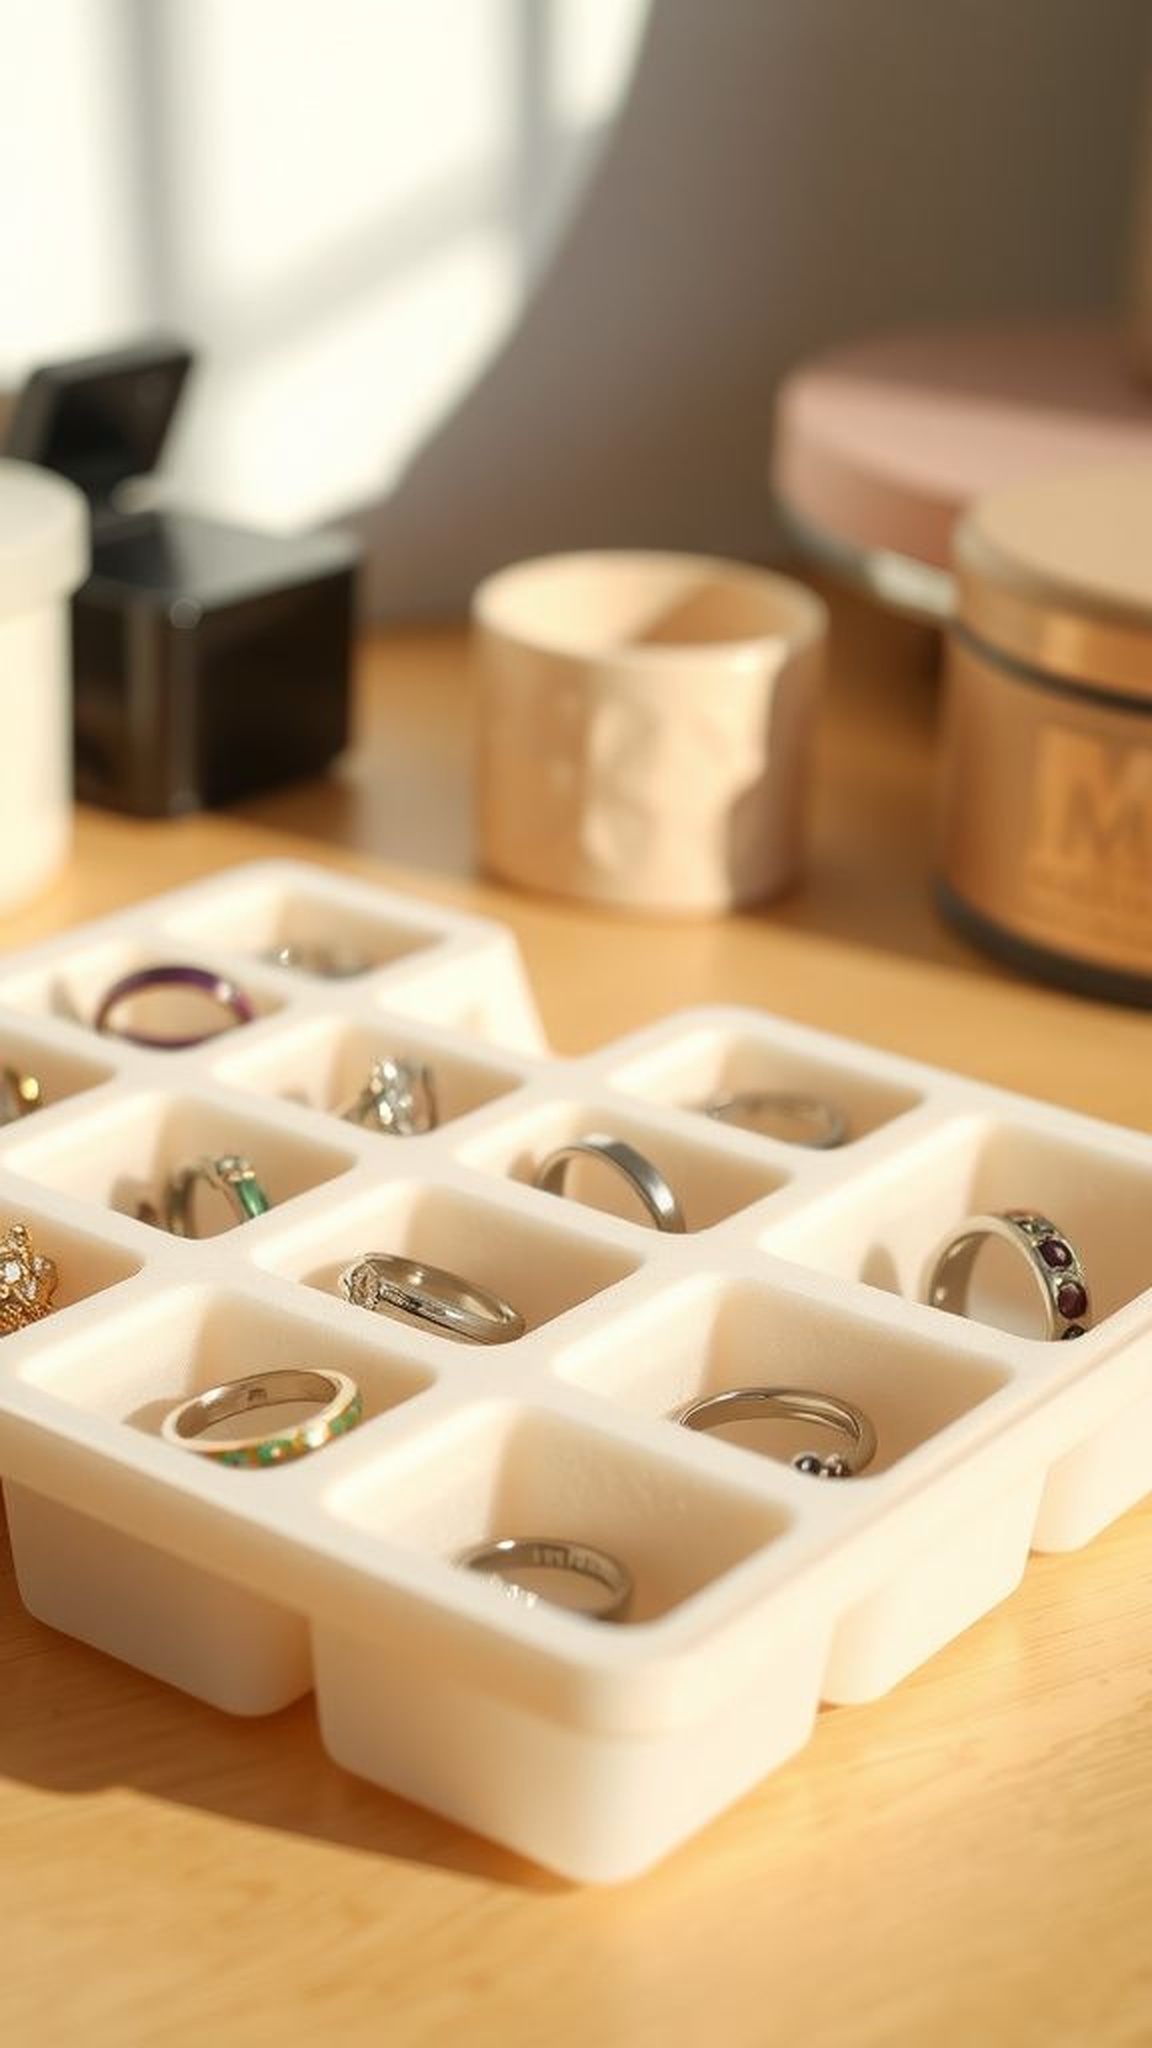
An ice cube tray lined with soft felt created tiny hammocks for rings and studs, each compartment a miniature cradle that kept pieces from clinking. The felt muffled metallic notes and added a velvet touch when reaching for a favorite pair.
The shallow wells provided an orderly layout and the tray felt pleasantly lightweight when carried to a vanity. Scattered sunlight made rings glint in small pockets across the tray as though tiny suns had settled into leisure.
This organizer turned a simple plastic tray into a calm ritual of selecting daily adornment.
Steps
- Cut felt pieces to fit snugly into each ice cube well so jewelry rests on a soft surface.
- Place the lined tray on a vanity or inside a drawer for organized storage.
- Arrange rings, earrings, and small necklaces within compartments to prevent tangling.
- Lift the tray gently when moving jewelry to avoid spillage and maintain neatness.
Chalkboard menu on a small wooden board for kitchens
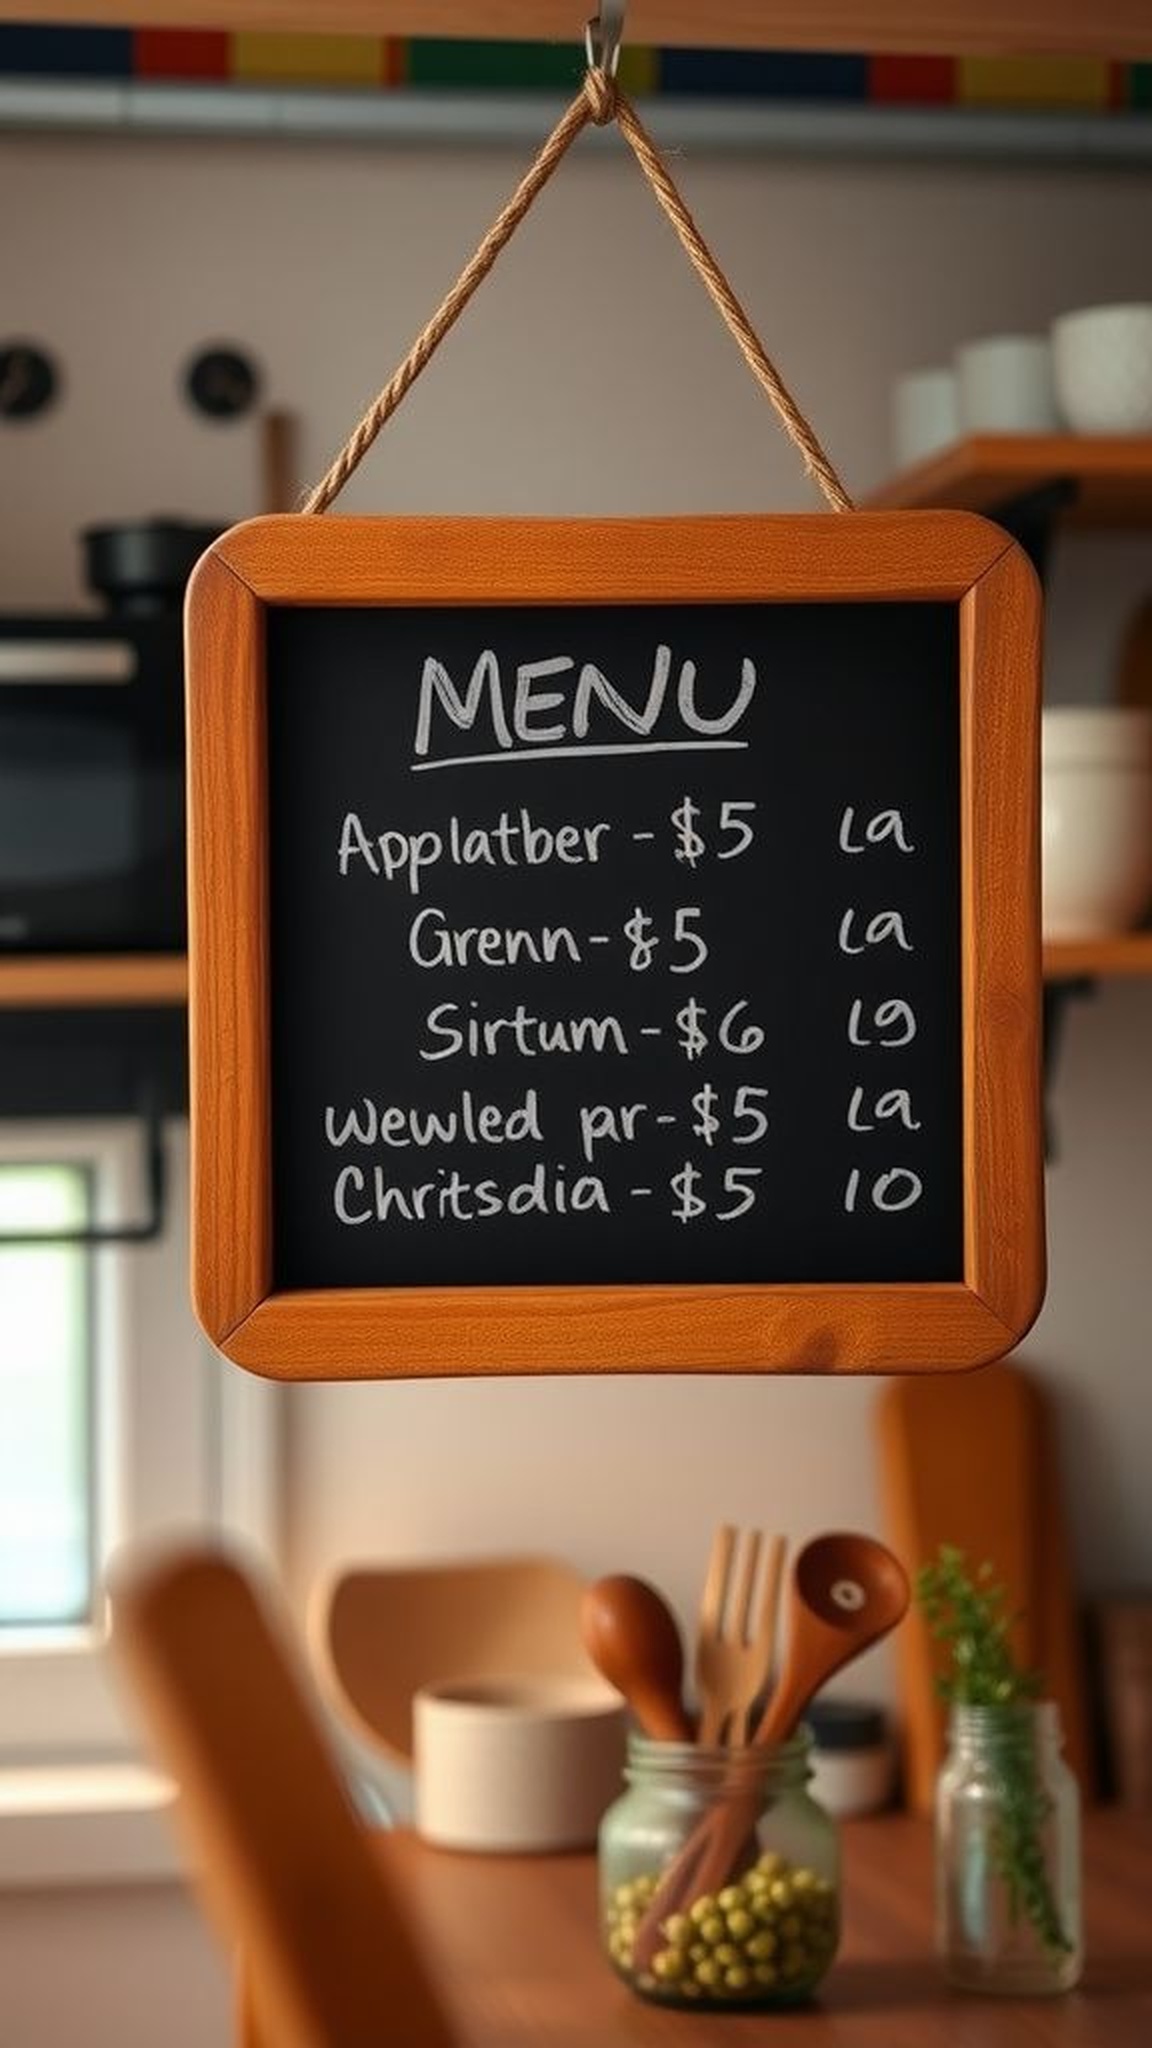
A small wooden board turned chalkboard held the day’s dinner note with a cozy, hand-drawn flourish. The matte black surface offered a forgiving space for quick scribbles and the chalk crumb left a faint dusty scent that felt nostalgic.
Erasing left subtle ghosts of earlier plans, creating a layered story of meals and reminders. The board lived near the stove and caught grocery lists, playful drawings, and quick love notes.
It made daily planning tactile; hands traced lines and letters as if sealing a tiny domestic pact before the evening unfolded.
Steps
- Apply a chalkboard coating to a small wooden board in thin, even layers and let each coat dry thoroughly.
- Season the surface by rubbing chalk over it and wiping clean to prepare for regular writing.
- Hang the board in a kitchen spot convenient for jotting menus or reminders.
- Write with chalk markers or traditional chalk and wipe clean as plans change.