
As an Amazon Associate I earn from qualifying purchases.
Sunlight dapples across a bustling garden patch as tiny green shoots burst through rich soil. Among them, herbs quietly flourish, each promising fresh flavor and fragrant aroma. Within this lively scene, handmade clay plant markers stand proudly, offering both beauty and function.
Clay markers add character to an herb garden, their textures and colors mingling naturally with leaves and dirt. The durability of baked clay ensures these markers last through many seasons, marking thyme, basil, oregano, and more with charm.
Simple stamped clay markers for beginners
⏱️ 1 hour · 🟢 Beginner
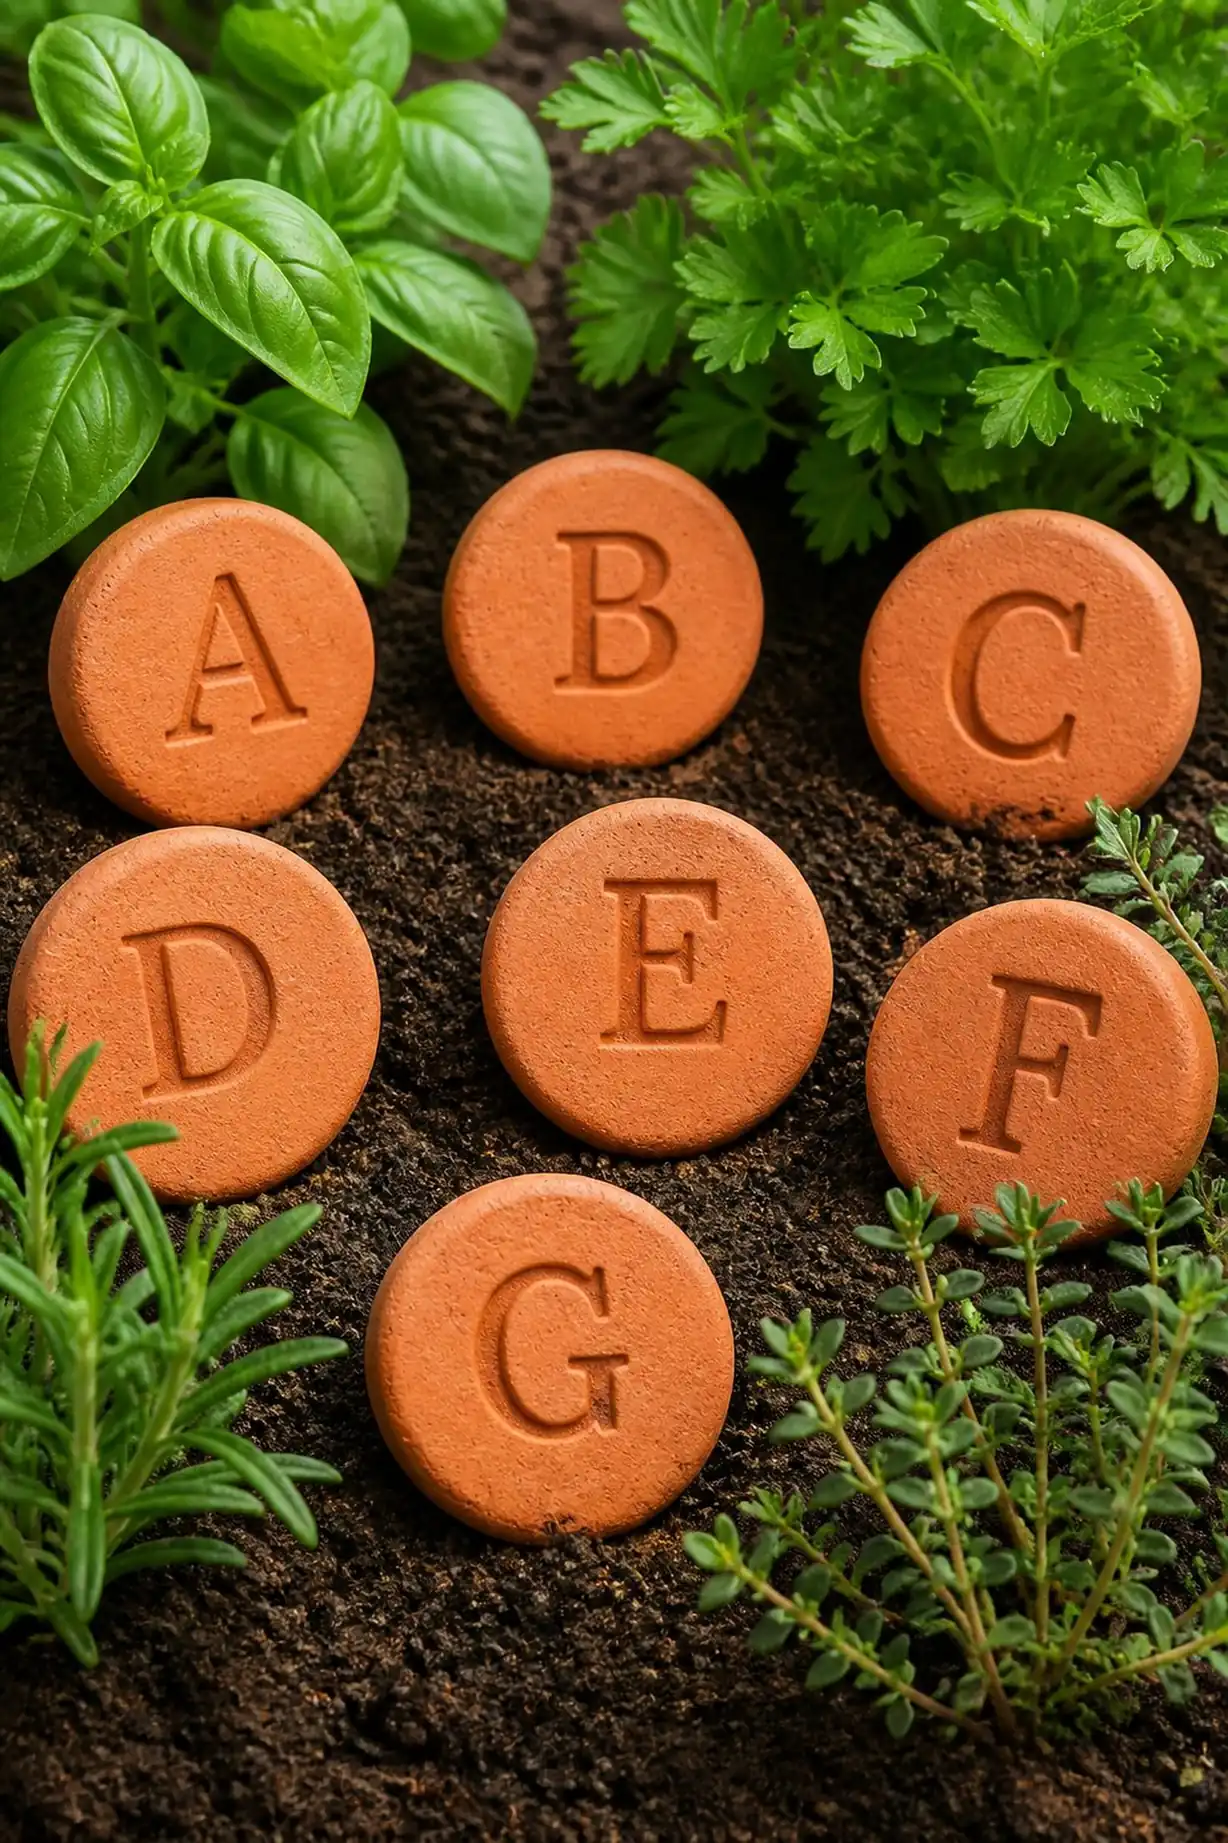
These markers feature smooth, terracotta-colored clay disks about 3 inches in diameter, each stamped with the name of an herb. The impressions create subtle shadows that catch sunlight, highlighting the inscriptions.
Softening the edges adds a tactile contrast to the firm stamping. After baking, the clay hardens to a sandy texture, resistant to wind and rain. The compact size fits perfectly beside small herb pots or garden rows about 6 inches apart.
Pro Tip: Keep clay thickness uniform around 1/4 inch to avoid cracking during baking or shattering outdoors.
How to Make This
- Roll out clay to a consistent 1/4 inch thickness.
- Use alphabet stamps to press herb names onto circular clay pieces, about 3 inches wide.
- Smooth edges gently with fingers for a neat appearance.
- Bake markers according to clay package instructions, usually around 30 minutes.
- Allow to cool completely before placing in the garden.
Avoid: Uneven clay thickness can cause cracks or incomplete baking that weakens markers.
Try Also: Try painting the impressions with waterproof paint for color contrast, or use leaf-shaped instead of circular disks.
Products & Materials
Items Used
- air dry clay
- alphabet stamping set
- rolling pin
“Easy stamped clay plant markers to personalize any herb garden.”
Rustic twig-stamped herb identifiers
⏱️ 2 hours · 🟠 Intermediate
These markers combine earth tones with raw textures by embedding thin twigs into soft beige clay rectangles, about 4 inches long and 1.5 inches wide. The twig impressions imprint natural patterns and the herb names appear delicately alongside.
The clay feels slightly rough, contrasting the smoother sticks pressed into its surface. After curing in a low oven temperature, the pieces become firm but retain some organic imperfections that enhance their rustic charm.
Pro Tip: Lightly moisten twigs before pressing to prevent sudden breaks and ensure clear imprint lines.
How to Make This
- Prepare beige-colored clay rolled to 1/4 inch thickness.
- Cut clay into 4 inch by 1.5 inch rectangular strips.
- Press thin twigs lengthwise into clay to form textured backgrounds.
- Inscribe herb names with a stylus or thin tool next to twig marks.
- Bake at low oven temperature to harden clay.
Avoid: Pressing twigs too hard can snap them, leaving uneven or incomplete impressions.
Try Also: Try adding small flower or leaf stamps beside herbs, or experiment with colored clay blends.
Products & Materials
Items Used
- polymer clay beige
- thin garden twigs
- stylus tool for detail work
“Add natural rustic style with twig textured clay plant markers.”
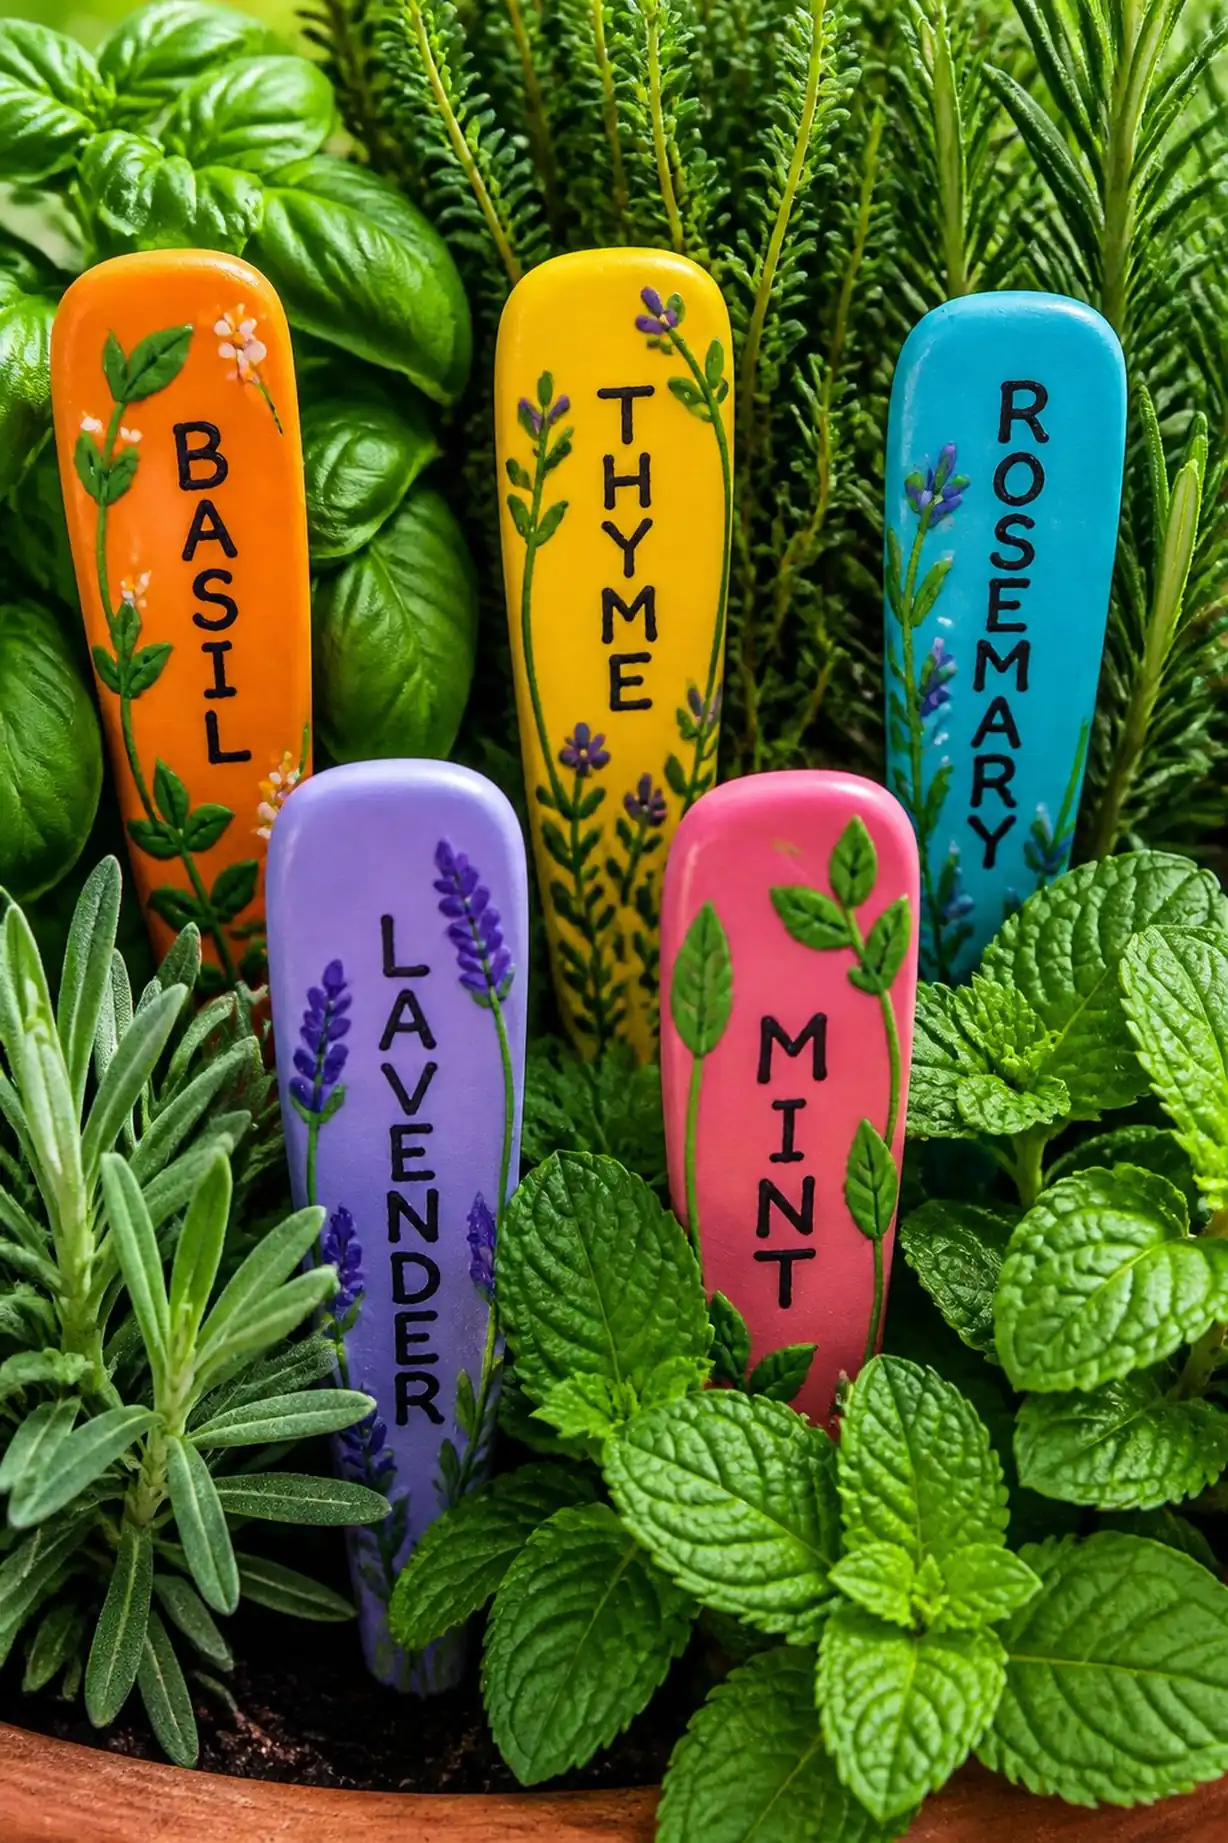
Colorful glaze finishes brighten herb markers
⏱️ 3 hours · 🟠 Intermediate
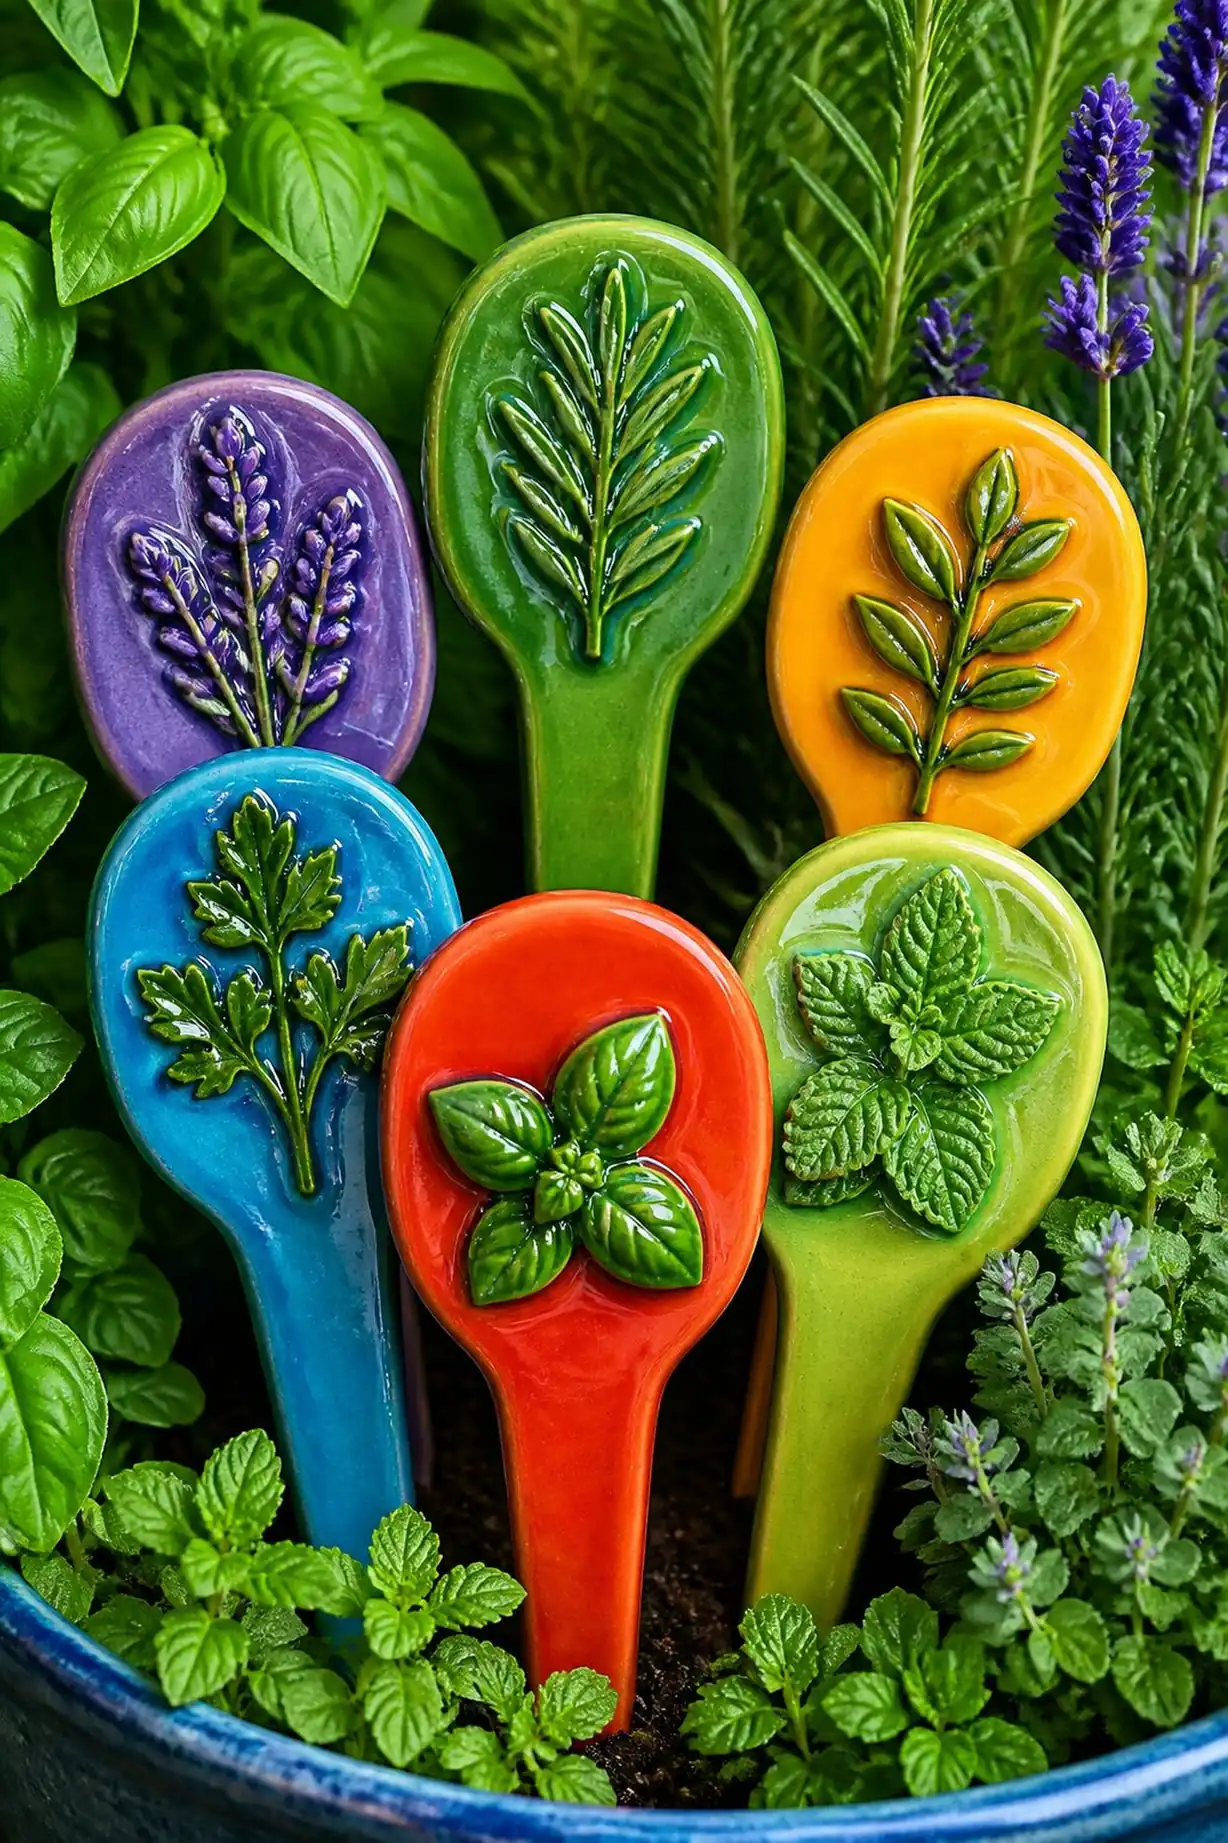
White air-dry clay markers about 2.5 inches tall take on life when coated in vibrant glazes like deep green or sunny yellow. The glossy finish accentuates engraved herb names, which appear as delicate shadows beneath the smooth surfaces.
Markers stand on narrow stakes about 4 inches long, thick enough to remain stable in soil but thin enough to blend naturally with leafy clusters. The glaze adds a subtle tactile coolness that contrasts with rough earth around them.
Pro Tip: Apply multiple thin glaze coats for even coverage and avoid wind-blown debris settling on sticky surfaces before drying.
How to Make This
- Form markers from white air-dry clay, shaping flat fronts with pointed stakes.
- Carve herb names with a fine needle tool.
- After drying fully, brush on glaze coats thinly and allow each to dry.
- Repeat glazing for richer color, then let cure overnight.
- Place markers firmly into soil among the herbs.
Avoid: Thick glaze coats take excessively long to dry and can form drips or uneven surfaces.
Try Also: Glossy white combined with pastel shades or speckled glaze effects make markers stand out more distinctly.
Products & Materials
Items Used
“Brighten herb gardens with vivid glazed clay plant signs.”
Save time and printer ink with 50+ printable templates and step-by-step instructions in one ad-free guide.

Just $19.99 — lifetime access
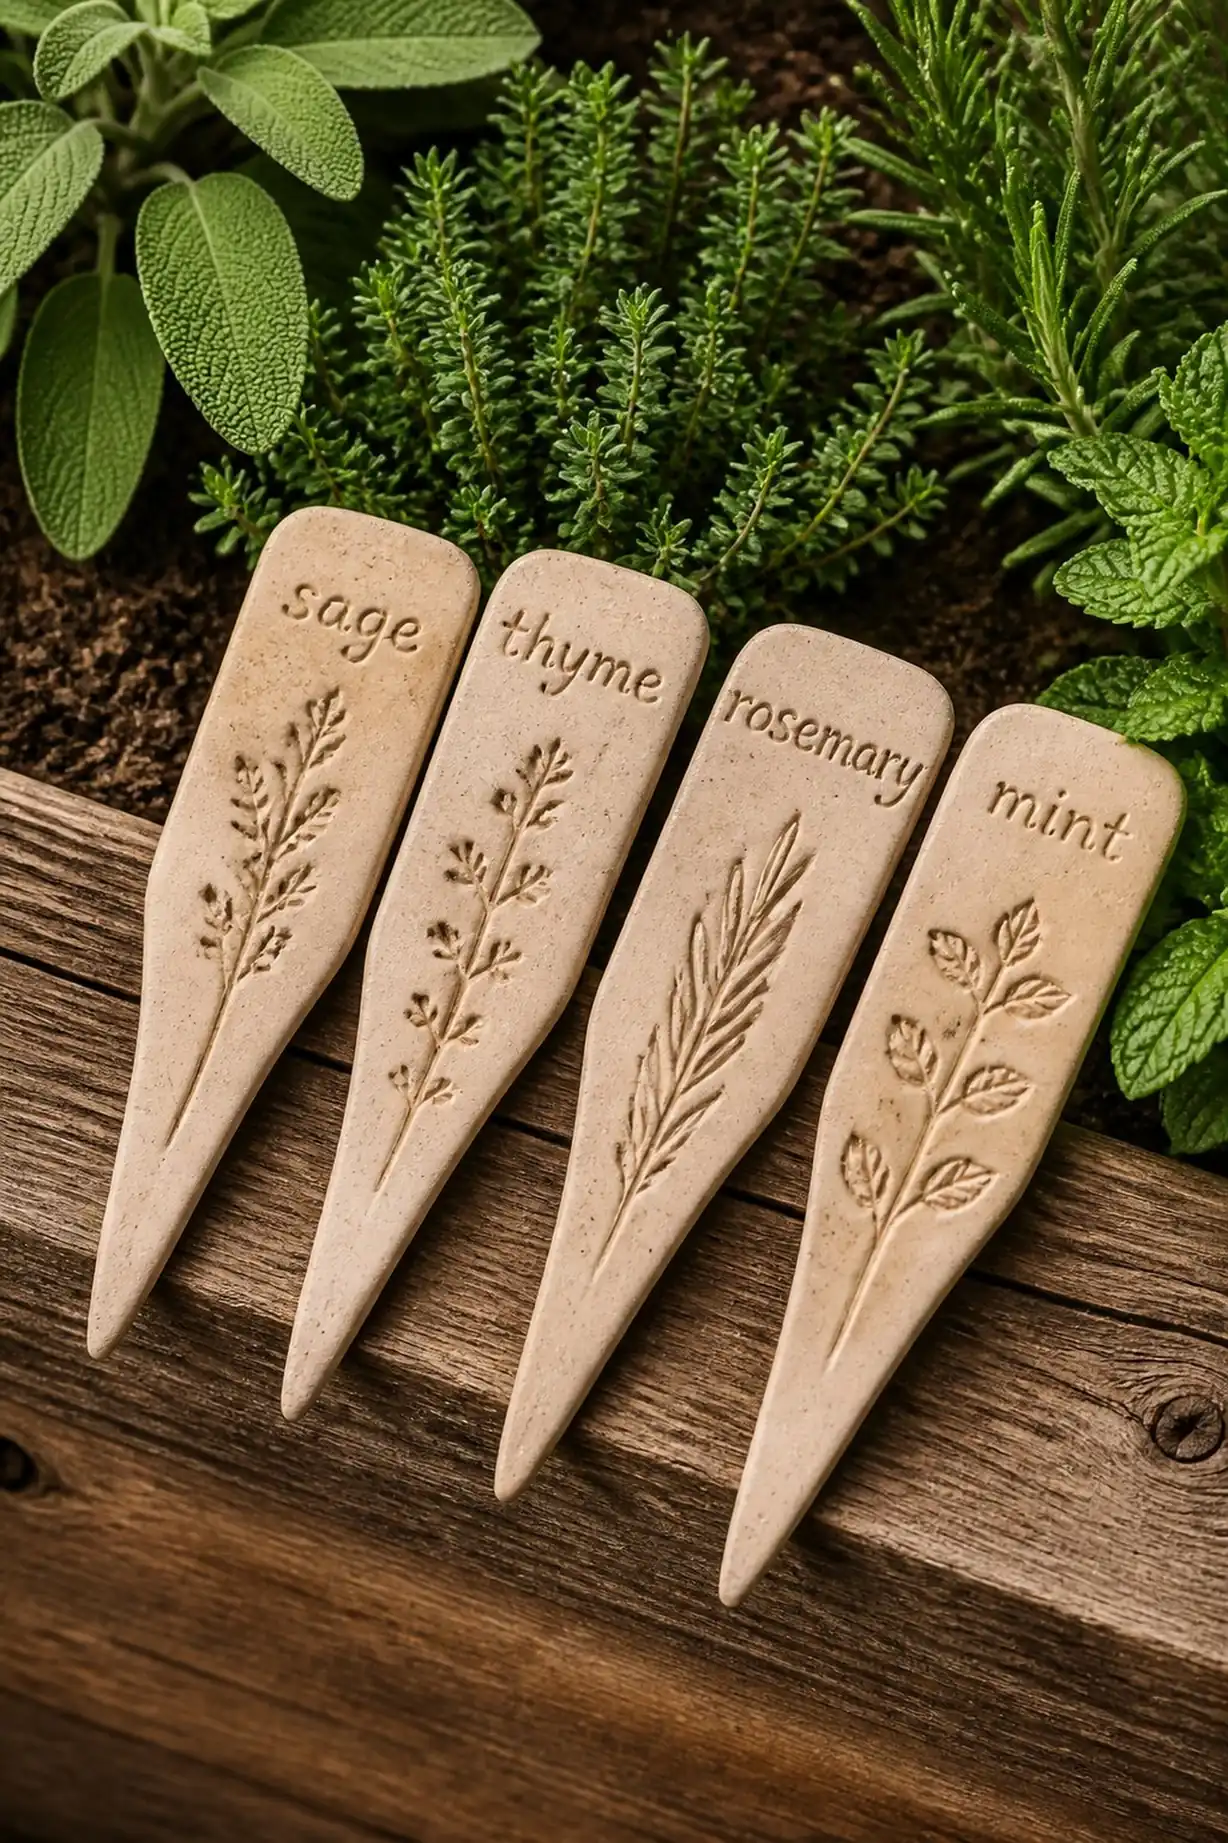
Hand-lettered calligraphy on smooth clay tags
⏱️ 3-4 hours · 🔴 Advanced
Sleek rectangular tags cut from light grey clay feature beautifully curved herb names in black ink, resembling gentle calligraphy strokes. Each tag measures approximately 4 by 2 inches, smooth to the touch with softly rounded corners.
After the clay hardens, permanent waterproof ink enhances the contrast. The tactile ink edges provide a subtle textural variation against the uniformly matte clay. Stakes attached below are slender and unobtrusive, about 3 inches long, designed to blend into herb foliage.
Pro Tip: Test calligraphy inks on scrap clay first to gauge drying time and prevent smudging after application.
How to Make This
- Roll grey clay to 1/4 inch thickness and cut 4×2 inch rectangles.
- Bake or air-dry shapes thoroughly to harden clay.
- Write herb names using waterproof calligraphy ink pens with flowing strokes.
- Allow ink to dry fully, applying additional coats as needed.
- Attach thin stakes with clay or adhesive for garden insertion.
Avoid: Applying ink on damp clay or incomplete drying results in smearing or fragile lines.
Try Also: Use metallic ink pens or white on dark clay for more striking visual effects.
Products & Materials
Items Used
“Sophisticated hand-lettered clay markers for elegant herb labeling.”
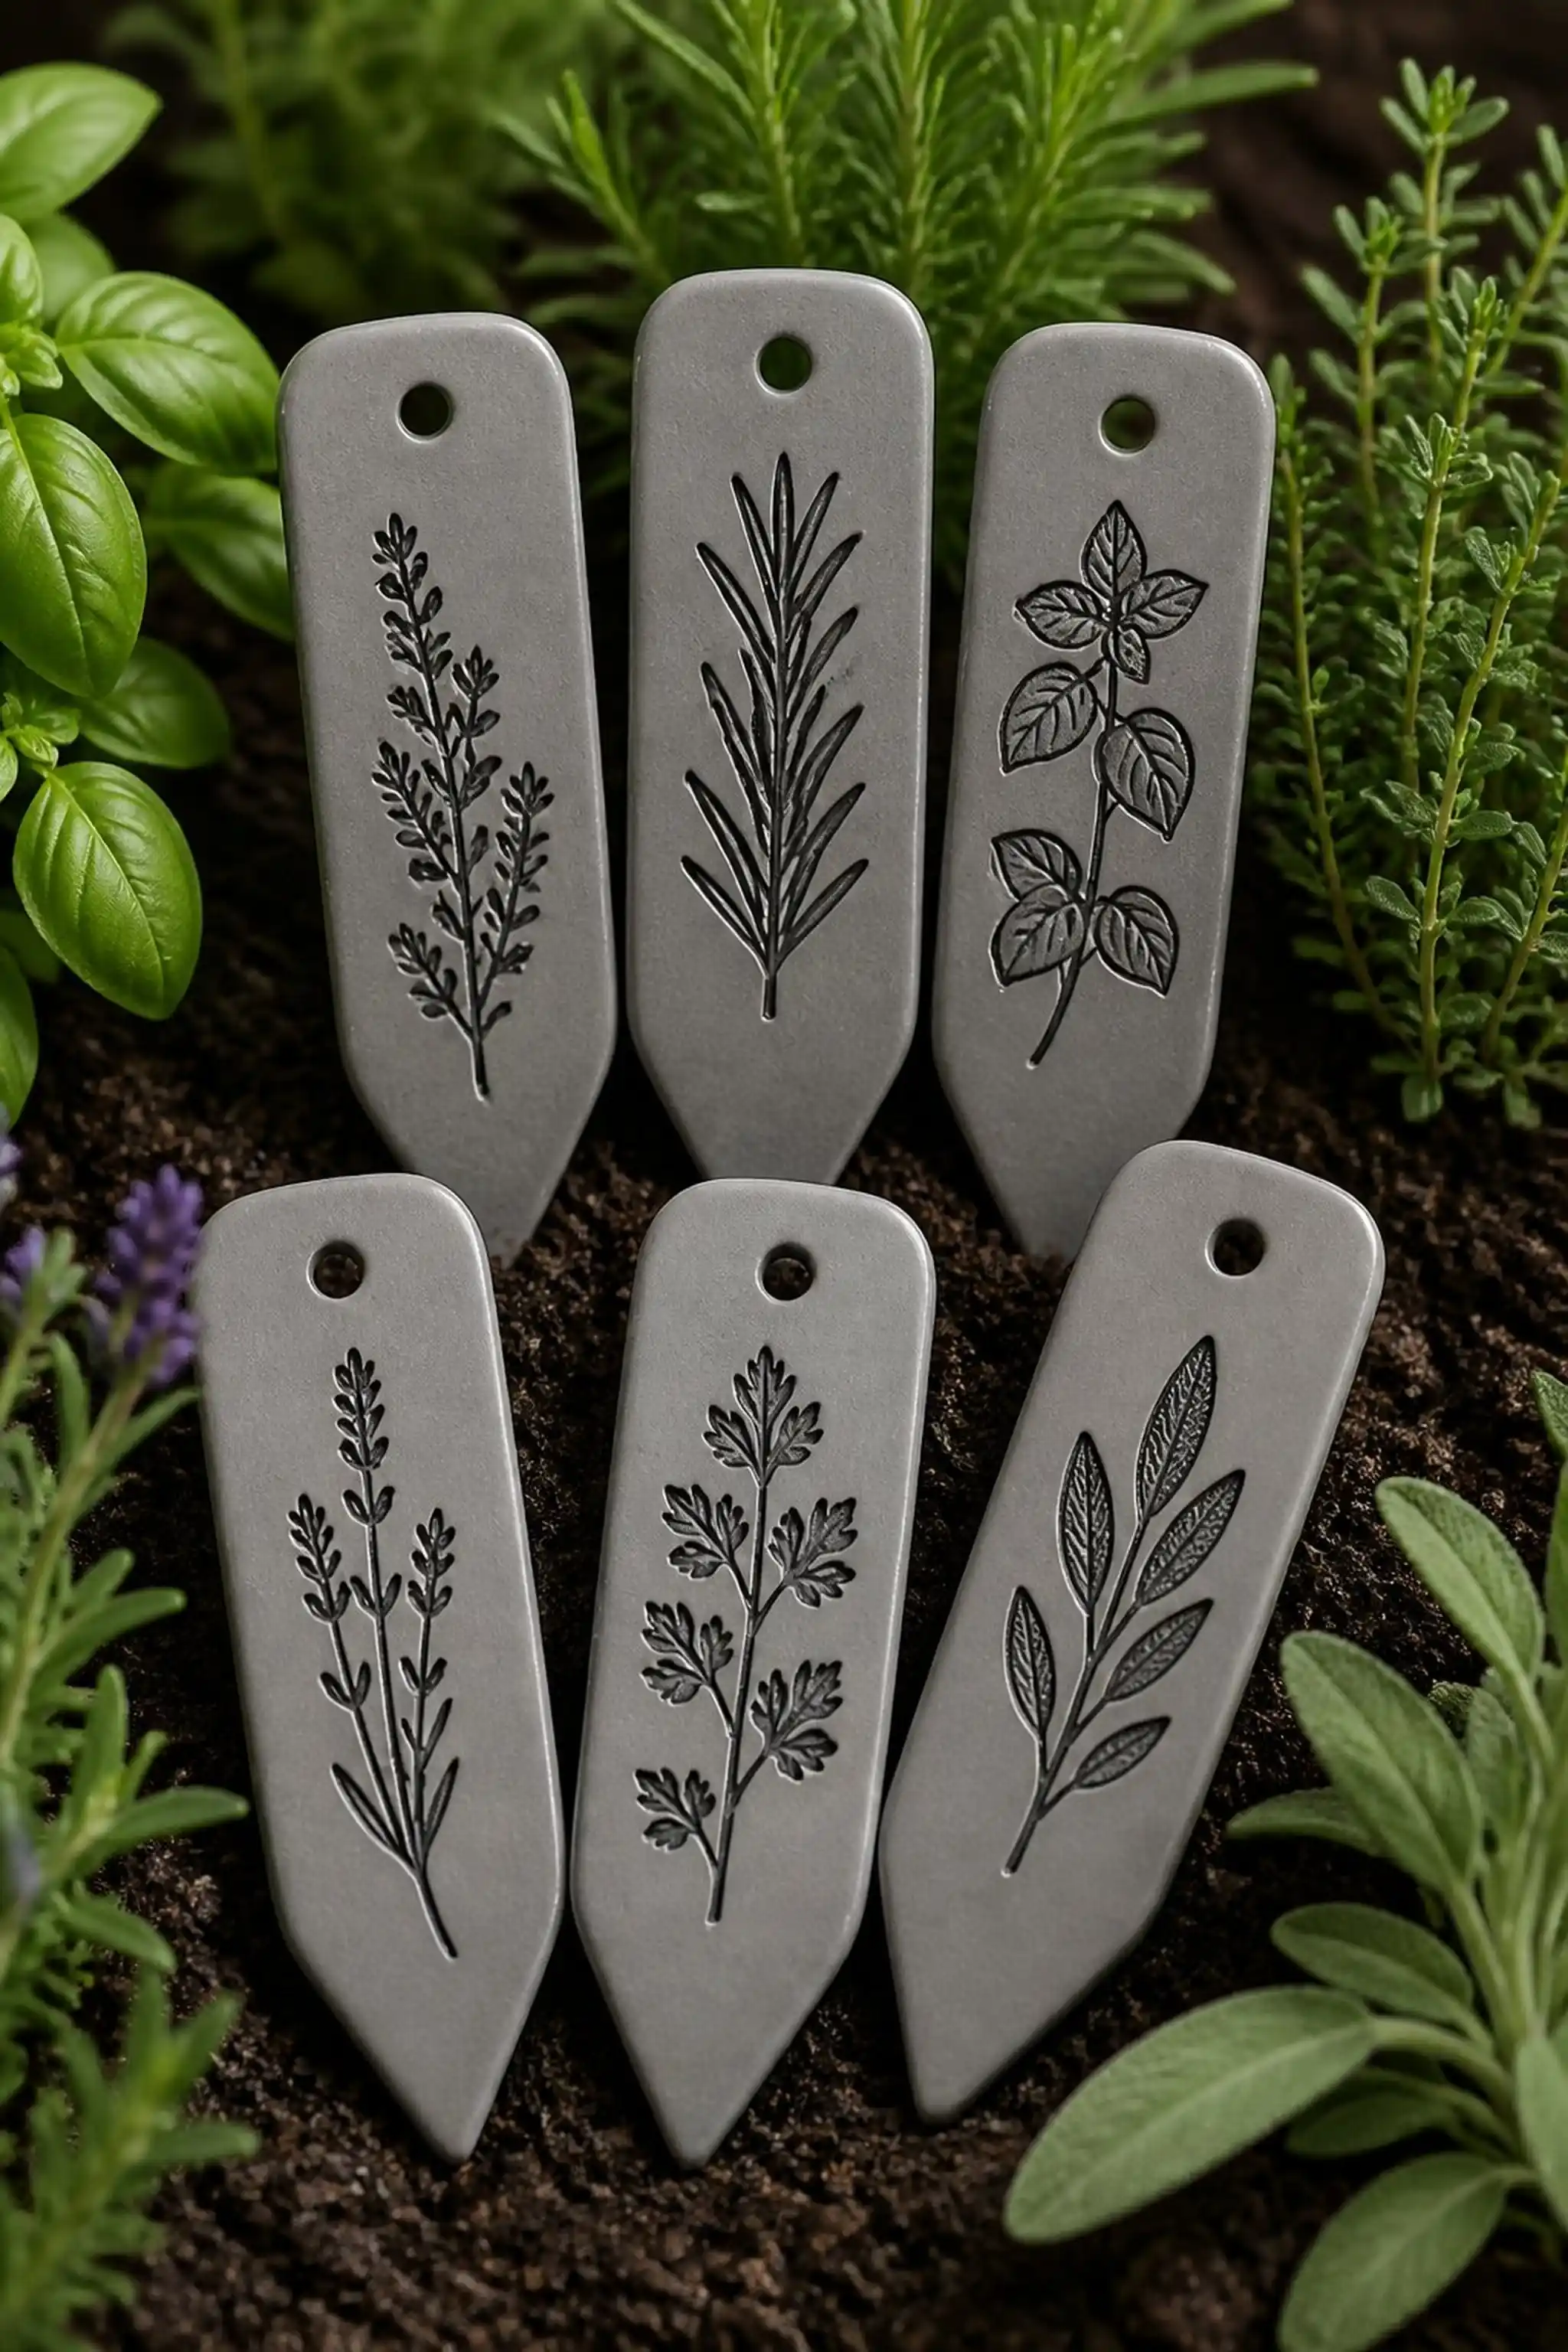
Imprinted leaf designs for nature-inspired tags
⏱️ 2 hours · 🟠 Intermediate
Soft green clay tags carry impressions from real herb leaves, about 3.5 inches long and 1.5 inches wide. Each leaf pattern reveals vein details and edges, complementing delicate herb names engraved beside the textures.
The surface feels slightly uneven due to the natural leaf relief, creating shadows in bright sunlight. Baked under moderate heat, the clay solidifies with a matte finish that sits comfortably against soil and plant stems.
Pro Tip: Select fresh, pliable leaves with prominent veins for sharper, more defined impressions.
How to Make This
- Roll green polymer clay to 1/4 inch thickness.
- Press real herb leaves firmly onto clay for detailed imprints.
- Carve herb names next to impressions with a stylus.
- Bake markers according to clay type instructions for about 30 minutes.
- Cool completely before positioning in garden beds.
Avoid: Using dry or brittle leaves yields faint, damaged impressions that lack detail.
Try Also: Experiment with contrasting clay colors or lightly dust leaf impressions with chalk for enhanced visibility.
Products & Materials
Items Used
- green polymer clay
- fresh herb leaves
- stylus detailing tool
“Organic leaf texture adds a fresh feel to clay plant labels.”
Thin oval tags with pressed flower embellishments
⏱️ 4 hours · 🔴 Advanced
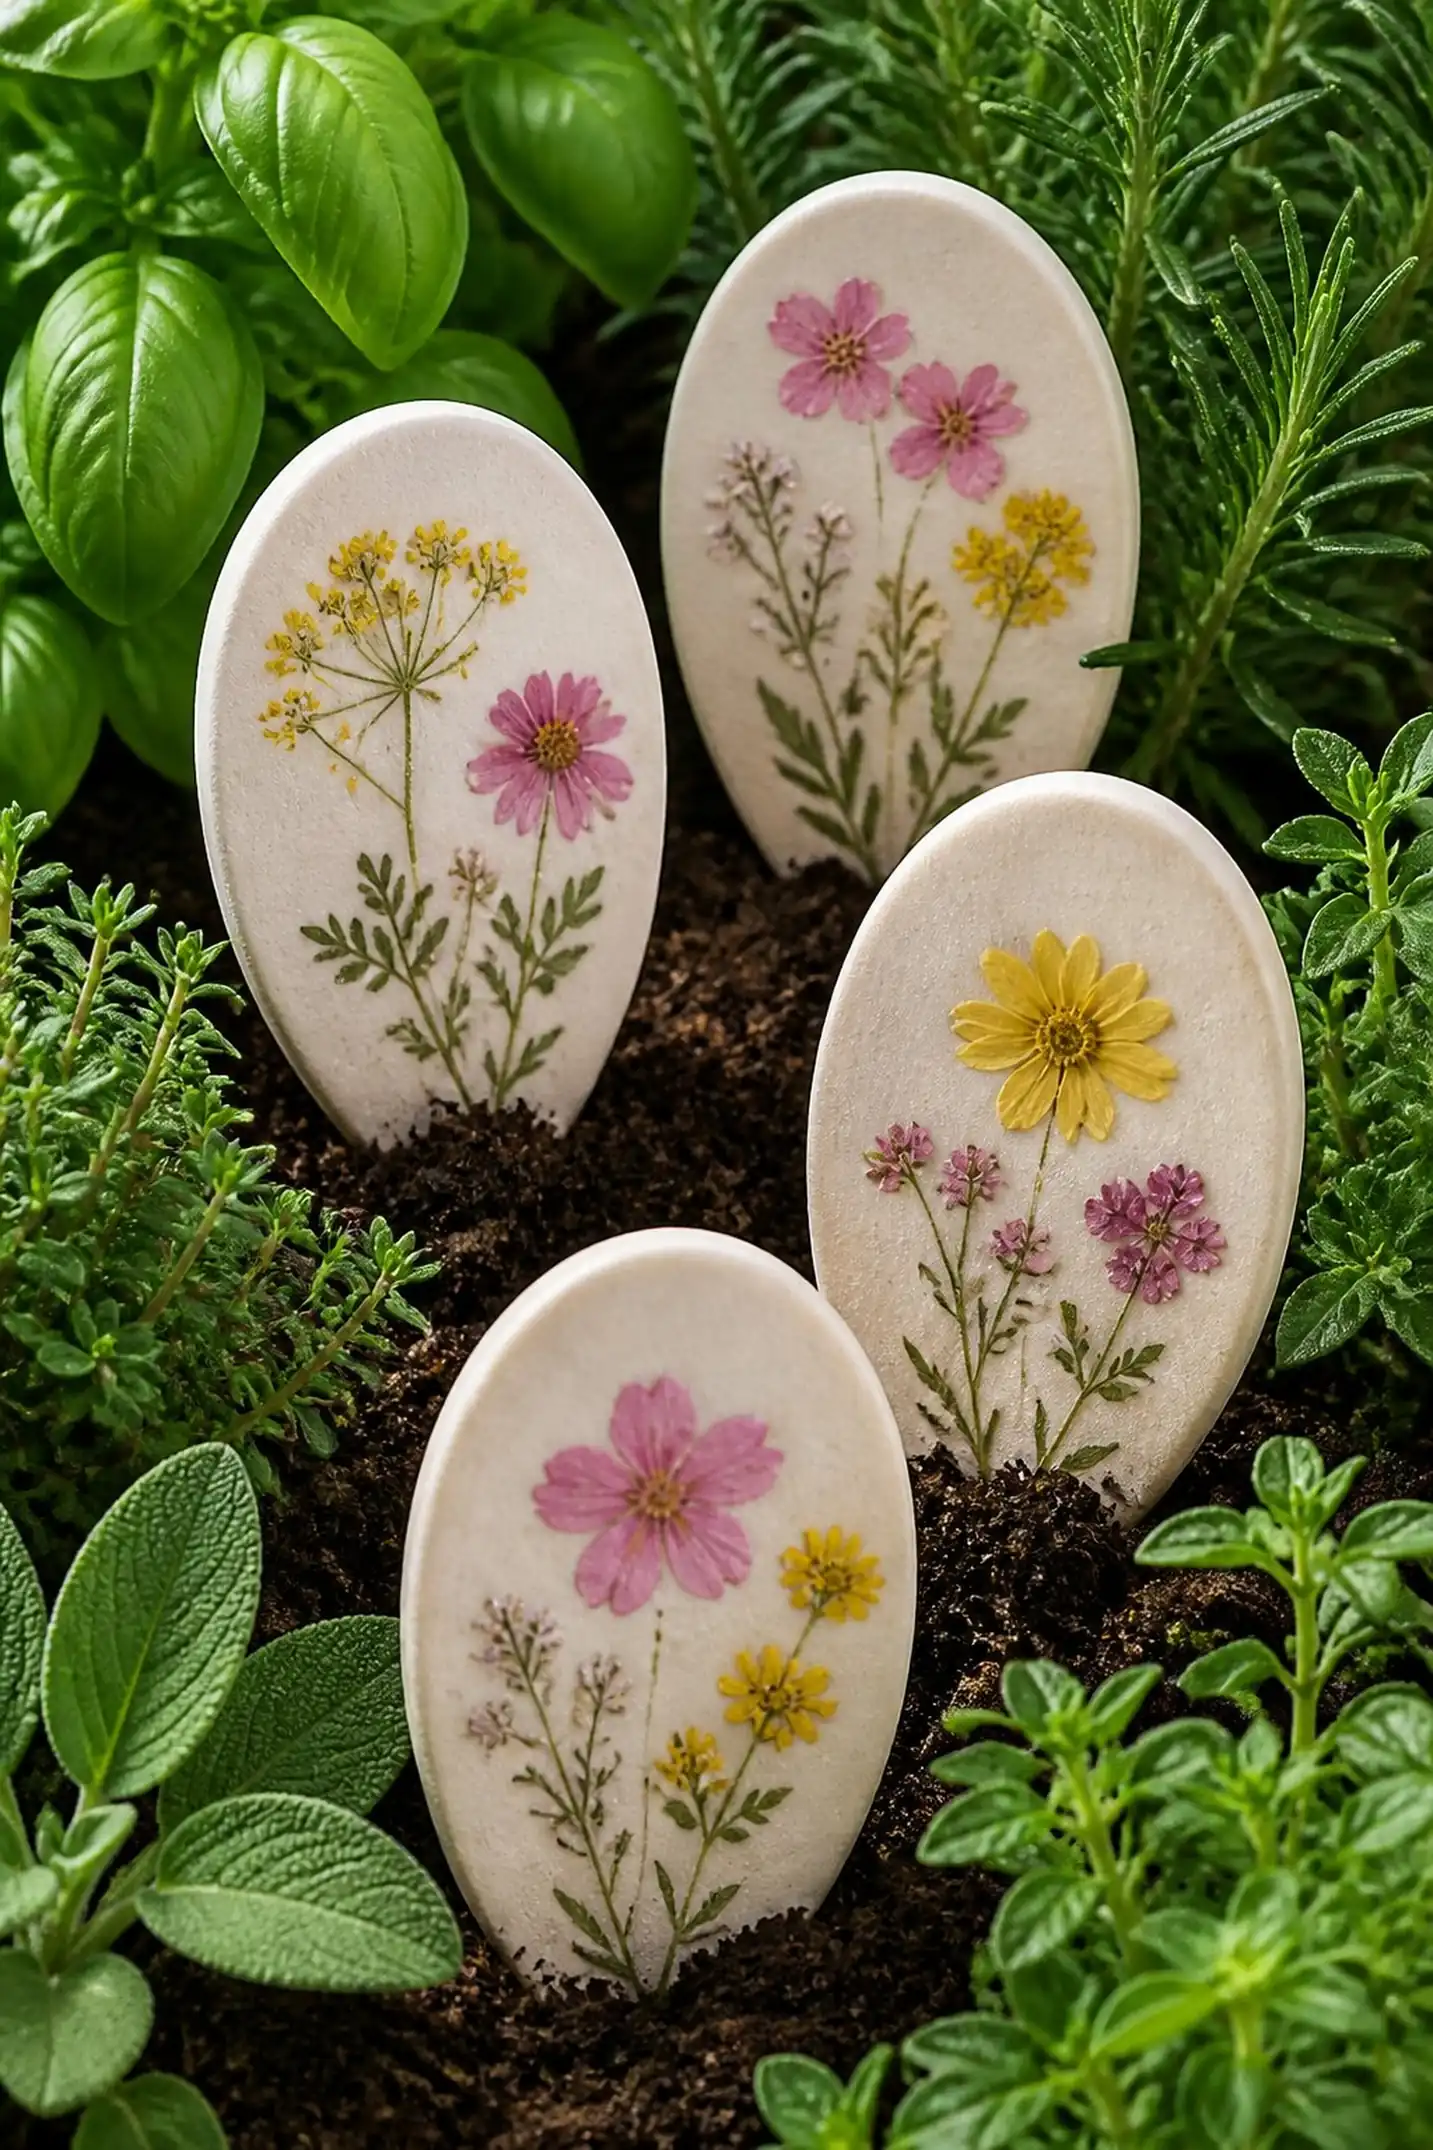
Oval clay tags about 3 inches long display tiny pressed flowers beneath a clear glaze, lending a delicate, translucent effect. The flowers’ colors—soft pinks and yellows—remain vivid, nestled inside pale cream clay bases.
After full drying, a glossy, glass-like surface stretches across the top, protecting the fragile blooms. Thin stakes approximately 3.5 inches long hold the tags upright in soil, complementing the floral theme without overwhelming plant shapes.
Pro Tip: Ensure pressed flowers are completely dry and flat to prevent moisture trapped inside the glaze.
How to Make This
- Form oval cream-colored clay tags about 3 inches by 1.5 inches.
- Press dried miniature flowers gently onto moist clay surfaces.
- Allow tags to dry fully before applying clear glaze for protection.
- Repeat glaze layers for durable finish and smooth texture.
- Attach stakes securely to the back for easy garden placement.
Avoid: Trapping damp flowers under glaze leads to discoloration or mold formation over time.
Try Also: Try using leaves or small herb seeds instead of flowers under glaze for different natural textures.
Products & Materials
Items Used
- cream polymer clay
- pressed miniature flowers
- clear ceramic glaze
- wooden stakes
“Elegant oval markers with real pressed flowers add garden charm.”
Embossed geometric patterns alongside herb names
⏱️ 2-3 hours · 🟠 Intermediate
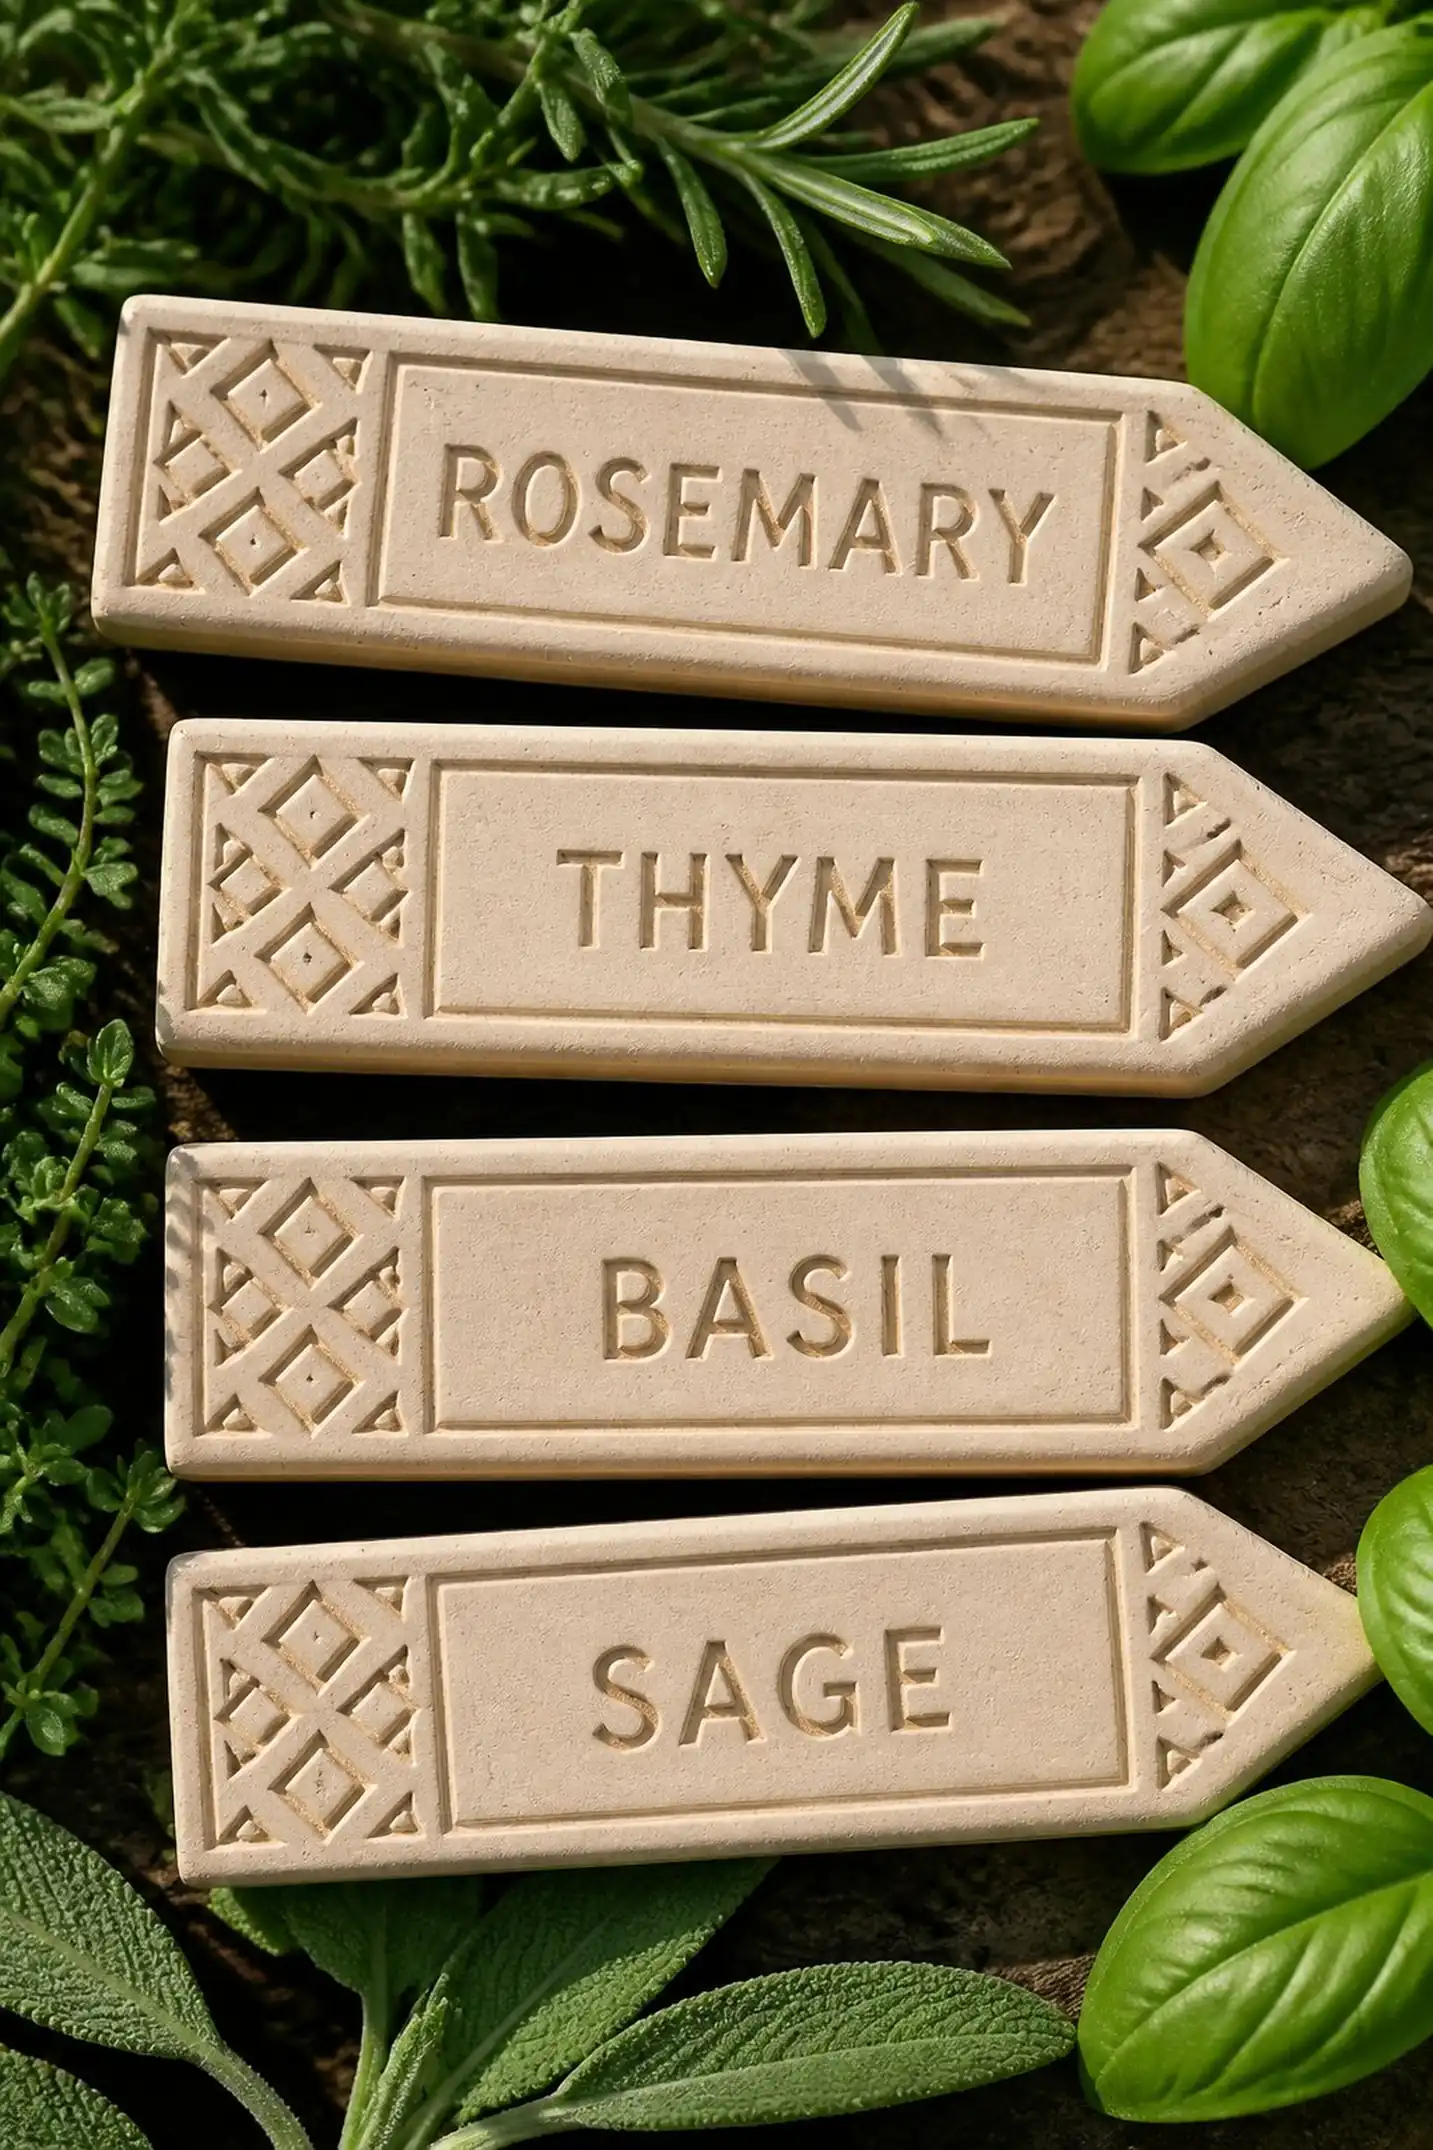
Clay markers about 3 inches wide showcase raised diamond and triangle patterns framing carved herb names. The light beige clay reveals the shapes through slight relief and shadow play, giving each tag a three-dimensional quality.
The symmetrical embossing uses a rolling stamp that leaves consistent impressions across surface areas. After baking, the texture becomes crisp and durable, easily visible in low-angle sunlight where shadows deepen.
Pro Tip: Roll embossing stamps gently to avoid clay distortion and maintain sharp pattern definitions.
How to Make This
- Prepare beige clay slabs around 1/4 inch thick and 3 inches wide.
- Apply a geometric rolling stamp across the surface for embossing.
- Etch herb names in smooth spaces between patterns.
- Bake markers following polymer clay baking settings.
- Cool and place markers securely in garden soil.
Avoid: Applying uneven pressure with the embossing stamp can cause irregular patterns and surface damage.
Try Also: Use different geometric stamps or invert patterns to create brighter vs recessed effects.
Products & Materials
Items Used
- light beige polymer clay
- geometric rolling stamp
- clay carving tool
“Modern geometric embossed clay markers add style to herbs.”
Mini hanging clay markers with twine loops
⏱️ 45 min · 🟢 Beginner
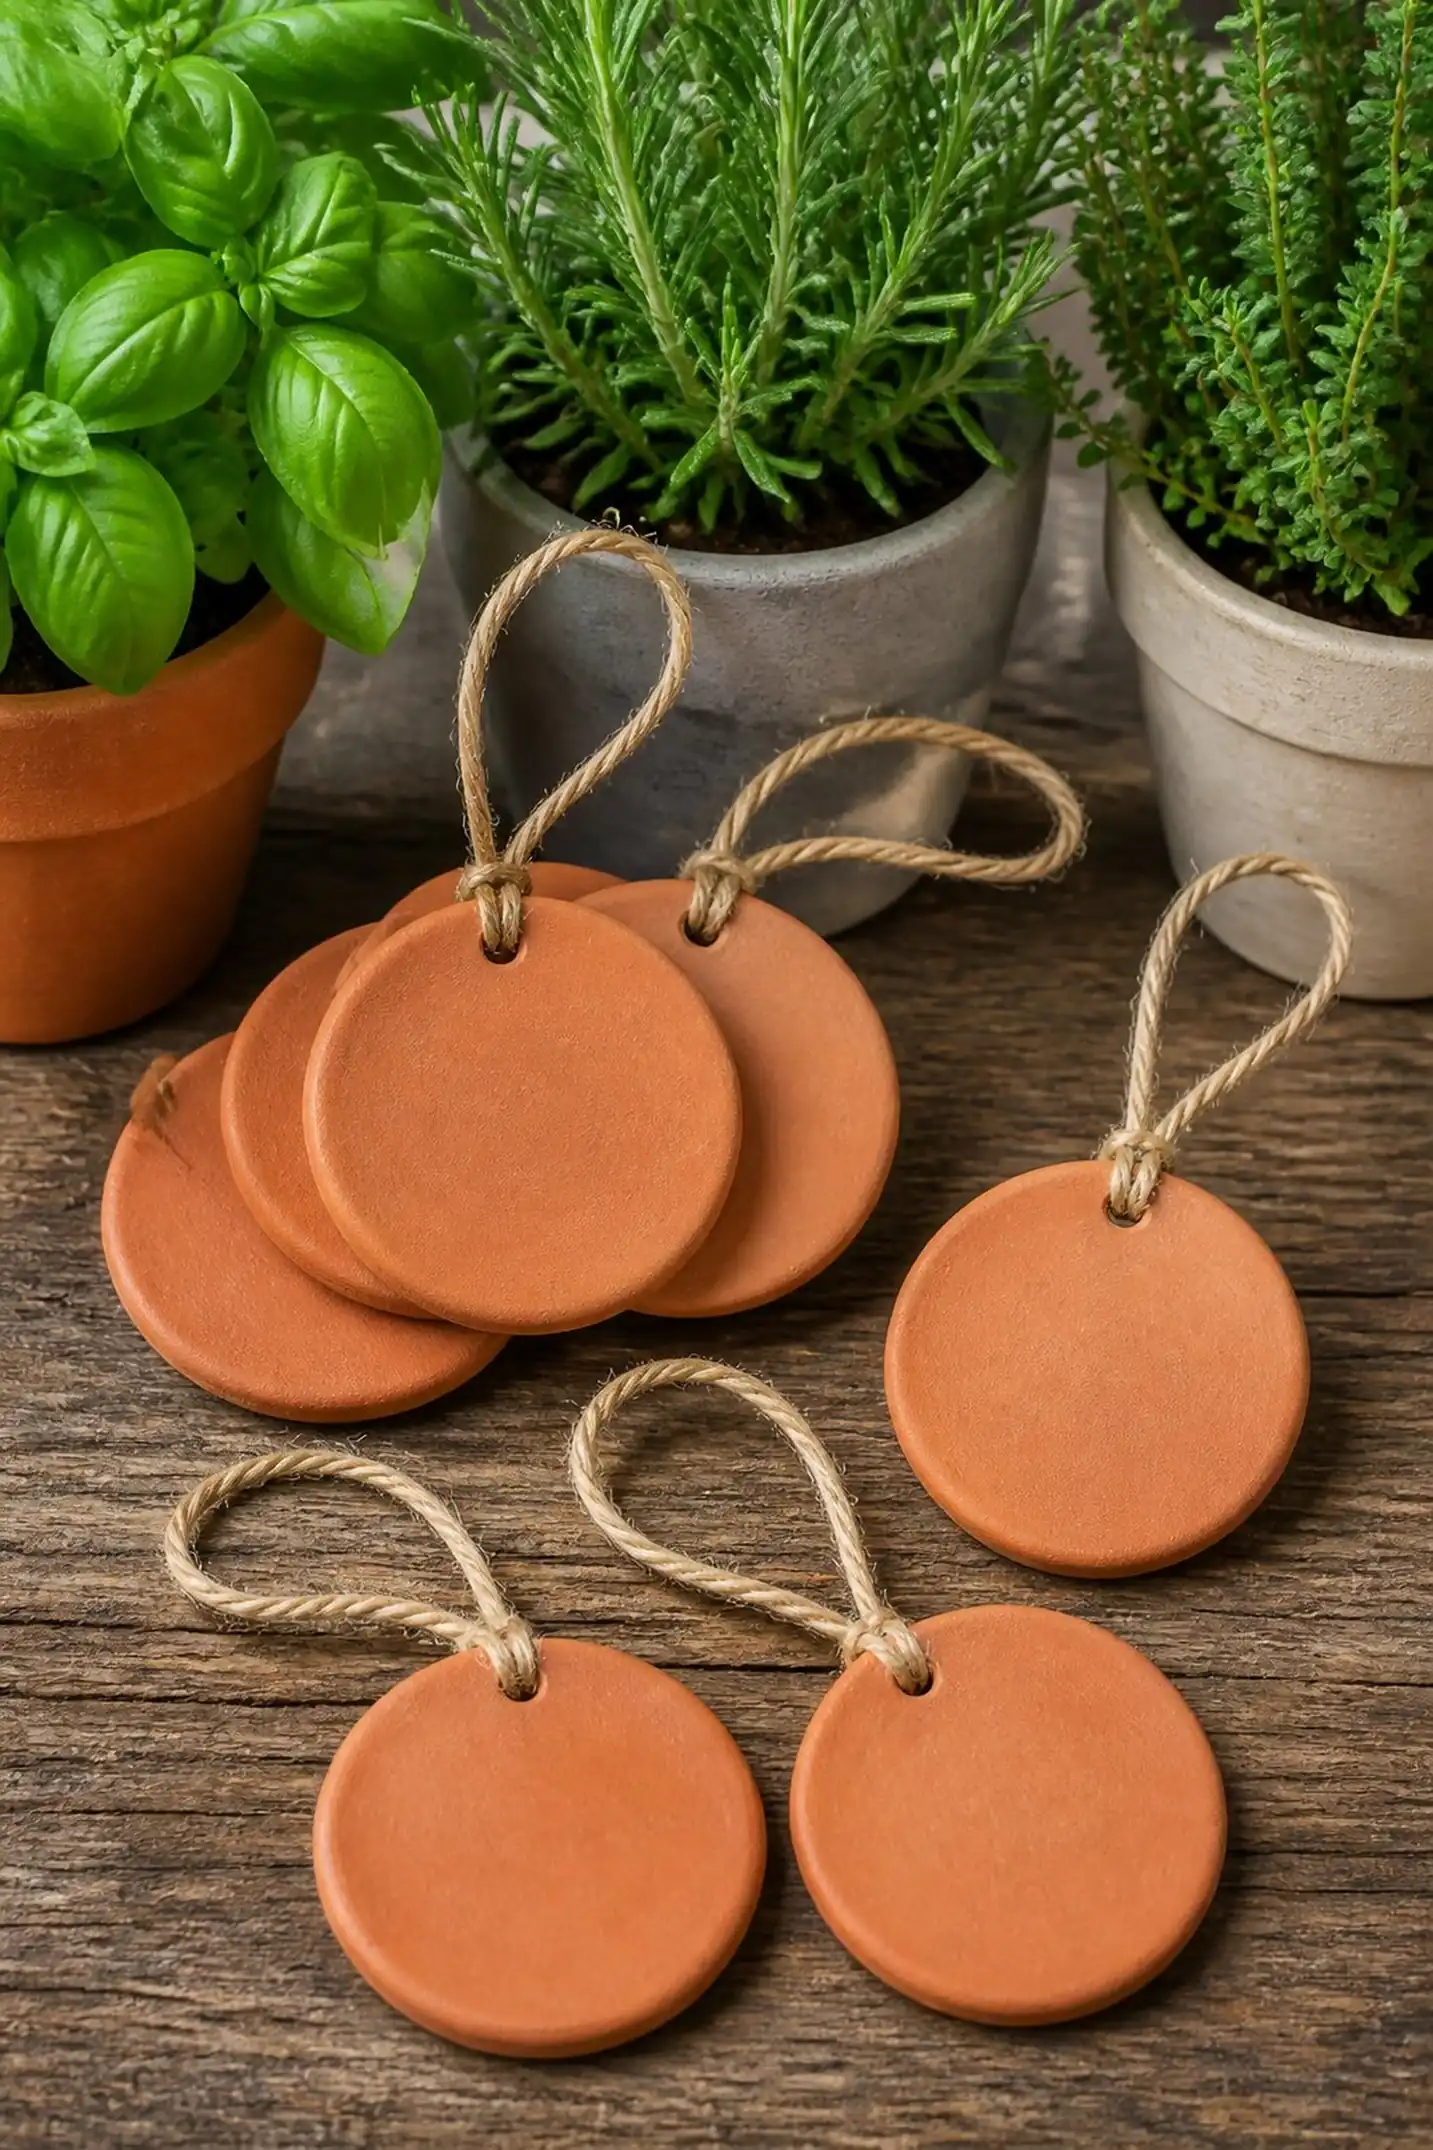
Small round markers, roughly 2 inches in diameter, feature names carved along curved surfaces and are pierced at the tops for twine loops. The matte terracotta clay contrasts with the natural fiber twine, creating a rustic hanging effect near pots or fences.
The lightweight disks swing slightly in wind, their thickness about 1/8 inch, which adds delicacy without fragility. The clay texture remains slightly porous yet hardened enough to withstand moisture.
Pro Tip: Make holes at the top while clay is soft for smooth edges that prevent twine fraying.
How to Make This
- Roll terracotta-colored clay to 1/8 inch thickness and cut 2 inch circles.
- Make holes near edge for threading twine.
- Carve herb names clearly on flat surfaces.
- Let clay air dry fully.
- Thread natural twine and tie loops for hanging.
Avoid: Small holes made after drying result in cracks or broken edges around loops.
Try Also: Use colored twine or add small wooden beads for extra decorative touches.
Products & Materials
Items Used
“Delicate hanging clay markers with twine loops for potted herbs.”
Mixing metallic clay for shimmering garden tags
⏱️ 3 hours · 🔴 Advanced
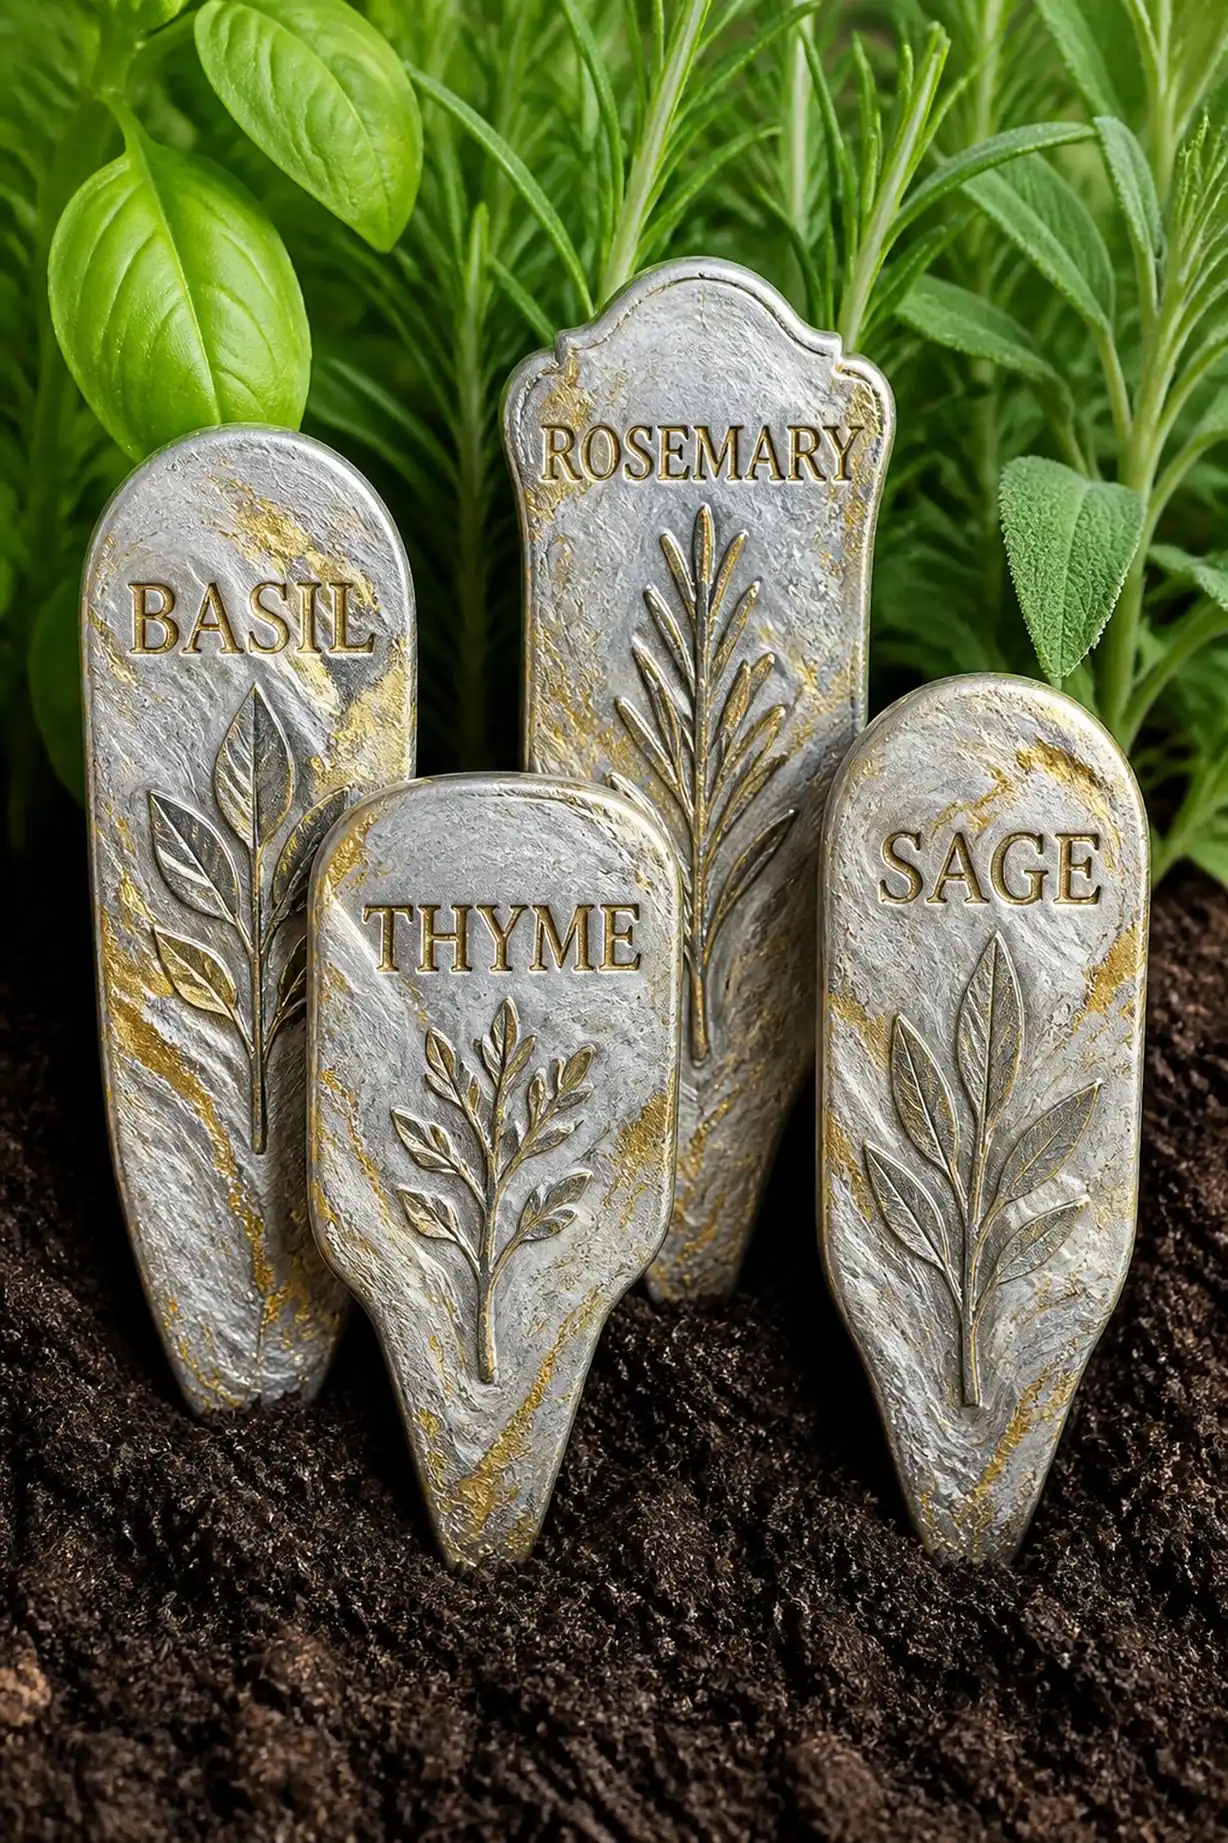
Clay that contains fine metallic flakes in silver and gold creates a shimmer reflecting garden light onto herb names carved deeply into 3-inch oval markers. The shimmer varies with viewing angle, lending a dynamic feel to the otherwise matte items.
After baking, the subtle gleam intensifies, catching raindrops and dew as if dusted with tiny stars. Markers have a firm feel with minor texture from metallic flakes embedded in the clay matrix.
Pro Tip: Blend metallic clay well to evenly distribute flakes, preventing clumps that can cause uneven surface reflections.
How to Make This
- Combine metallic silver and gold clay blends into desired color mix.
- Form oval markers about 3 inches long and 1.5 inches wide.
- Carve herb names deeply for shadow contrast.
- Bake according to metallic clay instructions.
- Cool fully before garden placement.
Avoid: Uneven mixing causes patchy shine and weak spots in baked markers.
Try Also: Create stripes or marbled effects by layering metallic and plain clays before shaping.
Products & Materials
Items Used
“Shiny metallic clay markers bring sparkle to herb gardens.”
Personalized shape cutters for unique marker outlines
⏱️ 2 hours · 🟠 Intermediate
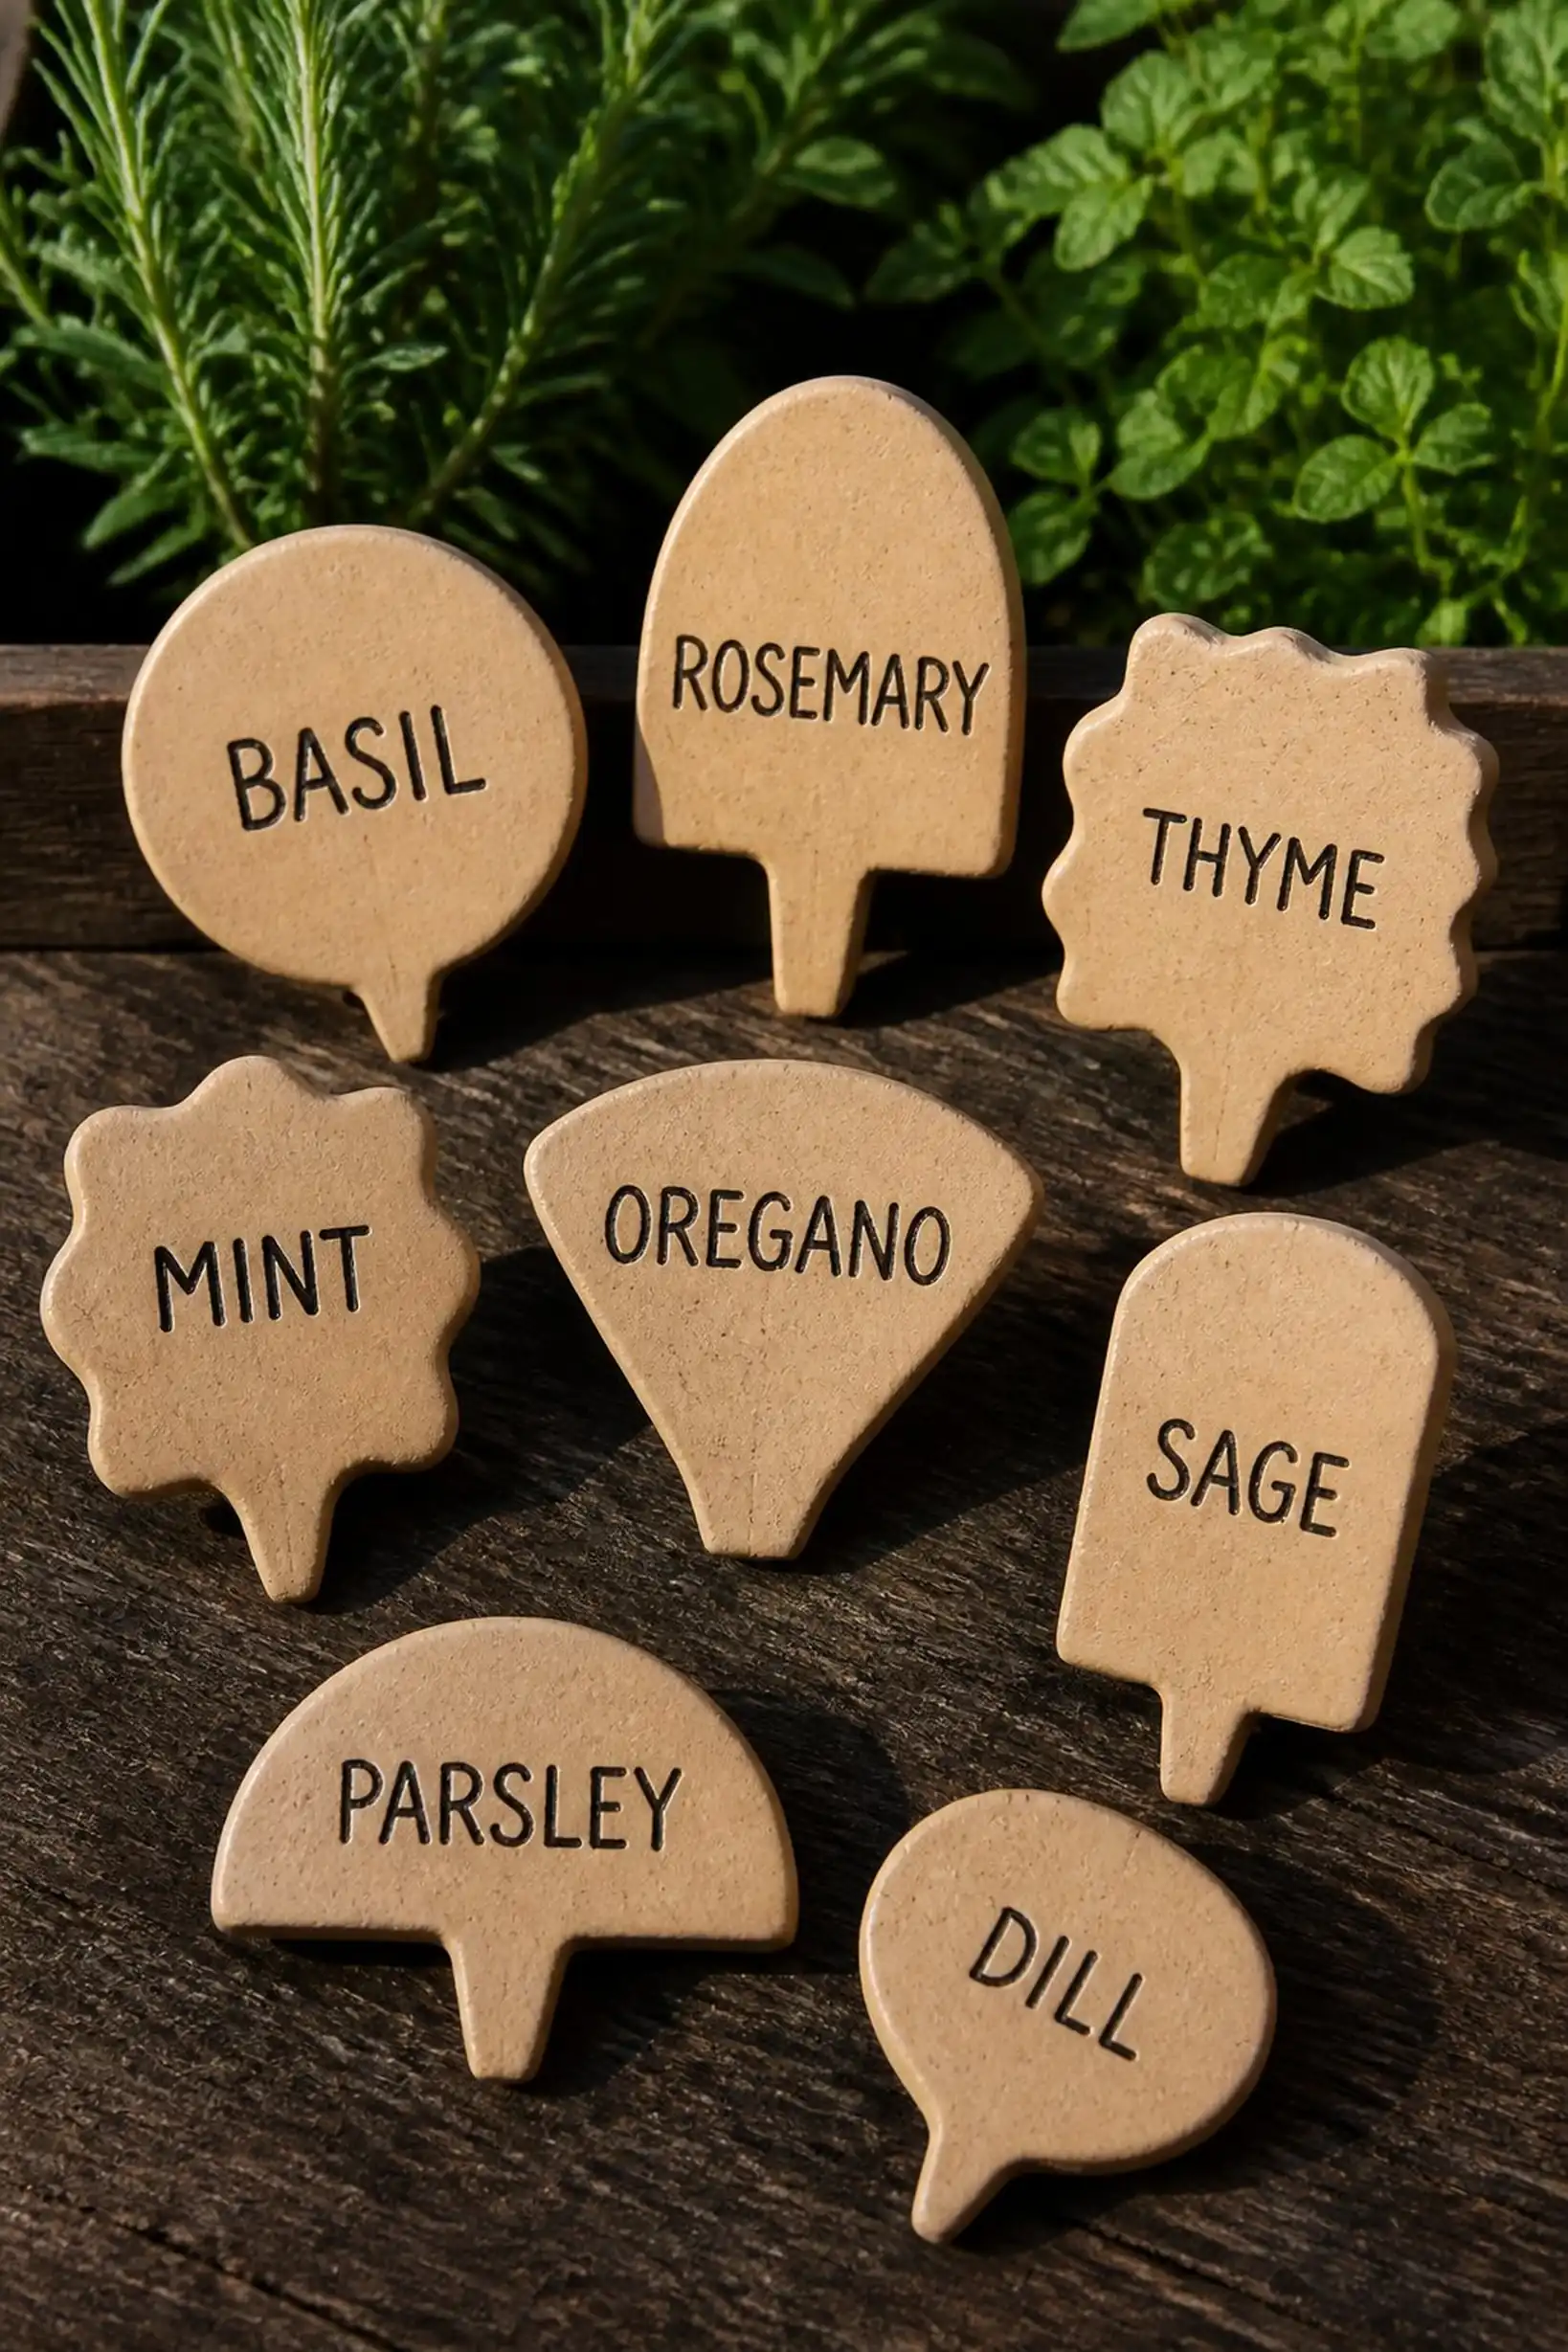
Markers shaped with custom cutters form unique outlines like hearts, stars, or leaves measuring about 3 inches across. The clay’s warm sandstone tone contrasts softly with black inked herb names, making each shape pop visually among green foliage.
Edges remain crisp due to firm clay, while the surface shows subtle fingerprint textures from hand pressing the cutters. The charming irregularities add individual character to every marker.
Pro Tip: Apply light powder on cutters before pressing to prevent clay sticking for clean edges.
How to Make This
- Roll sandstone colored air-dry clay to even thickness.
- Press custom shaped cutters firmly to form varied outlines.
- Use waterproof ink pens to write herb names centrally.
- Let dry thoroughly before insertion into soil.
- Place markers strategically within herb clusters.
Avoid: Using cutters without dusting leads to misshapen edges or tearing clay details.
Try Also: Decorate edges with paint outlines or add small drilled holes for twine hanging options.
Products & Materials
Items Used
“Unique personalized shaped clay markers make herbs easy to spot.”
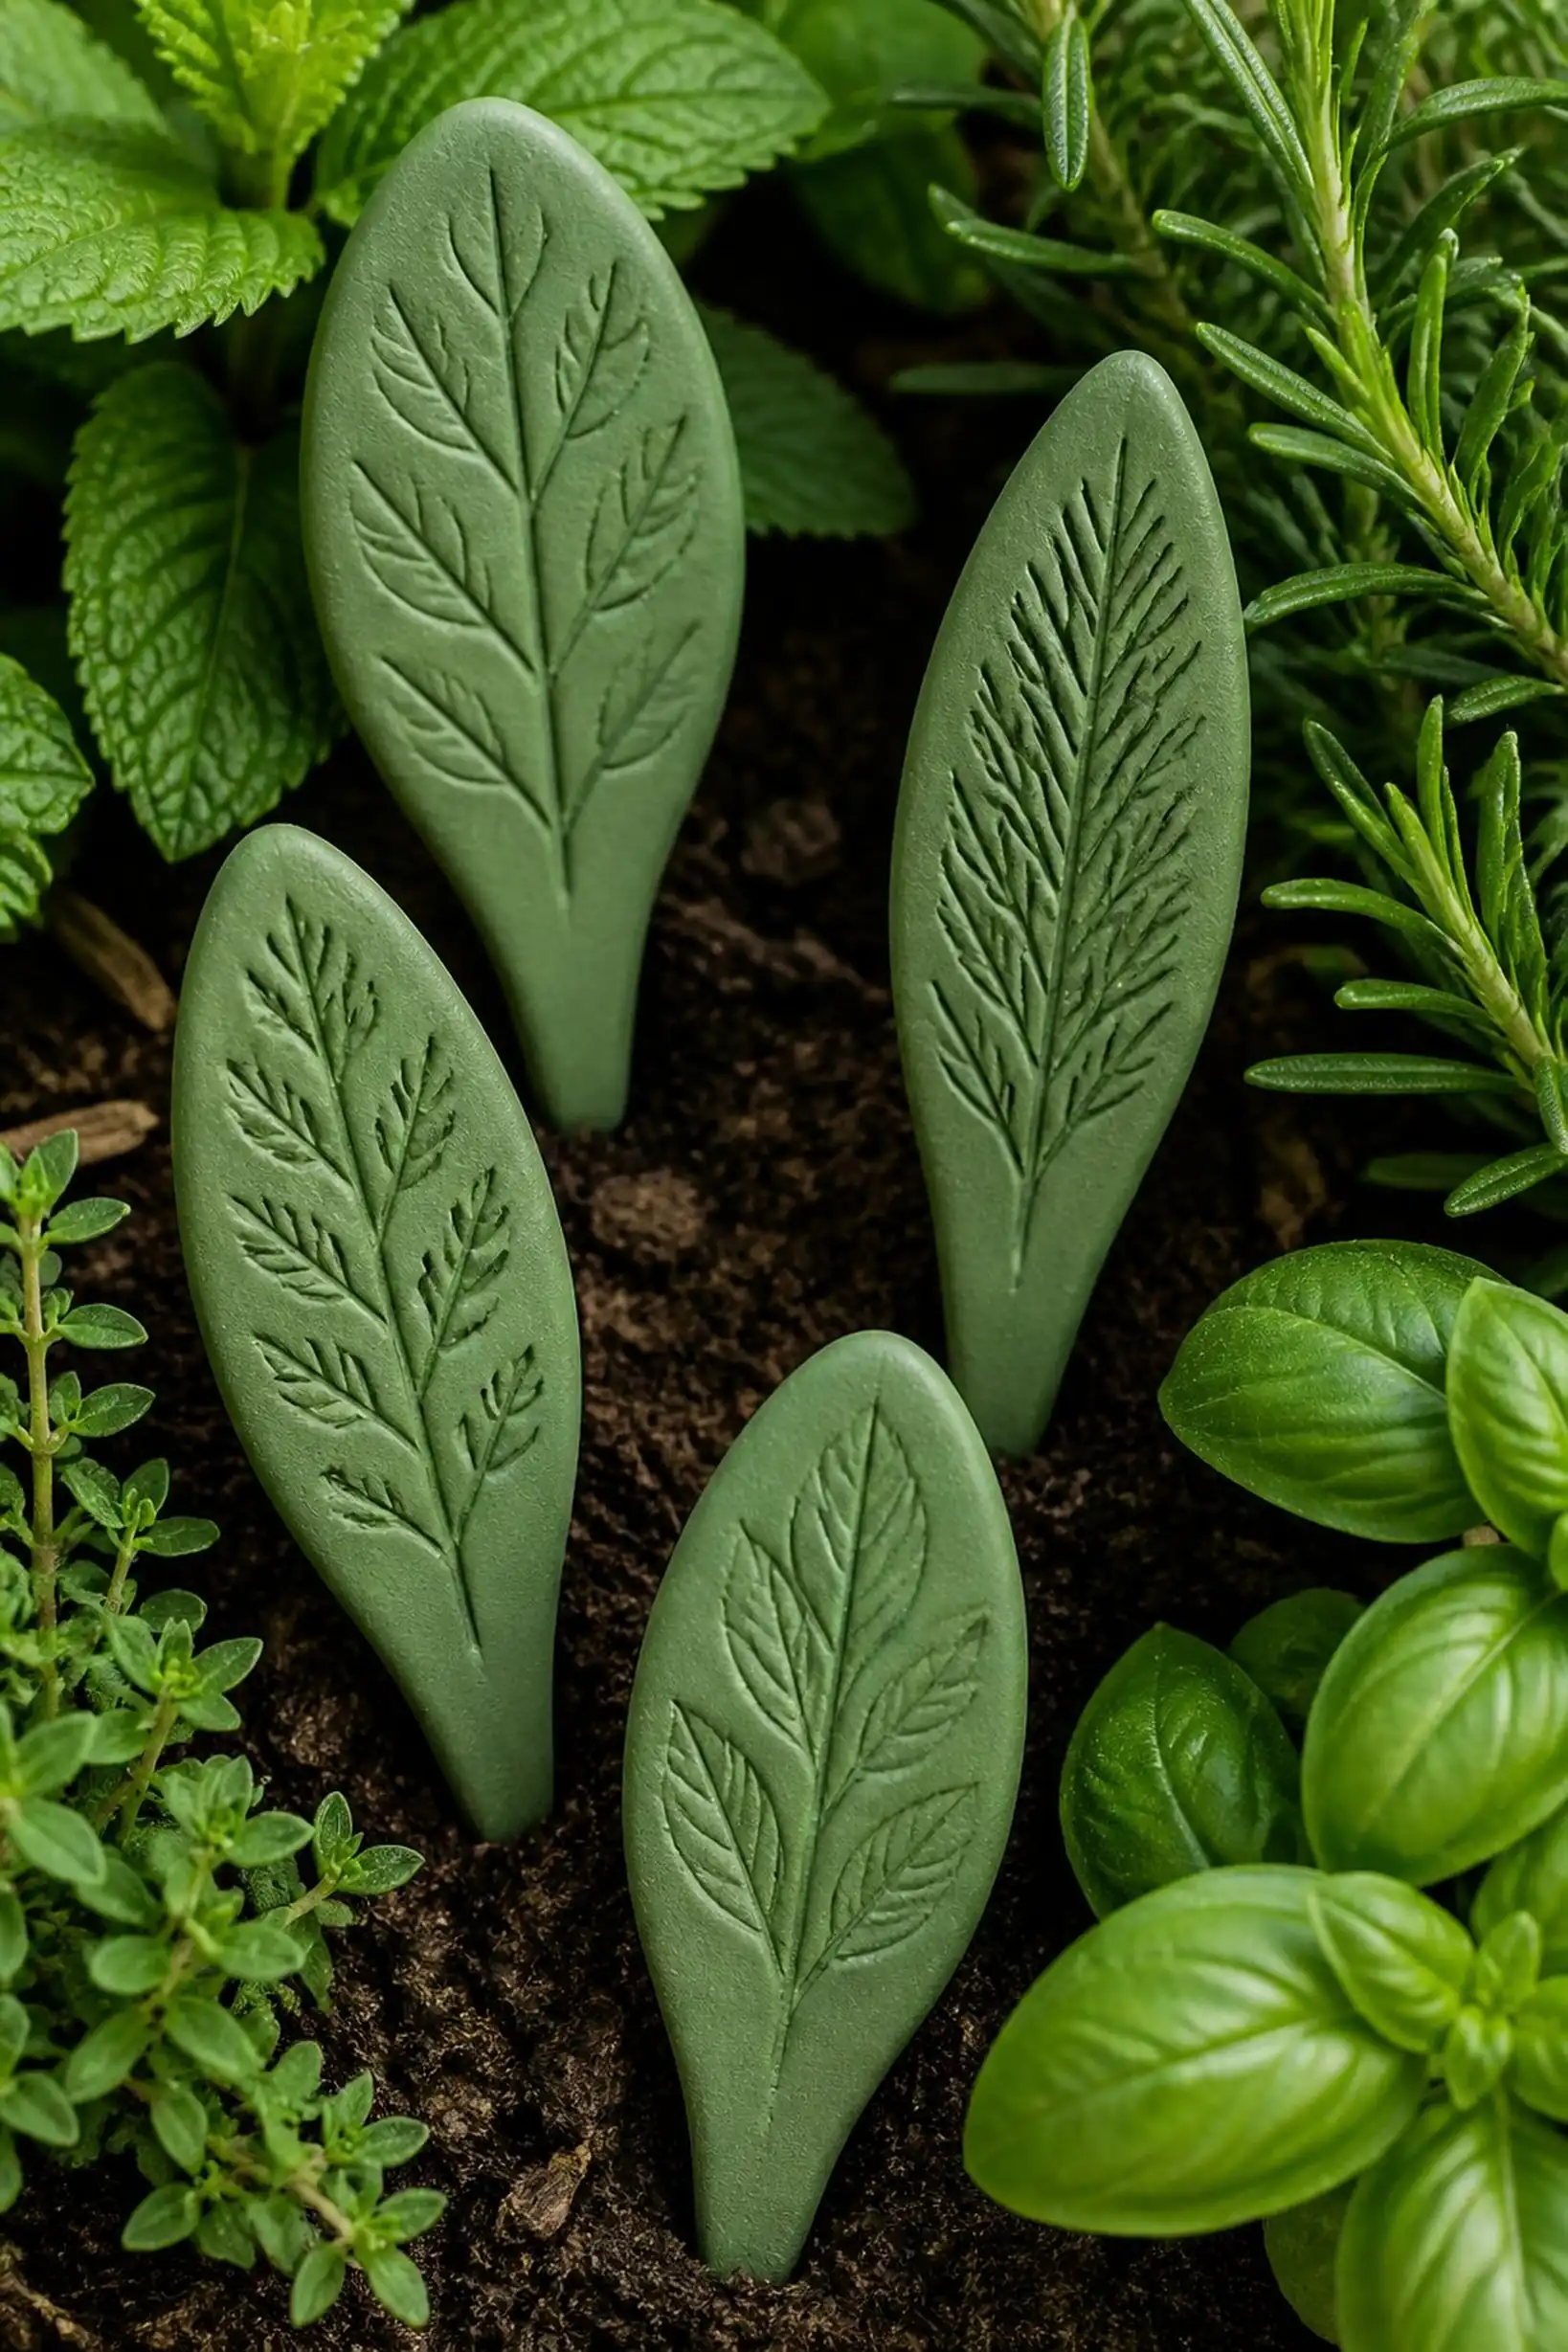
Tiny succulent-inspired markers with leaf shapes
⏱️ 1 hour · 🟢 Beginner
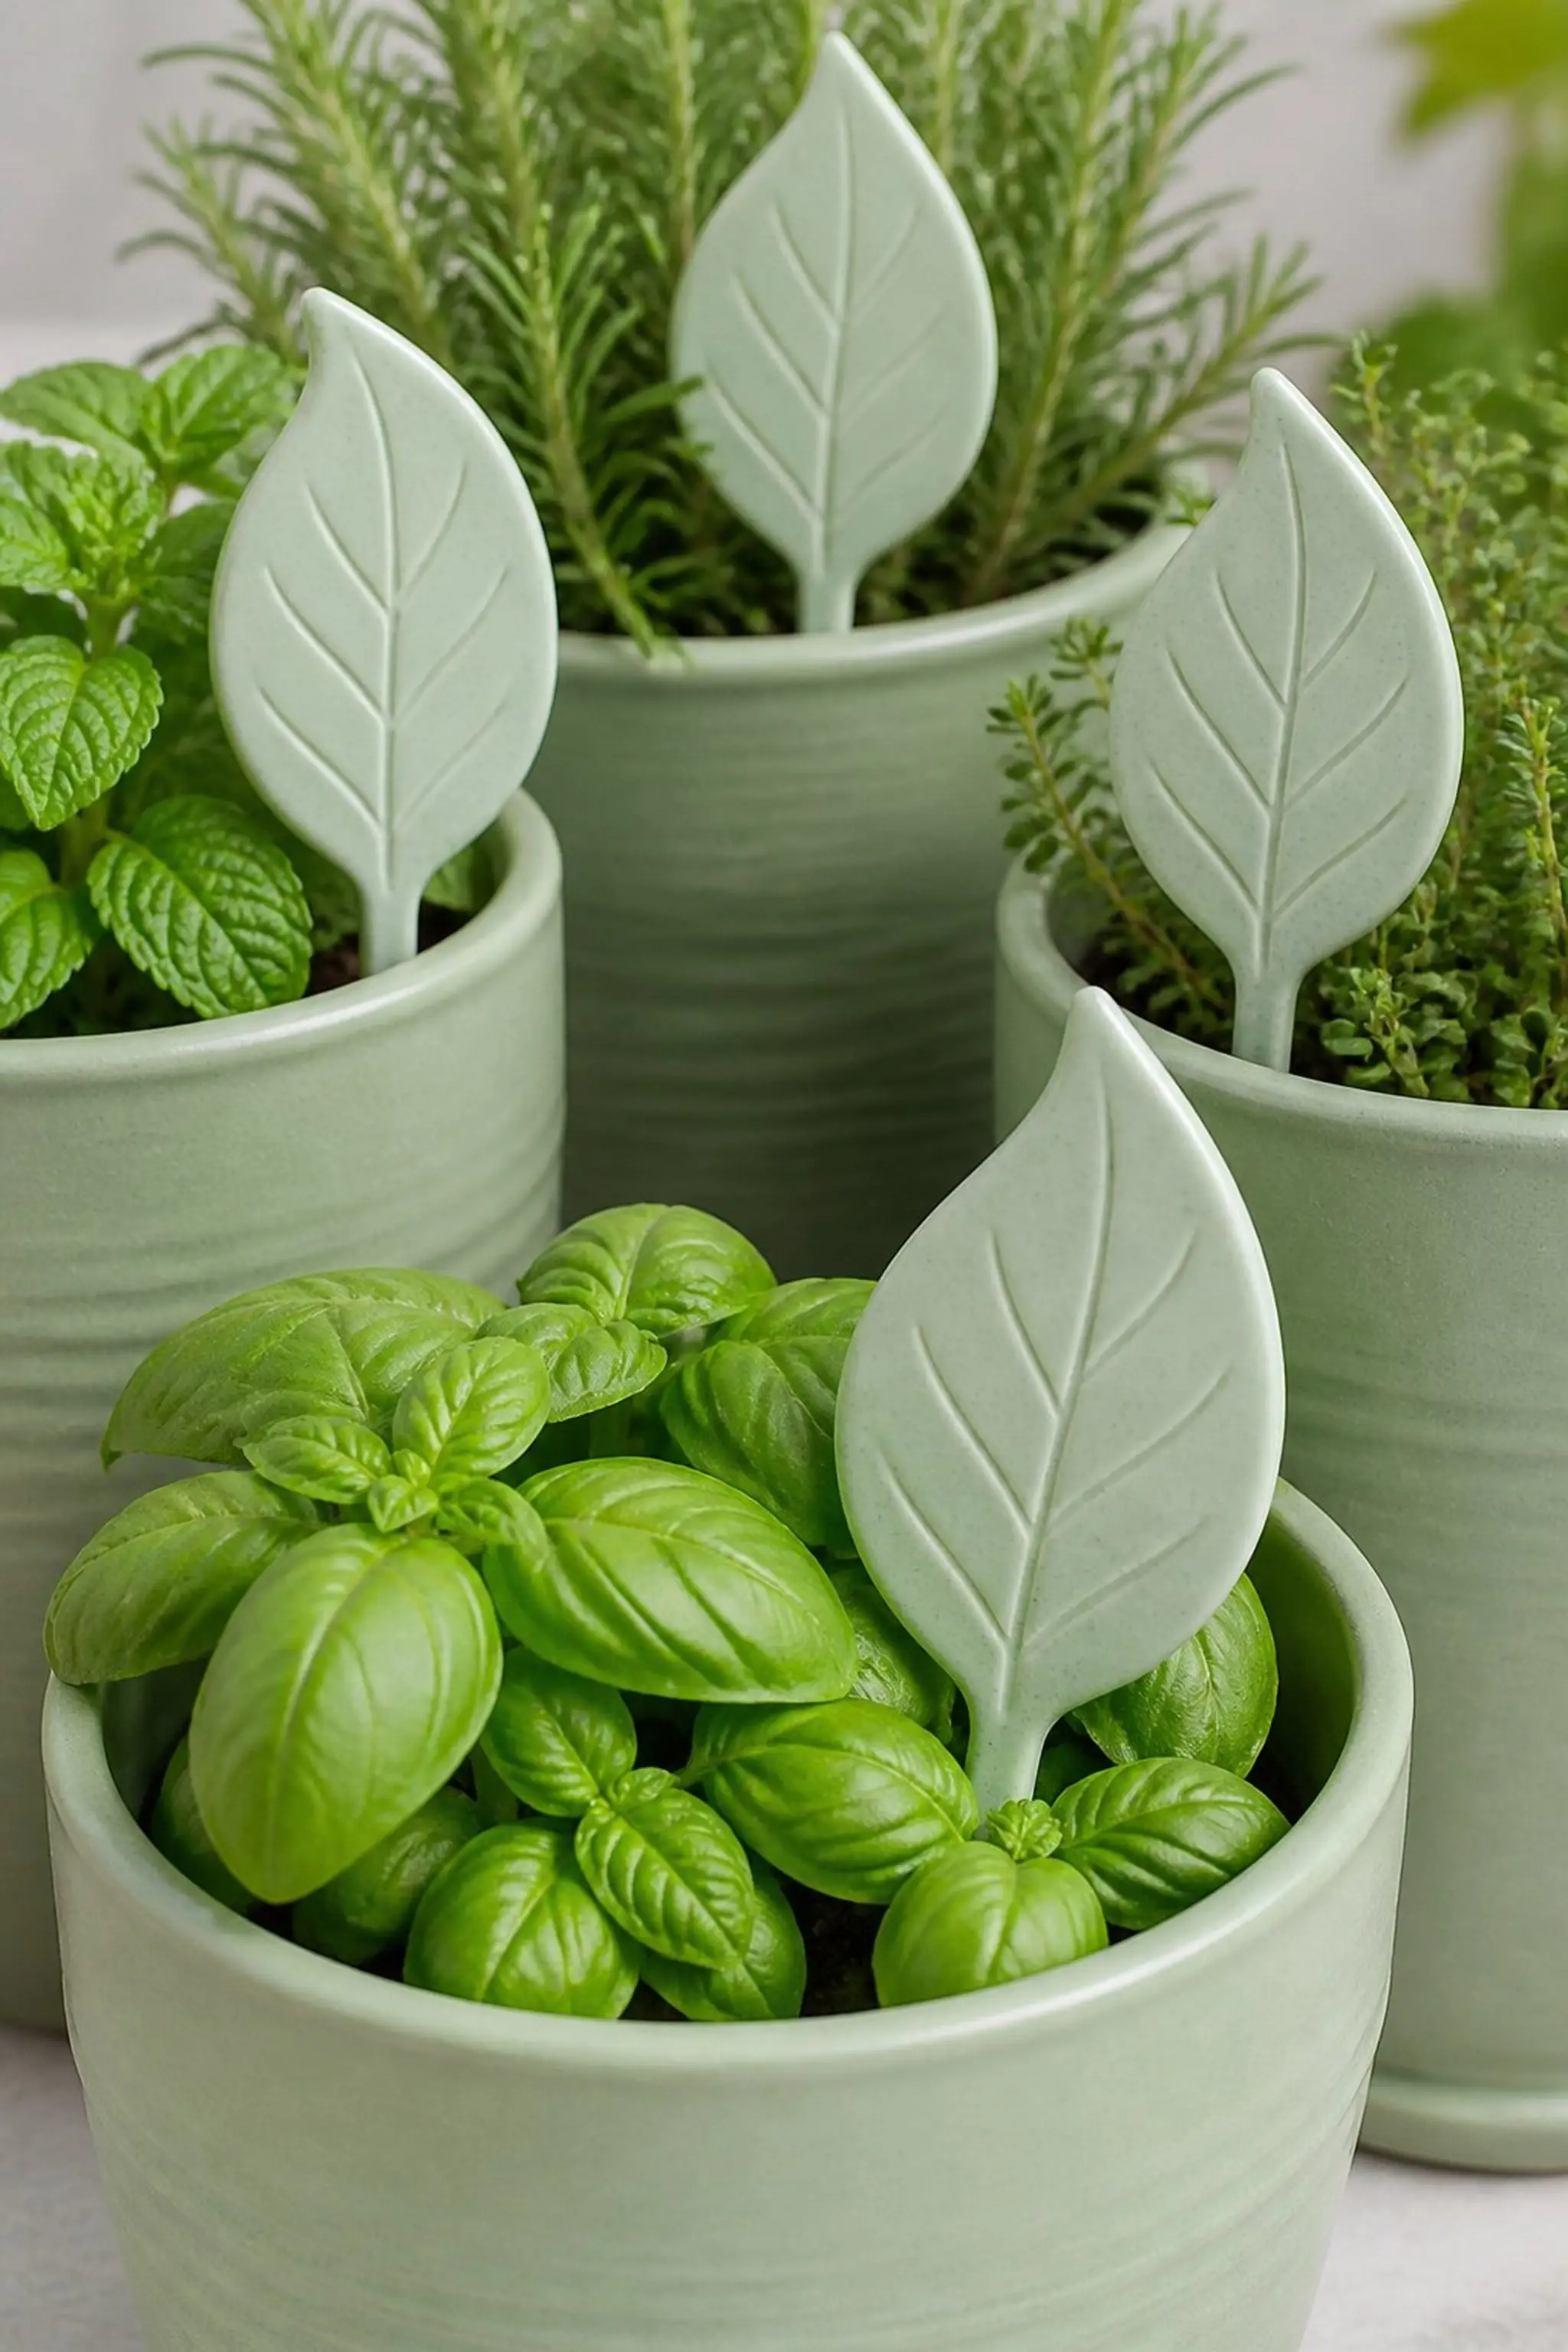
Small clay markers shaped like succulent leaves cast in mint green feature gentle curves about 2.5 inches long and 1 inch wide. Their smooth, matte surfaces and subtle ridges mimic succulent textures closely.
Herb names appear in tiny script along leaf midlines, balanced between artful design and practical labeling. These size-friendly markers fit compact herb pots or narrow garden rows without crowding plants.
Pro Tip: Shape leaves slightly asymmetrical for a natural look typical of succulents growing in varied light conditions.
How to Make This
- Form mint green clay into leaf shapes approximately 2.5 by 1 inch.
- Add ridges with a fine tool to mimic succulents.
- Write small herb names with waterproof paint or ink pens.
- Let air dry fully before use.
- Insert into soil close to small potted herbs.
Avoid: Overly symmetrical shapes look artificial and less like real succulents.
Try Also: Use shades of blue or gray-green clay and add tiny dots or speckles for texture diversity.
Products & Materials
Items Used
- mint green air dry clay
- fine detailing brush
- waterproof ink pen
“Simple mint green leaf markers inspired by succulents for herbs.”
Textured coil markers with embedded letter blocks
⏱️ 4 hours · 🔴 Advanced
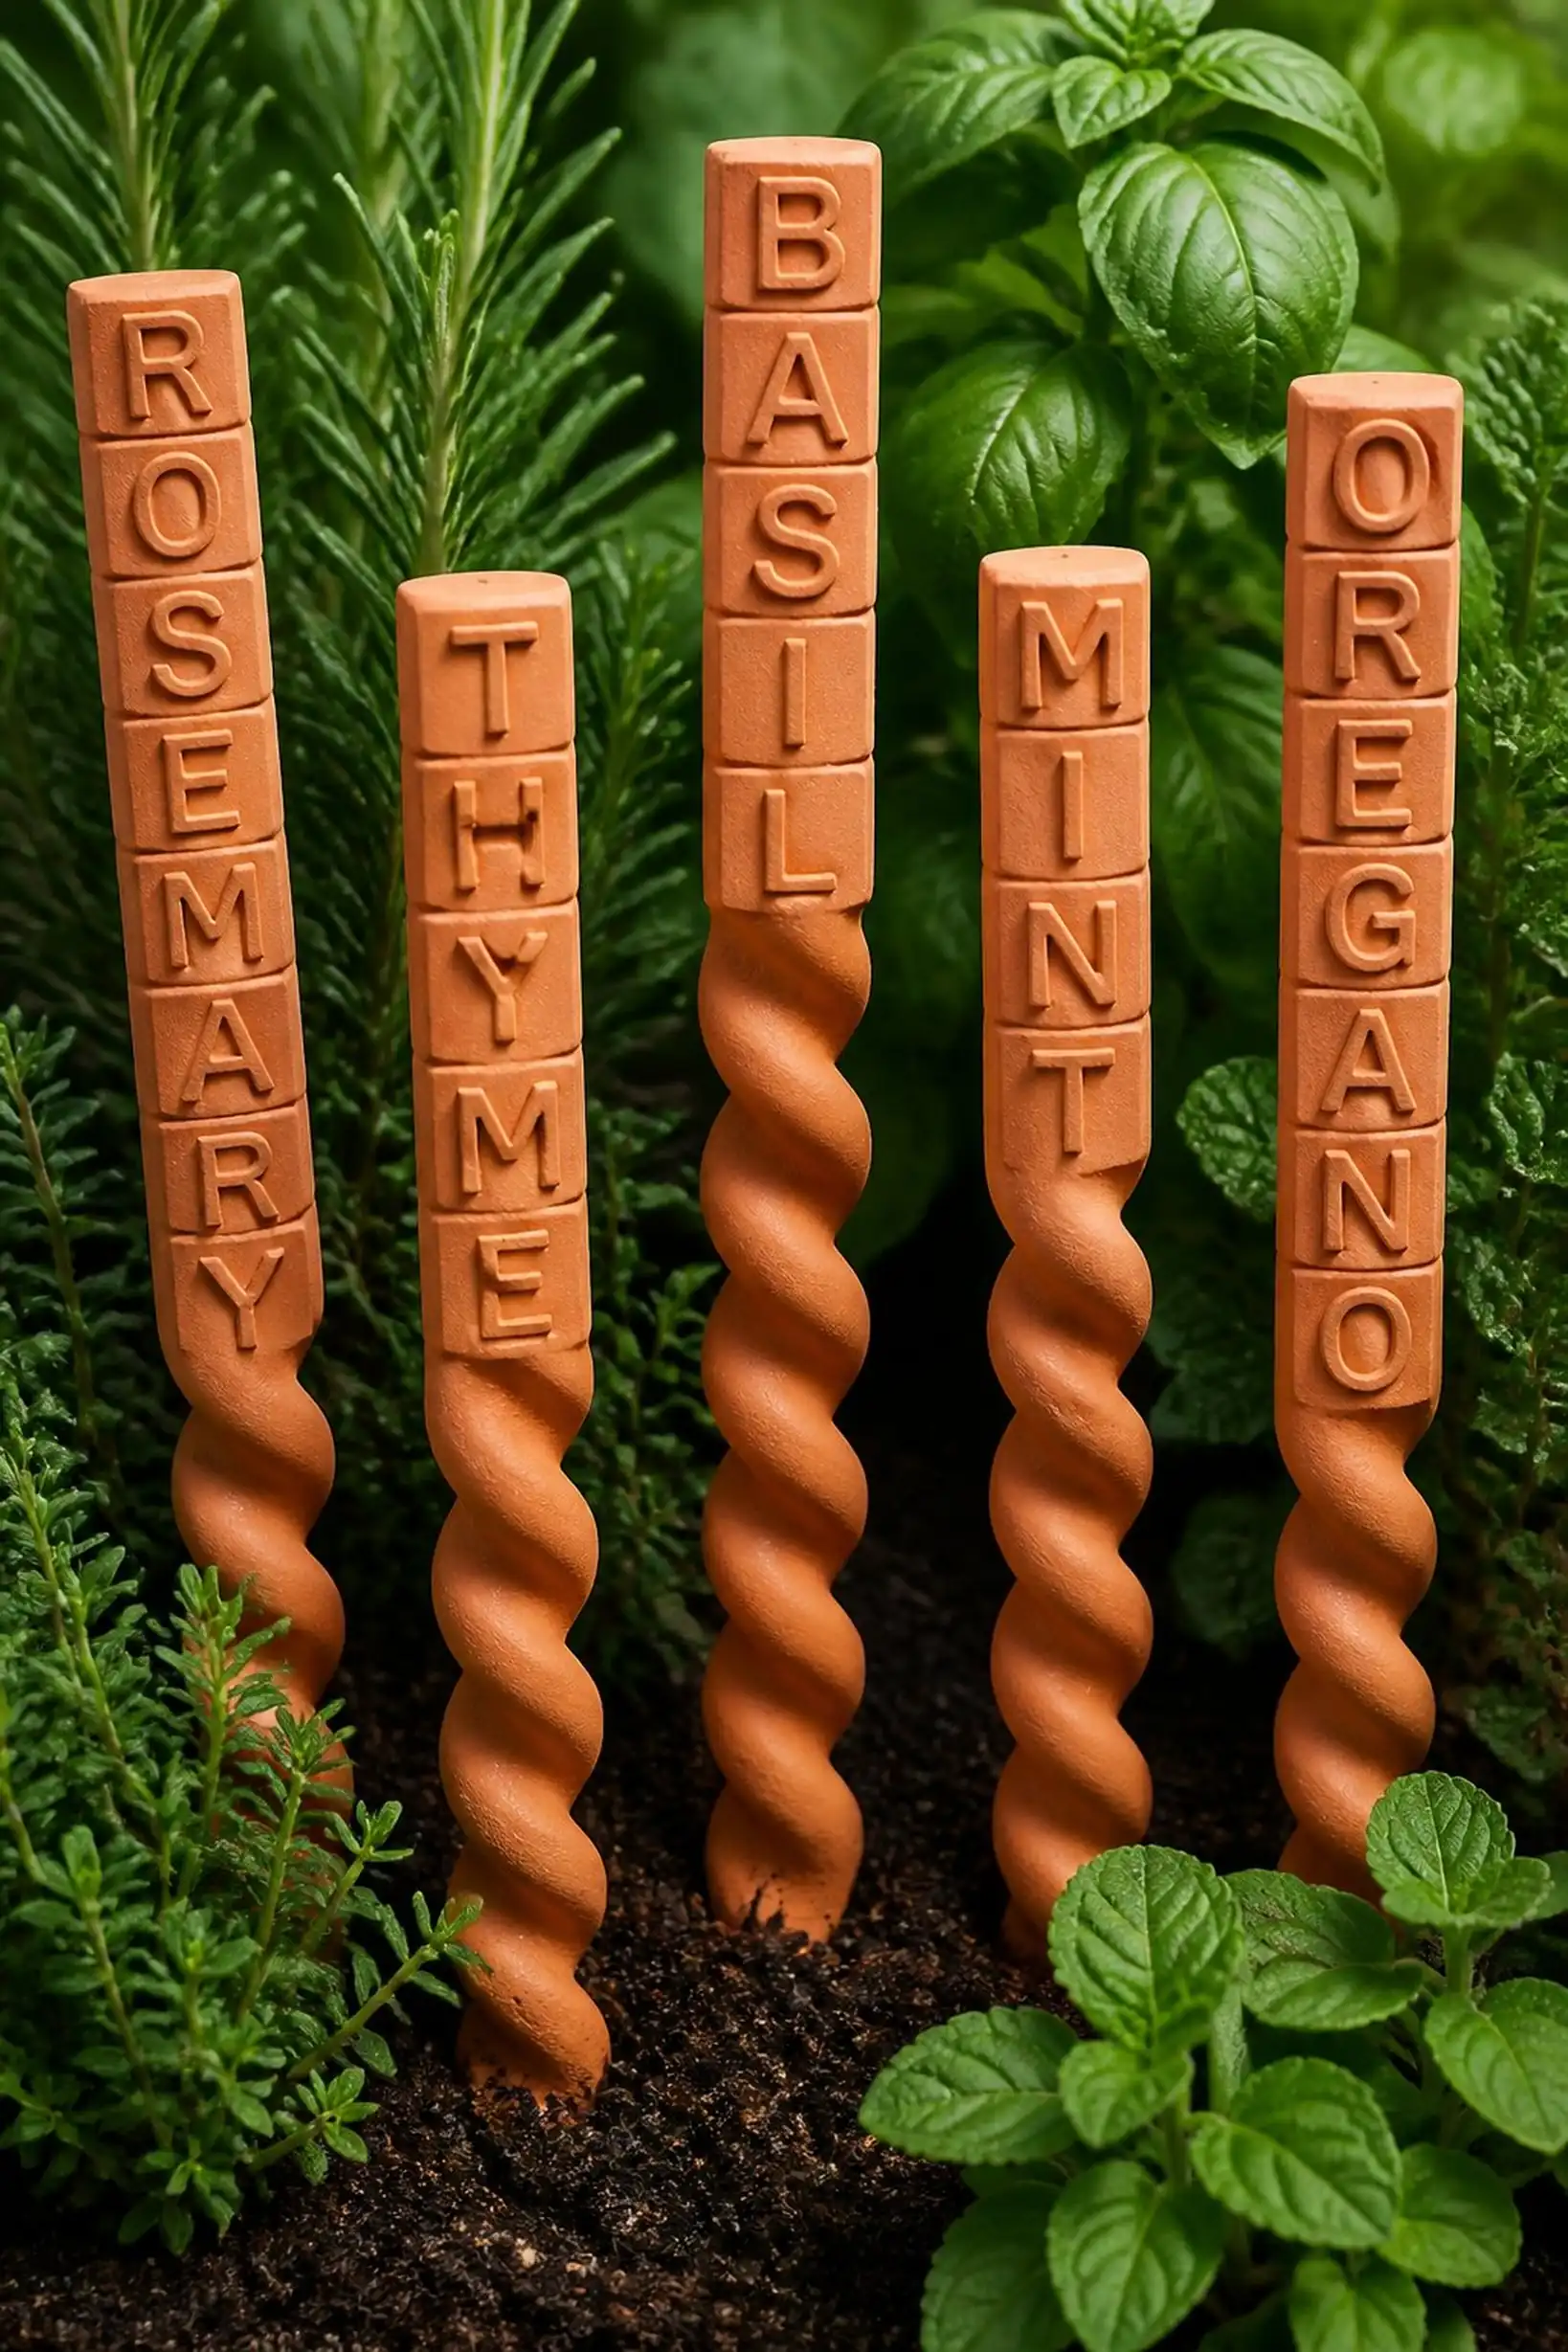
Cylindrical clay markers about 5 inches tall consist of hand-coiled ropes of clay wrapped tightly. Embedded into the coils are tiny alphabet blocks pressed about halfway in to exhibit herb names in raised letters.
The surface texture appears rugged, showing coil overlaps and matte clay’s natural grains. The robust design makes these markers stand out visually and physically among delicate herb stems.
Pro Tip: Keep coil diameters steady, roughly 1/2 inch thick, to ensure structural stability without excessive weight.
How to Make This
- Roll thin clay ropes about 1/2 inch diameter.
- Wrap coils vertically to form a 5 inch tall cylindrical column.
- Press alphabet blocks partially into the coil surfaces to spell names.
- Bake markers following clay type instructions.
- Cool completely before placing in soil.
Avoid: Uneven coils cause the markers to lean or be unstable when placed in soil.
Try Also: Try thicker coils for chunky looks or thinner coils for delicate designs; different block fonts change visual impact.
Products & Materials
Items Used
“Coiled clay columns with raised letters for sturdy herb markers.”
Pressed pebble accents on wide slab markers
⏱️ 2 hours · 🟠 Intermediate
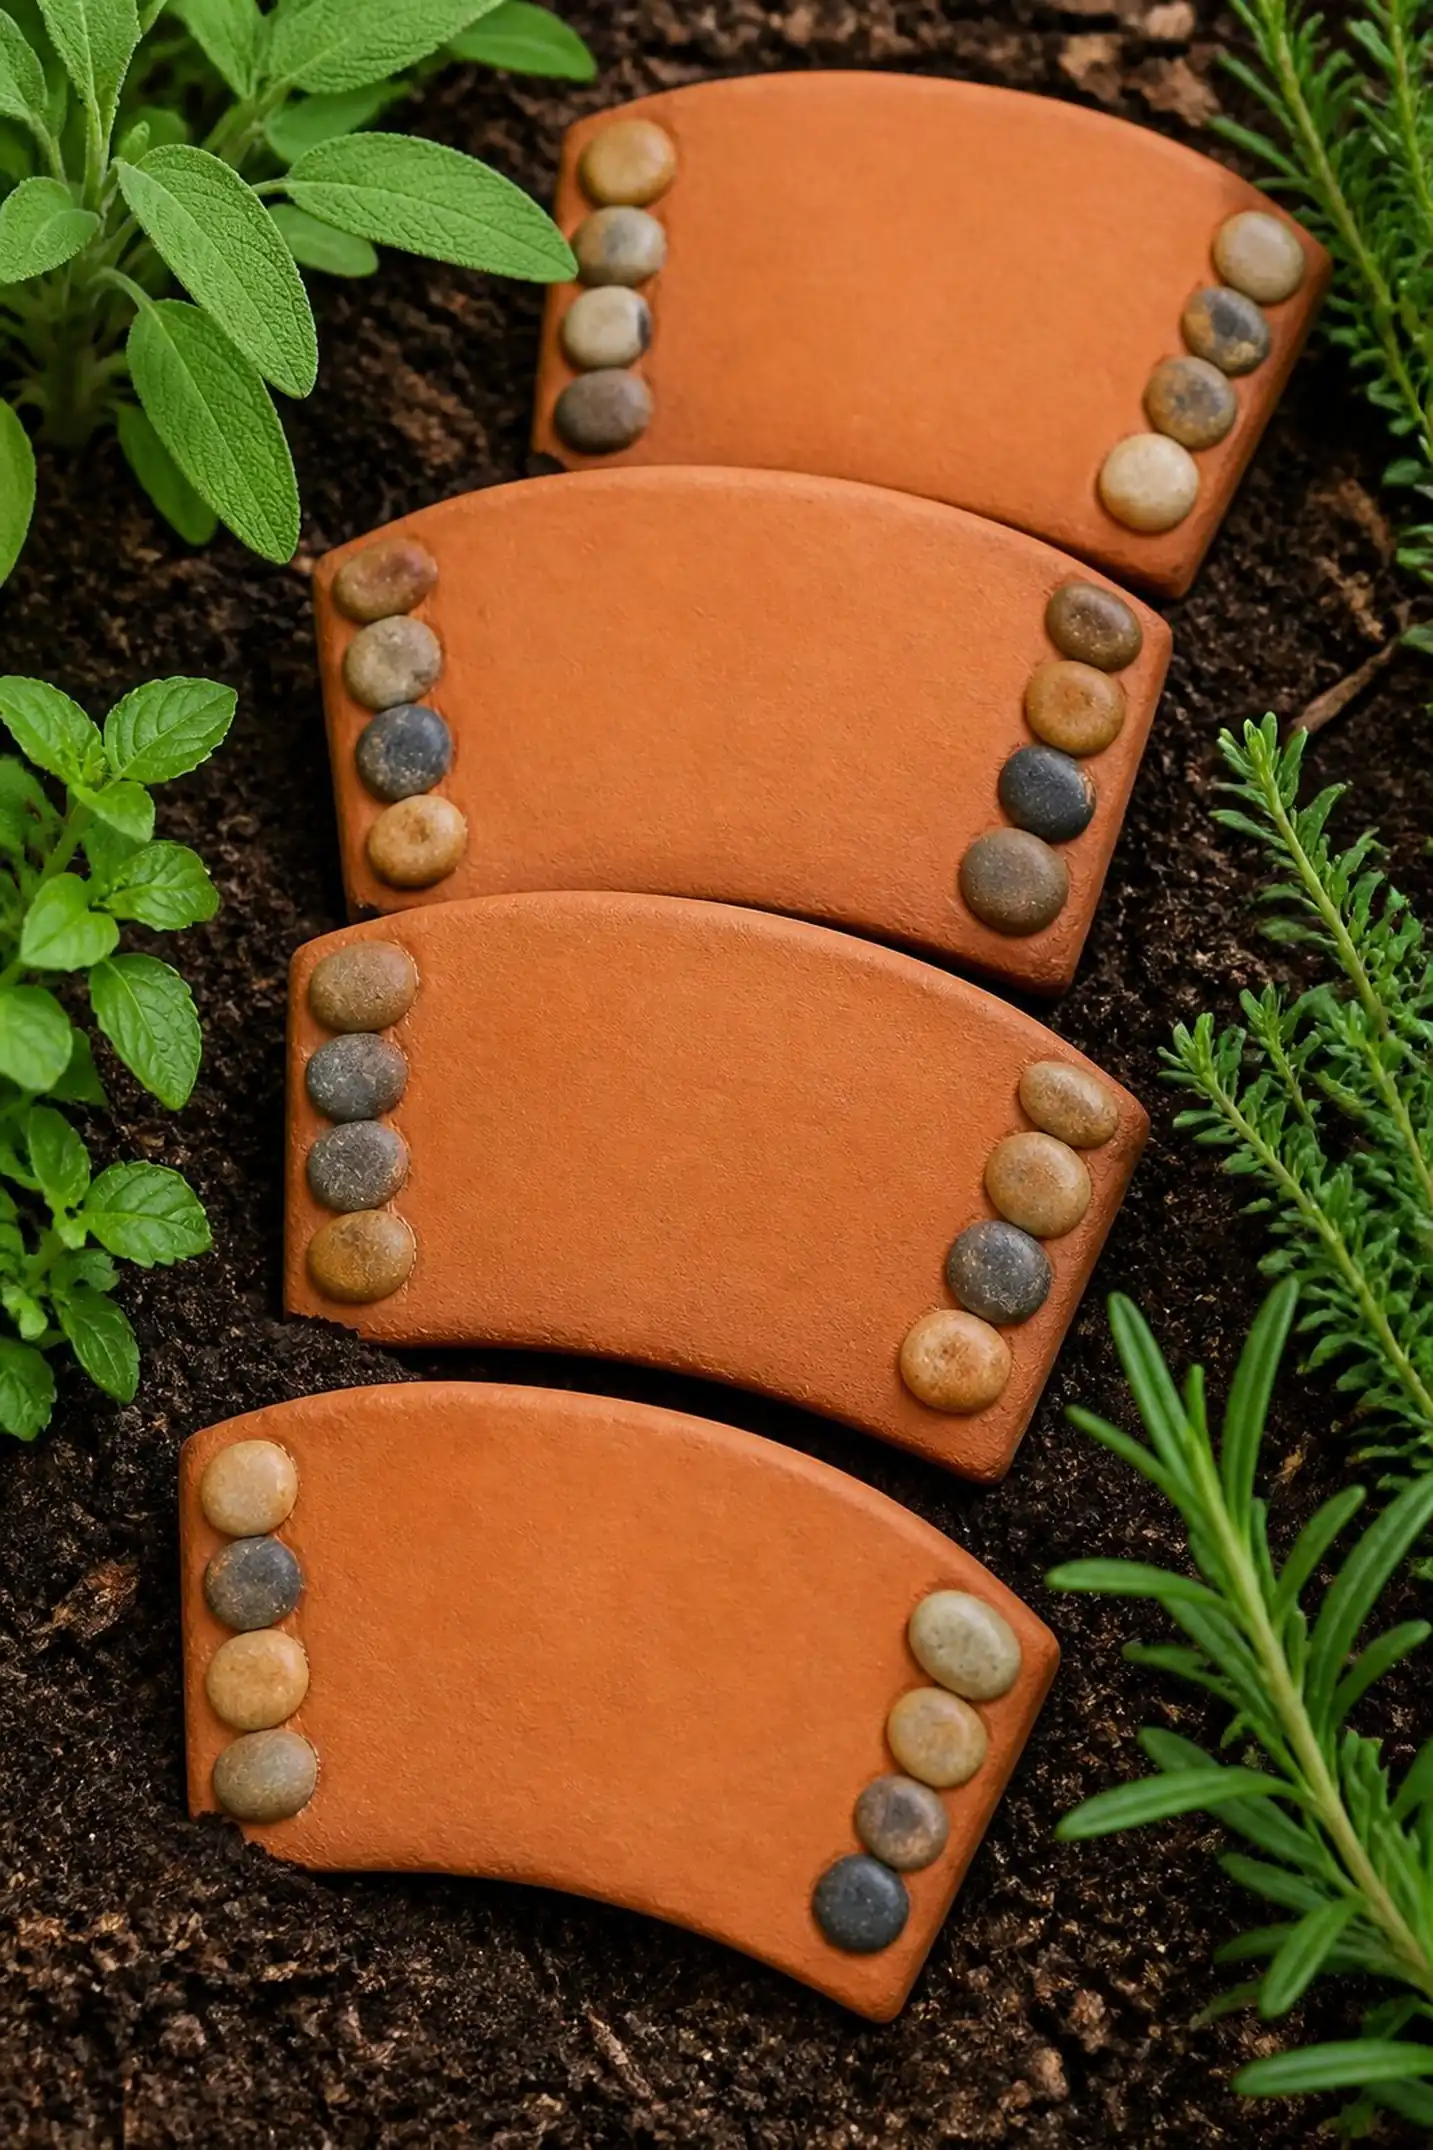
Flat clay slabs approximately 4 inches wide host small smooth pebbles pressed into their surfaces along edges. The contrast of cool grays and creams from stones against soft warm clay creates a balanced natural aesthetic.
Herb names appear etched centrally, framed by gentle pebble shapes. The overall texture combines firmness from baked clay and hardness from stone, making each marker robust for outdoor conditions about 1/4 inch thick.
Pro Tip: Select pebbles that sit flush with clay surfaces to keep markers balanced and prevent snagging on fabric gloves during gardening.
How to Make This
- Roll clay into 1/4 inch thick slabs around 4 inches wide.
- Gently press small smooth pebbles into edges before drying.
- Carve herb names in the middle using a stylus or carving tool.
- Bake markers or let air dry fully.
- Allow to cool before placing near herbs.
Avoid: Pebbles that protrude too far can loosen during handling or soil insertion.
Try Also: Use colored glass beads or tiny shells for alternative accent materials.
Products & Materials
Items Used
- terra cotta clay slab
- small smooth garden pebbles
- clay stylus tool
“Pebble-accented clay slabs add natural texture to herb labels.”
Bright color-coded markers for easy herb identification
⏱️ 1 hour · 🟢 Beginner
Markers painted in bright hues like red, yellow, and blue contrast vividly with the dark soil and green herb foliage. Each color corresponds to a different herb type, with black ink names written prominently on flat clay tablets about 3 inches wide and 1/4 inch thick.
These compact tags fit neatly between plants spaced about 5 inches, offering both visual cues for gardeners and a cheerful pop amid natural tones.
Pro Tip: Label colors consistently to speed up identification even from a distance or in low light conditions.
How to Make This
- Form flat clay tablets about 3 inches wide and 1/4 inch thick.
- Bake or air dry completely.
- Paint each with bright acrylic colors.
- Write herb names clearly with black waterproof ink pens.
- Allow full drying before planting.
Avoid: Using non-waterproof ink leads to smudging during watering or rain exposure.
Try Also: Include color-coded borders or use pastel palettes for a softer look.
Products & Materials
Items Used
“Color-coded clay markers help quickly identify herbs in gardens.”
Mini chalkboard style clay tags for reusable labels
⏱️ 3 hours · 🔴 Advanced
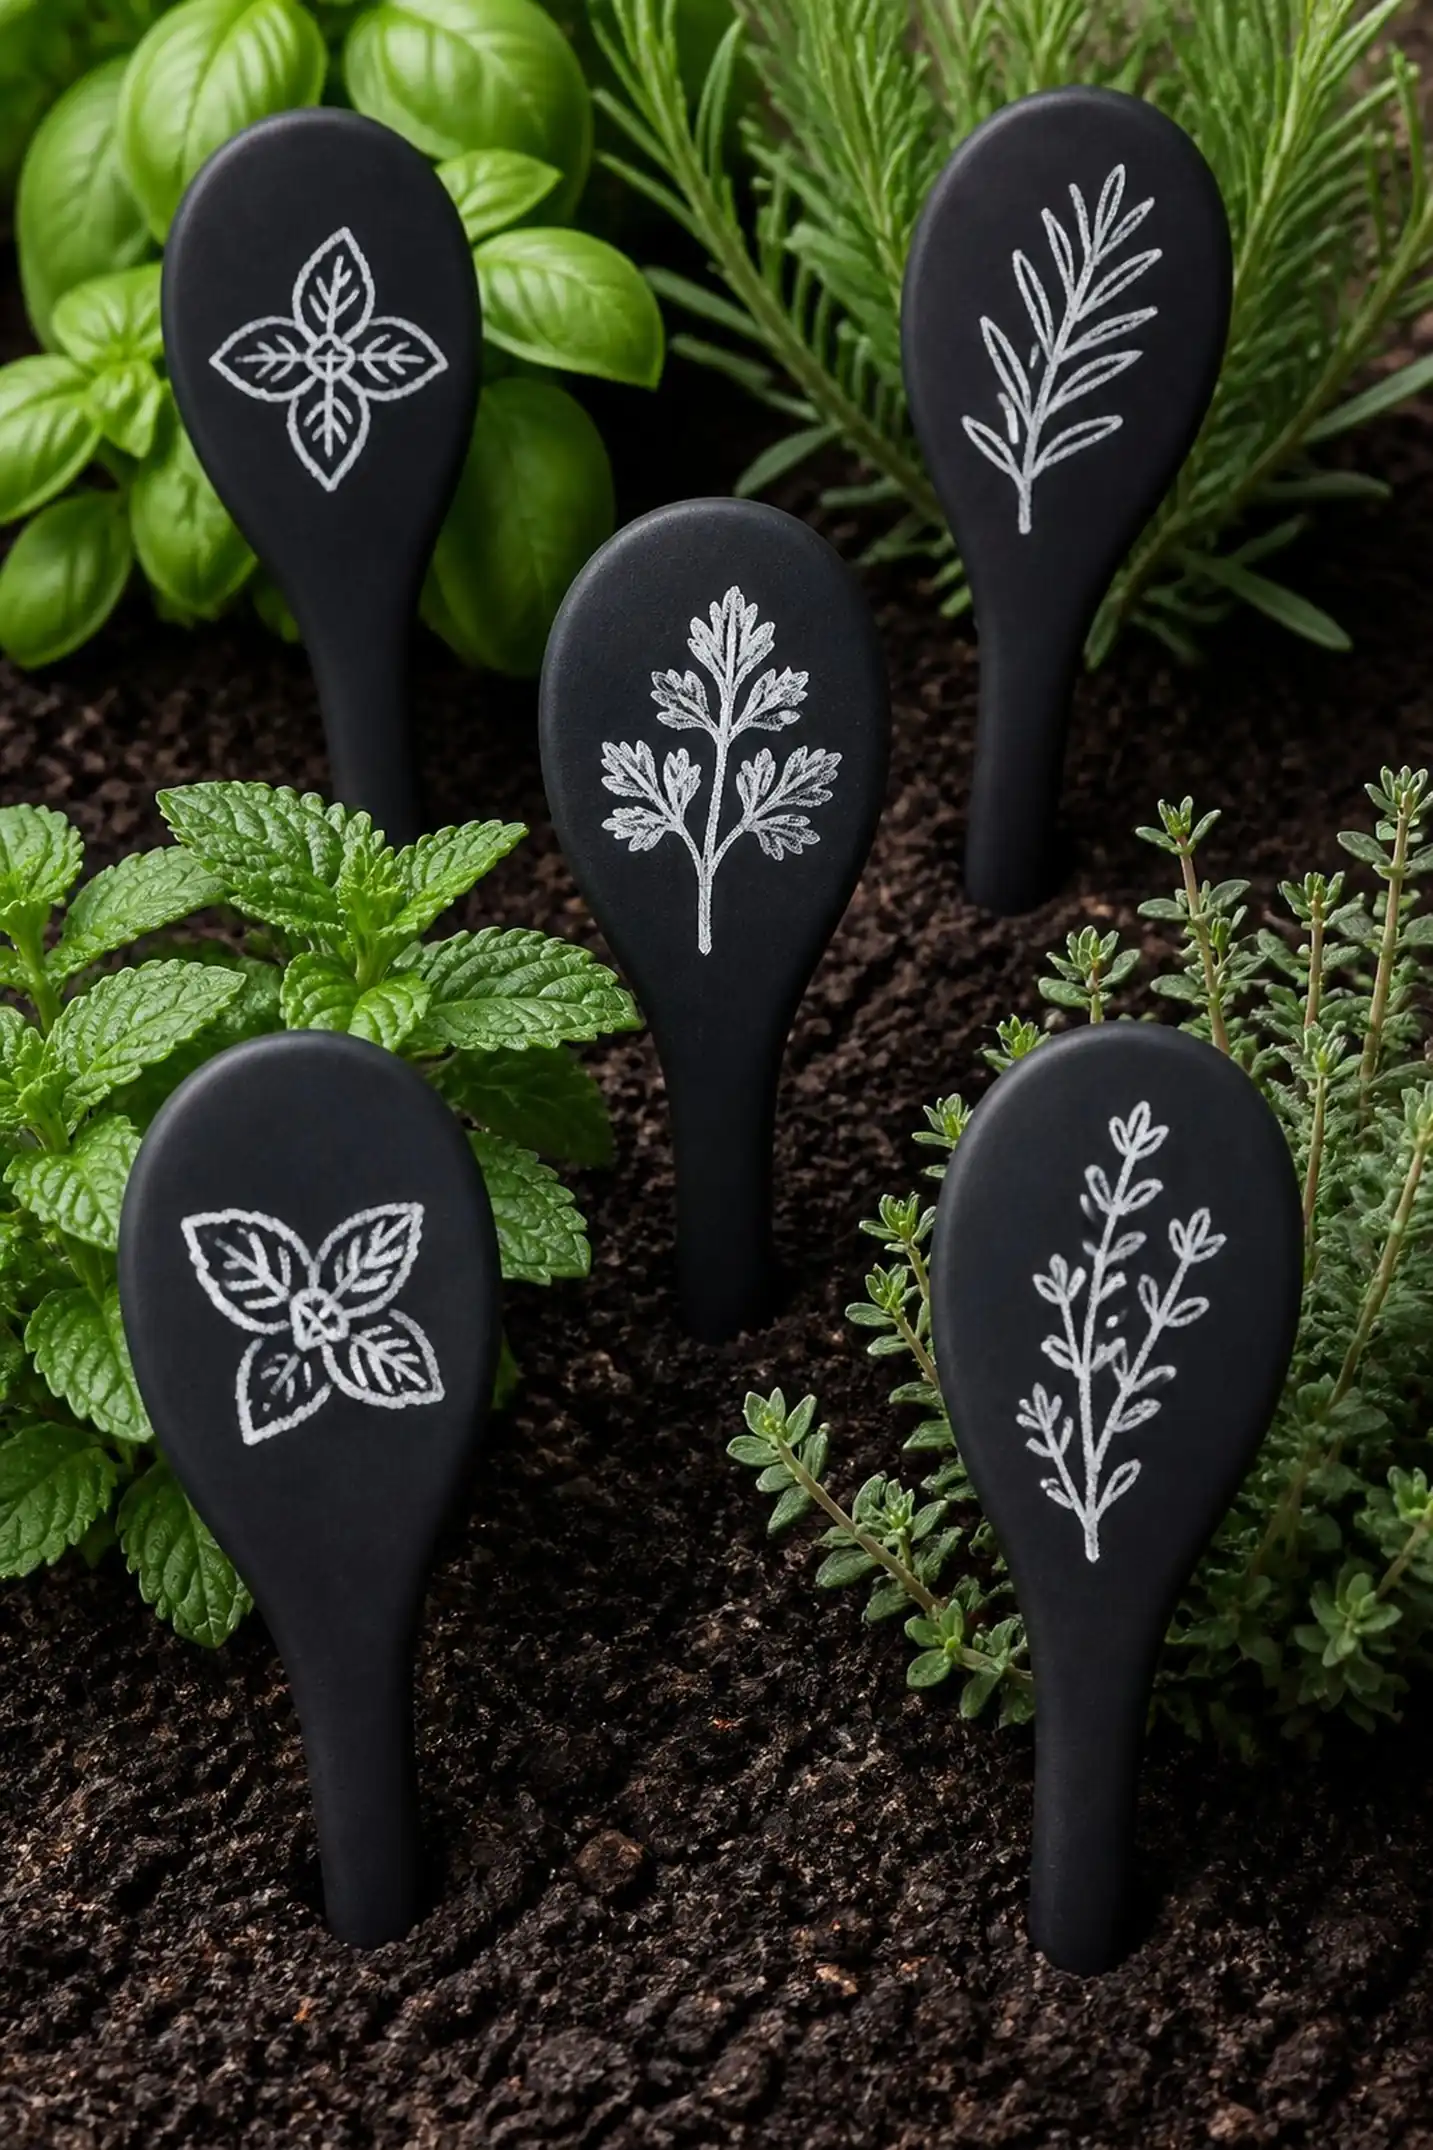
Markers coated with smooth blackboard paint create writable surfaces that allow changing herb names seasonally. Tags measure approximately 3 inches by 2 inches with thin wooden stakes about 4 inches long supporting them firmly in soil.
The chalkboard surface offers a soft matte finish, contrasting the pale beige clay beneath. Chalk or chalk markers glide easily across, with minimal dust.
Pro Tip: Allow chalkboard paint to cure fully for at least 24 hours before initial use to prevent flaking.
How to Make This
- Form pale beige clay tags 3×2 inches and attach wooden stakes.
- Fully dry or bake markers according to clay type instructions.
- Apply two thin coats of chalkboard paint, letting dry between layers.
- Write herb names with chalk or water-based chalk markers.
- Clean surfaces gently to update labels as needed.
Avoid: Using excess paint in one coat causes bubbling or cracking on the chalkboard finish.
Try Also: Add a tiny eraser on a stick stuck in garden soil for convenient cleaning.
Products & Materials
Items Used
- beige air dry clay
- chalkboard paint
- thin wooden stakes
- chalk markers
“Reusable chalkboard clay tags let herb labels change seasonally.”
