
As an Amazon Associate I earn from qualifying purchases.
Soft amber light flickers across a bedside table, casting gentle shadows on a textured knit blanket. Within this quiet glow, a unique candle holder adds personality and warmth to the room’s atmosphere. These DIY candle holder crafts bring a handcrafted touch to bedroom décor, blending function with artistry.
Crafting candle holders introduces tactile elements like smooth glass, coarse twine, or cool metal, contrasting with the candle’s steady flame. With a variety of materials and styles, these projects inspire cozy ambiance through simple, thoughtful details.
Rustic Mason Jar holder with twine accents
⏱️ 30 min · 🟢 Beginner
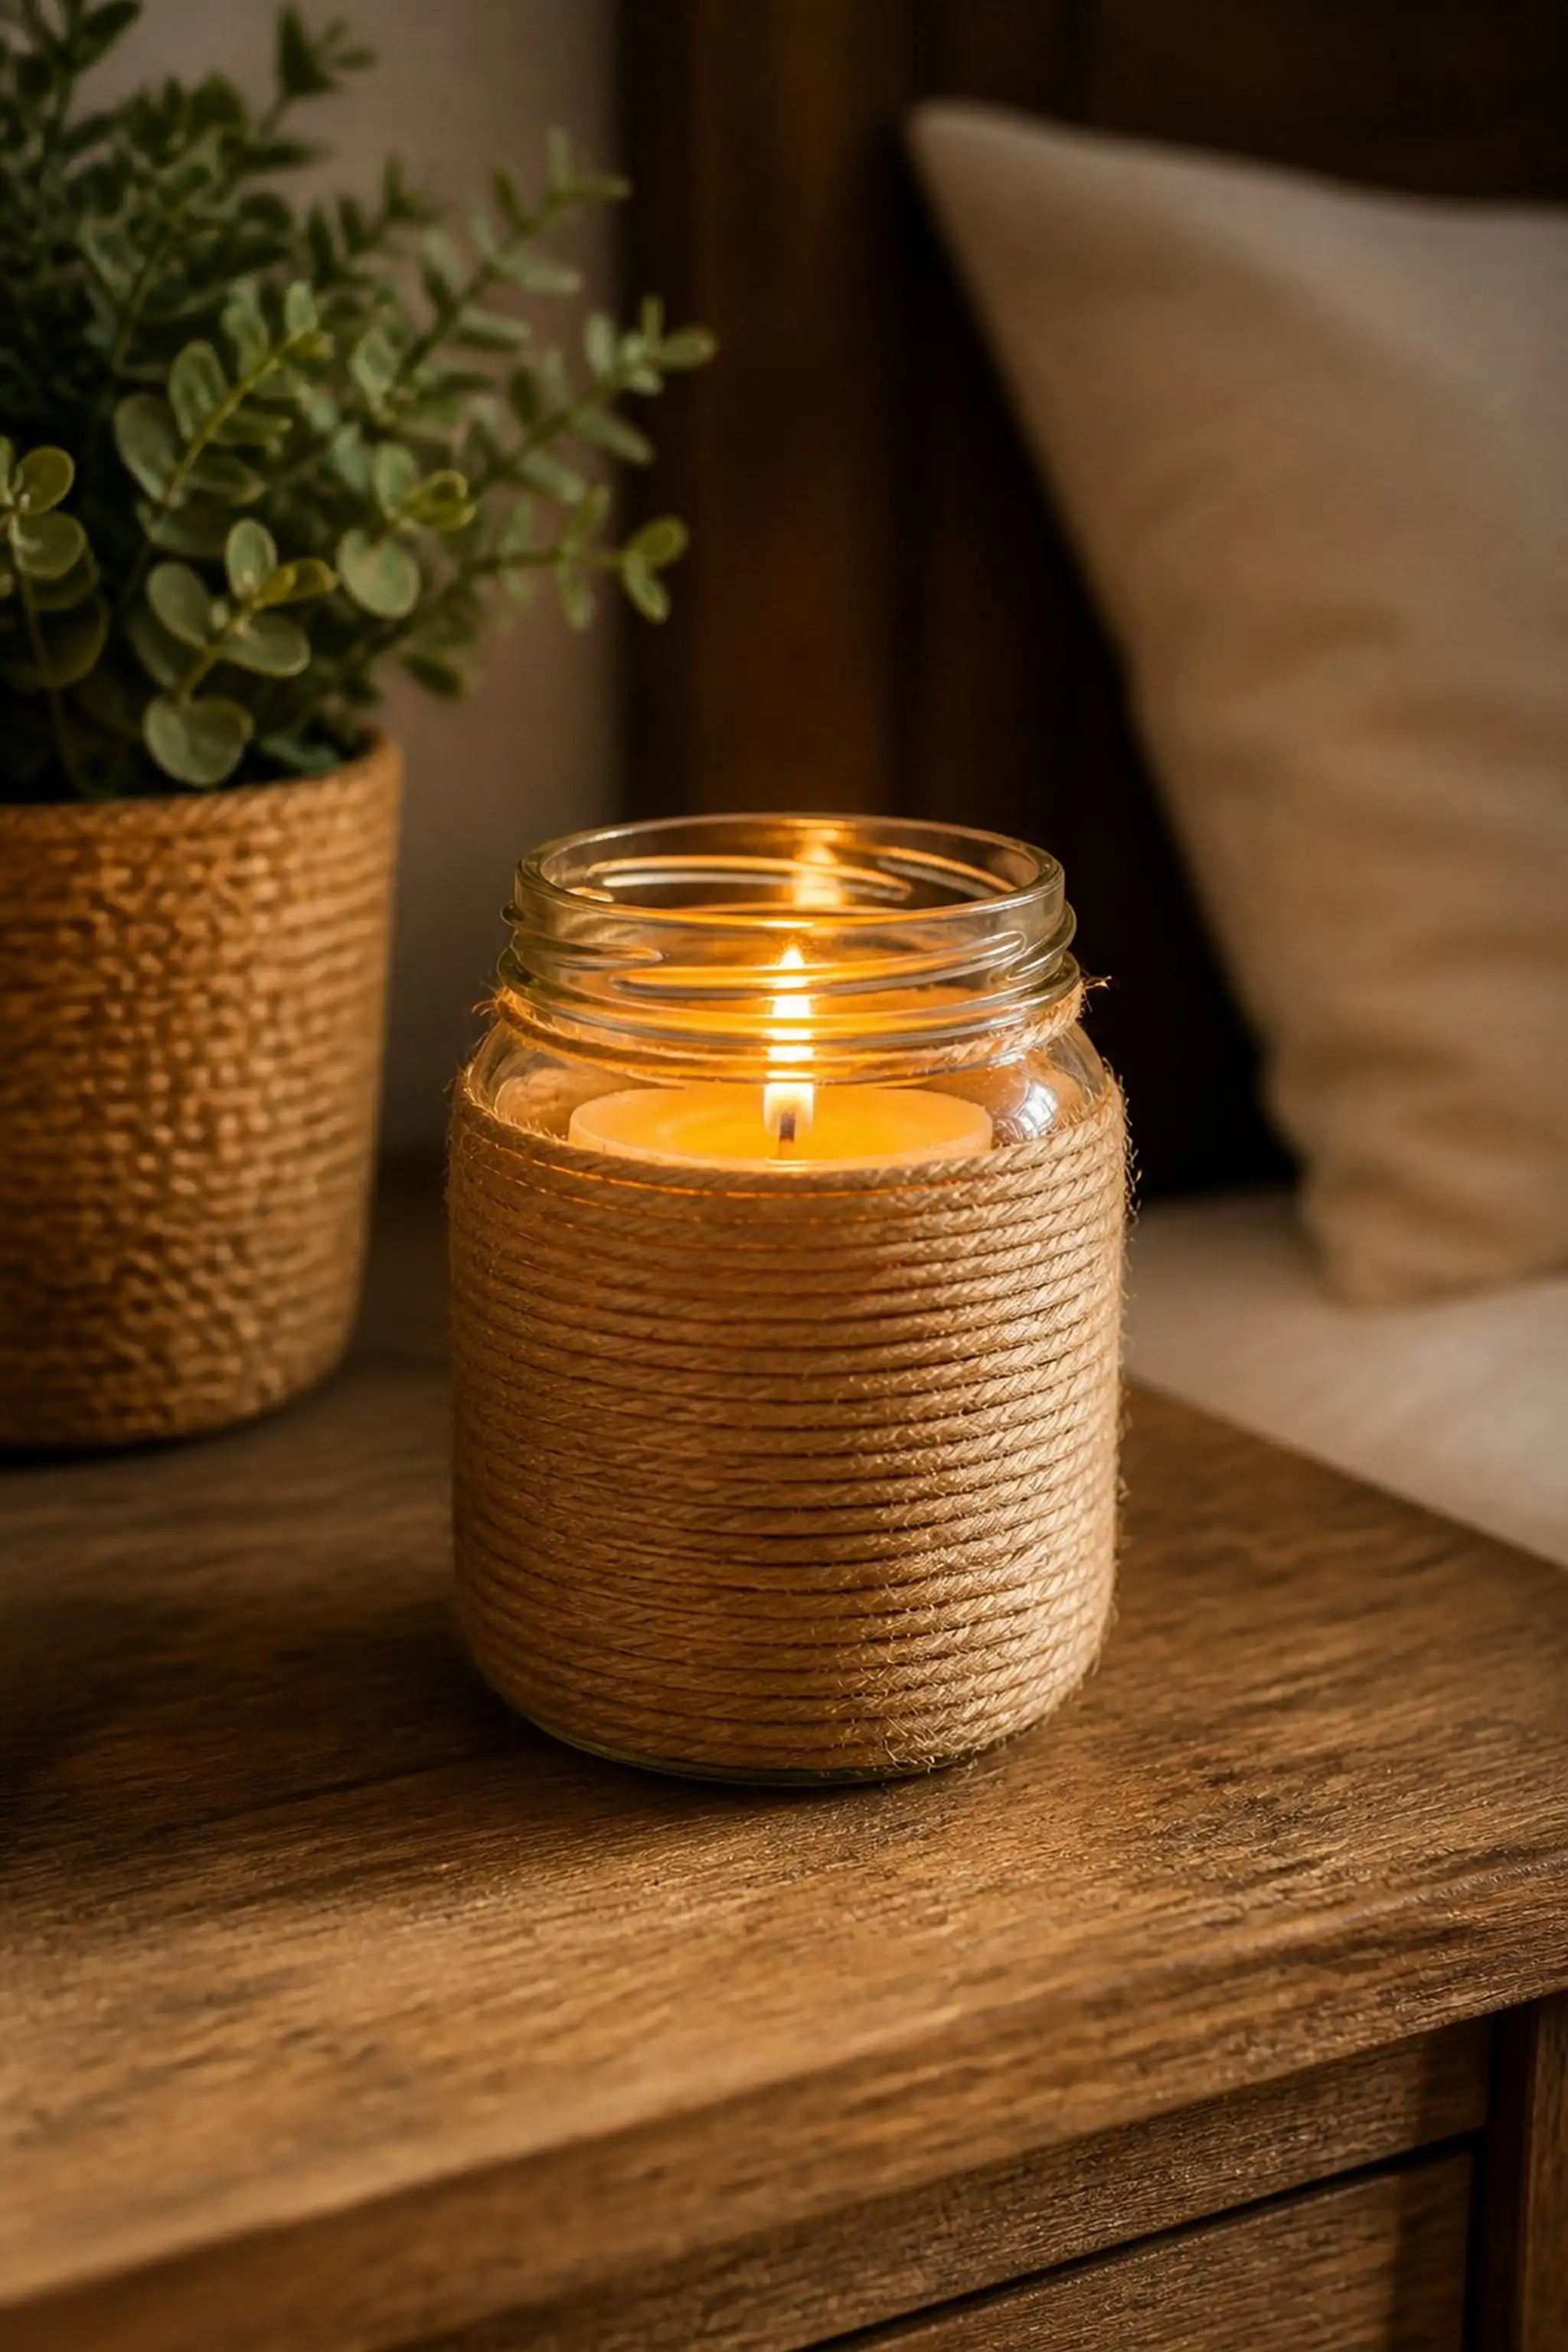
A clear 12-ounce mason jar wrapped tightly with natural jute twine creates a tactile rustic effect. The light refracts softly through the transparent glass, while the coarse texture of twine introduces an organic feel to this bedside essential.
The jar’s smooth surface contrasts with the rough twine, helping the candlelight play with shadows. The measured 18 feet of twine coils evenly, creating spaced bands of natural browns against the glass’s glossy finish.
Pro Tip: Opt for a beeswax candle to enhance the tactile warmth complemented by the jar’s rustic elements.
How to Make This
- Select a clean 12-ounce mason jar.
- Wrap approximately 18 feet of jute twine evenly around the jar’s body, securing ends with a drop of hot glue.
- Place a beeswax candle inside the jar to complete the holder.
Avoid: Wrapping twine too loosely can cause it to slip and disrupt the neat design of the holder.
Try Also: Try colored twine such as burgundy or olive green for seasonal flair, or use ribbon instead of twine for a smoother texture.
Products & Materials
Items Used
“Craft a warm rustic candle holder from simple mason jar and twine.”
Geometric concrete holder for an Industrial vibe
⏱️ 2-3 hours · 🟠 Intermediate
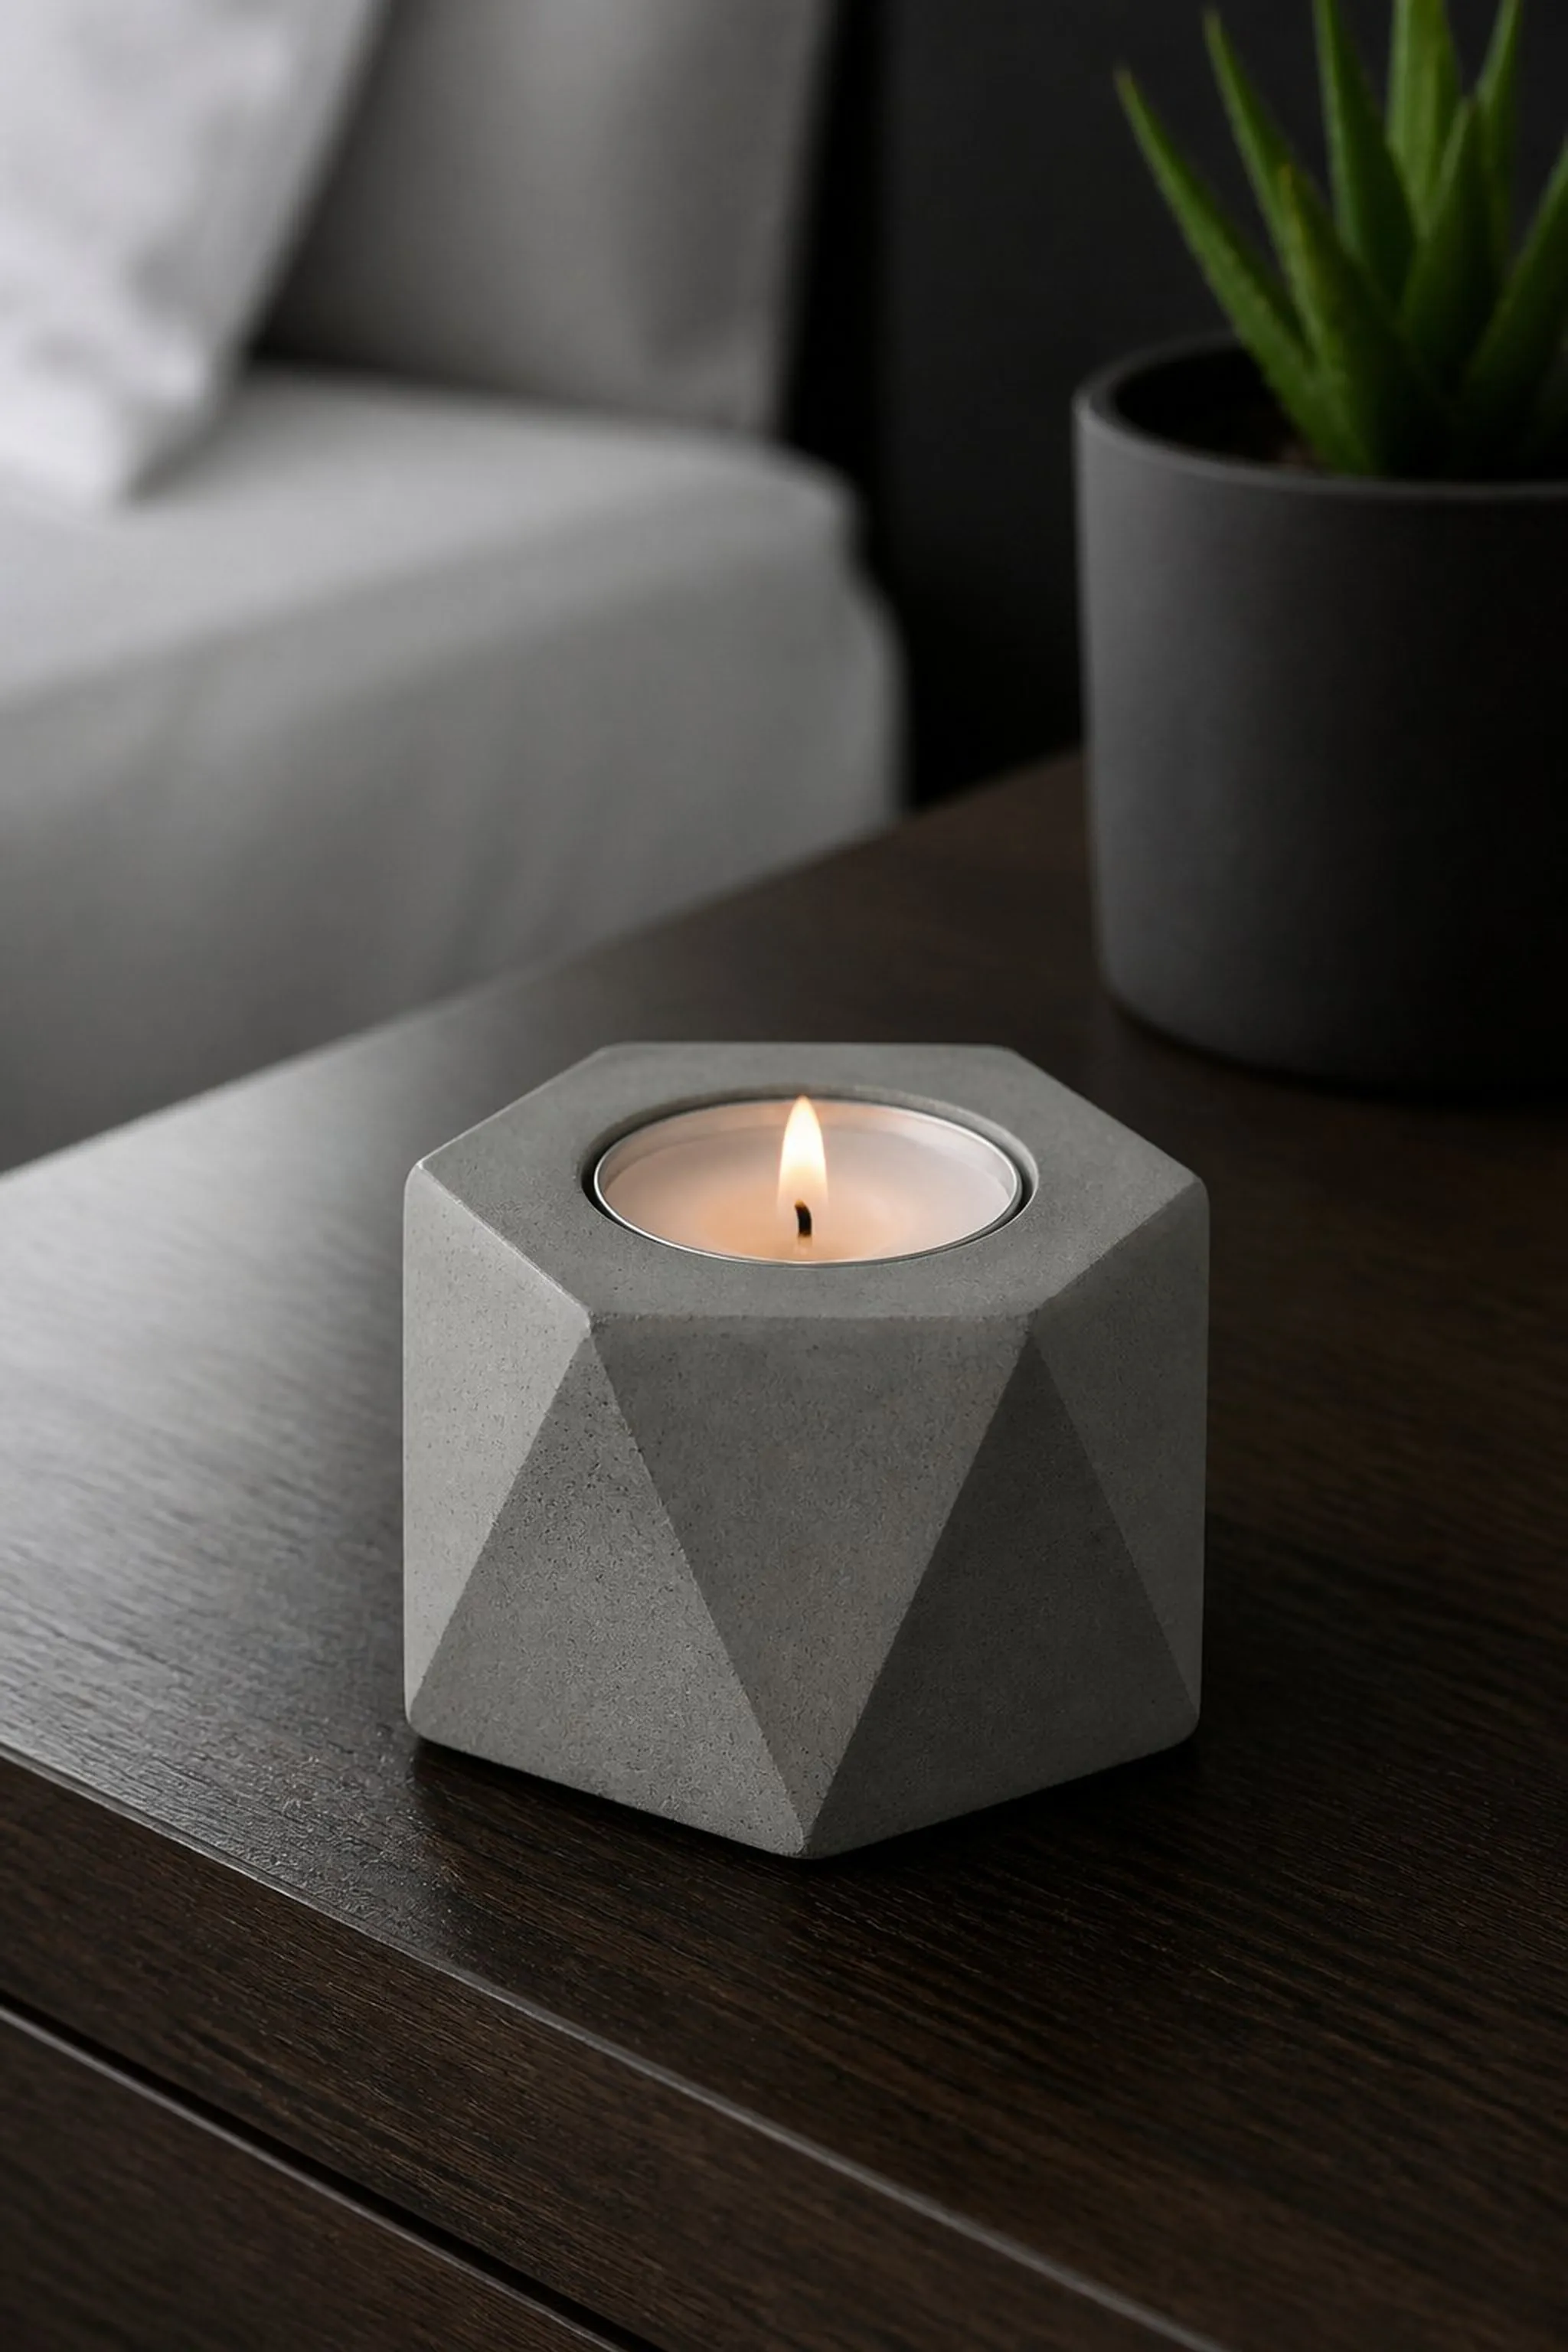
This candle holder uses gray concrete cast into a sharp hexagonal mold, offering a weighty, architectural presence. The cool matte finish absorbs ambient light, keeping focus on the softly glowing candle tucked within the 3-inch diameter depression.
The concrete’s natural variations in texture and tone range from smooth pale gray patches to rougher charcoal granules, giving each piece character. Its 4-inch height lends stability on a nightstand filled with heavier accessories.
Pro Tip: Using a silicone mold with sharp edges helps achieve crisp lines and a contemporary aesthetic.
How to Make This
- Mix fast-setting concrete according to package instructions.
- Pour into a hexagonal silicone mold with a cylindrical inset center for the candle.
- Allow to cure for 2 hours before unmolding and final drying.
Avoid: Not smoothing the surface before drying can result in rough patches detracting from the modern look.
Try Also: Try tints mixed into the concrete, such as charcoal black or soft pink for a personalized touch.
Products & Materials
Items Used
- fast-setting concrete mix
- hexagonal silicone mold
- small candle tealight
“Industrial chic concrete candle holder with striking geometric design.”
Vintage-inspired brass candle cup
⏱️ 1 hour · 🟠 Intermediate
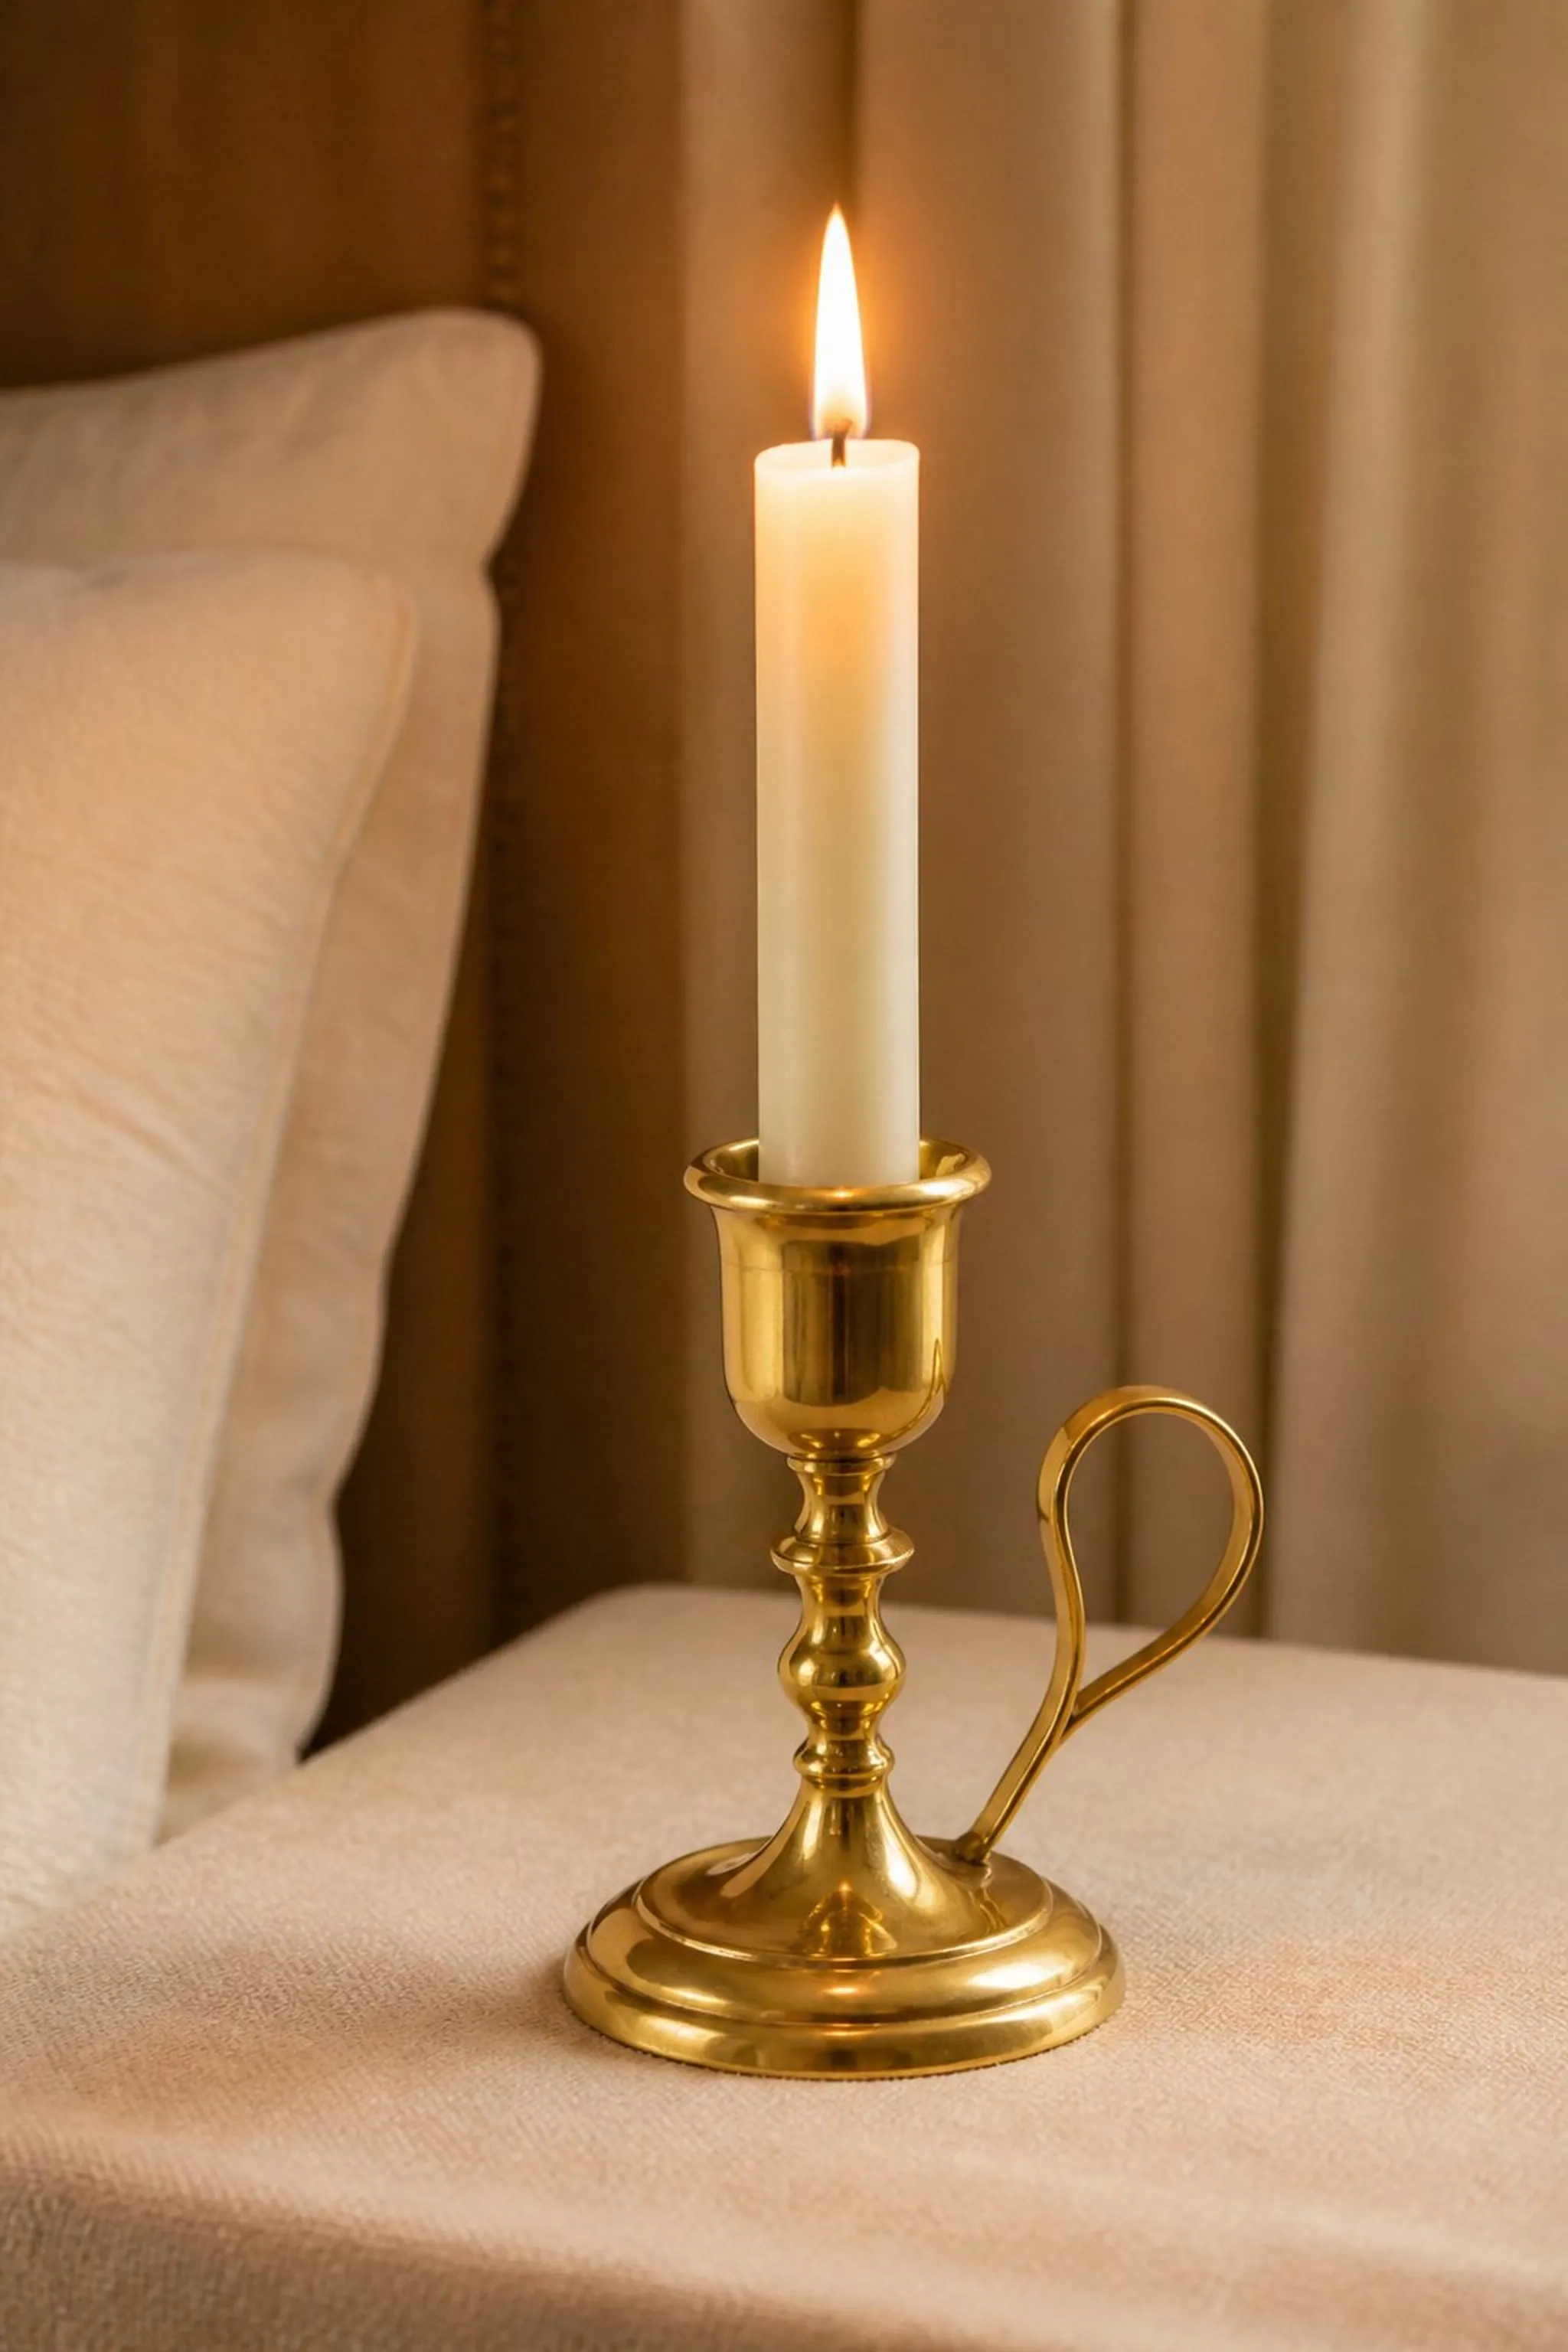
This vintage brass candle cup features a polished golden sheen that reflects flickering candlelight with glowing warmth. Measuring just 3 inches tall and 2 inches in diameter, the cup’s delicate curves create elegant light pools on nearby surfaces.
The smooth metal gleams with a patina that hints at age and craftsmanship, adding a tactile contrast to soft linen bedding. Brass’s reflective qualities amplify candle flame brightness without harsh glare.
Pro Tip: Polishing the brass surface before use enhances reflected light and reveals intricate metal grain.
How to Make This
- Select or locate a small vintage brass candle cup.
- Clean and polish the brass using metal polish and a soft cloth.
- Fit a standard taper candle securely inside the cup.
Avoid: Skipping the polishing step leaves dull surfaces that dampen the candle’s glow.
Try Also: Paint with heat-resistant metallic spray for a copper or silver finish or add decorative etching for an ornate look.
Products & Materials
Items Used
- vintage brass candle cup
- taper candle
- metal polish
- soft polishing cloth
“Elegant vintage brass cup holds candles with a golden shimmer.”
Save time and printer ink with 50+ printable templates and step-by-step instructions in one ad-free guide.

Just $19.99 — lifetime access
Seashell holder bringing ocean vibes indoors
⏱️ 45 min · 🟢 Beginner
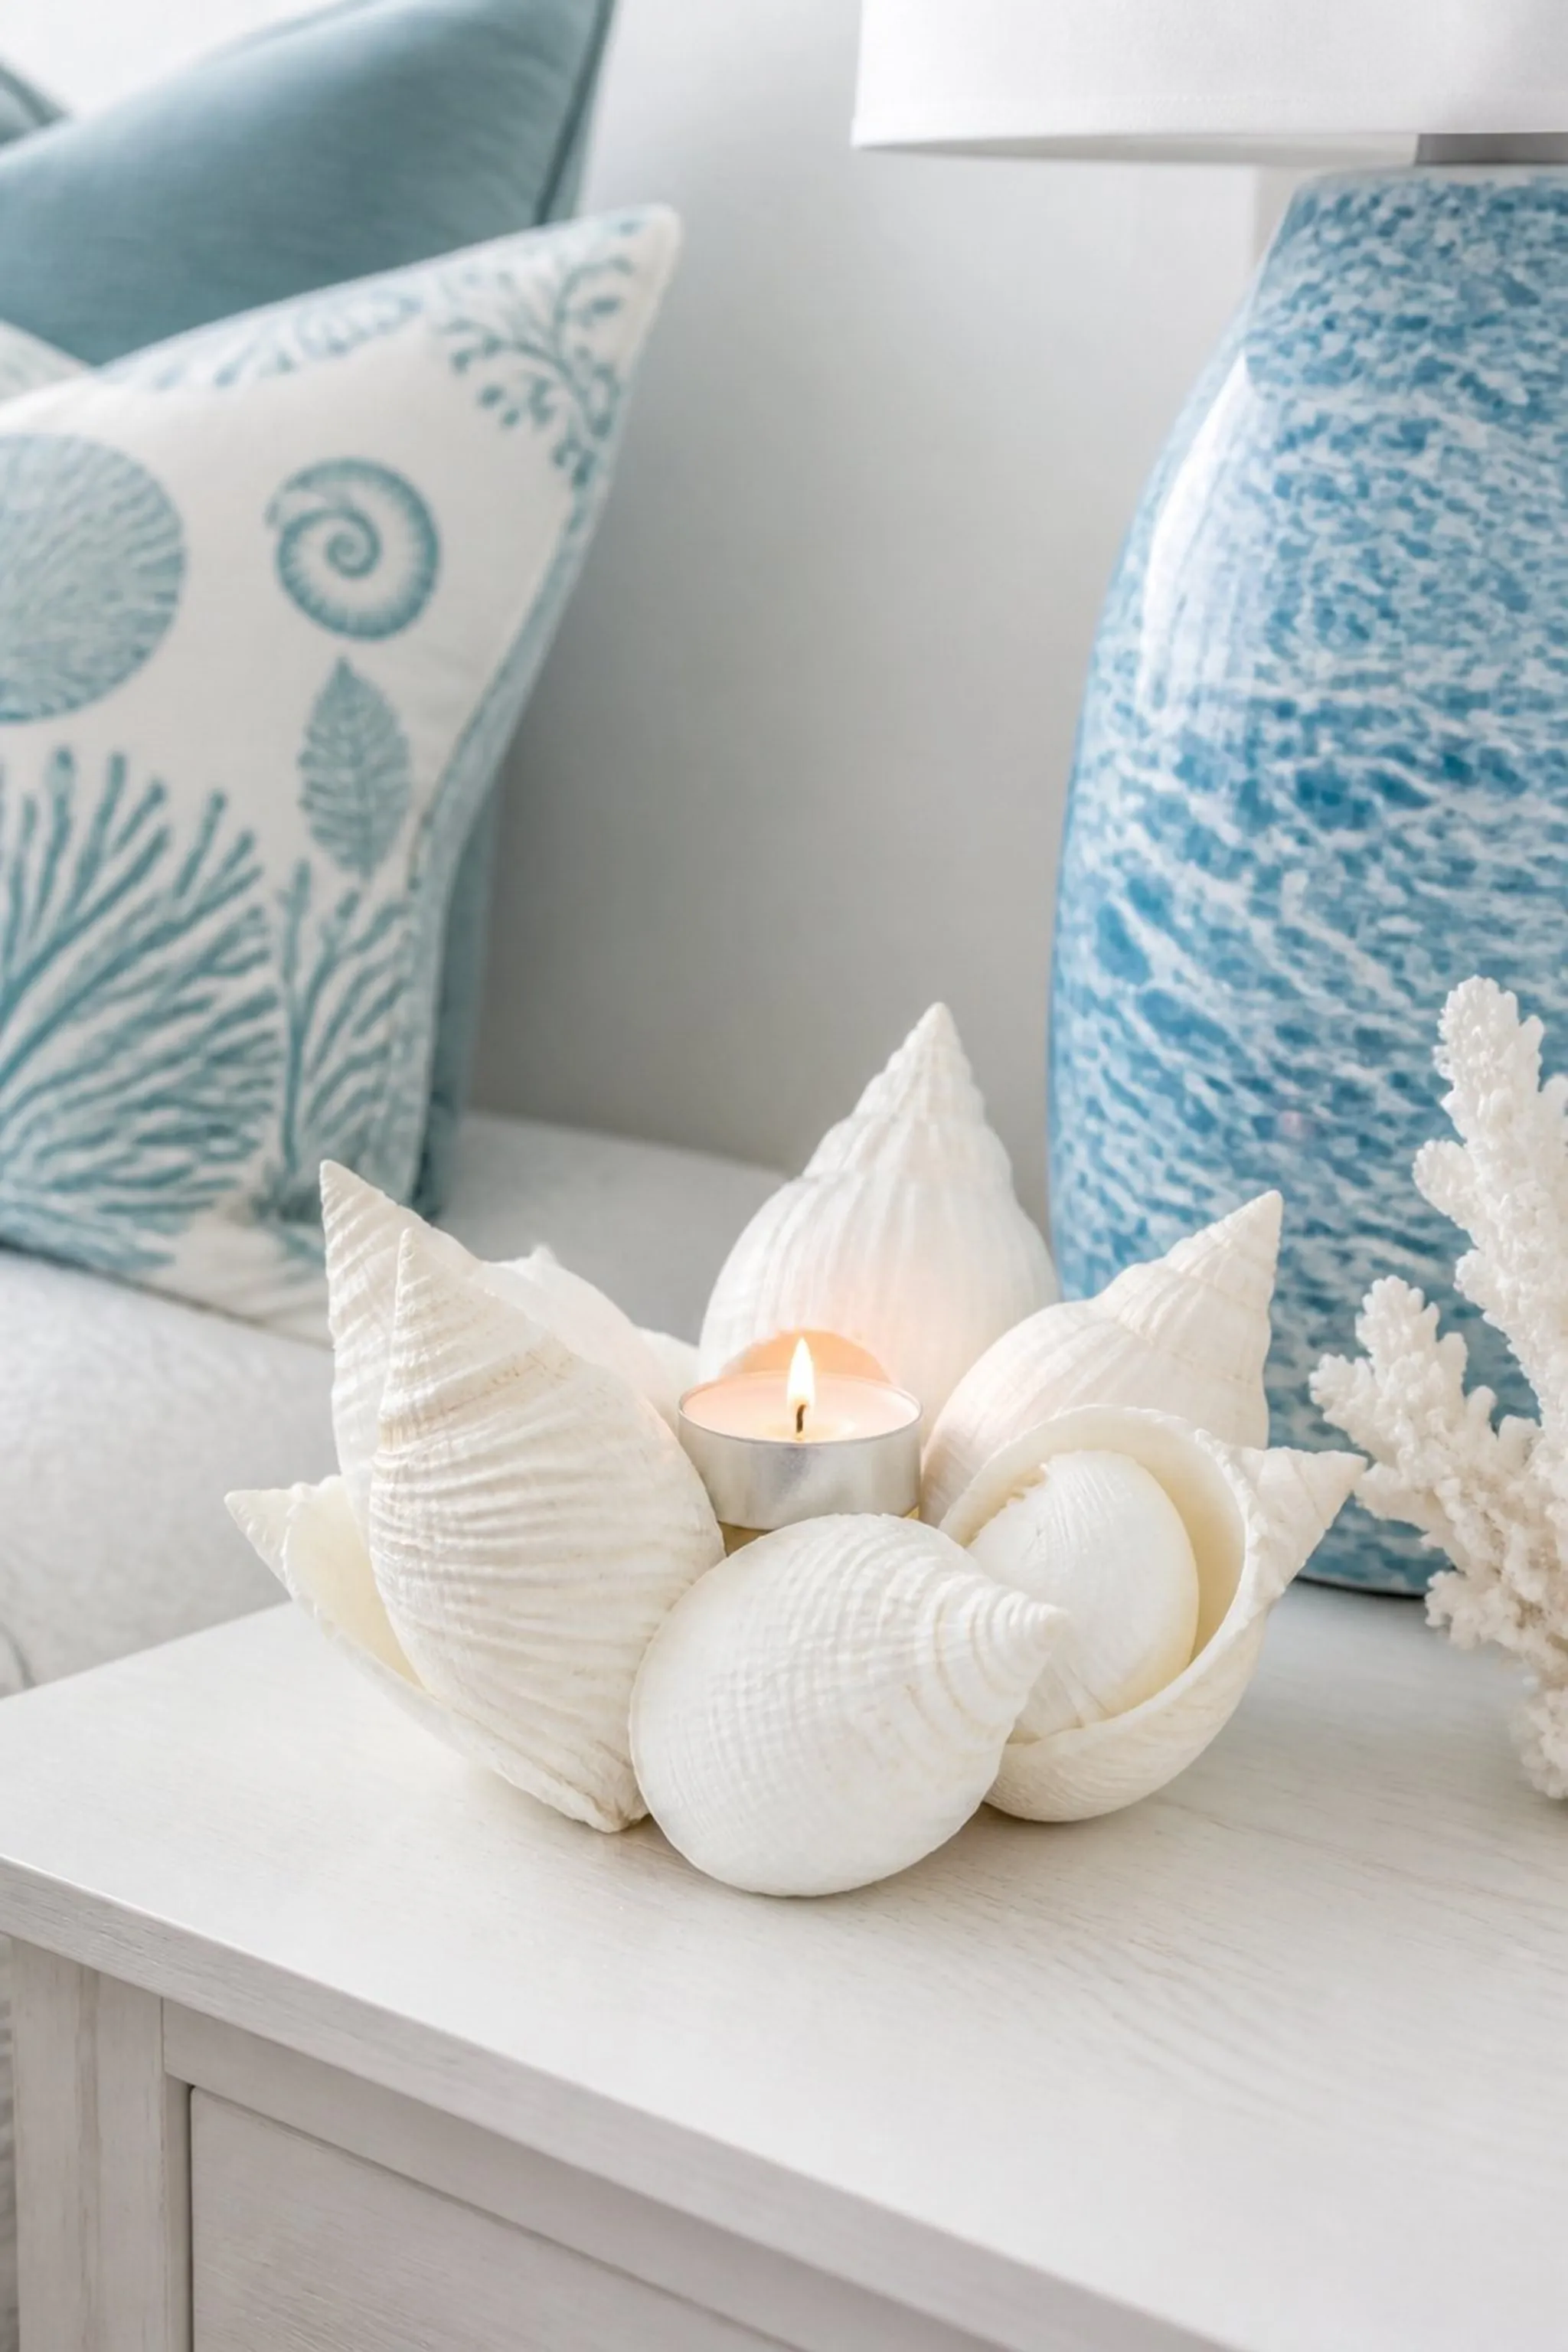
A cluster of large white seashells forms an organic base that cradles a small tealight candle. Their matte, slightly rough textures channel seaside serenity, balancing against the smooth, clear surface of the candle’s glass casing.
The arrangement measures about 5 inches across, wide enough to diffuse light while remaining compact for bedside use. Natural shell curves reflect flickers in soft patterns, evoking coastal quiet.
Pro Tip: Using shells with deeper natural cavities helps stabilize the candle and prevents tipping.
How to Make This
- Gather several large flat seashells.
- Arrange the shells in a circular cluster to gently hold a tealight candle.
- Set the cluster on a stable surface for display.
Avoid: Choosing shells that are too shallow can create unstable holders prone to spills.
Try Also: Add small sand grains between shells for texture or paint shells with subtle metallic highlights for shimmer.
Products & Materials
Items Used
“Bring beach calm with a cozy seashell candle holder cluster.”
Upcycled wine cork votive holder
⏱️ 1 hour · 🟠 Intermediate
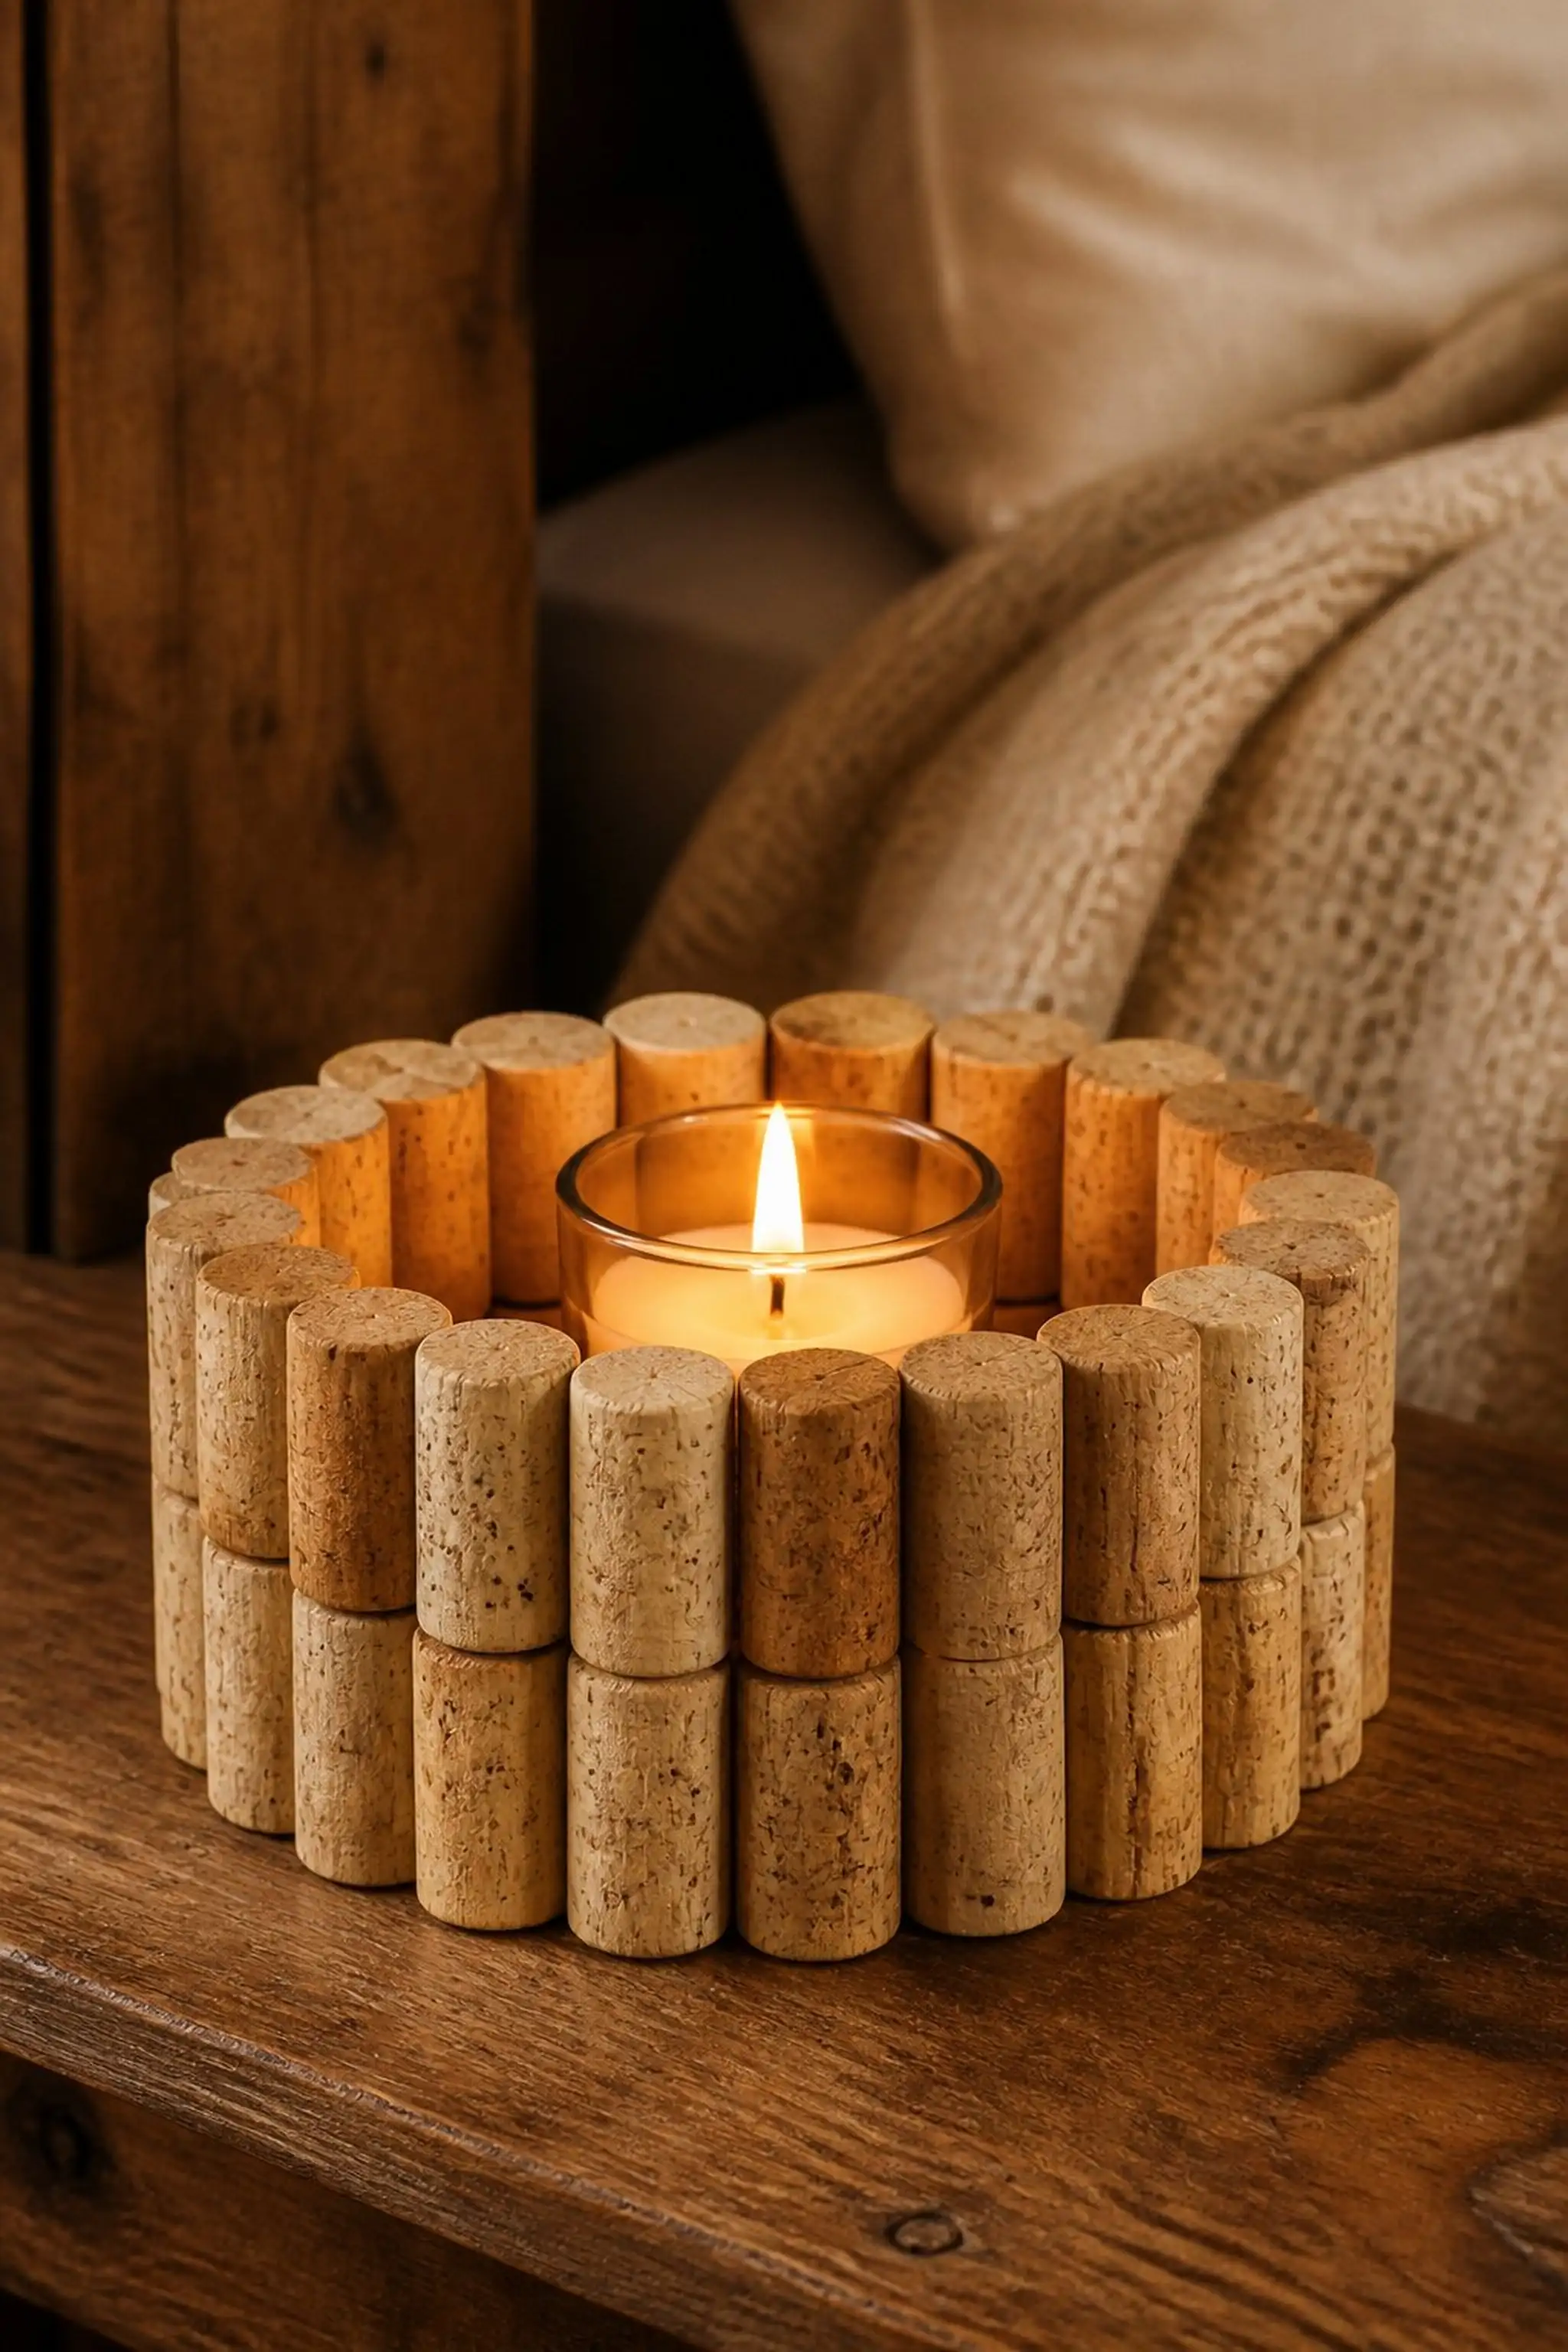
About forty natural corks combine to form a ring-shaped votive holder, measuring roughly 6 inches in diameter. The corks’ slightly rough surfaces feature tiny pores and a range of beige hues that offer inviting warmth to candlelight.
Arrangement craftsmanship reveals tightly packed cork diameters of 1.25 inches, resulting in a sturdy circular base. This recycled material carries a subtle woody scent that mingles with candle aromas.
Pro Tip: Soaking corks briefly in warm water softens them, aiding peaceful alignment within the circle.
How to Make This
- Collect approximately 40 wine corks.
- Arrange corks vertically and glue edges to form a circle about 6 inches wide.
- Place a small votive candle in the center.
Avoid: Gluing corks hastily can cause uneven spacing and unstable structure.
Try Also: Try painting cork tips in pastel colors or adding thin twine bows around each cork for detail.
Products & Materials
Items Used
- wine corks
- small votive candle
- strong craft glue
“Recycled wine corks form a charming rustic votive candle ring.”
Delicate crochet lace candle wrap
⏱️ 3-4 hours · 🔴 Advanced
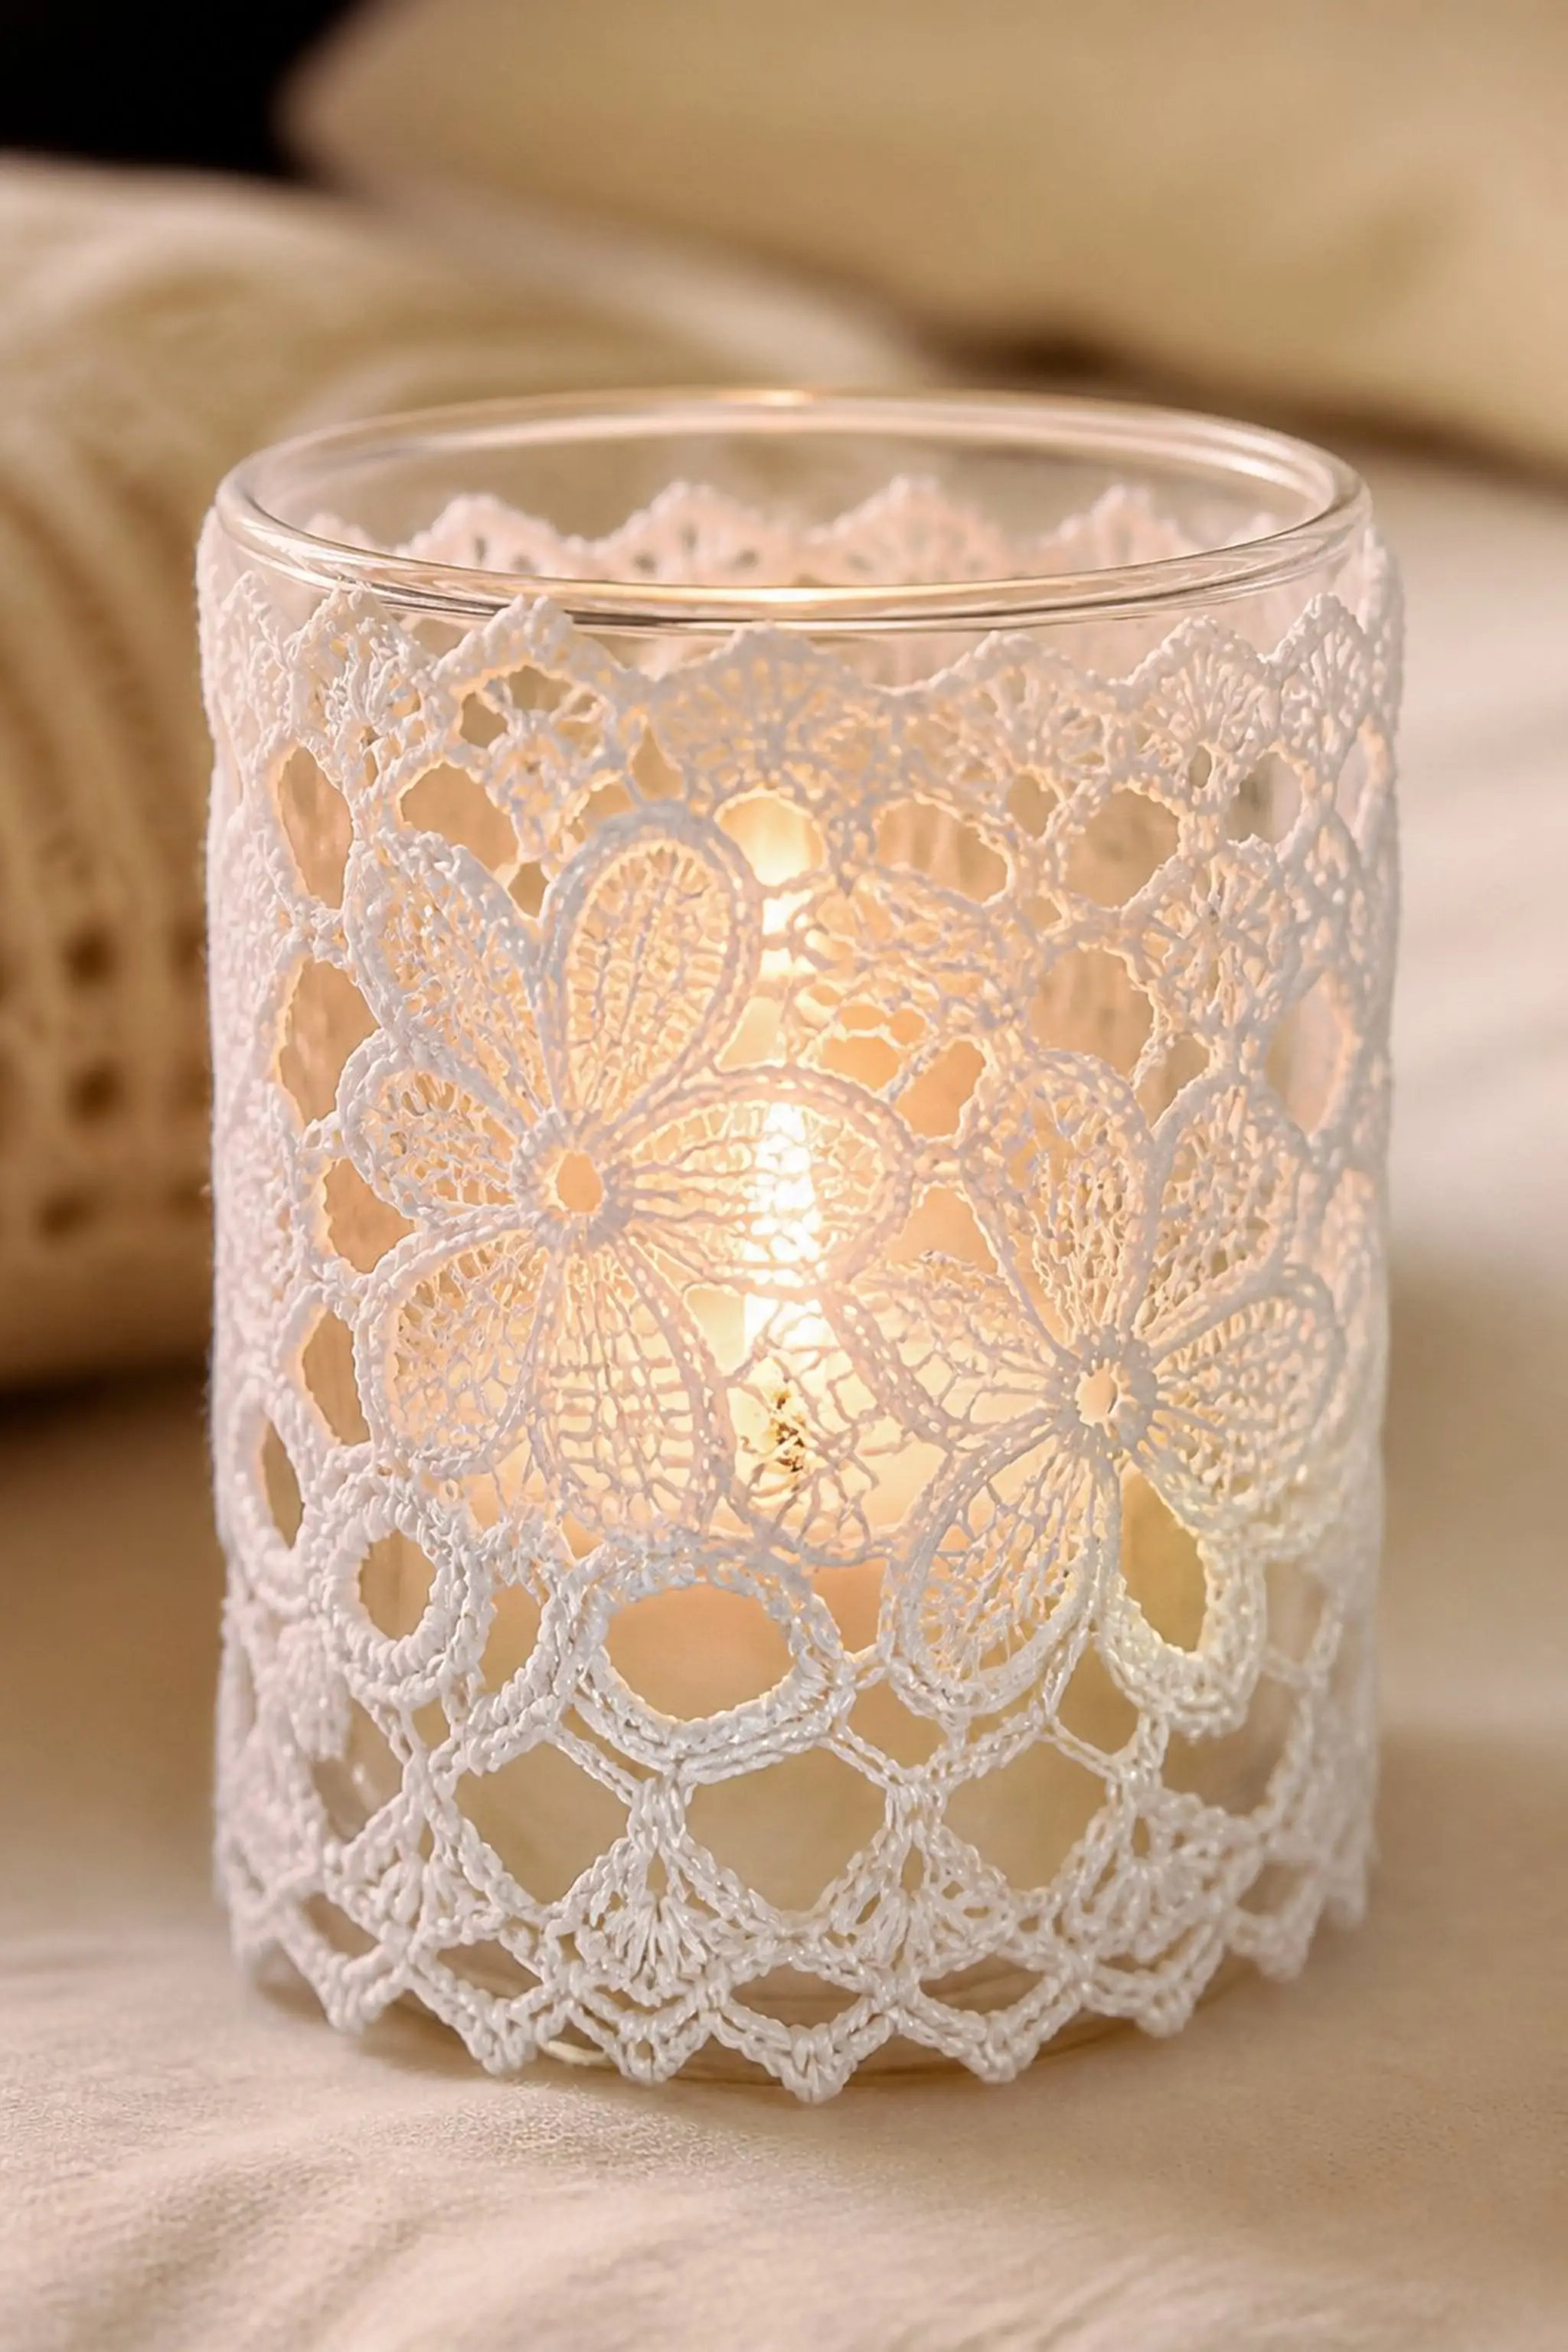
Fine white crochet lace wraps gracefully around a glass votive, presenting intricate floral motifs in a delicate 2-inch wide band. The lace’s tiny loops and threads create shadows that dance as the candlelight flickers.
Glass’s 3-inch diameter and smooth surface boost contrast, highlighting the lace’s craftsmanship. Handmade crochet stitches provide textural richness that softly diffuses emanating light.
Pro Tip: Blocking the lace band before wrapping preserves shape and ensures even tension for a snug fit on the glass surface.
How to Make This
- Crochet a lace band about 3 inches in diameter and 2 inches wide with floral patterns.
- Block and dry the lace to maintain shape.
- Slide lace snugly around a smooth glass votive candle holder.
Avoid: Skipping the blocking process leads to lace curling or uneven fitting around the glass.
Try Also: Use colored thread for contrast, or add sewn beads to the lace for subtle sparkle effects.
Products & Materials
Items Used
“Intricate crochet lace wraps a glass votive with delicate elegance.”
Natural wood slice candle base
⏱️ 40 min · 🟢 Beginner
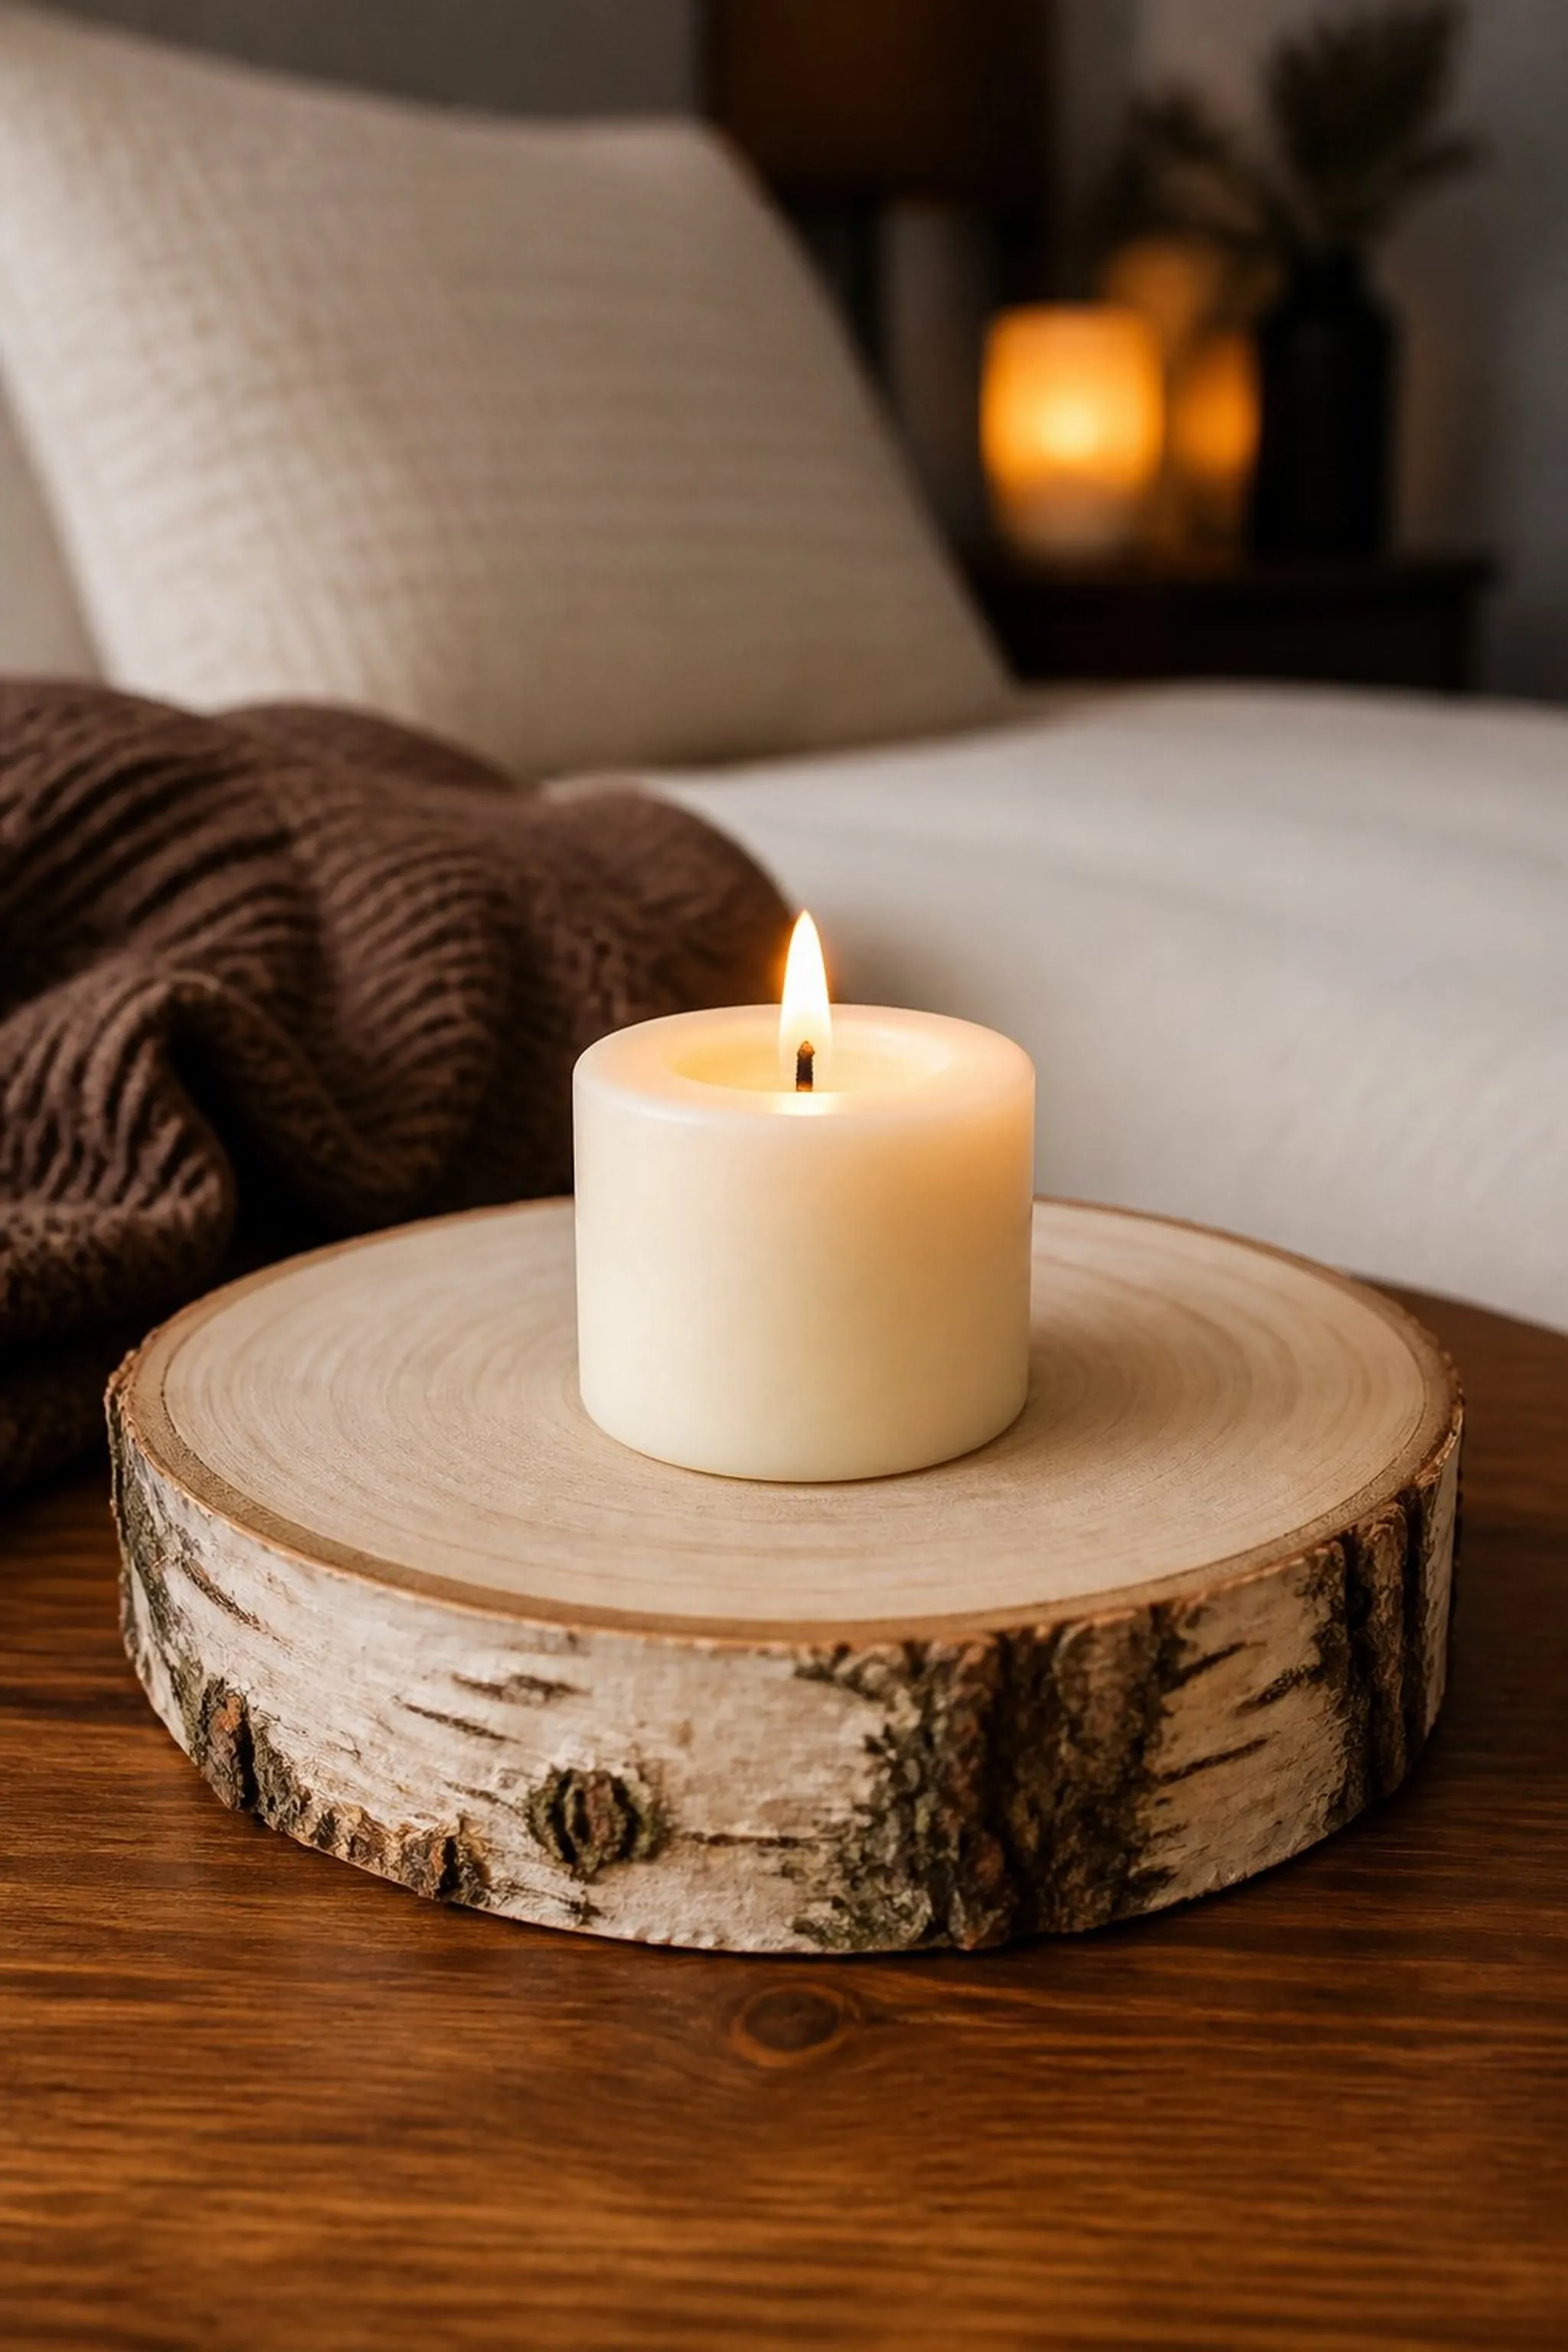
A smooth, round wood slice from birch tree bark acts as a sturdy candle base about 5 inches across and half an inch thick. The bark edges present natural ridges and grooves, contrasting with the pale, sanded flat surface.
The candle’s warm orange light reflects gently off the light wood grain, creating a natural glow that extends across bedside accessories. The piece’s organic feel emphasizes bedroom calmness.
Pro Tip: Using unfinished natural wood retains the bark texture and subtle scent that enhances sensory comfort.
How to Make This
- Locate a birch wood slice approximately 5 inches in diameter and 0.5 inch thick.
- Sand the flat surface smooth while preserving bark edges.
- Place a small pillar candle centered on the wood slice.
Avoid: Sanding too aggressively can damage the bark edges, reducing the rustic character.
Try Also: Leave the slice untreated for natural scent or varnish lightly for durability and a slight sheen.
Products & Materials
Items Used
- birch wood slice
- small pillar candle
- fine grit sandpaper
“Rustic birch wood slice creates an earthy candle base with bark edge texture.”
Minimalist glass holder with pebbles base
⏱️ 25 min · 🟢 Beginner
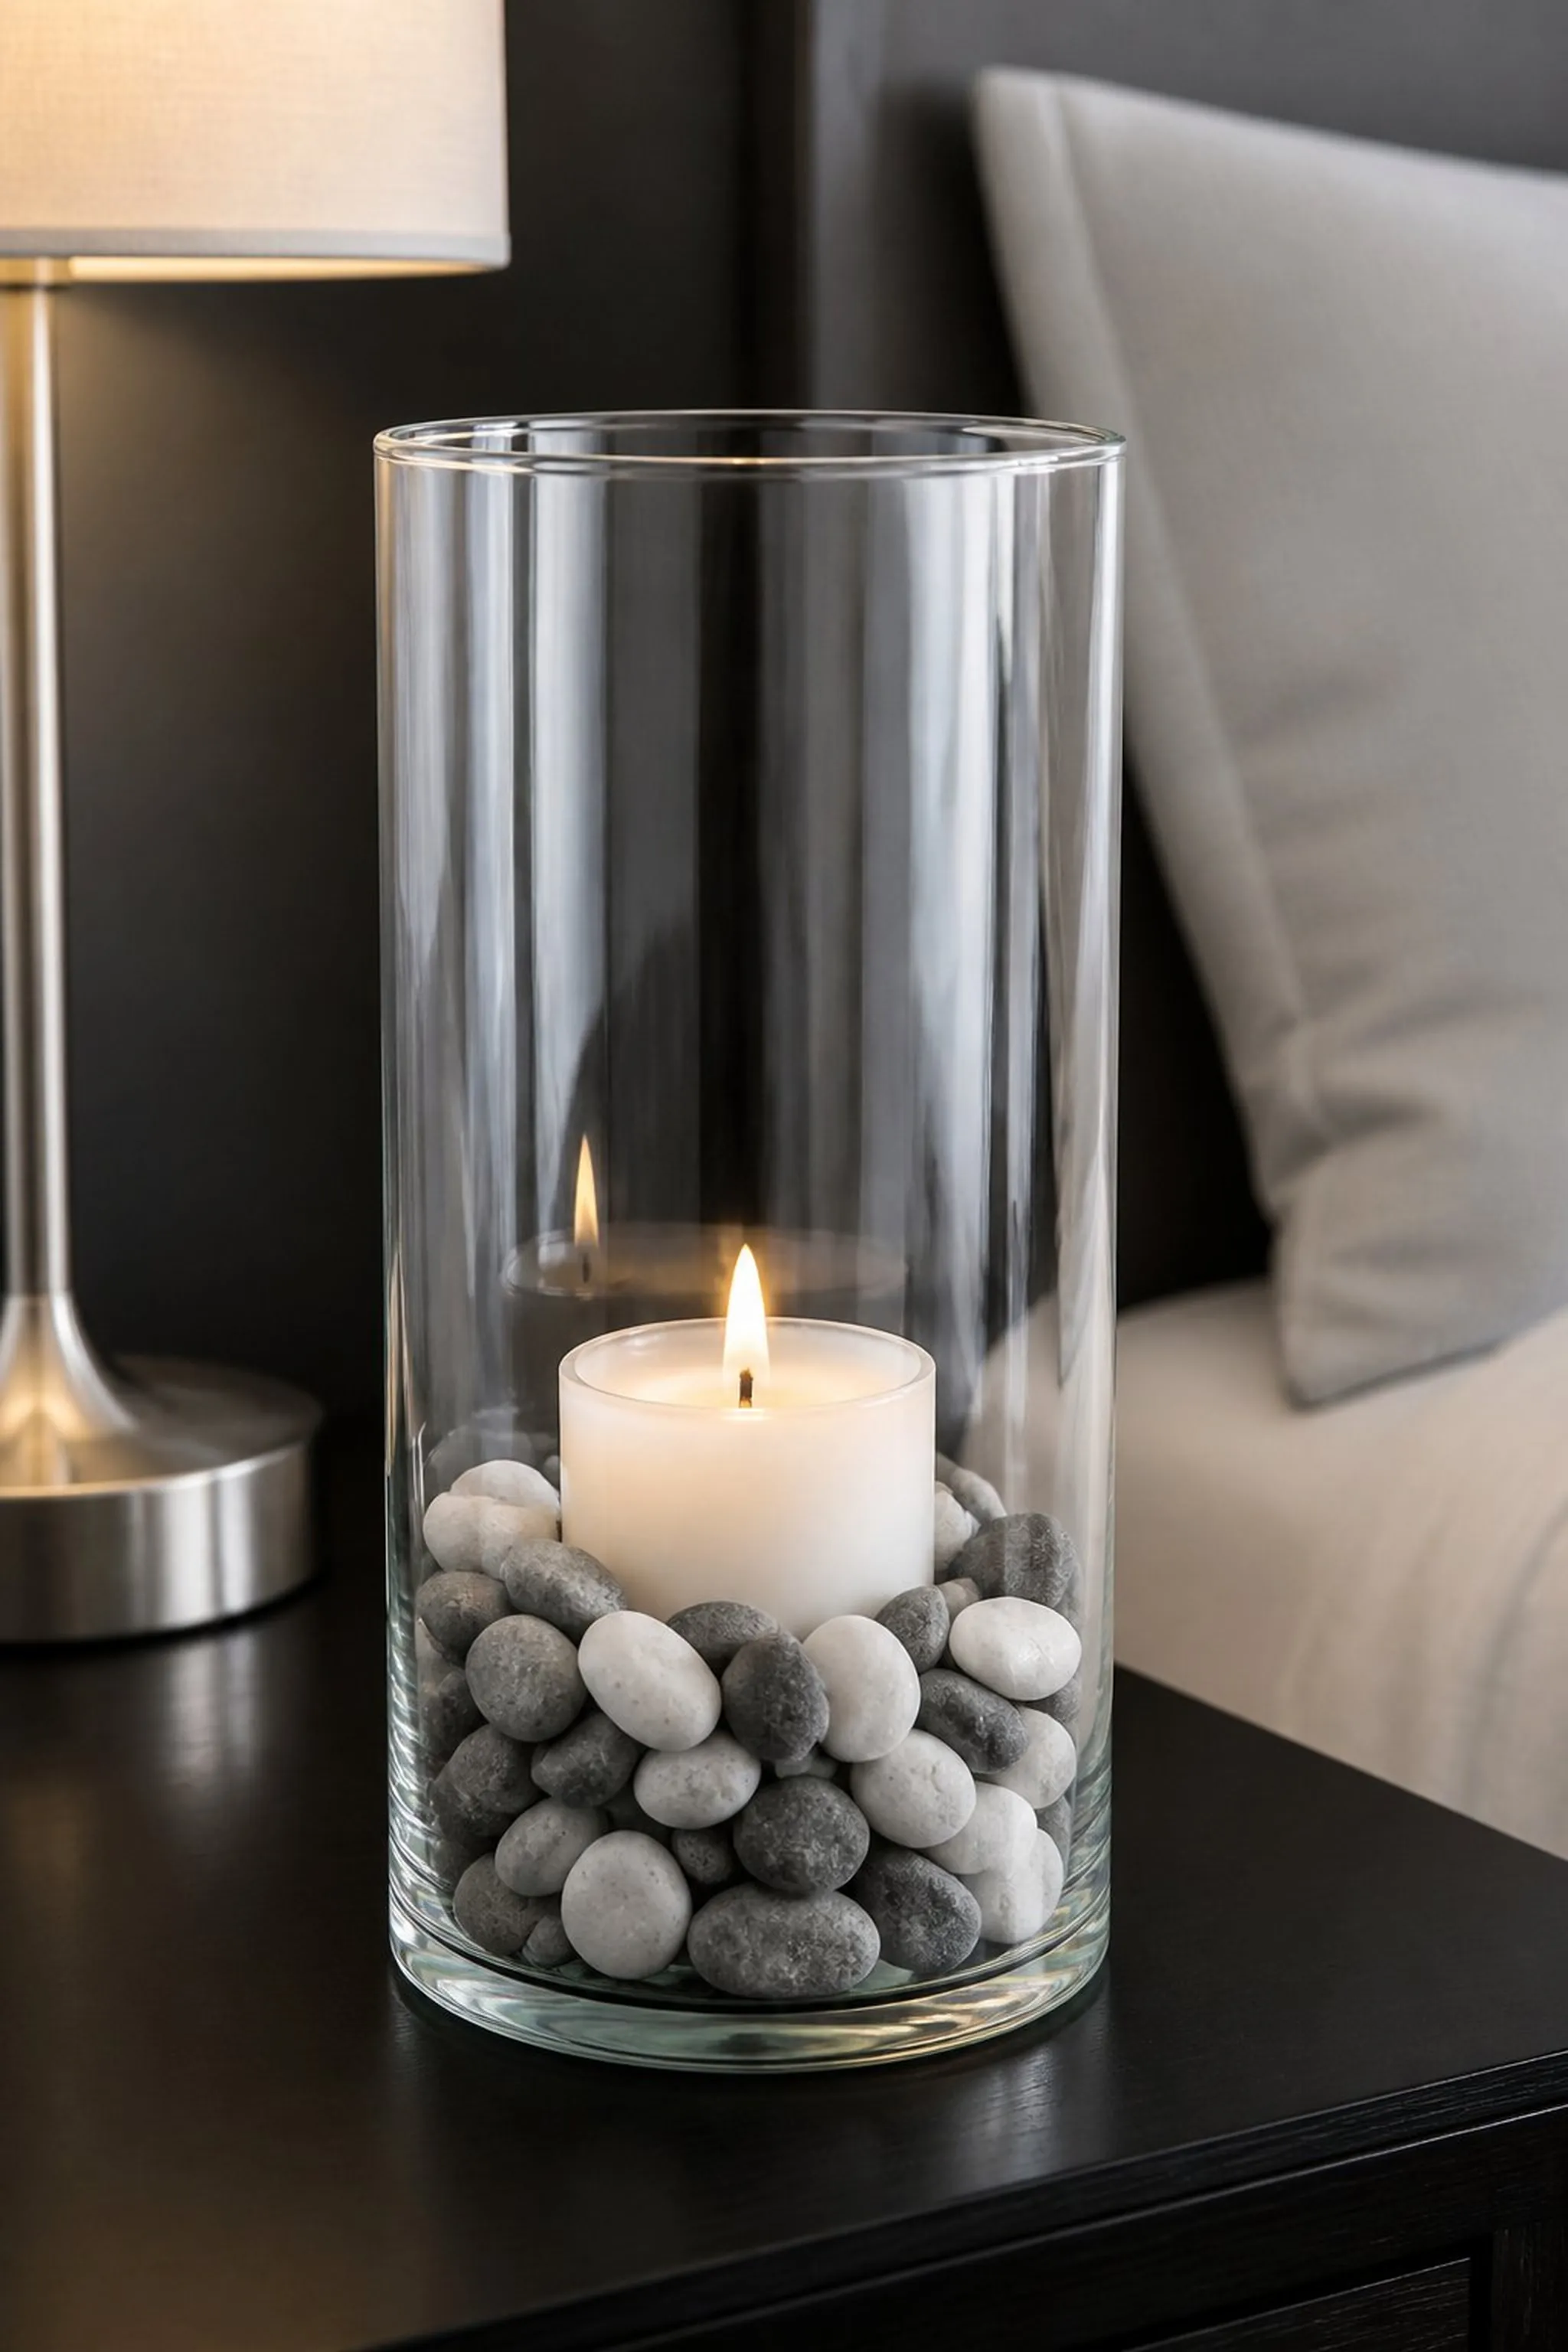
Clear cylindrical glass holders filled about one-third with polished river pebbles ranging from 0.2 to 0.5 inches in size offer grounded stability. Translucent pebbles in soft gray and white reflect diffused candlelight upward.
The glass stands 4 inches tall with a 3-inch diameter, and the smooth pebble surfaces contrast visually with the bright flickering candle flame above. This interplay balances clean lines with natural textures.
Pro Tip: Selecting uniformly smooth pebbles creates gentle shimmer and avoids stray fragments that could scratch the glass interior.
How to Make This
- Select a 4-inch tall clear glass votive holder.
- Fill one-third full with smooth river pebbles in varying light gray tones.
- Place a small candle securely above the pebbles.
Avoid: Using jagged or uneven stones may damage the glass or unevenly support the candle.
Try Also: Add colored glass beads for sparkle or place dried flower petals atop the pebbles for softness.
Products & Materials
Items Used
- clear glass votive holder
- polished river pebbles
- small candle
“Minimalist glass candle holder stabilized with smooth polished river pebbles.”
Colorful mosaic glass candle holder
⏱️ 3-4 hours · 🔴 Advanced
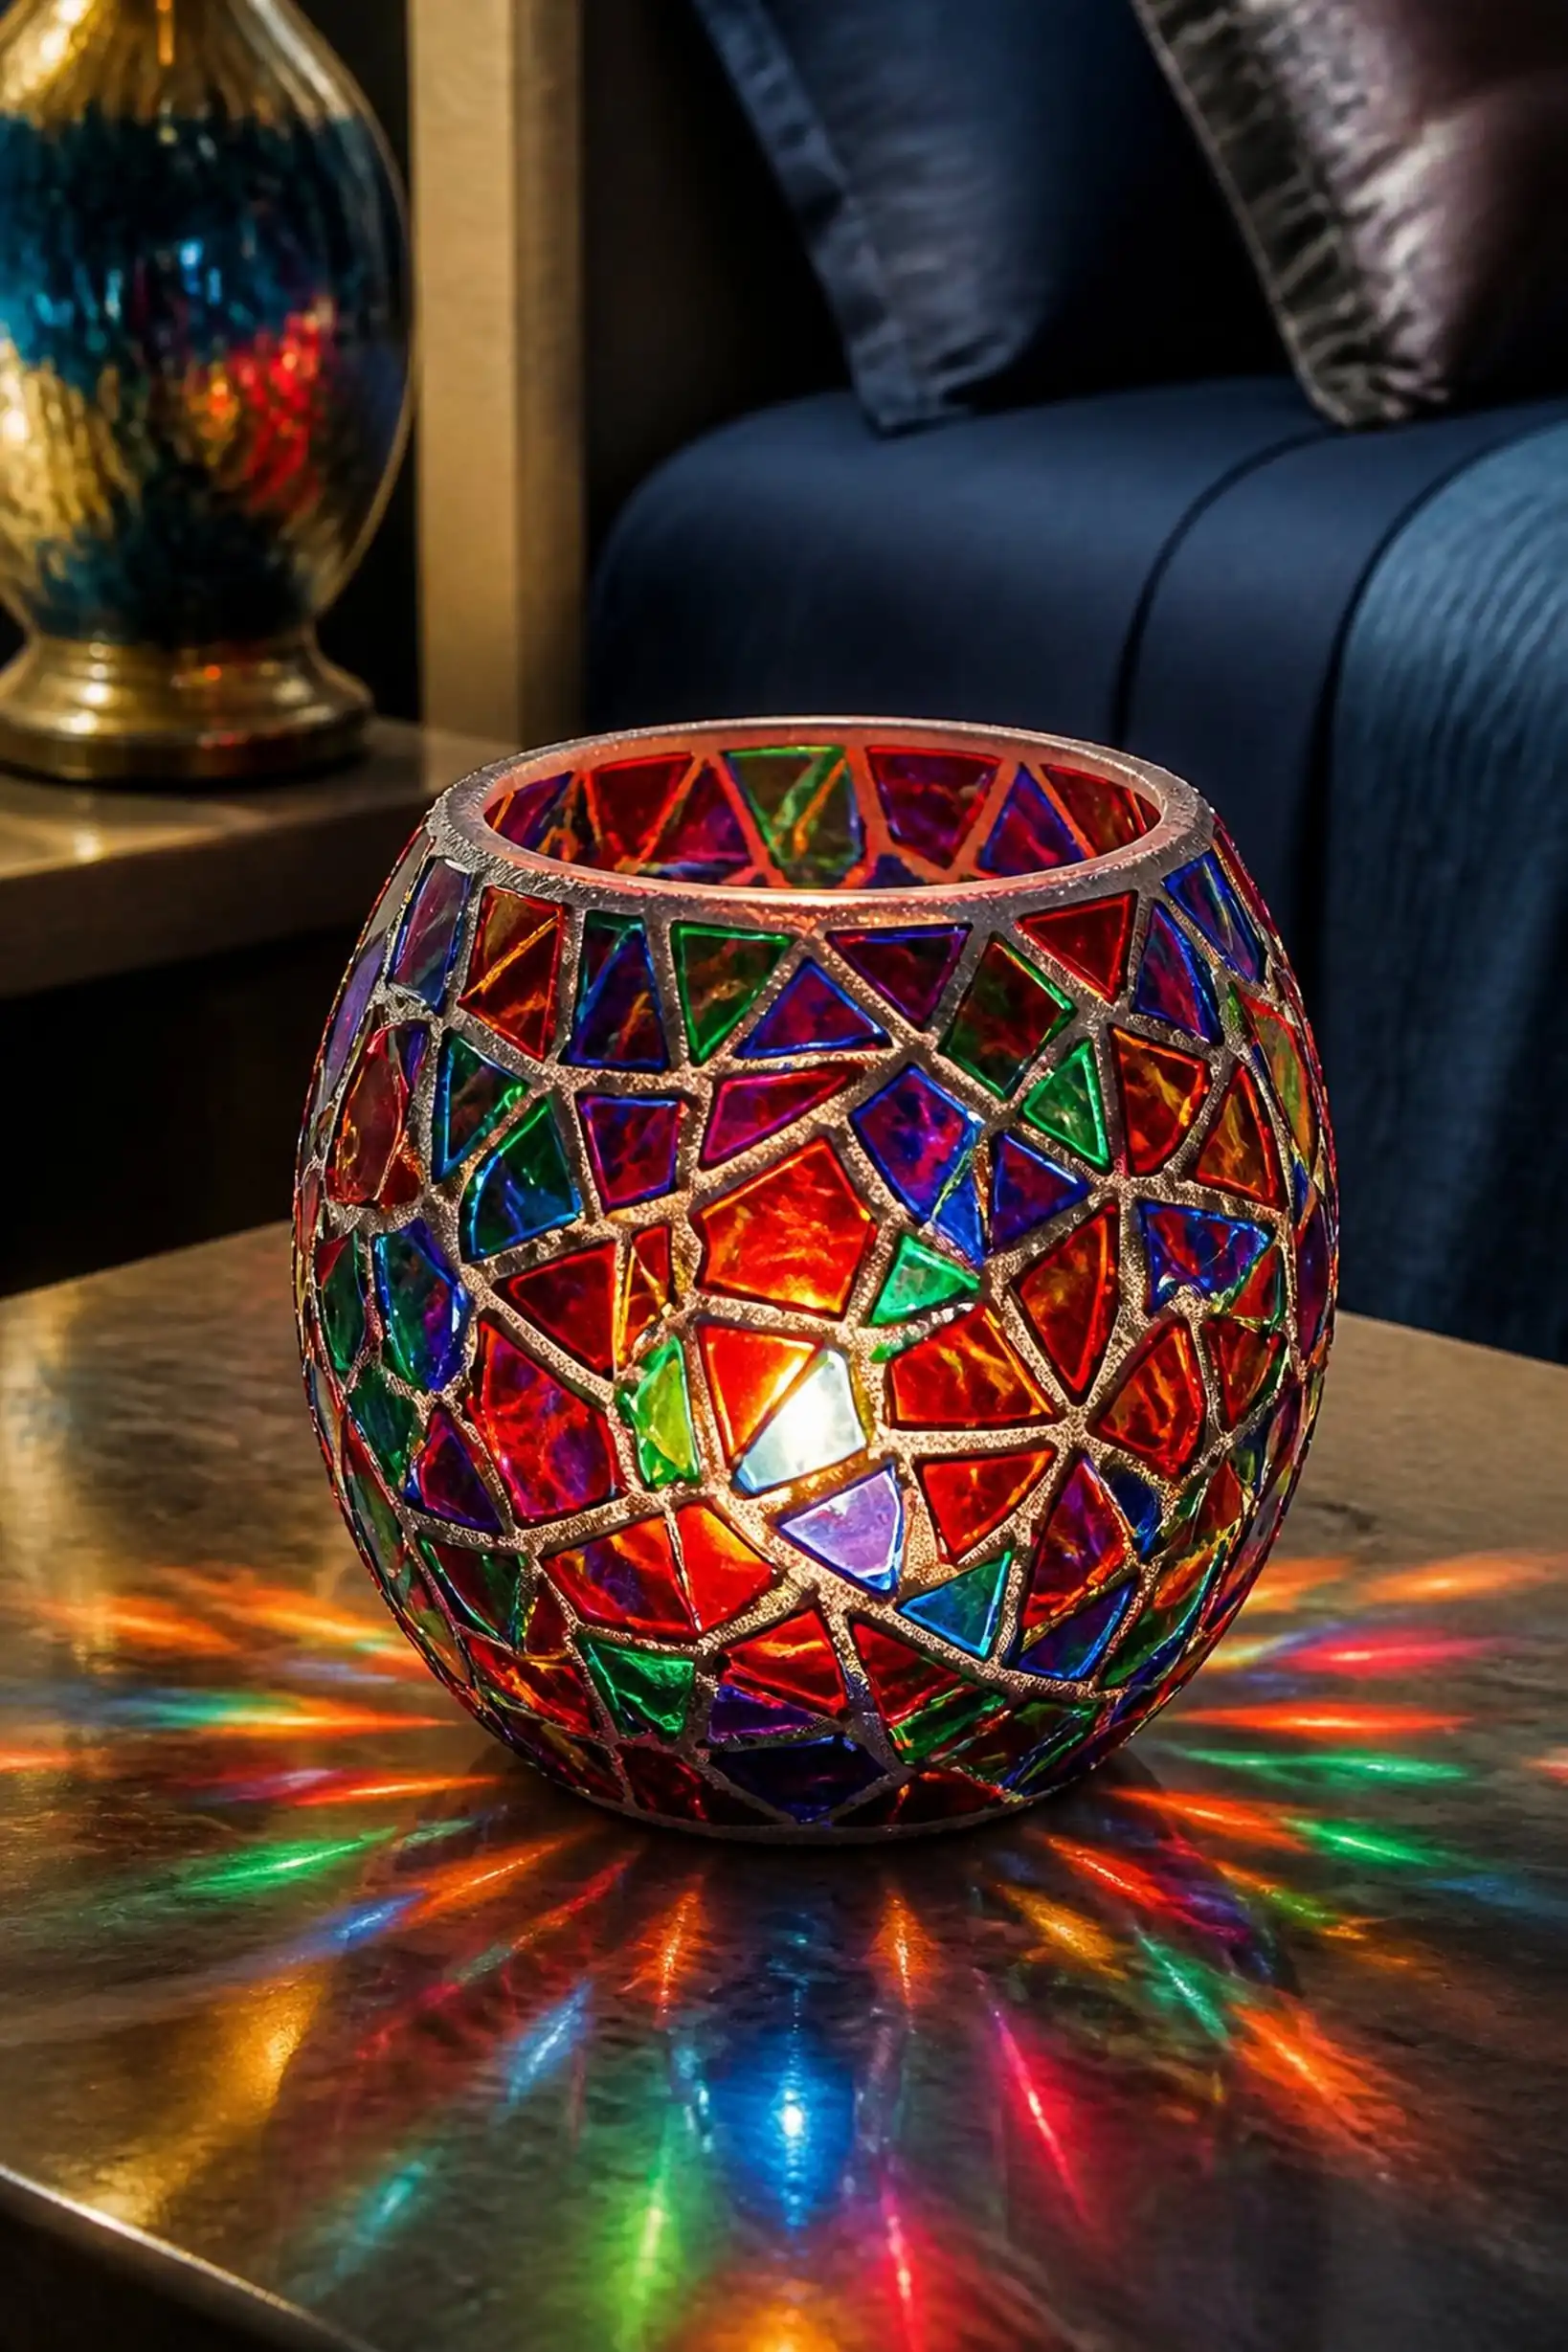
Tiny broken glass pieces in rich jewel tones—ruby reds, sapphire blues, and emerald greens—are arranged to cover a plain glass holder, measuring 4 inches tall and 3 inches wide. The shards create a shimmering surface that fragments candlelight into prismatic color spots.
The mosaic patterns, about 0.5 inch on each side, reflect layered craftsmanship, while grout in pale gray anchors each piece tightly, providing durability and subtle contrast.
Pro Tip: Using stained glass adhesive made for mosaics guarantees strong bonds and prevents glass shifting in use.
How to Make This
- Collect small glass shards in various jewel tones.
- Adhere shards tightly over the surface of a glass candle holder.
- Fill gaps with pale gray grout and allow to dry completely.
Avoid: Leaving spaces too wide between shards weakens the structure and ruins visual effect.
Try Also: Use metallic-coated glass pieces or add mirror fragments for extra sparkle and reflection.
Products & Materials
Items Used
“Jewel-toned mosaic glass candle holder blasts color across cozy rooms.”
Copper wire frame with suspended candle
⏱️ 2 hours · 🔴 Advanced
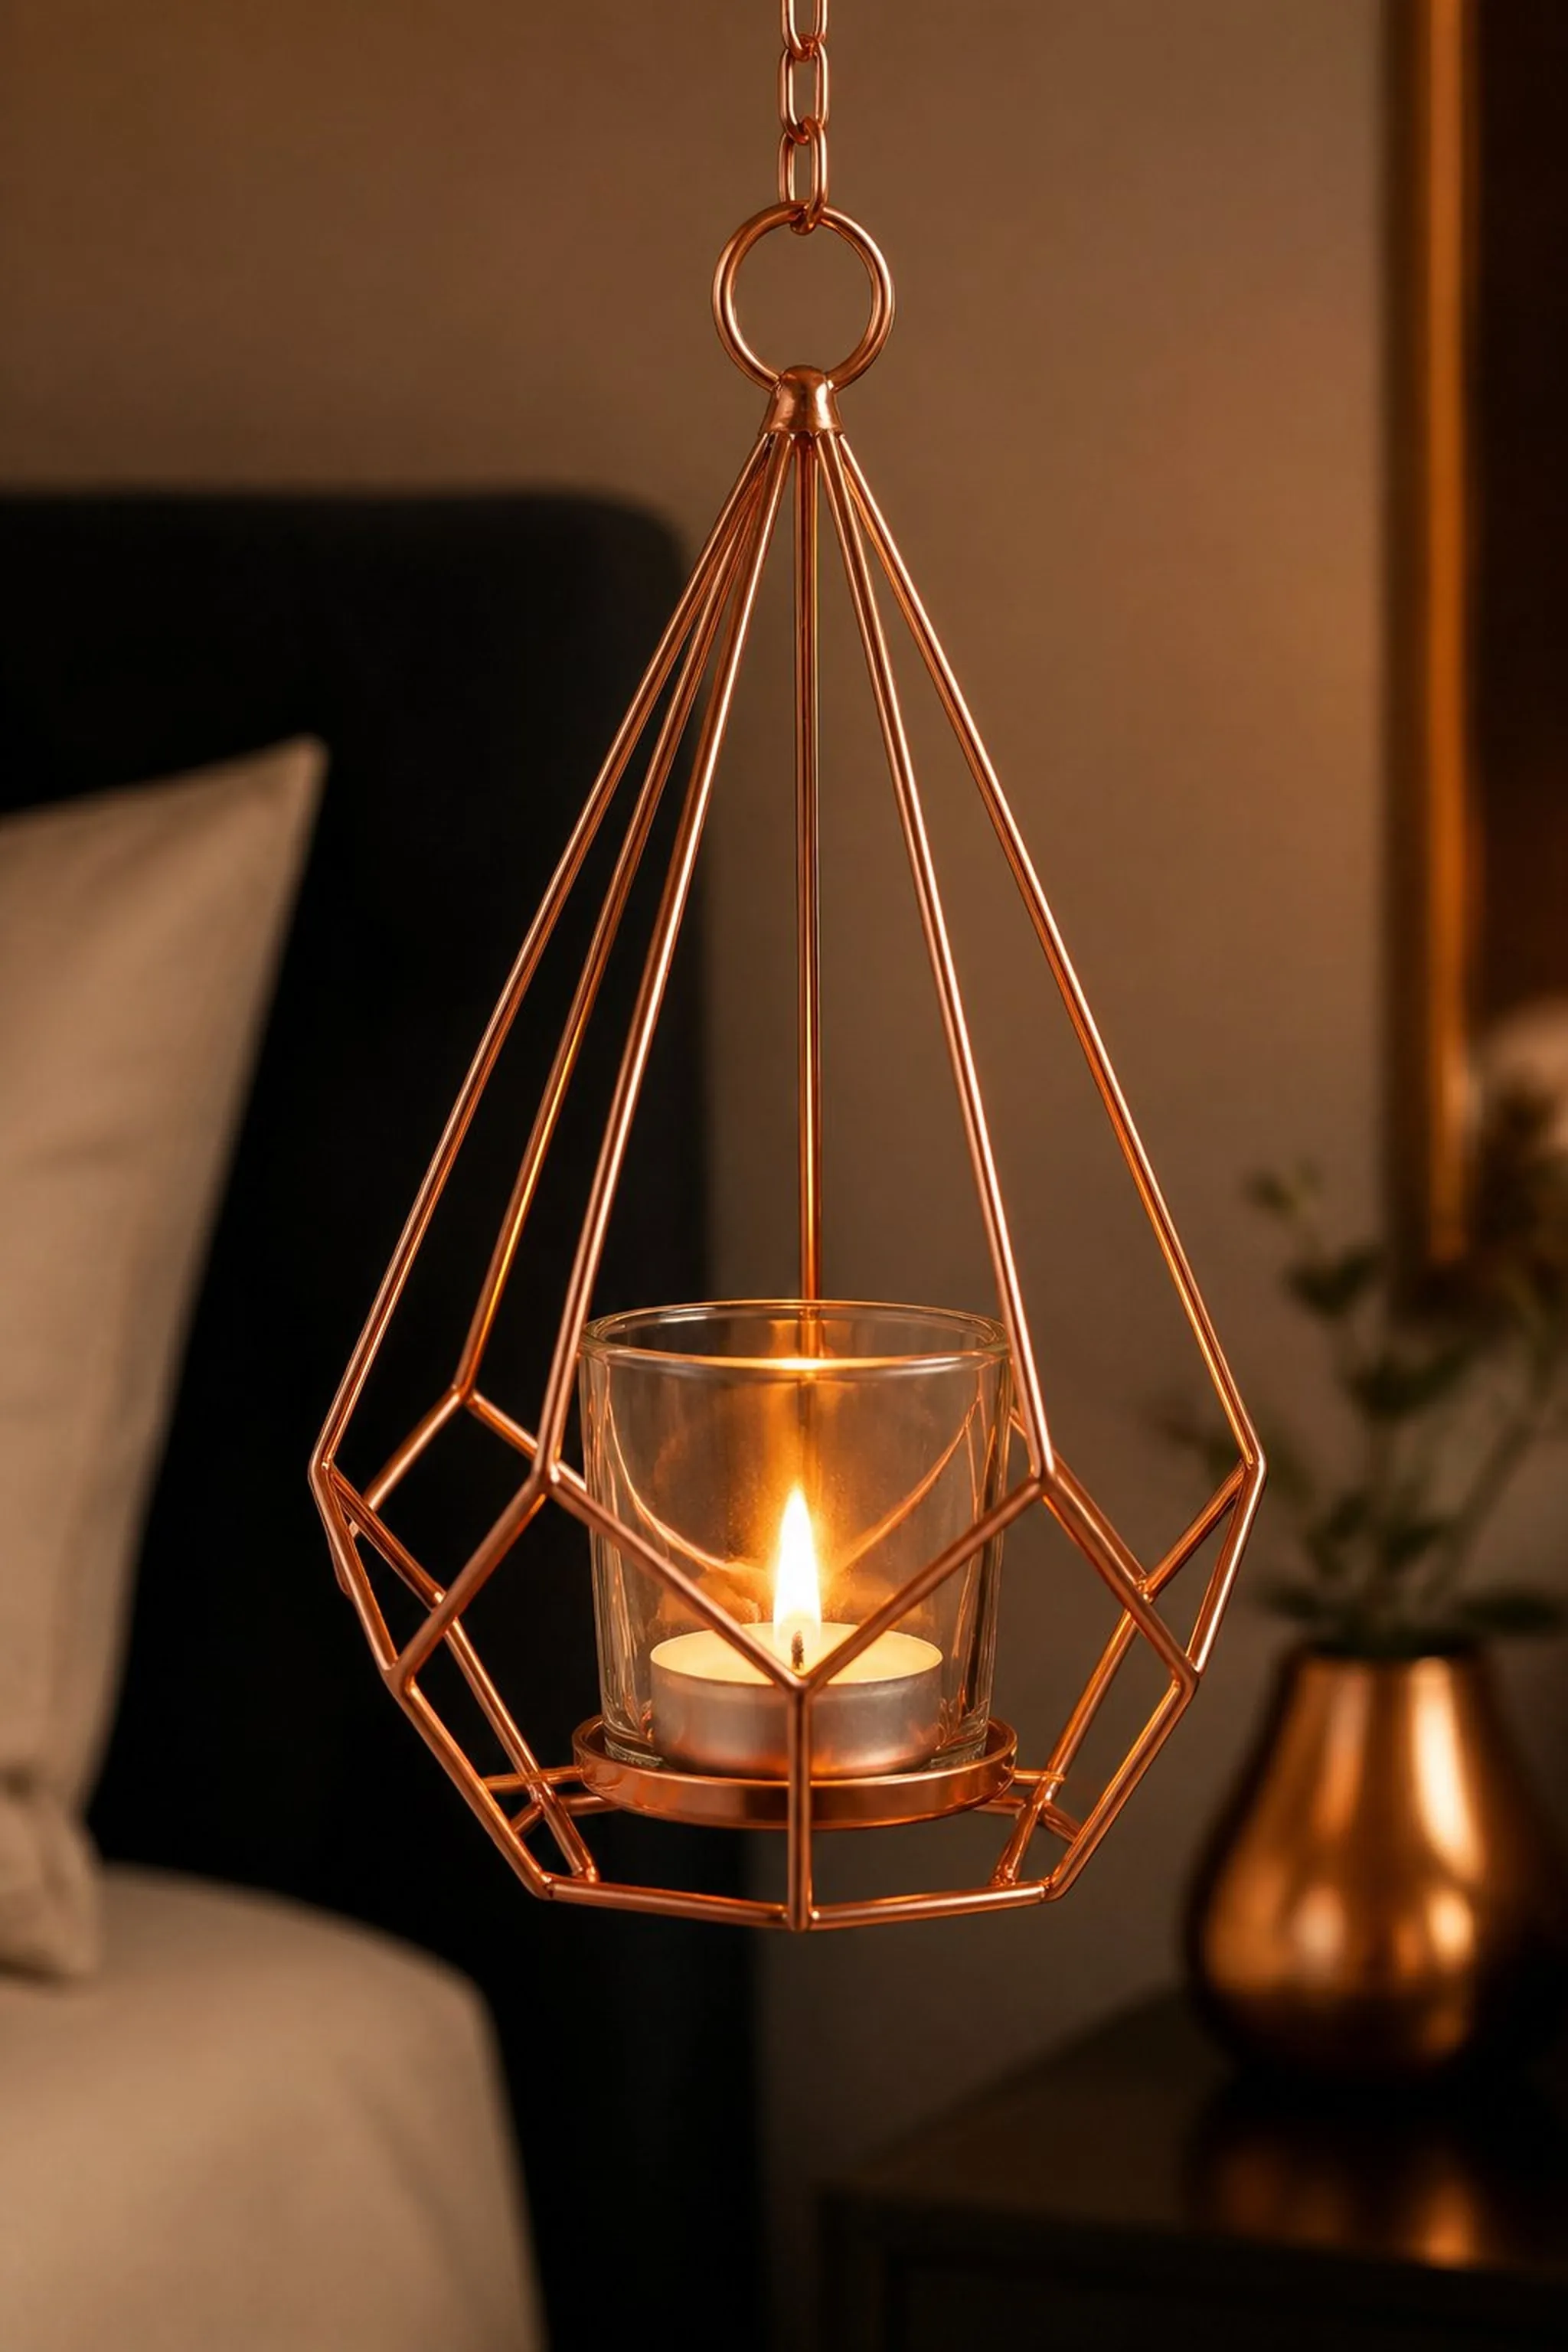
Thin copper wire bent into a geometric frame suspends a small glass votive candle holder inside a 5-inch tall angular shape. The soft metallic gleam catches candlelight reflections without overpowering the warmth of the flickering flame.
The structure balances lightness and strength, using 20-gauge wire formed into triangles arranged symmetrically. The suspended votive inside measures 2.5 inches tall, floating within the frame’s open center.
Pro Tip: Creating sharp wire bends with pliers results in clean frame edges and a professional look.
How to Make This
- Form a 5-inch tall 20-gauge copper wire frame in geometric shapes.
- Suspend a 2.5-inch glass votive candle holder inside the frame.
- Place a small votive candle within the suspended holder.
Avoid: Leaving wire ends unsecured causes sharp points that can snag fabric or skin.
Try Also: Try silver or brass wire for different metallic tones or add small hanging charms to the frame corners.
Products & Materials
Items Used
- 20-gauge copper wire
- small glass votive holder
- small votive candle
- round nose pliers
“Copper wire frame suspends candle for a lightweight geometric accent.”
Ceramic pinch pot with candle center
⏱️ 2 hours · 🟠 Intermediate
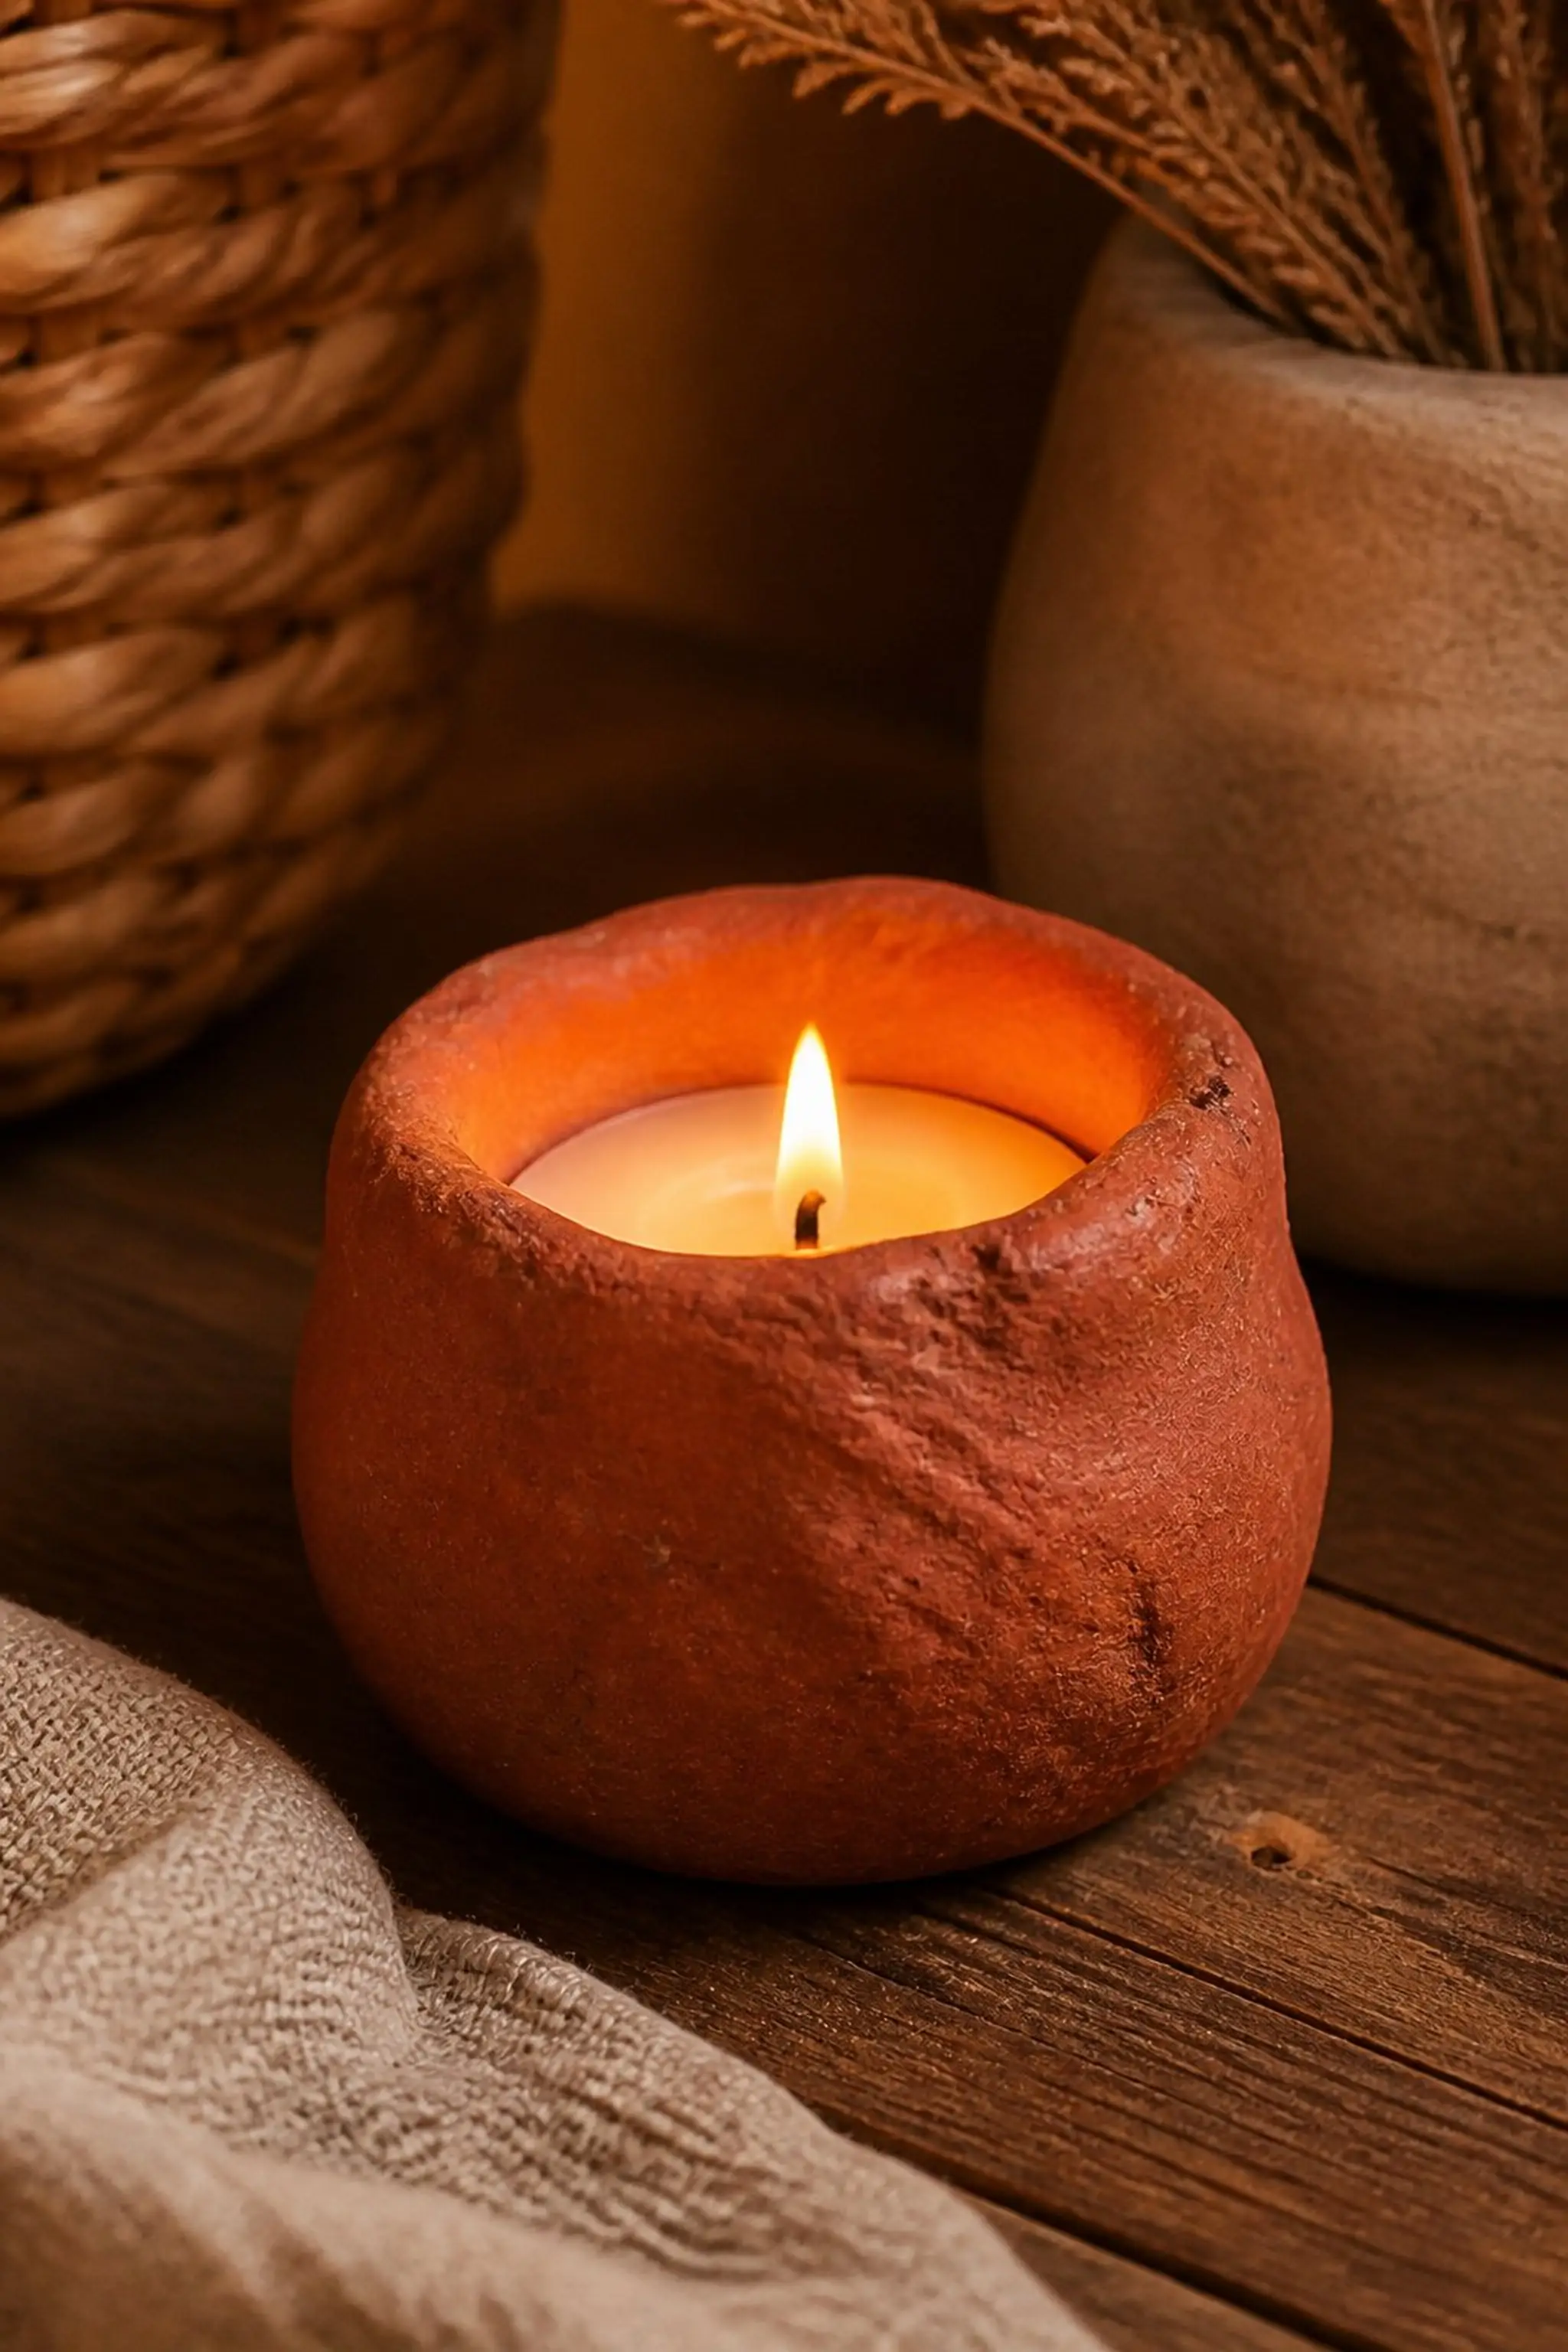
A hand-shaped ceramic pinch pot serves as a rustic vessel for a small candle, about 4 inches wide and 2.5 inches tall. The uneven rim and earthy red clay color highlight the tactile qualities of coil pottery techniques.
The rough matte glaze finishes the piece, absorbing and softening candlelight to spread gentle pools of warmth. Finger marks and natural indentations add handcrafted charm.
Pro Tip: Firing the clay to cone 04 (about 1940°F) ensures durability while maintaining porous texture for glaze adherence.
How to Make This
- Create a small pinch pot shape from earthenware clay.
- Allow to dry slightly then fire in kiln at cone 04.
- Place a small candle in the pot before use.
Avoid: Rushing drying stages can cause cracking or warping during firing.
Try Also: Use air-dry clay for an easier finish or paint the pot with acrylics for color contrast.
Products & Materials
Items Used
- earthenware clay
- small candle votive
- kiln firing
“Handmade ceramic pinch pot creates a warm rustic candle vessel.”
Recycled tin can holder with punched holes
⏱️ 1 hour · 🟠 Intermediate
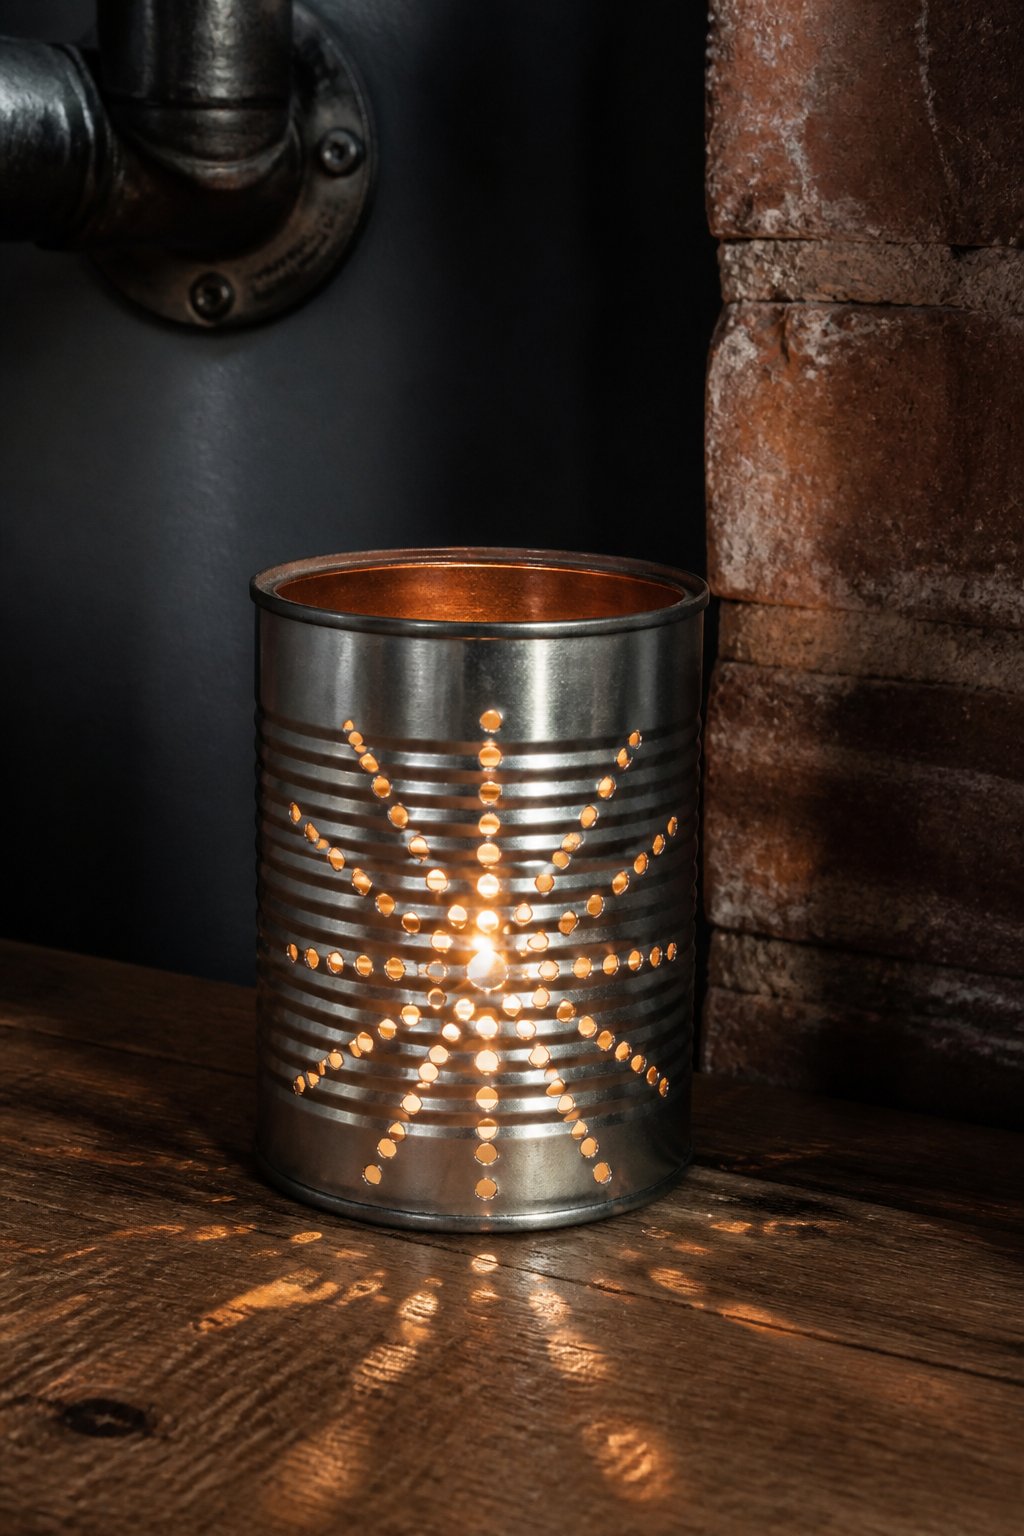
A repurposed metal tin can features an arrangement of punched circular holes forming a starburst design. The 4-inch tall silver cylinder diffuses candlelight in patterned dots and streaks, projecting lively shadows on nearby textures.
The tin’s reflective steel surface lightly glints, offsetting the matte interiors exposed through the perforations. The overall effect balances industrial edginess with cozy candle glow.
Pro Tip: Using a hammer and nail on a soft surface helps gently create uniform holes without bending the can’s shape.
How to Make This
- Clean and remove label from a 4-inch tall tin can.
- Punch starburst pattern holes evenly spaced all around the can.
- Place a small tealight candle inside the can.
Avoid: Puncturing holes too close weakens the can, risking deformation or collapsing sides.
Try Also: Paint the can exterior with heat-resistant paint or try different hole patterns like hearts or waves.
Products & Materials
Items Used
“Recycled tin can with punched starburst holes casts lively candlelight shadows.”
Textured paper lantern with warm glow
⏱️ 1.5 hours · 🟠 Intermediate
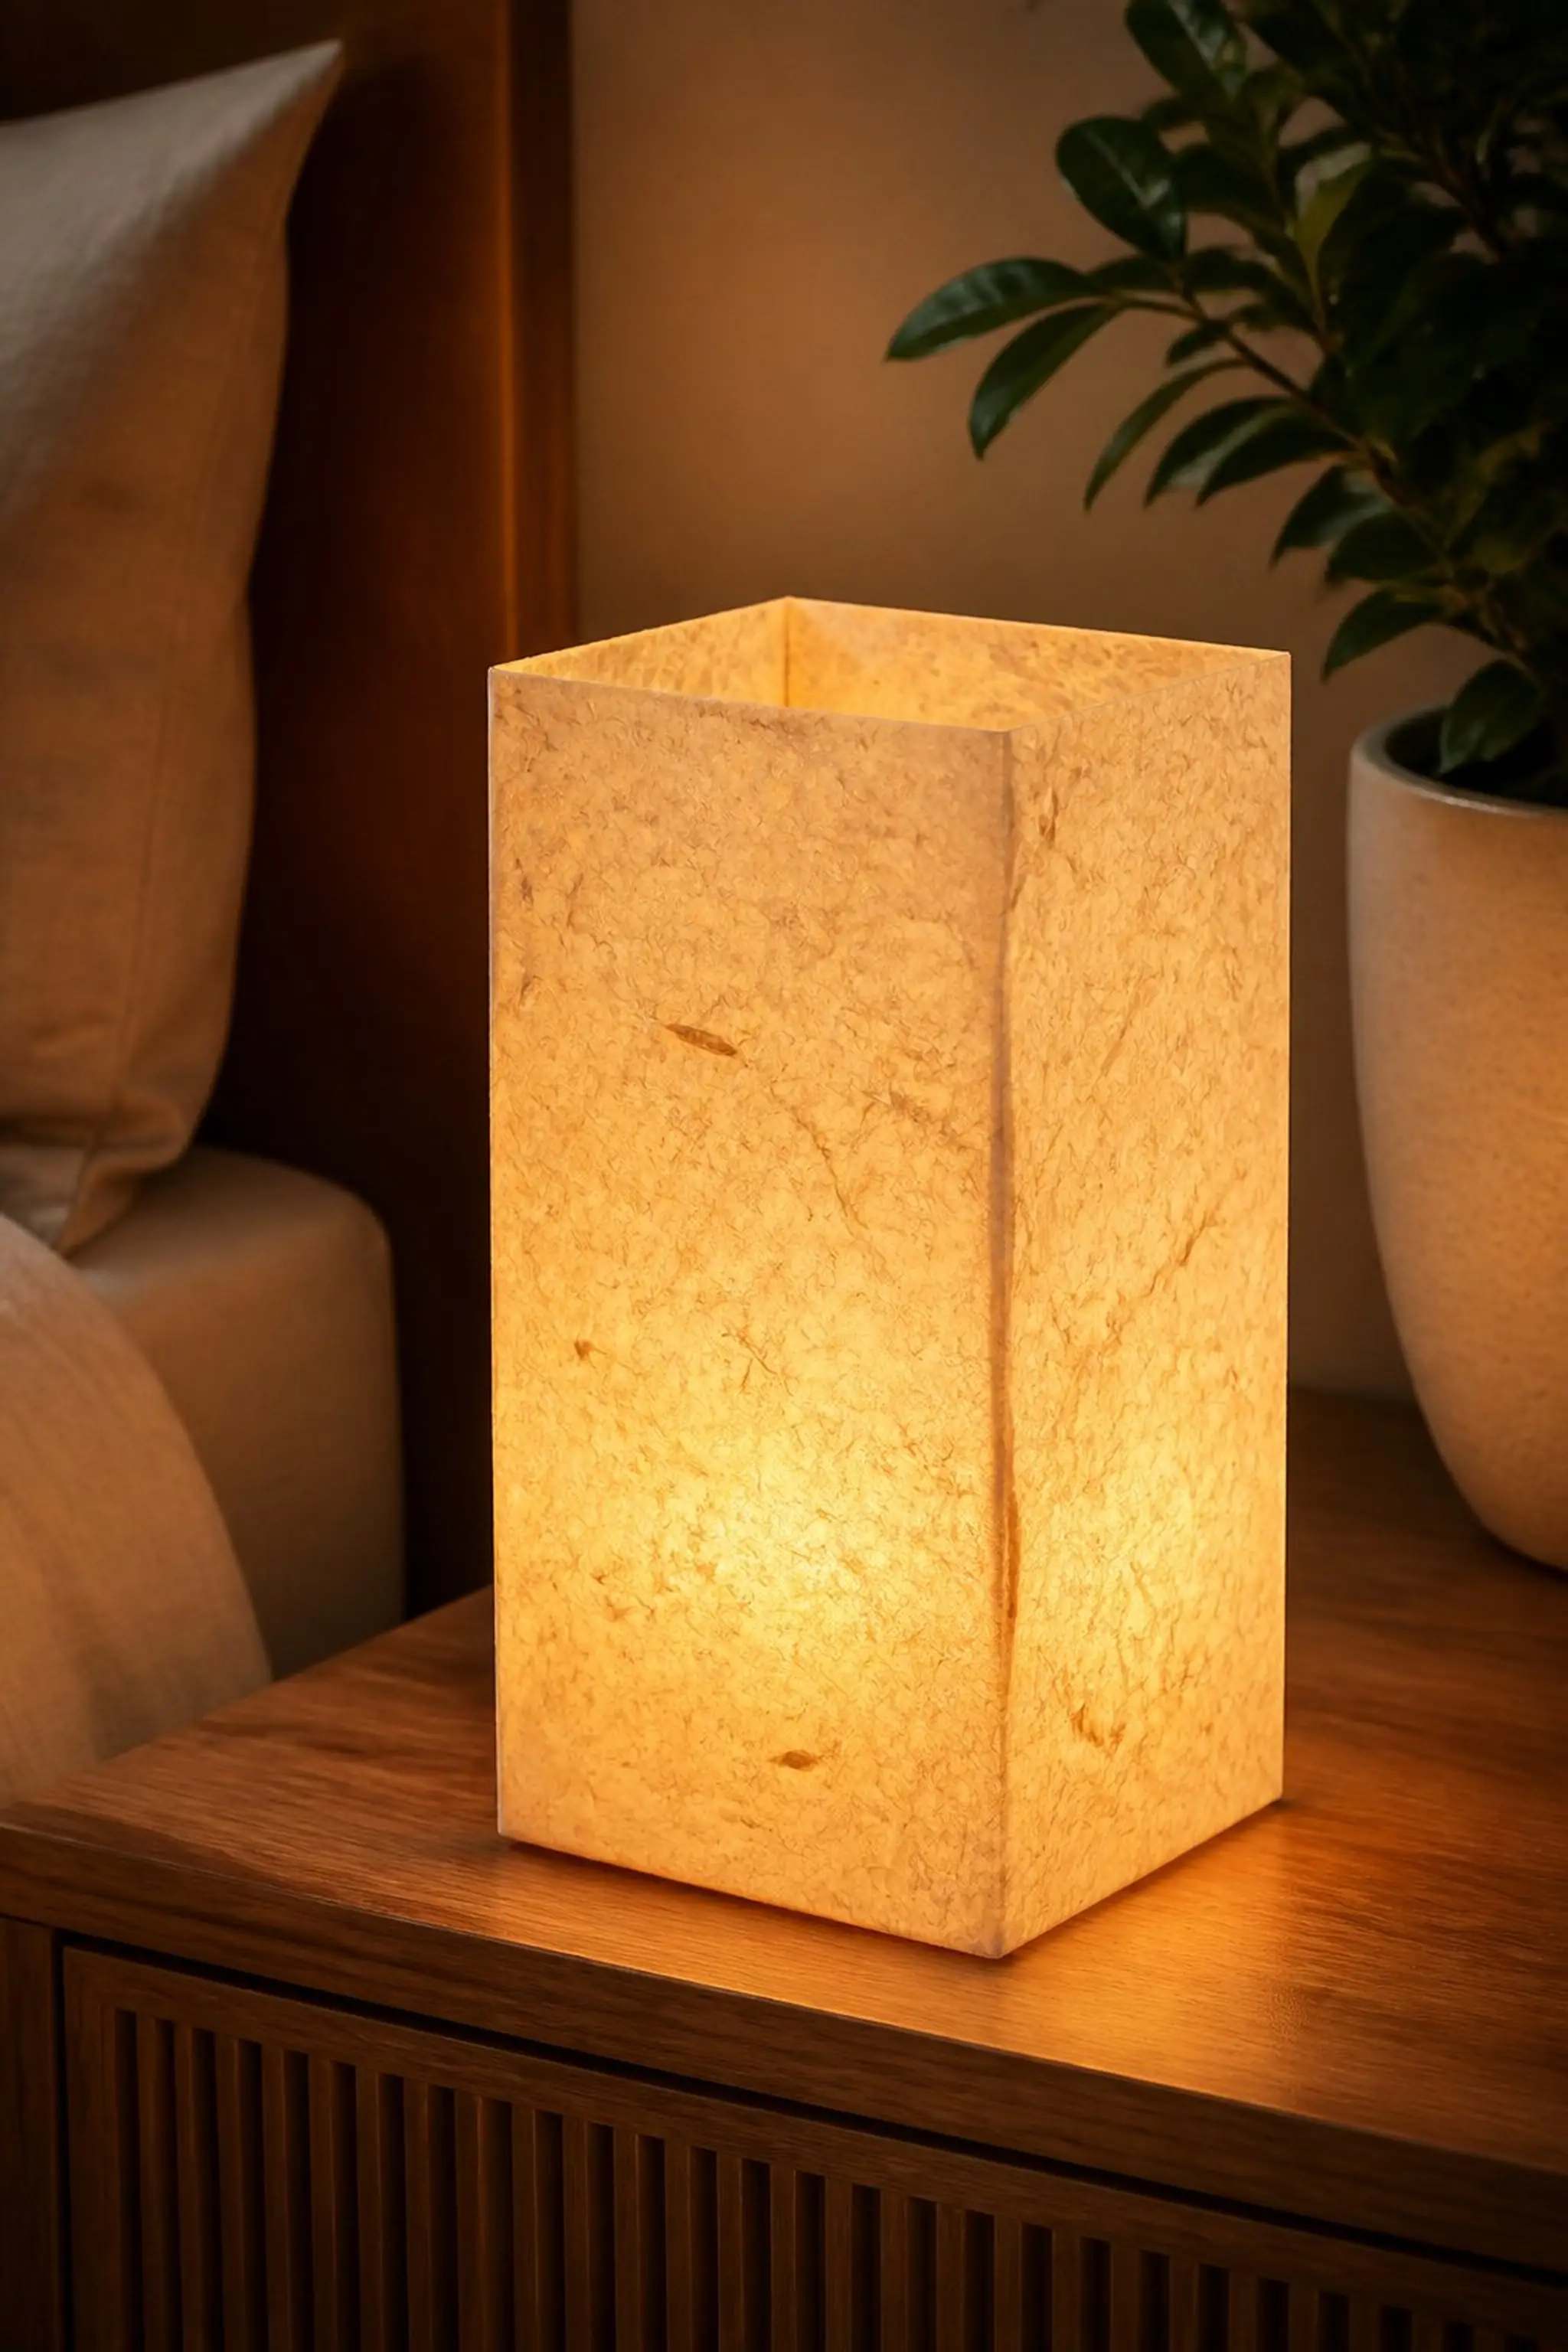
Translucent handmade paper shaped into a cylindrical lantern about 6 inches tall filters candlelight softly, resulting in a warm, diffuse glow. The paper’s subtle fibrous texture adds visual depth and soft contrasts when illuminated.
Subtle off-white and light cream patches create organic patterns, and the paper’s thickness balances sturdiness with gentle light passage, ideal for bedside ambiance.
Pro Tip: Choosing acid-free, thicker handmade paper prevents scorching and preserves the lantern’s silhouette around heat sources.
How to Make This
- Cut and shape handmade paper into a 6-inch tall cylinder.
- Secure edges and create a stable base for a small candle.
- Place a battery-operated candle inside for safety.
Avoid: Using regular thin paper risks fire hazards and rapid material curling.
Try Also: Incorporate pressed leaves or petals into the paper for added texture, or dye the paper in soft pastel tones.
Products & Materials
Items Used
- handmade translucent paper
- battery-operated candle
- double-sided tape
“Soft light glows through handcrafted textured paper lanterns.”
Natural pinecone candle holder centerpiece
⏱️ 40 min · 🟢 Beginner
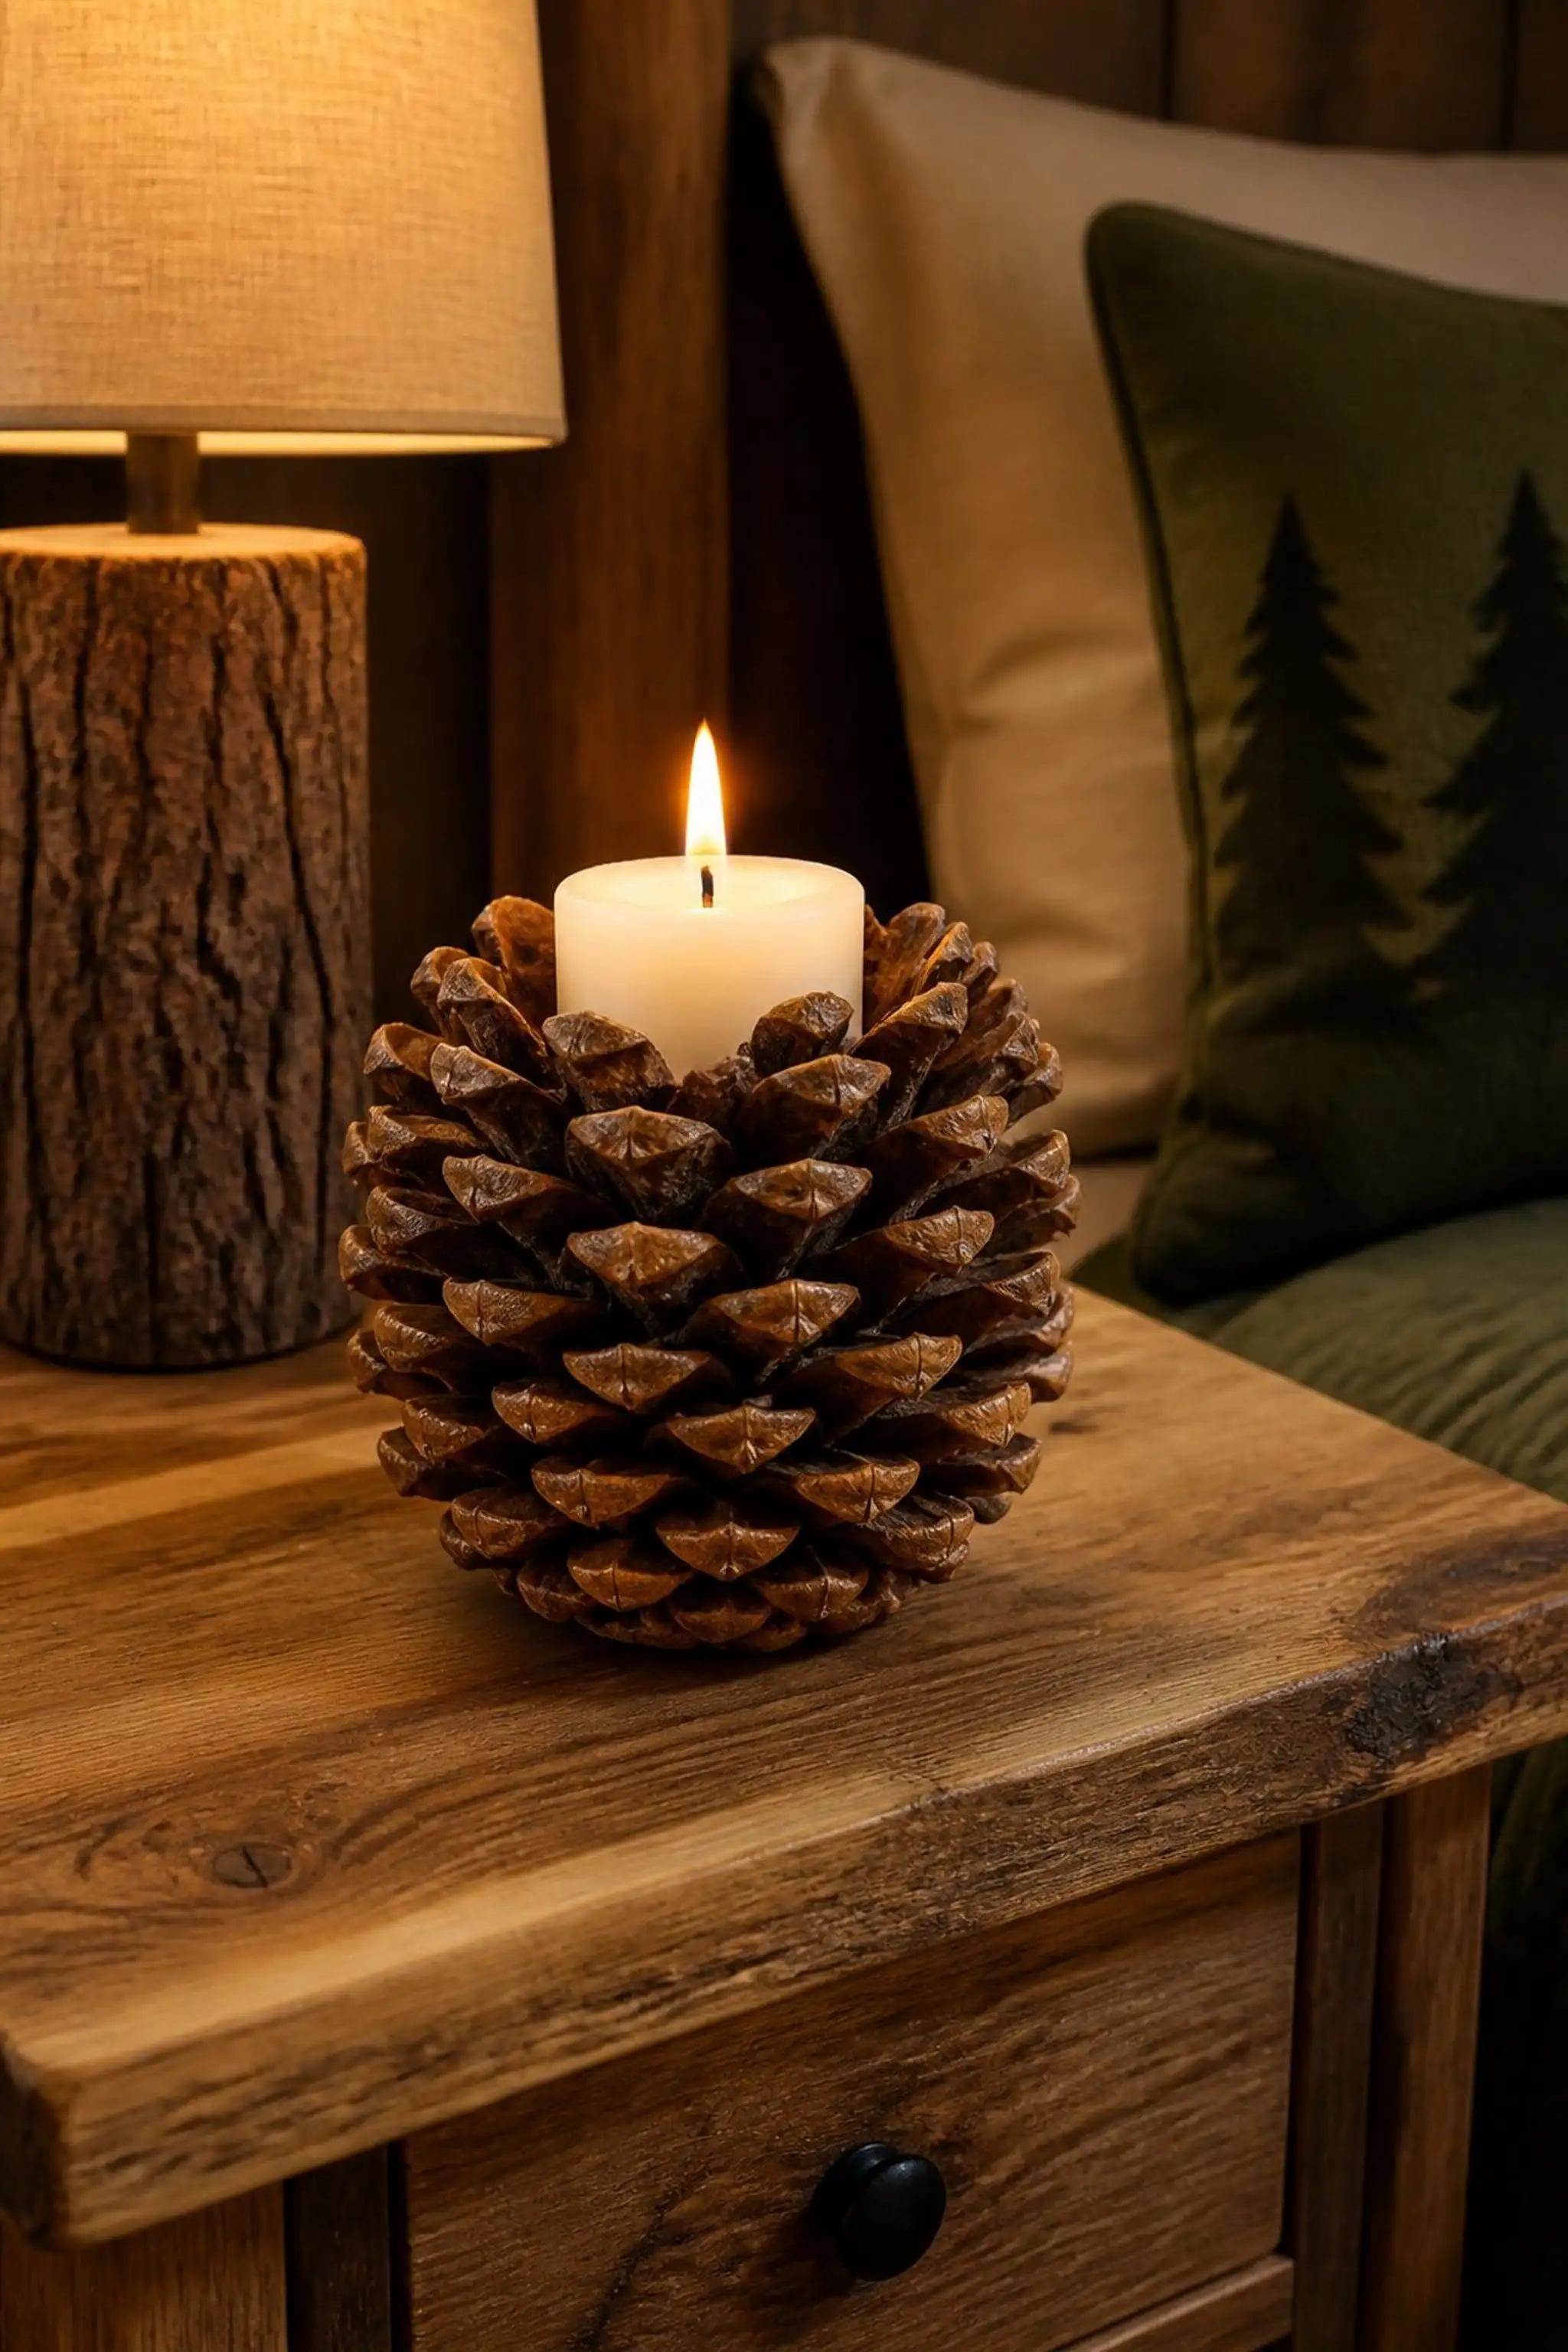
A large pinecone measuring about 4 inches tall plays base to a small pillar candle sitting securely in a natural depression among its layered scales. The rough, woody texture and deep brown tones evoke forest scents and autumn evenings.
Light bounces gently between the layered pinecone scales, creating flickering shadows that enhance the tactile depth. The pinecone’s irregular shape adds rustic authenticity.
Pro Tip: Choosing a dried but not overly brittle pinecone keeps scales intact and supports candle stability safely.
How to Make This
- Select a large, dried pinecone approximately 4 inches tall.
- Locate a stable spot near the center to place a small pillar candle.
- Light the candle carefully in the pinecone holder.
Avoid: Using a damp or loose pinecone causes scales to flake off and disrupt the holder’s form.
Try Also: Add a thin band of burlap around the pinecone base or paint tips white for a frosted effect.
Products & Materials
Items Used
“Forest charm comes alive with natural pinecone candle holder.”
Color-blocked ceramic candle dish
⏱️ 1.5 hours · 🟠 Intermediate
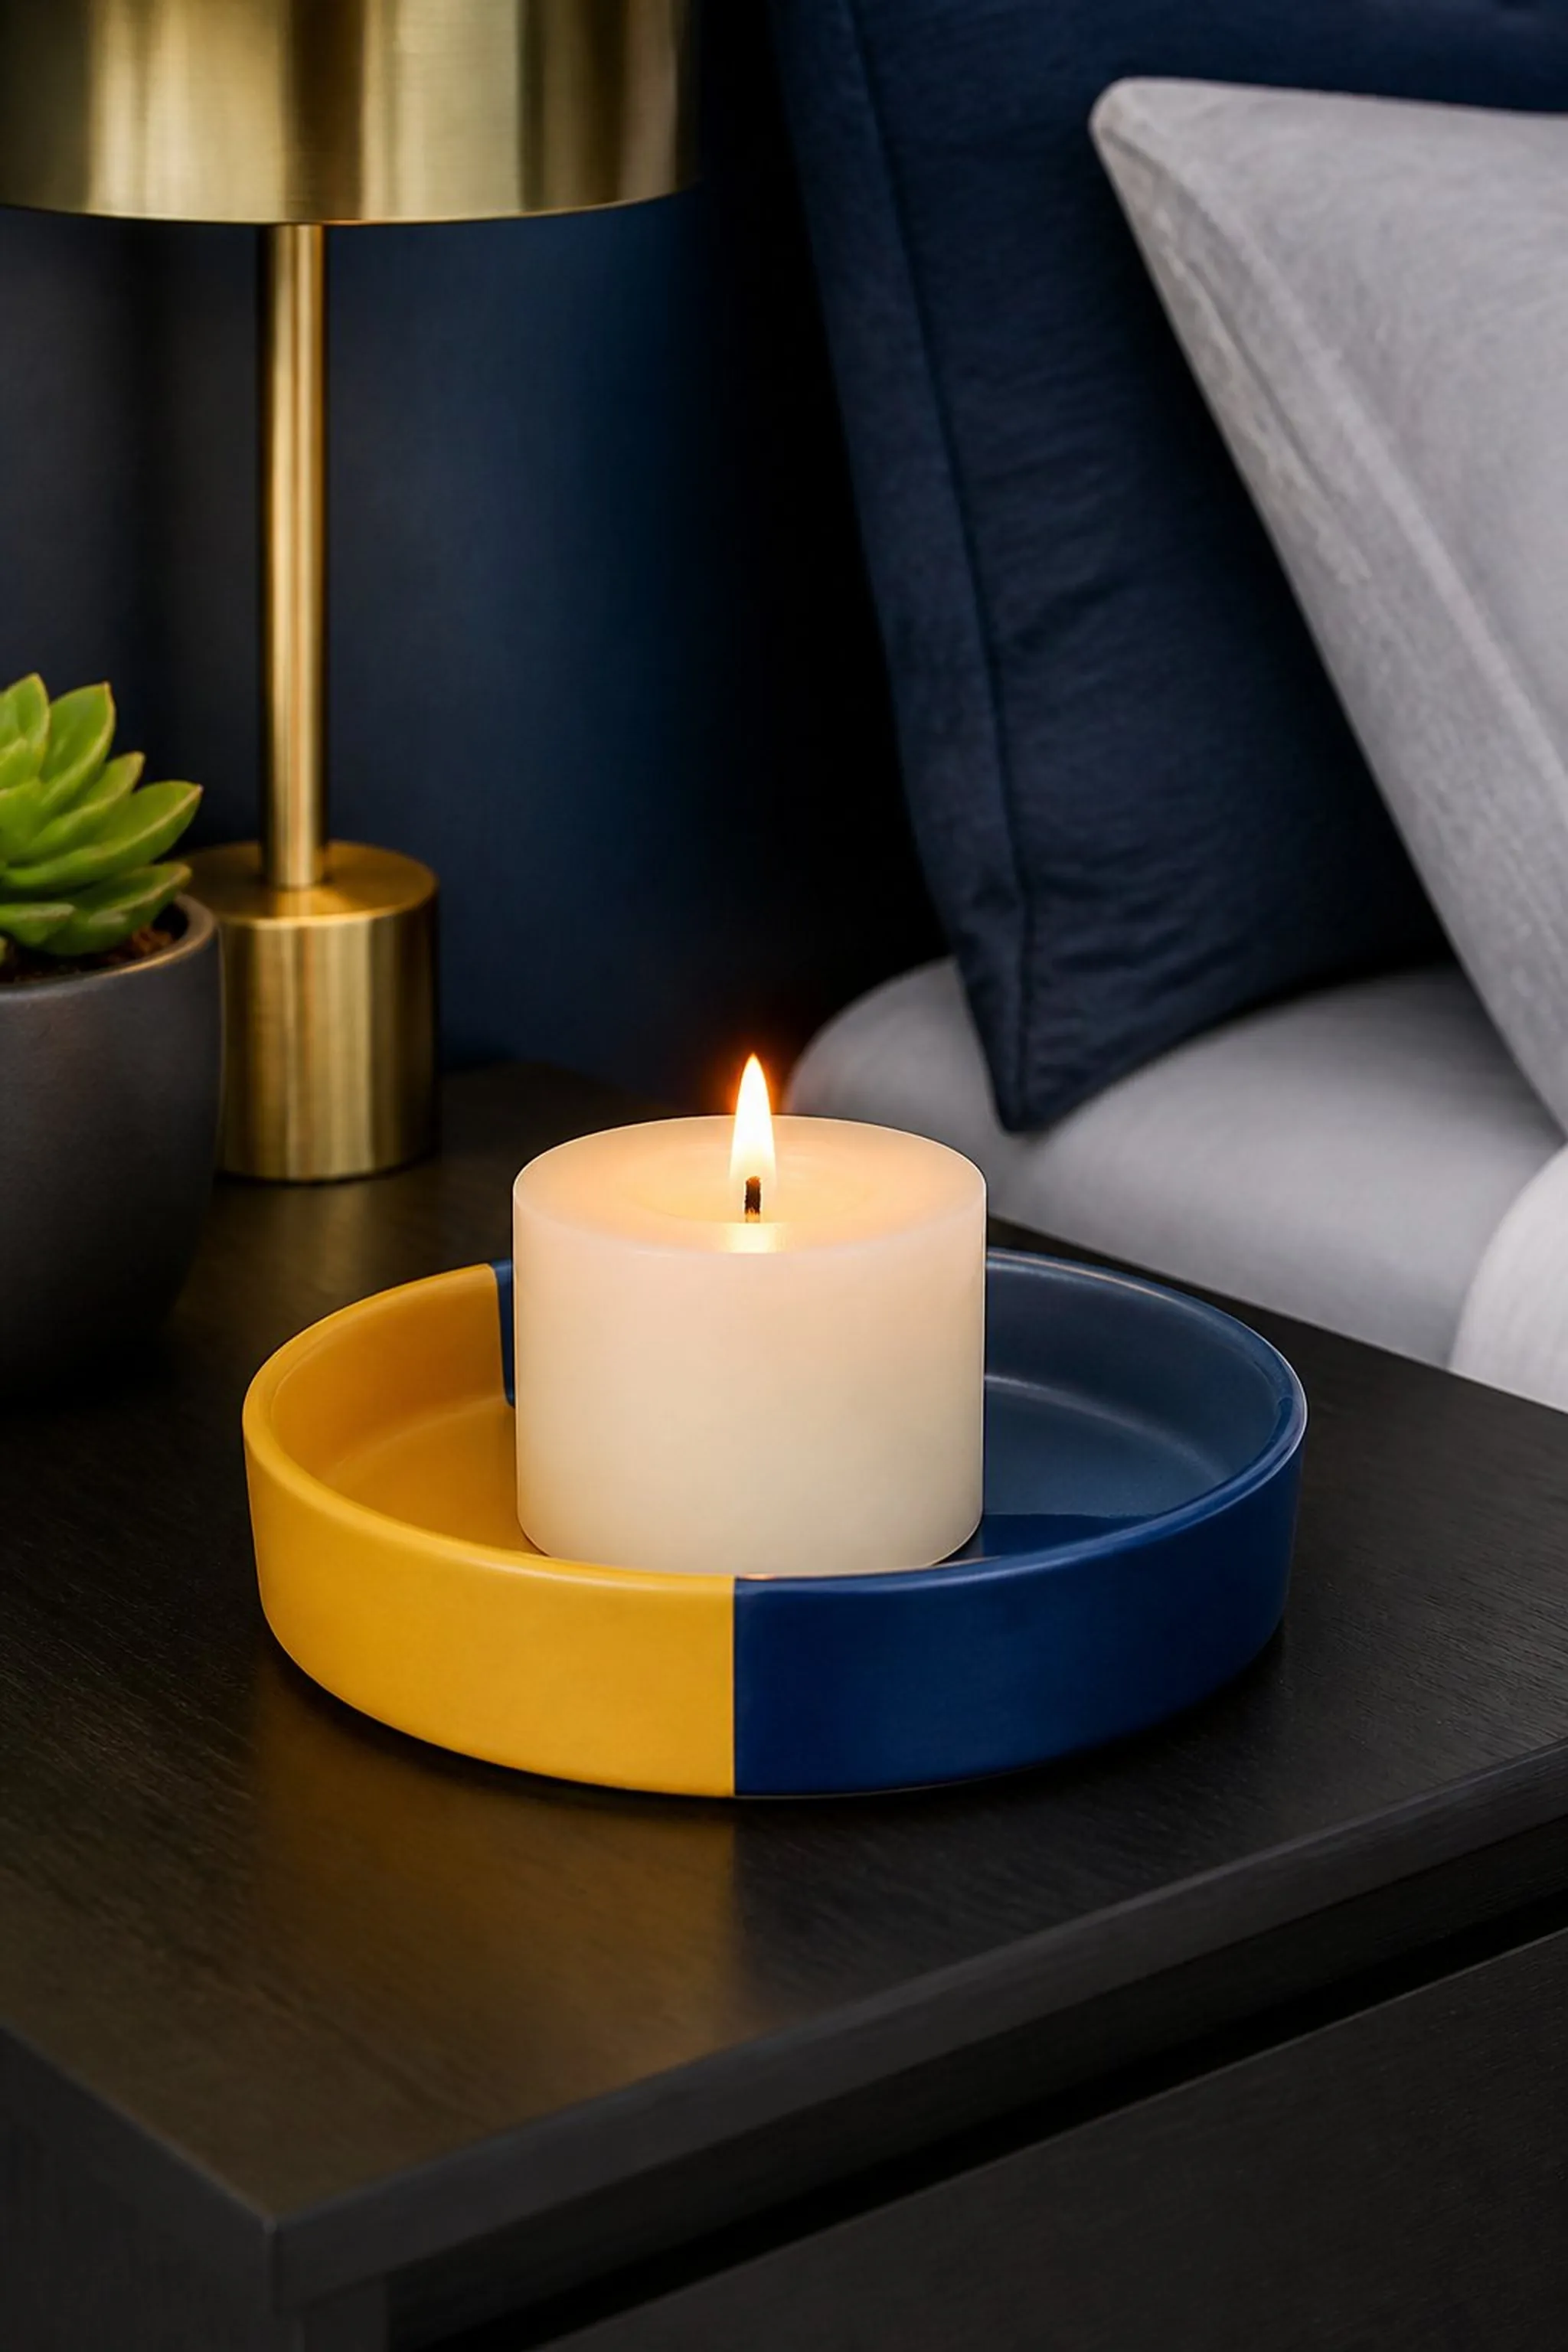
A smooth round ceramic dish, 5 inches wide and half an inch deep, hosts a single candle while featuring bold color-block sections in matte mustard yellow and muted navy blue. The contrasting flat hues highlight minimal modern appeal.
Glossy edges and a subtle curve provide tactile softness, while the ceramic’s density anchors the piece on nightstand surfaces. The color blocking divides the dish visually, adding structured energy to a cozy corner.
Pro Tip: Applying two coats of matte glaze separately for each color enhances clean dividing lines and textural contrast.
How to Make This
- Form and fire a 5-inch round ceramic dish.
- Paint or glaze halves in mustard yellow and navy blue, allowing drying between coats.
- Place a pillar or votive candle centered on the dish.
Avoid: Blurring colors by glazing wet-on-wet along lines creates messy division under heat.
Try Also: Try other bold combinations like burnt orange and forest green or pastel pink and white.
Products & Materials
Items Used
- ceramic dish
- matte ceramic glaze
- pillar or votive candle
“Color-block ceramic candle dish adds modern structure to cozy spaces.”
