
As an Amazon Associate I earn from qualifying purchases.
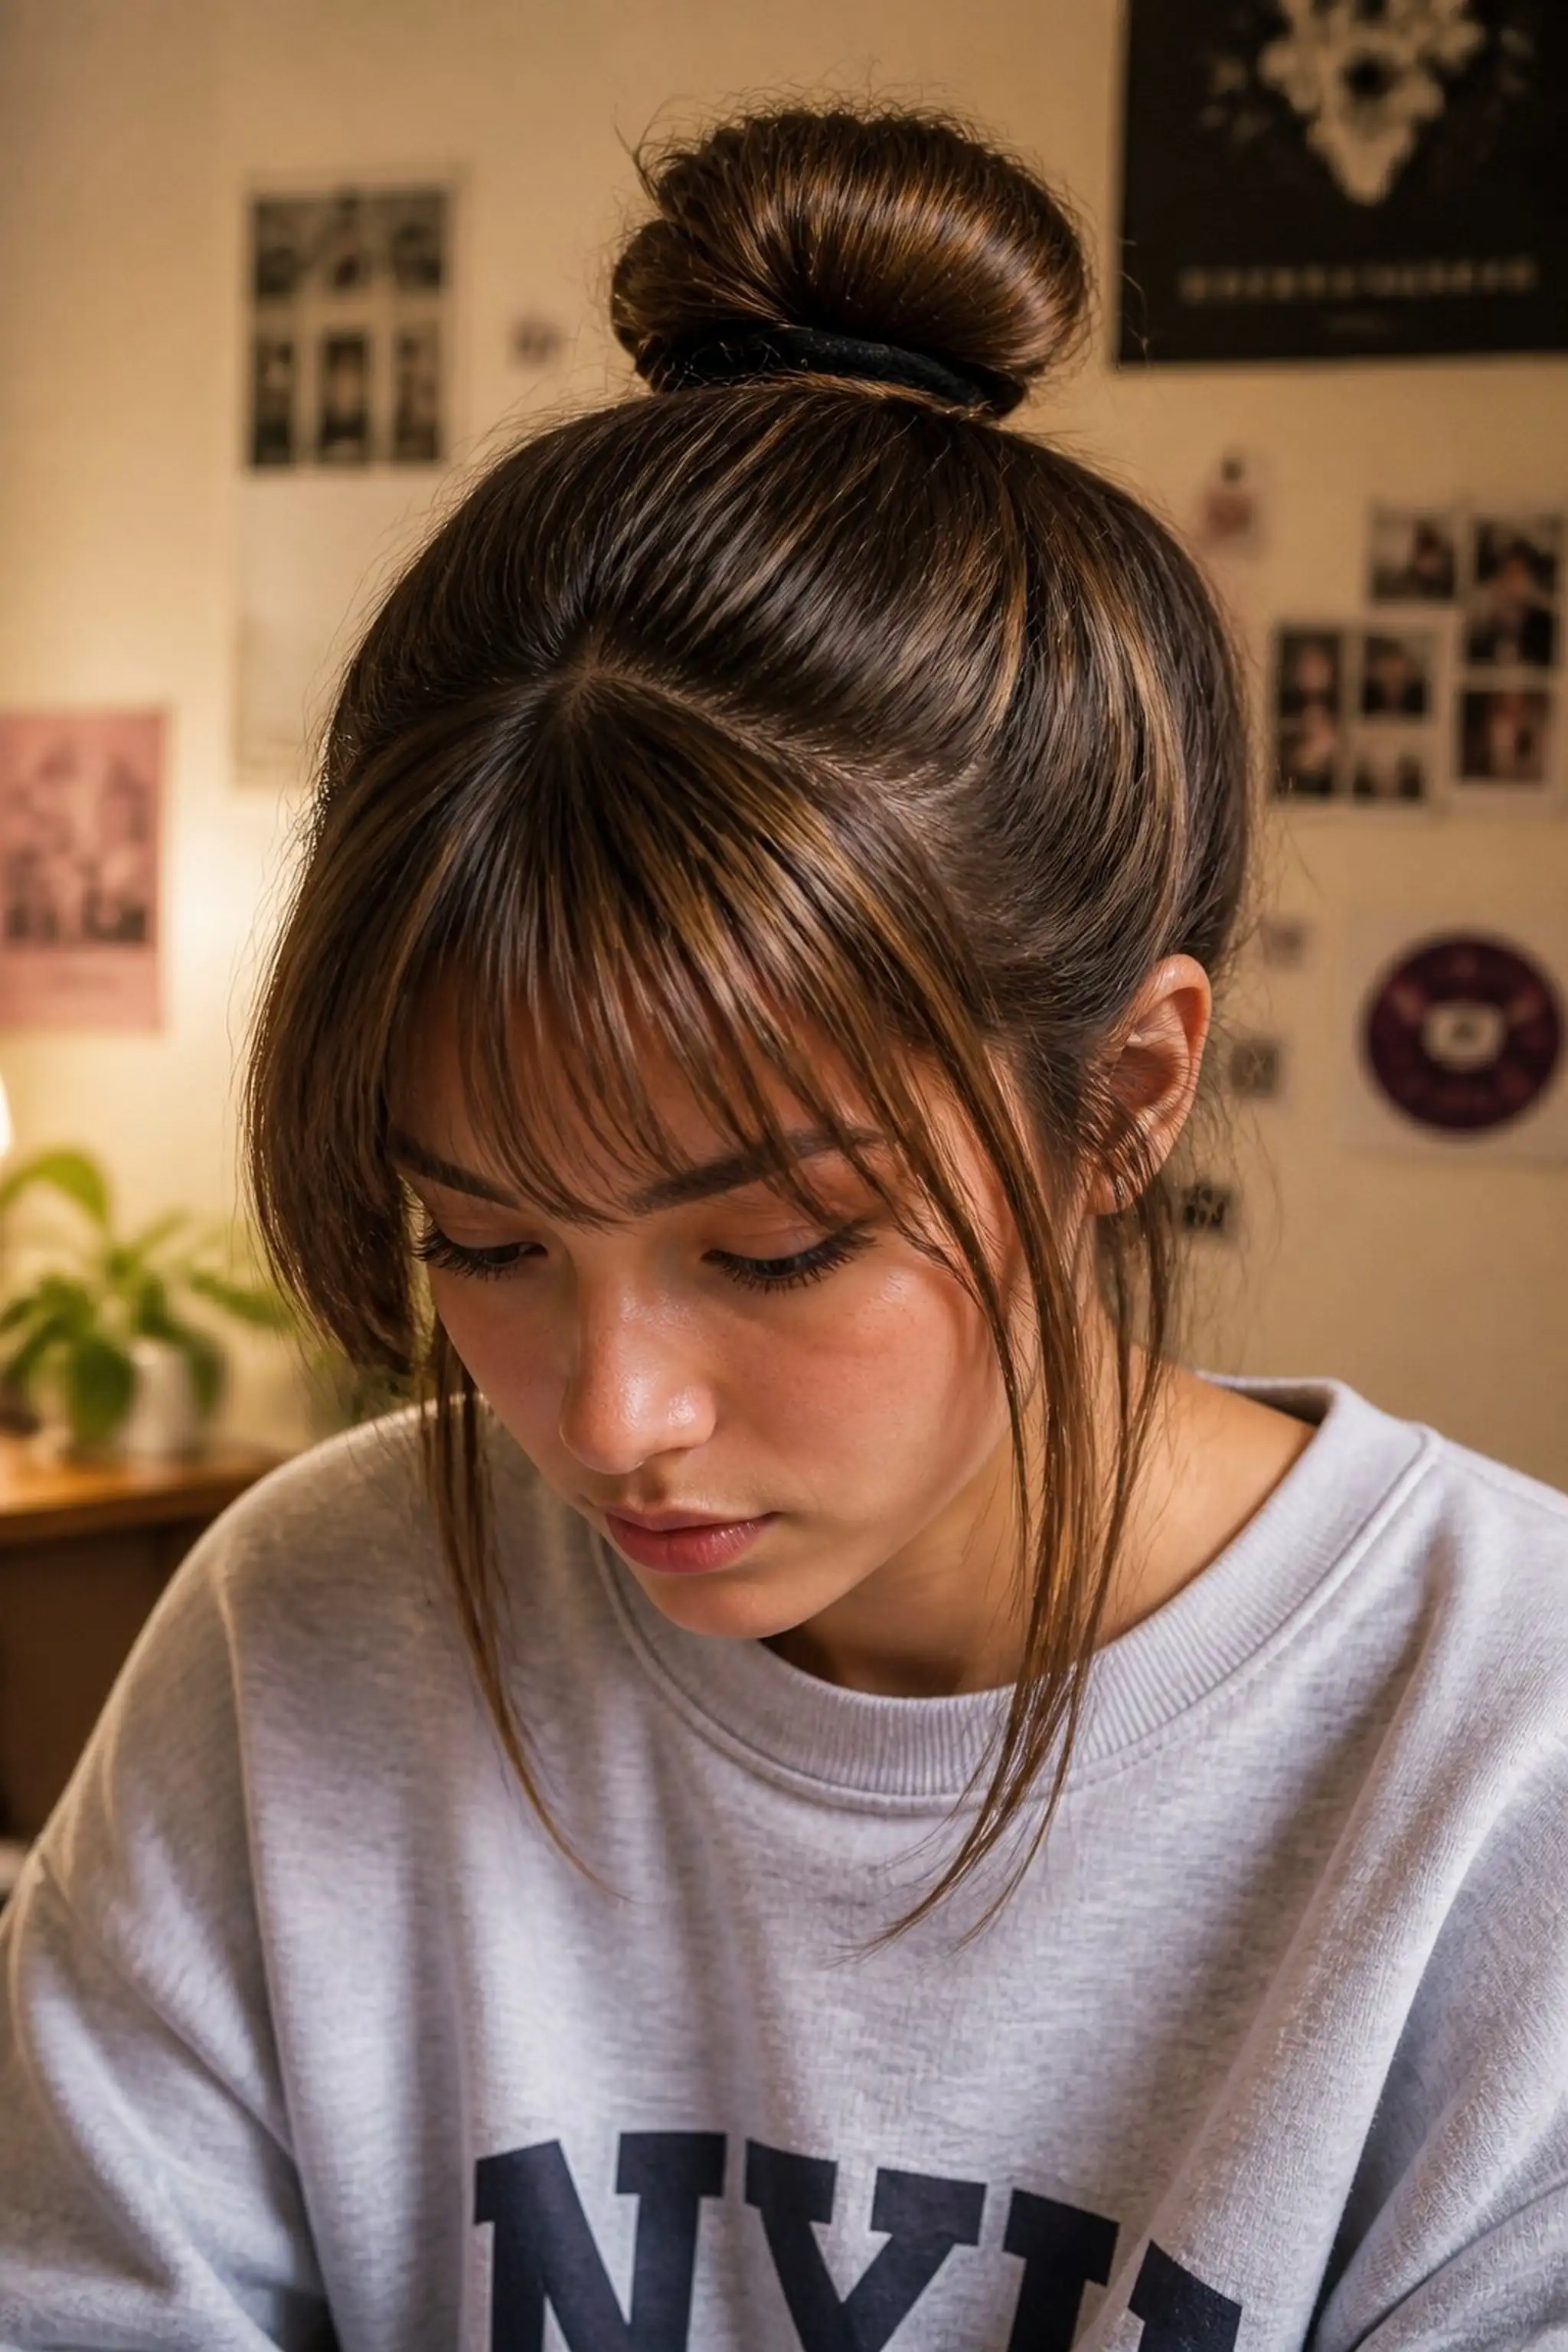
Sunlight streams through a dorm room window as a college student frantically checks the clock, hair still damp from a quick shower. Mornings like these call for hairstyles that are fast but fresh, suitable for bustling campus days and early classes.
Simple techniques make it possible to tame unruly strands within minutes, using basic tools and minimal products. These easy hairstyles fit perfectly with busy schedules, keeping hair styled without sacrificing precious time or sleep.
Classic Messy Bun With A Soft Twist
⏱️ 5 min · 🟢 Beginner
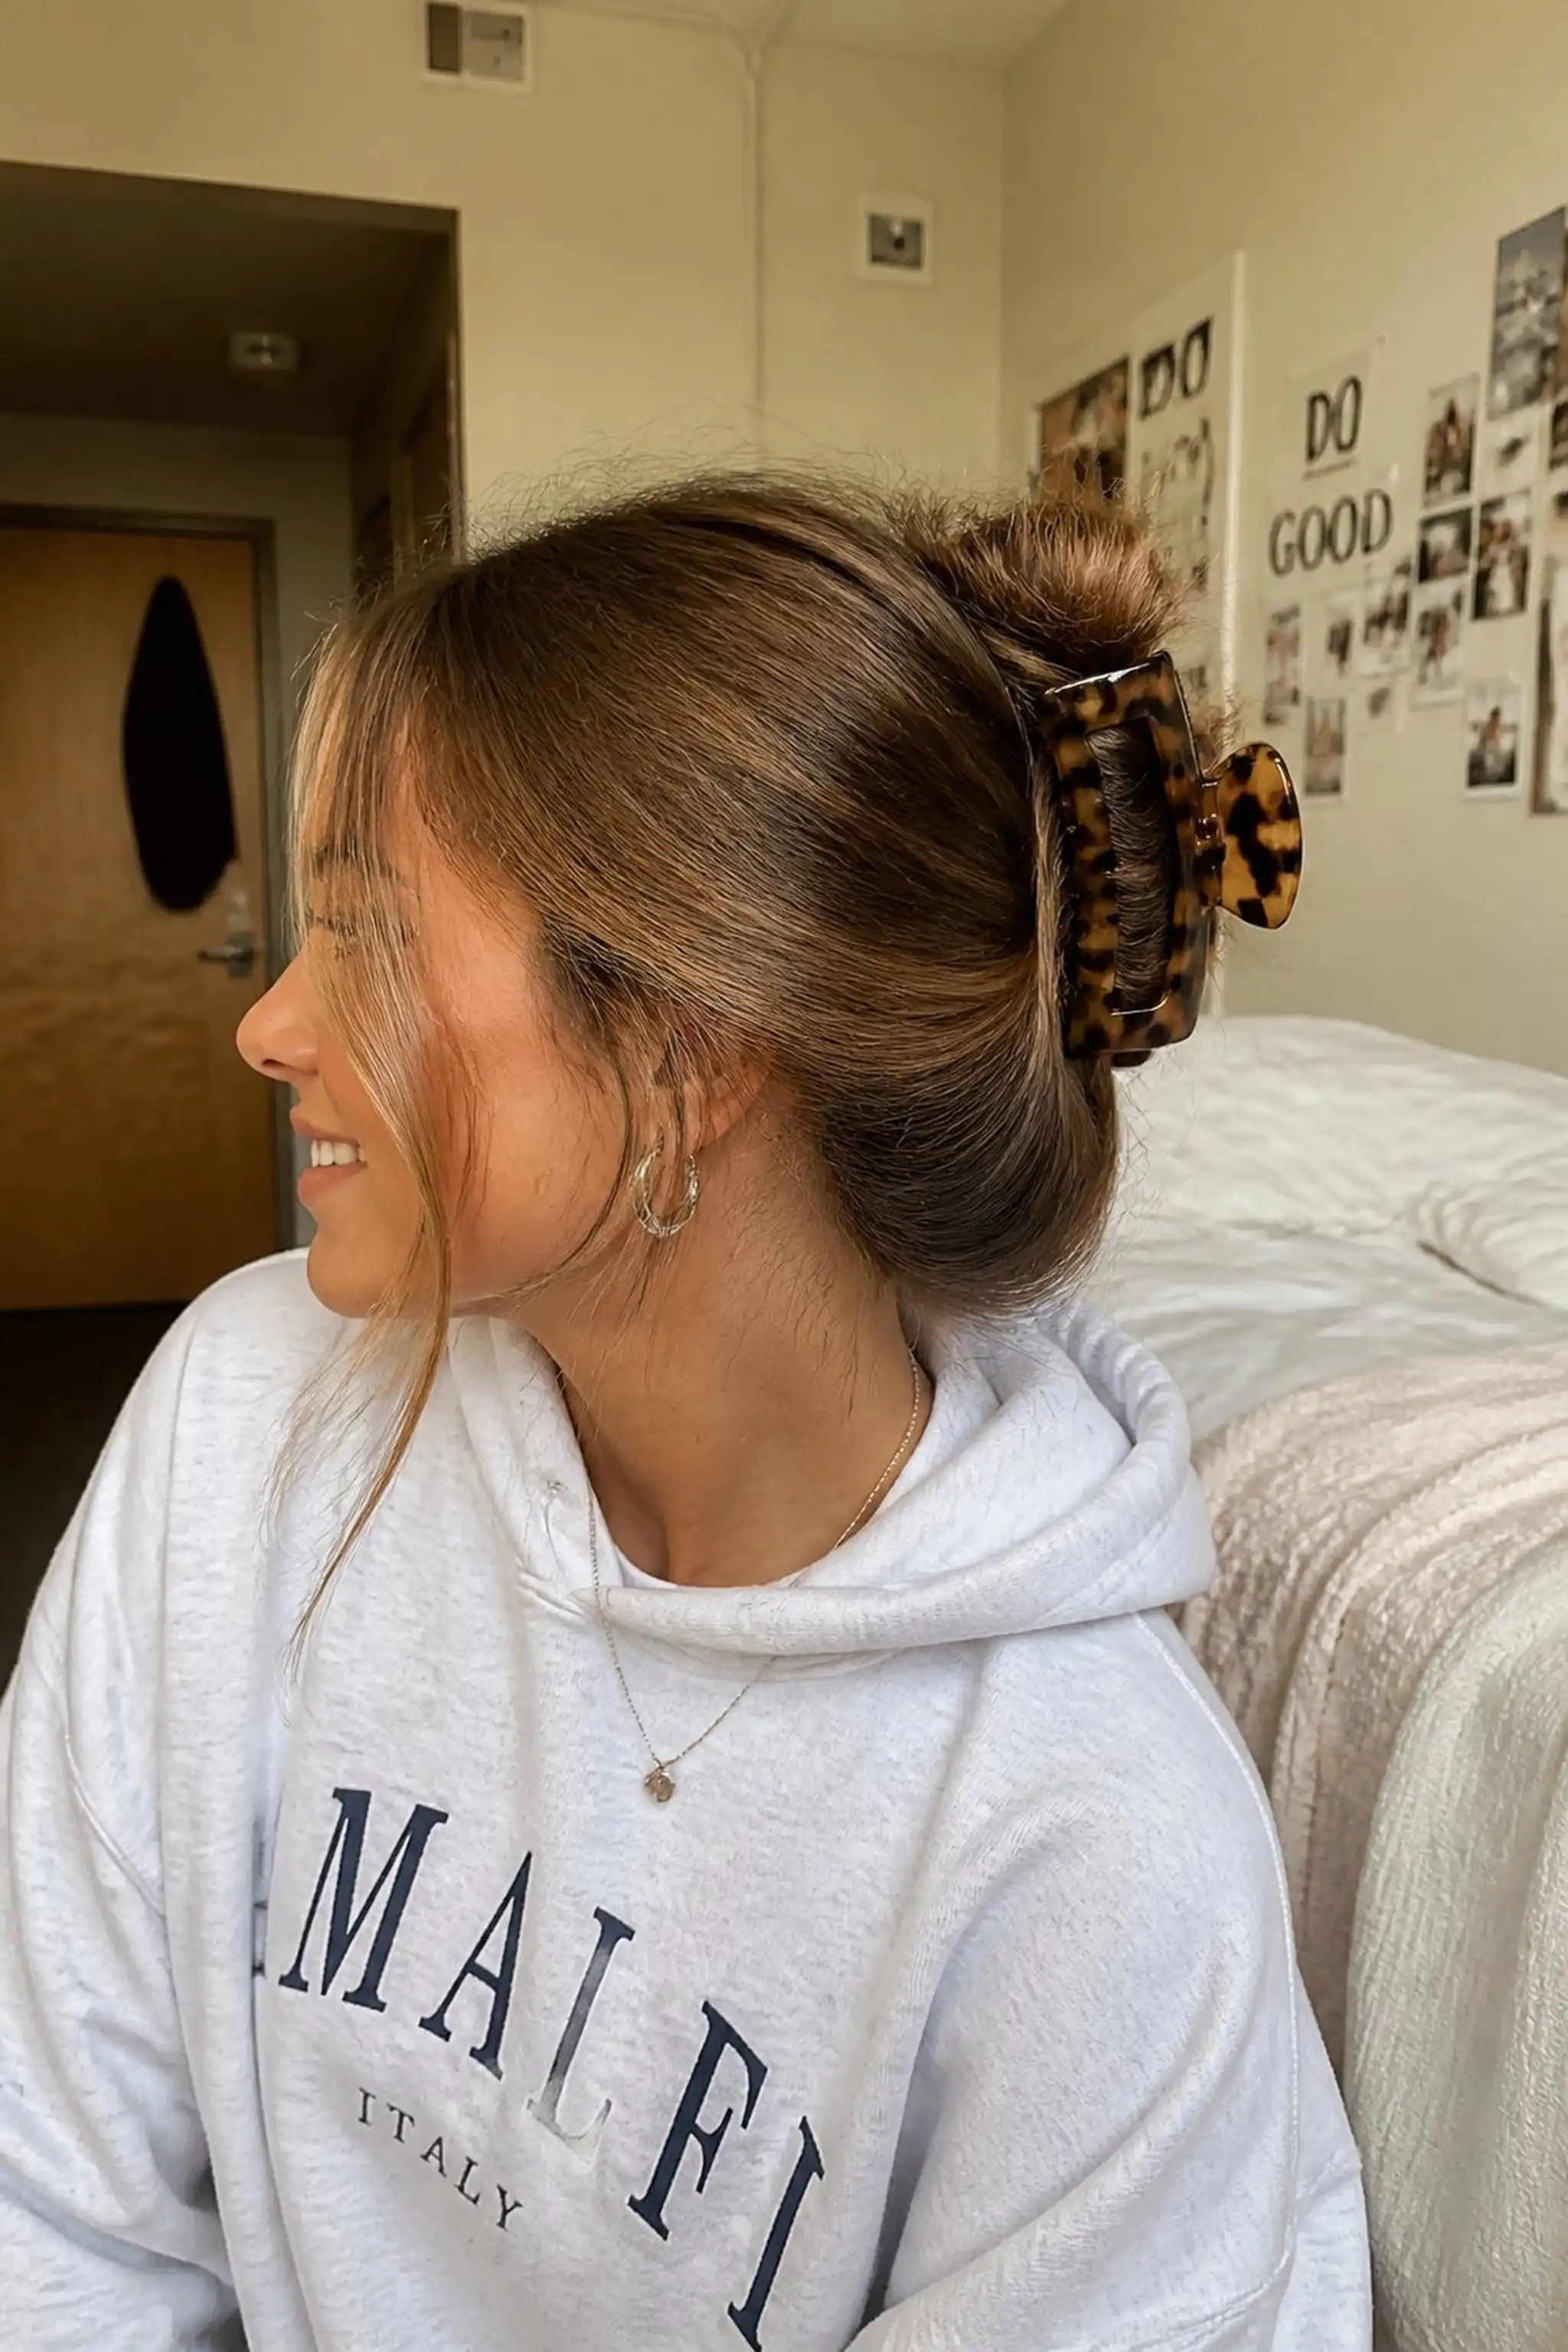
Loose strands peek around the edges of this messy bun, secured about 3 inches above the nape. The soft twist in the front adds subtle dimension to the otherwise casual knot.
This style works well on medium-thick hair, held in place by a large tortoise shell claw clip that allows easy repositioning throughout the day. The looseness keeps it feeling lightweight and breathable.
Styling Tips
- Use your fingers instead of a brush for softer volume.
- Loosen a few face-framing strands to soften the look.
- Secure with a claw clip that has sturdy teeth for grip.
Pro Tip: Pull the bun slightly loose after clipping for natural volume that lasts all day without tightening the scalp.
Avoid: Avoid pulling all hair too tight, which can cause headaches and looks less relaxed in this style.
Try Also: Try a low messy bun or add a colorful scrunchie for a playful touch anytime.
Products & Materials
Items Used
“Easy messy bun with a soft twist for effortless mornings.”
Sleek Low Ponytail With A Center Part
⏱️ 7 min · 🟢 Beginner
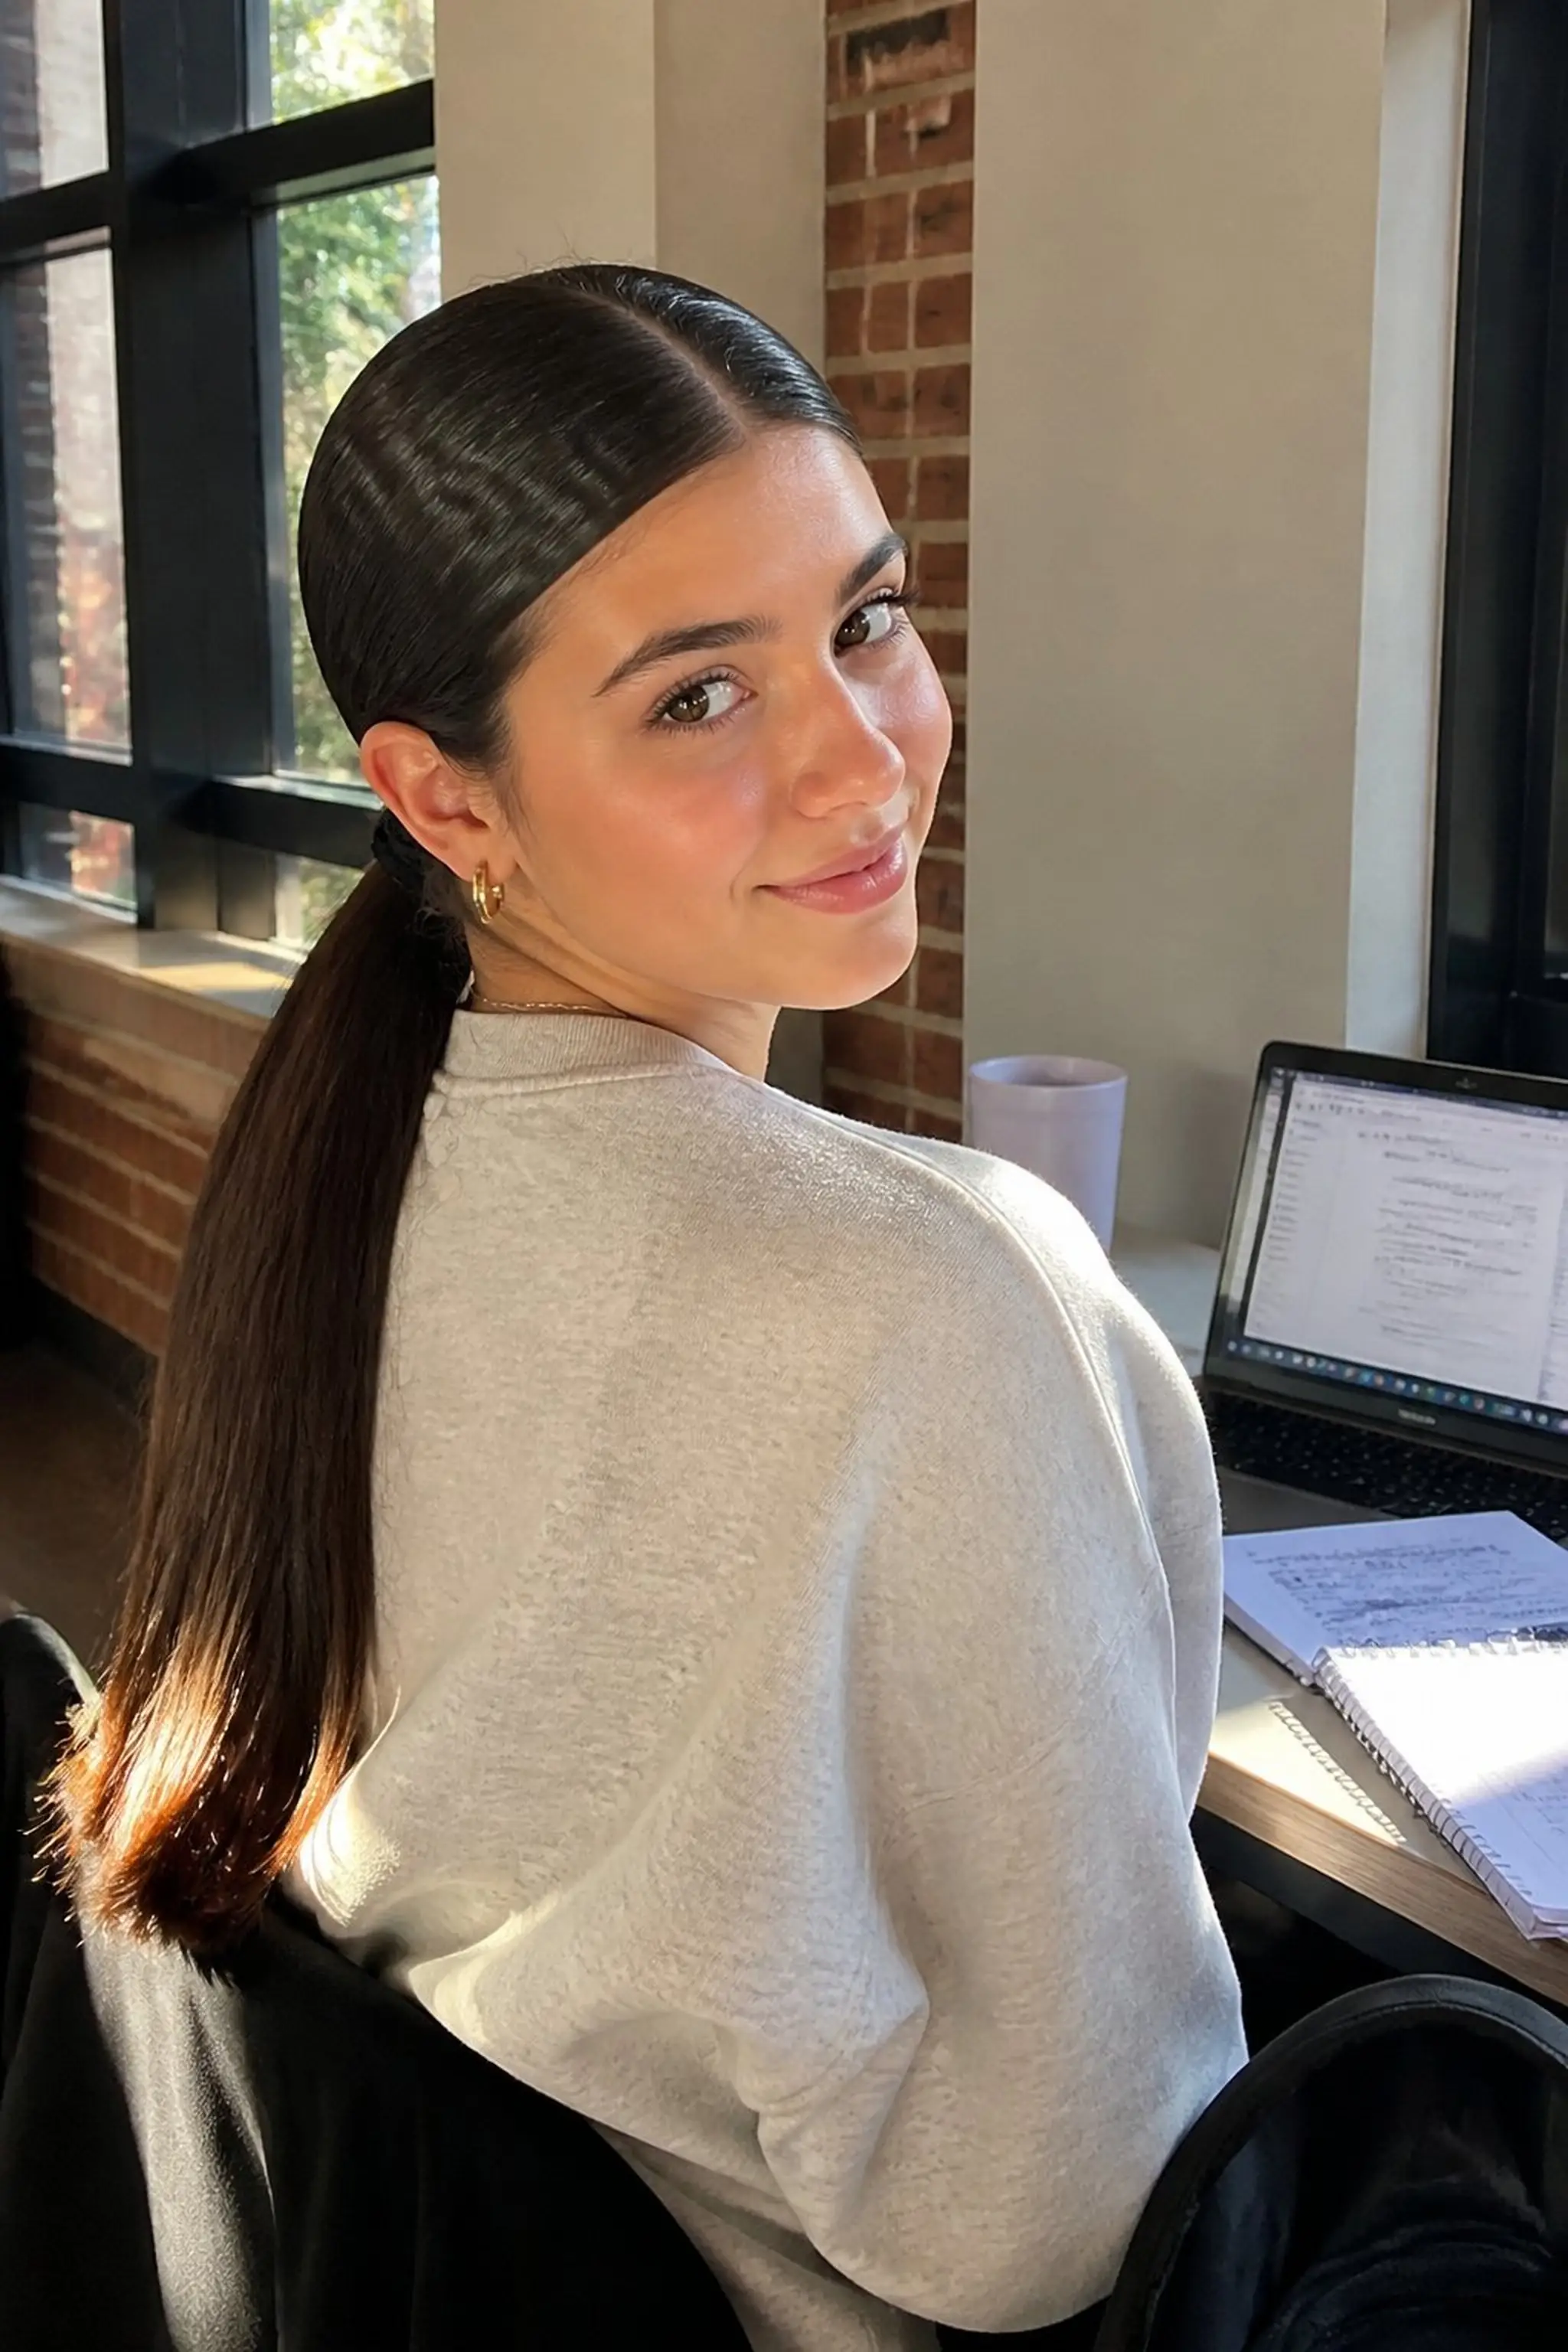
The hair lies smooth with a definite center part, gathered neatly into a low ponytail just above the shoulders. Glossy strands reflect morning light evenly along the length.
This look suits straight, fine hair best, pairing perfectly with a slim matte black hair tie that doesn’t dent or pull. Its simplicity contrasts sharply with chaotic mornings, giving a clean, put-together vibe.
Styling Tips
- Use a little smoothing serum to reduce flyaways before tying.
- Draw the part with a fine-tooth comb for crispness.
- Wrap a small piece of hair around the hair tie to conceal it.
Pro Tip: Apply lightweight serum only mid-lengths to ends to avoid greasy roots while keeping shine.
Avoid: Over-applying product near roots can weigh hair down and flatten volume at the scalp.
Try Also: Switch to a side part or transform into a sleek bun for a more formal touch.
Products & Materials
Items Used
“Sleek low ponytail with a sharp center part for quick style.”
Quick Half-Up Top Knot With Volume
⏱️ 8 min · 🟠 Intermediate
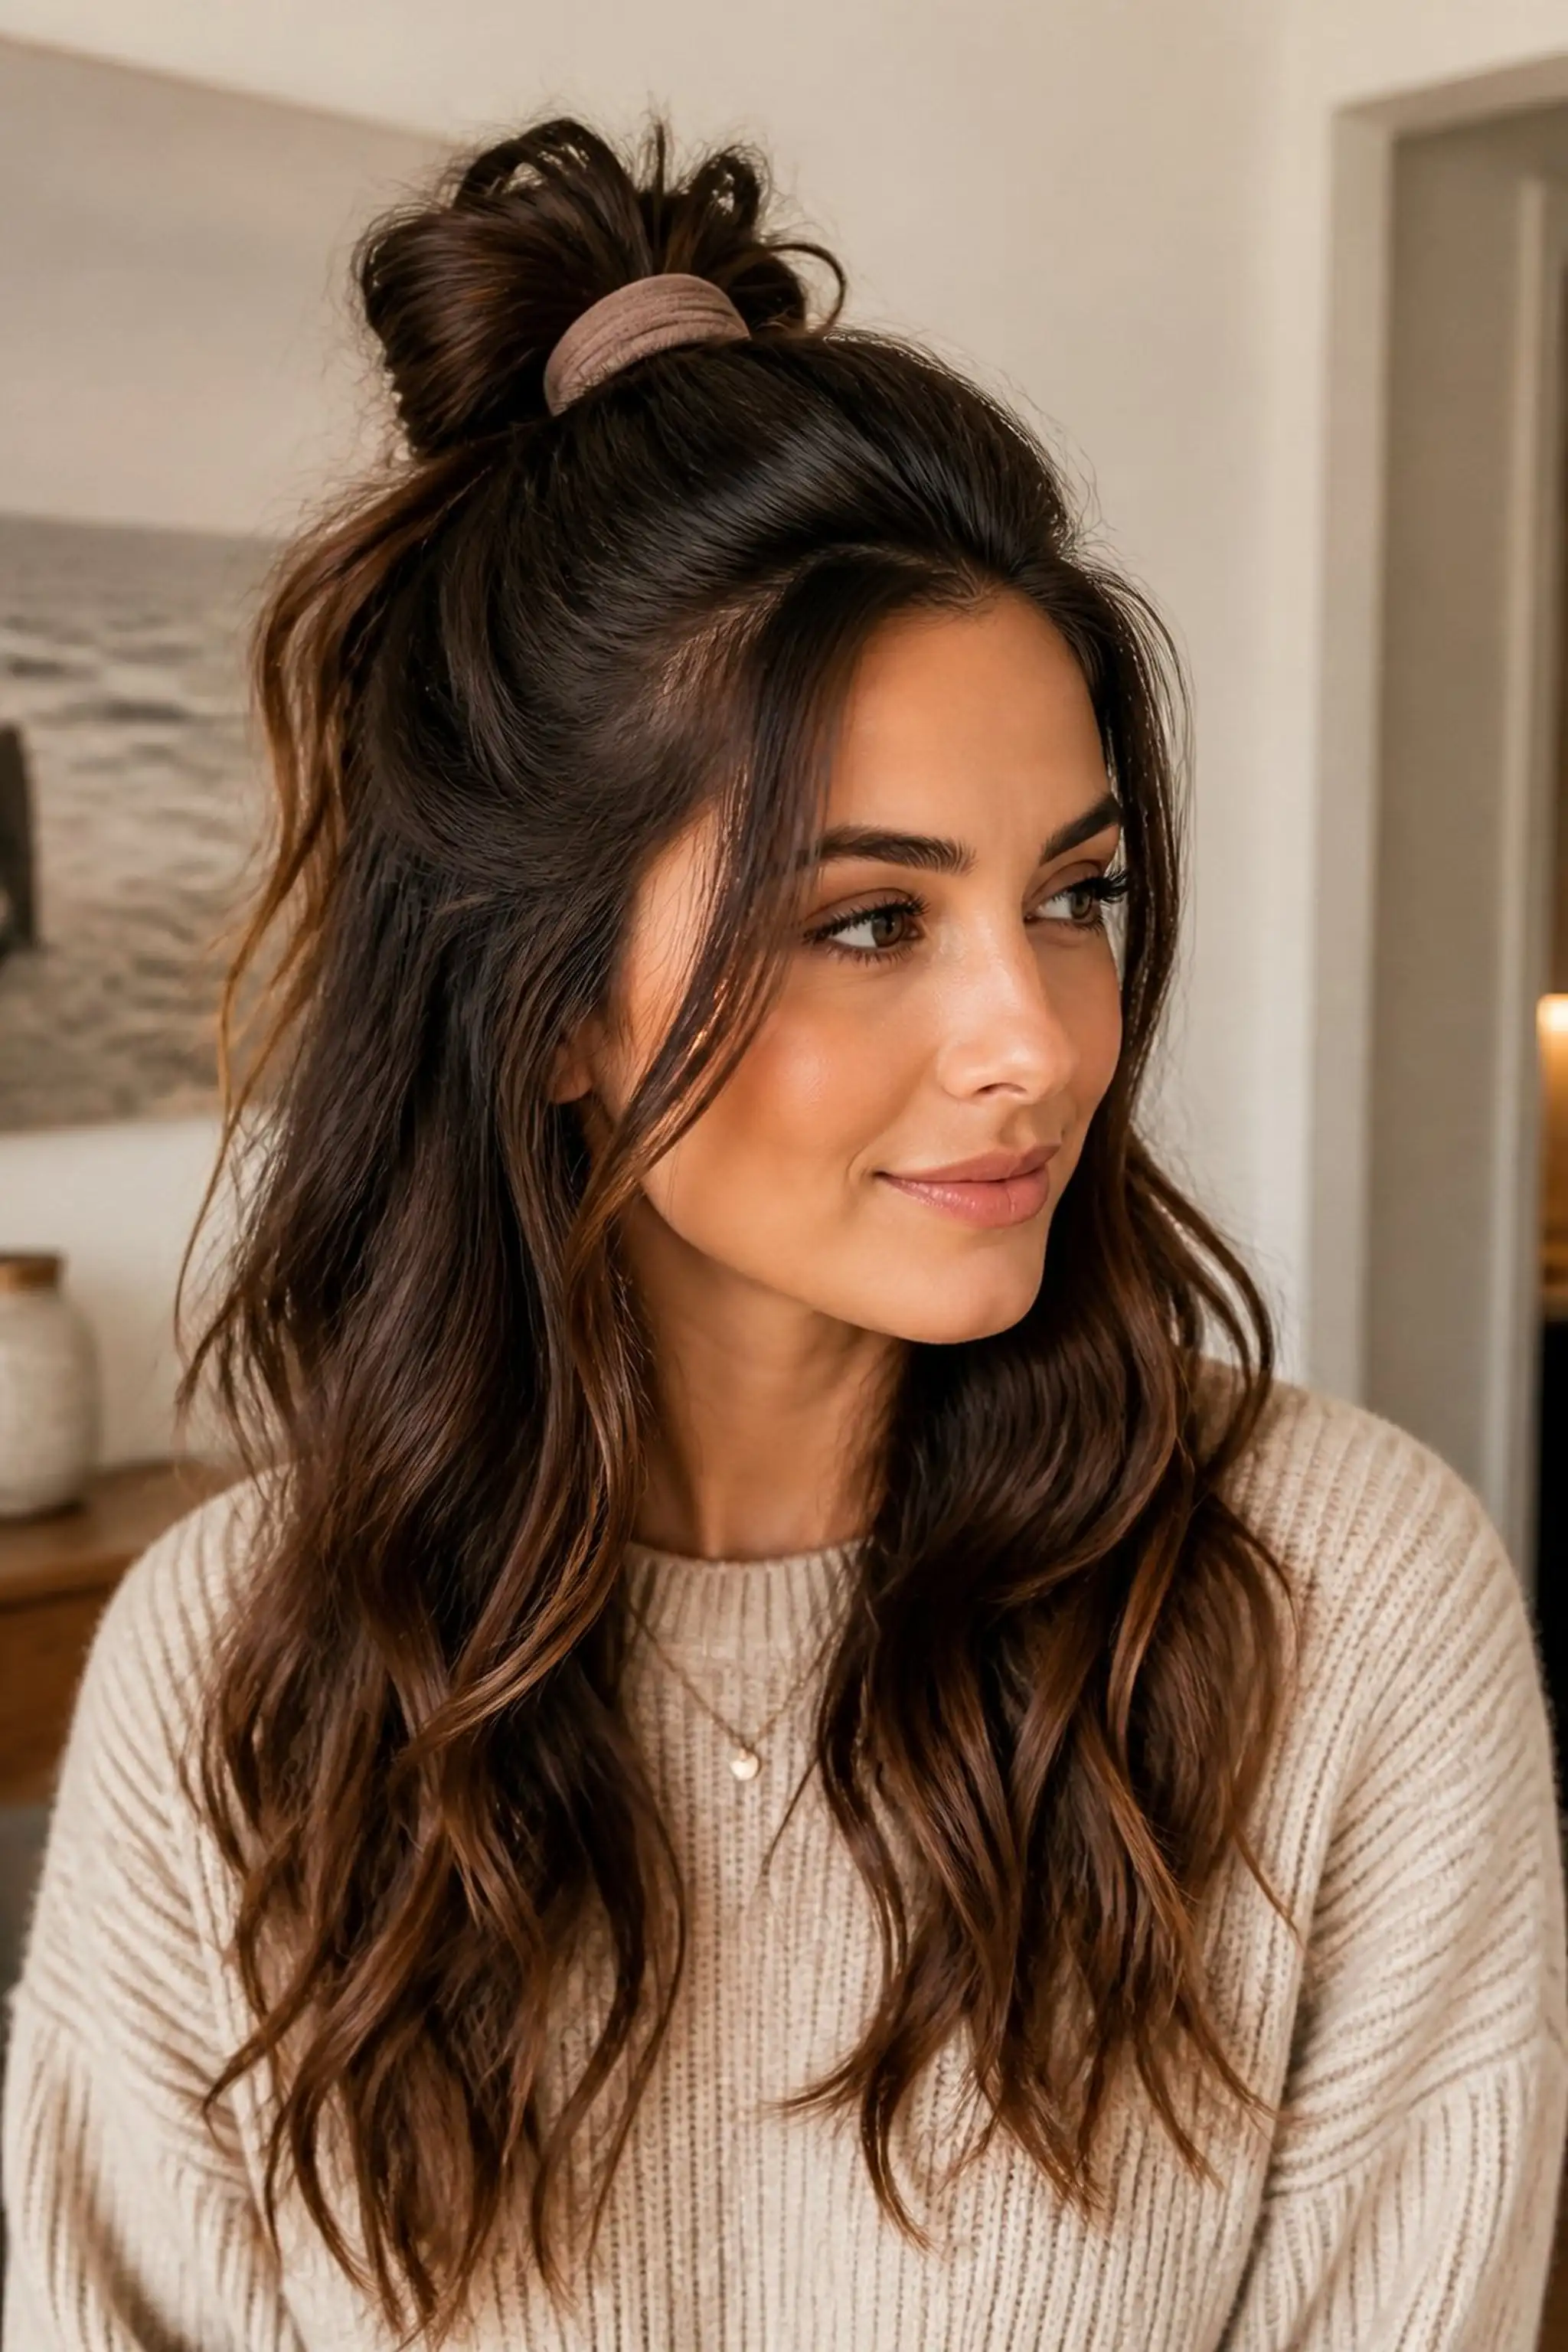
Here, the top half of thick hair pulls back into a compact knot atop the crown, while the bottom flows free with natural waves. The lifted roots create a textured volume reaching about 2 inches in height.
This style balances casual and trendy elements, best for wavy to curly textures with a medium-to-coarse density. A wide elastic band holds the knot firmly without flattening the volume.
Styling Tips
- Backcomb lightly at crown before knotting for extra lift.
- Use a strong elastic band that stretches slightly for comfort.
- Leave some strands loose by the face for softness.
Pro Tip: Tease hair at the crown gently before creating the knot to boost the natural volume without tangling.
Avoid: Avoid pulling the elastic too tight, which distorts the knot’s shape and causes scalp tension.
Try Also: Try a low half-up twist instead of a knot or add a decorative scrunchie for flair.
Products & Materials
Items Used
“Voluminous half-up top knot perfect for quick, textured mornings.”
Get 75+ ad-free, high-resolution printable tutorials for salon-quality results every single morning.
One printable guide · $19.99 · yours forever
Braided Headband Pull-Back Style
⏱️ 12 min · 🟠 Intermediate
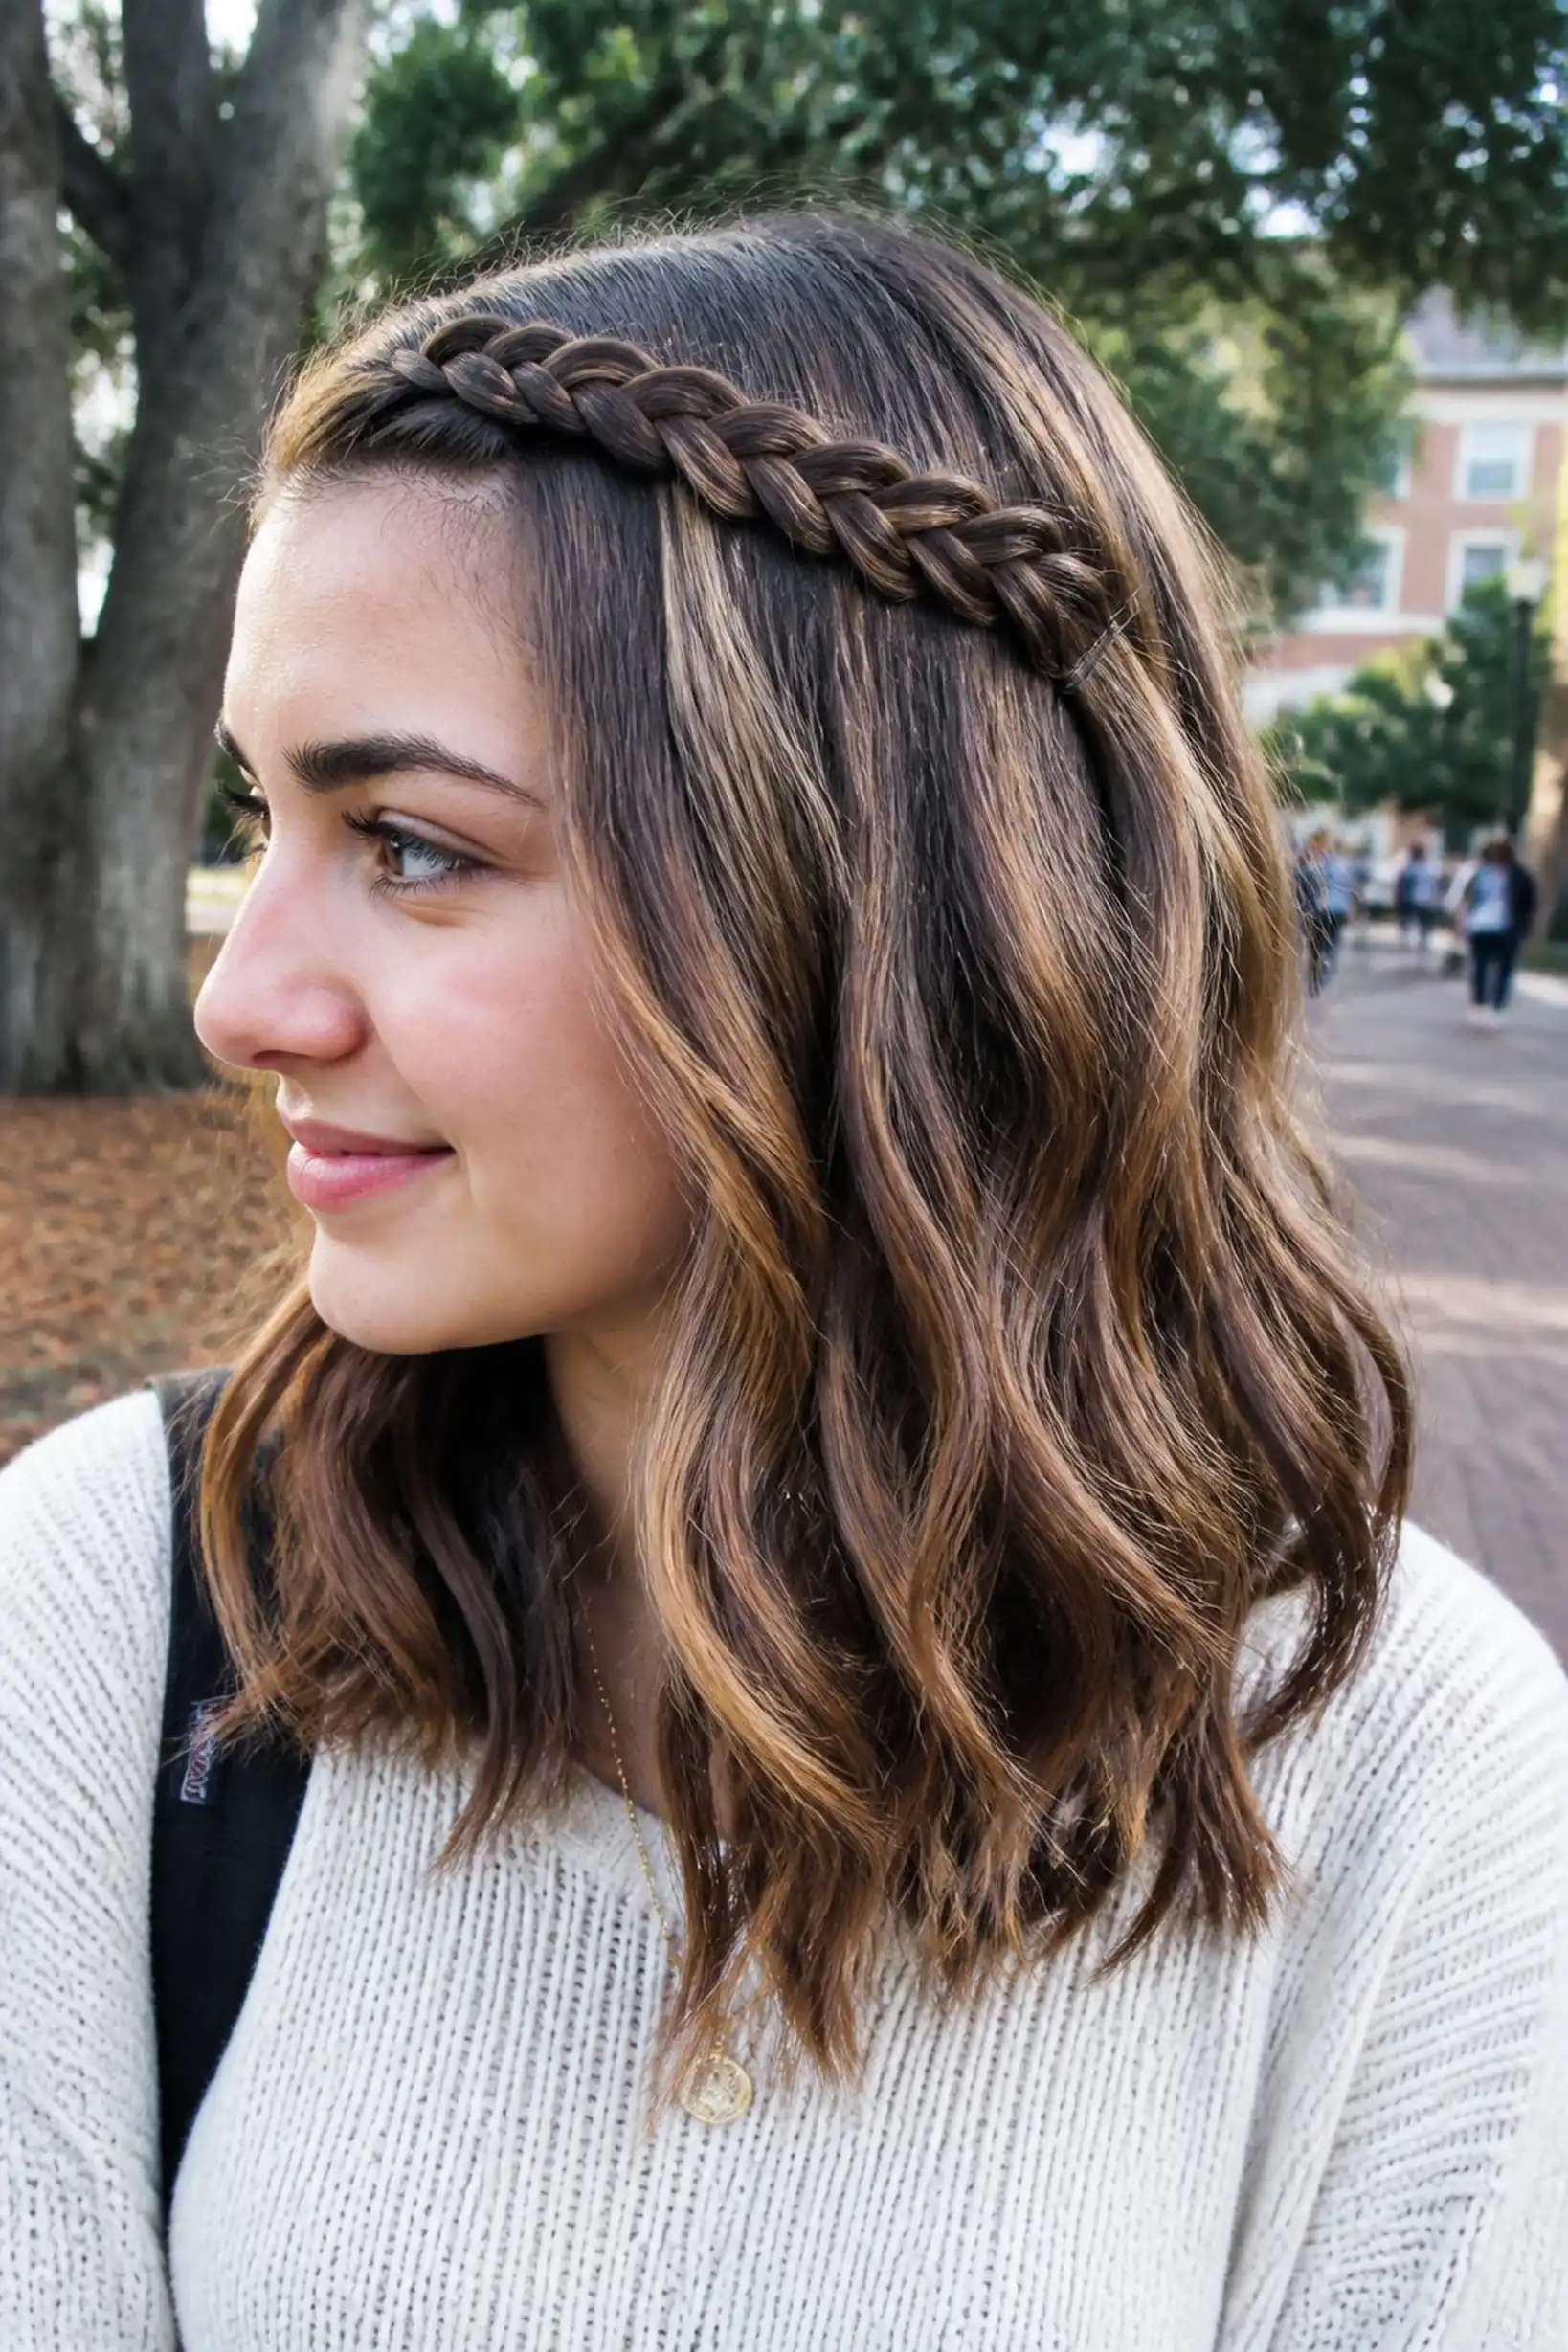
A four-strand braid crosses from one temple to the other, framing the forehead and blending seamlessly into loose, shoulder-length waves. The braid carries subtle highlights catching soft midday sunlight.
This technique adds texture and keeps hair off the face, handy for warm lecture halls. It’s best for medium-length hair with some natural wave and can be pinned with small, matte bobby pins hidden beneath the braid.
Styling Tips
- Use lightweight texturizing spray before braiding for grip.
- Pin the ends securely behind the ear to avoid slipping.
- Gently tug braid edges for a fuller, relaxed look.
Pro Tip: Add texturizing spray to damp hair and blow dry for better hold and braid definition throughout the day.
Avoid: Tight braids can cause discomfort and sharp hairlines; aim for a gentle but firm tension.
Try Also: Switch to a three-strand braid or try two smaller braids on opposite sides.
Products & Materials
Items Used
“Braided headband style keeps hair stylishly back during study sessions.”
Low Twisted Bun With Side Part
⏱️ 10 min · 🟠 Intermediate

Smooth hair curves into a low bun positioned just above the nape. The side part creates asymmetric framing, adding subtle sophistication to the silhouette.
This bun suits straight to slightly wavy hair, finished with a medium black elastic for hold and a single gold-toned hair pin for flair. It’s ideal when a class requires looking a little polished without fuss.
Styling Tips
- Run a fine comb through roots for a neat side part.
- Twist hair smoothly before gathering into a bun.
- Add a decorative pin for a simple accent.
Pro Tip: Dry shampoo applied at roots prevents any shine or oiliness, keeping the twist smooth while adding grip.
Avoid: Avoid leaving gaps in the twist; secure ends fully to maintain bun shape all day.
Try Also: Create a messy bun version or add a thin braided strand along the part.
Products & Materials
Items Used
- medium black elastic hair tie
- gold-toned hair pin
“Chic low twisted bun with a neat side part for quick refinement.”
High Ponytail With Textured Waves
⏱️ 10 min · 🟢 Beginner
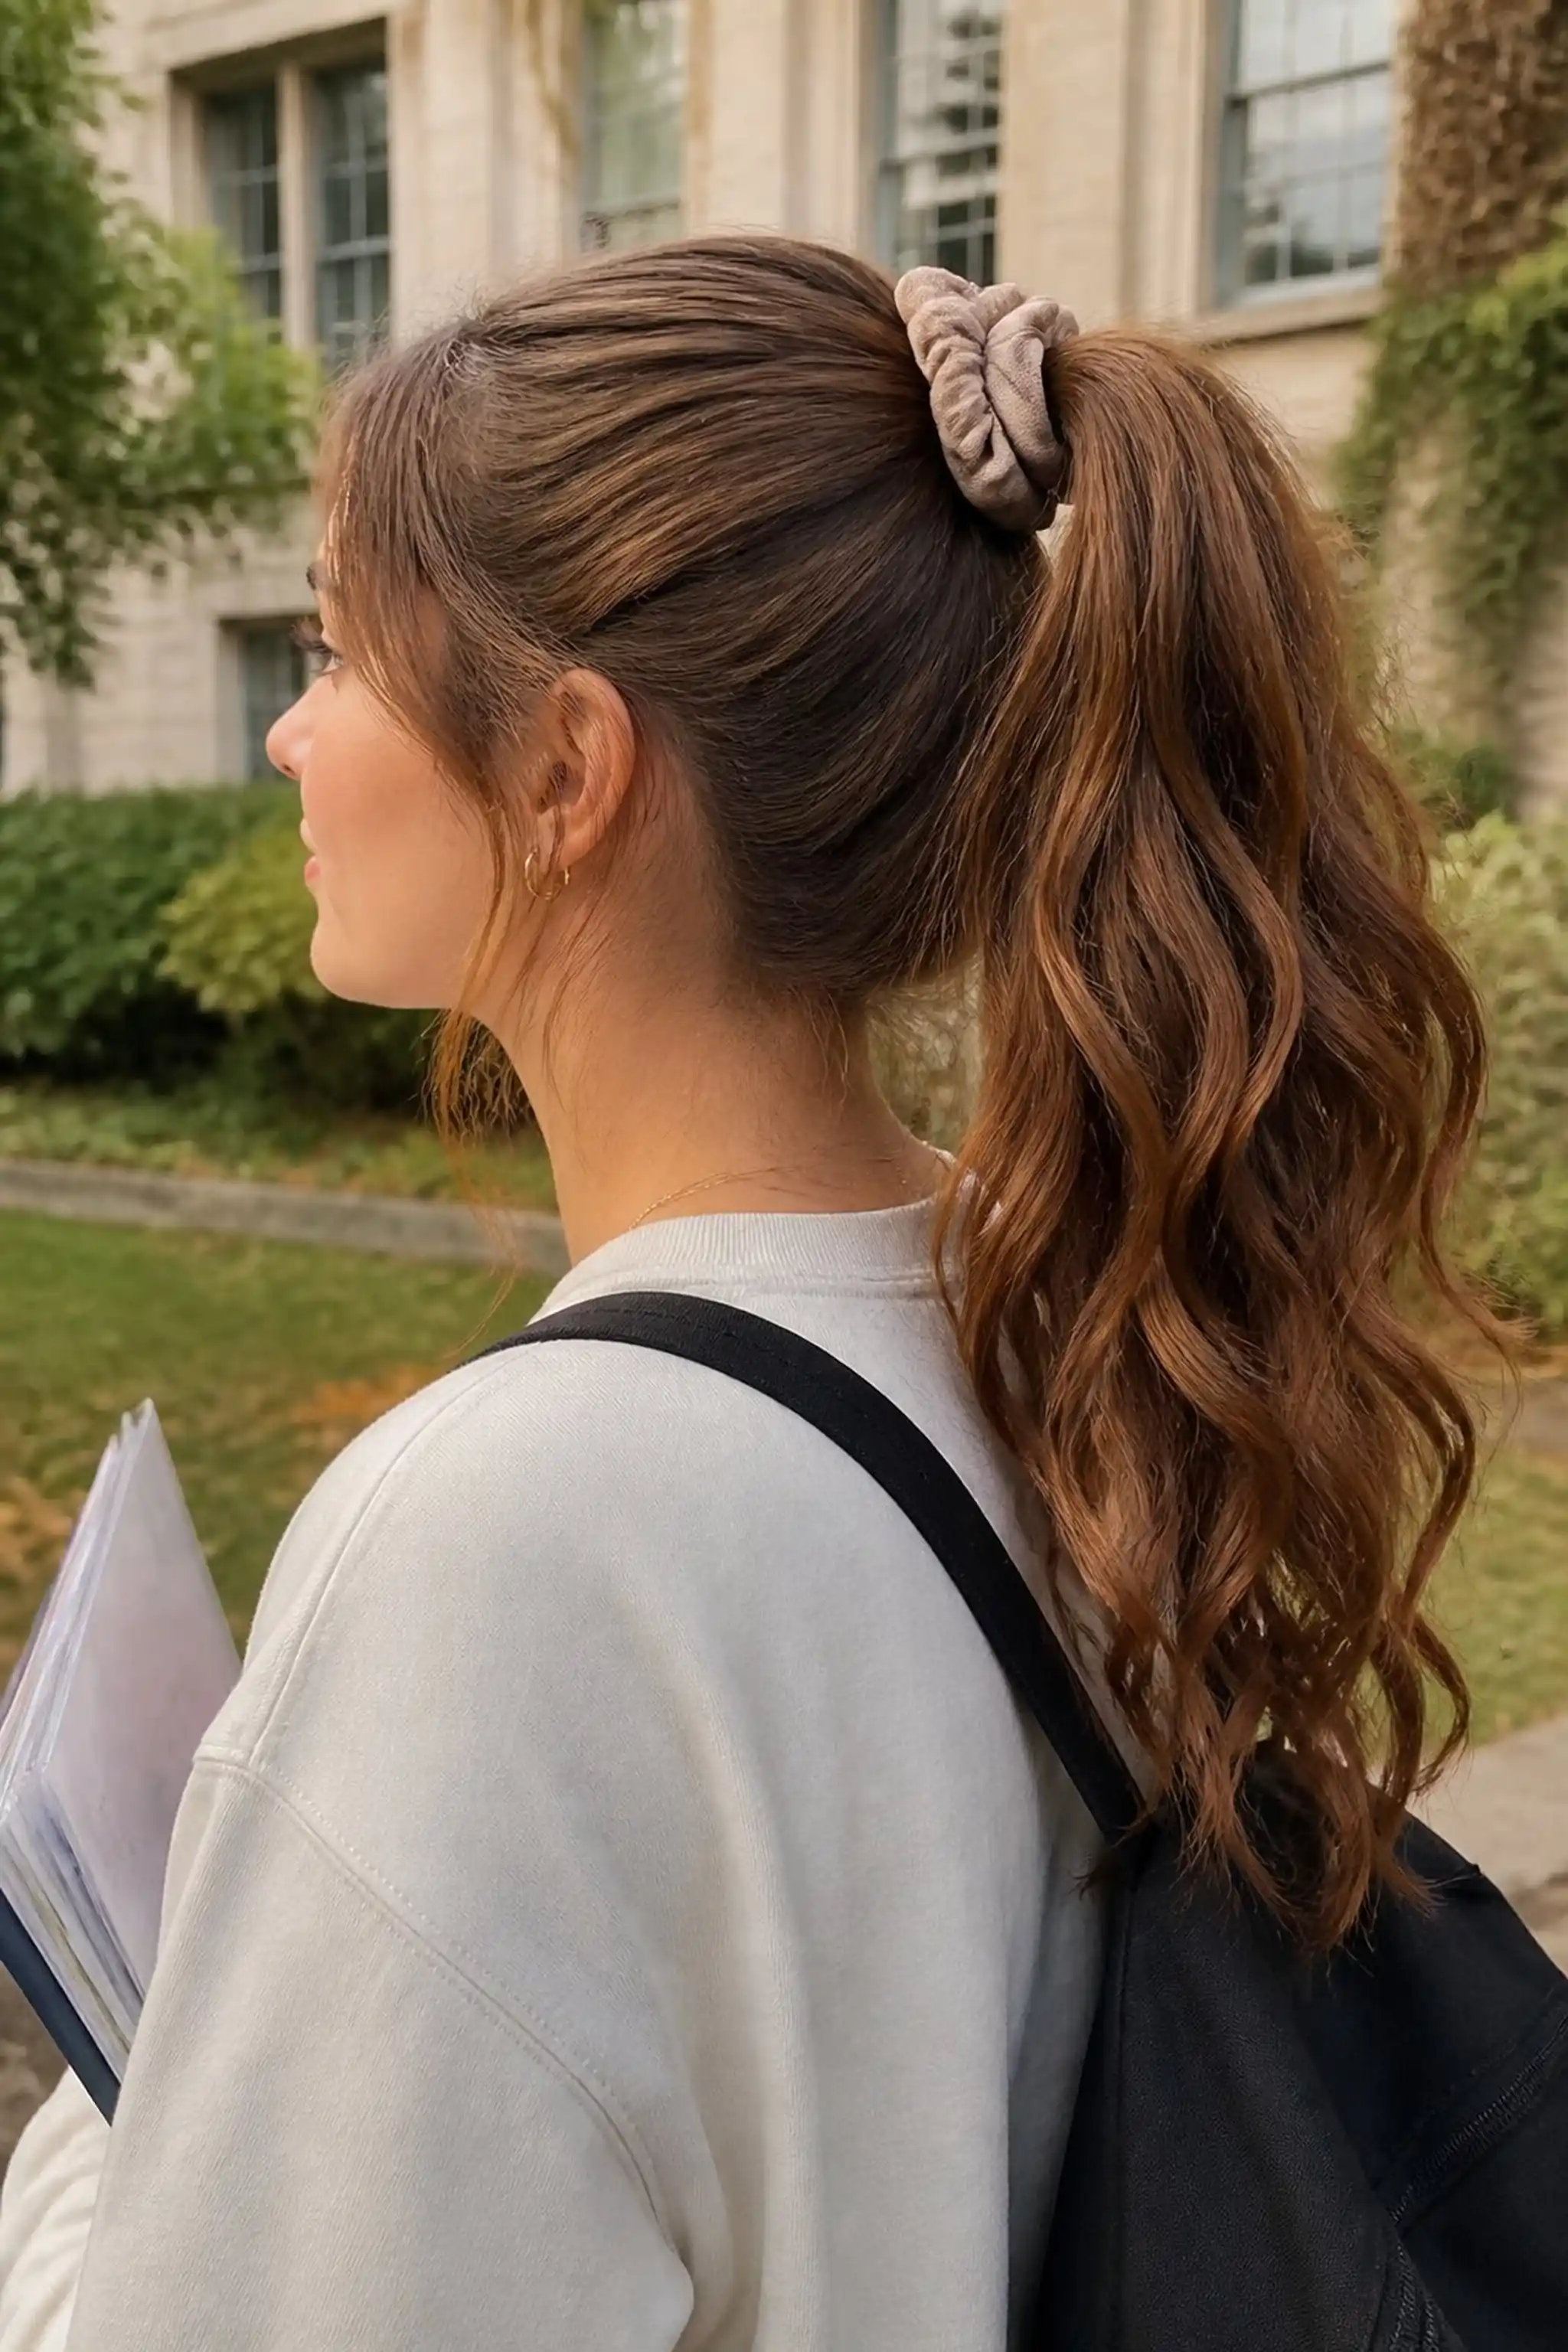
Lustrous chestnut hair pulls back into a high ponytail that cascades with loose, tousled waves extending past the shoulders. The volume at the crown measures roughly 3 inches high, ensuring the look doesn’t lay flat.
This style thrives with heat-styled texture but requires only a quick scrunch and elastic hold. A soft beige scrunchie gathers the hair comfortably, preventing dents from tight ties.
Styling Tips
- Use a curling wand or braid damp hair overnight for natural waves.
- Secure ponytail slightly loose near the scalp to allow movement.
- Choose a scrunchie that matches your hair tone for subtlety.
Pro Tip: Apply a lightweight heat protectant spray before curling for safer, long-lasting waves.
Avoid: Avoid pulling hair too tight at the crown which flattens natural waves and causes irritation.
Try Also: Try a messy side ponytail or add a braid along the hairline for detail.
Products & Materials
Items Used
“Bouncy high ponytail with textured waves, quick and comfy for mornings.”
Braided Side Ponytail With Ribbon Accent
⏱️ 15 min · 🟠 Intermediate
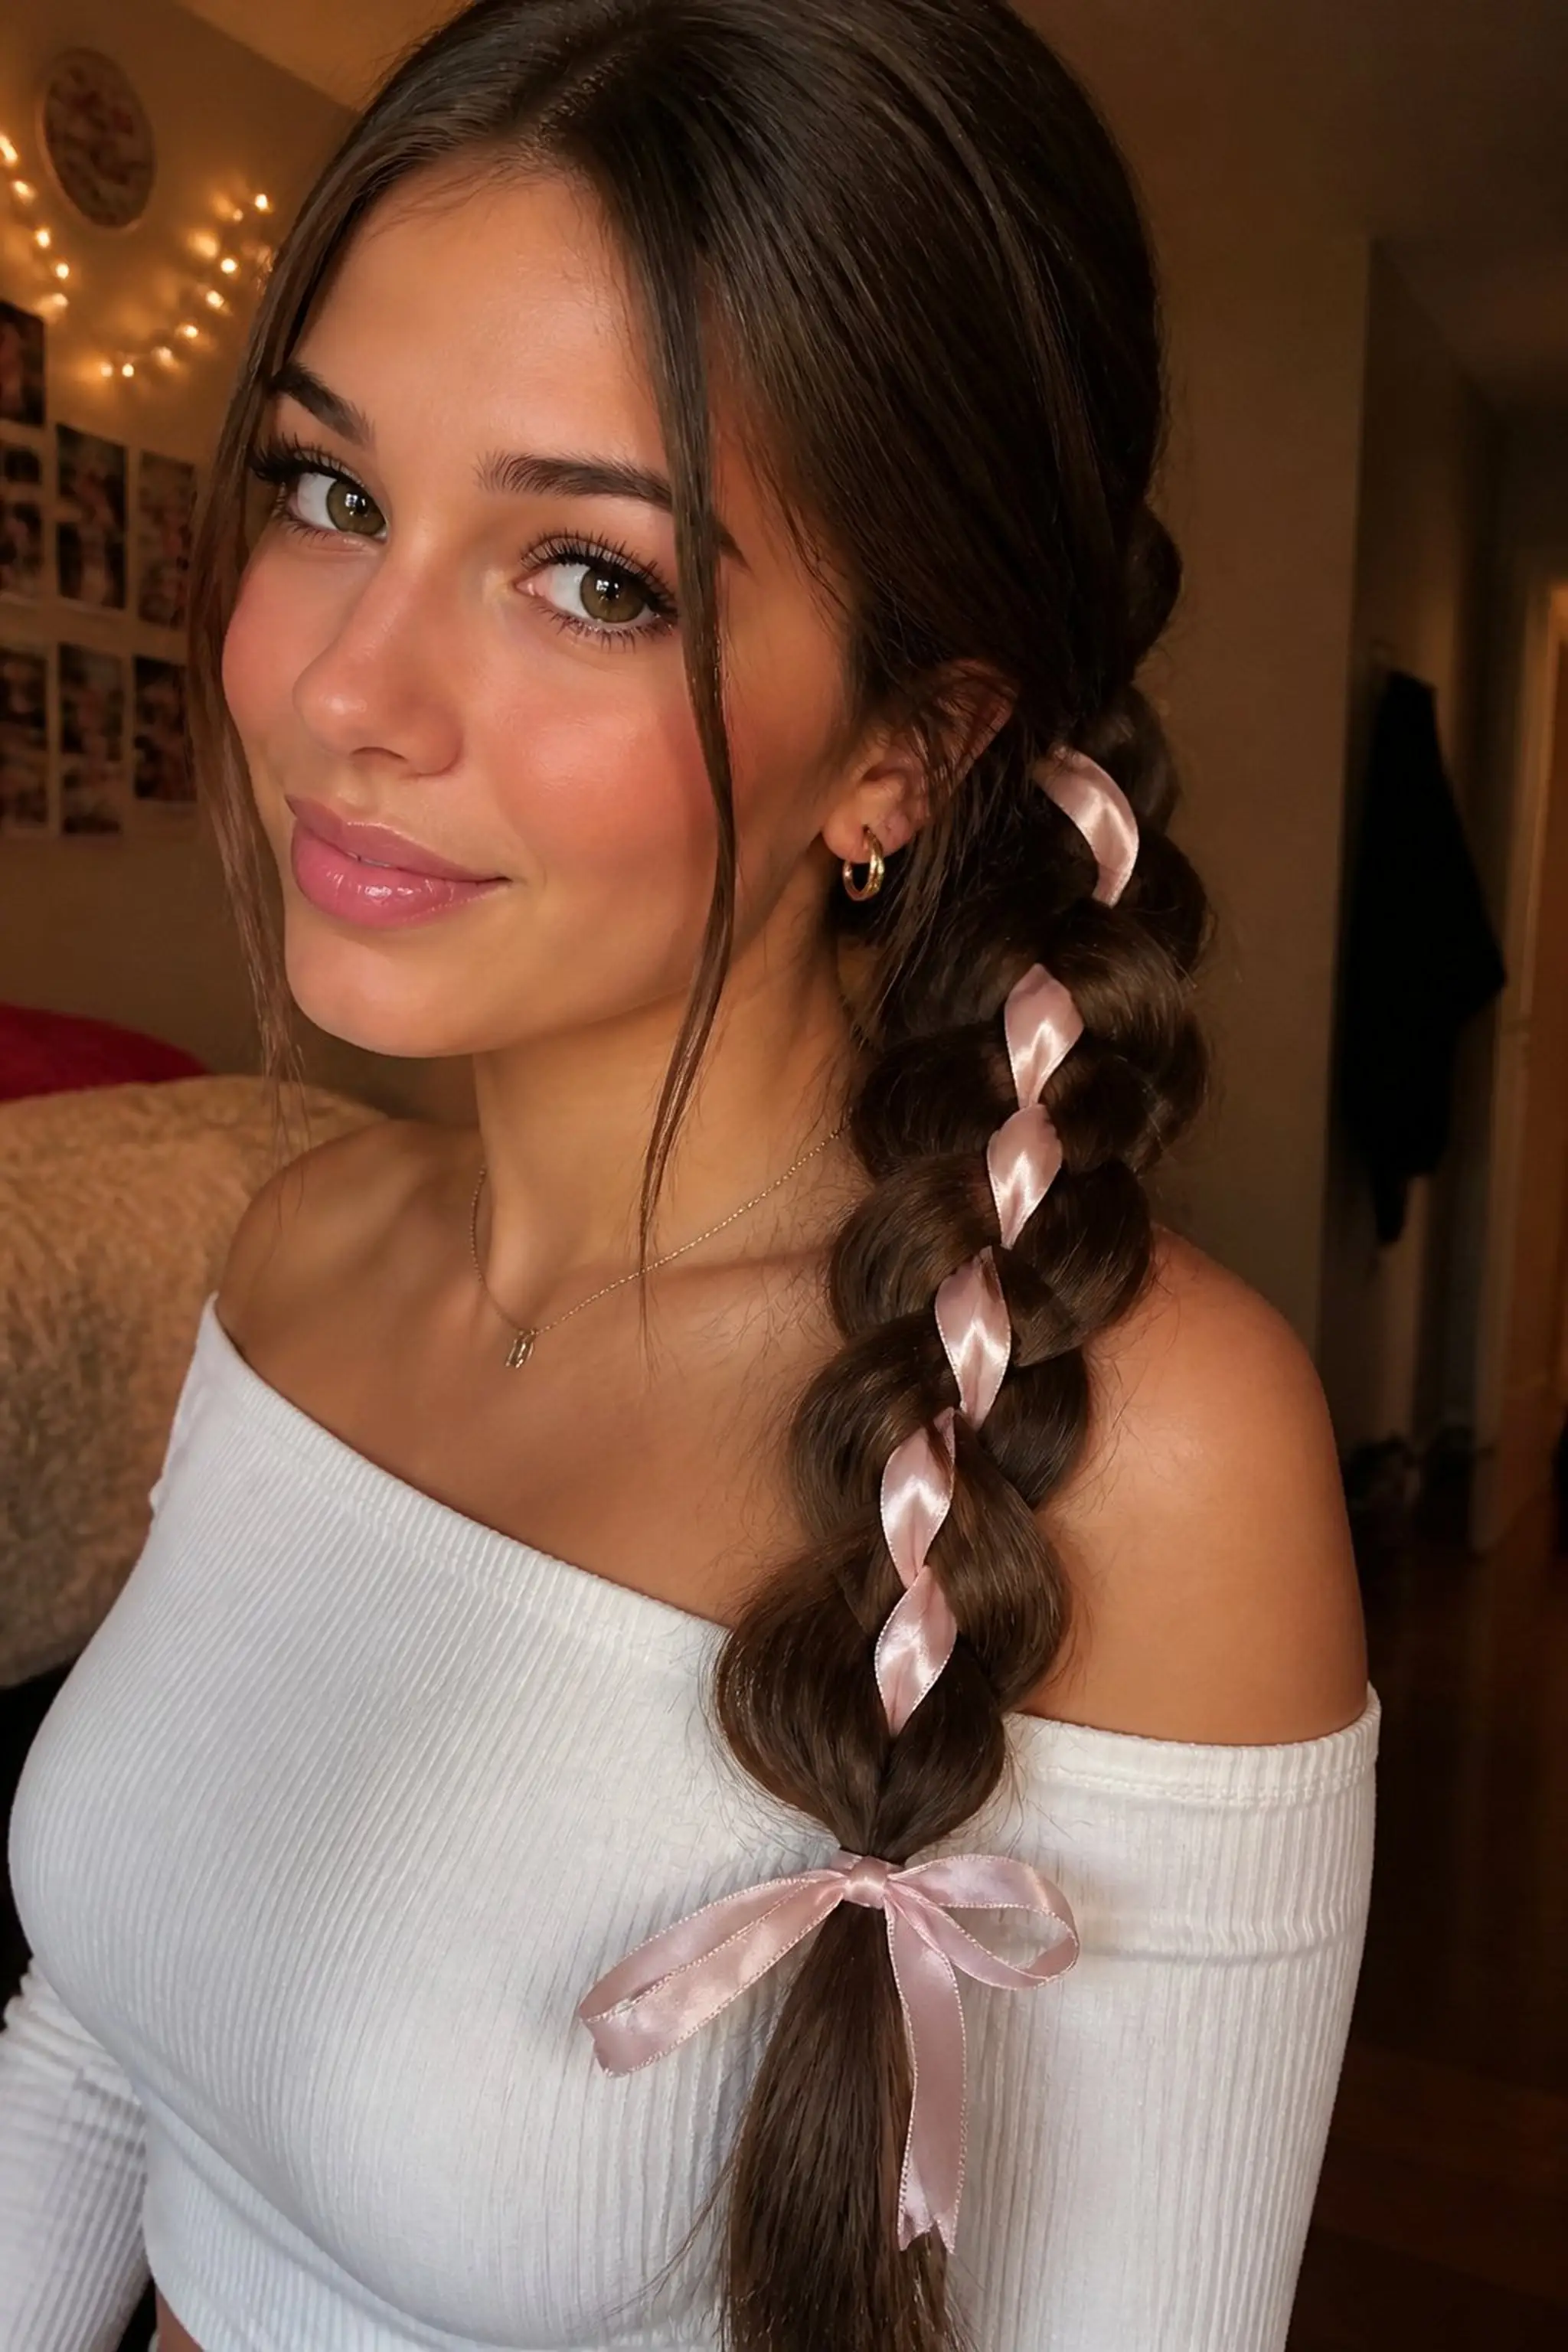
Thick brown hair forms a side ponytail intertwined with a three-strand braid that ends near the shoulder. A thin satin ribbon, in a soft blush color, winds through the braid adding a pop of delicate contrast.
This style pairs well with thick hair textures that hold braids cleanly. The satin ribbon is tied at the end, creating a bow that helps secure the braid and ponytail simultaneously.
Styling Tips
- Start by tying a low ponytail on the side before braiding.
- Weave the ribbon under three sections for even placement.
- Finish with a clear elastic band beneath the bow for invisibility.
Pro Tip: Place the ribbon beneath strands as you braid to avoid slipping and keep it evenly spaced along the braid’s length.
Avoid: Beginner braiders often wrap the ribbon unevenly, causing bunching and uneven tension in the braid.
Try Also: Try a double side braid with ribbons or use a velvet scarf instead of ribbon.
Products & Materials
Items Used
“Charming braided side ponytail accented with a blush ribbon bow.”
Simple Low Bun With Curled Bangs
⏱️ 10 min · 🟢 Beginner
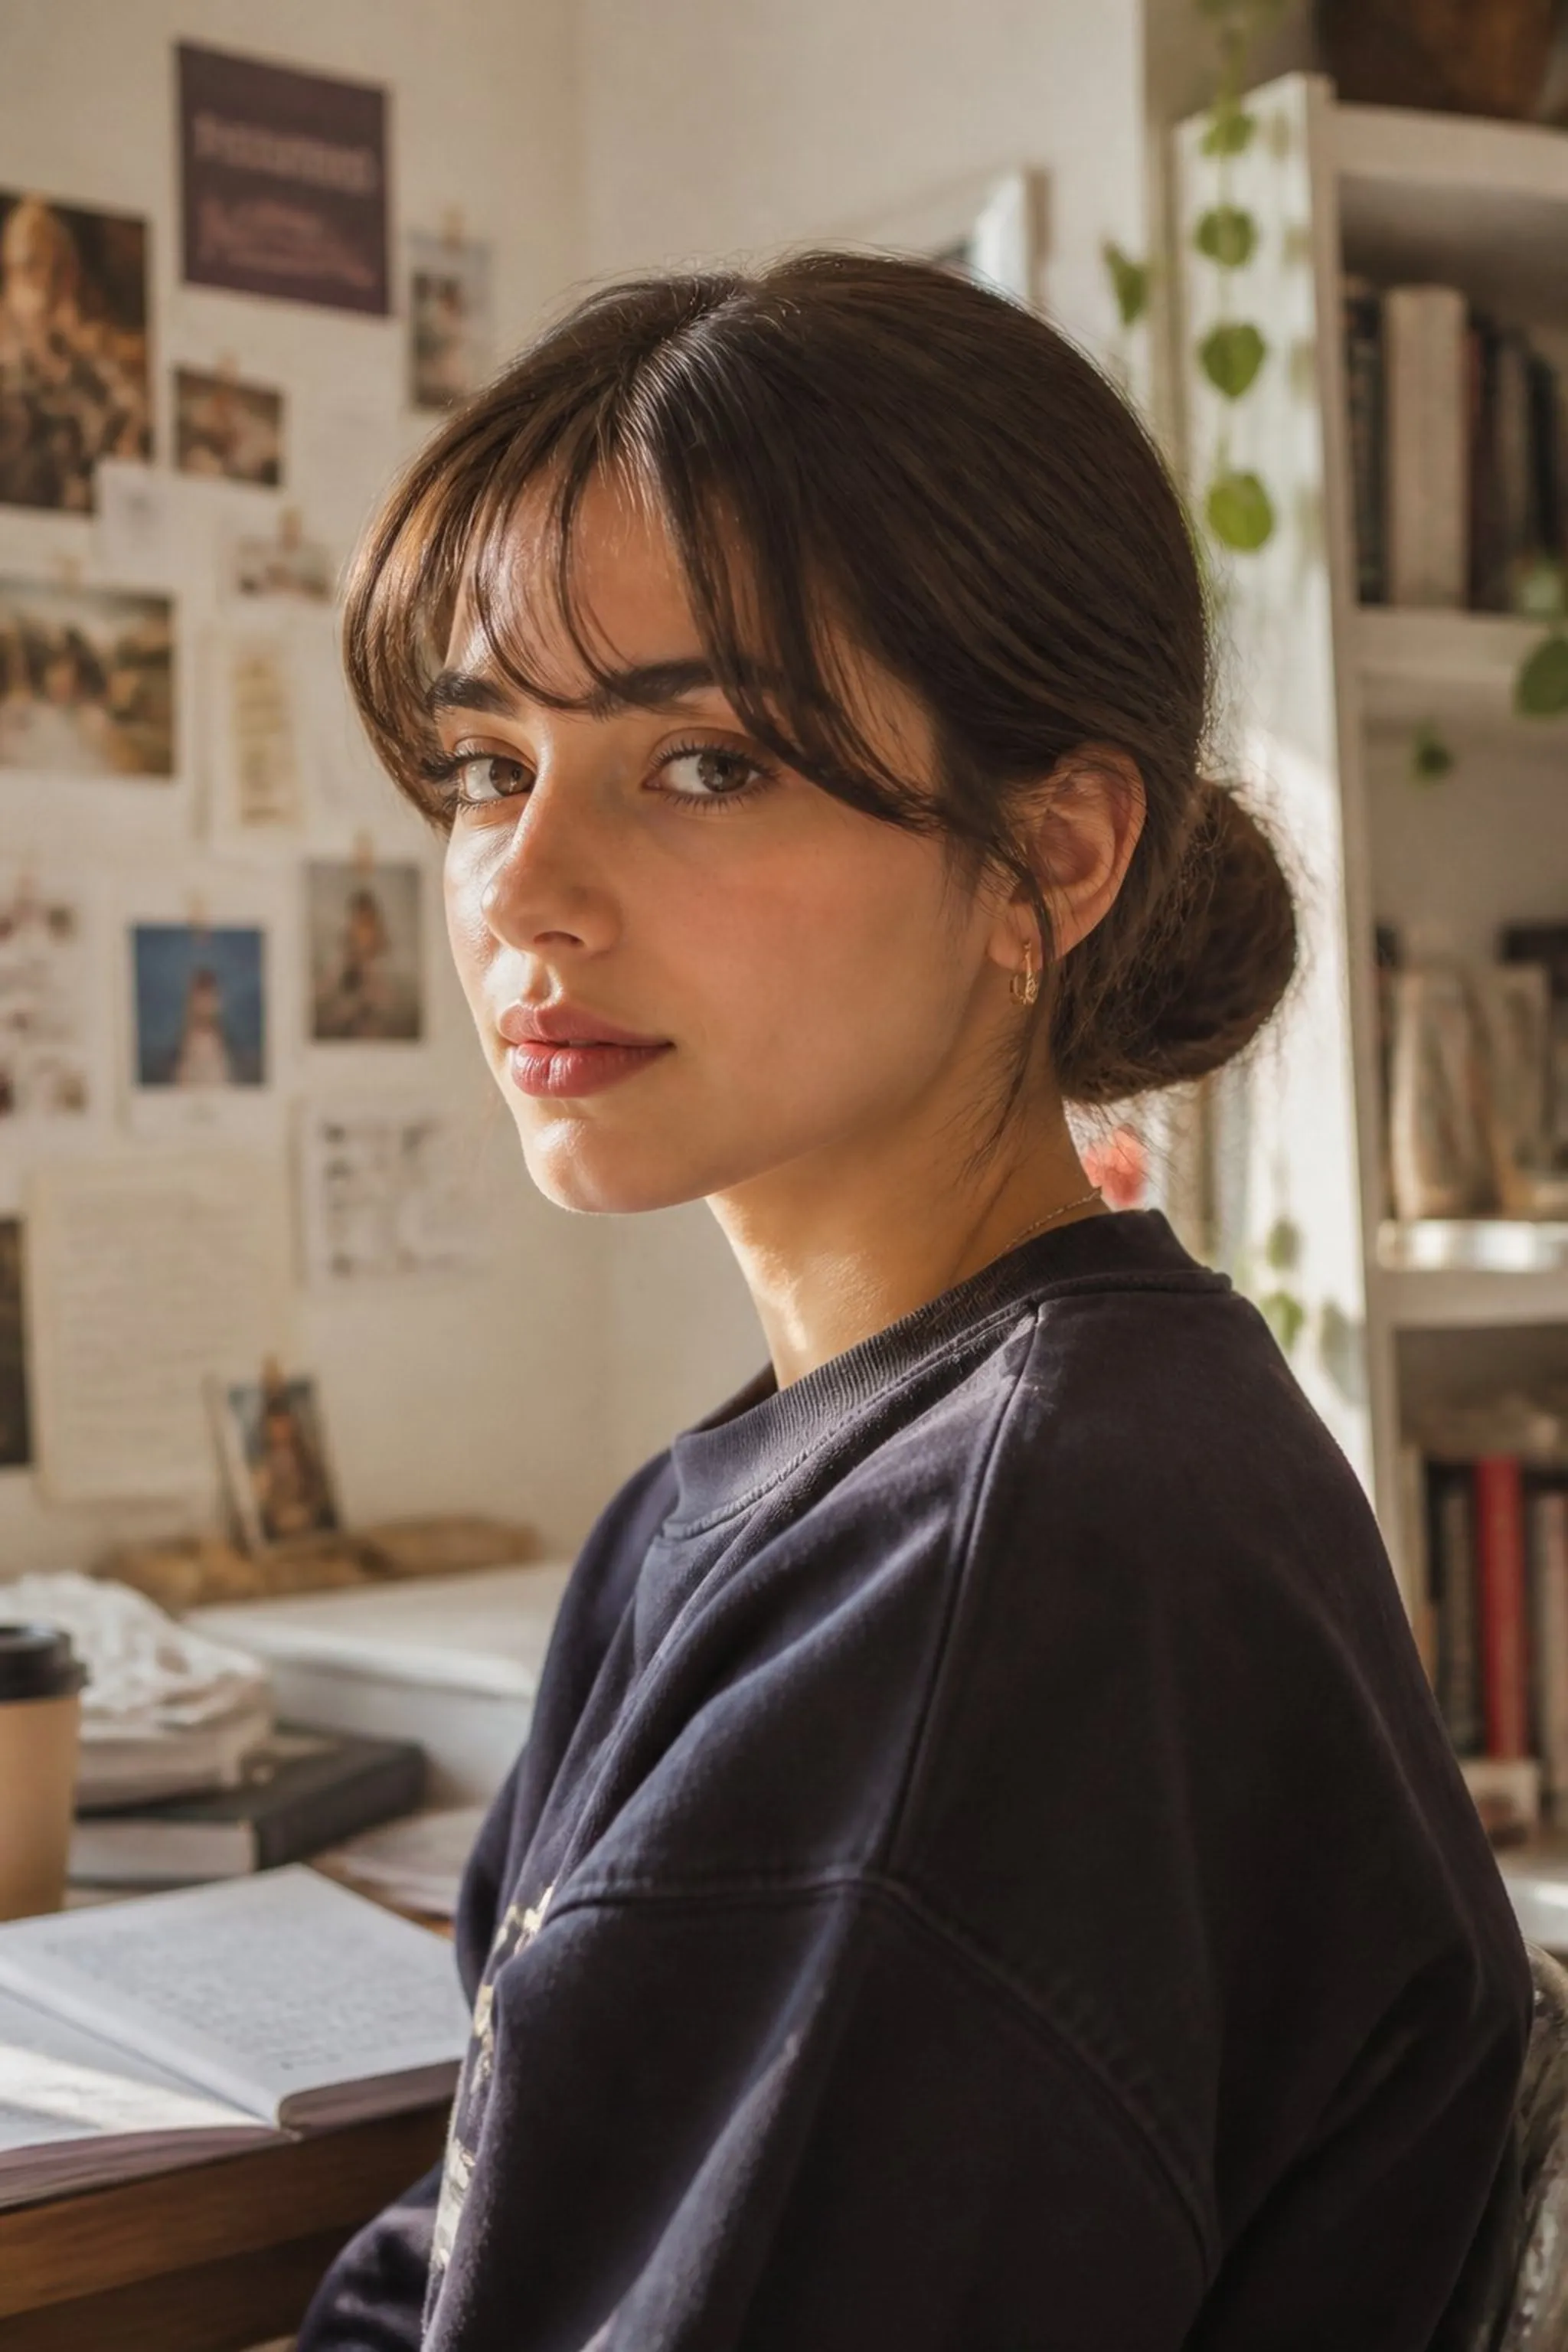
A tidy low bun sits just at the base of the neck while soft, curled bangs frame the forehead, measuring about 3 inches long. The bangs catch light, revealing subtle golden highlights.
This style suits straight to wavy hair, combining control with a bit of gentle movement. Soft hold hairspray is visible lightly misted for curl memory and frizz control.
Styling Tips
- Use a small barrel curling iron to shape bangs away from the face.
- Finish with a light hairspray mist to hold curls without stiffness.
- Keep the bun smooth with a mild smoothing cream if hair is frizzy.
Pro Tip: Curl bangs inward in short bursts for natural bend, avoiding stiffness from prolonged heat.
Avoid: Overusing hairspray results in crunchy bangs that can appear stiff and unnatural.
Try Also: Add a decorative hair comb or pull out a few loose tendrils for a softer edge.
Products & Materials
Items Used
“Neat low bun paired with soft curled bangs for quick elegance.”
Double Braid Pigtails For Playful Mornings
⏱️ 12 min · 🟠 Intermediate
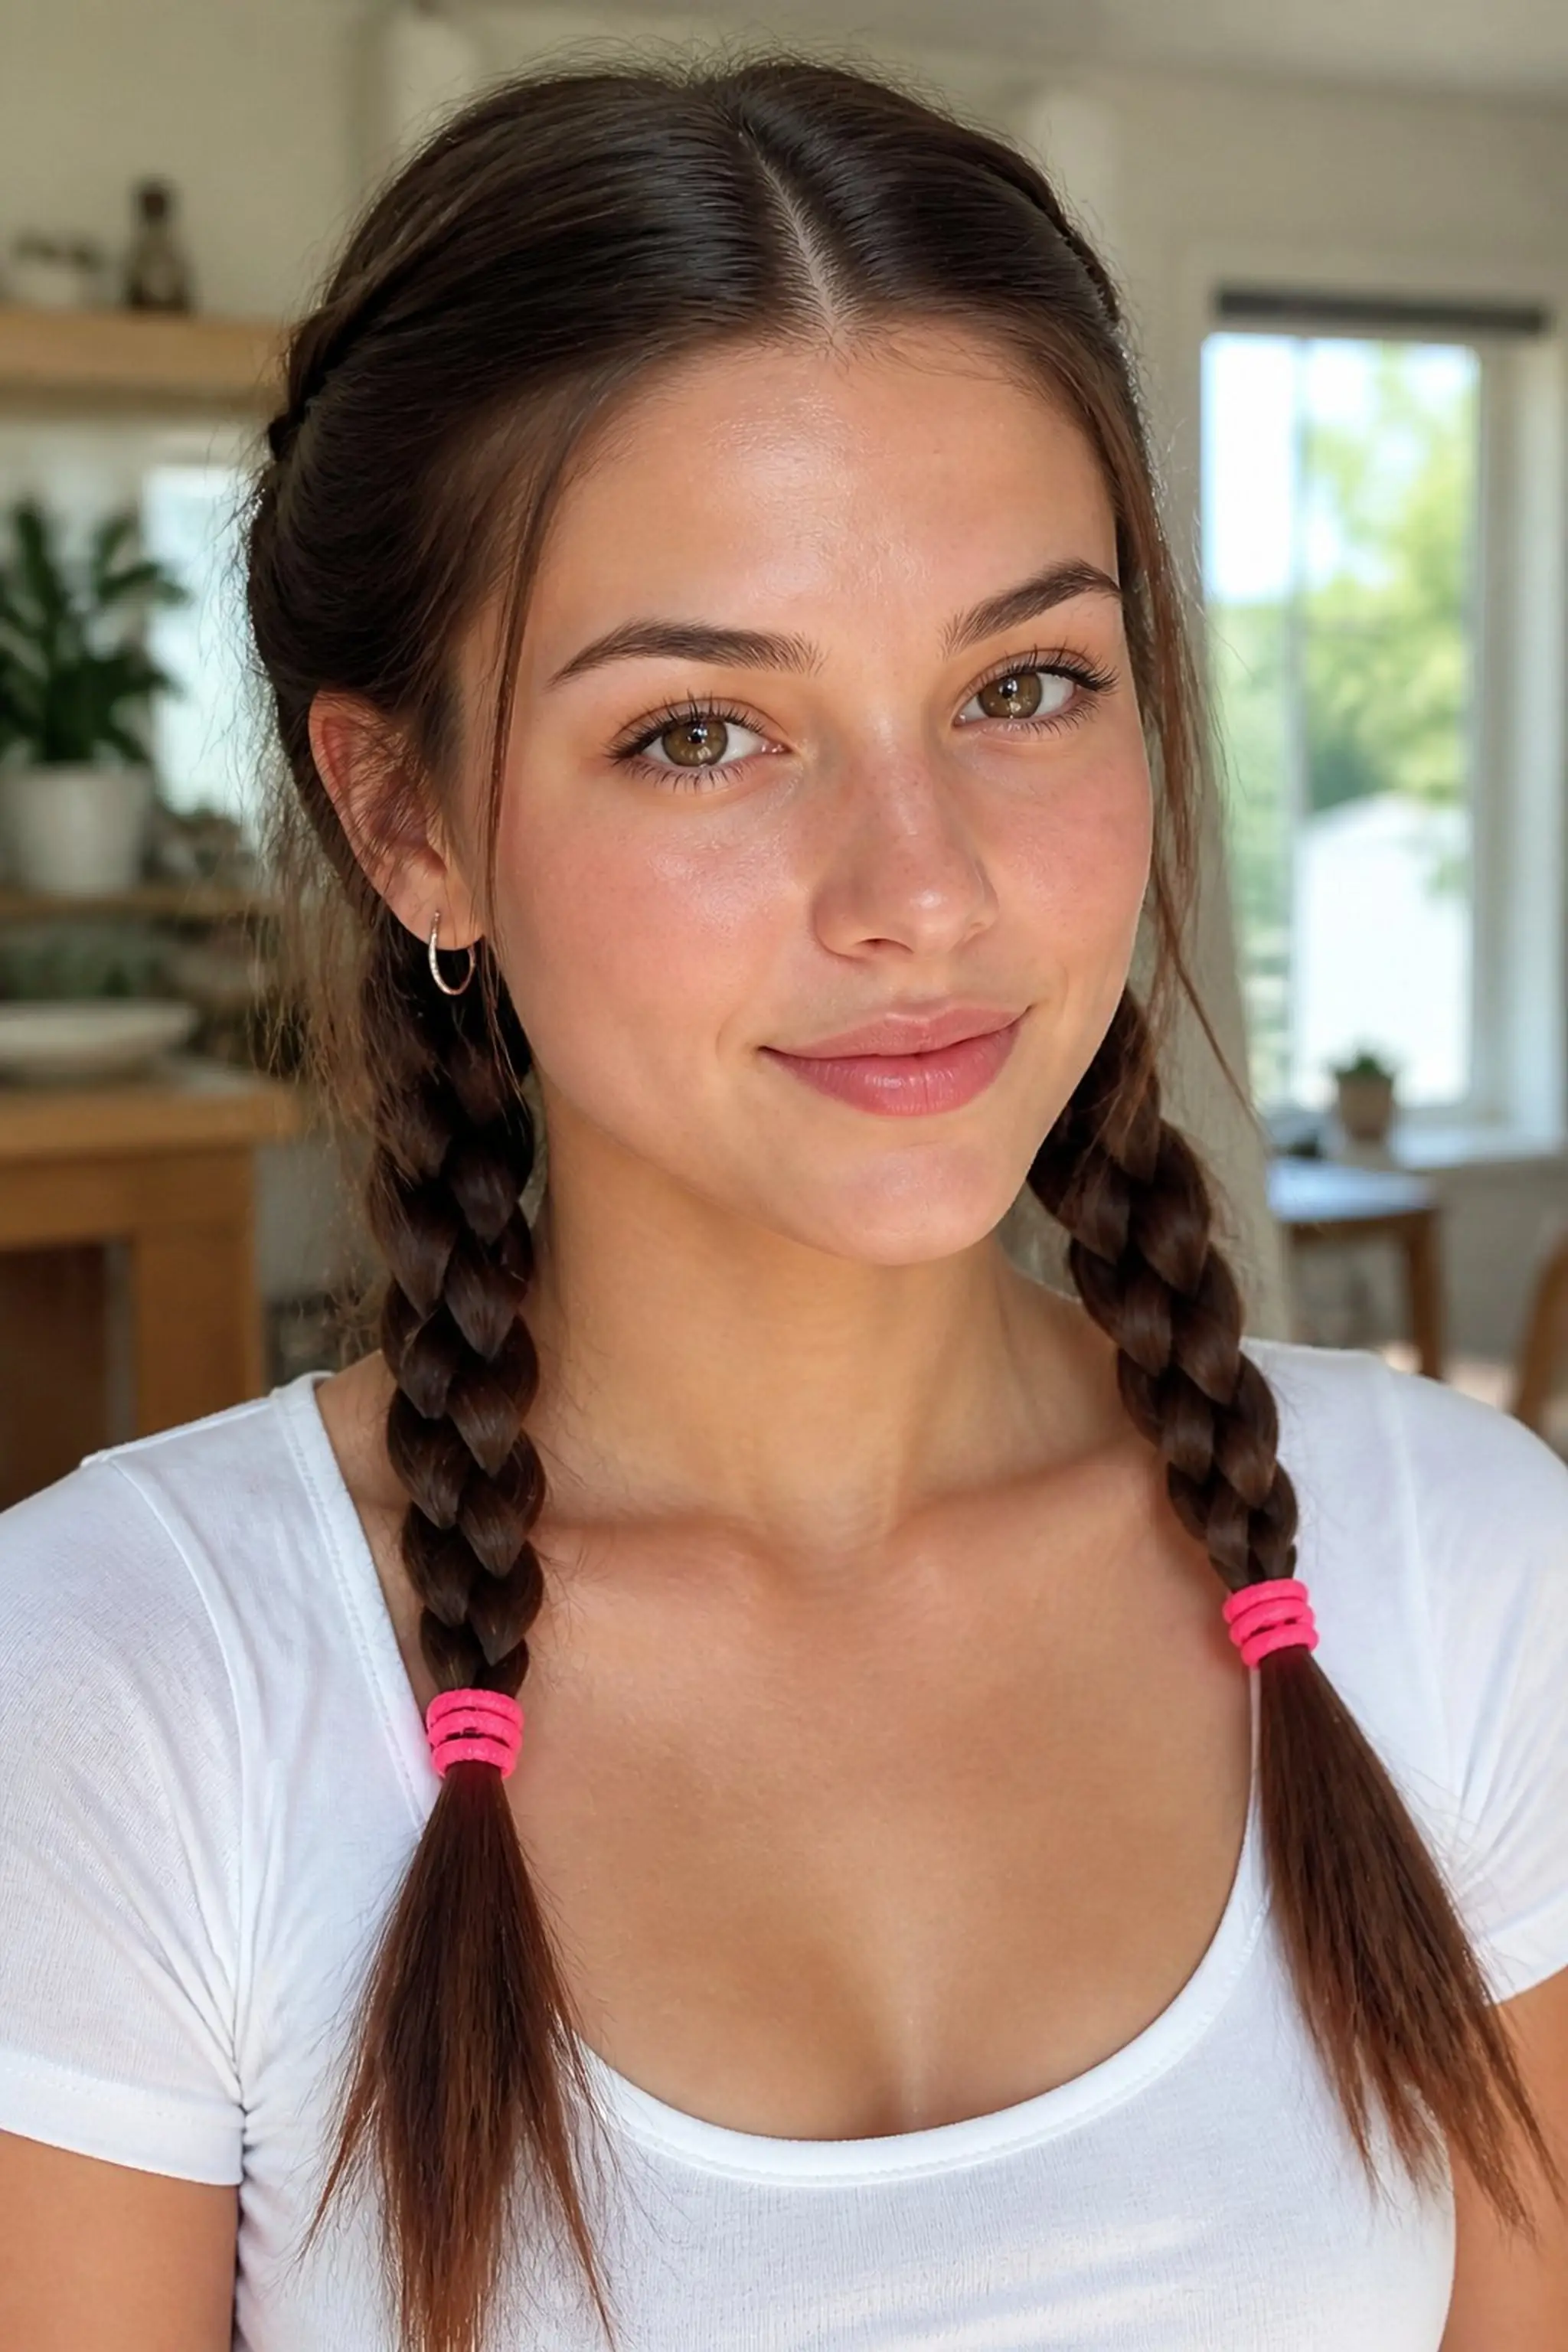
Two neat three-strand braids start just above the ears, continuing equally down to the collarbone. Each braid exhibits precise, even plaiting with no loose strands, and the hair color shifts subtly with natural highlights.
Ideal for medium-length straight or wavy hair, this playful style stays secure with two bright-colored elastic bands near the ends, adding a youthful accent to busy mornings.
Styling Tips
- Divide hair into equal sections for symmetry.
- Apply leave-in conditioner to smooth flyaways before braiding.
- Secure with colorful elastics for a fun finish.
Pro Tip: Use a fine-tooth comb to create clean parts before starting each braid to aid neatness throughout.
Avoid: Not dividing hair evenly often causes one braid to appear bulkier or shorter than the other.
Try Also: Try a Dutch braid or tuck ends under for a looped pigtail effect.
Products & Materials
Items Used
“Double braids with bright elastics bring fun and function to mornings.”
Twisted Crown Half-Up Hairstyle
⏱️ 15 min · 🔴 Advanced
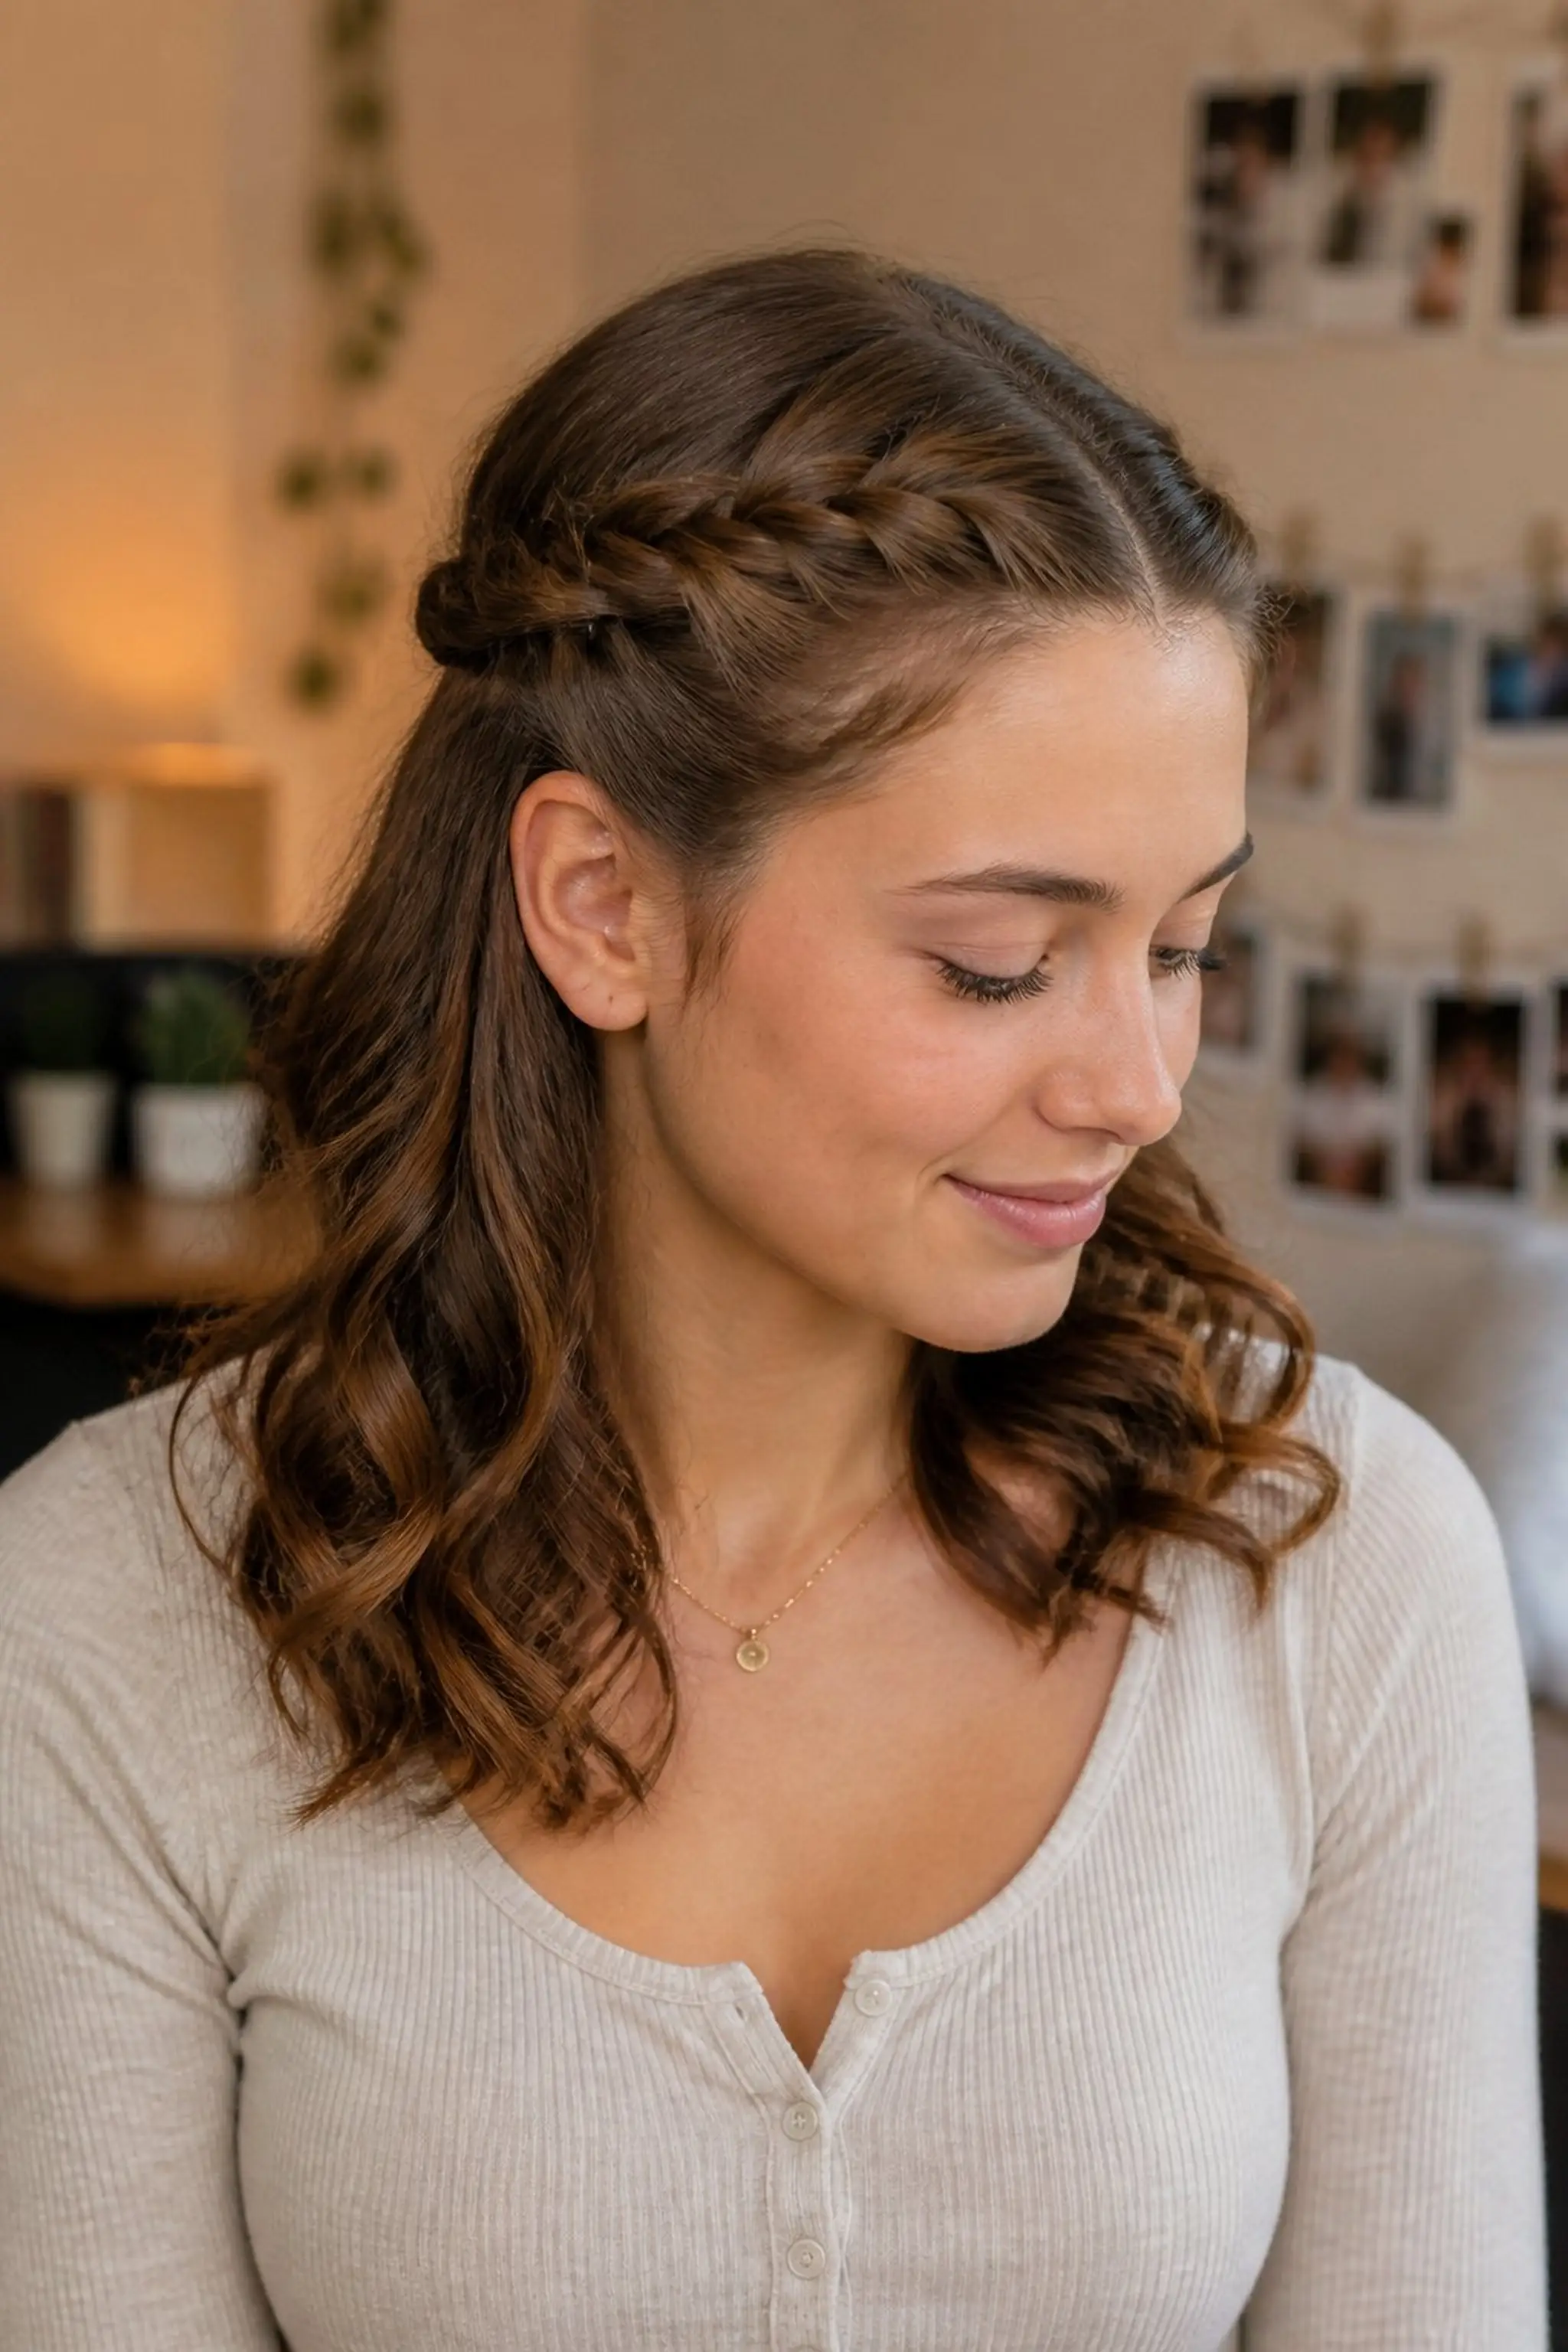
Two twisted sections start above each temple and sweep back to meet at the mid-back, pinned together where the hair naturally falls into a half-up, half-down style. The twists measure about 1 inch wide and add a delicate framing effect.
This look works best with shoulder-length hair of medium thickness, with matte black bobby pins holding the twists firmly without disrupting the flow of waves or curls.
Styling Tips
- Twist gently but firmly to avoid loosening during wear.
- Match pin color to hair shade for subtle hold.
- Spray a bit of flexible hairspray to lock twists without stiffness.
Pro Tip: Start twisting from the front and gather only small hair sections to keep the crown clean and even.
Avoid: Pulling twists too loosely can cause them to unravel during the day, losing shape.
Try Also: Turn twists into braids or add small floral pins for special occasions.
Products & Materials
Items Used
“Elegant twisted crown half-up for polished yet effortless college days.”
Side Swept Bangs With Loose Waves
⏱️ 10 min · 🟢 Beginner
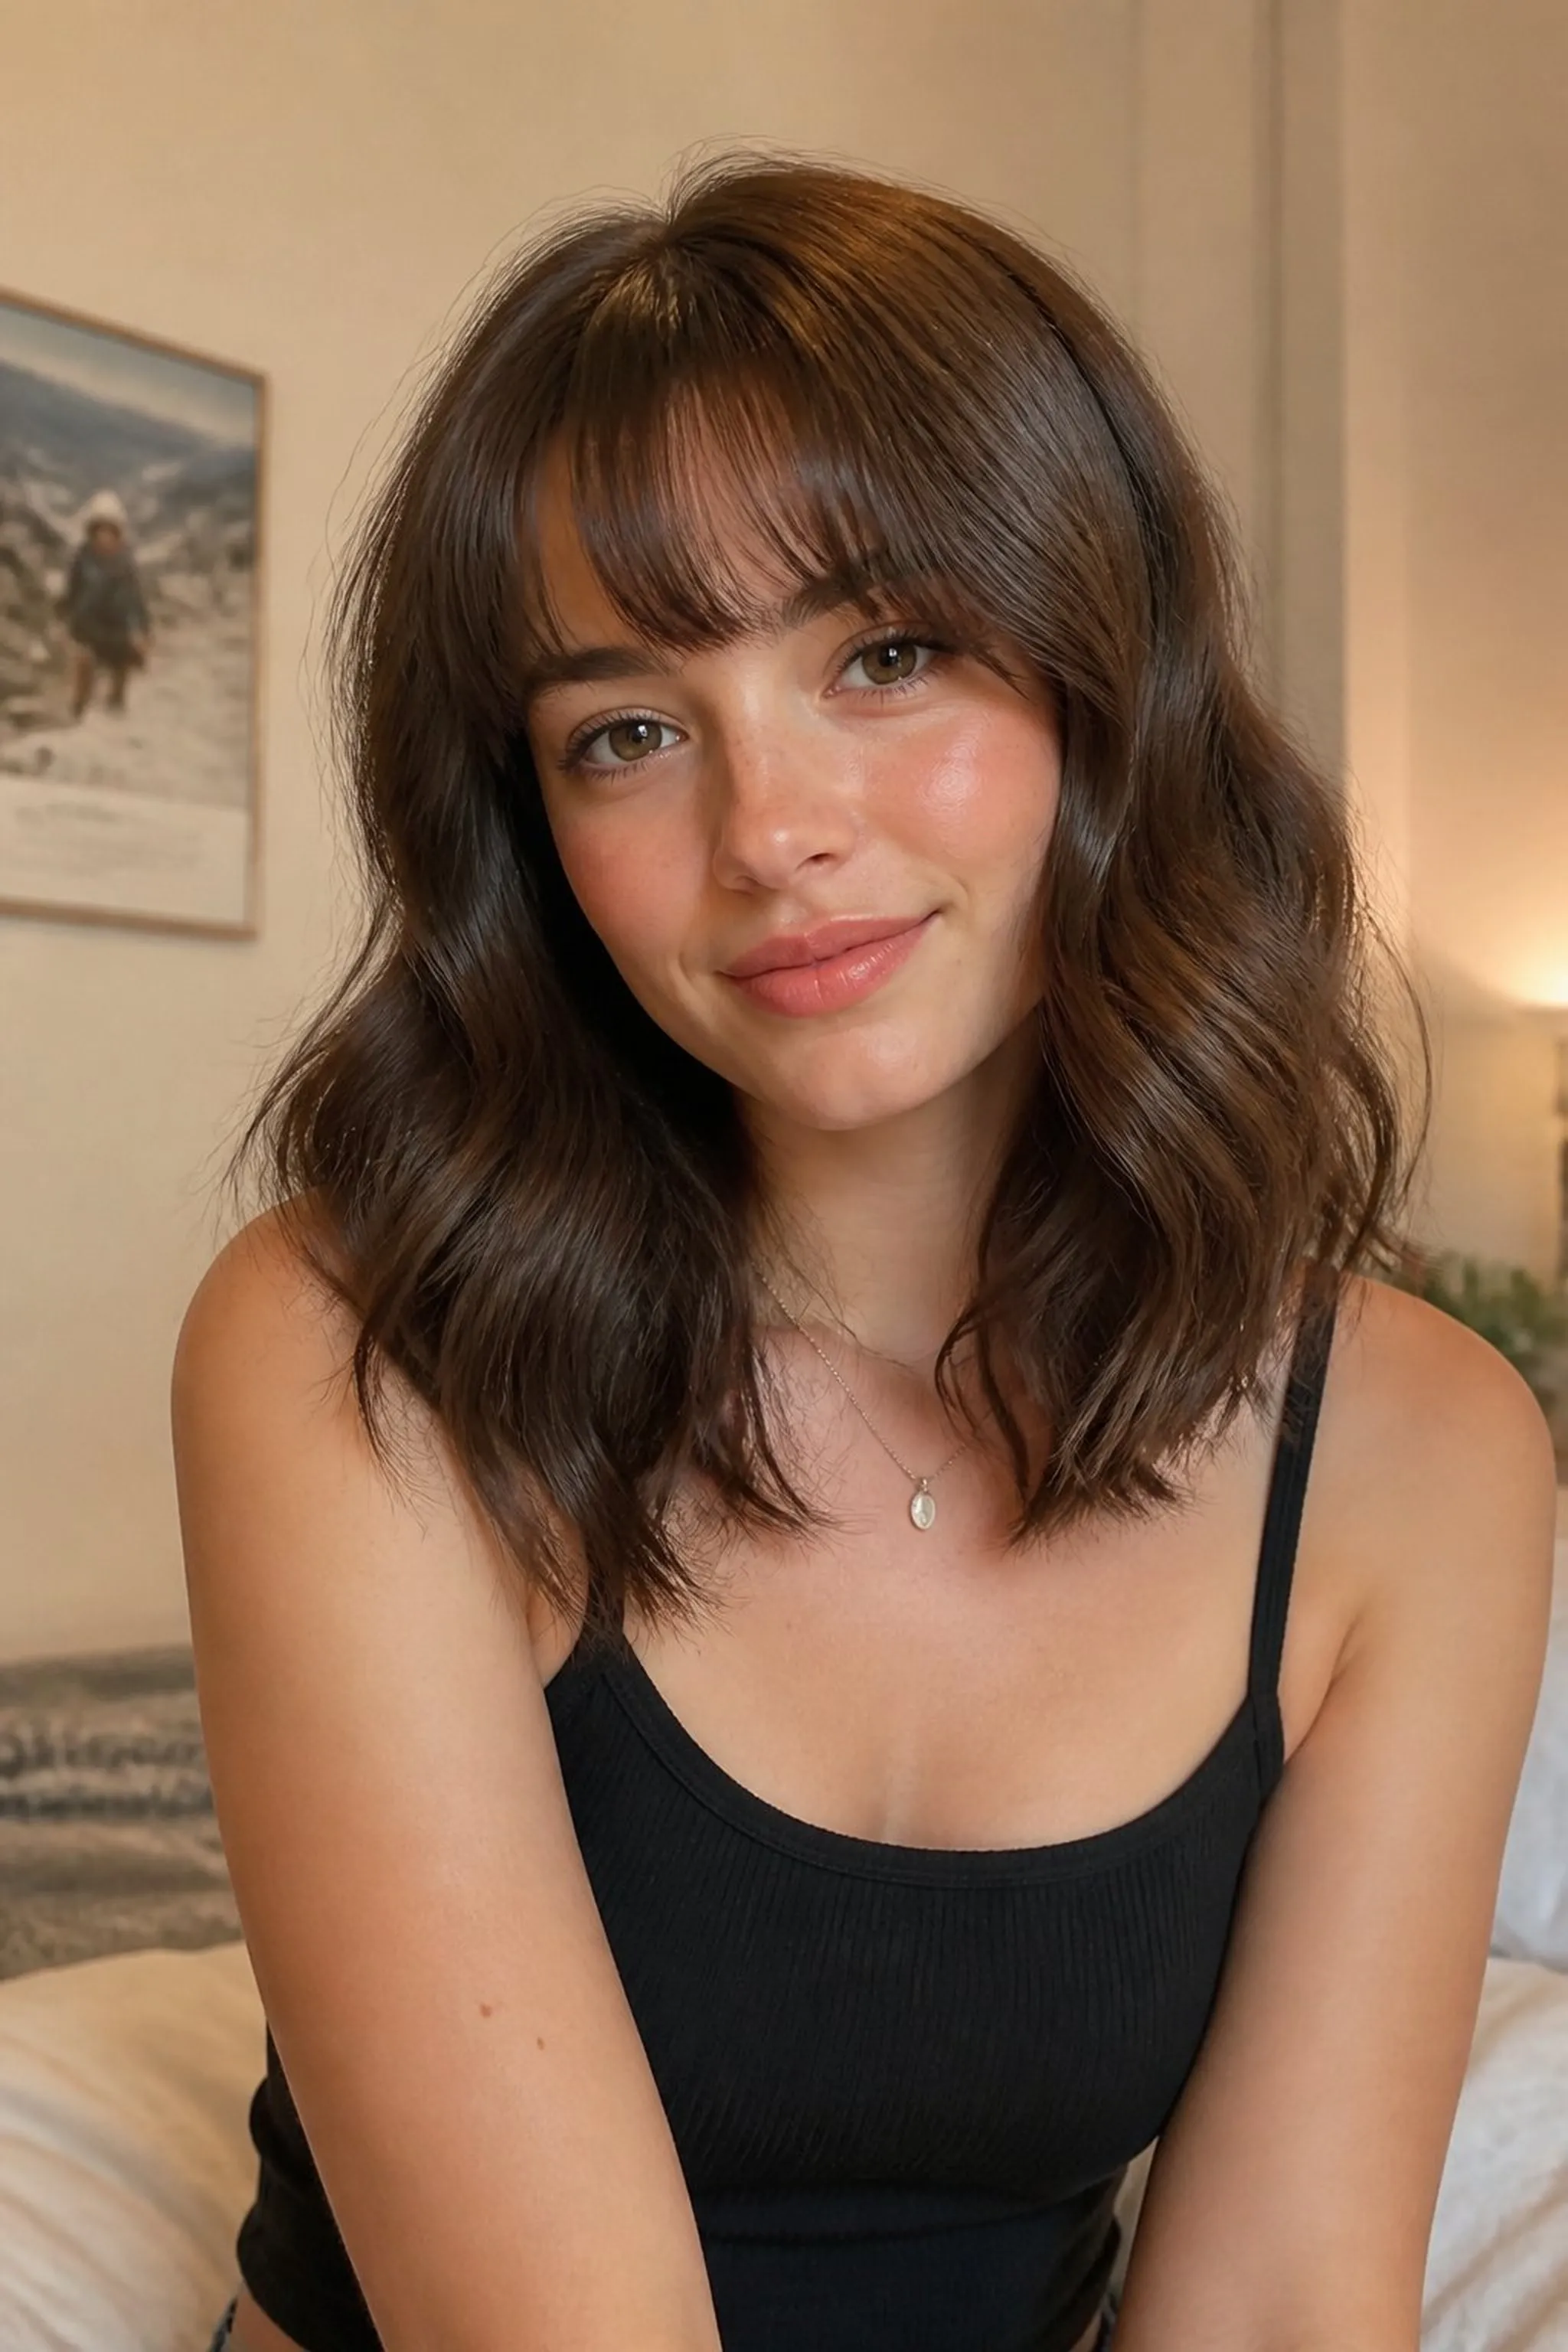
Soft, loose waves measure around 4 inches at their widest curl ring and frame the face gently. Side-swept bangs blend naturally, sweeping from one side to the other just above the eyebrows.
The waves carry shine enhanced by a light serum, and the bangs add movement to maintain structure during busy, long days on campus.
Styling Tips
- Apply serum on damp hair to add shine and reduce frizz.
- Use a round brush when blow-drying bangs for smooth bend.
- Finger-comb waves after curling for a relaxed finish.
Pro Tip: Comb serum through damp hair mid-lengths and ends to prevent buildup near roots and maintain natural volume.
Avoid: Brushing bangs dry often flattens them; use a blow dryer to shape for loftier sweep.
Try Also: Try straight bangs or tousled waves without bangs for other layouts.
Products & Materials
Items Used
“Side swept bangs and loose waves for a soft framed look.”
Fishtail Braid With A Casual Finish
⏱️ 20 min · 🔴 Advanced
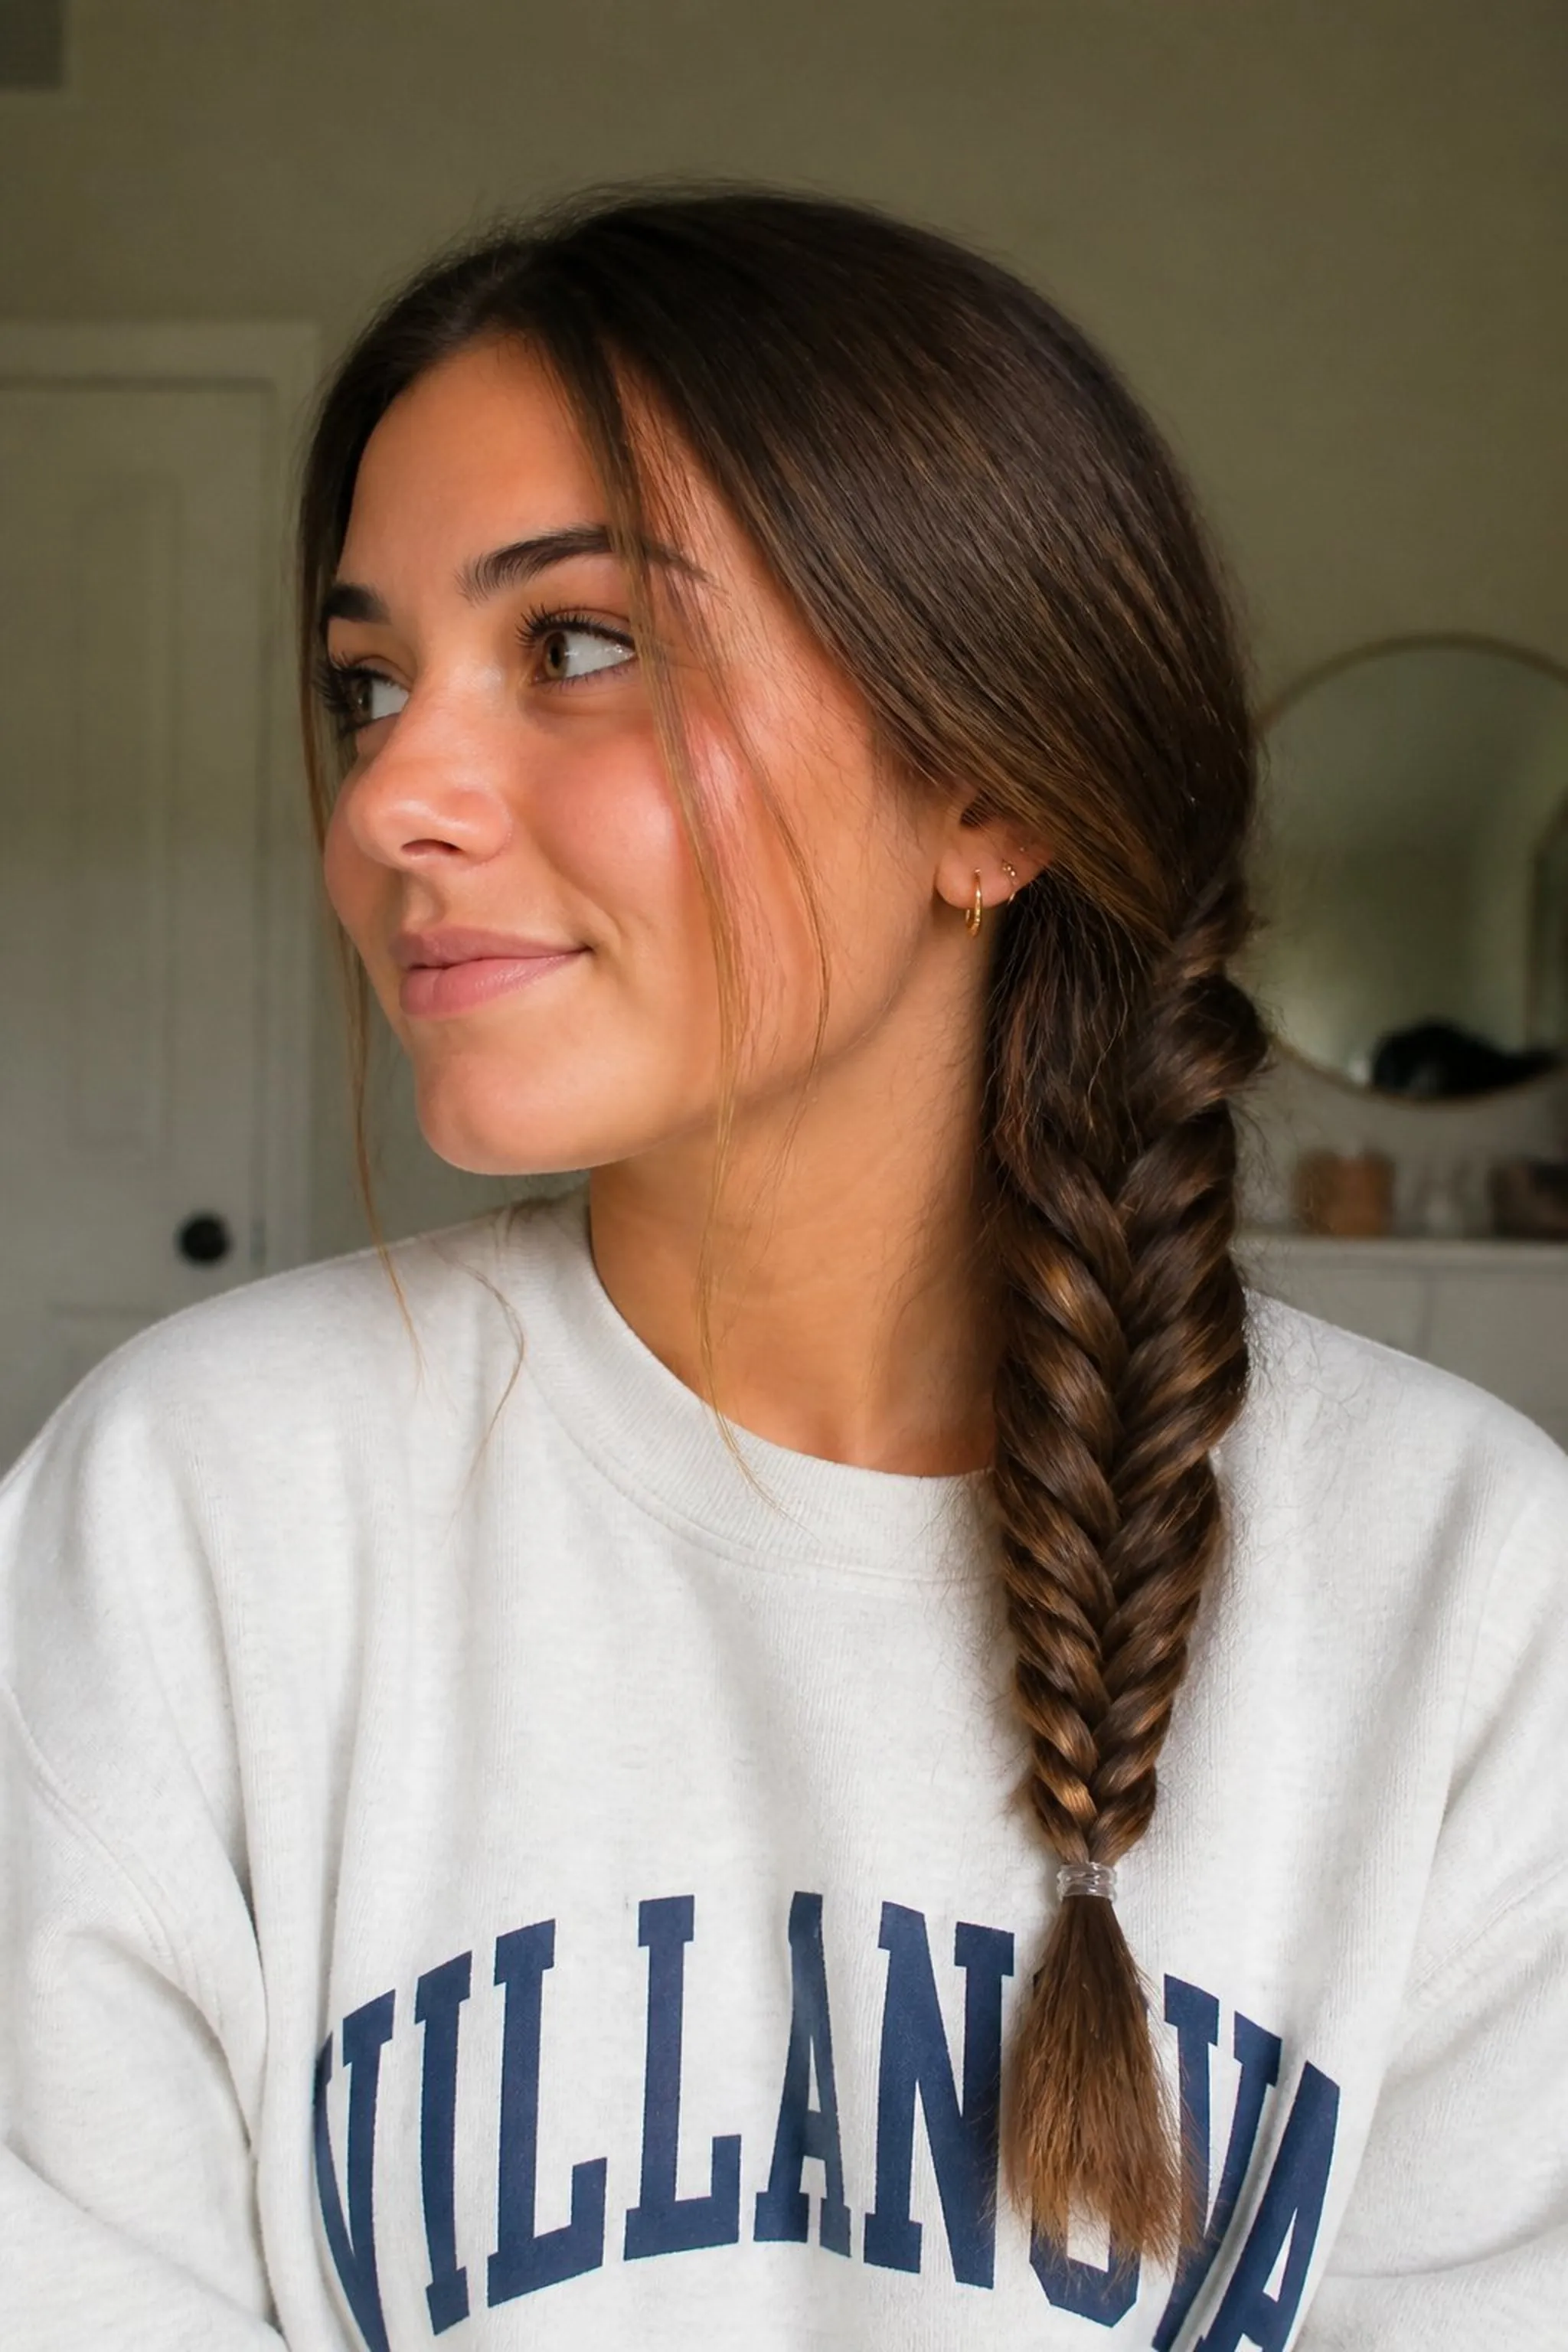
The fishtail braid starts slightly off center at the crown and narrows gradually to the end, revealing a loosely woven pattern about half an inch thick. Flyaways give an effortless, lived-in texture.
This style suits medium-thick, long hair and is often secured with a plain clear elastic near the tip to avoid distraction. The braid’s uneven strands create natural dimension over rigid uniformity.
Styling Tips
- Pull sections of the braid gently apart to emphasize looseness.
- Keep elastic ties low profile to maintain the braid’s airy look.
- Use a light hairspray for flyaway control without stiffness.
Pro Tip: Loosen the braid by gently tugging on sections after completion to amplify volume and texture.
Avoid: Braid too tightly causes stiffness and loses the casual, relaxed vibe.
Try Also: Try a Dutch fishtail braid or braid halfway, finishing with loose waves below.
Products & Materials
Items Used
“Casual fishtail braid with loose texture for long hair days.”
Top Knot With Textured Fringe
⏱️ 6 min · 🟢 Beginner
The hair is gathered into a sleek top knot about 2 inches in diameter, resting near the crown, while the textured fringe measures roughly 2.5 inches, styled with defined layers pushing slightly outward.
Suitable for fine, straight hair textures, the top knot gathers hair tightly using a matte black hair tie, while a styling wax highlights and separates layers in the fringe.
Styling Tips
- Apply a small amount of wax on fingertips for fringe texture.
- Smooth sides back fast to avoid flyaways under the knot.
- Rotate elastic gently to distribute tension evenly.
Pro Tip: Avoid heavy products near the fringe roots to maintain lift and natural texture without flattening.
Avoid: Pulling the knot unevenly can create awkward bulges rather than smoothness at the crown.
Try Also: Try a messy top knot or add a thin braided accent along the hairline.
Products & Materials
Items Used
“Sleek top knot with textured fringe for quick yet stylish mornings.”
Low Ponytail With Wrapped Hair Tie
⏱️ 7 min · 🟢 Beginner

The sleek low ponytail rests just below the nape, secured with an elastic wrapped by a piece of matching hair about 3 inches long, neatly covering the band. The hair tie itself sits invisible, creating a seamless finish.
Great for straight hair textures, this minimized look pairs well with polished outfits and requires only one medium elastic and a couple of bobby pins to keep the wrap steady.
Styling Tips
- Secure the ponytail tightly before wrapping hair around the base.
- Pin the wrapped section discreetly underneath for hold.
- Use a smoothing serum on lengths for shine.
Pro Tip: Grab a small section of hair from the ponytail to wrap the elastic tightly to conceal without gaps or looseness.
Avoid: Failing to secure the wrapped hair firmly causes it to loosen and reveal the elastic over time.
Try Also: Try a side ponytail or a mid-height ponytail with the same wrapped technique.
Products & Materials
Items Used
“Sleek low ponytail with wrapped hair tie for clean style.”
Beachy Waves With Center Part
⏱️ 15 min · 🟠 Intermediate
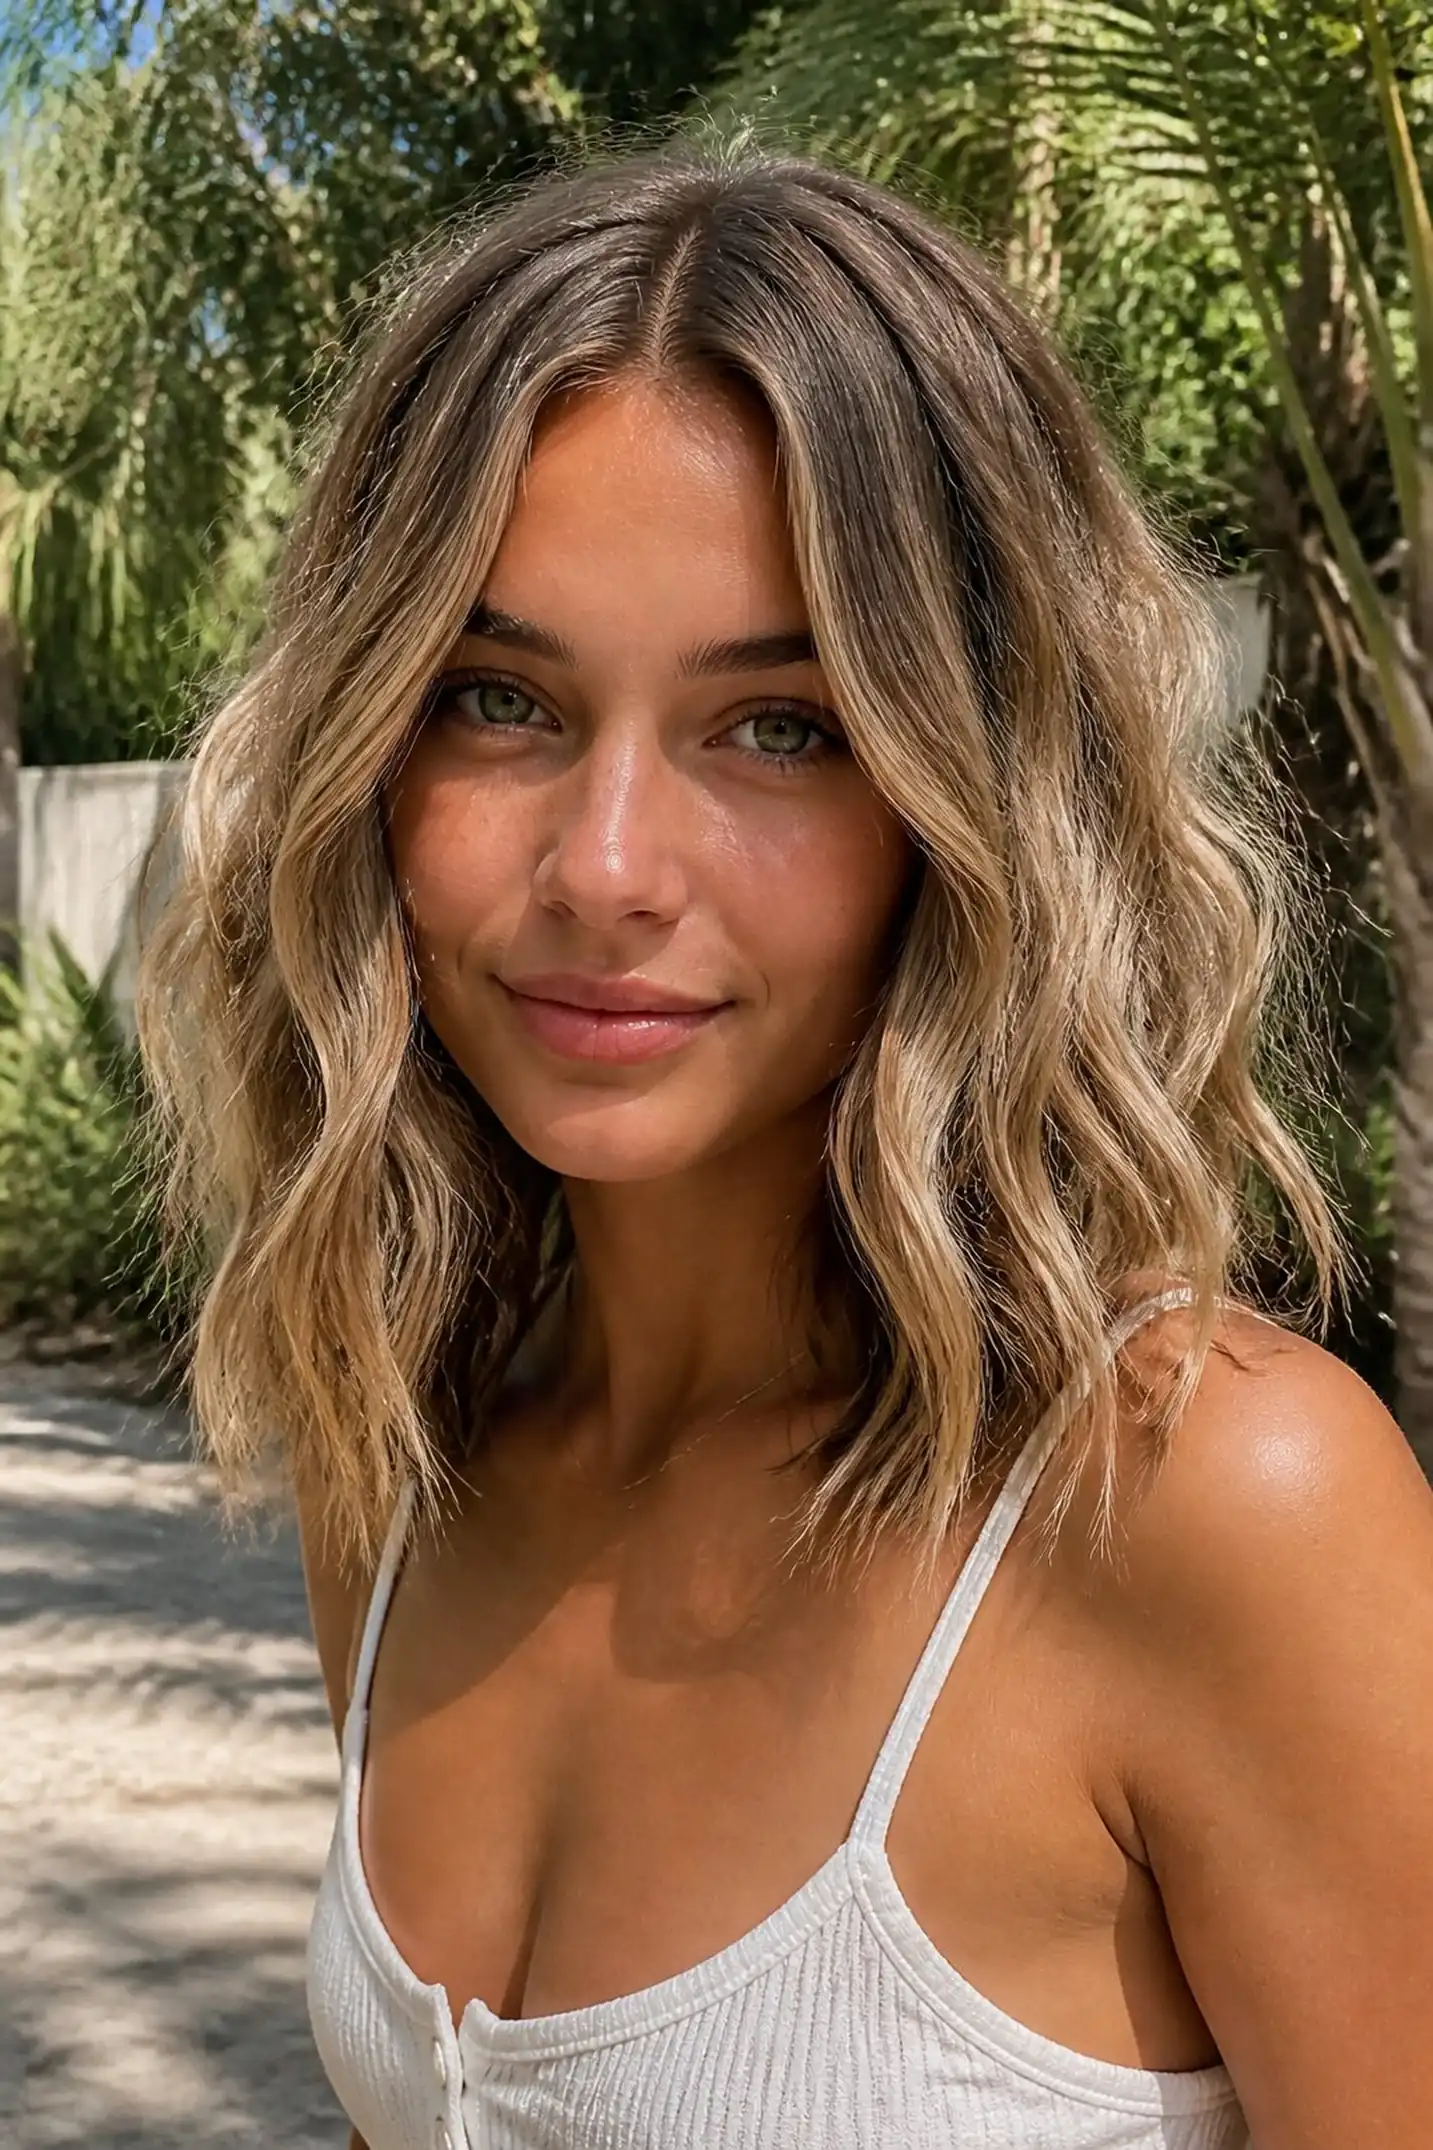
Loose beachy waves ripple through shoulder-length hair with a centered part, each wave about 2.5 inches wide and softly tousled for casual appeal. The sun reflects in natural highlights across the waves.
This style requires a medium curling wand and salt spray for texture, blending the natural look with subtle volume right at the roots.
Styling Tips
- Spritz hair with salt spray before curling for a tousled finish.
- Alternate curling direction to avoid uniformity.
- Finger comb waves to soften edges after cooling.
Pro Tip: Use a medium barrel curling wand to create waves that hold touchable softness without stiffness.
Avoid: Curling all strands in the same direction results in curls that appear overly staged rather than natural beach waves.
Try Also: Try a deep side part or half-up style with the waves for different moods.
Products & Materials
Items Used
“Effortless beachy waves with center part for laid-back style.”
