
As an Amazon Associate I earn from qualifying purchases.
Salt Dough Keepsake Crafts for Pet Parents at Home bring quiet, tactile joy to small moments and memory making. These salt dough keepsakes can capture a paw impression or a tiny name tag that feels personal and warm.
Every project celebrates a pet connection with soft textures and gentle edges that invite touch and display. The collection of pet parent keepsakes ranges from tiny ornaments to fridge magnets that hold a familiar pawprint close.
Creating salt dough mementos at home gives everyday spaces a handcrafted accent that smells faintly of baked dough and sunlit wood. These pet keepsakes make small rituals of remembrance or celebration without fuss or special tools.
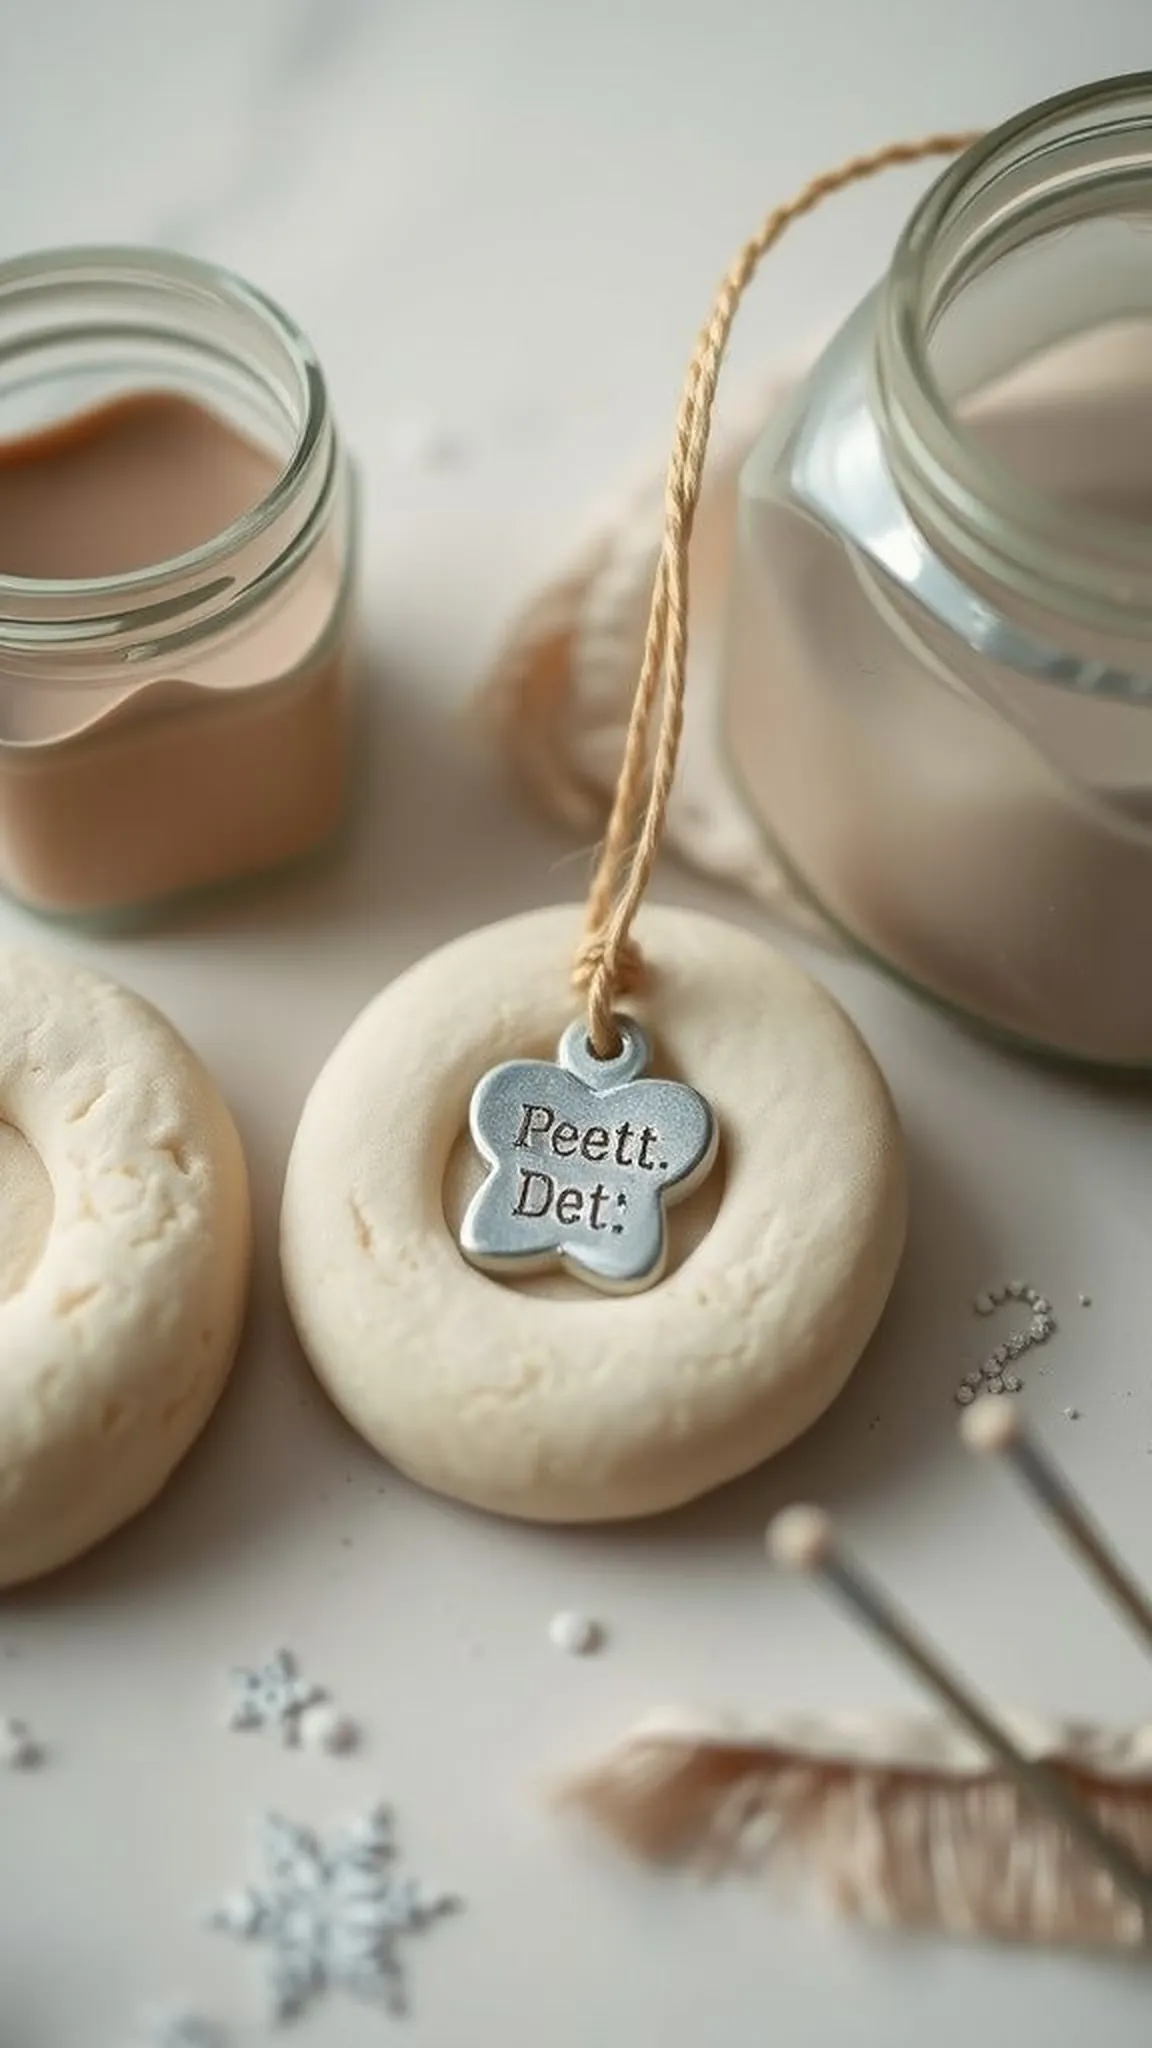
Paw print ornament with ribbon loop
⏱️ 1 hour · 🟢 Beginner
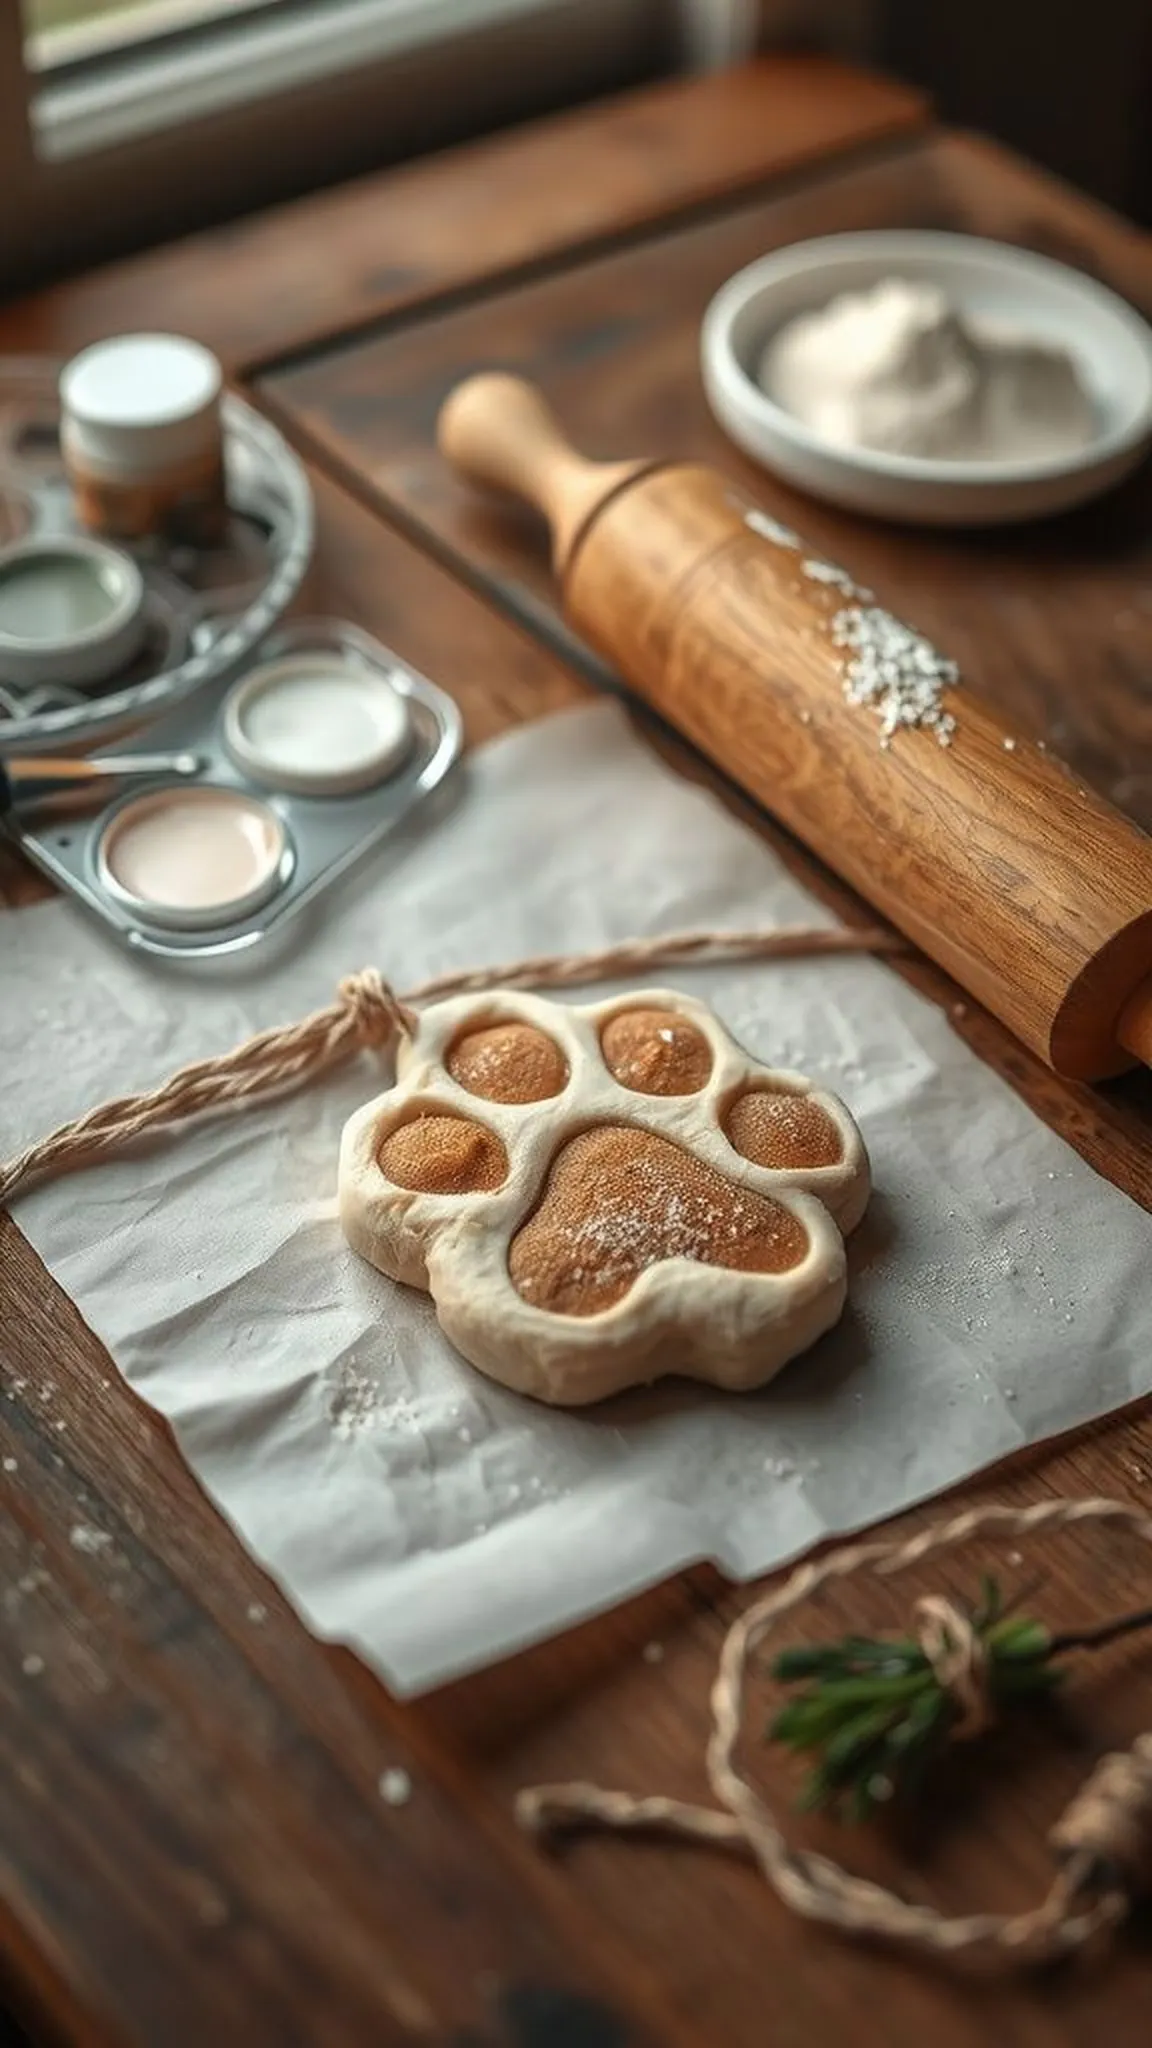
The dough surface looks slightly grainy and warm, holding a tender oval paw impression that catches a soft highlight. A thin ribbon threads through a cooked edge that glows with a faint golden tint.
Painted accents around the print add a matte color contrast and a subtle brush texture that invites closer inspection. The finished ornament sits lightly in a hand, its cool varnish and earthy scent making the memory feel immediate.
Natural light in a window sill brings out the salt crystals in the baked dough and the tiny imperfections that make each piece unique. This keepsake reads like a little portrait of a beloved pet moment.
Pro Tip: Dry ornaments slowly on a low oven setting or a warm shelf to reduce cracking and preserve the impression detail.
How to Make This
- Combine all-purpose flour and table salt with water until the mixture forms a soft, pliable dough.
- Flatten the dough to an even thickness with a rolling pin and imprint a paw using gentle thumb pressure.
- Create a small hole near the edge for the ribbon with a straw and transfer the piece to a baking sheet.
- Bake at a low temperature until the dough feels firm, then allow the piece to cool completely before painting.
- Apply acrylic paint for accents and finish with a clear varnish once the paint is dry.
Avoid: A frequent beginner error is overworking the dough which can make it dry and prone to cracks. Allowing the piece to dry too quickly often causes hairline fissures.
Try Also: Try a heart-shaped cutter for a different silhouette or mix in a pinch of cinnamon for a warm aroma before baking. Small adhesive magnets can convert a finished ornament into a fridge keepsake.
Products & Materials
Items Used
- all-purpose flour
- table salt
- rolling pin
- acrylic paint set
- clear varnish bottle
“Tiny paw print ornament keepsakes to cherish forever.”
Personalized collar tag shaped like a bone
⏱️ 2 hours · 🟠 Intermediate
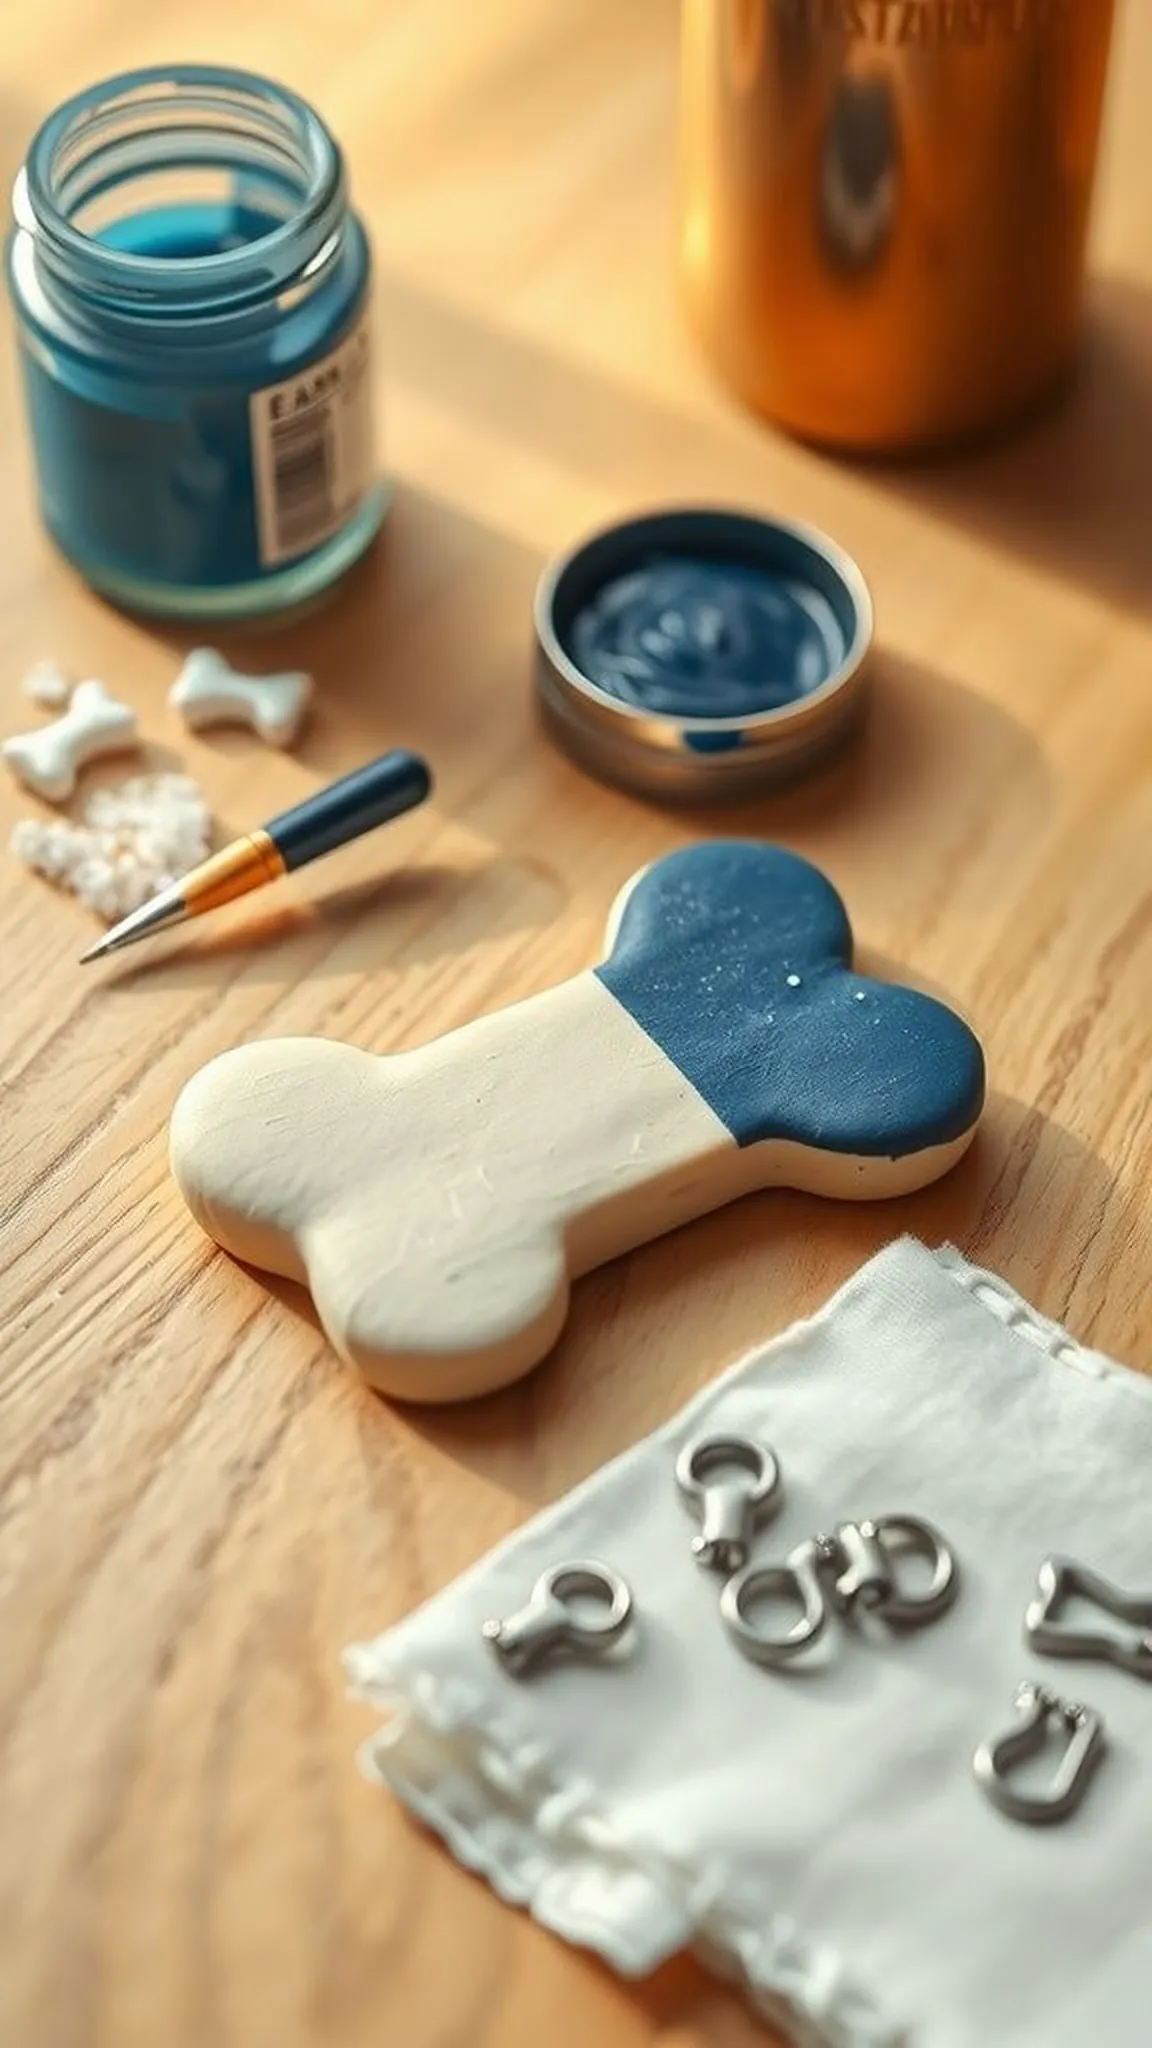
A little bone silhouette sits on a linen napkin, its edges sanded smooth and the surface awaiting tiny painted letters. The dough shows faint salt flecks that catch a glint of afternoon sun.
A small metallic sheen from a varnish lift gives the tag a finished look and a tactile coolness under the fingertip. Lettering contrasts with a matte background so the pet name reads clearly from across a room.
The tag feels light enough for a collar but solid enough to endure gentle handling and display. A petite hole near the top allows a jump ring to bring the piece to life on a collar or keyring.
Pro Tip: Allow the dough tag to rest uncovered before baking to reduce bubbling and ensure a smooth painted surface later.
How to Make This
- Mix flour, salt, and water into a smooth dough and knead until consistent.
- Press the dough into a shallow bone-shaped cutter and smooth the edges with a fingertip.
- Make a small hole for attaching to a collar and place the tag on a parchment-lined baking tray.
- Bake at a low temperature until completely firm, then let the tag cool fully on a wire rack.
- Paint the name using a fine brush, seal with clear varnish, and add a metal jump ring if desired.
Avoid: Working the dough for too long can introduce air pockets that expand during baking. Skipping a full cool-down period before painting sometimes warps the piece.
Try Also: Cut round or heart shapes for a different aesthetic and add small paw accents in contrasting paint. A tiny magnet glued behind the tag becomes a fridge memento instead of a collar charm.
Products & Materials
Items Used
- all-purpose flour
- cookie cutter bone shape
- fine detail paintbrush
- clear varnish bottle
- metal jump rings
“Handmade bone-shaped collar tag with pet name painted on.”
Fridge magnet paw impression keepsake
⏱️ 1 hour · 🟢 Beginner
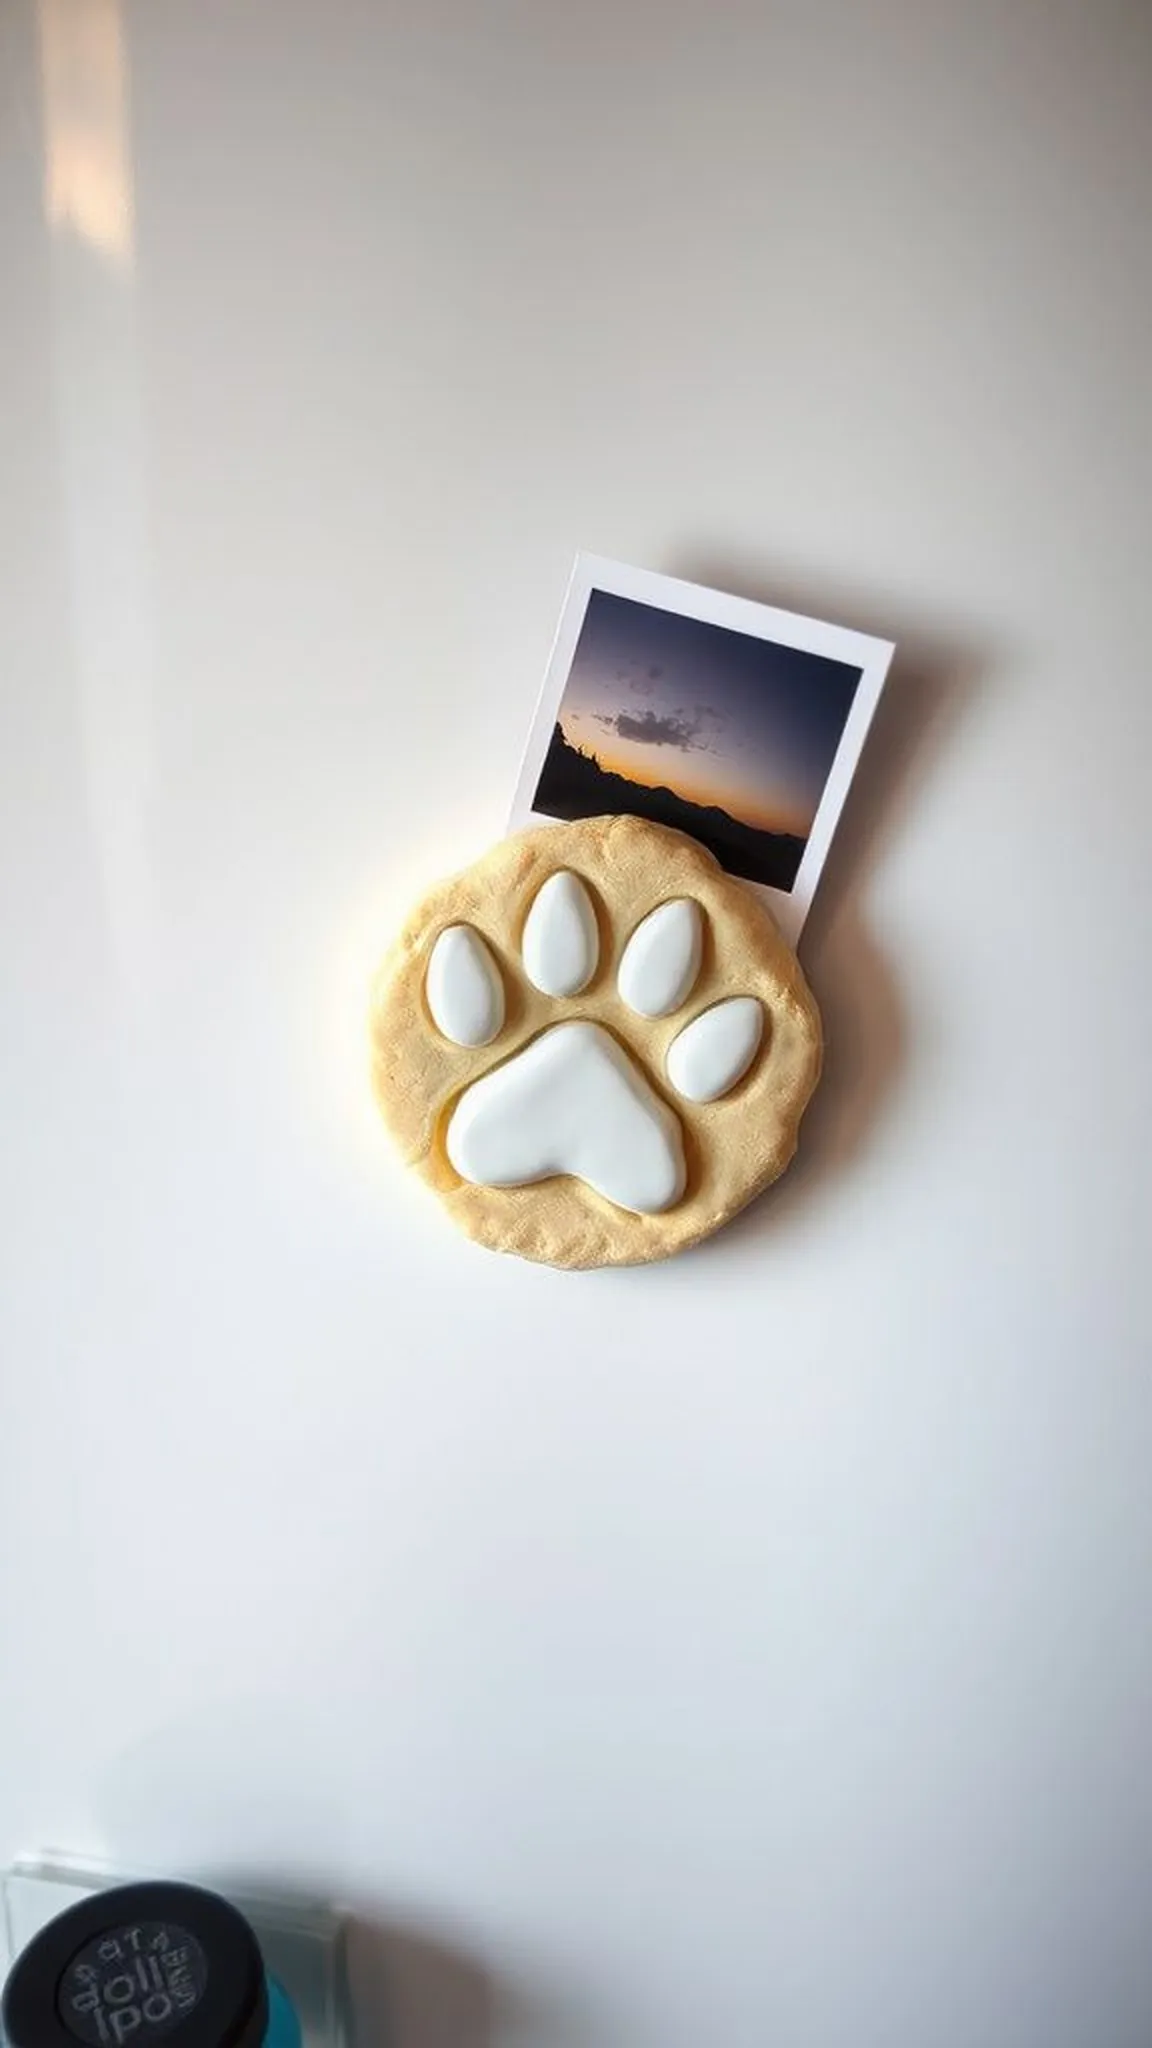
A rounded disk of baked dough sits against a slate backdrop, its central paw groove shaded with soft washes of color. The texture reads slightly sandy and matte, complemented by a tiny magnetic disk tucked on the reverse.
The magnet gives the keepsake a practical presence on the refrigerator while the painted outline provides a cozy contrast. Light brushes over the edges reveal a thin crust of golden baking tones.
The finished magnet catches the eye among photographs and notes, a small tactile reminder. Its surface retains a faint scent of warm dough and a hand-painted charm.
Pro Tip: Press the magnet firmly against the cooled back of the piece with a strong adhesive and allow overnight curing for best hold.
How to Make This
- Prepare a basic salt dough mixture and press it into a shallow round mold or form it by hand.
- Impress a paw print gently into the center and create a clean edge around the circle.
- Bake the disk until fully hardened and cool it completely on a rack to prevent moisture buildup.
- Paint a soft wash of color around the paw and affix a small magnet to the reverse with strong craft glue.
- Let the adhesive cure before placing the magnet on metal surfaces.
Avoid: Applying glue to a warm or slightly damp surface can prevent a lasting bond. Choosing an oversized magnet may overpower the lightweight dough disk and cause detachment.
Try Also: Try a square or heart silhouette and layer a thin paint wash in complementary tones. Tiny decorative beads embedded near the edge add a bit of texture and sparkle.
Products & Materials
Items Used
- all-purpose flour
- small disc magnets
- acrylic paint
- clear craft glue
“Magnetic paw print keepsakes for the fridge or locker.”
Save time and printer ink with 50+ printable templates and step-by-step instructions in one ad-free guide.

Just $19.99 — lifetime access
Heart-shaped memorial plaque with engraving
⏱️ 2-3 hours · 🟠 Intermediate
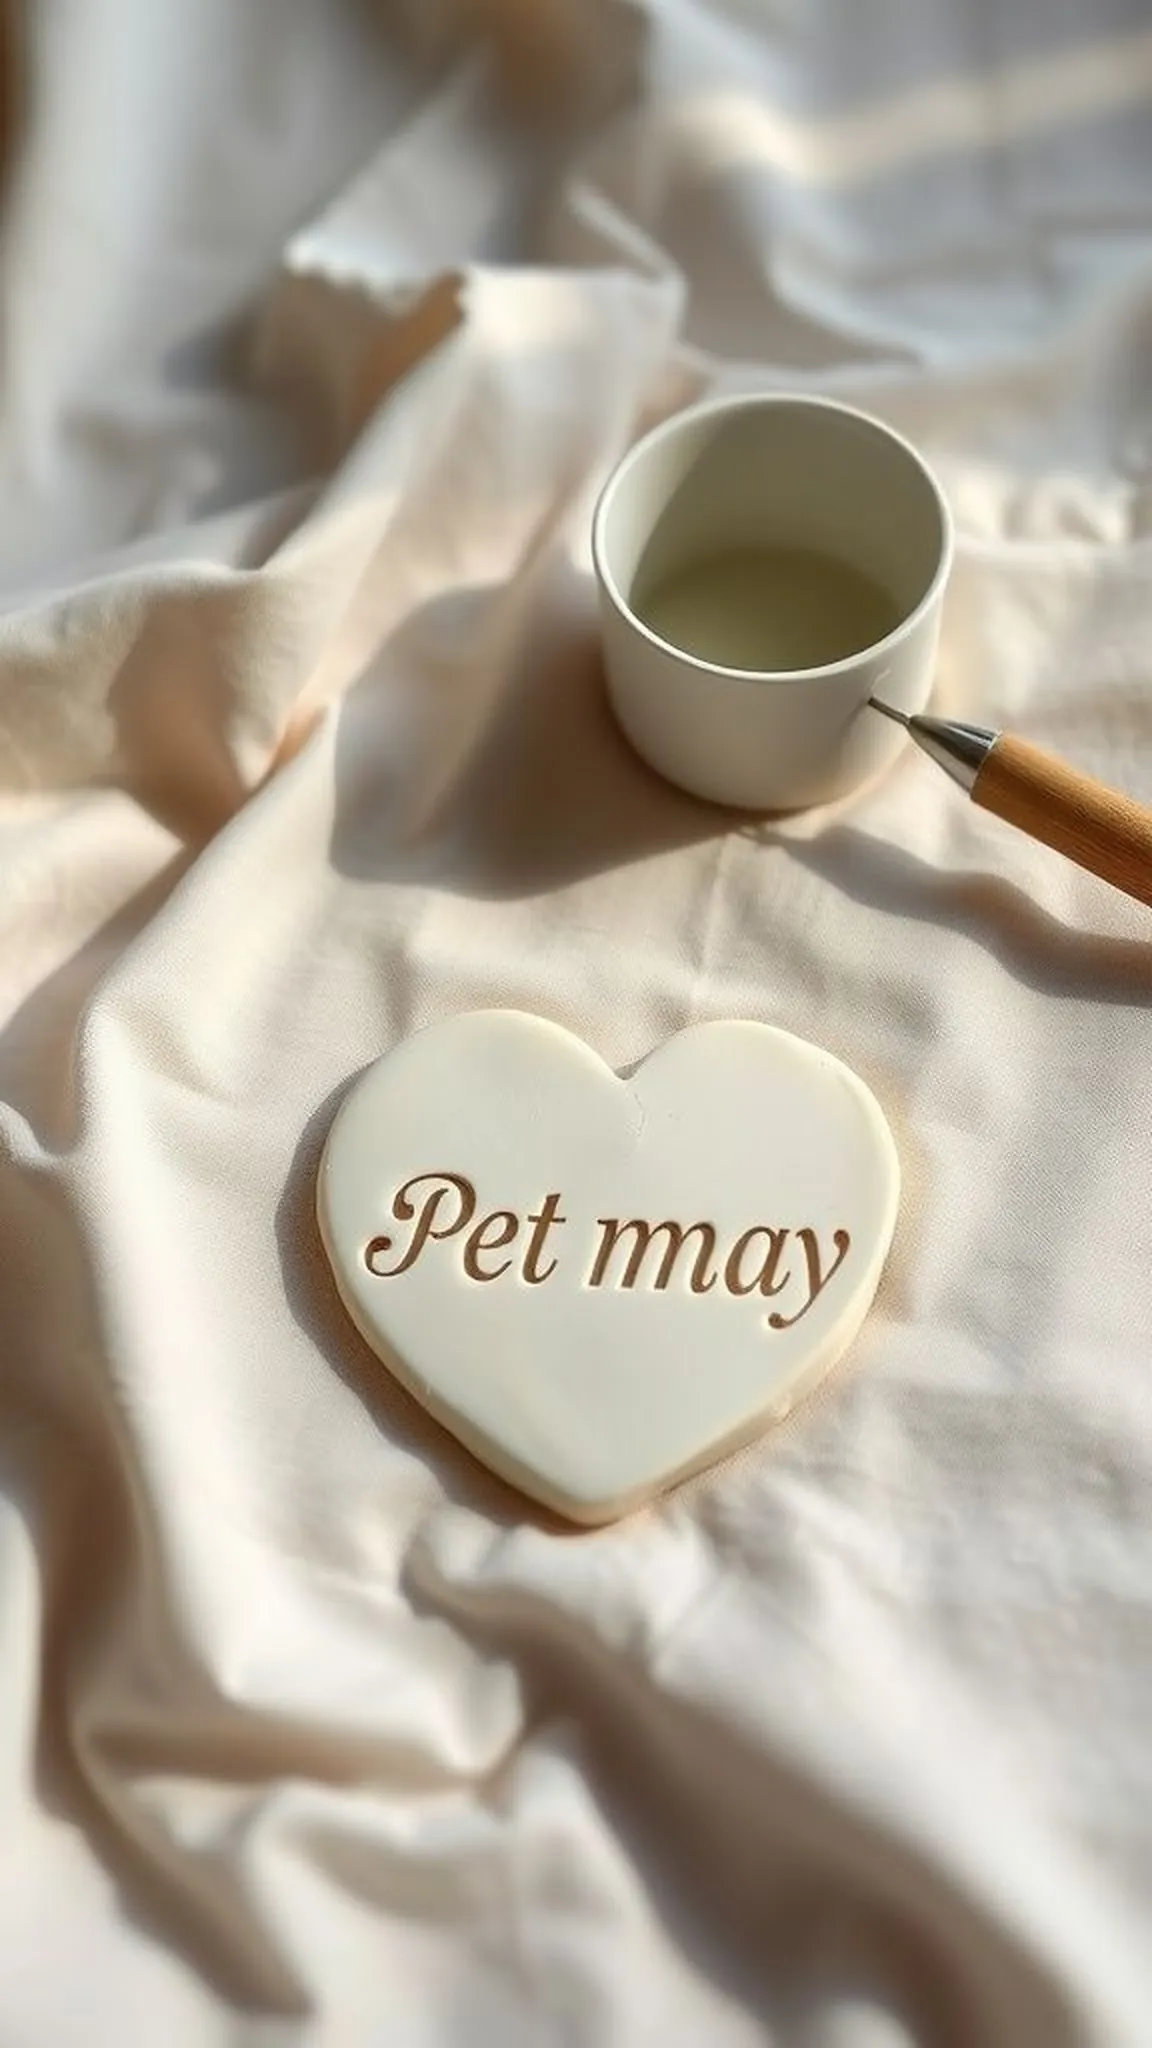
A heart-shaped plaque rests on a soft cloth, its central surface gently indented with a pet name in delicate lettering. The dough shows a warm caramel edge and subtle grain from careful handling.
A soft wash of muted paint pools in the engraved letters, creating a quiet contrast against the matte field. The piece feels weighty in the palm, the varnish lending a faint gloss to raised areas.
The finished plaque sits well on a small easel or hung by a hidden loop, offering a quiet spot for reflection. Its patina captures the light with a calm, familiar glow.
Pro Tip: Let engraved letters sit a few minutes after carving so the edges firm slightly before baking to preserve crisp detail.
How to Make This
- Knead the salt dough until smooth and press it into a shallow heart-shaped mold to form an even plaque.
- Carve a pet name into the surface with a fine tool, refining the letter edges for clarity.
- Allow the plaque to air-dry briefly before transferring to a baking tray.
- Bake gently until firm, then cool thoroughly and apply a soft paint wash into the engraving for contrast.
- Seal the surface with a clear varnish once the paint is dry and attach a small hanging loop if desired.
Avoid: Carving letters too deeply can weaken the plaque and cause breakage during baking. Rushing the cooling stage may dull fine carved edges.
Try Also: A circular plaque with a tiny paw beside the name creates a more modern look, while adding a thin ribbon loop turns it into a hanging ornament. Subtle metallic paint on edges adds a refined highlight.
Products & Materials
Items Used
“Heart-shaped memorial plaque engraved with your pet’s name.”
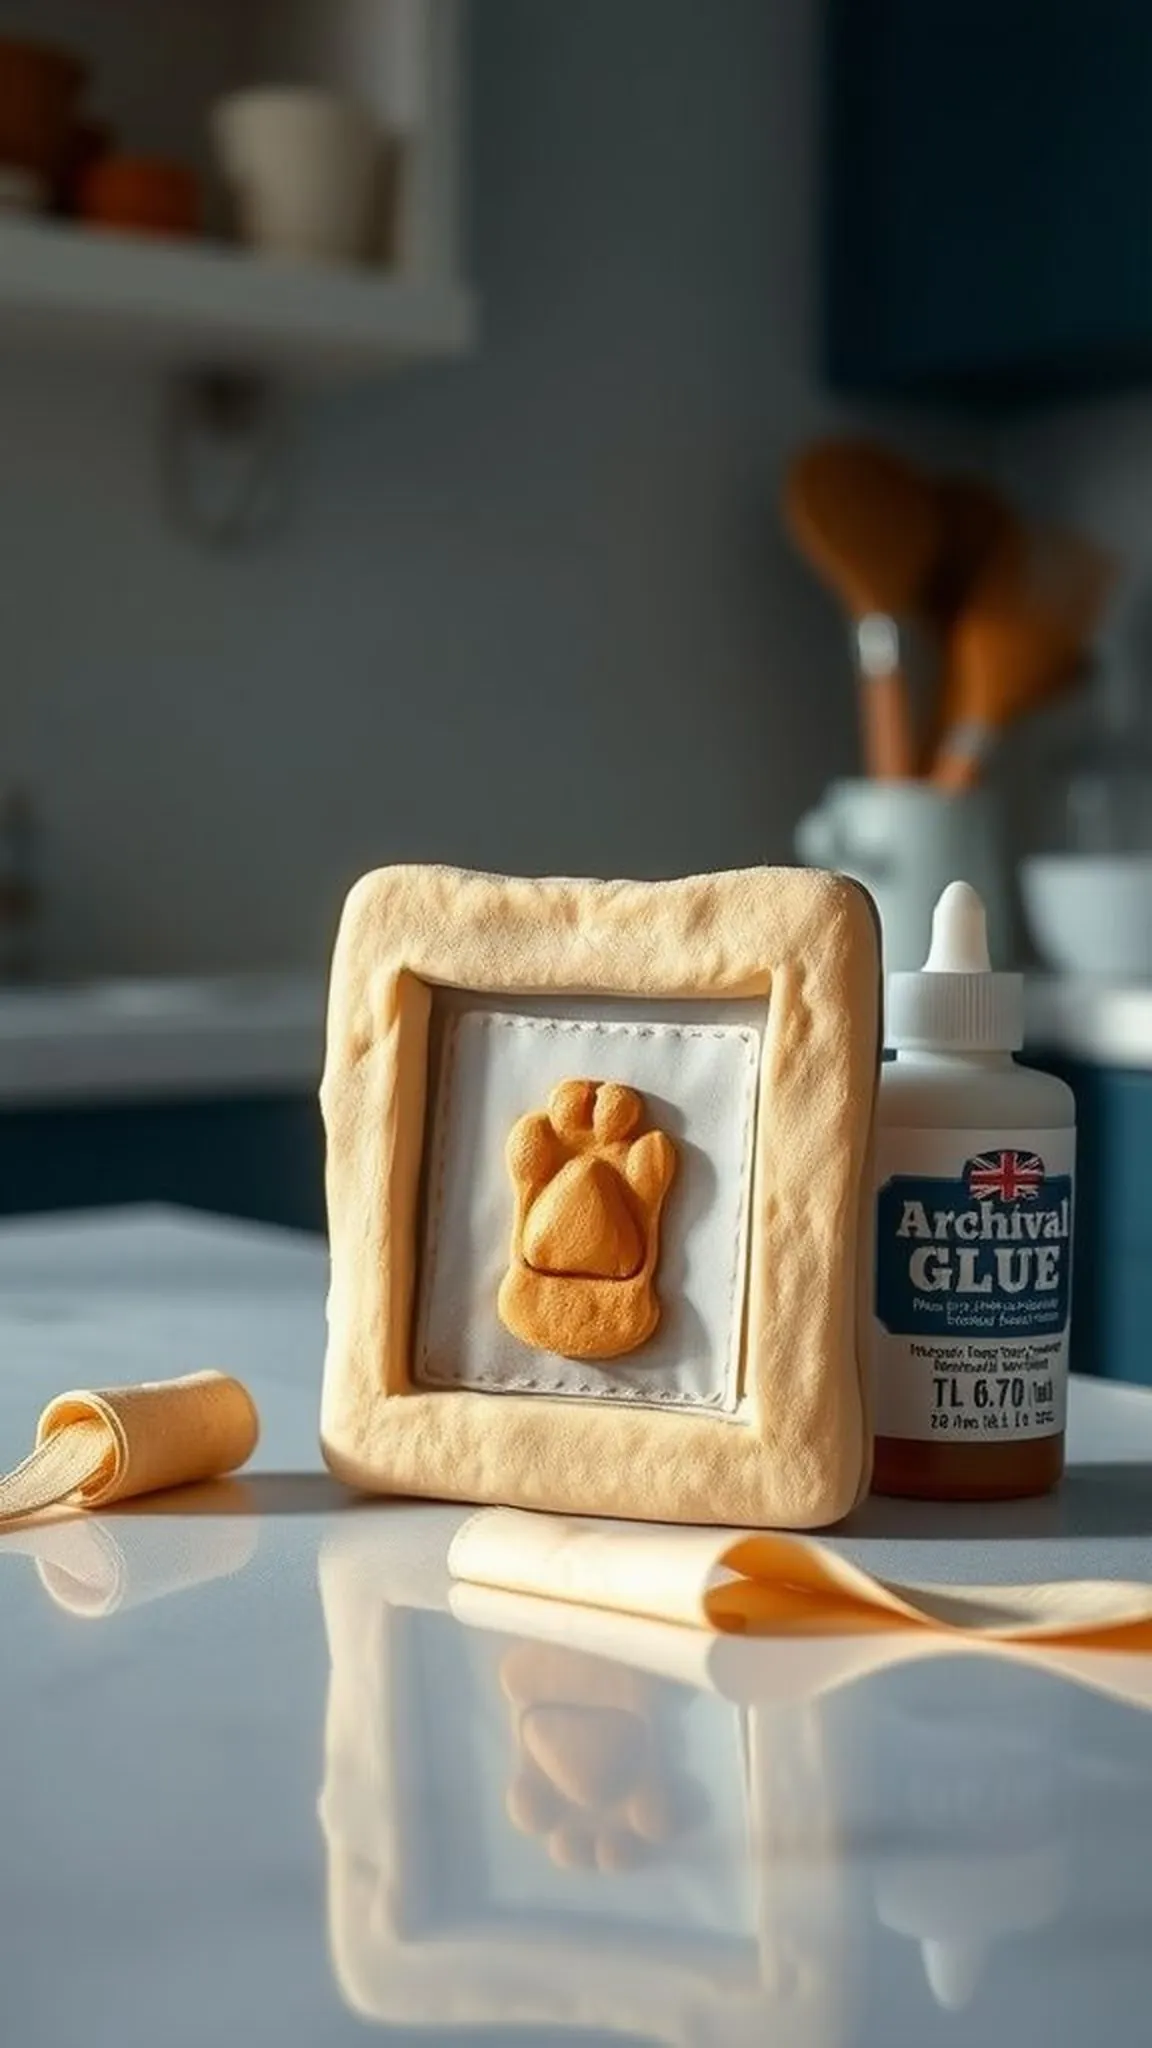
Mini photo frame with dough border
⏱️ 2 hours · 🟠 Intermediate
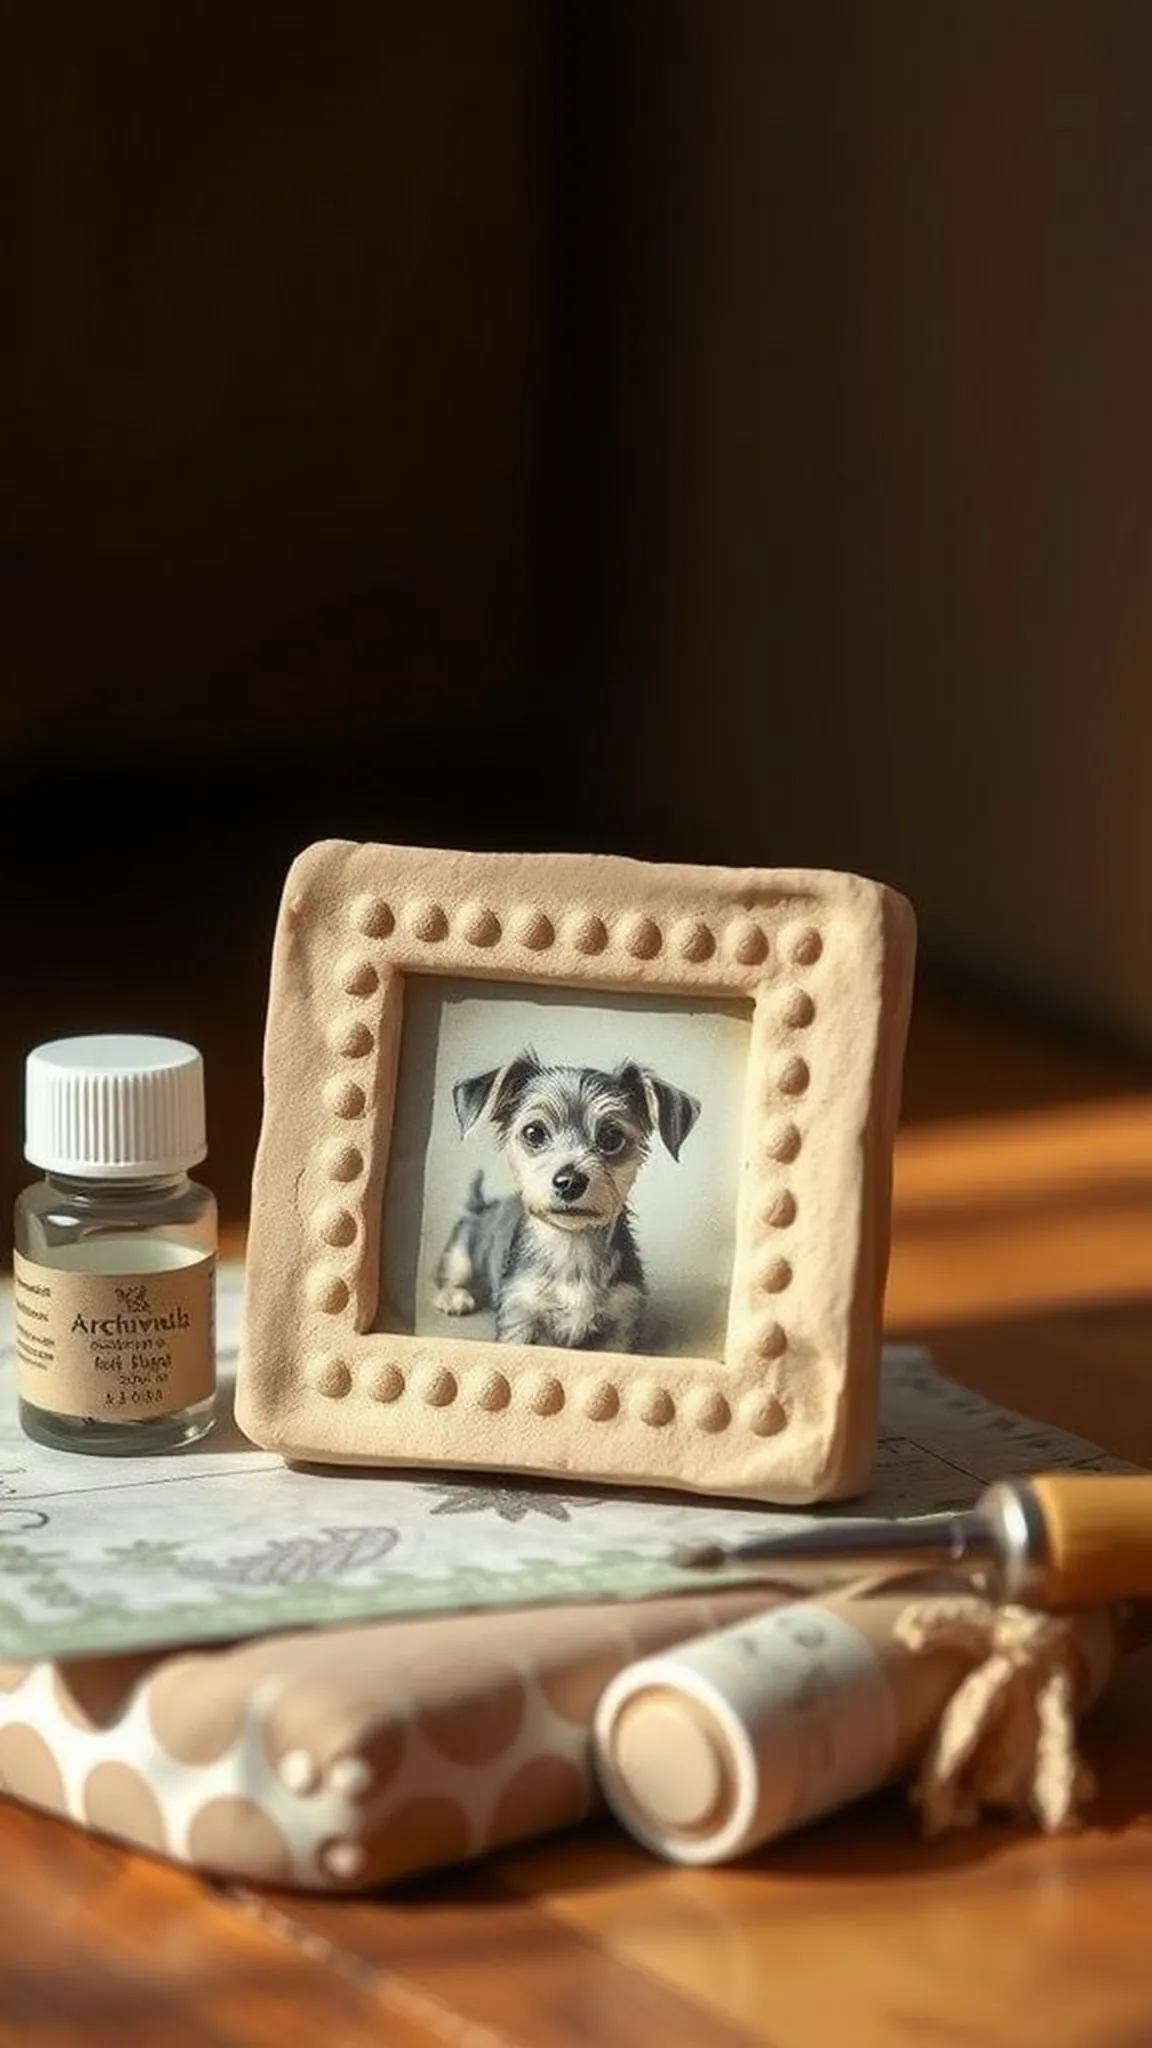
A tiny square frame shows a sepia pet photo cradled by a handcrafted dough border textured with little dots. The border carries a slightly sandy finish and pale baked tones that complement the photograph.
The paint on the edge softens the seam between photo and dough, and a faint varnish lends a gentle sheen. The piece sits flat and feels cool against the palm like a small relic.
This little frame tucks easily into a shelf display or a shadow box among other keepsakes. Its compact size invites close viewing and quiet smiles.
Pro Tip: Press the photo flush into the dough border after cooling and allow the adhesive to cure fully before handling the framed piece extensively.
How to Make This
- Create a small flat dough rectangle and form a recessed center to hold a printed pet photo.
- Texture the outer border with a toothpick or sculpting tool for visual interest.
- Bake the border until firm, let it cool completely, and insert the trimmed photo into the recess with archival glue.
- Paint edge accents if desired and finish with a clear sealer to protect the surface.
- Add a small stand or adhesive backing for display if preferred.
Avoid: Inserting the photo while the dough is still warm can warp both elements and compromise adhesion. Cutting the photo too close to the edge may cause it to lift from the recess.
Try Also: A circular frame or tiny oval offers a softer silhouette and decorative dots can be swapped for tiny leaf imprints. A magnet backing turns the frame into a refrigerator memento.
Products & Materials
Items Used
- all-purpose flour
- archival glue
- sculpting tool set
- clear varnish bottle
“Tiny photo frame keepsake with a handmade dough border.”
Paw and child’s hand duet plaque
⏱️ 2-3 hours · 🟠 Intermediate
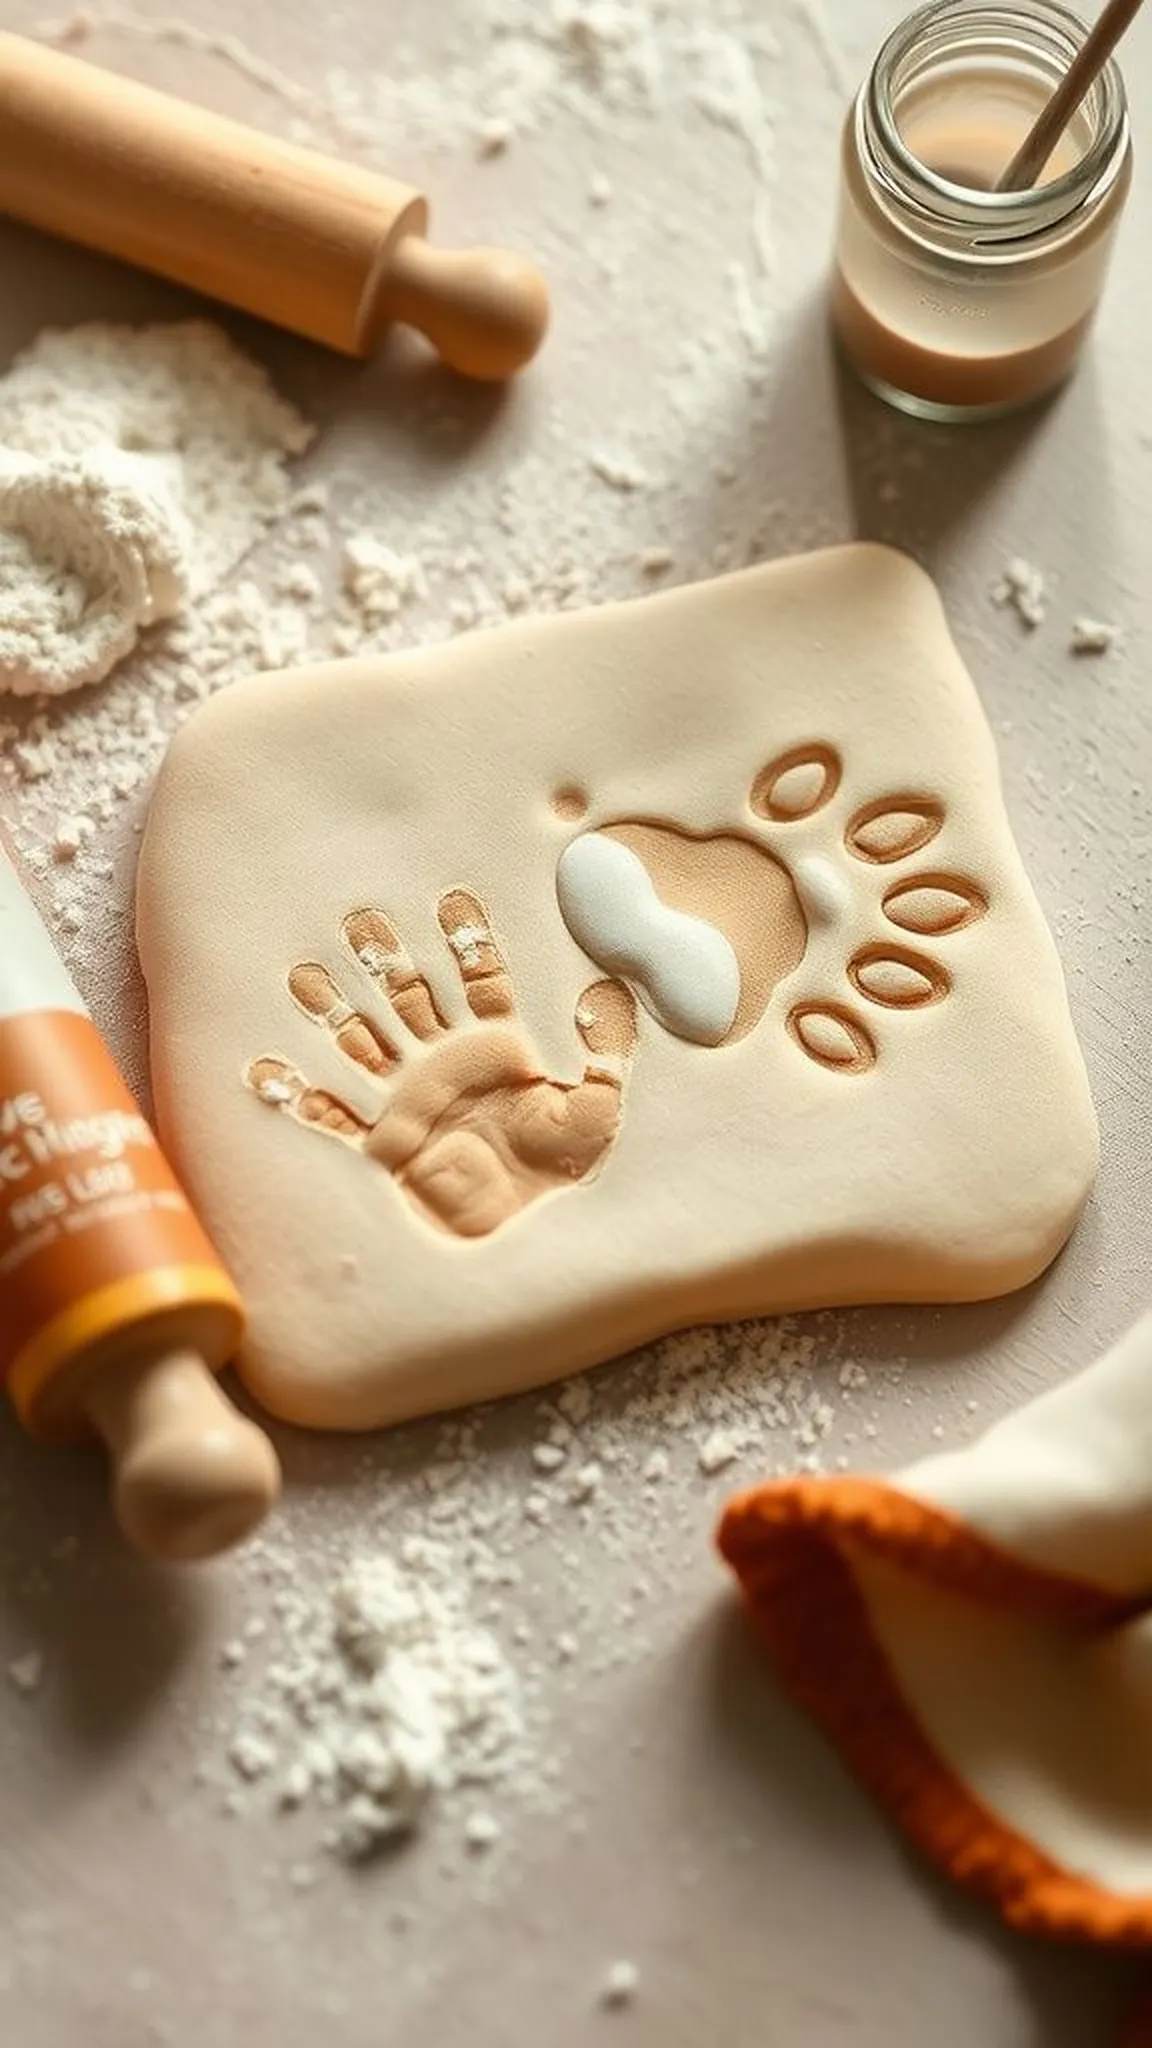
A rectangular plaque features a side-by-side impression where a small hand and a pet paw nestle near each other, sharing the same warm field. The impressions form a gentle relief that casts a soft shadow under direct light.
The surface shows a tactile grain and a subtle paint wash that enhances the contrast between impressions. This keepsake feels like a tiny moment preserved in a cool, solid form.
Placed on a mantel or shelf, the plaque invites remembering a shared afternoon or first meeting. Its humble palette and honest texture make it feel like a quiet family heirloom.
Pro Tip: Create impressions on a slightly tacky surface so details read clearly, and allow the piece to dry slowly to prevent fine cracking along the edges.
How to Make This
- Mix salt dough to a smooth consistency and press into a rectangular mold to form the plaque base.
- Gently press a child’s cleaned hand and the pet’s paw into the dough to create clear impressions.
- Air-dry briefly then transfer the plaque to a baking tray to harden safely in a low-temperature oven.
- Cool fully before applying a soft paint wash to highlight the impressions and seal with a varnish.
Avoid: Rushing the impression process may result in shallow or smudged prints that lack definition. Baking at too high a temperature risks warping the plaque’s flat surface.
Try Also: A circular plaque or split-heart design emphasizes togetherness, while adding initials beside each print personalizes the piece. A ribbon hanger makes it easy to display on a wall hook.
Products & Materials
Items Used
“Heartfelt plaque with both paw and child hand impressions.”
Tiny paw print keychain charm
⏱️ 1 hour · 🟢 Beginner
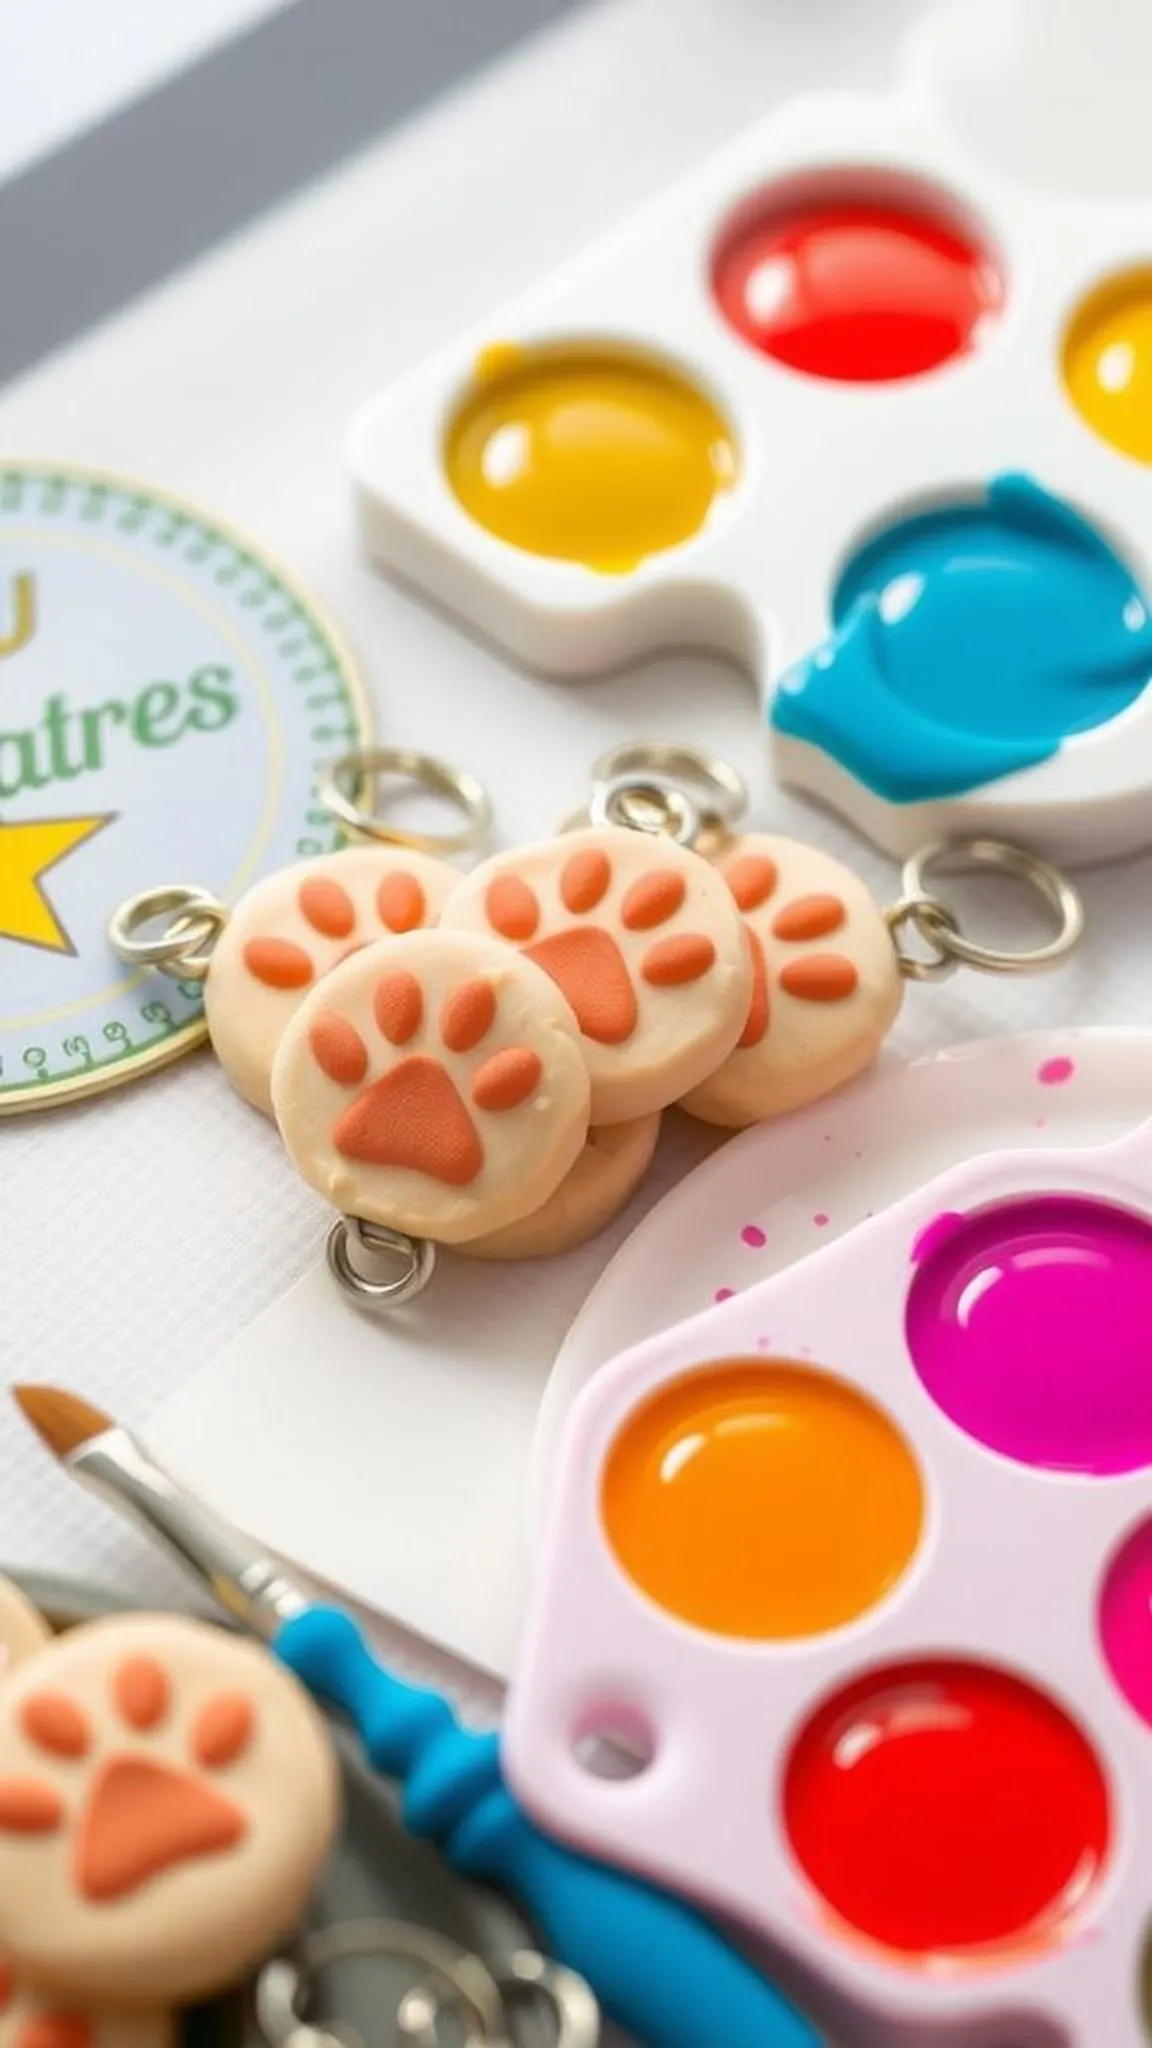
A petite circular charm hangs from a small split ring, its center marked by a faint paw impression. The baked edge carries a warm amber tone while the surface keeps a soft matte finish.
The charm feels light in a pocket and the metal ring adds a contrasting coolness that highlights the handmade dough texture. Painted details around the edge add a pop of color that catches the eye when keys jingle.
This little piece blends practicality and sentiment, tucked into everyday life. Its modest size makes it unobtrusive yet meaningful.
Pro Tip: Bake charms on a silicone mat to prevent sticking and flip them halfway through if the oven causes uneven browning.
How to Make This
- Prepare a small batch of dough and flatten to the thickness desired for charms.
- Use a small round cutter to punch out circles and gently impression a pet paw in each center.
- Create a hole near the edge for the split ring and bake the pieces until firm.
- Cool fully, paint accents as desired, seal with varnish, and attach metal split rings for keys.
Avoid: Placing the ring hole too close to the edge can cause cracking during baking. Trying to paint before the charm has fully cooled may blur fine details.
Try Also: Make oval or rectangle charms for a different look and add small initial stamps beside the paw. Attach a short leather cord instead of a metal ring for a rustic feel.
Products & Materials
Items Used
- all-purpose flour
- split key rings
- silicone baking mat
- acrylic paint set
“Sweet paw print keychain charms to carry with you.”
Pet silhouette ornament painted in watercolors
⏱️ 2-3 hours · 🔴 Advanced
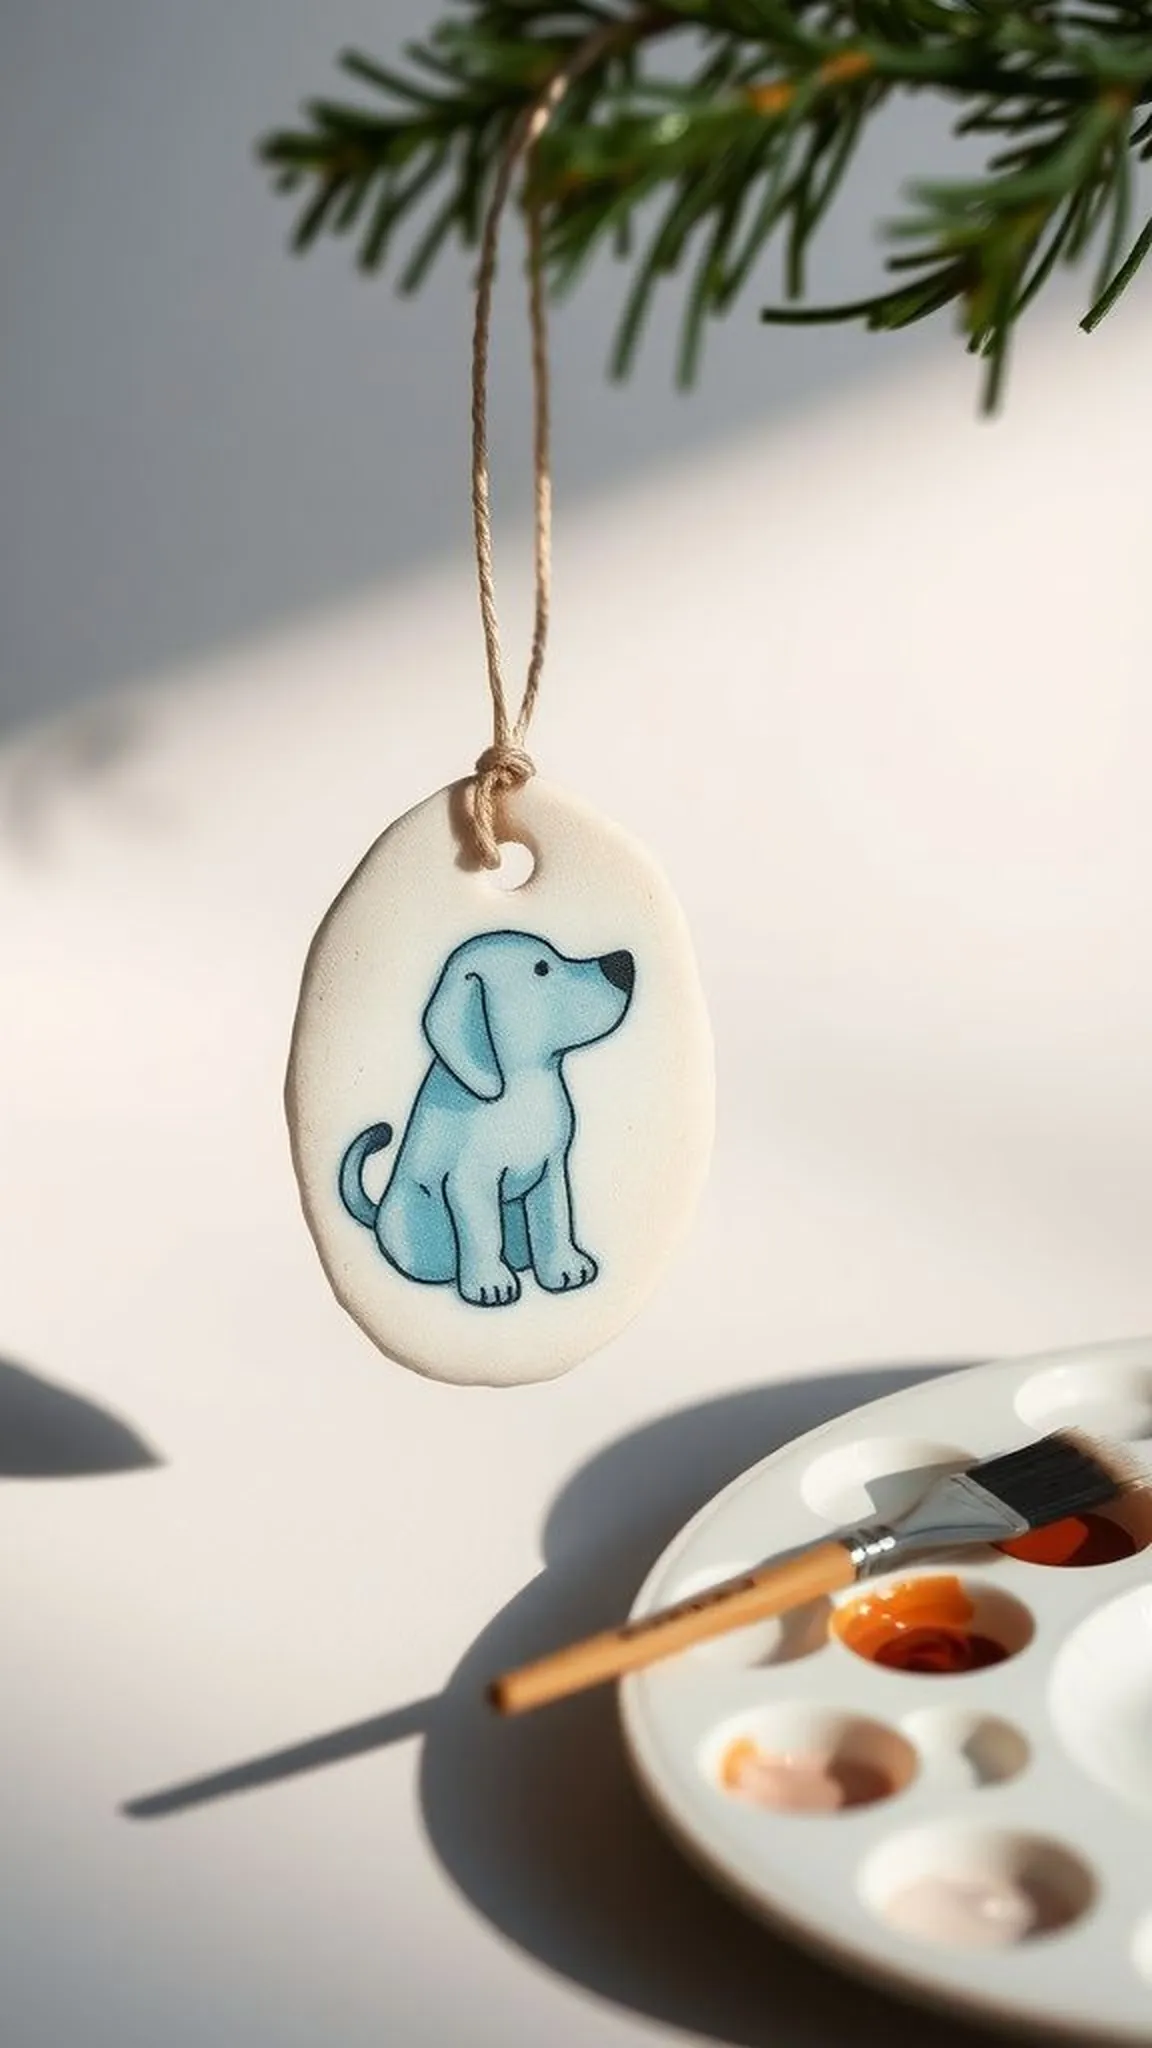
A slim oval ornament bears a delicately painted silhouette of a pet rendered in soft watercolor-style acrylics. The dough background is lightly sanded to hold a translucent paint layer that feels tender to the touch.
Fine brush strokes suggest fur direction and a hint of shadow beneath the chin, lending depth without heavy contrast. The silhouette floats in a muted field with tiny hand-drawn accents framing the image.
The finished ornament reads like a small portrait and carries a subtle sheen from a final protective coat. It hangs elegantly from a thin cord or ribbon, catching the light.
Pro Tip: Thin acrylics with a little water create a watercolor effect on sanded dough surfaces, allowing subtle layering without obscuring impression detail.
How to Make This
- Form an oval ornament from salt dough and sand the cooled surface gently for a smoother painting ground.
- Sketch a light silhouette with a pencil and paint thin layers of diluted acrylics to build up the watercolor look.
- Allow each thin layer to dry before adding subtle fur direction and shadow, then seal with a clear varnish.
- Attach a hanging cord once fully dry.
Avoid: Applying thick paint layers too quickly can obscure fine silhouette edges and make the surface feel heavy. Skipping light sanding may result in a textured ground that disrupts delicate brushwork.
Try Also: Try a profile silhouette versus a full-body outline for different moods and use metallic accents for a subtle halo. A distressed edge treatment creates a vintage feel.
Products & Materials
Items Used
- all-purpose flour
- fine sable paintbrush
- acrylic paint set
- fine grit sandpaper
- clear varnish bottle
“Elegant pet silhouette ornaments painted like mini portraits.”
Seasonal holiday paw print ornament idea
⏱️ 1 hour · 🟢 Beginner
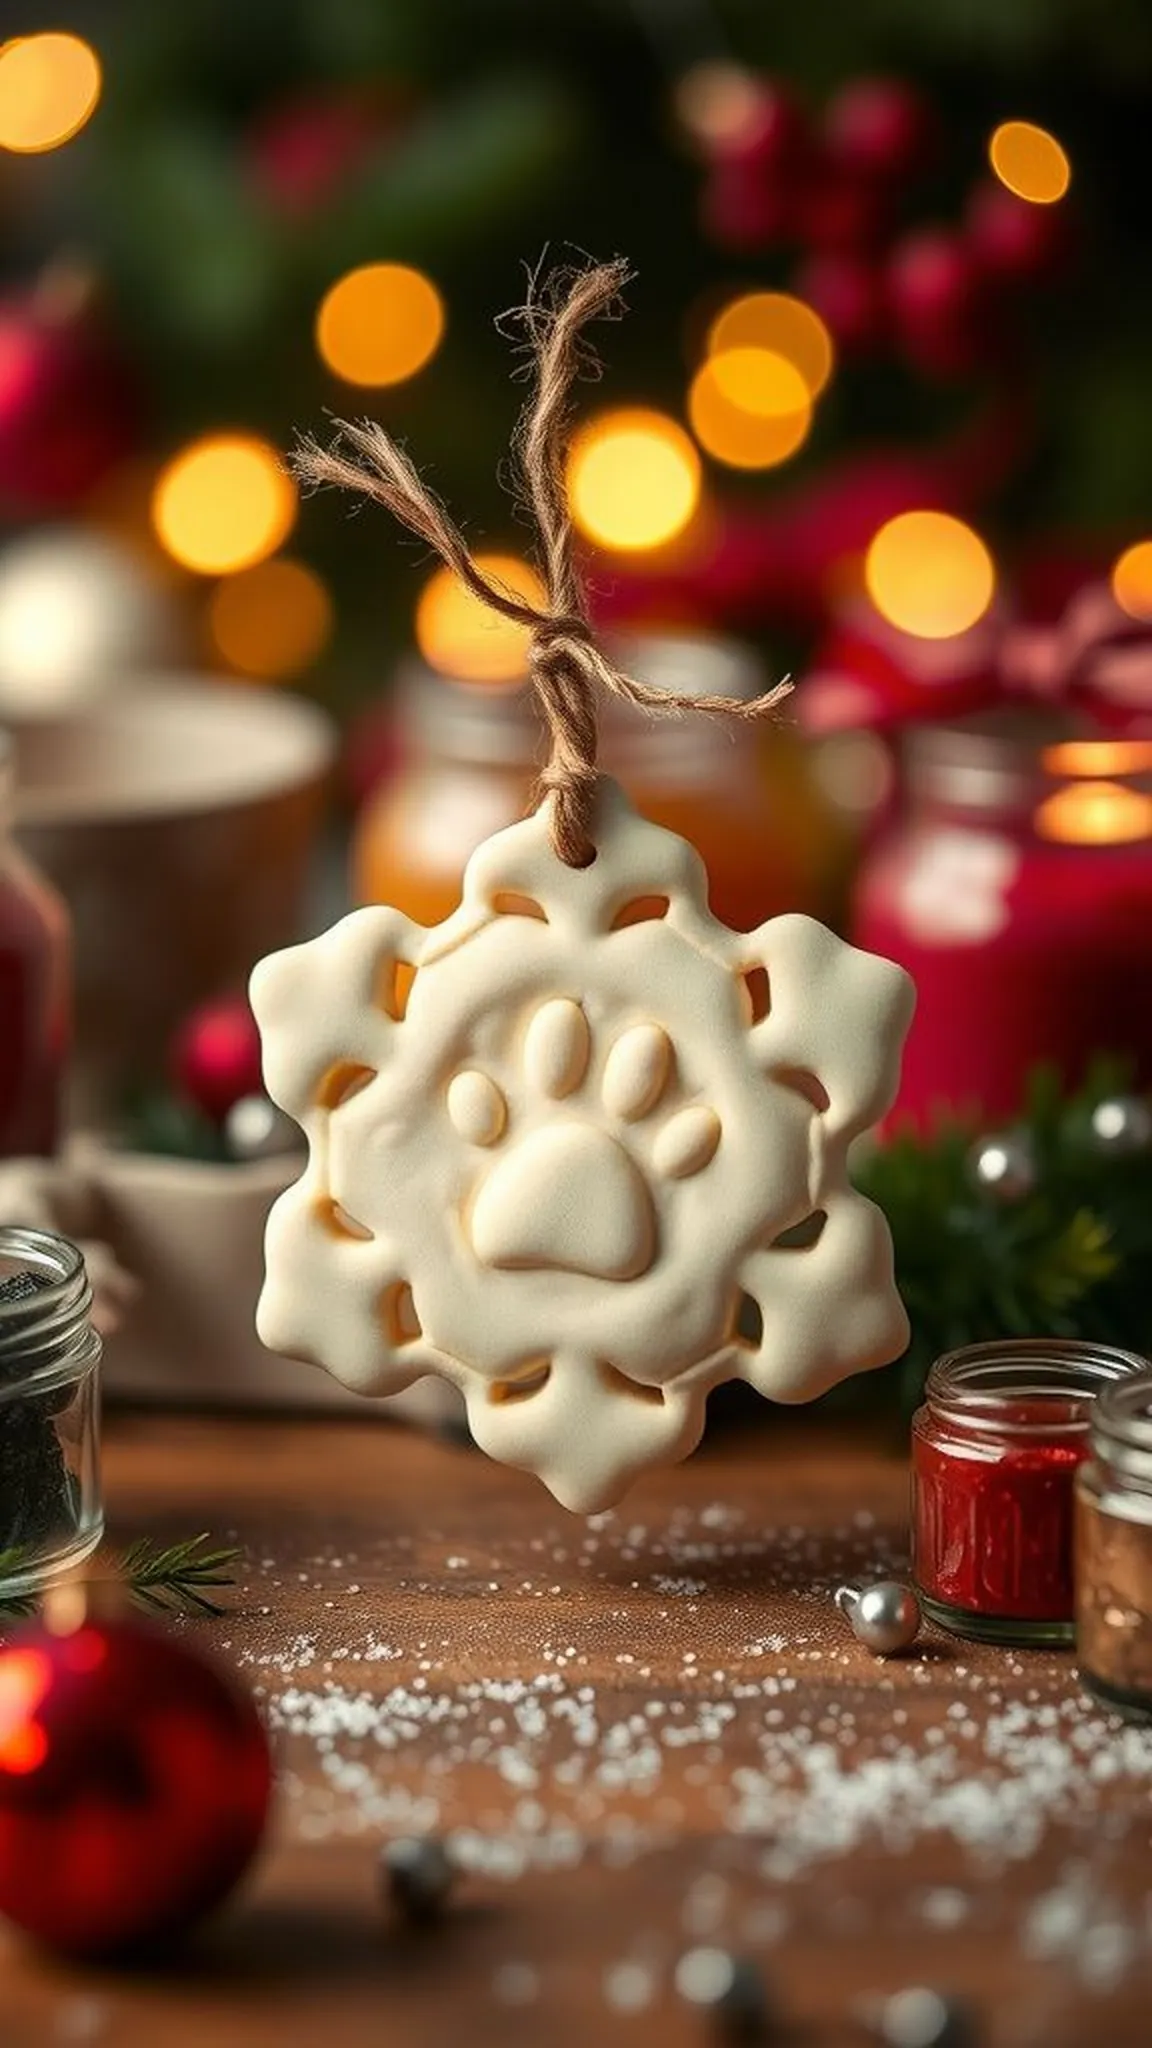
An ornament shaped like a snowflake or leaf holds a small paw mark at its heart, with festive tones adding warmth. The dough surface is cool and pale, with a faint dusting of glitter catching ambient light.
Small painted highlights emphasize points and give the piece a cheerful personality without overwhelming the print. The finished ornament hangs lightly and emits a soft, baked-dough scent when handled.
Clustered on a tabletop or hung in a tree, these ornaments bring a pet’s presence into seasonal displays. Their modest size makes them ideal as little gifts or stocking stuffers.
Pro Tip: Add a tiny loop for hanging before baking so the hole edges firm up with the piece and require no later drilling or reinforcement.
How to Make This
- Form the dough and cut out a seasonal shape like a snowflake or leaf using appropriate cutters.
- Impress the paw gently into the center and create a hanging hole near the top.
- Bake the ornament until firm and cool completely on a rack.
- Apply paint highlights and a light dusting of craft glitter if desired, then seal with varnish.
Avoid: Making the hanging hole too small can make threading difficult after baking. Excessive glitter application can mask the paw impression and make painting details harder to see.
Try Also: Try metallic paint accents for a more festive look or add a small wooden bead on the hanging cord for texture. Use autumnal colors for leaf shapes instead of winter tones.
Products & Materials
Items Used
- all-purpose flour
- seasonal cookie cutter set
- craft glitter
- acrylic paint set
“Festive paw print ornaments to celebrate the season together.”
Magnet photo tag with paw accent
⏱️ 1 hour · 🟢 Beginner
A small rectangular tag holds a tiny square photo with a raised paw accent on one corner, the dough rim slightly browned from baking. The miniature composition sits flat and feels cool to the touch, the photo protected under a thin layer of varnish.
The paw accent provides a tactile counterpoint to the glossy picture and a faint brush texture is visible on the painted border. Light skims the varnished surface and sets off a gentle sheen.
The magnet sits unobtrusively on a fridge or locker, blending imagery with handmade detail. Its small scale invites smiles during everyday moments.
Pro Tip: Trim the photo slightly smaller than the recess so it seats cleanly and seal edges with a tiny bead of archival glue for longevity.
How to Make This
- Roll out dough to a thin rectangle and cut a tag shape sized to hold a small photo.
- Form a shallow recess for the photo and add a small raised paw accent to a corner.
- Bake until firm, cool the piece, and set the trimmed photo into the recess with archival glue.
- Seal with varnish and affix a thin magnet to the back once dry.
Avoid: Using a photo that is the exact size of the recess can make insertion difficult and cause lifting. Attaching the magnet before the glue fully cures can weaken the bond.
Try Also: A circular tag or tiny heart provides a softer frame and swapping the paw accent for an initial creates a more personalized keepsake. Use patterned washi tape under the photo for added color.
Products & Materials
Items Used
- all-purpose flour
- archival glue
- small flat magnets
- acrylic varnish
“Mini photo magnet with a cute paw accent for everyday display.”
Pet paw coaster for tabletop display
⏱️ 2-3 hours · 🔴 Advanced
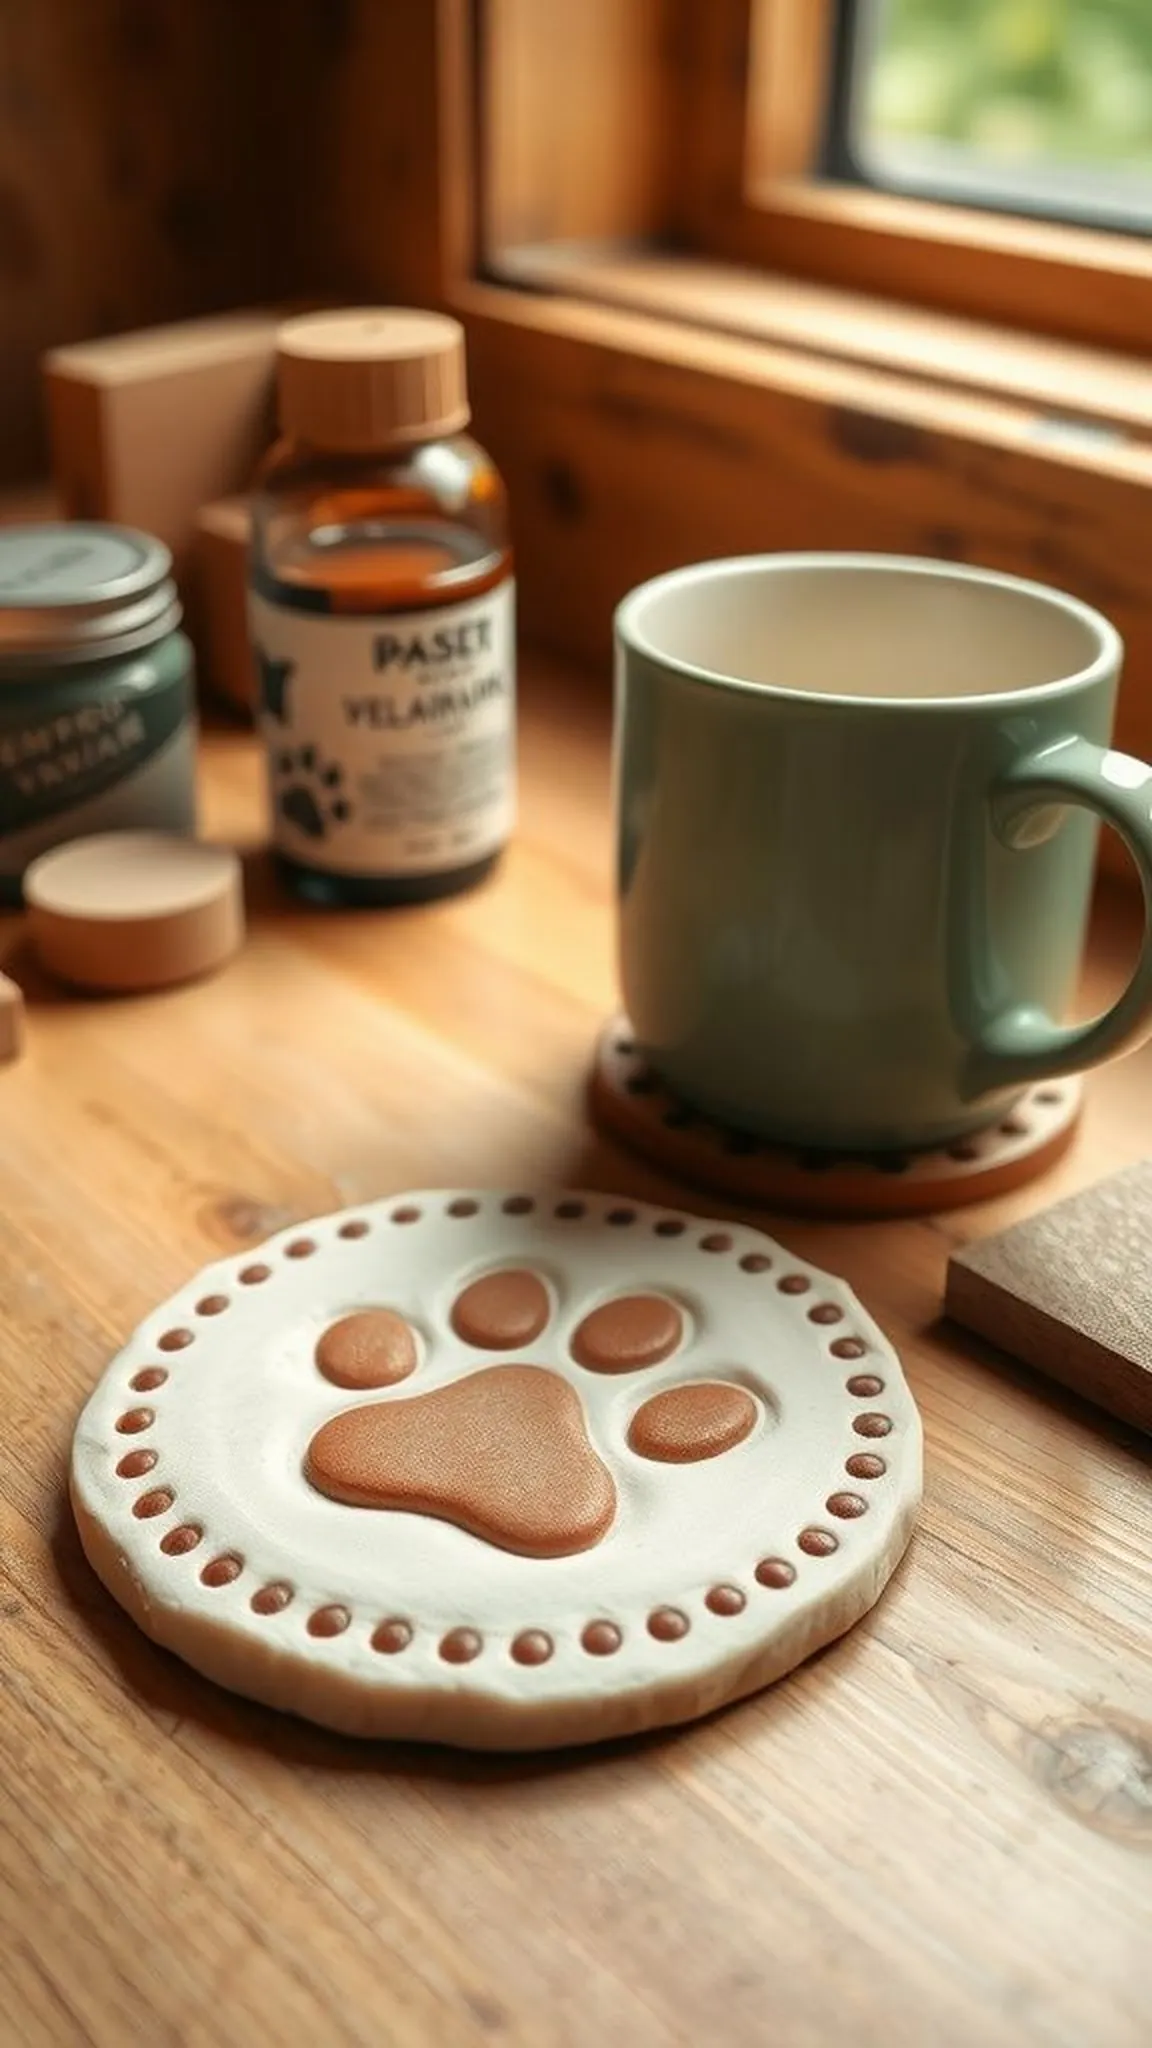
A round coaster displays a central paw impression surrounded by a ring of painted dots that suggest a playful border. The baked dough feels solid under a ceramic cup and carries a faint oven-sweet aroma.
The edge has been sealed to resist moisture and the painted decoration shows delicate brushwork that still allows the grain of the dough to read through. The finished coaster sits with a reassuring weight and modest charm.
This practical keepsake bridges function and memory in a daily ritual. It harmonizes easily with wooden trays and linen napkins on a coffee table.
Pro Tip: Seal coasters thoroughly with multiple thin coats of waterproof varnish, allowing full drying between layers for moisture resistance.
How to Make This
- Form a thick, even round from salt dough and impress a central paw to the desired depth.
- Smooth the rim and bake the coaster slowly until hard and dry throughout.
- Sand any rough edges lightly, paint decorative accents, and apply several thin coats of waterproof varnish.
- Allow full cure time before placing beverages on the coaster to ensure longevity.
Avoid: Skipping adequate sealing leaves the coaster vulnerable to moisture stains and softening. Baking too quickly can lead to interior dampness and eventual crumbling.
Try Also: Create a set with varied paw colors for each pet member or swap painted dots for tiny embossed names around the rim. A cork backing adds extra protection for tabletops.
Products & Materials
Items Used
“Paw print coasters blend everyday use with heartfelt memory.”
Stackable memory discs for a keepsake jar
⏱️ 2 hours · 🟠 Intermediate
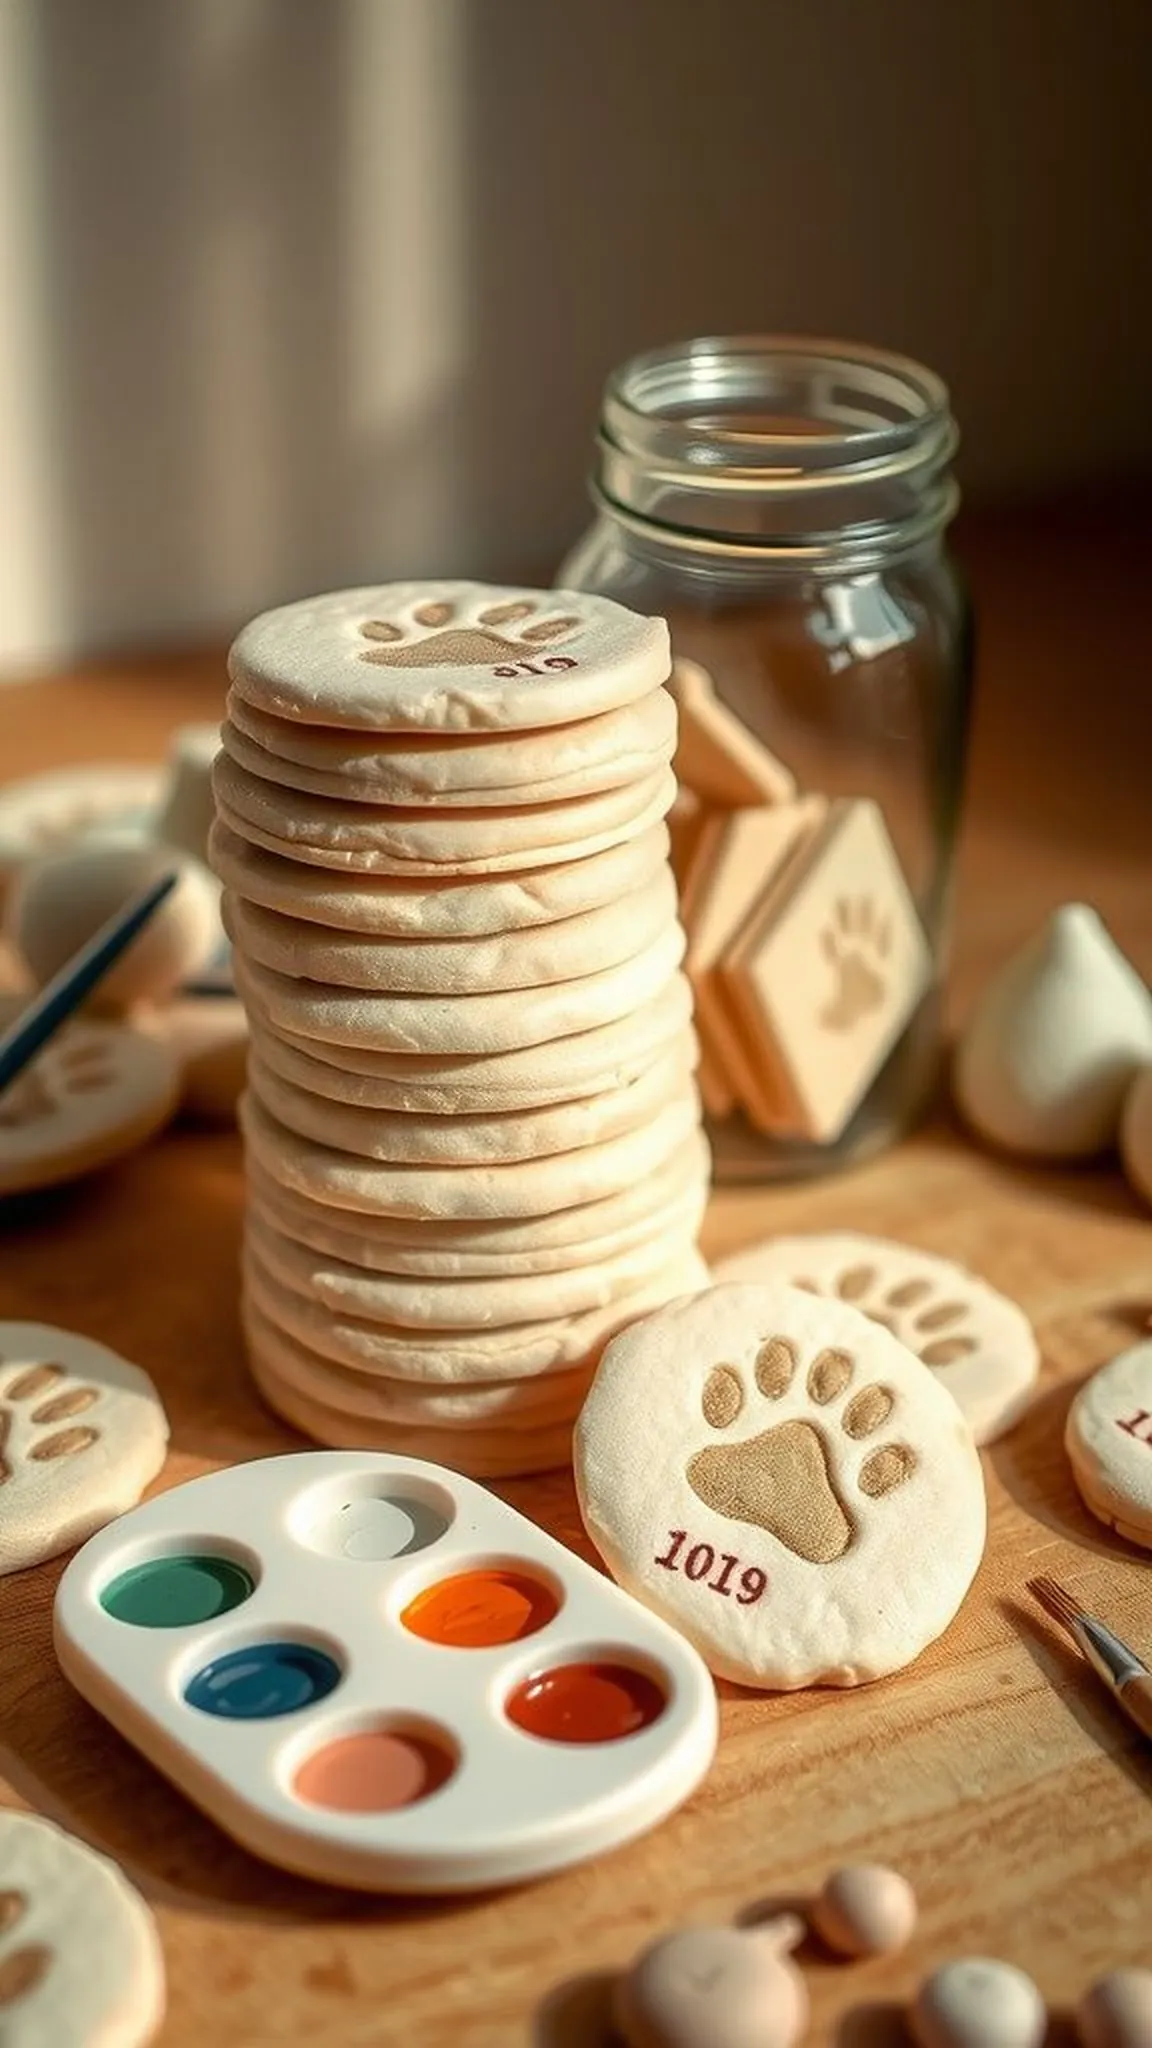
Several thin, coin-like discs are stacked beside a glass jar, each bearing a tiny paw or a painted date on its face. The edges show a soft, browned rim and the surfaces display delicate brushwork or initials.
The discs feel pleasantly cool and smooth, and when flipped they reveal slight irregularities that hint at the handmade process. A small jar collects them into a tactile pile that invites thumb exploration.
This set reads like a slow scrapbook, each disc a small marker of days and habits shared with a pet. Together they create a compact memory collection that fits neatly on a shelf.
Pro Tip: Make discs uniform in thickness with a guided rolling pin for consistent stacking and bake them spaced apart to prevent fused edges.
How to Make This
- Roll dough to an even thinness and cut out multiple small circles using a consistent cutter.
- Impress a paw, initial, or date lightly onto each circle for personalization.
- Bake all discs on a flat tray until fully hardened and cool on a rack.
- Paint tiny accents, seal with varnish, and collect the finished discs in a decorative jar for display.
Avoid: Uneven thickness among discs causes wobbly stacks and poor jar fit. Over-pressing impressions can create fragile thin spots that crack during baking.
Try Also: Color-code discs by year or event with a soft wash of paint, or add tiny drilled holes to thread them onto a ribbon garland. Using metallic paint for edges creates a subtle highlight.
Products & Materials
Items Used
“Stackable memory discs to fill a keepsake jar with pet moments.”
Keepsake ornament with embedded pet tag
⏱️ 2-3 hours · 🔴 Advanced
An ornament cradles a small metallic pet tag within a shallow dough recess so the metal peeks through like a tiny plaque. The contrast between cool metal and warm dough creates an intriguing visual and tactile interplay.
Fine paint highlights bring out engraved letters on the tag and the dough rim is subtly antiqued for depth. The finished piece sits with reassuring weight and a muted luster.
This keepsake feels like a layered memory, combining handcrafted elements with existing pet identifiers. It hangs well among other ornaments or rests on a shelf as a small relic.
Pro Tip: Ensure the metal tag lies flat in a slightly oversized recess so heat expansion during baking won’t warp the piece or displace the tag.
How to Make This
- Form a dough ornament base with a shallow central recess sized to fit a metal pet tag.
- Place the cleaned tag into the recess ensuring it sits level and smooth the edges around it.
- Bake the ornament slowly until firm, cool thoroughly, and paint any desired accents around the tag.
- Seal with a clear finish and add a hanging cord once fully dry.
Avoid: Embedding a tag too tightly can trap air pockets that expand and crack the dough. Not cooling the piece fully before painting risks smudging or lifting the embedded tag.
Try Also: Use a stamped clay disc instead of a metal tag for a fully handmade look, or create a duplex ornament with a photo on the reverse. A thin ribbon loop creates a softer hanging option.
Products & Materials
Items Used
- all-purpose flour
- pet id tag
- acrylic paint set
- clear varnish bottle
“Ornaments with embedded pet tags for layered keepsakes.”
Paw print bracelet charm trio
⏱️ 2 hours · 🟠 Intermediate
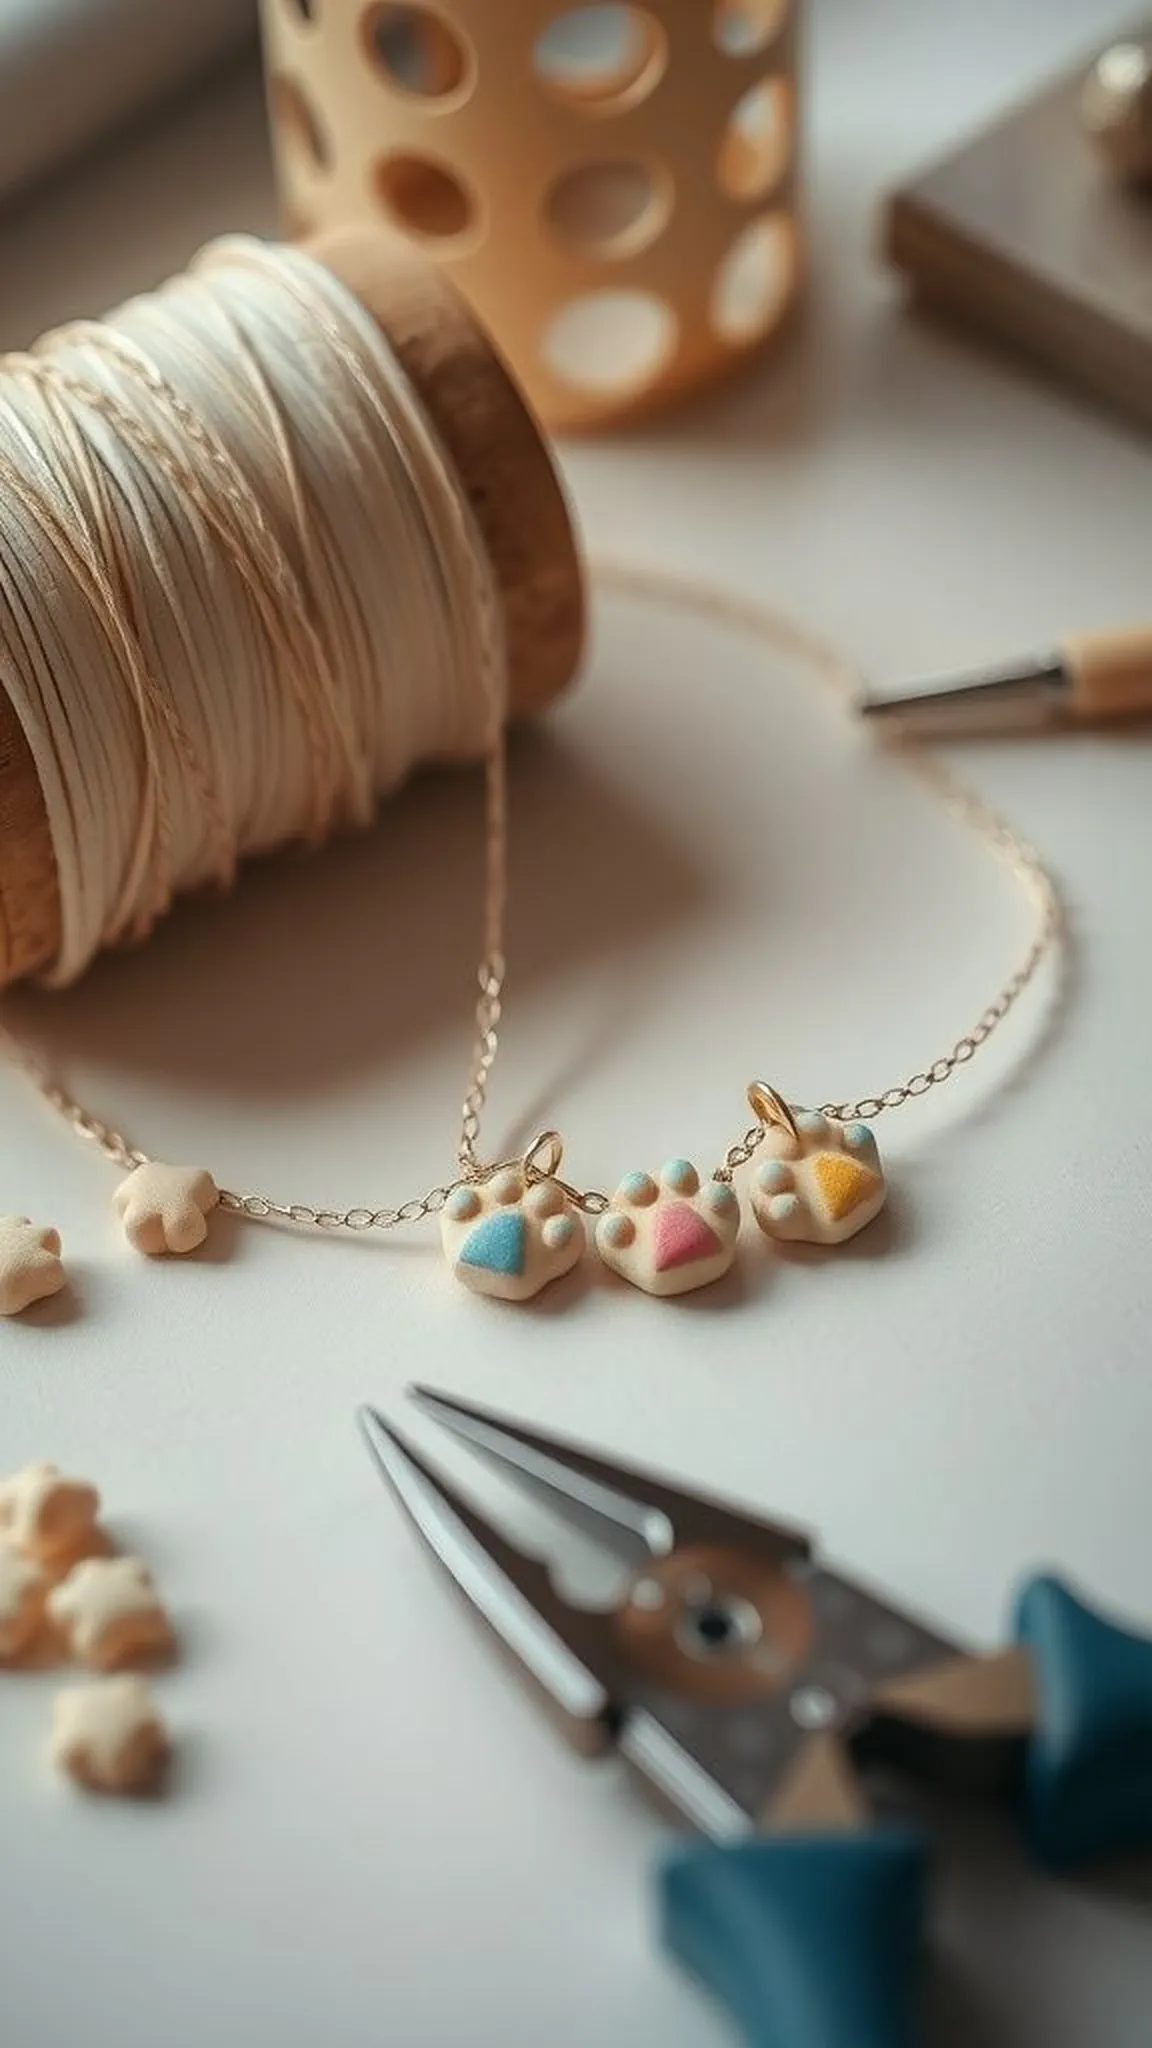
Three small charms sit together showing different paw impressions and color accents, linked by a short bracelet chain. The dough charms are petite and slightly irregular, lending them a casual, handmade look.
Metal findings add a crisp contrast to the soft dough edges and the charms carry a hushed matte finish once sealed. The bracelet drapes easily over a wrist or a small display dish.
This trio feels like a wearable memory that moves with daily rhythms, catching light at different angles. Each charm tells a small story when glanced at amid other jewelry.
Pro Tip: Bake small charms on a perforated tray to promote even heat circulation and avoid soggy centers in thicker pieces.
How to Make This
- Roll dough thin and cut out small charm shapes, impressing a paw into each center.
- Create tiny holes for jump rings and bake charms until completely firm.
- Cool fully, paint accents if desired, and seal with varnish before assembling onto a bracelet chain with jump rings.
Avoid: Making holes too large weakens the charm connection and can lead to tearing during wear. Skipping multiple thin varnish layers can leave charms vulnerable to oils from skin.
Try Also: Use different paint colors for each charm to represent multiple pets or swap the bracelet chain for a leather cord for a rustic look. Add tiny engraved initials beside each paw.
Products & Materials
Items Used
“Three tiny paw charms on a wearable bracelet memory piece.”
Memory garland with tiny dough tags
⏱️ 2-3 hours · 🟠 Intermediate

A string of tiny dough tags hangs across a mantel, each marked with a date, paw, or little symbol that tucks into a shared narrative. The tags carry a soft palette and slight surface texture from fingerprints and tools.
The garland moves gently with room air, the little tags clinking against each other with a faint, reassuring sound. Paint accents and tiny knots in the cord add human scale and a handmade rhythm.
This display reads like a slow timeline of days and small celebrations that matter at home. Its flexible arrangement allows easy addition of new tags over time.
Pro Tip: Space holes evenly on tags before baking so the garland hangs level and allows room for knots without tearing the dough.
How to Make This
- Form many small tag shapes from dough and press shallow impressions or initials into each before baking.
- Bake all tags thoroughly and cool before painting subtle accents and sealing with varnish.
- Thread a length of natural cord through the tag holes and knot between each piece to secure spacing.
- Display the garland across a mantel or along a shelf, adding new tags as desired.
Avoid: Uneven hole placement causes tags to hang lopsidedly on the cord. Overloading the cord without spacing knots can place stress on the dough and cause breaks.
Try Also: Alternate painted tags with small wooden beads for contrast or create themed garlands for birthdays and adoption anniversaries. Using colored cords changes the garland’s overall mood.
Products & Materials
Items Used
- all-purpose flour
- natural jute cord
- acrylic paint set
- clear varnish bottle
“Delicate memory garland of tiny dough tags for mantel displays.”
