
As an Amazon Associate I earn from qualifying purchases.
Shawl And Turtleneck-Friendly Updos solve the common problem of bulky collars and messy layers at the neckline. These hairstyles tuck hair low or flat so scarves, shawls, and high necklines sit smoothly.
Choose shawl-friendly updos that keep volume away from the neck while still feeling polished and wearable for day or night. The collection includes low buns, twists, braids, and sleek ponytails tailored for cozy layers and elevated knitwear.
Quick tips show which pins and accessories stay visible with turtleneck updos and which should be hidden for comfort. Short how-tos explain placement so collars rest flat and hair looks intentional with every layer.
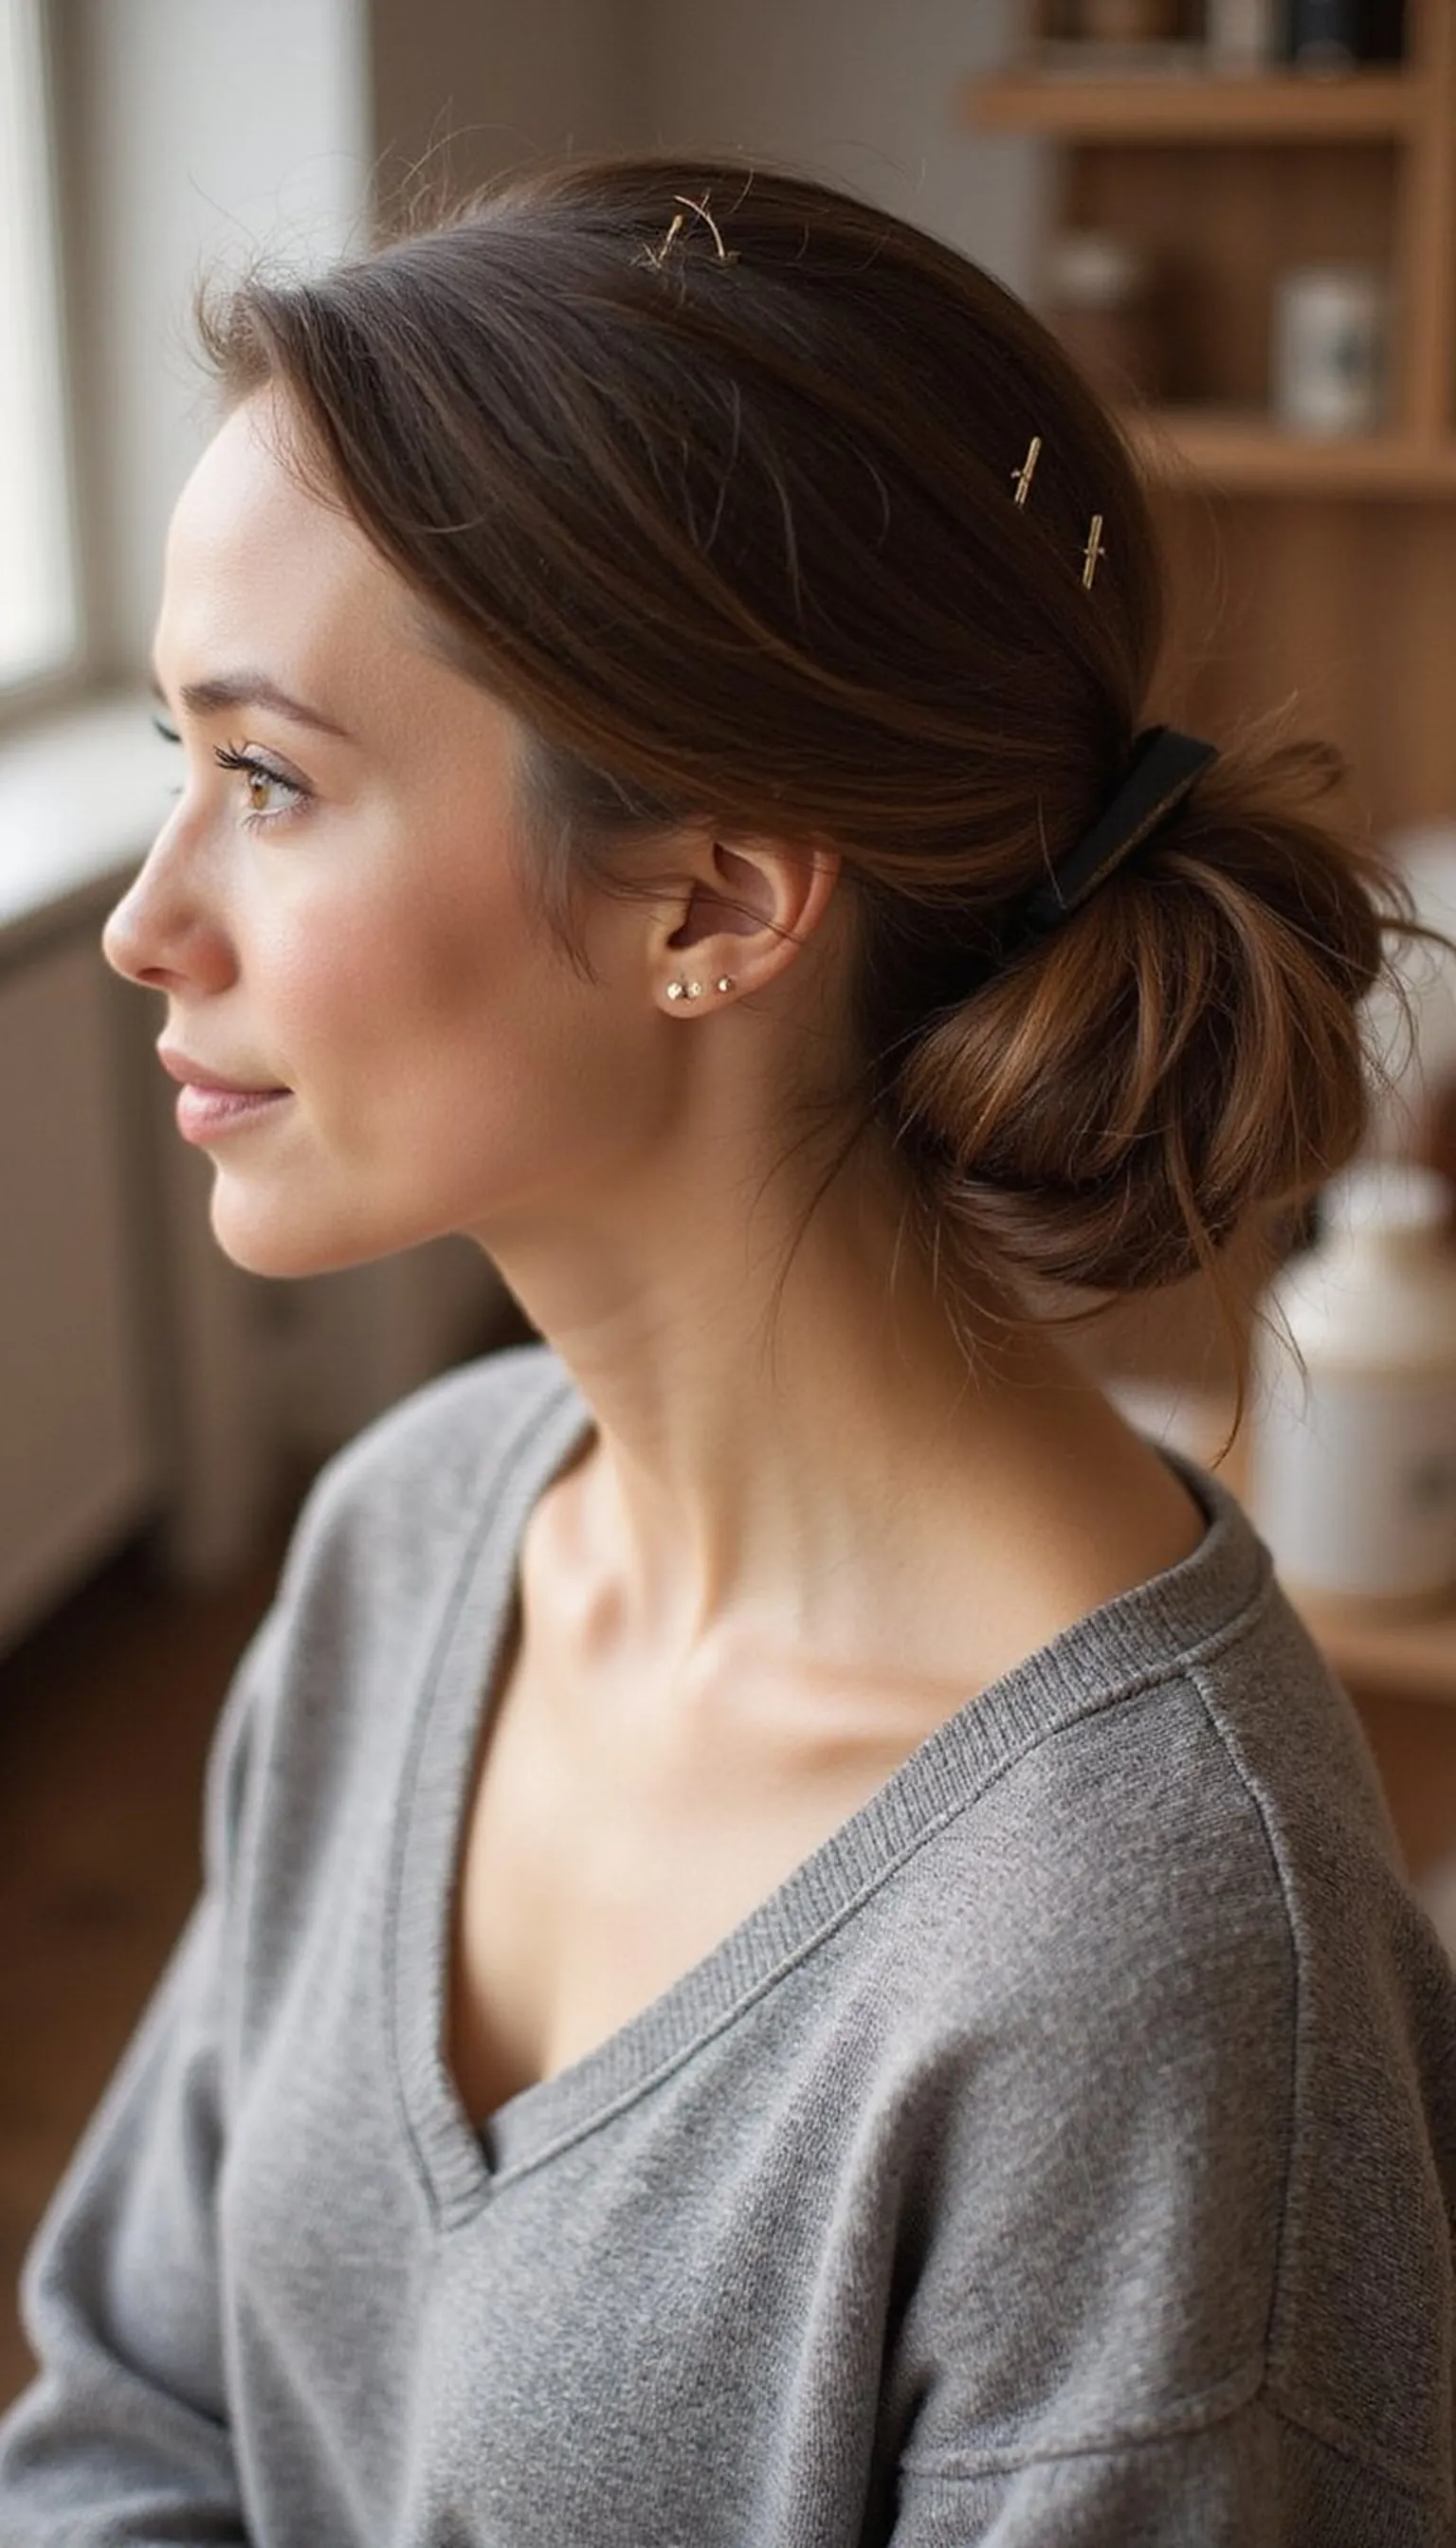
Sleek Low Bun Under Turtleneck Collar
⏱️ 10 min · 🟢 Beginner
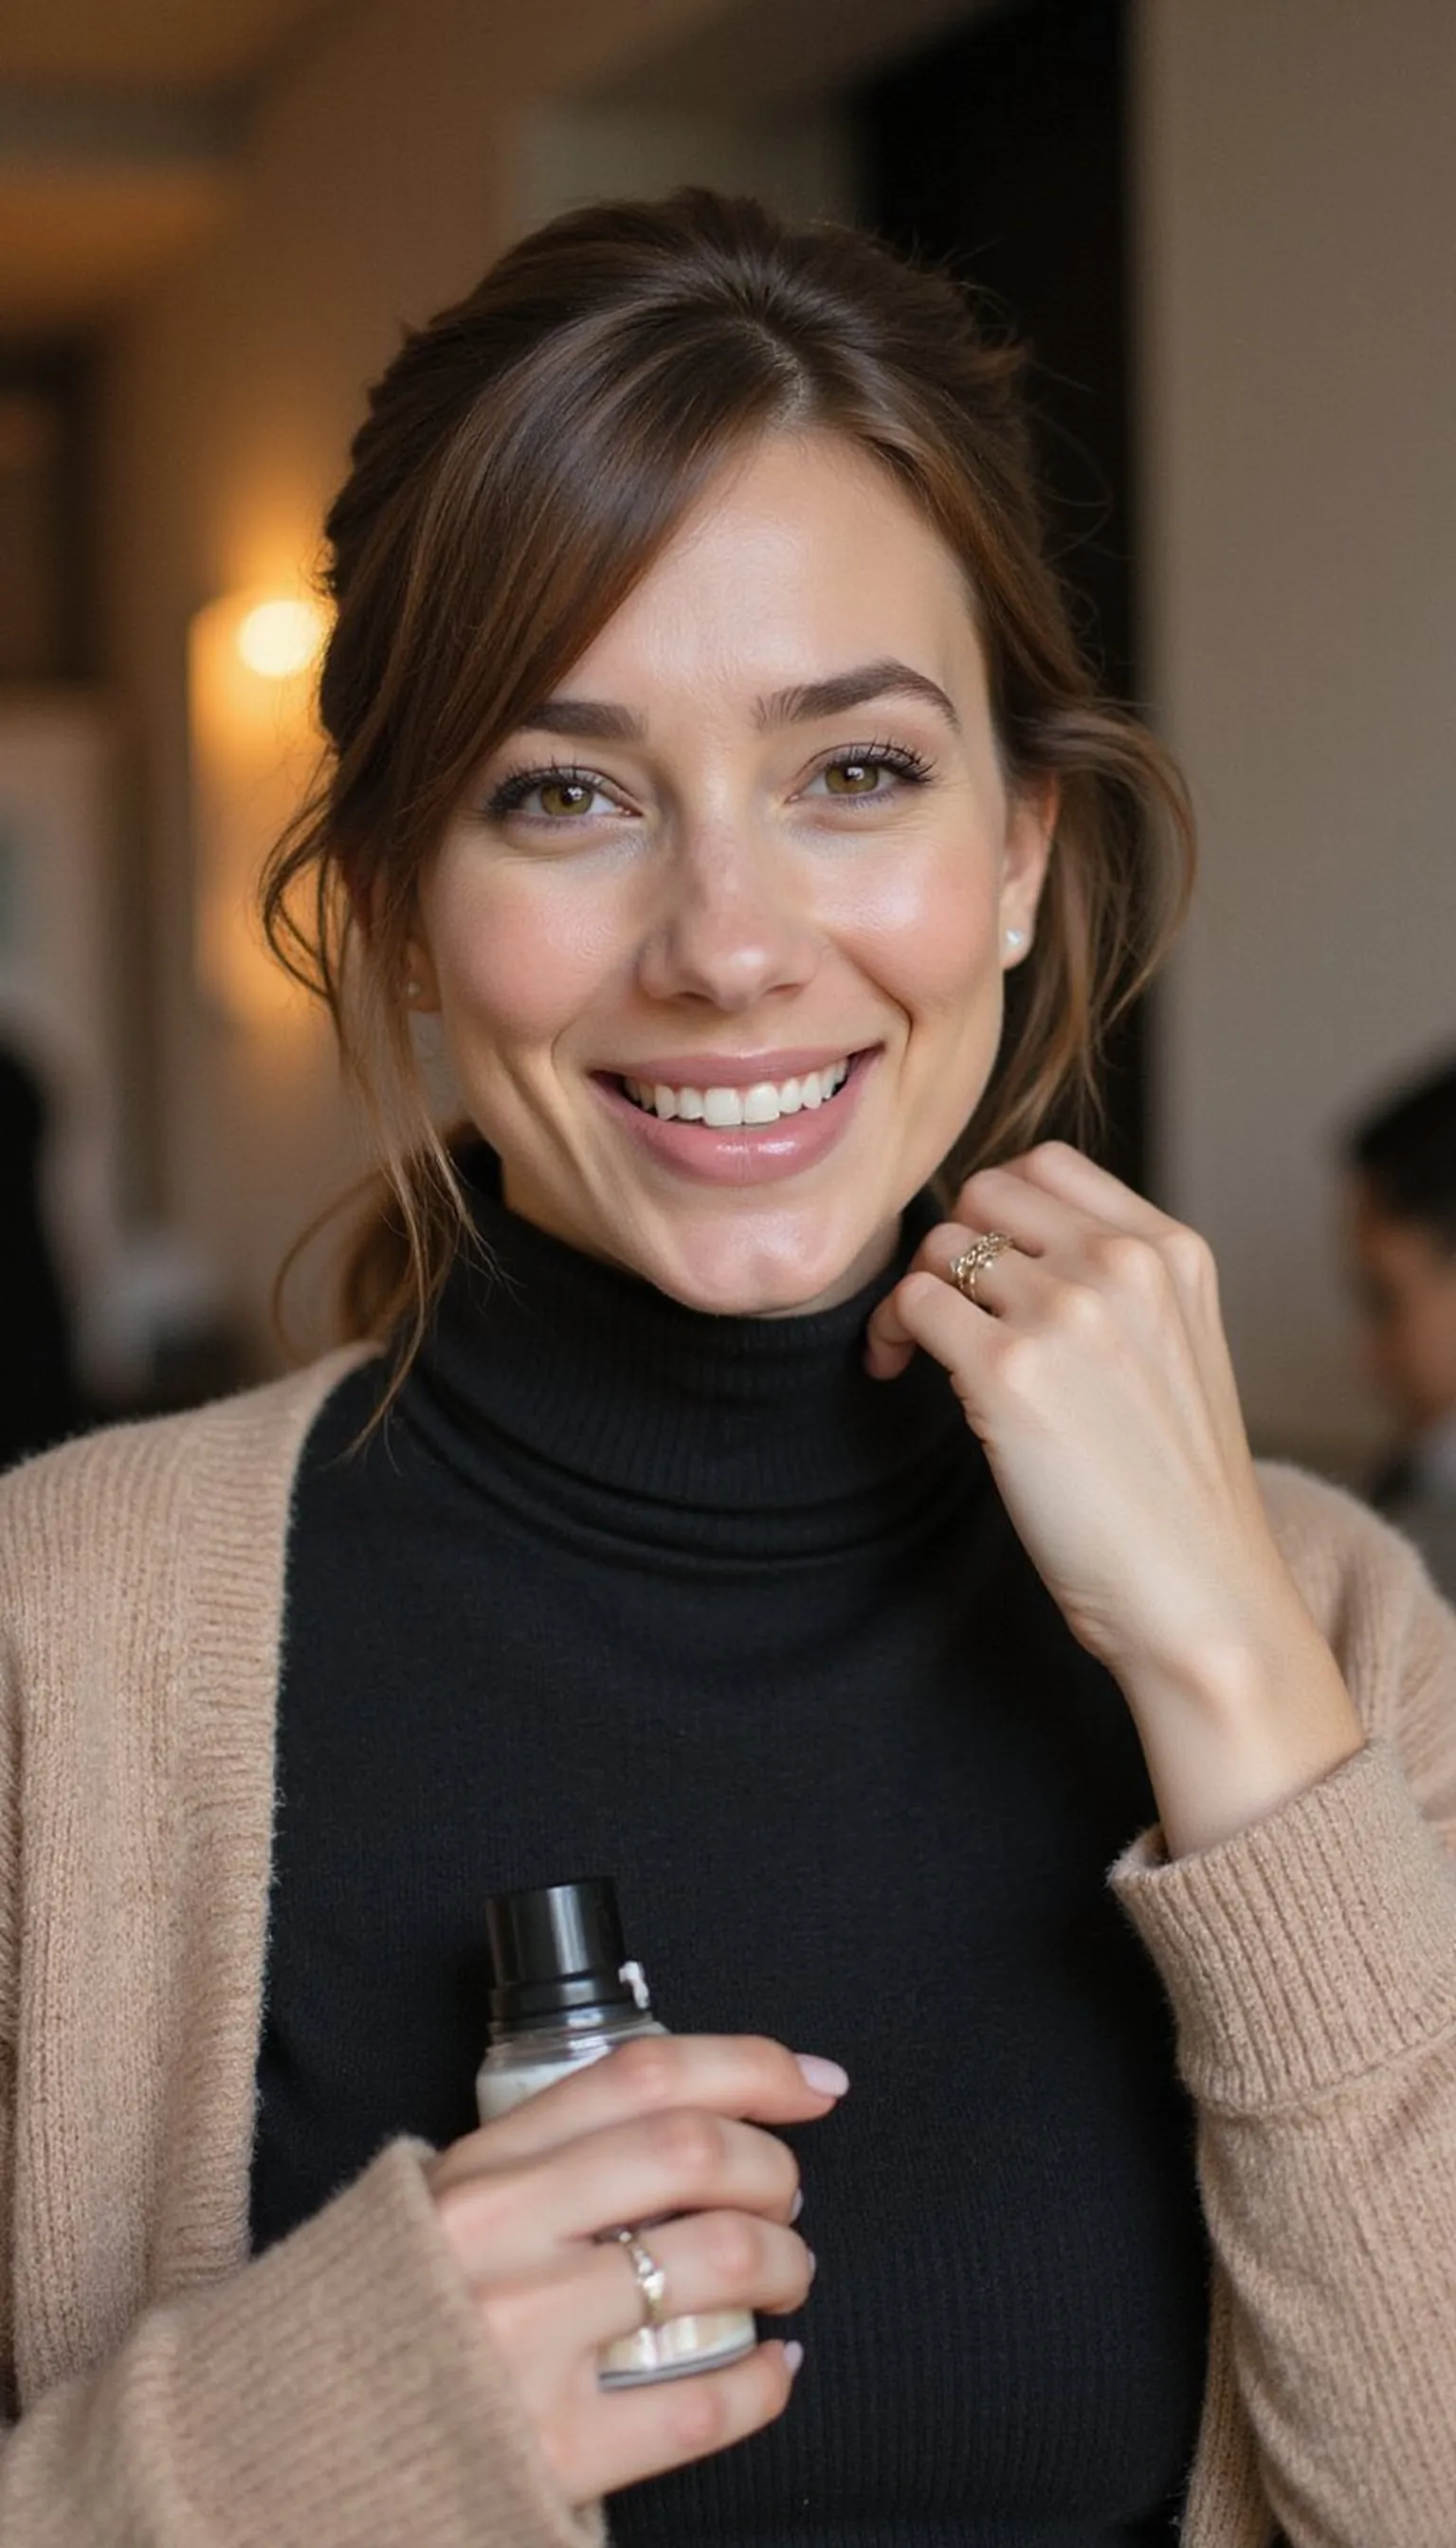
A sleek low bun sits right at the nape to stay hidden beneath turtlenecks and shawls. This clean silhouette keeps collars flat and prevents bulk around the neck.
Start with smooth, damp hair or a smoothing balm, then gather hair low and secure with an elastic. Tuck the ends into a tight coil and anchor with bobby pins for a neat finish.
Perfect for quick errands or refined evenings, the style reads elegant without adding extra warmth at the neckline. Mist lightly with shine spray to tame flyaways and keep the bun sitting sleek all day.
Styling Tips
- Use a fine-tooth comb to smooth hair before tying.
- Place the bun just above the nape so it doesn’t push against collars.
- Anchor loose sections with hidden bobby pins for a clean look.
Pro Tip: Pin a few bobby pins in a crisscross for extra hold that stays comfortable under thick shawls and high collars.
Avoid: Placing the bun too high causes collars to sit awkwardly and creates bulk. Keep it low and snug for a smooth neckline.
Try Also: Try a low twisted knot or a braided low bun for softer texture and extra grip. Swap shine spray for a matte finish if collars rub.
Products & Materials
Items Used
- bobby pins
- elastic hair tie
- shine spray bottle
“A polished low bun that tucks neatly under turtlenecks.”
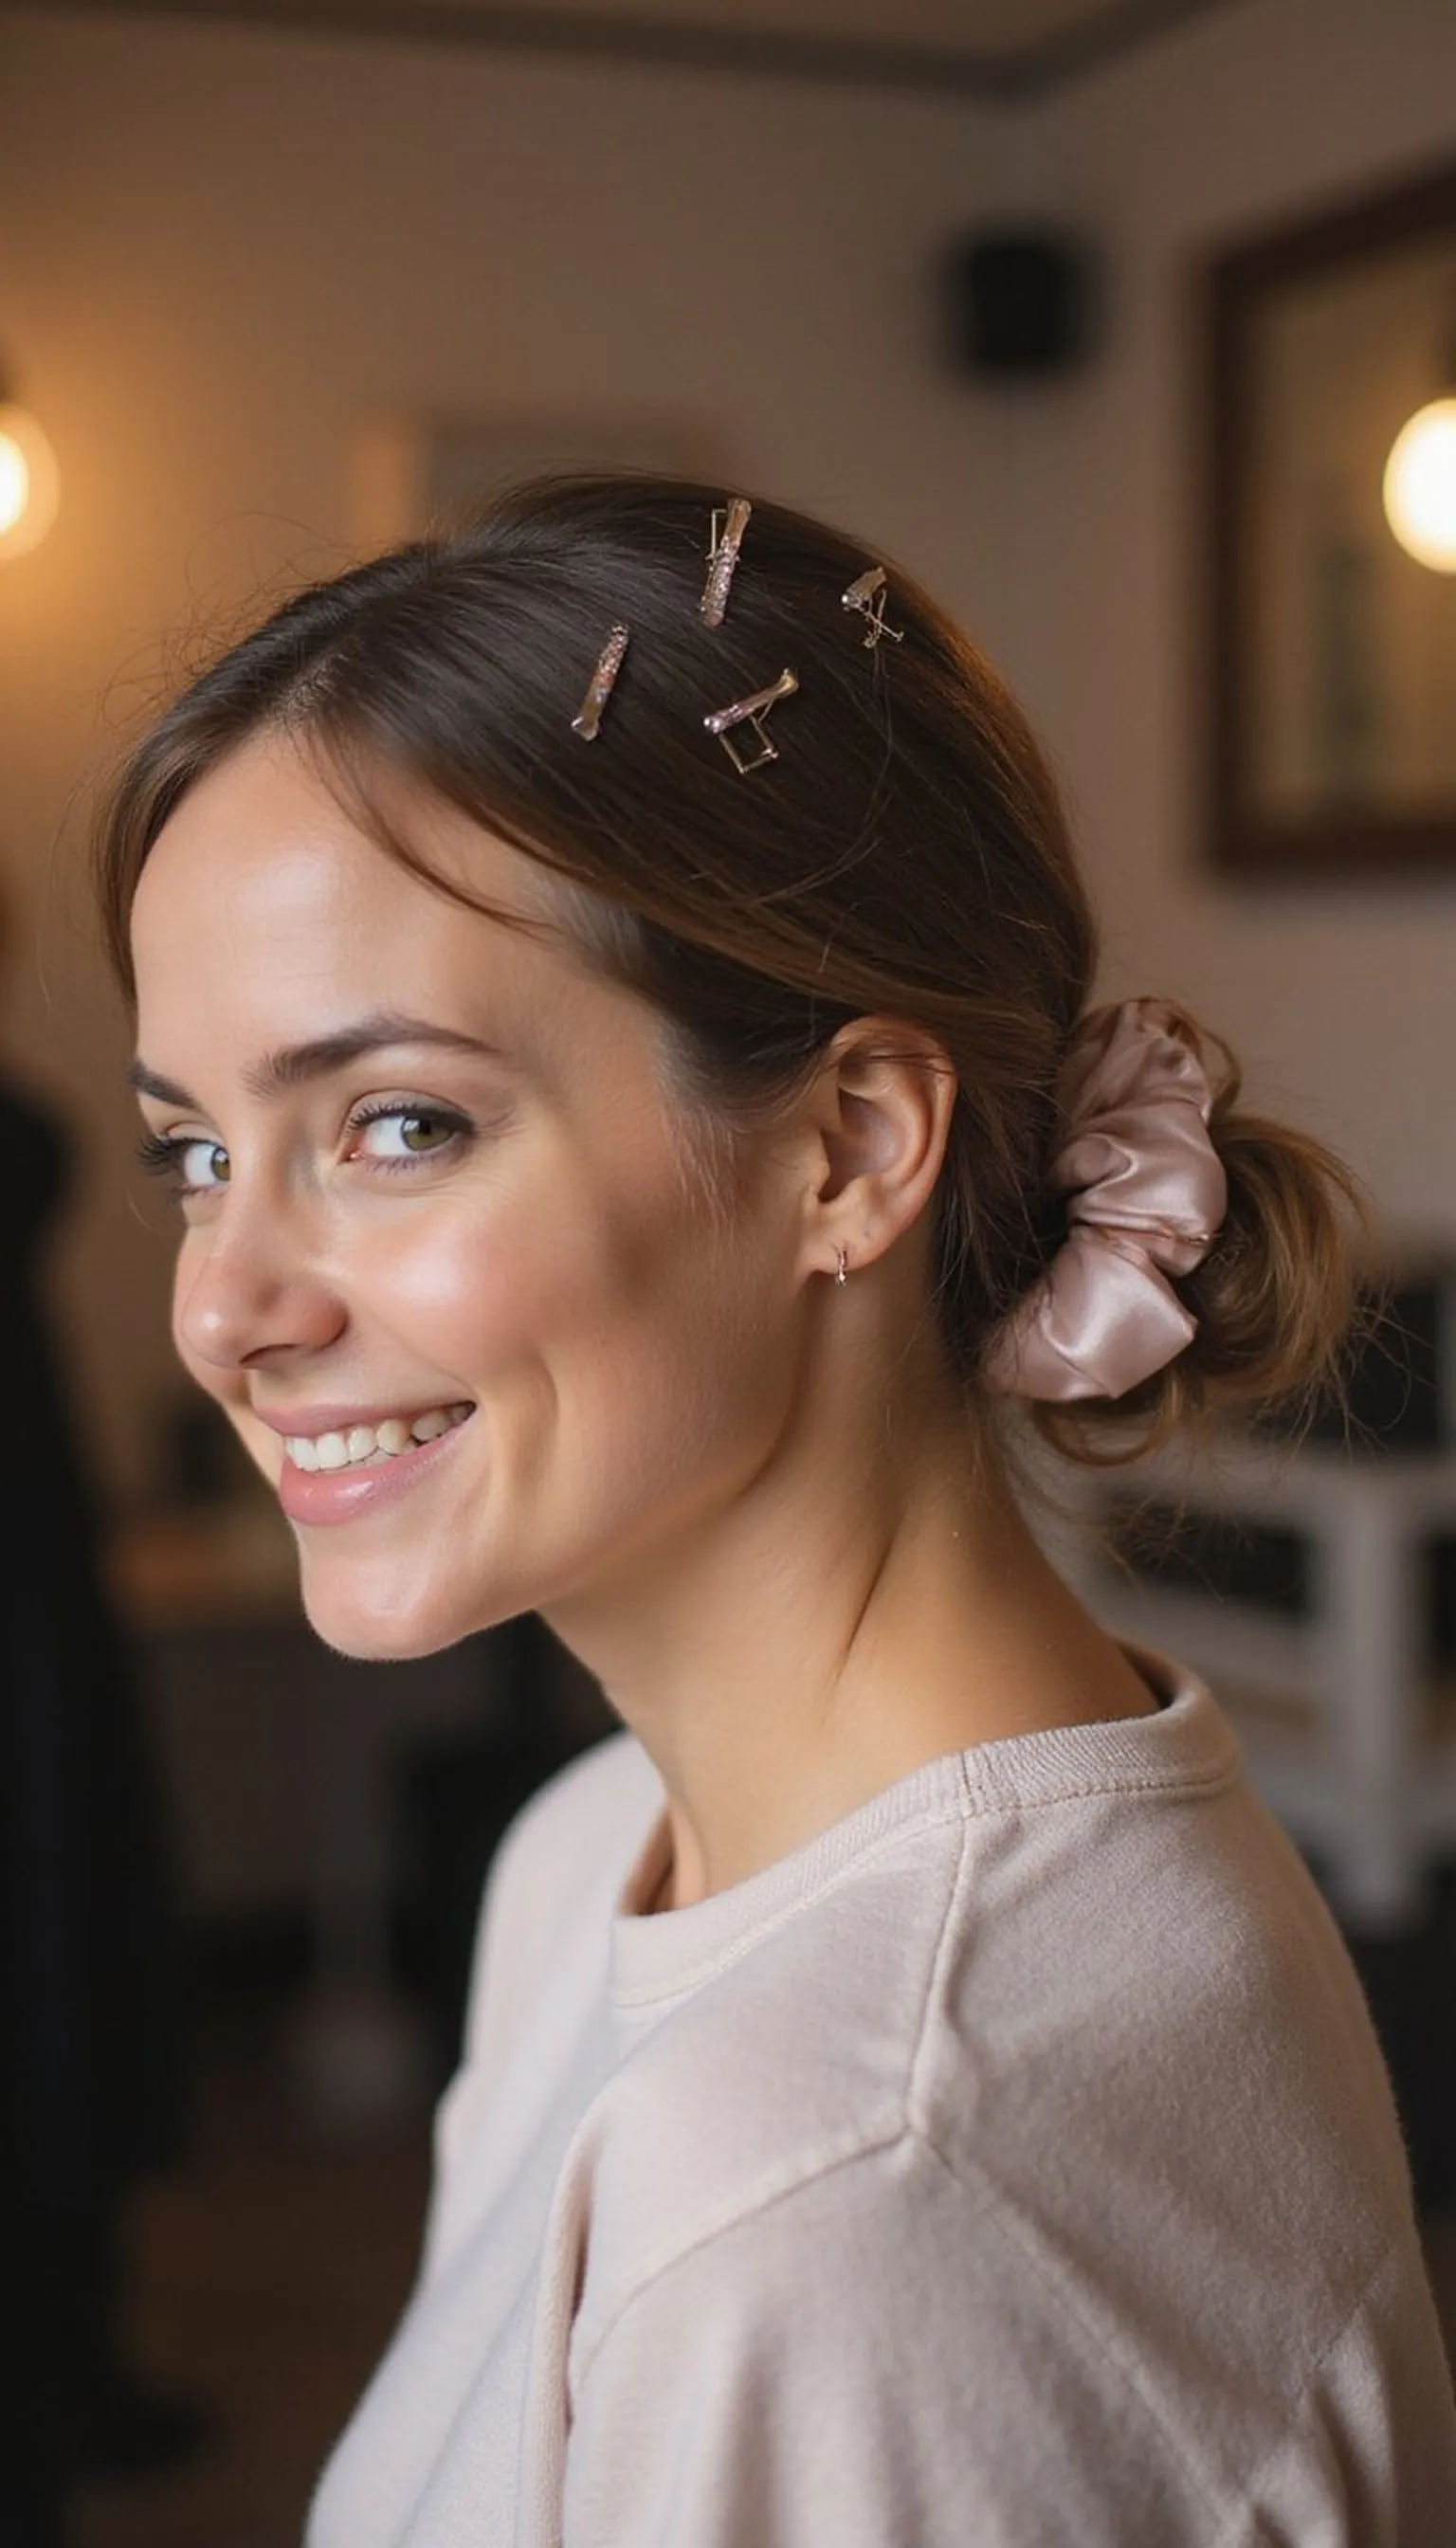
Twisted Low Knot With Decorative Pins
⏱️ 15 min · 🟠 Intermediate
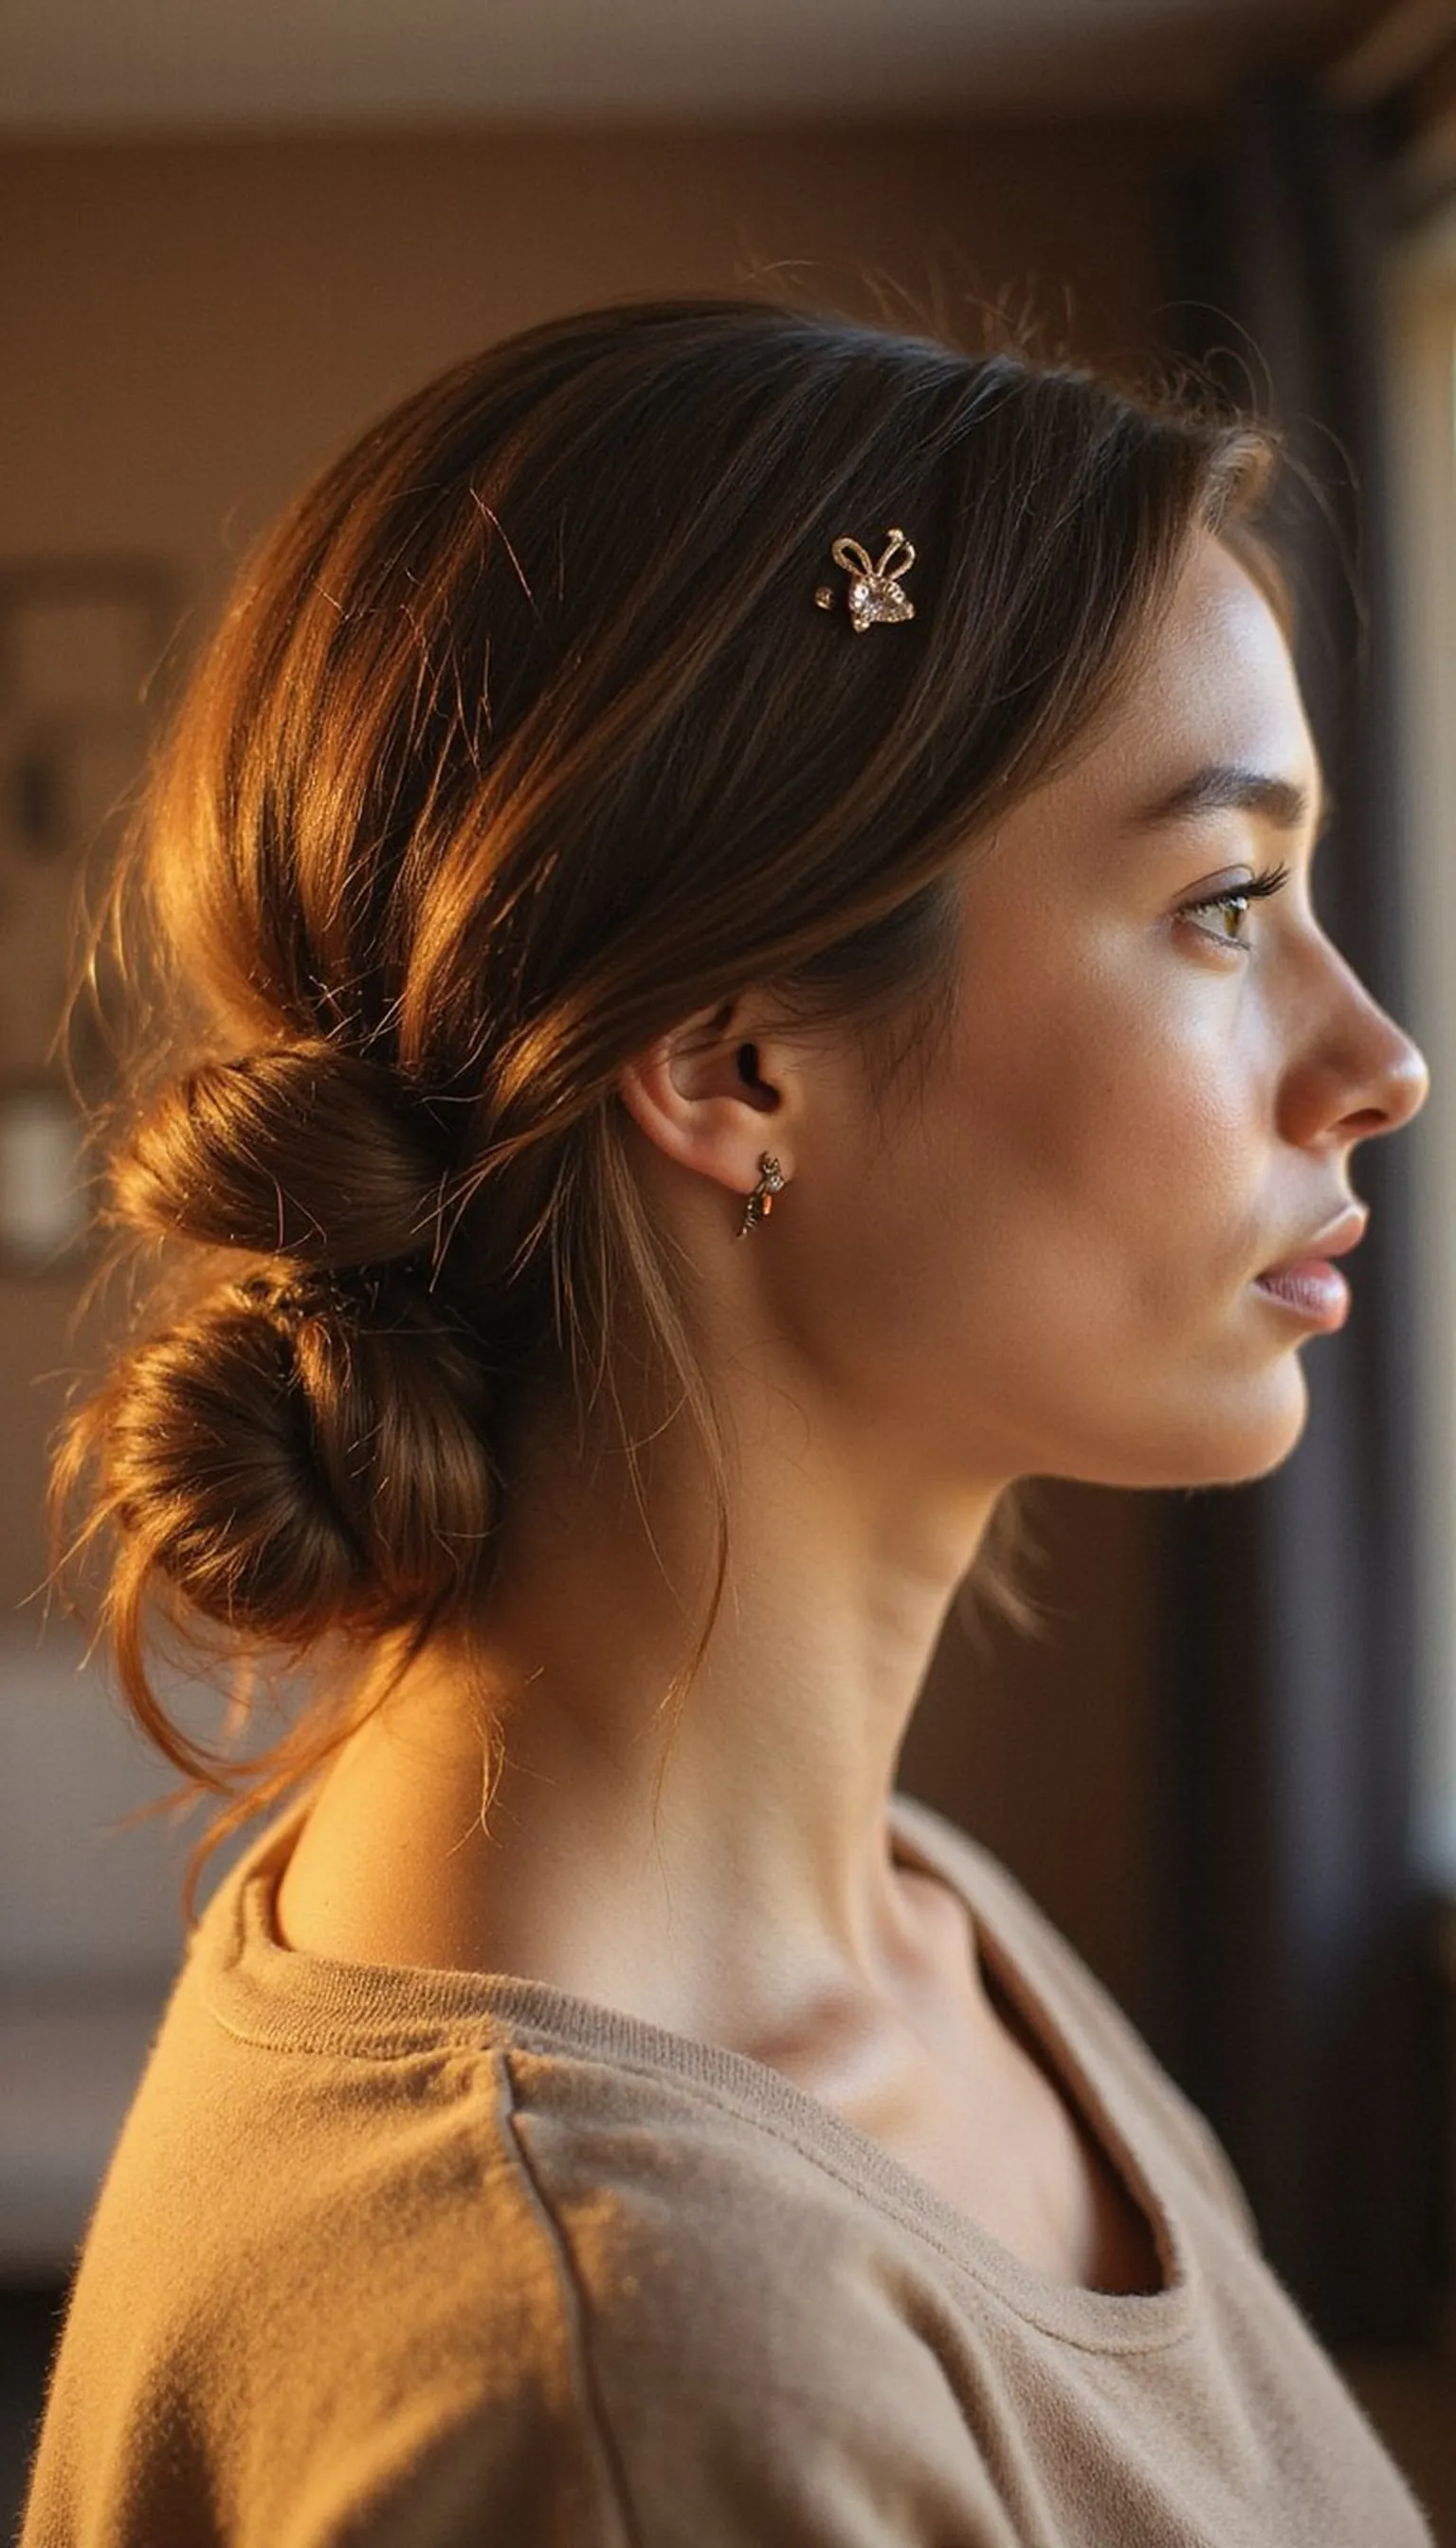
This twisted low knot is compact at the nape so shawls and high collars sit without bumping the hair. Decorative pins add a little sparkle while staying out of the way of fabric.
Create two loose twists from each side, cross them at the nape, and roll into a small knot, then secure with an elastic and bobby pins. Slide decorative hair pins on one side for a curated asymmetry that reads chic with collars.
Works on straight or wavy hair and reads dressy for dinners or meetings. Finish with a light mist to keep texture soft rather than stiff against the neckline.
Styling Tips
- Leave a few face-framing strands for softness if desired.
- Anchor the knot with bobby pins tucked under the twists.
- Place decorative pins on the outside edge so they remain visible with shawls.
Pro Tip: Angle decorative hair pins slightly upward so they peek above shawls without snagging fabric or causing discomfort against the neck.
Avoid: Pinning decorations too close to the collar makes them catch on knitwear. Keep embellishments slightly higher and angled outward.
Try Also: Swap decorative pins for a small barrette or scatter pearl pins for a more formal vibe. Try a softer rope twist for thicker hair.
Products & Materials
Items Used
- decorative hair pins
- bobby pins
- elastic hair tie
“Twisted low knot with pretty pins that won’t bulk collars.”
Soft Low Chignon With Side Sweep
⏱️ 20 min · 🟠 Intermediate

A soft low chignon with a gentle side sweep reads romantic while staying compact under chunky collars. The swept front keeps hair off the shoulder and frames the face without interfering with shawls.
Gather hair to one side at the nape, twist into a loose chignon and secure with an elastic and bobby pins. Add a pearl barrette on the swept side to hold the front and add a refined accent that won’t rub the turtleneck.
This look works for wedding guests or cozy date nights, offering softness without bulk. Use a mist and light finger-combing to keep the chignon airy yet tame against collars.
Styling Tips
- Leave a thin piece of hair near the ear to soften the sweep.
- Use bobby pins that match hair color to hide holds.
- Secure the pearl barrette where it won’t touch the neckline.
Pro Tip: Slide the pearl barrette into the swept section at a slight angle so it secures hair without sitting against the collar fabric.
Avoid: Making the chignon too big creates pressure under a shawl and an uneven collar line. Keep the bun compact and low.
Try Also: Try a low braided chignon or swap the pearl barrette for a slim metallic clip for a modern touch. Add loose tendrils for boho flair.
Products & Materials
Items Used
- pearl barrette
- bobby pins
- elastic hair tie
“A graceful side-swept chignon that stays flat under collars.”
Get 75+ ad-free, high-resolution printable tutorials for salon-quality results every single morning.
One printable guide · $19.99 · yours forever
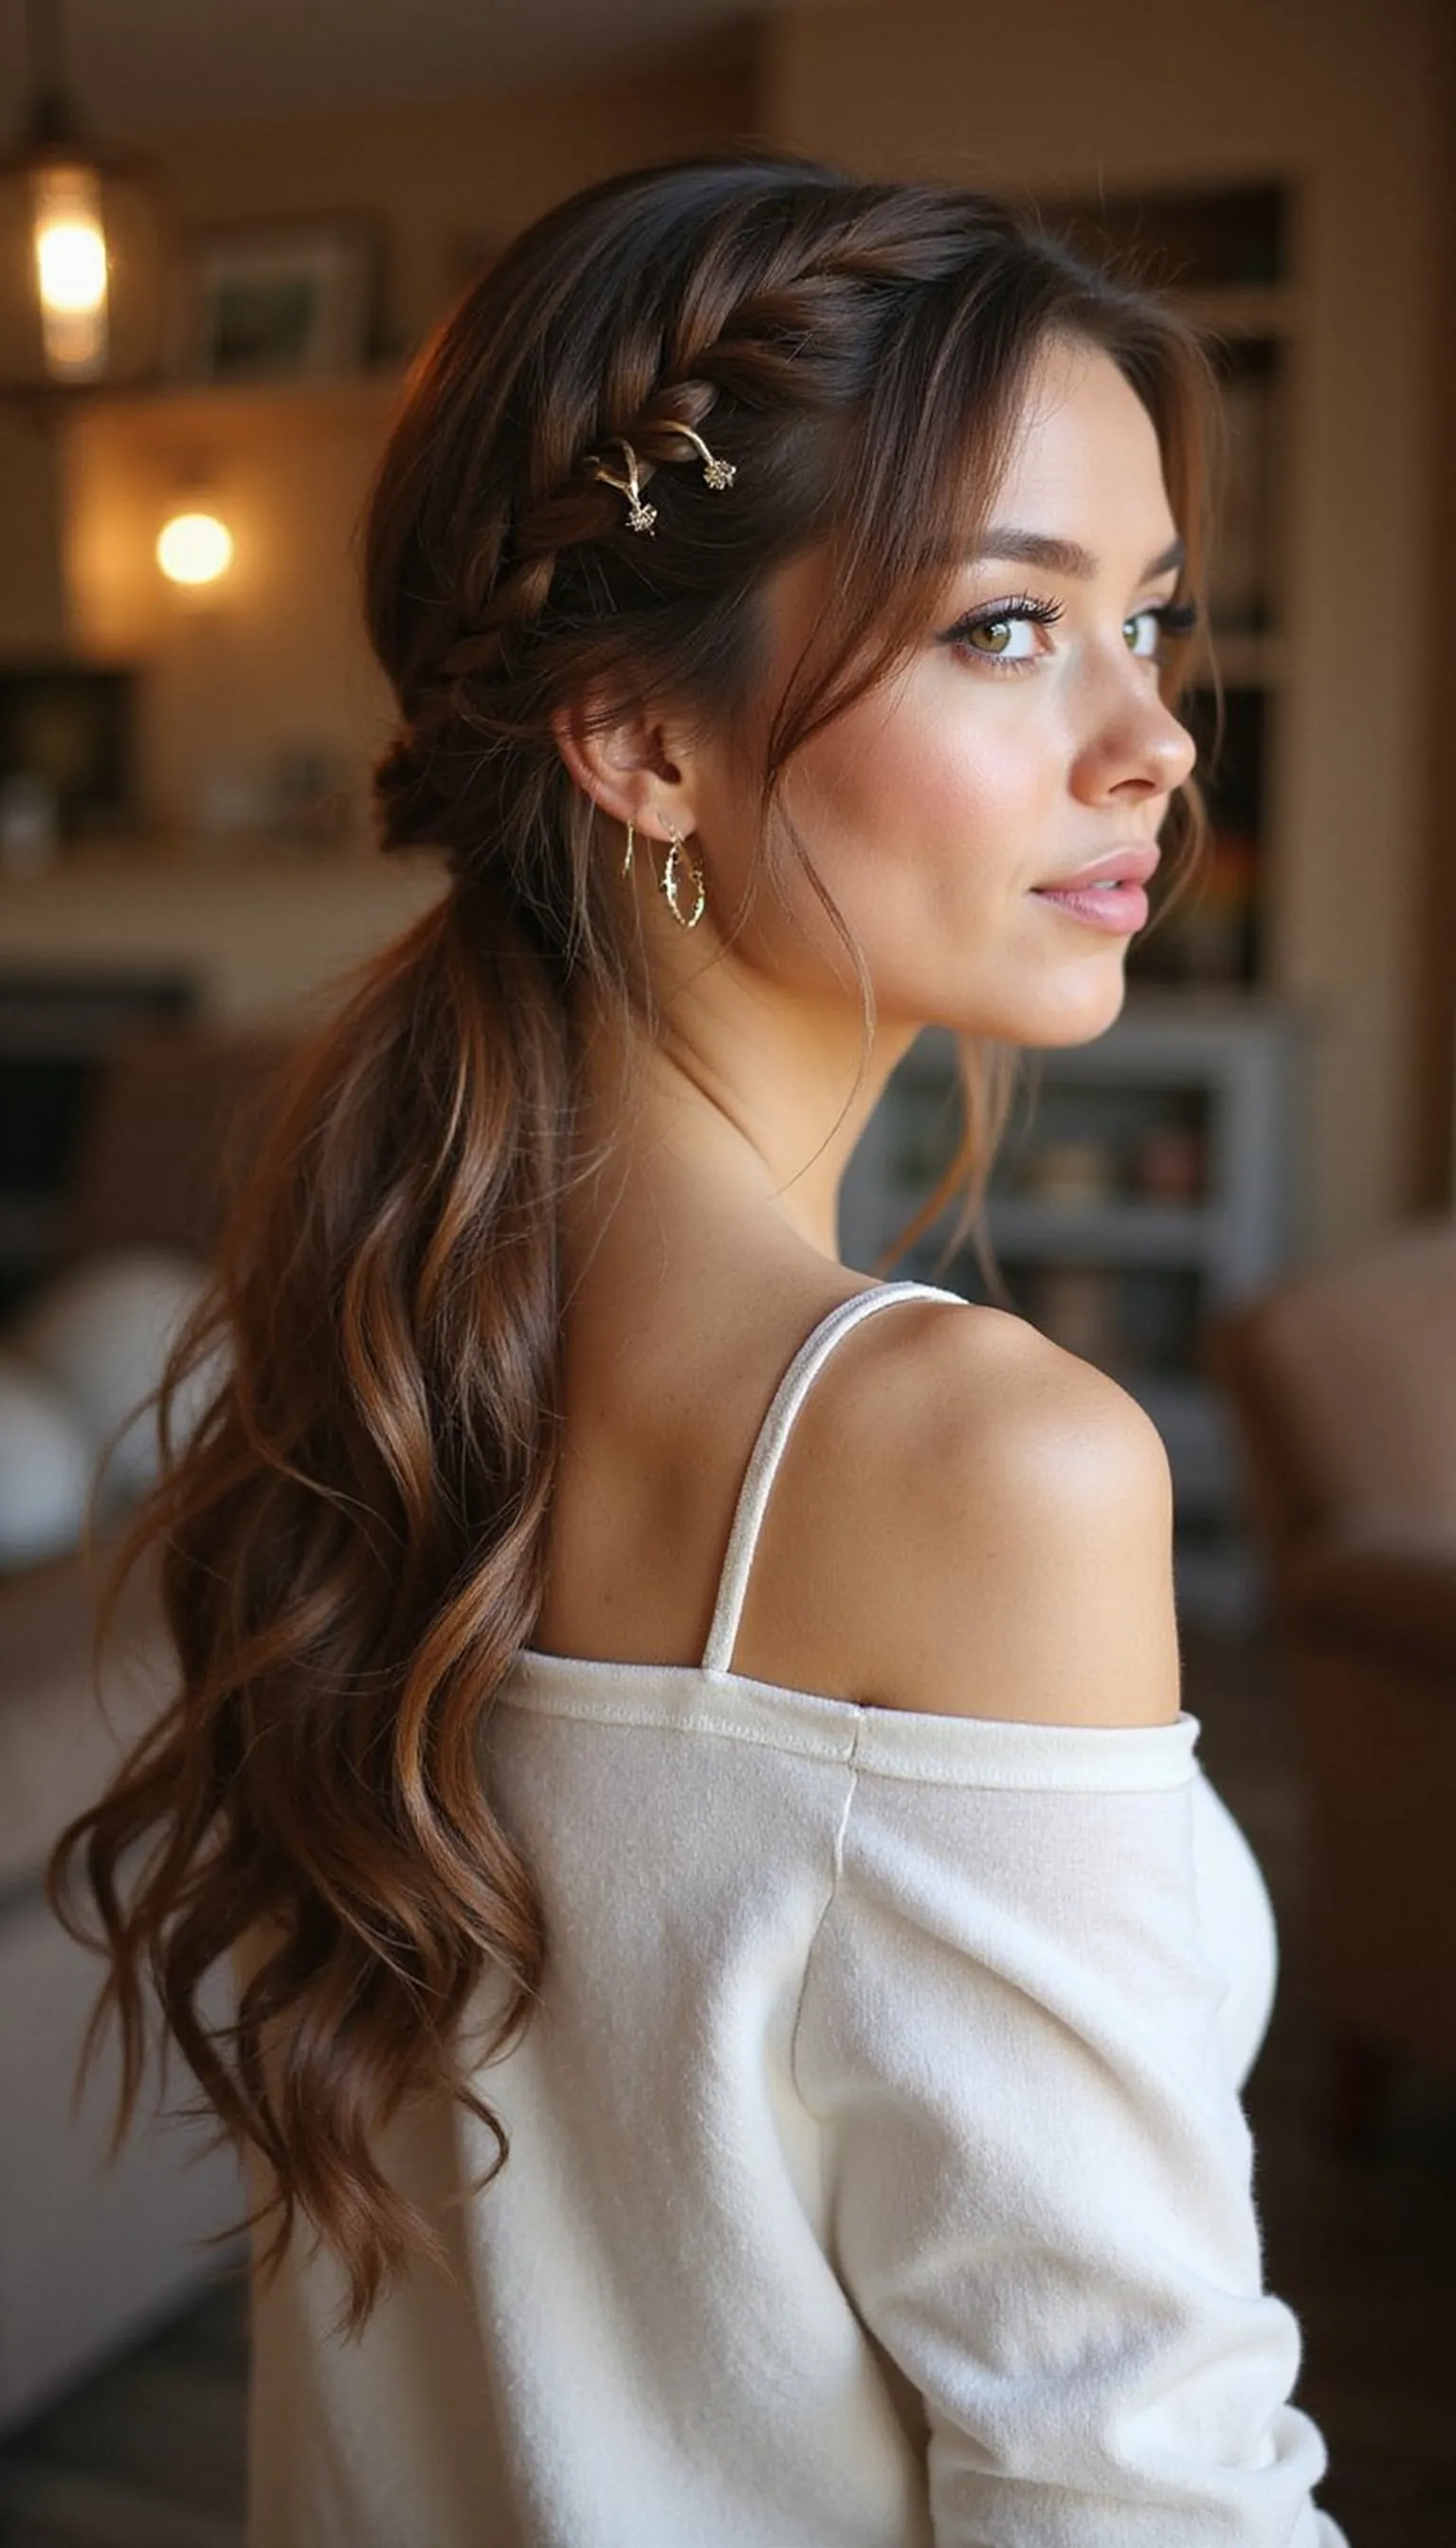
Braided Low Bun For Cozy Necklines
⏱️ 25 min · 🟠 Intermediate
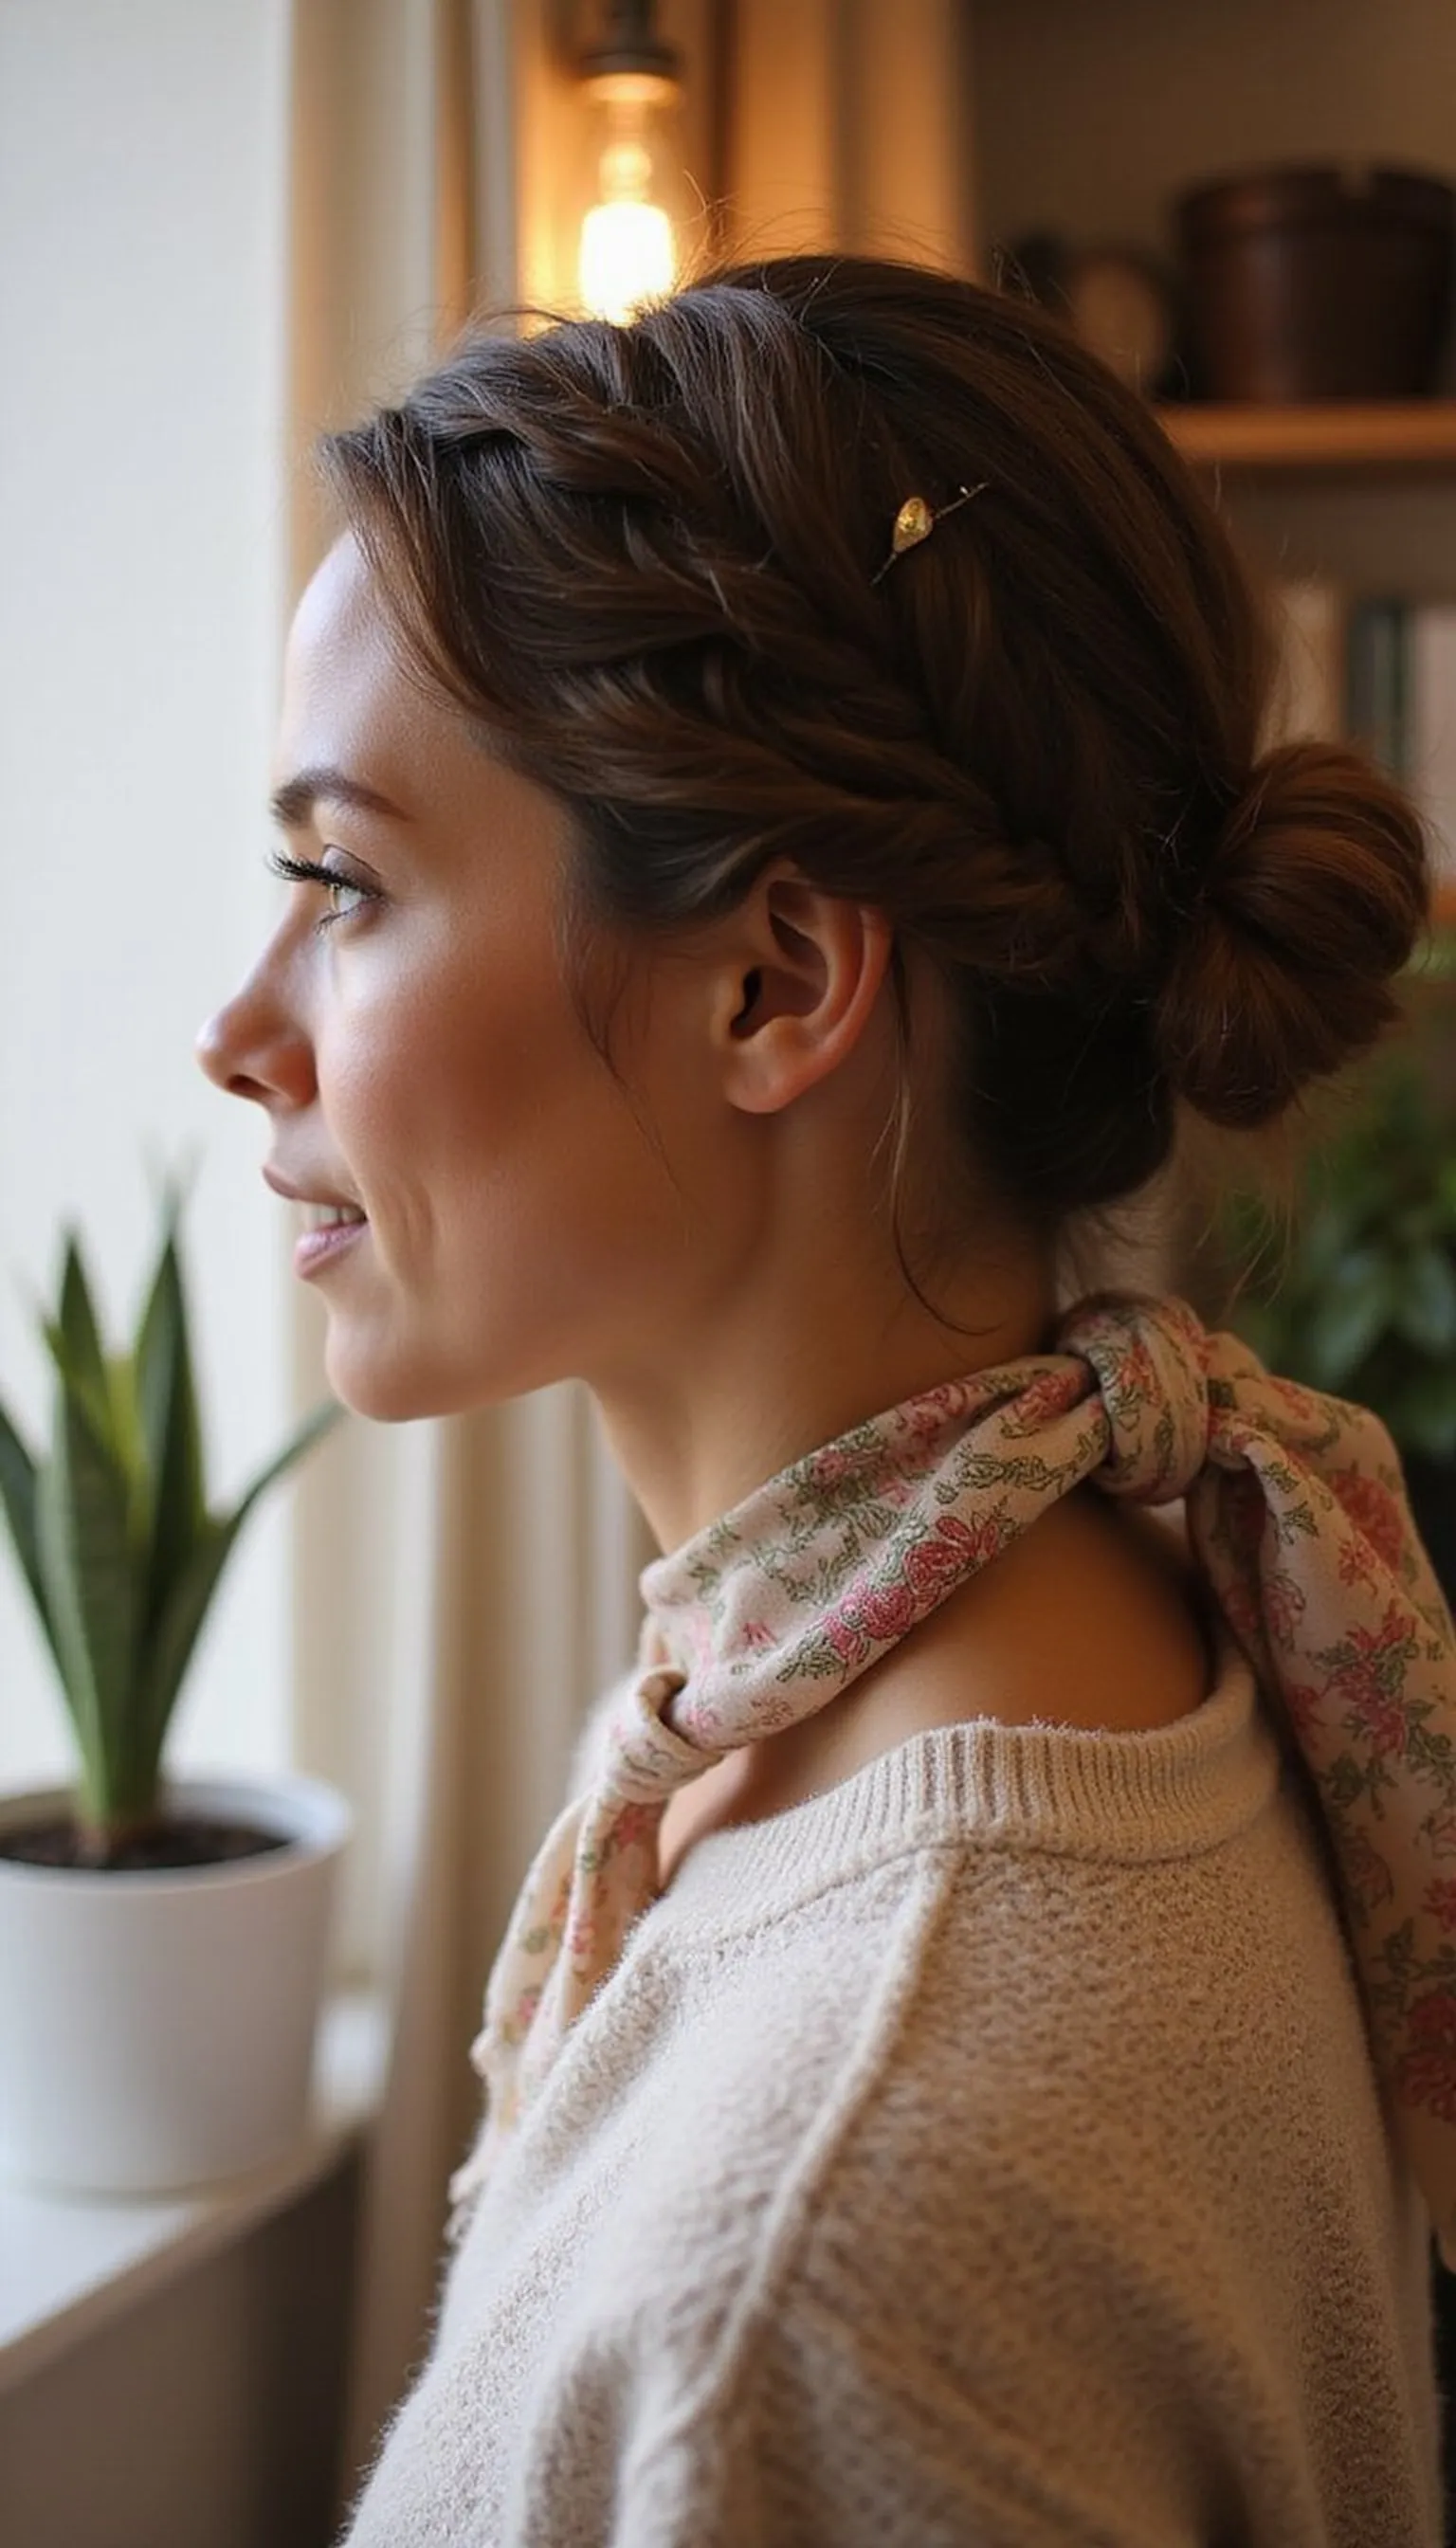
A braided low bun gathers hair into a compact, low shape that tucks easily beneath turtlenecks and shawls. The braid adds grip so the bun stays put when wrapped fabrics brush the nape.
Create a loose three-strand or Dutch braid down one side, wrap it into a low bun and secure with an elastic and bobby pins. Smooth the top with light serum to reduce friction and keep collars looking neat.
This style balances texture and polish for casual days and dress occasions alike. Add a silk scarf tied around the bun base for a vintage touch that layers smoothly with shawls.
Styling Tips
- Braid loosely to preserve volume without creating neck bulk.
- Use hidden bobby pins to anchor the bun against the nape.
- Tuck a silk scarf around the base for color that won’t snag.
Pro Tip: Wrap a thin silk scarf around the bun’s base to protect hair from friction and add a chic accent that won’t irritate collars.
Avoid: Braiding too tightly can flatten the braid and make the bun stiff against the neck. Keep tension gentle for flexibility.
Try Also: Try a double braid pulled into a low braided bun or a fishtail braid for more texture. Loop a thin ribbon through the braid for color.
Products & Materials
Items Used
- elastic hair tie
- bobby pins
- silk scarf
“A braided low bun that stays secure under shawls and collars.”
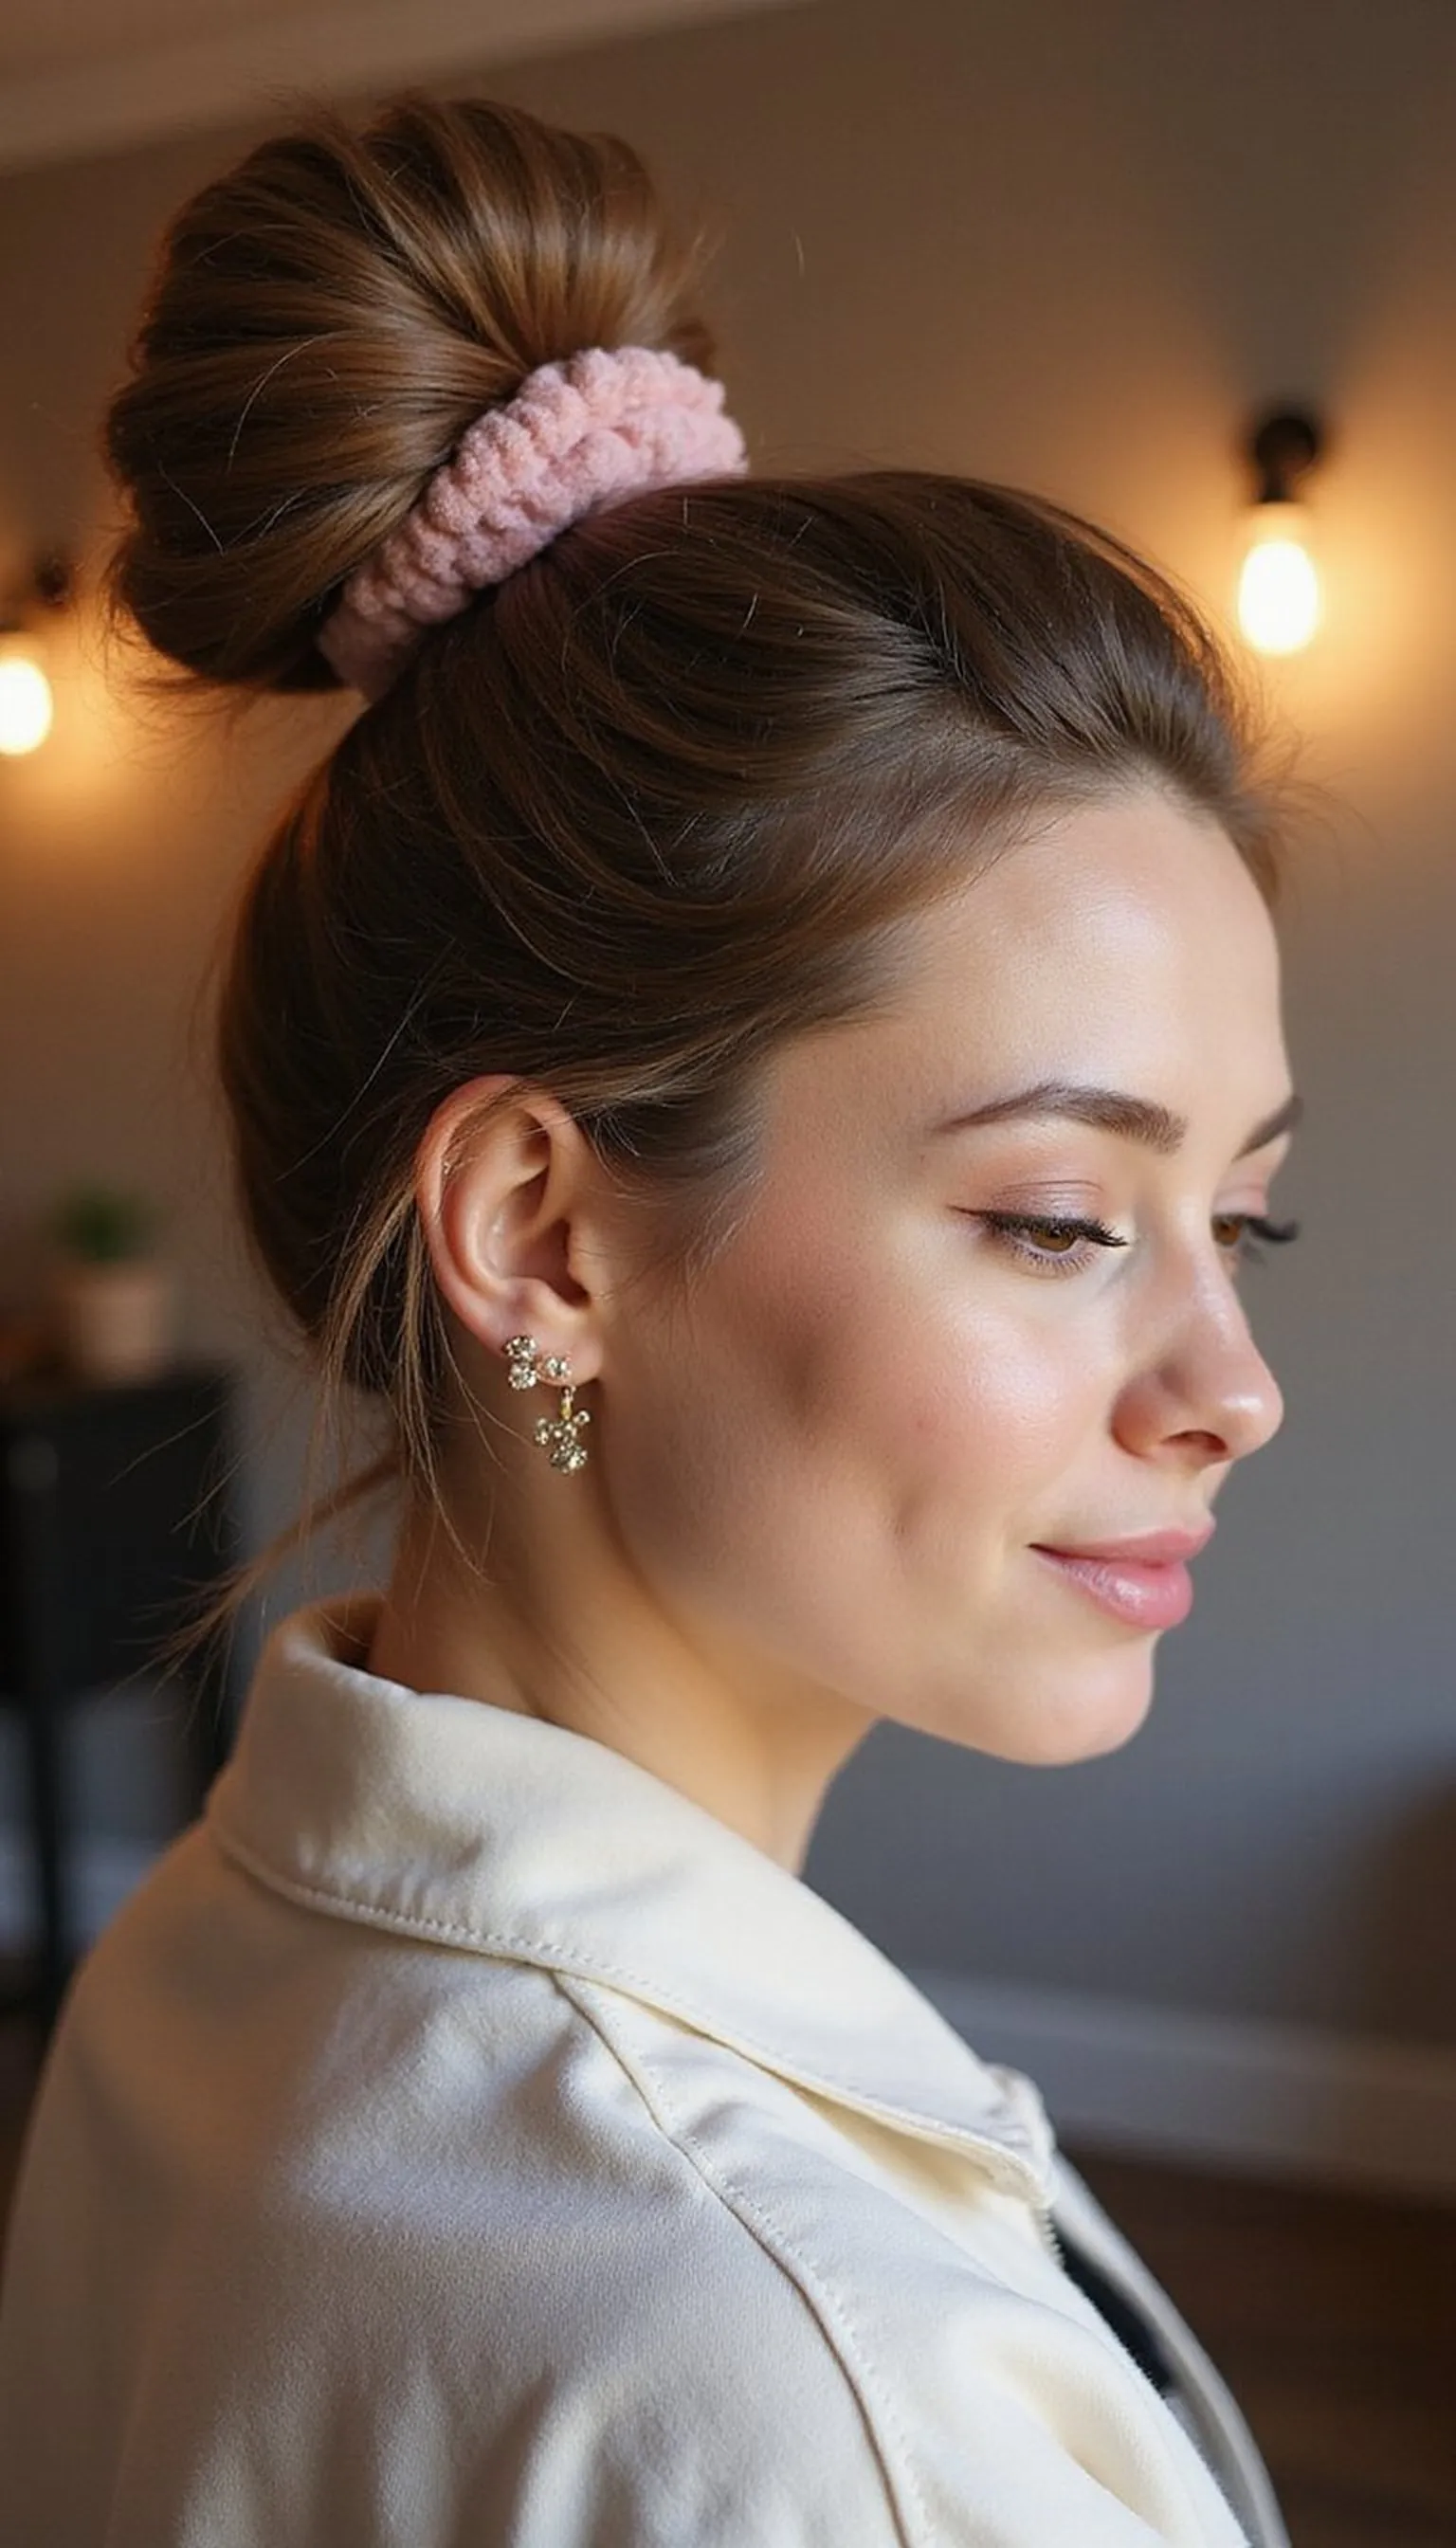
Messy Low Bun With Hidden Scrunchie
⏱️ 10 min · 🟢 Beginner
A messy low bun offers relaxed shape while staying low enough not to bulk collars or shawls. A silk scrunchie hides under the bun for comfort and prevents pinching at the neckline.
Gather hair loosely at the nape, twist into a bun and secure with an elastic hidden by a scrunchie, then pancake loops for texture. Use a few bobby pins to anchor pieces that might pull out under layers.
This is a quick, lived-in look that pairs with cozy knitwear or layered coats. Finish with a few texture drops to keep the messy vibe controlled and soft against the neck.
Styling Tips
- Tease lightly at the crown for balanced volume that doesn’t bulk the collar.
- Hide the elastic under a silk scrunchie for comfort with shawls.
- Pin stray ends low so the bun maintains shape all day.
Pro Tip: Use a silk scrunchie around the elastic to cushion the nape and prevent friction when wearing wool or heavy fabrics.
Avoid: Over-messing the bun can create too much bulk near the neck. Keep the core compact and let only surface loops be loose.
Try Also: Try a knotted scrunchie for added texture or swap for a velvet scrunchie for winter warmth. Add a small barrette above the bun for sparkle.
Products & Materials
Items Used
- silk scrunchie
- bobby pins
“A cozy messy low bun secured with a silk scrunchie.”
Low French Twist That Stays Flat
⏱️ 30 min · 🔴 Advanced
The low French twist is a streamlined, elegant option that hugs the nape so shawls and turtlenecks glide over it. Proper pinning makes this classic updo lie flat without poking the fabric.
Sweep hair to one side, twist inward along the nape and tuck the ends up, securing with hair comb and bobby pins inserted horizontally. Use a smoothing brush to refine the sides and push any stubborn pieces into the twist for a seamless finish.
This style reads formal and refined, ideal for evenings or work events when collars must be tidy. Set with a light hold spray so the twist keeps shape but remains comfortable under layered garments.
Styling Tips
- Insert the hair comb flush with the twist to anchor it without bulk.
- Use long bobby pins horizontally to distribute hold along the nape.
- Smooth sides with a light brush and serum before twisting.
Pro Tip: Slide the hair comb into the base at a shallow angle so it secures the twist while keeping the profile slim under collars.
Avoid: Rushing the twist can leave loose ends that push into shawls. Take time to tuck and pin each section neatly.
Try Also: For a softer take, pull out a few tendrils around the face or add a slim ribbon along the twist. Create a double twist for extra hold.
Products & Materials
Items Used
“A refined low French twist that stays flat under collars.”
Wrapped Low Pony With Claw Clip Hold
⏱️ 5 min · 🟢 Beginner
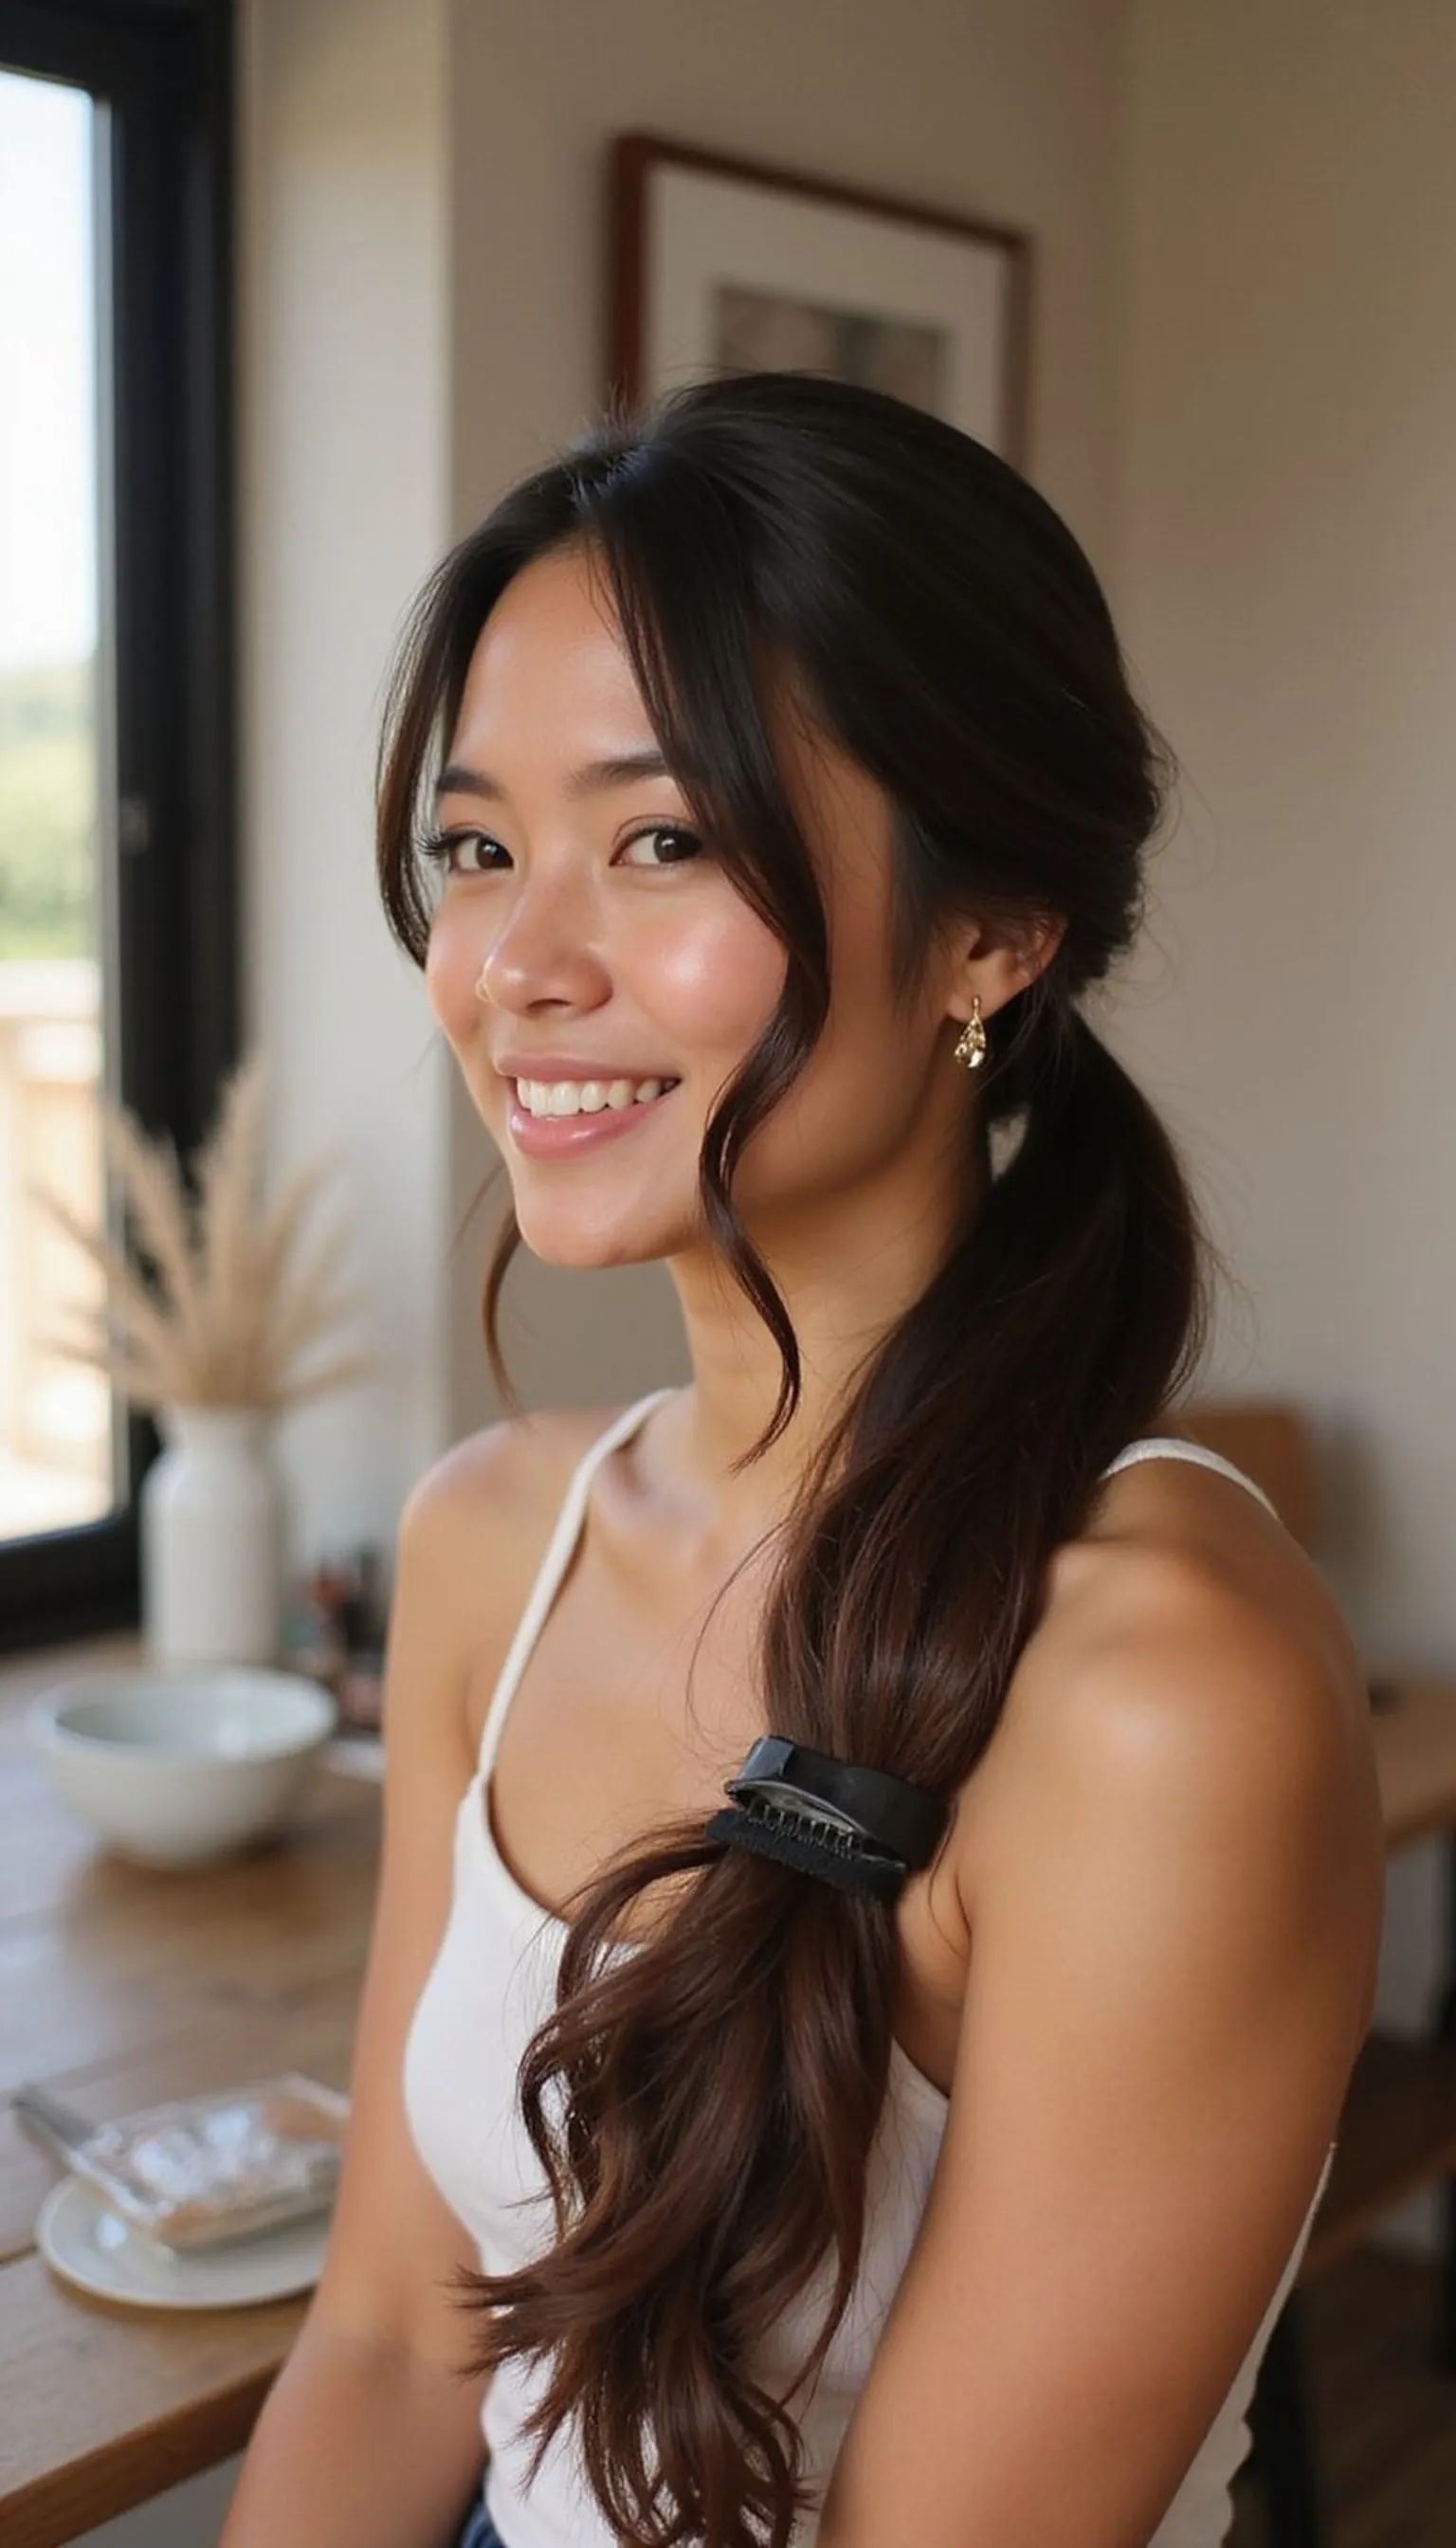
A wrapped low pony clipped with a medium claw clip offers instant polish while keeping bulk low at the collar. The clip holds weight without pressing into the neck when paired with shawls or chunky sweaters.
Gather hair at the nape, wrap a small section around the elastic to hide it, then grip the pony with a claw clip positioned horizontally. Tuck the clip slightly under a shawl edge so it reads like part of the outfit rather than a bump.
This is a speedy pick-me-up for mornings and travel when collars must lay flat. Use smoothing serum on the top to keep the silhouette neat and collar-friendly.
Styling Tips
- Position the claw clip so it doesn’t sit directly against the collar seam.
- Wrap an extra strand around the elastic for a polished base.
- Choose a low-profile claw clip for slimmer collars or finer knits.
Pro Tip: Rotate the claw clip slightly so its teeth grip horizontally, reducing pressure points where a shawl might press against the nape.
Avoid: Clipping too high causes snagging against collars. Keep the clip low and secure to preserve a flat neckline.
Try Also: Try a half-up wrap clipped at the nape or swap the claw for a slim barrette for sleeker looks. Add a thin ribbon around the elastic for color.
Products & Materials
Items Used
- claw clip
- elastic hair tie
“A quick wrapped low pony secured with a claw clip for comfort.”
Fishtail Low Braid For Smooth Collars
⏱️ 20 min · 🟠 Intermediate
A fishtail low braid lies close to the nape and creates a neat, elongated silhouette that doesn’t add neck bulk. The woven texture keeps strands in place so shawls glide over without catching.
Divide hair into two sections and weave tight fishtail segments down, then fold the braid into a low bun or leave it hanging over the shoulder. Secure with an elastic and a couple of bobby pins at the base to stabilize movement against layers.
This braid reads polished and casual at once, perfect for busy days or weekend coffee runs. Lightly mist with anti-frizz spray to keep the weave tidy and collar-friendly.
Styling Tips
- Start the braid low so the finished shape stays out of the collar zone.
- Use an elastic that blends with your hair color for a seamless look.
- Tuck the braid end into the nape if you need extra comfort under shawls.
Pro Tip: Secure the fishtail’s base with a small elastic and pin the braid into the nape to avoid movement that rubs under knit collars.
Avoid: Bumping the braid into a shoulder can loosen it and create bulk. Keep the braid anchored low and compact.
Try Also: Try a side fishtail that rests over one shoulder or fold the braid into a low bun for a compact option. Add a small ribbon at the end for color.
Products & Materials
Items Used
- elastic hair tie
- bobby pins
“A tidy fishtail low braid that keeps collars smooth and snag-free.”
Low Sock Bun For Volume Control
⏱️ 15 min · 🟢 Beginner
The low sock bun creates a round, controlled shape that can be sized to sit neatly below turtlenecks. A hair donut fills the bun without making it bulky against shawls or scarves.
Pull hair into a low pony, slip the hair donut over the pony, spread hair around it and tuck ends under, then secure with an elastic and bobby pins. Smooth the top with a brush for a polished silhouette that won’t push into collars.
This is a fuss-free option for medium to long hair when a smooth profile is needed. Add light hairspray to keep shorter pieces from poking through under layers.
Styling Tips
- Choose a hair donut sized to match how flat you want the bun to sit.
- Pin the bun base at multiple points so it resists shifting under coats.
- Smooth with a bristle brush to avoid friction marks from turtlenecks.
Pro Tip: Select a low-profile hair donut and flatten it slightly before wrapping hair to keep the bun slim and collar-friendly.
Avoid: Using too large a donut creates unwanted bulk at the neckline. Scale the donut to the collar height you need.
Try Also: Make a half-sock bun for softer volume or wrap a ribbon around the base for a vintage feel. Tuck a thin scarf for color.
Products & Materials
Items Used
- hair donut
- elastic hair tie
- bobby pins
“A low sock bun that controls volume and sits flat under layers.”
Slim Low Loop With Pearl Pins
⏱️ 15 min · 🟠 Intermediate
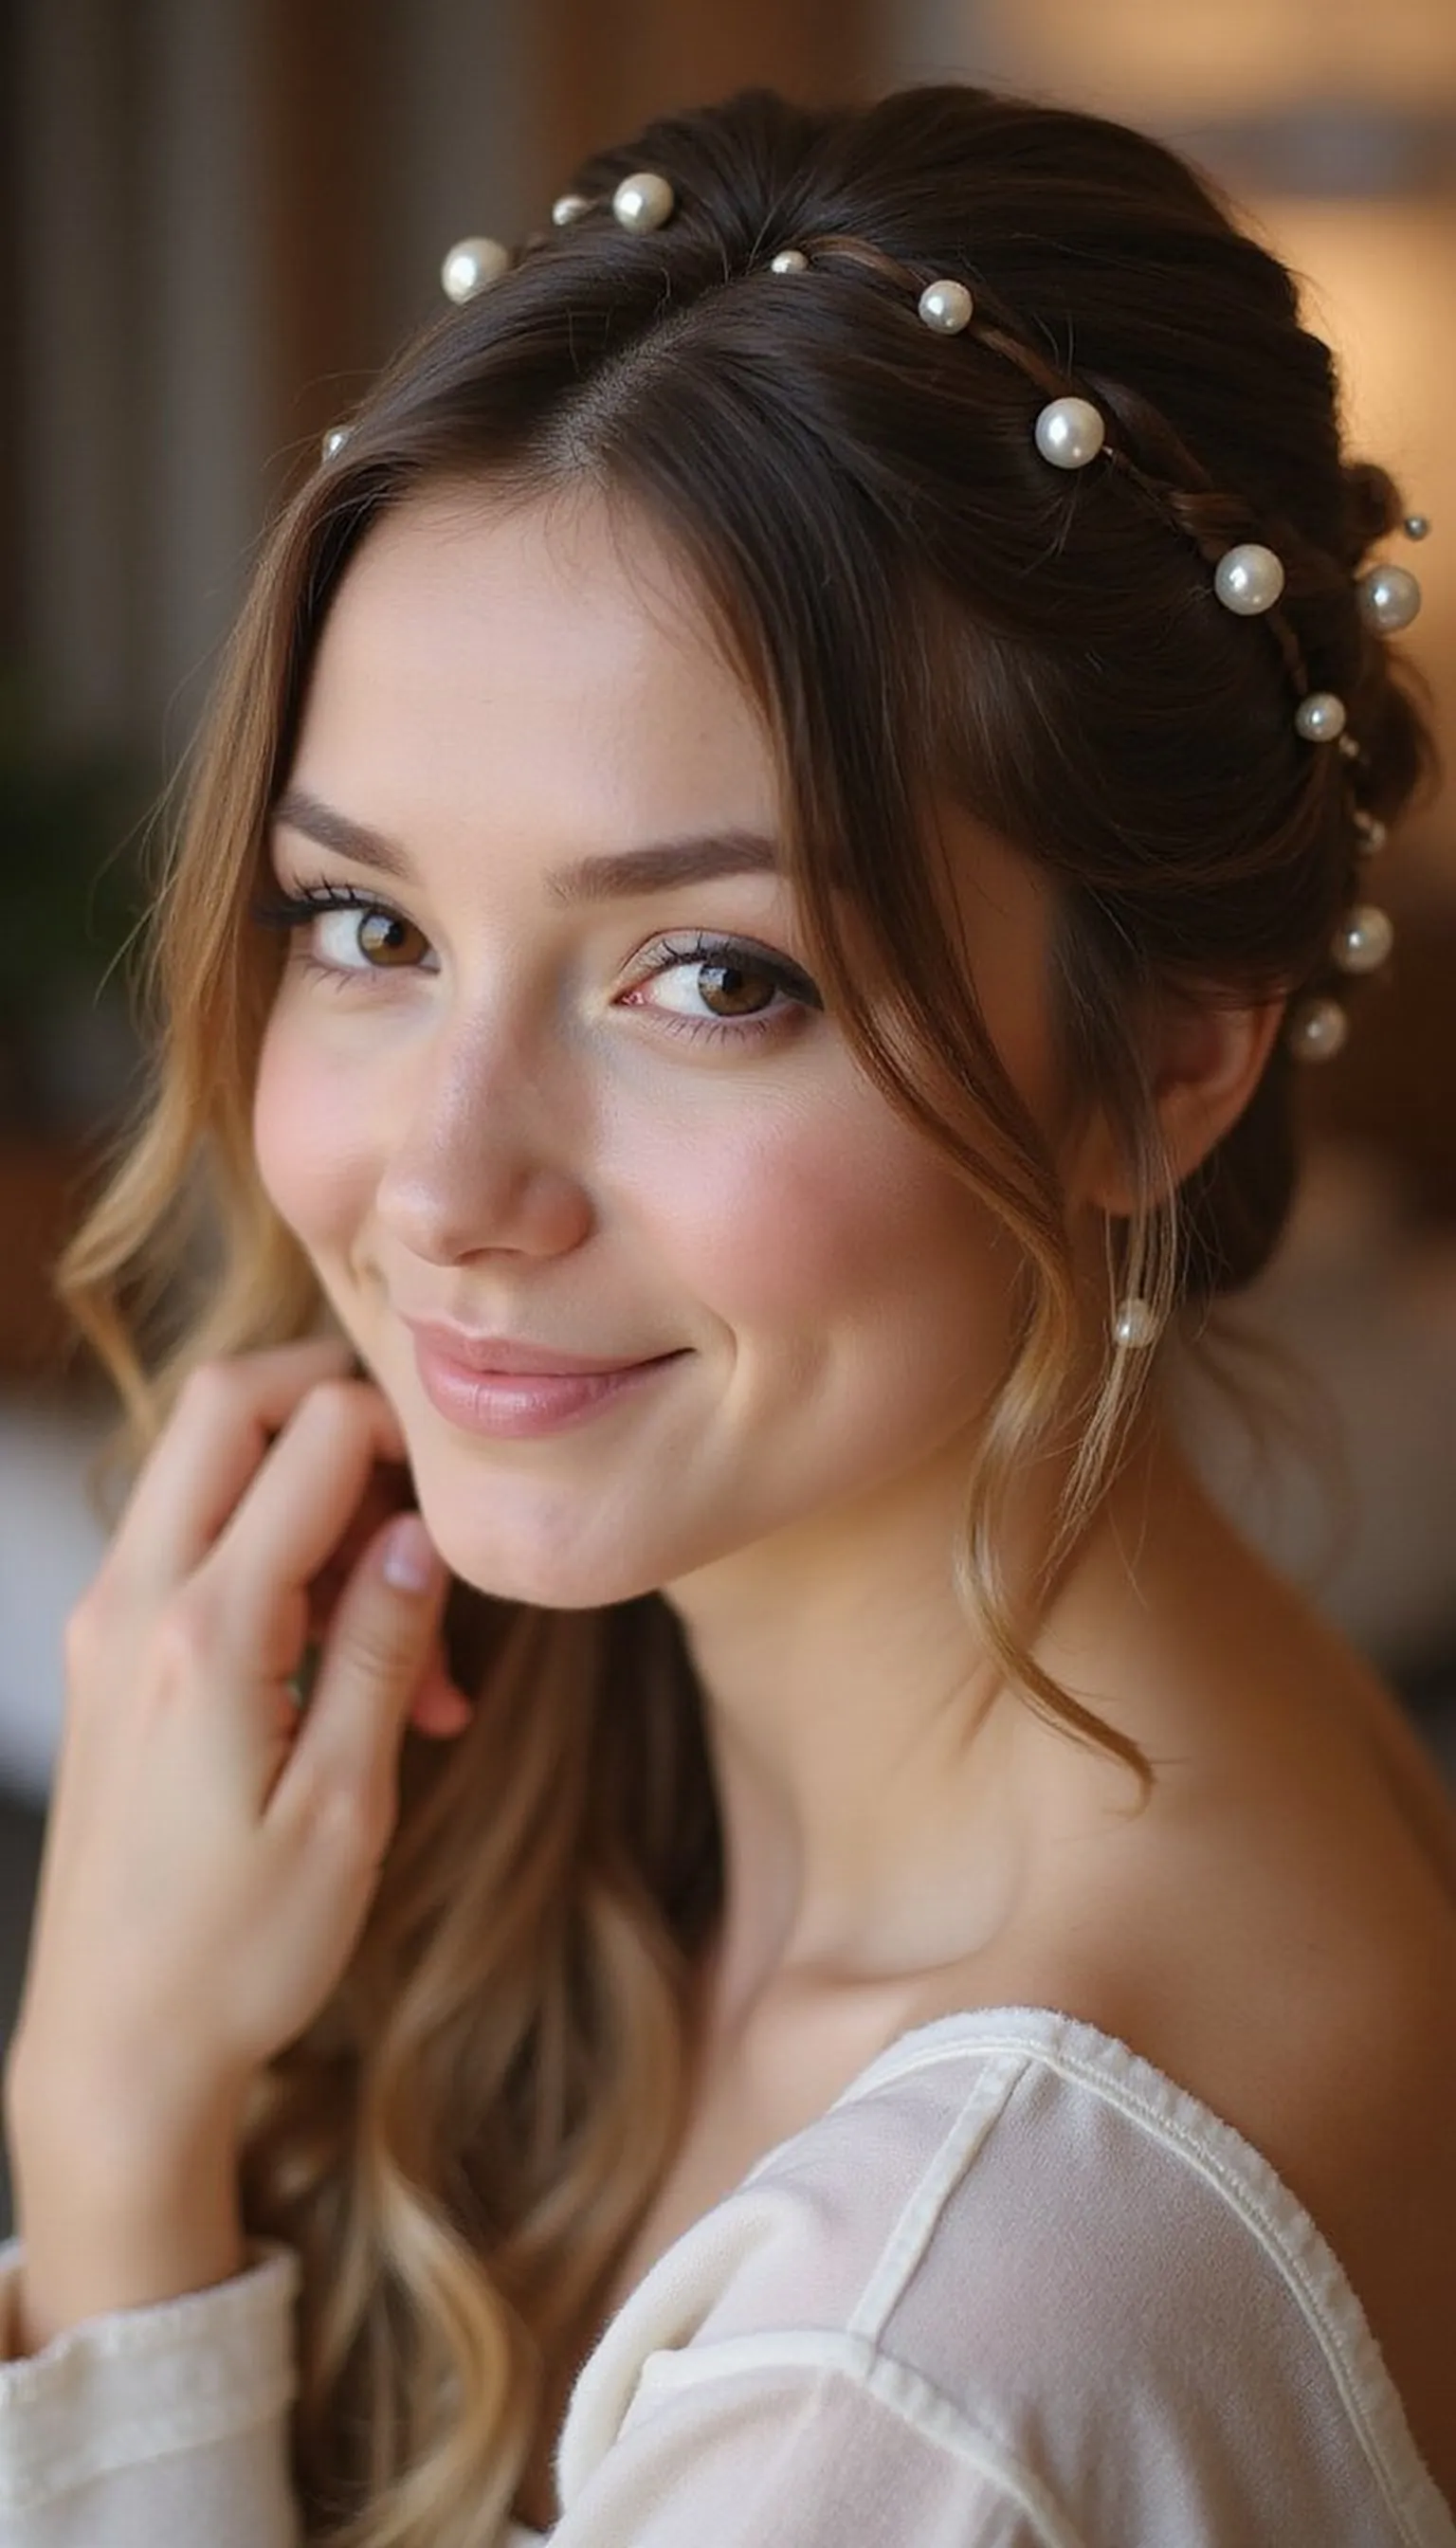
A slim low loop gathers hair into a compact fold that keeps collars smooth while pearl pins add refined interest. The loop stays close to the nape so scarves and turtlenecks rest naturally.
Create a low pony, twist the length into a small loop and anchor with bobby pins, then scatter pearl hair pins across the outer curve. Keep the loop tight so it reads slim rather than bulky under heavy fabrics.
This style is understated yet dressy, great for receptions and polished daytime looks. Finish with a light setting spray to keep the pearls in place without stiffening the hair.
Styling Tips
- Place pearl pins on the outer edge to avoid contact with collars.
- Use color-matched bobby pins to hide the base hold.
- Keep the loop compact for a low-profile silhouette.
Pro Tip: Space pearl hair pins evenly and angle them outward so they’re visible above a shawl without rubbing against the neckline.
Avoid: Creating a large loop will press against turtleneck seams. Aim for a slim, snug loop close to the nape.
Try Also: Swap pearls for tiny metallic pins or create two small loops side-by-side for a modern twin-bun vibe. Add a velvet ribbon at the base for texture.
Products & Materials
Items Used
“A slim low loop accented with pearl pins for classy comfort.”
Tucked Halo Braid Around The Nape
⏱️ 30 min · 🔴 Advanced
This tucked halo braid wraps around the nape to create a crown-like effect that stays low and collar-friendly. The braid’s tuck hides ends so nothing pokes the skin or snags on wool fabrics.
Braid hair into a halo that follows the hairline low at the nape, then tuck the remaining braid under the base and secure with bobby pins. Smooth the top and set with a light mist so the halo holds without creating stiffness against turtlenecks.
The result reads polished and romantic, excellent for formal events or special occasions. Add a few decorative pins along the crown for subtle shine that won’t interfere with neck layers.
Styling Tips
- Keep the braid close to the head so it doesn’t push into collars.
- Use many small bobby pins to anchor the tucked braid securely.
- Finish with a light mist rather than a heavy spray for flexibility.
Pro Tip: Tuck the braid under itself and secure with multiple small bobby pins to create a flush base that won’t catch on shawls.
Avoid: Leaving the braid too loose makes it shift and snag under collars. Keep the halo snug to the head.
Try Also: Create two thinner halo braids for a textured crown or add scattered pearl pins for a bridal look. For a casual take, pancake the braid slightly.
Products & Materials
Items Used
“A tucked halo braid that creates a low, collar-friendly crown.”
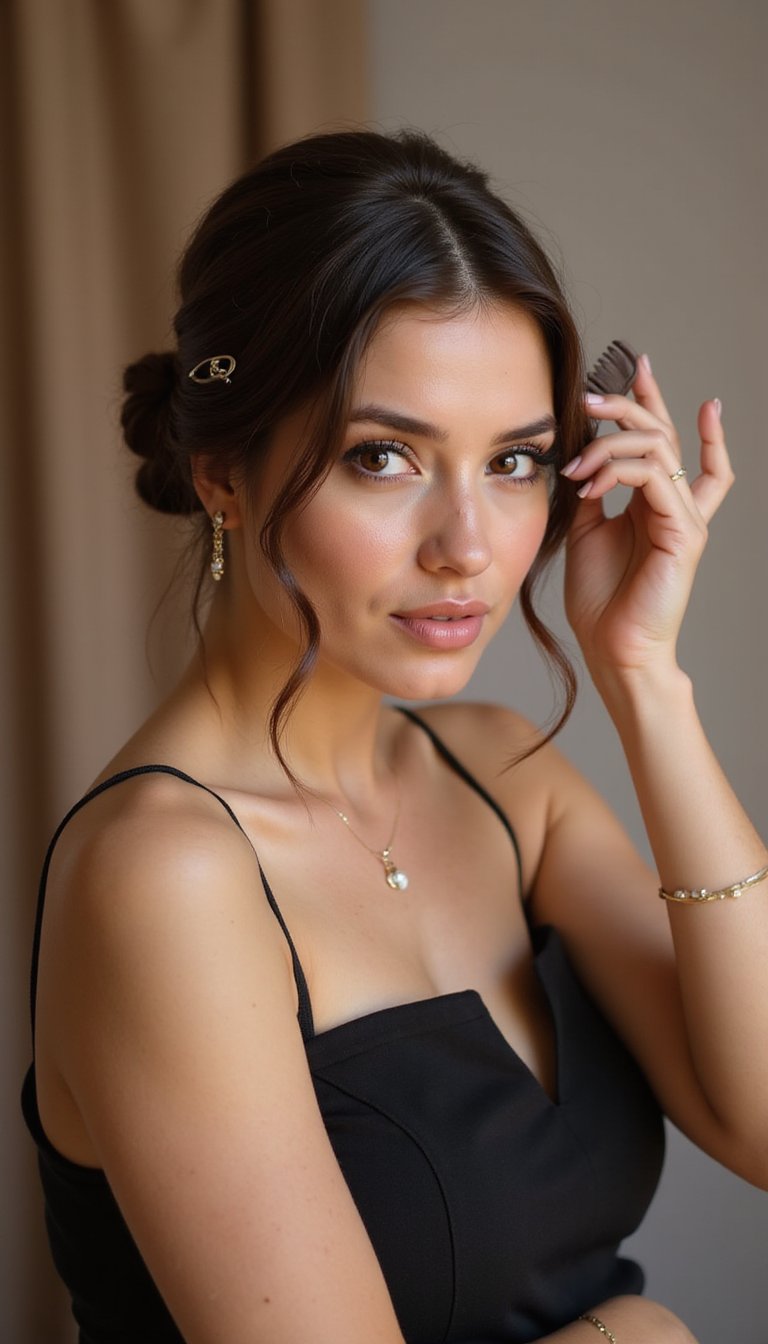
Low Knot With Decorative Comb Accent
⏱️ 20 min · 🟠 Intermediate
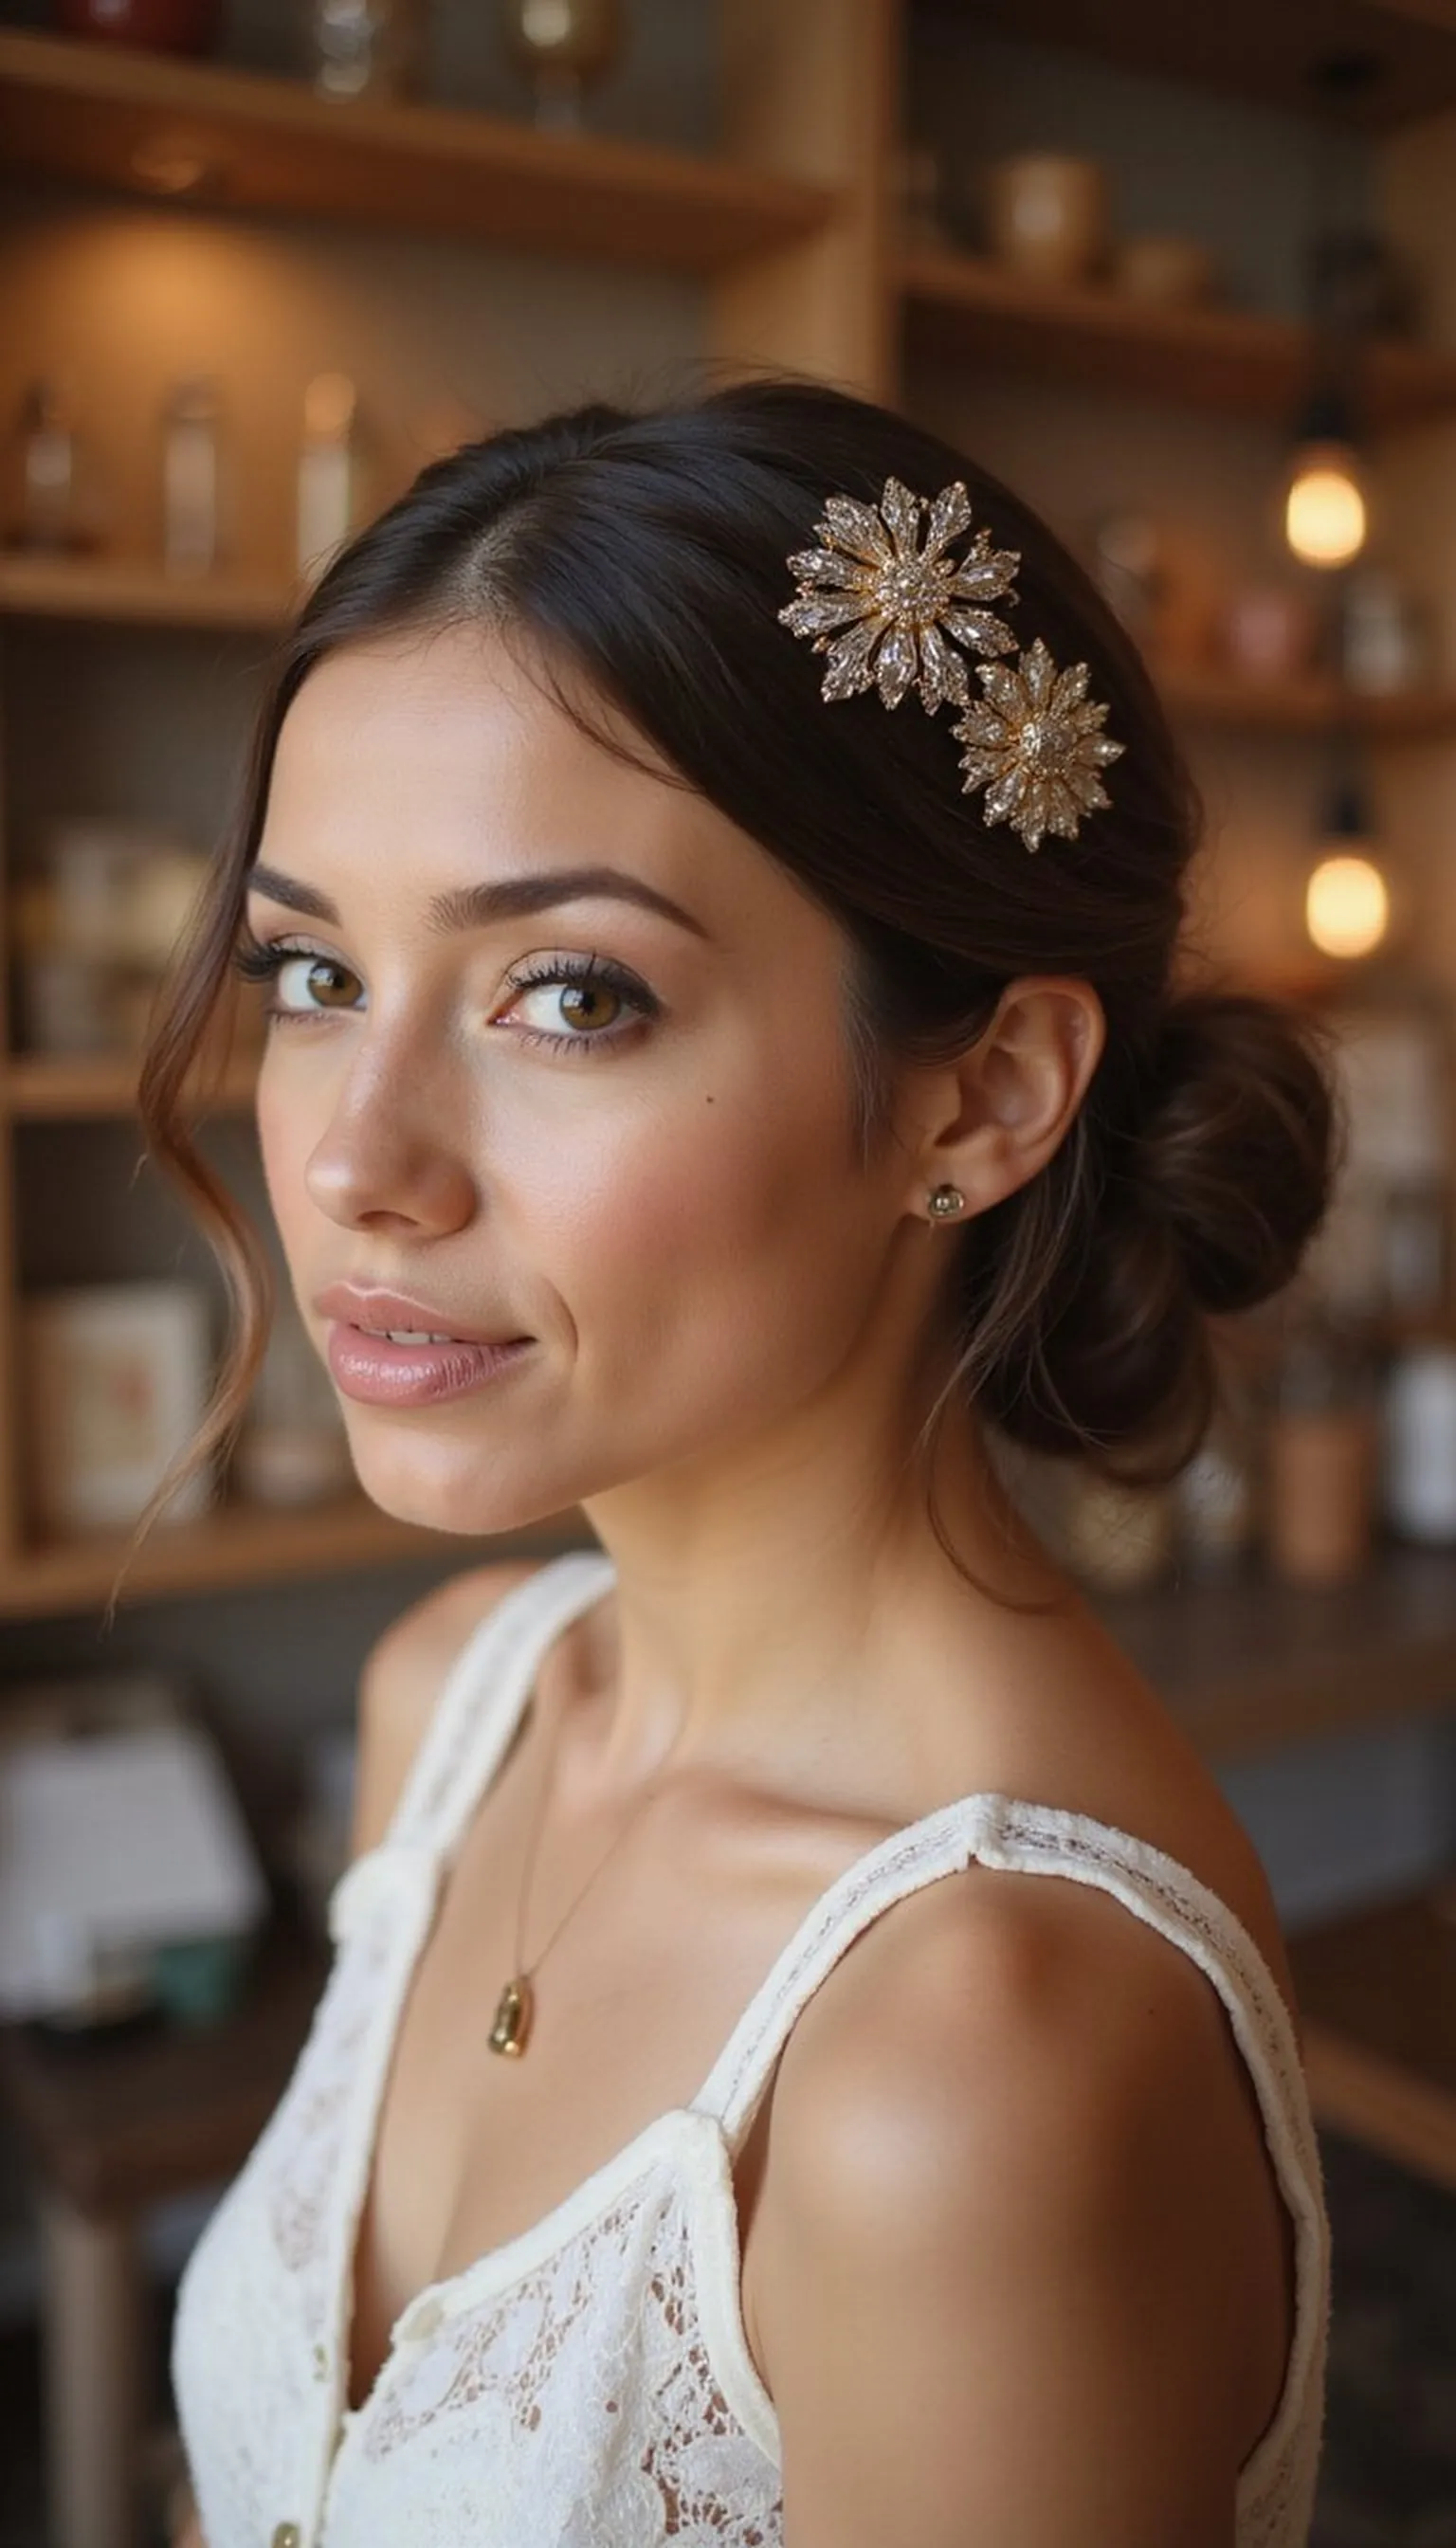
A low knot paired with a decorative comb gives a polished touch while staying compact under shawls and collars. The comb sits above the knot so it decorates without rubbing the neckline.
Create a sleek low knot by twisting hair into a small coil at the nape and securing it with bobby pins, then slide the decorative hair comb above the coil for detail. Keep the coil tight for comfort and a slim profile when layered garments are worn.
This option works for dressier events where collars must remain neat. Finish with a smoothing serum to prevent fabric from catching on stray hairs.
Styling Tips
- Insert the decorative comb just above the knot for visibility and comfort.
- Use bobby pins to anchor the knot before adding the comb.
- Choose a slim comb to avoid added bulk under shawls.
Pro Tip: Anchor the knot with several bobby pins before adding the decorative comb so the accessory doesn’t shift when putting on a shawl.
Avoid: Placing the comb too low makes it rub against collars. Position it slightly higher and angle outward.
Try Also: Swap the comb for a slim jeweled barrette or place two small combs symmetrically. Try a textured knot for soft volume.
Products & Materials
Items Used
- decorative hair comb
- bobby pins
“A neat low knot accented with a decorative comb for collar-friendly style.”
Layered Low Bun For Thick Hair Control
⏱️ 25 min · 🔴 Advanced
A layered low bun tames thick hair into a controlled, flatter shape that won’t push turtleneck seams outward. Texturizing spray helps distribute grip so the bun stays compact under heavy fabrics.
Section thick hair, twist inner layers into a compact base and wrap outer layers smoothly around it, securing with bobby pins and an elastic. Use texturizing spray on the underlayers to give the pins something to hold onto without adding visible volume at the nape.
This gives a refined profile for cold weather outfits while managing density near collars. Finish with a light sheen mist to tame frizz and keep the silhouette tidy throughout the day.
Styling Tips
- Work in sections so heavy hair doesn’t create a single bulky mass at the nape.
- Use strong bobby pins and several anchoring points for stability.
- Apply texturizing spray sparingly to build grip without puffing the hair.
Pro Tip: Build the bun from the inside out, pinning the heavier inner layers first so the outer wrap sits flat and collar-friendly.
Avoid: Combining all hair into one big loop creates too much bulk. Layer and pin gradually to flatten the profile.
Try Also: Try a braided base under the wrap for extra hold or a low twisted bun for a sleeker finish. Add a narrow headband for polish.
Products & Materials
Items Used
- texturizing spray bottle
- bobby pins
- elastic hair tie
“A layered low bun that controls thick hair without adding neck bulk.”
Sleek Twisted Low Ponytail With Headband
⏱️ 10 min · 🟢 Beginner
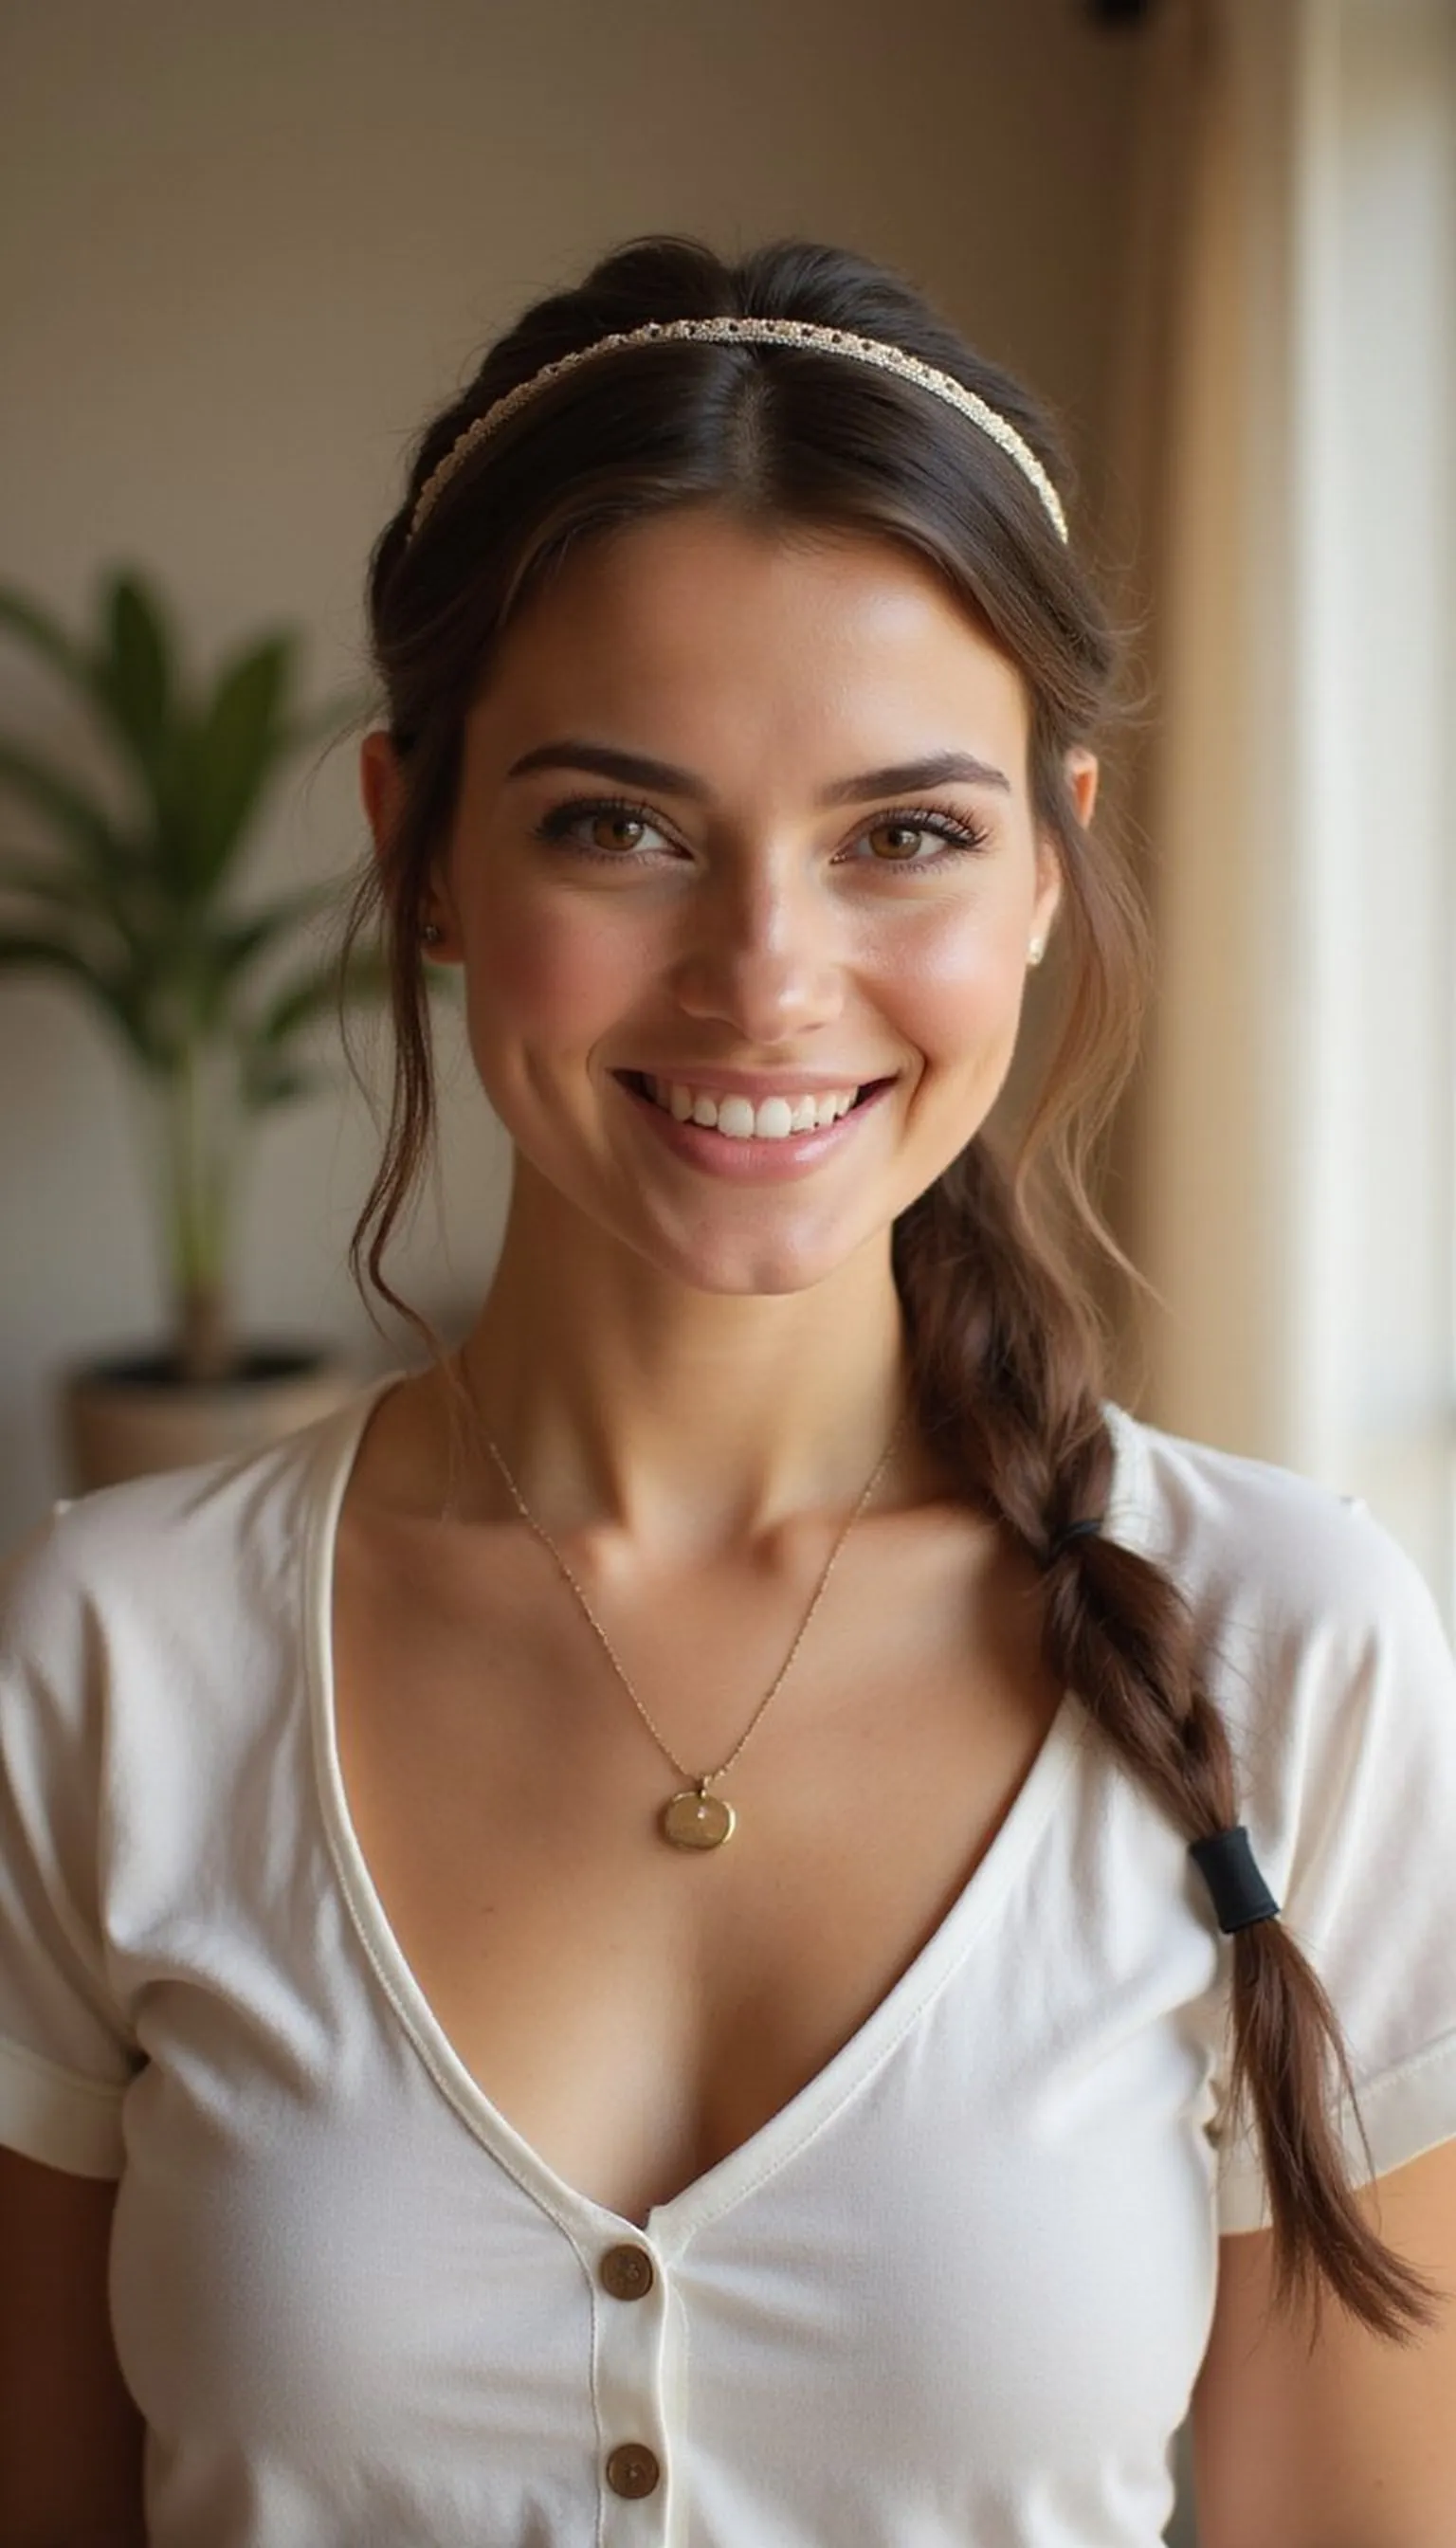
A sleek twisted low ponytail paired with a thin headband keeps hair tidy and out of the collar area. The headband smooths the top while the low twist sits comfortably under shawls.
Create a low pony, twist the length gently and coil it into a slim loop, then secure with an elastic and a few bobby pins. Add a thin headband to tame baby hairs and create a polished frame that won’t lift turtleneck edges.
This quick option is perfect for workdays or casual coffee meetups where neatness matters. Finish with smoothing balm and a soft brush-through for a refined, collar-friendly silhouette.
Styling Tips
- Choose a thin headband that won’t add bulk at the crown.
- Secure the twist low so it stays clear of the neckline seam.
- Use bobby pins that match hair color to hide holds.
Pro Tip: Wear the thin headband slightly back from the hairline to smooth flyaways while keeping the profile slim against high collars.
Avoid: Using a wide headband can create an unwanted ridge under a shawl. Opt for a slim option for comfort.
Try Also: Swap the headband for a silk scarf or add a decorative barrette above the pony for flair. Try a low braided pony for texture.
Products & Materials
Items Used
- thin headband
- elastic hair tie
- bobby pins
“A sleek twisted low pony with a slim headband for neat collars.”
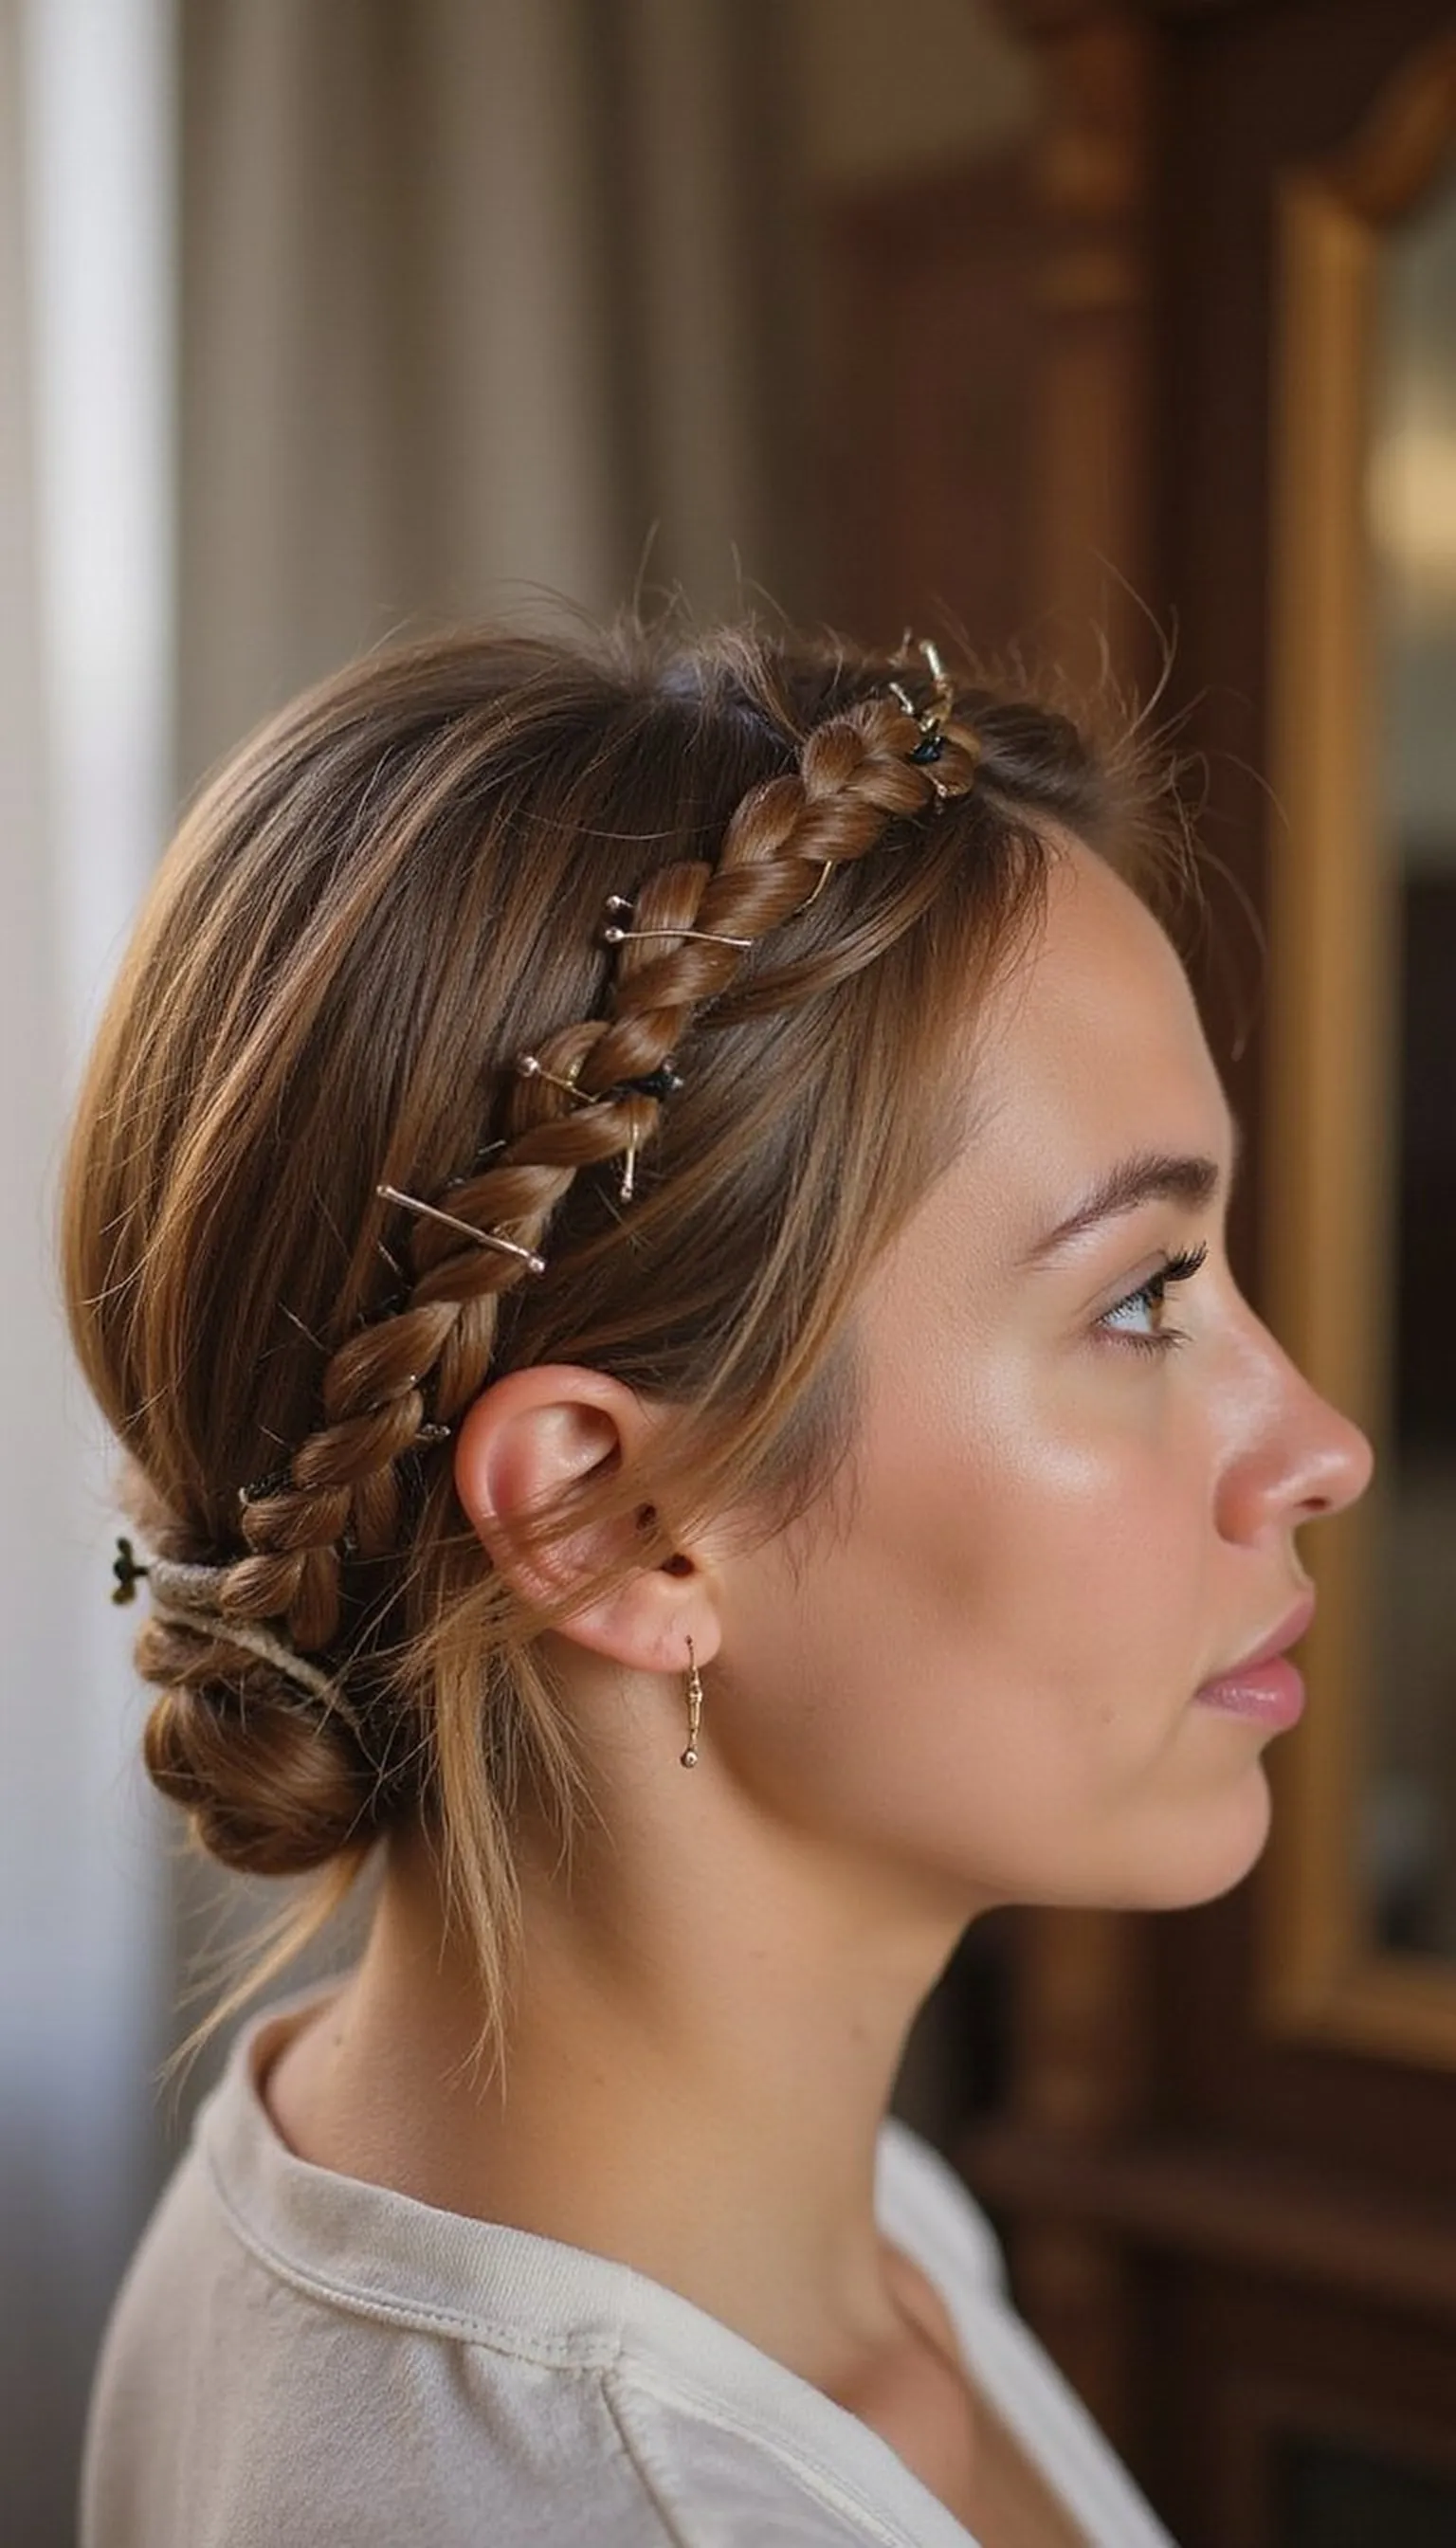
Low Braided Crown That Tucks In
⏱️ 40 min · 🔴 Advanced
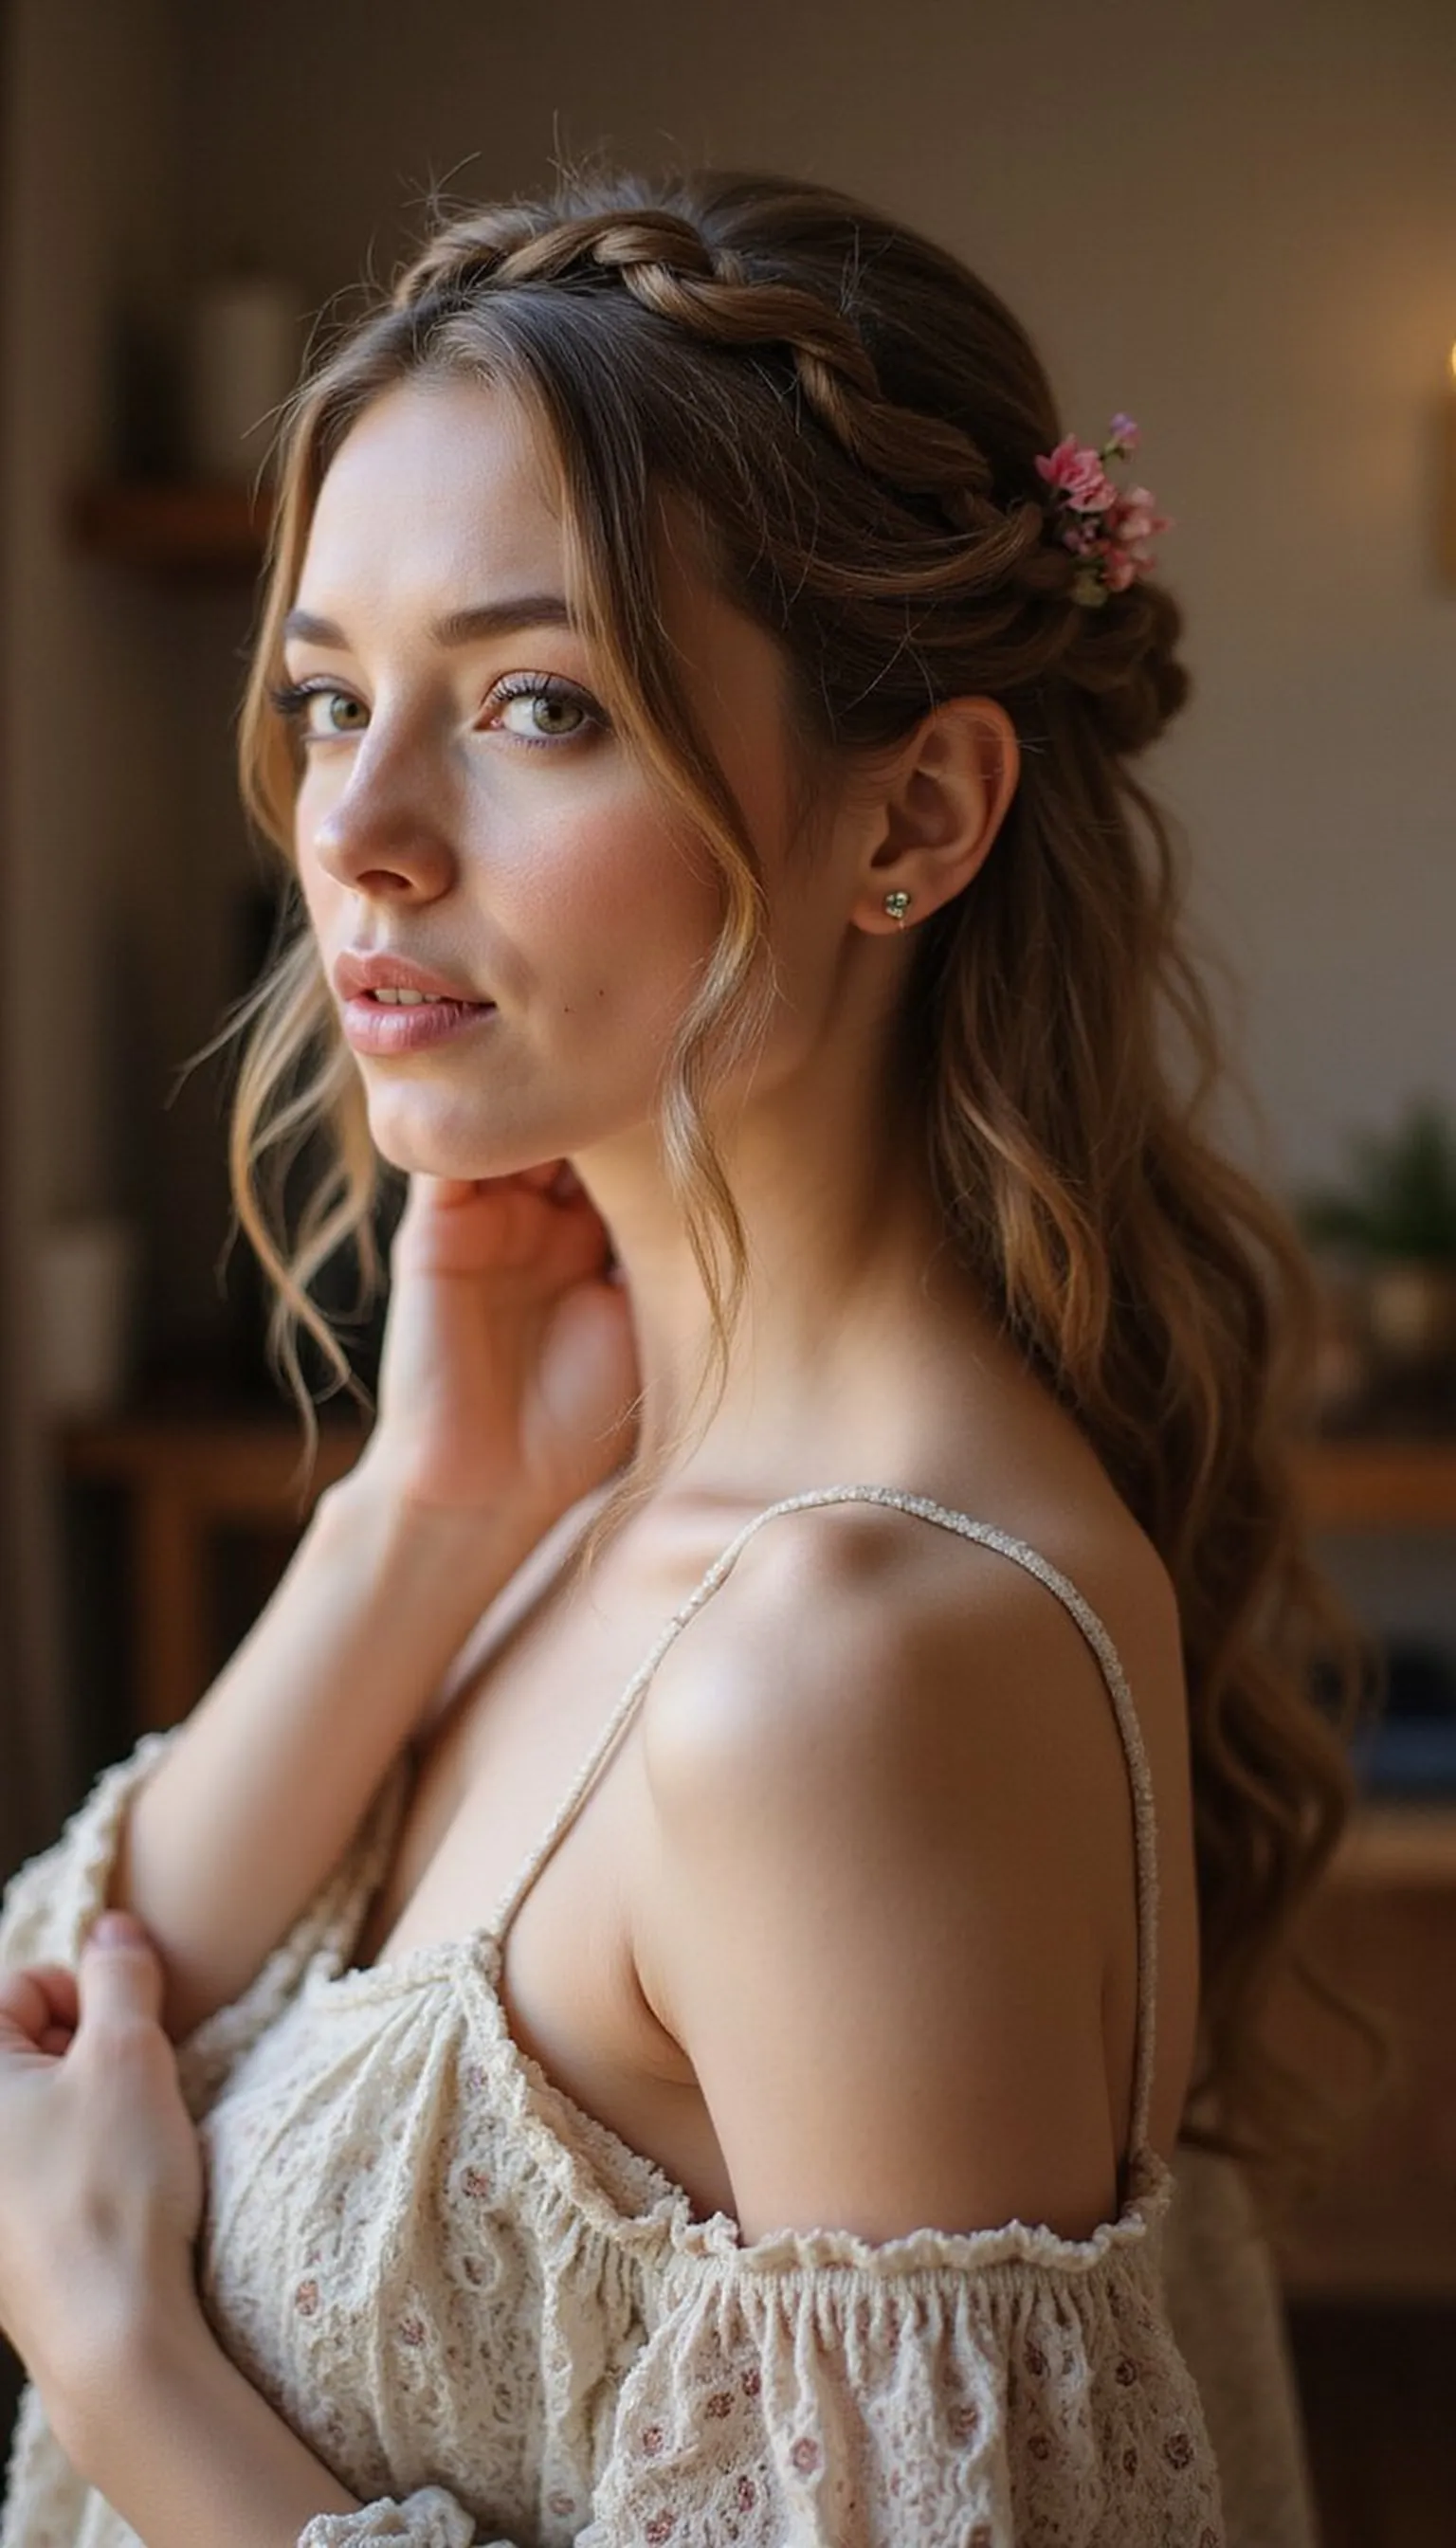
A low braided crown tucks neatly into the nape to create a crown-like effect without adding neck bulk. The braid’s tucked ends sit flush under the base so scarves glide over smoothly.
Create two braids from temple to temple that curve along the hairline, then wrap them low and tuck the ends under the base, securing with bobby pins. Smooth the top lightly so the crown reads soft and close-to-head rather than voluminous at the collar.
This intricate look is great for special events where collars must remain pristine. Add a few small floral pins for a romantic touch that won’t interfere with layers.
Styling Tips
- Tuck braid ends fully under the base to avoid snagging on knitwear.
- Anchor the crown with many small bobby pins for secure hold.
- Keep the top smooth for a refined, collar-friendly profile.
Pro Tip: Use many small bobby pins to secure the braided crown tightly so the tucked ends don’t shift when adjusting a shawl or collar.
Avoid: Leaving braid ends loose can cause poking and snagging under layers. Fully tuck and pin every tail for comfort.
Try Also: For a softer look, pull the braids apart slightly to pancake them or add tiny floral pins along the crown for romance. Try a single long braid wrapped low for a simpler version.
Products & Materials
Items Used
- bobby pins
- elastic hair tie
- small floral pins
“A tucked low braided crown that stays flat under knitwear.”
