
As an Amazon Associate I earn from qualifying purchases.
Red White and Blue Party Crafts bring bold color and playful texture to summertime celebrations. These patriotic party crafts turn simple materials into cheerful accents that brighten a table and invite guests to linger.
The collection covers quick garlands, glowing lanterns, and small tabletop pieces that suit a relaxed backyard gathering. Useful ideas for Fourth of July and Memorial Day décor keep supplies approachable while honoring a stars-and-stripes palette throughout the party.
Projects span easy kid-friendly options and a few more detailed designs for someone wanting an afternoon craft session. Thoughtful touches like layered fabrics, sparkly cardstock, and painted wood help tie the Red White and Blue Party Crafts into a cohesive celebration look.
Rustic Mason jar centerpiece with layered fillers
⏱️ 1 hour · 🟢 Beginner
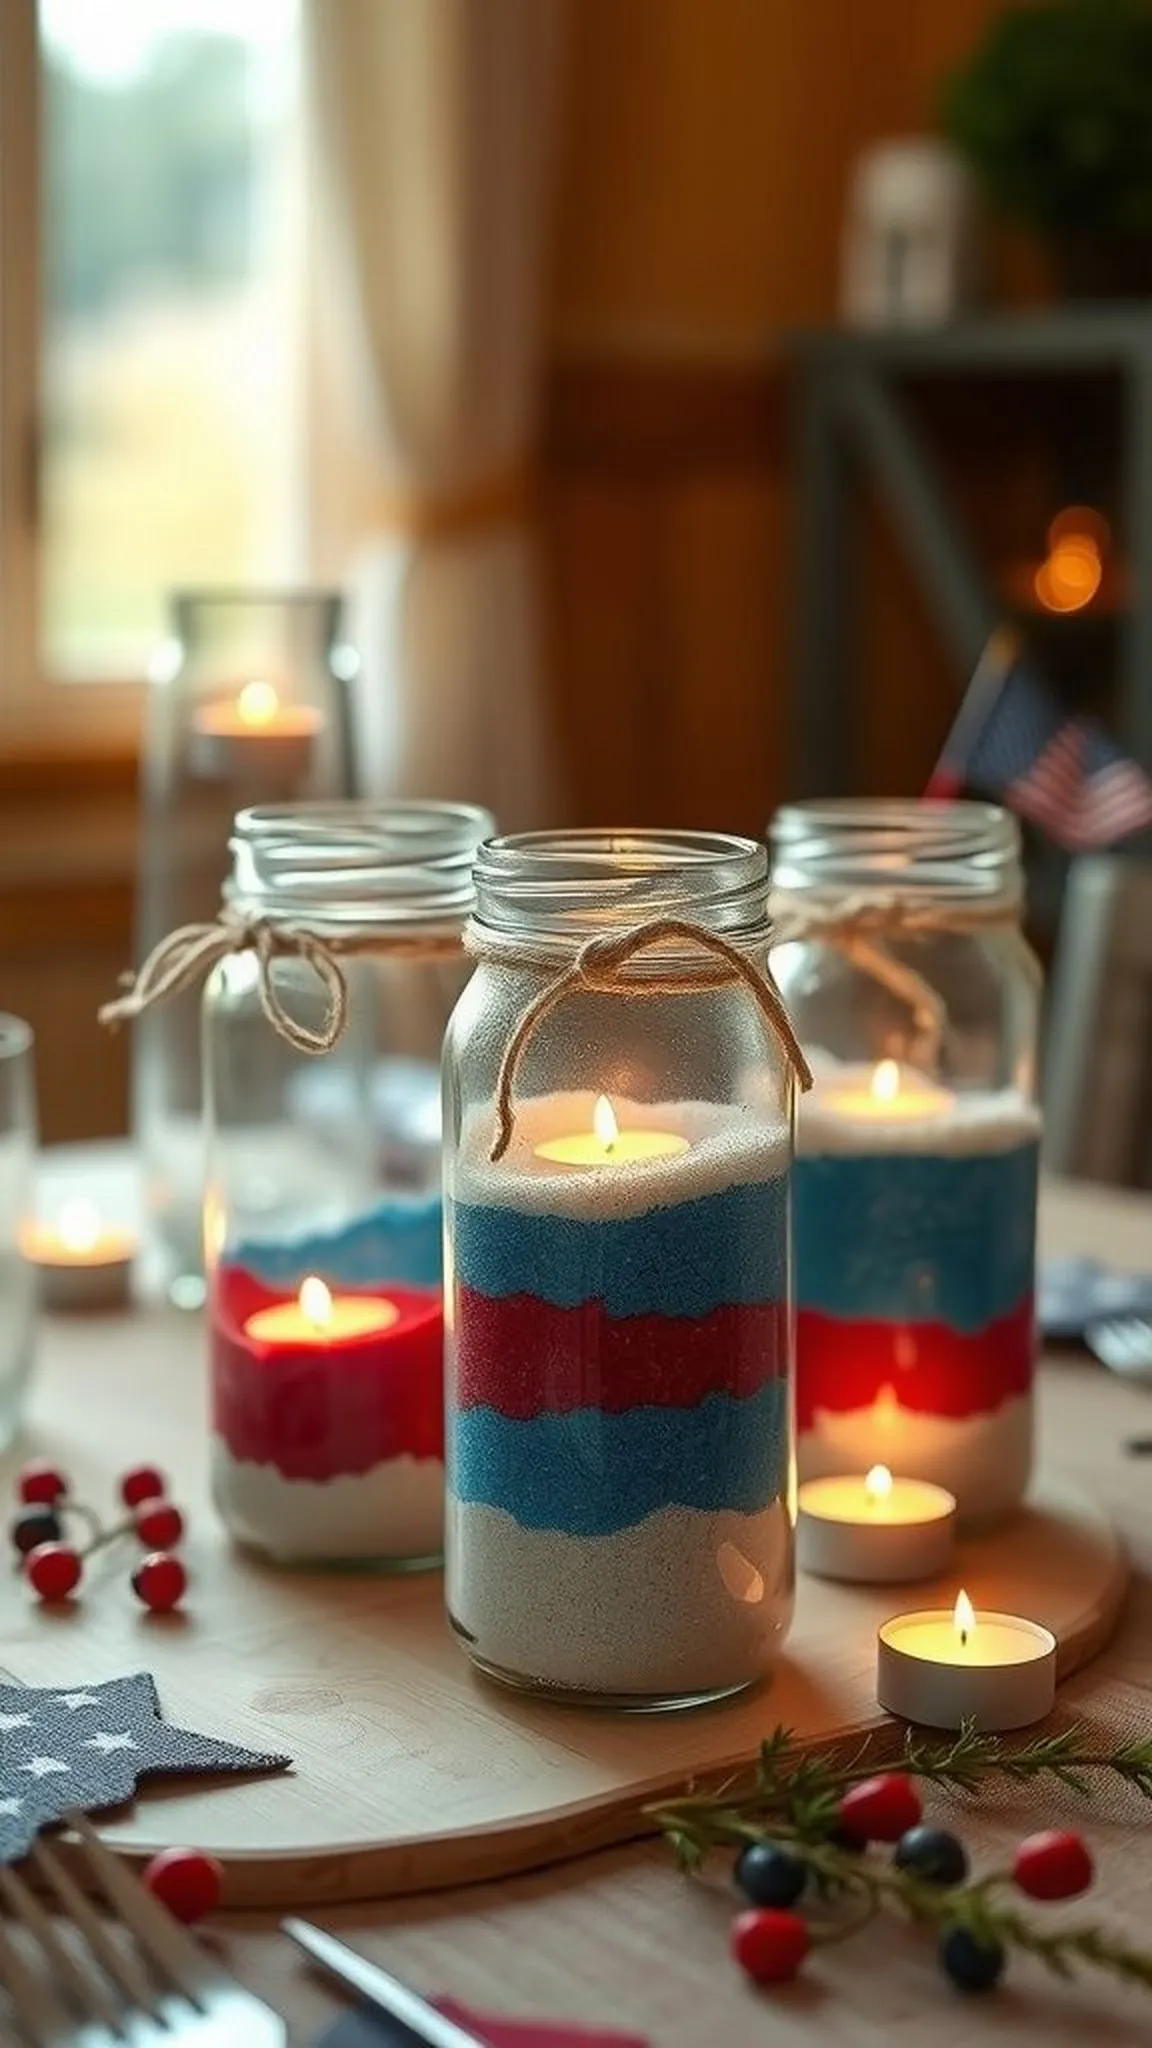
A group of clear glass jars shows off bands of red, white, and blue textures that gleam when sunlight hits them. The glass catches small reflections while the colors read bright and festive across a wood table.
Natural twine around the necks softens the palette and adds a cozy, homespun touch that feels familiar and relaxed. Battery tea lights inside produce a warm glow that makes the jars feel inviting as the evening cools.
Different jar heights create a casual rhythm that keeps the centerpiece interesting from every angle. Small floral sprigs or faux berries tucked beside the jars bring an organic contrast to the vivid layers.
Pro Tip: Choose jars of mixed heights and narrow-neck varieties to create visual layers and dynamic light play across the table setting.
How to Make This
- Gather clean mason jars in different sizes, red-white-blue craft sand or beads, battery tea lights, and twine.
- Layer colored sand or beads in the jars to create horizontal stripes, leaving room at the top for a light.
- Place a battery tea light into each jar and wrap twine around the neck for a rustic accent.
- Arrange jars in clusters on a runner or wooden board, alternating heights for a natural flow.
Avoid: Overfilling jars can crowd the tea lights and reduce the glowing effect; leave enough space for the light to sit comfortably. Choosing identical heights for every jar can make the display feel flat instead of lively.
Try Also: Swap sand for red and blue glass pebbles for added shine, or swap twine for satin ribbon in the same colors. A single tall jar with layered motifs can act as a striking solo centerpiece.
Products & Materials
Items Used
- mason jars
- red white blue craft sand
- battery tea lights
- twine
“Layered mason jar centerpieces that glow with patriotic charm.”
Folded star garland from colorful cardstock
⏱️ 45 min · 🟢 Beginner
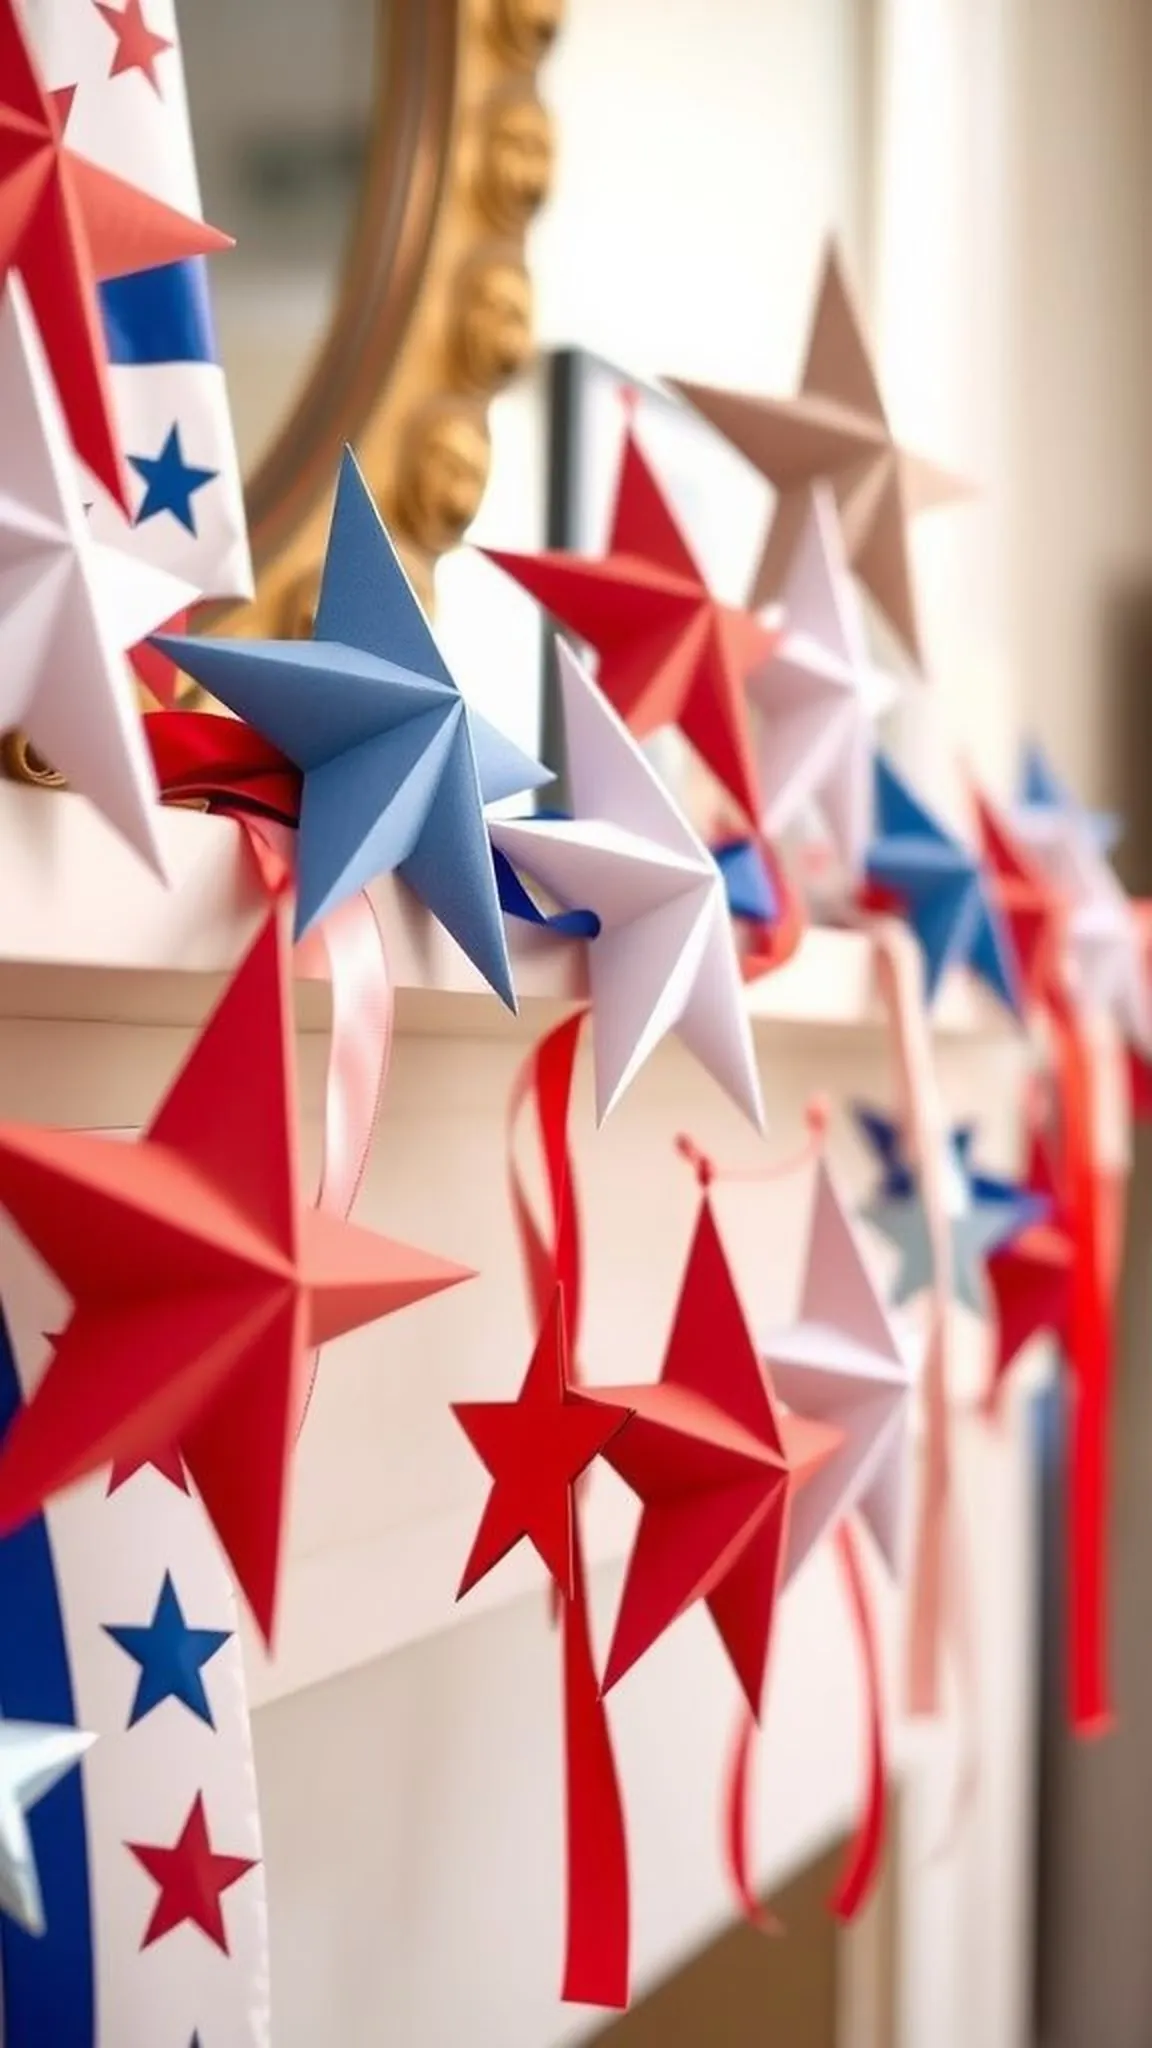
A string of folded stars drifts along a mantel, each point catching the light and casting tiny shadows on the wall. The cardstock has a crisp edge that makes each star look neat and slightly architectural.
The colors alternate in a rhythmic pattern that reads instantly celebratory without feeling over the top. Soft folds create texture so the garland seems playful and tactile when guests pass beneath it.
The overall effect is lightweight and airy, perfect for a breezy backyard setup or a bright indoor nook. Small metallic accents add a subtle gleam that lifts the palette without overwhelming the paper shapes.
Pro Tip: Score folds lightly along each star for crisp, uniform creases that help maintain shape without tearing delicate cardstock.
How to Make This
- Select red, white, and blue cardstock sheets and a star template sized for the mantel or doorway.
- Trace and carefully fold each star along pre-marked lines to create three-dimensional points.
- Thread a thin ribbon or twine through the center of each folded star using a needle or fine skewer.
- Space stars evenly along the ribbon and tie secure knots at each end for hanging.
Avoid: Folding without scoring can lead to uneven creases and a sloppy star shape, especially on heavier cardstock. Crowding too many stars close together can hide the three-dimensional effect and make the garland look flat.
Try Also: Mix patterned scrapbook paper with solid cardstock for a lively mix, or swap some stars for small paper rosettes. Create a mini garland for a cake table using smaller star sizes.
Products & Materials
Items Used
- cardstock sheets
- thin ribbon
- scoring tool
“Crisp folded star garland that brightens a mantel or doorway.”
Whimsical paper pinwheels for outdoor breezes
⏱️ 30 min · 🟢 Beginner
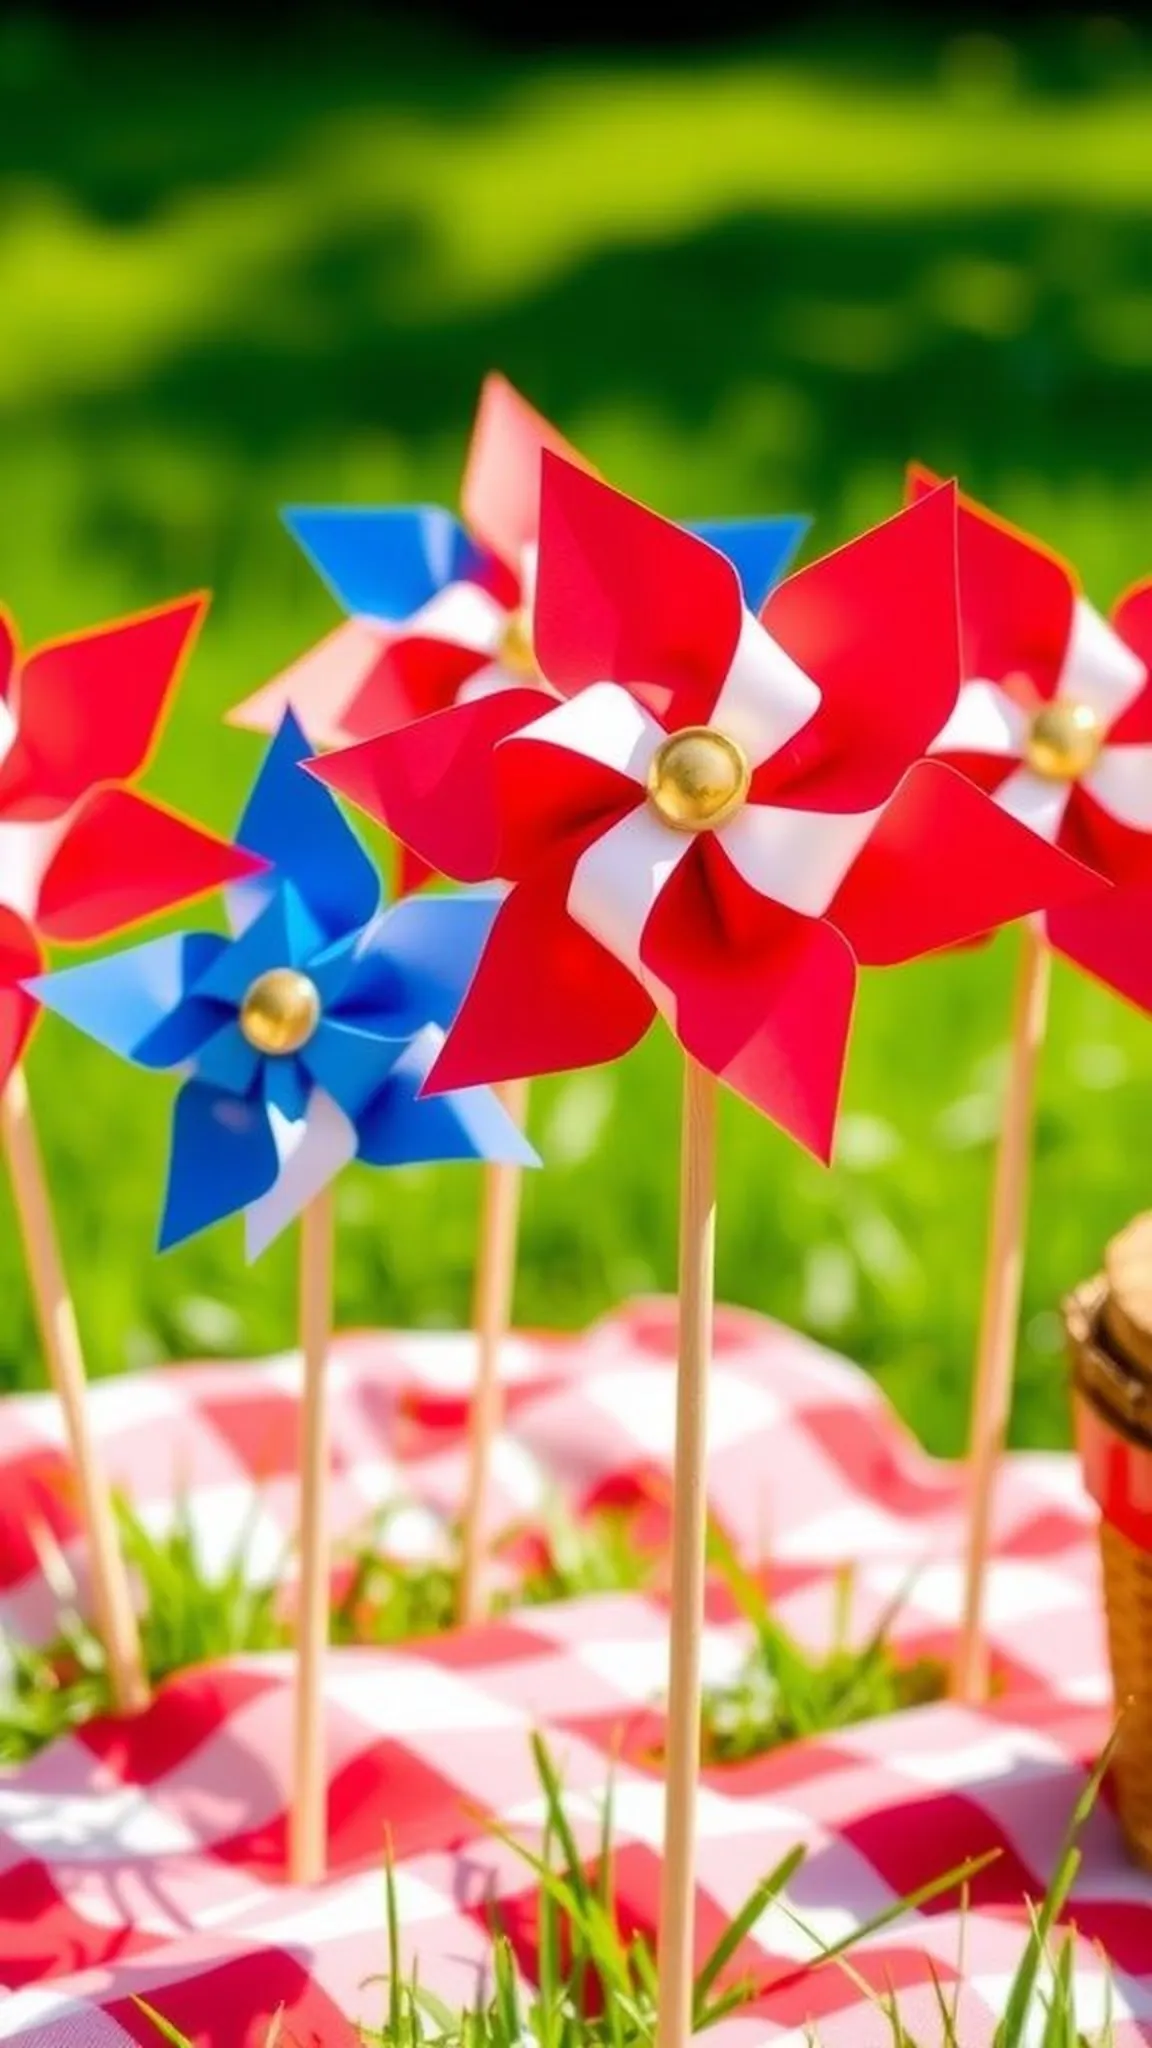
Paper pinwheels spin gently when a breeze passes, sending tiny flashes of red, white, and blue around the yard. The glossy cardstock faces catch light in quick glints that feel playful and summery.
A wooden stick provides a tactile contrast to the shiny paper, making the pinwheel pleasant to hold and wave. The motion adds an energetic rhythm above a picnic blanket or along a walkway.
Clusters of pinwheels of different sizes create a sense of movement and whimsy without needing much space. Their bold centers pull the eye while the outer points blur into lively color streaks when in motion.
Pro Tip: Choose slightly glossy cardstock for brighter catch and balance the pinwheel on a smooth dowel to ensure free, steady spinning in light breezes.
How to Make This
- Cut square pieces of red white and blue cardstock and mark diagonal fold lines from each corner toward the center.
- Fold every other corner toward the center and secure with a brad or small pin through all layers and a wooden skewer.
- Add a small bead or spacer between the paper and the stick to allow the pinwheel to spin freely.
- Anchor the skewers into a foam block or small pots to display a cluster.
Avoid: Fixing the center too tightly prevents spinning and makes the pinwheel feel stiff rather than lively. Skewers that are rough or splintered can catch the paper and impede motion.
Try Also: Make mini pinwheels as cupcake toppers or create oversized pinwheels using poster board for a dramatic entrance statement. Alternate patterned paper with solids for a playful contrast.
Products & Materials
Items Used
- cardstock squares
- wooden skewers
- brads
- small beads
“Bright paper pinwheels that spin with every summer breeze.”
Save time and printer ink with 50+ printable templates and step-by-step instructions in one ad-free guide.

Just $19.99 — lifetime access
Bottle cap magnets with painted star accents
⏱️ 1-1.5 hours · 🟠 Intermediate
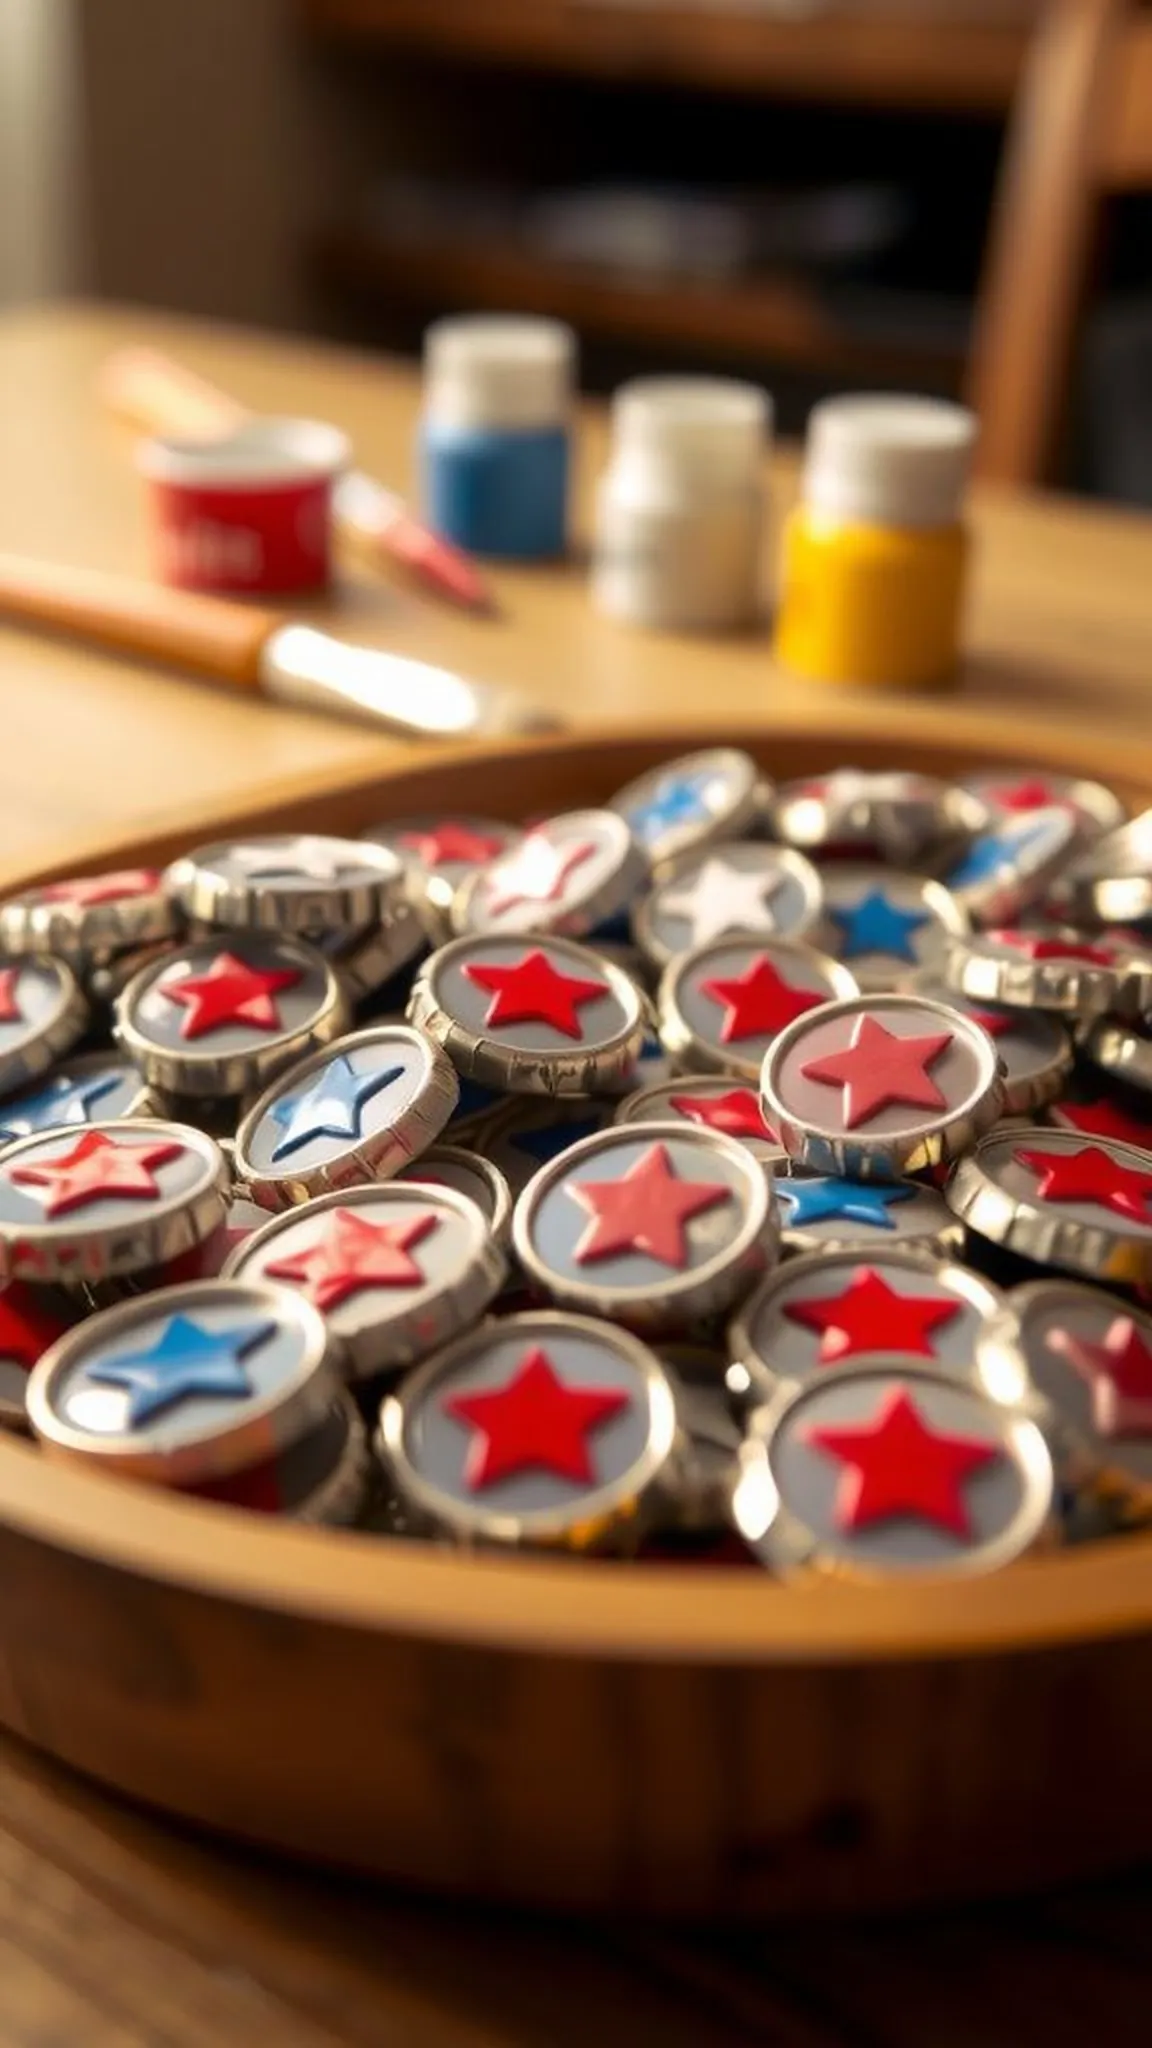
Small bottle caps become miniature canvases, each holding a hand-painted star that pops against a painted sea of blue or a crisp white. The rounded metal edges add a subtle sheen that frames the tiny artwork and contrasts with the matte paint.
Magnets on the back turn these accents into functional party keepsakes that can hold a card or a photo on a fridge. Their weight feels pleasingly solid in the hand, while the paint texture invites a second look up close.
A scatter of these little magnets across a dessert table gives the display a crafty, homespun vibe. The color edges read clean and festive from across the room and reward guests who examine them closely.
Pro Tip: Lightly roughen bottle cap interiors before painting so the primer and paint adhere evenly and resist flaking over time.
How to Make This
- Collect clean metal bottle caps and sand the interior lightly, then apply a thin primer coat suitable for metal.
- Paint base colors inside each cap and let dry before adding small star details with a fine brush.
- Once fully dry, attach round magnets to the back with a strong adhesive and press onto a flat surface until set.
- Arrange magnets in a shallow dish or display board near the party table.
Avoid: Skipping primer can lead to paint chipping off metal caps and creating a messy finish. Using weak adhesive for magnets may result in magnets popping off during handling.
Try Also: Swap stars for tiny stripes, polka dots, or tiny photo inserts for personalized keepsakes. Use different metal finishes like copper or silver paint for a vintage look.
Products & Materials
Items Used
“Tiny bottle cap magnets hand-painted with patriotic star designs.”
Layered paper rosettes for a backdrop wall
⏱️ 2 hours · 🟠 Intermediate
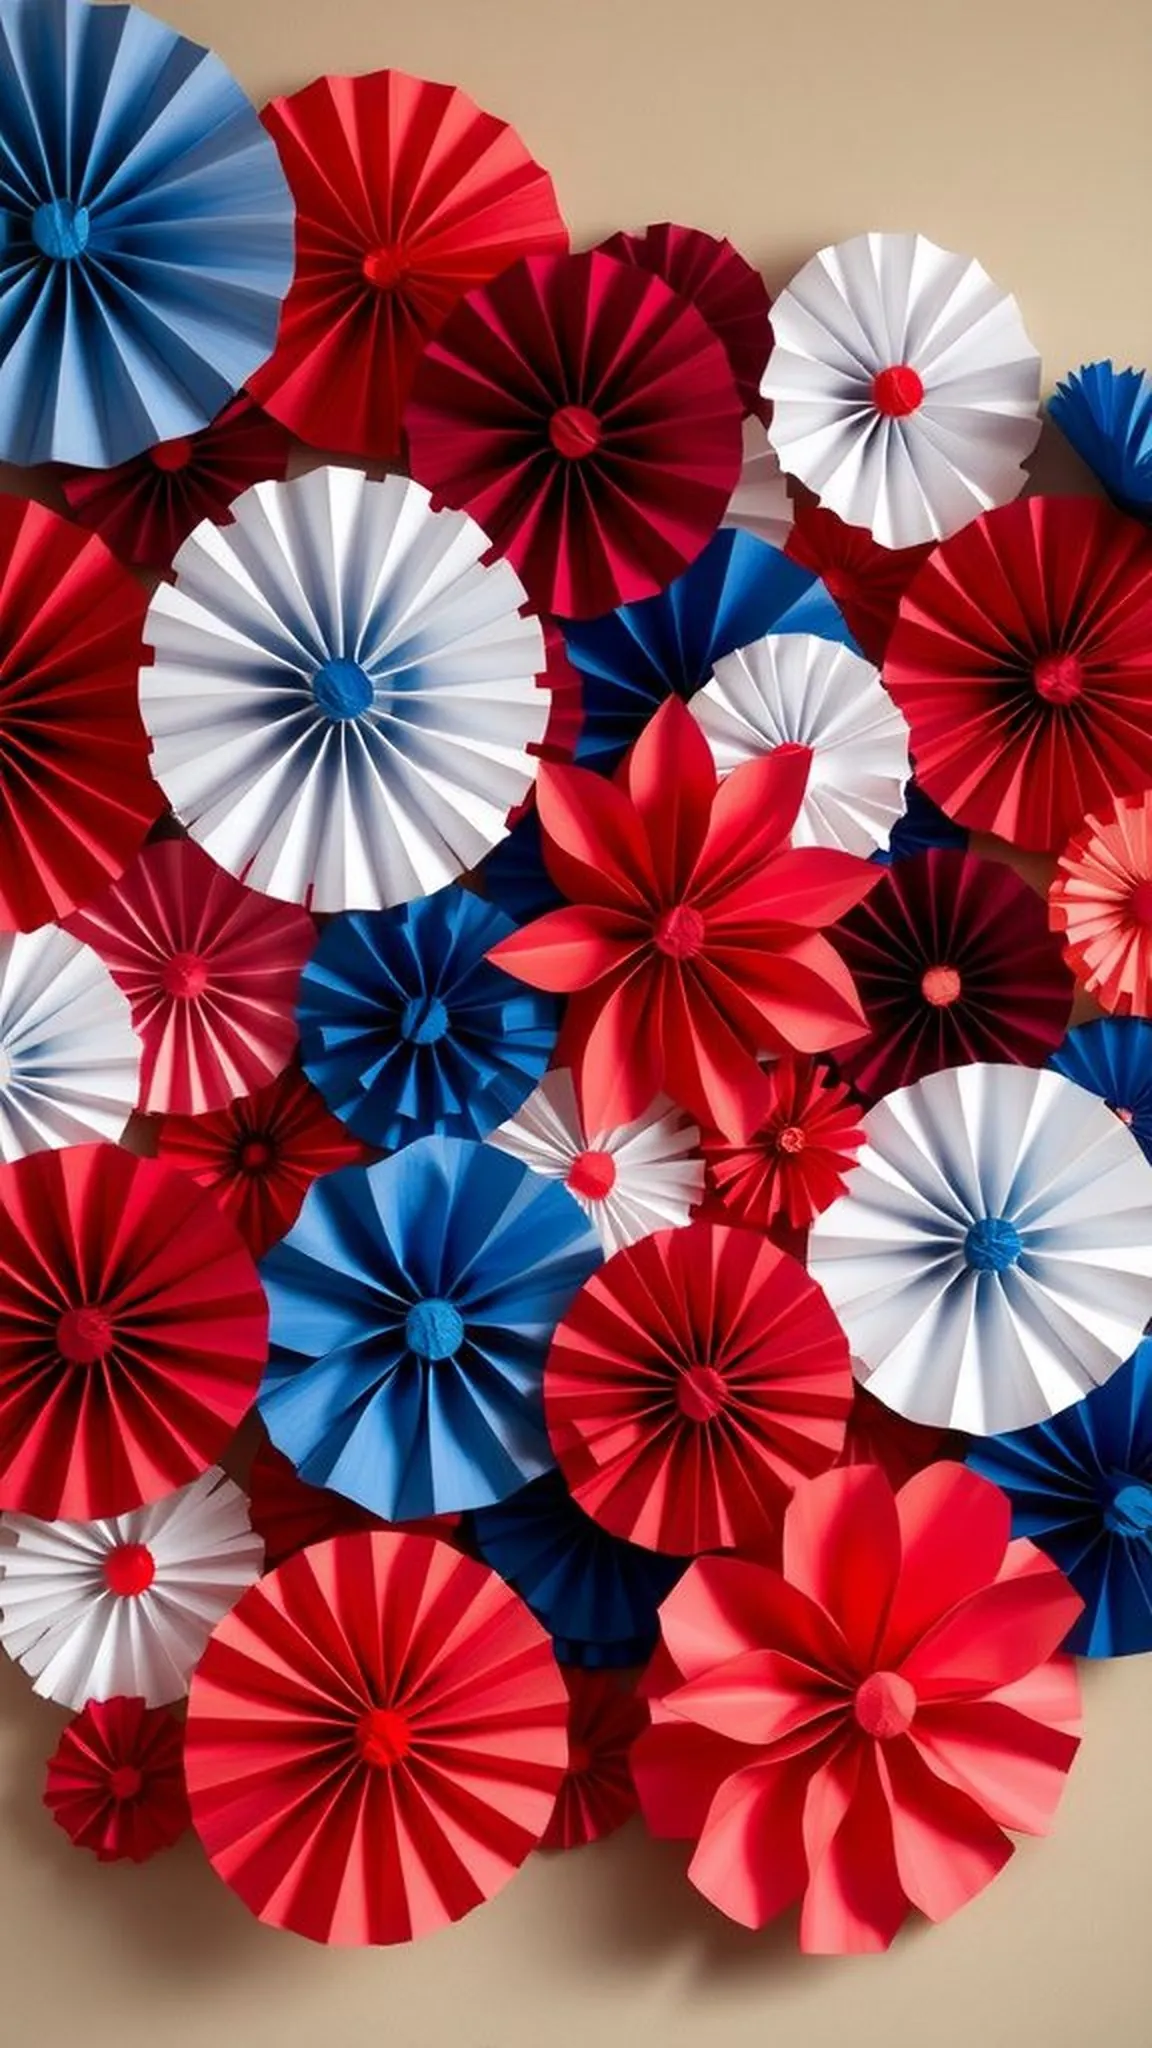
Large paper rosettes unfold into concentric waves that create a dramatic backdrop when clustered together. Their folded ridges catch light and shadow, producing a textured wall that reads like textile from a distance.
The layered arrangement of reds, whites, and blues produces a lively mix of scale that suits photo-worthy corners. The overall display feels celebratory and a bit theatrical, perfect for pictures and mingling beneath its sweep.
Slightly glossy papers add a reflective edge while matte stock keeps things grounded, offering pleasing contrast in the same installation. The rosettes’ radial patterns draw attention toward a focal spot without overwhelming surrounding décor.
Pro Tip: Mix glossy and matte paper stocks for each rosette to create visual contrast and extra depth under party lighting.
How to Make This
- Cut wide strips of cardstock in red white and blue and score evenly to create accordion folds across the length.
- Bring the folded strip ends together to form a circular rosette and secure the center with hot glue or strong craft adhesive.
- Layer smaller rosettes atop larger ones using adhesive to build concentric interest, then attach hanging tabs to the back.
- Arrange a cluster on a backdrop board or wall, staggering sizes for a dynamic photo background.
Avoid: Using only one paper finish can make the entire backdrop feel flat and less dimensional. Attaching rosettes too close together hides their individual shapes and reduces the dramatic effect.
Try Also: Create a single oversized rosette as a focal point, or make a garland of mini rosettes for table edges. Add a small mirror or metallic center for sparkle.
Products & Materials
Items Used
“Bold layered paper rosettes that make a festive photo backdrop.”
Classic flag bunting banner for porch or table
⏱️ 45 min · 🟢 Beginner
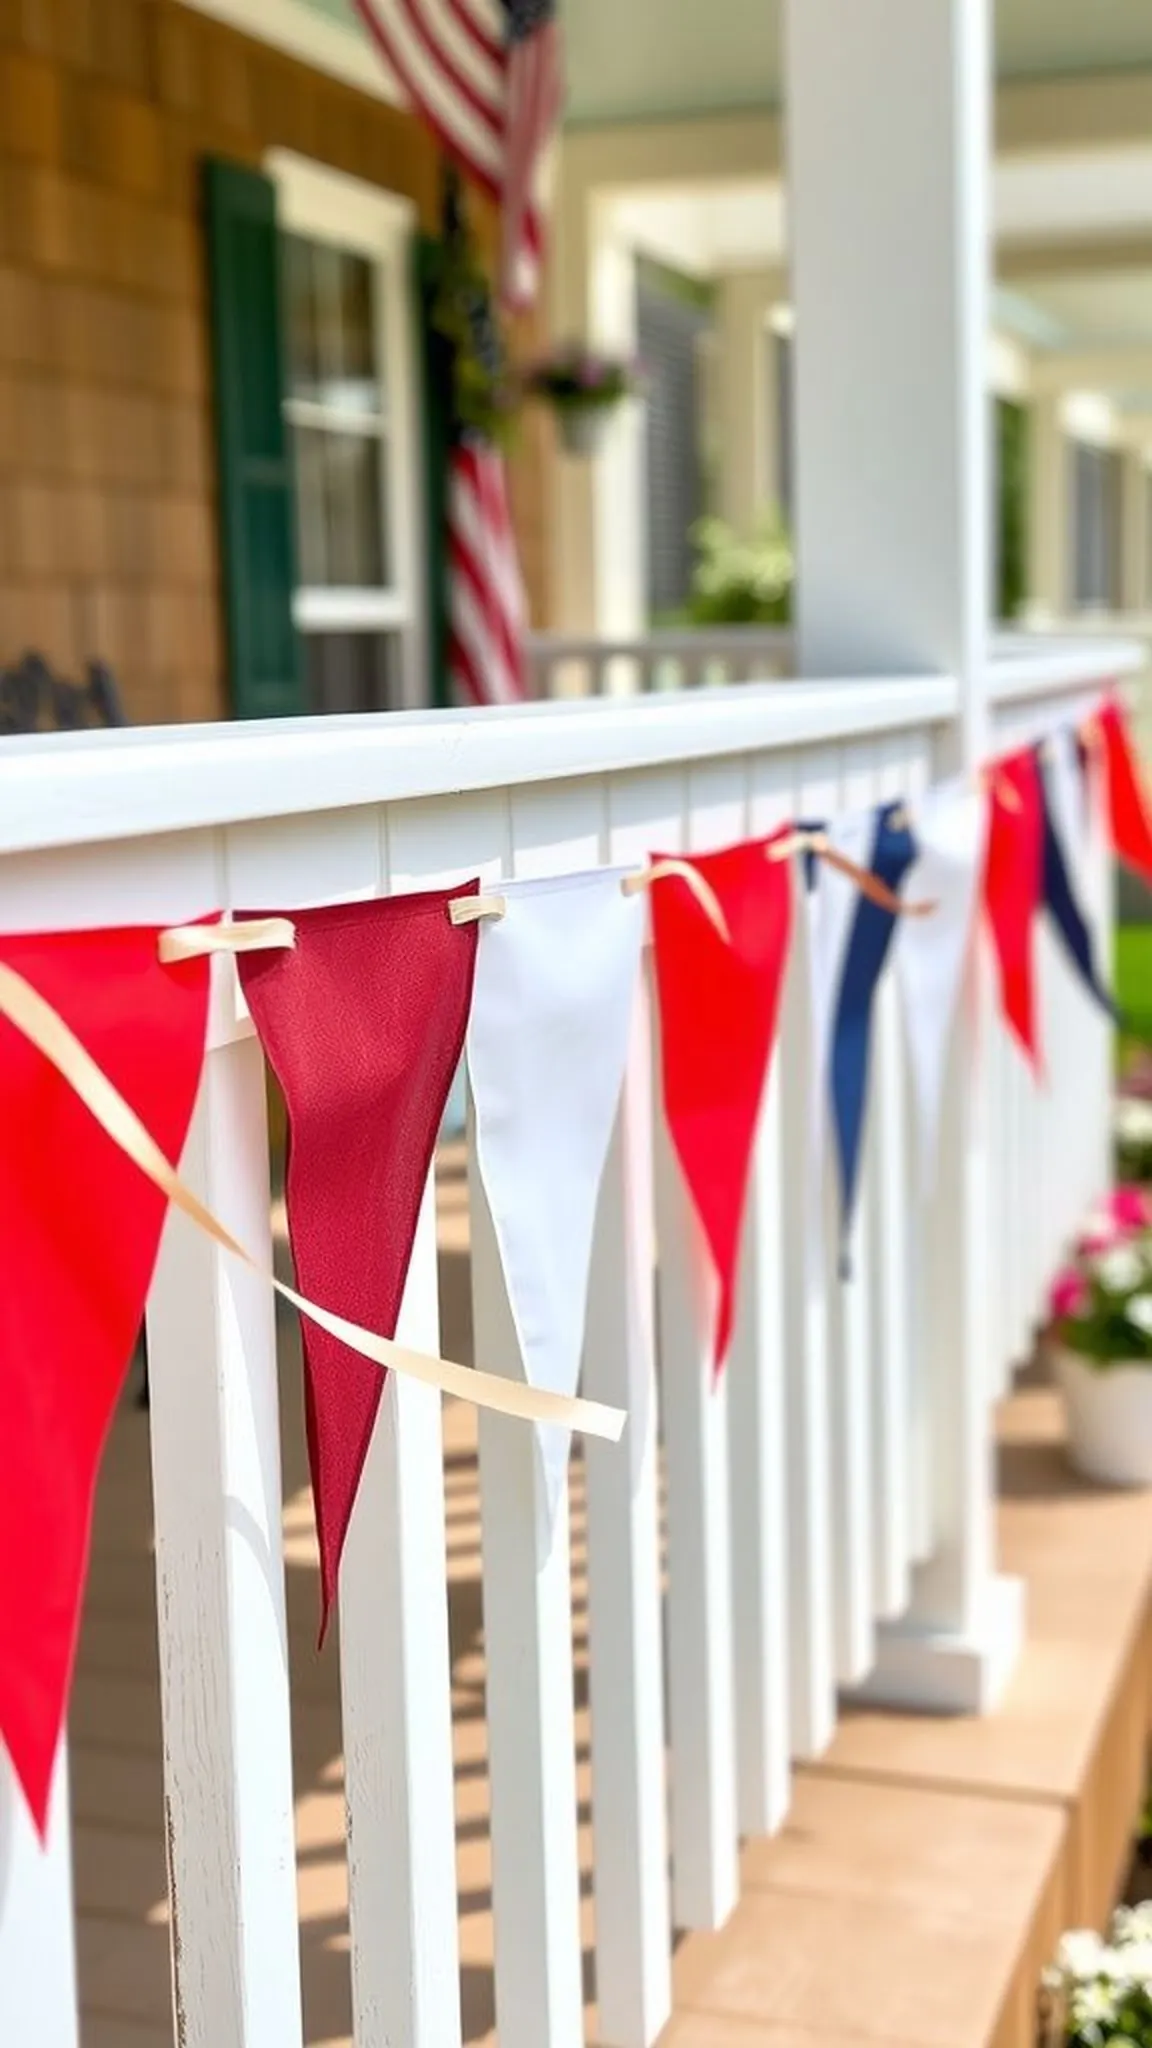
A string of triangular pennants drapes across a porch or the edge of a buffet, the repeated shapes reinforcing a classic stars-and-stripes mood. The fabric or paper triangles ripple slightly in a breeze, lending a gentle, rhythmic motion to the space.
The palette stays true to red, white, and blue with occasional star-printed pennants that nod toward tradition. When hung low over a buffet it frames the food area and makes the display feel cohesive and intentional.
Stitched edges or neat folded hems keep the pennants tidy while the connecting ribbon remains simple and unobtrusive. The overall look balances celebratory flair with familiar, easygoing charm.
Pro Tip: Space pennants evenly and alternate star-patterned pieces with solids to keep the bunting visually balanced and lively.
How to Make This
- Cut equal-sized triangles from red white and blue fabric or heavy cardstock and hem or reinforce edges for durability.
- Lay out a length of strong ribbon and position triangles evenly along it, overlapping slightly to prevent gaps.
- Secure each triangle to the ribbon with stitching, adhesive, or staples, depending on material and desired permanence.
- Add loops or reinforced ends for easy hanging on a porch or across a table edge.
Avoid: Attaching pennants too far apart can make the banner look sparse and unbalanced. Using very thin ribbon for heavy fabric pennants may cause drooping over time.
Try Also: Make mini buntings to edge a dessert table, or create a circular bunting to frame a wreath or centerpiece. Swap fabric for waterproof outdoor canvas for weatherproofing.
Products & Materials
Items Used
- fabric triangles
- satin ribbon
- thread
“Timeless flag bunting that frames a porch or buffet with patriotic charm.”
Puffy tissue paper pom-poms over the picnic table
⏱️ 30 min · 🟢 Beginner
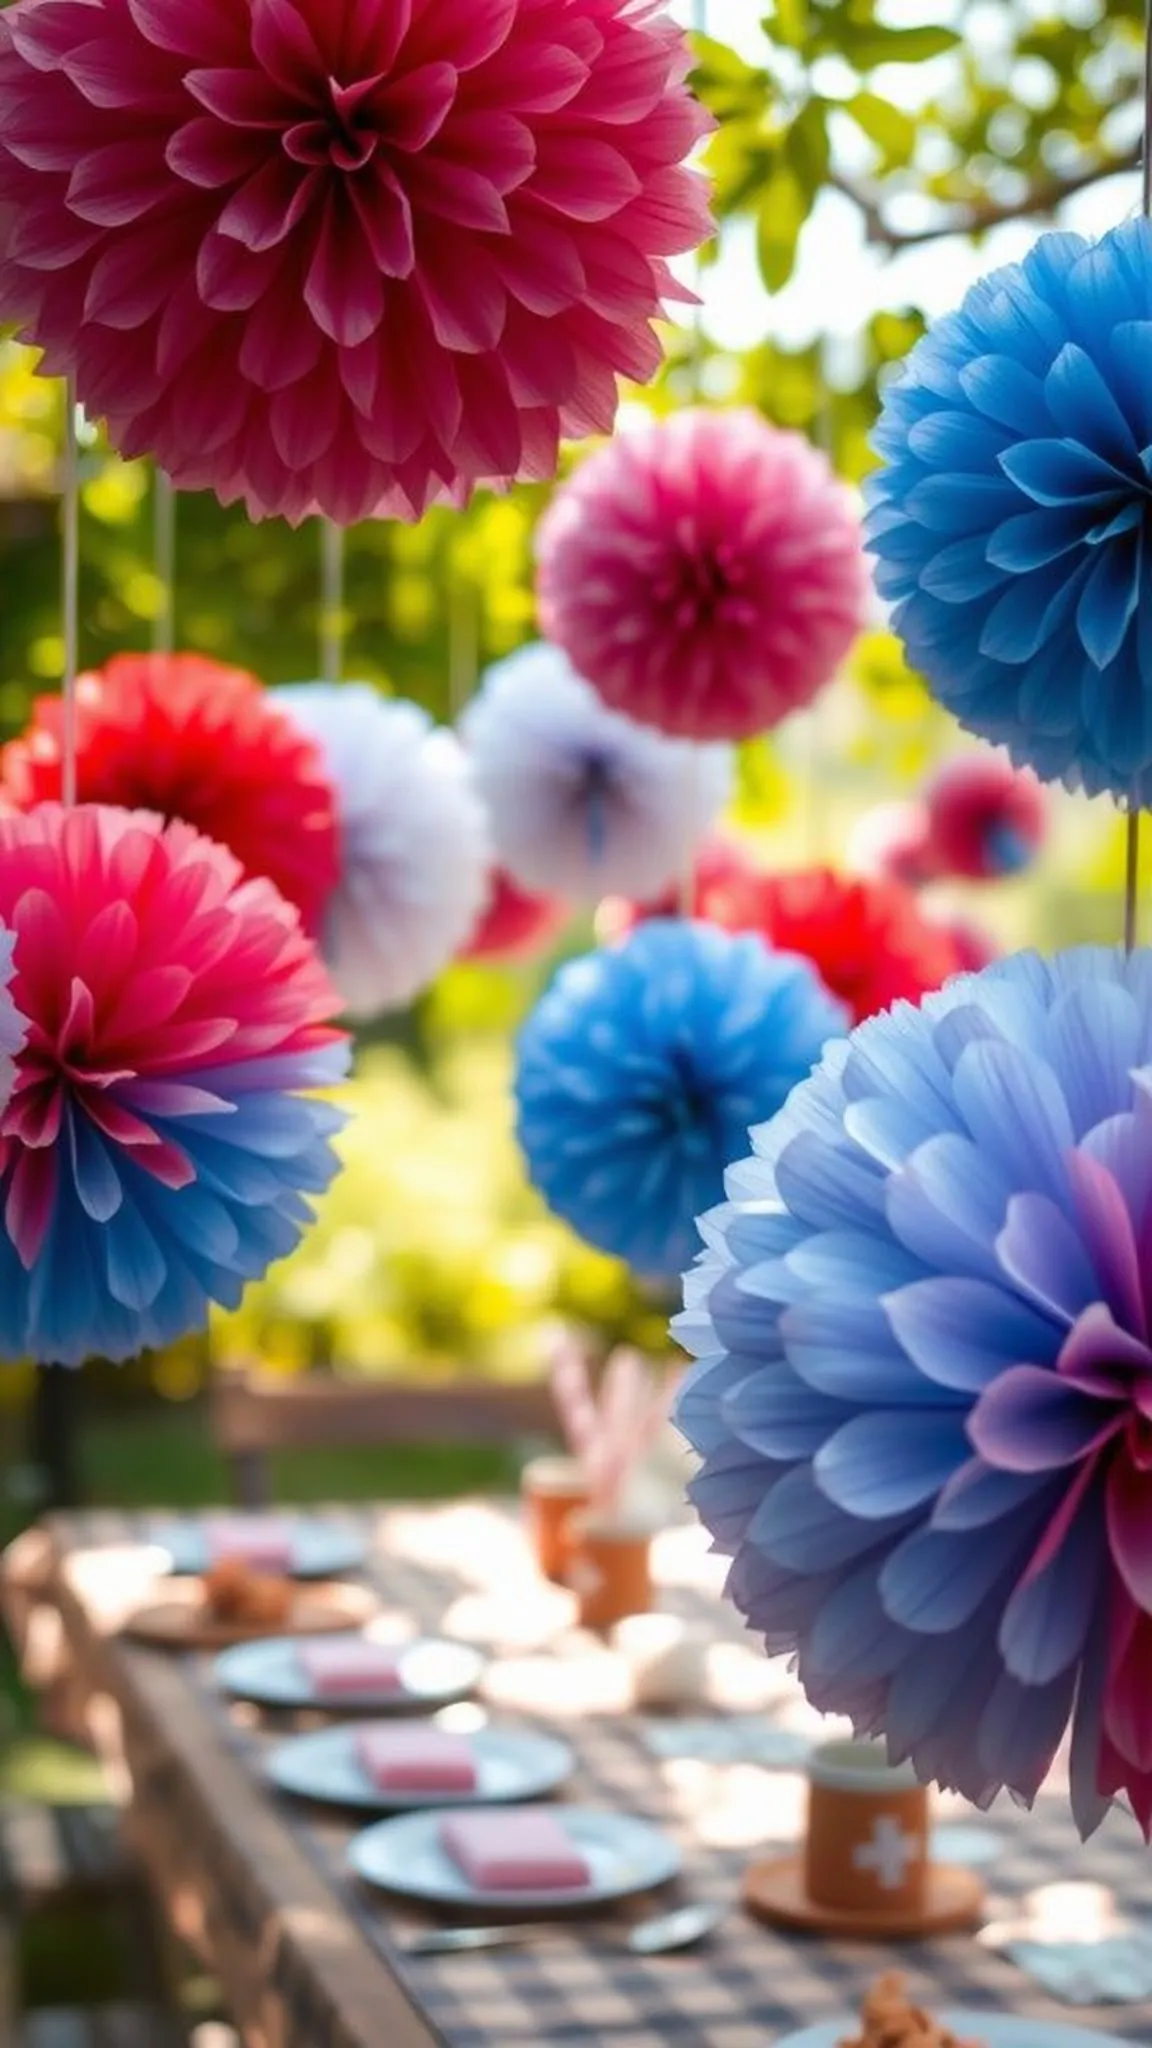
Tissue paper pom-poms hover above a picnic setup like soft clouds in red white and blue, casting playful shadows on tableware. Their featherlight folds catch air and move in a way that feels breezy and carefree.
The layered stacks of tissue create a voluminous silhouette that reads festive without being fussy. When gathered at varied heights the pom-poms form a layered canopy that flickers with light through the sheets of paper.
Edges have a slightly feathered look that softens the overall geometry and makes every piece feel handmade. The effect is whimsical and adds a burst of color above plates and platters.
Pro Tip: Stack multiple sheets for each pom-pom and gently separate layers to build volume while keeping the center secure and balanced.
How to Make This
- Stack sheets of red white and blue tissue paper and accordion-fold across the short side to create a flat folded bundle.
- Secure the center with string or wire and spread layers outward to form a round, puffy pom-pom shape.
- Trim edges slightly for a uniform silhouette, then attach a hanging string to suspend above the table.
- Vary sizes and hang pom-poms at different heights to create a layered canopy effect.
Avoid: Pulling layers apart too roughly can tear tissue and reduce pom-pom fullness. Making every pom the same size flattens the display and removes playful depth.
Try Also: Create half-pom-poms to attach to a wall as a backdrop, or mix in metallic fringe pom-poms for a touch of shimmer. Use oversized sheets for dramatic ceiling decor.
Products & Materials
Items Used
“Light, colorful tissue pom-poms that float above the picnic table.”
Mason jar lanterns with star-cut wraps
⏱️ 1.5 hours · 🟠 Intermediate
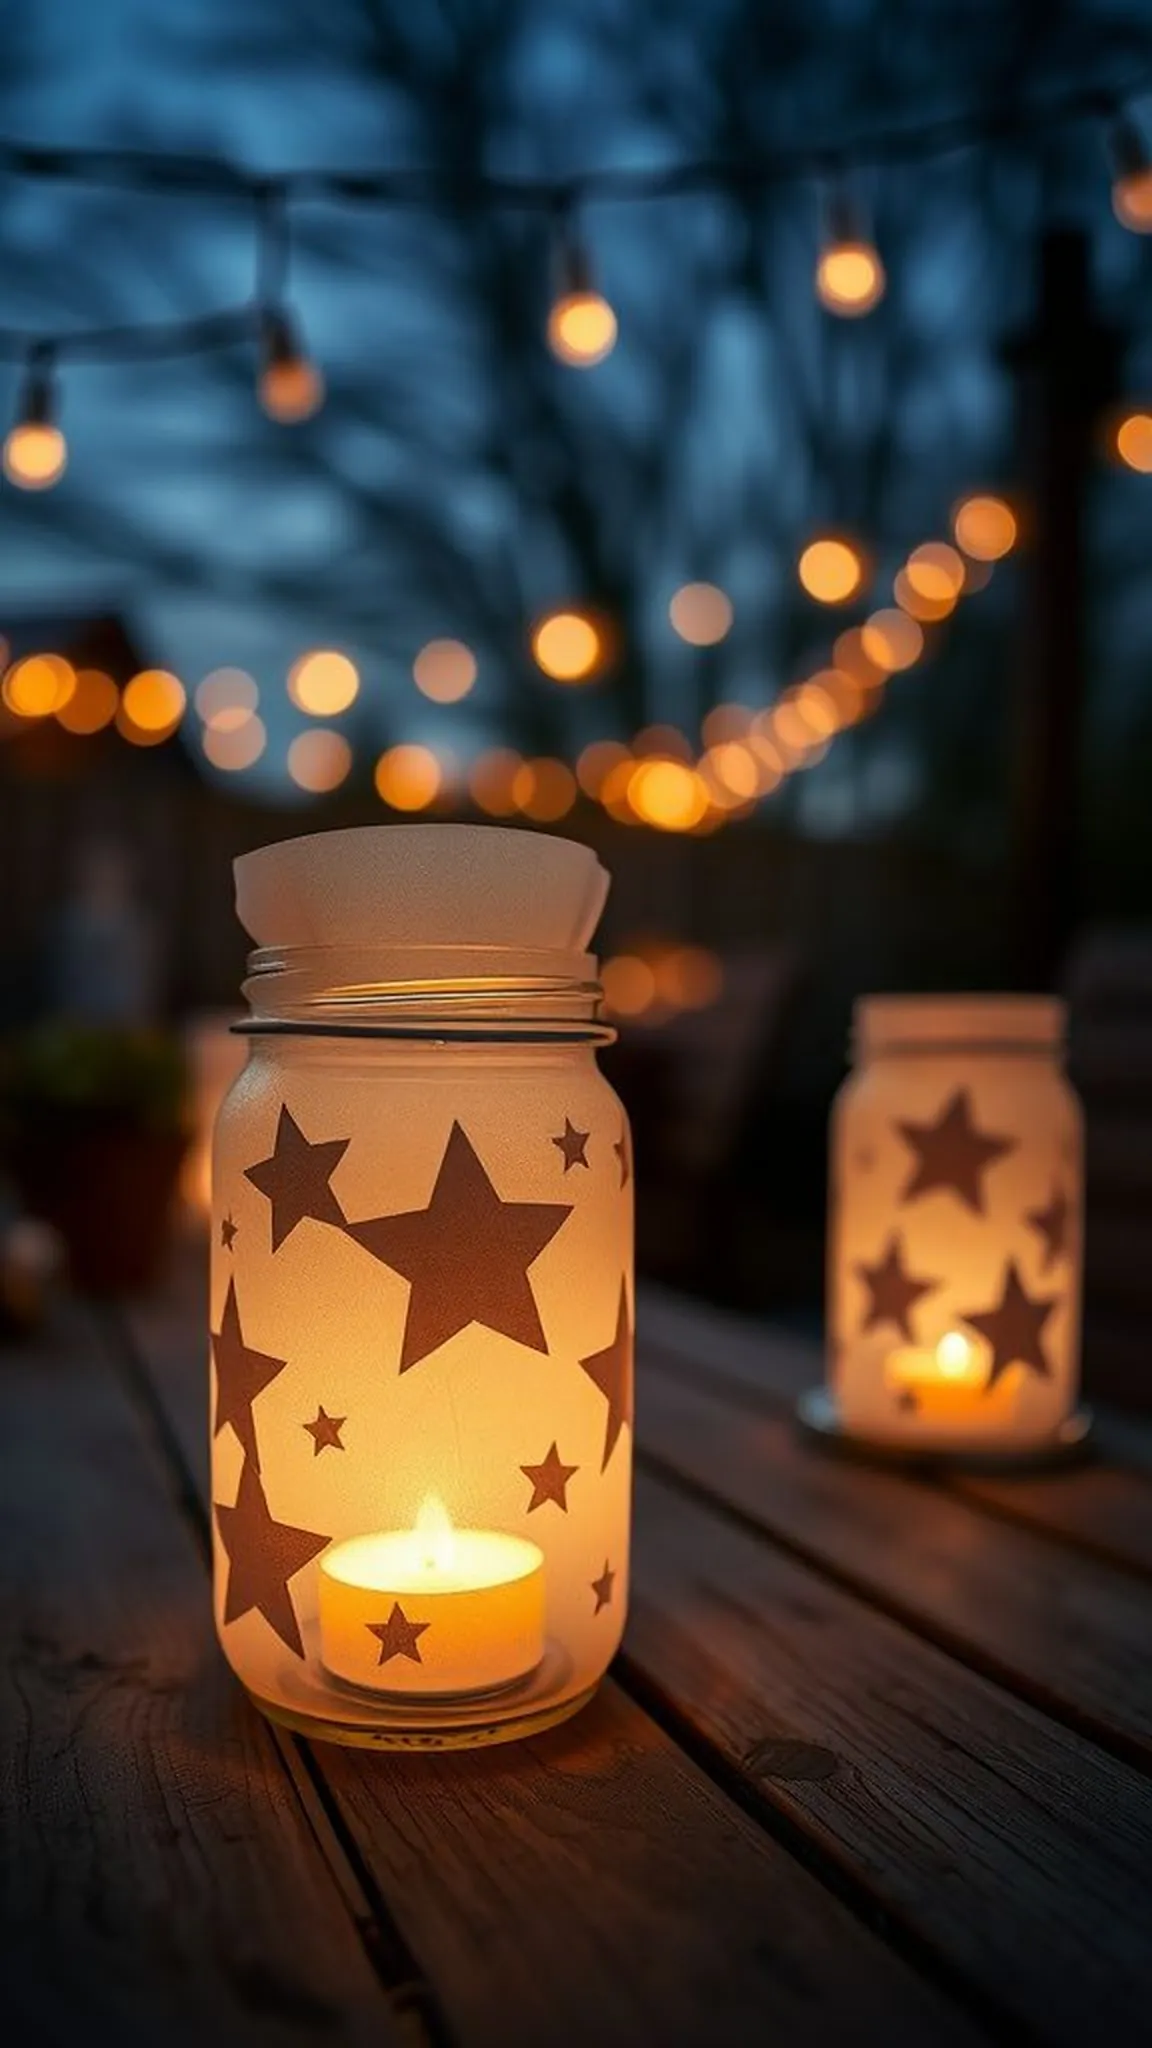
Jars wrapped in star-patterned paper cast decorative light patterns when illuminated from within, bathing a tabletop in playful silhouettes. The glow feels intimate and warm while the cutouts project crisp star shapes onto nearby surfaces.
The mix of translucent wraps and bright candlelight gives the lanterns a gentle, almost cinematic presence on an evening patio. Surfaces around the jars pick up soft pools of light that complement the surrounding décor.
A cluster of these lanterns produces a cozy constellation effect that feels both celebratory and quietly elegant. Small details such as rustling paper edges and the soft hum of tiny lights enhance the sensory atmosphere.
Pro Tip: Choose semi-translucent paper for wraps to balance crisp star shapes with a warm, diffused glow from battery tealights or LED candles.
How to Make This
- Cut a strip of semi-translucent paper wide enough to wrap a mason jar and punch or cut star shapes evenly across the strip.
- Secure the paper around the jar with double-sided tape or adhesive and place a battery tealight inside.
- Add decorative twine or ribbon at the neck for a finished look and arrange lanterns at varying heights for interest.
- Test the glow in dim light and adjust star density for desired shadow effect.
Avoid: Using fully opaque paper hides the light and eliminates the star silhouettes, so translucency matters. Tight or bulky wraps can make the jar unstable and hide the candle glow.
Try Also: Try moon and stripe cutouts instead of stars, or use colored vellum for tinted lighting effects. Scale up with large glass jars for a walkway display.
Products & Materials
Items Used
- mason jars
- semi translucent paper
- battery tealights
- double sided tape
“Star-cut paper lanterns that glow with cozy patriotic charm.”
Ribbon-wrapped napkin rings that catch the eye
⏱️ 20 min · 🟢 Beginner
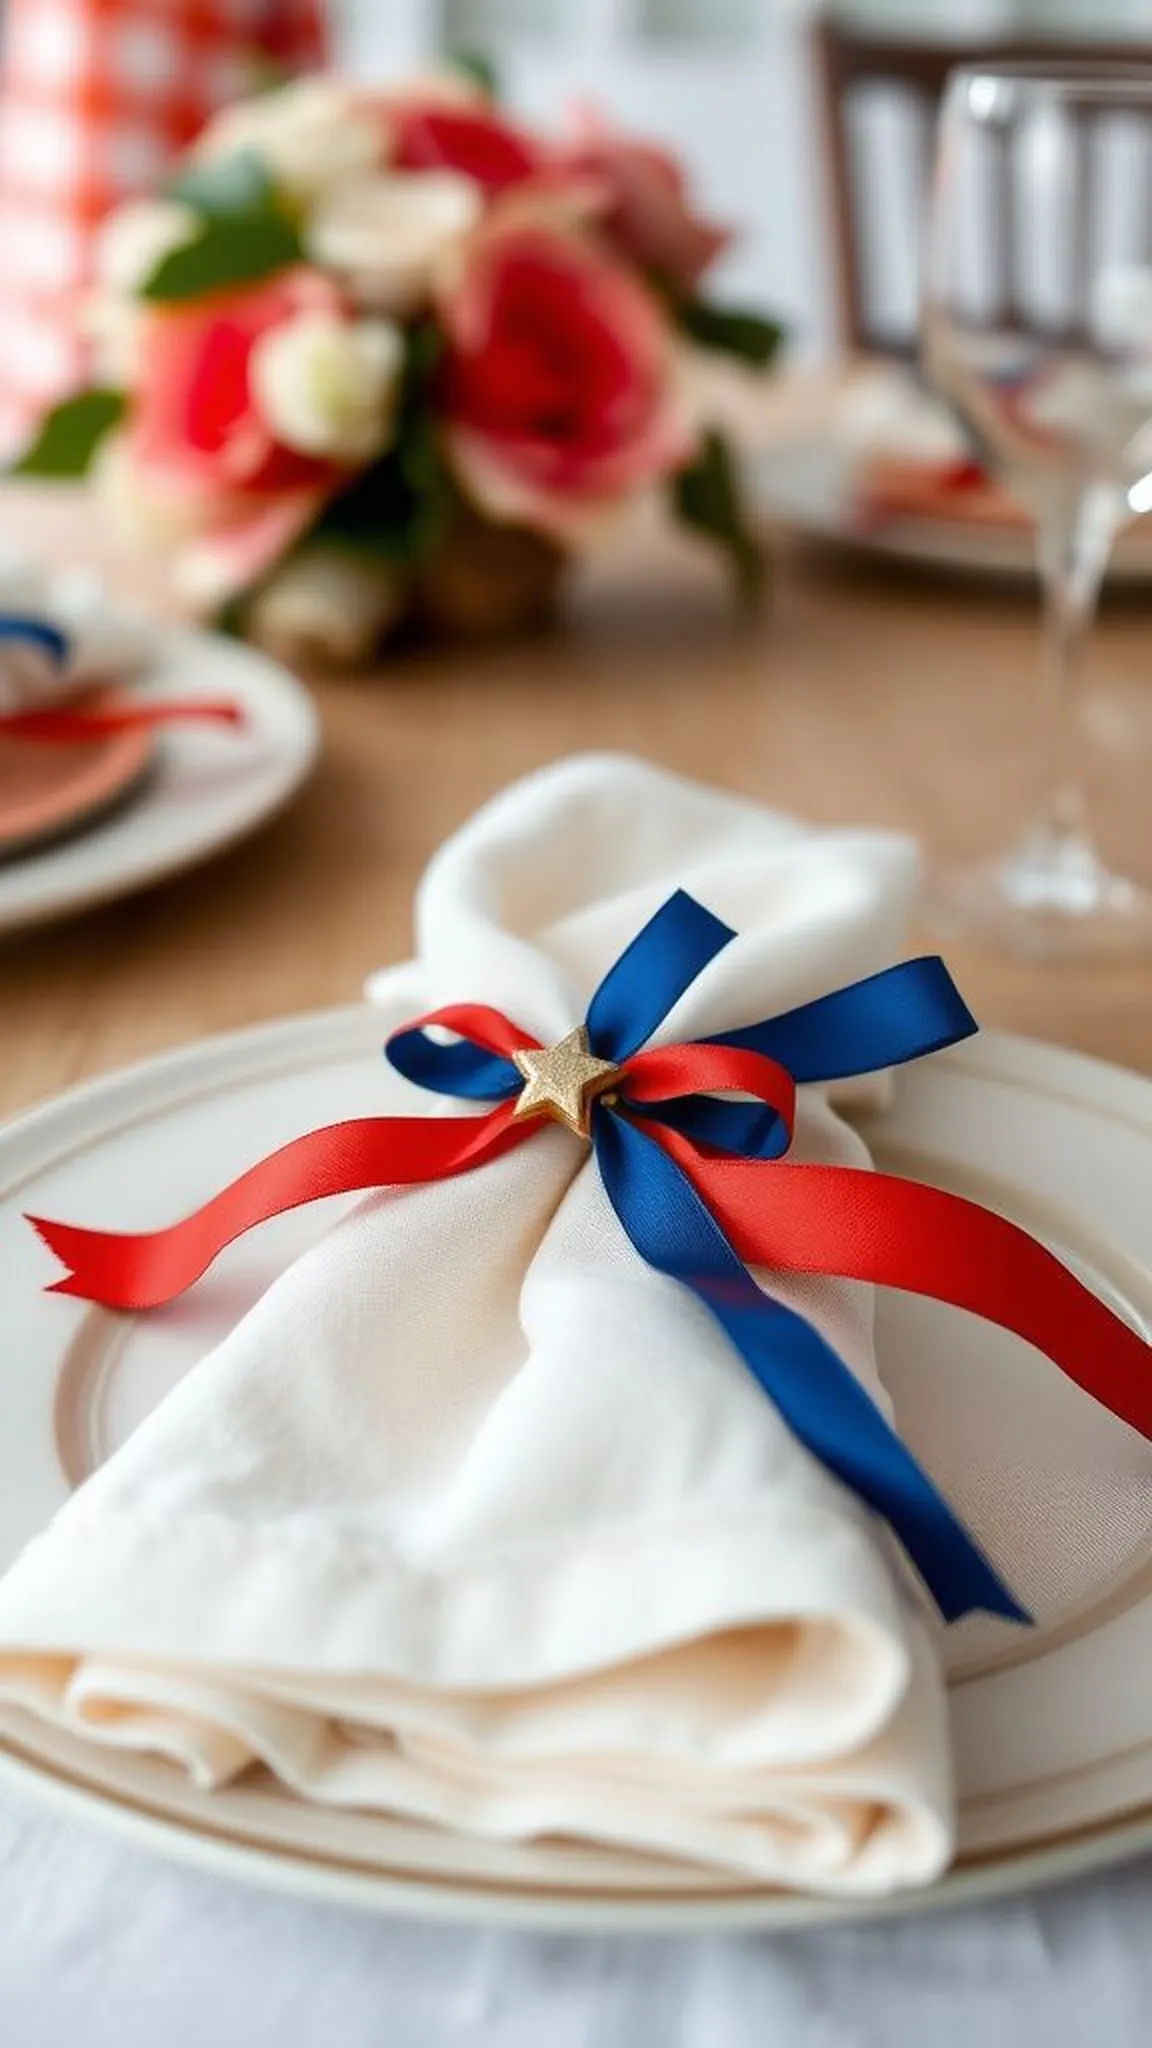
Small rings wrapped in layers of ribbon add a tactile detail at each place setting, catching light on satiny surfaces. The varying ribbon widths and textures create a compact, polished accent against plain napkins.
The rings tuck neatly under a folded napkin and feel pleasant to handle as guests sit down, offering a subtle pop of color. When ribbons are mixed with a tiny star charm the effect reads festive and thoughtfully composed.
Grouped at the center of a table they form a repeating motif that unifies the setting without competing with centerpieces. The finished rings look intentional and help set a celebratory tone right at the plate.
Pro Tip: Layer two ribbon textures per ring for a refined look and secure ends invisibly for a neat, polished finish that holds up through the party.
How to Make This
- Cut short lengths of narrow satin and grosgrain ribbon and prepare small metal or cardboard rings as bases.
- Wrap the ribbons snugly around the rings, overlapping slightly for full coverage, and glue the ends discreetly.
- Add a tiny metal star charm or a small knot detail to finish each napkin ring.
- Slide rings onto folded napkins and place at each setting for an instant upgrade.
Avoid: Using only one narrow ribbon can look too sparse; layering provides a richer finish. Leaving raw ribbon ends visible leads to fraying and a less tidy appearance.
Try Also: Swap in jute or lace for texture contrast, or use metallic ribbon for a hint of sparkle. Create matching napkin ties for utensils with the same ribbon combinations.
Products & Materials
Items Used
“Layered ribbon napkin rings that polish every patriotic place setting.”
Sparkler bottle holders that feel festive and safe
⏱️ 45 min · 🟠 Intermediate
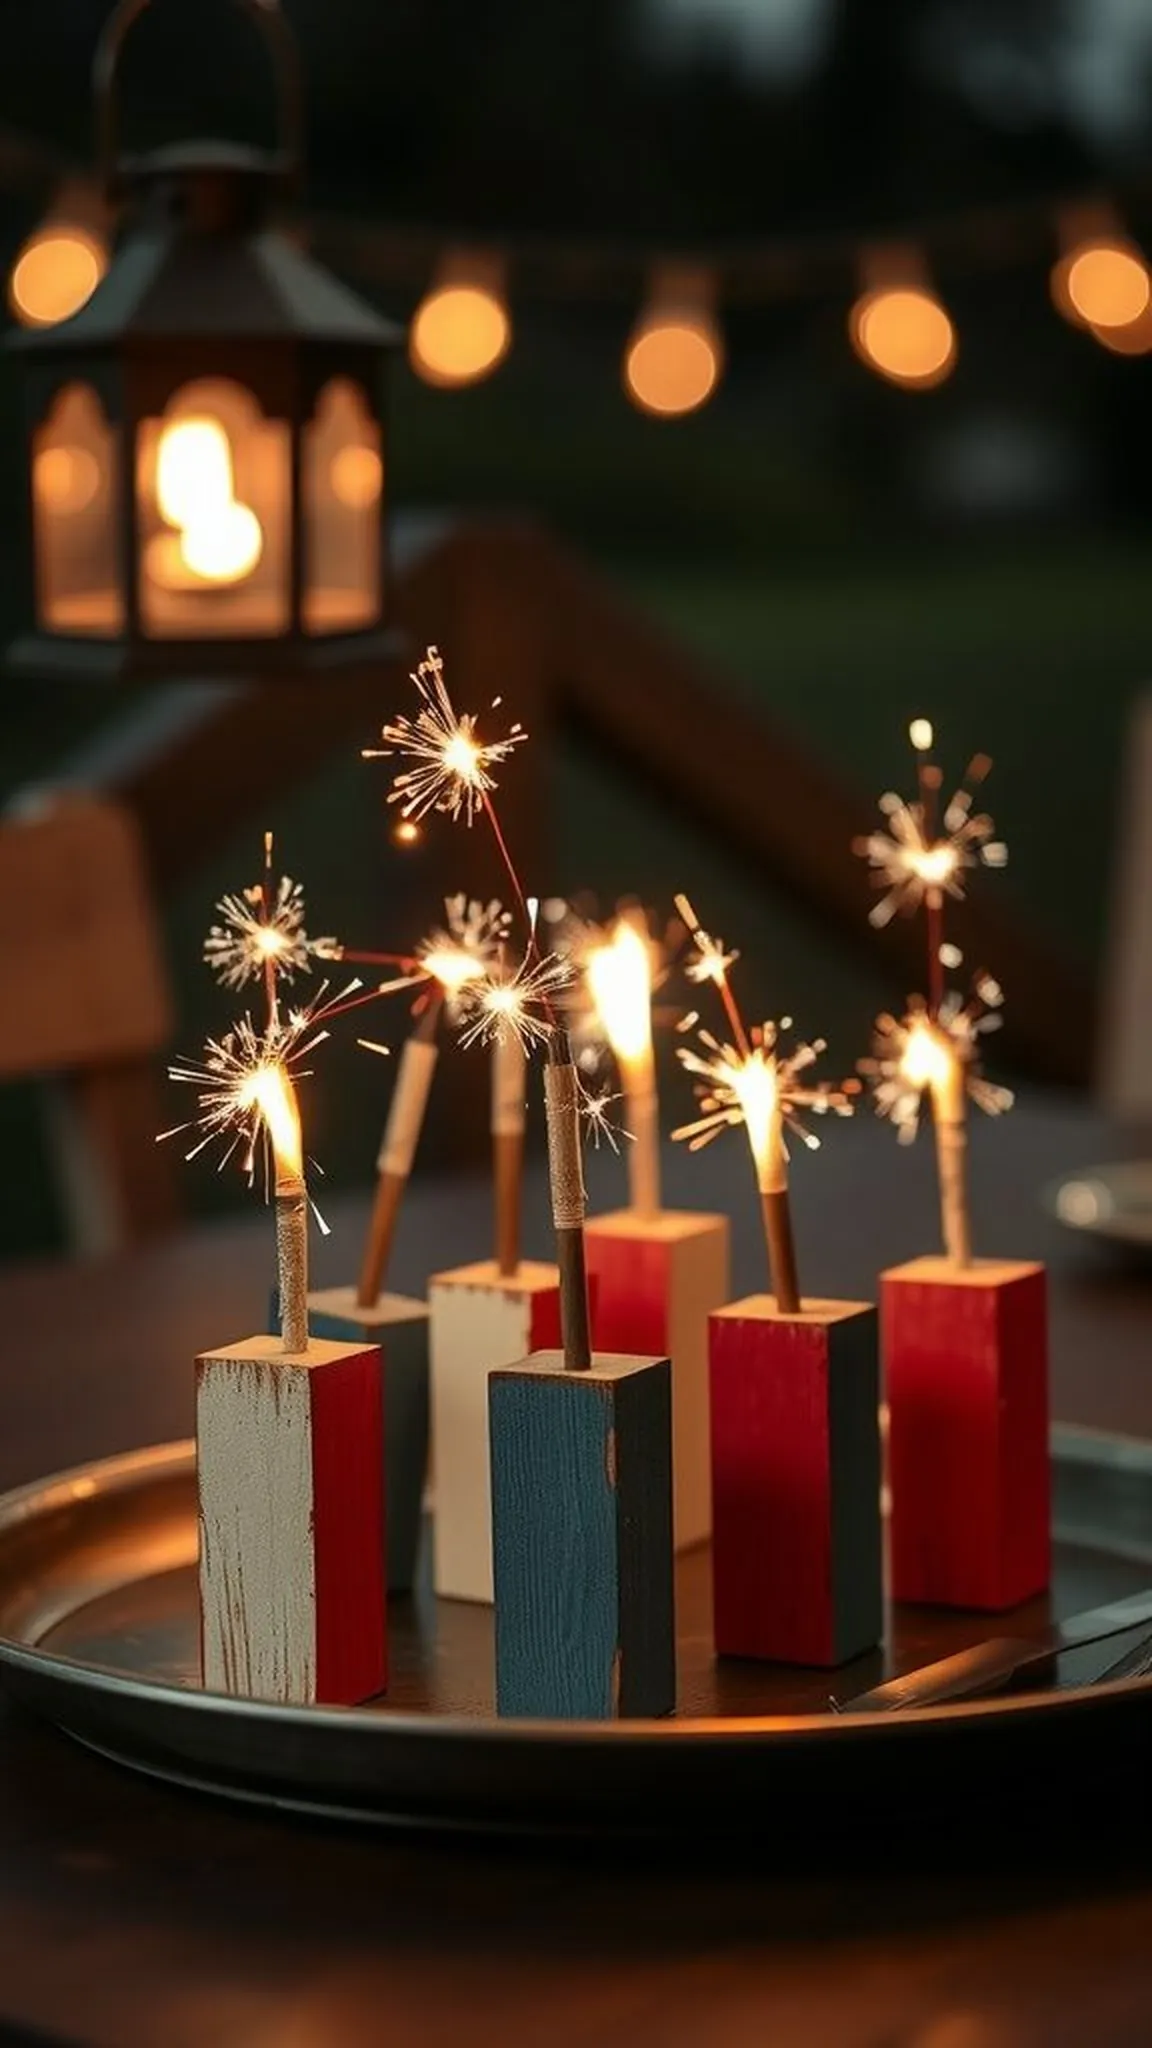
Decorative holders cradle sparklers upright in a bottle for a celebratory display that brightens a tabletop or walkway. The painted wood base and paper accents give the holders a tactile, crafted personality that complements outdoor evenings.
When lit, the sparklers create a lively, ephemeral sparkle that contrasts nicely with the steady lantern light nearby. The arrangement reads celebratory and cinematic without demanding a large footprint on the table.
Careful spacing between holders keeps the display airy and minimizes heat concentration while maintaining visual impact. The overall look blends practicality with playful ornamentation for a short but memorable burst of light.
Pro Tip: Create a stable, weighted base and insert metal sleeves to hold sparklers upright for safer, steadier burning during celebrations.
How to Make This
- Prepare small wooden bases, drill a shallow hole or insert a metal sleeve to receive sparklers upright.
- Paint bases in red white and blue and embellish with small paper stars or stickers for visual interest.
- Place one sparkler per holder and position holders on a nonflammable surface away from flammable decorations.
- Light sparklers outdoors with an extended lighter and supervise until fully expended, removing spent remnants safely.
Avoid: Using lightweight bases can tip when a sparkler is lit, so a weighted base is safer and steadier. Placing holders near flammable fabrics or decorations increases fire risk during use.
Try Also: Make taller versions for walkway lining or tiny tabletop sizes for individual place settings. Swap paper stars for small painted stripes on the base.
Products & Materials
Items Used
“Stable sparkler bottle holders for a festive, glowing moment.”
Mini paper flags for straws and food picks
⏱️ 20 min · 🟢 Beginner
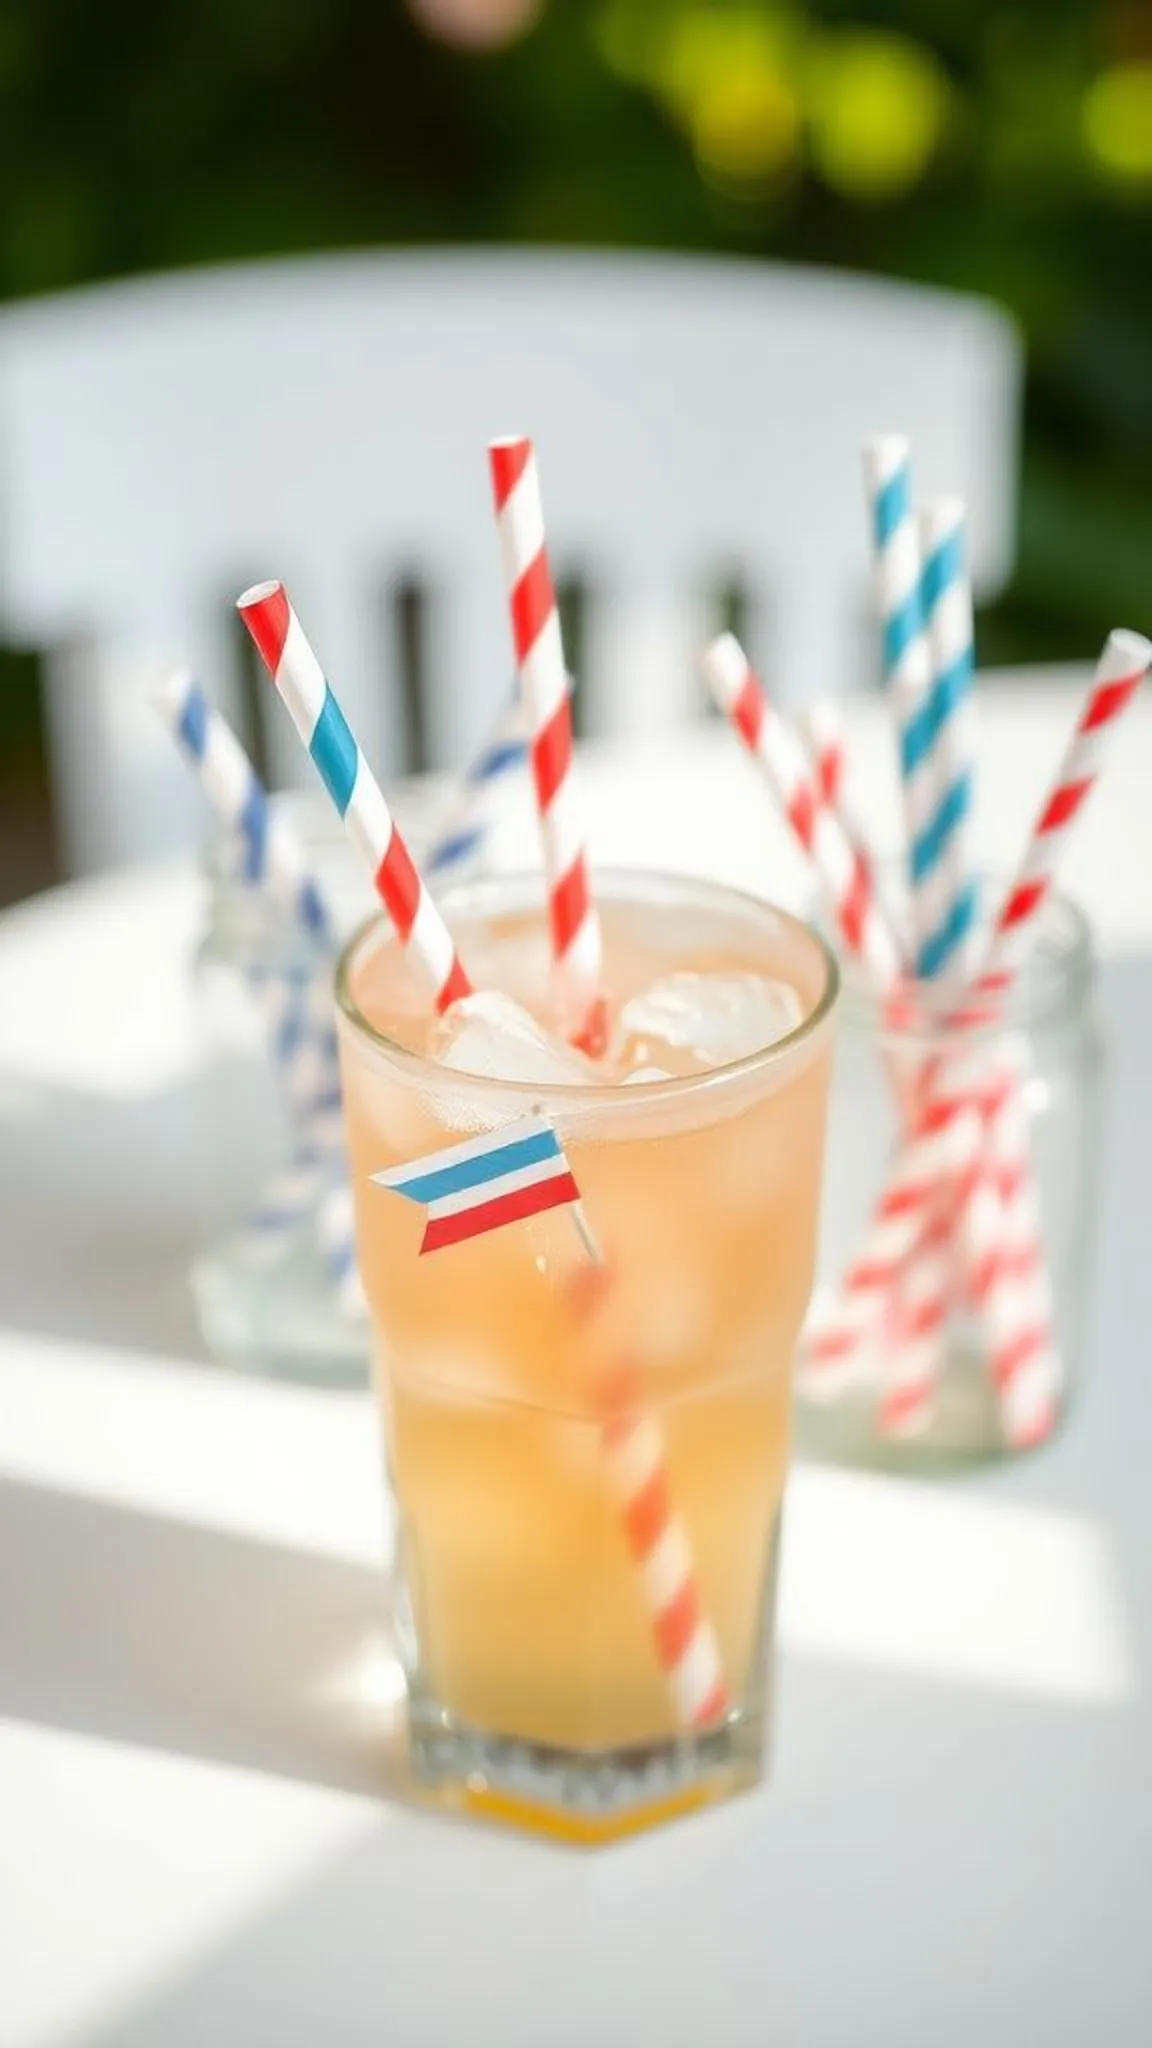
Tiny paper flags flutter from drink straws and appetizer picks, offering a playful, scaled-down nod to the stars-and-stripes. The crisp paper edges and neat folds give each miniature flag a polished look that feels cheerful beside a glass rim.
These small accents add color to cups and finger foods without taking attention from the main spread. The flags’ petite scale invites close-up smiles and little photo details when guests grab a drink.
A mix of patterned and solid flags keeps the arrangement interesting and lively across the buffet. The assortment reads festive and intentional while remaining unobtrusive and practical.
Pro Tip: Fold flag paper over straws for hidden adhesive that keeps the flag secure without visible glue marks or frayed edges.
How to Make This
- Cut small rectangles from red white and blue paper and fold them in half over paper or plastic straws.
- Secure folded edges with a dab of glue or double-sided tape and press firmly until set.
- Trim ends into a neat notch or triangle to create a classic flag silhouette.
- Insert flags into cocktail straws or toothpicks and place in drinks or appetizers as accents.
Avoid: Using heavy cardstock makes flags top-heavy and causes straws to tilt; lighter paper keeps them upright. Placing flags too close to drink rims can interfere with sipping and become soggy.
Try Also: Create tiny pennants with patterned scrapbook paper or add small star stickers to plain flags. Use decorative picks for desserts with the same miniature flags.
Products & Materials
Items Used
- paper straws
- cardstock paper
- double sided tape
“Cute mini paper flags that add patriotic flair to drinks and appetizers.”
Button star framed wall art with layered textures
⏱️ 2 hours · 🟠 Intermediate
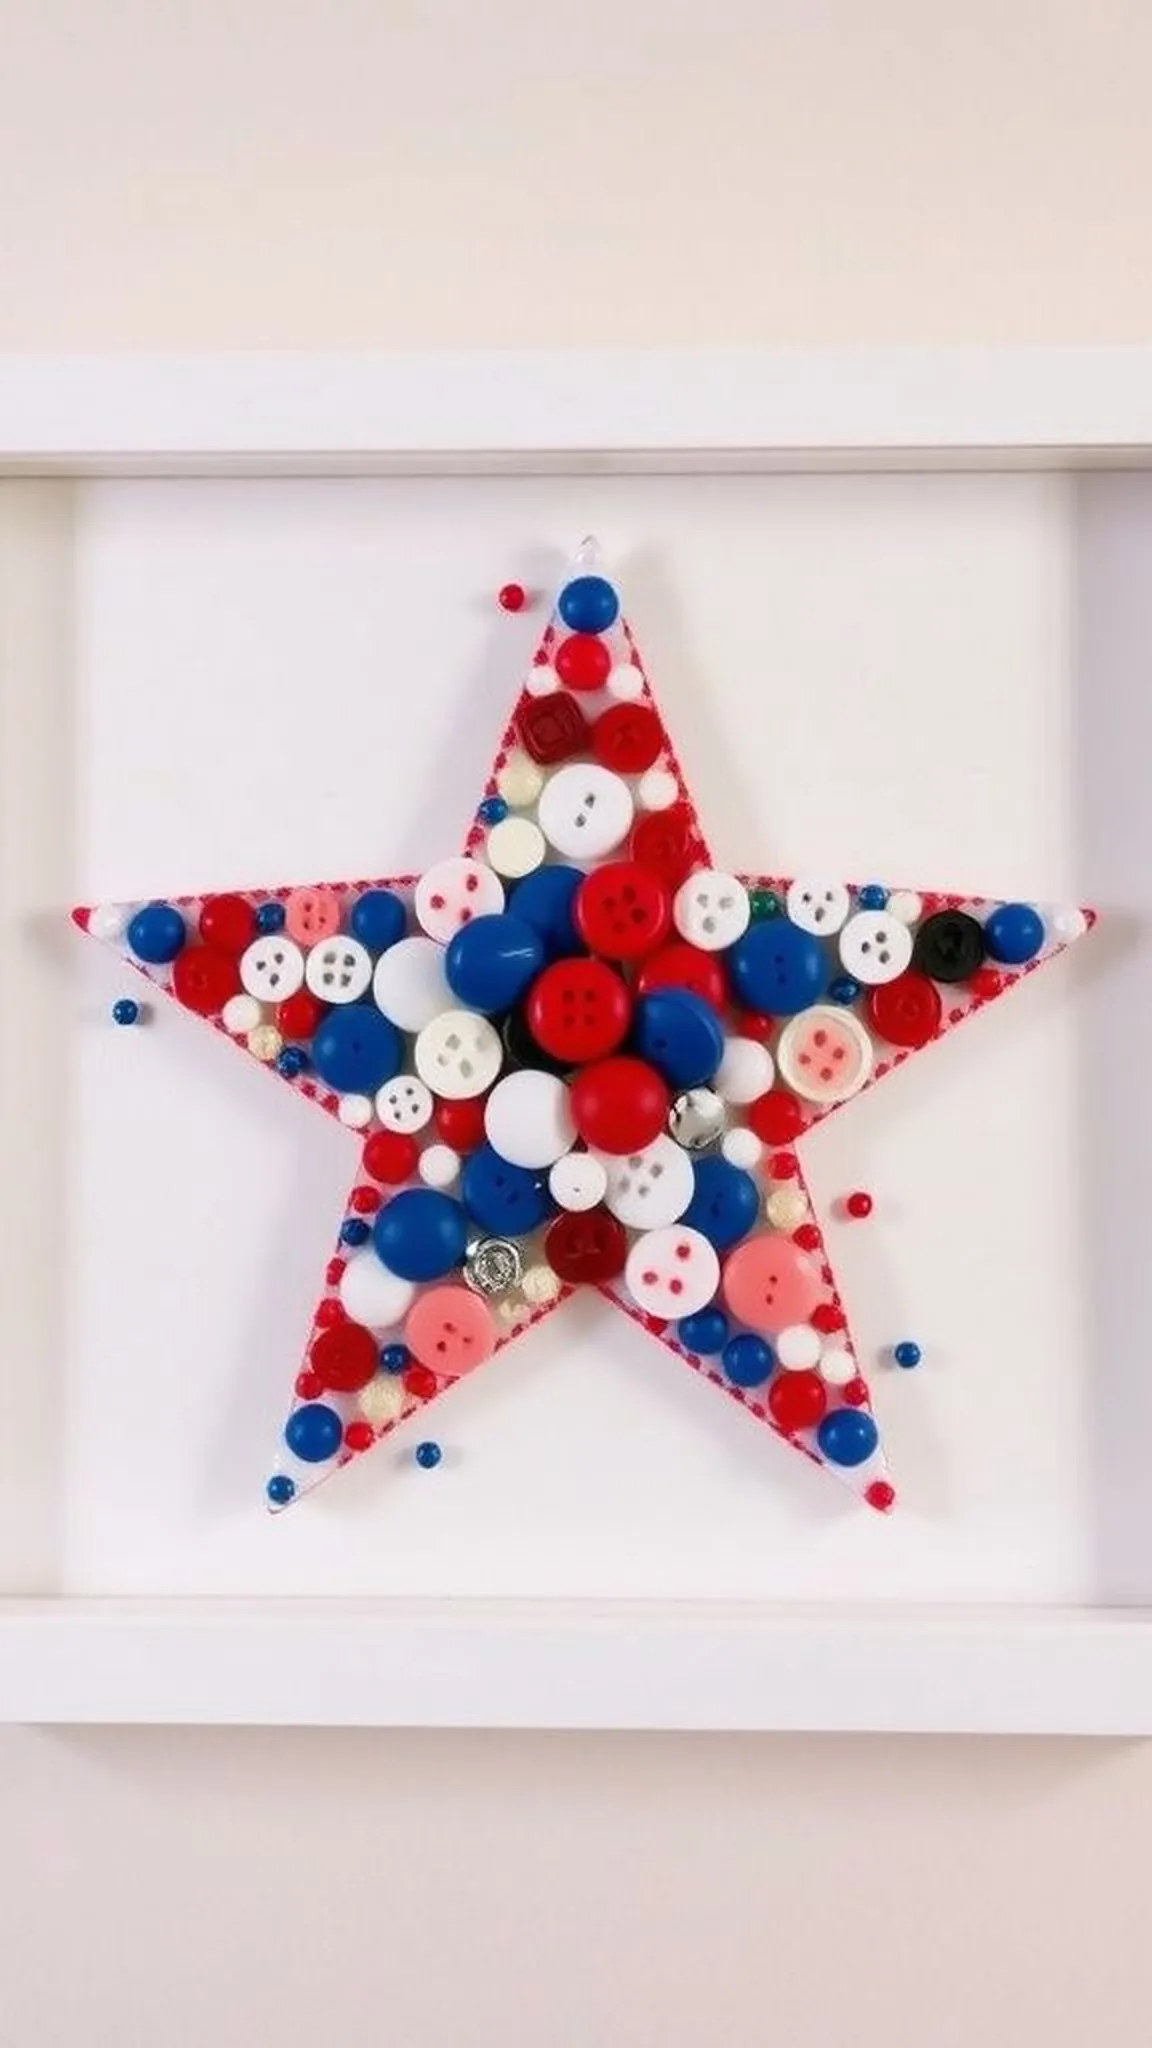
A framed star shape built from buttons and tiny beads reads like folk art with a modern color scheme of red, white, and blue. Each button adds a small shine or matte softness that catches light in different ways.
The layered assembly within a simple frame yields a compact piece that works well above a sideboard or in an entry. The texture is tactile and invites guests to lean in for a closer look at the varied materials.
Subtle shadow between the buttons and backing adds depth and makes the star feel sculptural despite its small size. The finished art blends handcrafted charm with a neat, gallery-ready silhouette.
Pro Tip: Sort buttons by size and color before arranging the star so placement feels deliberate and spacing stays even for a balanced composition.
How to Make This
- Trace a star template onto foam board and plan button placement by size and color across the outline.
- Adhere buttons and small beads into the star shape, starting from the center and working outward for consistent coverage.
- Allow adhesive to cure fully, then mount the foam board into a frame with a neutral mat to highlight the star.
- Hang the framed piece at eye level for maximum visual impact in the room.
Avoid: Random placement without planning can lead to clumps of one color that throw off balance. Using weak adhesive risks buttons lifting over time, especially near edges.
Try Also: Create a series of small framed stars in different color proportions, or form letters using buttons for personalized signage. Swap beads for tiny shells for a nautical twist.
Products & Materials
Items Used
- assorted buttons
- foam board
- clear drying craft glue
- picture frame
“Textured button star in a neat frame, handmade and photo-ready.”
Clothespin photo display for party memories
⏱️ 30 min · 🟢 Beginner
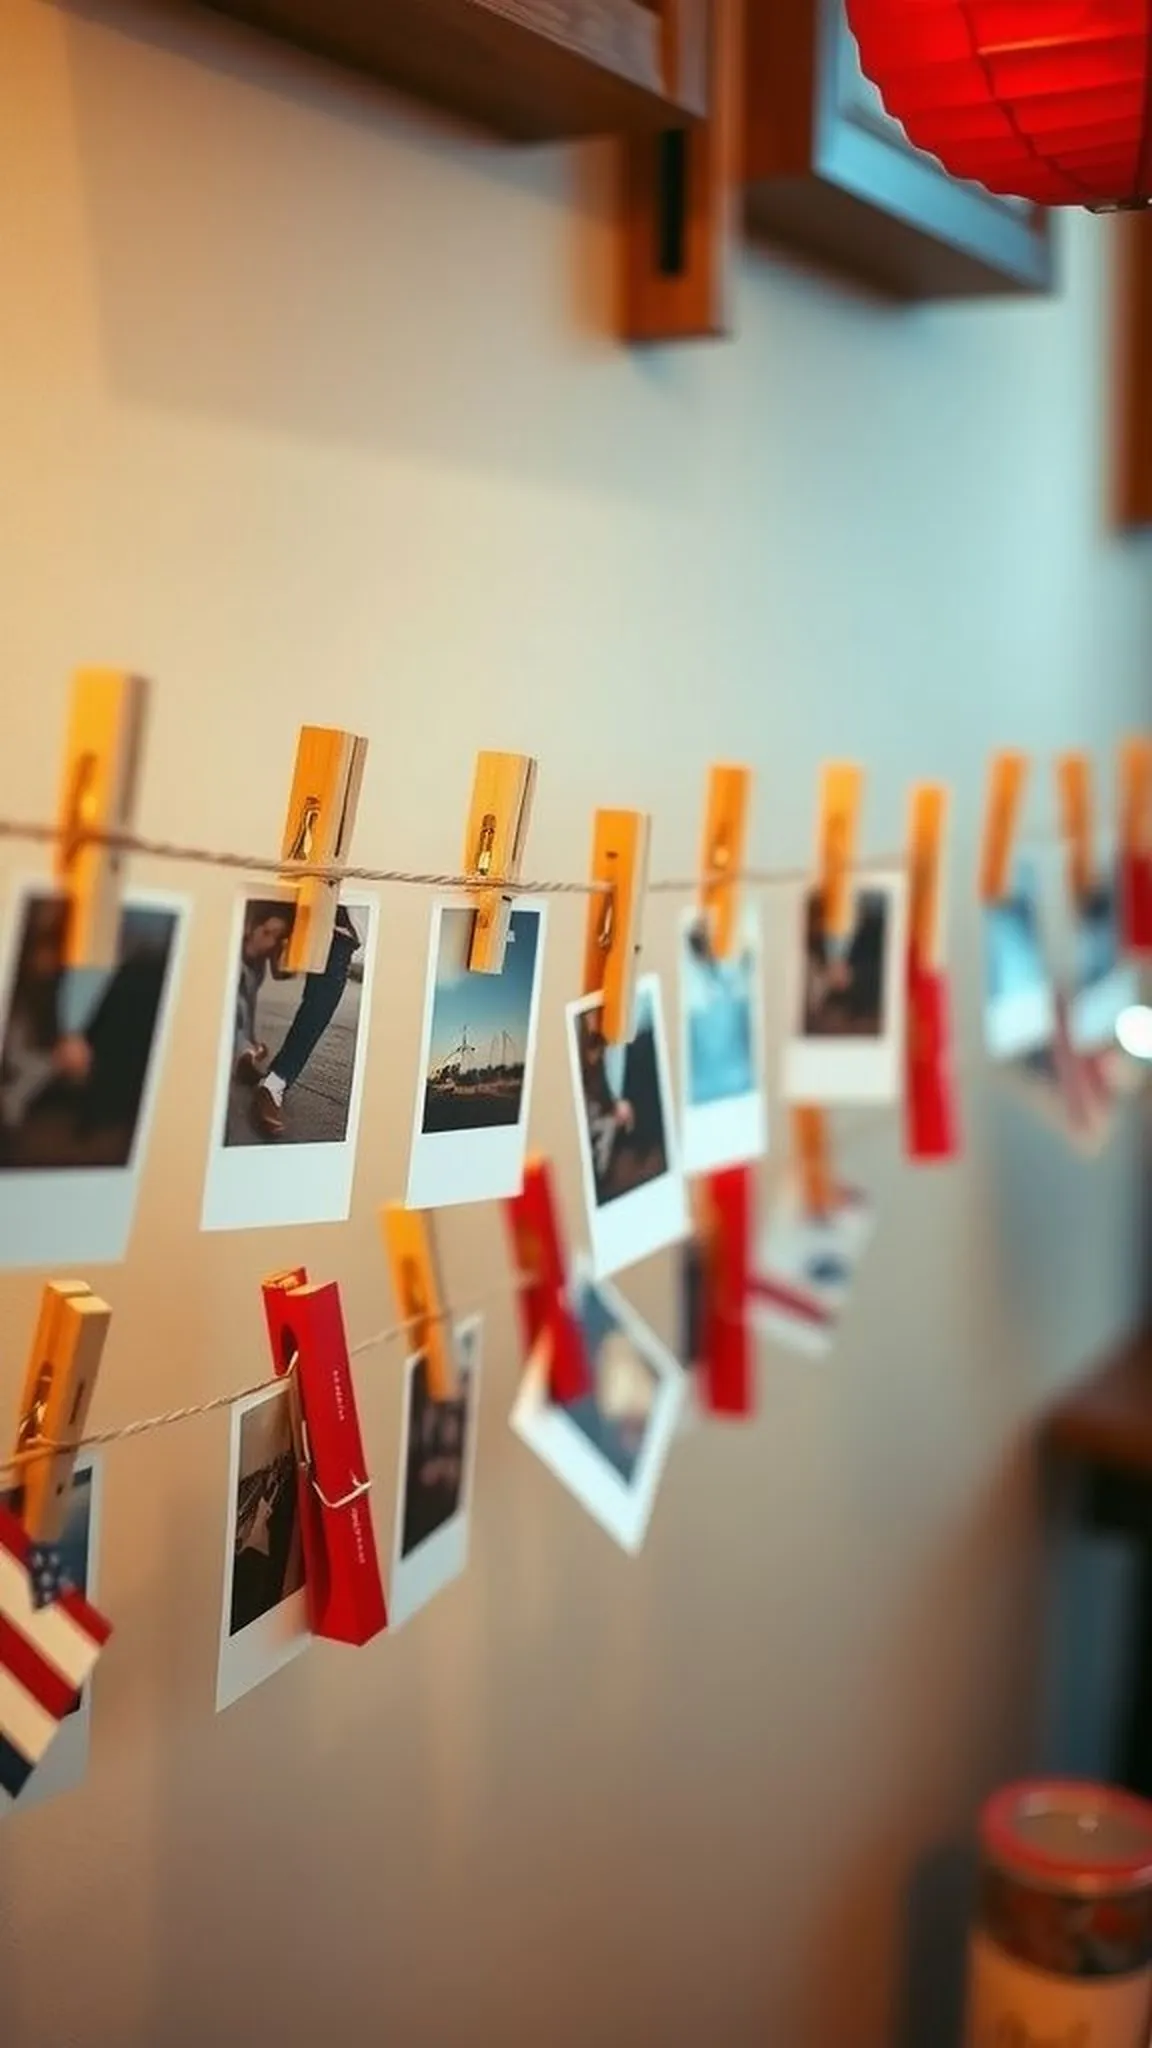
A simple string with clothespins holds instant photos and paper notes, creating a casual gallery of snapshots from the celebration. The wooden clothespins and twine add a warm, approachable texture that complements the photo edges.
Red, white, and blue accents on a few clips tie the display into the party palette, making the photos feel part of the décor. The layout invites guests to pause and enjoy captured moments, encouraging smiles and conversation.
When draped across a wall or table edge the display reads like a living guestbook with a relaxed, craft-forward aesthetic. The layered images and handwritten captions create a sense of collected joy that grows as the event continues.
Pro Tip: Clip photos at slightly varied angles for a playful, relaxed look and swap a few themed clothespins for instant color pops.
How to Make This
- Stretch a length of natural twine or thin rope across a wall or between two anchors and secure firmly.
- Decorate small wooden clothespins with red white and blue washi tape or paint and let dry.
- Use the decorated clothespins to hang instant photos, postcards, or paper notes along the twine at even intervals.
- Add a small sign explaining that guests are invited to clip a photo or note to the display.
Avoid: Stringing the twine too loosely causes photos to sag and overlap, obscuring images. Overloading the line with too many items can make the display look cluttered and lose its charm.
Try Also: Create a tabletop version using a mini wooden frame and crisscrossed twine, or make a postcard-only display for mailed well-wishes. Replace photos with small fabric flags for a non-photo option.
Products & Materials
Items Used
“Easy clothespin photo display that collects party memories beautifully.”
Patriotic wine glass charms for easy mingling
⏱️ 30 min · 🟢 Beginner
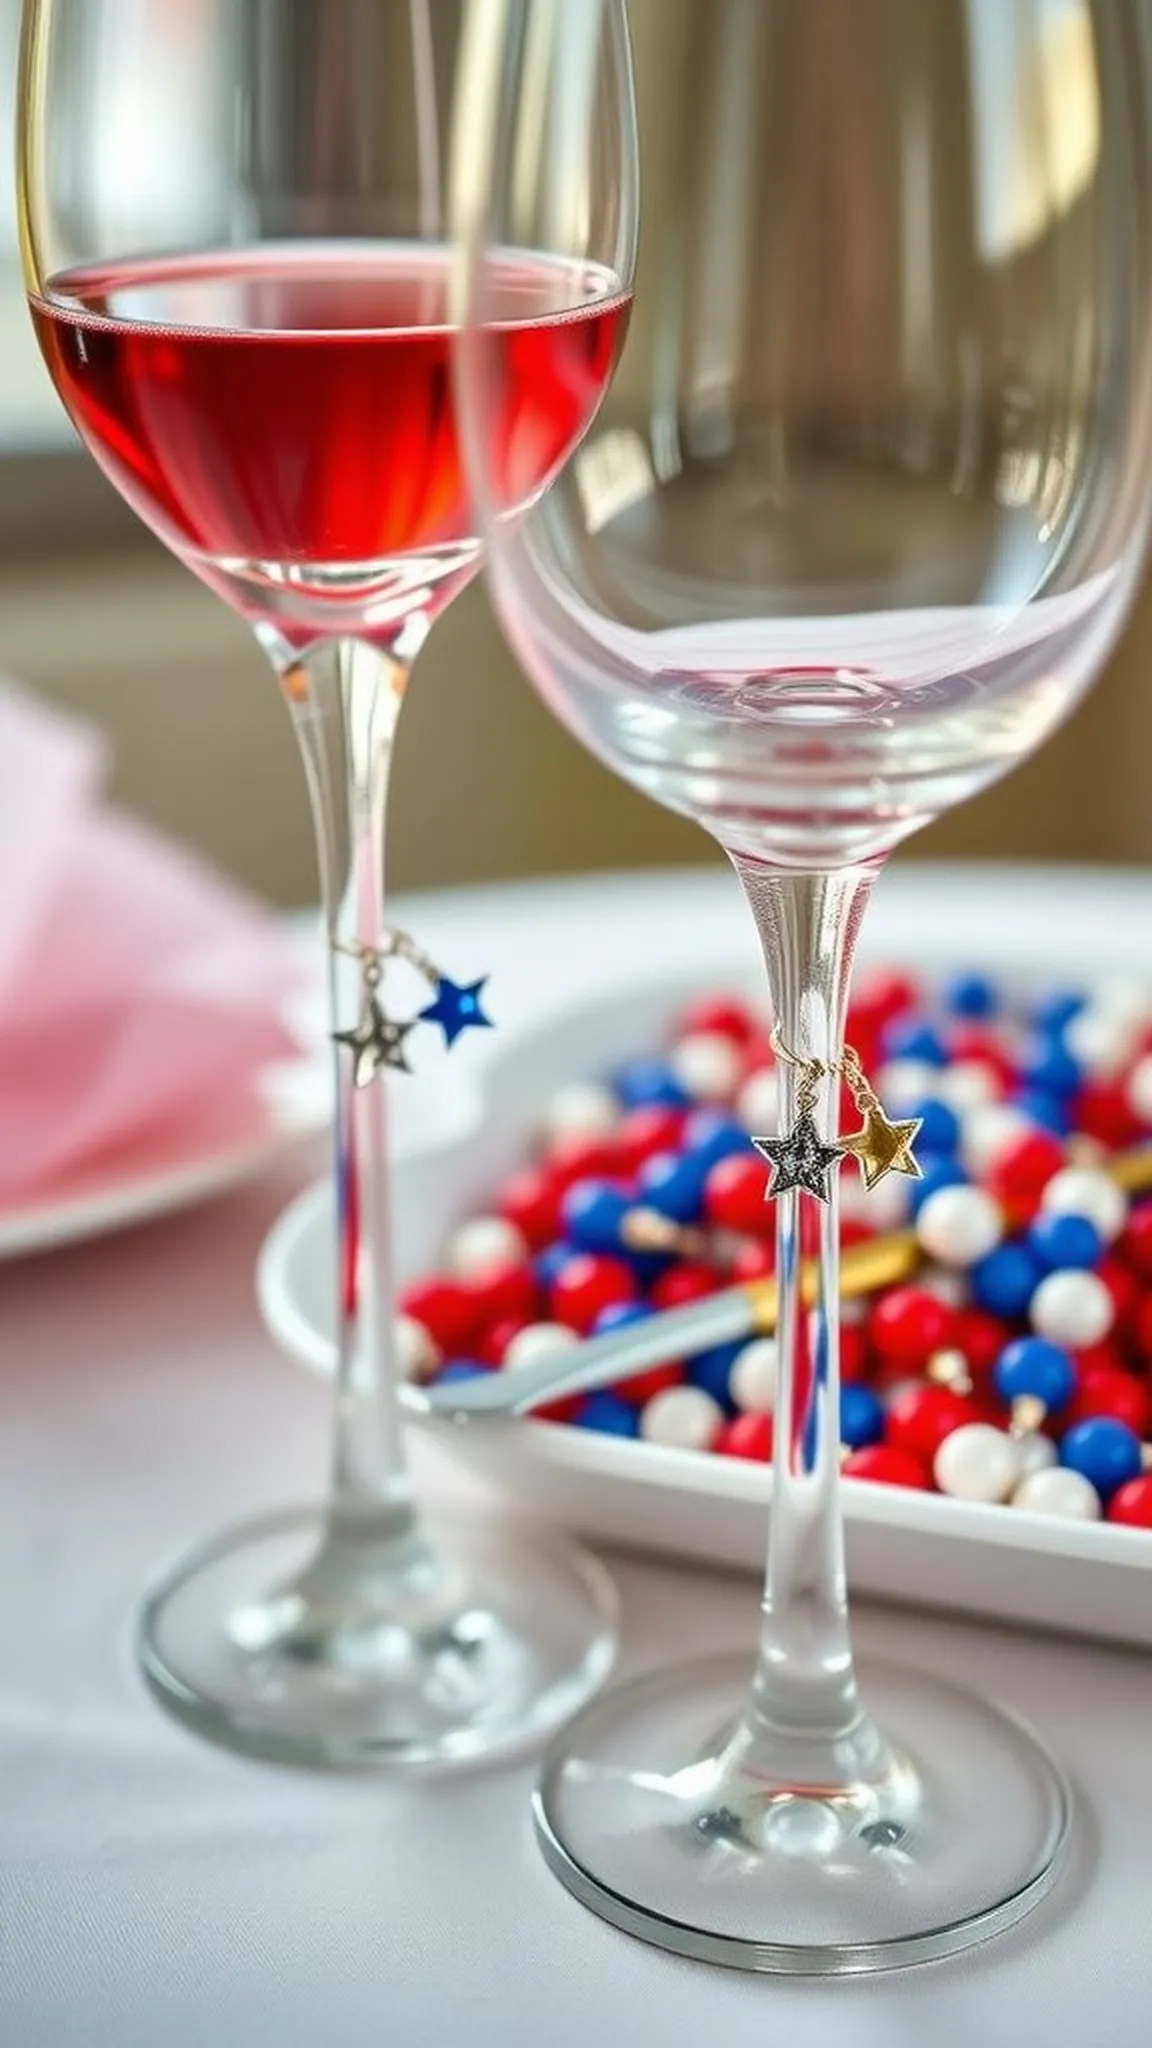
Small wine glass charms dangle from stems and help guests keep track of their drinks with a festive touch. Tiny beads and star charms add a tactile jingle and a hint of movement whenever glasses are lifted.
The color-coded charms read clearly from a short distance and bring a cohesive look when scattered across a drinks table. Their dainty size makes them unobtrusive while still adding personality to each glass.
A neat dish of charms invites guests to choose and personalize their glass, creating a small interactive moment during the party. The charms’ subtle shine catches overhead light as people mingle and toast.
Pro Tip: Use color-coded bead sequences so guests can quickly identify their glass at a glance even in a lively crowd.
How to Make This
- Thread small beads in red white and blue onto thin wire or split rings sized for wine glass stems.
- Add a small star charm or bead cluster and secure the wire ends by twisting or crimping.
- Place finished charms in a small bowl on the drinks table for guests to select as they arrive.
- Provide a few extra blank rings for last-minute personalization.
Avoid: Using oversized charms makes handling glasses awkward and increases the chance of bumping other glasses. Weak wire or loose crimps can unwind, causing charms to fall off mid-party.
Try Also: Create charm sets with initials for a personalized touch, or use mini tassels for a softer look. Offer matching charm sets for water glasses and wine glasses.
Products & Materials
Items Used
- small beads
- jewelry wire rings
- star charms
“Delightful wine glass charms that add charm and color to drinks.”
Star-shaped confetti balloons for bold overhead color
⏱️ 30 min · 🟢 Beginner
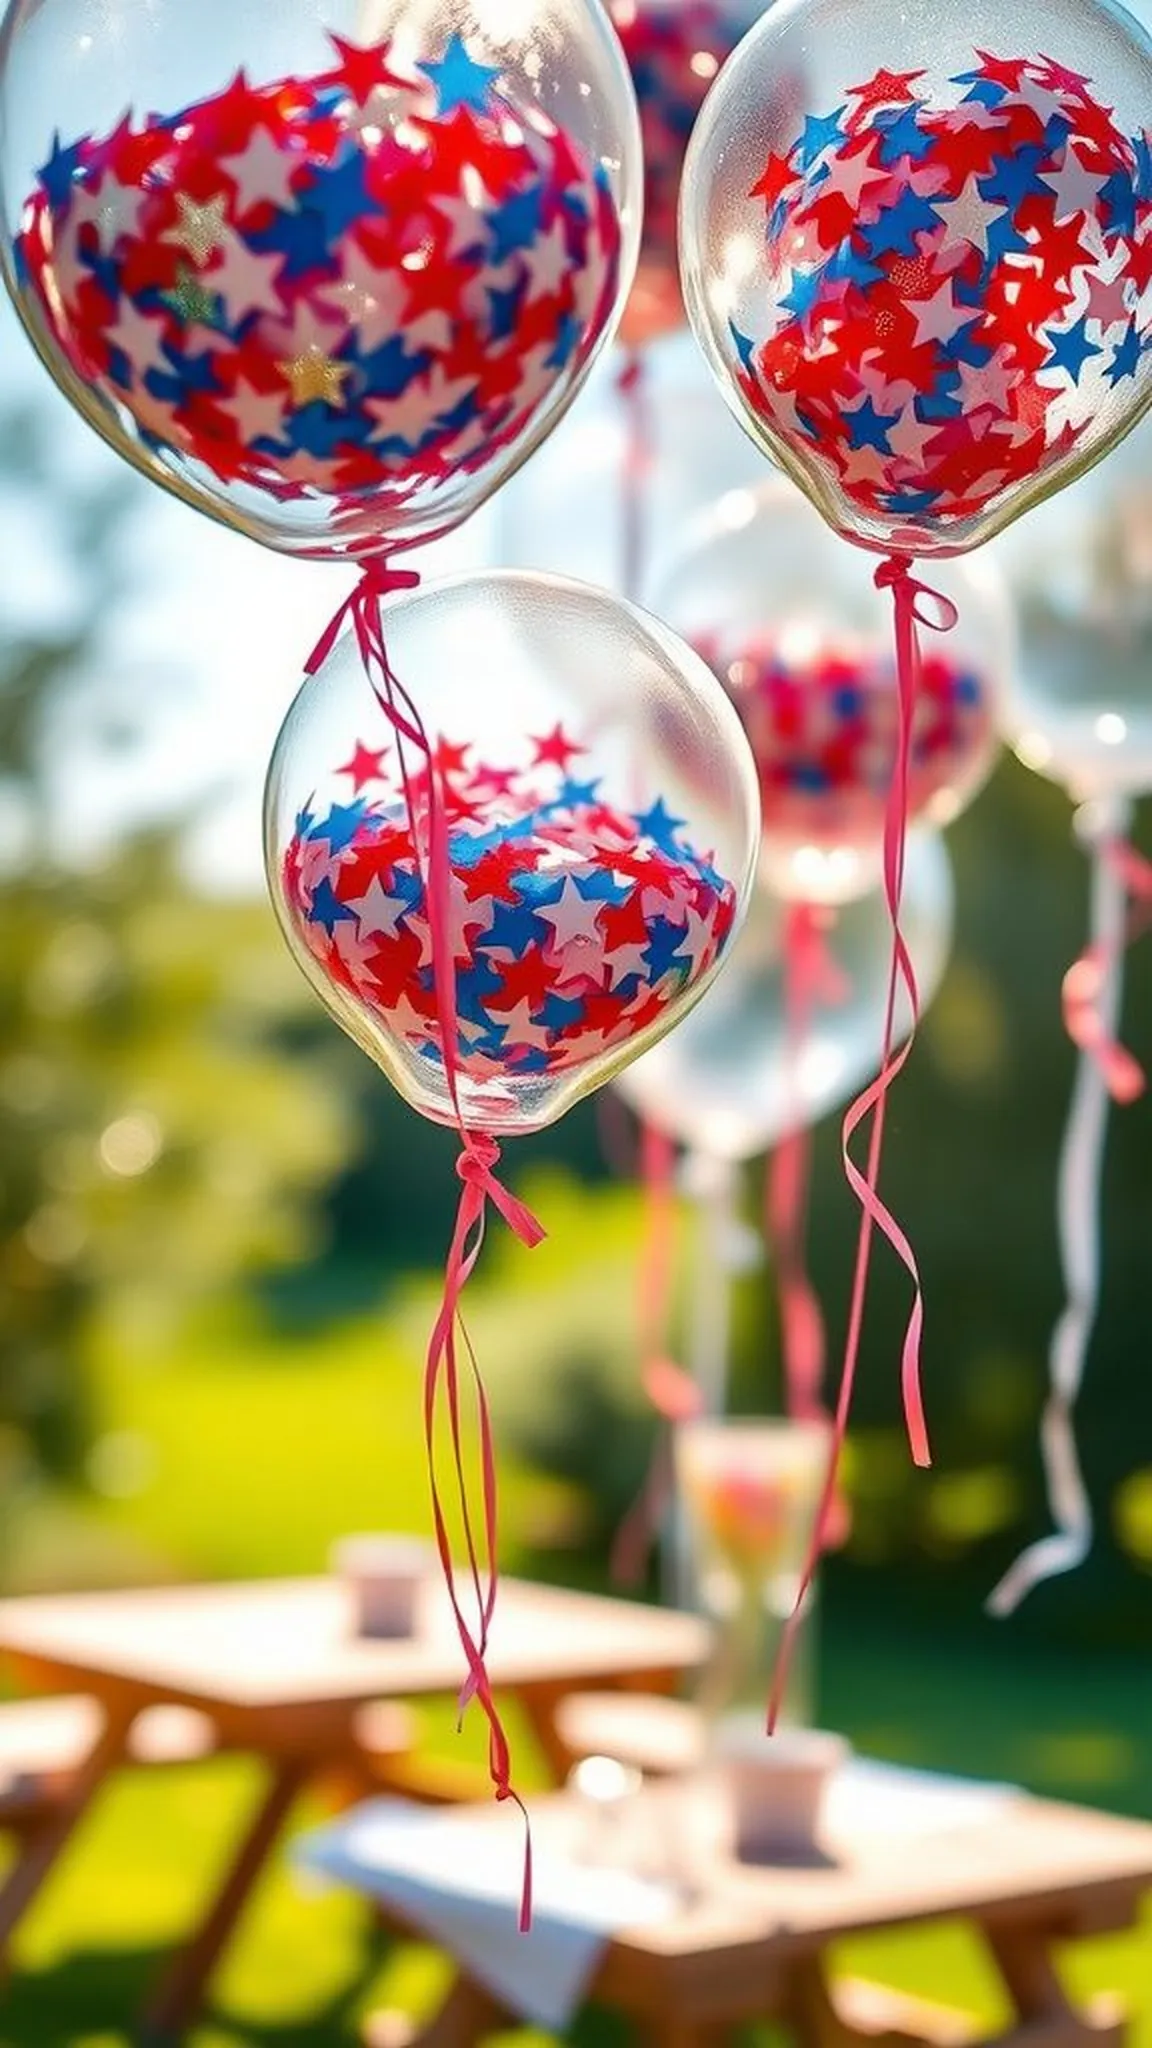
Translucent balloons filled with star confetti drift above the party, casting colored specks of light as they move. Each balloon’s sheen plays with reflections and makes the color appear luminous in the midday sun.
The confetti inside creates a playful, celebratory motion whenever the balloon shifts, lending a sense of movement without wind. Clusters of balloons at varied heights produce a joyful ceiling that frames the party area.
The combination of glossy surface and crisp star shapes feels modern and cheerful, tying into the Red White and Blue Party Crafts look in a big way. The balloons act like floating punctuation marks that punctuate the mood.
Pro Tip: Charge confetti with static by rubbing on a soft fabric before inflating to help stars cling to the balloon interior for a denser visual effect.
How to Make This
- Insert star-shaped confetti into clear balloons in red white and blue, adding a few extras for density.
- Inflate balloons with helium and tie off with ribbon, leaving varied lengths for height interest.
- Anchor balloons with small weights and arrange clusters above seating and the food table.
- Replace or re-tie balloons as needed to maintain a fresh, tidy overhead display.
Avoid: Putting too much confetti into each balloon can prevent them from inflating properly and make them too heavy for helium. Tying ribbons too short can crowd the table area and interfere with guests.
Try Also: Use metallic confetti for extra sparkle or create a cascade of small confetti balloons down a staircase. Combine with tassel garlands for extra vertical interest.
Products & Materials
Items Used
- clear balloons
- star confetti
- helium tank
- balloon ribbon
“Floating confetti balloons that shower starry color above the party.”
