
As an Amazon Associate I earn from qualifying purchases.
DIY Rope Basket Crafts bring cozy texture and practical storage to everyday spaces with soft natural fibers and handcrafted charm. These rope basket projects offer tactile warmth and quiet sculptural form that suit shelves, counters, and corners alike.
From small coiled bowls to hanging planters and lidded keepsake baskets, rope basket ideas adapt to different rooms and moods. Simple rope baskets and braided rope vessels blend rustic fiber texture with tidy silhouettes for clever home organization.
Each rope basket project highlights texture, weight, and the little irregularities that make handmade pieces feel familiar. Exploring rope basket styles sparks curiosity about color choices, handle options, and lining details for personal flair.
Coiled cotton rope basket for shelf storage
⏱️ 45 min · 🟢 Beginner
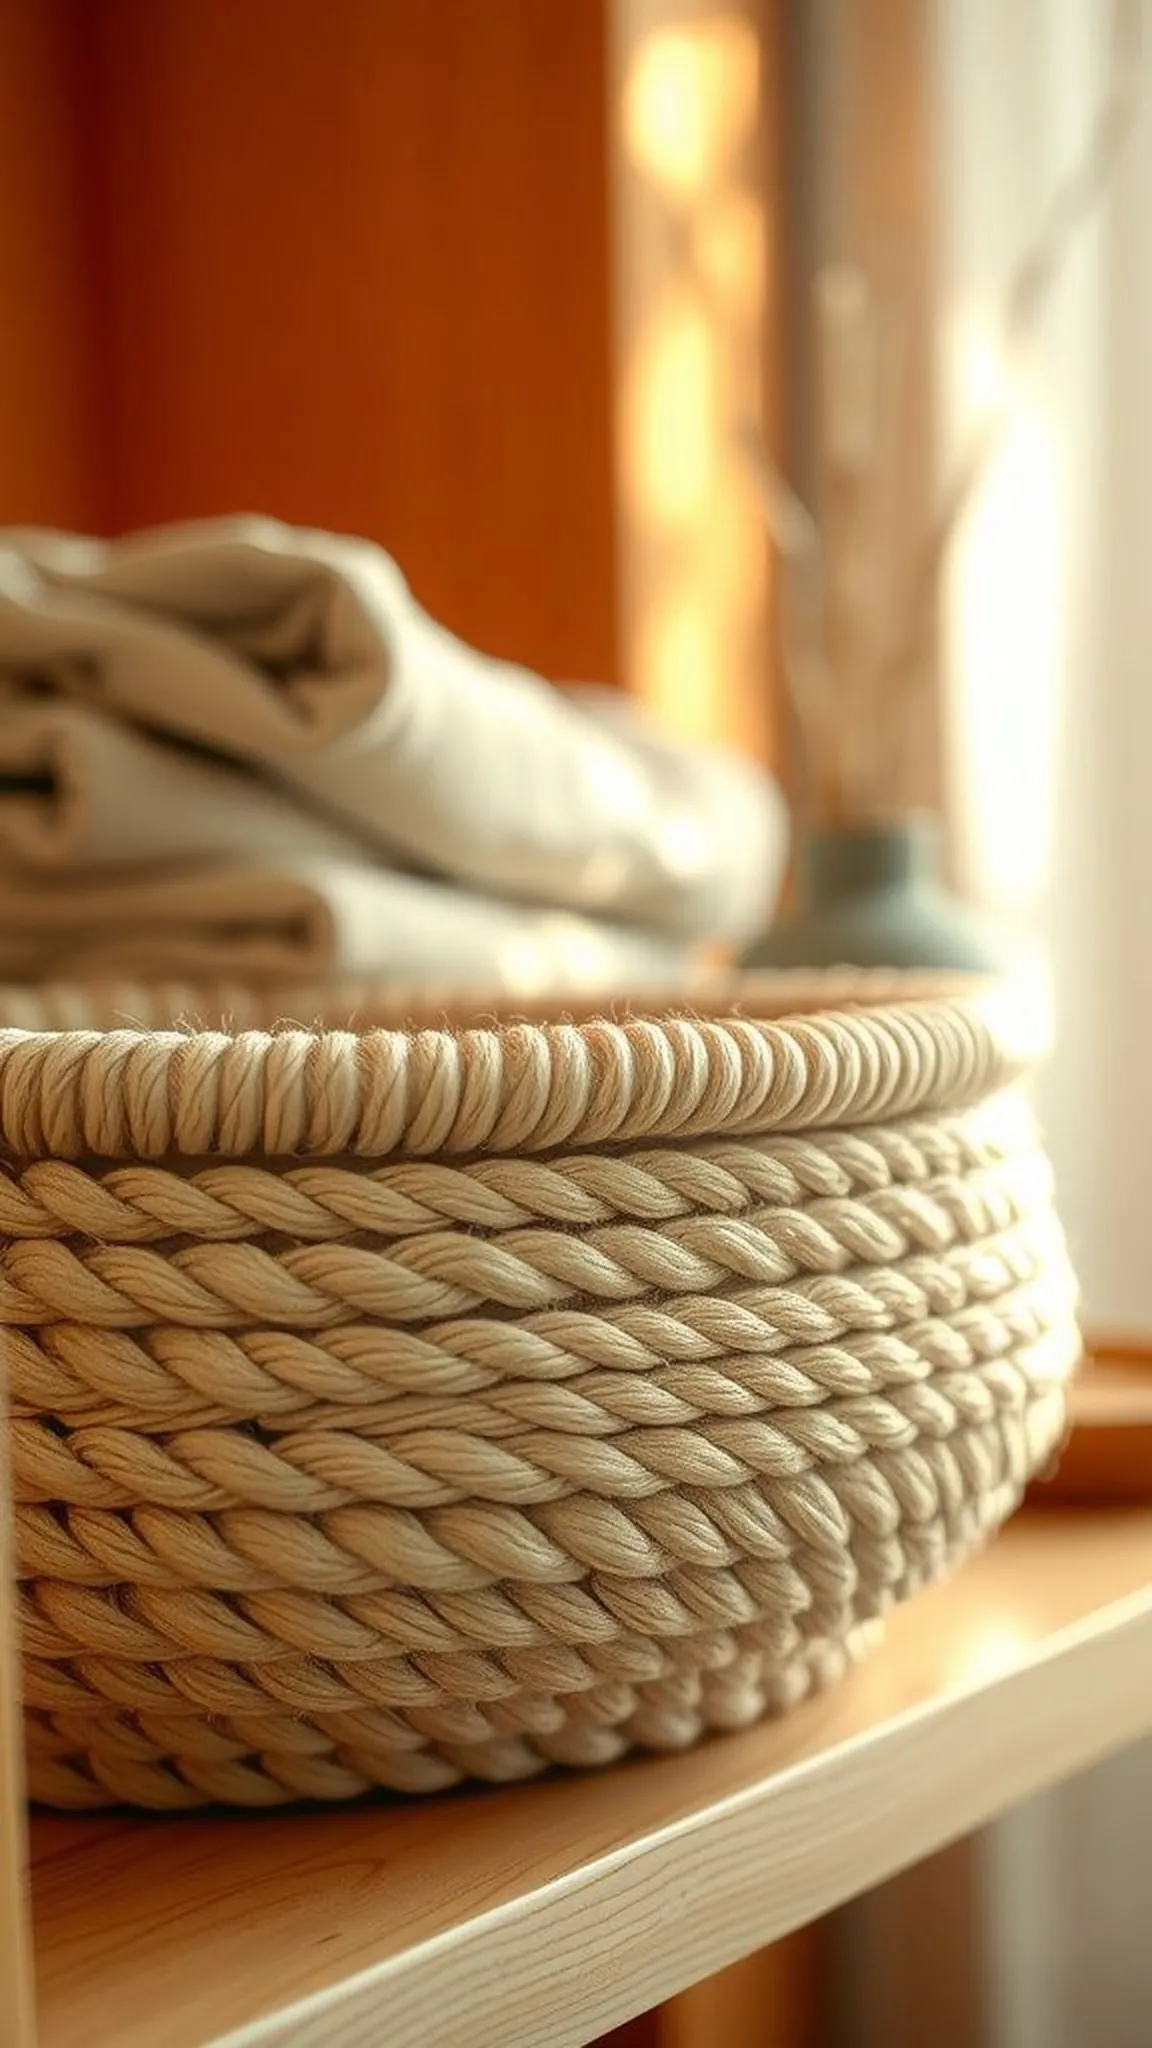
A low, coiled cotton rope basket brings soft, tactile texture to an otherwise flat shelf display. The warm natural fibers and tight spirals catch morning light and invite fingertips to explore the weave.
The rim shows a subtle matte sheen where fibers nestle together, giving a handcrafted quietness to the silhouette. A faint warm glue aroma lingers near the base and blends with the cotton scent.
This piece settles beside folded linens or ceramic vessels without demanding attention, complementing muted tones. Close inspection reveals gentle irregularities that make each curve distinctly personal and comforting.
Pro Tip: Allow each glued join to cool completely before adding more coils for a firmer outer edge and neater curvature.
How to Make This
- Measure and cut a length of cotton rope for the basket base.
- Apply hot glue to the rope and coil it tightly around a small cardboard or wooden base.
- Continue coiling and gluing outward and upward until the desired diameter is reached.
- Trim the end and tuck it under the last coil for a clean edge.
Avoid: A frequent beginner mistake is leaving joins too loose, which yields a wobbly wall. Taking a little pause at each bond tends to produce a steadier final shape.
Try Also: A striped look appears when alternating two colored ropes, or a small fabric liner adds softness and hides inner seams. Tiny leather loops attached to the rim create soft carrying handles while keeping the rustic aesthetic.
Products & Materials
Items Used
- Cotton rope (3/8 inch)
- Hot glue gun with glue sticks
- Scissors
- Cardboard round or wooden base
“Soft coiled cotton basket for tidy shelf storage”
Small hanging rope planter with macramé fringe
⏱️ 1-2 hours · 🟠 Intermediate
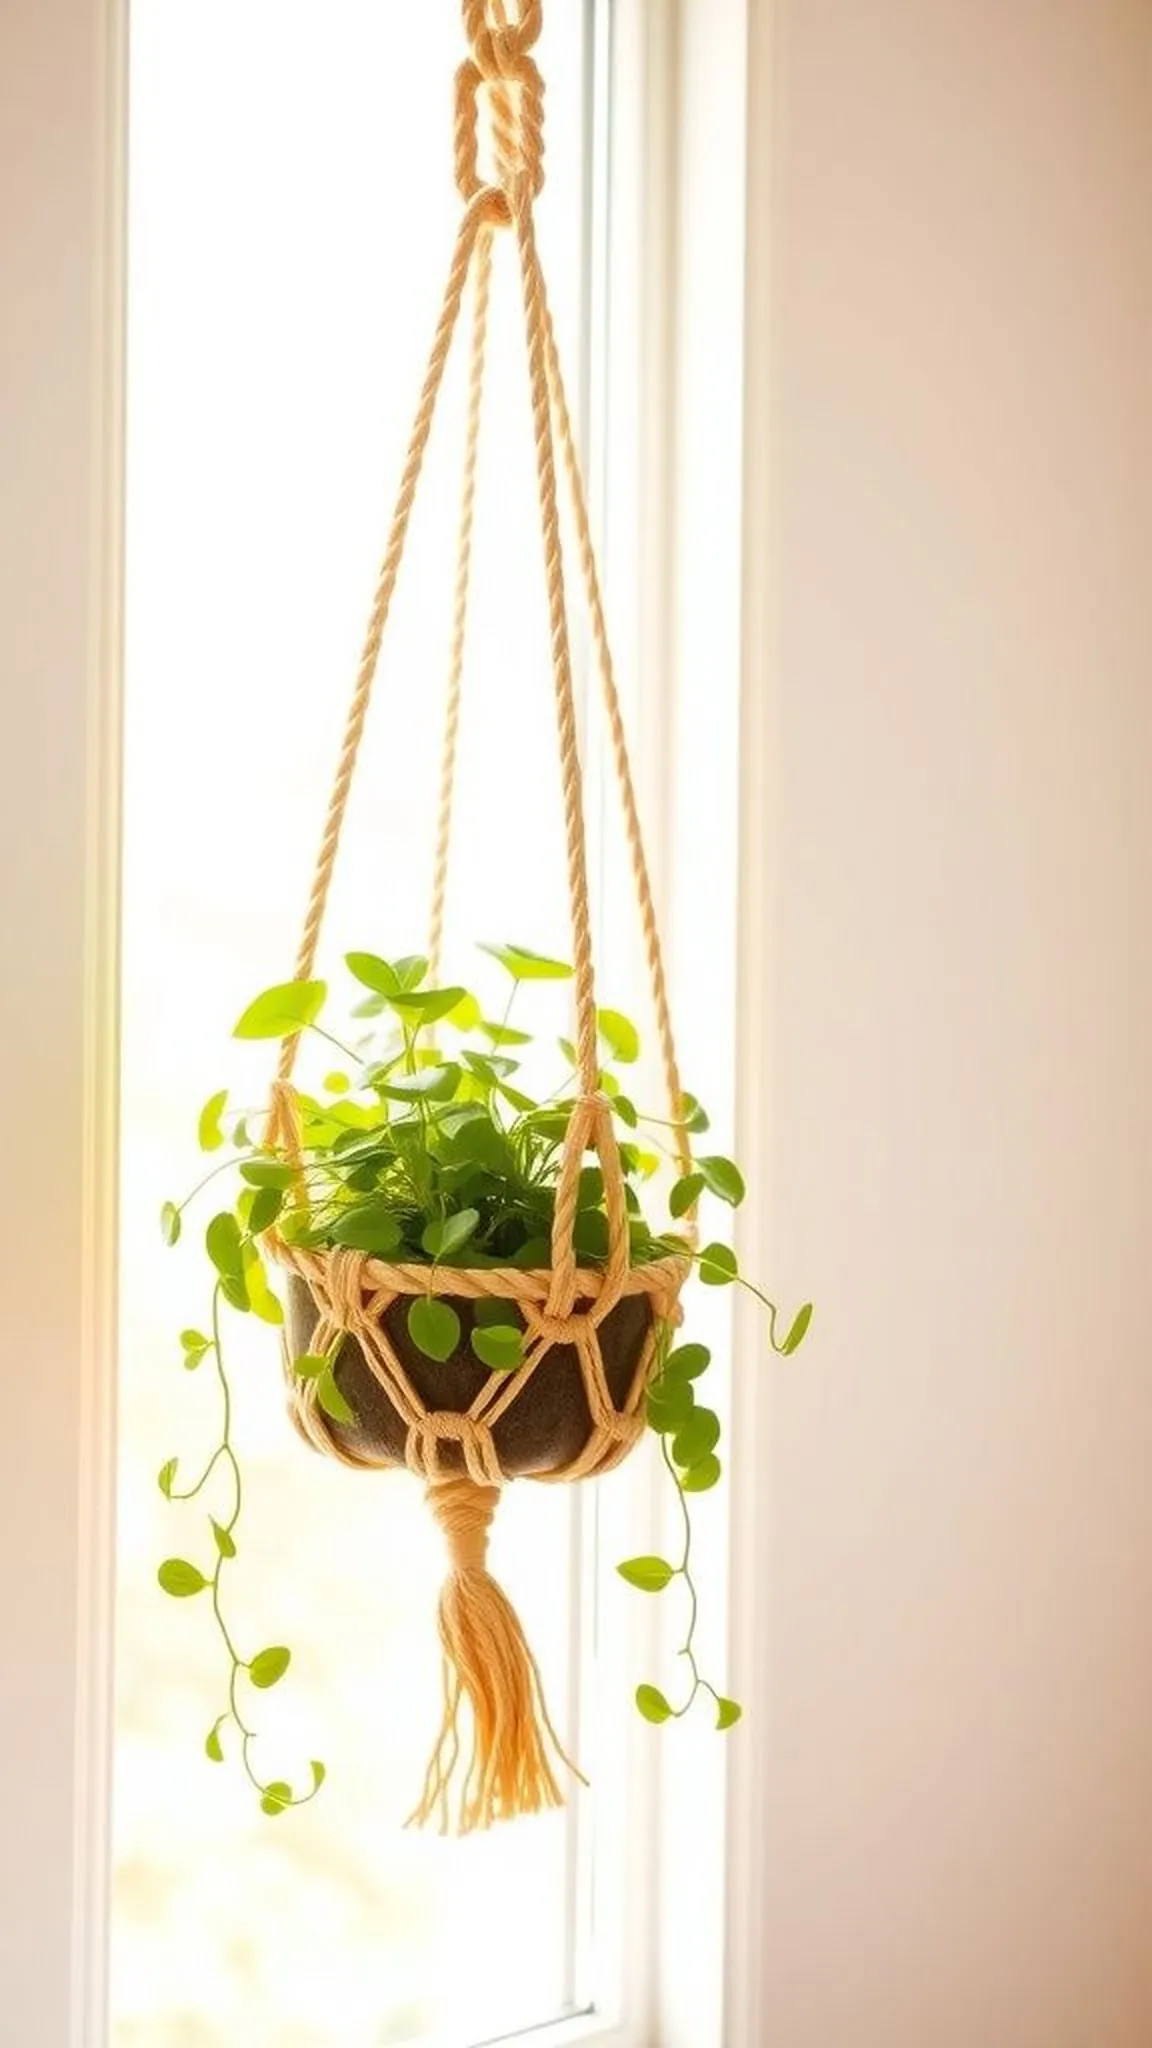
A petite hanging rope planter puts a quiet green presence into a sunlit corner with soft dangling fringe. The coiled base offers a cushioned nest while the braided hanger swings gently in a light breeze.
The fringe creates a rhythmic tassel silhouette that catches stray light and adds a friendly, tactile outline. Plant leaves peek above the rim and introduce a cool glossy contrast to the matte rope texture.
This planter feels at home in a kitchen window or beside a reading nook, lending height and warmth without crowding space. Close observation reveals subtle color shifts where different rope strands meet and settle.
Pro Tip: Allow natural fibers to relax overnight before final tightening so the planter hangs with even balance and softer drape.
How to Make This
- Cut three equal lengths of rope and attach them to a metal ring for the hanger.
- Coil a short rope length into a shallow basket base while adding hot glue at intervals to secure each wrap.
- Join the base to the braided hanger and tidy fringe ends to even the look.
Avoid: A frequent error is uneven hanger lengths that cause the planter to tilt. Measuring and aligning before final bonding helps the piece hang level.
Try Also: A wider base suits a trailing plant, or natural dyes create soft ombré bands along the coils. A wooden bead threaded onto the hanger adds a small sculptural accent.
Products & Materials
Items Used
- Cotton rope (1/4 inch)
- Metal hanging ring
- Hot glue gun with glue sticks
- Scissors
“Hanging coiled planter with macramé fringe and warm texture”
Lidded rope basket for keepsakes and trinkets
⏱️ 2 hours · 🟠 Intermediate

A lidded rope basket keeps small treasures tucked away beneath a snug, textured cap. The lid mirrors the base’s concentric coils and sits with a soft, cable-like silhouette that invites inspection.
The lid edge may present a faint ridge where fibers meet, adding a charming handmade cadence to the form. A muted rope aroma mingles with the faint warmth of recently set adhesive at the lid’s joins.
This piece nestles on a bedside table or dresser and offers quiet containment without bulk. Close viewing rewards the eye with subtle shifts in rope thickness and a gentle, rhythmic pattern.
Pro Tip: Test-fit the lid frequently during construction to keep alignment natural and avoid a too-tight or overly loose fit at the rim.
How to Make This
- Coil a flat base using rope and hot glue until the desired diameter is achieved.
- Build the side walls by layering coils upward and gluing at each seam for structure.
- Create a matching lid by coiling to the same diameter and adding a small loop handle to the center.
- Dry-fit the lid on the base and adjust the last coils for a snug fit.
Avoid: A frequent issue is a lid that sits too tight after final joins, making removal tricky. Allowing a slight clearance during the last coils ensures easier access.
Try Also: A low-profile button handle keeps the silhouette minimal, or a contrasting colored rope band around the lid adds a decorative ring. A fabric-wrapped lid center softens the look and hides glue seams.
Products & Materials
Items Used
- Cotton rope (3/8 inch)
- Hot glue gun with glue sticks
- Scissors
“Handy lidded rope basket for bedside keepsakes”
Save time and printer ink with 50+ printable templates and step-by-step instructions in one ad-free guide.

Just $19.99 — lifetime access
Nautical rope beach tote with leather handles
⏱️ 2-3 hours · 🔴 Advanced
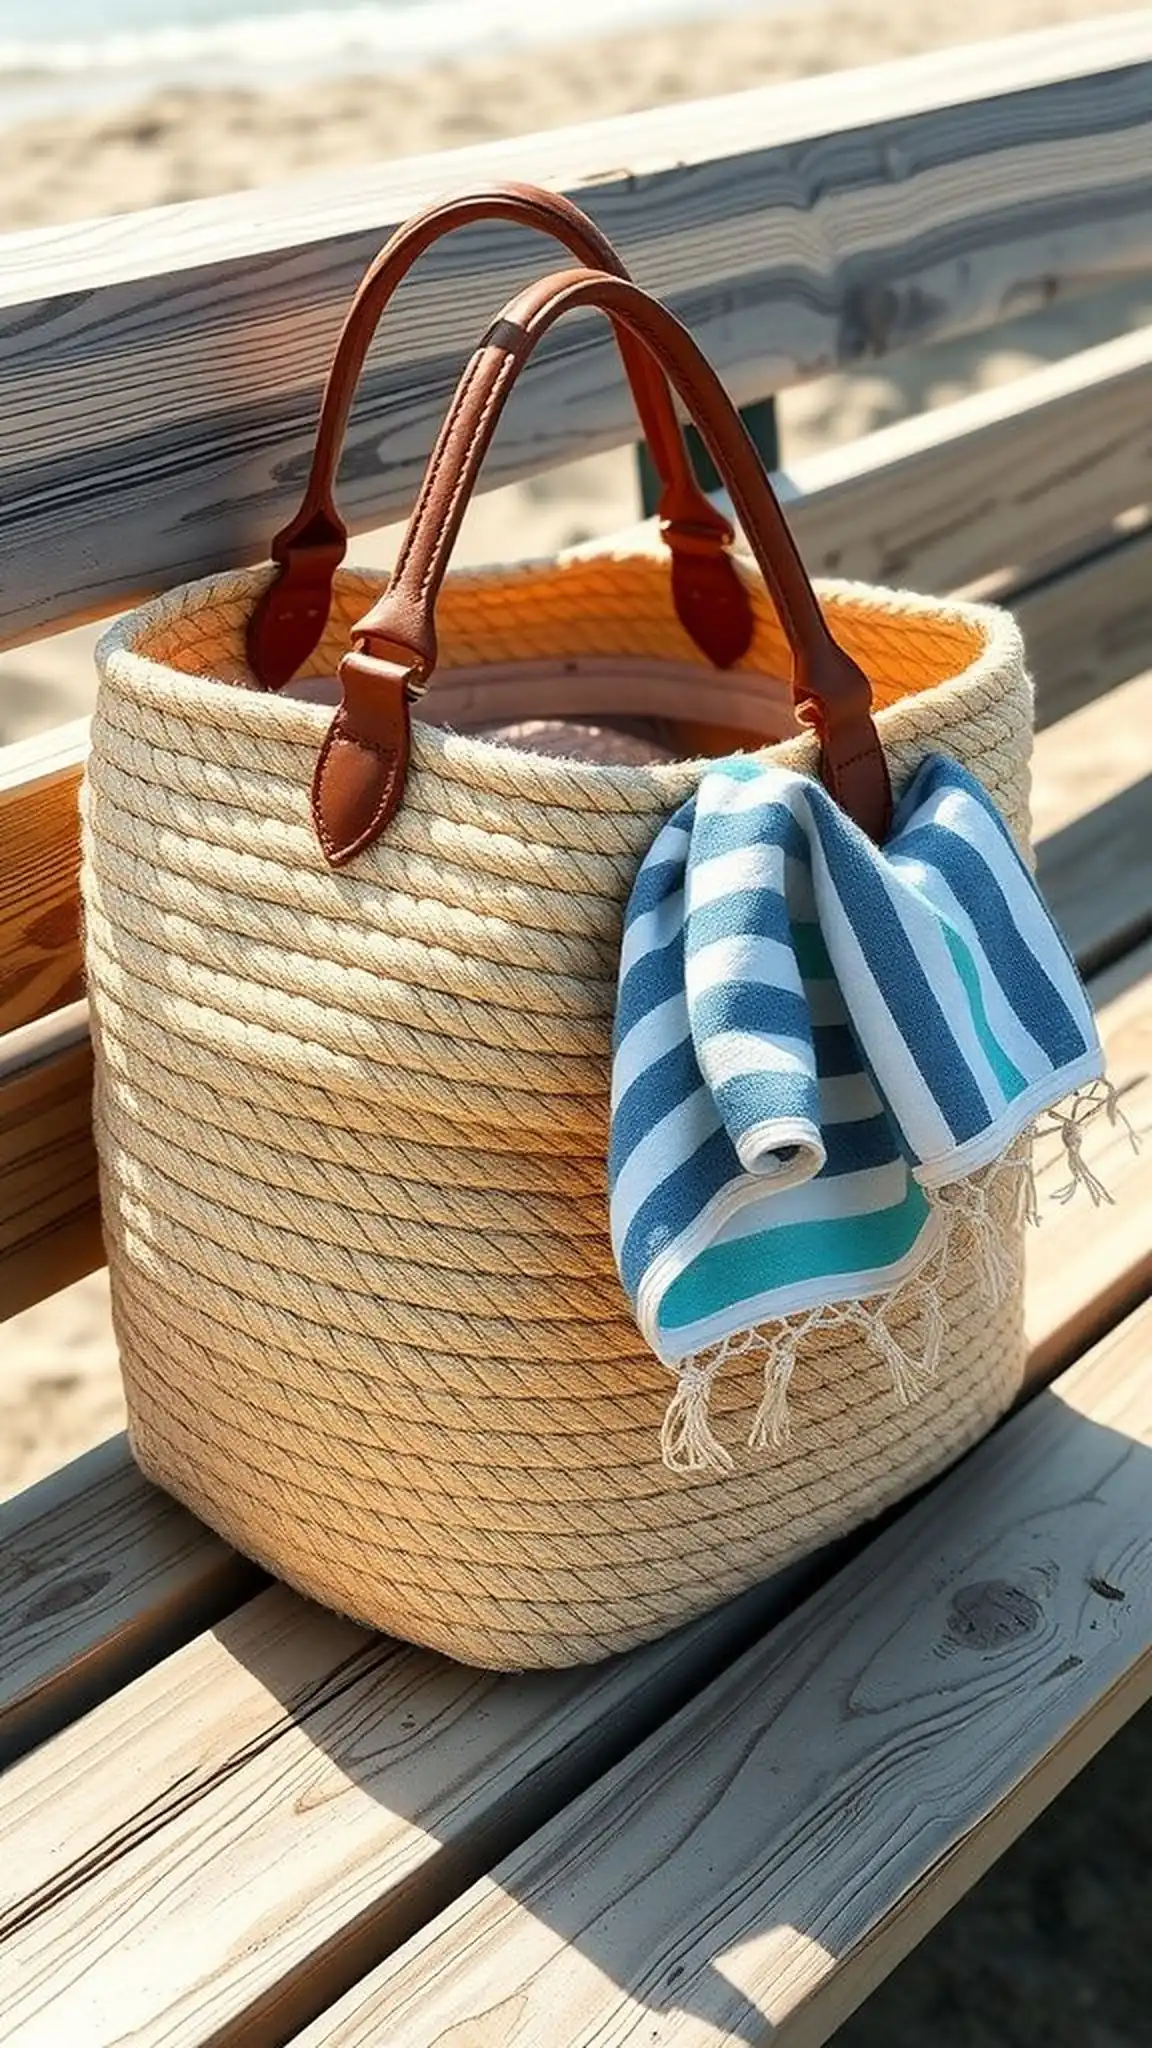
A roomy nautical rope tote blends rugged braid with smooth leather handles for a seaside-ready silhouette. The thicker rope holds a sturdy shape while sand and sun bring a lived-in character to the fibers.
Placed on a boardwalk bench, the tote suggests a slow stroll toward water and warm breeze. Close observation shows intentional stitching at handle mounts and slightly flattened coils under load.
Pro Tip: Reinforce handle mounts with extra glue and small stitches to keep leather attachments strong under heavier loads.
How to Make This
- Create a large coiled base using thick cotton rope and glue to form the tote bottom.
- Build tall side walls with overlapping coils until the desired capacity is reached.
- Attach leather handles with strong adhesive and secure with small hand stitches for reinforcement.
- Optionally add a fabric liner to protect the interior and hide seams.
Avoid: A frequent mistake is under-reinforcing handle attachments, which can pull away under weight. Extra adhesive and stitching prevents early loosening.
Try Also: A shorter version becomes a market bag, or a striped band of navy rope creates a classic coastal look. Metal rivets at the handles add an industrial accent.
Products & Materials
Items Used
“Sturdy nautical rope tote with sleek leather handles”
Braided rope basket with contrasting color bands
⏱️ 1-2 hours · 🟠 Intermediate
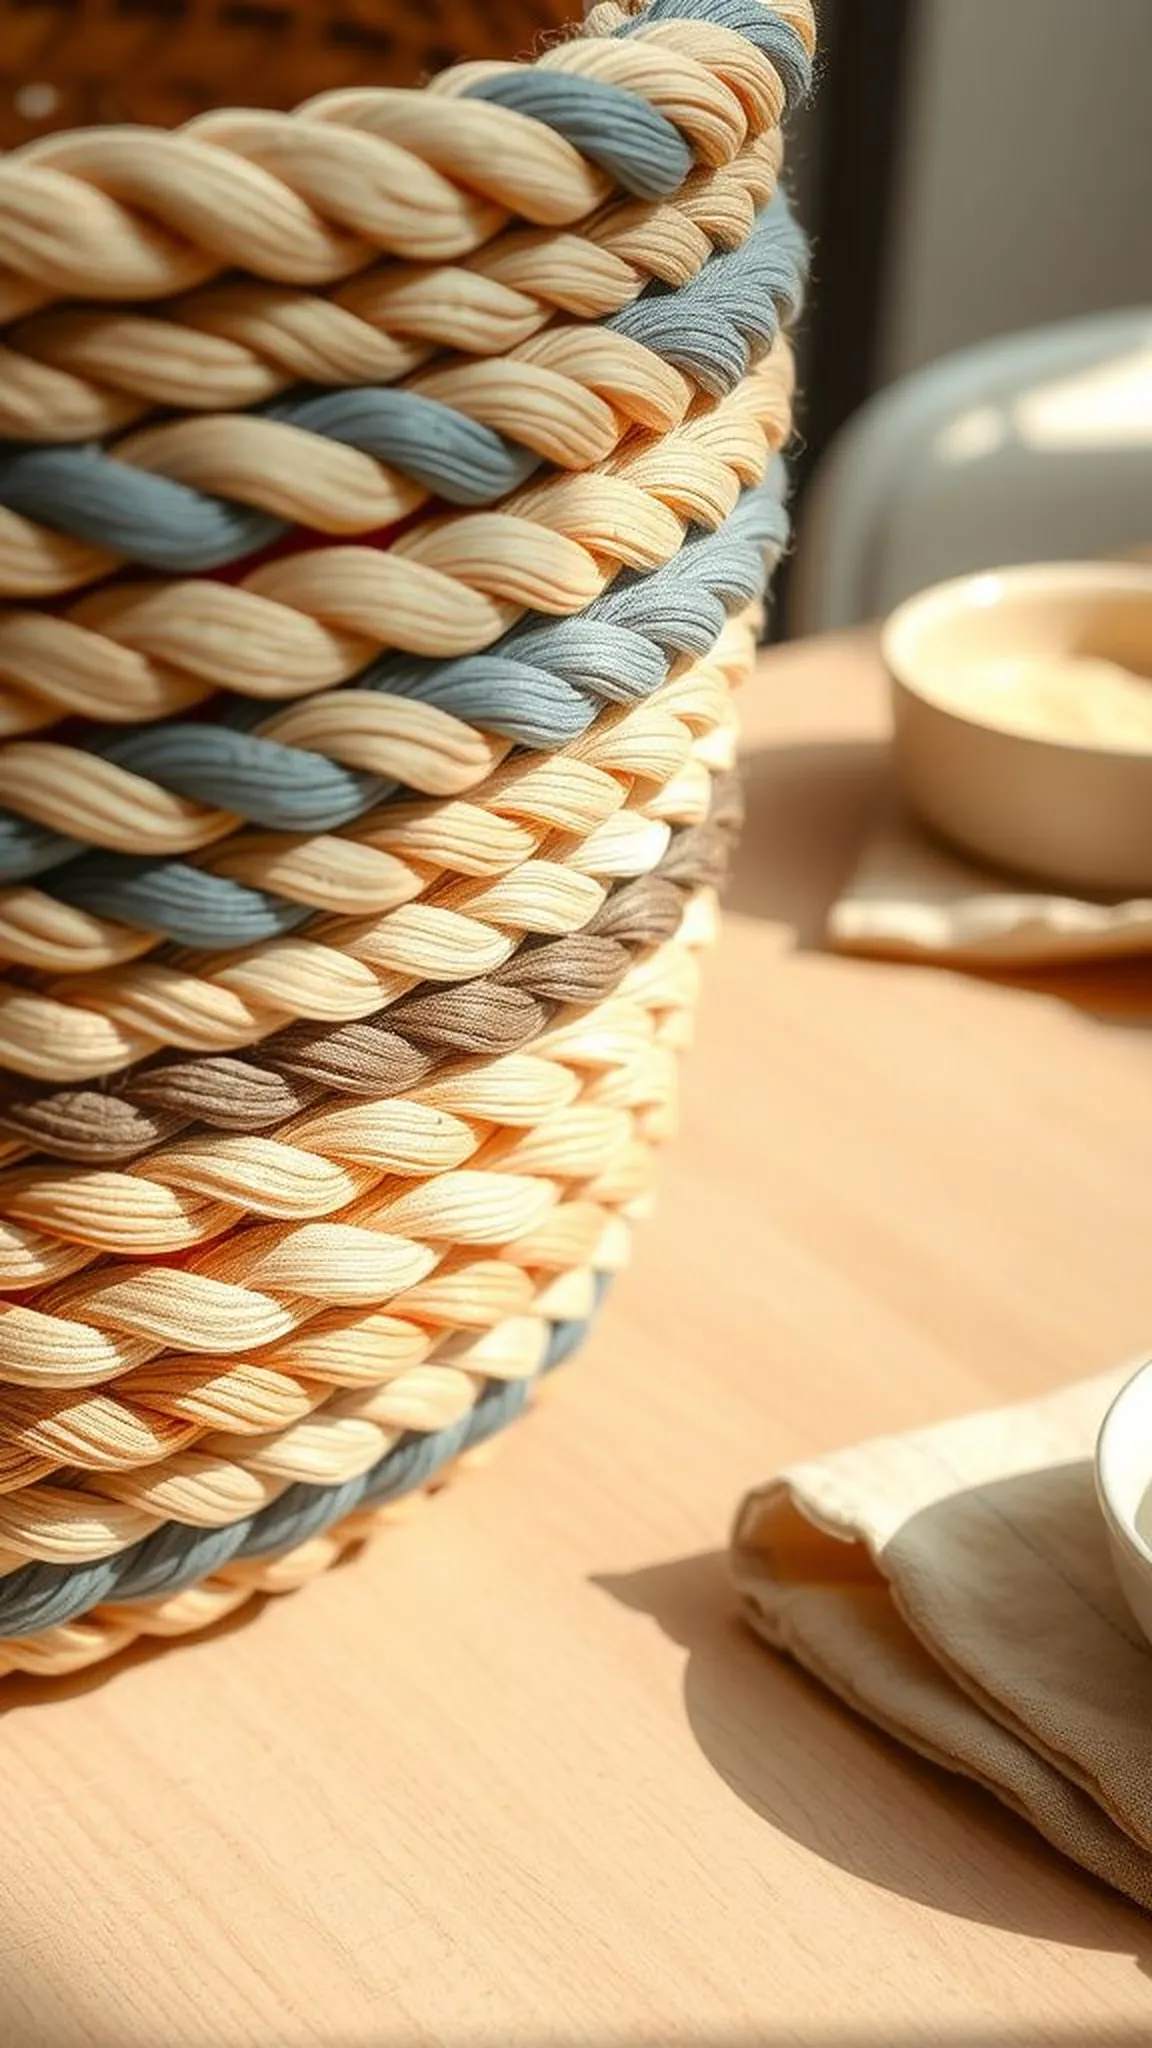
A braided rope basket offers a lively surface where two tones weave into a rhythmic pattern. The braid yields a tactile ribbon effect that plays with shadow and light along each ridge.
The contrasting bands emphasize the basket’s spiral movement and provide a visual anchor on a console or entry table. The rope texture remains soft but holds shape thanks to the braided structure and snug joins.
This design brings a playful note to neutral decor while staying practical for daily stowage. Small variations in tension give each braid a slightly different personality when viewed up close.
Pro Tip: Keep braid tension even and check alignment frequently so color bands run smoothly and the basket keeps a circular profile.
How to Make This
- Braid three long rope strands together, alternating colors to create repeating bands.
- Coil the braided rope into a circular base, securing with hot glue at intervals.
- Continue spiraling upward until the desired height is achieved, trimming and tucking the tail neatly.
Avoid: A frequent problem is inconsistent braid tension that distorts the circular shape. Maintaining steady tension during braiding keeps the piece balanced.
Try Also: A thinner braid yields a delicate bowl, or three colors produce a vibrant rainbow banding. Metallic thread woven into one strand adds a subtle shimmer.
Products & Materials
Items Used
- Cotton rope in two colors (1/4 inch)
- Hot glue gun with glue sticks
- Scissors
“Color-banded braided rope basket with lively texture”
Fabric-lined rope basket for delicate storage
⏱️ 1-2 hours · 🟠 Intermediate
A fabric-lined rope basket marries soft interior comfort with a tactile outer braid for gentle storage of linens or scarves. The lining introduces color and pattern, softening the overall feel while hiding inner seams.
The rope exterior provides structure while the fabric lends a plush contrast against delicate textiles placed inside. The rim presents a smooth lip where fabric folds meet the rope’s texture.
This hybrid piece reads both crafted and cozy, perfect on a closet shelf or near a dresser. Small pleats in the liner create a casual gathered look that changes with each load.
Pro Tip: Basting the liner lightly to the basket interior helps it sit smoothly and reduces shifting when items are added or removed.
How to Make This
- Build a coiled rope basket to the desired size, leaving an even rim edge.
- Cut a fabric circle and a shallow side band for the liner, sewing the pieces into a soft pouch.
- Insert the liner and tack it to the inside of the basket at discreet points for stability.
Avoid: A frequent oversight is making the liner too tight, which resists fitting into the basket. Leaving a little ease in the fabric prevents bunching.
Try Also: A quilted liner adds insulation for delicate items, or a patterned cotton gives a pop of color. A removable liner with a drawstring makes washing easier.
Products & Materials
Items Used
- Cotton rope (3/8 inch)
- Cotton fabric for liner
- Sewing needle and thread
- Scissors
- Hot glue gun
“Soft fabric-lined rope basket for delicate storage needs”
Rope storage bin with wooden carry handles
⏱️ 2-3 hours · 🔴 Advanced
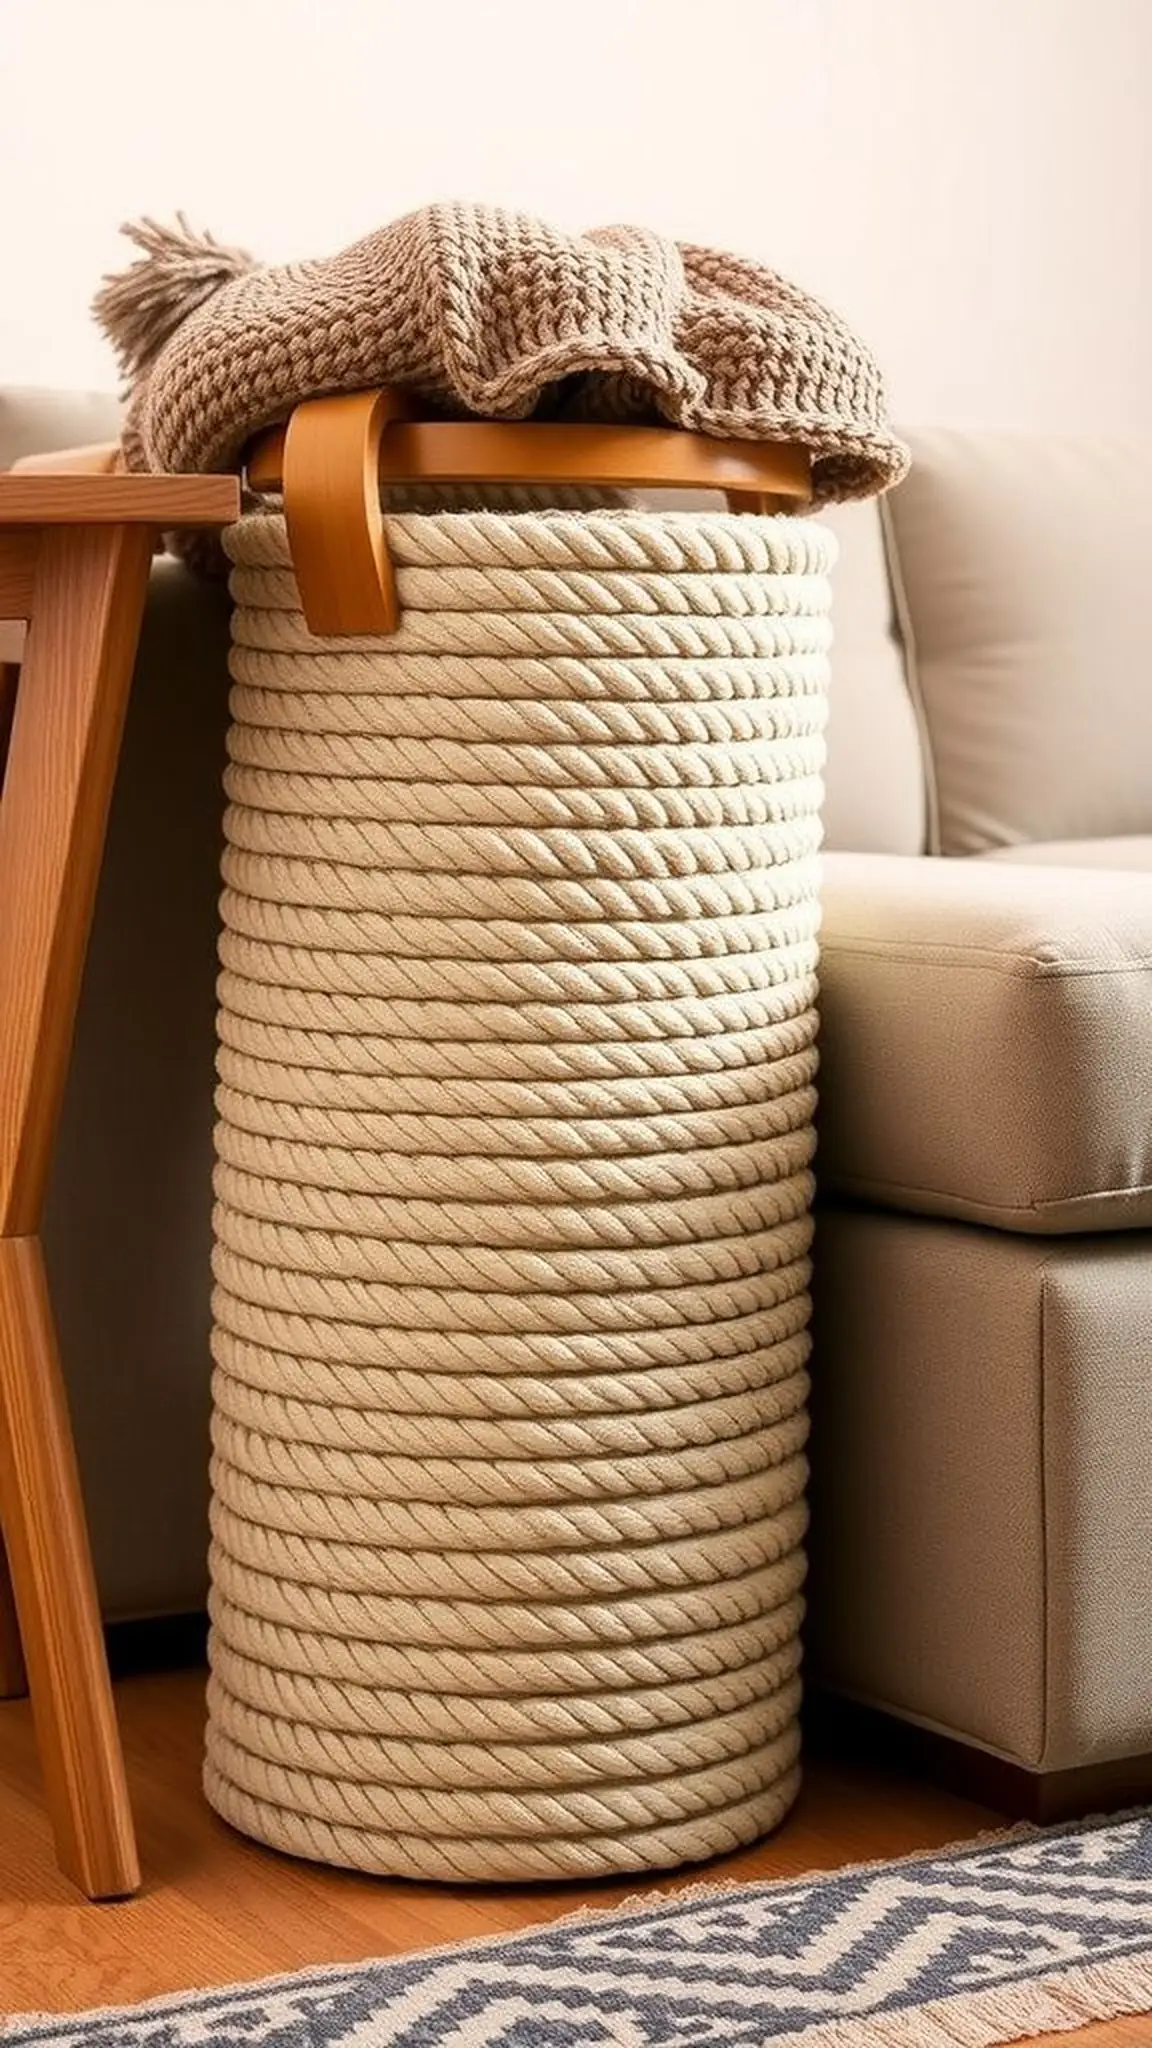
A tall rope storage bin offers generous capacity while the wooden carry handles add a sturdy, tactile contrast. The vertical walls present an upright stance that reads as both functional and decorative.
The wood feels cool and smooth against the matte rope, and the handle mounts show neat stitching and adhesive reinforcement. Interior depth invites folded throws or toys without adding clutter to a living area.
Placed near a sofa, the bin blends texture and warmth while staying visually light thanks to natural tone pairing. Close attention reveals subtle flattening where heavier contents settle into the base.
Pro Tip: Pre-drilling small holes in the wooden handles before stitching prevents splitting and makes attachment neater and stronger under load.
How to Make This
- Coil a wide base and build tall side walls with thick rope, gluing each wrap securely.
- Drill pilot holes into wooden handles and align them with matching points on the basket rim.
- Stitch handles through rope and wood with strong thread, then reinforce with adhesive around the mounts.
Avoid: A frequent problem is attaching handles too close to the rim edge, which can tear fibers under weight. Positioning mounts slightly lower distributes stress more evenly.
Try Also: Shorter handles convert the bin into a low stool, or adding a fabric liner creates hidden compartments. Painted handle ends add a modern color accent against the natural rope.
Products & Materials
Items Used
- Thick cotton rope (1/2 inch)
- Wooden handles
- Heavy duty thread and needle
- Power drill with small bit
- Hot glue gun
“Tall rope storage bin with smooth wooden handles”
Mini rope trinket bowls with bead accents
⏱️ 30 min · 🟢 Beginner
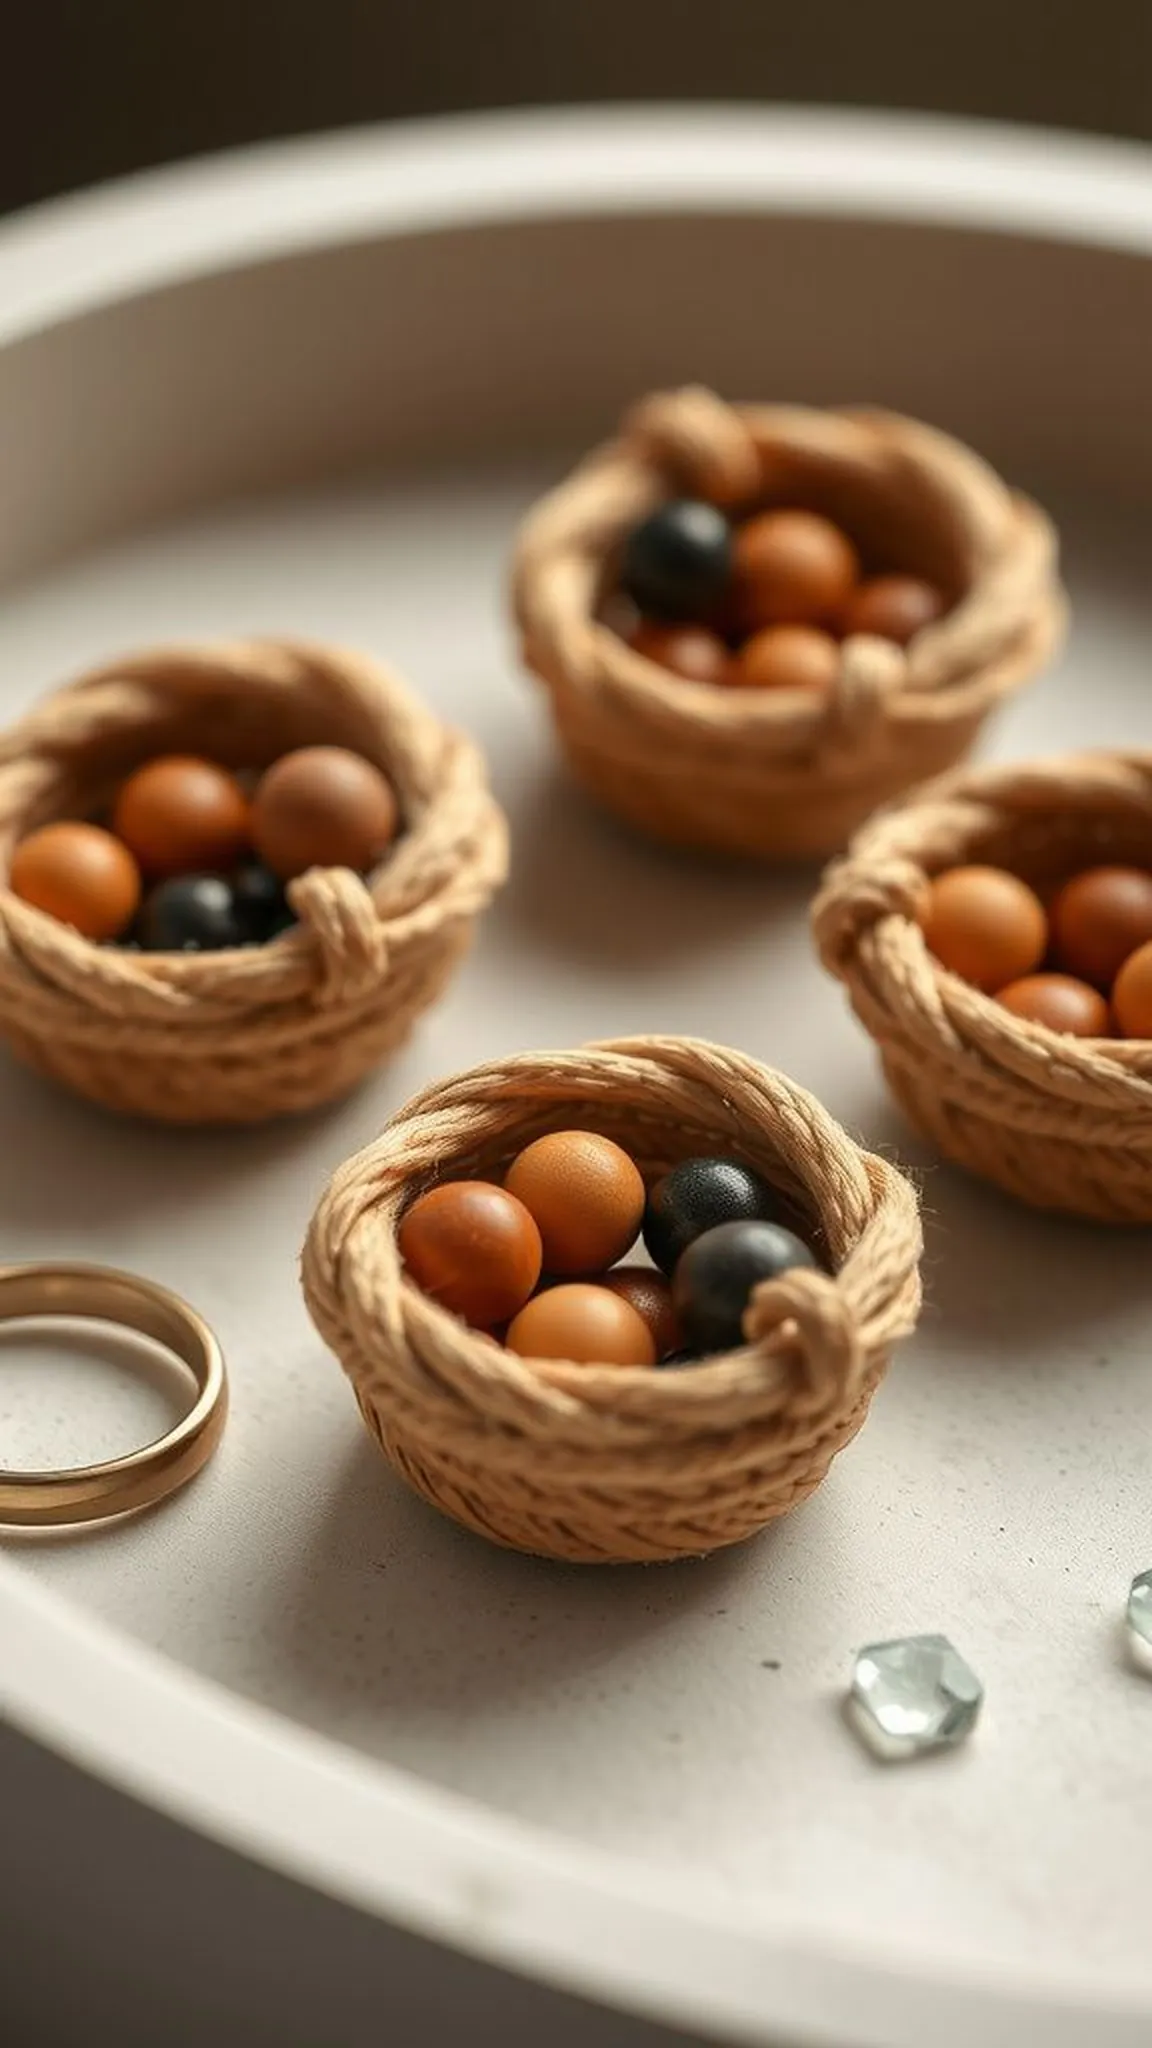
Tiny rope trinket bowls act as catchalls on a dresser or nightstand, their compact shape offering a nook for rings and keys. Bead accents at the rim add a playful rhythm against the soft rope curves.
The small scale brings the rope’s texture into sharp focus, with each coil forming a gentle ridge beneath fingertips. Light glints off the bead surfaces while the rope keeps a matte compliment, creating a balanced contrast.
Grouped in differing colors, these little bowls create a casual vignette that feels both ordered and lively. Close viewing reveals small variations in coil spacing that lend each bowl its own character.
Pro Tip: Thread beads onto the rope early so they sit naturally within the coil pattern rather than being forced into place later.
How to Make This
- Cut a short length of rope and begin coiling tightly to form a small base.
- Slide beads onto the rope at intervals while continuing to coil and glue.
- Finish the rim neatly and tuck the end under the last coil for a tidy finish.
Avoid: A frequent slip is crowding beads too close together, which flattens the coil profile. Spacing them evenly preserves the bowl’s rounded shape.
Try Also: Tiny bowls in a trio create a color block, or mix wood and glass beads for textural contrast. A metallic bead at the center becomes a subtle focal point.
Products & Materials
Items Used
- Cotton rope (1/4 inch)
- Wooden or glass beads
- Hot glue gun with glue sticks
- Scissors
“Charming mini rope trinket bowls with playful bead accents”
Rope picnic basket with hinged lid and clasp
⏱️ 2-3 hours · 🔴 Advanced

A rope picnic basket with a hinged lid and clasp evokes a weekend ritual, its substantial body holding napkins and treats. The lid’s curve and the clasp’s small gleam give the piece an inviting, purposeful look.
The rope sides show gradual compression where heavier items have rested, while the lid remains slightly springy at the joins. The metal clasp adds a cool contrast to the rope’s warm matte surface and signals secure closure.
Set on a grass blanket, the basket reads like an intentional companion to outdoorsy plans, carrying texture and weight with quiet confidence. Close inspection reveals careful join work around the hinge and clasp mounts.
Pro Tip: Reinforce hinge attachment points with extra stitching and a small backing patch to prevent pull-through from frequent opening and closing.
How to Make This
- Construct a rigid coiled base and high side walls using thick rope and strong adhesive.
- Create a matching lid with a slight overhang and attach small hinge plates at the back with screws or stitching.
- Install a front clasp and reinforce all hardware mounts with extra adhesive and thread.
Avoid: A frequent issue is underestimating hardware stress, causing mounts to loosen after repeated use. Backing and stitching the mounts improves longevity.
Try Also: A shallower lid becomes a picnic tray, or a removable fabric insert protects fragile contents. Brass hardware gives a vintage vibe while modern clips keep the look minimalist.
Products & Materials
Items Used
- Thick cotton rope (1/2 inch)
- Small metal hinges and clasp
- Screws and small drill
- Heavy duty glue
“Sturdy rope picnic basket with hinged lid and secure clasp”
Rope magazine holder with slanted open top
⏱️ 1-2 hours · 🟠 Intermediate
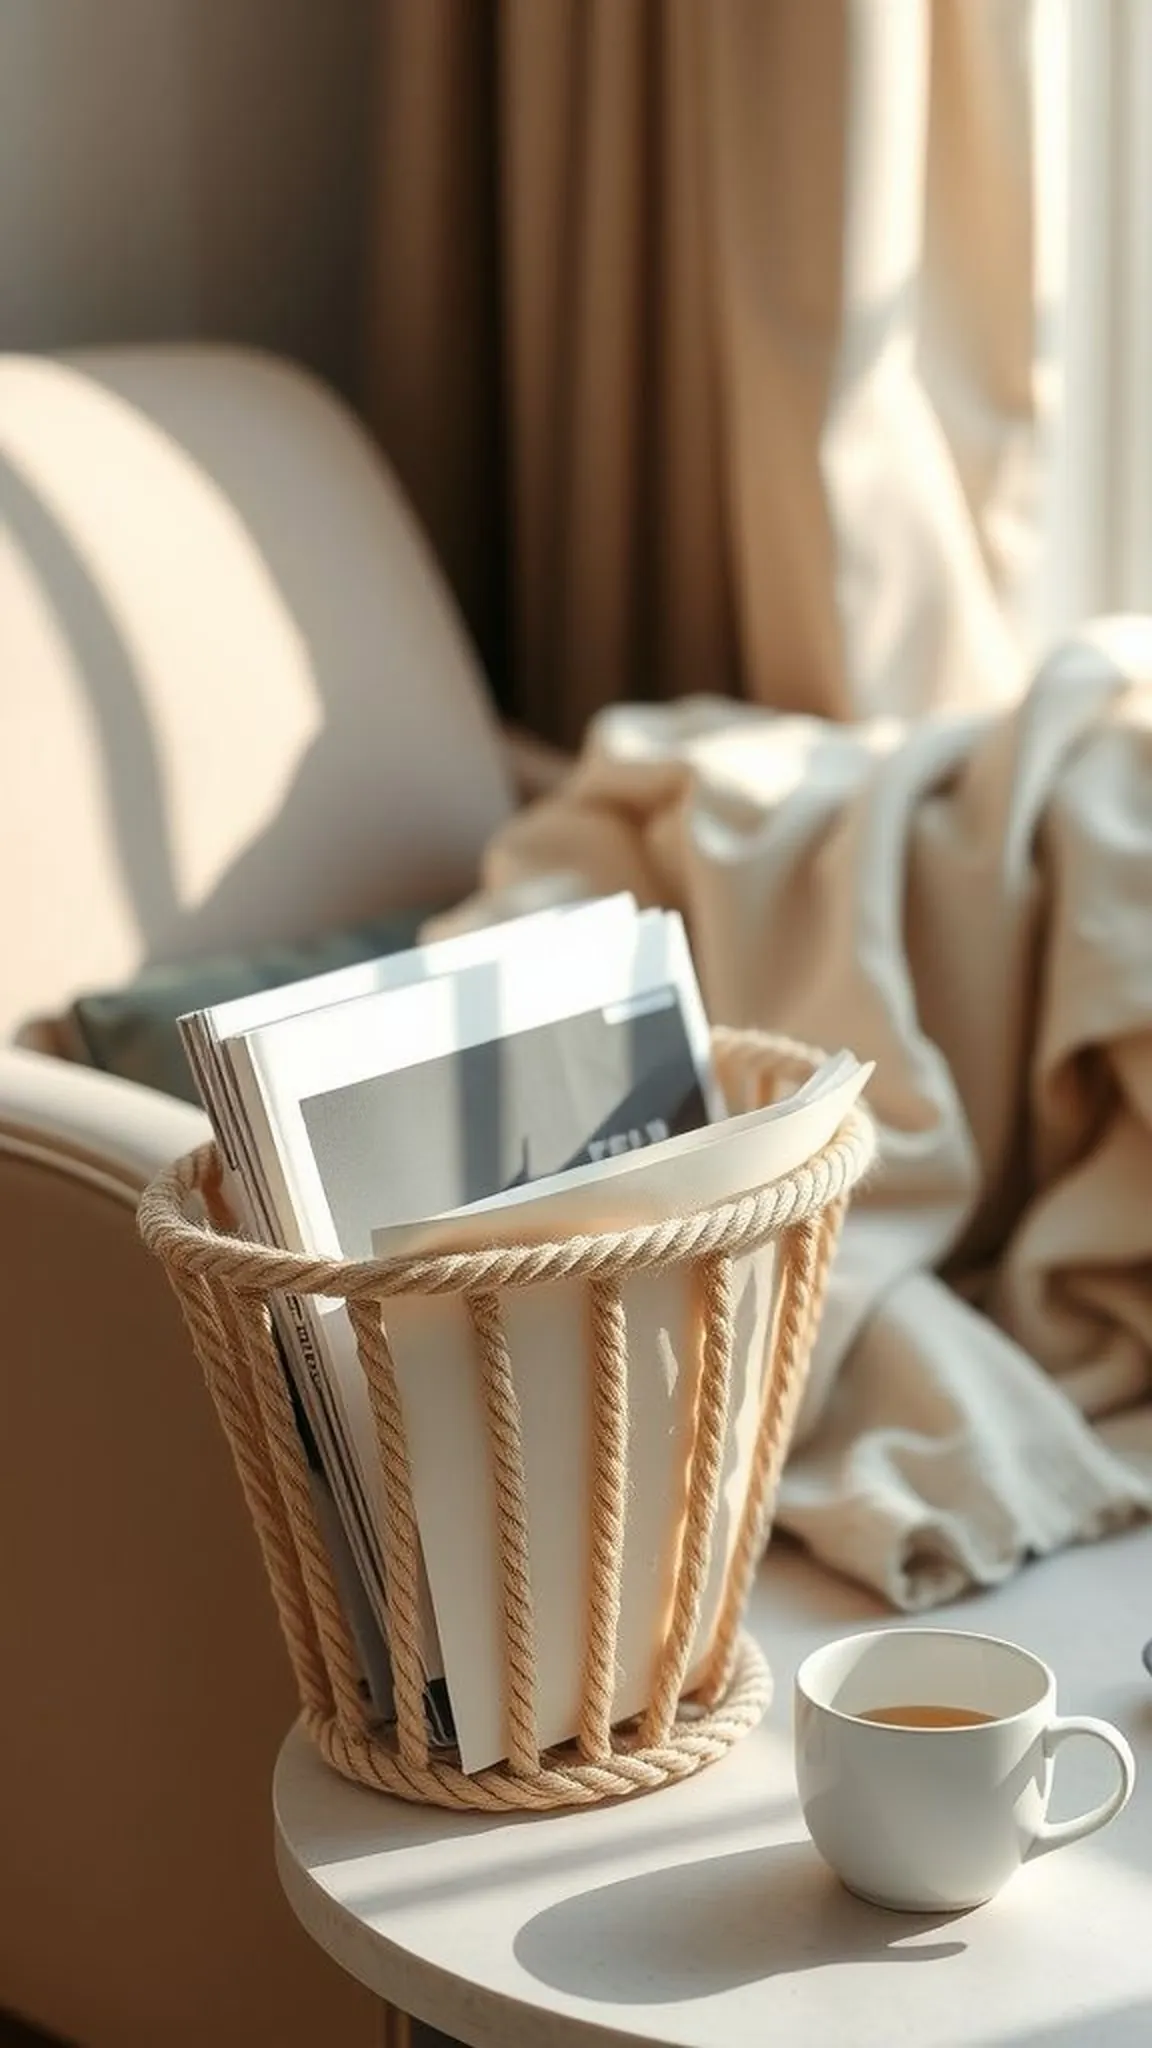
A slanted rope magazine holder leans with intention, offering an easy slide for periodicals and slim books. The angled opening creates a casual, lived-in look and the rope’s texture keeps documents from slipping too far inside.
The holder’s lip provides a soft tactile edge that contrasts with crisp paper corners, while the coils show subtle compression at the base. Natural fiber tones pair nicely with printed covers and glossy pages for a cozy reading corner.
Placed near a favorite chair, the holder suggests lingering and slow moments with a cup of tea. Up-close viewing reveals neat coil joins and warm shadows along the diagonal face.
Pro Tip: Create a slightly wider base than the magazine width to prevent tipping when a few issues are stacked inside.
How to Make This
- Coil a broad base and build upward, angling one side taller to form the slanted opening.
- Secure each coil with glue and check the angle frequently to maintain consistent slope.
- Finish the rim neatly and trim any stray fibers for a tidy appearance.
Avoid: A frequent problem is making the opening too narrow, which resists sliding magazines in. Allowing extra width near the top prevents jams.
Try Also: A lower, wider version suits vinyl records, or adding a leather strap creates a carrying handle. Two stacked holders form a compact bedside organizer.
Products & Materials
Items Used
“Angled rope magazine holder for cozy reading nooks”
Tiered rope hanging organizer for small items
⏱️ 2 hours · 🔴 Advanced
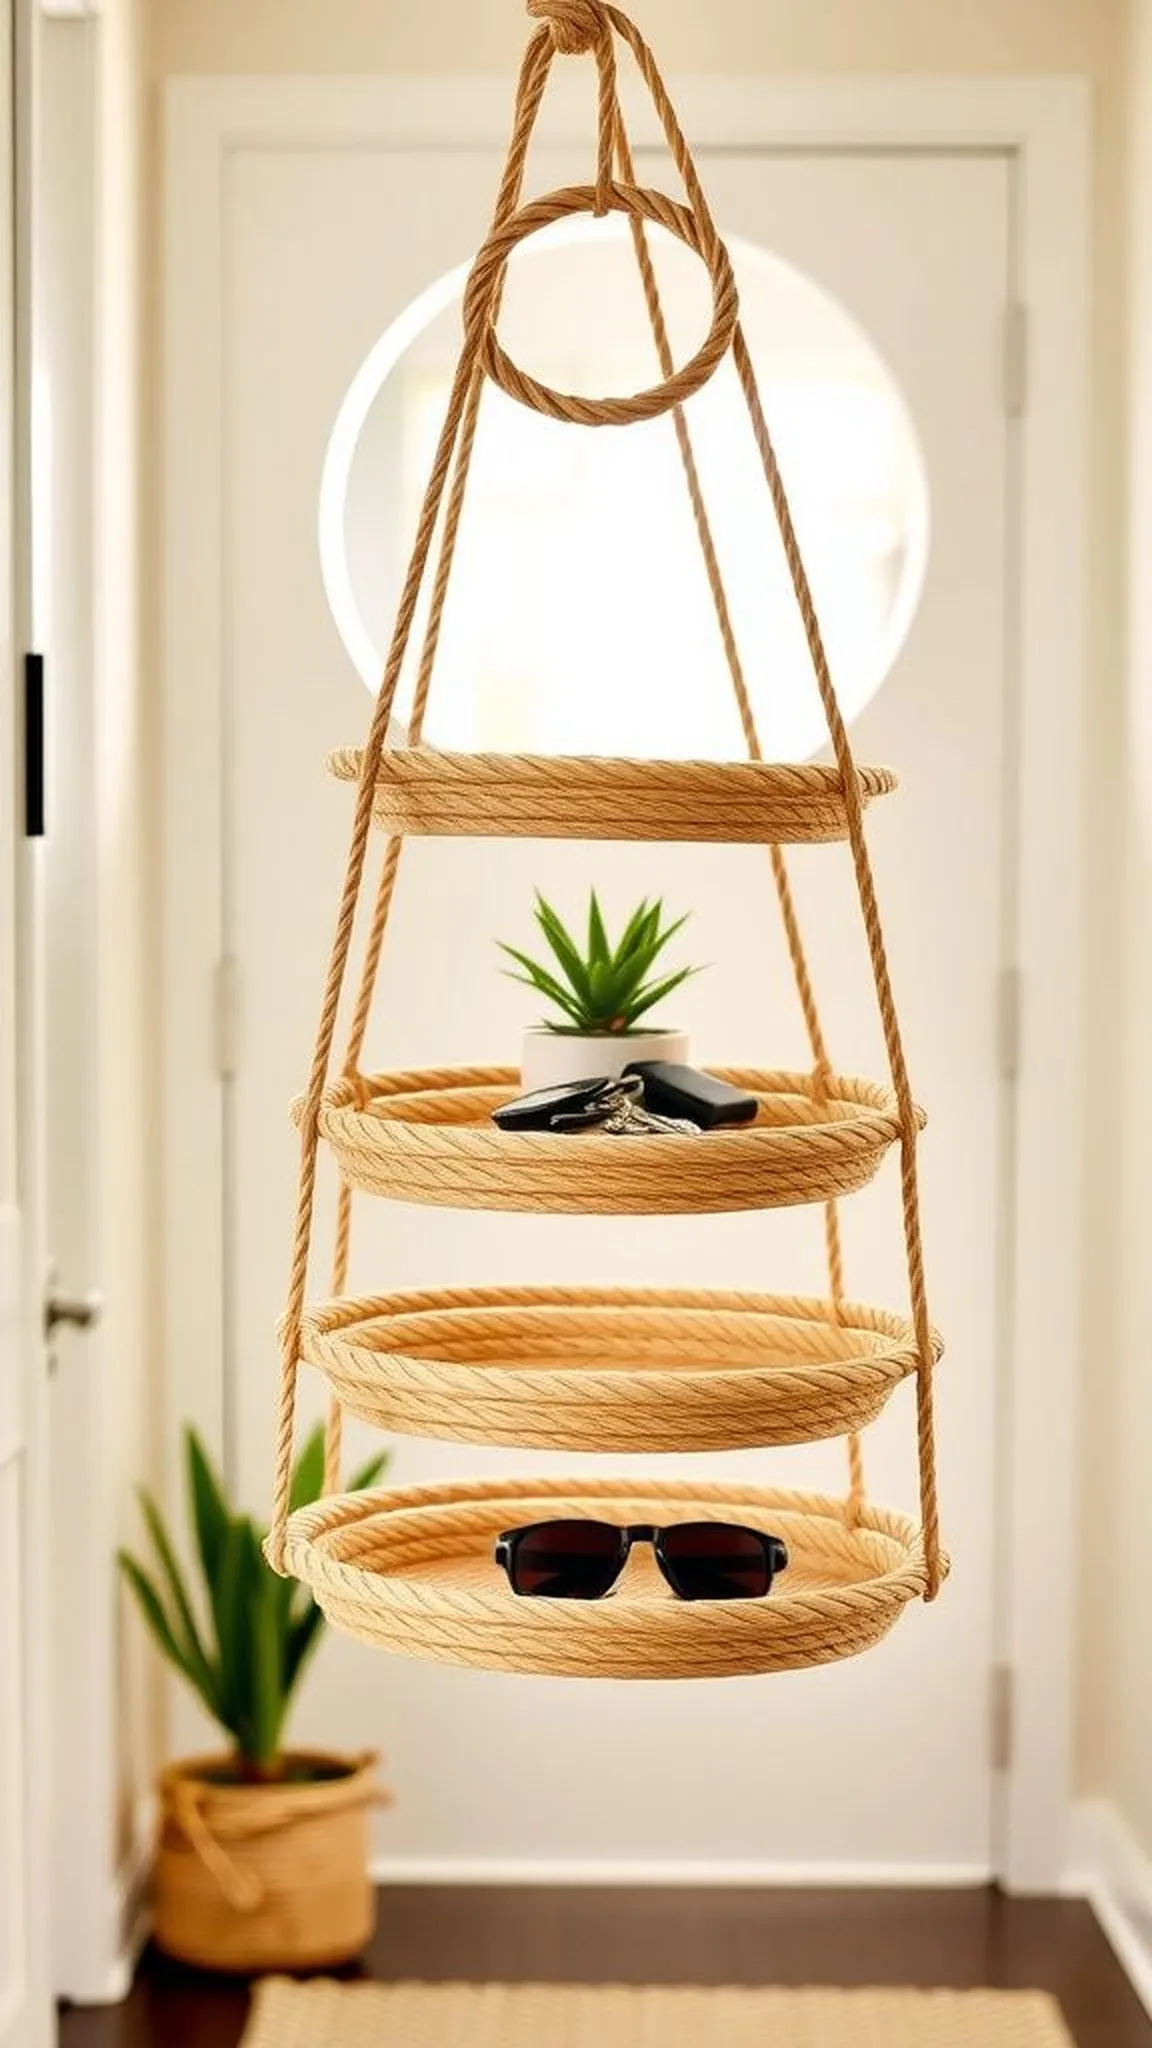
A tiered hanging organizer stacks shallow rope trays on a single hanger, saving tabletop space with layered, airy storage. Each tier holds small items while the overall silhouette remains light and sculptural.
The ropes feel warm to the touch and the tiers cast soft stacked shadows that change with the light angle. Tiny items nestle into the shallow basins, their edges softened by the rope coils.
Suspended near an entry or in a bathroom, the organizer becomes a vertical landing spot for daily essentials. Close inspection highlights neat joins where tiers meet the central hanger and the gentle sway of each tray.
Pro Tip: Balance the tier spacing so heavier items go lower, which keeps the organizer from swaying excessively when accessed.
How to Make This
- Craft several shallow coiled trays of graduated diameters and heights.
- Thread a central rope hanger through each tray center and secure with knots or adhesive between tiers.
- Attach a top ring for hanging and test balance before filling with items.
Avoid: A frequent oversight is crowding trays too closely, which prevents easy access and increases sway. Spacing tiers a little further improves stability and functionality.
Try Also: A wider top tray becomes a catchall, or adding small pockets to a tray side stores thin items. Natural dyes on alternating tiers create a subtle striped effect.
Products & Materials
Items Used
“Vertical tiered rope organizer for compact storage”
Rope basket with tassel accents and color pops
⏱️ 45 min · 🟢 Beginner
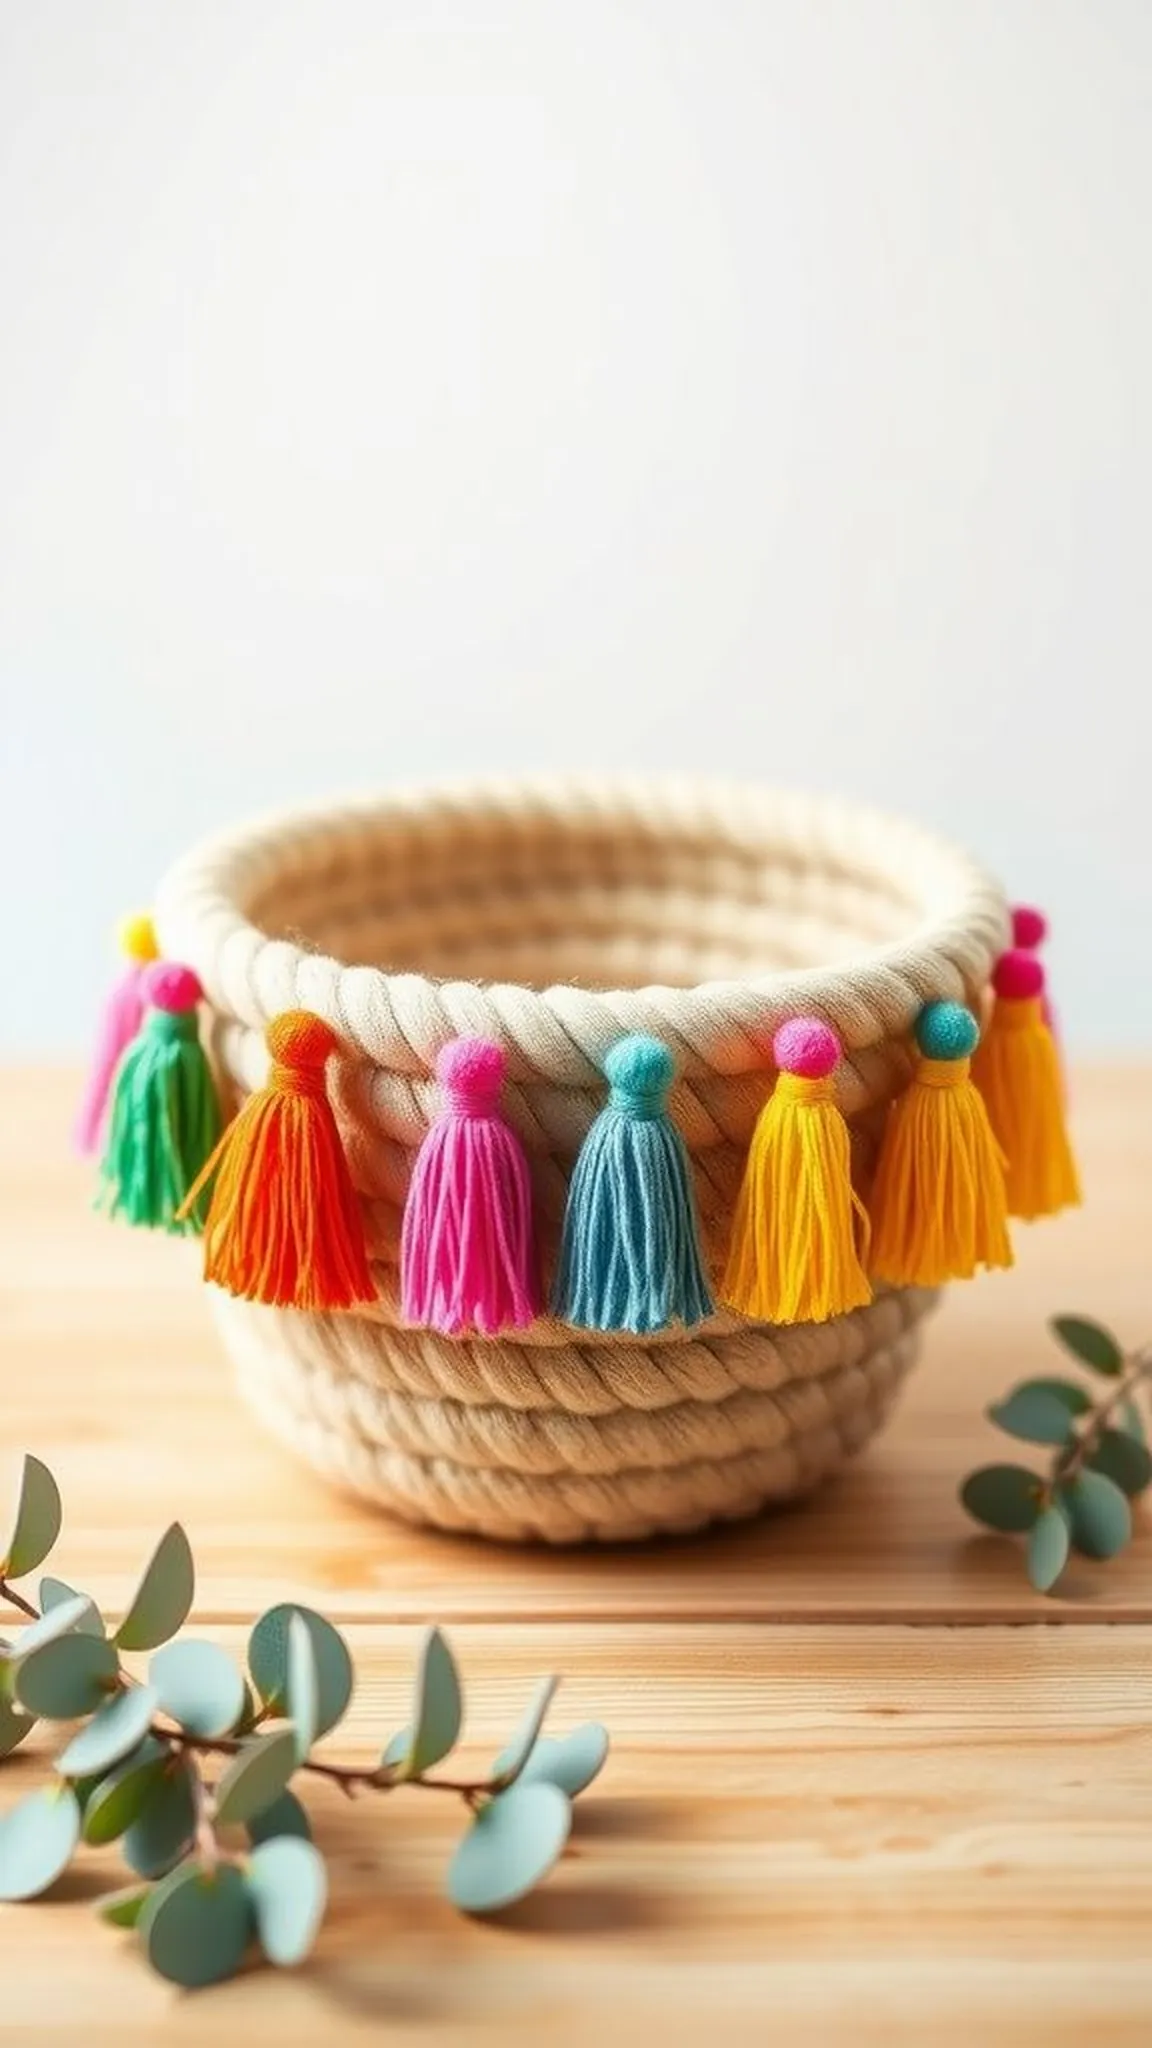
A cheerful rope basket with tassel accents brings personality to a shelf while holding smaller items. The tassels add movement and sudden color punctuation against the neutral coil body.
The rope core remains tactile and matte while tassels whisper in softer cotton strands, catching light at their tips. The contrast draws eyes to the rim and creates a friendly, handmade flourish.
Clustered with other woven pieces, this basket reads playful and collected without feeling cluttered. Close viewing reveals how tassel placement changes the visual rhythm along the rim.
Pro Tip: Secure tassel knots with a touch of adhesive before trimming ends to maintain neat, even lengths and prevent fraying.
How to Make This
- Coil a small to medium basket base and build up the sides with even wraps and glue.
- Create tassels from short rope lengths or yarn and tie them off tightly.
- Attach tassels evenly around the rim, spacing for a balanced look.
Avoid: A frequent issue is attaching tassels too tightly so they pull the rim out of shape. Allowing a little give keeps the rim round.
Try Also: Vary tassel lengths for a bohemian vibe, or use multiple colors for a festive band. Tiny metal charms tied into tassels add a subtle gleam.
Products & Materials
Items Used
- Cotton rope (3/8 inch)
- Colored yarn or rope for tassels
- Hot glue gun
- Scissors
“Playful rope basket with colorful tassel accents”
Rope centerpiece bowl with candle-safe dish inside
⏱️ 1 hour · 🟠 Intermediate
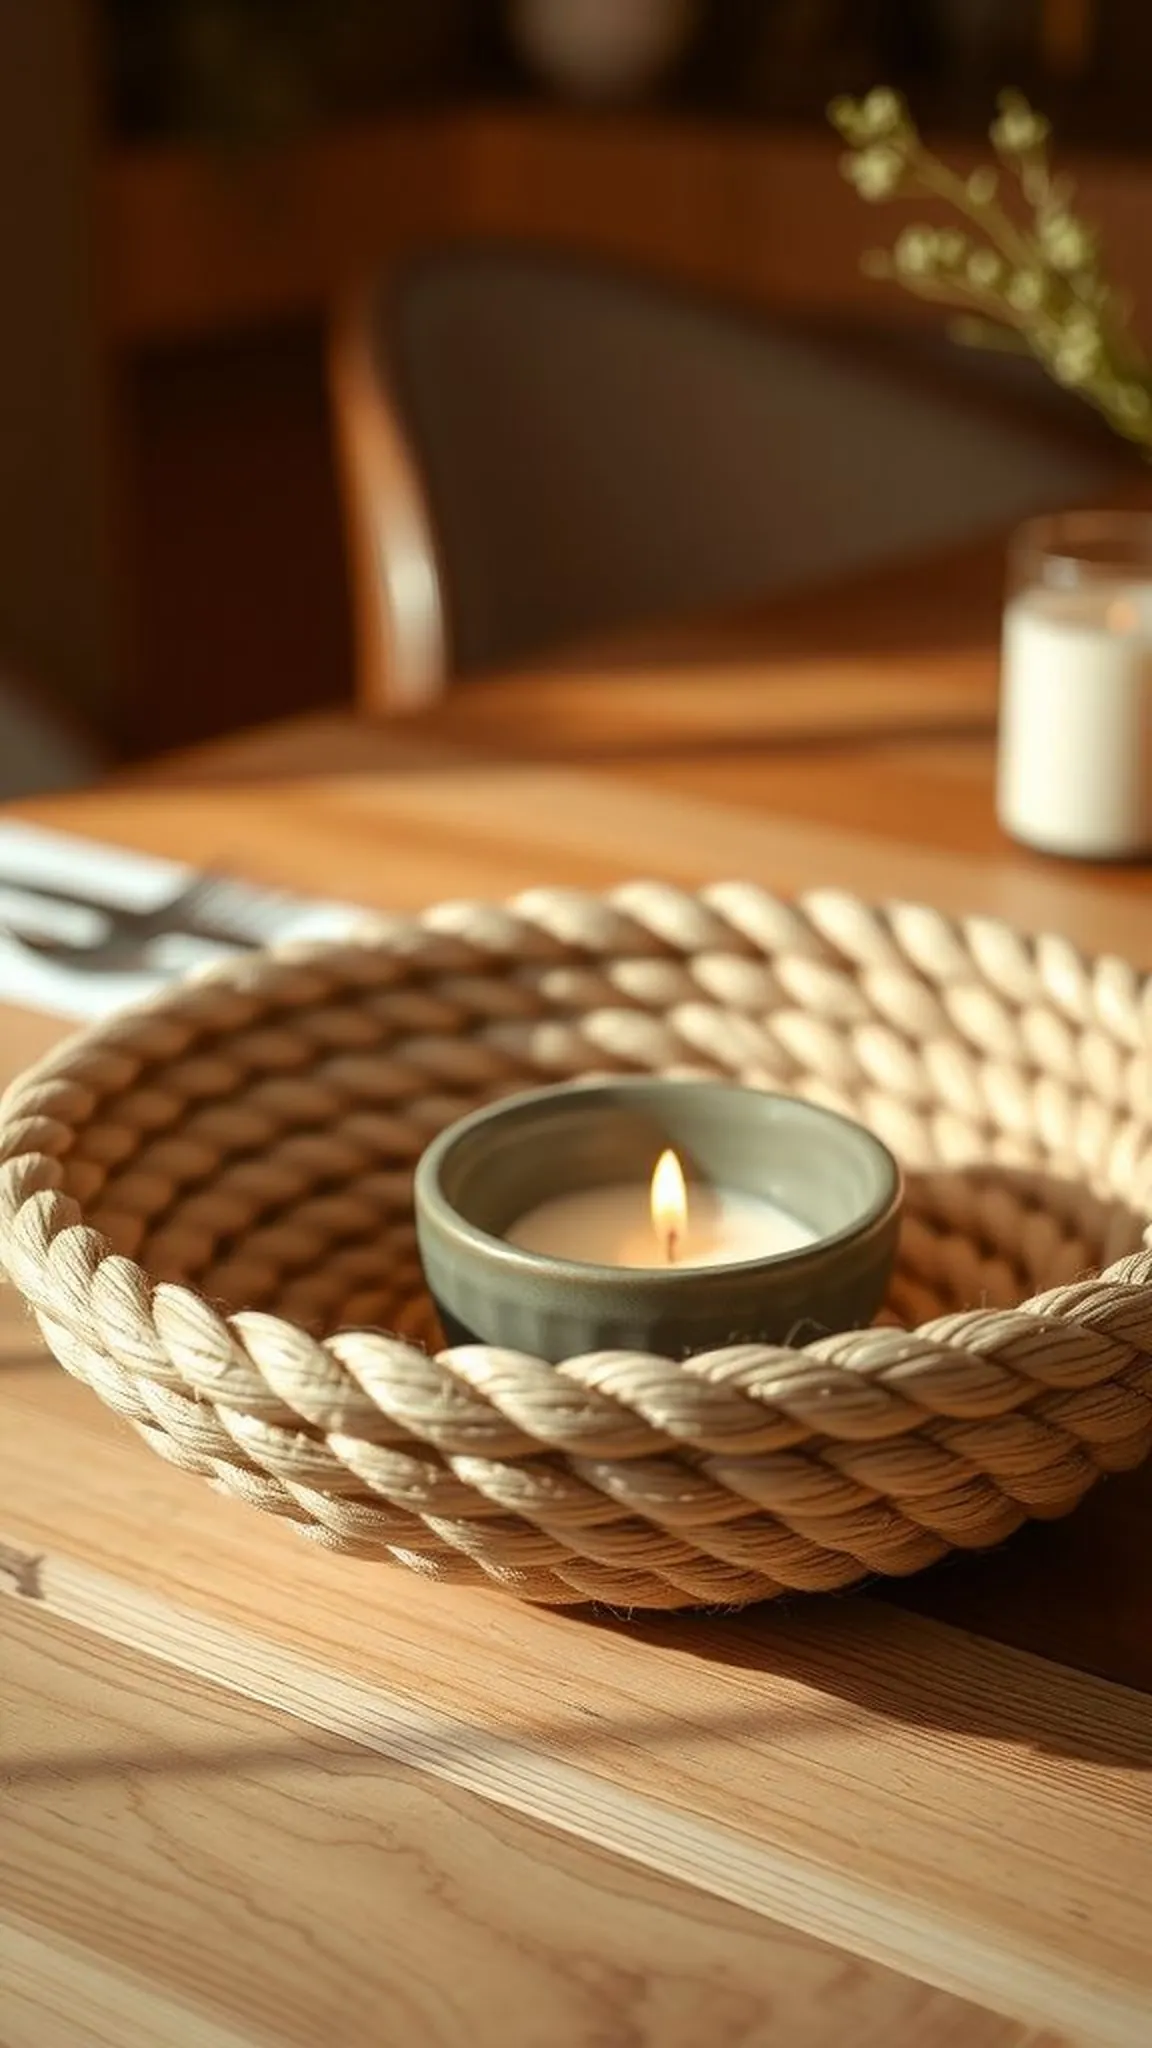
A wide rope centerpiece bowl pairs a coiled outer shell with a small candle-safe dish tucked inside for ambiance. The bowl’s shallow profile creates a cozy frame around the glowing element without competing for attention.
The rope’s warm matte tone contrasts with a glossy ceramic dish that sits snugly within the coils, and heat-safe materials stand up to gentle candle warmth. Soft shadow bands radiate outward from the bowl when the candle is lit, lending a slow, calming rhythm to the table.
The piece reads like a quiet, handcrafted focal point at mealtime or in a living room vignette. Close inspection shows careful spacing where the ceramic edge meets the rope lip.
Pro Tip: Choose a ceramic or metal dish that fits with slight clearance to avoid direct heat transfer to the rope fibers beneath.
How to Make This
- Coil a wide shallow bowl using rope and glue to form a stable base for the dish.
- Place a heat-resistant ceramic dish in the center and secure it with a few glue points beneath the rim.
- Allow everything to set fully before placing a candle inside the dish for safe display.
Avoid: A frequent mistake is picking a dish that’s too tight, creating stress at the rim; leaving slight clearance prevents pressure on the coils. Selecting heat-safe containers avoids fiber discoloration or damage from candle heat.
Try Also: A small arrangement of dried botanicals replaces the candle for a non-flammable centerpiece, or a trio of tiny dishes becomes an elegant cluster. Metallic dish finishes reflect candlelight for extra sparkle.
Products & Materials
Items Used
“Calm rope centerpiece bowl with a safe candle dish inside”
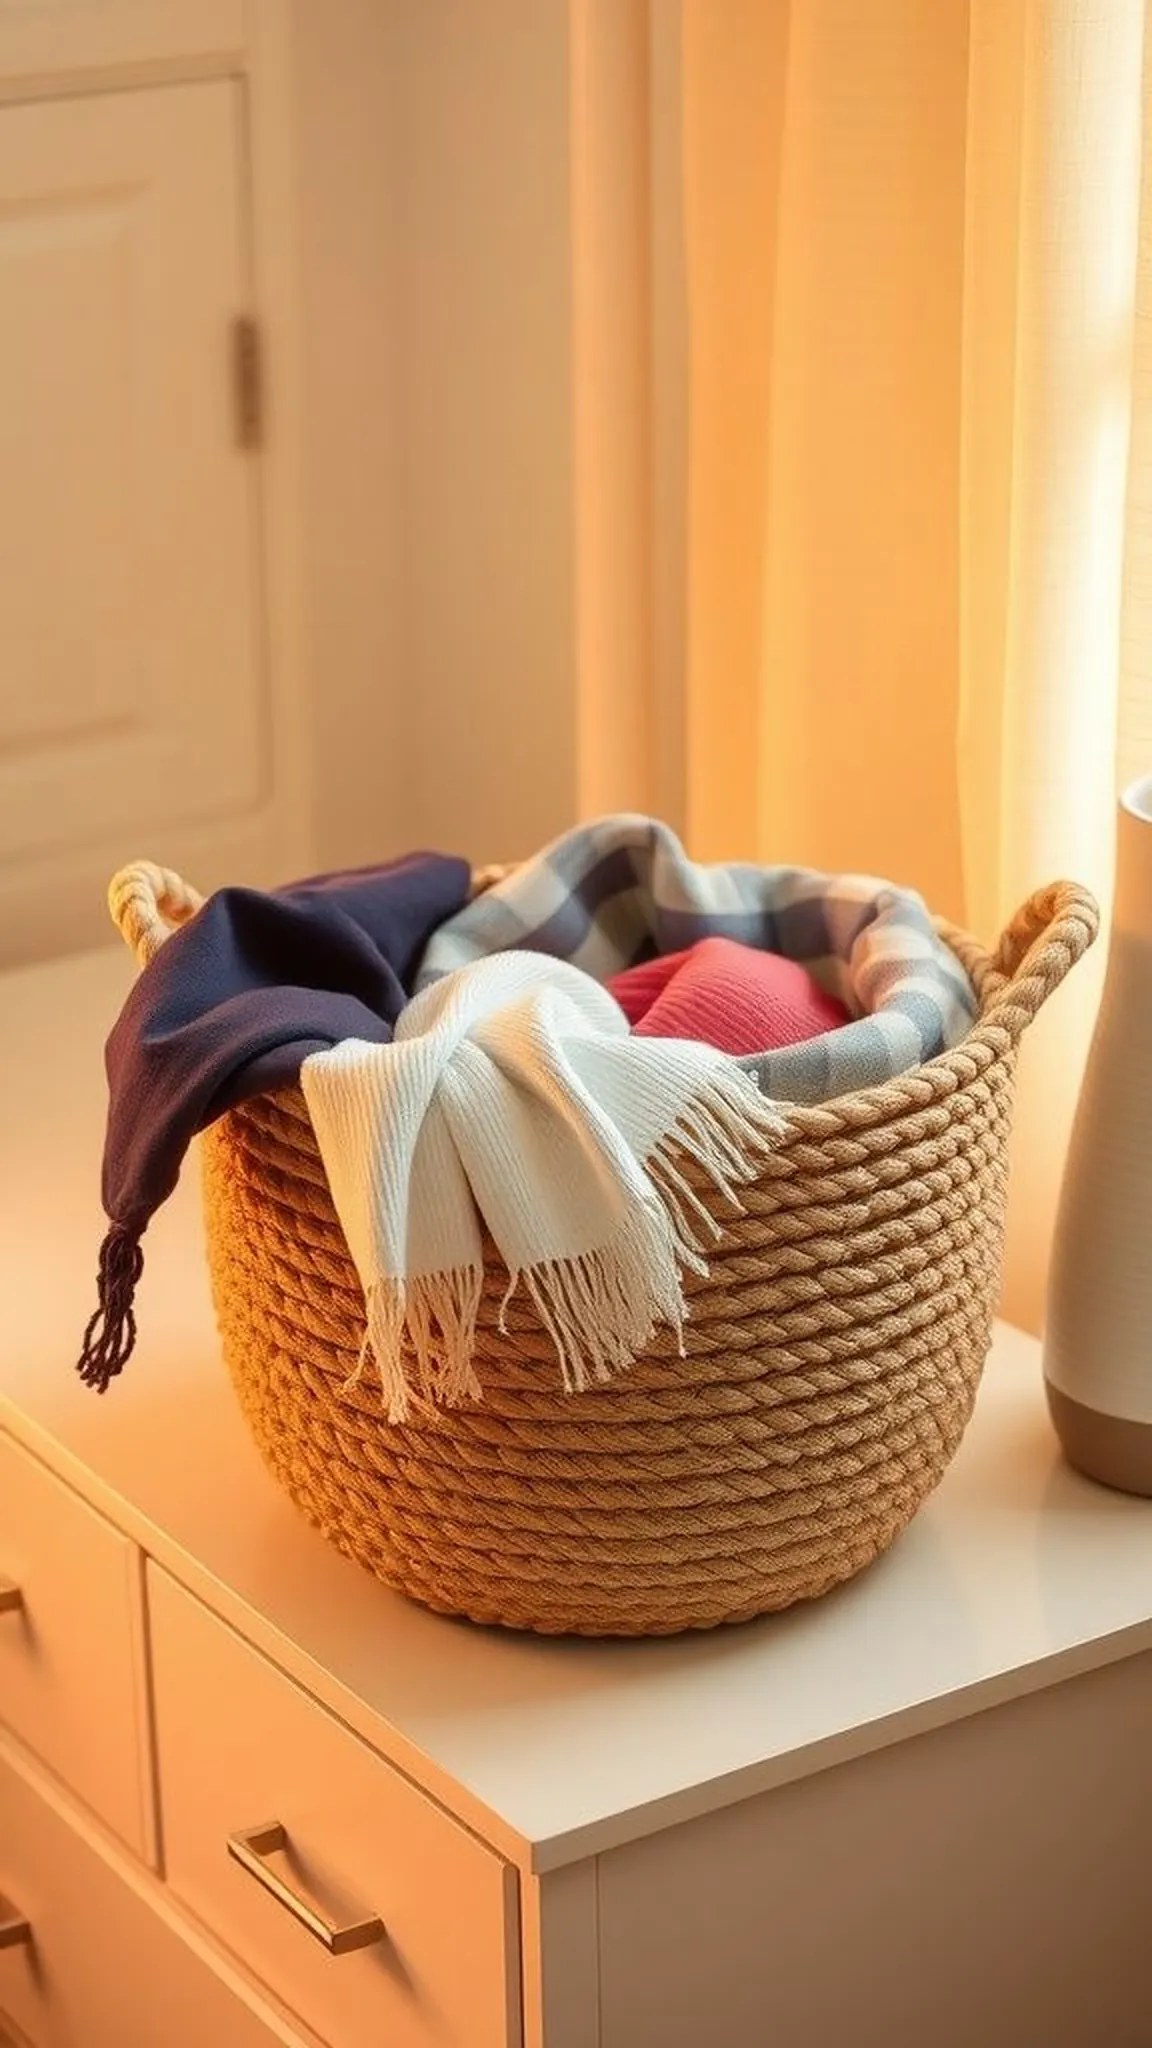
Upcycled denim lined rope basket for rugged charm
⏱️ 1-2 hours · 🟠 Intermediate
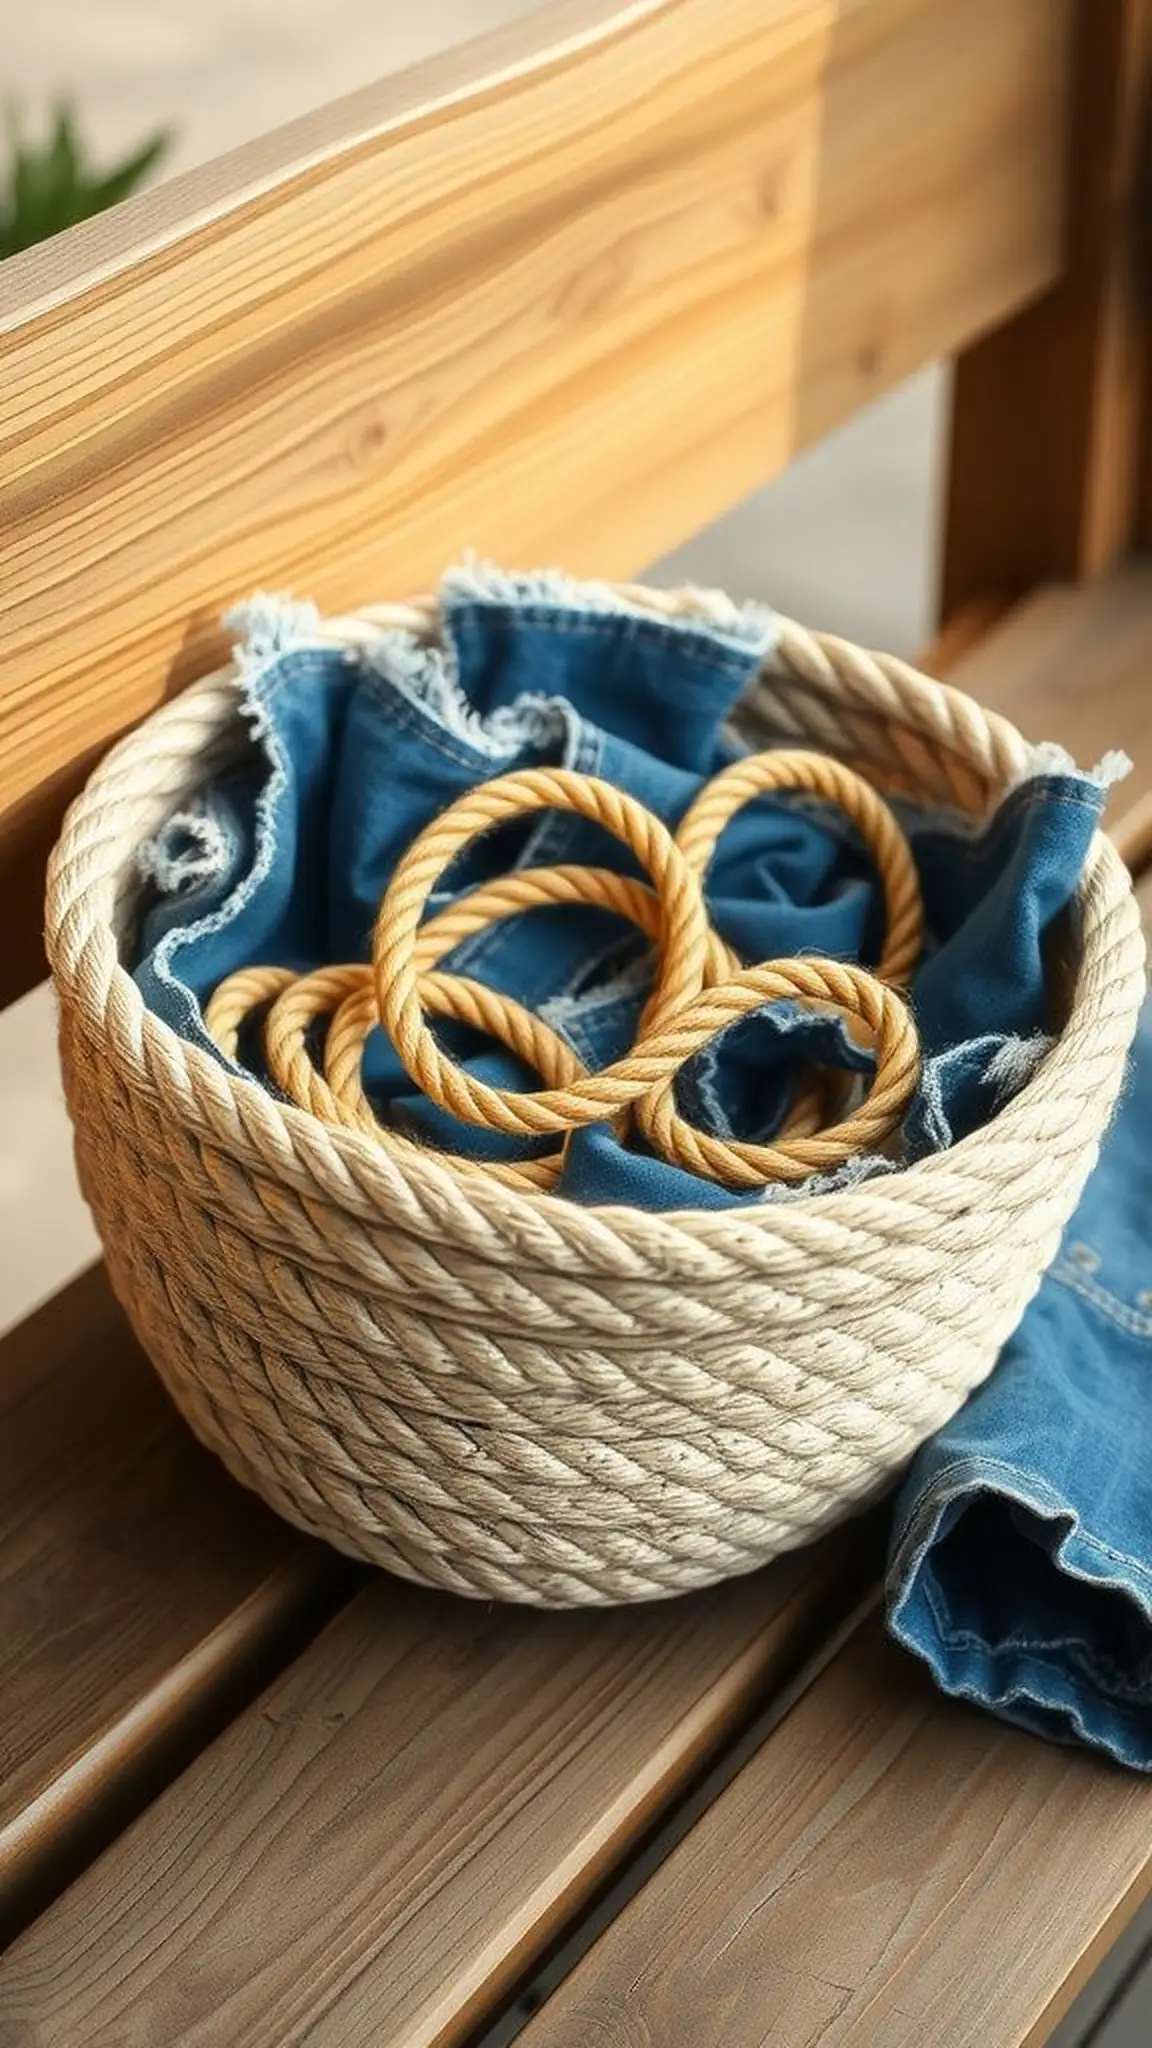
An upcycled denim lined rope basket combines sturdy textile scraps with soft rope coils for a casually lived-in piece. The rugged denim brings deep indigo and frayed edges that contrast the rope’s warm hue.
The lining feels substantial to the touch and offers reinforcement for heavier contents while the rope exterior keeps a handcrafted rhythm. Faded seams and pocket corners peek from the lining for an eclectic, nostalgic note.
This basket reads like a thrifted treasure with practical function, ideal by a mudroom bench or laundry area. Close inspection rewards the eye with layered textures and a playful mix of hard and soft surfaces.
Pro Tip: Sew a simple denim pouch slightly larger than the basket interior to allow for a comfortable fit and easy removal for washing.
How to Make This
- Construct a coiled rope basket to the desired size and leave a tidy rim edge.
- Cut denim scraps into a circular base and side band, sewing them into a liner pouch.
- Tuck or sew the liner into the basket, anchoring discreetly at a few tension points.
Avoid: A frequent misstep is lining the basket too snugly, which resists insertion and causes bunching. Allowing a modest amount of ease ensures a smoother fit.
Try Also: Add a recycled pocket as an exterior stash pocket, or contrast light and dark denim panels for a patchwork effect. Leather trim at the rim gives a polished accent.
Products & Materials
Items Used
- Cotton rope (3/8 inch)
- Recycled denim fabric scraps
- Sewing needle and thread or sewing machine
- Hot glue gun
“Upcycled denim lined rope basket for rugged, practical storage”
Rope basket with metal grommet accent and strap
⏱️ 2 hours · 🔴 Advanced
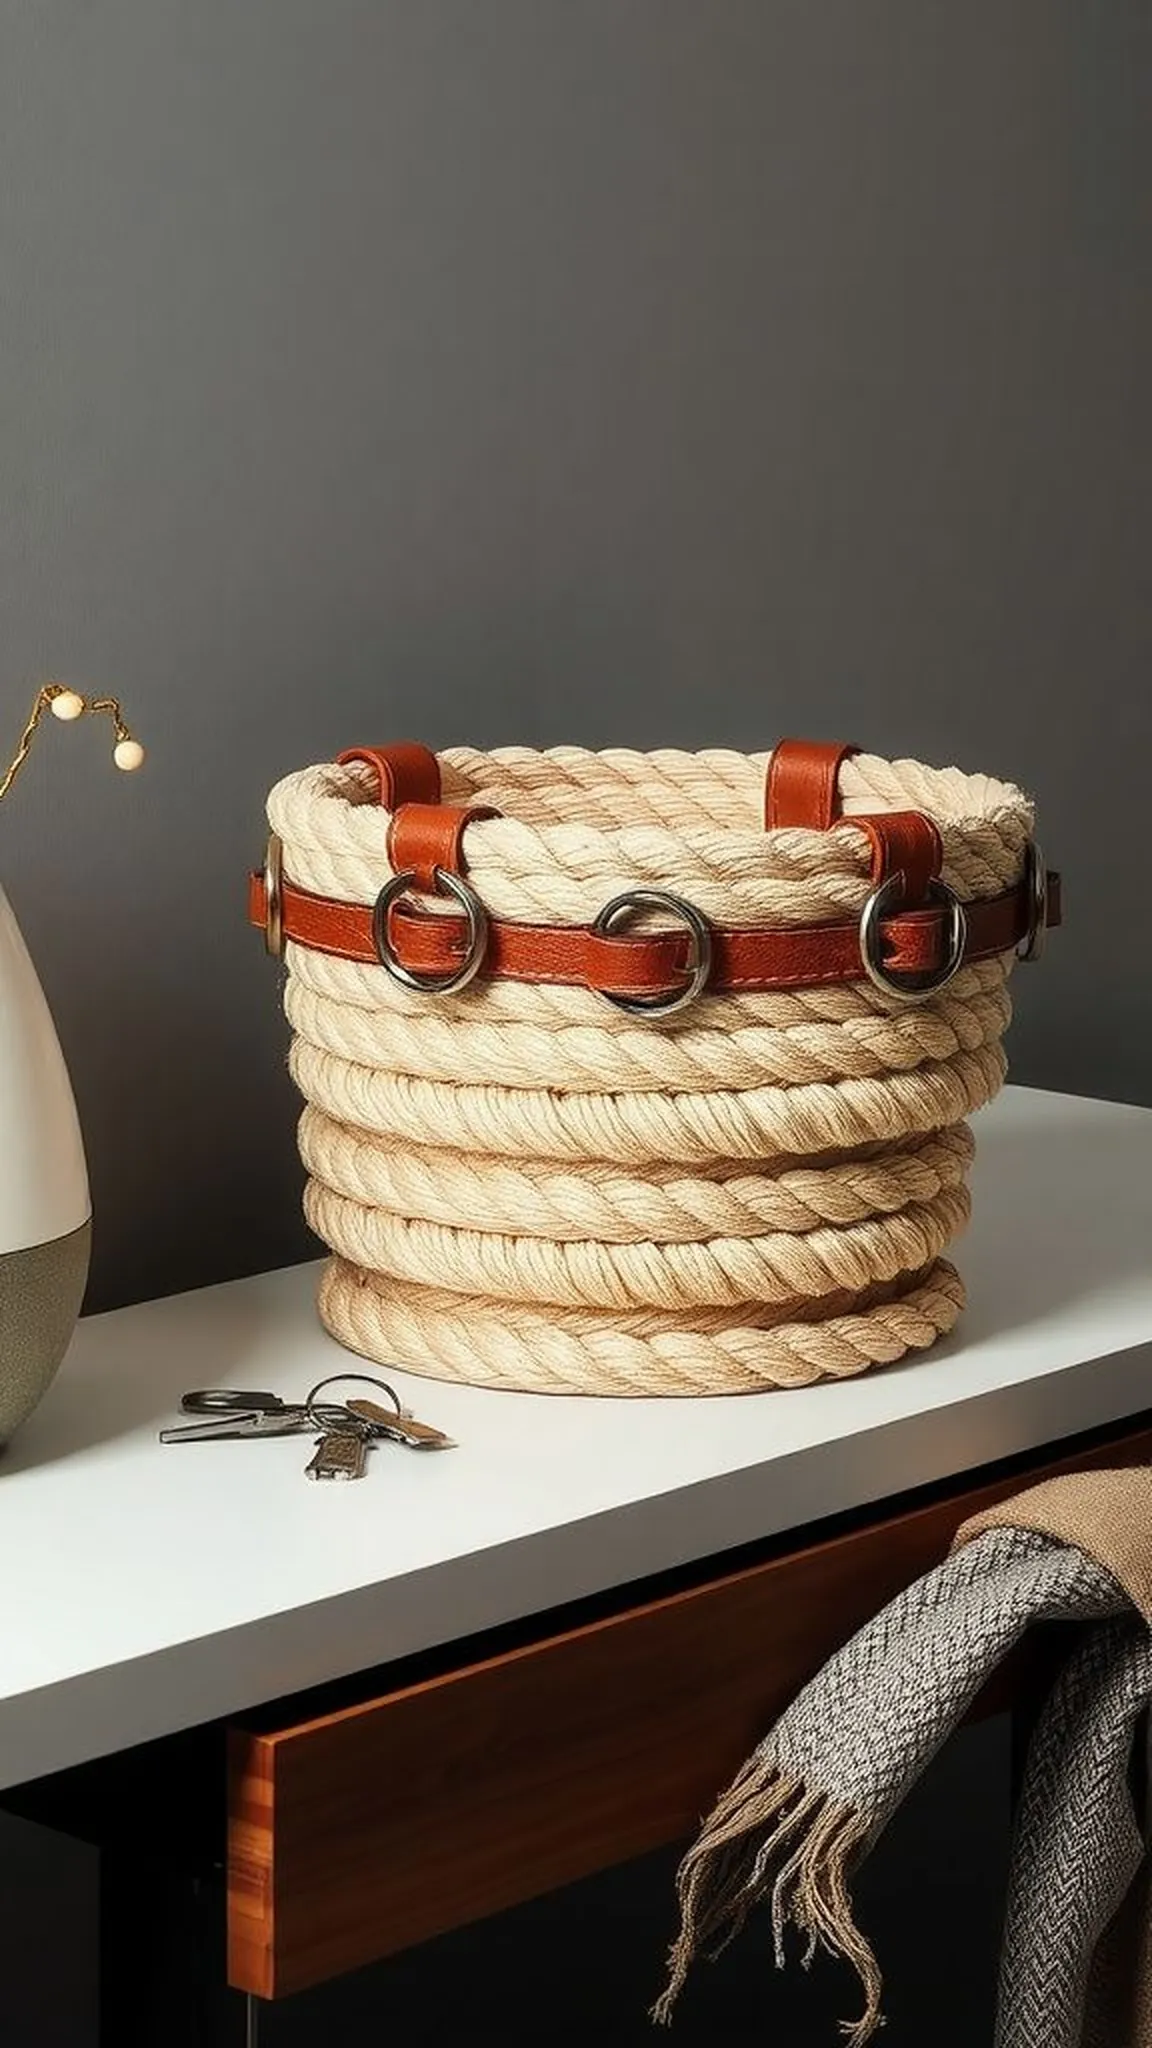
A rope basket accented with metal grommets and a strap reads modern while keeping a handcrafted warmth. The cool gleam of the grommets punctuates the rope’s matte texture and frames a wearable-style strap across the rim.
The strap feels firm under hand and offers a slim carrying line that contrasts tactilely with the coils. Light bounces off metal edges and falls into the rope valleys, creating a subtle interplay of sheen and shadow.
This basket feels at home on a hallway console or as a stylish catchall by a door. Close viewing reveals thoughtful reinforcement around each grommet and a neat strap finish.
Pro Tip: Reinforce grommet areas with small fabric or leather patches behind the rope to prevent tear-through and distribute stress from the strap.
How to Make This
- Build a rope basket to the desired size, leaving an even rim for hardware placement.
- Attach small leather or fabric backing patches inside where each grommet will go.
- Install metal grommets through the backing and rope, then secure a strap through them and fasten.
Avoid: A frequent issue is installing grommets without backing, which can pull through the rope under load. Adding internal patches prevents damage and extends life.
Try Also: A single wide strap makes a bold statement, or multiple small grommets create an industrial grid. Painted grommets add a pop of color against natural rope.
Products & Materials
Items Used
- Cotton rope (3/8 inch)
- Metal grommets and setting tool
- Leather strap or fabric strap
- Small leather or fabric backing patches
“Modern rope basket with metal grommets and carrying strap”
