
As an Amazon Associate I earn from qualifying purchases.
DIY Picnic Party Decor Crafts bring bright, handmade charm to outdoor gatherings with a focus on picnic decor that feels warm and relaxed.
Gingham patterns, repurposed jars, and simple fabric accents help shape a welcoming party decor scene that invites lingering conversations.
Small DIY picnic crafts range from quick napkin rings to glowing jars, each idea turning a blanket and basket into a festive, picture-ready moment.
Mason jar lanterns for golden evening glow
⏱️ 30 min · 🟢 Beginner
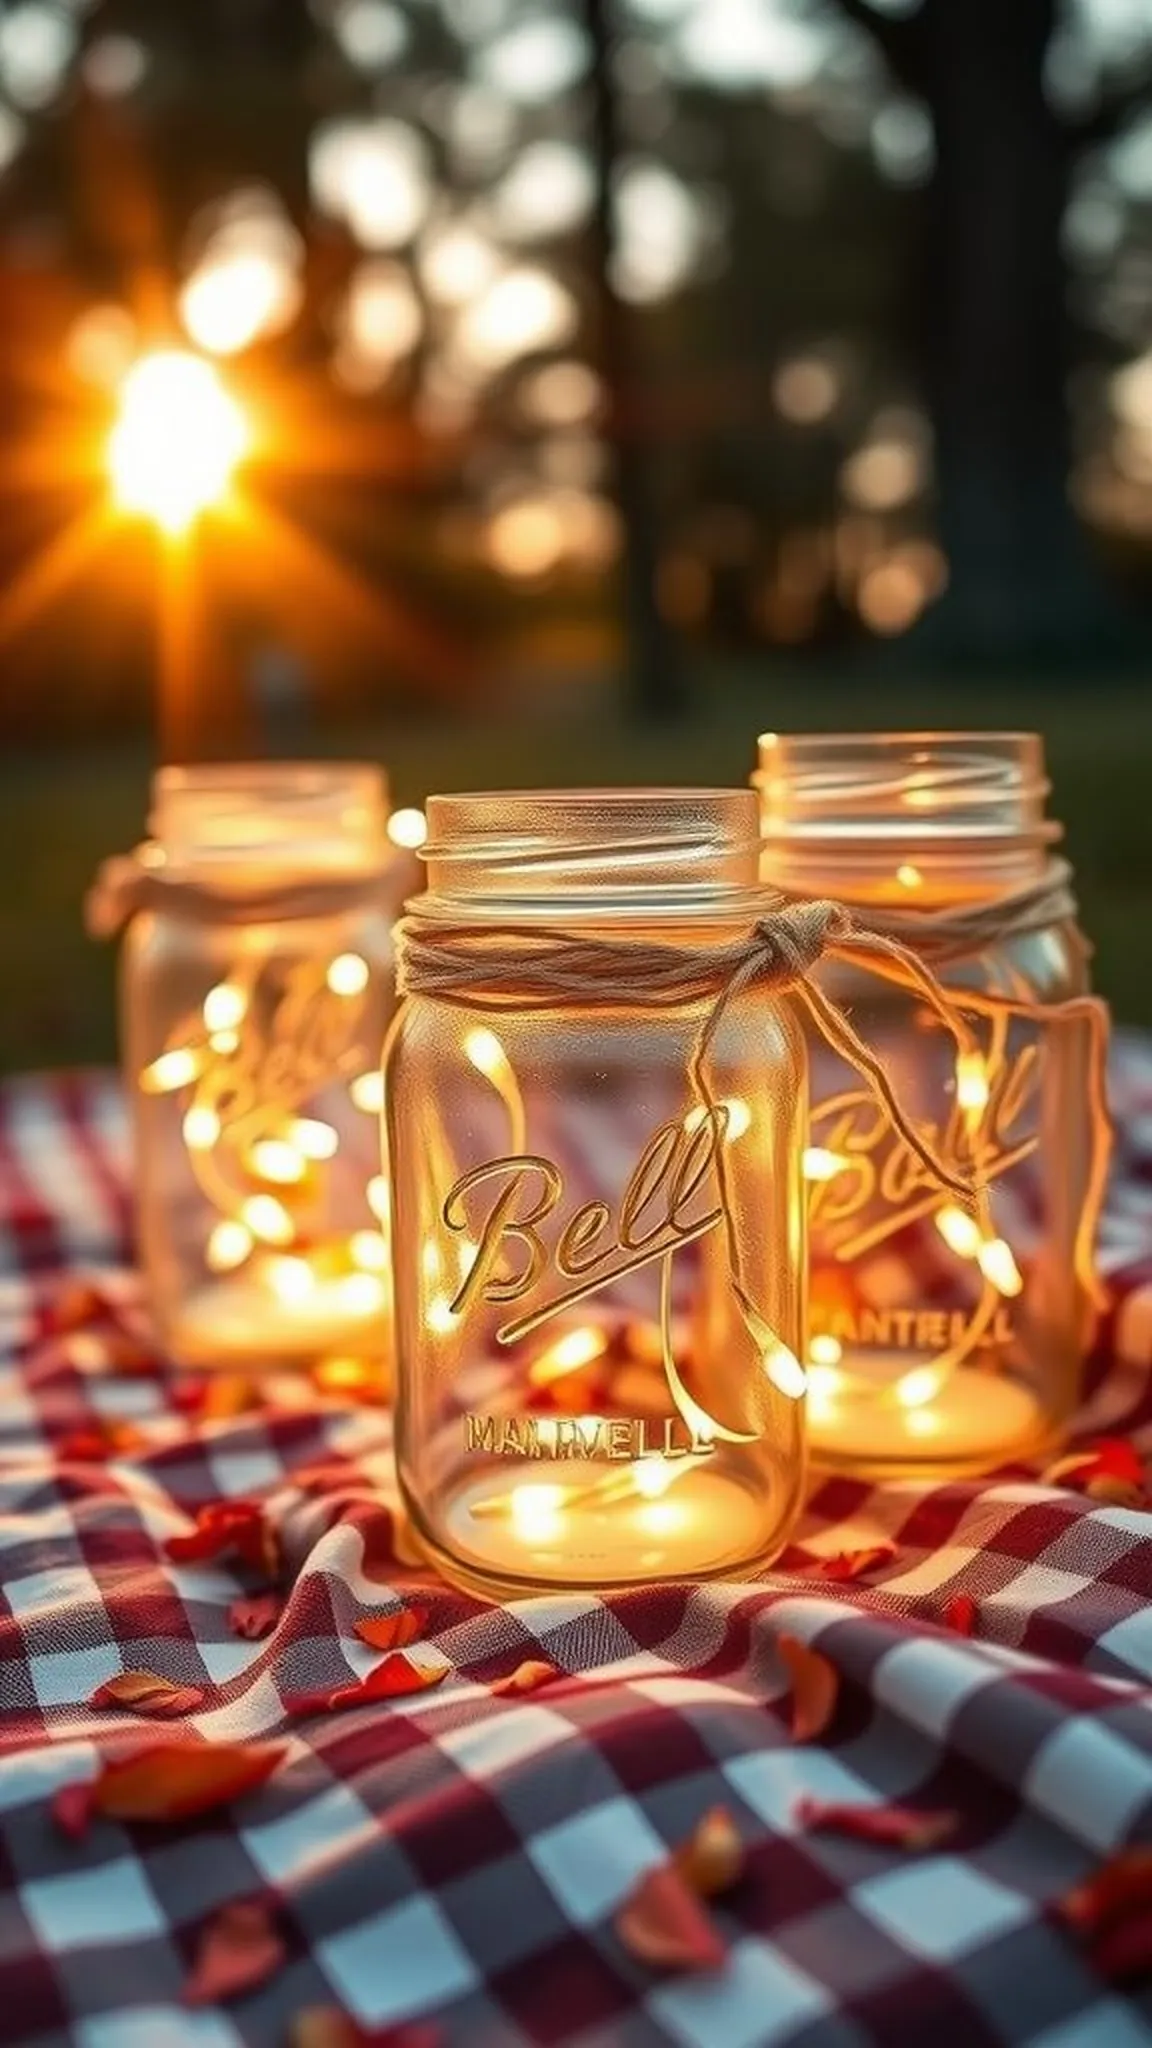
Clear glass jars catch the last warm light as evening settles over a blanket. Soft flicker from small battery lights creates a honeyed glow that makes the picnic feel intimate.
The tactile contrast of glass and natural twine sits nicely against gingham fabric and cool grass underfoot. A faint clink of glass and the whisper of breeze make the scene feel alive.
These lanterns bring a hand-made sparkle to long, lazy meals outdoors. They radiate a gentle warmth that invites casual conversation and relaxed laughter.
Pro Tip: Pick warm white LED lights for a steady, candle-like glow without smoke or heat at an outdoor table.
How to Make This
- Clean mason jars and dry them to ensure clear, streak-free glass.
- Place battery-operated LED fairy lights inside and tuck the battery pack toward the base.
- Wrap natural twine around the jar neck and secure with a small knot or bow.
- Optionally add dried flowers or citrus slices inside for texture and scent.
Avoid: A frequent beginner mistake is putting open flames in light breezes, which can snuff candles out and create uneven light. Testing light sources before guests arrive avoids awkward flicker.
Try Also: Colored glass jars create a softer palette, or tiny sand bases with a votive offer a beachy feel. Switch twine for ribbon to introduce a pop of color.
Products & Materials
Items Used
- mason jars
- battery LED fairy lights
- natural jute twine
- dried flower confetti
“Glowing mason jars turn a picnic into a cozy evening scene.”
Gingham fabric bunting to lift the picnic mood
⏱️ 1 hour · 🟢 Beginner
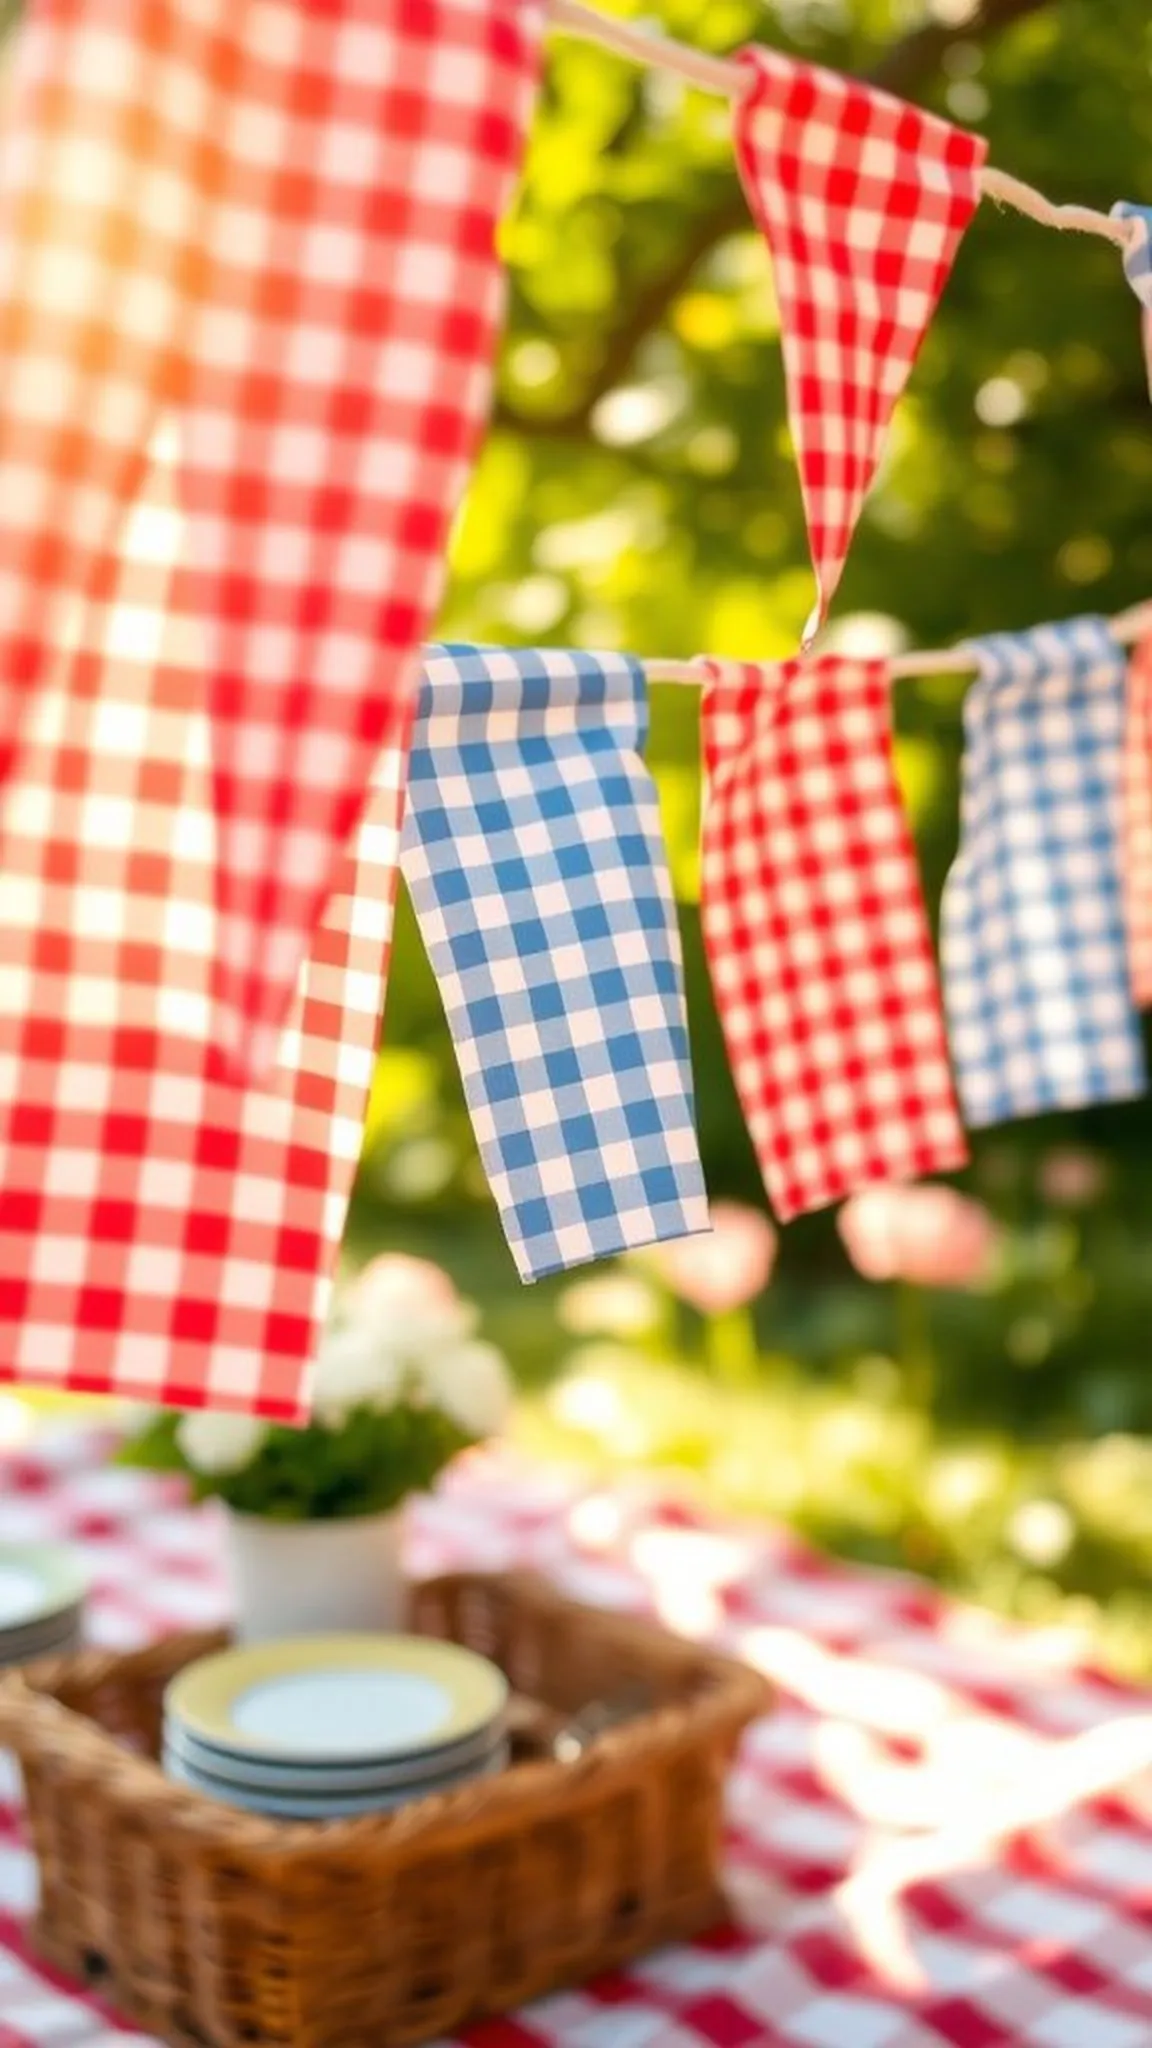
Rows of triangular gingham flags flutter gently above a low picnic table, offering a cheerful, nostalgic pattern. The crisp cotton texture and small checks read as playful without feeling fussy.
A light breeze sets the bunting into soft motion while the fabric’s edges whisper together. Colors echo the blankets and plates, tying the whole spread into a unified snapshot.
This simple string of flags adds vertical interest and casts tiny, patterned shadows across plates. The overall effect feels like a casual celebration in miniature.
Pro Tip: Choose medium-weight cotton gingham for flags that hold shape but still move softly in the breeze.
How to Make This
- Cut triangular flags from gingham fabric of matching or contrasting colors.
- Sew or hot glue the top edge of each flag onto a length of cotton rope or bias tape.
- Space flags evenly along the rope and knot each end for hanging.
- Hang bunting between trees, poles, or picnic umbrella ribs for a festive touch.
Avoid: A frequent beginner mistake is using very lightweight fabric that flops and looks limp in motion. Slightly heavier cotton keeps the triangle shapes crisp in an open-air setting.
Try Also: Mix solid color flags with gingham for a balanced look, or alternate fabric with paper flags for texture contrast. Small tassels between flags add extra movement.
Products & Materials
Items Used
“Gingham bunting adds instant vintage charm overhead at any picnic.”
Painted bottle vases for colorful table accents
⏱️ 2 hours · 🟠 Intermediate
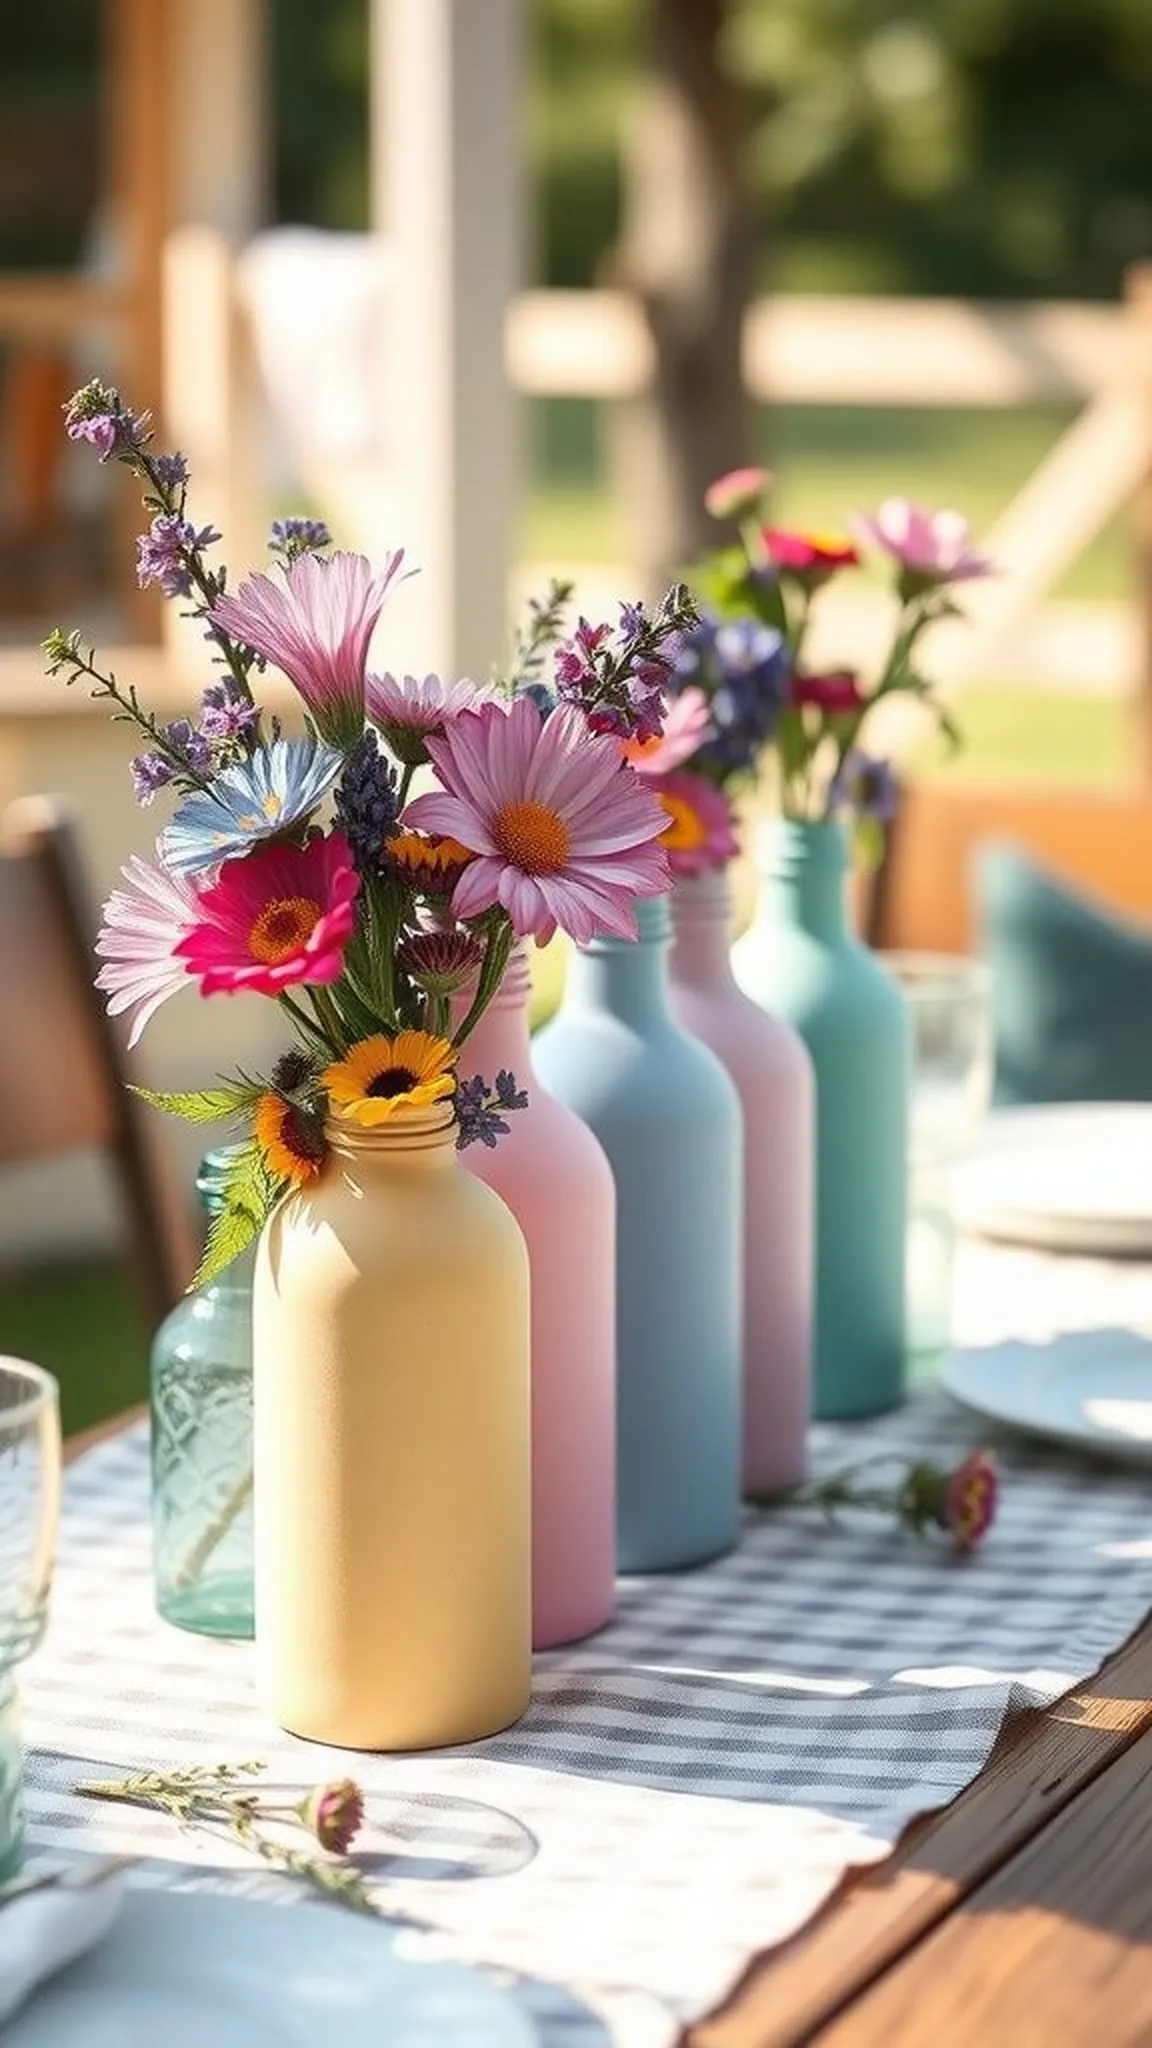
Repurposed glass bottles take on fresh life when layered with matte paint in summer hues. The slightly chalky finish contrasts with glossy wildflower stems and leafy greens.
Warm sunlight picks out brush strokes and creates a subtle, handcrafted rhythm along each bottle. The cool touch of painted glass feels reassuring against fingertips while sitting on a picnic table.
A set of varied bottle heights creates a casual centerpiece that reads charming from every angle. Colors coordinate with napkins and plates for a cohesive, lively palette.
Pro Tip: Choose matte craft paint and a foam brush for smoother coverage and soft, even texture on glass bottles.
How to Make This
- Clean and dry glass bottles thoroughly to ensure paint adheres evenly.
- Apply one or two coats of matte craft paint, allowing drying time between coats.
- Lightly distress edges with sandpaper for a vintage feel if desired.
- Arrange bottles with wildflowers or greenery for a low, informal centerpiece.
Avoid: A frequent beginner mistake is painting without cleaning residue off bottles, which can lead to flaky coverage. Proper surface prep makes the paint lay down smoothly.
Try Also: Group bottles by color family for a gradient effect, or wrap necks in ribbon for added contrast. Metallic accents at the rims bring subtle shine.
Products & Materials
Items Used
- recycled glass bottles
- matte craft paint
- foam brushes
- sandpaper fine grit
“Repainted bottles become a colorful, casual centerpiece for picnic tables.”
Save time and printer ink with 50+ printable templates and step-by-step instructions in one ad-free guide.

Just $19.99 — lifetime access
Chalkboard picnic menu for playful mealtime charm
⏱️ 20 min · 🟢 Beginner
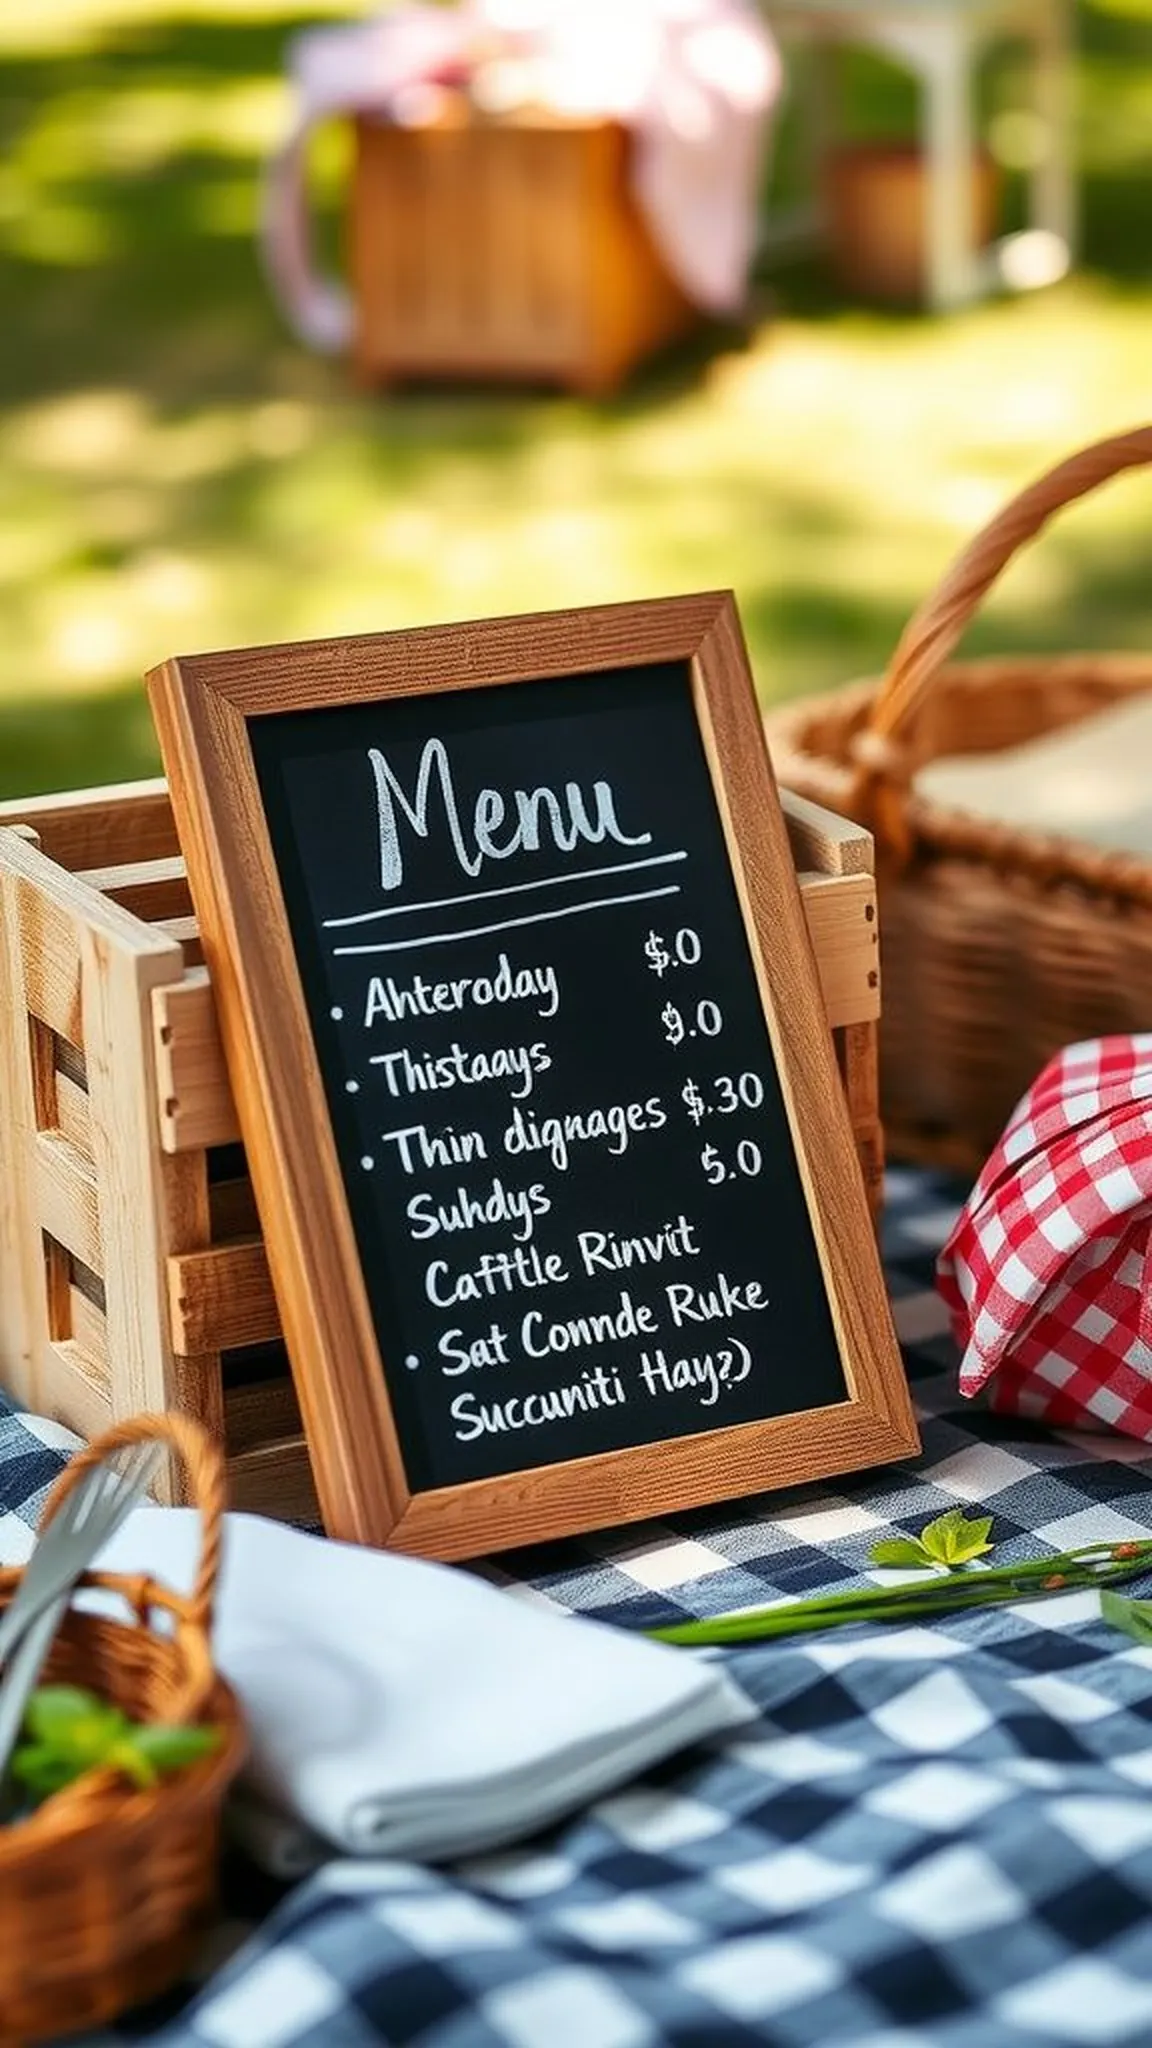
A small chalkboard sign leans against a crate and lists the day’s sandwiches and lemonade in casual handwriting. The matte black surface provides a calm contrast to bright plates and patterned cloth.
Chalk dust softens edges beneath the written words and lends a friendly, informal vibe. Fingers brushing the board leave faint, warm-smelling marks that feel tactile and human.
Placed near the serving basket, the sign helps focus attention and invites guests to linger. It adds a playful little detail without overwhelming the spread.
Pro Tip: Keep a damp cloth nearby to gently wipe the board and refresh handwriting between courses or guests.
How to Make This
- Select a small framed chalkboard or make one from a painted wood panel.
- Prime the surface with a chalk stick rubbed over the board and then wipe away for clean writing.
- Write menu items with chalk marker or standard chalk in legible, friendly lettering.
- Prop the chalkboard near the food station where it is easily seen.
Avoid: A frequent beginner mistake is writing too small, which makes the menu hard to read from a short distance. Bold, simple lettering reads best outdoors.
Try Also: Use mini chalkboard clothespins clipped to jars for individual names, or make a larger board for a full menu. Colored chalk adds a cheerful pop.
Products & Materials
Items Used
“A small chalkboard menu adds rustic, readable style to any picnic spread.”
Fabric napkin rings with fresh wildflower tuck
⏱️ 25 min · 🟢 Beginner
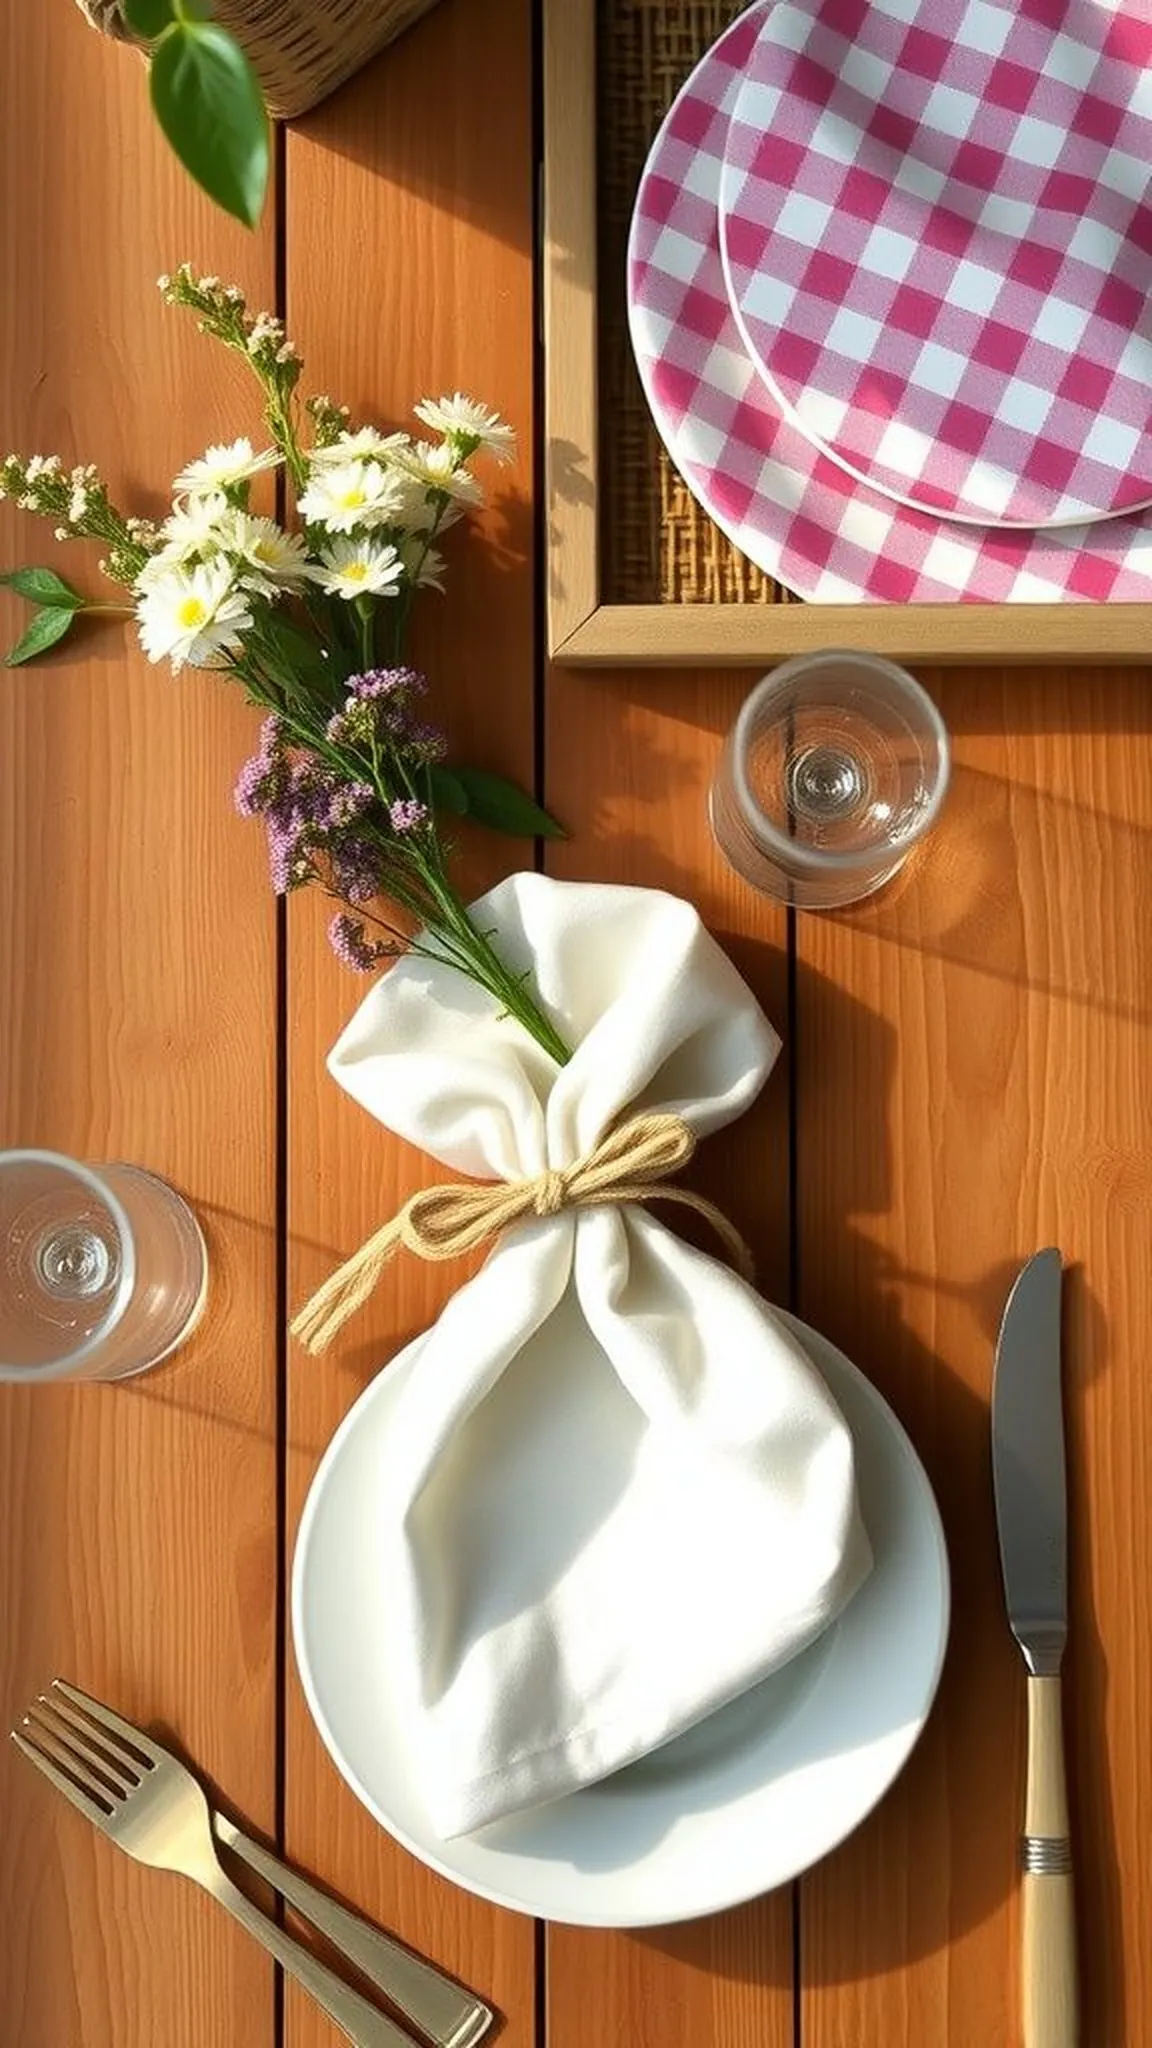
Soft loops of ribbon cradle a single sprig of wildflower, adding small floral notes to each place setting. The gentle texture of cloth contrasts with crisp cutlery and chilled lemonade glasses.
A hint of green stem and a tiny blossom brings a natural perfume to fingertips while dining. The arrangement feels personal, like a tiny gift laid at each plate.
This detail turns even simple paper napkins into a styled element that complements the rest of the picnic palette. The overall look is light, fragrant, and welcoming.
Pro Tip: Choose short-stemmed blooms that won’t wilt quickly and select ribbon widths that balance the napkin size.
How to Make This
- Cut ribbon lengths that comfortably loop around folded napkins with extra for a small knot.
- Place a short-stem wildflower or sprig of greenery inside the ribbon loop.
- Tie a simple knot or bow and trim ends for a neat finish.
- Position the napkin ring at the center of each place setting.
Avoid: A frequent beginner mistake is using long-stem blooms that droop and look untidy when seated. Short, sturdy stems keep the look crisp and fresh.
Try Also: Swap ribbon for thin twine for a rustic feel, or use velvet for an elevated picnic aesthetic. Tiny paper tags with guest names double as place cards.
Products & Materials
Items Used
“Tiny floral napkin rings bring fresh, personal charm to picnic place settings.”
Paper tassel garland for playful overhead color
⏱️ 45 min · 🟢 Beginner
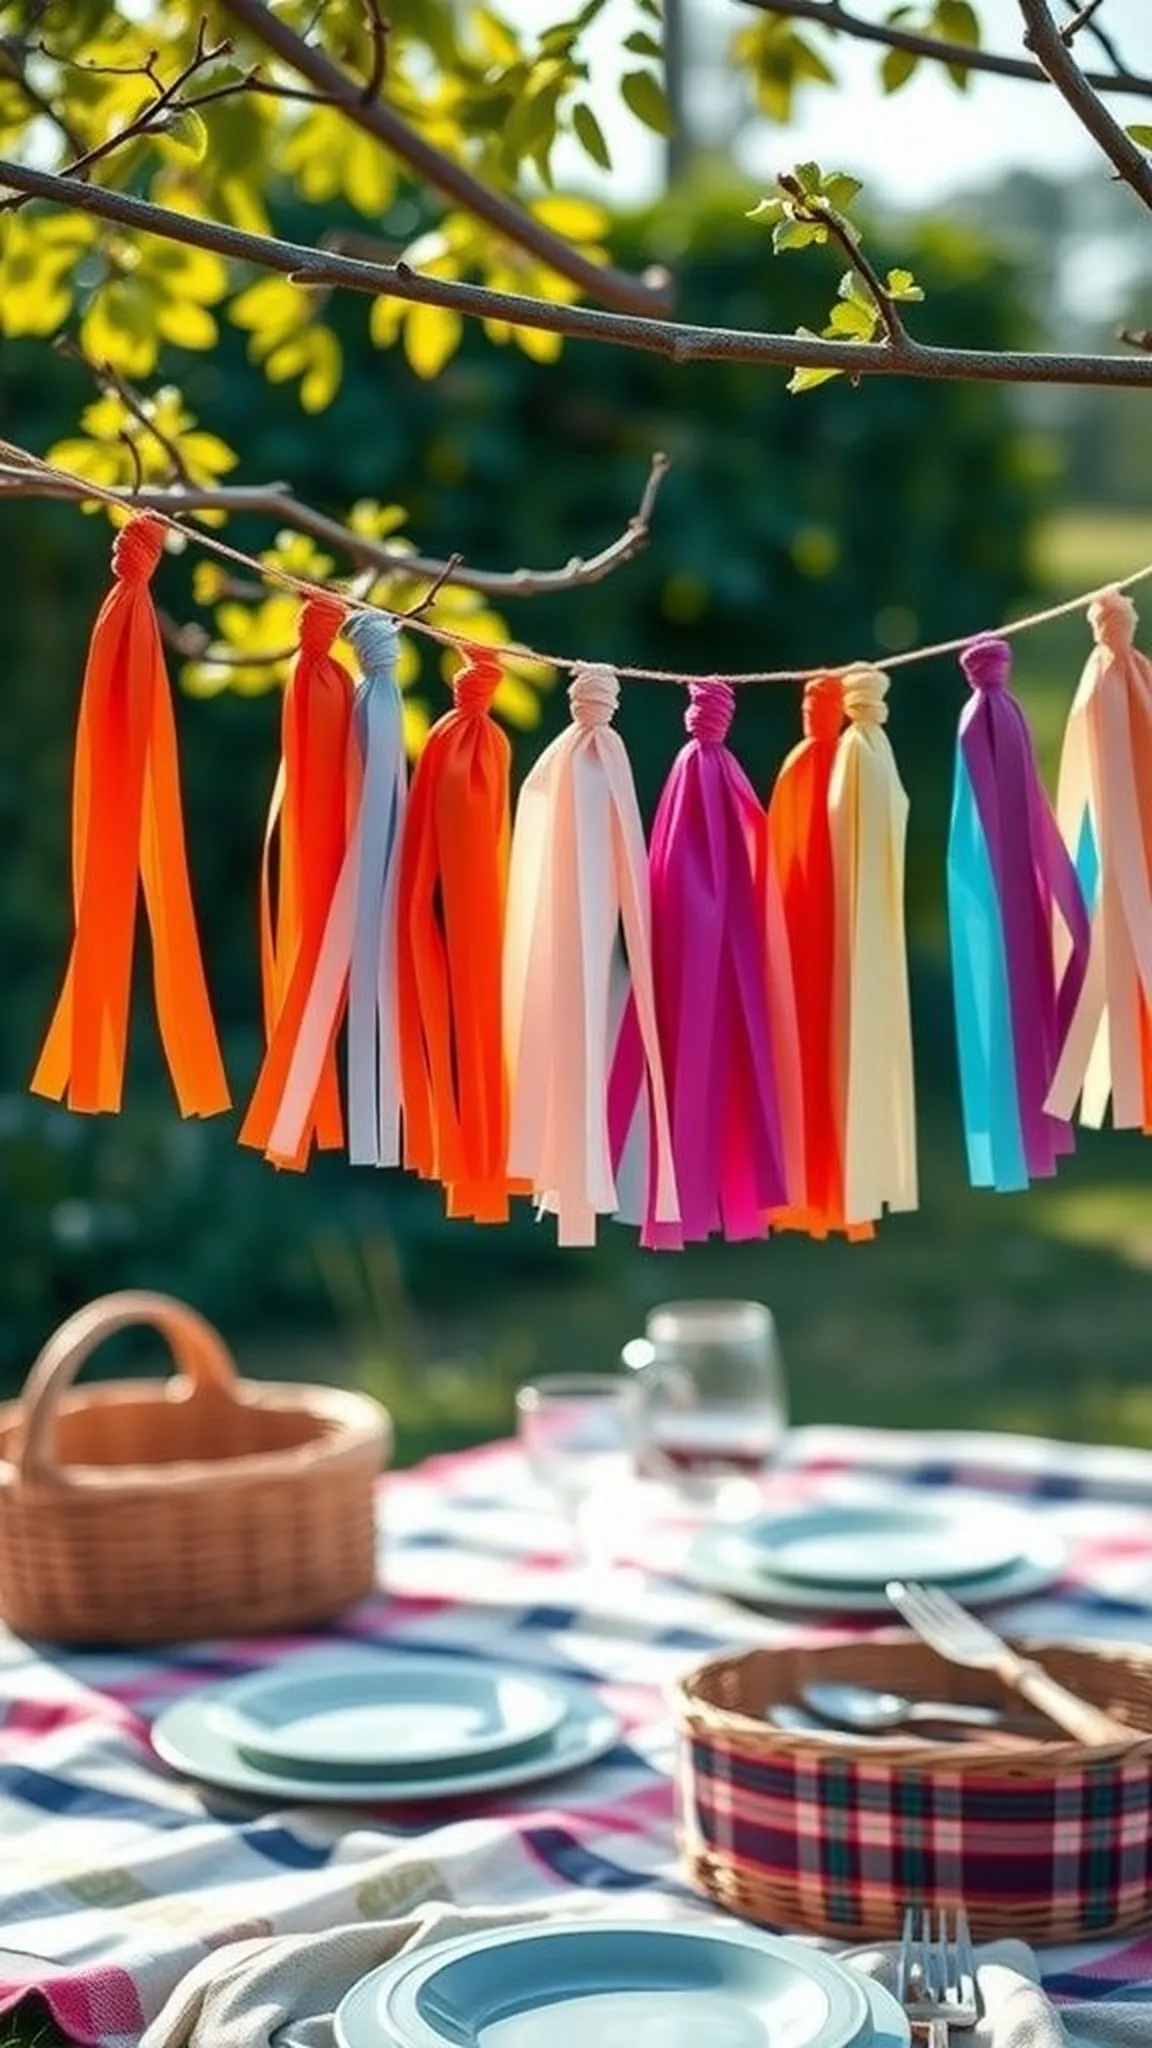
Fringed paper tassels sway with the breeze and scatter tiny shadows across a picnic blanket. The bright crepe paper adds a soft, papery rustle that feels jubilant without being loud.
Color blocks of coral, mustard, and teal play against wooden crates and woven baskets. The tassels bring an energetic, handcrafted rhythm that livens the vertical space above plates.
A long garland stretched between branches or poles frames the whole gathering with joyful color. Its lightweight motion keeps the mood informal and festive.
Pro Tip: Layer two shades within each tassel for depth and gentle color variation when they move in the breeze.
How to Make This
- Cut strips of crepe or tissue paper and fold them into fringed tassels along one edge.
- Roll each strip into a tassel and secure the top with thin wire or twine.
- Thread a length of cotton string through tassel tops to form a garland.
- Hang the garland between trees or poles at picnic height.
Avoid: A frequent beginner mistake is making tassels too heavy by doubling thick paper, which causes drooping. Lightweight sheets mean lively movement and better hanging.
Try Also: Alternate cardstock shapes with tassels for shape contrast, or create a monochrome garland for a refined look. Add small paper flowers between tassels for texture.
Products & Materials
Items Used
- crepe paper rolls
- cotton string
- thin craft wire
“Tassel garlands add movement and cheerful color overhead at any picnic.”
Burlap table runner with wildflower clusters
⏱️ 1 hour · 🟠 Intermediate
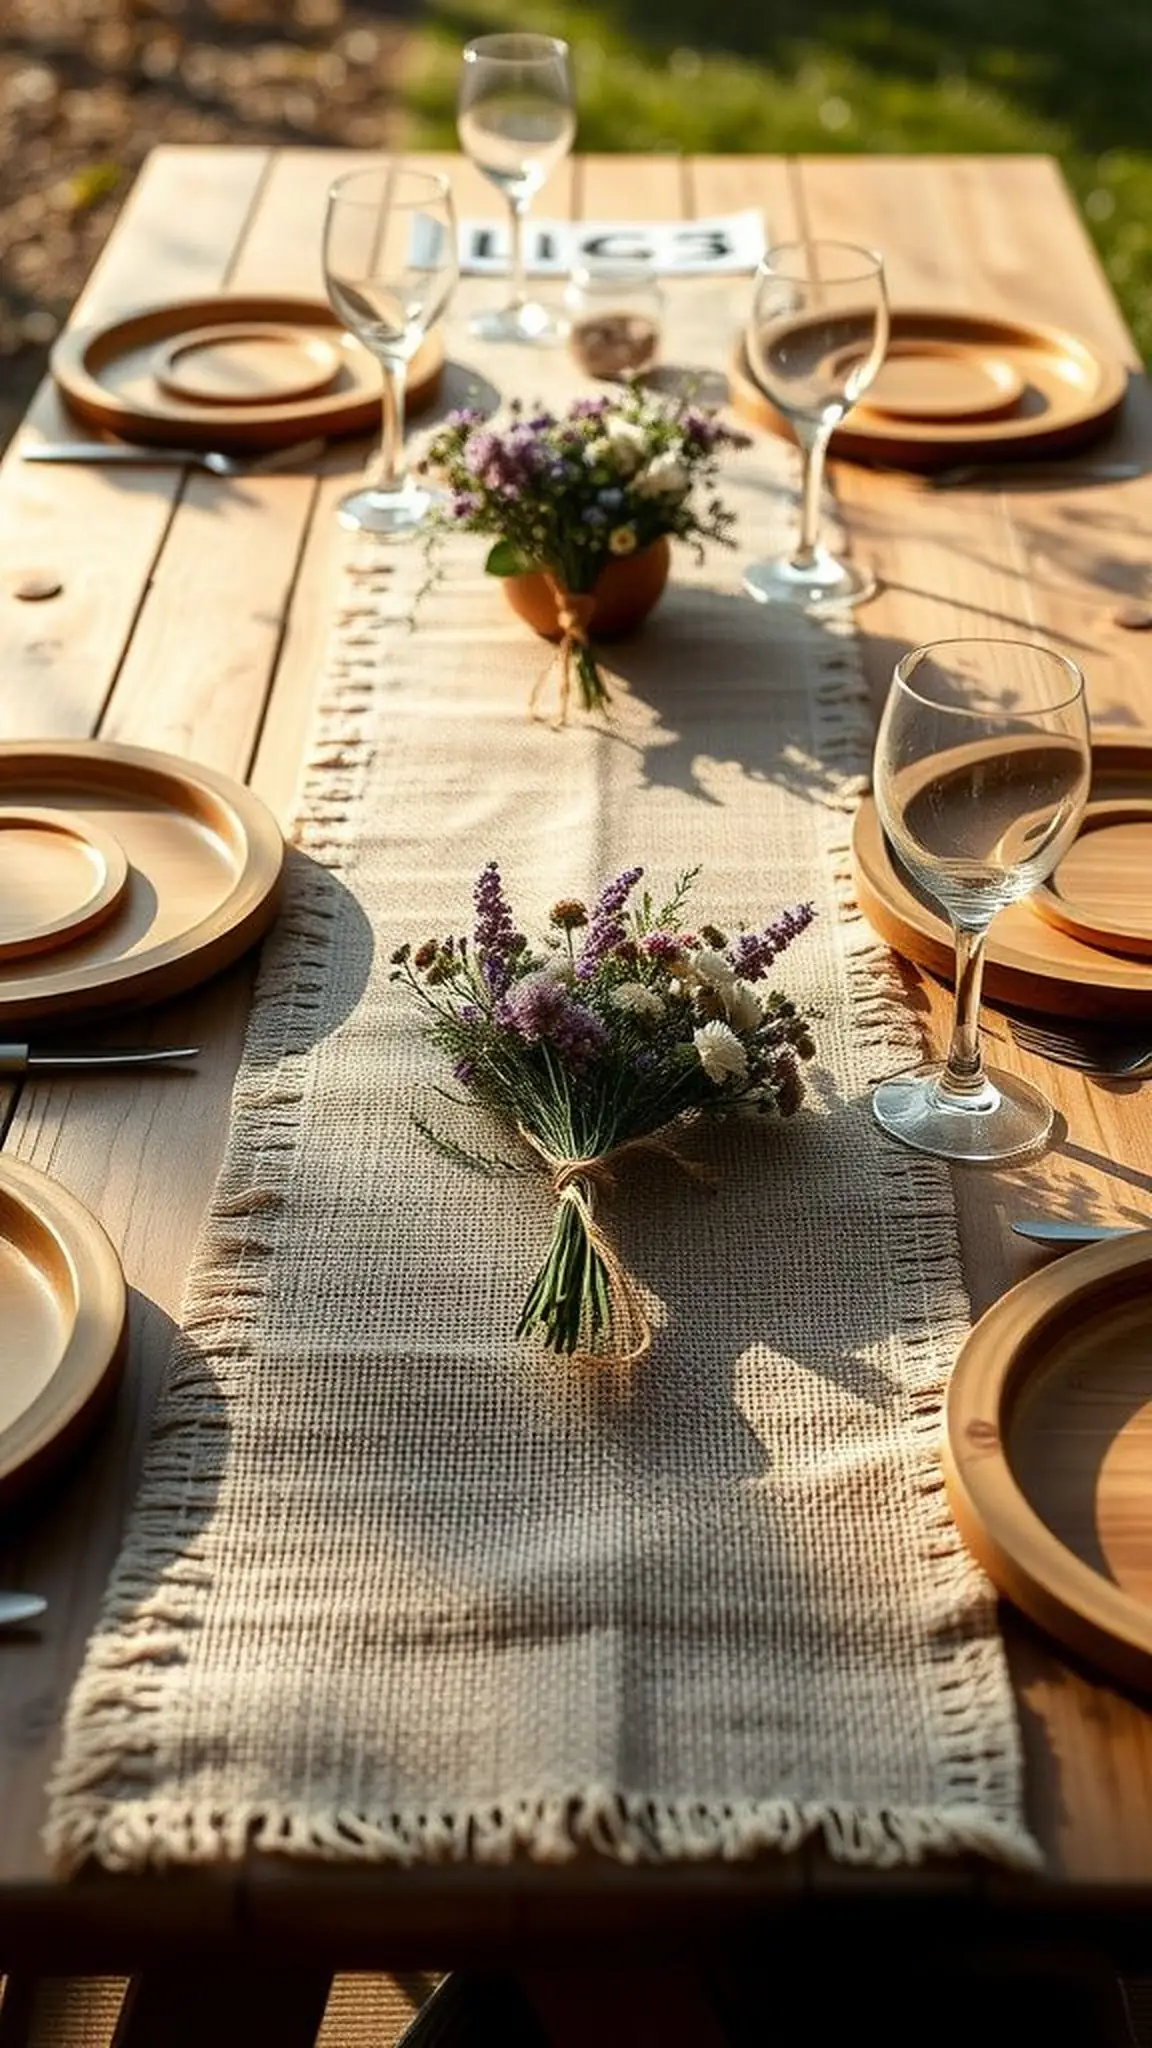
A wide strip of natural burlap adds a rustic, textured spine to an outdoor table. Small clusters of wildflowers laid atop create pockets of color that feel fresh and unstudied.
The coarse weave of burlap catches sunlight and creates intriguing shadow lines across plates. Fingers brushing the runner feel the rough, homey grain beneath soft linens.
This low centerpiece approach lets the landscape remain the star while the table gains quiet decorative interest. The palette reads as organic and slightly undone in a deliberate way.
Pro Tip: Cut burlap with pinking shears to reduce fraying and keep neat edges during transport and setup.
How to Make This
- Measure a length of burlap to run down the center of the picnic table and trim to size.
- Place small bunches of wildflowers or greenery at uneven intervals along the runner.
- Secure clusters with twine wraps that sit flat on the fabric.
- Smooth the runner and tuck any loose frayed edges for a tidy look.
Avoid: A frequent beginner mistake is leaving long frayed threads that tangle with dishware or napkins. Trimming or securing edges keeps the table functional and neat.
Try Also: Layer a narrow linen runner over burlap for softness, or scatter small votives between flower clusters. Swap wildflowers for fresh herbs to add scent.
Products & Materials
Items Used
- burlap fabric roll
- fresh wildflower bunches
- natural jute twine
- pinking shears
“A burlap runner and tiny wildflower clusters create rustic picnic table charm.”
Citrus candle holders for bright summery scent
⏱️ 20 min · 🟢 Beginner
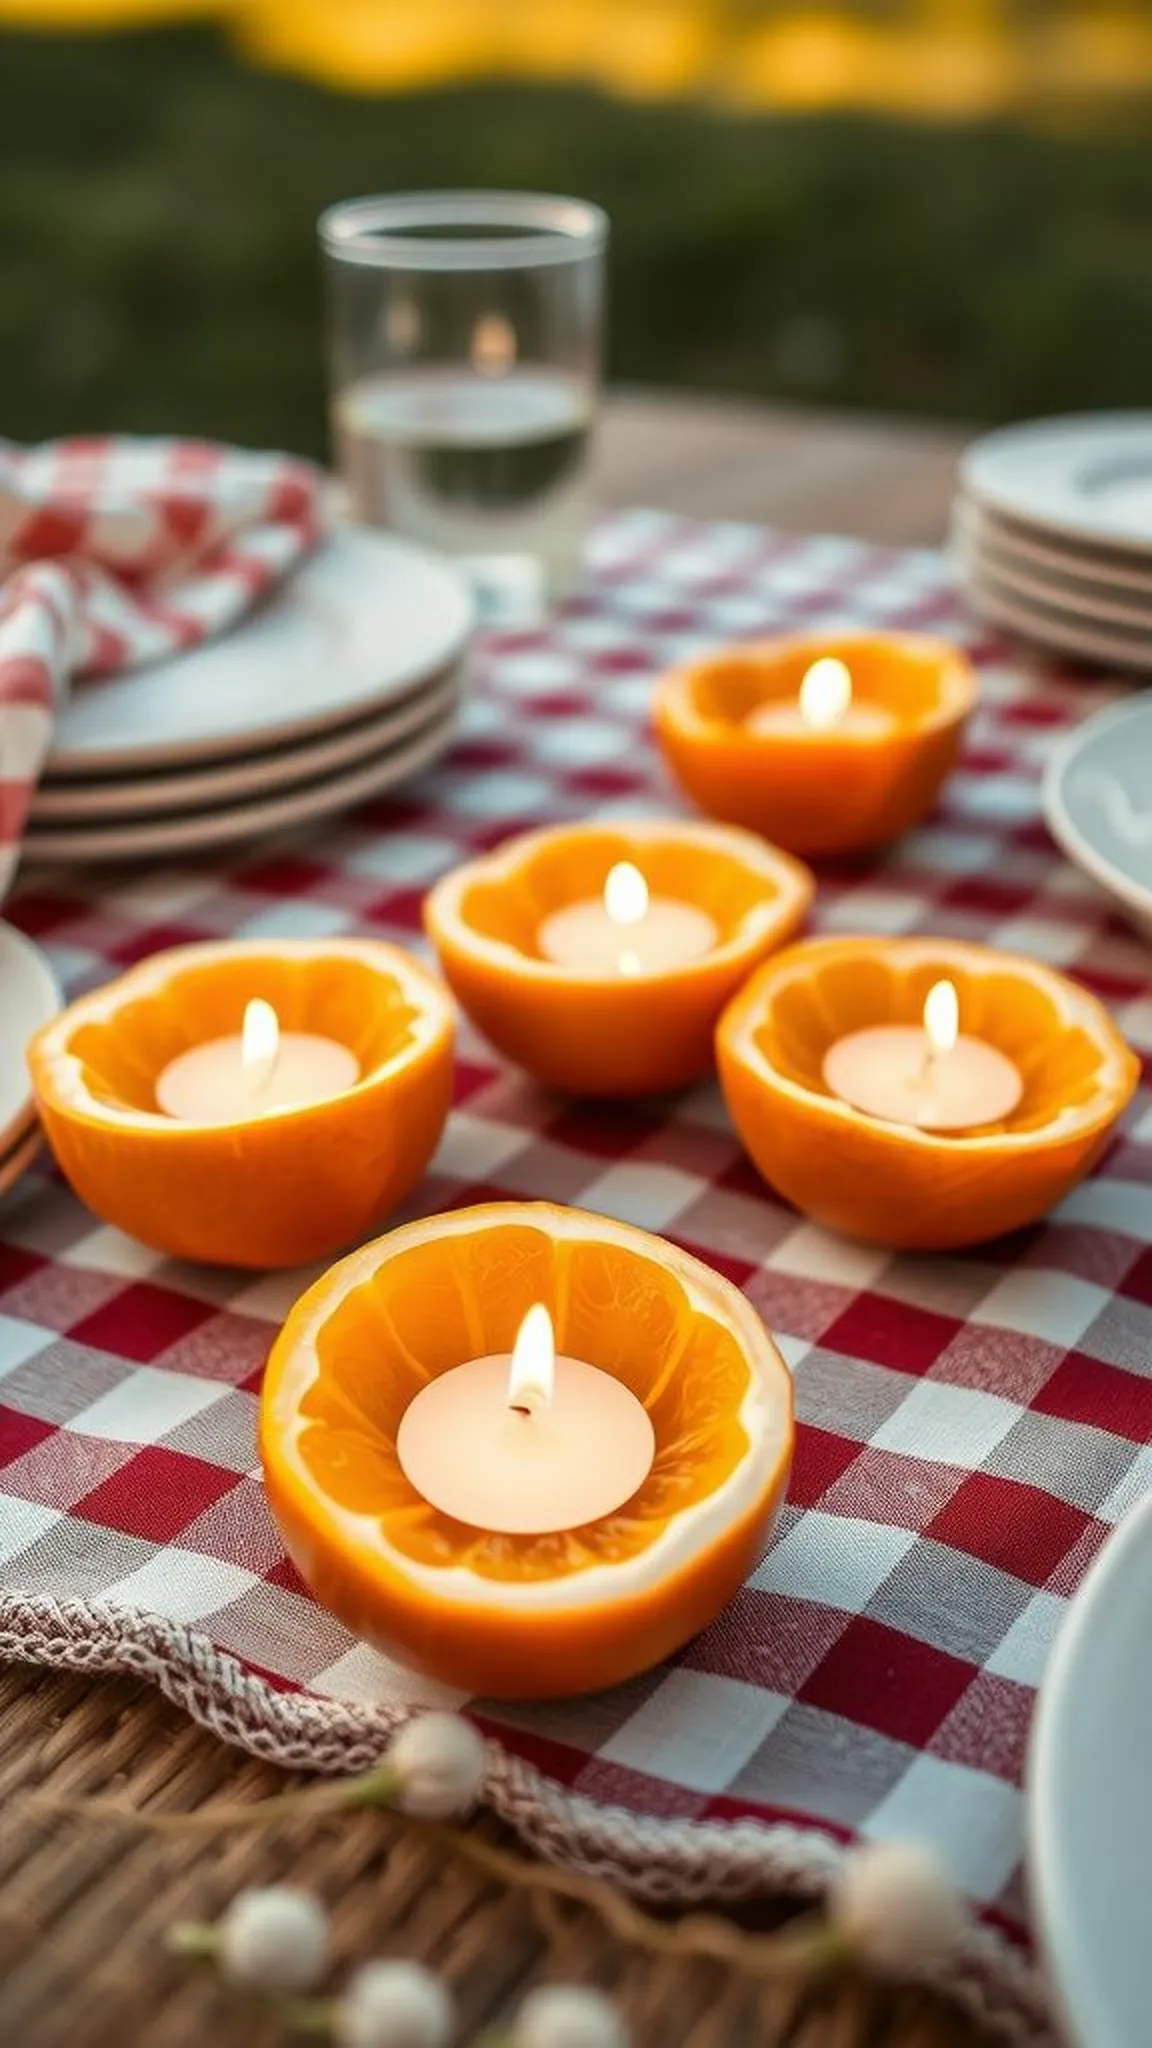
Hollowed citrus halves cradle small votive candles, giving off a faint citrus aroma as they warm. The glossy interior of the fruit contrasts with soft flame and matte napkins.
Sunset light makes peel colors glow like little lanterns while a gentle citrus perfume drifts across the blanket. The combination of scent and light lifts spirits in a quiet, sensory way.
These small holders add a fresh, summery accent that looks lively on any picnic table. They feel playful, slightly whimsical, and perfectly seasonal.
Pro Tip: Use unscented votive candles when relying on the fruit’s natural aroma to avoid competing fragrances.
How to Make This
- Slice citrus fruits in half and scoop out pulp to create shallow bowls.
- Place a small votive or tealight in each hollowed half, ensuring stability.
- Arrange citrus holders along the picnic table away from flammable materials.
- Monitor candles and replace fruit or candle as needed for safety.
Avoid: A frequent beginner mistake is placing citrus holders too close to napkins or paper, which risks heat transfer. Leaving breathing room prevents accidental contact.
Try Also: Try limes for a brighter green pop or blood oranges for rich, warm tones. Add a few sprigs of mint inside for an extra herbaceous note.
Products & Materials
Items Used
“Citrus halves become fragrant, colorful holders that brighten picnic tables.”
Clothespin place cards with pressed herb sprigs
⏱️ 15 min · 🟢 Beginner
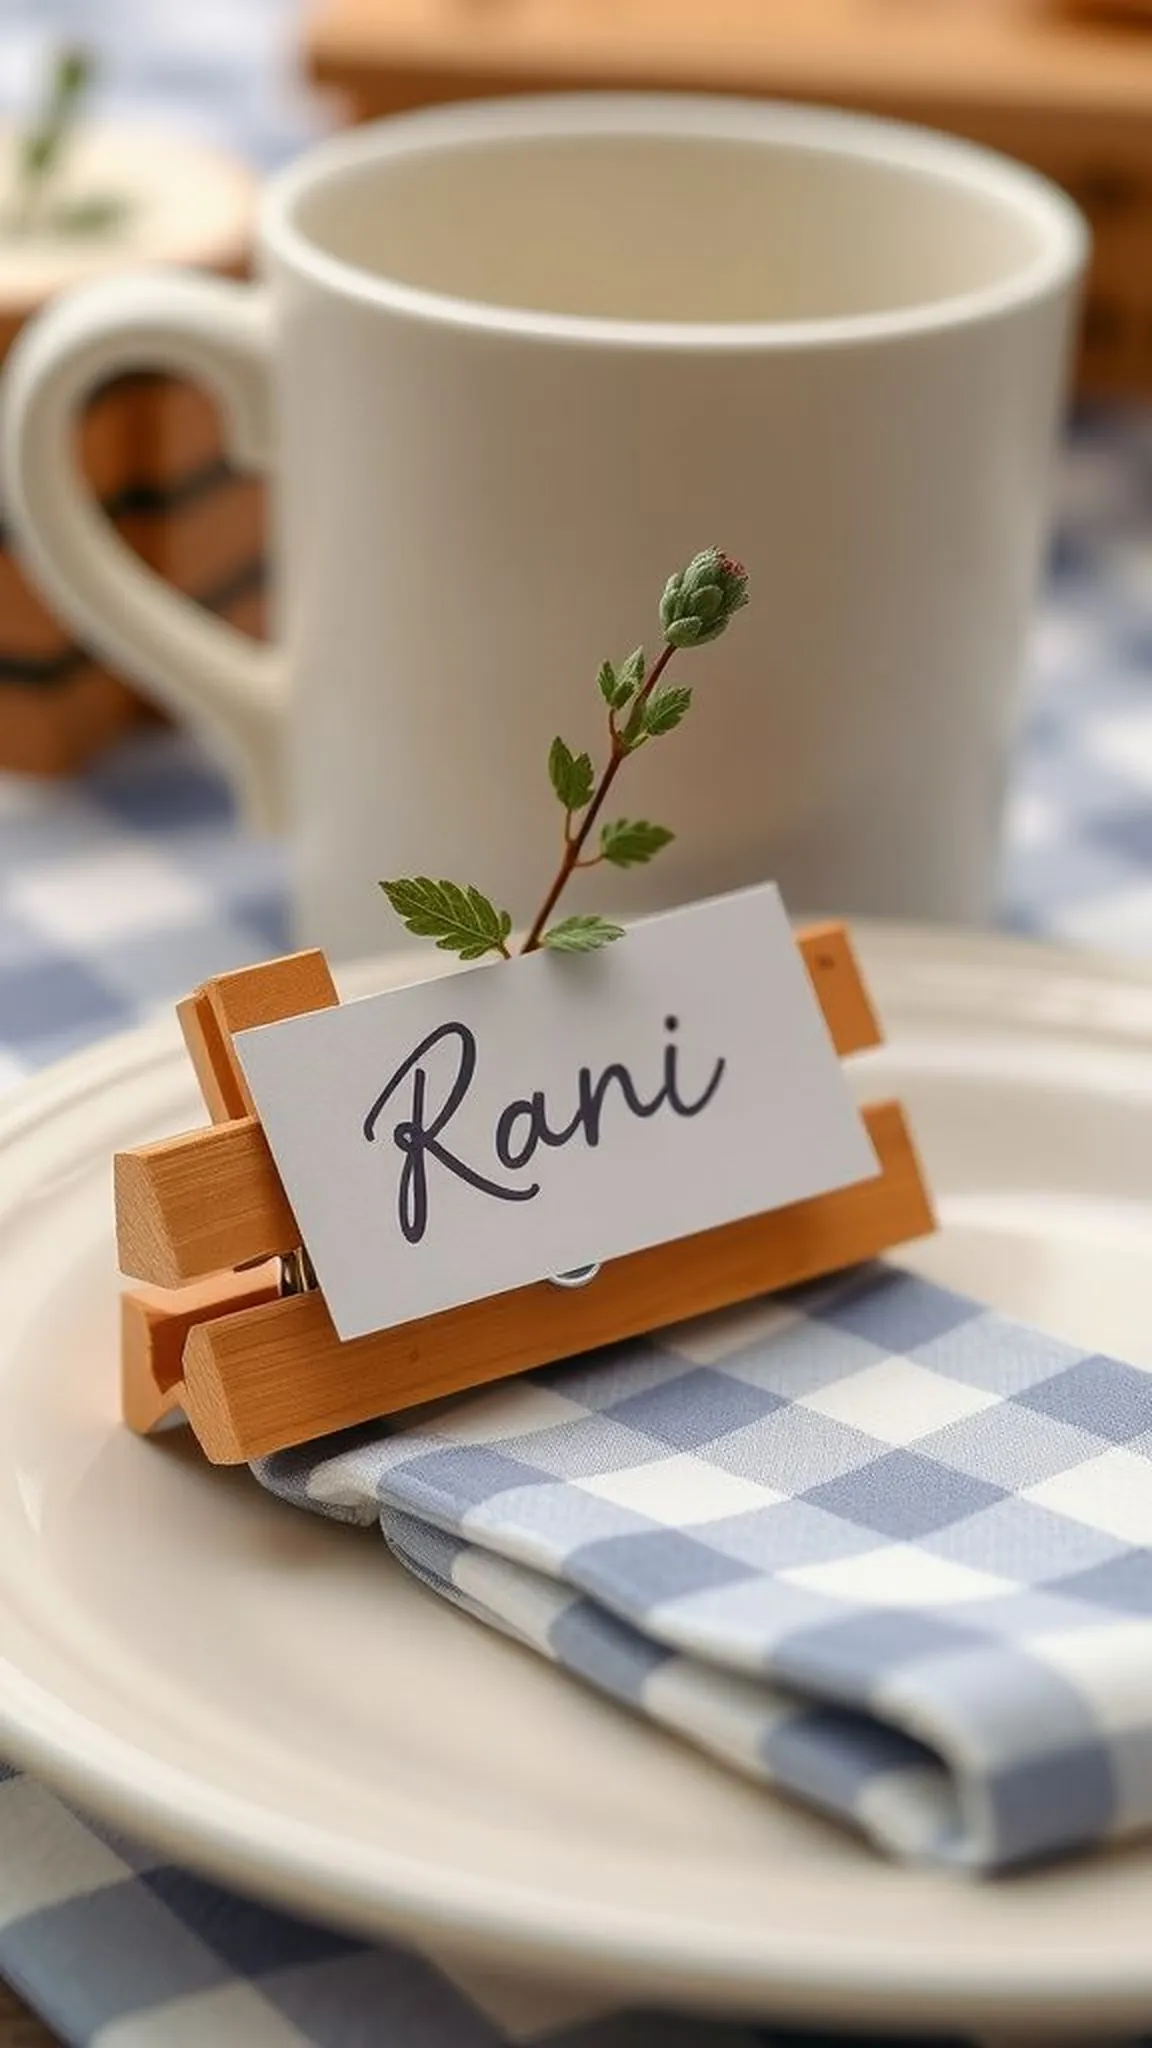
Tiny cards clipped with wooden clothespins sit atop cups, each paired with a small pressed herb for fragrance and texture. The tactile wood and paper combo feels homey against the woven basket and ceramic plates.
A faint scent of thyme or rosemary drifts as fingers lift the card, adding a quiet natural note to the meal. The visual rhythm of clips and cards repeats along the edge of the table for a handmade touch.
These little markers make each seat feel anticipated and personal without fuss. They blend practical labeling with a delicate, botanical accent.
Pro Tip: Press herbs between absorbent paper overnight for a flatter, longer-lasting sprig that sits neatly under a clip.
How to Make This
- Cut small rectangular cards from cardstock and write guest names in clear lettering.
- Press herb sprigs flat and place them beneath a wooden clothespin clipped to the card.
- Clip each card to a cup rim or napkin fold at each place setting.
- Arrange similar herbs for a cohesive scent along the table.
Avoid: A frequent beginner mistake is clipping large, bulky sprigs that make cards flop or look untidy. Choosing flatter, pressed herbs keeps the marker upright and neat.
Try Also: Use tiny painted clothespins for a splash of color or add small watercolor washes to each card for soft backgrounds. Swap herbs for tiny dried flowers for a floral scent.
Products & Materials
Items Used
“Wooden clothespins plus pressed herbs create charming, fragrant place cards.”
Mini jam jar floral centerpieces for casual elegance
⏱️ 20 min · 🟢 Beginner
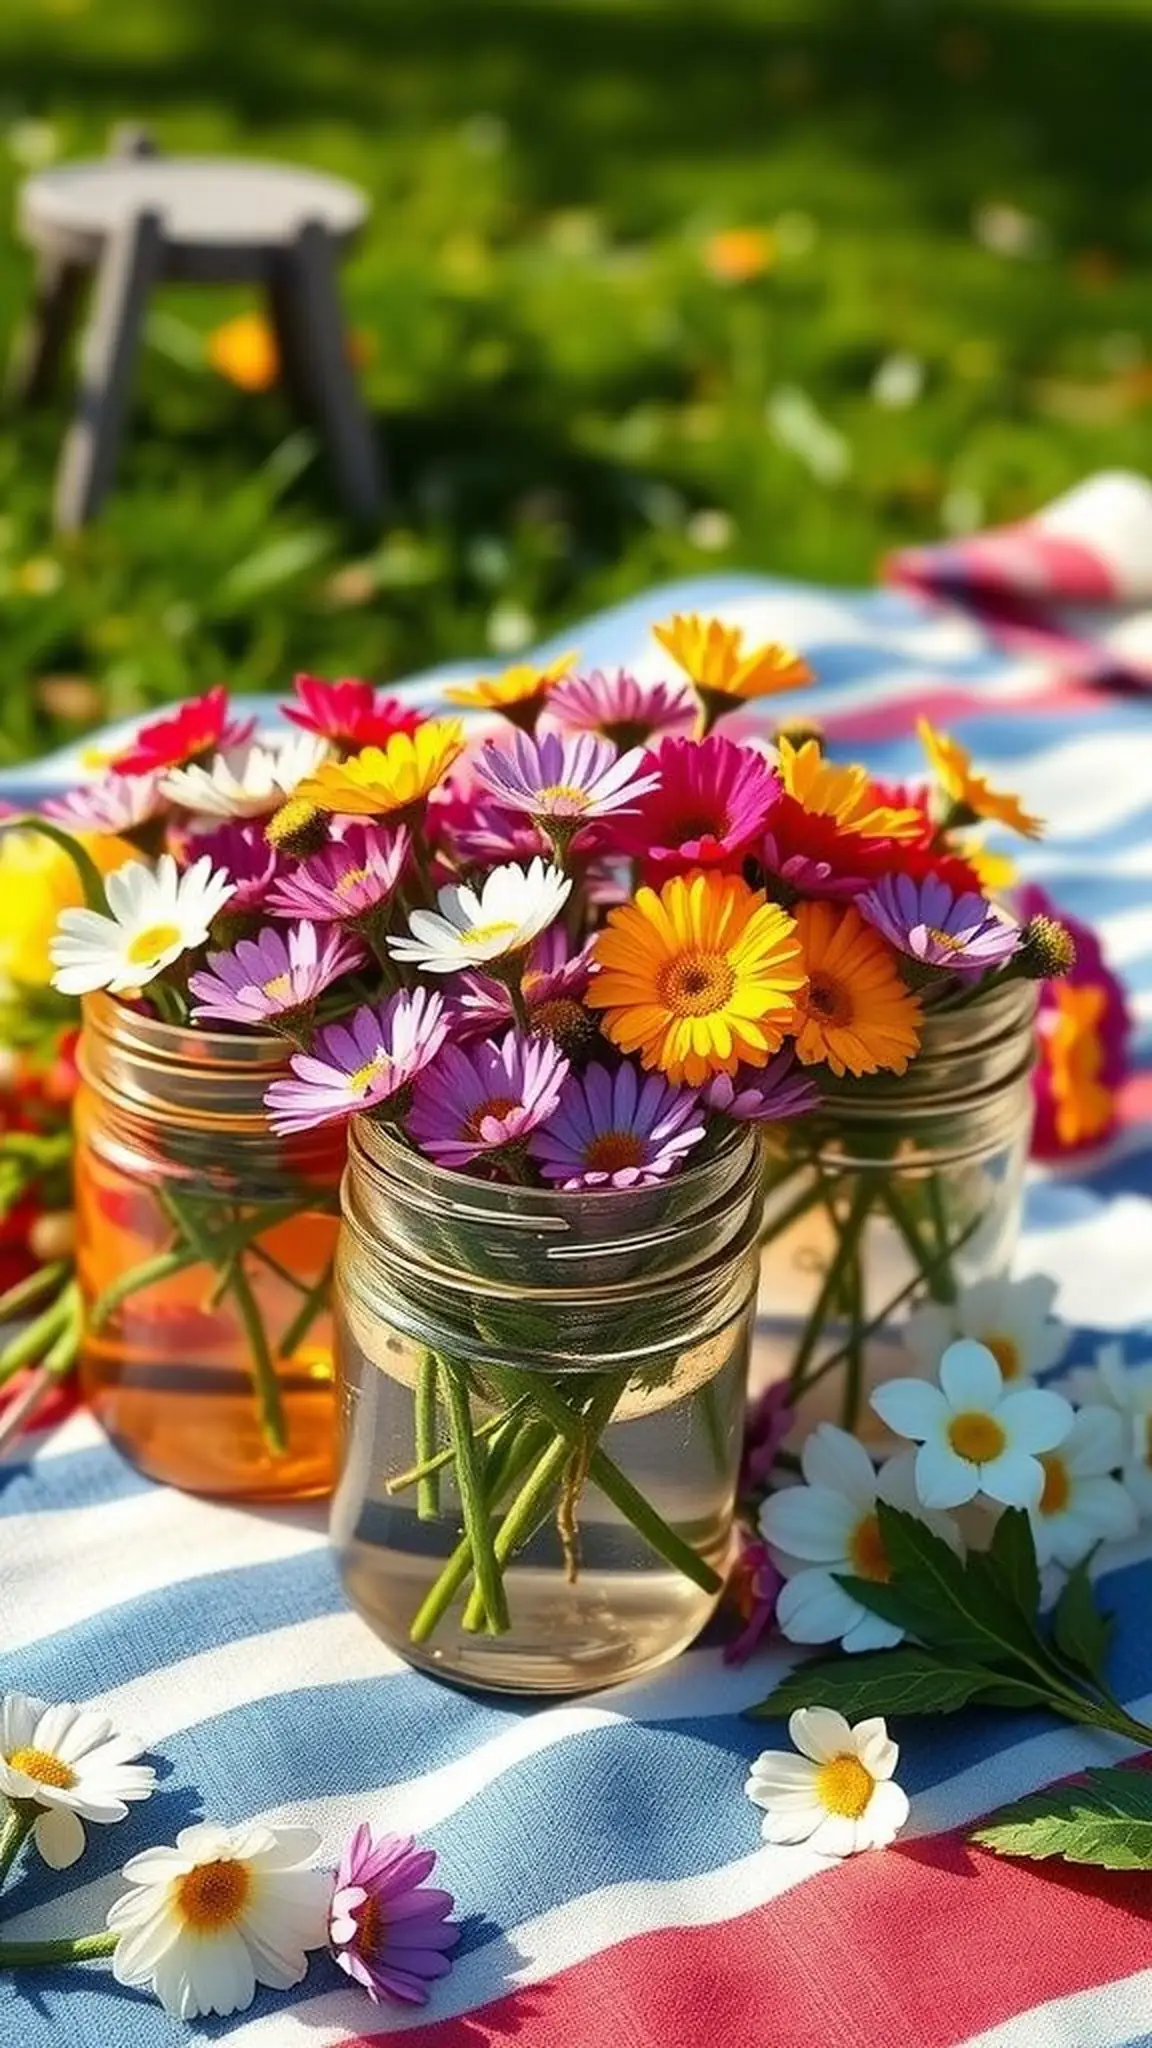
Small jam jars filled with tight clusters of garden blooms create intimate focal points down the table. The glass refracts light and makes stems look jewel-like in the afternoon sun.
Petals and leaves provide soft color splashes while the breeze teases the blooms in a gentle rhythm. The arrangement smells subtly floral and invites quiet appreciation between bites.
Grouping jars in odd numbers produces a pleasing, relaxed composition that reads as effortless. The approach feels fresh, approachable, and perfectly suited to outdoor dining.
Pro Tip: Trim stems at an angle and keep water fresh to prolong bloom life during warm daytime gatherings.
How to Make This
- Fill mini jam jars with cool water and a small preservative if desired.
- Shorten flower stems and arrange small clusters in each jar for balance.
- Group jars in threes or fives along the table for visual interest.
- Replace water and refresh blooms if the event lasts all day.
Avoid: A frequent beginner mistake is overcrowding a single jar with too many stems, which hides individual blooms. Spacing flowers allows each blossom to show its shape.
Try Also: Use colorful jam jars for extra hue or mix in greenery for texture contrast. Place jars inside a shallow crate for a rustic vignette.
Products & Materials
Items Used
“Tiny jam jar bouquets bring relaxed floral charm to picnic tables.”
Chalk-dipped utensils for subtle, rustic flair
⏱️ 30 min · 🟢 Beginner
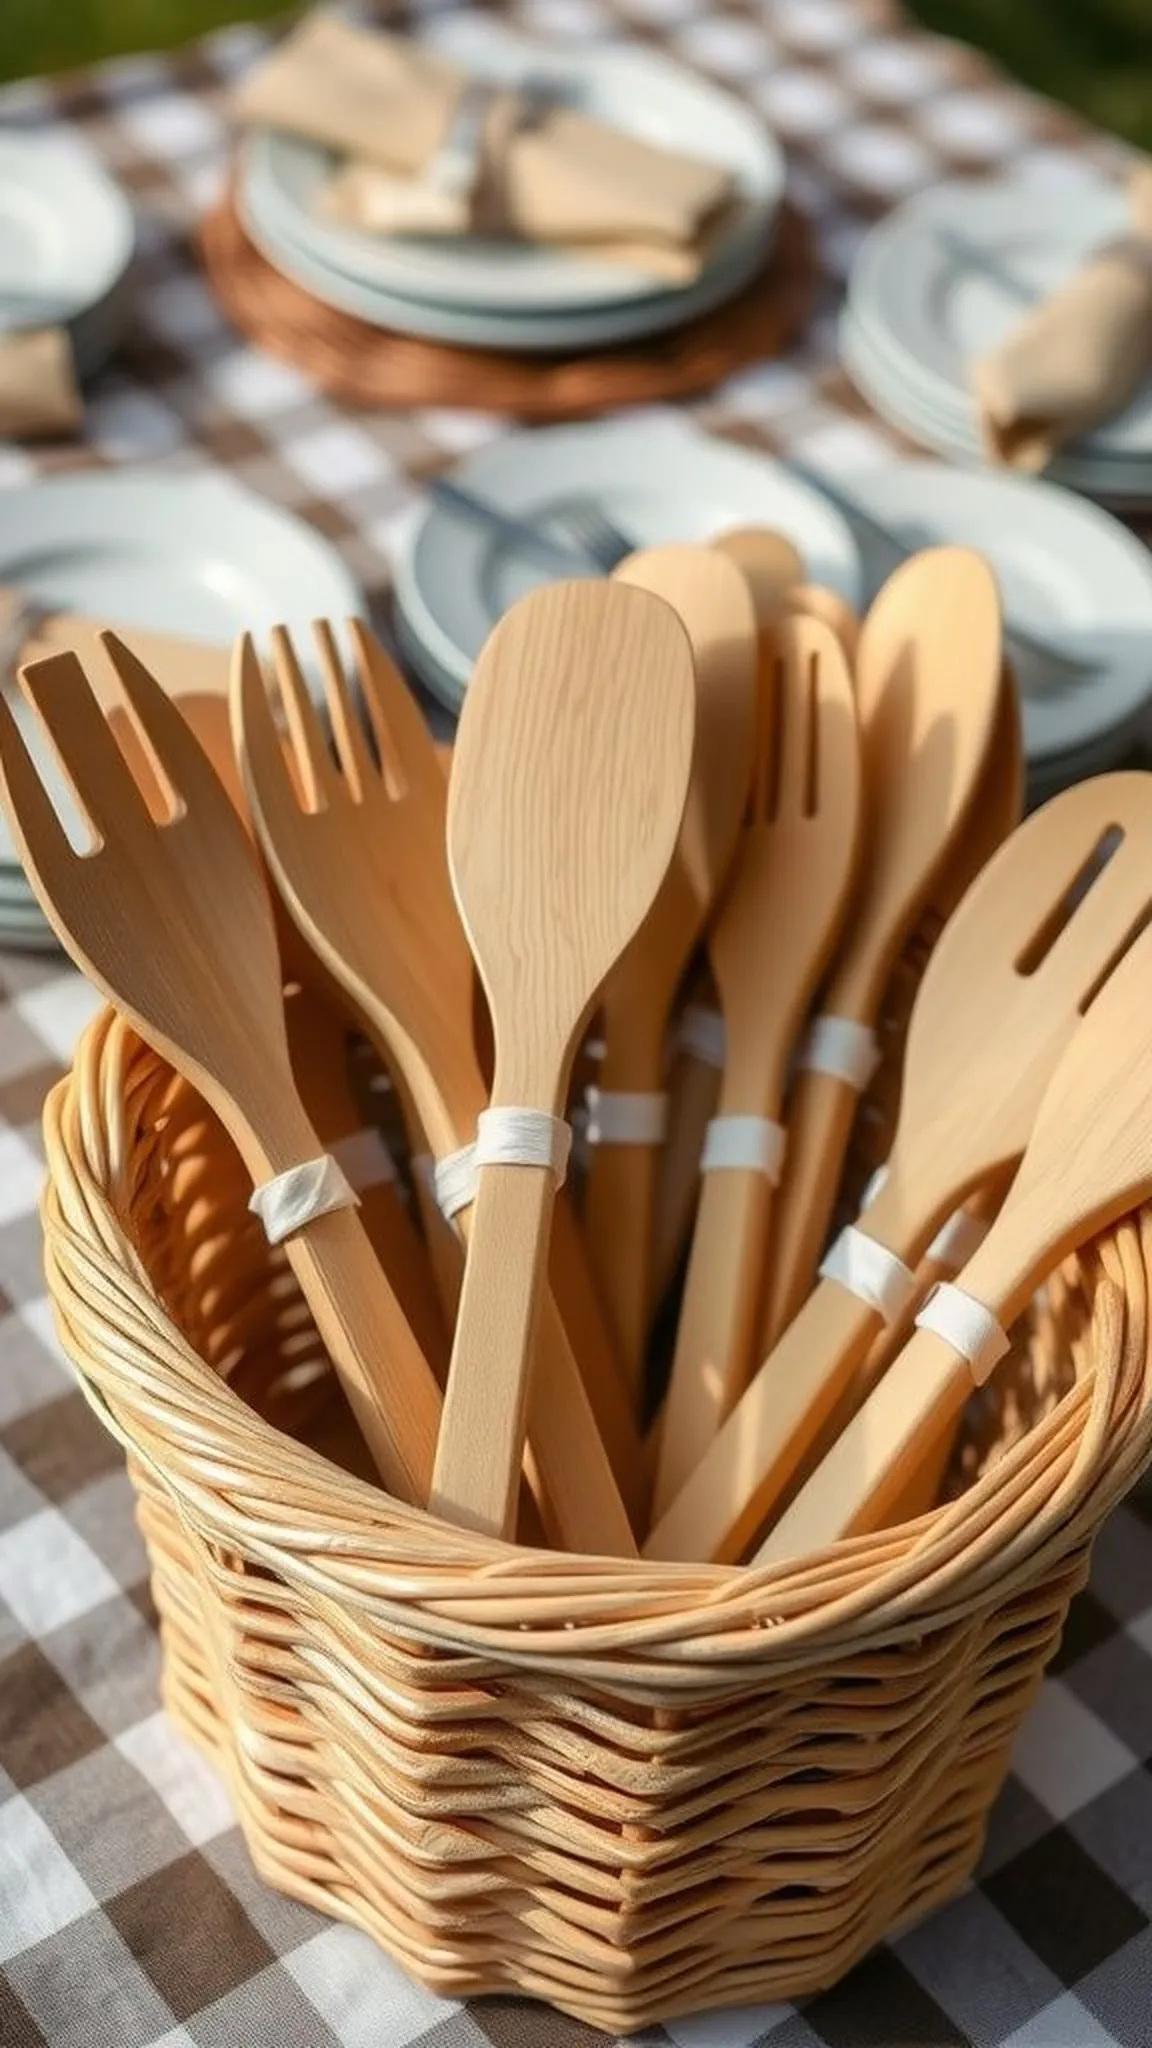
Wooden utensils with chalk-dipped handles add a subtle handcrafted note to each place setting. The matte, slightly dusty finish contrasts pleasantly with smooth wooden spoons and bowls.
Handles feel softly textured under fingertips while the neutral tones sit well amid bright plates and leafy greens. The effect is warming and quietly artisanal.
Scattered in a woven basket, these utensils look thoughtfully assembled without fuss. They contribute to an understated, cohesive tabletop aesthetic.
Pro Tip: Dip just the handles and allow plenty of air drying time to avoid tacky spots that pick up lint.
How to Make This
- Lightly sand wooden utensil handles for better paint adhesion.
- Dip handles into chalk-style paint, leaving a clean line where paint stops.
- Let pieces dry flat and apply a second thin coat for opacity if desired.
- Store in a basket or wrap with twine for display on the picnic table.
Avoid: A frequent beginner mistake is dipping too deeply and creating uneven paint lines. Marking the desired depth beforehand keeps the look consistent.
Try Also: Try dipping in two complementary colors for a color-block effect, or add tiny stamped initials for personalization. Light sanding of the edge creates a vintage look.
Products & Materials
Items Used
- wooden utensils
- chalk-style paint
- fine sandpaper
“Chalk-dipped wooden utensils add soft, handmade style to picnics.”
Paper straw bouquets for whimsical drink toppers
⏱️ 15 min · 🟢 Beginner
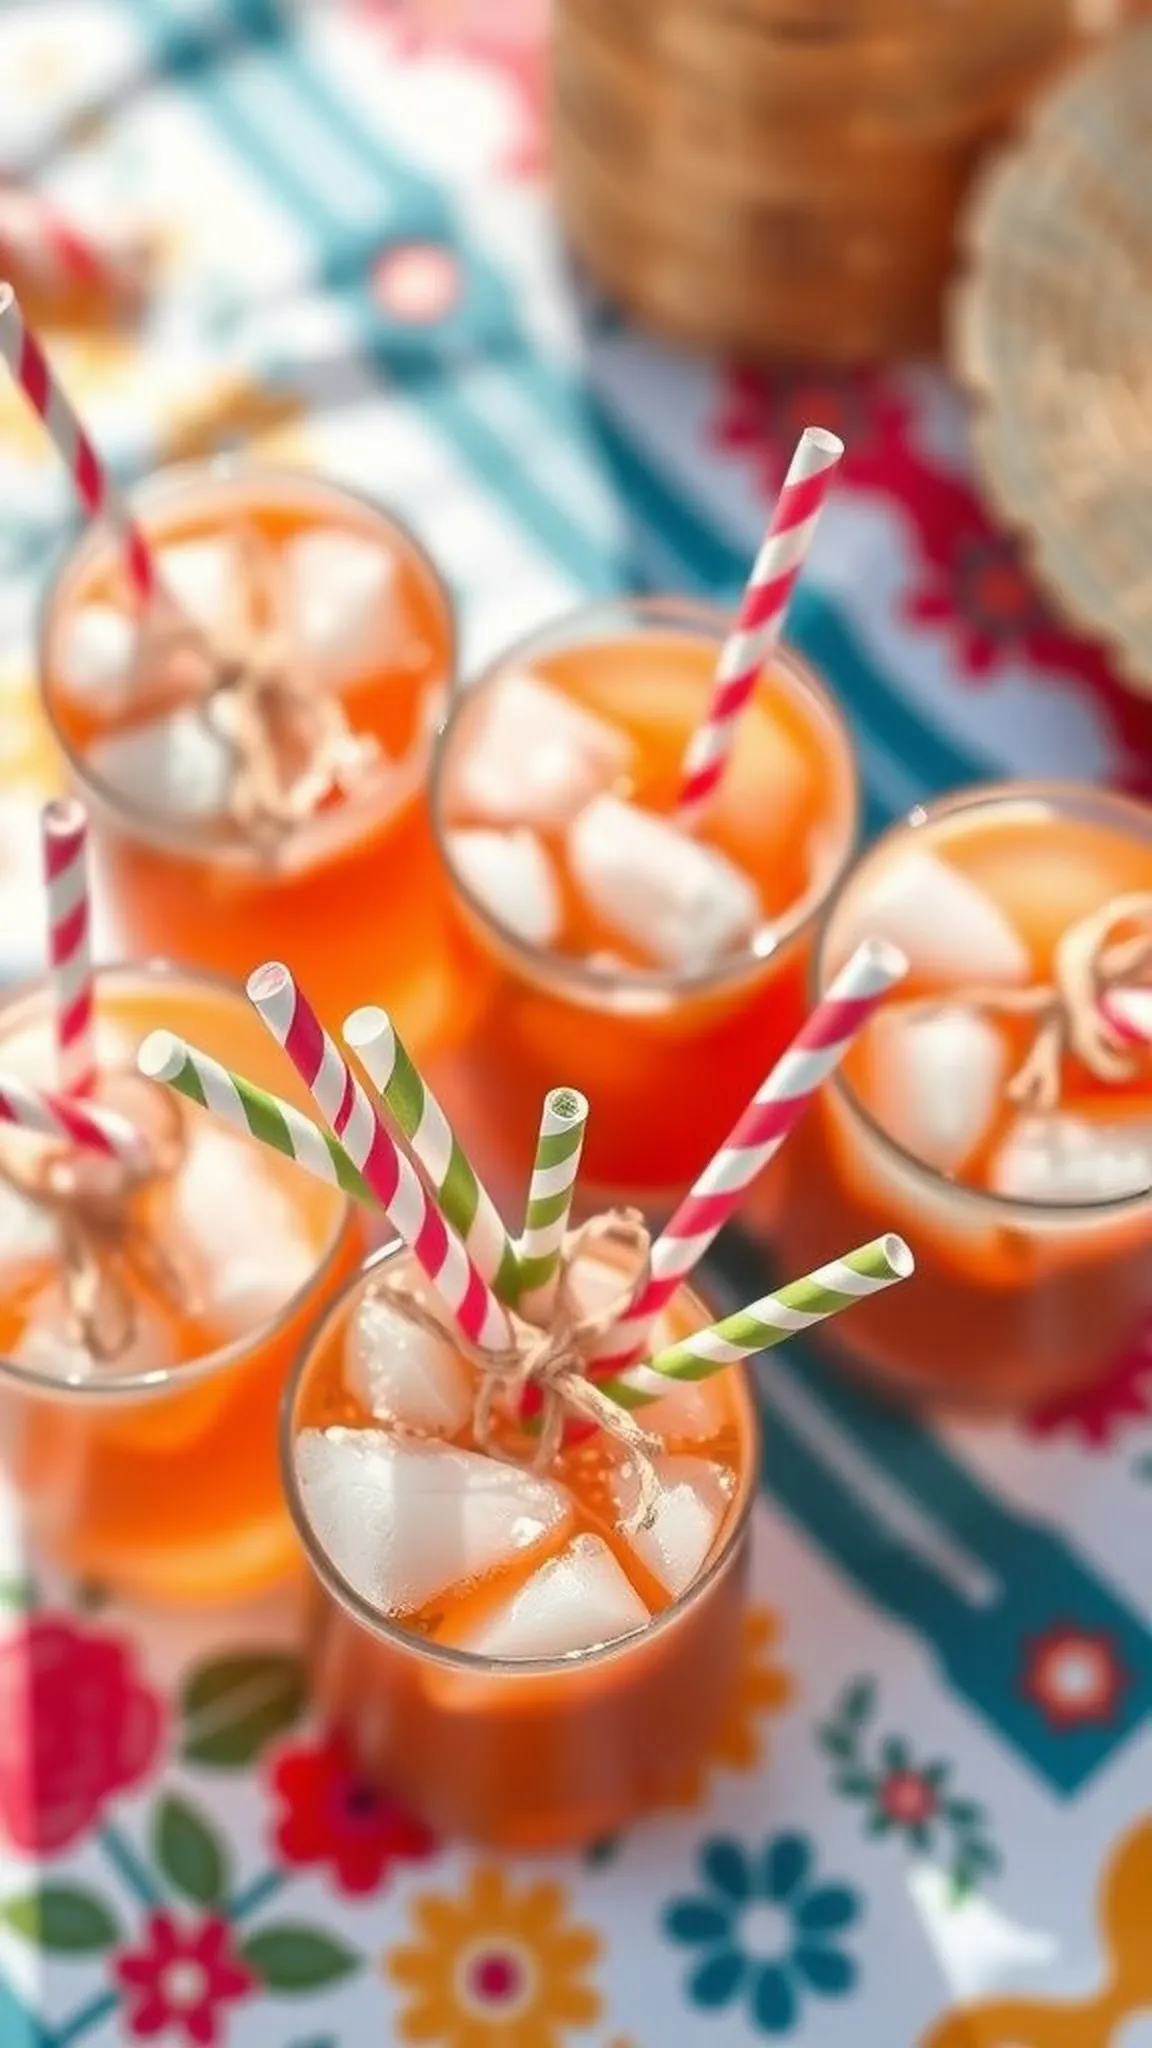
Clusters of colorful paper straws tied together become playful drink toppers that peek above mason jars and tumblers. The striped and polka dot patterns catch the eye and add cheerful detail to cups.
Paper gives a soft rustle when guests lift their glasses and the bright colors pop against iced tea and lemonade. The tactile feel of crisp paper strikes a fun, nostalgic note.
These small bouquets are lightweight, transport easily, and give each drink a festive personality. They feel casual and cheerfully celebratory at the same time.
Pro Tip: Choose food-safe paper straws and trim to a consistent height so each drink looks tidy and balanced.
How to Make This
- Gather paper straws in complementary patterns and group them into small bouquets.
- Secure each bundle with thin twine or a decorative band near the base.
- Trim the straw ends evenly for a neat presentation.
- Tuck a bouquet into each cup or jar opening for a playful accent.
Avoid: A frequent beginner mistake is leaving straws at mismatched heights, which makes the display look untidy. Even trimming creates a clean, intentional look.
Try Also: Add tiny paper flags to the straws for names or swap straws for small wooden stirrers for a rustic vibe. Use mint sprigs between straws for aroma.
Products & Materials
Items Used
- paper straws
- thin twine
- scissors
“Striped paper straw bouquets add playful, colorful flair to drinks.”
Mini chalkboard tent signs for sweet labeling
⏱️ 20 min · 🟢 Beginner
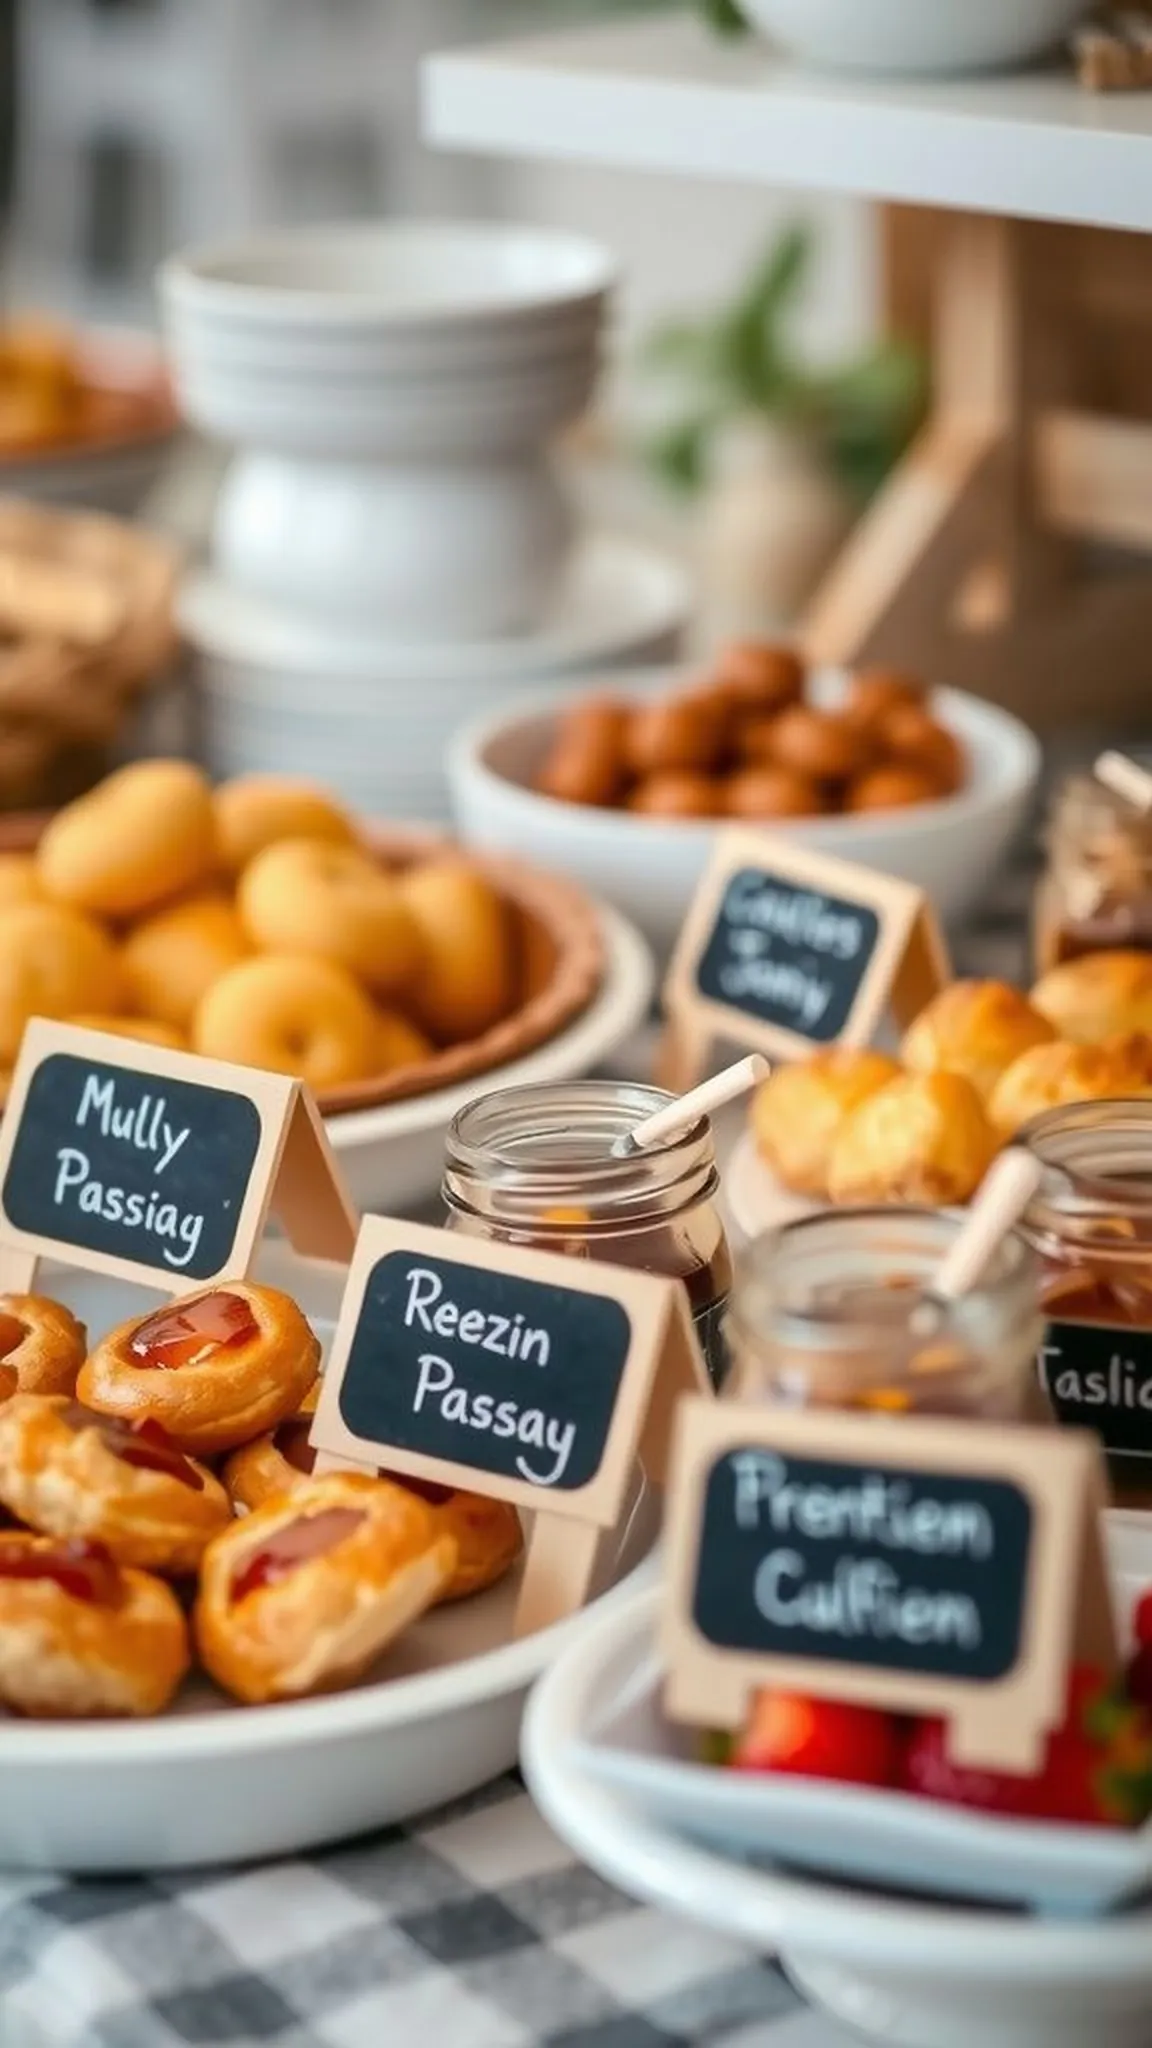
Tiny tent-style chalkboards label dishes and desserts with friendly handwriting. The dark slate contrasts with jam jars and pastries, making names read clearly from a short distance.
Chalk dust softens the written words and the faint smell of chalk is oddly comforting in an outdoor setting. Guests can glance and smile, recognizing each choice at a quick look.
These modest signs blend practicality with a quaint, crafted appearance that complements picnic spreads. They are unobtrusive yet helpful for buffet-style layouts.
Pro Tip: Write in bold, rounded letters for readability and carry an extra marker for quick rewrites if labels smudge.
How to Make This
- Fold small chalkboard tent pieces into a standing triangle shape or assemble framed mini boards.
- Prime each board and then write dish names with a chalk marker or white chalk.
- Place signs near dishes at eye level for easy reading.
- Refresh writing if smudging occurs during the gathering.
Avoid: A frequent beginner mistake is choosing tiny lettering that disappears against the board. Larger, simpler lettering ensures readability in outdoor light.
Try Also: Use colored chalk to denote dietary notes or add small doodles beside names for character. Clip mini signs onto jars for vertical labeling.
Products & Materials
Items Used
- mini chalkboard tents
- chalk marker
“Mini chalkboard tent signs make picnic labeling cute and readable.”
Lined picnic basket centerpiece with layered textures
⏱️ 1 hour · 🟠 Intermediate
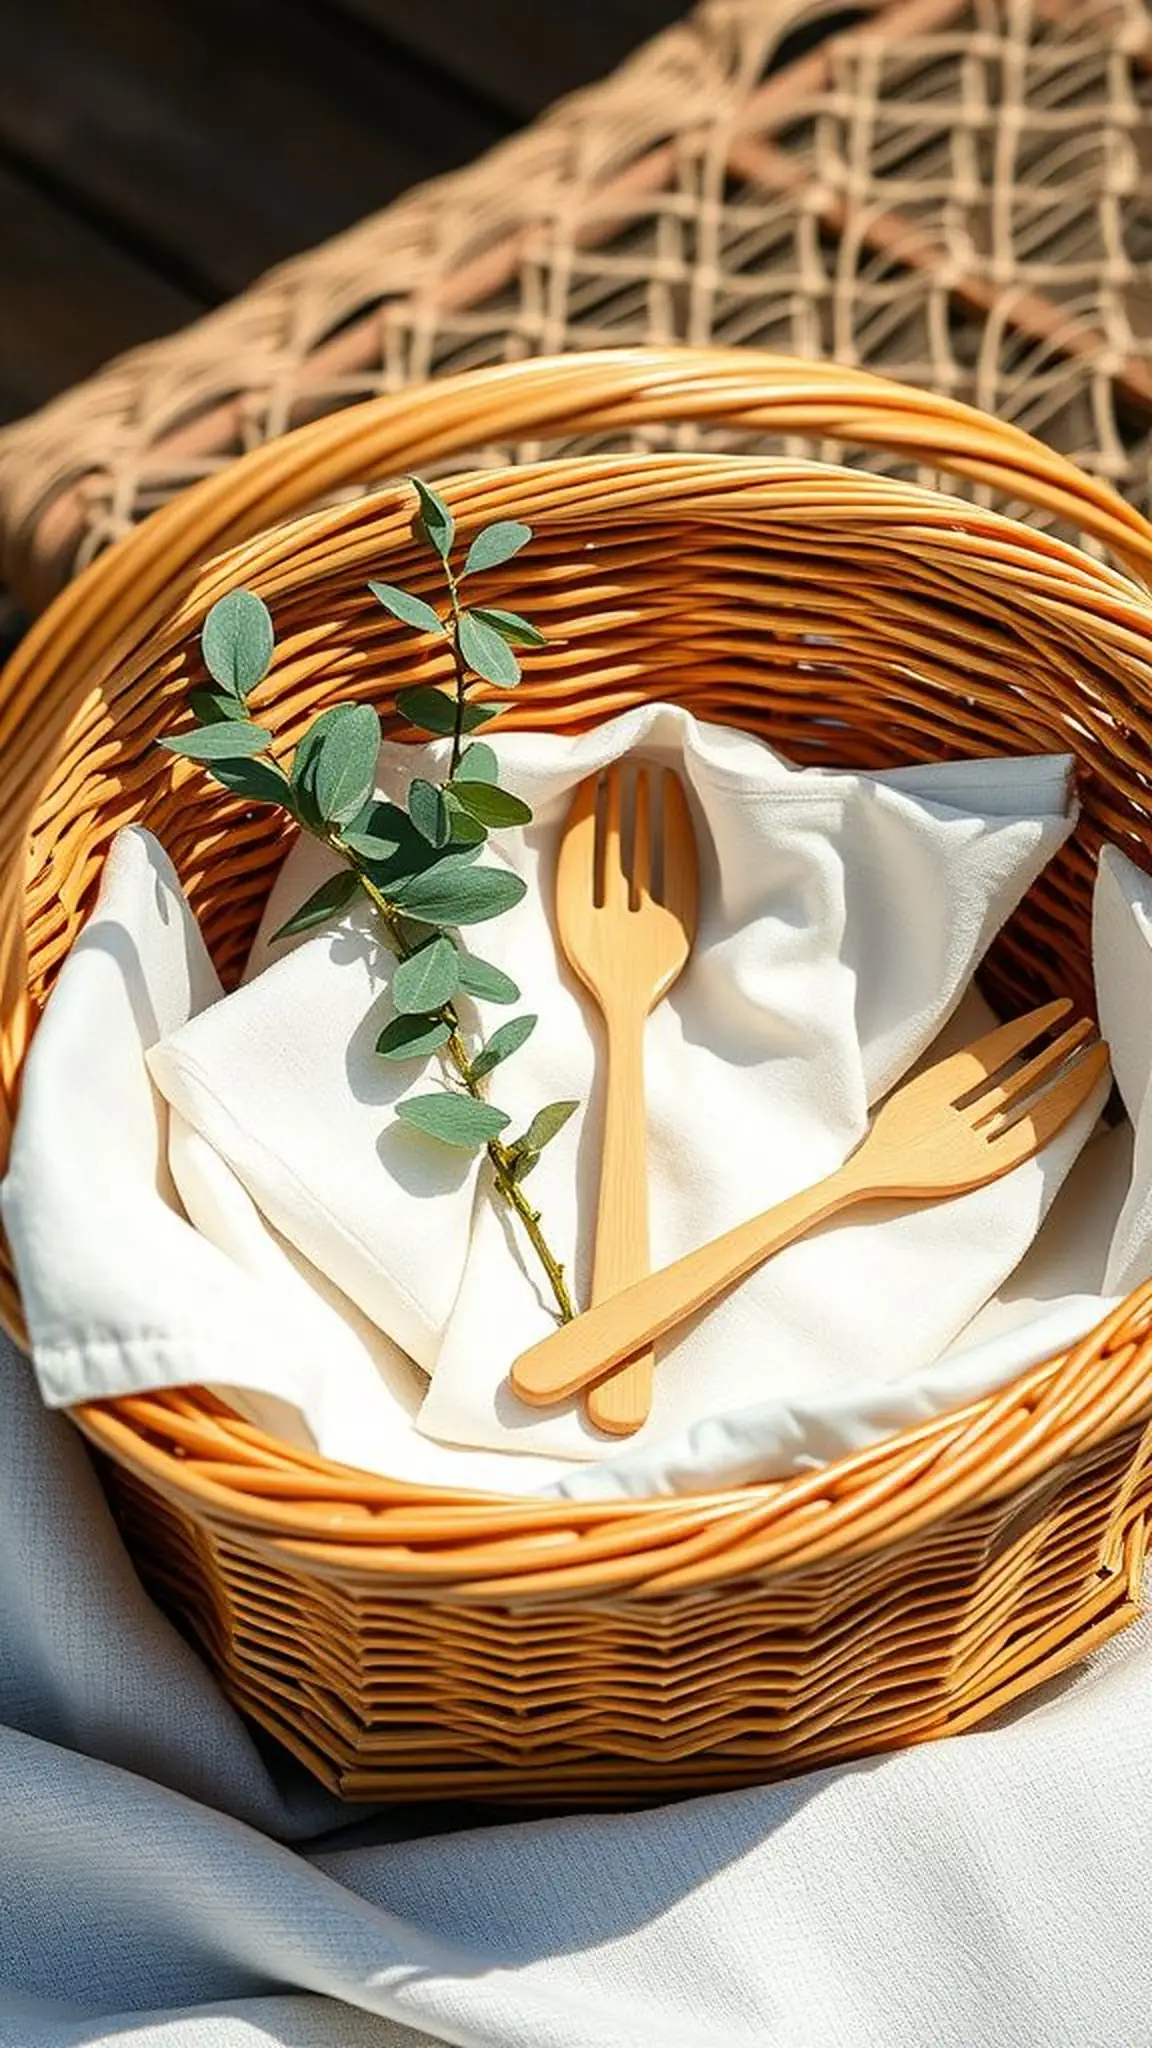
A lined picnic basket becomes a centerpiece when filled with linens, napkins, and small coordinated accents. The weave of the basket and the smooth cotton create a pleasing textural interplay.
Soft folds of fabric peep from beneath plates while wooden utensils and a sprig of eucalyptus add natural notes. The scent of fabric and greenery blends with the outdoor air in a calm, inviting way.
This layered approach keeps the centerpiece contained yet visually rich, perfect for balancing a larger picnic spread. It reads as thoughtfully arranged without being fussy.
Pro Tip: Layer patterns in two or three tones and keep one neutral base to avoid a busy visual effect on the table.
How to Make This
- Line a picnic basket with a neutral cotton cloth to create a soft base.
- Arrange folded napkins, small plates, and wooden utensils inside with edges peeking out.
- Tuck in sprigs of eucalyptus or herbs for subtle scent and texture.
- Place the basket at the table center and surround with low jars or candles.
Avoid: A frequent beginner mistake is overfilling the basket, which makes it look cluttered rather than styled. Leaving breathing room between items keeps the composition elegant.
Try Also: Switch linens for bright bandanas for a lively theme, or fill the basket with chilled drinks tucked into a bed of ice for a functional centerpiece. Add a folded chalkboard for menu display.
Products & Materials
Items Used
- wicker picnic basket
- cotton napkins
- eucalyptus sprigs
“A lined picnic basket layered with linens makes an effortless centerpiece.”
DIY seagrass placemats for a coastal picnic feel
⏱️ 2-3 hours · 🟠 Intermediate
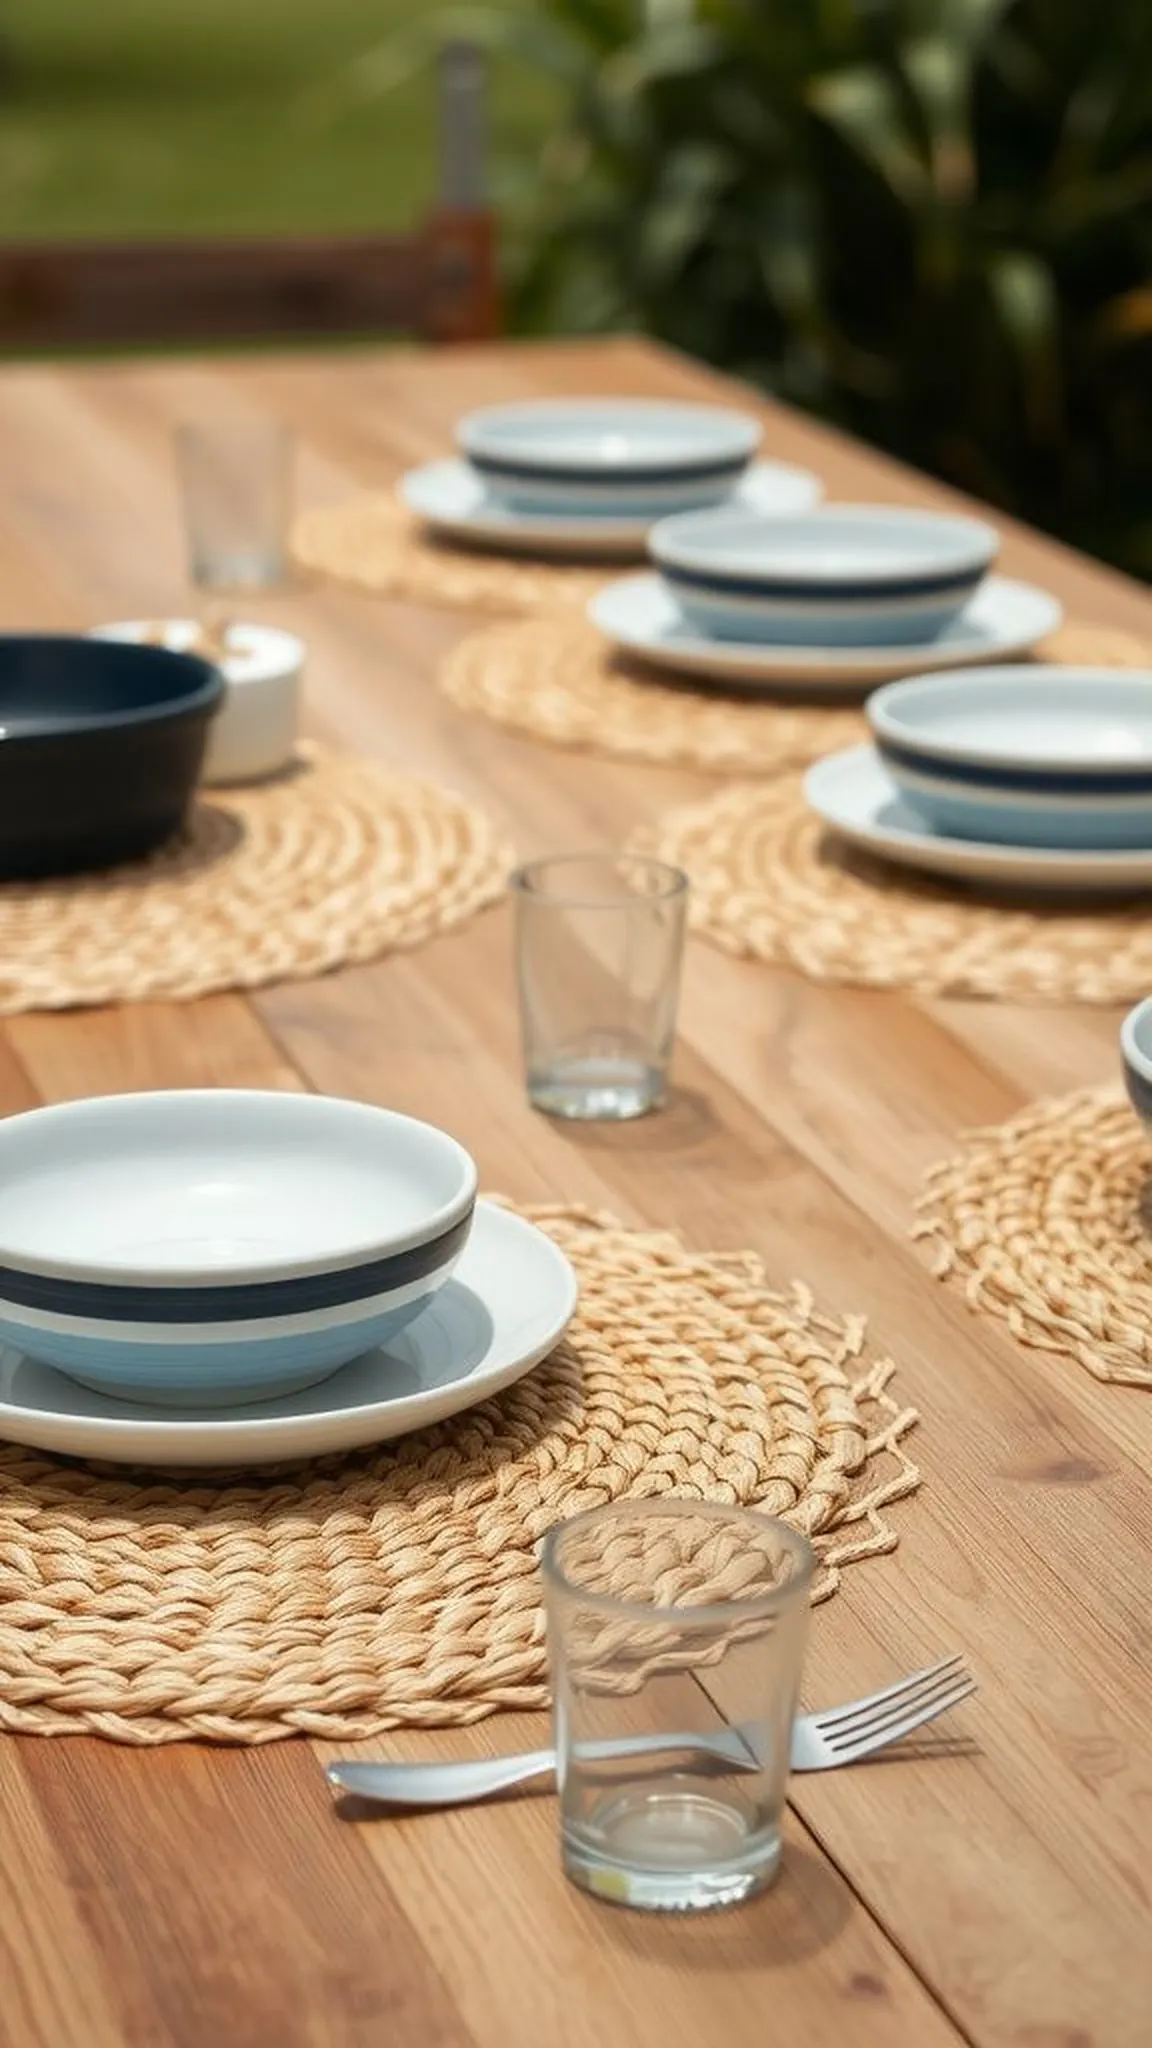
Hand-braided seagrass placemats lend a subtle coastal breeze to outdoor dining, with warm straw tones and a slightly rough texture. The natural scent of dried grasses adds an earthy, sun-warmed note under plates.
Edges show tiny, rustic bumps where fibers interweave, which feels charming against smooth ceramic and glassware. Sunlight plays across the woven pattern, creating a relaxed, seaside cadence.
Placed beneath plates and bowls, these mats ground the table while keeping the aesthetic light and breezy. They pair especially well with blues, whites, and muted coral accents.
Pro Tip: Soak seagrass lightly before braiding to make fibers more pliable and reduce snapping during shaping.
How to Make This
- Divide seagrass rope into even strands and dampen slightly for flexibility.
- Braid strands into a tight coil, stitching the inner edge as the mat grows.
- Continue spiraling and stitching until the desired placemat diameter is reached.
- Trim ends and tuck them under the outer edge for a neat finish.
Avoid: A frequent beginner mistake is braiding too loosely, producing uneven mats that curl at the edges. Tight braiding ensures a flat, stable surface.
Try Also: Make larger charger-style mats for dramatic settings or dye the outer ring for a two-tone effect. Combine with seashell accents for a true beach vibe.
Products & Materials
Items Used
- seagrass rope
- heavy-duty thread
- large needle
“Hand-braided seagrass placemats introduce coastal texture to picnic tables.”
