
As an Amazon Associate I earn from qualifying purchases.
Easy No-Sew Fabric Crafts offer a fast, gentle way to refresh a home or gift without stitching. These no-sew fabric projects keep things friendly for crafters who prefer scissors and glue over needles.
Bright, tactile results come from simple materials like fleece, felt, fusible web, and fabric glue that sit quietly on a craft table. Each no-sew fabric craft idea below leans into texture, color, and playful imperfections for approachable handmade charm.
Ideas span wearable accents, cozy home pieces, and quick decorative touches that fit spare moments during a busy day. Expect approachable patterns and fabric-friendly shortcuts that celebrate material and touch for each easy fabric craft.
Cozy no-sew fleece fringe scarf in minutes
⏱️ 20 min · 🟢 Beginner
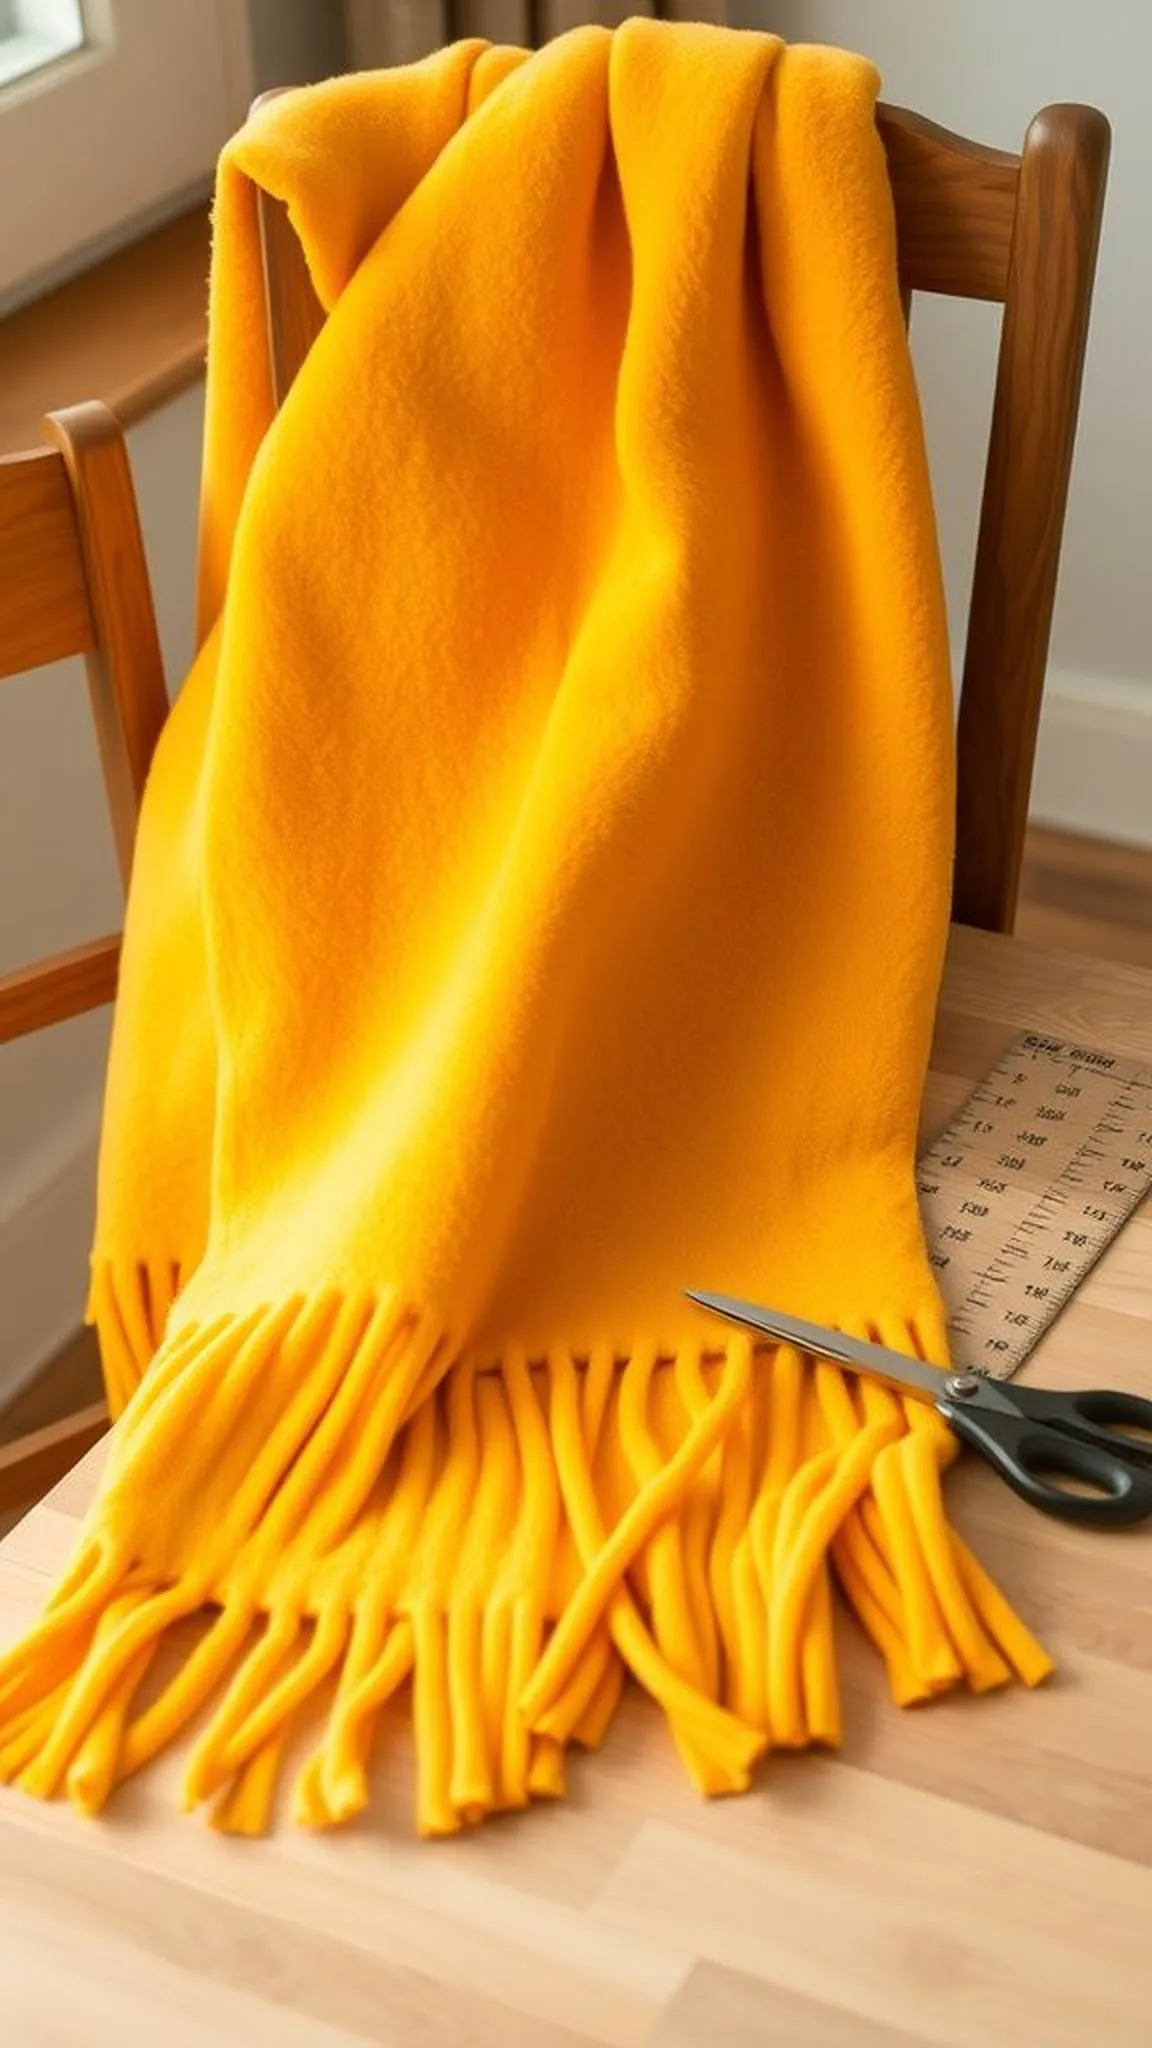
The fleece fringe scarf feels soft and warm with an immediate, plush texture that invites touch. Bright or muted colors catch the eye and drape with relaxed movement along the shoulders.
Edges reveal playful, fringed ribbons that flutter lightly when walking, creating a casual, handmade look. The overall result reads comfortable and casual, a tactile accent that pairs well with simple winter layers.
Weights and fibers influence how the fringes fall and how snug the scarf feels around the neck. A cozy fleece finish carries a quiet warmth without heavy bulk in chilly weather.
Pro Tip: Pick a lightweight fleece for softer drape and easier fringes that feel less bulky around the neck while still staying warm.
How to Make This
- Lay the fleece flat and smooth out wrinkles on a cutting surface.
- Measure and mark the desired scarf length with a ruler and fabric marker.
- Cut long fringe strips along both short edges of the fabric, keeping a solid middle section.
- Tie or braid fringe pairs along each edge to create a decorative finish.
Avoid: A frequent issue is making the fringe too thin, which can weaken the strips and create an uneven look. Leaving a little extra width at the base keeps the scarf sturdy and pleasing to the eye.
Try Also: Try using patterned fleece for a bolder statement or mixing two coordinating colors for a striped effect. Shorten the length to make a neck warmer or lengthen for a full wrap.
Products & Materials
Items Used
“Quick cozy fleece scarf with playful fringed edges.”
Quick fabric-wrapped napkin rings with flair
⏱️ 15 min · 🟢 Beginner

Fabric-wrapped napkin rings add a soft, handmade accent to a table setting with cheerful, tactile charm. Small bands of cotton or linen hug napkins, offering color contrast and a gentle, textural pop.
Patterns and plain tones shift the mood from relaxed brunch to a cozy dinner, while lightweight fabrics keep the rings low profile. The finished pieces feel tailored without formality, blending with mixed tableware and natural elements.
Edges can show a frayed, rustic look or a smooth, pressed finish depending on fabric choice. These rings sit neatly at place settings and invite guests to touch a bit of craft warmth.
Pro Tip: Choose cotton or linen scraps with crisp prints that add pattern without adding bulk to the napkin fold or table layout.
How to Make This
- Cut fabric strips to a size that comfortably wraps around a folded napkin.
- Apply a thin line of fabric glue along the inside edge of a strip.
- Wrap the strip snugly around the napkin and press the glued seam until set.
- Trim any excess and let the ring rest until the adhesive dries.
Avoid: A frequent slip is using heavy upholstery fabric that creates a bulky ring and looks out of scale with standard napkins. Lightweight fabrics keep proportions balanced and more elegant.
Try Also: Swap cotton for voile for an airy, romantic feel or try burlap for a rustic table. Add a small button or dried sprig for seasonal character.
Products & Materials
Items Used
- cotton fabric scraps
- fabric glue
- small craft scissors
“Handmade fabric napkin rings for an instant table update.”
No-sew denim pocket pillow from old jeans
⏱️ 1 hour · 🟠 Intermediate
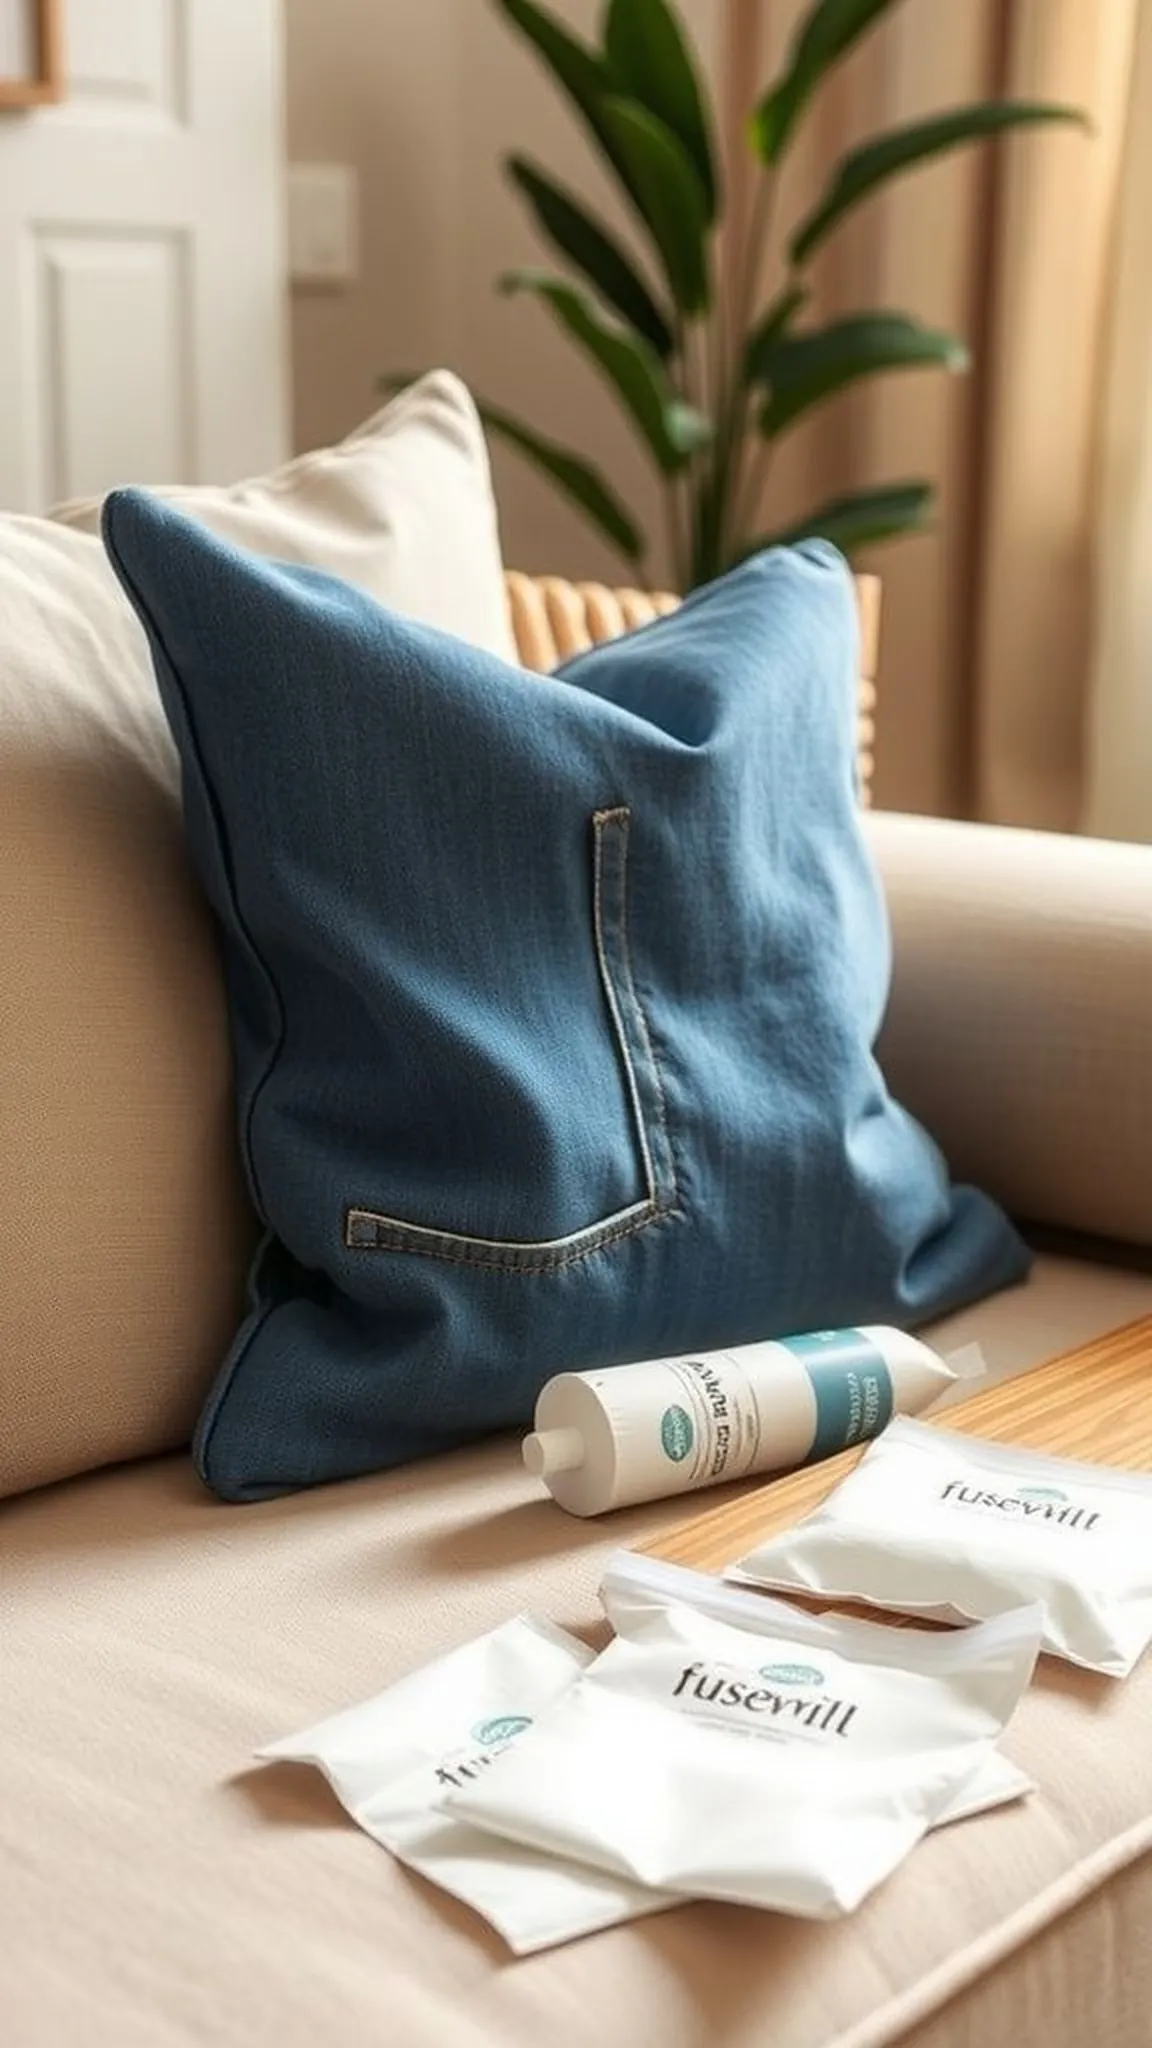
The denim pocket pillow carries an easy, lived-in energy with sturdy texture and a reassuring weight that rests comfortably on a couch. A front pocket keeps its casual character, offering a visual focal point and a soft, worn finish.
Denim tones range from deep indigo to faded blue, with seams and stitch lines creating visual rhythm across the surface. The pillow feels familiar and durable, inviting a hand to linger over the woven denim grain.
Edges and seams show rugged personality through frayed yarns and contrasted thread; the fabric accepts wear with charm rather than stiffness. The piece blends well with leather, linen, and wood for a cozy, lived-in corner.
Pro Tip: Select a sturdy denim section with a visible pocket and contrast stitching to add handcrafted detail without extra embellishment.
How to Make This
- Cut two denim panels to the desired pillow size, keeping one pocket intact on a panel.
- Apply fusible web around the panel edges and press with an iron following product instructions.
- Fuse the two panels together, leaving a small opening for stuffing.
- Stuff with pillow fill until plump and press the opening closed with more fusible web.
Avoid: A frequent oversight is picking panels that are too small, resulting in a stiff, overstuffed appearance. Larger panels allow a softer, more inviting pillow profile.
Try Also: Combine contrasting denim washes for a patchwork effect or add a thin batting layer behind the top panel for extra loft. Swap the pocket location for off-center interest.
Products & Materials
Items Used
- old denim jeans
- fusible web
- polyfill stuffing
“Repurpose jeans into a rugged no-sew denim pocket pillow.”
Save time and printer ink with 50+ printable templates and step-by-step instructions in one ad-free guide.

Just $19.99 — lifetime access
Simple fabric flowers for bouquets and crafts
⏱️ 25 min · 🟢 Beginner
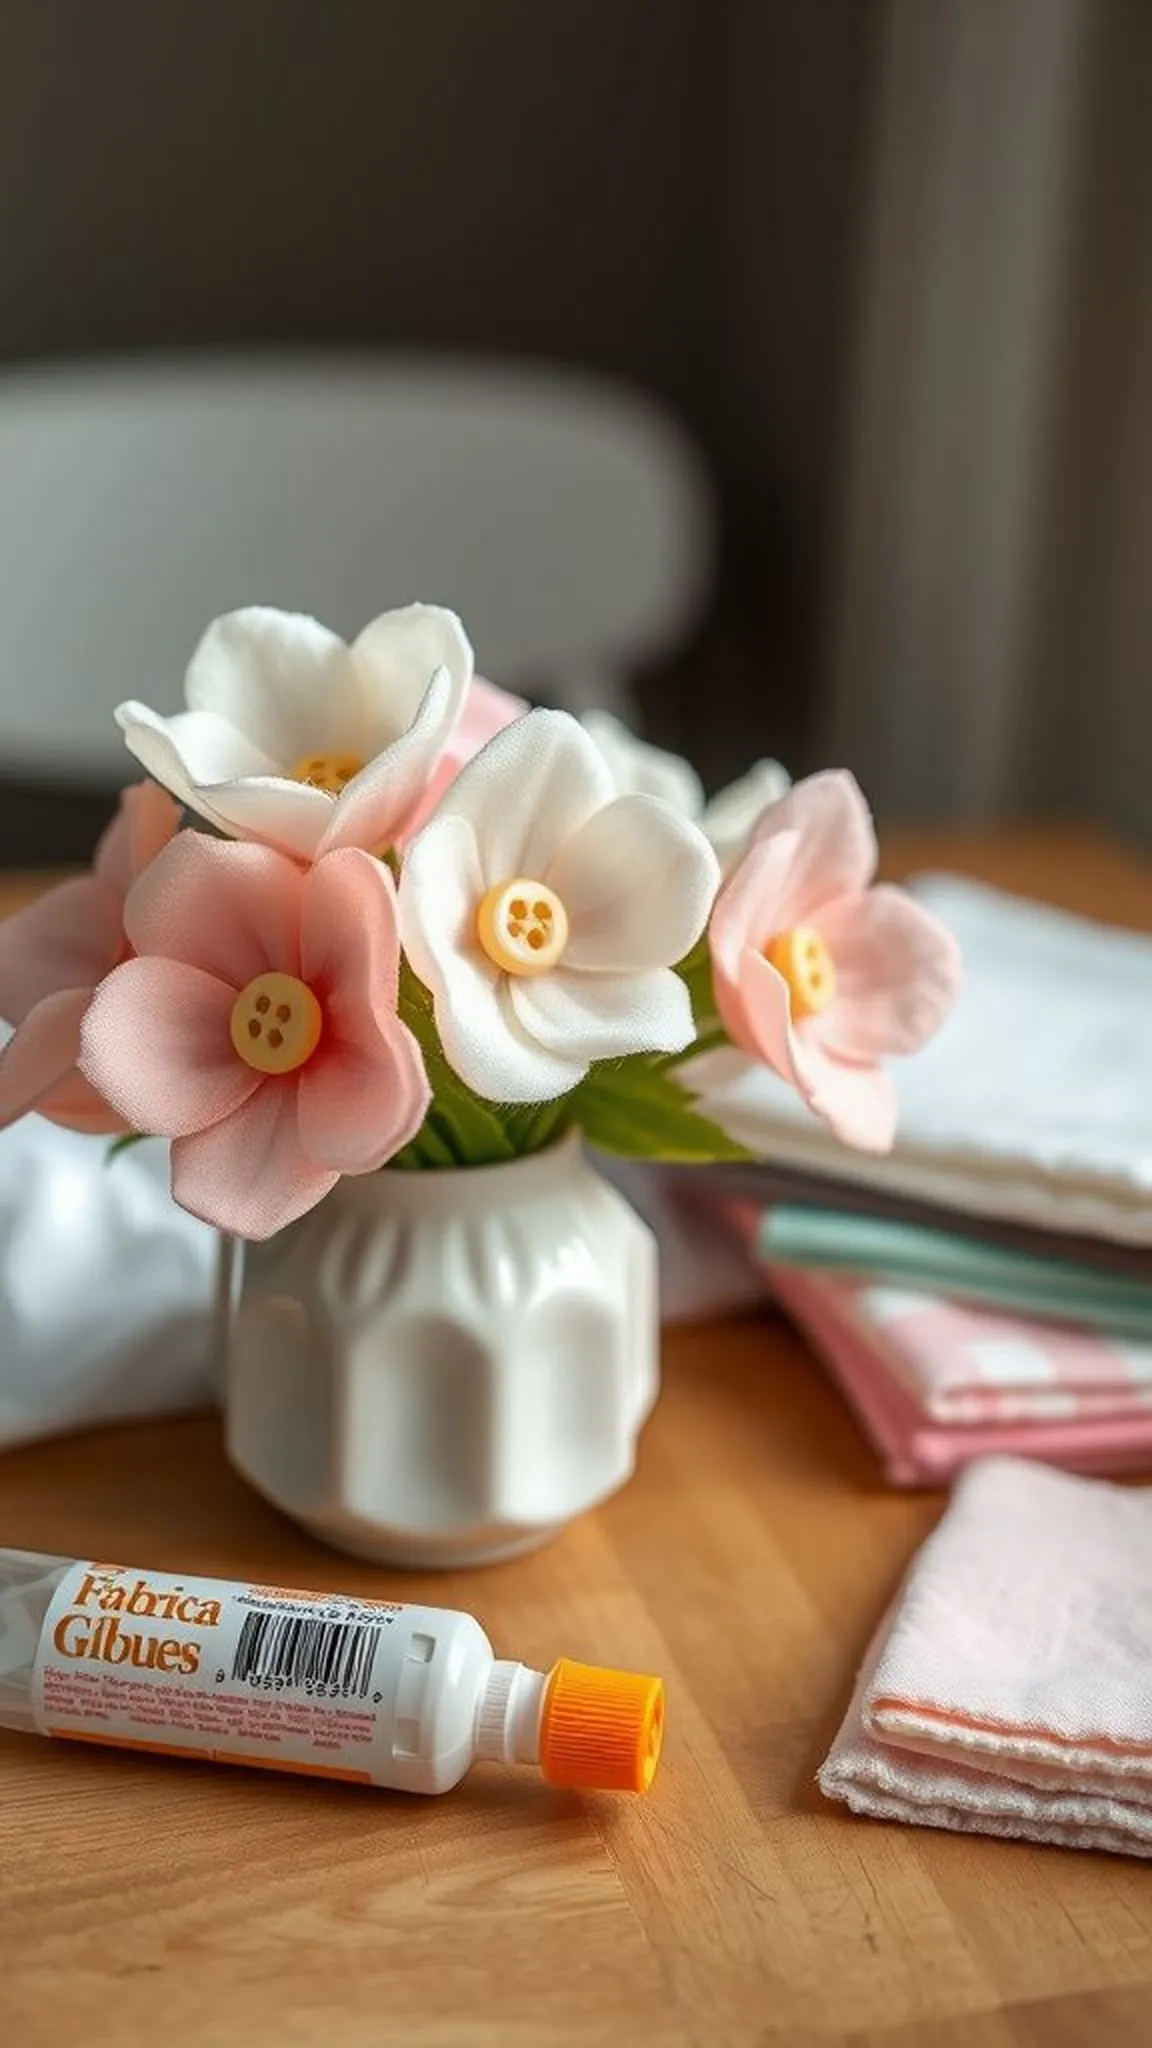
Fabric flowers bring a soft, everlasting presence to vases and gift tops with petals that hold shape without water. Cotton and felt petals add subtle matte textures that read sweet and handcrafted from a short distance.
Color combinations influence mood from gentle pastels to bold, saturated blooms that catch the eye. Petal layers create depth and shadow, offering a realistic yet stylized floral accent for indoor displays.
Small centers made of buttons or wrapped cloth add a tactile focal point, encouraging close inspection. When grouped, these flowers form a cheerful cluster that keeps its color and shape over time.
Pro Tip: Mix thin cotton for delicate petals and felt for sturdy bases to create flowers with varied texture and dimensional contrast.
How to Make This
- Trace petal shapes onto fabric and cut multiples for layered depth.
- Stack petal layers and secure centers with fabric glue or hot glue.
- Add a button or wrapped fabric piece to the middle for a finished look.
- Attach a short wrapped stem if a vase display is desired.
Avoid: A frequent error is using slippery fabric that slips during assembly, causing petals to misalign. Choosing fabrics with a bit of grip keeps layers steady while glue sets.
Try Also: Make tiny brooch-sized blooms on felt backs or create oversized statement blossoms for wall displays. Mix prints with solids for playful bouquets.
Products & Materials
Items Used
“Handmade fabric blooms that brighten any vase or craft project.”
No-sew tote from a single tea towel
⏱️ 45 min · 🟠 Intermediate
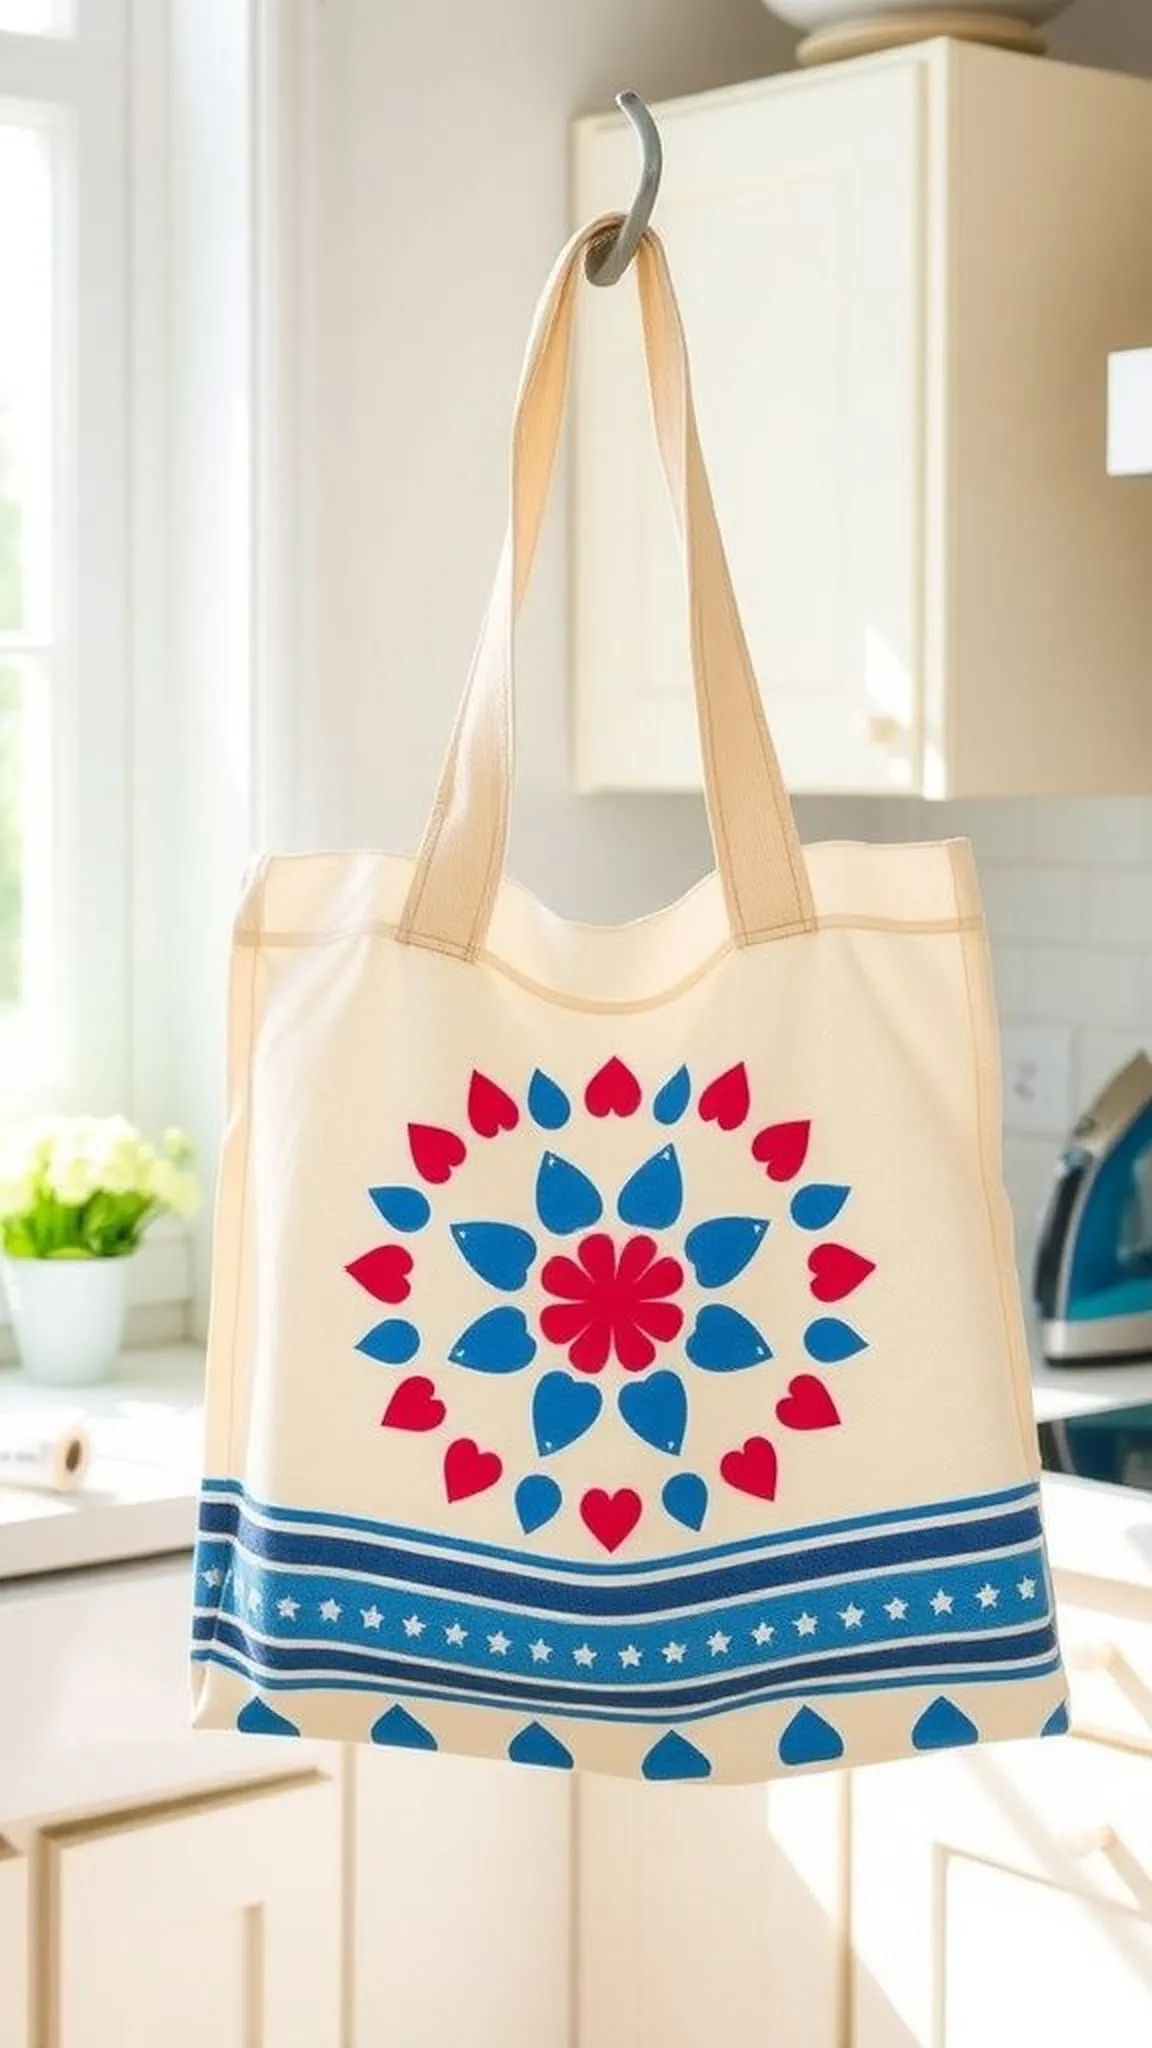
A no-sew tote made from a tea towel offers a compact, eco-friendly carry solution with charming printed textiles. The towel’s woven surface provides a smooth, tactile exterior that feels sturdy in the hand.
Handles and body create a relaxed silhouette that collapses flat when not in use, fitting neatly into a drawer. Pattern placement lends personality, making each tote feel curated and purposeful.
The finished bag sits comfortably on the shoulder with soft, forgiving handles that soften with use. Edging details and neat seams convey a tidy, finished piece without visible stitching.
Pro Tip: Select a tea towel with a bold central motif and thick cotton weave to create a tote that holds shape and shows off the design.
How to Make This
- Fold the towel to form the tote body and mark handle placements with a fabric pen.
- Apply fusible web along folded edges and press with an iron to create strong seams.
- Reinforce handle areas with extra fusible web patches to prevent strain.
- Turn the tote right side out and smooth seams for a finished look.
Avoid: A frequent oversight is picking a very thin dish towel that lacks body, resulting in a floppy tote. A thicker cotton towel keeps the bag structured and useful for daily items.
Try Also: Use a tea towel with stripes for a nautical feel or a floral print for a vintage vibe. Add a small inside pocket with fusible web for organization.
Products & Materials
Items Used
- cotton tea towel
- fusible web
- iron
“Turn a pretty tea towel into a practical no-sew tote bag.”
Plush no-sew stuffed heart for thoughtful gifting
⏱️ 30 min · 🟢 Beginner
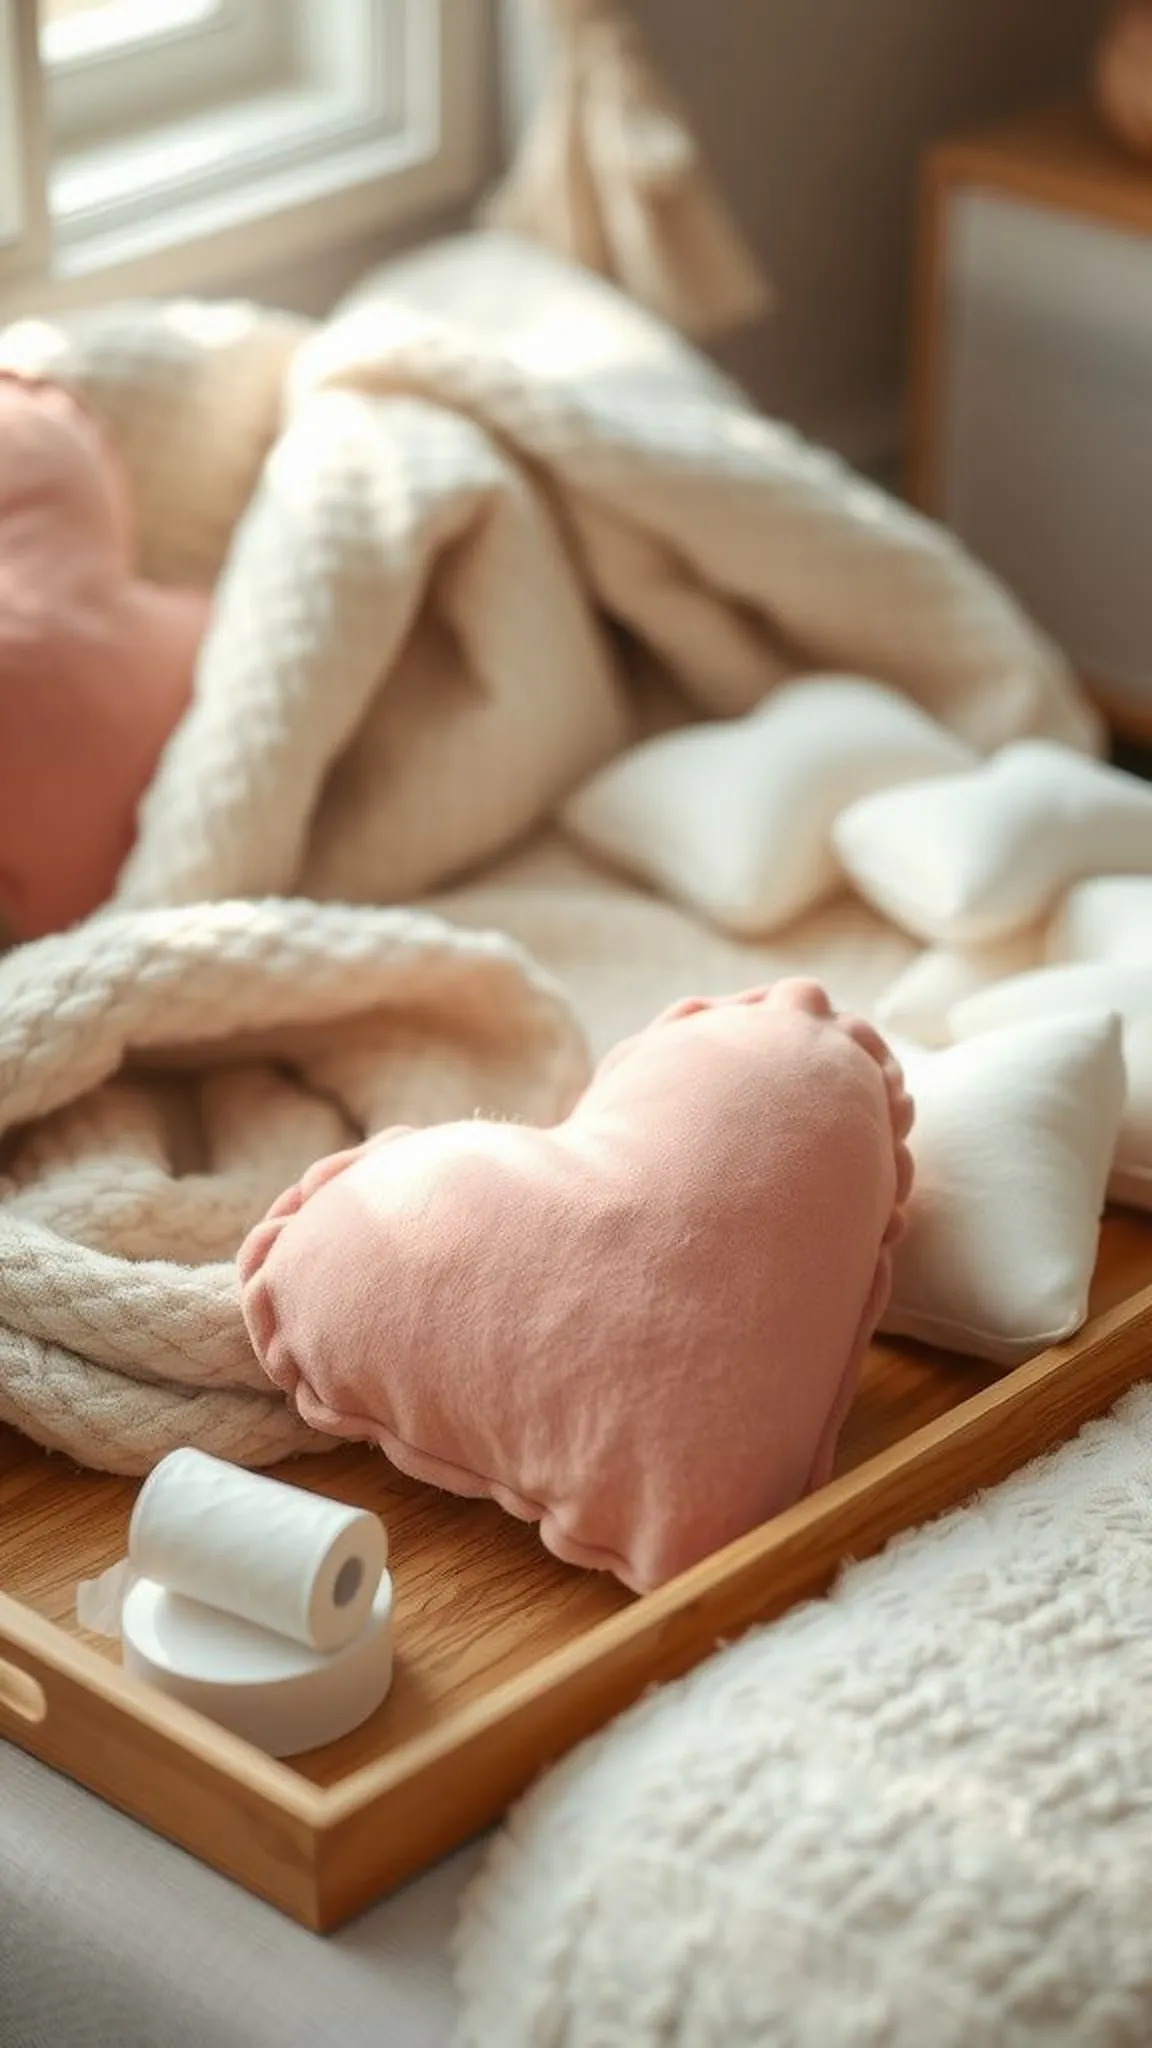
The plush no-sew heart feels soft and comforting, a squeezable token with a gentle rounded shape that sits warmly in the palm. Fabrics like velvet or minky give a lush surface that invites touch and small, cozy squeezes.
Edges hold a soft, smoothed silhouette with charming, slightly irregular seams that read handmade. The heart adds a personal, tactile accent to gift packages or a bedside table grouping.
Color choices can shift the mood from romantic to playful without changing the simple form, and the finished piece keeps its softness over time. Small decorative centers like a stitched felt heart or button add a sweet focal point.
Pro Tip: Choose a plush fabric with a short nap and fill lightly for a squeezable heart that keeps its rounded shape without feeling rock hard.
How to Make This
- Trace a heart shape onto two fabric panels and cut them out carefully.
- Place the panels right sides together and apply fusible web around the perimeter, leaving a small opening.
- Turn the heart right side out through the opening and fill with polyfill for softness.
- Seal the opening with a final patch of fusible web and press gently.
Avoid: A frequent problem is overstuffing, which flattens curves and creates a stiff feel. Lighter stuffing preserves a plump, squeezable profile that feels inviting.
Try Also: Create a set in different sizes for stacking or make tiny hearts for zipper pulls. Try velvet, cotton, or minky fabrics for texture differences.
Products & Materials
Items Used
- plush fabric
- polyfill stuffing
- fusible web
“Sweet plush heart that makes a soft, heartfelt handmade gift.”
Easy fabric-covered journal with adhesive backing
⏱️ 40 min · 🟢 Beginner
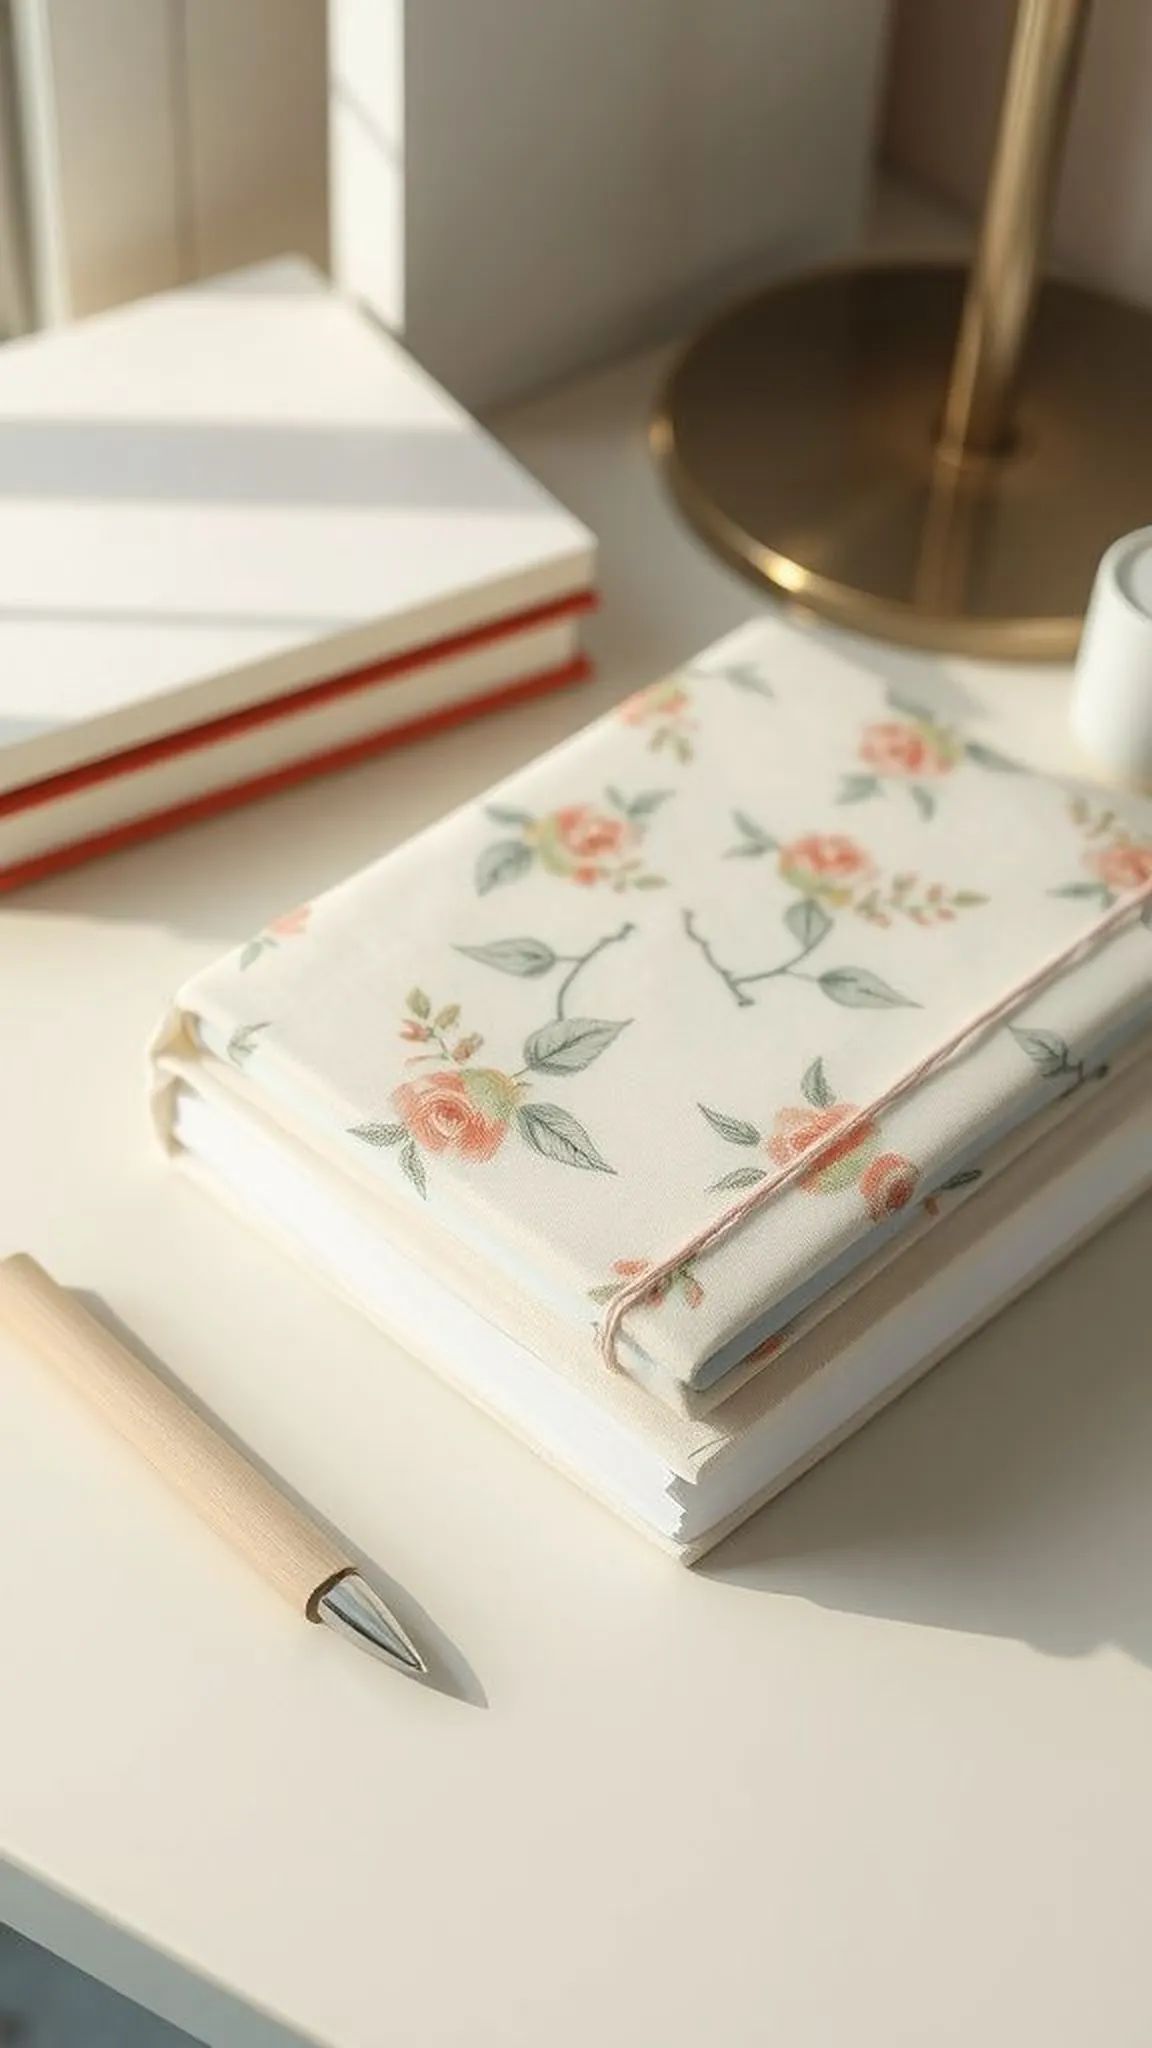
A fabric-covered journal gives notebooks a tactile, personal facelift with cloth that lends warmth to the cover. Cotton or linen fabrics create a calming, matte surface that pairs well with neutral interiors and colorful patterns alike.
The cloth wraps the cover with neat edges and a subtle, soft seam that reads hand-finished rather than mass produced. The finished journal feels pleasant to hold and invites regular use for notes or sketches.
Patterns can be matched to the notebook spine or offset for playful contrast; texture choices influence how the book sits in a hand. A fabric cover adds durability while maintaining a gentle, everyday aesthetic.
Pro Tip: Choose a fabric with a small repeat pattern to avoid awkward mismatches at the spine and to keep a polished look when wrapped.
How to Make This
- Cut fabric to cover the journal with generous overlap on all edges.
- Apply a sheet of adhesive backing to the journal cover and peel the release paper.
- Smooth the fabric onto the adhesive, pressing out bubbles and aligning the pattern.
- Fold and adhere the excess fabric over the inside covers for a clean finish.
Avoid: A frequent slip is not smoothing out air pockets, which can create lumps under the fabric. Working slowly and pressing firmly helps the cloth settle flat against the adhesive.
Try Also: Use a leather-look fabric for a refined feel or playful cotton prints for everyday notebooks. Add a small elastic band for closure if desired.
Products & Materials
Items Used
- cotton fabric
- adhesive fabric backing
- bone folder
“Transform a plain notebook with an easy fabric cover upgrade.”
No-sew patchwork table runner with fusible web
⏱️ 2-3 hours · 🟠 Intermediate
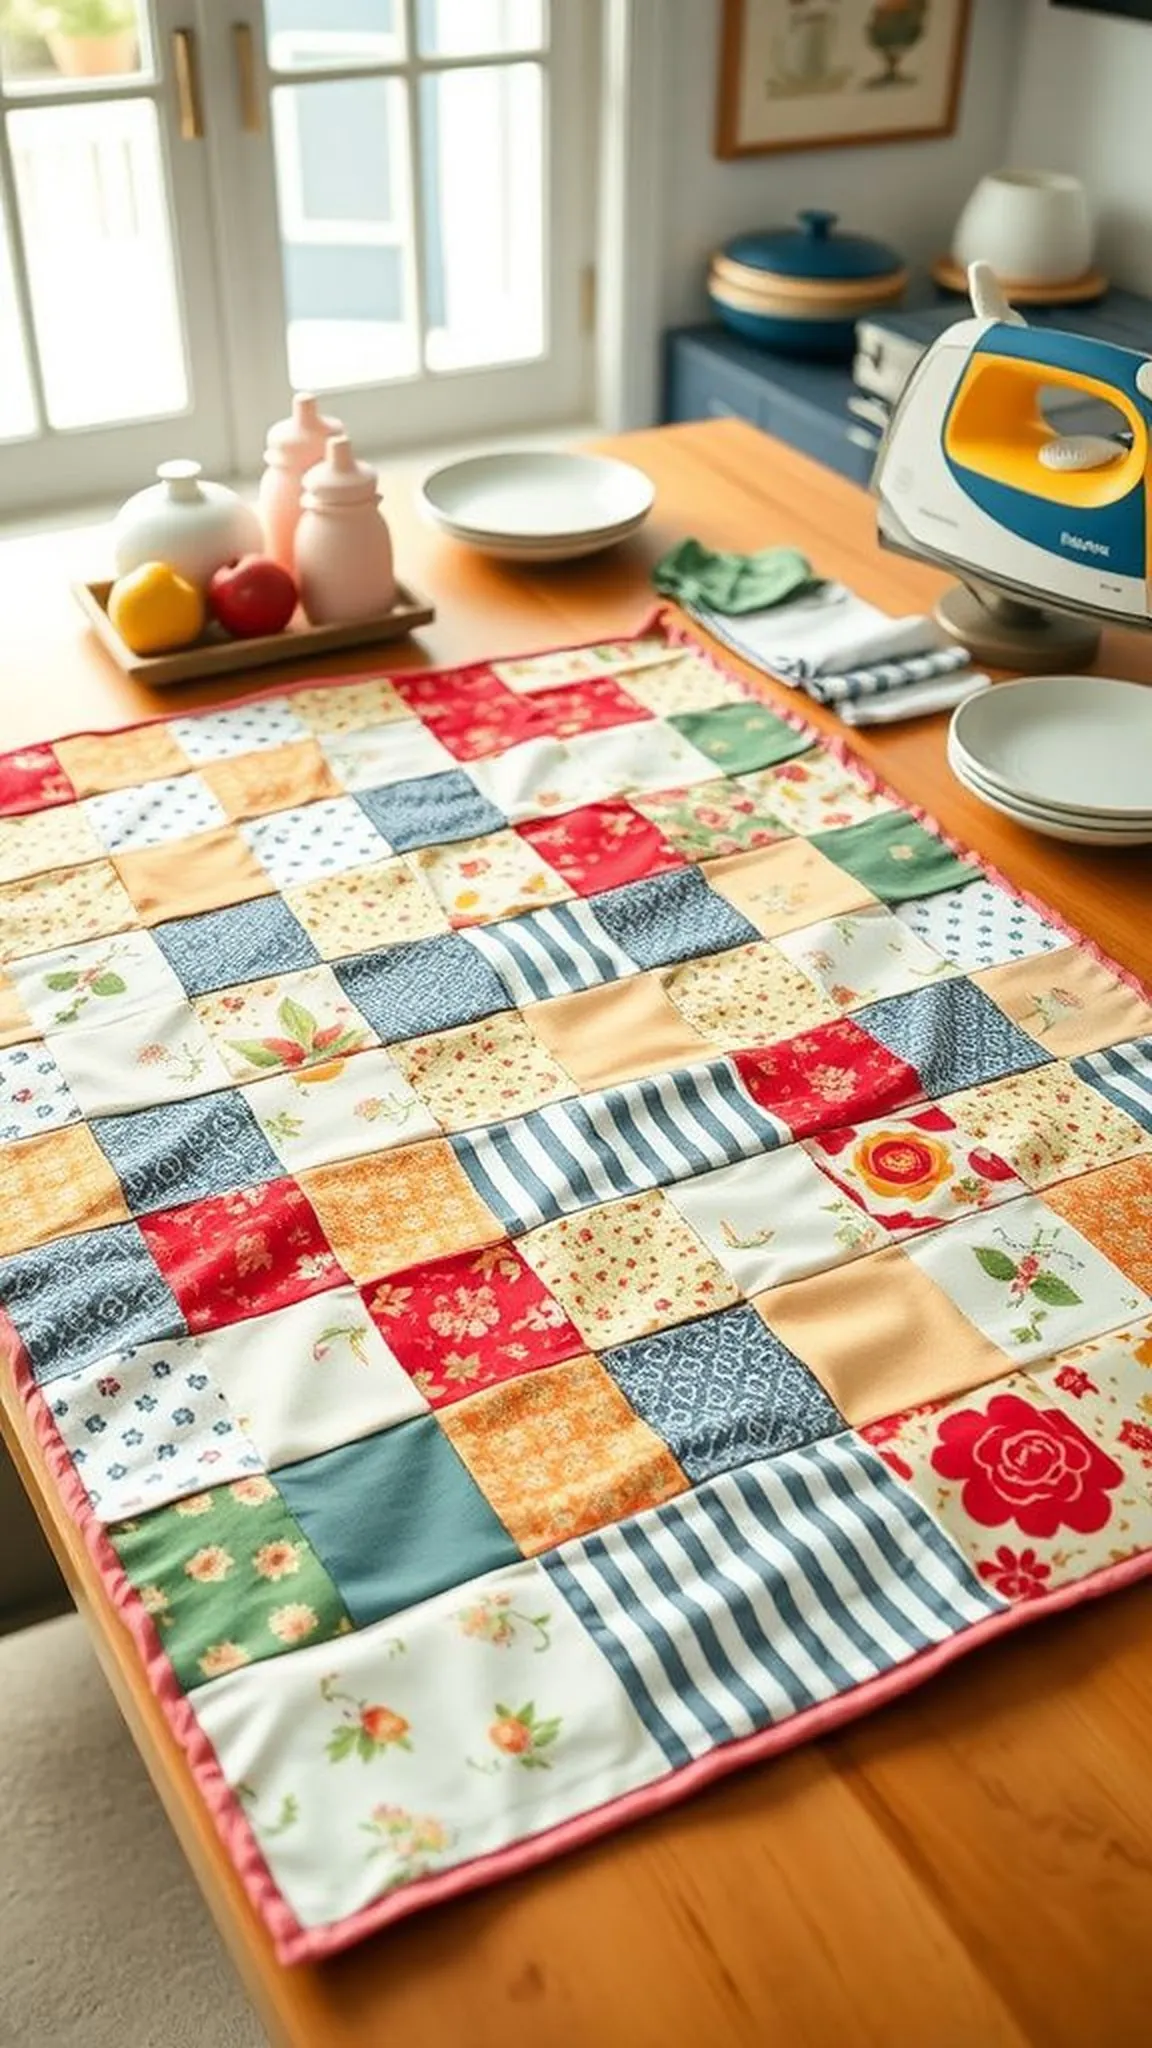
The patchwork table runner layers small fabric pieces into a stitched-look mosaic while avoiding needles, creating a warm, quilted appearance. Mixed cotton prints bring energy across a dining table, with seams and color changes that catch light and shadow.
Texture and pattern combine to create a lively centerpiece that anchors table settings without being fussy. The runner carries a pleasing weight and slight softened edges from batting and fusible layers beneath the surface.
Edges reveal a tidy finish that reads handcrafted and deliberate rather than rough. When placed under candles or bowls, the runner warms the tabletop with layered textile interest and color contrast.
Pro Tip: Press each fusible seam carefully for a smooth surface, which helps the runner lie flat and look intentionally finished on the table.
How to Make This
- Arrange fabric squares into a pleasing patchwork layout and trim to a uniform size.
- Fuse fabric squares together row by row using fusible web and a hot iron.
- Layer a strip of batting beneath the patched top and fuse the backing fabric to the assembly.
- Press the entire runner and finish edges with a folded fabric binding fused in place.
Avoid: A frequent issue is inconsistent square sizes that create wavy seams and an uneven runner. Cutting squares carefully and trimming as needed keeps rows aligned and flat.
Try Also: Use all solids for a modern look or mix small florals with stripes for a cottage style. Scale up square size for a quicker sew-free mosaic.
Products & Materials
Items Used
- assorted cotton fabric squares
- fusible web
- batting
- iron
“No-sew patchwork runner that brings handmade color to the table.”
Fabric bunting garland to brighten any room
⏱️ 45 min · 🟢 Beginner
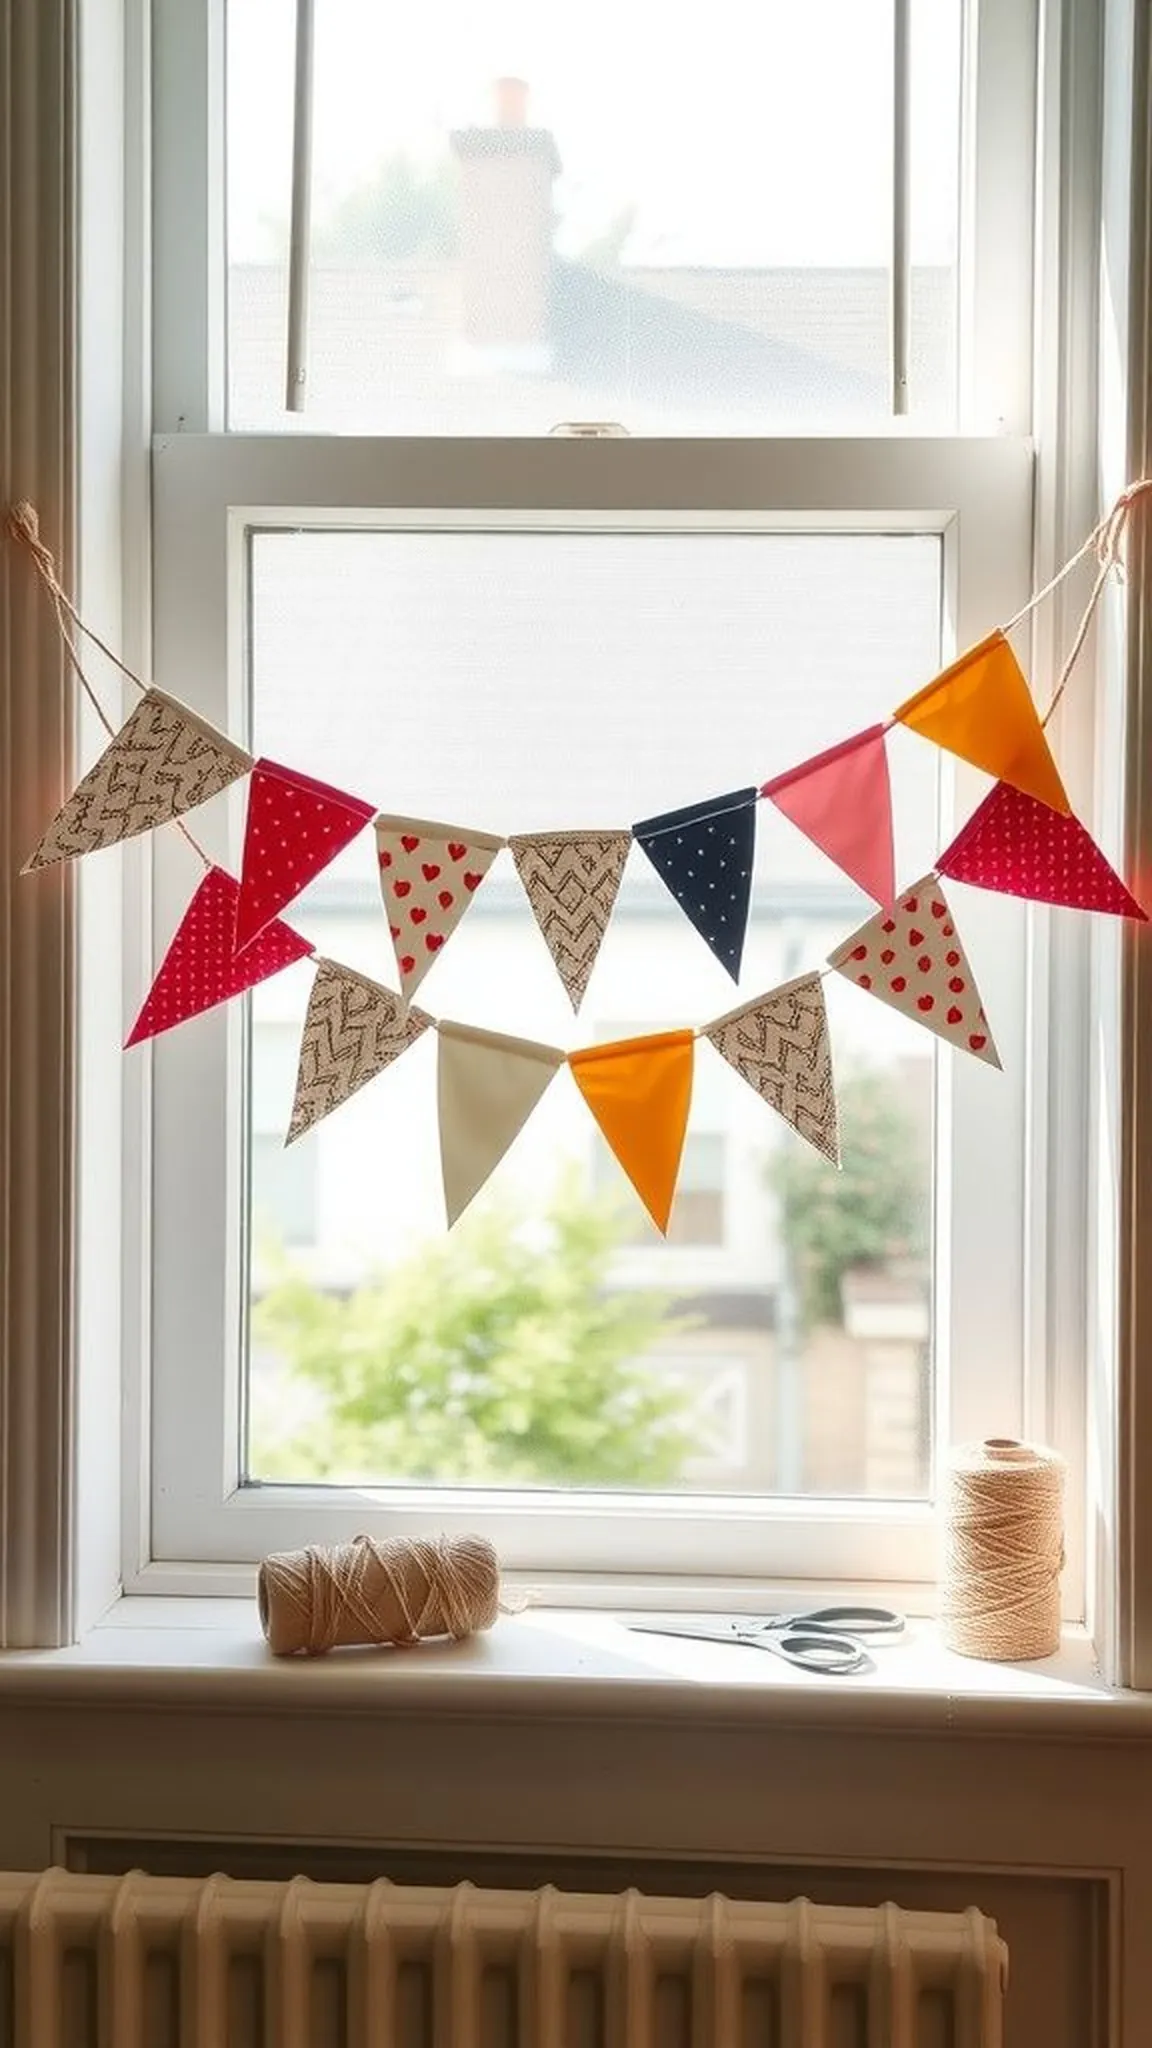
A fabric bunting garland adds playful rhythm to a window, shelf, or party wall with fluttering triangles that catch air. Lightweight cotton and linen flags sway softly, casting small moving shadows and providing a cheerful edge to a room.
Patterns may repeat or alternate, and the overall line reads handmade and festive without being overwhelming. The garland carries a crafted, gentle motion when hung near a drafty window or fan.
Colors can unify a room palette or inject a pop of contrast for a seasonal update. Flags overlap and layer slightly, creating little pockets of depth and texture along the string.
Pro Tip: Cut flag shapes from a single fold to keep edges consistent and press each triangle flat for crisp, tidy lines before assembly.
How to Make This
- Cut triangular flag shapes from chosen fabrics, keeping uniform dimensions for a cohesive look.
- Attach flags to a length of cotton twine using fabric glue along the top edge.
- Space flags evenly and press them flat for a neat appearance.
- Leave extra twine for tying and hang the garland where it can sway gently.
Avoid: A frequent misstep is uneven flag spacing, which makes the garland look lopsided once hung. Laying out all flags and measuring spacing before adhering keeps the line balanced.
Try Also: Mix solid colors with small prints for a playful effect or cut scalloped edges for added charm. Make mini bunting for a shelf or large flags for a mantel.
Products & Materials
Items Used
- cotton fabric scraps
- cotton twine
- fabric glue
“Cheerful fabric bunting that adds instant room personality.”
No-sew bucket-style fabric storage basket
⏱️ 2 hours · 🟠 Intermediate
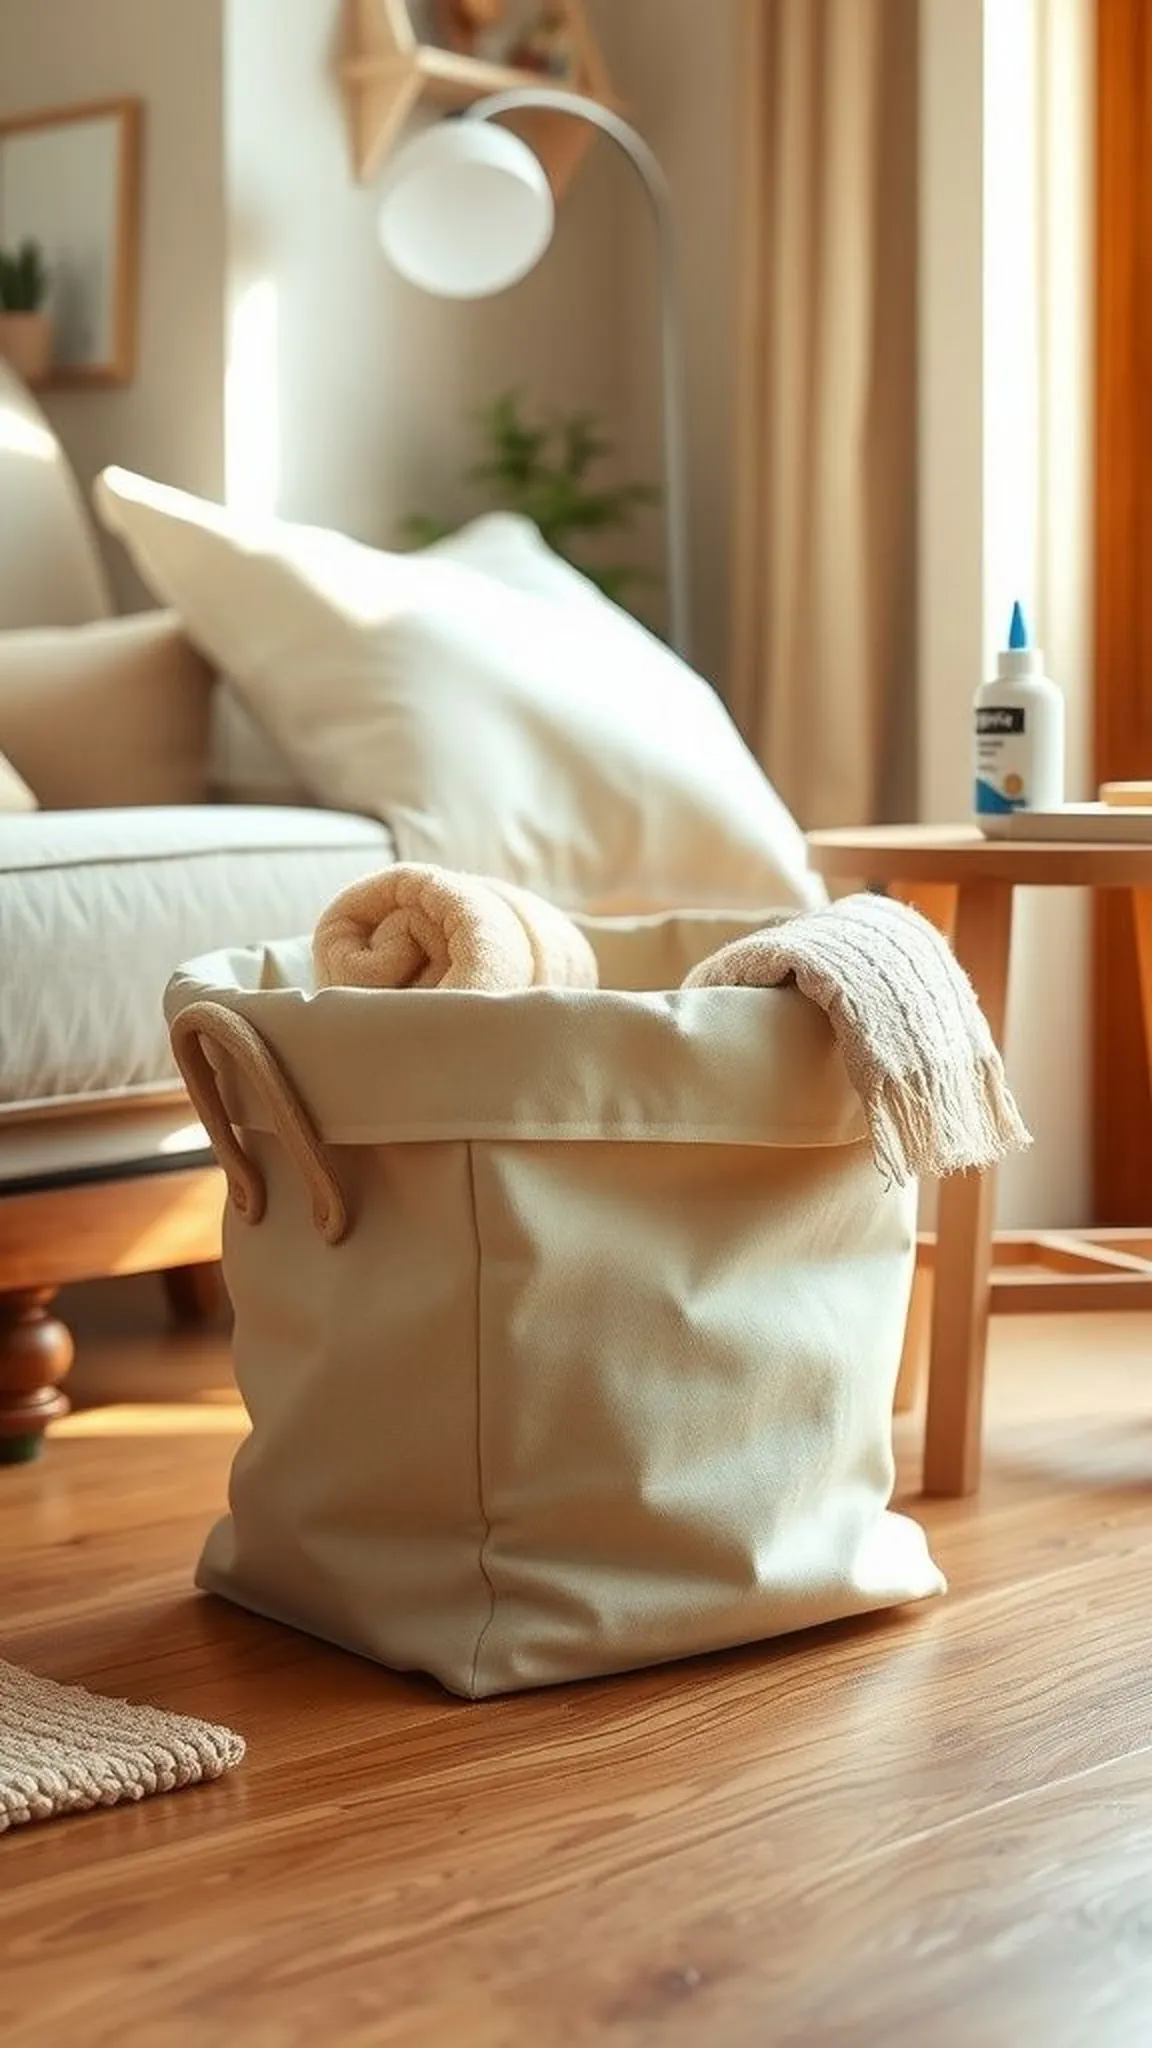
The bucket-style fabric storage basket stands with soft walls that can hold yarn, toys, or blankets while keeping a casual silhouette. Heavyweight canvas or denim gives structure, while the top rim retains a slightly slouched, relaxed character.
Textures and neutral hues blend into living spaces, offering hidden utility that reads decorative rather than purely practical. The basket surface shows gentle folds and fabric grain that suggest handwork and warmth.
Handles or folded rims add subtle detail and make the piece easy to move around a room. The finished basket provides organized calm within a messy, lived-in corner.
Pro Tip: Choose a midweight canvas and add a fusible interfacing layer for a balance of structure and gentle collapsibility that holds small items neatly.
How to Make This
- Cut two circular base panels and a long rectangular side panel from canvas fabric.
- Fuse interfacing to the inside of the side panel for extra structure and press it flat.
- Use fabric glue to attach the side panel to the base, working around the circumference.
- Fold and glue the top edge to the inside for a finished rim and add handles if desired.
Avoid: A frequent problem is skipping interfacing, which can make the basket collapse under lightweight fabric. Adding a stable layer helps the basket hold its shape while remaining soft to the touch.
Try Also: Make smaller versions for desktop organizers or larger ones for blankets. Try striped canvas for a nautical feel or natural linen for a softer look.
Products & Materials
Items Used
- canvas fabric
- fusible interfacing
- fabric glue
“Soft-structured fabric basket that corrals clutter stylishly.”
Soft no-sew eyeglass pouch with elastic loop
⏱️ 20 min · 🟢 Beginner
The soft eyeglass pouch cradles spectacles in a gentle, padded fold that protects lenses from light scuffs. Plush fabrics like microfiber or velveteen offer a silky surface that slides over frames and feels smooth in a bag.
A small elastic loop keeps the pouch closed with a neat, understated closure that adds functionality without bulk. The pouch sits comfortably in a handbag and tucks into pockets without catching on hardware.
Color and texture choices can read elegant or playful depending on the fabric pattern and finish. The piece offers quiet protection that blends into daily carry items with ease.
Pro Tip: Trim elastic to just snugly close the pouch without pulling fabric edges inward to maintain a clean, rounded silhouette when closed.
How to Make This
- Cut two identical fabric rectangles and a small strip of soft batting for padding.
- Layer batting between the fabric rectangles and fuse around the edges with fusible web.
- Attach a short elastic loop to the top edge and adhere the layers together.
- Press the pouch flat and ensure the loop secures the top when folded over.
Avoid: A frequent issue is over-tightening the elastic, which puckers the fabric and makes it hard to use. A slightly relaxed loop retains ease of access while keeping the pouch closed.
Try Also: Make a sunglass sleeve by enlarging the dimensions or add a small pocket for a cleaning cloth. Use microfiber to protect lenses from smudges.
Products & Materials
Items Used
“Plush eyeglass pouch that protects lenses without sewing.”
No-sew braided fabric bracelet with knots
⏱️ 15 min · 🟢 Beginner
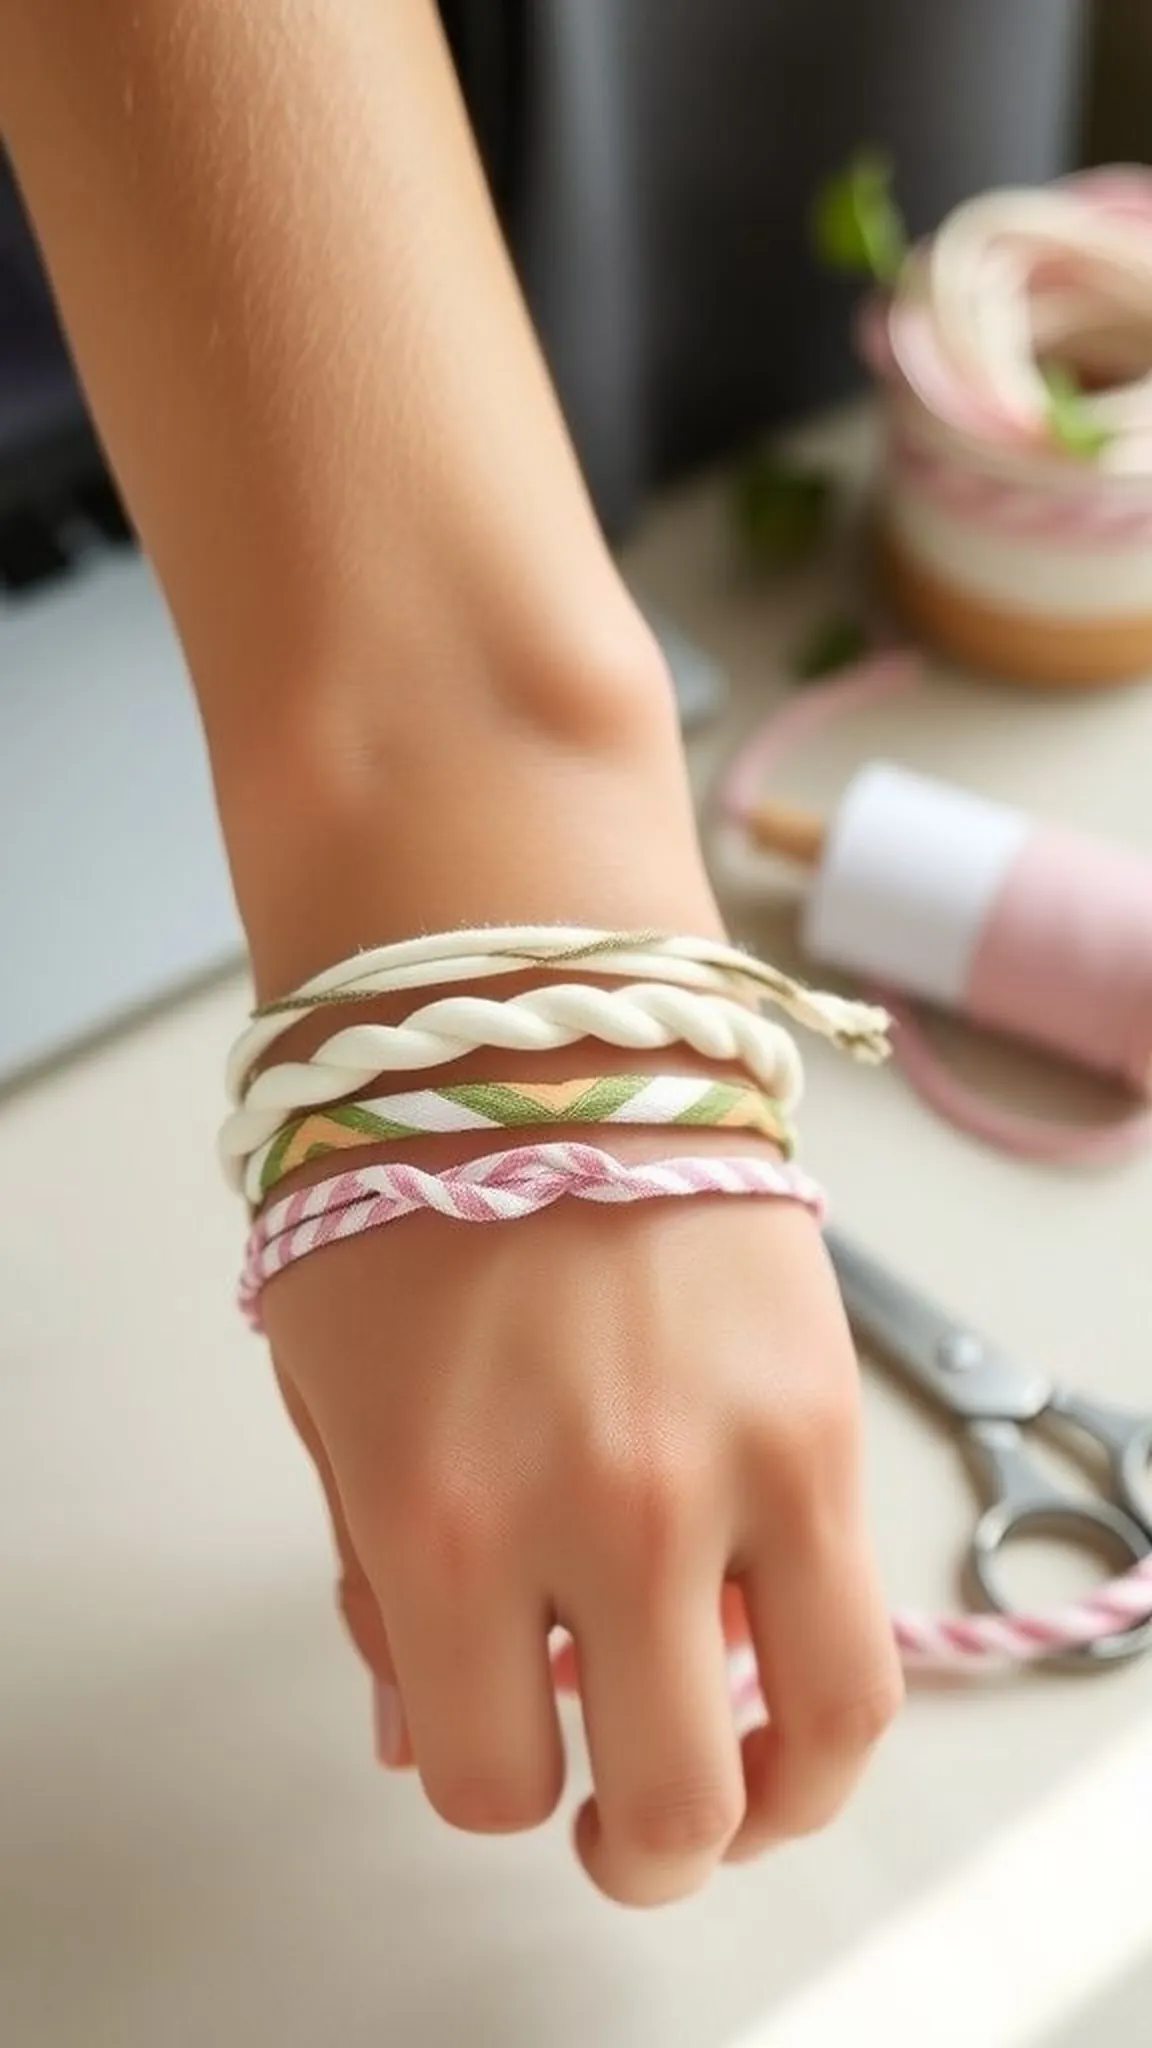
The braided fabric bracelet wraps a wrist in colorful strips that move and catch light with each gesture. Soft cotton strips produce a comfortable band that breathes and softens with wear.
Knot details add small sculptural accents and a relaxed, beachy feel that suits casual outfits. The bracelet feels light and playful, with textures that invite close-up inspection.
Pro Tip: Use three long, even fabric strips and keep them smooth while braiding for an even, neat bracelet that lies flat on the wrist.
How to Make This
- Cut three long fabric strips of equal width from lightweight cotton.
- Tie a secure knot at one end to hold strips together and begin braiding tightly.
- Braid to desired length and finish with a secure knot to hold the braid.
- Trim ends and tuck or glue them into the knots for a tidy finish.
Avoid: A frequent slip is braiding too loosely, resulting in an uneven, floppy bracelet. Keeping the braid snug ensures a uniform look and comfortable fit.
Try Also: Make a thicker bracelet by using wider strips or add small beads between knots for a boho twist. Create matching necklaces with longer strips.
Products & Materials
Items Used
- cotton fabric strips
- fabric scissors
- fabric glue
“Colorful braided fabric bracelet made without sewing.”
No-sew fabric coasters with pressed edges
⏱️ 30 min · 🟢 Beginner
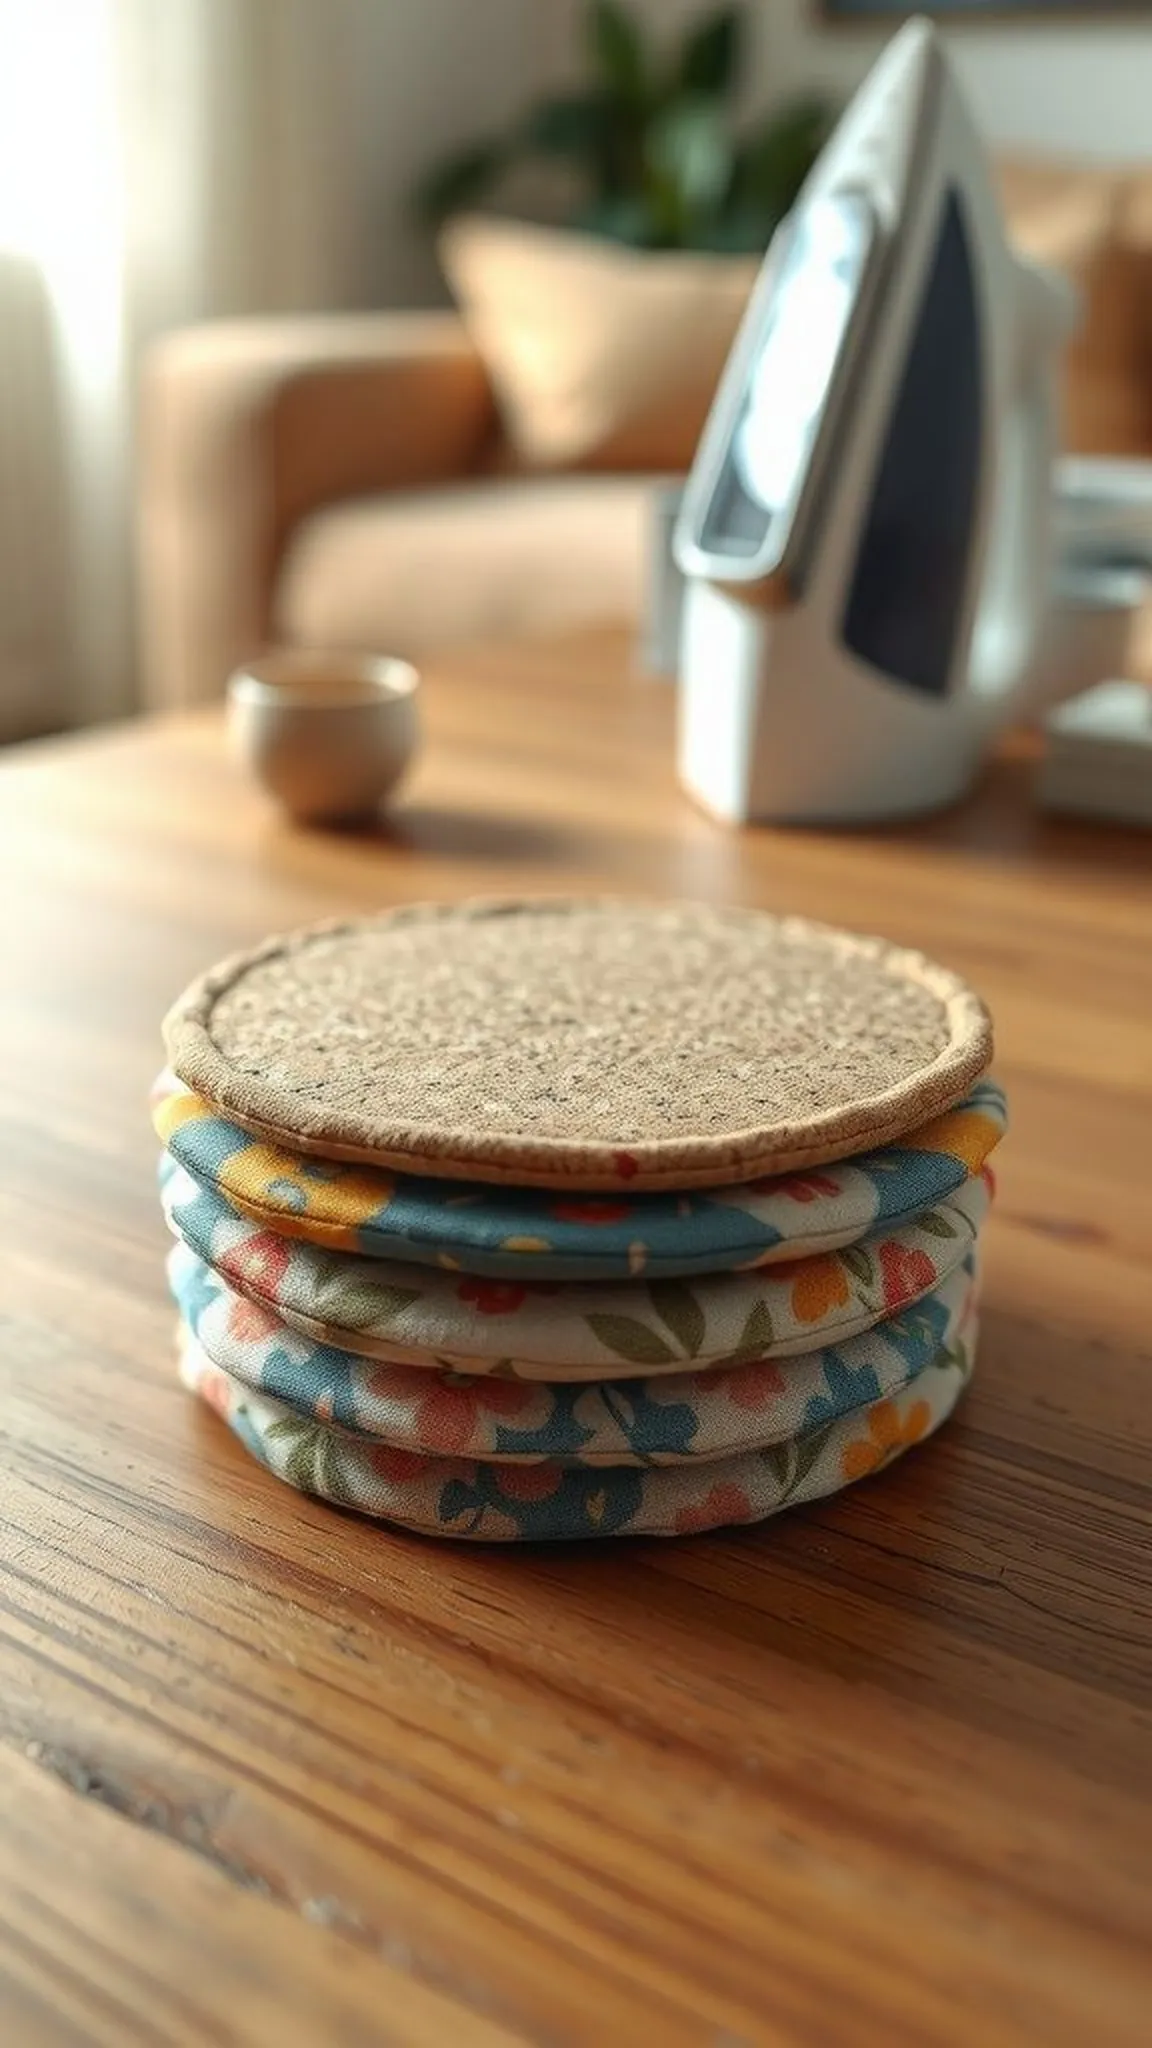
Fabric coasters soften tabletops while adding a splash of pattern under a mug or glass, absorbing minor drips. Quilting cotton atop a thin cork or felt backing yields a warm surface that protects wood and hides small stains.
Pressed edges create a refined outline that keeps the coaster flat and tidy against a cup base. The texture of cotton and backing material combines into a compact, resilient small craft.
Colors and motifs can be coordinated with table linens for a pulled-together look or mixed for a playful set. When stacked, the coasters form a neat, colorful pile on a countertop or coffee table.
Pro Tip: Pair thin cork backing with quilting cotton and press edges carefully for a smooth, durable coaster that resists slipping under cups.
How to Make This
- Cut fabric squares and matching cork or felt backing to the same size for coaster pairs.
- Apply fusible web between the fabric and backing and press firmly with an iron.
- Press edges flat and add a thin line of fabric glue around the perimeter for extra hold.
- Let the coasters rest under a weight until adhesive sets for a smooth finish.
Avoid: A frequent error is using thick backing that makes the coaster unstable under light cups. Thin cork or felt provides traction without excessive height.
Try Also: Make round coasters for a softer silhouette or use embroidered linen tops for a more refined look. Create a holiday set with seasonal prints.
Products & Materials
Items Used
“Pretty pressed-edge fabric coasters to protect surfaces with style.”
No-sew lampshade cover for instant refresh
⏱️ 2 hours · 🔴 Advanced
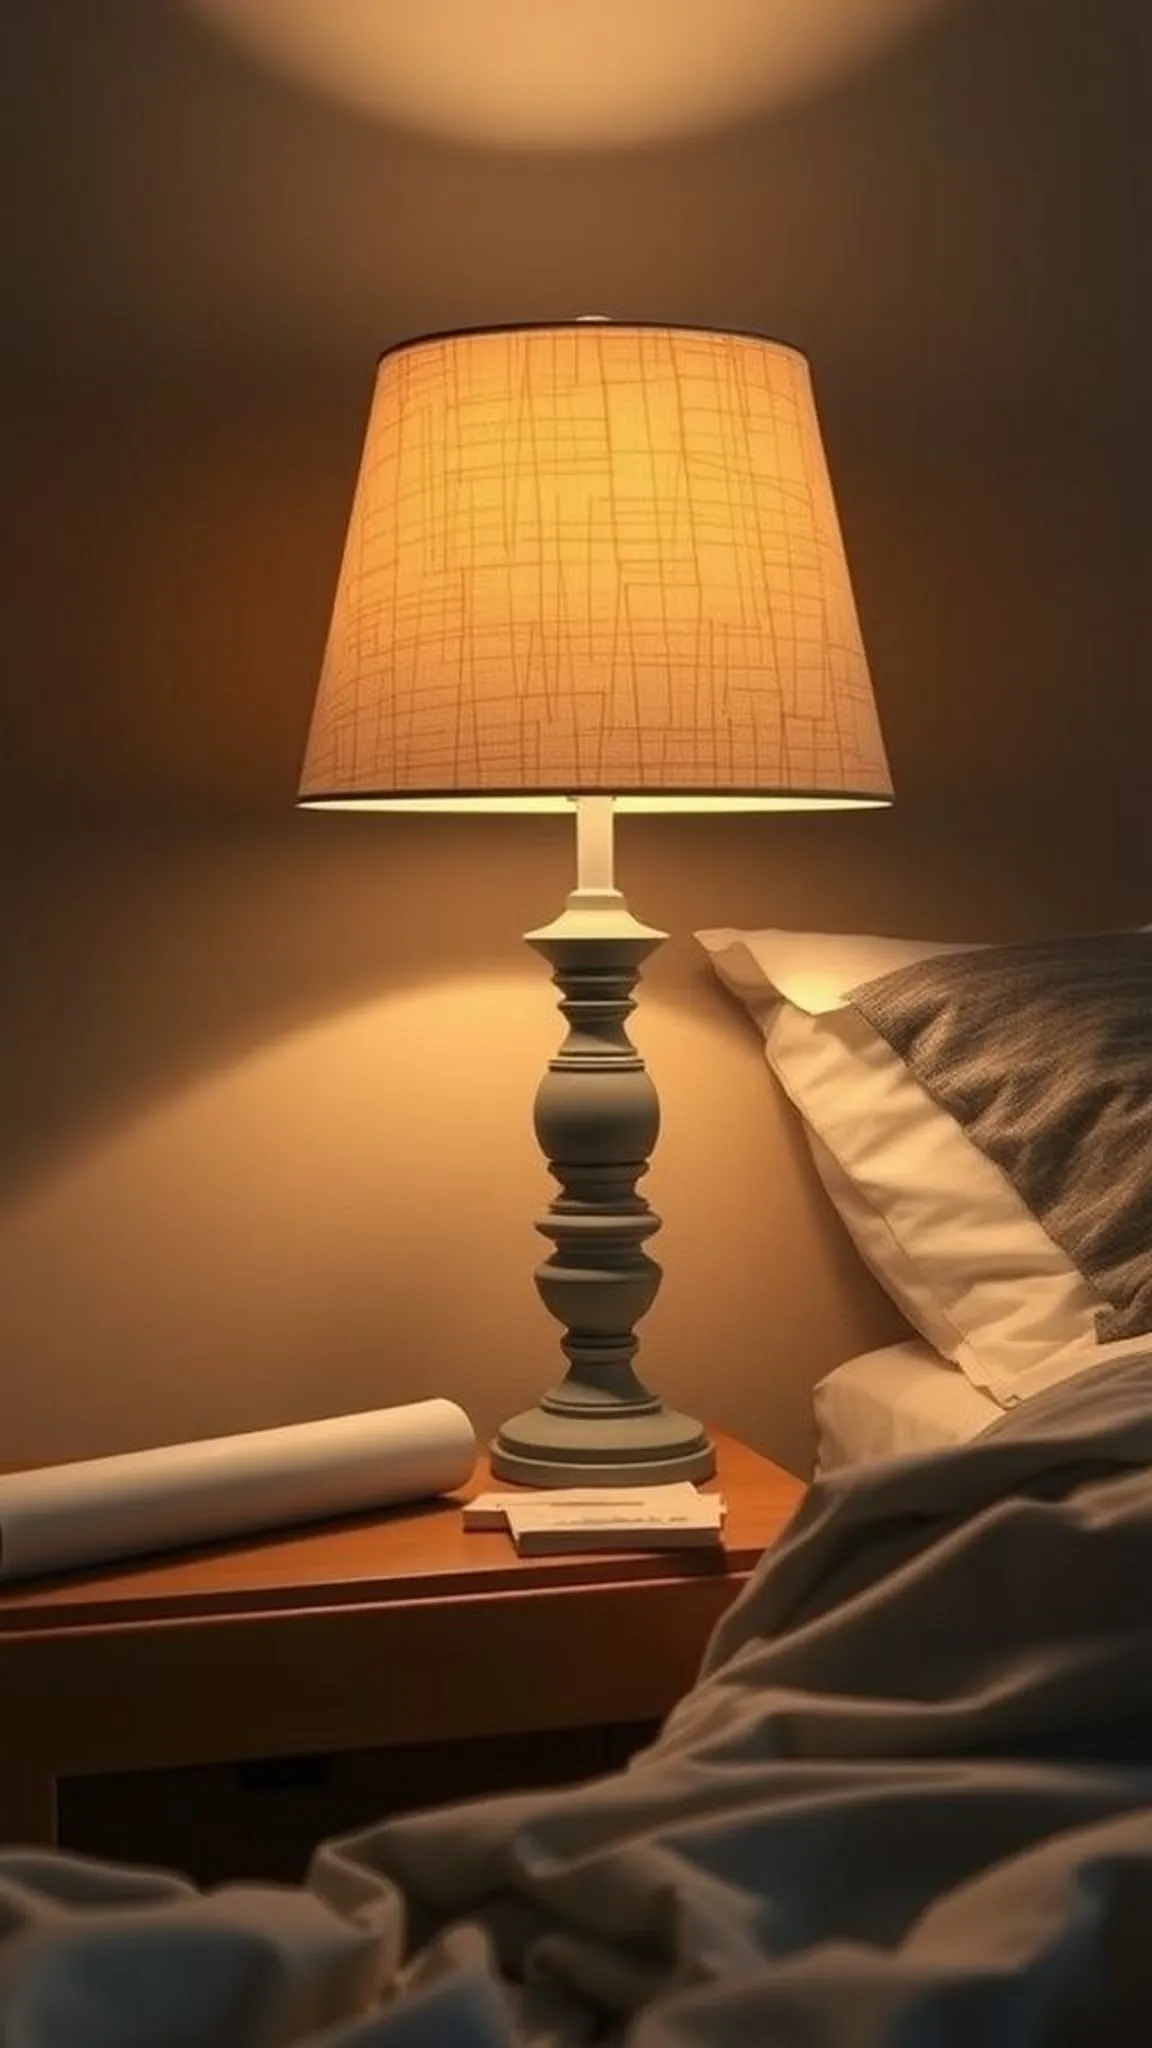
A no-sew lampshade cover refreshes a lamp with new pattern and warmth while softening light through fabric. Linen and lightweight cotton allow a gentle glow, transforming glare into a cozy lumen that changes a room’s tone.
Edges and seams read neat when fabric is applied smoothly and pressed, producing a tailored finish that still feels handmade. Patterns scale across the shade, creating rhythm and shadow as the lamp is lit.
The cover gives a quick aesthetic update that ties a lamp into the room palette without permanent alteration. When the lamp is illuminated, the fabric surface becomes part of the ambient layer for the space.
Pro Tip: Measure the lampshade surface carefully and choose a lightweight fabric that allows warm light to pass while showing pattern clearly once mounted.
How to Make This
- Measure the lampshade circumference and cut fabric with a bit of overlap for seam allowance.
- Apply fusible web to the inside of the fabric and align it to the lampshade surface.
- Smooth the fabric around the shade, pressing with an iron to adhere sections evenly.
- Trim excess fabric at the top and bottom and press edges inward for a neat finish.
Avoid: A frequent problem is selecting heavy fabric that blocks light and weighs down the shade. A lighter weave preserves glow and wraps more smoothly.
Try Also: Try a patterned stripe for vertical emphasis or a neutral silk-like fabric for a soft sheen. Add a narrow trim to the top and bottom for a finished look.
Products & Materials
Items Used
- lightweight cotton fabric
- fusible web
- iron
“Freshen a lamp with an easy no-sew fabric shade cover.”
Fabric-covered keychain fob without stitching
⏱️ 20 min · 🟢 Beginner

The fabric-covered keychain fob provides a soft, tactile handle for keys that stands out in a bag or pocket. Tiny fabric wraps or felt shells add color and protect hardware from scratches while offering a pleasant grip.
Small scale means details like folded edges and neat seams matter more, creating a polished micro accessory. The piece feels lightweight and personal, carrying a bit of handmade personality everywhere.
Patterns and solids can be mixed for a small burst of character among metallic rings and chains. When grouped, a set of key fobs reads like a tiny collection of textiles.
Pro Tip: Work with sturdy woven fabric and trim edges neatly to avoid fraying that can make the tiny key fob look untidy over time.
How to Make This
- Cut a small piece of fabric or felt to wrap around a key fob base and a matching backing piece.
- Apply a thin layer of fabric glue to the key fob base and press the fabric into place.
- Fold edges inward neatly and adhere the backing piece to conceal raw edges.
- Attach the keyring hardware and let the glue fully dry before use.
Avoid: A frequent oversight is leaving raw edges exposed, which leads to fraying with everyday use. Concealing edges with a backing piece preserves the tidy look longer.
Try Also: Create a tassel-style fob by leaving longer fringe or make a minimalist leather-look version with faux leather fabric. Personalize with a tiny charm.
Products & Materials
Items Used
- felt or cotton fabric
- keyring hardware
- fabric glue
“Cute fabric key fob that adds personality to any keyring.”
