
As an Amazon Associate I earn from qualifying purchases.
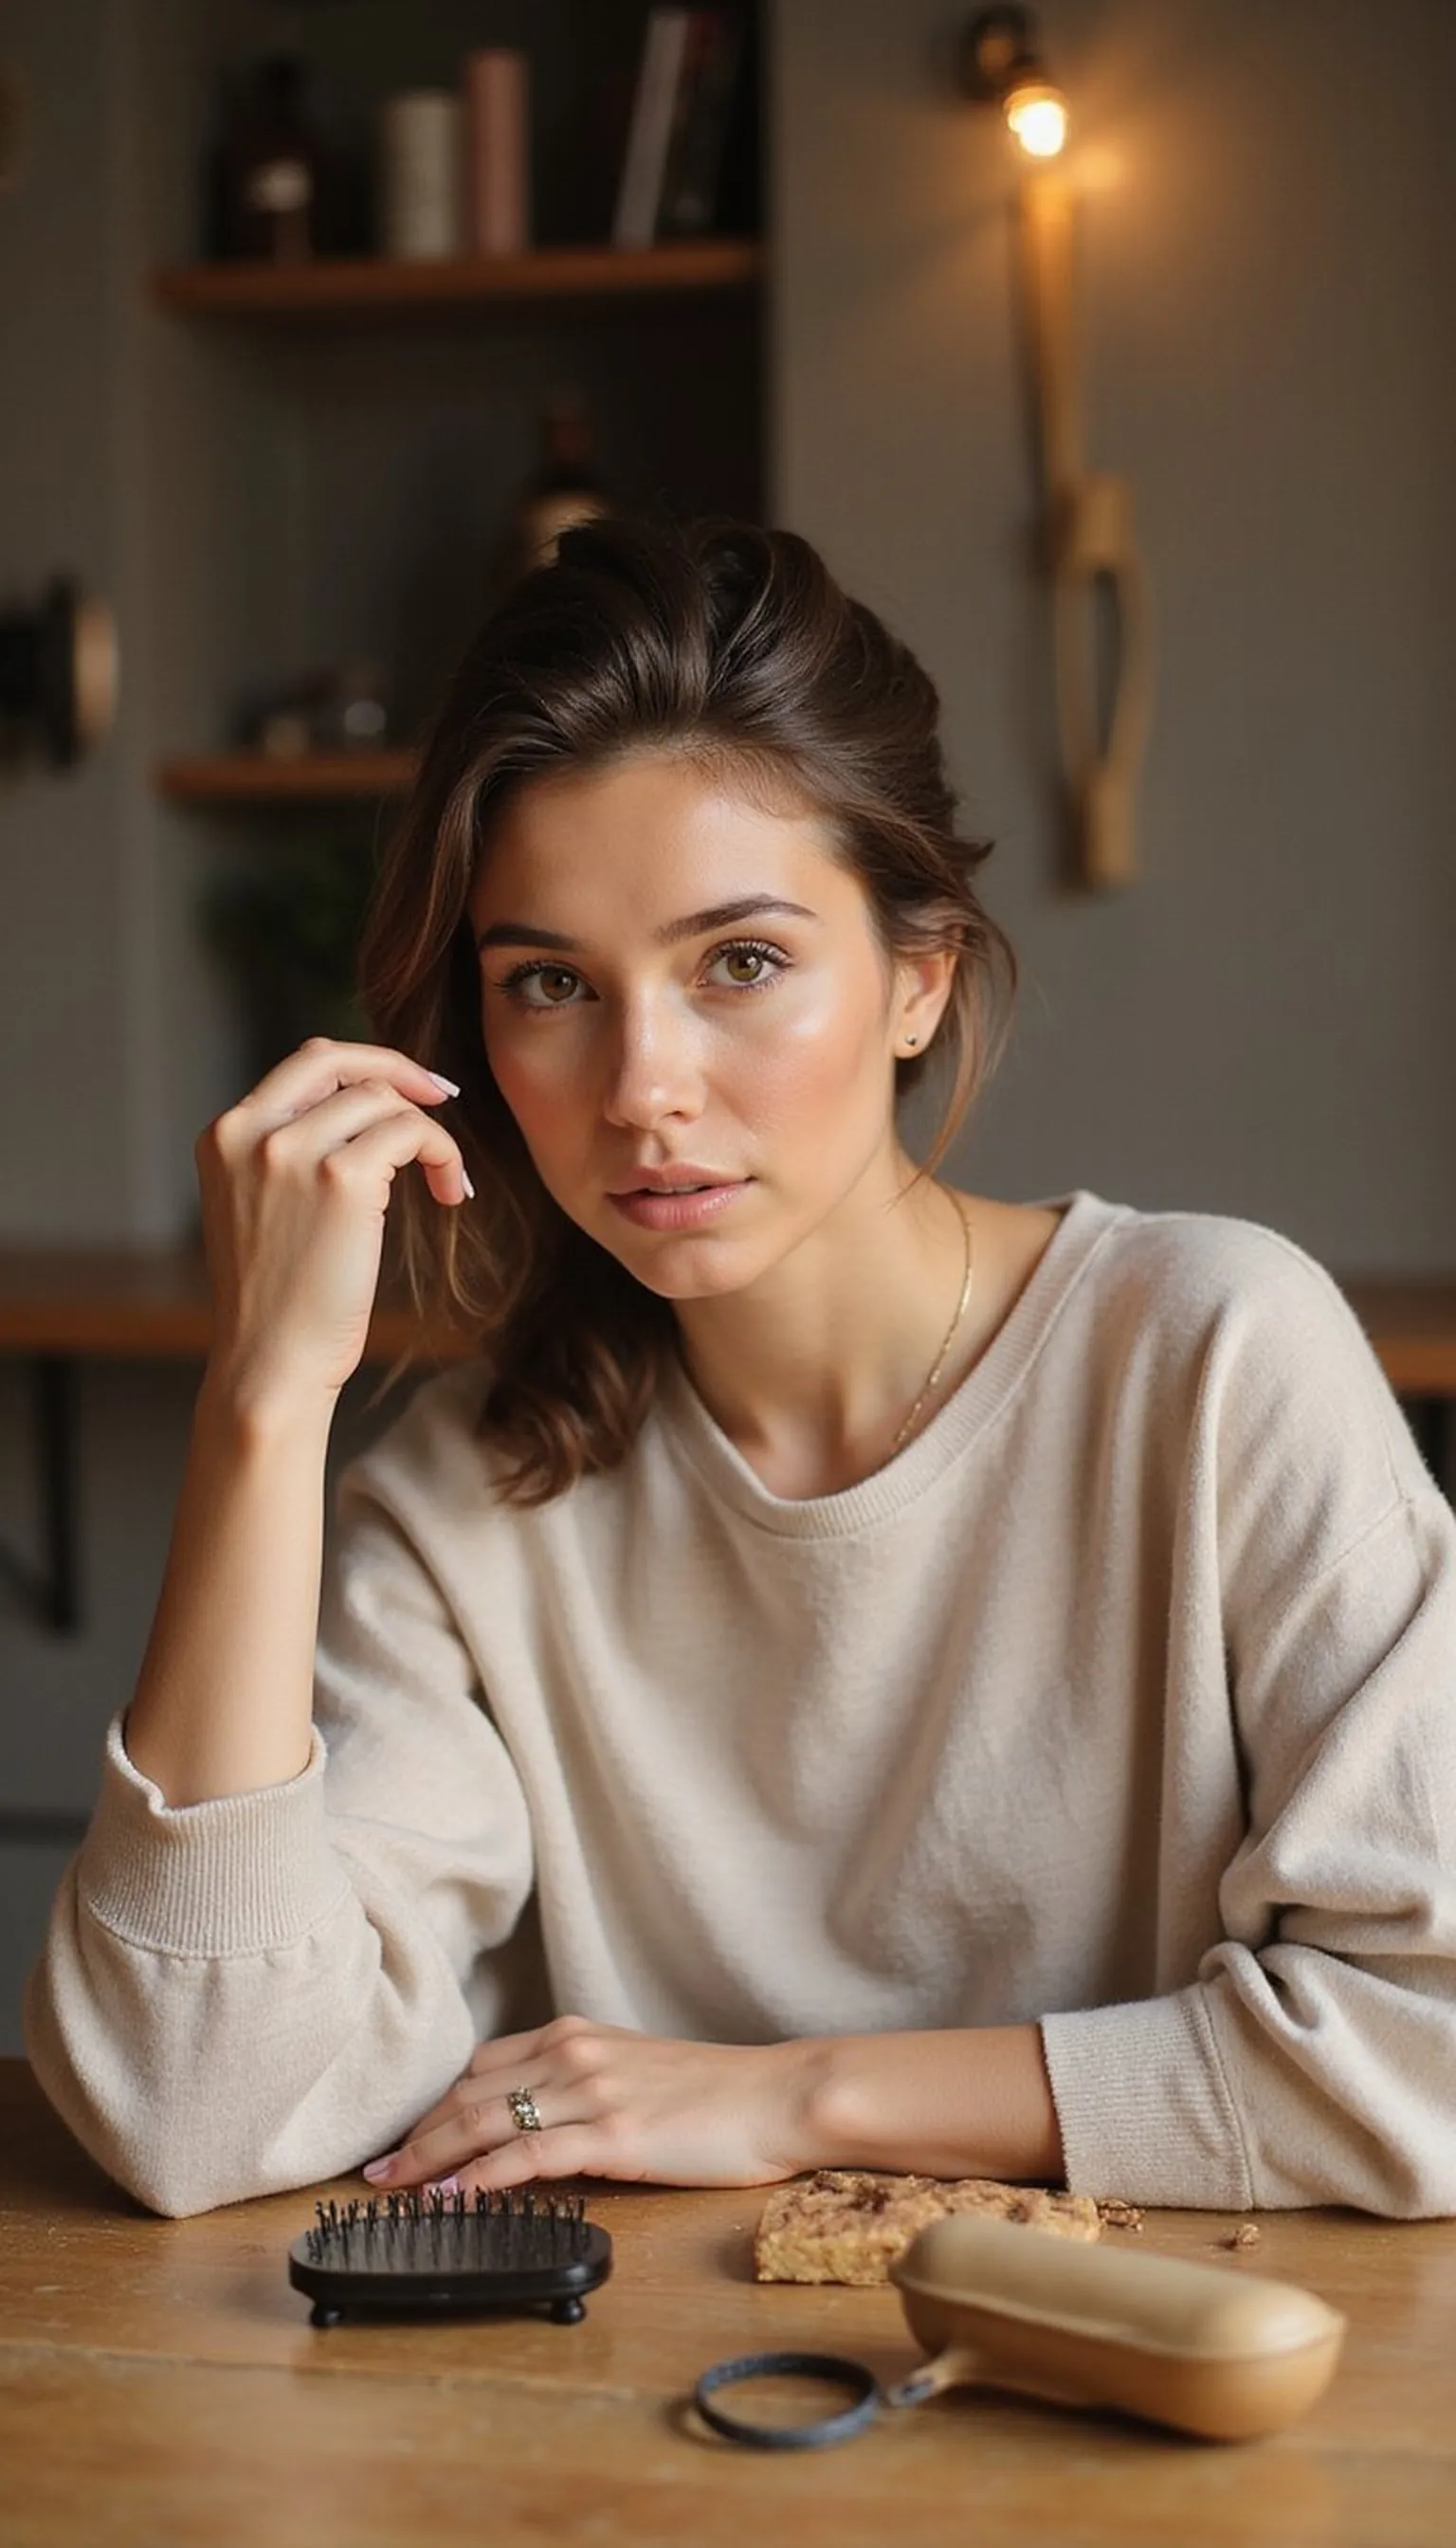
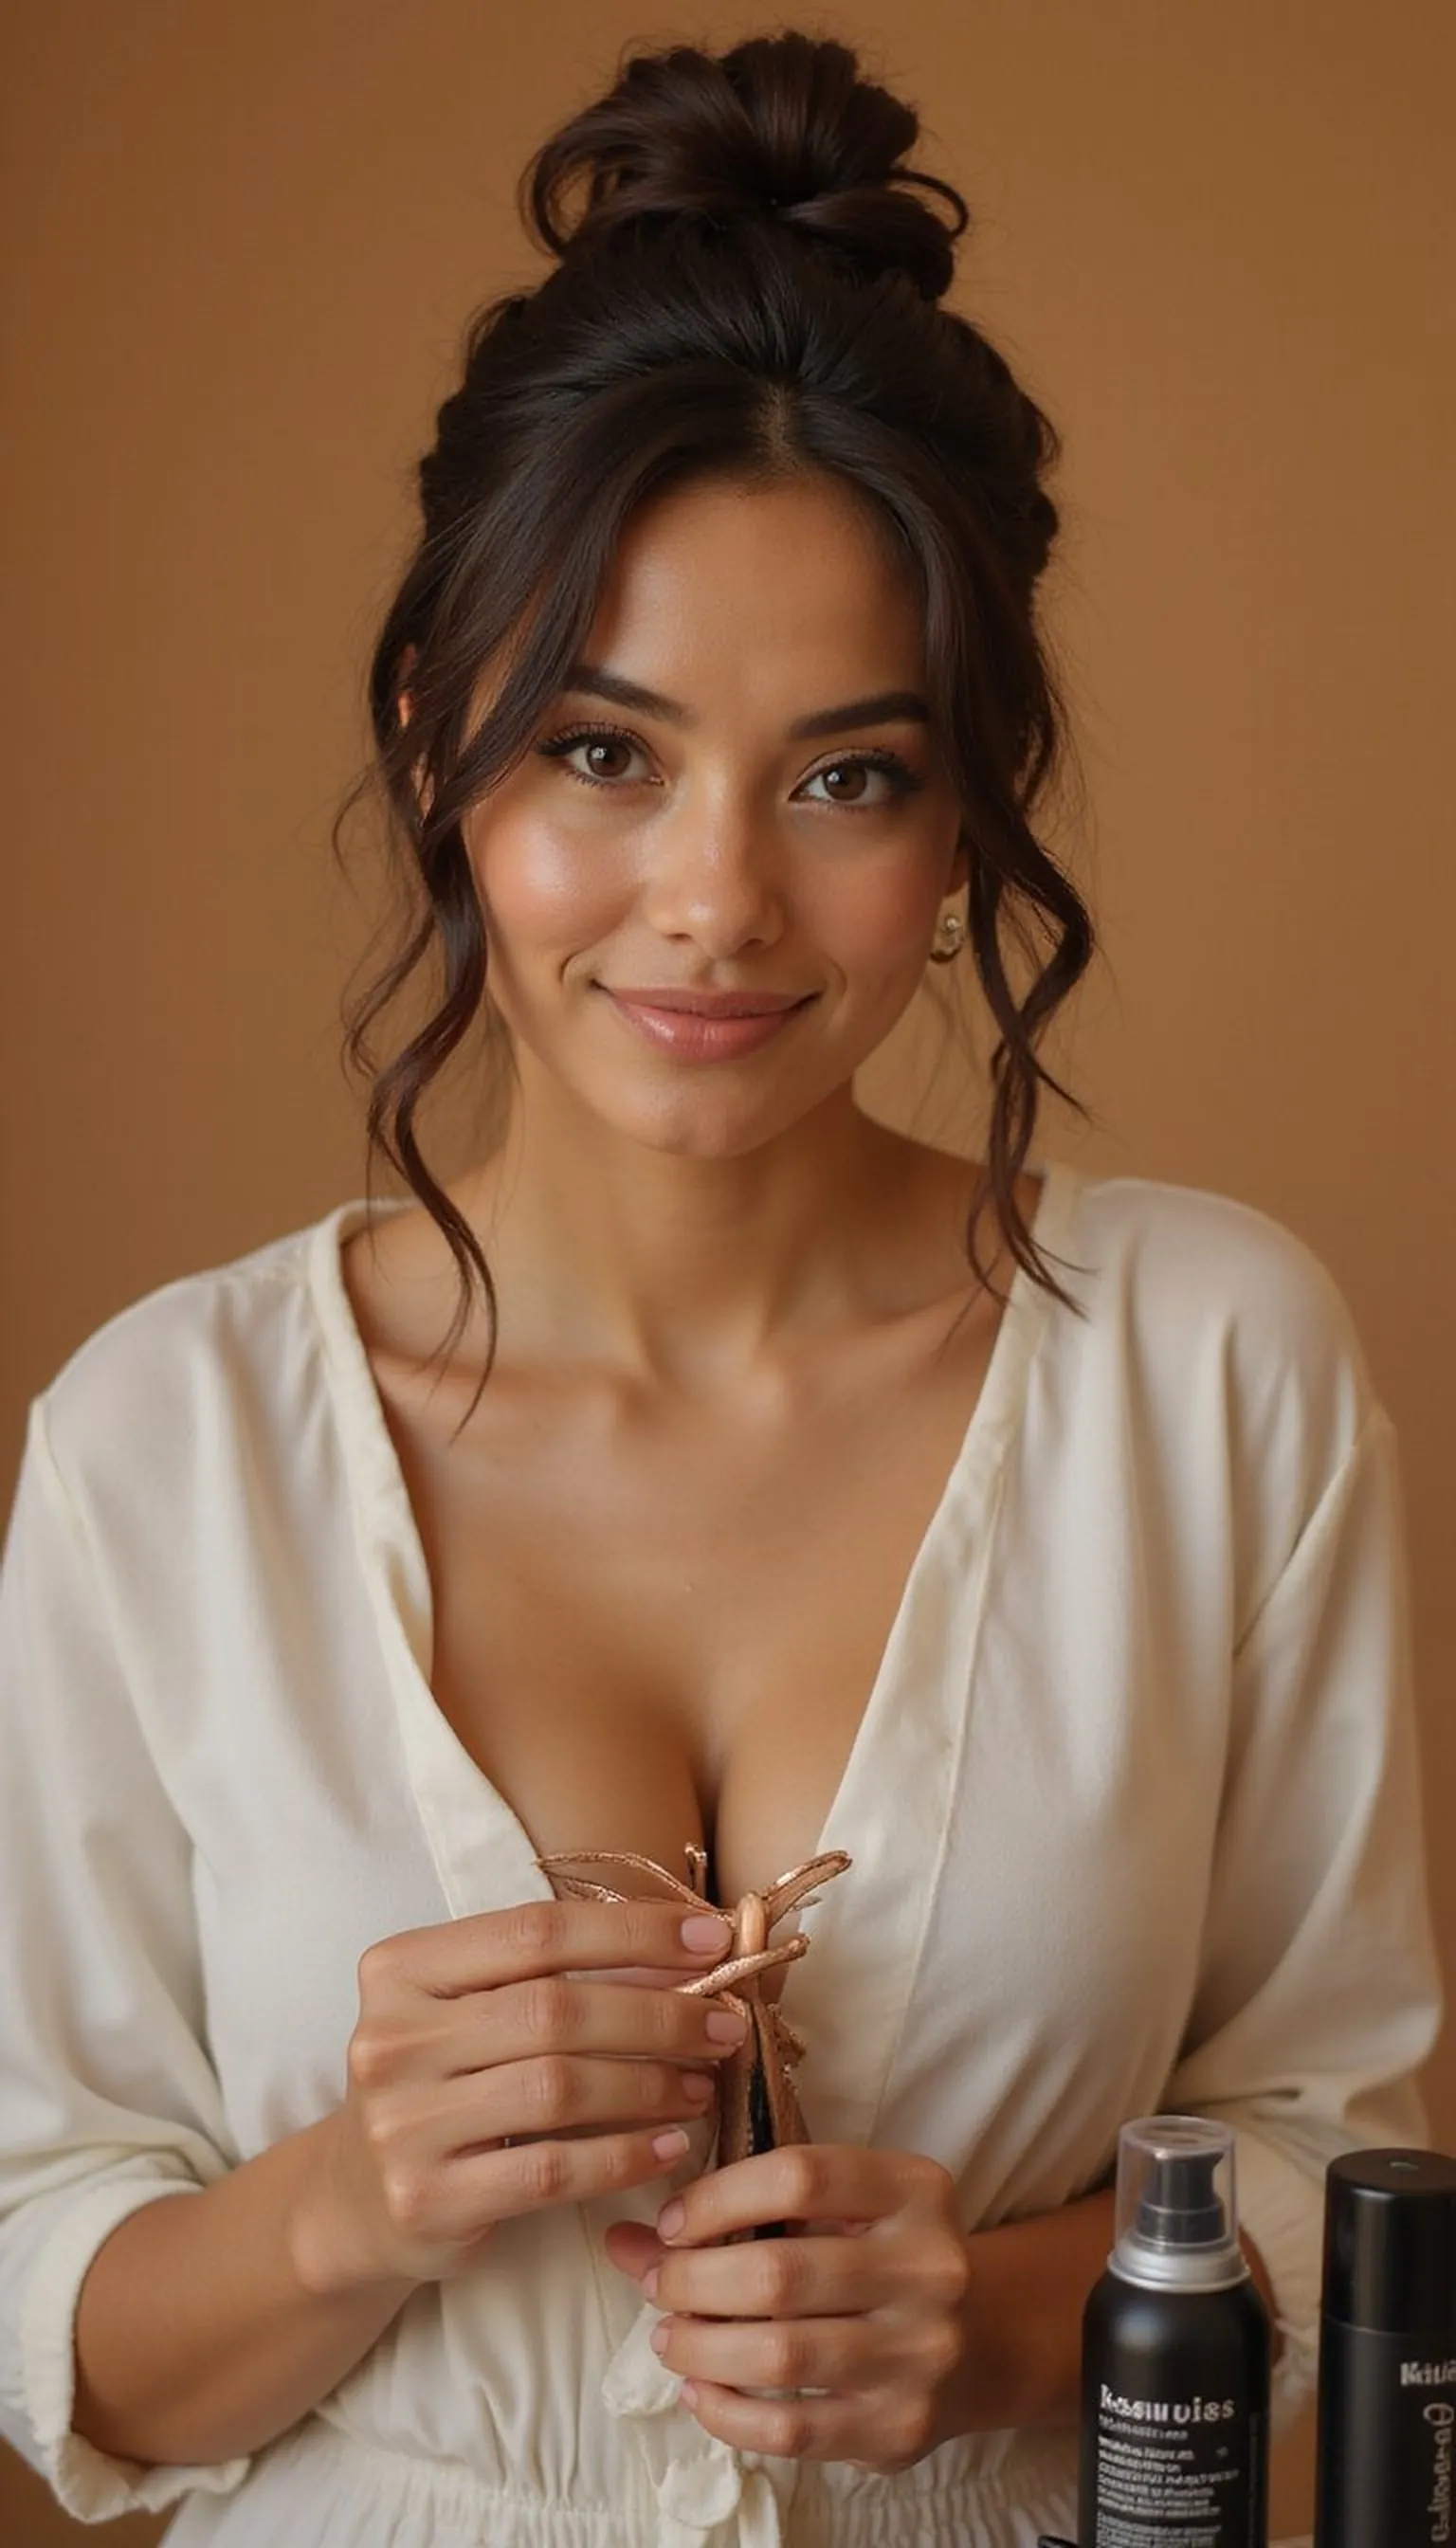
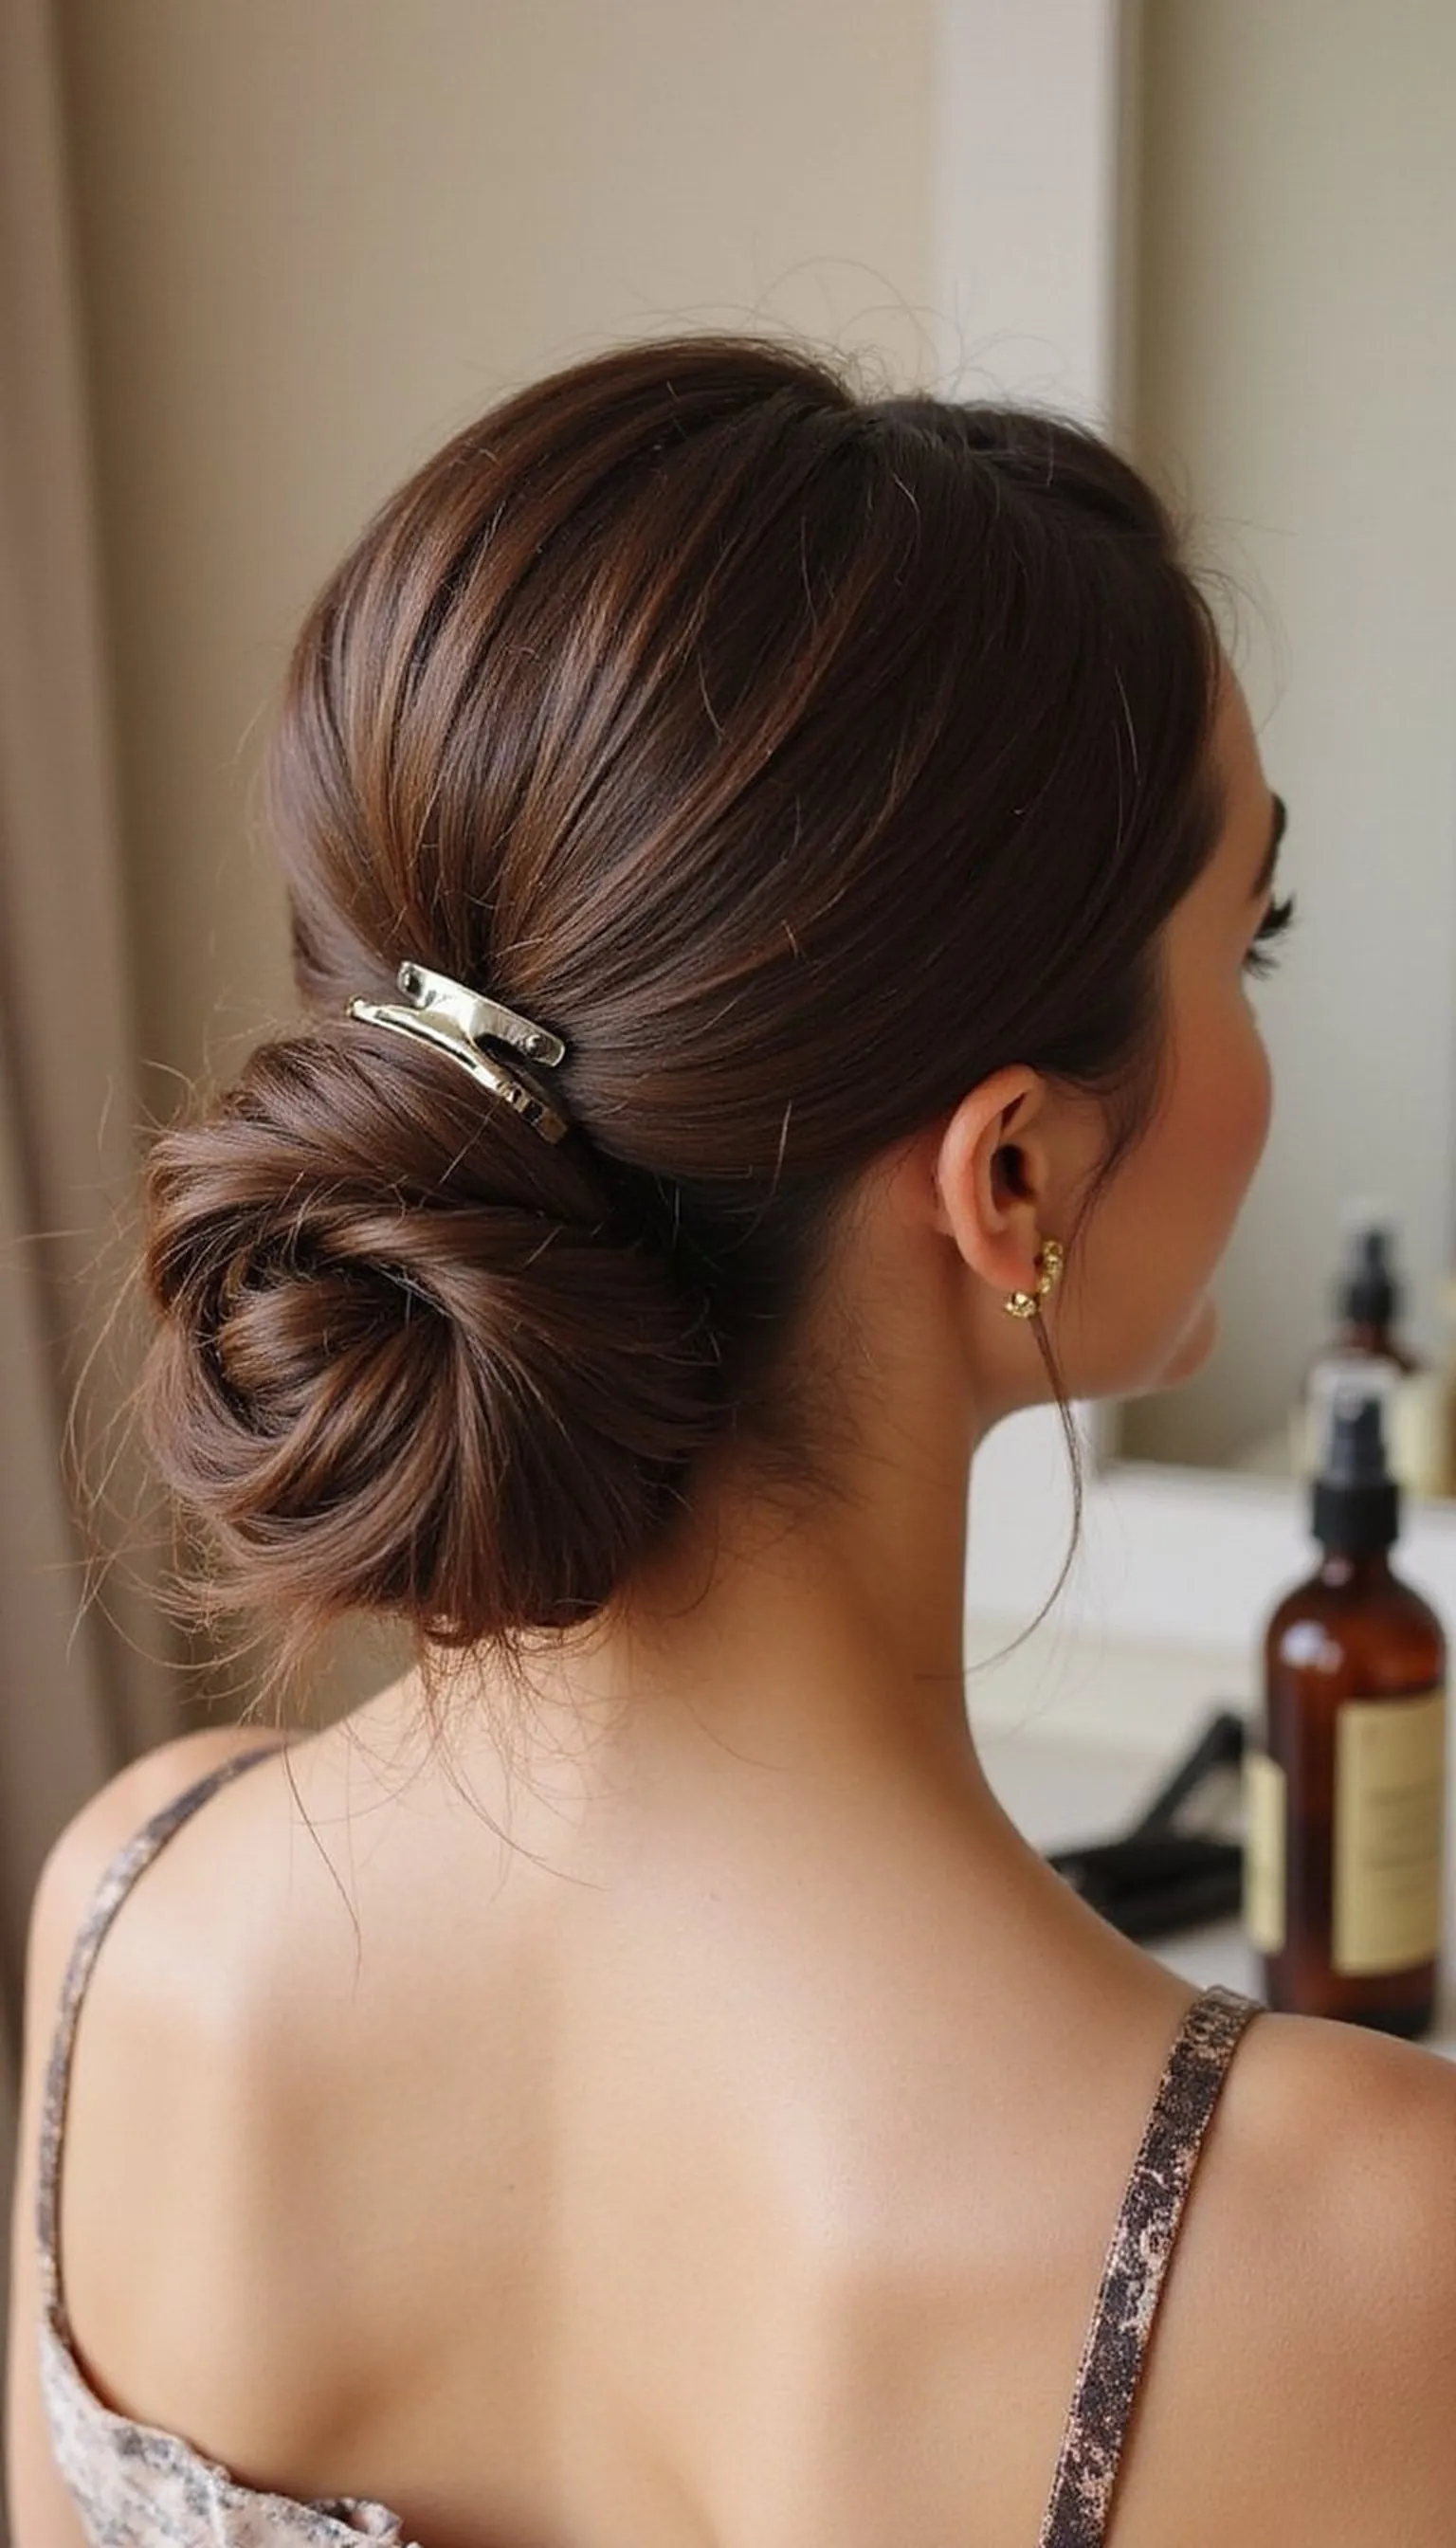
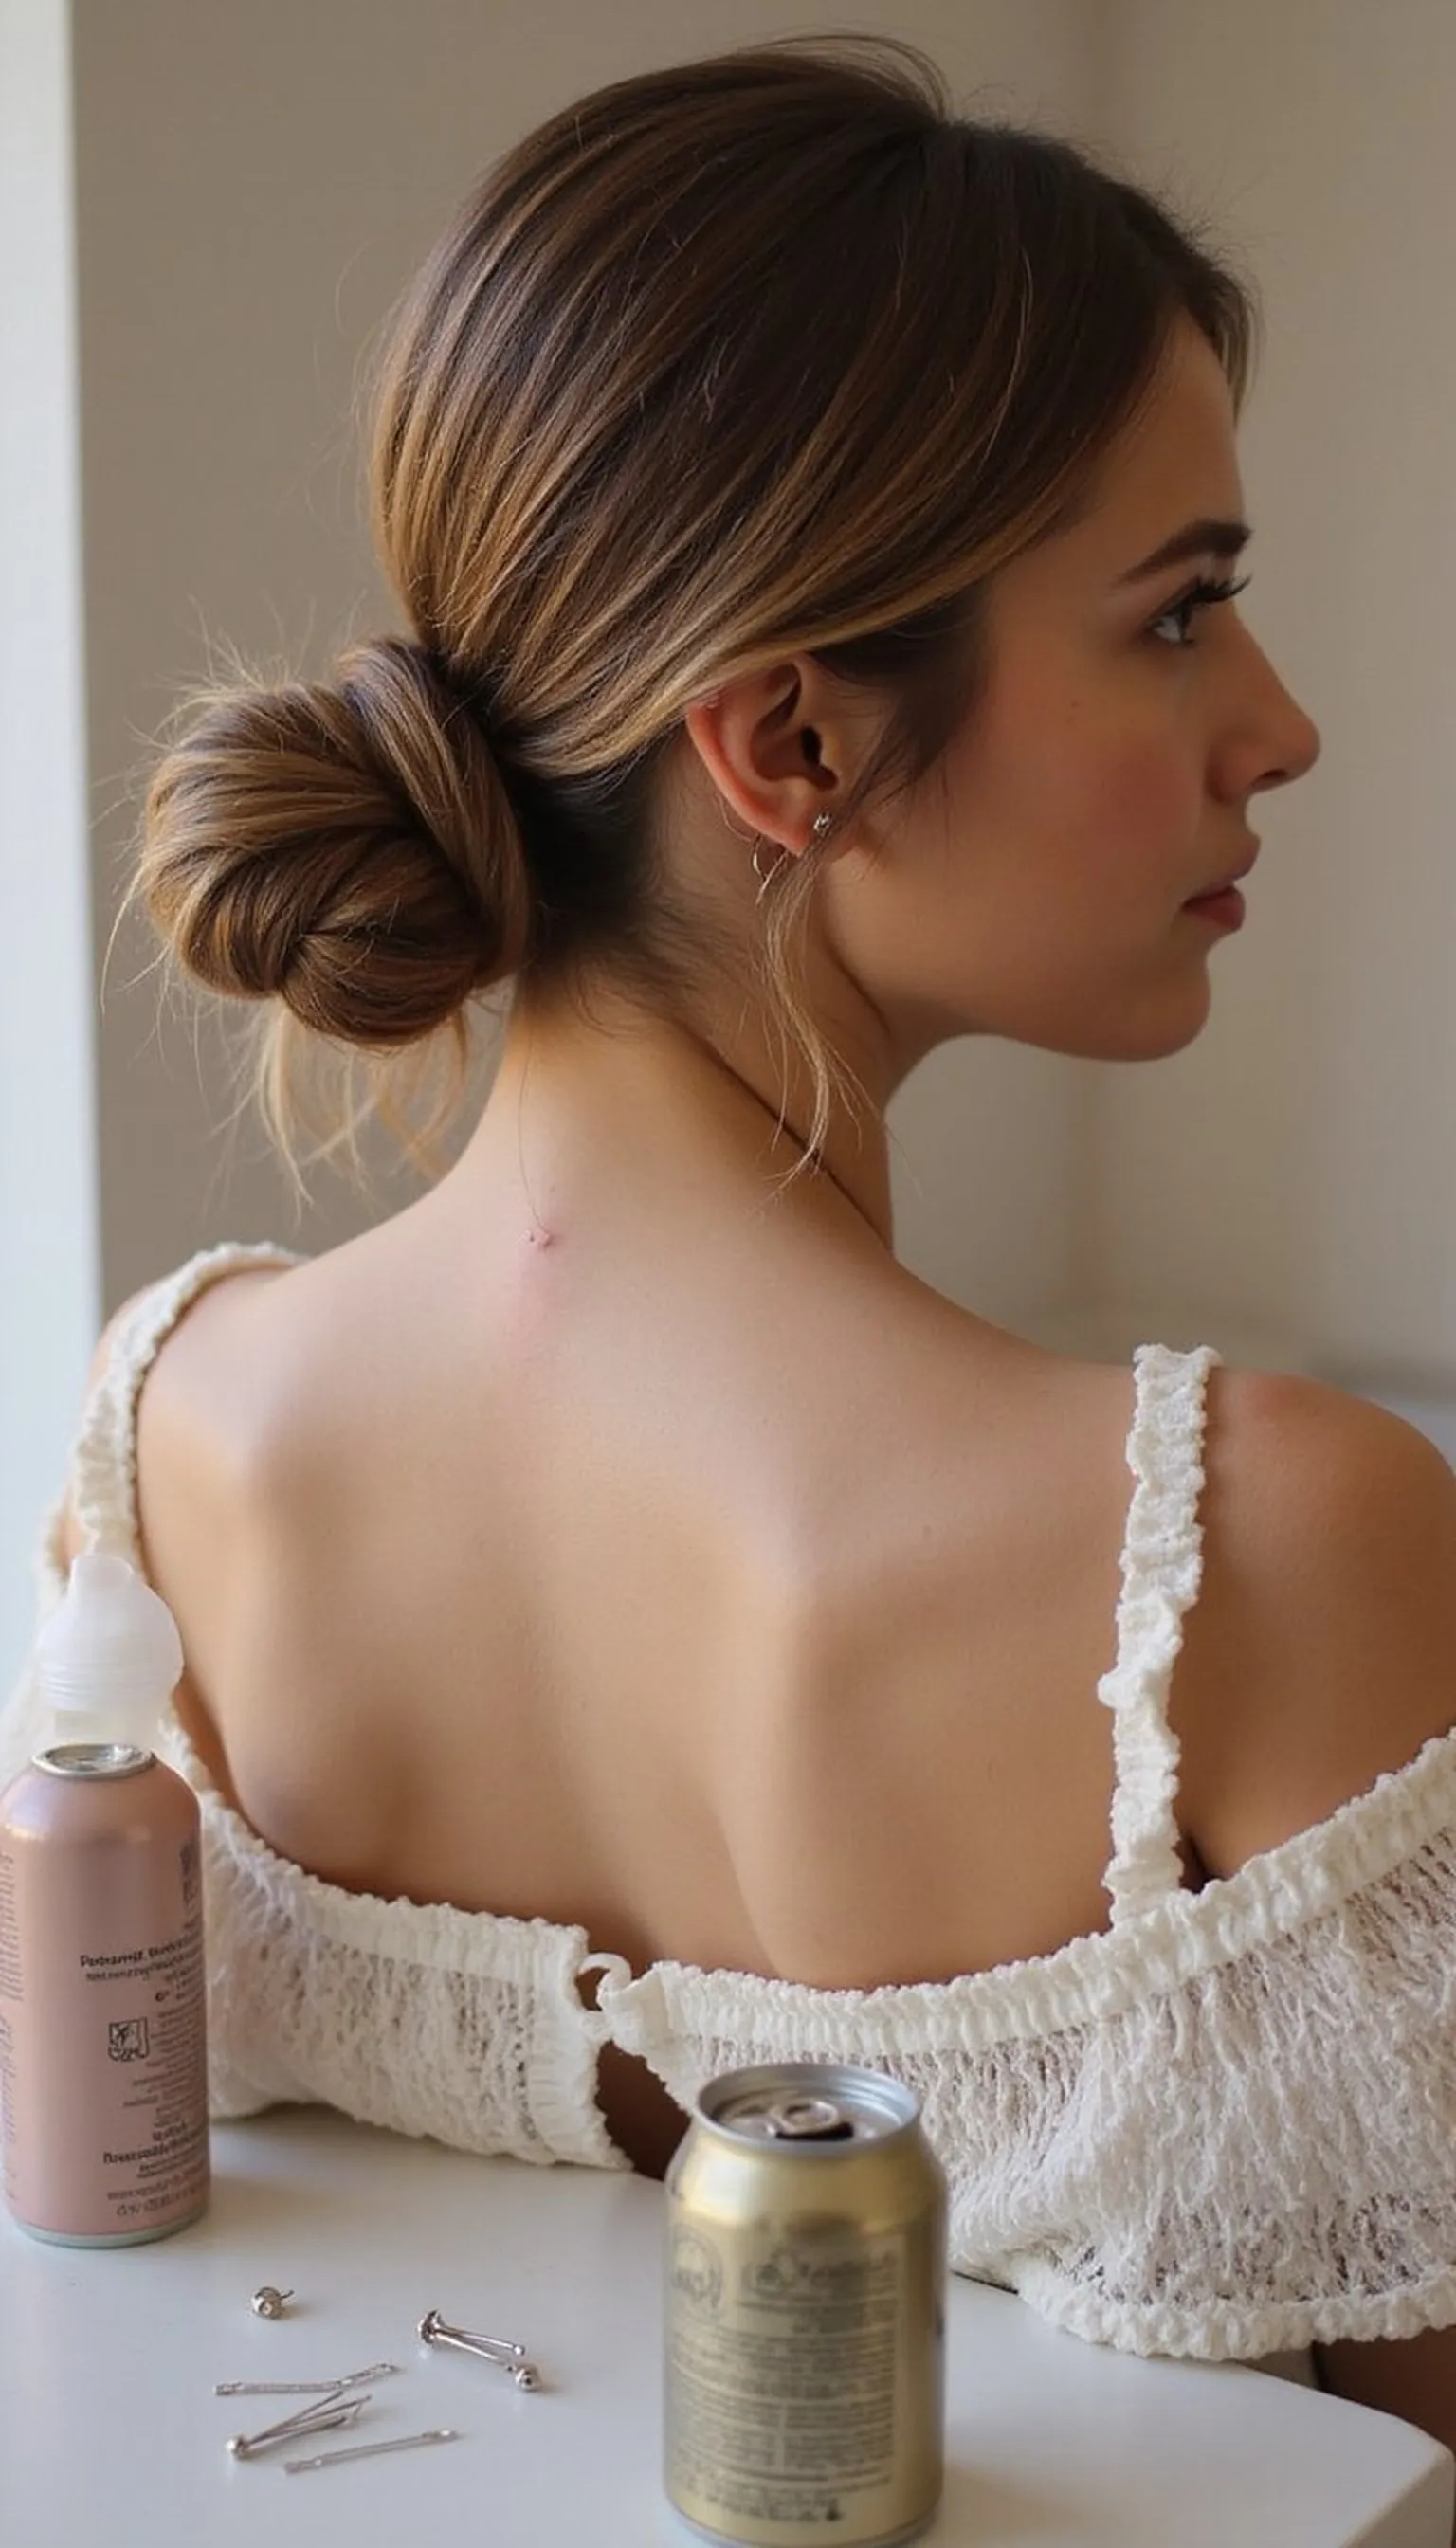
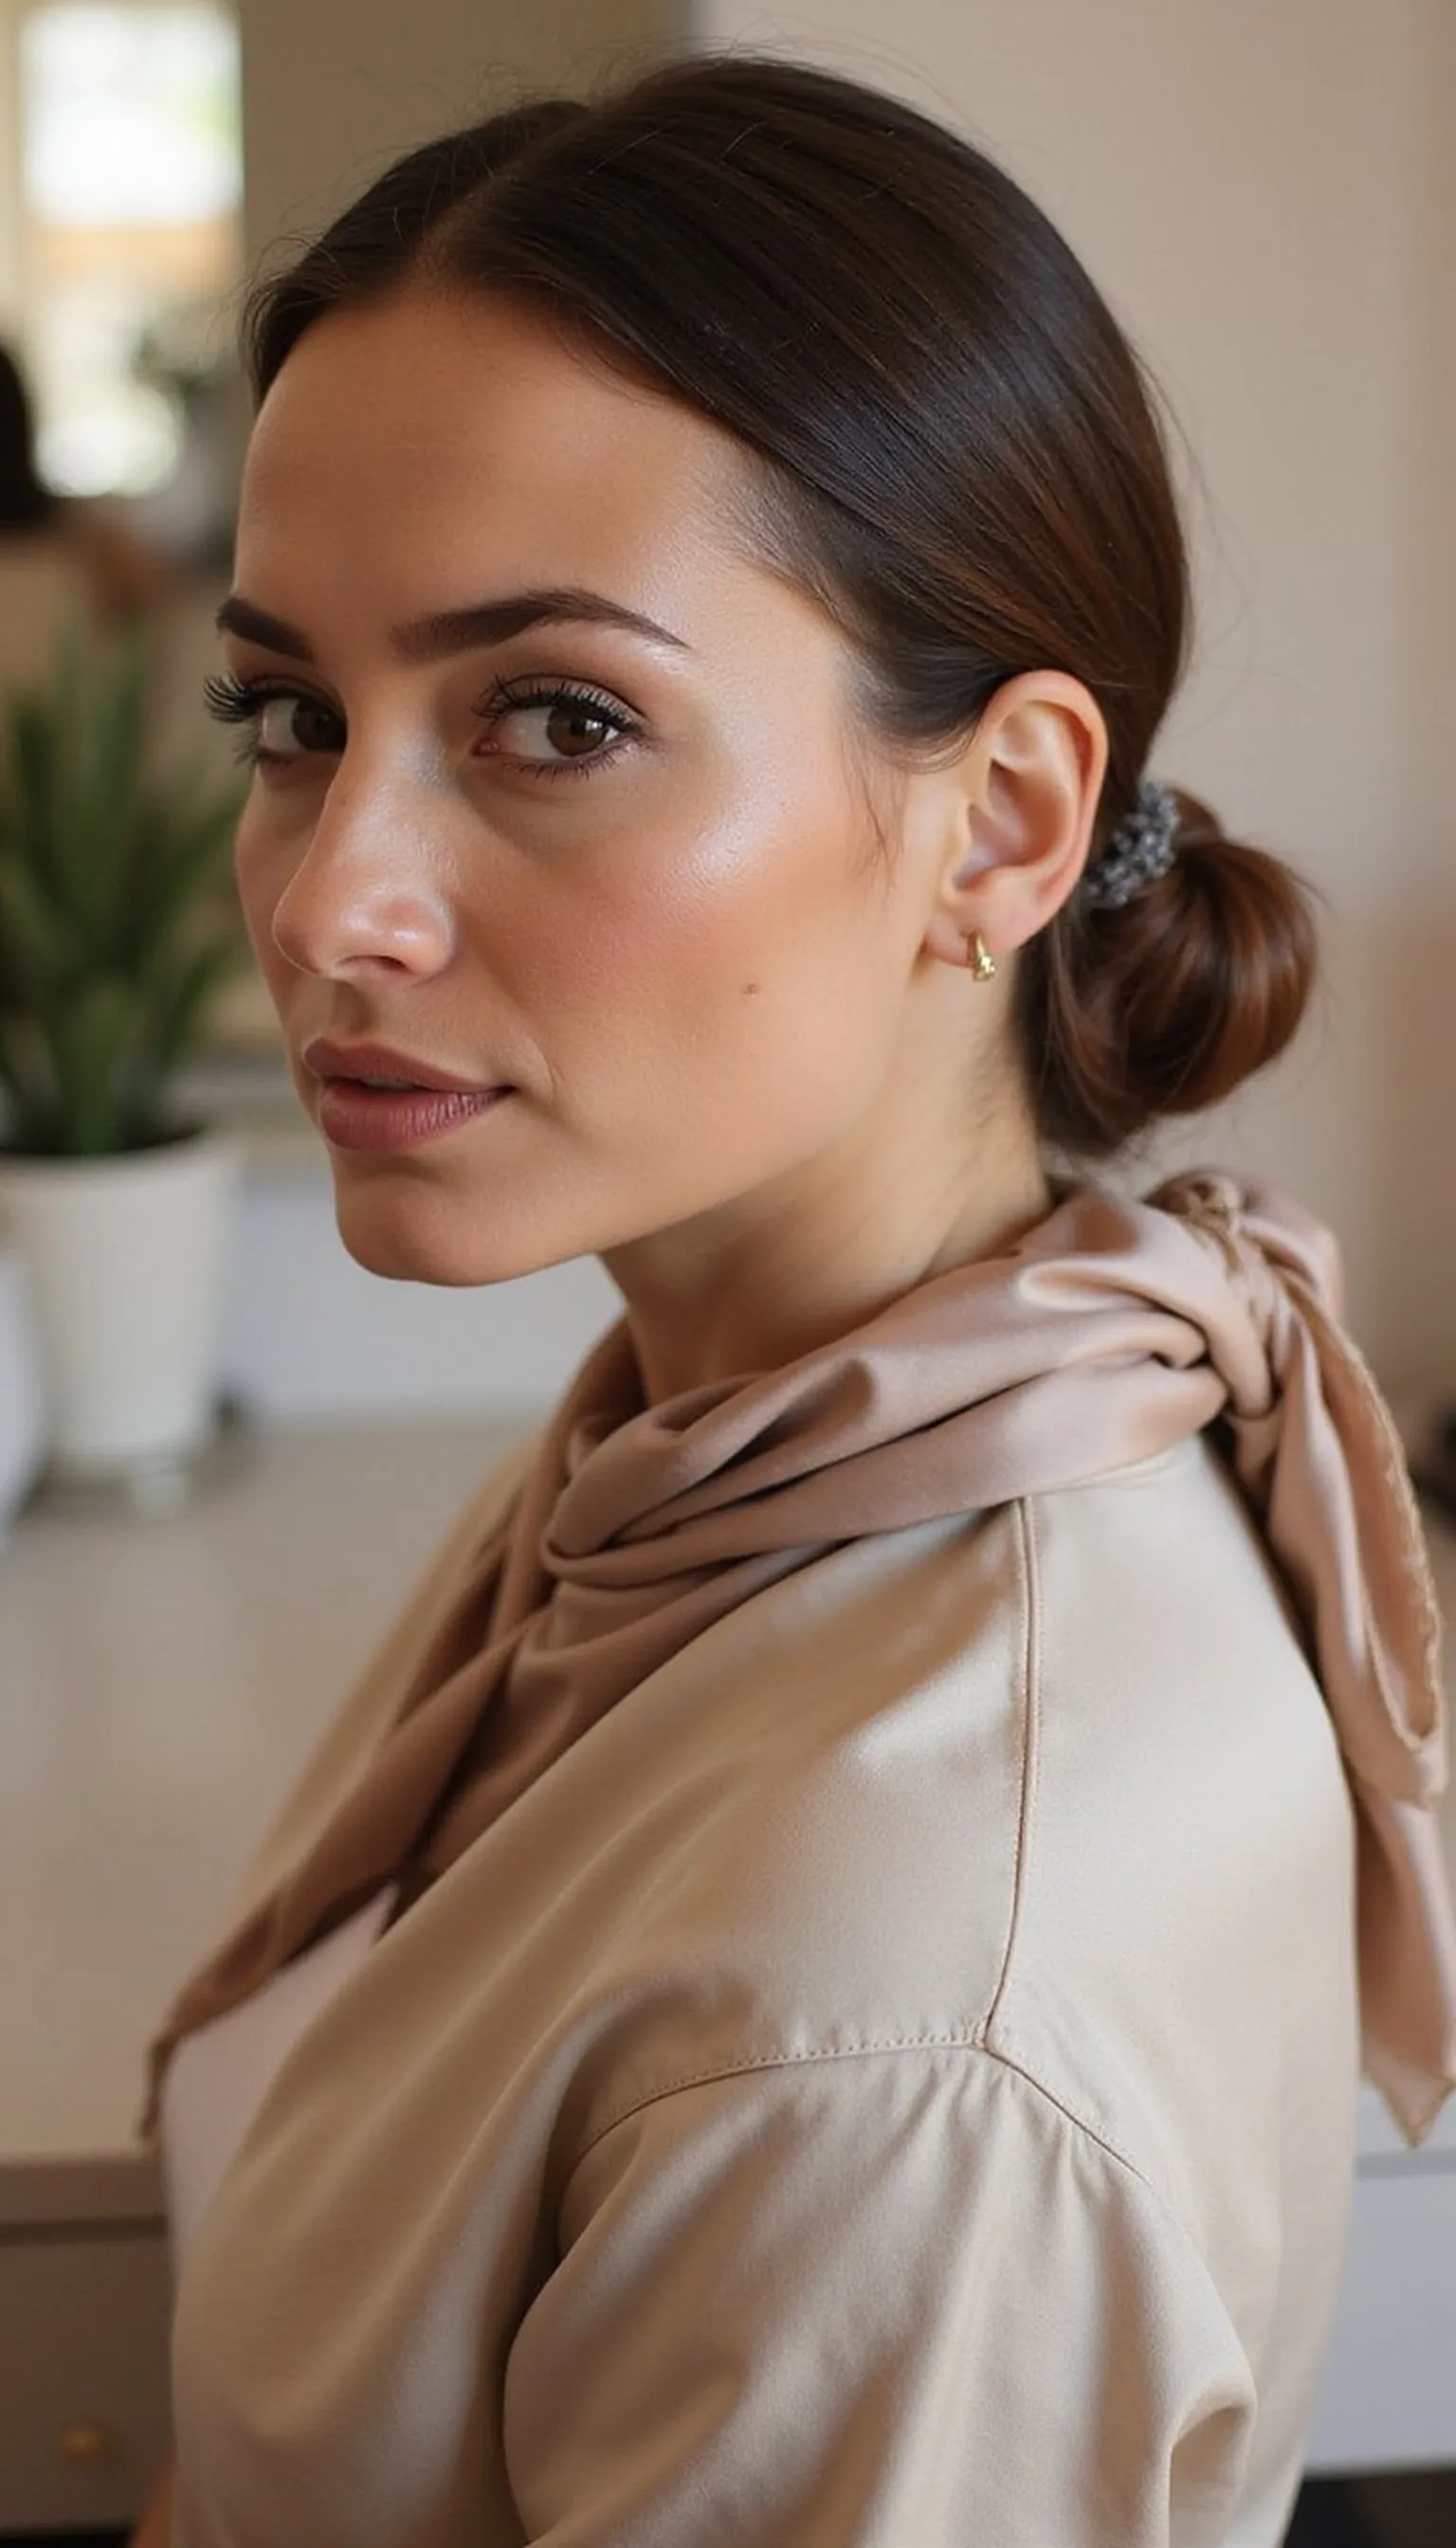
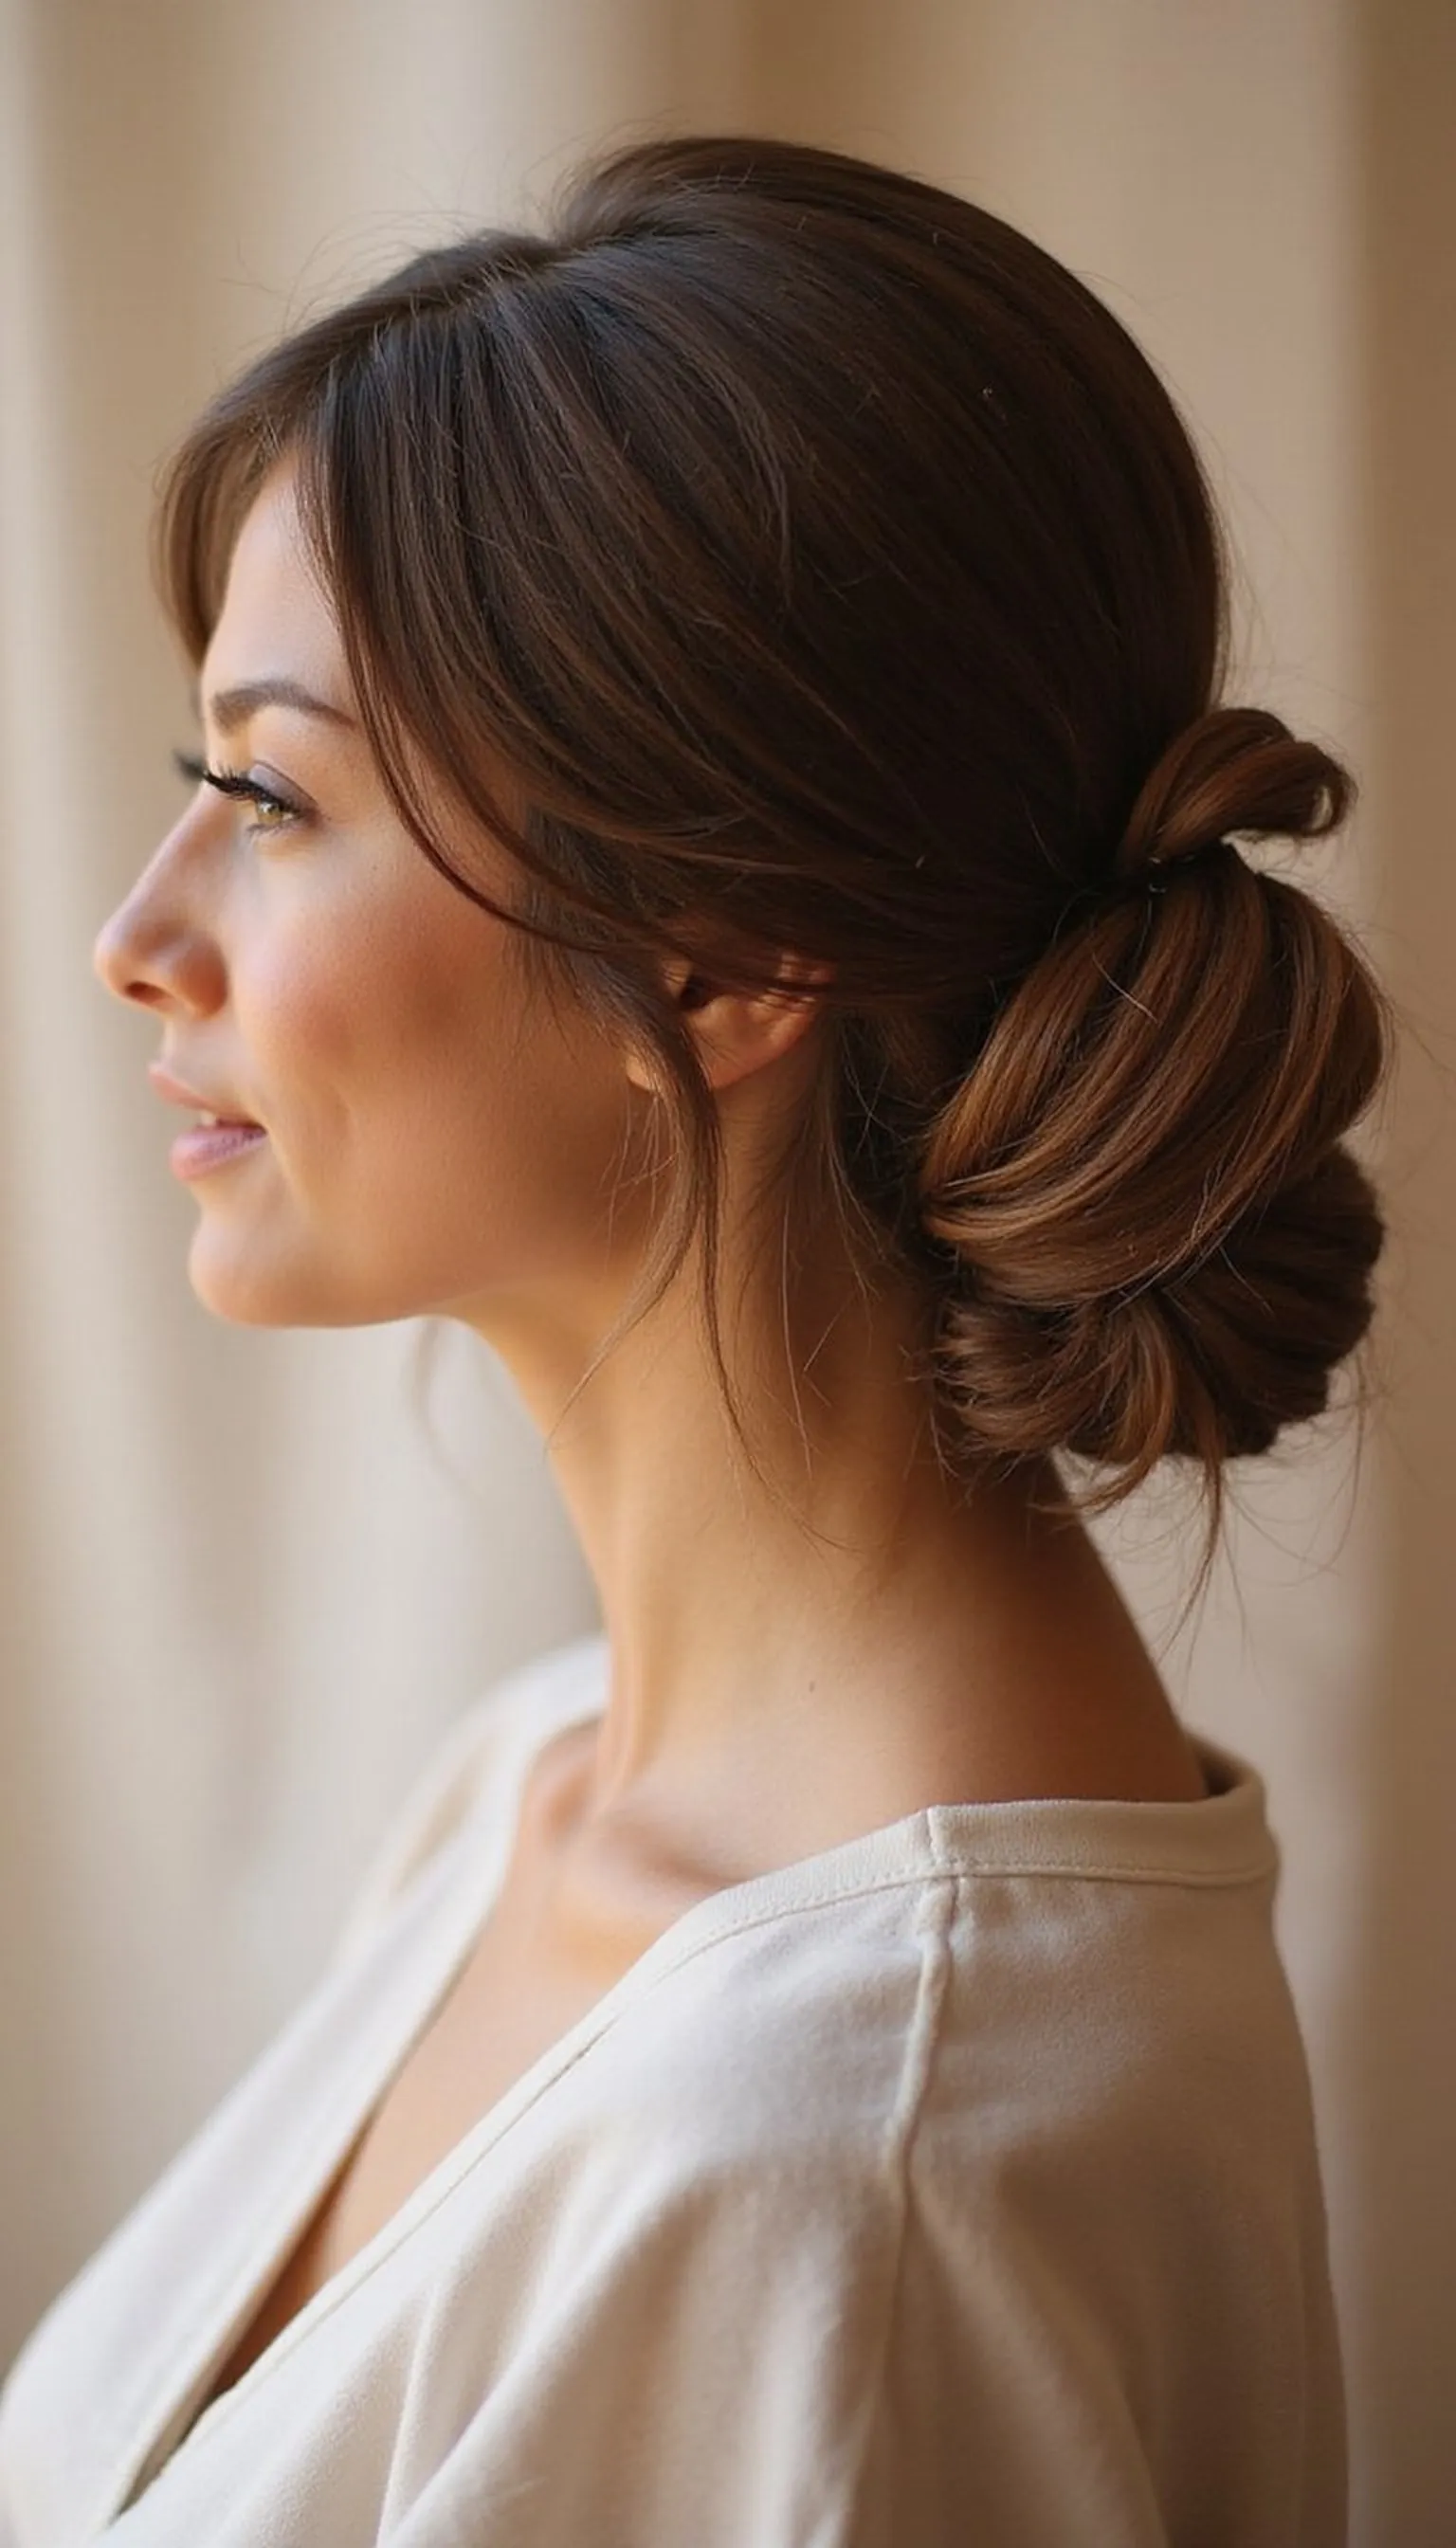
Sleek Low Bun Hairstyles are the go-to solution for polished looks that sit low at the nape and feel effortlessly chic.
These low bun hairstyles include glossy sleek buns, minimalist low chignons and smooth twisted knots that suit straight or slightly wavy textures.
Quick smoothing steps and a few well-placed pins help build a long-lasting sleek low bun that holds through busy days and evening plans.
Classic Sleek Low Bun For Every Occasion
⏱️ 10 min · 🟢 Beginner
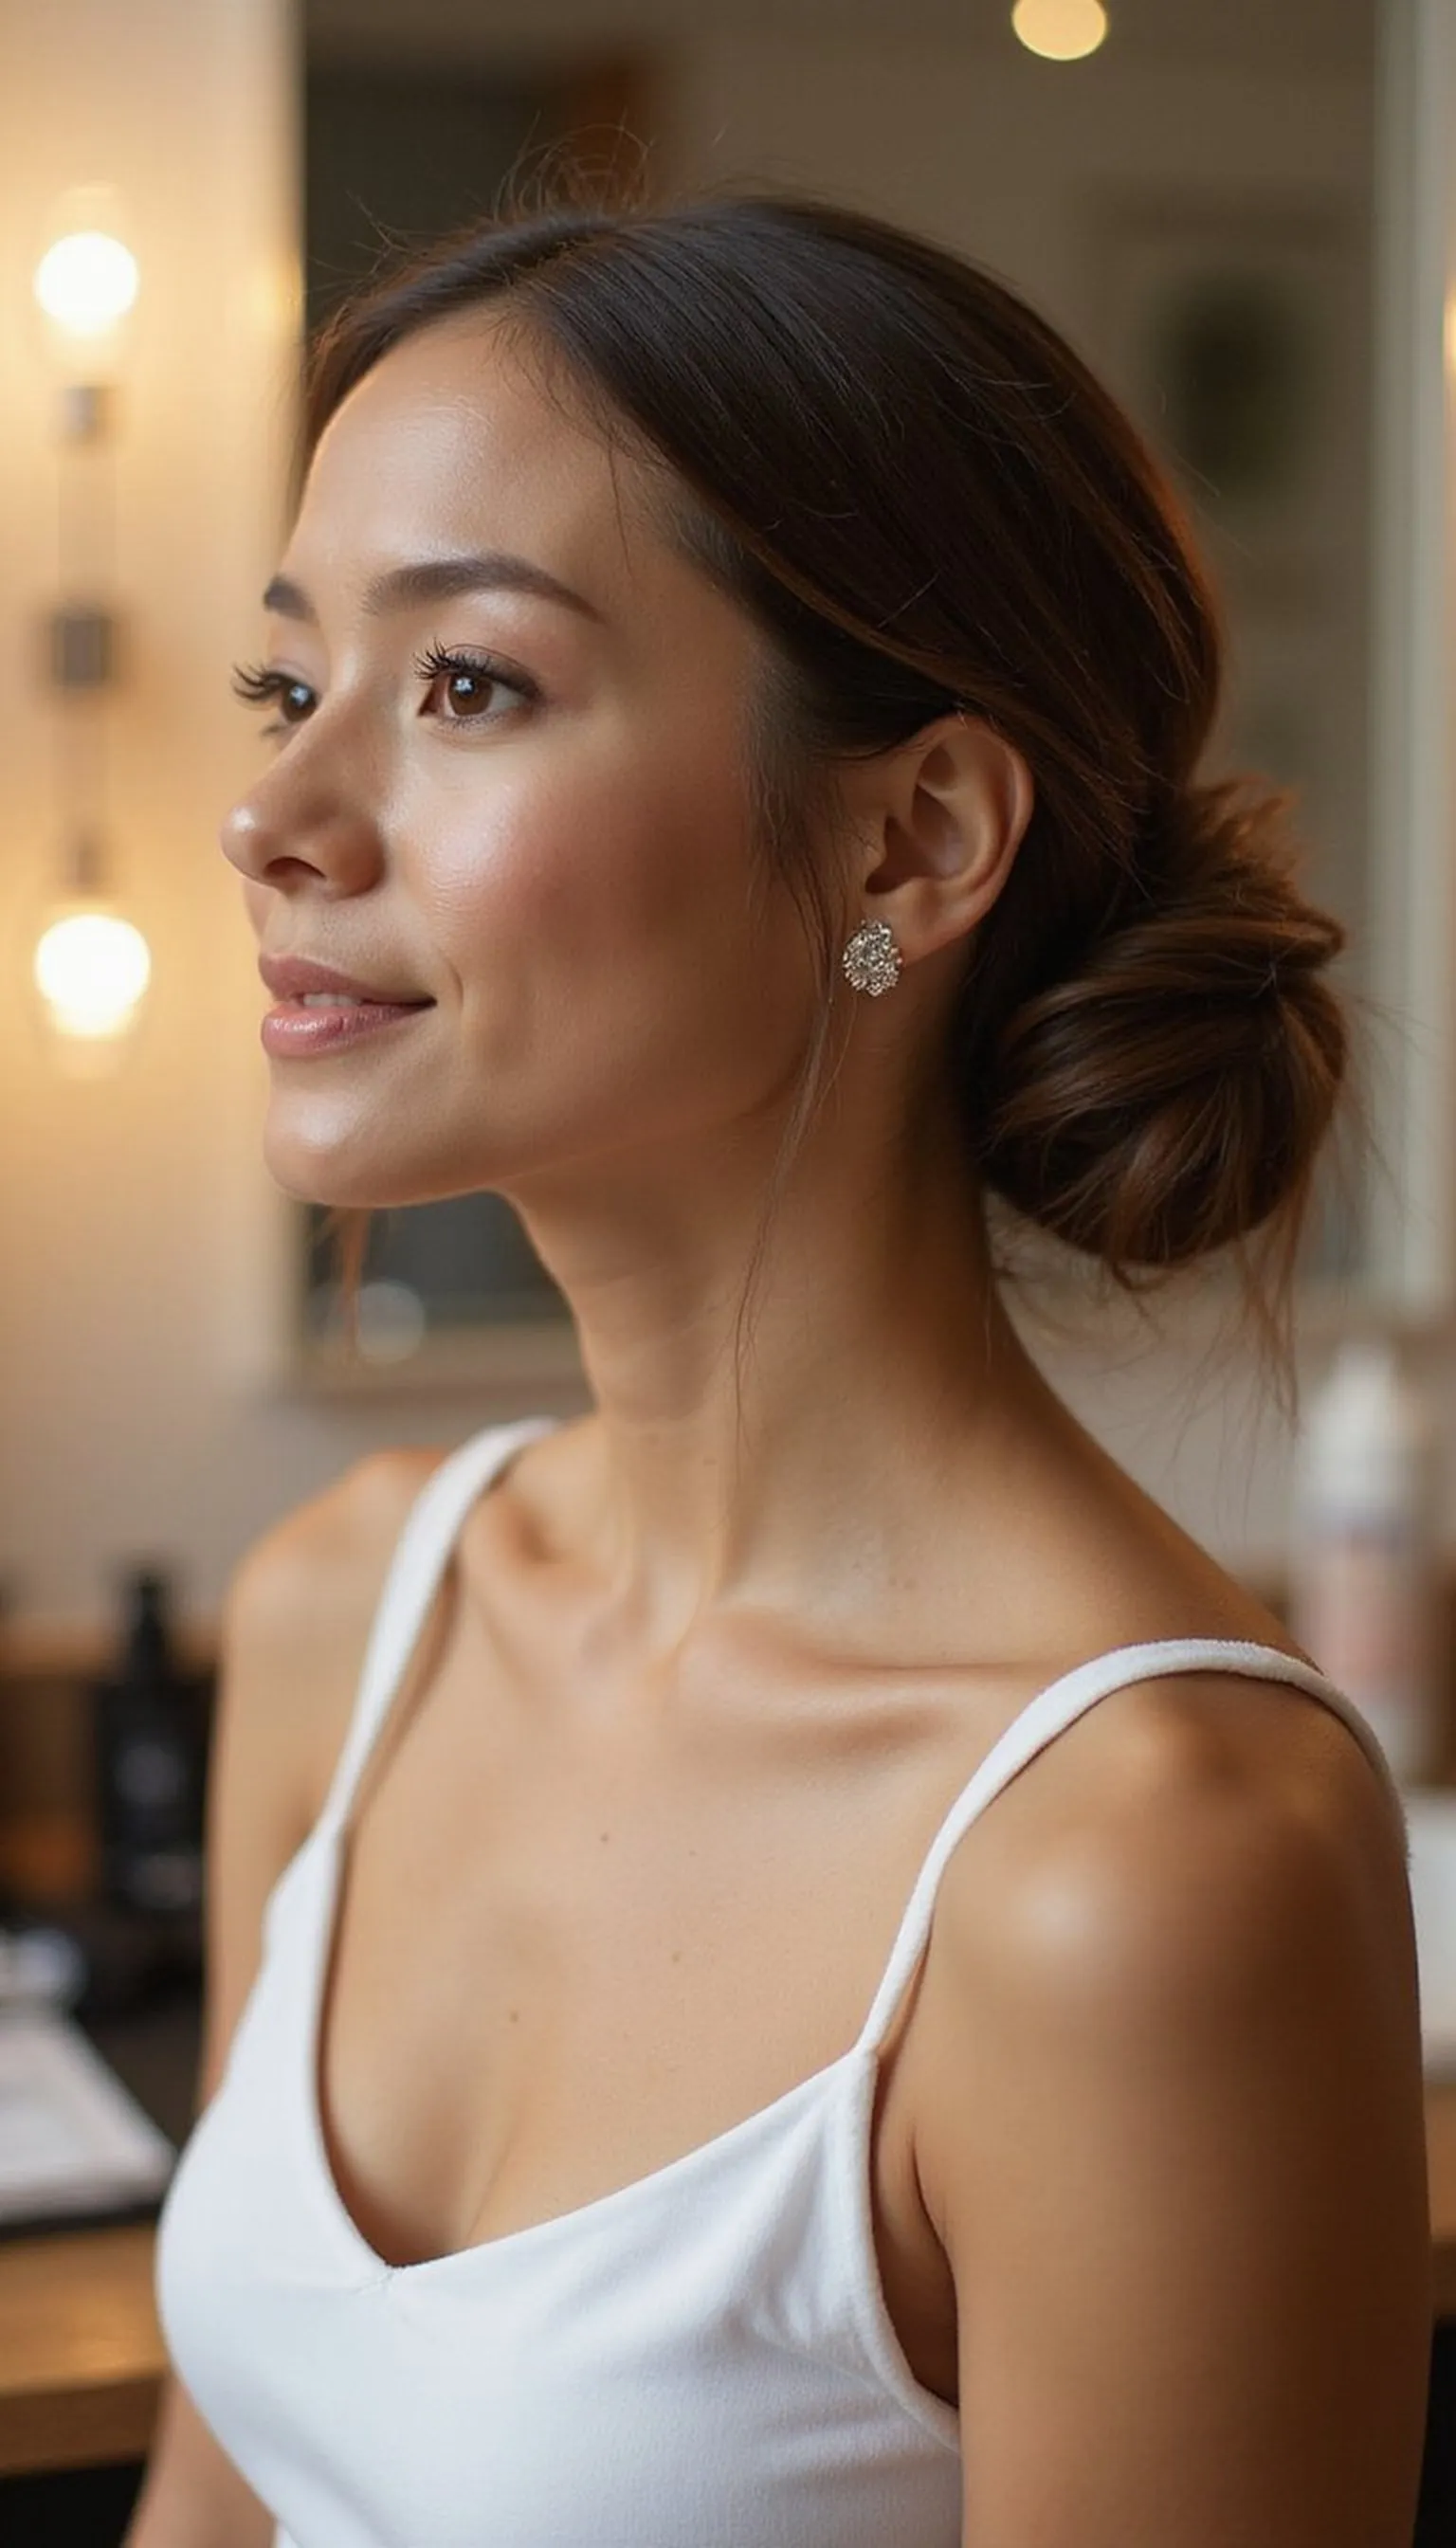
A classic sleek low bun sits at the nape for a timeless polished finish. This low bun hairstyle smooths flyaways and creates an instant put-together look.
Perfect for office days and simple events, it pairs clean lines with glossy hair. Straightened hair or a smooth blowout works best for a neat roll and compact shape.
Start with a low ponytail, twist the length into a smooth coil and pin close to the head. Finish with light hairspray and a shine serum for hold and gloss.
Styling Tips
- Use a fine-tooth comb to create a sleek part.
- Secure with a small clear elastic to hide the base.
- Anchor the bun with bobby pins tucked under the coil.
Pro Tip: Apply a pea-sized smoothing serum before styling to reduce flyaways and boost shine without weighing hair down.
Avoid: Leaving the ponytail too loose before twisting causes a puffy, uneven bun shape that slips during the day.
Try Also: Turn the coil into a low chignon for softer edges or wrap a thin ribbon around the base for a feminine touch.
Products & Materials
Items Used
- bobby pins
- hair elastic
- smoothing brush
“Timeless sleek low bun for polished, everyday elegance.”
Low Twisted Knot With Glossy Finish
⏱️ 15 min · 🟠 Intermediate
The low twisted knot wraps two sleek sections into a tidy knot at the nape for a modern twist on the bun. Clean parting and firm smoothing give it a polished silhouette that reads chic and intentional.
This style suits medium to long hair and looks great with a deep side part or center part. Twist tension controls how tight or soft the knot sits against the head for a tailored look.
Create two low sections, twist each toward the center and cross them into a low knot, then pin securely. Finish with low-hold hairspray to keep the twist smooth without hardness.
Styling Tips
- Use a bit of styling cream on the lengths before twisting.
- Pin the knot with curved bobby pins for comfort.
- Smooth edges with a soft toothbrush and hairspray.
Pro Tip: Twist hair tightly for a sleek, compact knot then gently tug a few face-framing strands for softness around the face.
Avoid: Pinning the twists too far from the base can make the knot stick out instead of laying flat at the nape.
Try Also: Make two thin twists for a delicate rope effect, or combine a low twist with a wrapped ribbon for a romantic vibe.
Products & Materials
Items Used
- curved bobby pins
- styling cream
- small hairspray
“Sleek twisted knot at the nape for a modern refined bun.”
Low Chignon With Sleek Side Part Finish
⏱️ 20 min · 🟠 Intermediate
A low chignon sits low and tucked with a sleek side part for a refined, vintage-inspired look. The side part adds direction while the chignon remains smooth and compact at the nape.
This style flatters oval and heart-shaped faces by drawing attention to the jawline and neckline. It works best on blow-dried or straightened hair to keep the chignon smooth without bumps.
Create a deep side part, gather hair into a low ponytail, then roll and pin the ends into a neat chignon. Use a flat brush and a light mist of hairspray to maintain the glossy finish all day.
Styling Tips
- Clip the part in place with a sectioning clip while you smooth the rest.
- Wrap the ponytail tightly for a compact chignon.
- Add shine spray for a polished reflection under light.
Pro Tip: Palm-press the hair at the roots after brushing to lock down flyaways before securing the chignon.
Avoid: Rushing the roll can create bumps; take time to smooth and anchor each pin for a seamless finish.
Try Also: Loosen the chignon for a low romantic bun or add a thin jeweled headband for evening glam.
Products & Materials
Items Used
- sectioning clip
- flat brush
- shine spray
“Elegant low chignon with a sleek side part for polished looks.”
Get 75+ ad-free, high-resolution printable tutorials for salon-quality results every single morning.
One printable guide · $19.99 · yours forever
Low Braided Bun For Sleek Texture And Shape
⏱️ 25 min · 🟠 Intermediate
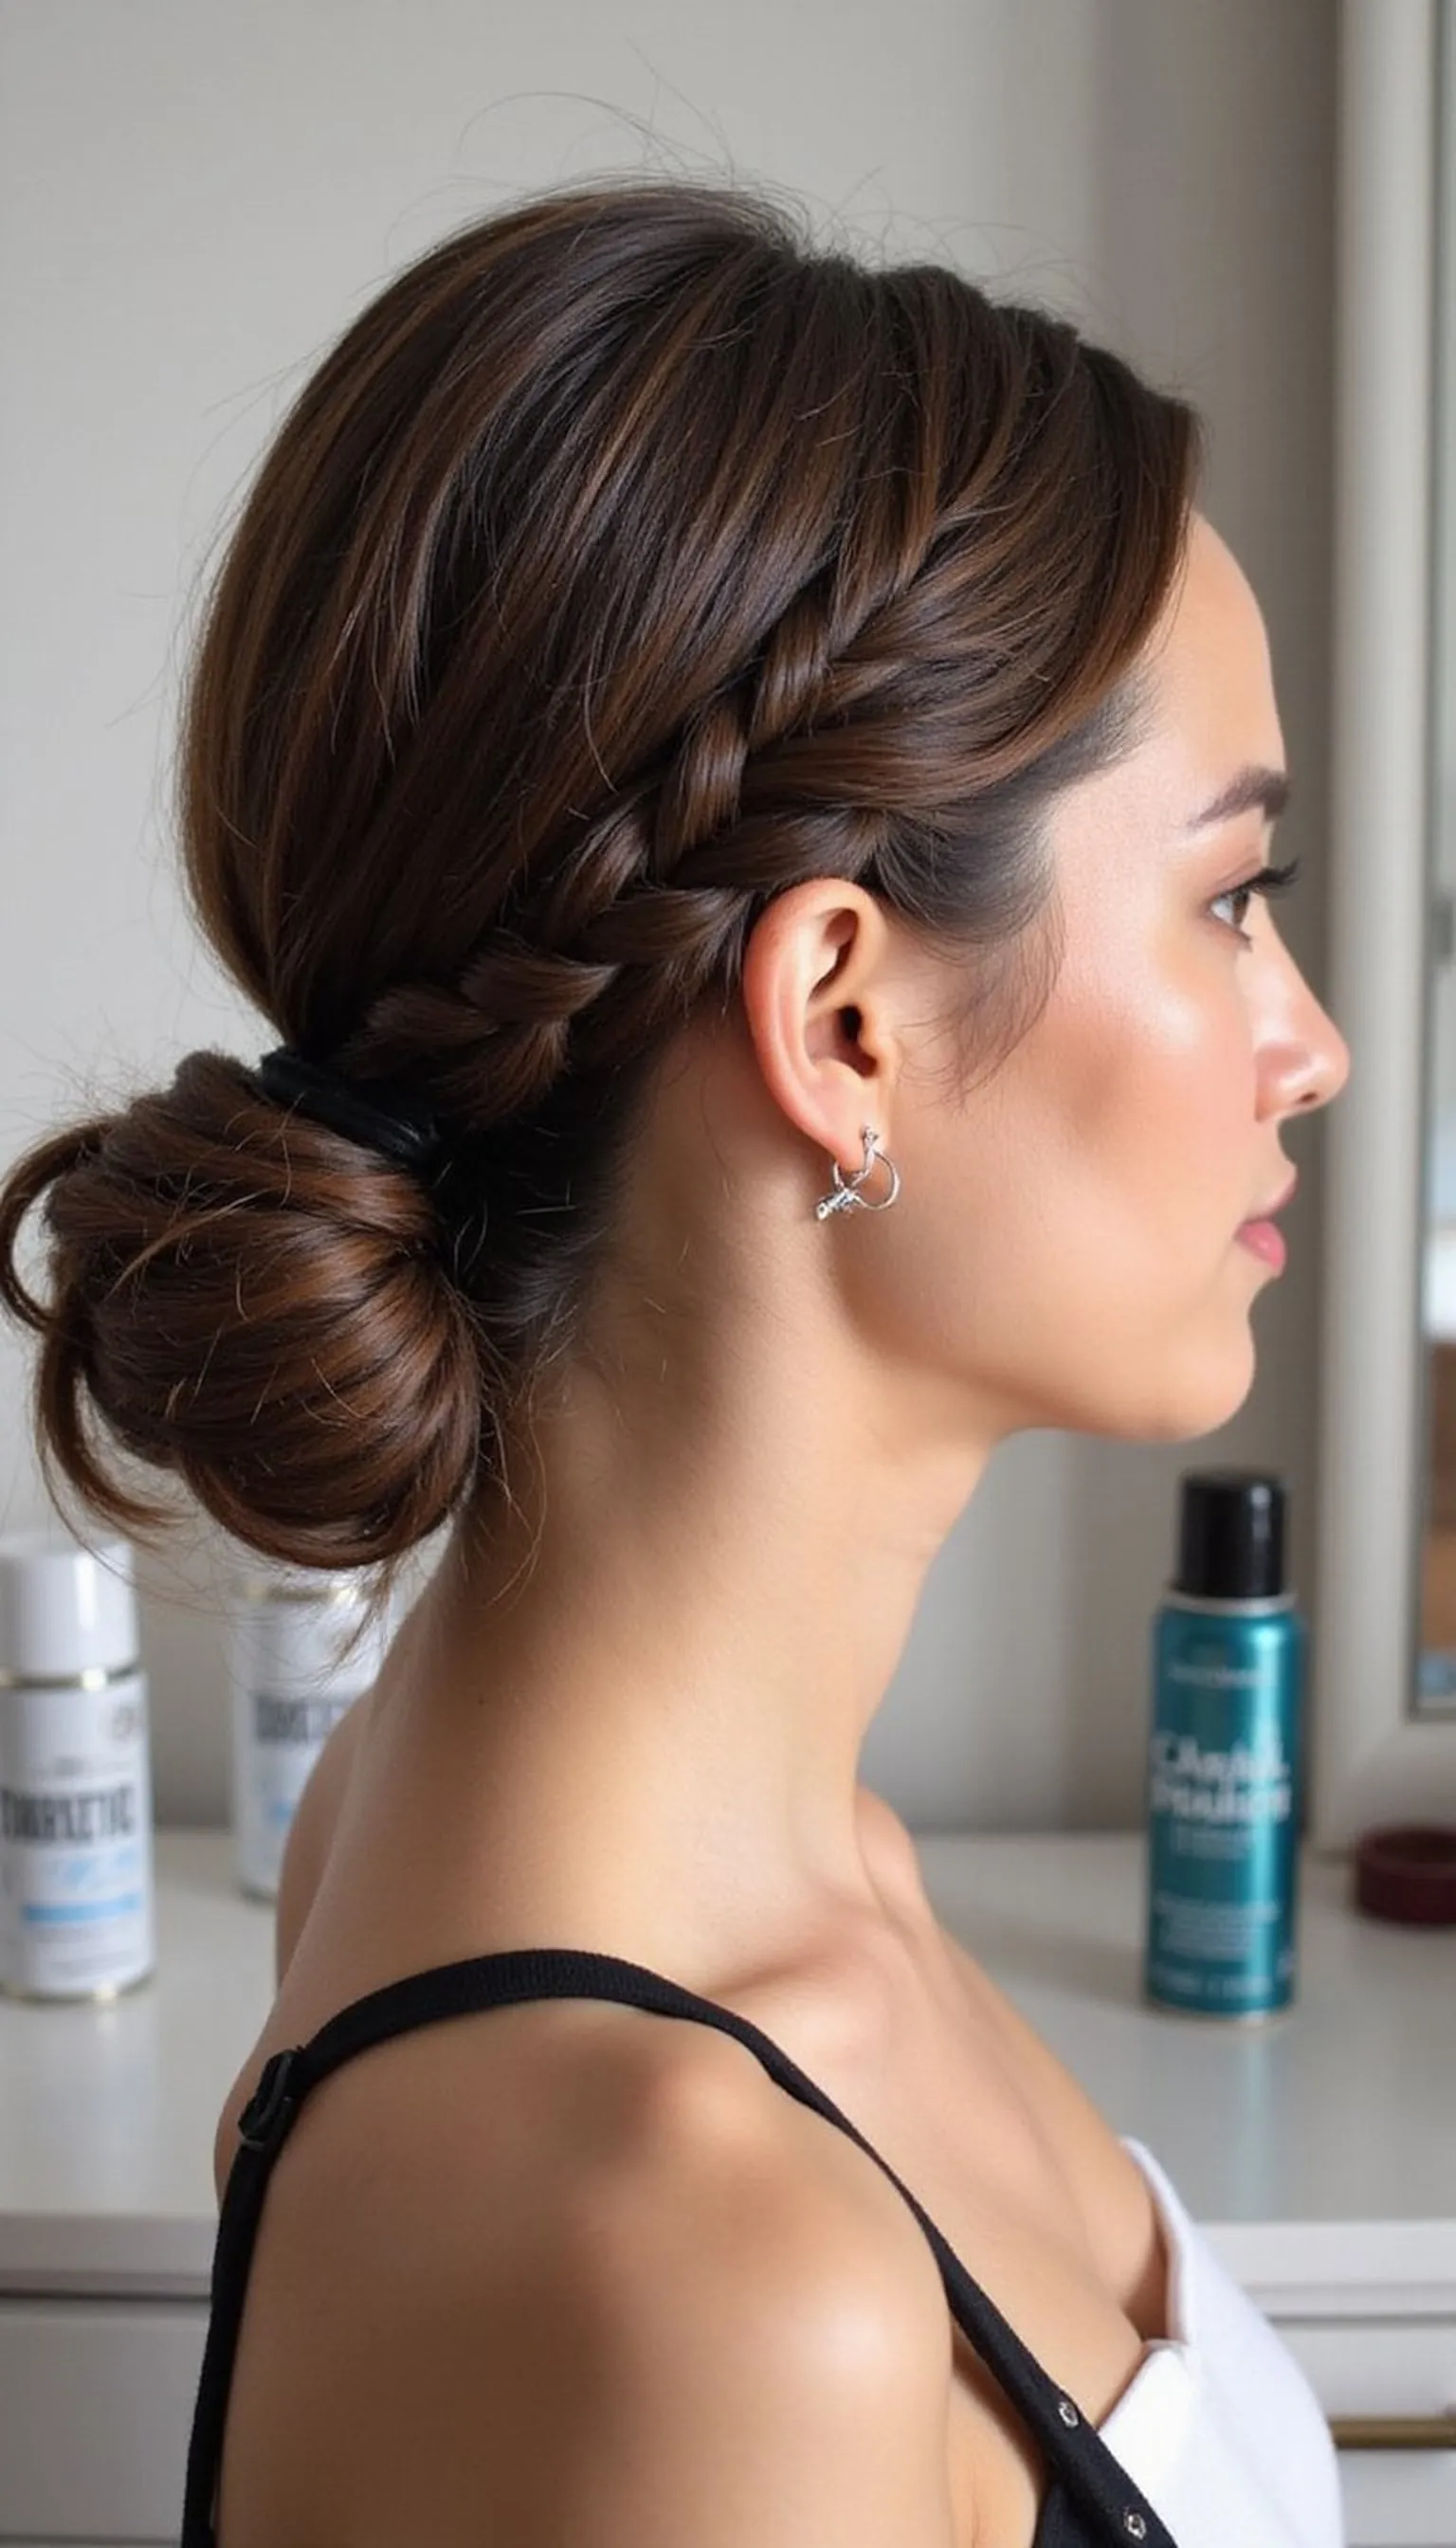
The low braided bun wraps a smooth braid into a compact bun at the nape for added texture with a sleek look. The braid keeps the coil tidy while still reading polished and elegant.
This hairstyle works well for medium to long hair and holds shape through long events. A slicked-in part or smoothed roots keep the braid lay flat against the head for a refined finish.
Create a low braid from a ponytail, then coil it around the base and pin evenly with strong bobby pins. Finish by smoothing the crown with a lightweight serum and a final mist of hairspray.
Styling Tips
- Braid tightly for a neat bun that stays secure.
- Wrap the braid around the elastic to hide it completely.
- Use extra pins under the braid for even weight distribution.
Pro Tip: Spritz the lengths with a light texturizing spray before braiding to help the braid keep its shape without frizz.
Avoid: Leaving the braid too loose causes the bun to unravel or look messy instead of sleek and structured.
Try Also: Try a three-strand braid for classic texture or a fishtail braid for a modern, intricate finish.
Products & Materials
Items Used
- hair elastic
- bobby pins
- texturizing spray
“Sleek braided bun brings polished texture to a low bun silhouette.”
Sleek Low Bun With Center Part And Mirror Shine
⏱️ 12 min · 🟢 Beginner

A center-parted sleek low bun highlights symmetry and glossy shine for a minimalist refined feel. The center part lines up with the bun to create a balanced, clean profile from forehead to nape.
Straight hair or a precise blowout gives the mirrored effect that makes the style pop. Smooth the roots and sides with a soft brush to keep the hair flat against the scalp.
Gather hair into a center-parted low ponytail, smooth, then coil into a tight bun and secure with pins. Finish with a shine spray for a salon-sleek reflection under lighting.
Styling Tips
- Use a rat-tail comb to create a crisp center part.
- Brush hair downwards while securing the elastic for a flat root.
- Apply shine spray last for a high-gloss finish.
Pro Tip: Run a silk scarf around the head for two minutes after pinning to compress the hair and boost sleekness.
Avoid: Not smoothing the crown can leave bumps that show through the tight bun and break the mirrored look.
Try Also: Swap the center part for a shallow side part for softer framing or add a low knot for variation.
Products & Materials
Items Used
- rat-tail comb
- shine spray
“Center-parted sleek low bun for symmetrical, mirror-like shine.”
Low Bun With Wrapped Elastic For Hidden Finish
⏱️ 8 min · 🟢 Beginner
This low bun uses a wrapped section of hair to hide the elastic for a smooth, uninterrupted base. Hiding the elastic gives a sleek, professional touch without extra accessories showing.
It works for most hair lengths as long as there is enough length to wrap and tuck the ends. A lightweight serum helps the wrapped piece lay flat and blend into the bun seamlessly.
Create a low ponytail, loop the hair into a bun and wrap a thin strand around the base to cover the elastic, then secure with pins. Smooth stray hairs and set with a mist of hairspray for longevity.
Styling Tips
- Reserve a small piece of hair from the ponytail specifically for wrapping.
- Pin the wrapped strand discreetly under the bun for a clean finish.
- Use elastic matching your hair color for extra camouflage.
Pro Tip: Keep the wrapping strand slightly damp for easier smoothing and a sleeker tuck under the bun.
Avoid: Using a thick wrap strand can look bulky; choose a thin piece to keep the base slim and invisible.
Try Also: Try a low knot with a wrapped base for added volume or add pearl pins around the wrapped seam for glam.
Products & Materials
Items Used
“Hidden elastic low bun for a seamless, professional finish.”
Sleek Low Bun With Scarf For Instantly Styled Vibe
⏱️ 10 min · 🟢 Beginner
A silk or satin scarf tied around a sleek low bun instantly elevates the look with color and texture. The scarf hides the base and adds an intentional accessory without bulk.
Place the scarf under the bun, tie it once and secure the knot on top or to the side for a playful accent. Smooth hair before tying so the scarf sits neatly and the bun remains sleek under the fabric.
This style works whether the bun is compact or loosely coiled, as the scarf provides visual focus. Seal with a soft mist of hairspray to keep edges tidy and the scarf in place during wear.
Styling Tips
- Choose a silk scarf for minimal friction and extra shine.
- Tuck the scarf ends into the knot for a neat finish.
- Match the scarf color to your outfit for a cohesive look.
Pro Tip: Fold the scarf into a slim band to avoid bulk and keep the bun’s silhouette low and sleek.
Avoid: Tying the scarf too tightly can flatten the bun and cause discomfort at the nape.
Try Also: Wear the scarf as a low headband over the bun or knot it around the base for a wrapped bow look.
Products & Materials
Items Used
- silk scarf
- hair elastic
“Add a silk scarf to a sleek low bun for instant style.”
Low Bun With Sleek Curtain Bangs Framing Face
⏱️ 15 min · 🟠 Intermediate

Sleek curtain bangs soften the face while a low bun keeps the overall look tidy and elegant. The bangs frame the cheekbones and add movement against the smooth nape finish.
This pairing works best when the bangs are blow-dried into a gentle curve and the rest of the hair is smoothed back. Keep the bangs slightly separated so they float at the temples rather than lying flat.
Create the low bun as usual, leaving the curtain bangs out to frame the face, then smooth them with a round brush and a touch of serum. Lock the bun with pins and finish the bangs with a light mist to hold the shape.
Styling Tips
- Blow-dry bangs with a small round brush for natural curve.
- Pin the bun slightly lower to balance the face framing effect.
- Use a dab of styling cream to keep bangs separated and frizz-free.
Pro Tip: Dry bangs first and clip them while you finish the bun to keep them perfectly shaped and cool before styling.
Avoid: Tucking the bangs into the bun removes the intended face-framing effect and can make the forehead appear heavy.
Try Also: Swap curtain bangs for side-swept bangs for a softer sweep, or add micro-buns for playful texture.
Products & Materials
Items Used
- round brush
- bobby pins
- styling serum
“Curtain bangs plus a sleek low bun for soft, framed elegance.”
Low Bun With Subtle Volume At The Crown
⏱️ 18 min · 🟠 Intermediate
Add subtle volume at the crown to balance a sleek low bun and create a flattering silhouette. A small amount of backcombing at the roots lifts the crown while smoothing keeps the sides sleek.
This look keeps the nape tidy while giving the top a gentle lift that complements round or square faces. Choose a soft brush and light texturizing spray to hold volume without frizz.
Tease a thin section at the crown lightly, smooth the top layer over it and gather hair into a low ponytail before coiling into a bun. Pin firmly and apply a light-hold hairspray to maintain the lift without stiffness.
Styling Tips
- Backcomb only small sections to avoid visible tangles.
- Smooth the top layer gently to hide the teased area.
- Use flexible-hold spray to keep movement natural.
Pro Tip: Use a cushion brush for smoothing after teasing to blend volume without flattening the crown.
Avoid: Aggressive teasing makes the crown look messy; keep teasing minimal and controlled for a refined lift.
Try Also: Go for a higher bouffant for retro drama or keep it flatter for a minimalist feel.
Products & Materials
Items Used
- teasing brush
- texturizing spray
- bobby pins
“Softly lifted crown paired with a sleek low bun for balanced style.”
Sleek Low Bun With Exposed Bobby Pin Art
⏱️ 20 min · 🔴 Advanced
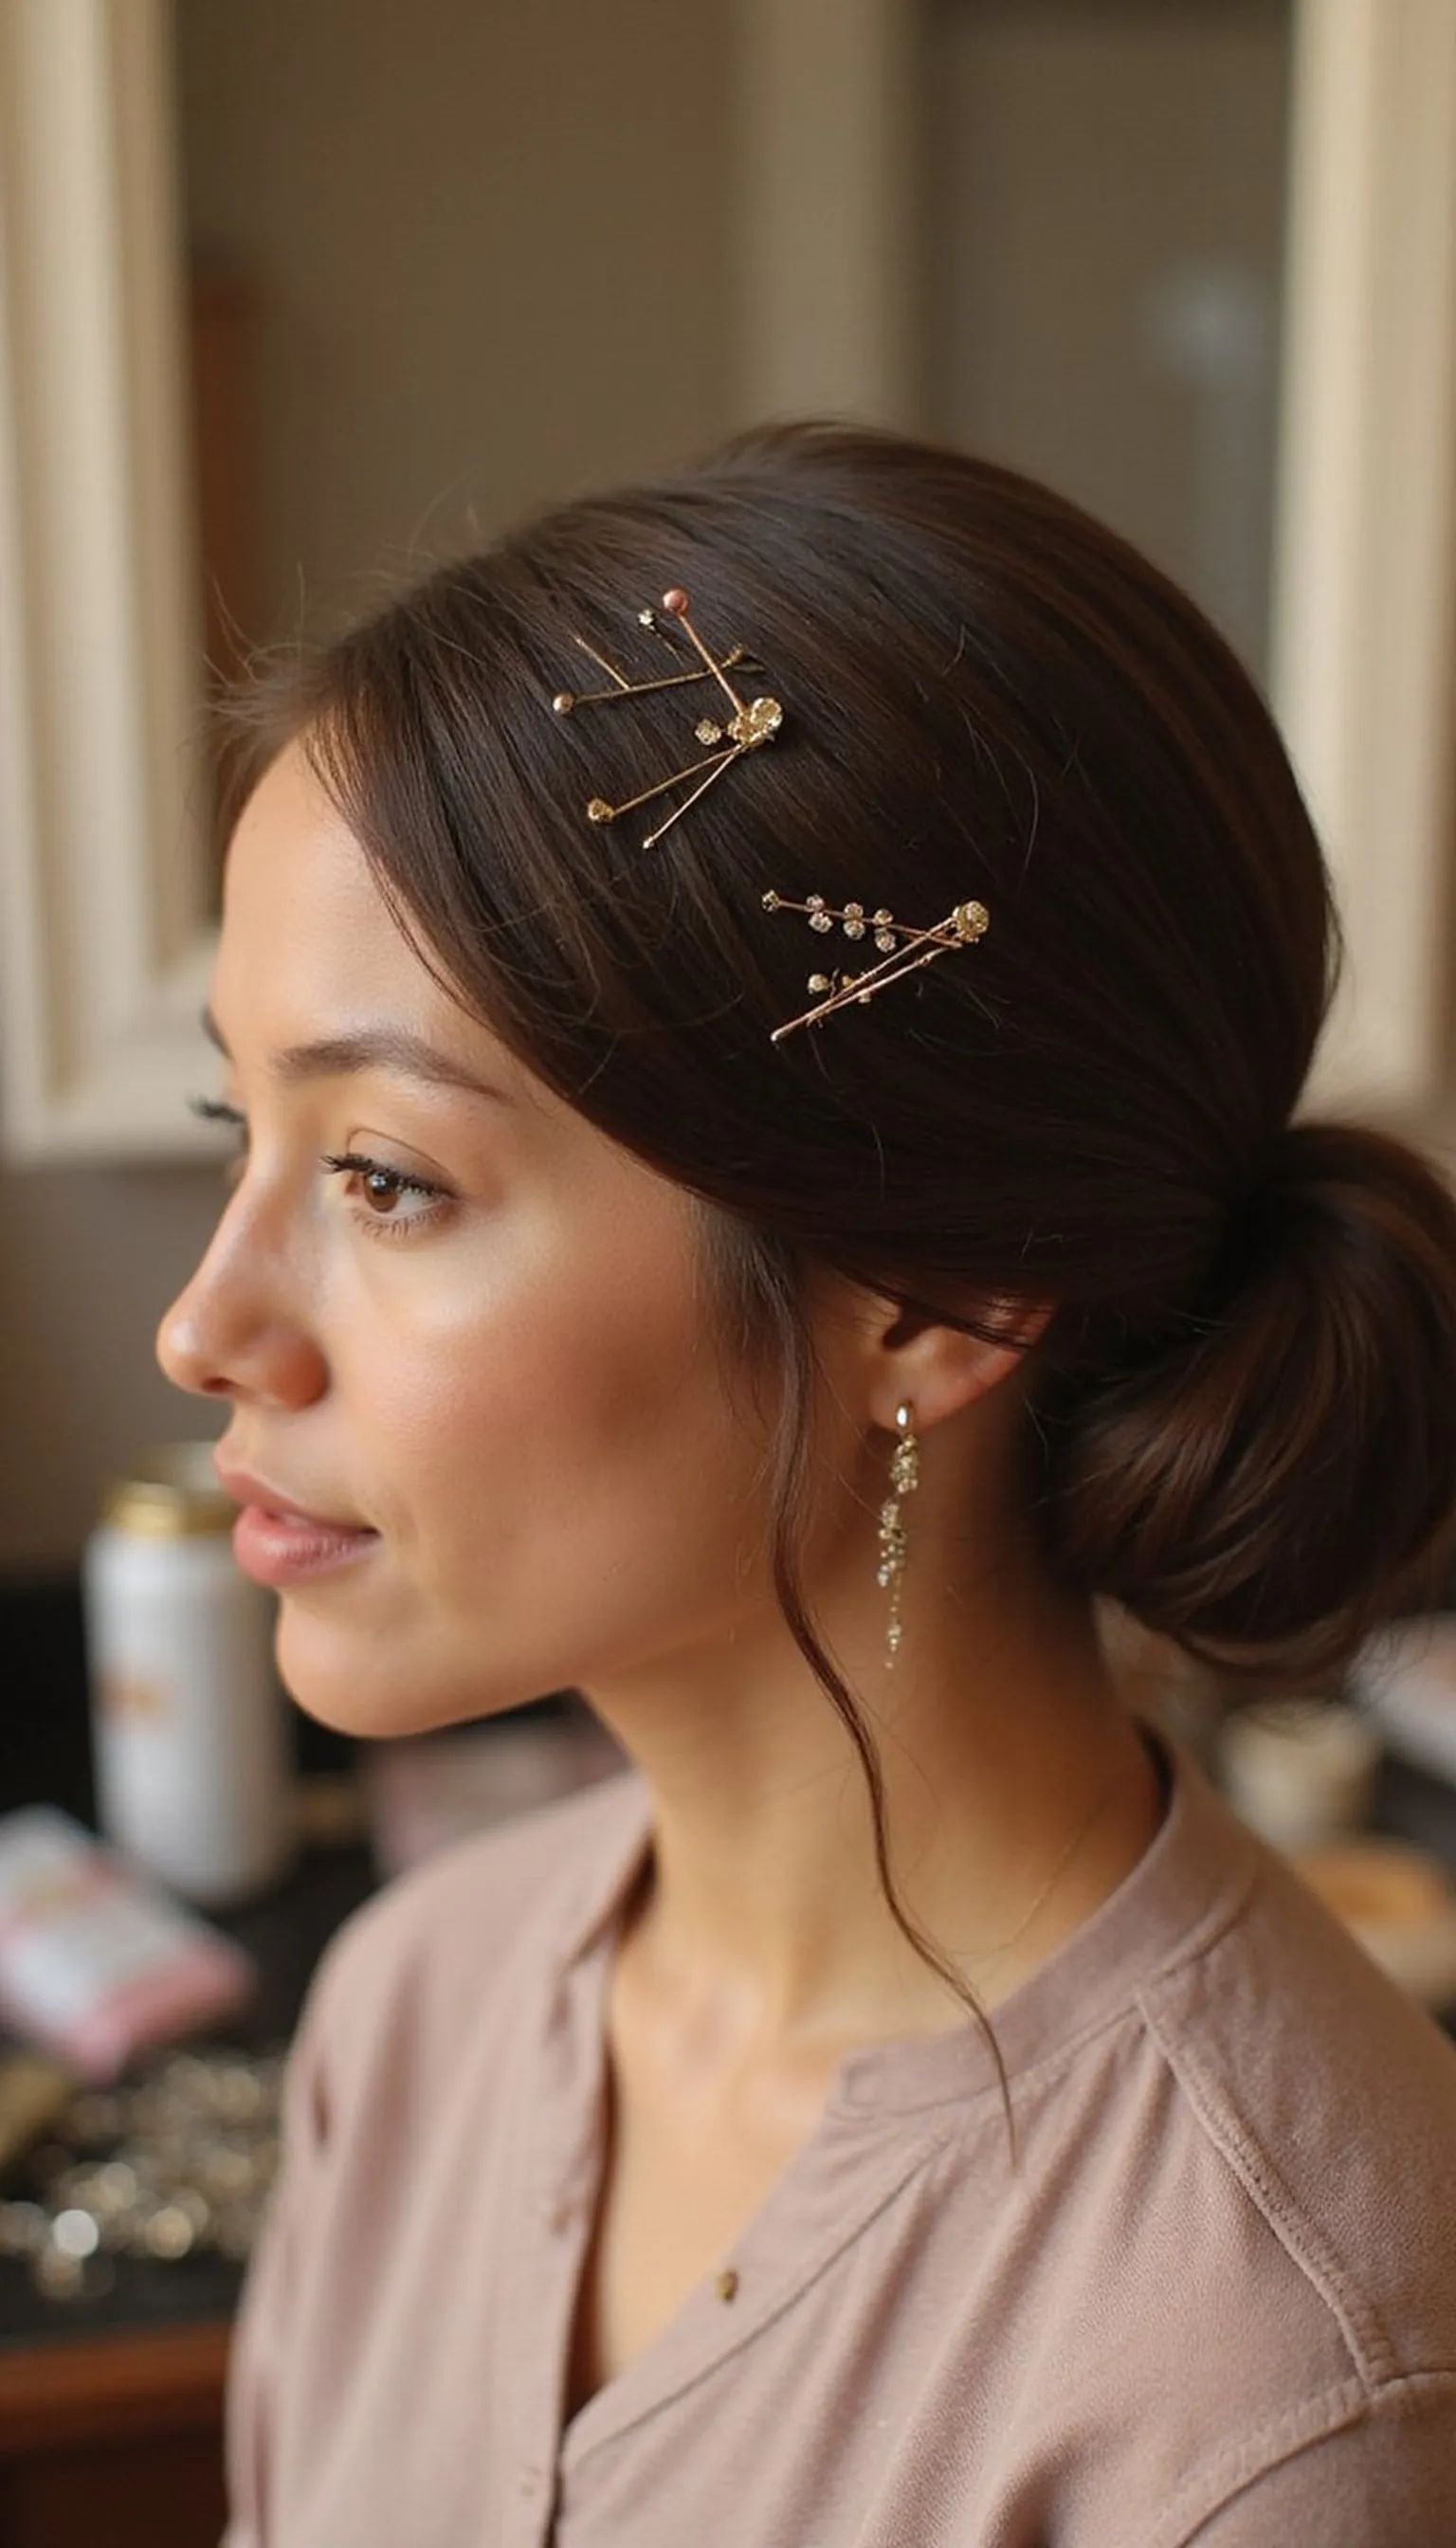
Create an artful row of exposed bobby pins along the side or above the bun for an editorial sleek look. Placing pins in a geometric or cascading line gives the low bun a modern, styled edge.
This technique requires precise placement and symmetry to look intentional rather than accidental. Choose matching metallic pins or statement embellished pins to coordinate with the outfit and mood.
Smooth hair into a low ponytail and form a compact bun, then add the bobby pins in your chosen pattern, pressing them flat against the head. Finish with firm-hold spray to keep pins secure and maintain the sleek surface around them.
Styling Tips
- Plan the pin layout before inserting to keep lines even.
- Use hair grips that match hair color for subtle patterns or metallic pins for drama.
- Press pins flat to the head for a sleek finish.
Pro Tip: Map the pin placement with temporary clips first to ensure perfect spacing and symmetry before inserting the bobby pins.
Avoid: Randomly placed pins can look messy; measure spacing and angle for a clean graphic result.
Try Also: Create a single diagonal line, cluster pins into a fan shape, or mix pearl and metallic pins for contrast.
Products & Materials
Items Used
- metal bobby pins
- embellished pins
- firm hold hairspray
“Graphic exposed bobby pin art accents a sleek low bun for modern flair.”
Low Bun With Sleek Side-Swept Fringe
⏱️ 12 min · 🟢 Beginner
A side-swept fringe paired with a sleek low bun creates an elegant frame without stealing focus from the bun. The fringe softens the face while the bun keeps the overall style polished and tidy.
Blow-dry the fringe with a round brush to add a gentle curve that rests beside the cheek. Smooth the remaining hair back into a low ponytail for a neat coil at the nape.
Secure the bun with discreet pins and lightly mist the fringe to keep it in place without stiffness. Tuck any short layers behind the ear for a refined profile and cleaner silhouette.
Styling Tips
- Use a few lightweight pins to hold the fringe in place if it slips.
- Smooth side hair toward the ear for a sleek line.
- Finish with a flexible-hold spray to keep movement natural.
Pro Tip: Clip the fringe while styling the bun to preserve its shape and avoid accidental flattening from handling the hair.
Avoid: Pinning the fringe into the bun removes the side-swept effect and can make the face look heavy.
Try Also: Wear the fringe fuller for a vintage vibe or trim it shorter for a modern, edgy look.
Products & Materials
Items Used
“Side-swept fringe plus a sleek low bun for soft, framed elegance.”
Low Bun With Sleek Wet-Look Finish
⏱️ 15 min · 🔴 Advanced
The wet-look sleek low bun uses gel or styling balm for a high-gloss, slicked-down finish that reads ultra-modern. Hair is molded close to the scalp and gathered into a tight low bun for maximum sheen and hold.
This approach works best on straight or freshly flat-ironed hair to avoid frizz and maintain that wet sheen. Use a lightweight gel to avoid flaking and finish with a gloss spray for extra shine.
Smooth product through the roots and lengths, comb to shape, then secure into a low bun and press with your palms for a glossy seal. Keep a toothbrush or small brush on hand to tame baby hairs and edges for a polished outline.
Styling Tips
- Work gel through damp hair for a true wet look without crunch.
- Use a toothbrush to smooth flyaways near the hairline.
- Finish with gloss spray rather than heavy hairspray to keep shine.
Pro Tip: Warm the gel between palms before applying for an even, glossy finish and to avoid clumping on the strands.
Avoid: Using too much gel can flake once dry; apply sparingly and build as needed for a smooth wet finish.
Try Also: Try a low wet-look ponytail for a simpler option or add a center part for an editorial edge.
Products & Materials
Items Used
- styling gel
- toothbrush
- gloss spray
“High-gloss wet-look low bun for editorial, sleek style.”
Low Bun With Sleek Half Up Wrapped Accent
⏱️ 15 min · 🟠 Intermediate
A half-up wrapped accent adds a modern twist to a classic sleek low bun by lifting the top section into a wrap before pinning. The wrapped piece creates a subtle lifted line that keeps the nape neat while adding visual interest.
This style works well on medium to long hair and reads polished without being formal. Slightly smoothing the wrapped section before pinning keeps the finish clean and sleek.
Gather the top half into a small loop, wrap it around the base of the low ponytail, then coil the remaining hair into the bun. Pin both sections securely and mist with light-hold spray to maintain the shape.
Styling Tips
- Secure the wrapped section with hidden pins under the bun.
- Keep the wrap flat against the head for a sleek profile.
- Use a smoothing brush to tame the top layer before wrapping.
Pro Tip: Anchor the wrapped section first with a single pin, then add supporting pins after coiling the bun to lock placement.
Avoid: Overfilling the wrap can make the top look bulky; keep the wrapped piece narrow for balance.
Try Also: Create a small bouffant before wrapping for vintage flair or keep the top ultra-flat for minimalism.
Products & Materials
Items Used
- bobby pins
- smoothing brush
- light hold hairspray
“Half-up wrapped accent adds modern detail to a sleek low bun.”
Low Bun With Sleek Bubble Pony Accent
⏱️ 20 min · 🔴 Advanced
A sleek bubble pony above a low bun gives a contemporary vibe while keeping the nape polished and tidy. The bubbles add rhythm to the silhouette while the bun anchors the look with smooth finish.
Create a low ponytail then add elastic sections above it to form sleek bubbles leading into the bun. Smooth each bubble with serum and clip ends cleanly into the low coil for a unified style.
Use small elastics for defined bubbles, then gather the ends into a low ponytail and twist into a bun. Finish by smoothing seams and misting with flexible-hold spray so the bubbles stay neat but not stiff.
Styling Tips
- Use clear elastics for an invisible bubble connection.
- Smooth the area between elastics with a brush for polished bubbles.
- Pin the bun base securely to hold the weight of the bubbles.
Pro Tip: Wrap a thin strand of hair around each elastic to camouflage them and keep the look seamless from crown to bun.
Avoid: Skipping smoothing between bubbles makes the style look uneven; brush each segment for consistent gloss.
Try Also: Make the bubbles larger for a playful look or tighter for a refined, linear effect.
Products & Materials
Items Used
- clear hair elastics
- bobby pins
- flexible hold spray
“Modern bubble accents flowing into a sleek low bun for playful polish.”
Low Bun With Pearl Pins For Subtle Glam
⏱️ 12 min · 🟠 Intermediate
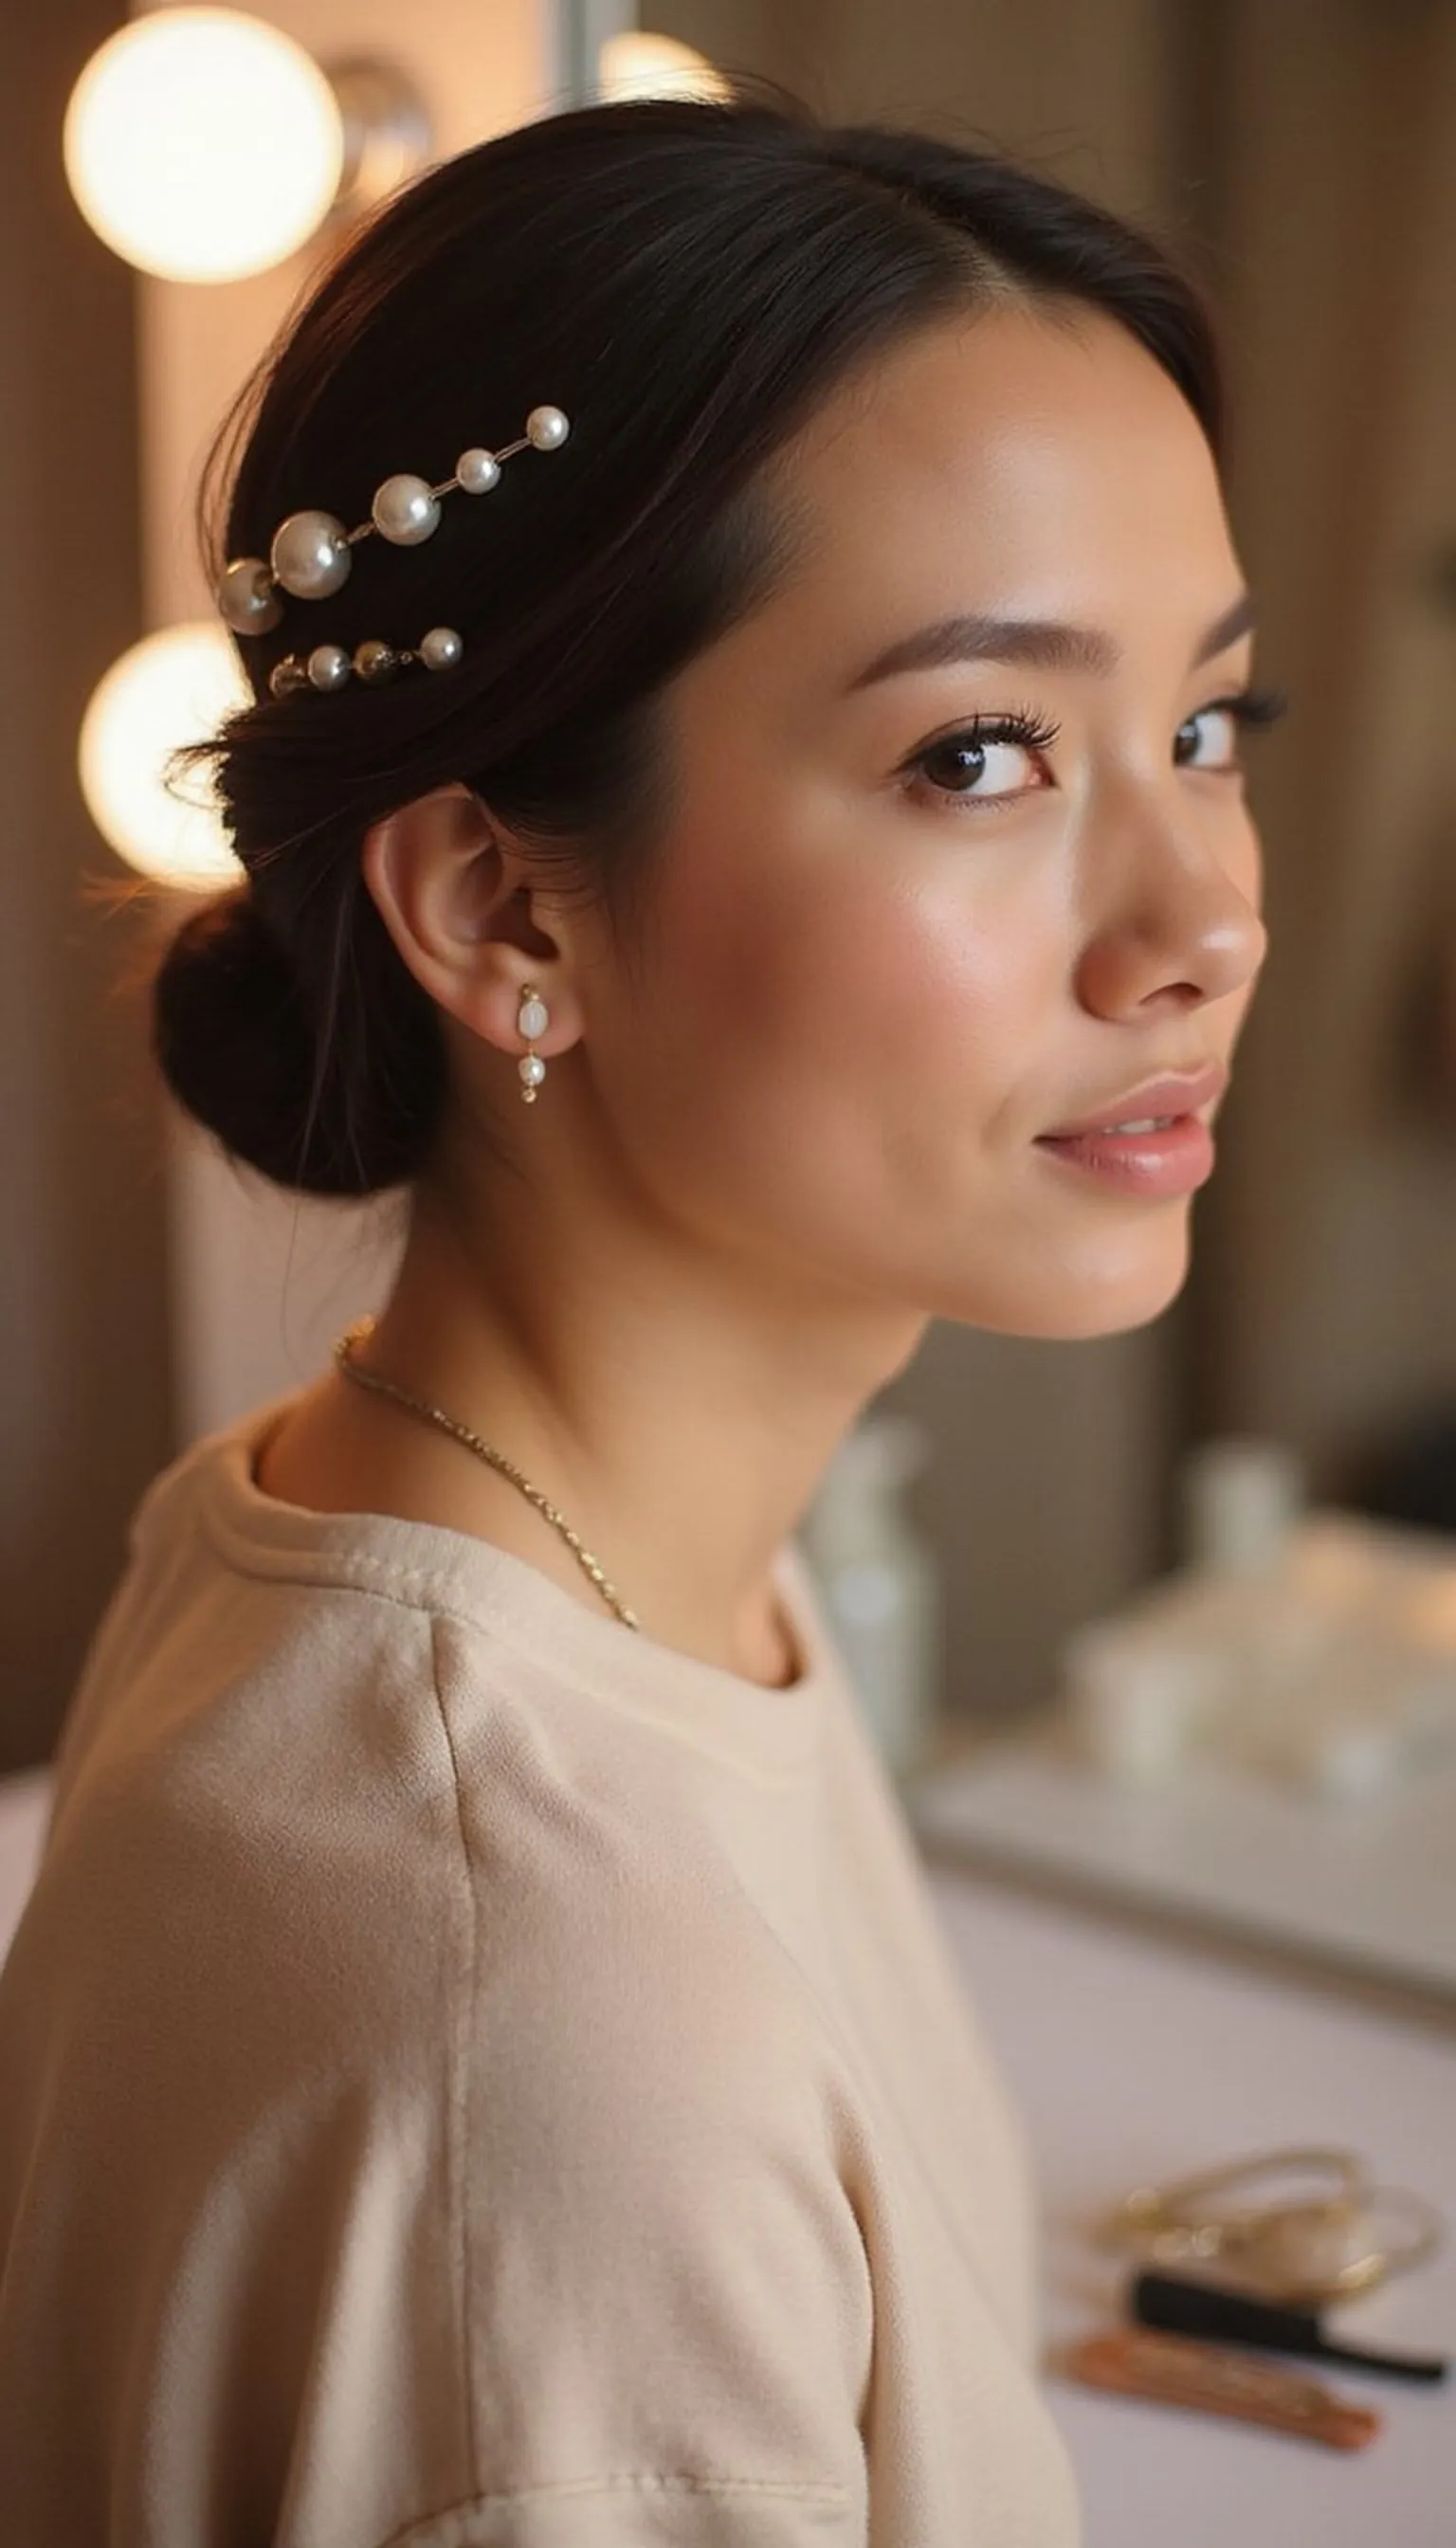
Pearl pins tucked into a sleek low bun add a feminine, understated glint without overpowering the style. The pearls sit along the seam or scattered around the coil for delicate detail.
This approach is ideal for events when a little sparkle is desired while keeping hair tidy and low. Place pins asymmetrically for a modern touch or evenly for a classic finish.
Form a neat low bun, then press pearl pins gently into the coil where they catch light best. Finish with a medium-hold spray so the pins stay put and the bun keeps its sleek profile.
Styling Tips
- Use pearl pins with a secure grip to prevent slipping in fine hair.
- Cluster pins around one side for a contemporary accent.
- Anchor pins under the hair layers to hide the stems.
Pro Tip: Tilt your head slightly while inserting pearl pins to find the most reflective angle before securing them.
Avoid: Placing pins too close to the ends can cause them to poke out; insert into thicker coil sections for stability.
Try Also: Mix pearl and metallic pins for contrast or use a single oversized pearl for minimalist impact.
Products & Materials
Items Used
- pearl hair pins
- bobby pins
- medium hold hairspray
“Pearl pins add subtle glam to a sleek low bun for special occasions.”
