
As an Amazon Associate I earn from qualifying purchases.
DIY Wine Cork Home Decor Crafts add warm, lived-in texture to shelves and tabletops. These wine cork crafts slip easily into small corners and bring quiet, approachable accents around the house.
Cork decor ideas range from tiny coasters to framed board art that invites touch. Natural cork warmth and the faint scent of old wine create a comforting, tactile mood in everyday rooms.
A handful of simple techniques turn leftover corks into thoughtful home accents with personality. Small gatherings and solitary moments both benefit from these cozy, handcrafted pieces that feel friendly and lived with.
Rustic wine cork coasters for cozy tables
⏱️ 30 min · 🟢 Beginner
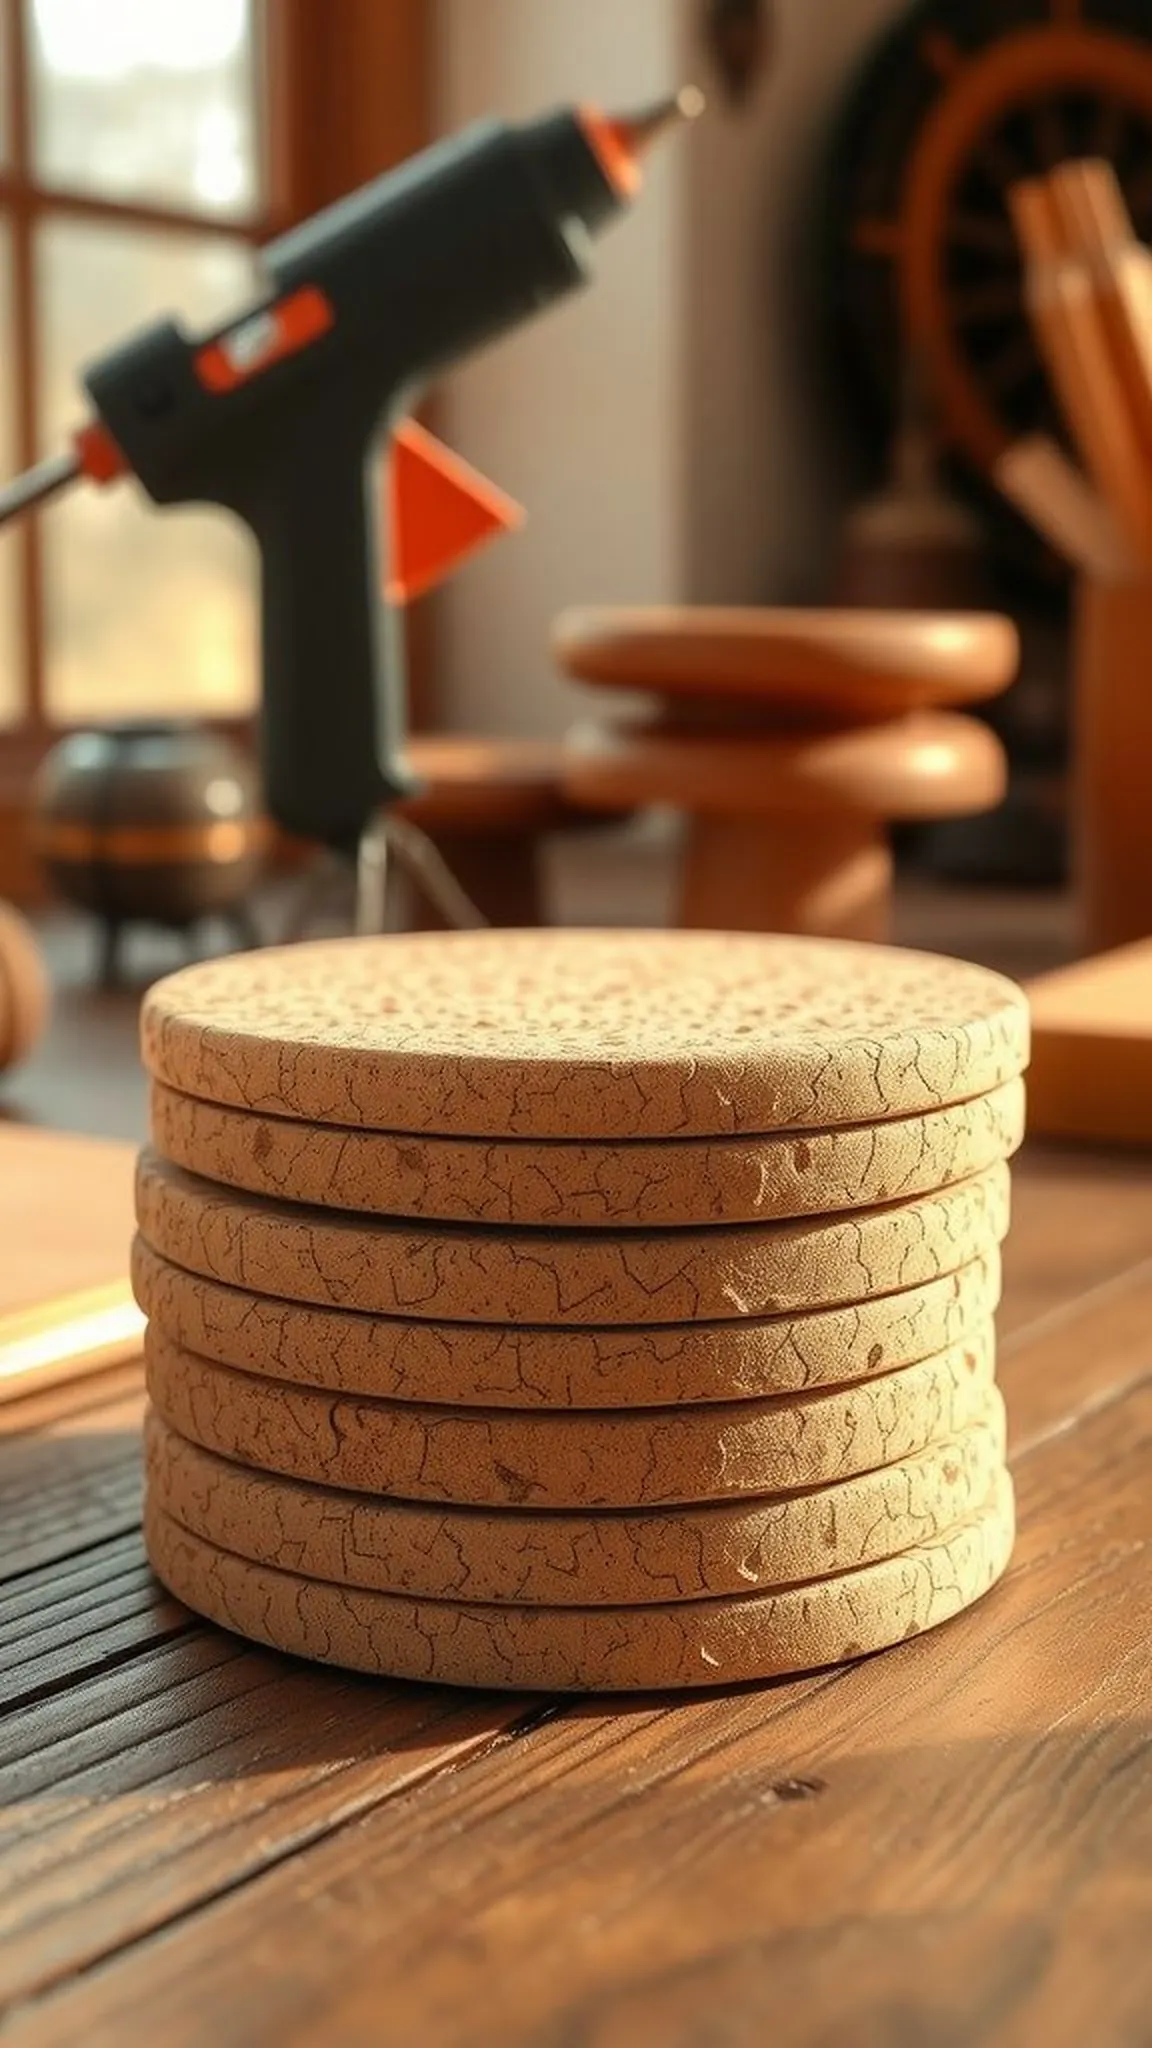
A cluster of cork pieces forms a soft, speckled surface that cushions mugs and glasses. The warm tan tones and tiny pores create an organic pattern against darker table finishes.
The edges give a gentle bounce under fingertips and the faint aroma carries hints of cellar evenings. Light pools on the round silhouette, encouraging relaxed coffee or wine rituals.
Close-up shots emphasize the tactile grain and subtle color shifts between corks. Finished coasters sit low and humble, offering quiet charm without fuss.
Pro Tip: Allow newly joined cork pieces to rest overnight so adhesives set evenly and edges remain true without warping.
How to Make This
- Gather used wine corks and slice them lengthwise for flat profiles.
- Arrange the flat cork halves in a circular pattern on a round wooden backing.
- Secure cork pieces with hot glue, filling gaps for a tight fit.
- Apply a clear sealer across the surface to protect from moisture and stains.
Avoid: A frequent beginner error is applying excessive adhesive, which darkens cork and creates uneven edges. Too much glue can also lead to visible squeeze-out that dulls the natural texture.
Try Also: Smaller rounds form coaster stacks while a square backing yields a modern silhouette; a painted rim introduces a subtle pop of color. Cork halves can be alternated by grain to create a plaid-like pattern.
Products & Materials
Items Used
“Cozy cork coasters add rustic warmth to any coffee table.”
A trivet that soaks up heat and character
⏱️ 1 hour · 🟠 Intermediate
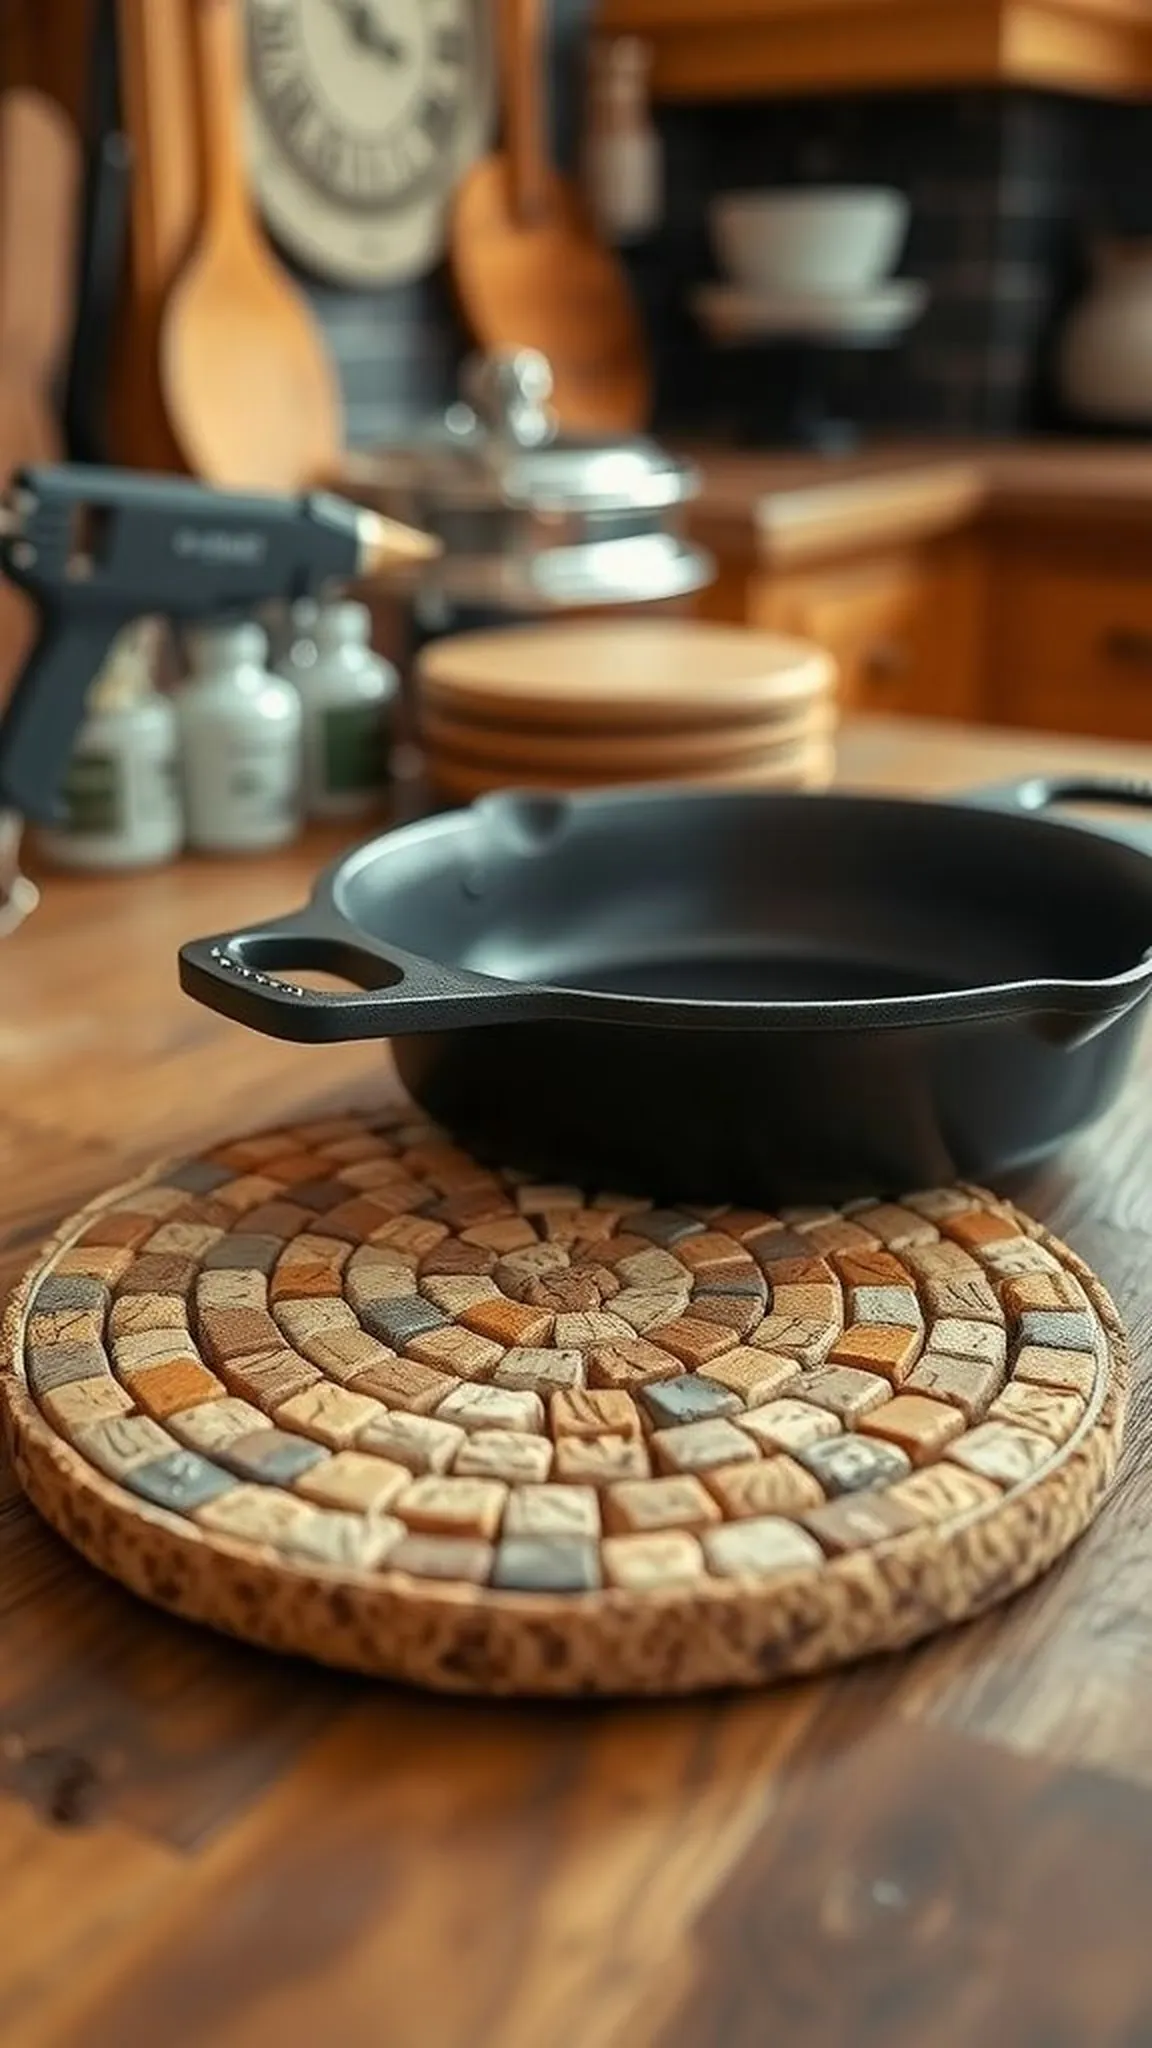
A compact cork trivet feels pleasantly springy under a hot pan and wears light scorch marks without fuss. The mosaic of stumpy corks creates a honeyed surface that plays with shadow and light.
Edges show tiny, tactile ridges that invite bare-footed curiosity in the kitchen. The overall shape sits confidently beneath cast iron, providing both insulation and a handcrafted look.
Color variations in the corks make a warm, rhythmic pattern when grouped together. A textured underside adds grip against a wooden table while the top shows subtle wine stains that read as lived-in personality.
Pro Tip: Let the heated pan cool briefly on a trivet to protect sealant from sudden temperature shock and preserve finish longevity.
How to Make This
- Collect wine corks and slice them into uniform rounds or discs.
- Lay the discs tightly on a flat backing board in a honeycomb or grid layout.
- Secure each disc with a bead of hot glue, ensuring a flush top surface.
- Finish with heat-resistant sealant applied evenly over the assembled trivet.
Avoid: A typical novice mistake is leaving gaps between cork discs, which reduces heat insulation and looks uneven. Crowding discs too tightly can also create a slightly domed surface.
Try Also: A hexagonal trivet introduces a modern edge while alternating vertical and horizontal cork cuts yields a striped field. Embedding thin metal accents between rows adds an industrial note.
Products & Materials
Items Used
- wine corks
- hot glue gun
- wooden backing board
- heat resistant sealant
“Handmade cork trivet that protects surfaces with cozy texture.”
Front-door wreath from recycled wine corks
⏱️ 2-3 hours · 🟠 Intermediate
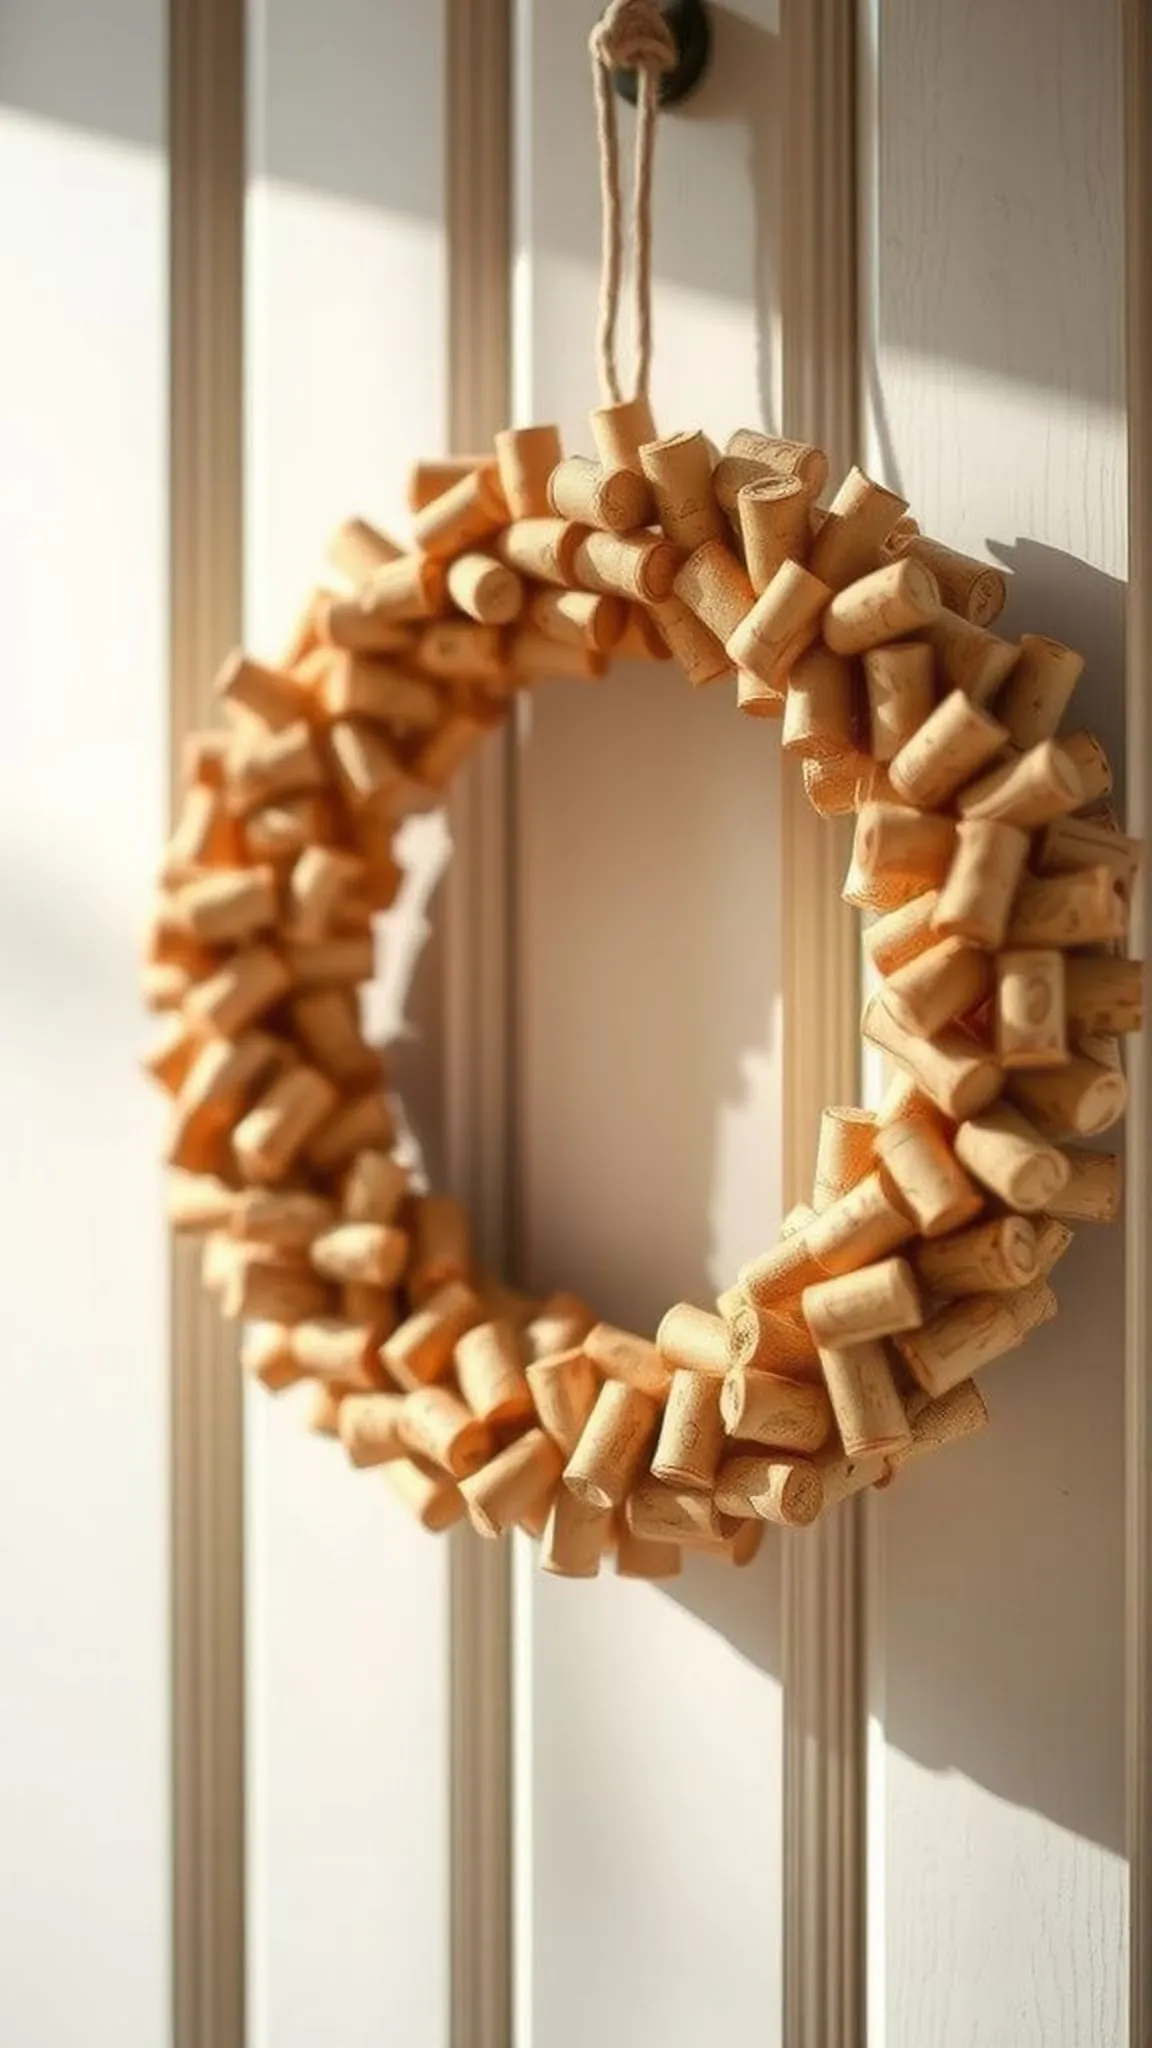
A cork wreath greets guests with layered depth and a casual, country charm. Bundles of short cork stubs form a dense, tactile crown that catches late afternoon light.
Natural shades range from pale beige to rich amber, creating a soft ombre effect across the ring. Tiny shadows between corks add cozy dimensionality when viewed from an angle.
A hint of twine and a subtle loop give the wreath a modest, handmade posture on the door. The overall impression reads like an heirloom that earned its place through many small gatherings.
Pro Tip: Allow the wreath to relax for a day before hanging so adhesive holds fully and the shape settles evenly without shifting.
How to Make This
- Prepare a circular base like a foam or wire ring suited to the wreath size.
- Group wine corks side by side and adhere them around the base until fully covered.
- Add a loop of twine at the top and secure extra corks to hide any exposed backing.
- Optional light spray adds protection and unifies the cork tones.
Avoid: A frequent beginner error is overloading one section with more corks than the rest, which causes an off-balance silhouette. Ignoring slight gaps early on often leads to last-minute crowded patches later.
Try Also: A half-wreath focuses texture on the lower arch for a modern doorway vibe while adding dried sprigs or ribbon softens the look. Alternating horizontal and vertical cork placement creates subtle geometric interest.
Products & Materials
Items Used
- wine corks
- wreath base ring
- twine
- hot glue gun
“Recycled cork wreath with cozy, dimensional farmhouse charm.”
Save time and printer ink with 50+ printable templates and step-by-step instructions in one ad-free guide.

Just $19.99 — lifetime access
Cork bulletin board for kitchen messages
⏱️ 1 hour · 🟢 Beginner
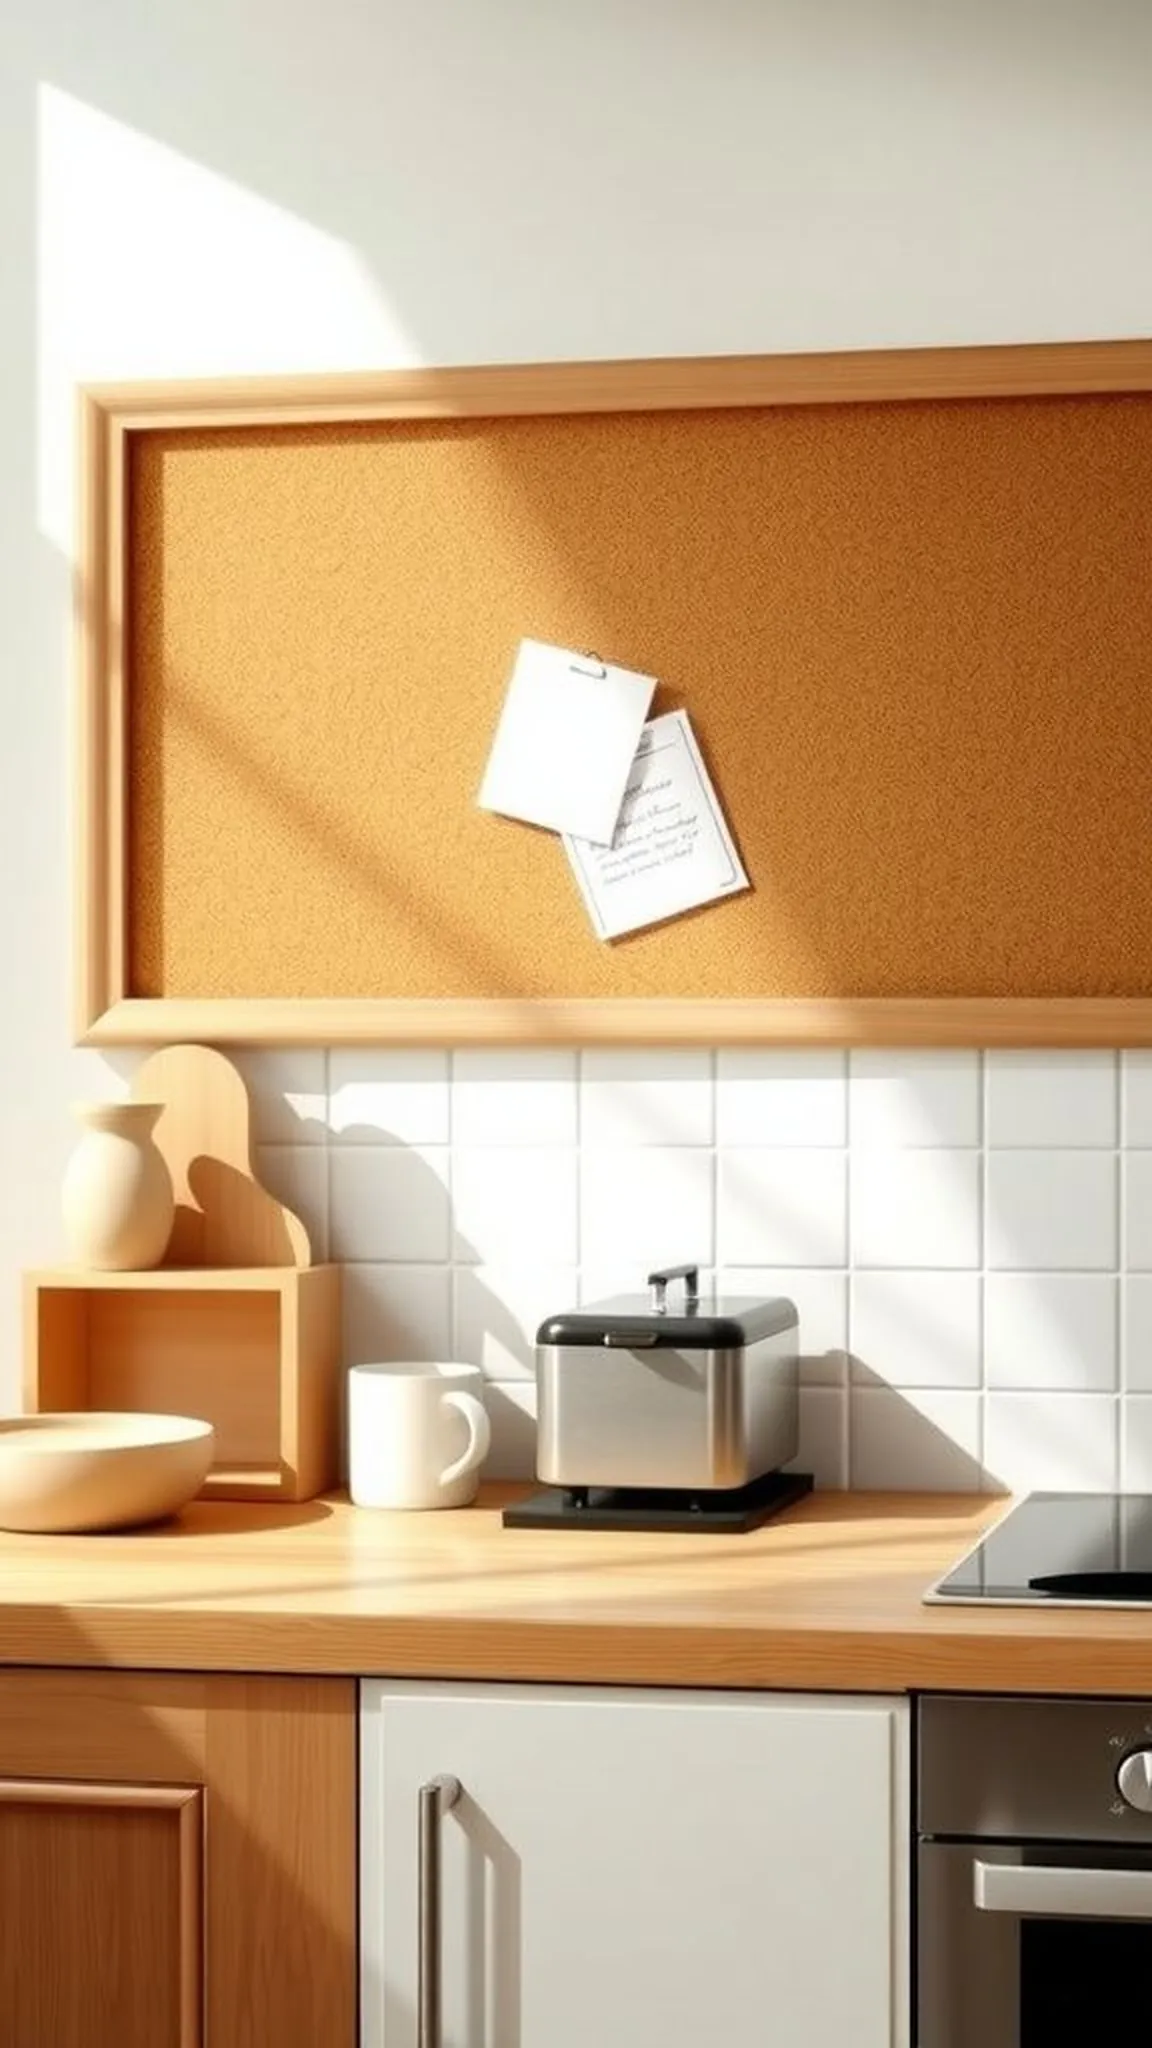
A cork bulletin board reads like a cozy command center above a kitchen counter. Tiny cork ends form a patchwork that accepts pins and magnets with a friendly, muted look.
The surface bears small indentations that tell stories of lists, postcards, and grocery scribbles. Colors sit quietly, blending with fridge magnets and clipped recipes for a lived-in feeling.
The frame gives the piece intentional presence without shouting, and light grazes the textured plane throughout the day. Small shadows around each pinhole lend a tactile quality that invites quick notes and reminders.
Pro Tip: Let the board rest flat for several hours after assembly to prevent small seams from separating and to ensure a stable surface for pins.
How to Make This
- Arrange corks upright on a flat backing board to reach the desired width and height.
- Glue corks row by row, keeping tops level for a consistent pin surface.
- Trim edges and add a frame to conceal exposed backing if a clean finish is preferred.
Avoid: A frequent error is not keeping cork tops level, which results in a bumpy pin surface. Leaving small gaps between corks also reduces the board’s pin-holding reliability.
Try Also: A small square board works as a jewelry holder while a larger rectangle serves as a family message center. Painting the frame introduces a color pop without altering the cork face.
Products & Materials
Items Used
- wine corks
- plywood backing
- frame moulding
- hot glue gun
“Charming cork bulletin board for notes, recipes, and keepsakes.”
Mini succulent planters made from cork stubs
⏱️ 2 hours · 🔴 Advanced
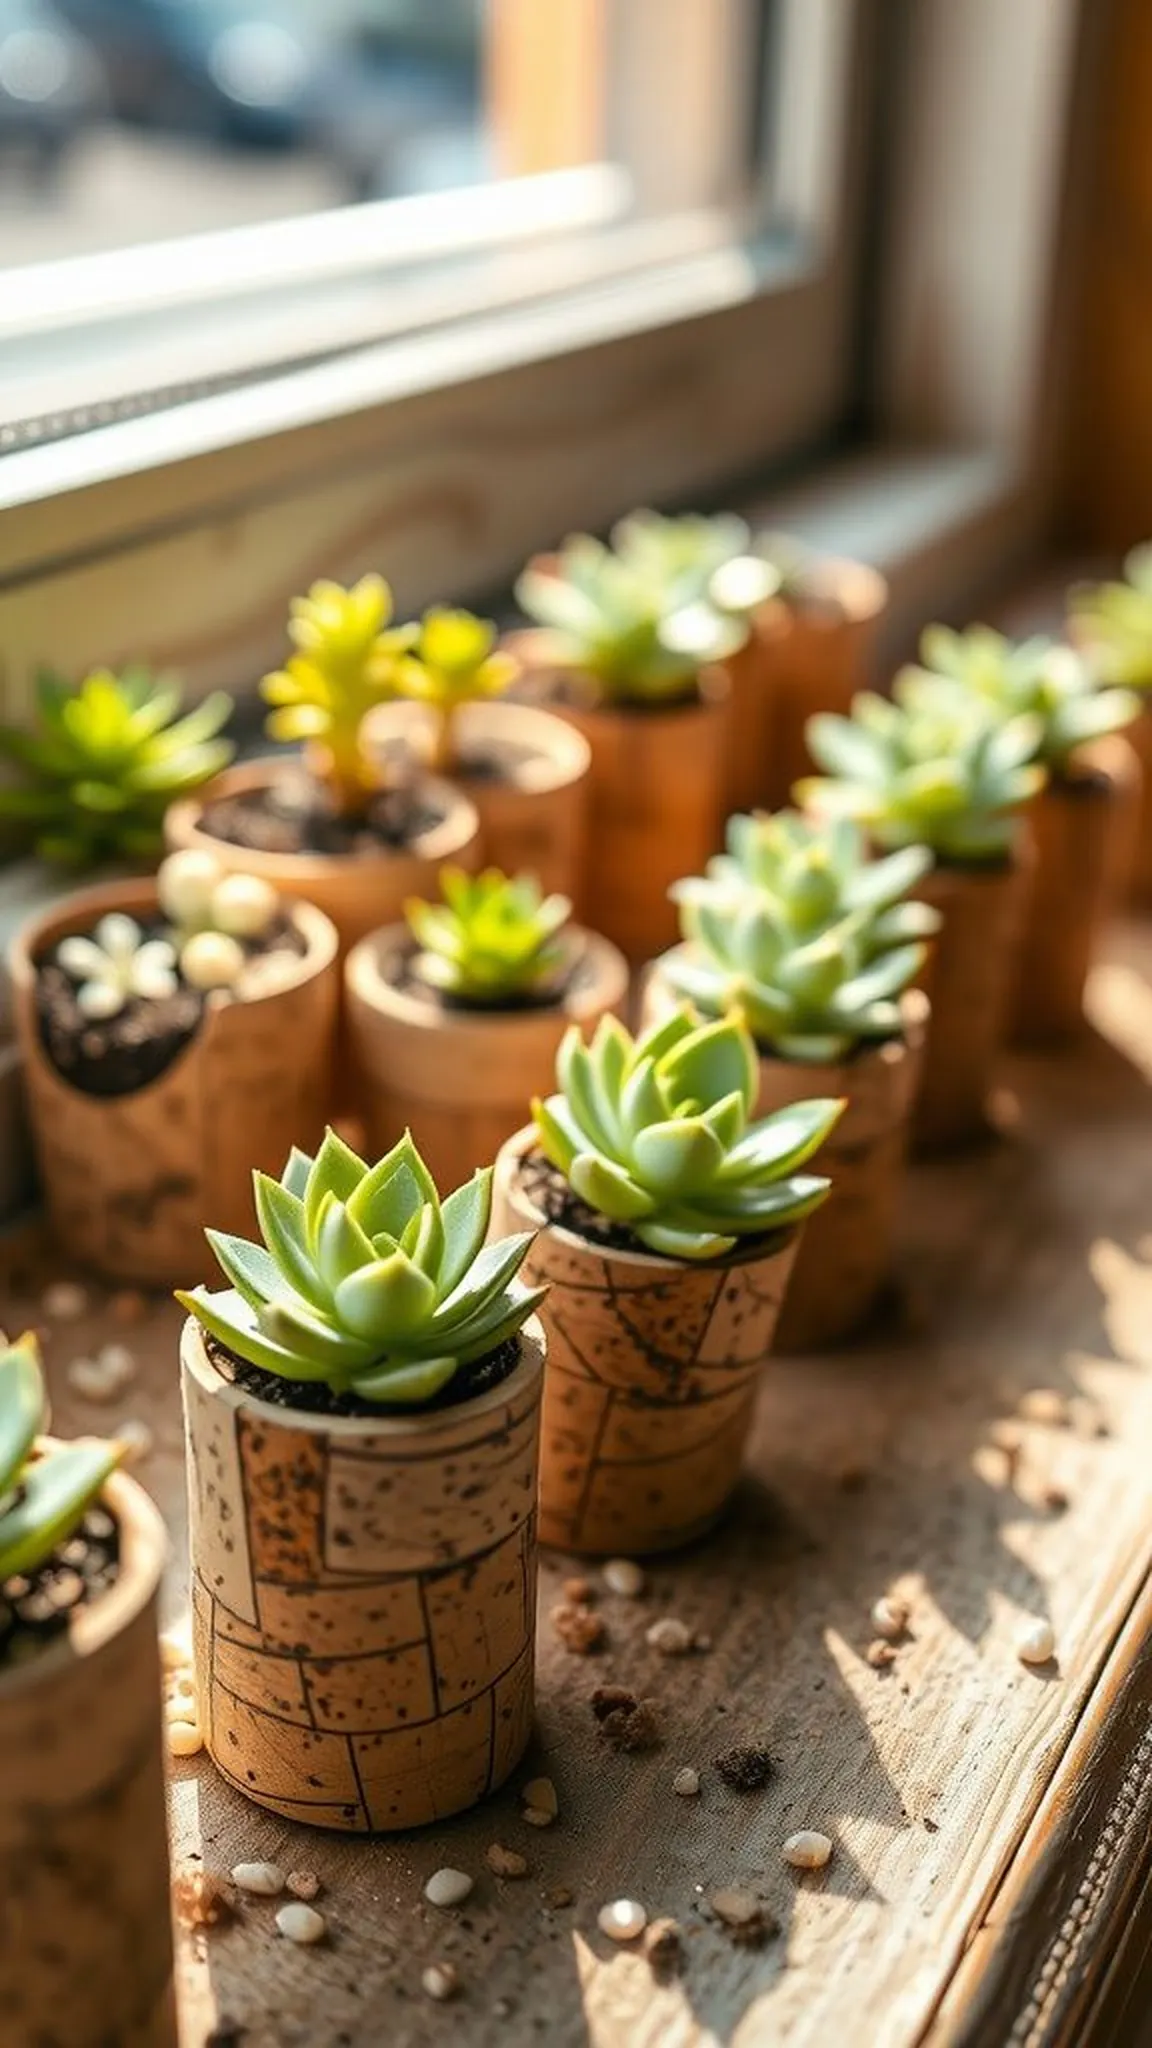
Tiny succulents nestle into hollowed cork stubs like miniature islands. The contrast of soft green leaves against the warm cork grain is quietly delightful up close.
Textural differences are noticeable by touch, with cork retaining a pleasant springiness beneath fingers. A faint earth scent enhances the small, living vignette when placed on a sunlit windowsill.
Groupings form a mini landscape that reads as an intentional, low-maintenance green corner. Each miniature pot contributes to a tabletop garden that feels curated and calm.
Pro Tip: Allow cork interiors to air out fully before adding soil so moisture levels remain balanced and fragile roots avoid rot issues.
How to Make This
- Create a shallow cavity in cork stubs using a small drill or carving tool.
- Add a pinch of gravel for drainage and fill with a tiny bit of succulent soil.
- Nestle miniature succulent cuttings into the soil and firm gently.
- Mist lightly and let the arrangement rest in bright, indirect light.
Avoid: A frequent mistake is over-potting the tiny planters with too much soil, which leads to trapped moisture and root problems. Crowding several succulents into one small cork can also stress the plants.
Try Also: Cluster a few cork planters on a driftwood slice for a natural display, or line them along a sunny windowsill for a row of tiny green bursts. Painting the cork bases adds a playful, modern contrast.
Products & Materials
Items Used
- wine corks
- small drill bit set
- succulent soil
- mini succulents
“Tiny cork planters for succulents make a sweet, low-care display.”
Candle holders that whisper rustic romance
⏱️ 45 min · 🟠 Intermediate
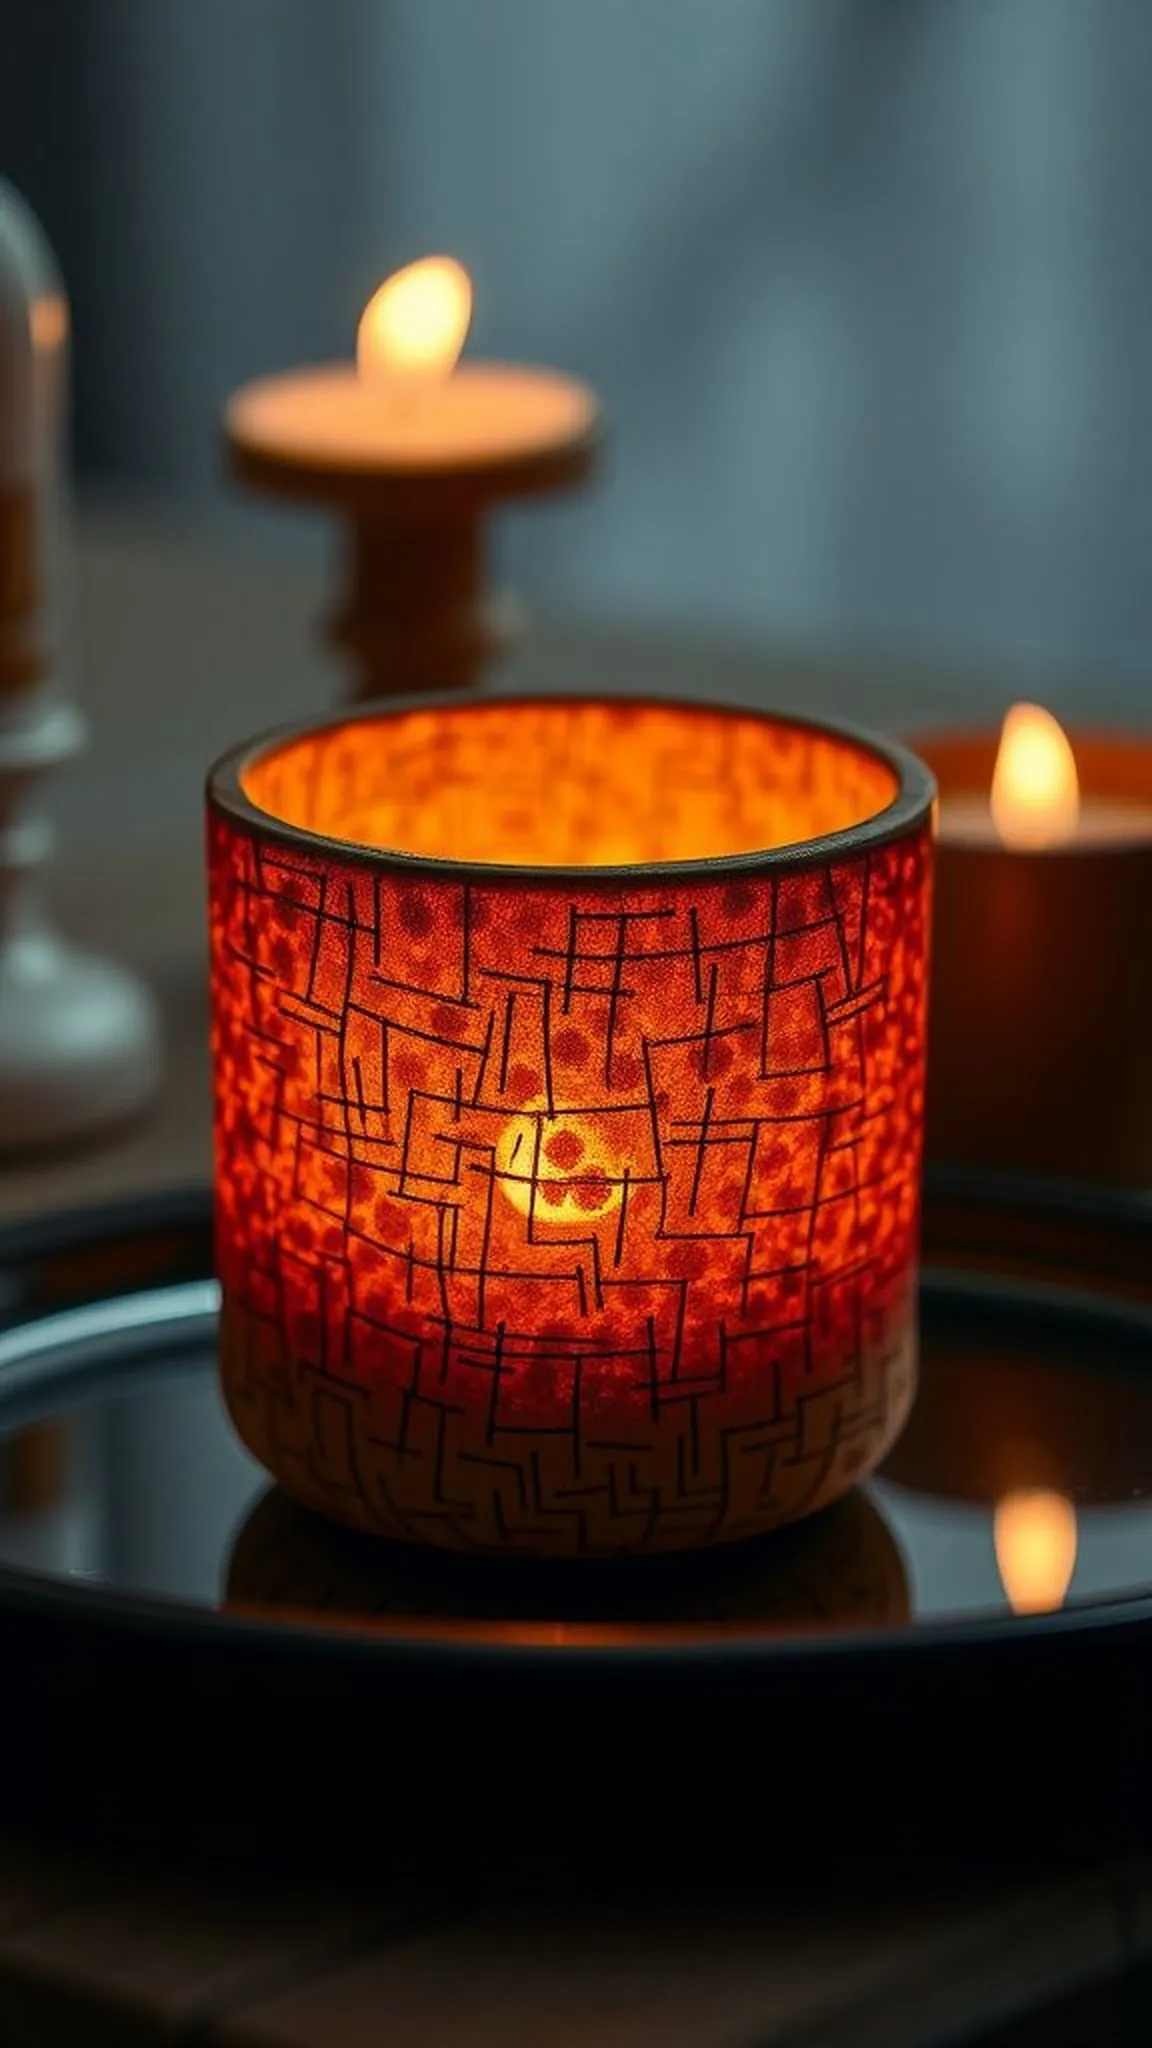
A ring of short cork segments cradles a small votive with a humble, hand-stitched feel. The cork surface softens candlelight, casting warm speckles across nearby surfaces.
The scent and texture of cork complement flickering flames with an earthy counterpoint. Slight variations in cork height create a cozy, irregular silhouette that looks natural at dusk.
Mirrored or metallic trays beneath the holders amplify the glow for quiet dinners or reading nooks. The ensemble reads as unpretentious and tender, perfect for gentle evenings.
Pro Tip: Allow a full adhesive cure before lighting candles so heat exposure does not disturb joins or create uneven gaps around the holder.
How to Make This
- Trim corks to consistent heights and arrange them in a tight circle around a votive glass.
- Secure each cork to a round base using hot glue, holding until the contact feels stable.
- Add a felt pad beneath the base to protect tabletop finishes and place the candle inside.
Avoid: A frequent misstep is not centering the glass holder, which leaves lopsided gaps and an unstable candle. Forgoing a protective pad beneath the base risks surface heat marks on delicate tables.
Try Also: A cluster of three holders of different heights creates an intimate tiered display, while embedding a thin metal ring gives a modern contrast. Painting only the top edge of the corks hints at color without covering natural grain.
Products & Materials
Items Used
- wine corks
- votive glass holders
- hot glue gun
- felt pads
“Soft-glowing cork candle holders for cozy evenings and quiet dinners.”
Framed photo border with cork texture
⏱️ 45 min · 🟢 Beginner
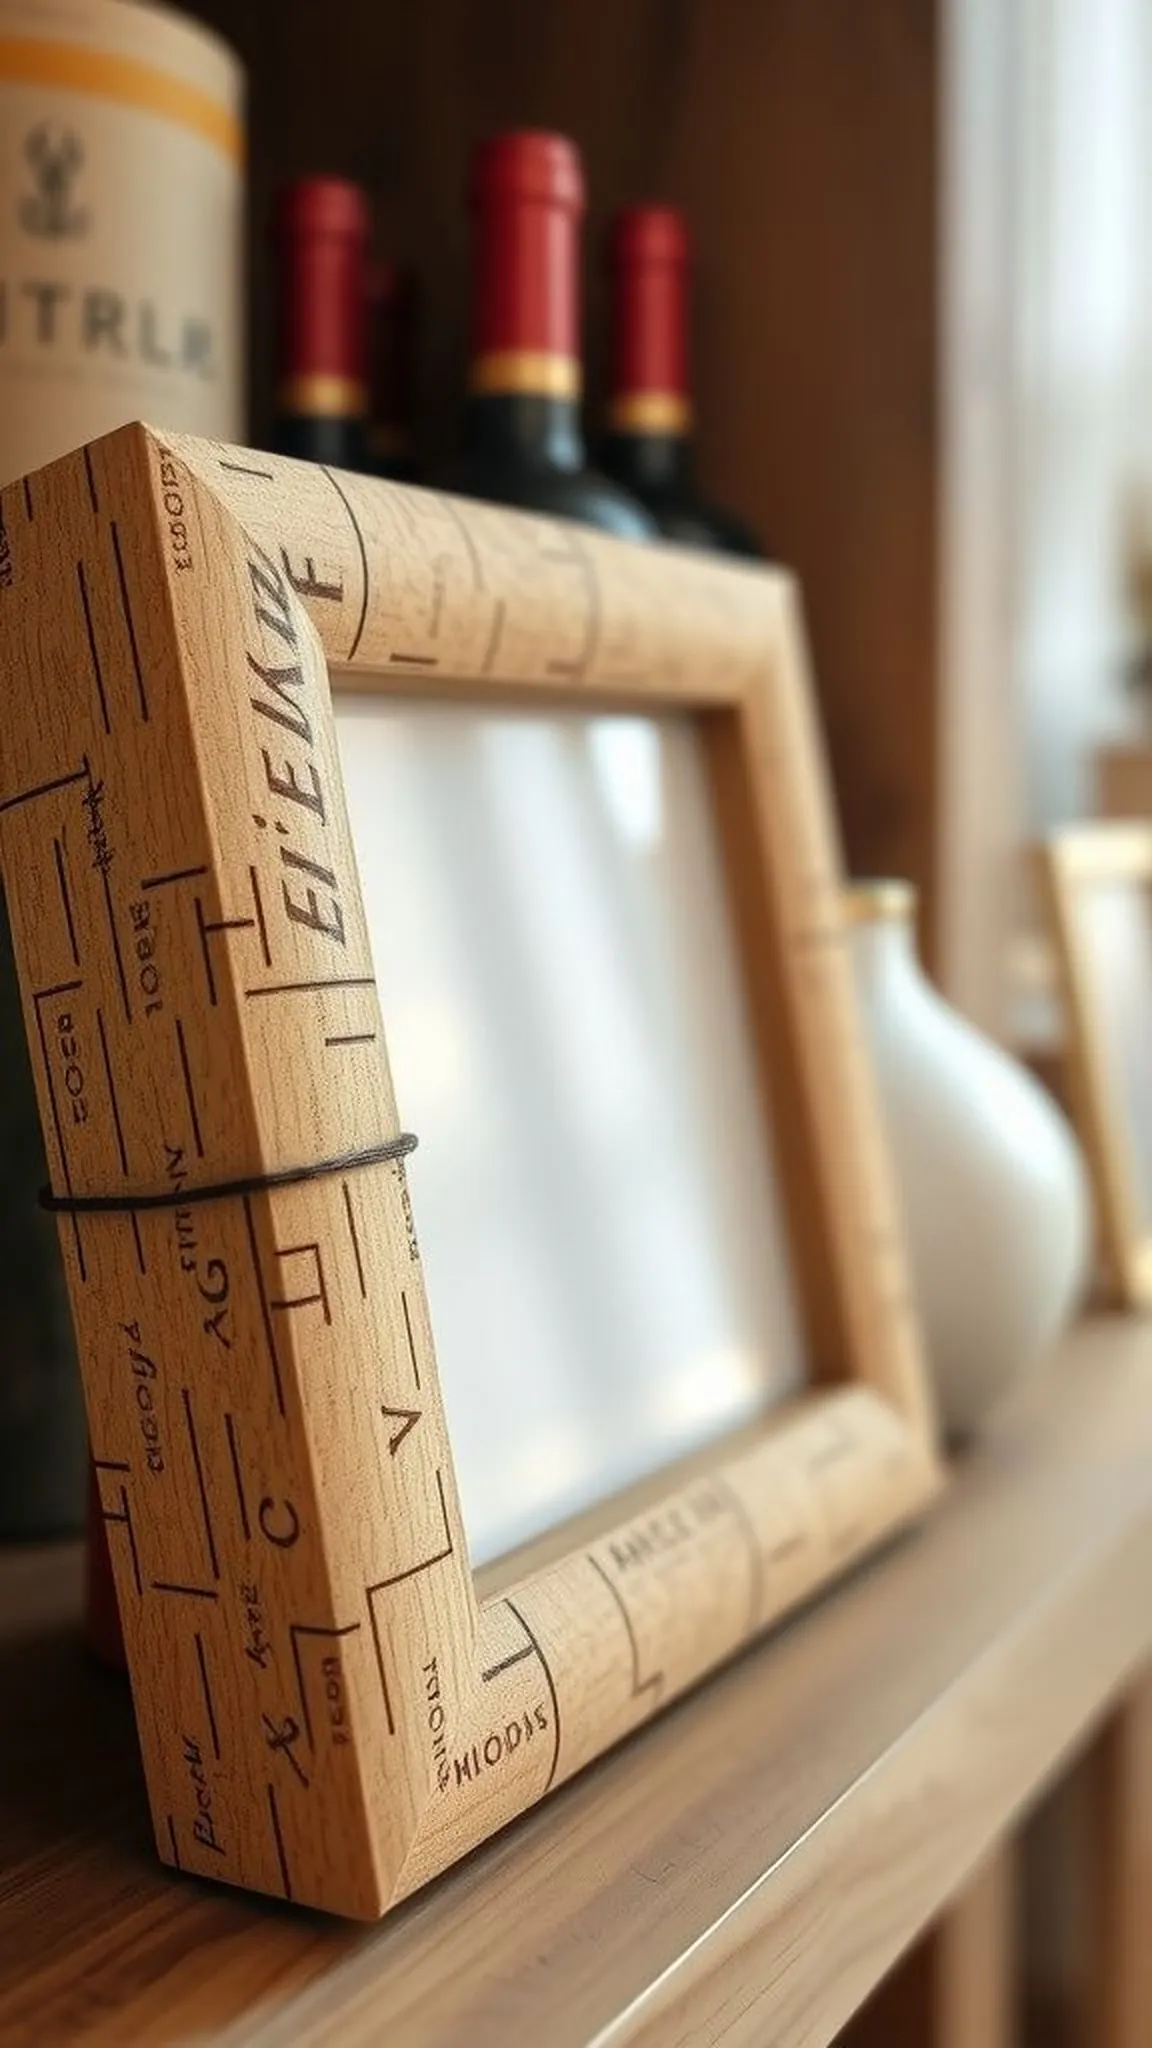
A simple frame receives an immediate personality boost when topped with rows of cork ends. The result feels handcrafted and casual, with an inviting, tactile rim around memories.
Small cork pores and wine stains add tiny variations that read as intimate and worn in a pleasant way. Light skims across the raised edges, creating a lively outline that complements the photo inside.
The frame sits comfortably on a shelf or leans against a wall, offering soft contrast to glossy prints. It reads like a thoughtful, handmade accent that frames everyday moments with warmth.
Pro Tip: Pressing the cork rim gently into place while adhesive starts to set helps maintain an even border and keeps the profile uniformly low.
How to Make This
- Measure the frame edge and sort corks by diameter for a snug fit.
- Adhere cork ends along the frame perimeter, keeping tops level and tight.
- Allow the completed border to cure fully before inserting the photo and rehanging.
Avoid: An early mistake is not matching cork diameters, which leads to a wavy border and noticeable height differences. Skipping a full cure before finishing the frame can shift corks out of alignment.
Try Also: A painted inner lip highlights the photo while leaving cork natural on the outside, or a mosaic pattern of cork slices introduces subtle geometry. Using partial cork lengths yields a scalloped edge.
Products & Materials
Items Used
- wine corks
- picture frame
- hot glue gun
“Photo frame with a cozy cork border for warm displays.”
Cork keychains: small, personal, portable
⏱️ 20 min · 🟢 Beginner
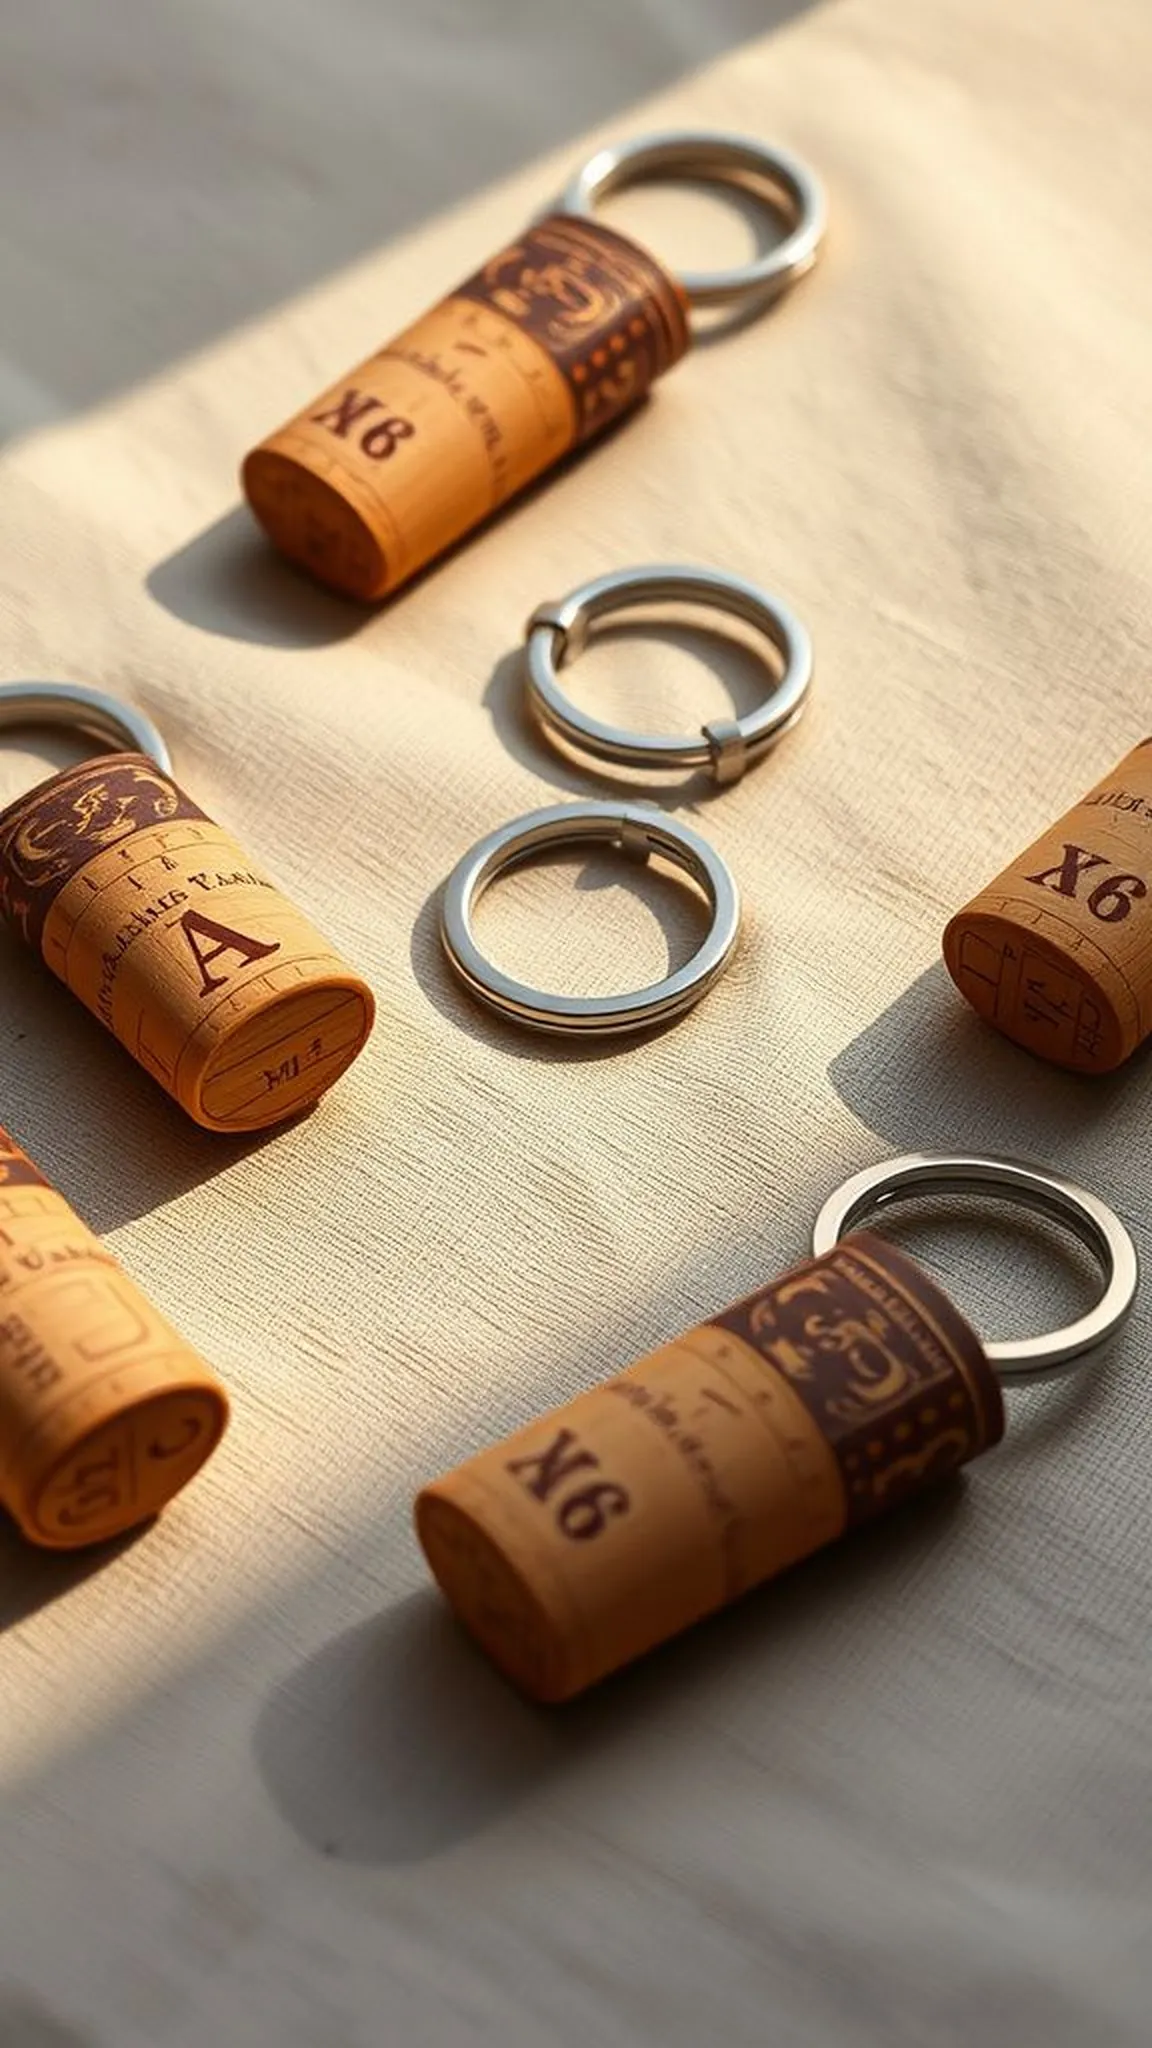
A cork keychain feels lightweight and pleasantly tactile in the palm, with a soft matte finish that resists sweat and slips. The natural grain provides a subtle visual interest against metal key rings.
A stitched loop or a thin leather strap complements the warm cork body with gentle contrast. Over time the cork darkens slightly from handling, gaining an agreeable patina that feels lived in.
Mini prints or tiny initials sit well on the flat cork face and read as thoughtful markers of identity. The finished charm moves easily from pocket to bag, carrying simple personality along.
Pro Tip: Allow any ink or paint to dry fully before handling so decoration remains crisp and the cork surface keeps its natural texture.
How to Make This
- Slice a flat face on a cork if needed and drill a small hole near the top for hardware.
- Insert a split ring or eye screw and attach a short leather or twine loop.
- Add a tiny stamped initial or sealer to the cork face to personalize the charm.
Avoid: A frequent slip is drilling too close to the edge, which can crack a small cork under stress. Using heavy hardware can overload thin cork and cause breakage at the attachment point.
Try Also: Attach a small charm or tag for extra character, or dye only the bottom half for a dipped effect. Grouping three tiny cork charms on one ring creates a playful cluster.
Products & Materials
Items Used
- wine corks
- split key rings
- eye screws
- leather cord
“Lightweight cork keychains that age beautifully with everyday use.”
Place card holders for casual dinner parties
⏱️ 15 min · 🟢 Beginner
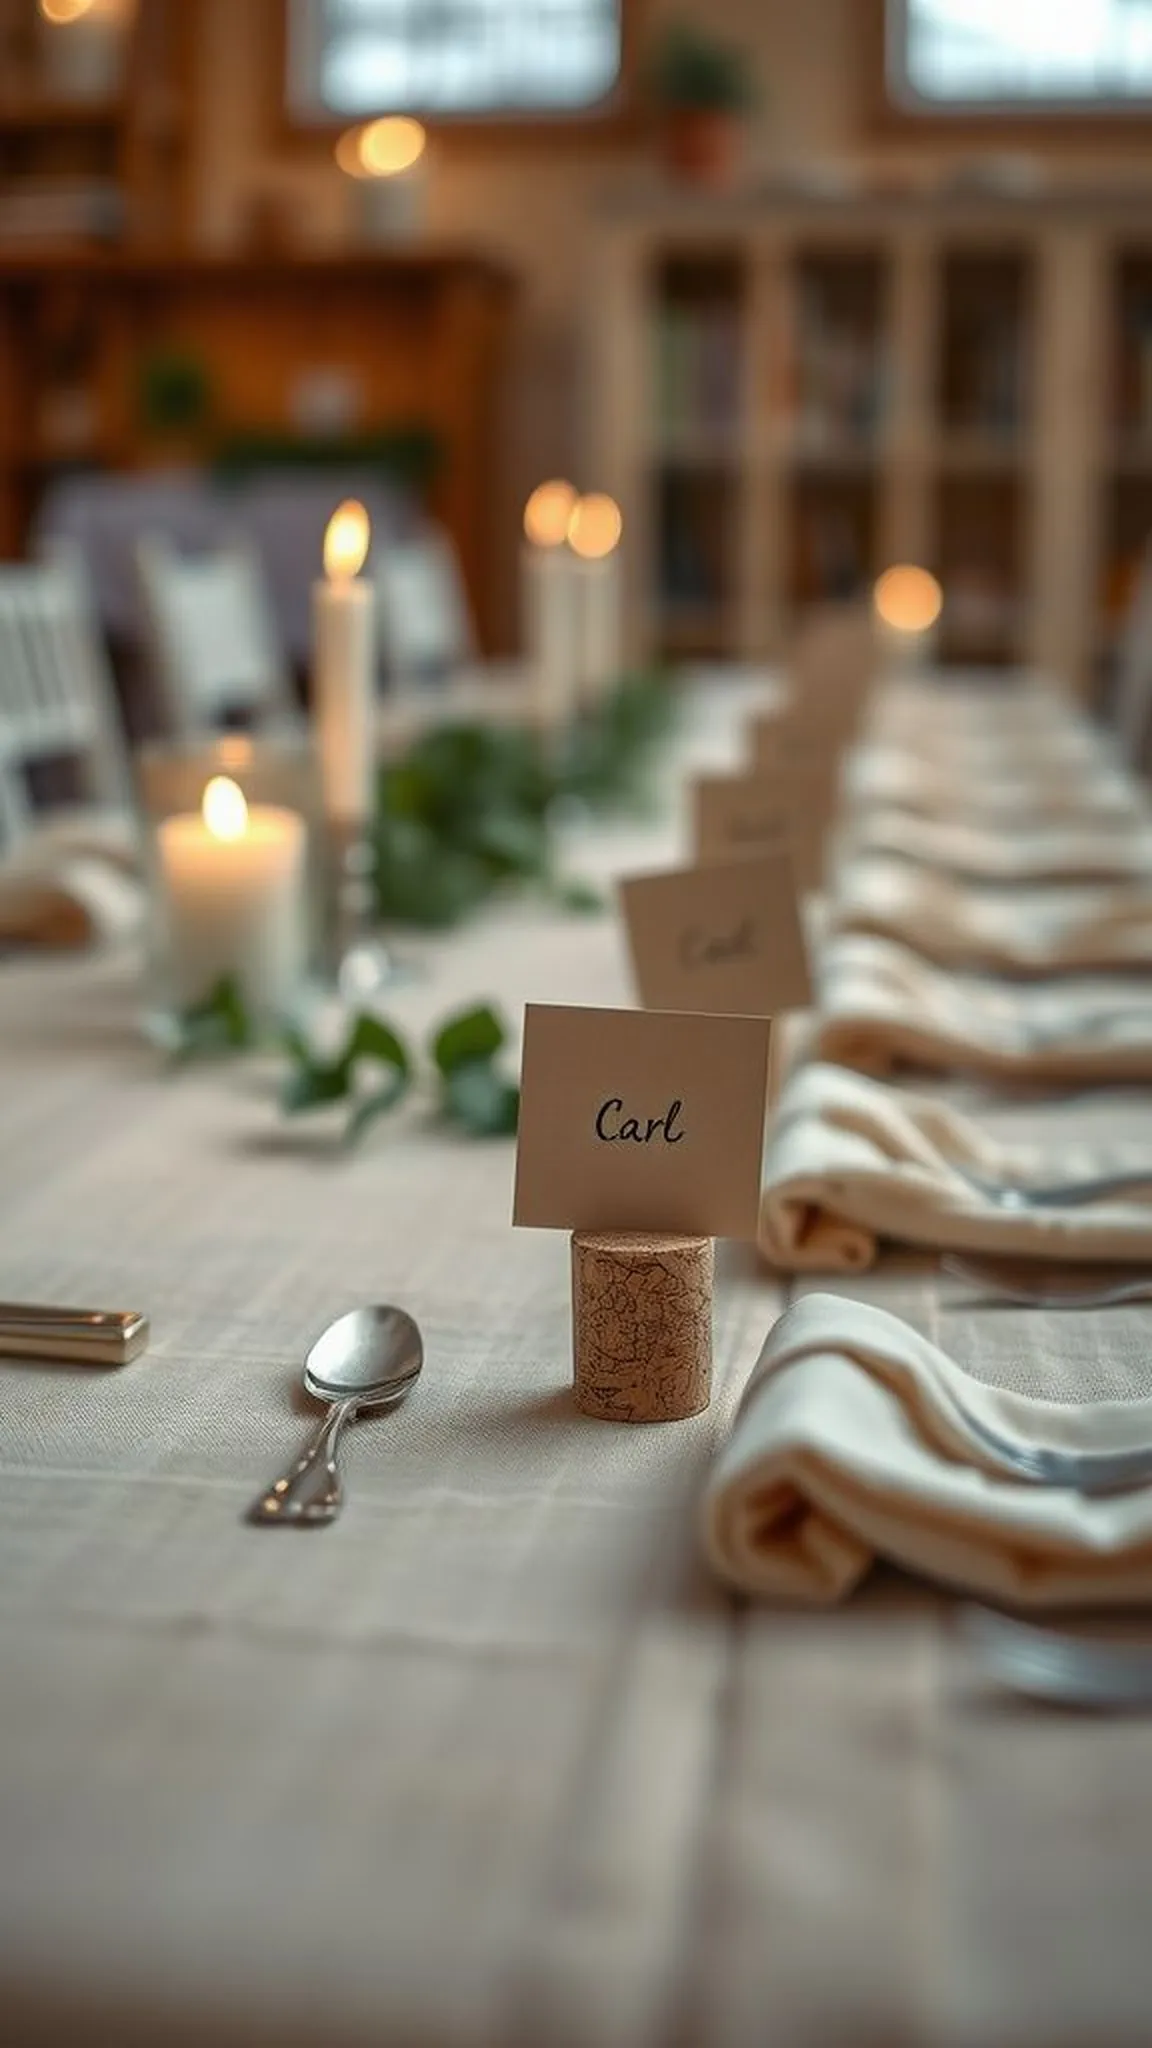
A short cork stub holds a small paper card with modest elegance at the tabletop. The compact form feels homey and unobtrusive, blending well with natural linen and wooden chargers.
Pinprick holes create a crisp slot while the cork body remains warm and tactile to the touch. Each holder keeps place cards upright without drawing too much attention from the meal itself.
Grouping them along a long table forms a rhythmic procession of tiny markers that feel intentional. The neutral cork tone complements candles and greenery in simple centerpiece arrangements.
Pro Tip: Allow any painted edges to cure well before stacking holders to avoid transfer and preserve crisp lines on tabletop sets.
How to Make This
- Slice a shallow vertical slot into the top of short cork stubs using a craft knife.
- Insert folded place cards gently so they stand upright in the slot.
- Optionally dye edges or add tiny embellishments for a coordinated table look.
Avoid: A frequent oversight is making the slot too deep, which destabilizes the card and causes tipping. Cutting the slot unevenly can make cards lean awkwardly at the table.
Try Also: A simple painted stripe coordinates with dinnerware colors while small stamped motifs add a seasonal touch. Longer cork stubs serve double duty as menu or escort card holders.
Products & Materials
Items Used
- wine corks
- craft knife
- watercolor paint set
“Minimal cork place card holders for effortless, homespun gatherings.”
Mosaic wall art from sliced cork faces
⏱️ 3 hours · 🔴 Advanced
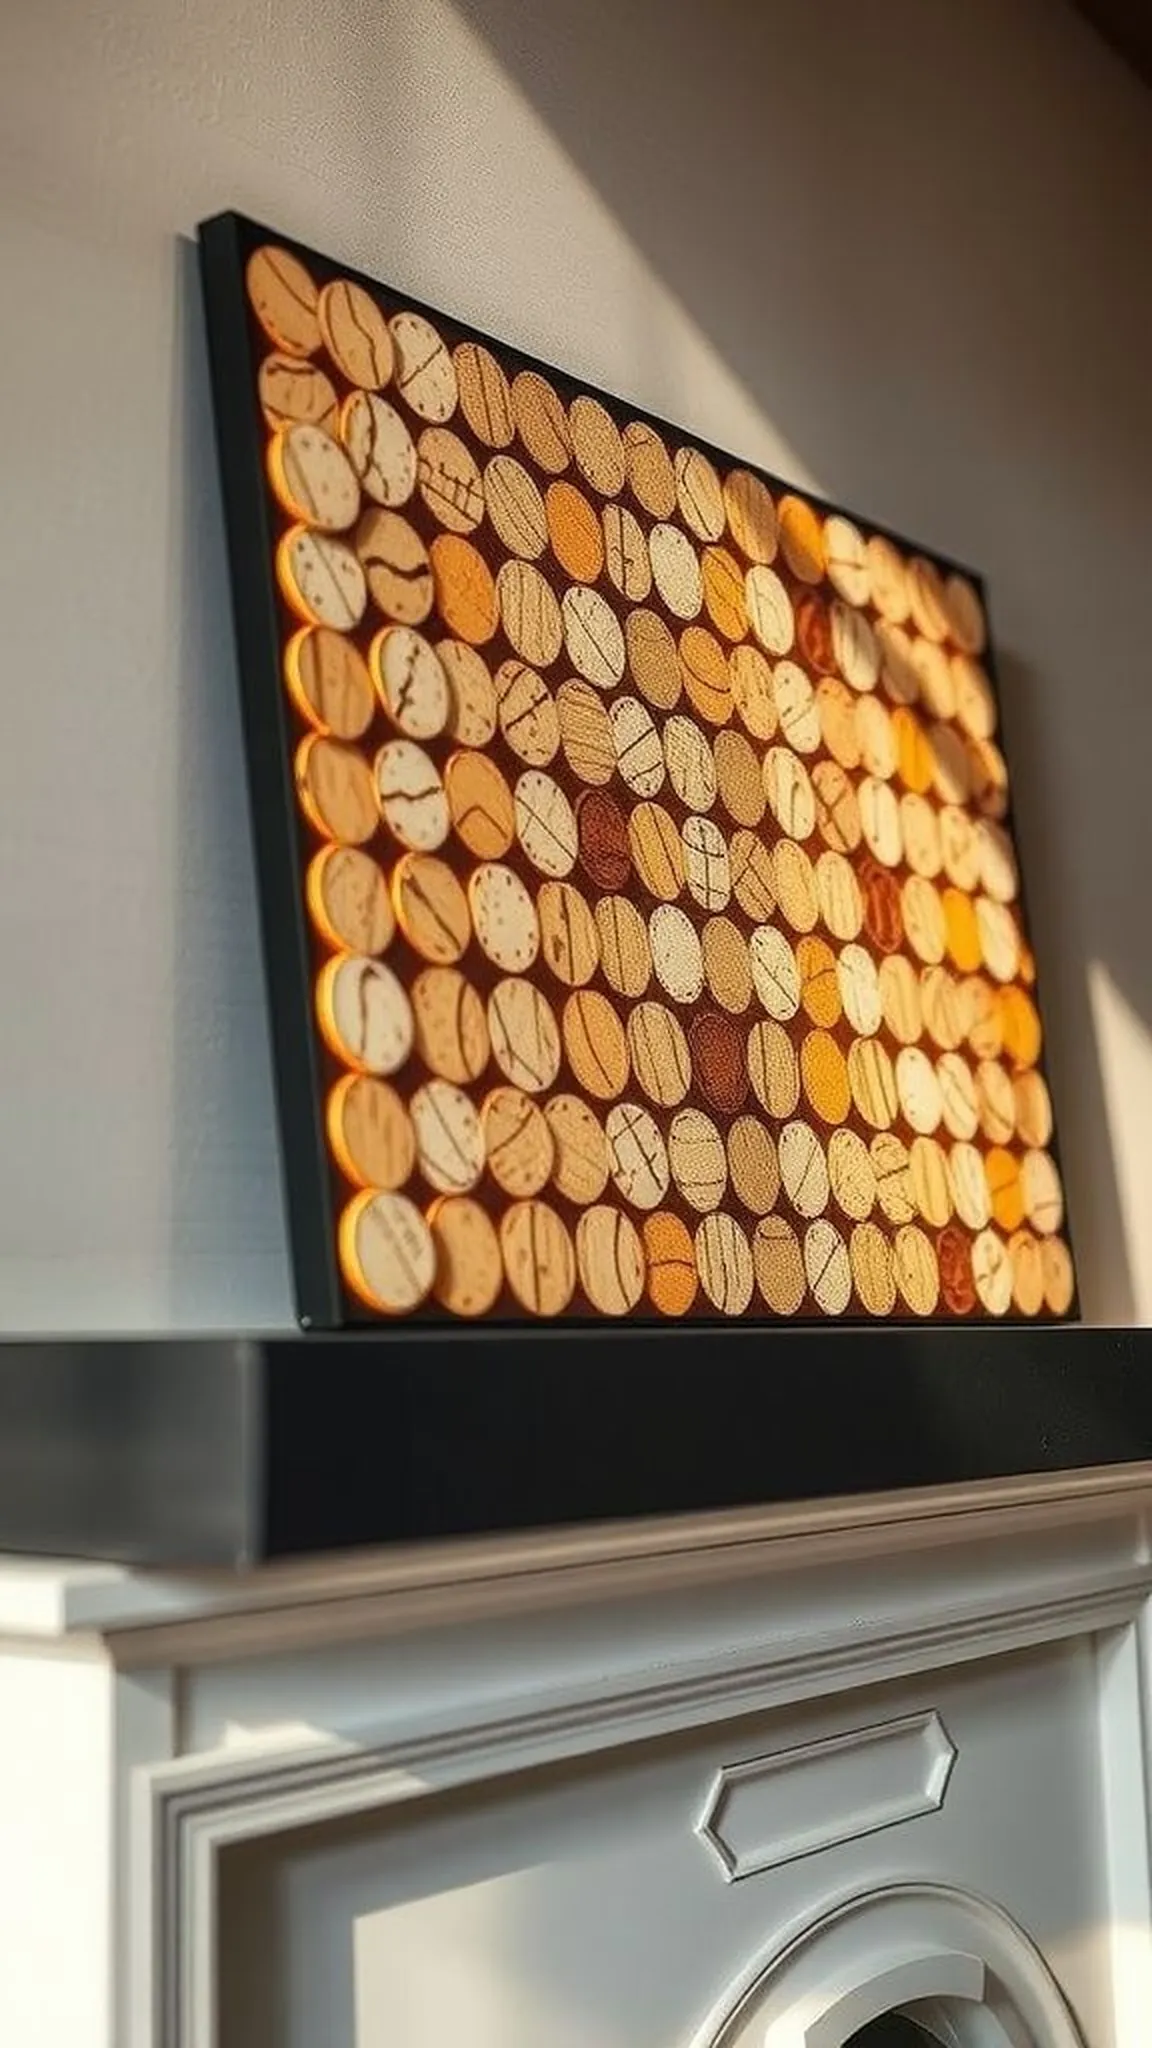
A mosaic of sliced cork faces forms an abstract field that reads like a small landscape. Tiny circular patterns and subtle color variance create rhythm across a framed panel.
Touch reveals gentle ridges where slices meet and small pockets that catch light differently through the day. The surface feels soft but sculptural, lending a quiet modernity to relaxed interiors.
Viewing up close rewards attention to grain and staining patterns that feel unexpectedly decorative. Hung over a console or mantle, the panel brings warmth without overwhelming the room.
Pro Tip: Let the assembled mosaic sit flat for a full cure so seams equalize and the panel remains perfectly flush for hanging.
How to Make This
- Slice wine corks into thin discs using a steady blade or slicer.
- Lay the discs in a planned composition on a sturdy backing board.
- Adhere each disc and fill small gaps with matching cork dust or adhesive.
- Frame the finished panel and allow full drying time before wall mounting.
Avoid: A frequent pitfall is inconsistent disc thickness, resulting in a wavy final panel that resists framing. Rushing adhesive application often leads to uneven spots and shifting pieces during cure.
Try Also: A diagonal color sweep adds motion while a tightly packed circle creates a mandala-like focal point. Combining painted discs with natural ones introduces contemporary contrast.
Products & Materials
Items Used
“Textured cork mosaic art that warms walls with subtle geometry.”
Cork mirror frame with earthy accents
⏱️ 1.5 hours · 🟠 Intermediate
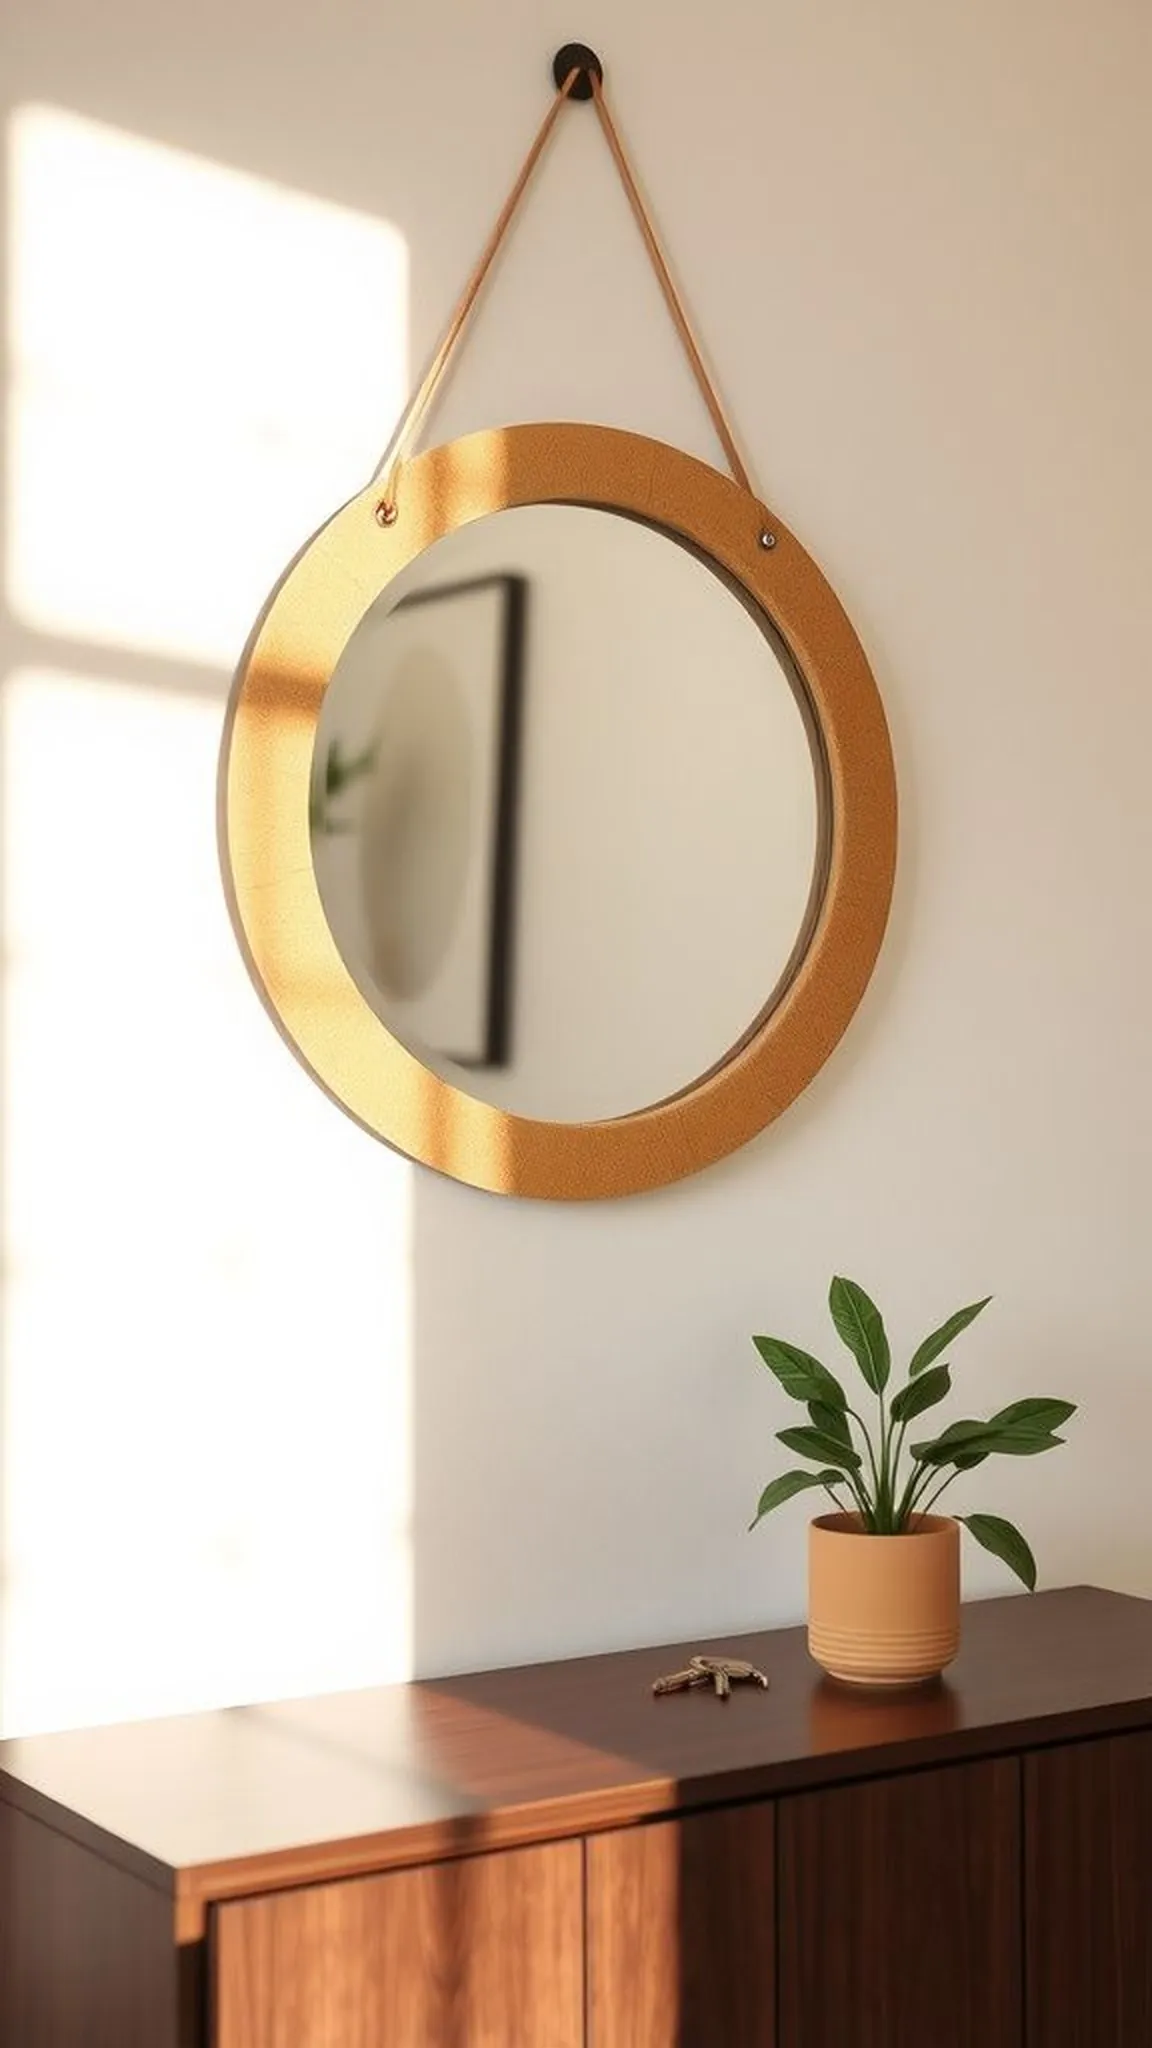
A mirror wrapped in cork radiates a gentle, grounded energy that suits entryways or bathrooms. The tactile band of cork softens reflected light and adds a handcrafted border to the glass plane.
Small cork ends create a soft halo that catches shadows at different times of day. The natural palette complements brass or matte black fixtures without competing for attention.
The finished mirror reads as both practical and quietly decorative, balancing shine with matte texture. It becomes a warm focal point that blends with wood and textile surfaces nearby.
Pro Tip: Press the cork pieces gently while the adhesive begins to set so edges align cleanly and the mirror sits flush in its frame.
How to Make This
- Lay cork sections around a mirror edge to determine fit and placement.
- Attach corks in small groups to ensure a consistent profile and even spacing.
- Wipe away any excess adhesive and allow the piece to cure before hanging.
Avoid: A frequent issue is not pre-fitting groups of corks, which causes uneven spacing when glued in place. Excess adhesive left on the mirror edge can create visible marks if not cleaned promptly.
Try Also: A slim cork band reads modern while a densely packed rim offers a rustic feel; alternating cork orientations adds texture. Adding a thin painted line on the inner mirror edge defines the border.
Products & Materials
Items Used
“Earthy cork-framed mirror adds warm texture to any room.”
Napkin rings carved from single corks
⏱️ 20 min · 🟢 Beginner
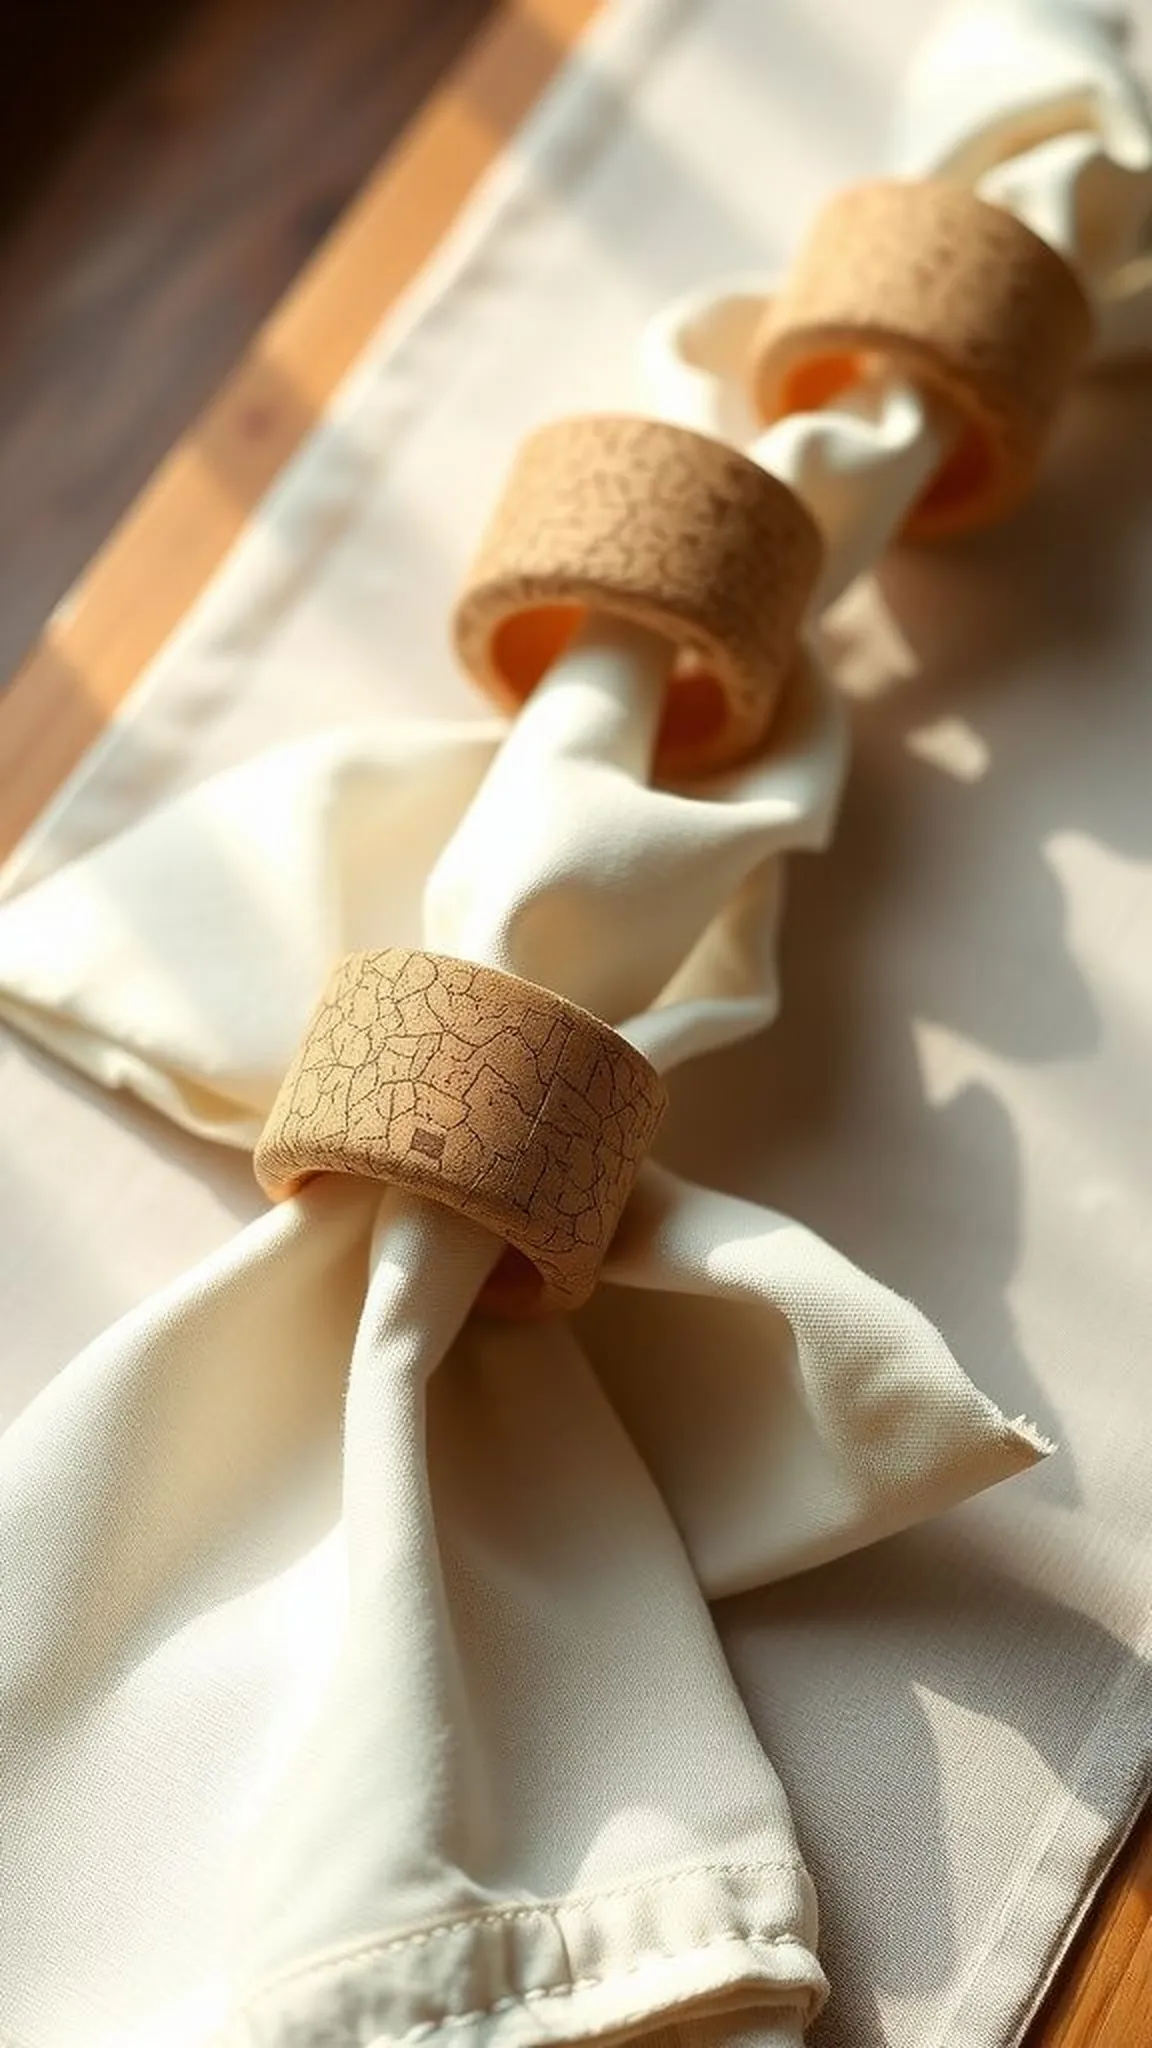
Sleek napkin rings created from single corks add a modest, tactile accent to place settings. The rounded, matte feel of cork pairs well with linen and simple cutlery for relaxed dining.
Small surface marks and tiny pores give each ring a handcrafted signature that feels welcoming. Light catches the top edge, creating a thin highlight that reads as calm detail.
Grouped at the center of a plate, the rings anchor a table setting without competing with floral arrangements. The result is uncomplicated and quietly thoughtful for casual meals.
Pro Tip: Allow any decorative paint to dry completely before stacking rings to avoid smudging and preserve crisp edges on the tabletop.
How to Make This
- Cut corks into uniform ring sections and hollow the center using a round hole tool.
- Smooth rough edges with fine sandpaper, keeping the ring comfortable to touch.
- Optionally add a thin painted band or seal for a finished touch.
Avoid: A frequent mistake is leaving the inner hole too tight, which prevents napkins from sliding through easily. Inconsistent ring heights make the table setting look uneven and informal in an unintended way.
Try Also: A painted dot motif adds subtle color while a thin metallic band introduces a refined contrast. Tying tiny sprigs to each ring creates a seasonal flourish.
Products & Materials
Items Used
- wine corks
- round hole cutter
- fine sandpaper
- acrylic paint set
“Simple cork napkin rings that make everyday meals feel curated.”
Cork bath mat with a warm, springy feel
⏱️ 3 hours · 🔴 Advanced

A cork bath mat creates a warm landing that feels pleasantly springy under bare feet. Rows of tightly packed corks form a breathable surface that dries quickly and resists mildew.
The natural texture and warm hues make it a gentle contrast against cool tile. Tiny seams between corks catch light and create a rhythmic, tactile pattern underfoot.
The mat carries a subtle scent that fades with use, and its dense assembly gives it reassuring durability. Placed near a shower or tub, it introduces a spa-like calm that reads as understated luxury.
Pro Tip: Let the completed mat cure flat for a full day to ensure adhesive bonds have reached full strength and the surface remains even.
How to Make This
- Prepare a waterproof backing mat sized to the desired dimensions.
- Attach corks in tight rows across the backing, trimming edges for a flush border.
- Apply a breathable sealant to protect against moisture while maintaining texture.
Avoid: A frequent oversight is neglecting a waterproof backing, which allows adhesive to degrade when exposed to water. Overly thick sealant can reduce the mat’s natural grip and change the tactile feel.
Try Also: Rectangular mats suit larger bathrooms while a half-moon shape fits beside tubs; alternating cork orientations creates a checker effect. Leaving small drainage gaps improves drying time.
Products & Materials
Items Used
- wine corks
- waterproof backing mat
- heavy duty adhesive
- clear breathable sealant
“Warm, springy cork bath mat for a spa-like, natural bathroom touch.”
Table runner inlaid with cork mosaics
⏱️ 2-3 hours · 🔴 Advanced
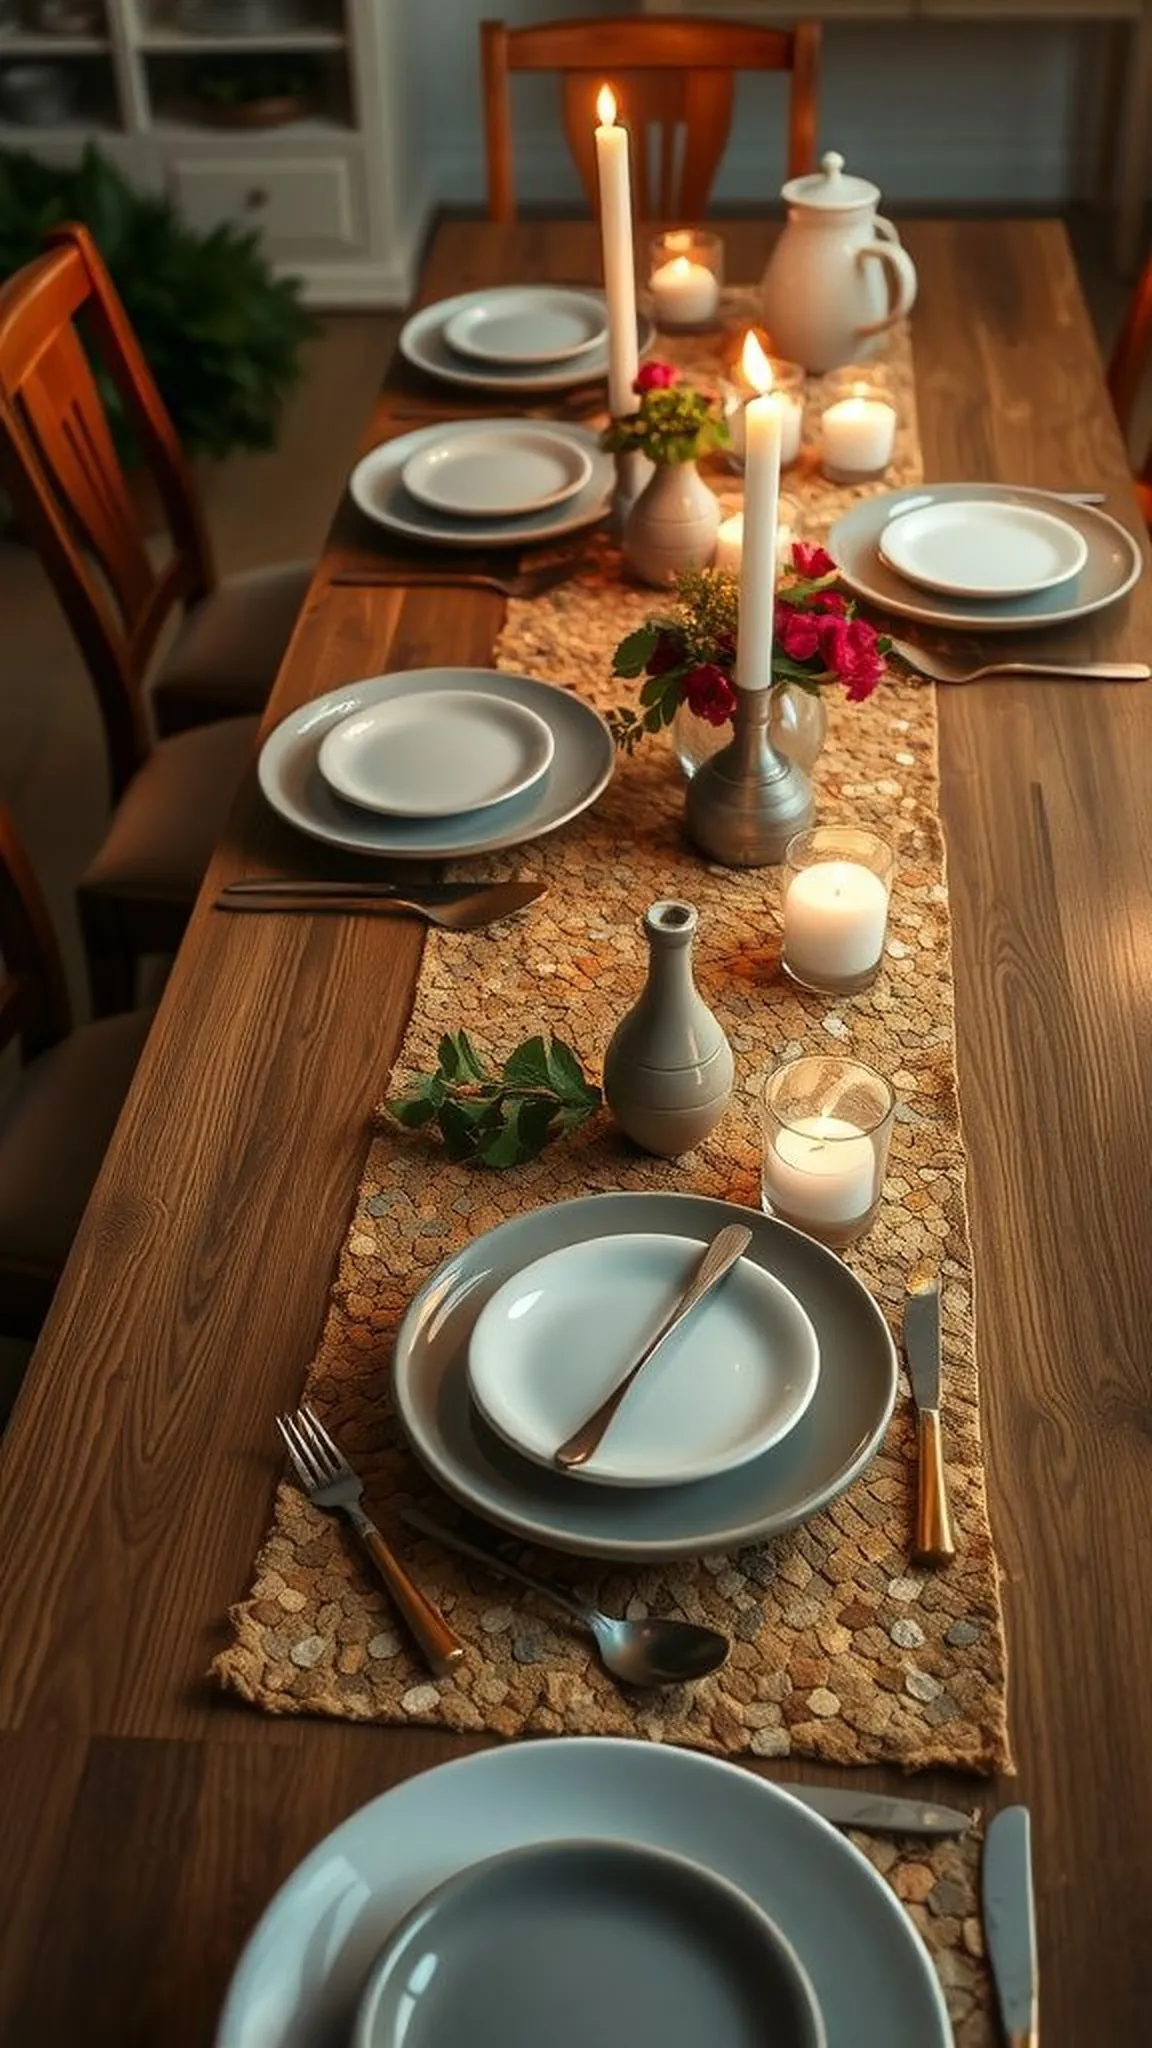
A table runner inlaid with cork brings a low, tactile stripe down the center of a dining table. The mosaic feels warm under platters and softens the overall tabletop arrangement.
Varying cork lengths and tones introduce movement along the runner, catching candlelight in small, friendly pockets. The surface carries a textured rhythm that invites hands to linger and rearrange plates.
The runner balances utility and decoration, working equally well for daily dinners or relaxed gatherings. It reads as a thoughtful, hand-assembled backdrop that complements wooden tables and simple floral stems.
Pro Tip: Allow the runner to lie flat under light weights while curing to prevent any warps or lifted edges along the seams.
How to Make This
- Cut a long backing fabric or board to the runner dimensions and mark the placement grid.
- Arrange cork pieces in a running pattern and adhere them securely to the backing.
- Trim outer edges and bind with fabric or sealant for a finished look.
Avoid: A frequent problem is not planning the layout in advance, which leads to mismatched edges and last-minute trimming. Using inconsistent adhesive amounts can lift tiles after initial curing.
Try Also: A paired set of narrow runners creates balance for a long table, while a single wide panel reads as bold and modern. Introducing thin painted lines between rows adds subtle geometric emphasis.
Products & Materials
Items Used
- wine corks
- backing fabric or board
- strong craft adhesive
- fabric binding tape
“Cork mosaic table runner for warm, textured dine-in moments.”
Place a cork trivet shaped like a heart
⏱️ 1 hour · 🟠 Intermediate
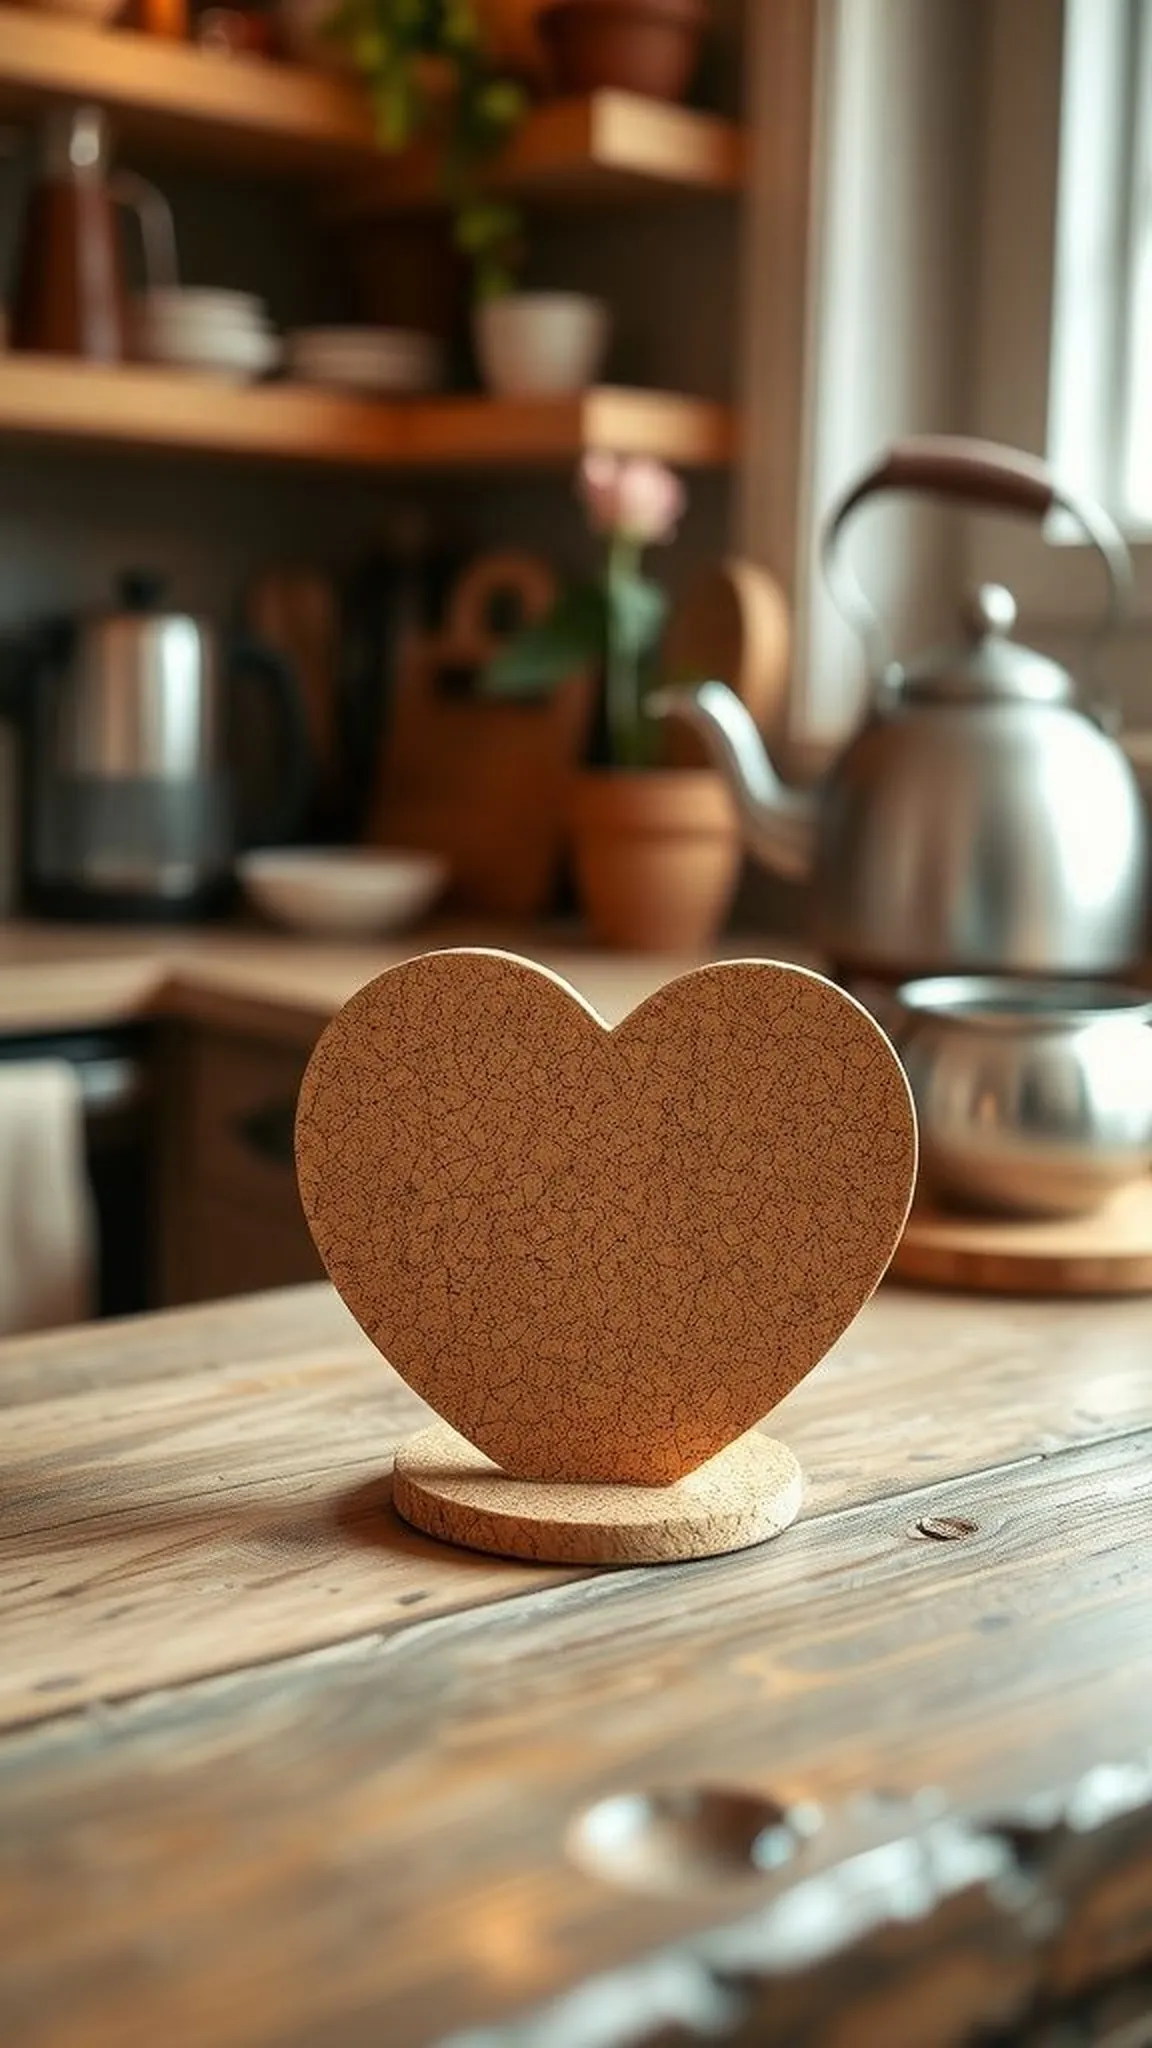
A heart-shaped cork trivet reads as playful without being precious, offering a soft landing for warm dishes. The compact silhouette fits romantic breakfasts or cozy weeknight dinners with equal ease.
Textural pockets between cork elements catch light and shadow, giving the heart a gently sculpted profile. The warm palette complements easygoing table settings and bright ceramic plates.
The piece feels tactile and friendly when lifted, with a weight that suggests durability rather than fragility. Placed near a corner stove or within a cozy nook, it adds small personality to everyday routines.
Pro Tip: Press cork pieces into a temporary mold while bonding so the heart shape remains consistent and edges stay neatly aligned.
How to Make This
- Trace a heart shape onto a backing board sized to the desired trivet.
- Arrange cork pieces tightly within the traced shape and adhere them down.
- Trim and sand edges for a smooth, finished perimeter and seal if desired.
Avoid: A frequent slip is leaving loose gaps at the curve of the heart, which weakens the overall shape. Rough edges from trimming create an unfinished look if not smoothed carefully.
Try Also: A set of small hearts in different sizes forms a playful cluster while a single oversized heart becomes a striking centerpiece. Alternating natural and painted cork rows suggests subtle banding.
Products & Materials
Items Used
“Heart-shaped cork trivet that brings warmth and a handmade touch.”
