
As an Amazon Associate I earn from qualifying purchases.
Chunky Crochet Blanket Patterns offer a cozy route to big texture and fast results with bulky yarn and oversized hooks. These chunky crochet blanket ideas bring plush loops, bold stitches, and warm throws that brighten a living room or bedroom.
Patterns range from airy open stitches to dense, squishy fabrics that feel soft against the skin while showing stitch definition with clear, sculptural ridges. A selection of chunky throw projects and bulky yarn blanket motifs makes it simple to find a favorite for gifting or curling up on cold nights.
Each pattern idea emphasizes cozy scale, tactile interest, and approachable shaping that suits different skill levels and color plans. The focus stays on easy-to-read stitch language, yarn choices, and visual options for chunky crochet blankets and oversized throws.
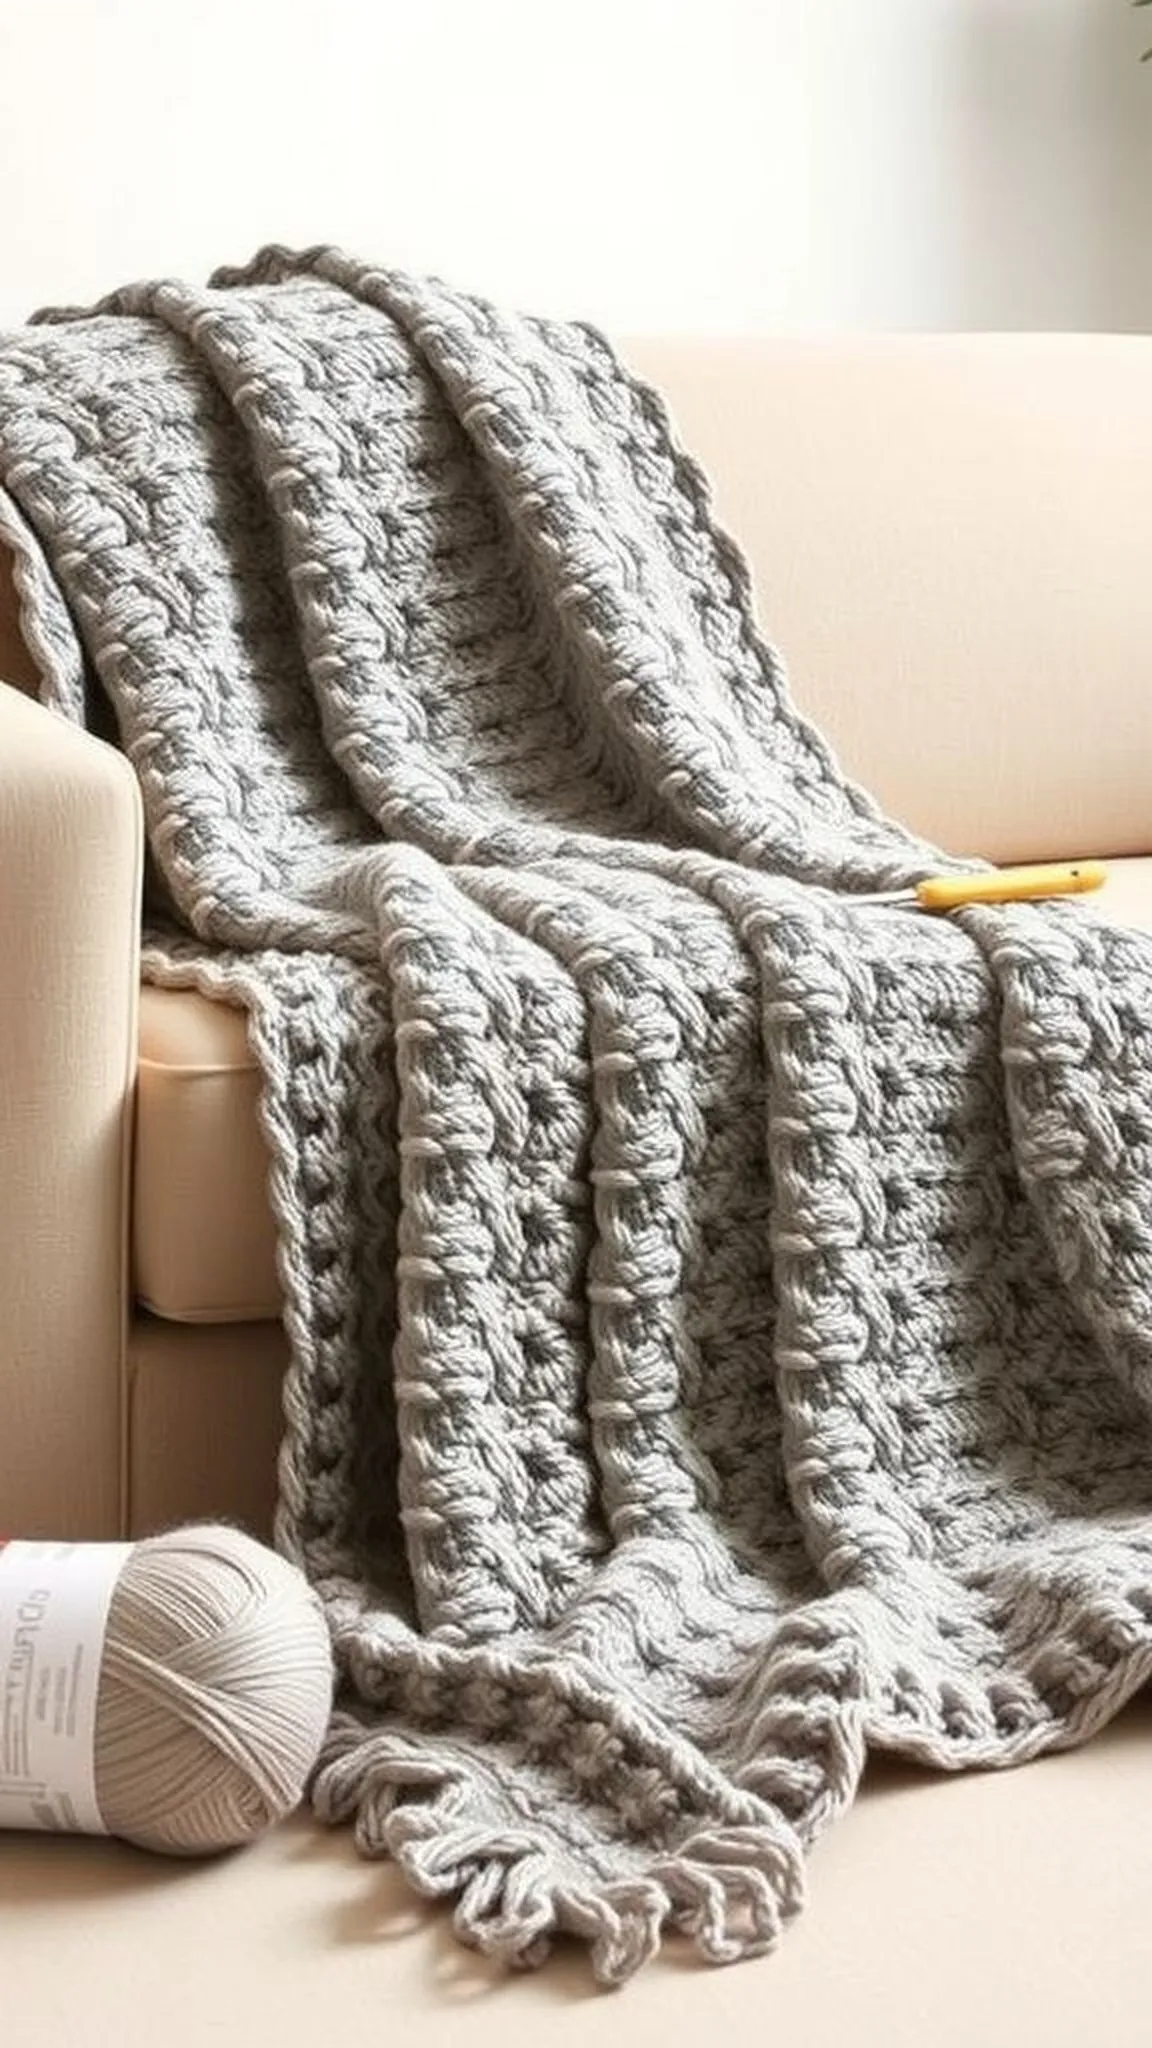
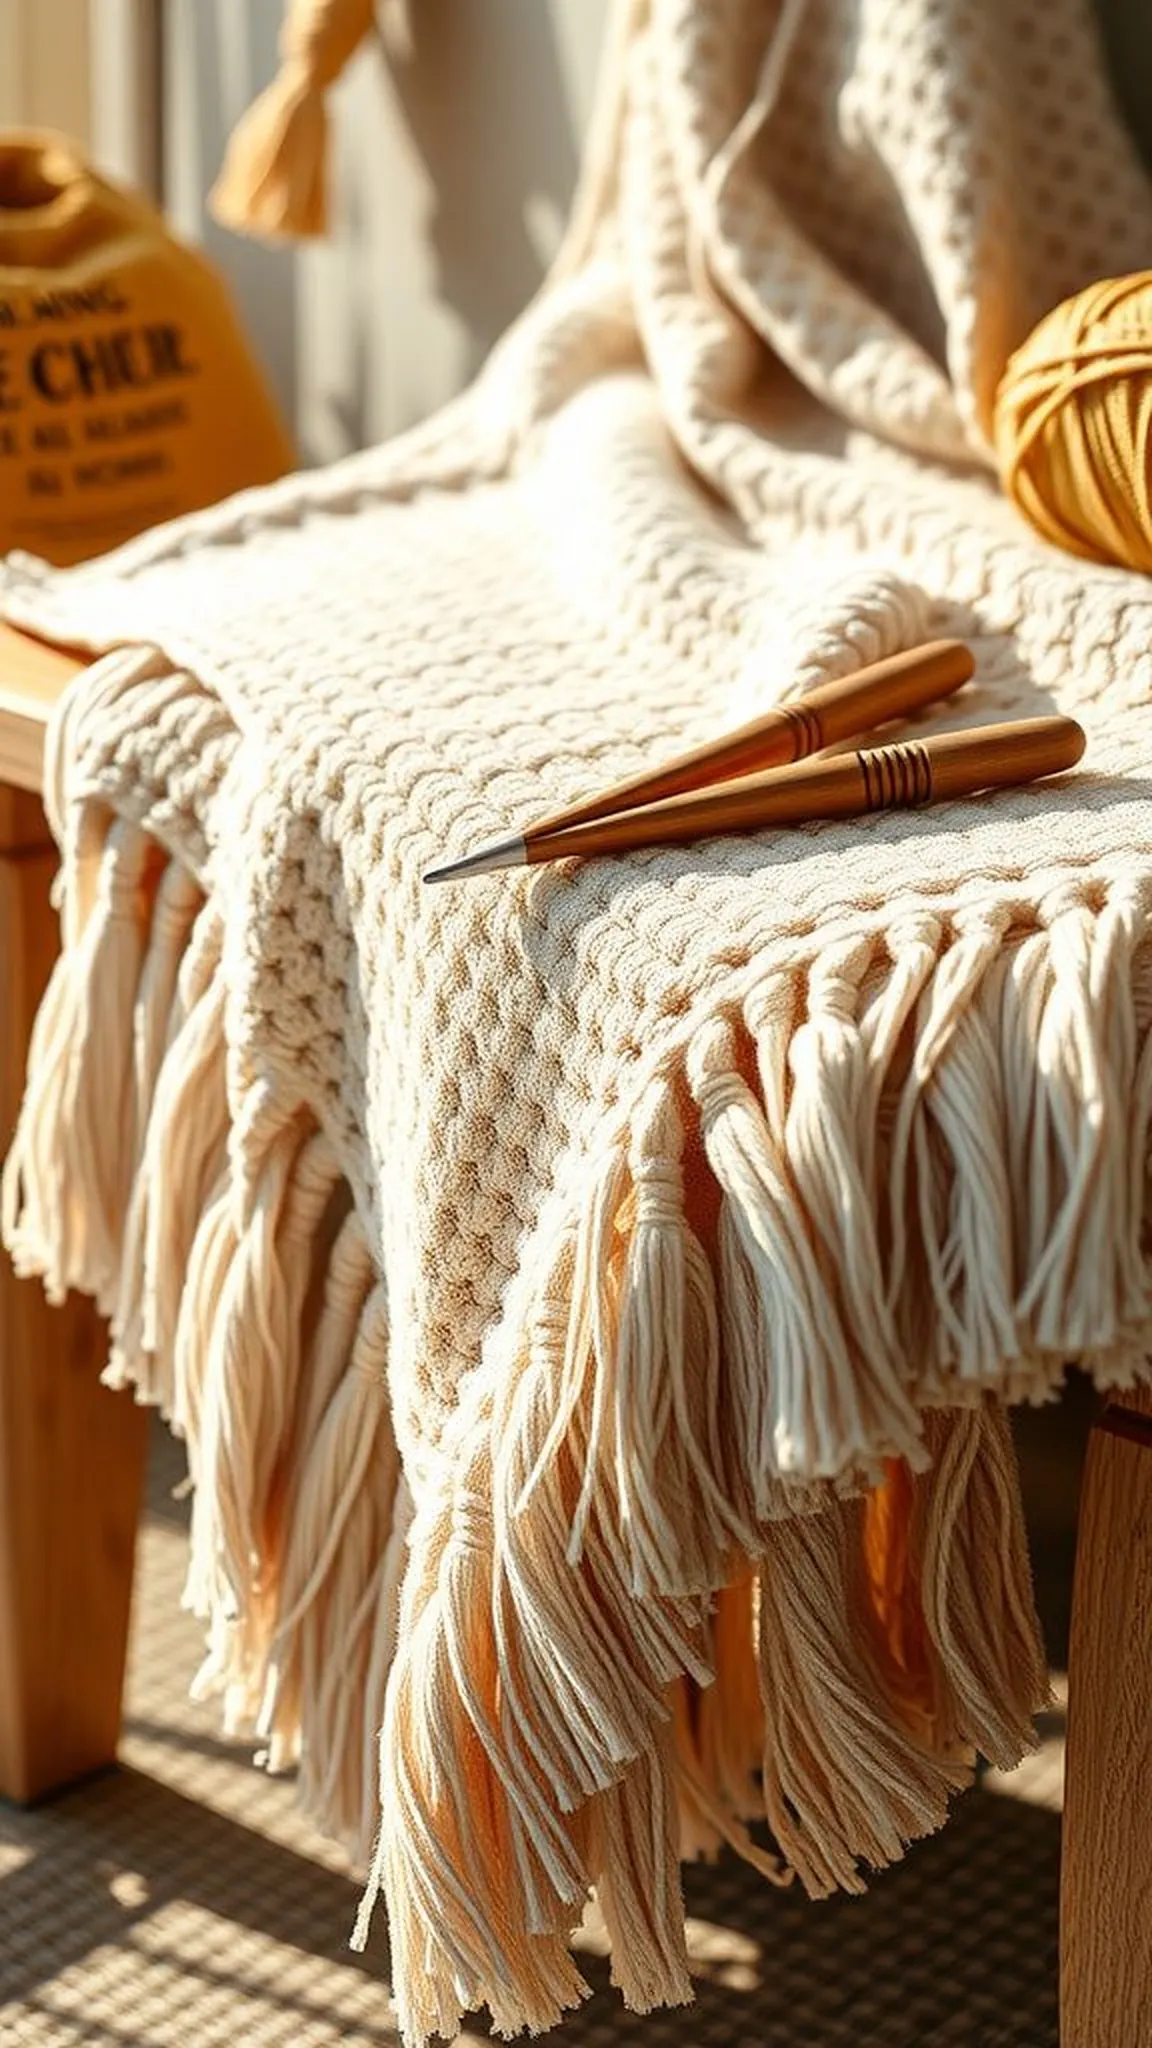
Chunky moss stitch throw for cozy evenings
⏱️ 3-4 hours · 🟢 Beginner

The moss stitch blanket has a woven look with soft, pillowy ridges that beg to be touched. Plush loops and a steady, rhythmic texture make this throw feel like a hug on chilly evenings.
A palette of muted neutrals enhances the stitch definition while the bulky yarn creates lofty height and airy drape. Light catches the raised bits, producing small shadows that add depth and visual warmth to a sofa or bed.
The overall fabric feels thick but flexible, with a gentle weight that settles around shoulders. A quiet handmade presence fills the room without shouting for attention.
Pro Tip: Keep tension relaxed so stitches stay plump and the blanket keeps a soft, even drape without tight edges.
How to Make This
- Chain to desired width using super bulky yarn and a jumbo hook, leaving a long tail for edge weaving.
- Work alternating single crochet and chain spaces across to form the moss pattern and repeat rows until near the desired length.
- Finish with a tidy border of single crochet around the perimeter and weave in all yarn tails with a tapestry needle.
Avoid: Beginners often pull the yarn too tightly, which leads to a stiff fabric and uneven edges that don’t lie flat.
Try Also: Try two-tone stripes for a graphic look or switch to a softer alpaca-blend yarn for extra loft and sheen. Narrow the width for a lap blanket or make a wider version for whole-bed coverage.
Products & Materials
Items Used
- super bulky yarn skeins
- jumbo crochet hook
- tapestry needle
“Plush moss stitch blanket with lofty texture and relaxed drape.”
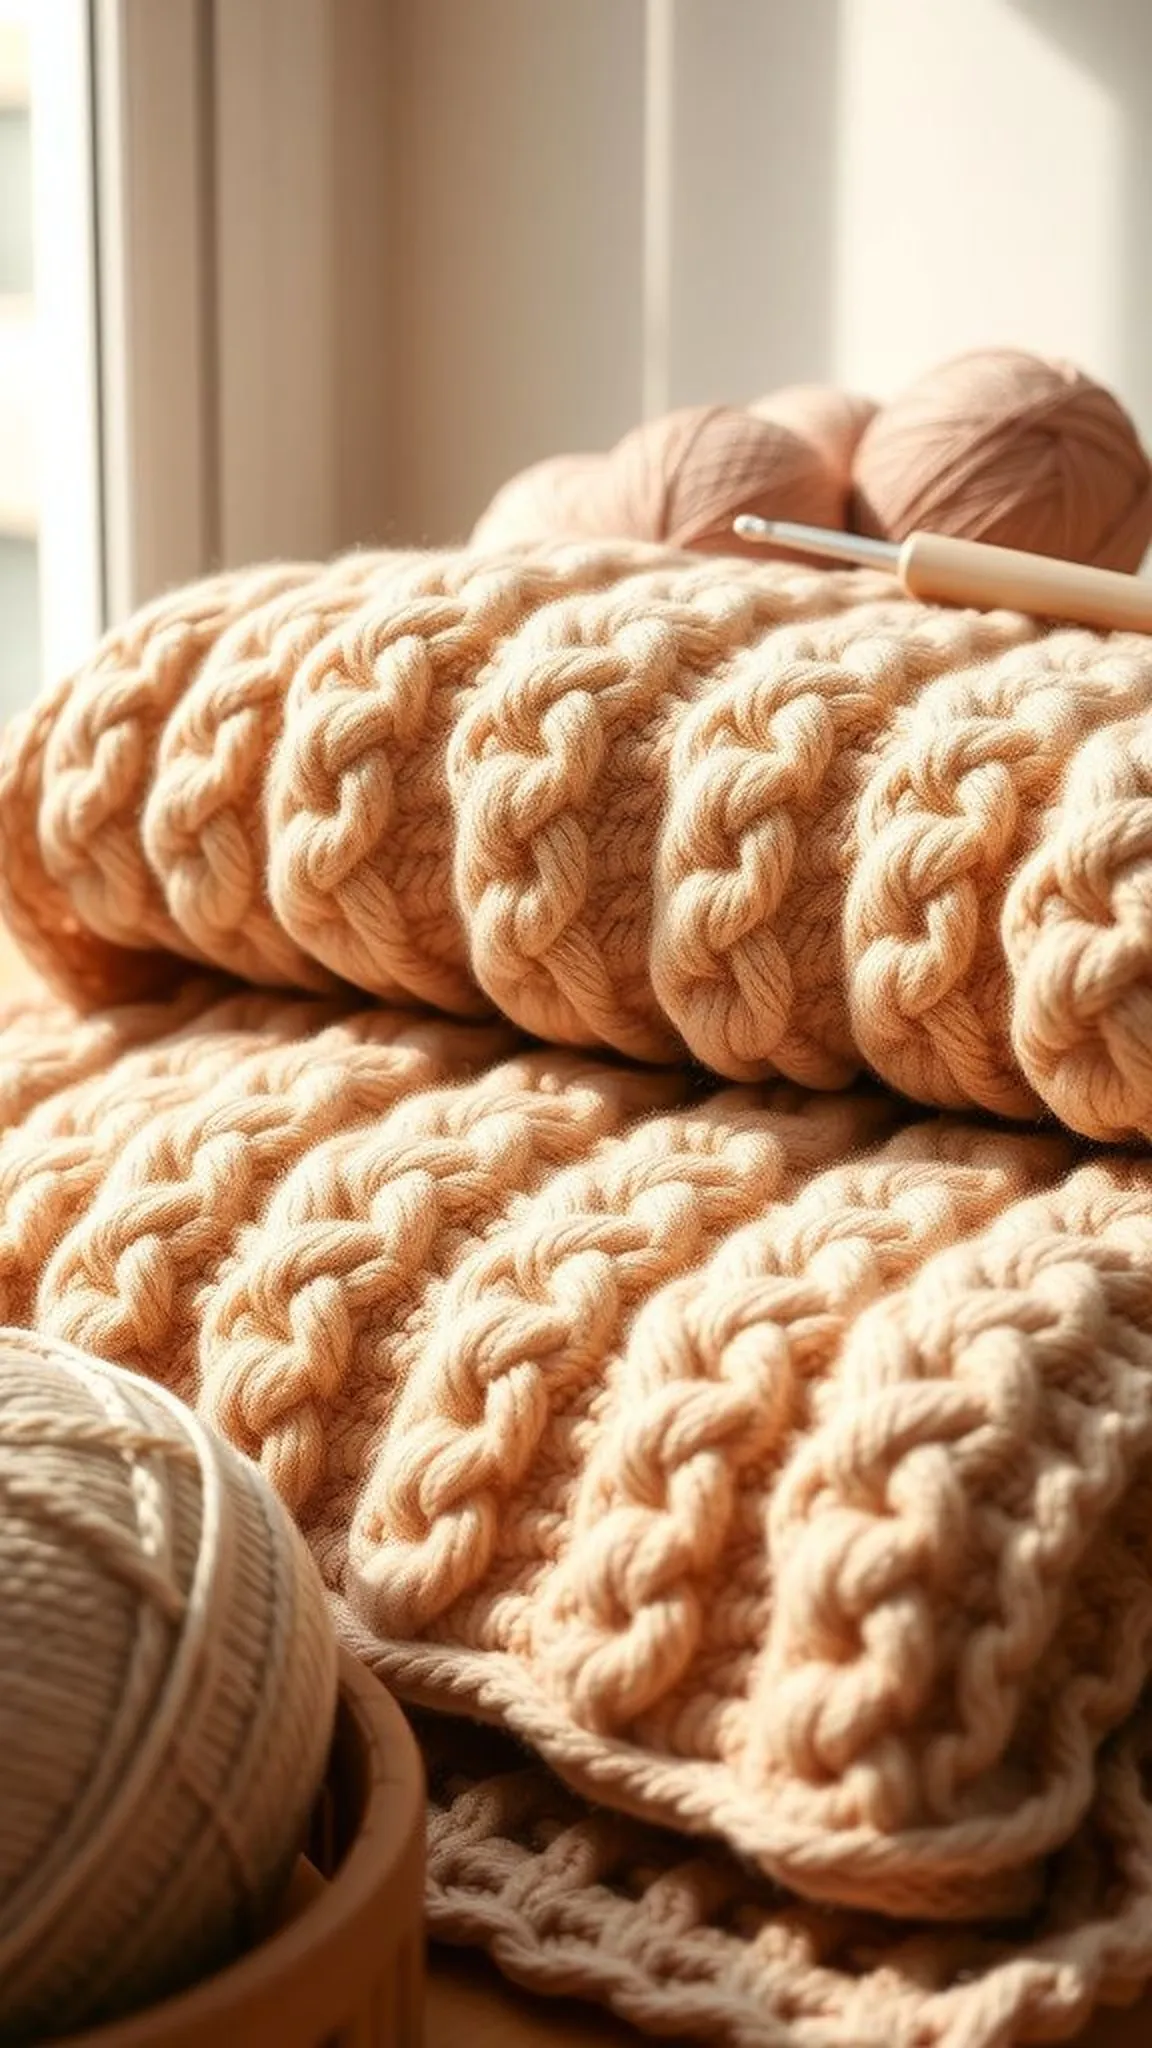
Waffle stitch blanket with thick waffle texture
⏱️ 6-8 hours · 🟠 Intermediate
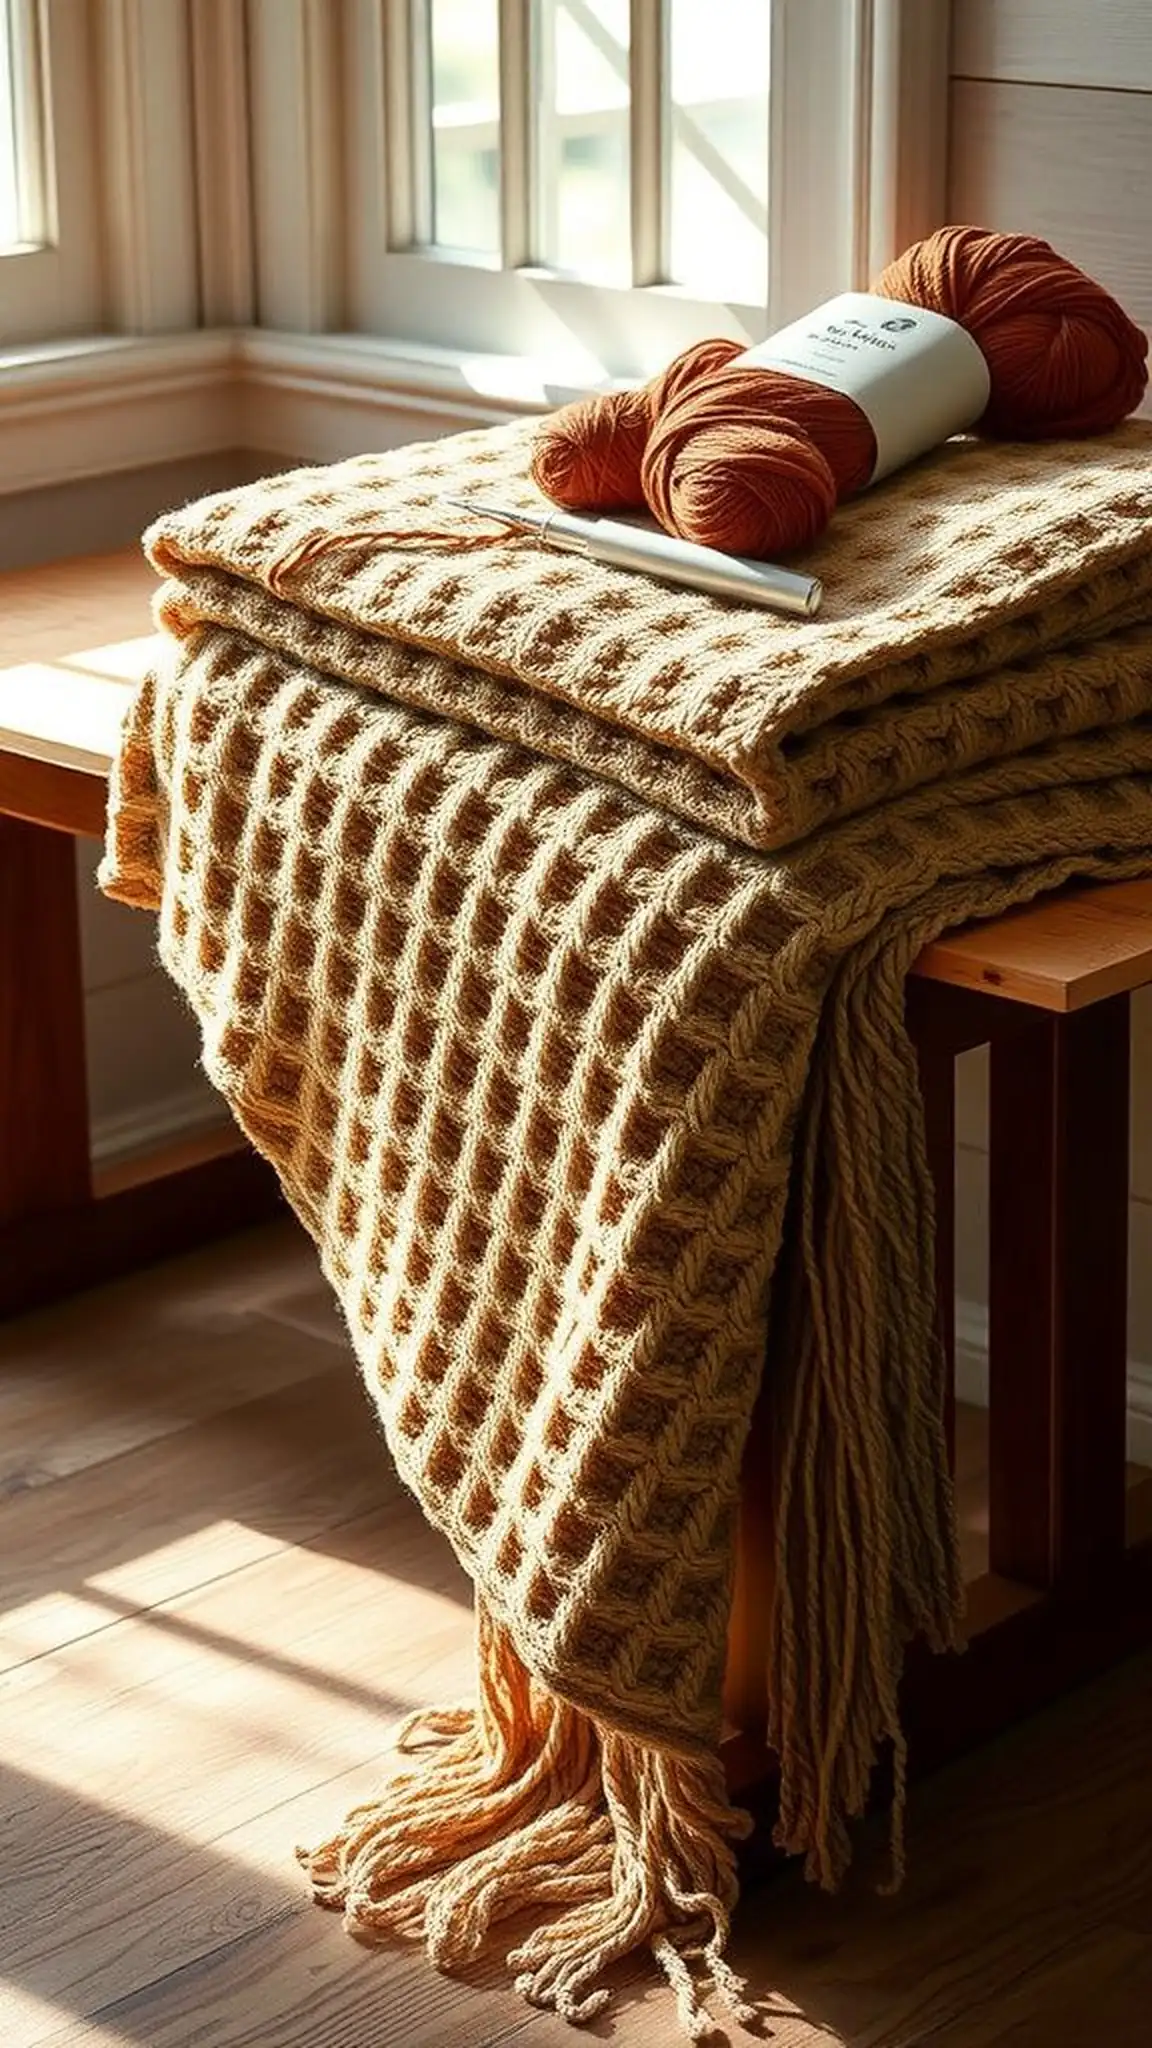
The waffle stitch blanket shows deep, tactile pockets that trap air and invite fingers to explore the surface. The pattern feels sculptural, with crisp columns that create a checkerboard of raised and recessed areas.
Bulky yarn exaggerates the waffle depth, giving the throw a sturdy yet cushioned hand that sits nicely at the foot of a bed. Natural light emphasizes the three-dimensional quality and casts soft shadows across the squares.
The finished piece has a comforting weight and a slightly rustic charm that pairs well with linen and leather. Color blocks or single tones both read clearly, thanks to the strong stitch definition.
Pro Tip: Pull loops gently when forming waffle pockets so the texture remains defined without tightening the whole fabric.
How to Make This
- Chain the base width and work a foundation row, selecting a stitch multiple that suits the waffle pattern repeat.
- Alternate front post and back post double crochet rows to build the waffle pockets until the blanket reaches the desired length.
- Add a neat single crochet border around all sides and weave in stray ends with a tapestry needle.
Avoid: Tension that is too tight can flatten the waffle effect, leaving the surface less puffy and more rigid than expected.
Try Also: Make a colorblock waffle by changing hues every few inches or try a tonal gradient for subtle movement. A thinner bulky yarn will soften the pockets for a gentler texture.
Products & Materials
Items Used
“Deep waffle texture in a chunky throw, sculptural and cozy.”
Bobble-stitch cuddle blanket with playful bumps
⏱️ 5-7 hours · 🟠 Intermediate
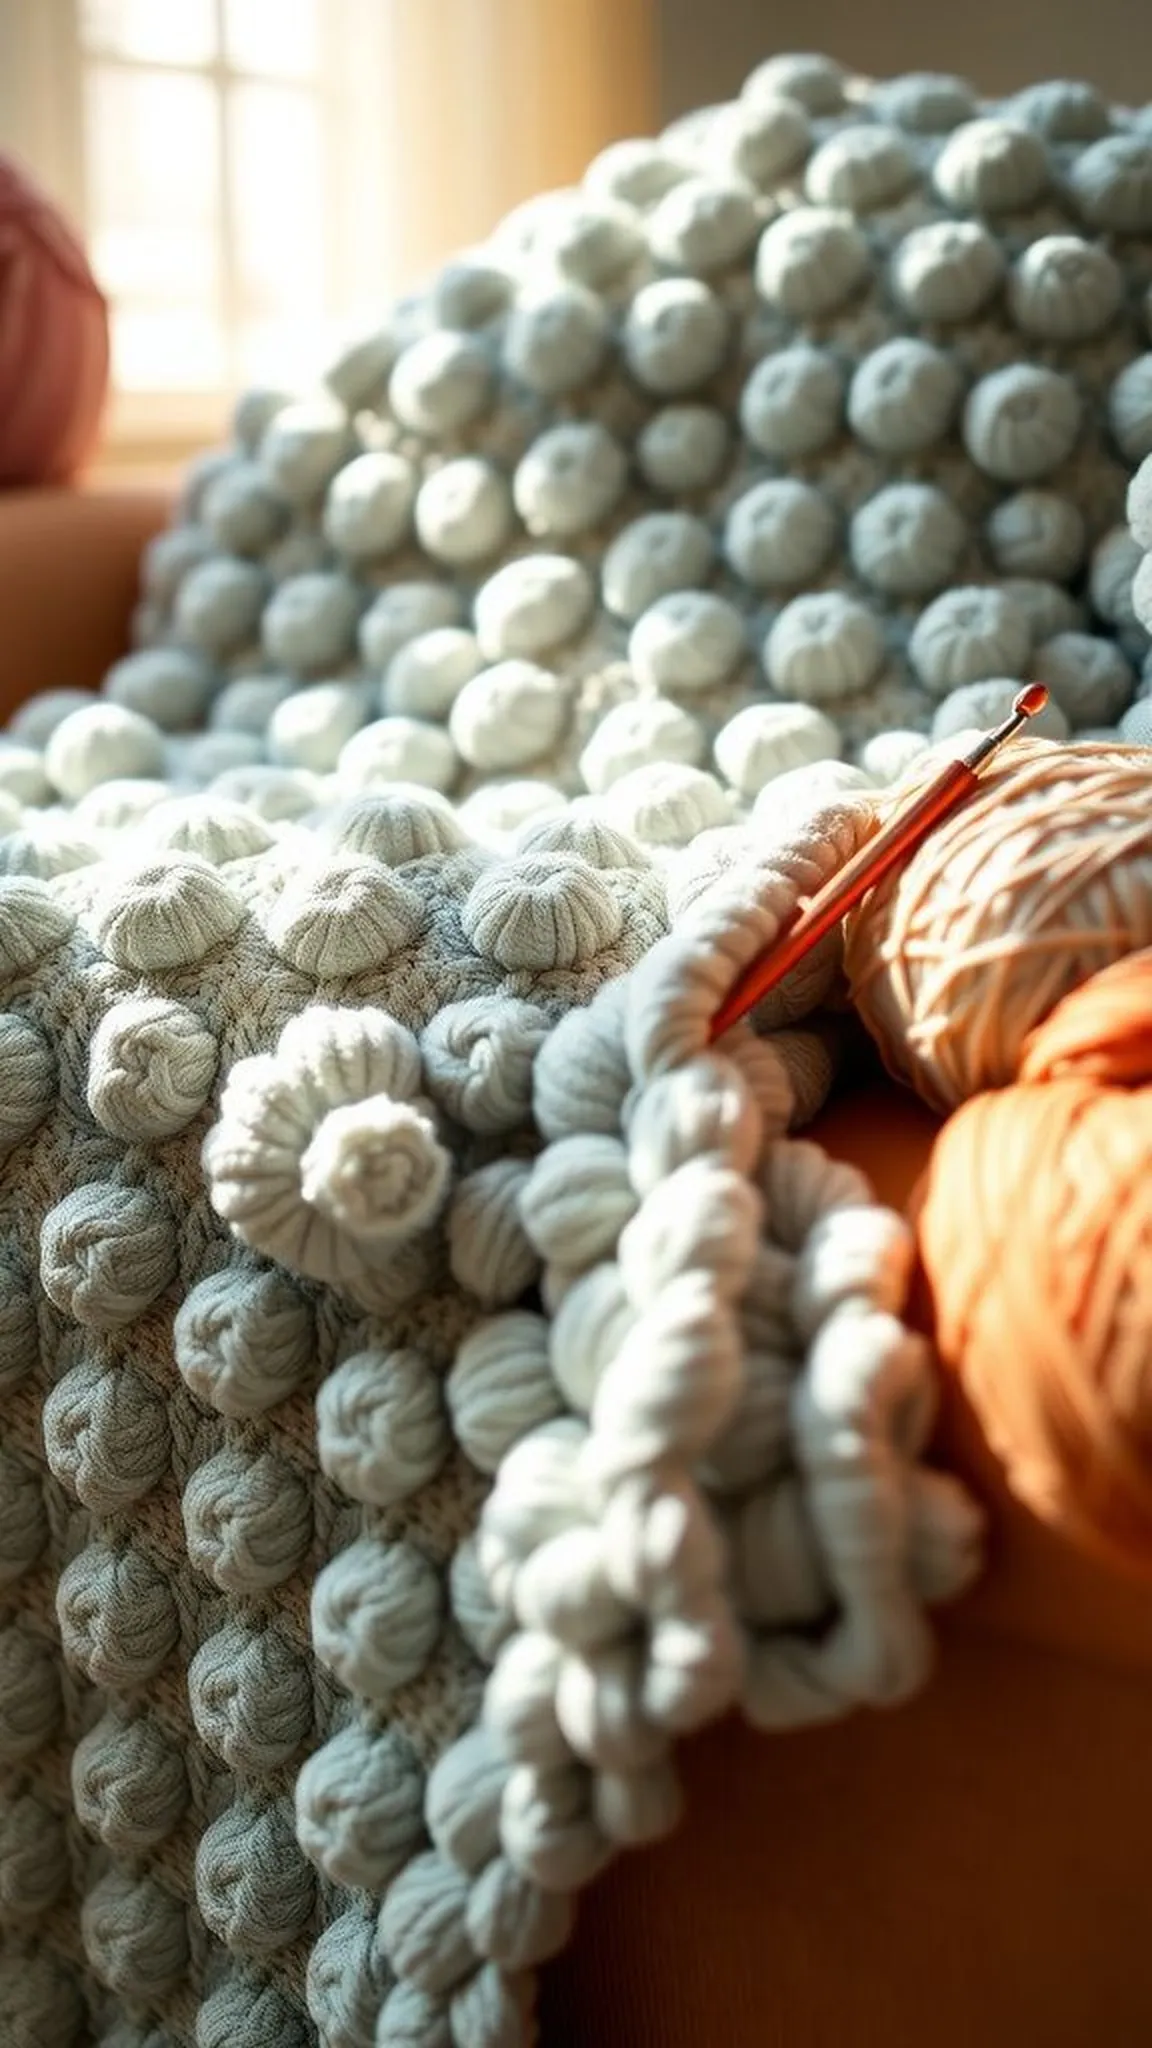
The bobble-stitch blanket offers a playful, tactile surface full of rounded bumps that catch the light. Each bobble creates a tiny island, producing a lively, almost pebble-like field across the throw.
Bulky wool lends body to each bump, so the pattern reads clearly even from a distance and feels springy to the touch. Color choices can accentuate or soften the bobble silhouette depending on contrast and sheen.
The overall fabric is lively and a joy to prod, giving a handmade energy to any seating area. Small shadow pockets form around each bobble, enhancing the three-dimensional effect.
Pro Tip: When forming bobbles, leave a slightly longer loop on the final pull to keep lumps round and evenly sized across the blanket.
How to Make This
- Chain the desired width and establish a base of simple stitches to set gauge with bulky yarn.
- Create bobbles by working multiple incomplete double crochet stitches into one stitch and finishing them together, repeating across the row.
- Continue bobble rows with plain rows between for contrast, then finish with a tidy border and secure tails with a tapestry needle.
Avoid: Skipping the plain rows between bobble rows can make the blanket very dense and less flexible than expected.
Try Also: Scatter bobbles randomly for a confetti look or align them in grids for a more structured pattern. Try bright contrasting yarn for a playful statement or soft pastels for a gentler feel.
Products & Materials
Items Used
“Playful bobble blanket with springy texture and cozy appeal.”
Save time and printer ink with 50+ printable templates and step-by-step instructions in one ad-free guide.

Just $19.99 — lifetime access
Ribbed crochet blanket with bold vertical ribs
⏱️ 4-5 hours · 🟢 Beginner
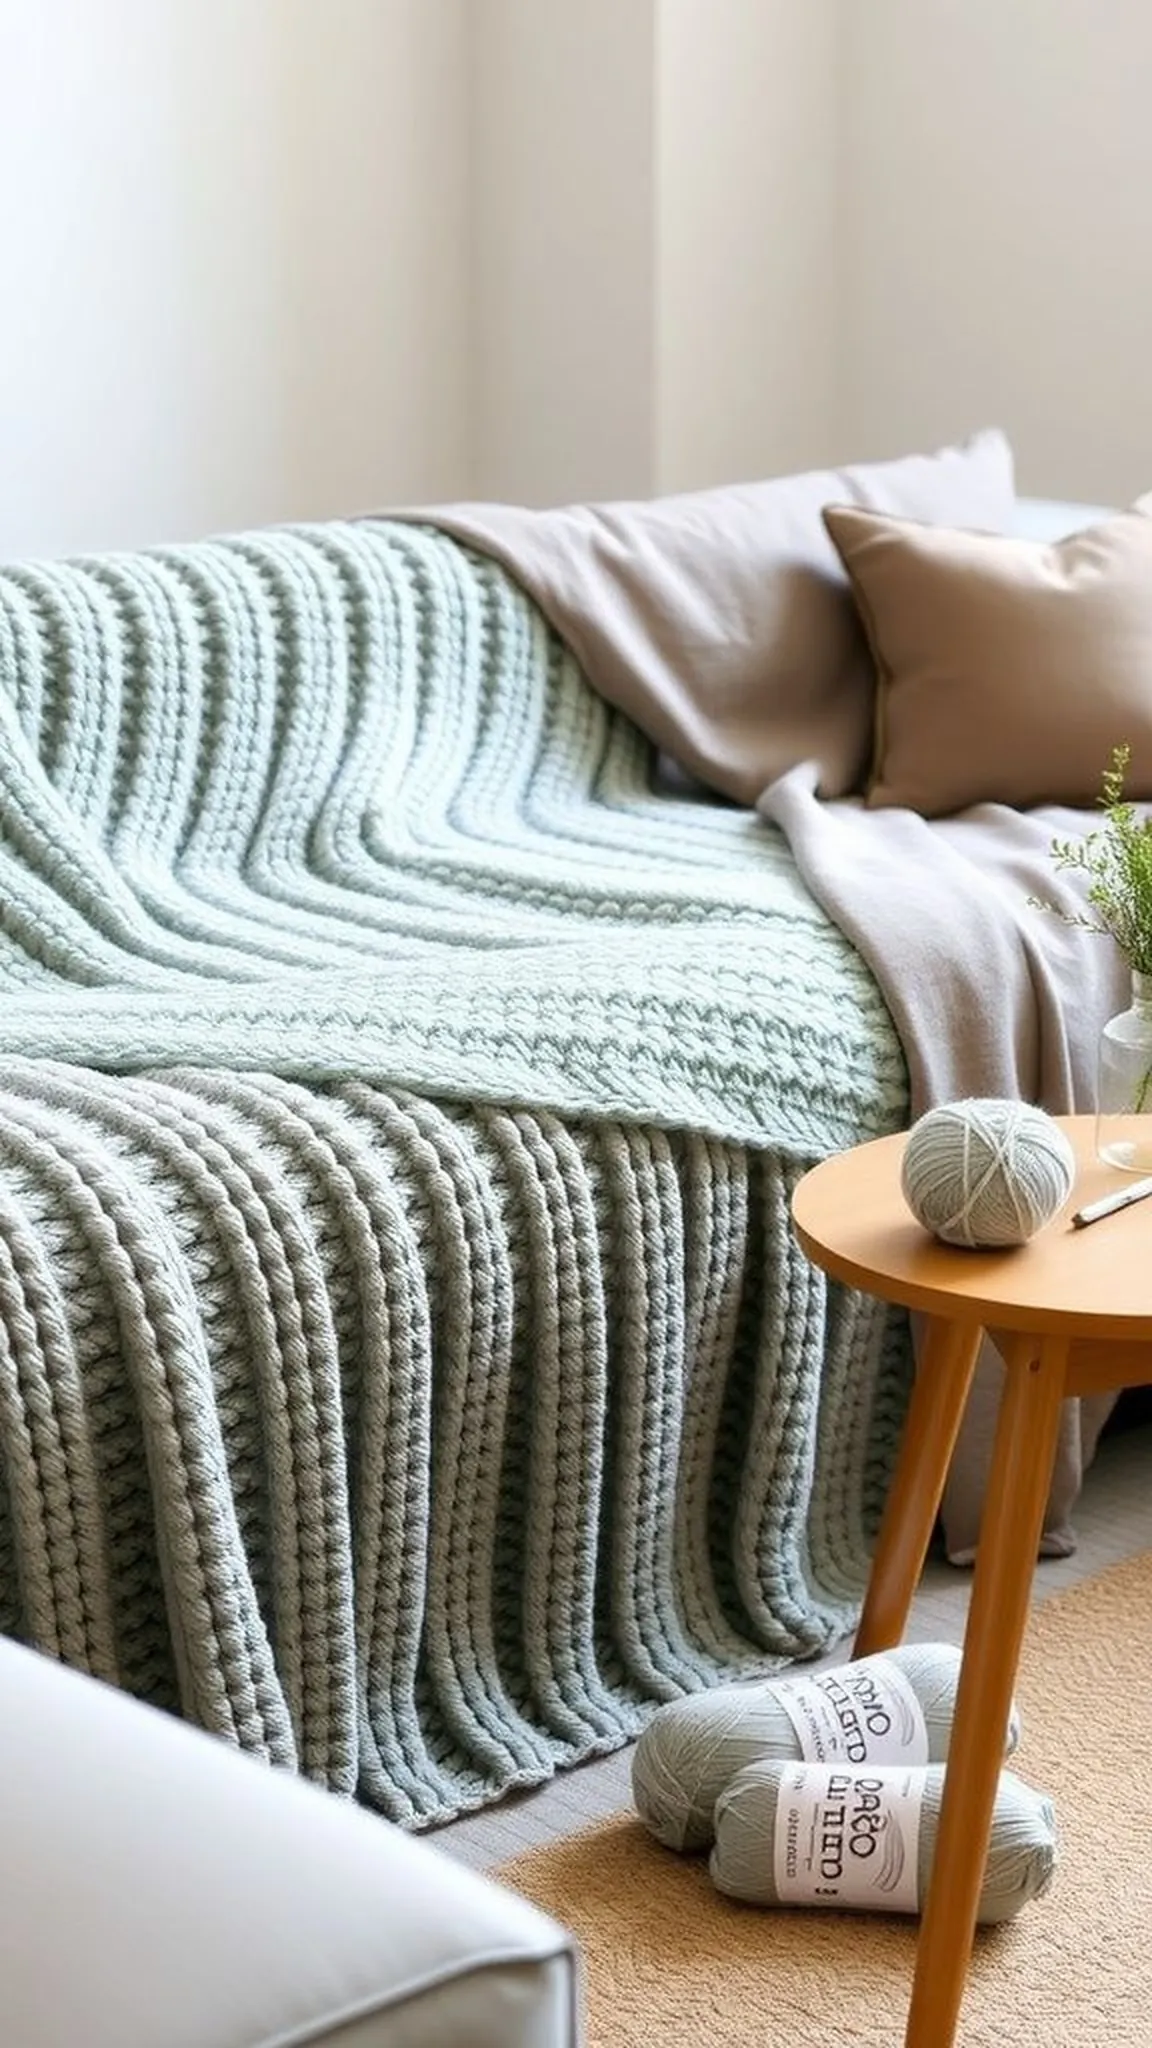
The ribbed blanket features strong vertical ribs that create a stretchy fabric with a clean, modern look. The ridges are tactile and pleasing, giving the throw a structured presence without stiffness.
A chunky acrylic-wool blend gives the ribs bounce and a soft sheen that plays with directional light. The surface invites hands to move along the paths of raised lines, offering a meditative quality.
Edges read neat and straight, making this design ideal for a minimalist living room or a cozy reading nook. Color layering can emphasize the ribs or keep the look sleek and monochrome.
Pro Tip: Work post stitches with a relaxed grip so ribs stay lofty and the fabric keeps gentle elasticity across the length.
How to Make This
- Chain to the desired width and begin with a foundation row of double crochet to set the base tension.
- Alternate front post and back post stitches to build tall vertical ribs across each row until reaching the desired length.
- Finish with a single crochet border and weave in yarn tails to tidy the edges.
Avoid: Pulling the working yarn tightly while doing post stitches can flatten ribs and reduce the intended stretch and softness.
Try Also: Create wider ribs by working multiple post stitches per ridge or introduce a thin contrasting stripe every few inches. A boucle-style bulky yarn will add a fuzzy halo to the ribs.
Products & Materials
Items Used
- super bulky yarn skeins
- jumbo crochet hook
- tapestry needle
“Modern ribbed throw with tall, tactile ridges and relaxed stretch.”
Basket weave blanket with interlocking columns
⏱️ 7-9 hours · 🟠 Intermediate
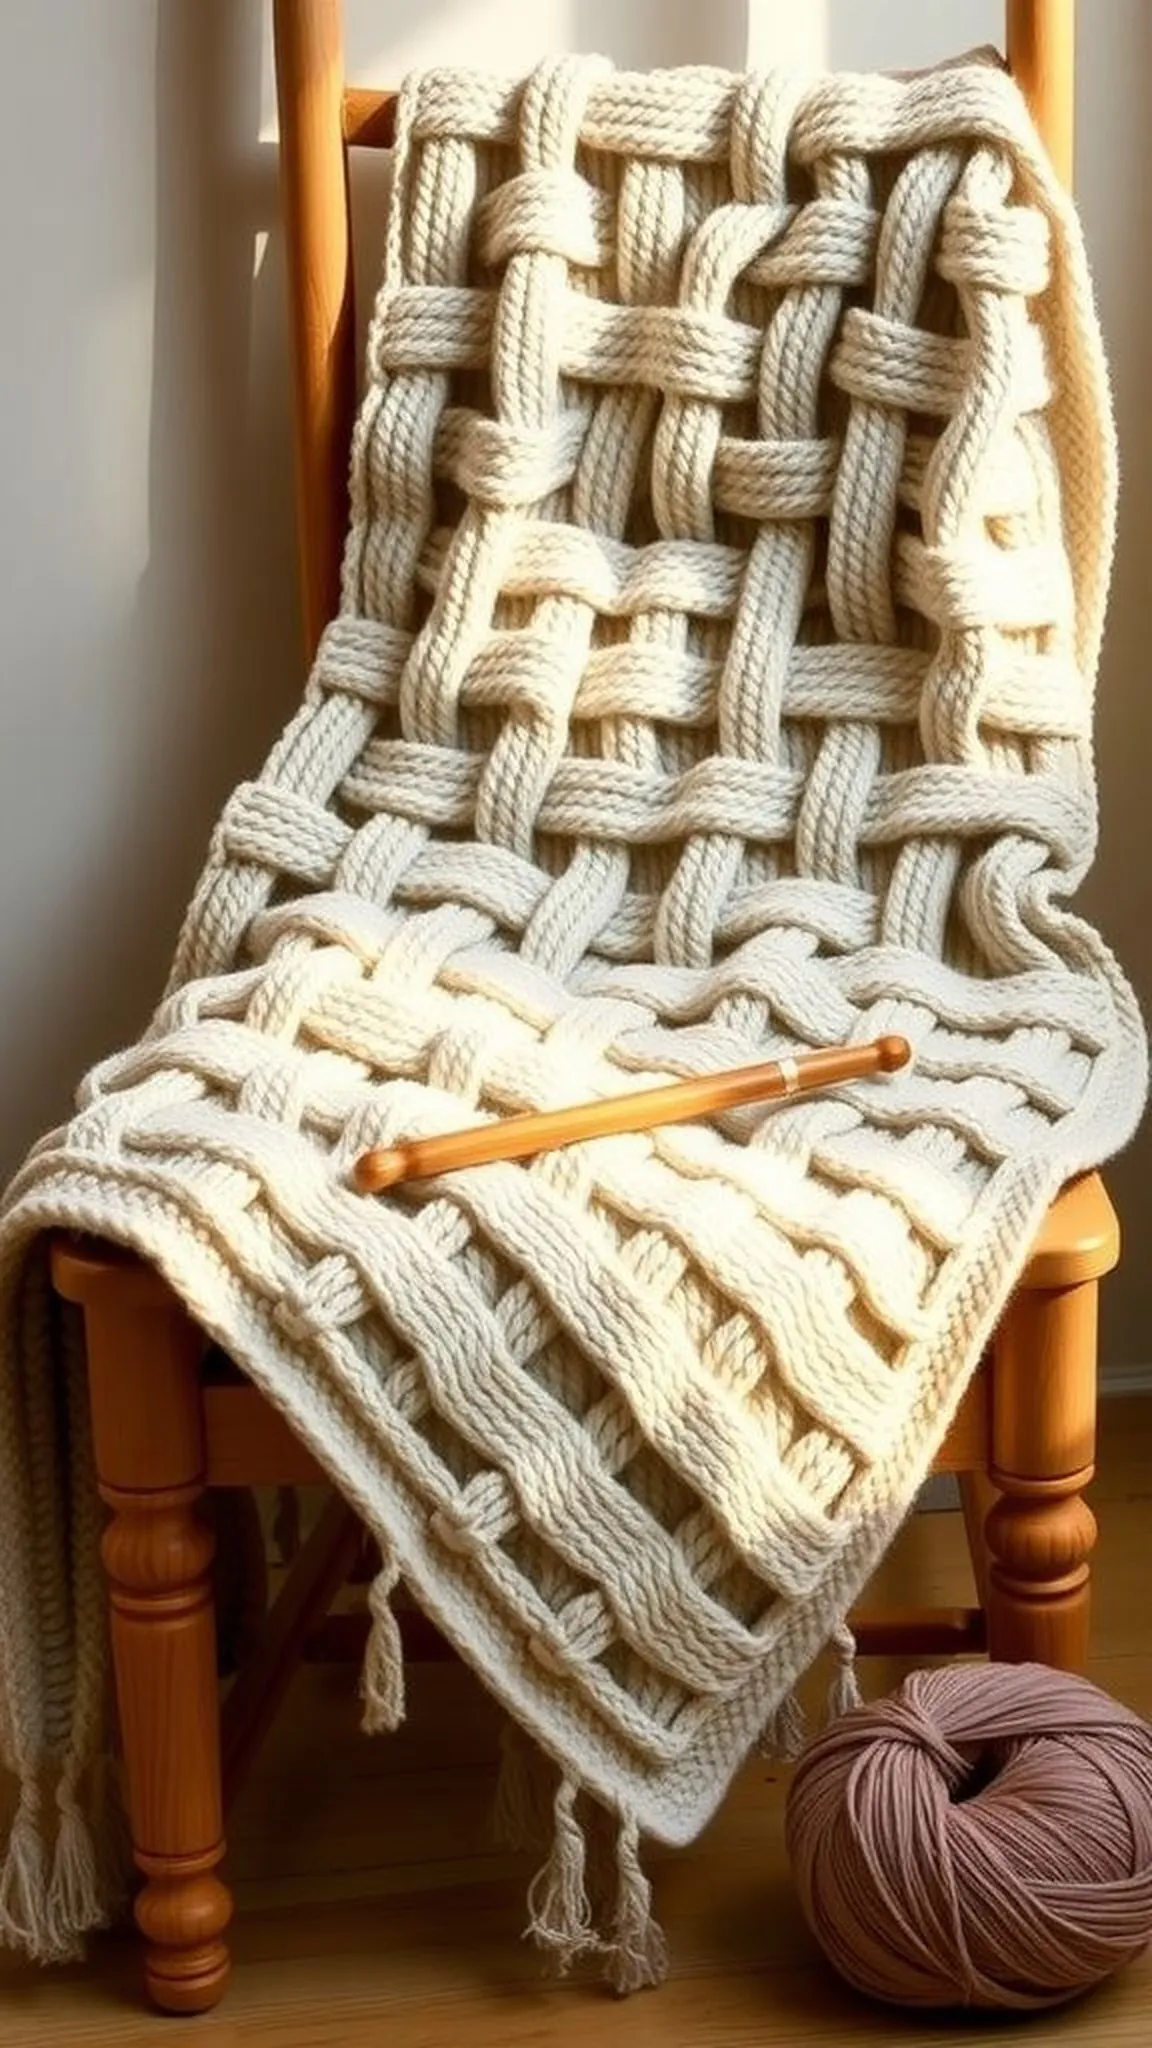
The basket weave blanket mimics a woven basket through alternating raised and recessed columns that interlock across the fabric. The result feels sturdy and textured, with a rhythm that pleases the eye and fingers alike.
Thick yarn turns each column into a bold cord, creating a blanket with weight and presence that still folds easily. Light plays along the ridges, producing a cozy chiaroscuro across the surface.
This fabric lends a rustic, handmade spirit to a room while keeping a clean geometric silhouette. Natural tone yarns emphasize the woven illusion, while brighter hues give a playful modern twist.
Pro Tip: Keep stitch height consistent when alternating columns so the woven effect reads clean and the fabric stays even across rows.
How to Make This
- Chain to a multiple that suits the basket weave repeat and establish a foundation row with basic stitches.
- Alternate front post and back post groups to create the raised and recessed columns, shifting the grouping every few rows to interlock the pattern.
- Continue until the blanket reaches desired length, then finish with a tidy border and secure ends with a tapestry needle.
Avoid: Uneven grouping when alternating columns can make the woven illusion look irregular and disrupt the rhythm of the surface.
Try Also: Try chunkier cords by doubling the yarn for a more graphic weave or alternate two colors per column for a checkerboard effect. A marled bulky yarn softens the contrast between columns.
Products & Materials
Items Used
- super bulky yarn skeins
- jumbo crochet hook
- tapestry needle
“Woven-look basket weave blanket with bold, interlocking ribs.”
Chevron ripple throw in bold color waves
⏱️ 5-8 hours · 🟠 Intermediate
![]()
The chevron ripple blanket creates a dramatic zigzag that flows across the throw in bold peaks and valleys. The sculpted ridges catch light and shadow, giving the pattern a graphic motion that livens a room.
Chunky yarn makes the peaks prominent and gives the valleys a soft, cushioned feel that folds neatly. A striped palette emphasizes the directional energy and draws the eye along the length of the blanket.
The result is cozy and dynamic at once, adding a handcrafted focal point to a sofa or window seat. Switching colors at each peak can create a lively, rhythmical effect.
Pro Tip: Mark the peak and valley stitches with a removable marker to keep the zigzag alignment crisp across wide blankets.
How to Make This
- Chain the required number of stitches for the chevron repeat and establish a base row in the first color.
- Work increases and decreases at regular intervals to form peaks and valleys, changing colors as desired for stripes.
- Continue the chevron rows until the blanket reaches desired size, then finish edges and weave in tails securely.
Avoid: Miscounting the increase and decrease points can skew the chevron, causing the pattern to drift sideways instead of staying straight.
Try Also: Soften the look with tonal shades of the same color, or go high-contrast for retro energy. A thinner bulky yarn will yield gentler waves.
Products & Materials
Items Used
- super bulky yarn skeins
- jumbo crochet hook
- tapestry needle
“Bold chevron blanket with chunky peaks and soft valleys.”
Giant granny stripe blanket with wide bands
⏱️ 4-6 hours · 🟢 Beginner

The giant granny stripe blanket scales up classic motifs into wide, colorful bands that feel fresh and nostalgic. Thick rounds read like bold paint strokes across the throw, creating a friendly, graphic presence.
Bulky yarn makes each band plump and rapid to crochet, so progress shows quickly and keeps motivation high. The fabric folds easily and feels warm without being overly heavy.
Colors can be playful or serene depending on selection, giving the blanket personality for a living room or nursery. The wide stripes make color changes easy and visually satisfying.
Pro Tip: Carry color up the side when changing bands to avoid extra ends and keep the edge tidy and smooth.
How to Make This
- Chain a base and work wide granny stitch clusters across the row to start the first band.
- Change color after the desired band height and continue clusters to form the next stripe, repeating until the blanket reaches full length.
- Finish with a single crochet border and weave in any remaining yarn tails neatly with a tapestry needle.
Avoid: Leaving long floating color tails can create lumps in the edge and make the border look uneven when the blanket is folded.
Try Also: Alternate bright, saturated bands for a retro vibe or stick to pastel gradations for a soft nursery throw. A neutral border can unify mixed colors.
Products & Materials
Items Used
“Oversized granny stripes in chunky yarn for quick, bold blankets.”
Reversible seed stitch blanket with rich pebble texture
⏱️ 8-12 hours · 🔴 Advanced
The reversible seed stitch blanket presents a tiny pebble surface on both sides, giving the throw a refined, finished look wherever it’s displayed. The dense texture feels substantial and pleasantly tactile when fingertips travel across it.
Chunky yarn enlarges the pebble motif so the pattern remains intricate yet bold, creating a refined handmade textile. The fabric holds shape well and folds into a satisfying, weighty bundle.
Neutral shades bring out the subtle play of light, while a speckled fiber can add depth and movement to the surface. This blanket makes a sophisticated accent in calm, layered interiors.
Pro Tip: Maintain a steady stitch height on both sides to keep the pebble texture even and fully reversible without one side dominating the look.
How to Make This
- Chain an even number and establish a seed stitch foundation by alternating single and double crochet stitches across the row.
- Continue alternating stitches each row so the pebble texture builds symmetrically and remains reversible on both faces.
- Work until the blanket reaches the desired size, then add a subtle border and weave in ends to complete the fabric.
Avoid: Inconsistent stitch height across rows can make one side look tighter or more compressed than the other, reducing the reversible effect.
Try Also: Introduce a thin contrast border for framing or alternate two complimentary yarns every few rows for a marled pebble field. A softer alpaca-blend yarn will add loft.
Products & Materials
Items Used
“Reversible seed stitch blanket with pebble texture on both sides.”
Cable-look crochet blanket with braided illusion
⏱️ 9-12 hours · 🔴 Advanced
The cable-look crochet blanket creates a braided illusion through clever post stitch work that mimics knitting cables. The raised braids feel sculptural and hold crisp shadows along each twist.
Bulky yarn makes each braid bold and tactile, resulting in a blanket with strong visual rhythm and satisfying weight. The surface invites touching and tracing the braided lanes with the fingertips.
This design brings a handcrafted, heirloom quality to a room while staying surprisingly modern in shape. Natural or muted colors help the braid texture read clearly without distraction.
Pro Tip: Work cable-crossing rows with relaxed loops so the braids sit loftily and maintain distinct separation from the background fabric.
How to Make This
- Chain a foundation and establish base rows with double crochet to set the stitch height for the cable sections.
- Create cable crosses by working front post stitches and slipping groups over each other to form braided twists across the row.
- Repeat braided and plain rows until the blanket measures as desired, then finish with a neat border and weave in ends.
Avoid: Not keeping the background stitches consistent in height can make the cables look uneven and disrupt the braided illusion.
Try Also: Make slimmer cables for a delicate look or cluster multiple braids for a dramatic center panel. A heathered bulky yarn adds soft color shifts within each braid.
Products & Materials
Items Used
- super bulky yarn skeins
- jumbo crochet hook
- tapestry needle
“Braided cable-look crochet blanket with sculptural, chunky twists.”
Giant loop blanket with super soft loops
⏱️ 2-3 hours · 🟢 Beginner
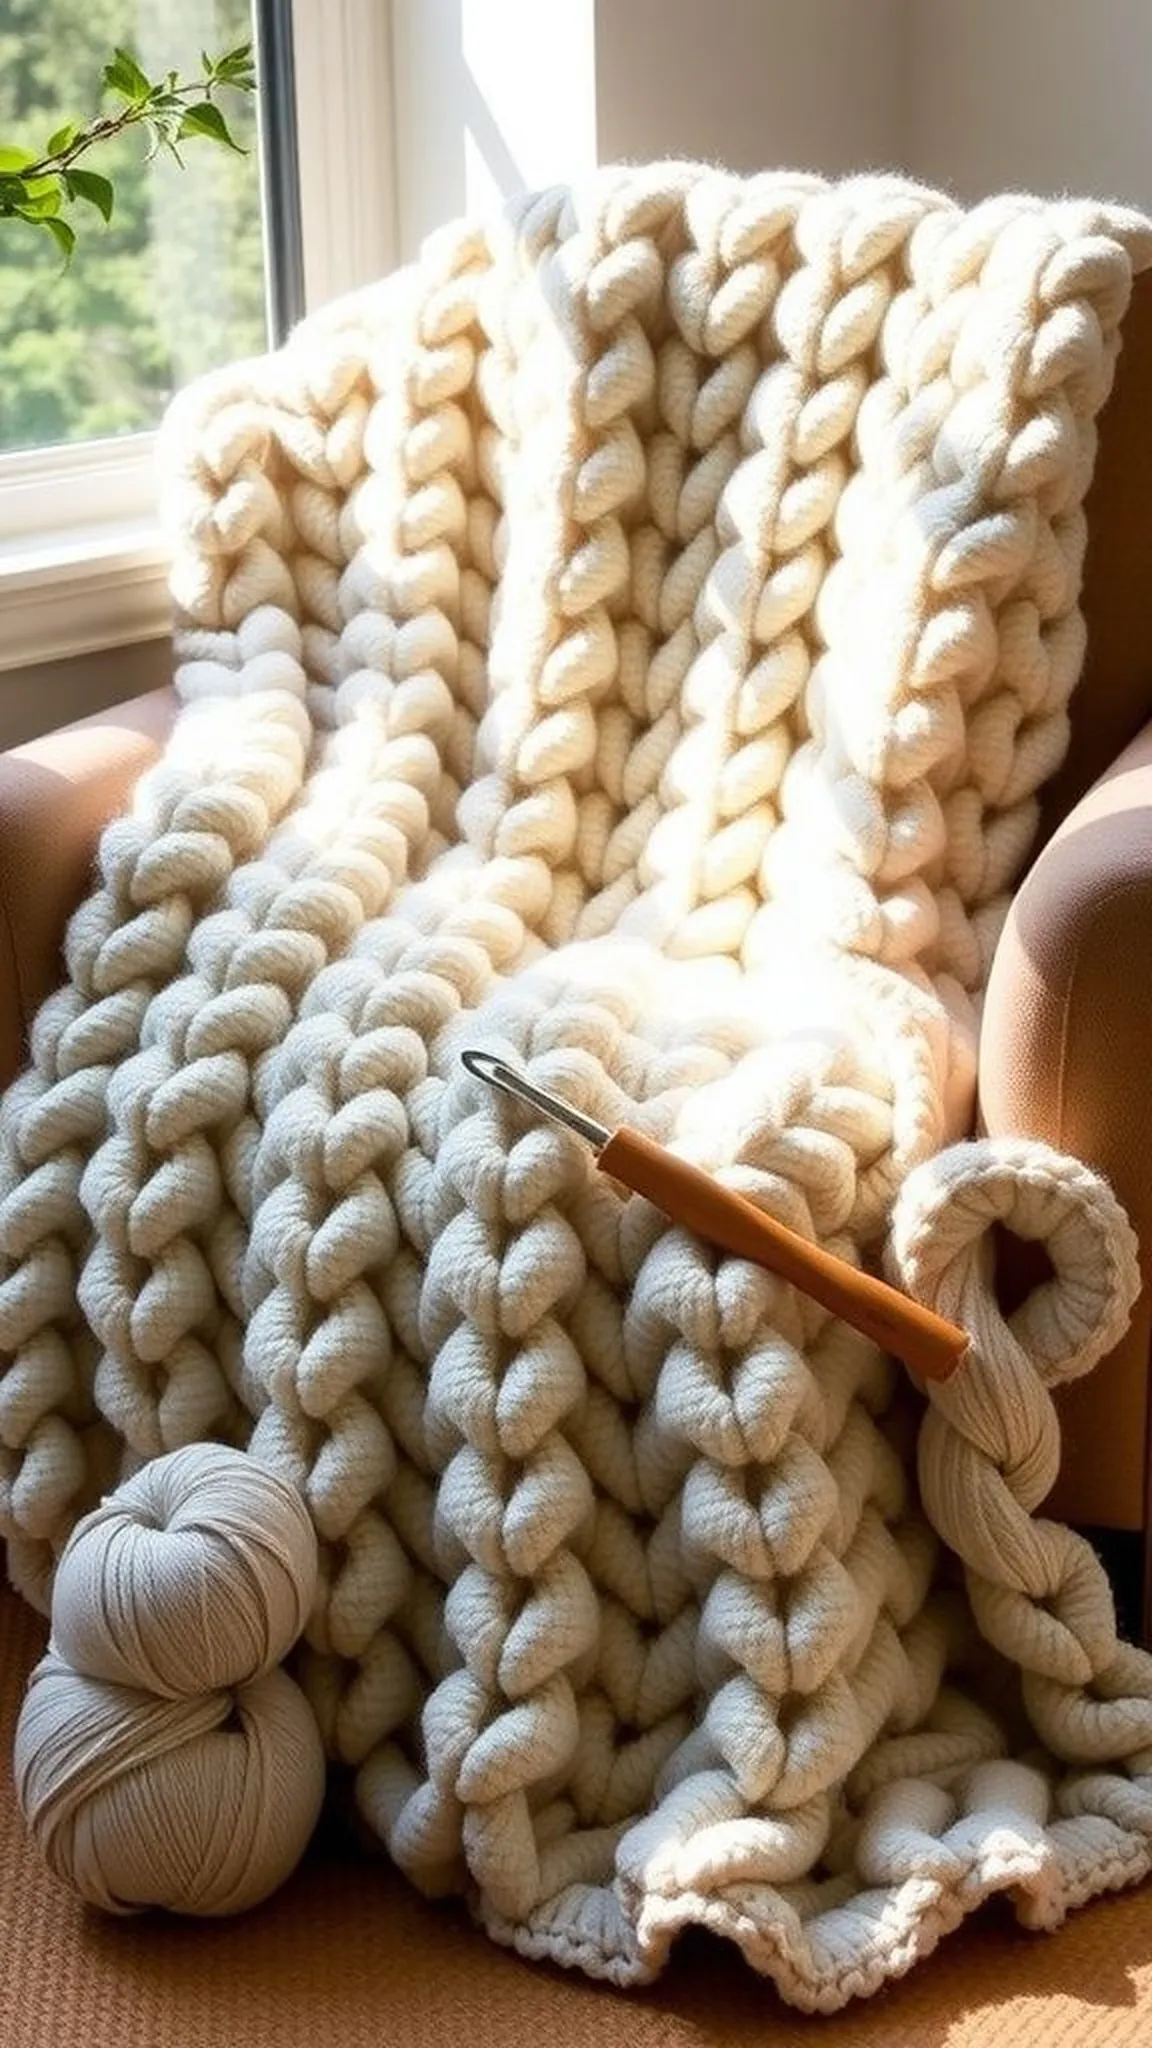
The giant loop blanket is all about exaggerated loops that create a plush, tactile field perfect for snuggling. The surface has a playful, cloud-like quality that feels irresistibly soft under the hands.
Using arm knitting or an extra-large hook gives the loops scale and a dramatic, cozy appearance that fills a space with texture. The blanket drapes easily while still keeping a lofty, cushioned feel.
Pro Tip: Keep loop lengths even by measuring a short guide before forming each loop to maintain consistent loop size across the blanket.
How to Make This
- Begin a foundation chain sized to the desired width and work large loops using a jumbo hook or hands to form elongated loop stitches.
- Continue looping rows to build height until the blanket reaches the intended length, keeping loop tension even throughout.
- Finish by closing the final row securely and weaving in any yarn tails with a tapestry needle.
Avoid: Uneven loop length can create a lopsided look and make the edge hard to tidy when finishing the blanket.
Try Also: Make the loops oversized for an ultra-plush feel or slightly shorter for a more durable surface; try a nylon-wool blend for extra loft. Add a simple border for a cleaner edge.
Products & Materials
Items Used
- super bulky yarn roving
- jumbo crochet hook
- tapestry needle
“Ultra-plush giant loop blanket with cloud-like, oversized loops.”
Striped colorblock blanket with bold wide panels
⏱️ 4-6 hours · 🟢 Beginner
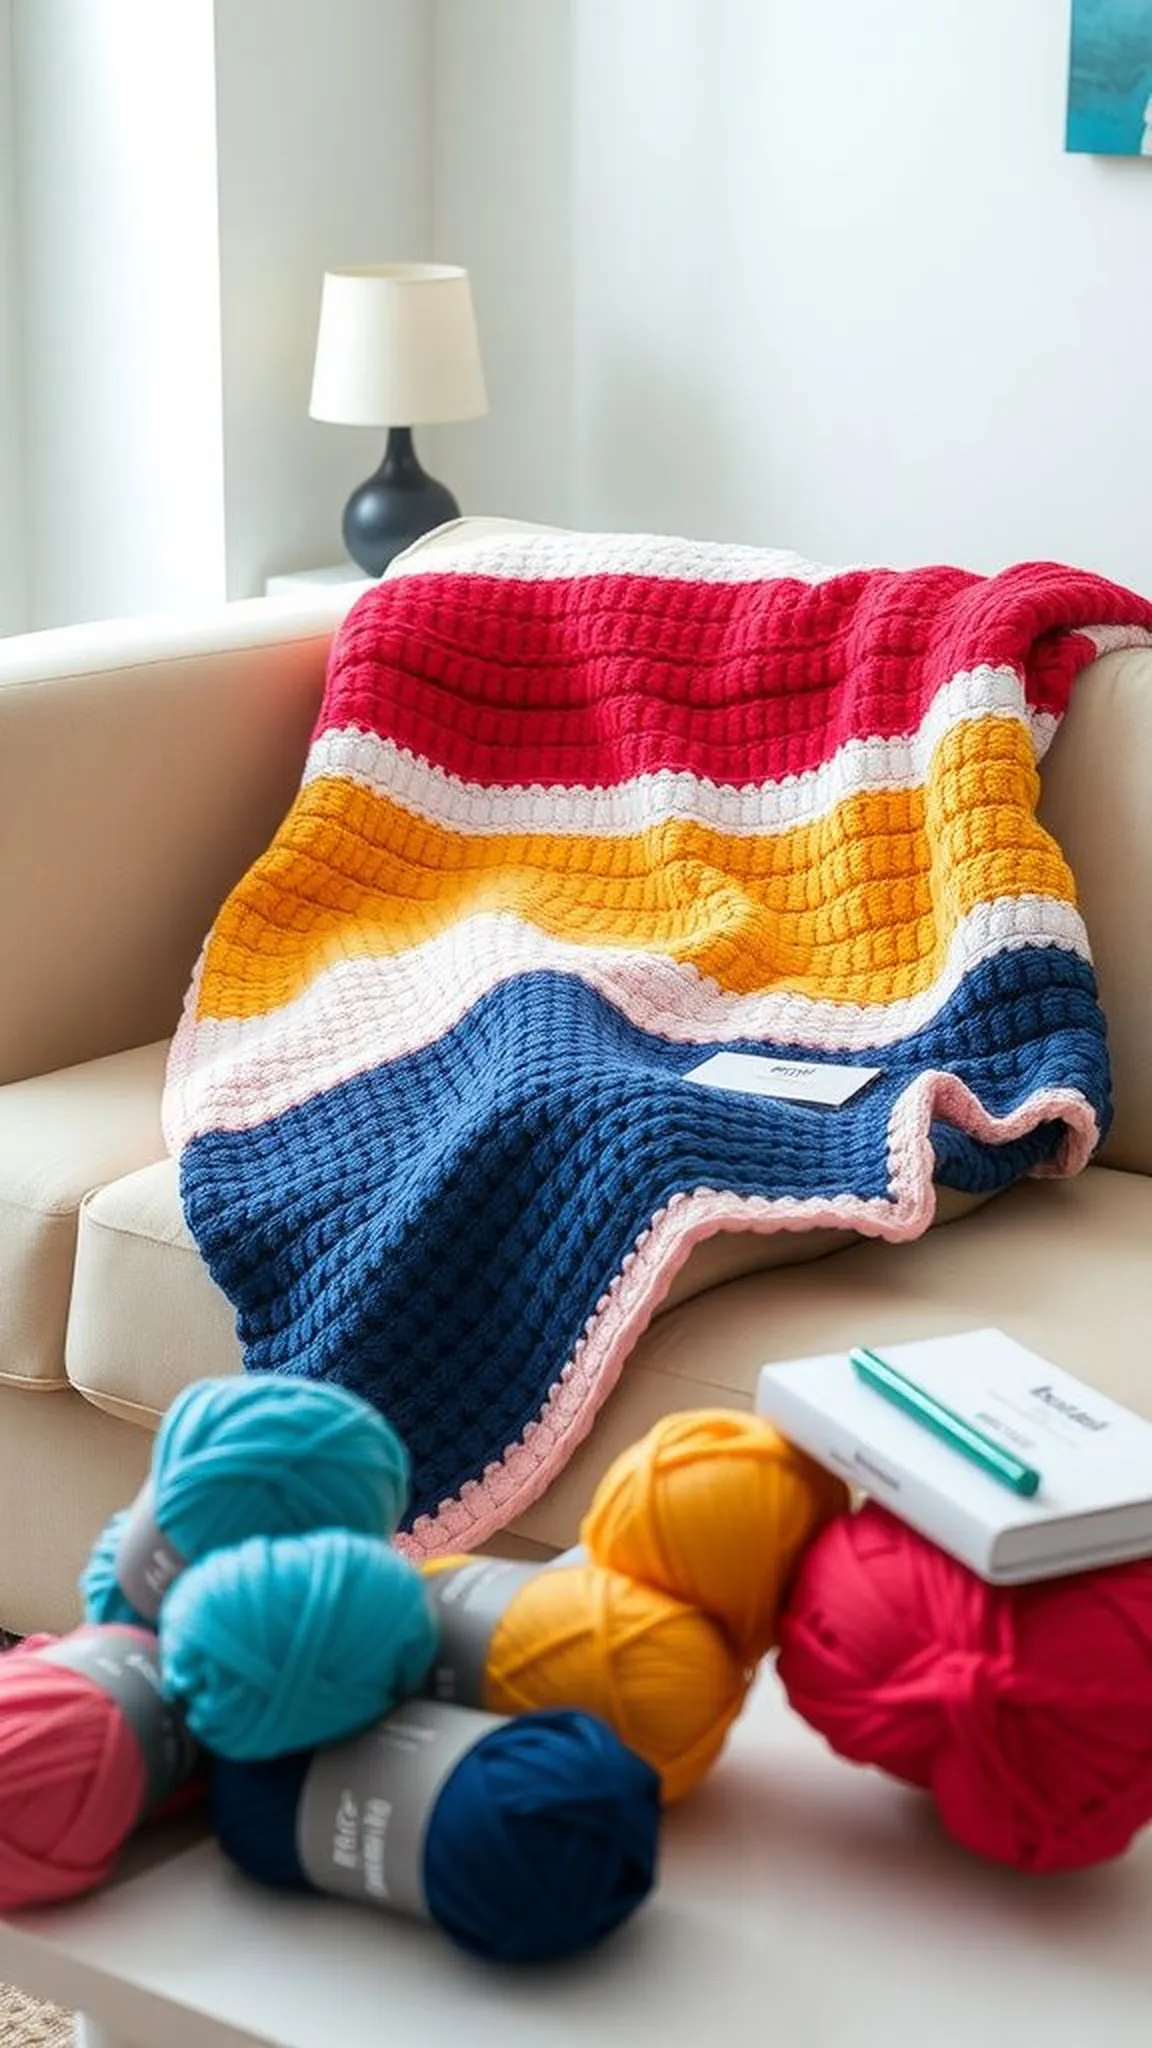
The striped colorblock blanket uses wide panels of chunky yarn to create bold visual sections that read like modern art. Each panel lies flat and feels substantial, contributing to a balanced overall weight.
Thick yarn helps color transitions sit cleanly, so stripes appear as confident bands rather than fussy details. The tactile surface is soft and satisfying to fold and arrange on a couch or guest bed.
This design pairs well with simple furniture and crisp linens, bringing a handmade pop without overwhelming the room. Changing color scale adjusts the mood from playful to refined.
Pro Tip: Carry the unused color along the edge when shifting panels to minimize loose ends and keep the side seam tidy and secure.
How to Make This
- Chain the blanket width and work rows of single or double crochet in the first chosen color until the panel reaches the desired height.
- Join the next color and continue working full-width panels, changing hues at clean intervals to form the colorblock layout.
- Repeat until the blanket is complete, then add a border to frame the panels and weave in all yarn tails with a tapestry needle.
Avoid: Not securing color joins tightly can lead to slipping seams and visible gaps between panels when the blanket is handled.
Try Also: Alternate thin accent stripes between wide panels for extra rhythm or reverse the palette for high-contrast drama. A tonal palette keeps the look calm and refined.
Products & Materials
Items Used
- super bulky yarn skeins
- jumbo crochet hook
- tapestry needle
“Modern colorblock blanket with chunky wide panels for bold decor.”
Fringed chunky throw with cozy tassel edges
⏱️ 3-5 hours · 🟢 Beginner
The fringed chunky throw balances a simple body stitch with playful tassel edges that sway slightly when the blanket moves. The fringe frames the throw, adding a handcrafted flourish that catches attention without overwhelming the texture.
Bulky yarn gives each tassel weight so they hang with confidence and complement the soft, squishy blanket body. The main fabric feels warm and approachable, inviting relaxed use.
Fringe length and density can change the character from subtle to dramatic, making it easy to tune the final look. Neutral bodies with colorful fringe create a lively contrast while single-tone fringe reads elegantly.
Pro Tip: Make fringe bundles even by prepping a small cardboard measure to fold loops uniformly before trimming for neat, consistent tassels.
How to Make This
- Crochet the blanket body in a simple repeating stitch until the desired size is reached, keeping edge stitches neat for tassel placement.
- Prepare tassel bundles by winding yarn around a measure and then attach bundles evenly along the short edges at regular intervals.
- Trim tassel ends to match, fluff them gently, and weave in any leftover tails to finish the piece.
Avoid: Tassels placed too closely can create a heavy, crowded edge that overwhelms the blanket body and makes folding awkward.
Try Also: Try contrasting colored tassels for a playful border or shorter, sparser fringe for a subtle finish. Add beads to a few tassels for a boho touch.
Products & Materials
Items Used
“Cozy chunky throw with playful tassel fringe for handcrafted charm.”
Chevron granny square blanket assembled panels
⏱️ 8-10 hours · 🟠 Intermediate
![]()
The chevron granny square blanket combines classic granny motifs with zigzag alignment for a patchwork-meets-ripple look. Each square brings its own little halo of texture, and the joined layout forms a dynamic chevron across the whole throw.
Bulky yarn makes each square bold and quick to complete, while the join lines add a handcrafted grid that reads clearly from a distance. The assembled blanket has visual rhythm and a satisfying weight that keeps it draped beautifully.
A neutral join color can unify bright squares or let each hue sing when a lively palette is chosen. The result is playful yet structured, ideal for a lively family room or casual guest quilt.
Pro Tip: Keep joining slip stitches loose enough to allow the blanket to relax, preventing puckering along the seams between squares.
How to Make This
- Crochet multiple large granny squares in chosen colors, working each square to a consistent size with bulky yarn.
- Arrange squares into a chevron alignment and join them using slip stitch or single crochet joins to form the zigzag pattern.
- Finish with a border around the entire assembly and weave in any remaining yarn tails for a clean look.
Avoid: Joining squares too tightly can cause puckering and prevent the blanket from lying flat when spread out.
Try Also: Make each square a different solid color for a scrappy vibe or limit the palette to two tones for a modern take. Swap in textured stitches for some squares to increase tactile interest.
Products & Materials
Items Used
- super bulky yarn skeins
- jumbo crochet hook
- tapestry needle
“Patchwork chevron blanket from oversized granny squares, charted and cozy.”
Textured puff-stitch blanket with pillowy knots
⏱️ 6-8 hours · 🟠 Intermediate
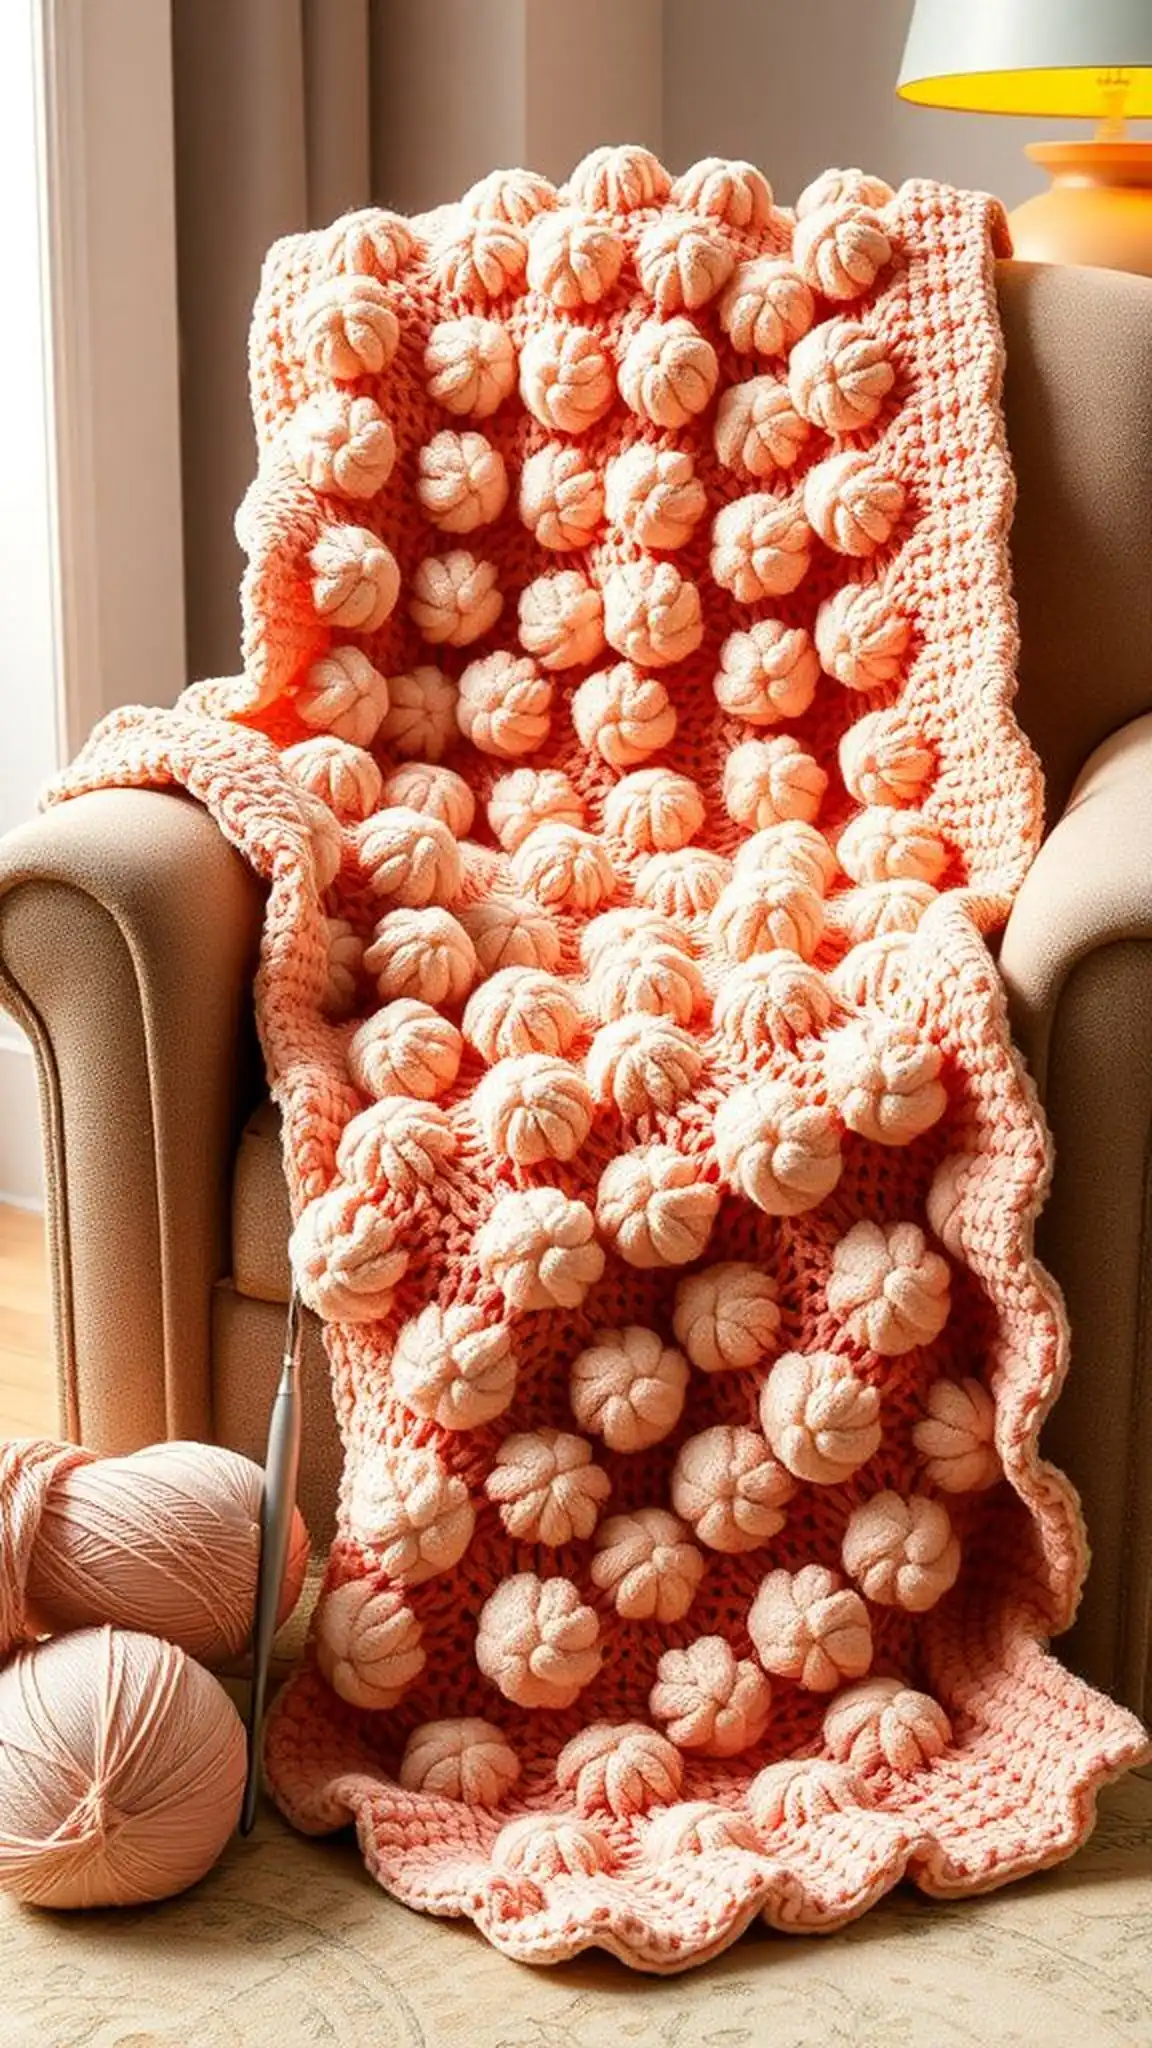
The puff-stitch blanket features clusters that swell into soft pillows, giving the fabric a sumptuous, tufted surface. Each puff reads as a little cloud, producing a cushioned feel that begs for a nap.
Bulky yarn enlarges the puffs so the texture stays dramatic while remaining soft and yielding. Puffs cast tiny shadows that create a plush landscape across the blanket.
Color choices can make the puffs pop or blend them into a tranquil field of texture. This blanket feels luxurious draped over a lounge or folded at the foot of a bed.
Pro Tip: Avoid pulling puff loops too tight when forming clusters so each puff retains a rounded, airy profile across the blanket surface.
How to Make This
- Chain a base and establish a foundation row in simple stitches to set gauge with the bulky yarn.
- Create puff clusters by drawing multiple loops into the stitch and pulling them together before completing the cluster, repeating across each row.
- Alternate puff rows with plain rows for stability, then finish with a border and weave in all yarn ends.
Avoid: Making puff clusters inconsistent in size leads to an uneven surface and can make finishing the edges awkward.
Try Also: Alternate puff rows with plain rows for rhythm or cluster puffs closer for a denser texture. Use a sparkly metallic bulky yarn for occasional highlight puffs.
Products & Materials
Items Used
- super bulky yarn skeins
- jumbo crochet hook
- tapestry needle
“Puff-stitch blanket with pillowy clusters for ultra-cozy texture.”
Garter-like crochet blanket mimicking knit texture
⏱️ 6-8 hours · 🟠 Intermediate

The garter-like crochet blanket imitates the cozy ridges of knit garter stitch while keeping the speed of crochet. Rows stack into soft ridges that are tactile and visually familiar to knit lovers.
Bulky yarn makes these ridges round and pillowy, producing a blanket with gentle bounce and comforting weight. The surface catches soft light in a way that enhances the knit-like appearance.
This design suits calmer palettes and layered textiles, offering a handmade knit look without switching hooks for needles. The fabric folds with a pleasant heft that feels comforting on cool evenings.
Pro Tip: Keep row tension steady when creating ridges so the blanket maintains even width and a consistent knit-like texture.
How to Make This
- Chain to the desired width and work alternating rows of single crochet and chain stitches or half double crochet to build ridge texture.
- Continue the ridge pattern across the blanket until reaching the target length, maintaining even tension for consistent row height.
- Finish with a subtle border and secure yarn tails using a tapestry needle for a tidy edge.
Avoid: Varying tension between ridge and plain rows can make the edges ripple and the blanket fail to lie flat.
Try Also: Add thin contrast stripes between ridge groups for rhythm or alternate two yarn weights for a mixed-texture surface. A neutral heather works well for a knit-like look.
Products & Materials
Items Used
- super bulky yarn skeins
- jumbo crochet hook
- tapestry needle
“Crochet blanket with knit-like garter ridges, cozy and textural.”
