
As an Amazon Associate I earn from qualifying purchases.
DIY Father’s Day Card Ideas bring playful creativity to the season with DIY Father’s Day Card Ideas for every kind of dad. These DIY Father’s Day Card Ideas transform simple paper into keepsakes, pairing handmade Father’s Day cards with clever touches found in DIY Father’s Day Card Ideas and quick DIY Father’s Day cards for busy afternoons. With DIY Father’s Day Card Ideas that range from rustic to modern, these DIY Father’s Day Card Ideas and handmade Father’s Day cards make greetings feel personal and memorable.
Pop‑up tie surprise with textured paper flair
⏱️ 1 hour · 🟠 Intermediate
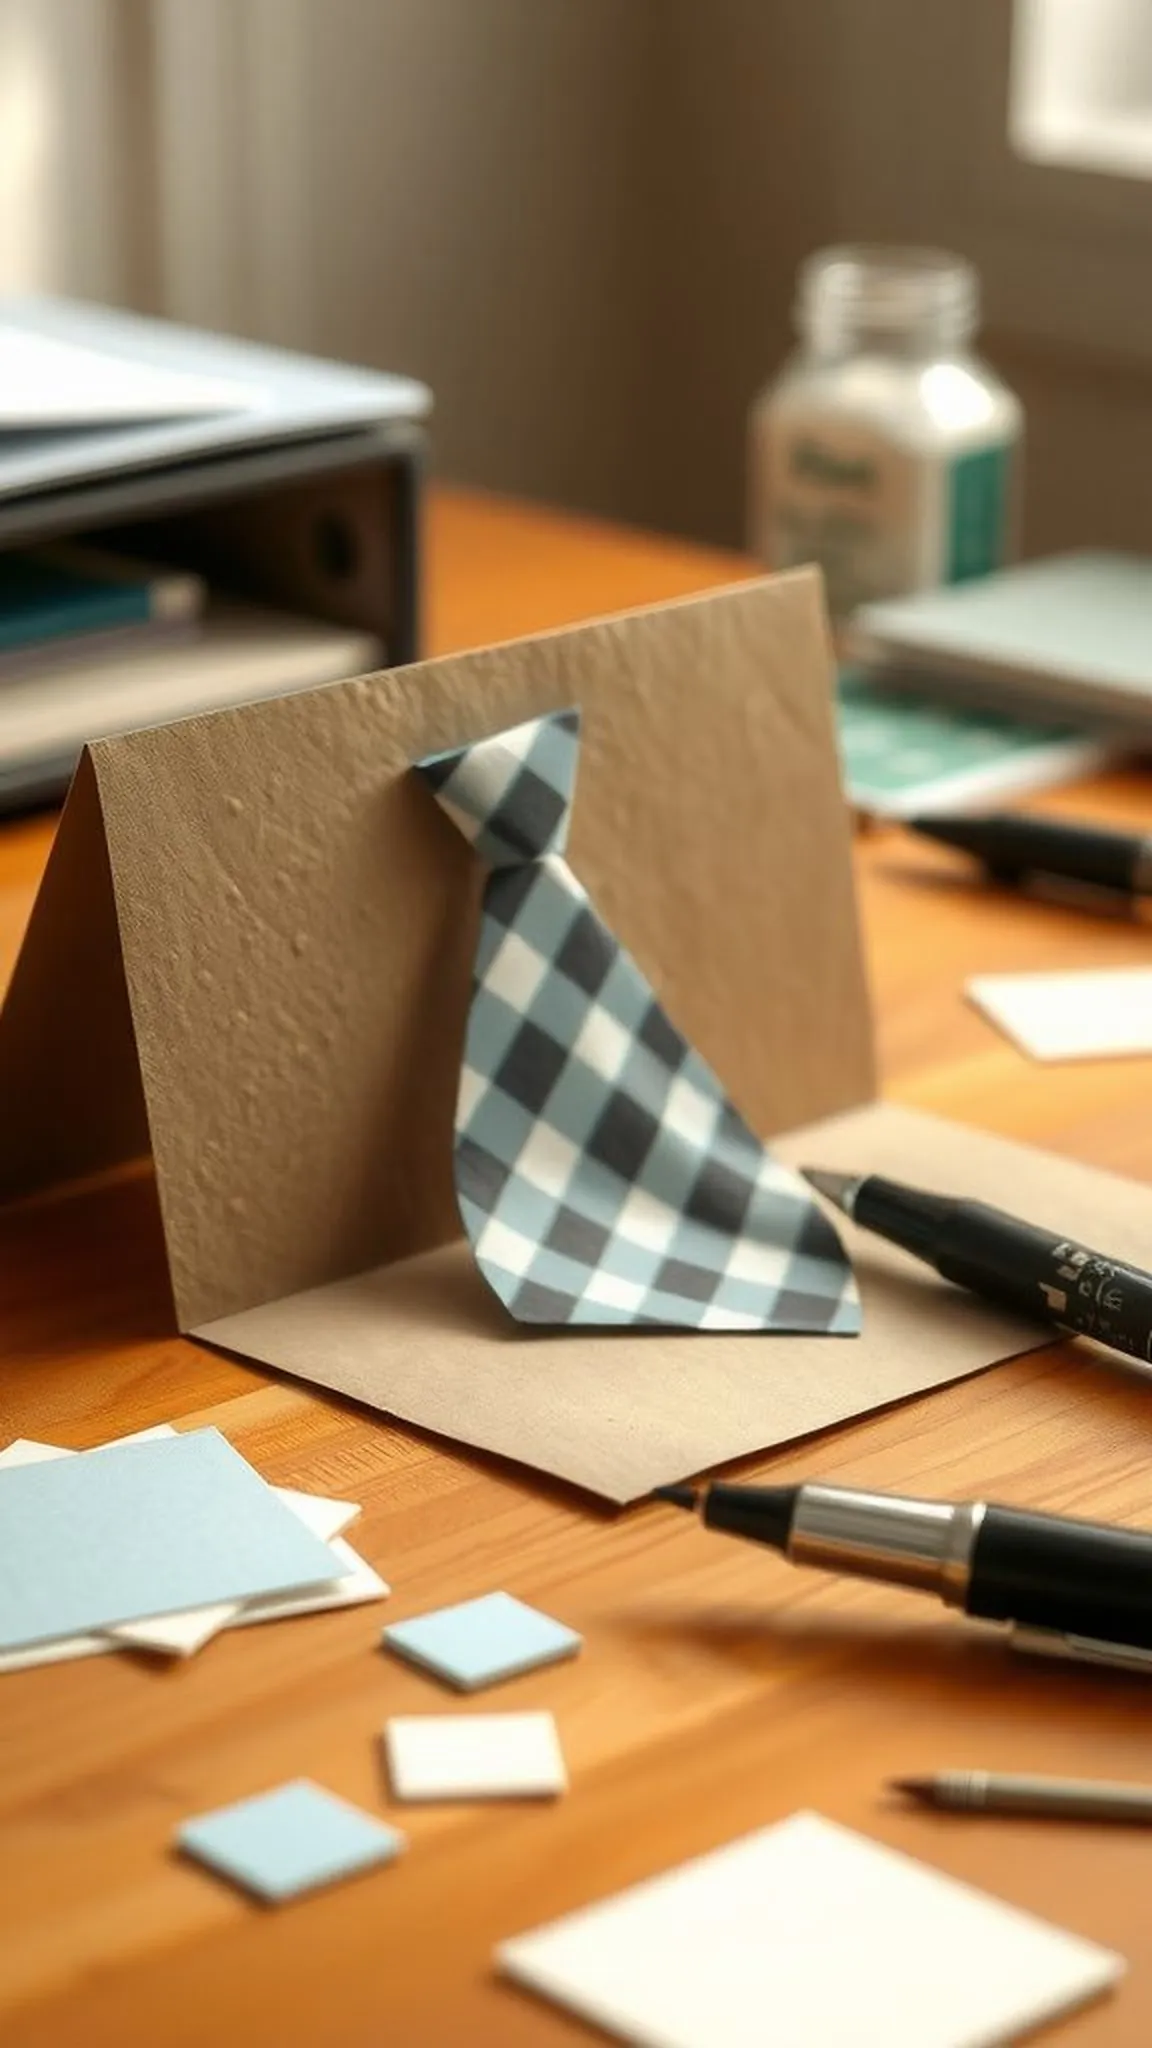
A pop-up tie card feels playful and a little theatrical, the kind that makes a small gasp when opened. The tie element pops forward with a pleasant crispness against the soft matte of the card base. Patterned paper adds energy while a hint of sheen on the tie suggests favorite shirts and weekend brunches.
The interior keeps warm notes and the exterior carries a tactile rhythm, the layers catching light differently. It reads like a snapshot of dad’s easy smile and a memory folded into paper.
📋 How to Make This ▶
- Score the card base along the center and create a rectangular pop-up tab inside to anchor the tie element.
- Cut a tie silhouette from patterned paper and add a small contrasting knot piece for dimension.
- Apply foam adhesive beneath the tie and nestle it onto the pop-up tab so the tie lifts when the card opens.
- Decorate the front with a pocket, textured strip, or hand-lettered greeting to complement the tie motif.
⚠️ Avoid: A common mistake is using thin paper for the pop-up, which can flop and lose impact. Overly bulky decorations can stop the card from closing cleanly.
🔄 Try Also: A slimmer tie gives a modern vibe while a bow-tie shape brings a playful twist; swapping patterned paper for fabric scraps adds a tactile element.
🛒 Products & Materials ▶
Items Used
- heavyweight cardstock
- patterned scrapbooking paper
- foam adhesive squares
- black fine liner pen
📌 “Pop-up tie card that opens with personality and texture.”
• • •
Fingerprint grill scene that smells like summer
⏱️ 30 min · 🟢 Beginner
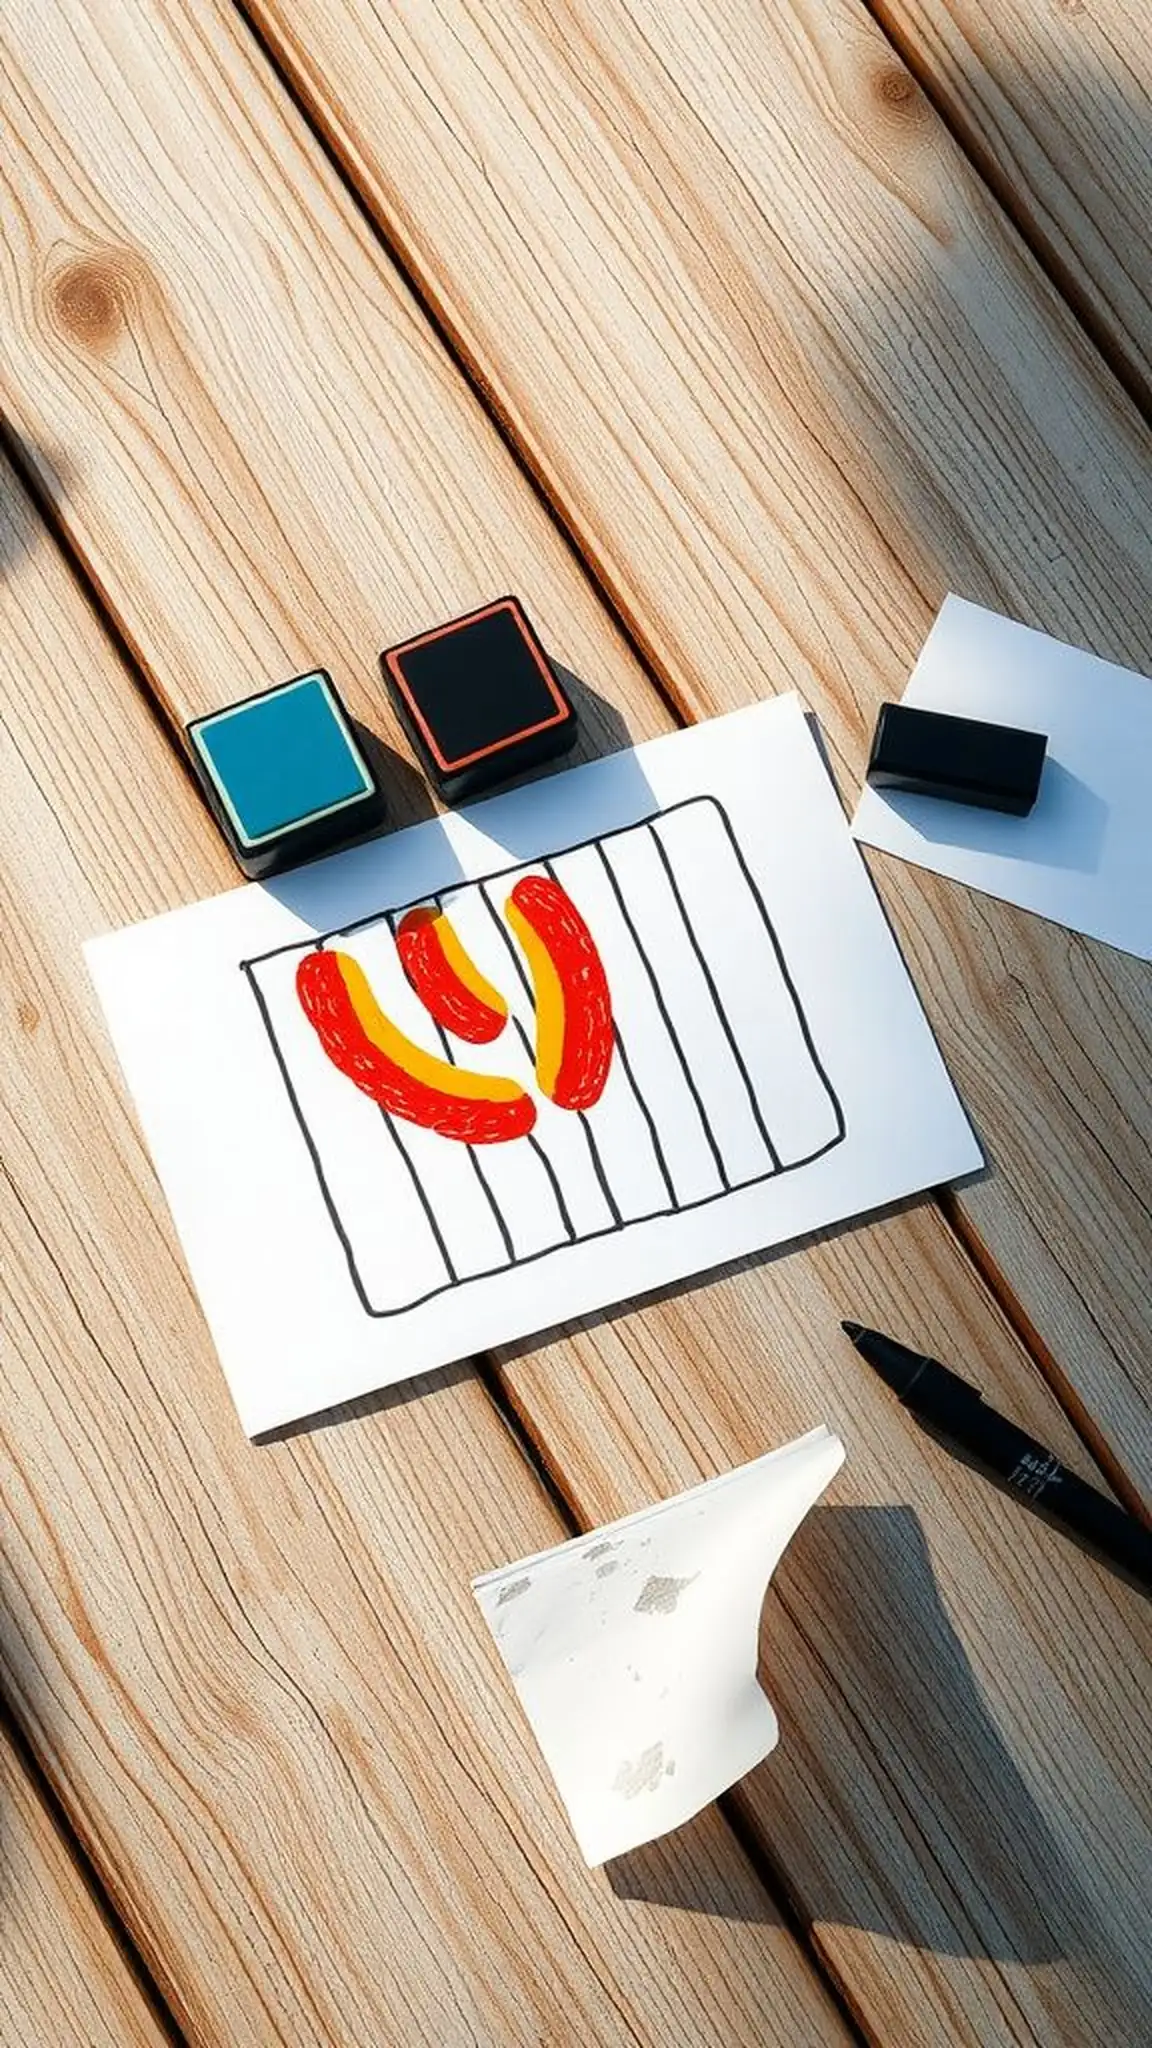
A fingerprint grill card has a playful, hands-on charm that feels like sticky fingers and backyard warmth. Little fingerprint sausages and coals sit on a drawn grate with a faint suggestion of smoke from wispy ink lines. The paper bears tiny smudges that read as proof of effort, and the colors recall charcoal, mustard, and a sunburnt afternoon.
The simple imagery leaves room for a short, funny caption and carries a sense of outdoor laughter, perfect for a dad who loves flip-flops and easy meals.
📋 How to Make This ▶
- Fold a cardstock base and lightly sketch a grill shape on the front with a pencil.
- Press fingertips into ink pads to create small ovals for sausages and dots for coals on the grill area.
- Add thin marker lines to suggest grill bars and soft curving strokes for smoke above the fingerprints.
- Write a short greeting inside using a bold pen that complements the grill drawing.
⚠️ Avoid: Beginners sometimes press too hard with ink, creating blobs rather than crisp fingerprints. Overcrowding the grill area can make the scene feel cluttered.
🔄 Try Also: Swap ink for paint for brighter colors, make kebab shapes instead of sausages, or turn fingerprints into burger patties with a toasted bun sketch.
🛒 Products & Materials ▶
Items Used
- cardstock blank cards
- small ink pad set
- fine tip permanent marker
📌 “Fun fingerprint grill card for a playful Father’s Day.”
• • •
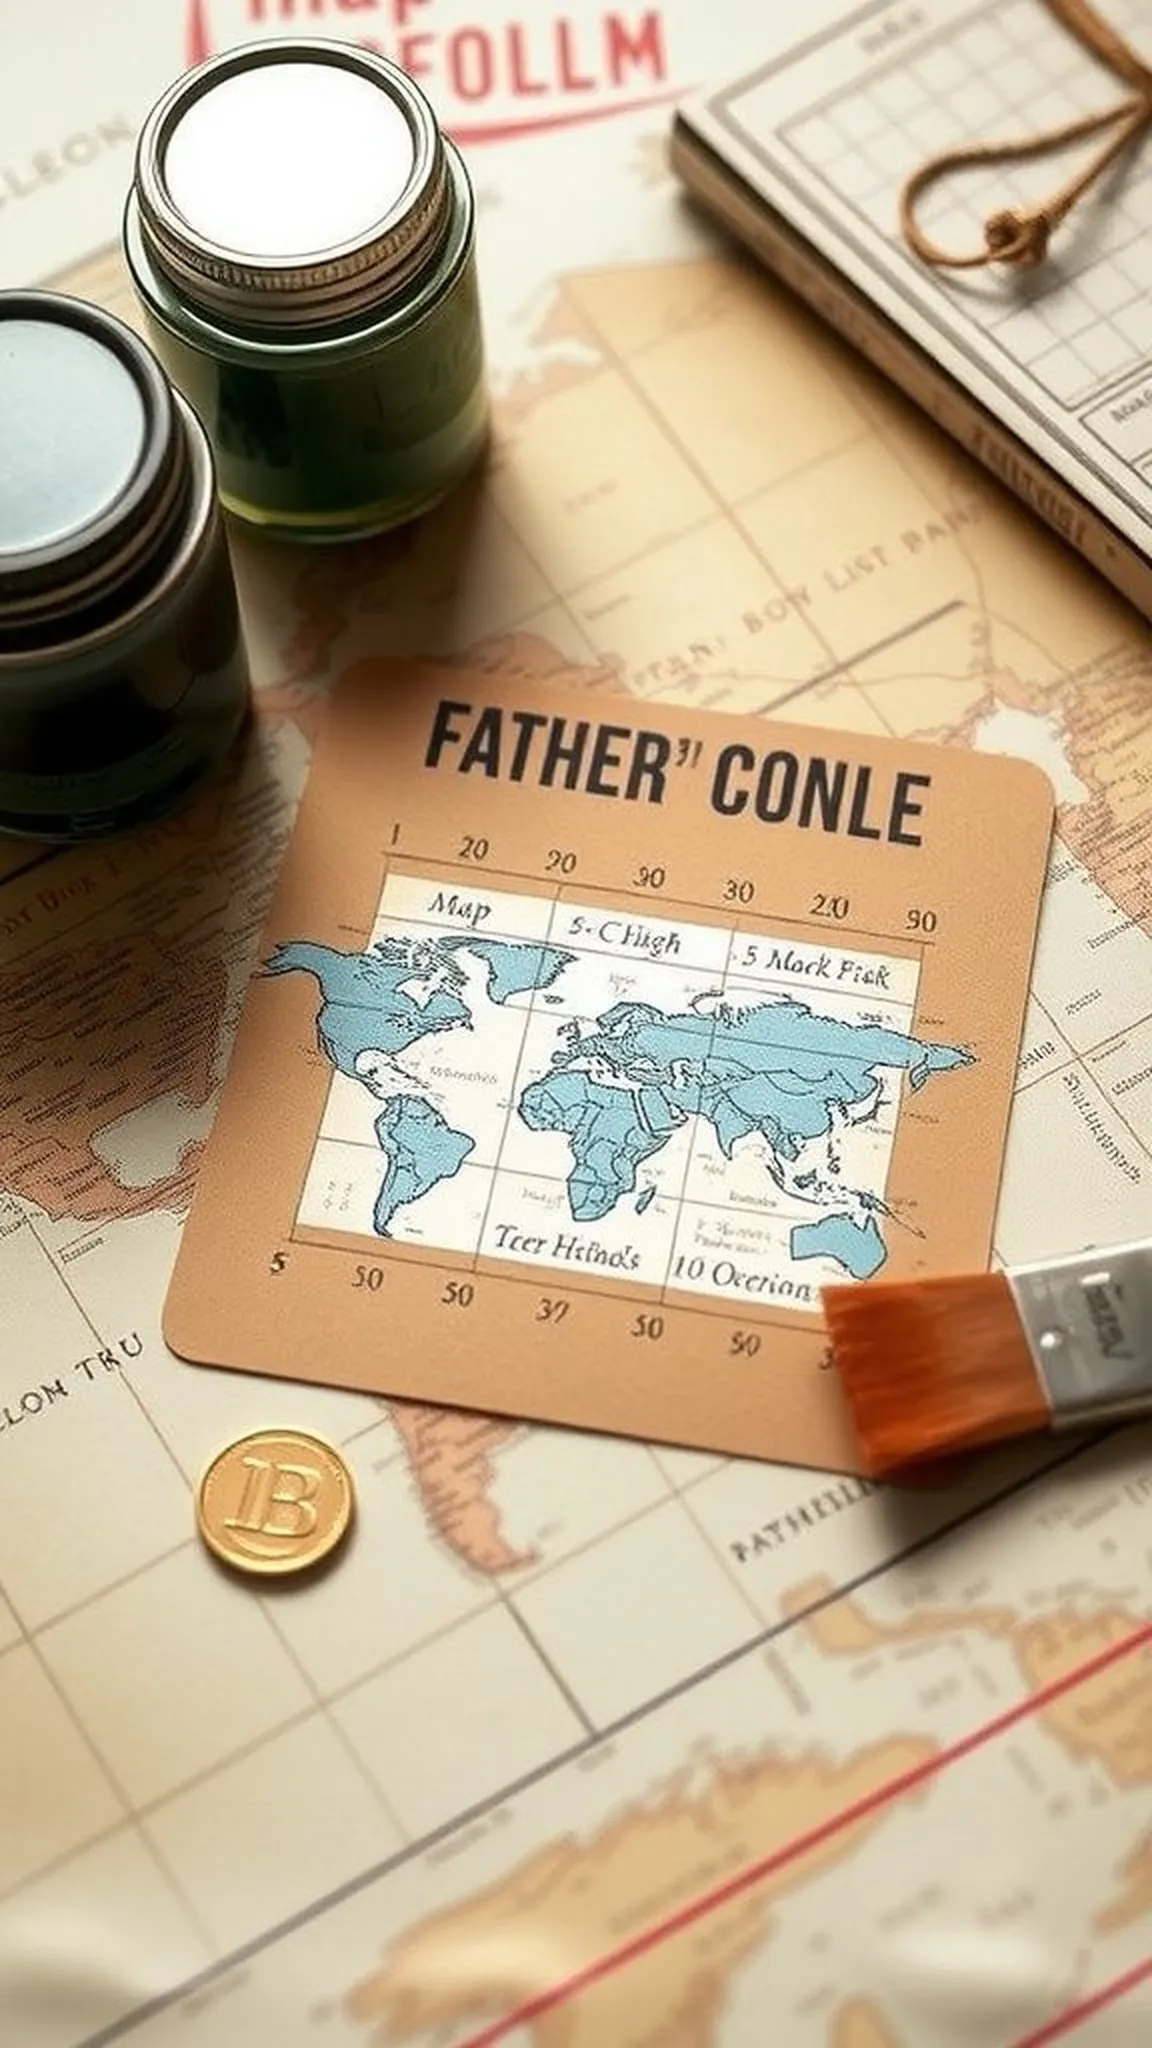
Vintage map heart fold-out surprise
⏱️ 2 hours · 🟠 Intermediate
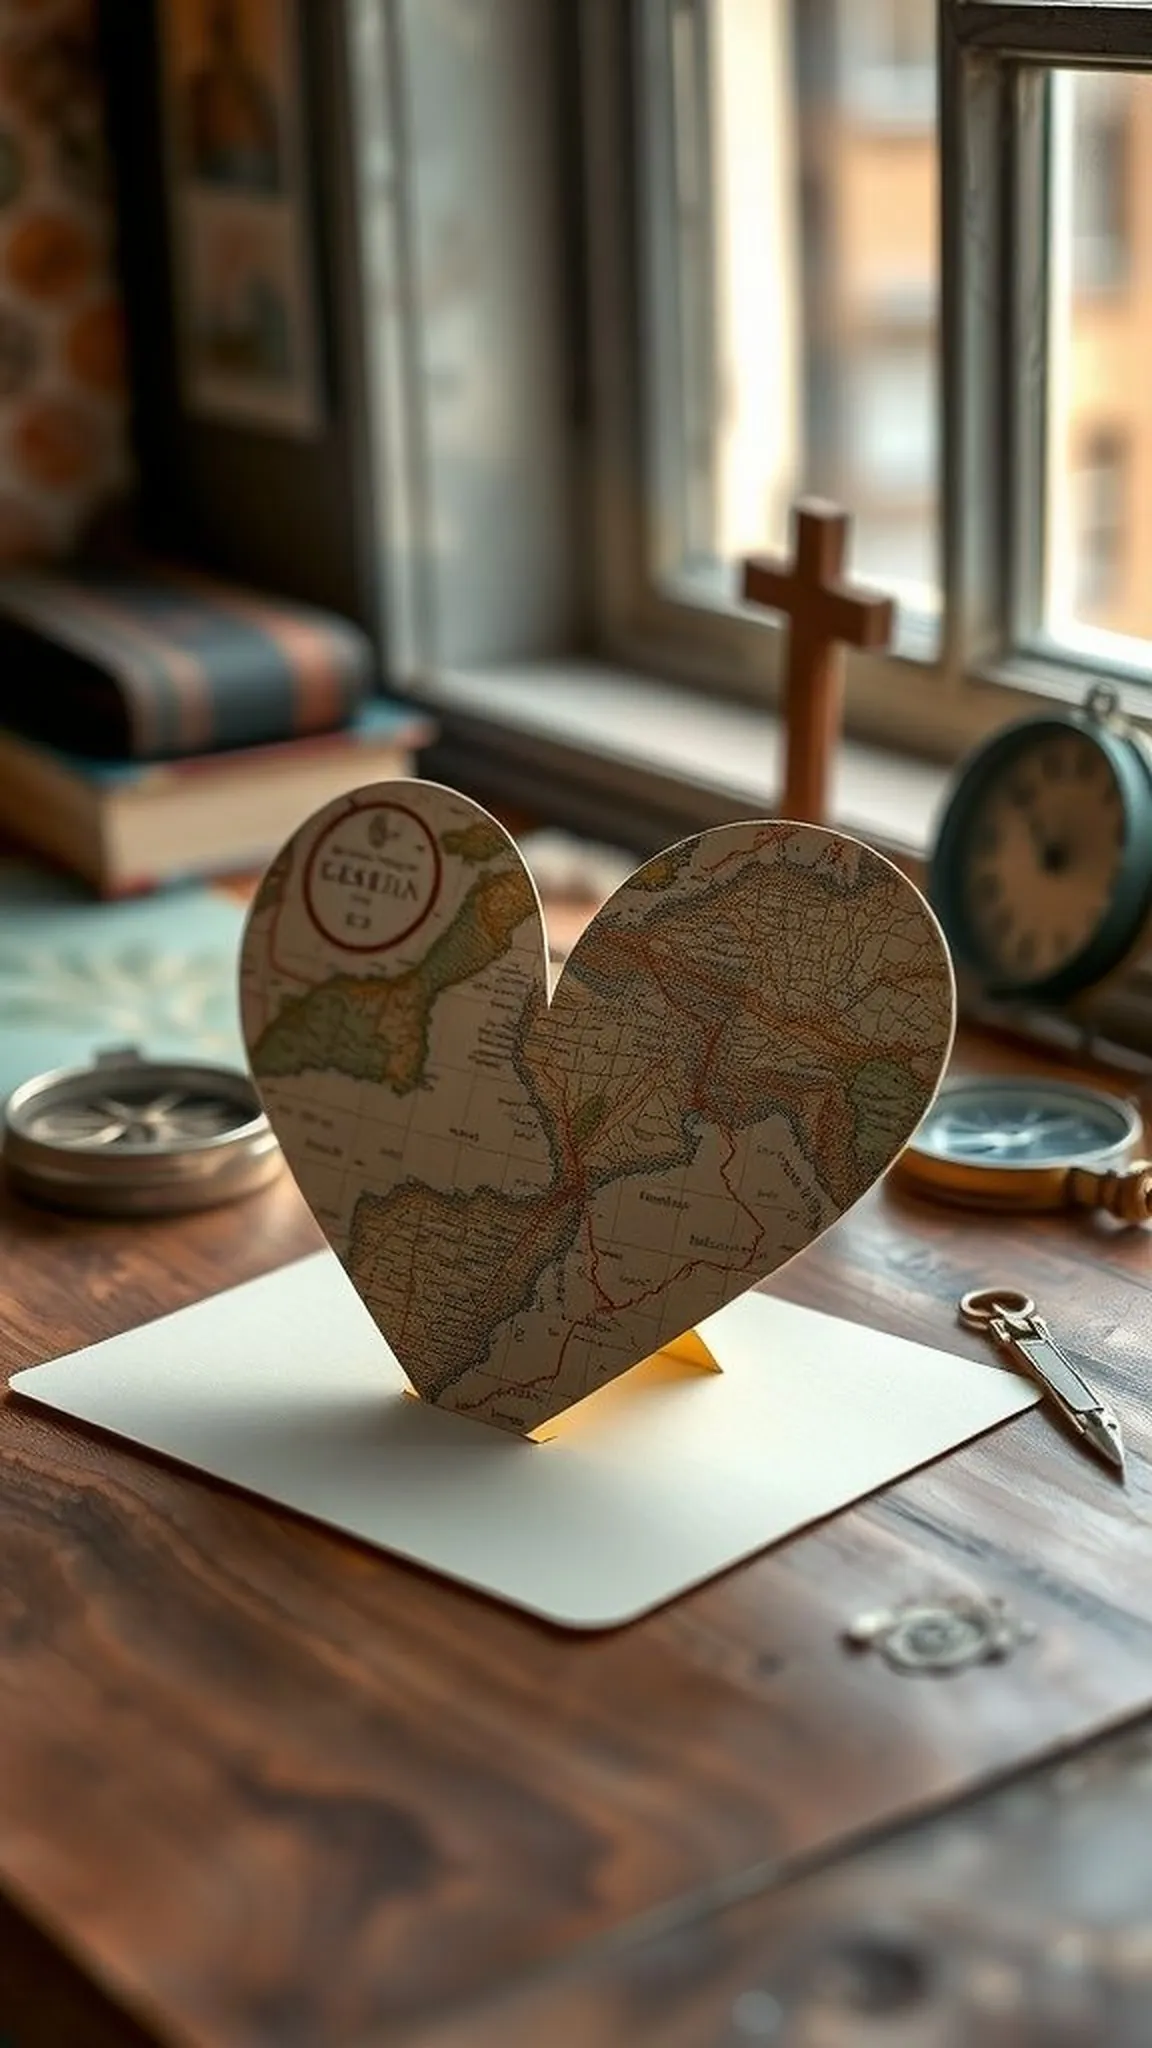
A vintage map heart fold-out has a nostalgic pull, the paper carrying a map’s faint creases and the scent of ink from a long-ago route. The heart-shaped map peeks from a tuck, the fold-out revealing routes that hint at shared trips and weekend escapes. The patina of the map edges and muted colors evoke road-trip playlists and easy conversation.
The whole piece feels like a keepsake, the map offering a quiet prompt to remember small voyages together rather than an overt declaration.
📋 How to Make This ▶
- Select a vintage-style map print and cut a heart shape for the front panel.
- Create a slim fold-out panel inside the card to hold the map heart so it tucks neatly.
- Lightly distress the map edges with sanding or ink to enhance an aged appearance.
- Add a short typed or handwritten note on the fold-out panel referencing a shared place.
⚠️ Avoid: Using glossy modern map paper can break the antique illusion; overly aggressive distressing can tear the thin map edges.
🔄 Try Also: Use a city map for a hometown theme or switch to a star map for a celestial, quiet mood; smaller map pieces make pocket-sized cards.
🛒 Products & Materials ▶
📌 “Vintage map heart fold-out for sentimental travel memories.”
• • •
Save time and printer ink with 50+ printable templates and step-by-step instructions in one ad-free guide.

Just $19.99 — lifetime access
Photo slider card with secret image reveal
⏱️ 2-3 hours · 🔴 Advanced
A photo slider card carries a delightfully theatrical motion, the hidden image gliding into view with a satisfying whisper. The mechanics sit under a decorated window, the photo strip framed by patterned borders and a matte finish. The tactile pull has a smoothness that invites curiosity, while the revealed photograph creates a moment of connection—a surprised smile, a memory returned.
The card feels like a miniature present, the combination of motion and imagery turning a simple greeting into a remembered moment.
📋 How to Make This ▶
- Prepare a photo strip sized to slide within the card and create a window slot on the front panel.
- Assemble sliding tracks using reinforcement strips and position the photo strip so it moves freely.
- Decorate the visible area around the window with patterned paper and write a short caption on the moving strip.
- Test the slide motion multiple times, making subtle adjustments until the reveal is smooth.
⚠️ Avoid: A frequent error is making the photo strip too wide, causing it to jam; adhesive placed too close to the sliding channel can restrict movement.
🔄 Try Also: Make a vertical slider for portrait photos, create multiple windows for a multi-image reveal, or use translucent vellum for a soft unveil.
🛒 Products & Materials ▶
Items Used
- photographic paper prints
- clear acetate sheet
- double-sided tape
- patterned paper pad
📌 “Interactive photo slider card that reveals a surprise picture.”
• • •
Tool-shaped shaker card for the handy dad
⏱️ 1-2 hours · 🟠 Intermediate
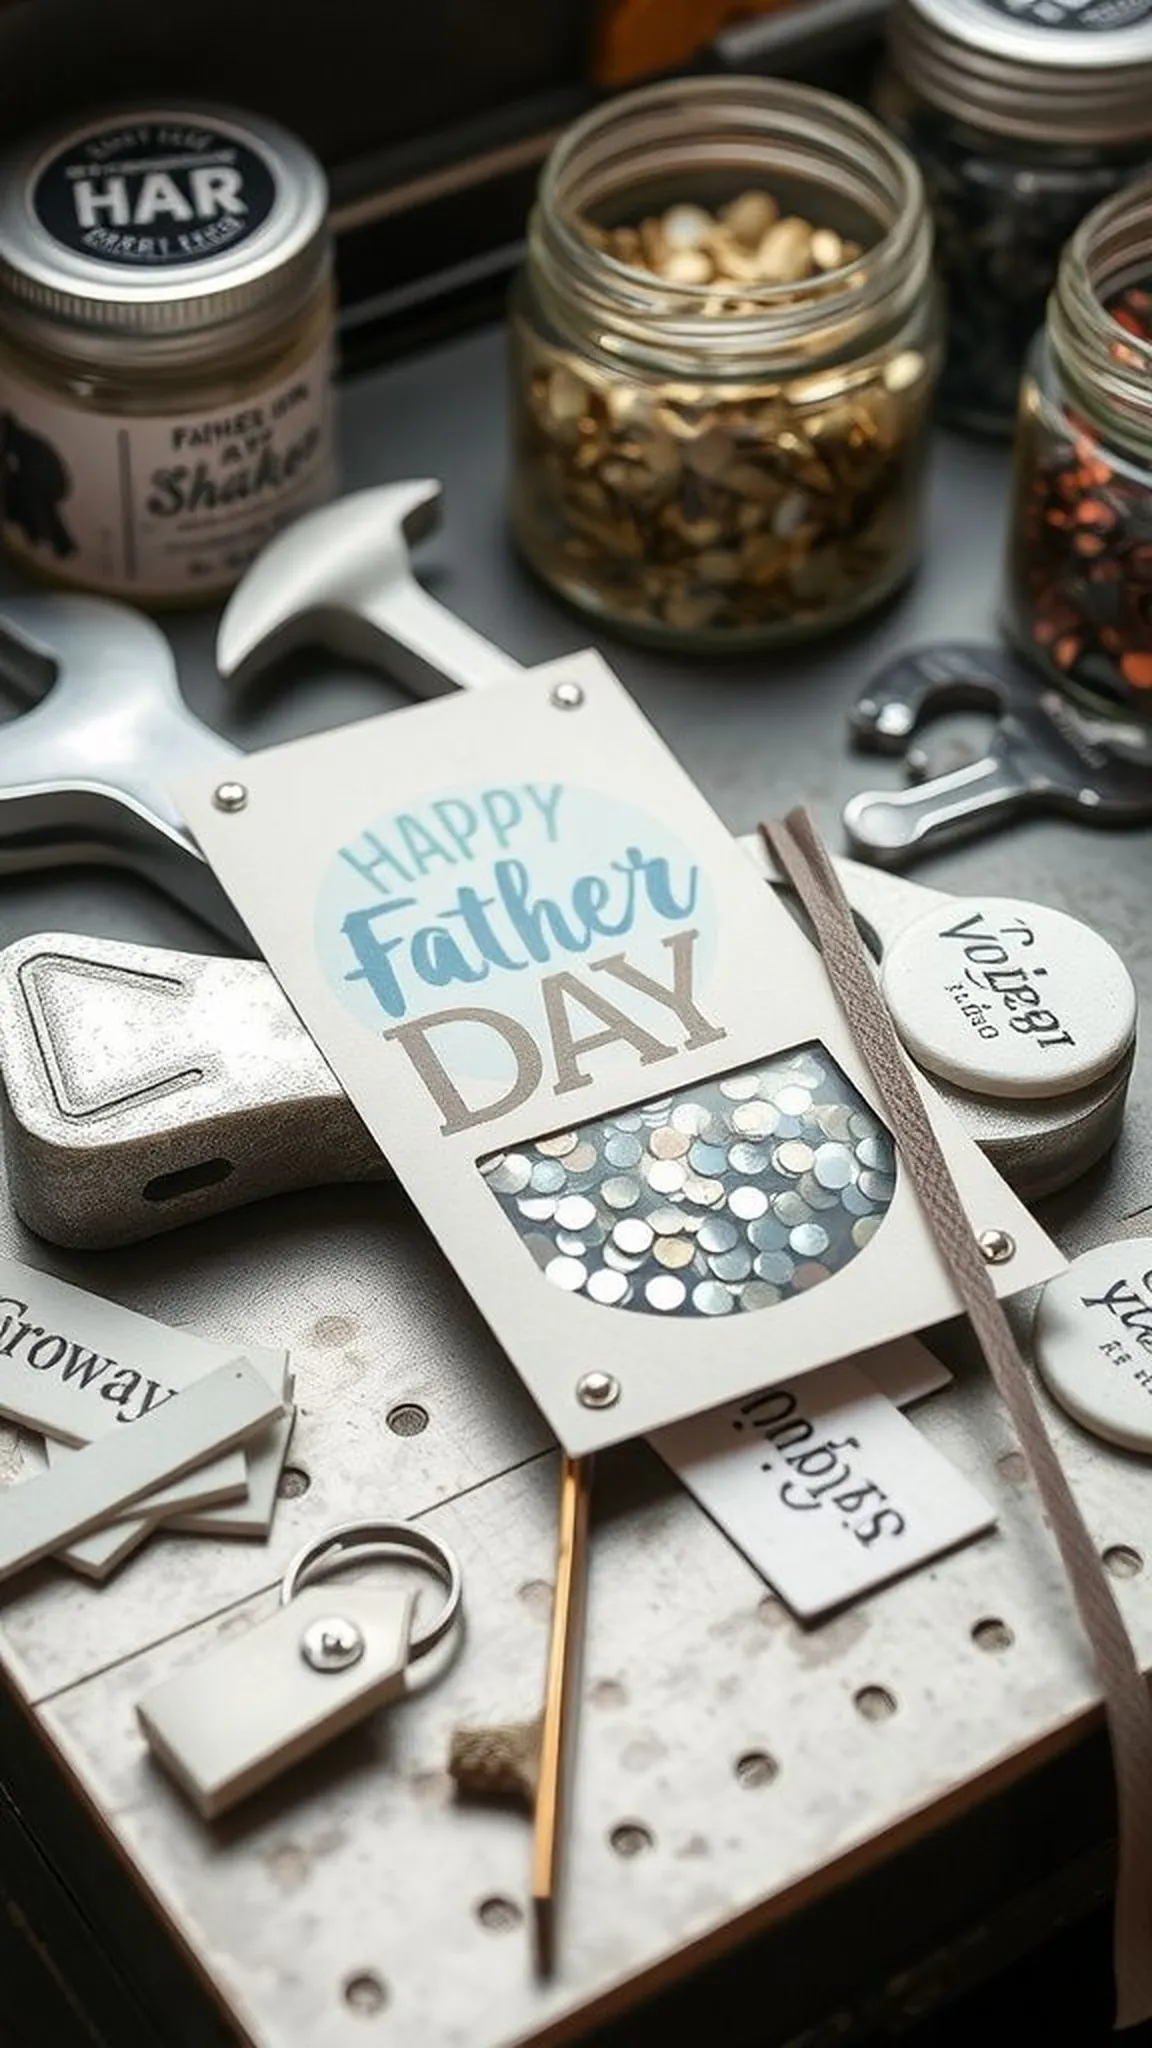
A tool-shaped shaker card has playful heft and kinetic charm as tiny beads tumble inside a wrench or toolbox silhouette. The shaker pocket glitters with metallic confetti that jingles softly when the card moves, the clear window offering a peek into motion. The exterior bears subtle scratches of ink that suggest a well-used toolbox, and muted paint tones recall workshop afternoons.
That little sound of beads feels cheeky and lighthearted, like a small joke that lands with the right dad who enjoys a good project.
📋 How to Make This ▶
- Cut the tool silhouette from sturdy cardstock and create a recessed area for the shaker window.
- Adhere a clear acetate window over the recess and form a sealed pocket with foam strips.
- Place sequins or microbeads inside the pocket and close it so the shaker moves freely.
- Decorate the tool exterior with inked edges and a short greeting.
⚠️ Avoid: Using large, chunky filler can prevent free movement and make the pocket feel lumpy; too much adhesive near the edges risks sealing the shaker closed.
🔄 Try Also: Make a toolbox scene with multiple shaker tools, use metallic confetti for a festive look, or create a tiny shaker for a single nail or bolt motif.
🛒 Products & Materials ▶
📌 “Tool-shaped shaker card with playful, tinkling confetti inside.”
• • •
Handy coupon booklet filled with favors
⏱️ 45 min · 🟢 Beginner
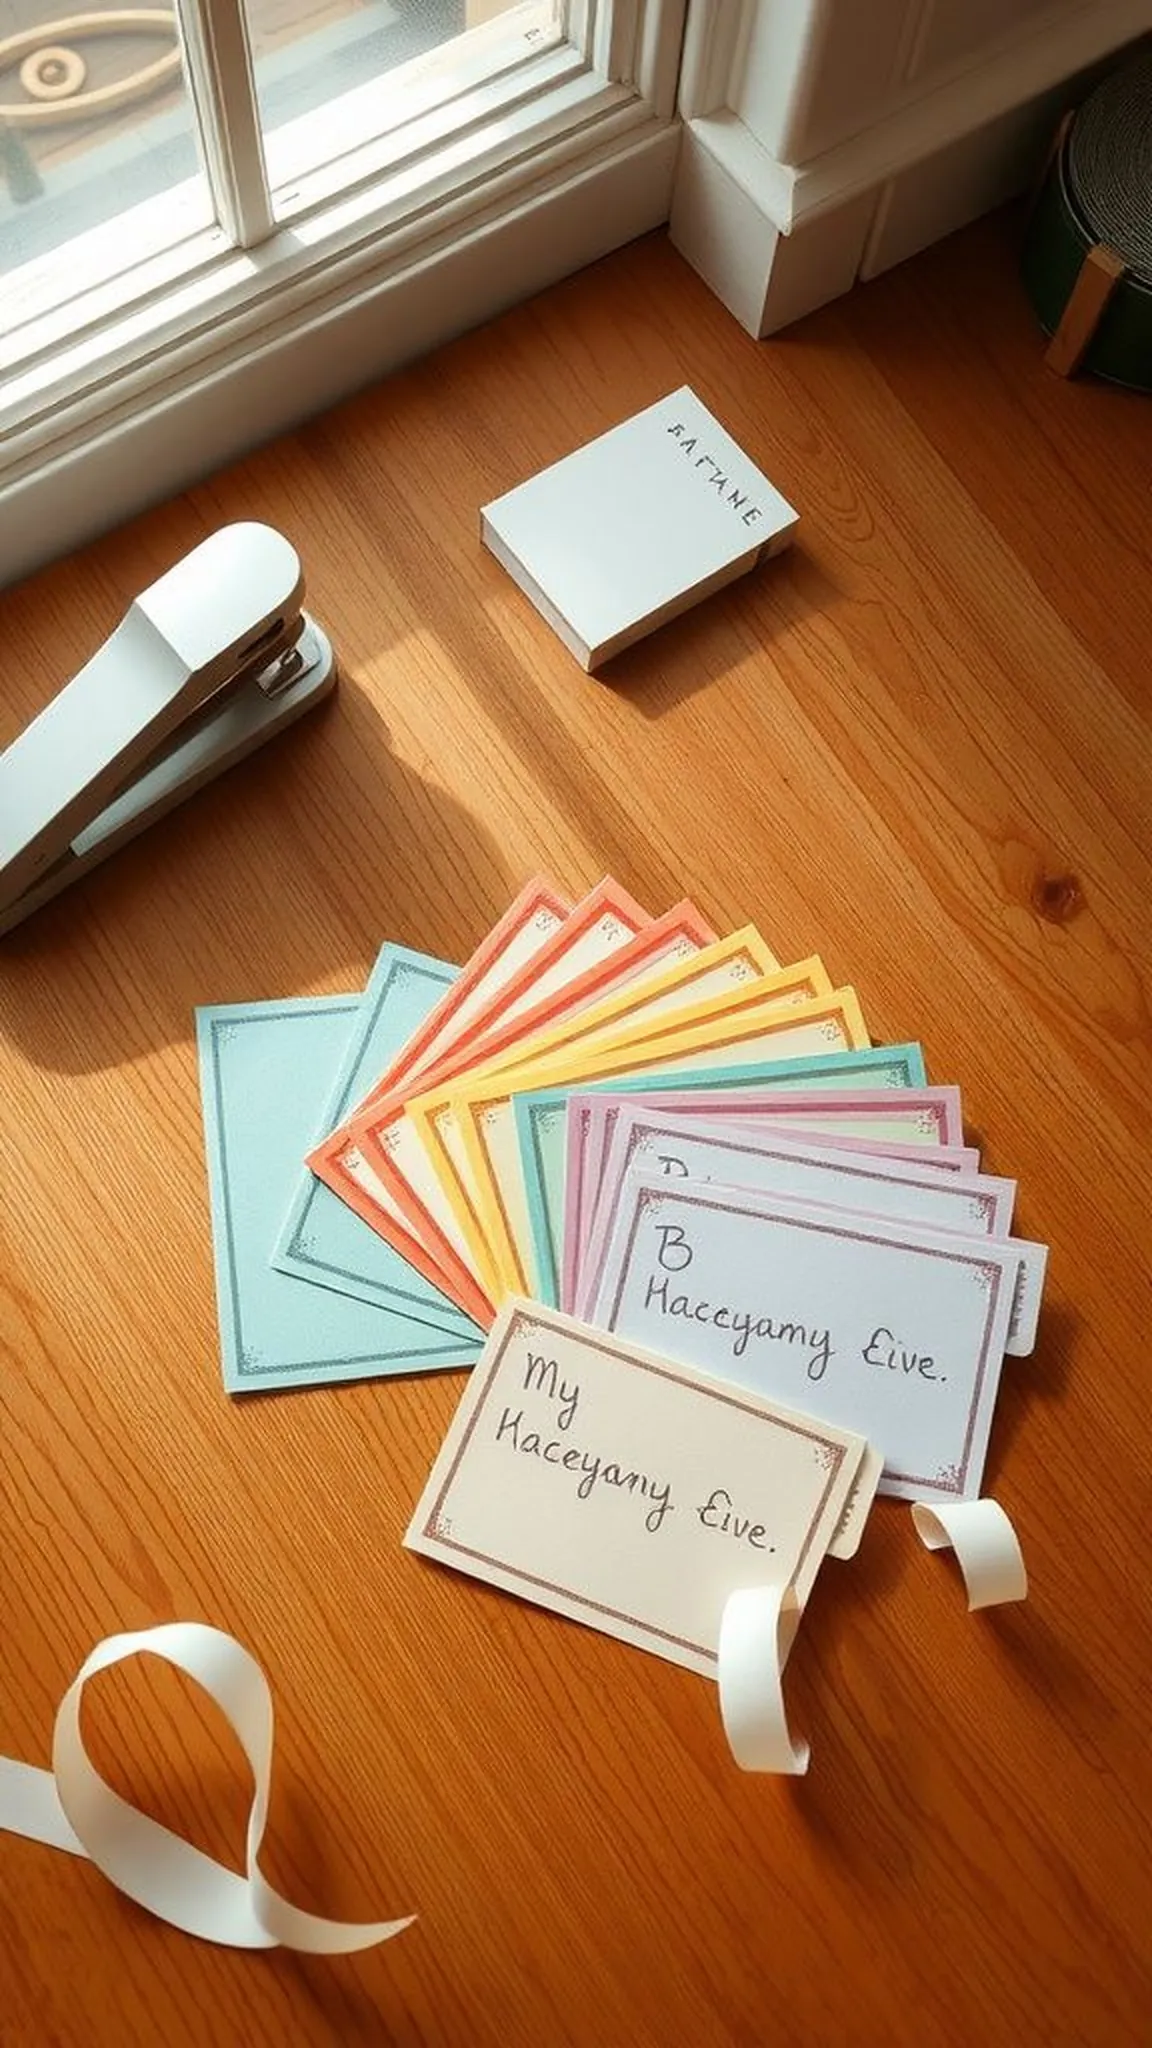
A coupon booklet reads like a stack of promises folded into small, friendly rectangles. Each ticket slips out with a soft paper rustle and carries a personal favor written in bold, warm handwriting. The booklet feels compact and generous at once, the stapled spine holding little moments tightly.
The textures of paper, the blush of ink, and the slightly imperfect edges add charm. It invites small exchanges of time and attention, the kind of gift that speaks in simple acts rather than grand gestures.
📋 How to Make This ▶
- Cut several small ticket-sized pieces from cardstock and stack them evenly for the booklet.
- Bind the stack along one edge with staples or a small binding clip to create a booklet.
- Write a different favor on each coupon and add small decorative stamps or doodles if desired.
- Tie a short ribbon around the booklet to present it neatly.
⚠️ Avoid: A typical mistake is making coupons too small to write legibly; loose binding can cause pages to shift or fall out.
🔄 Try Also: Make a mini calendar-style booklet for weekend favors, create themed coupons like breakfast or yard help, or design a digital printable booklet for easy reuse.
🛒 Products & Materials ▶
📌 “Personal coupon booklet packed with thoughtful favors for dad.”
• • •
Pressed flower botanical card with translucent layer
⏱️ 2 hours · 🟠 Intermediate
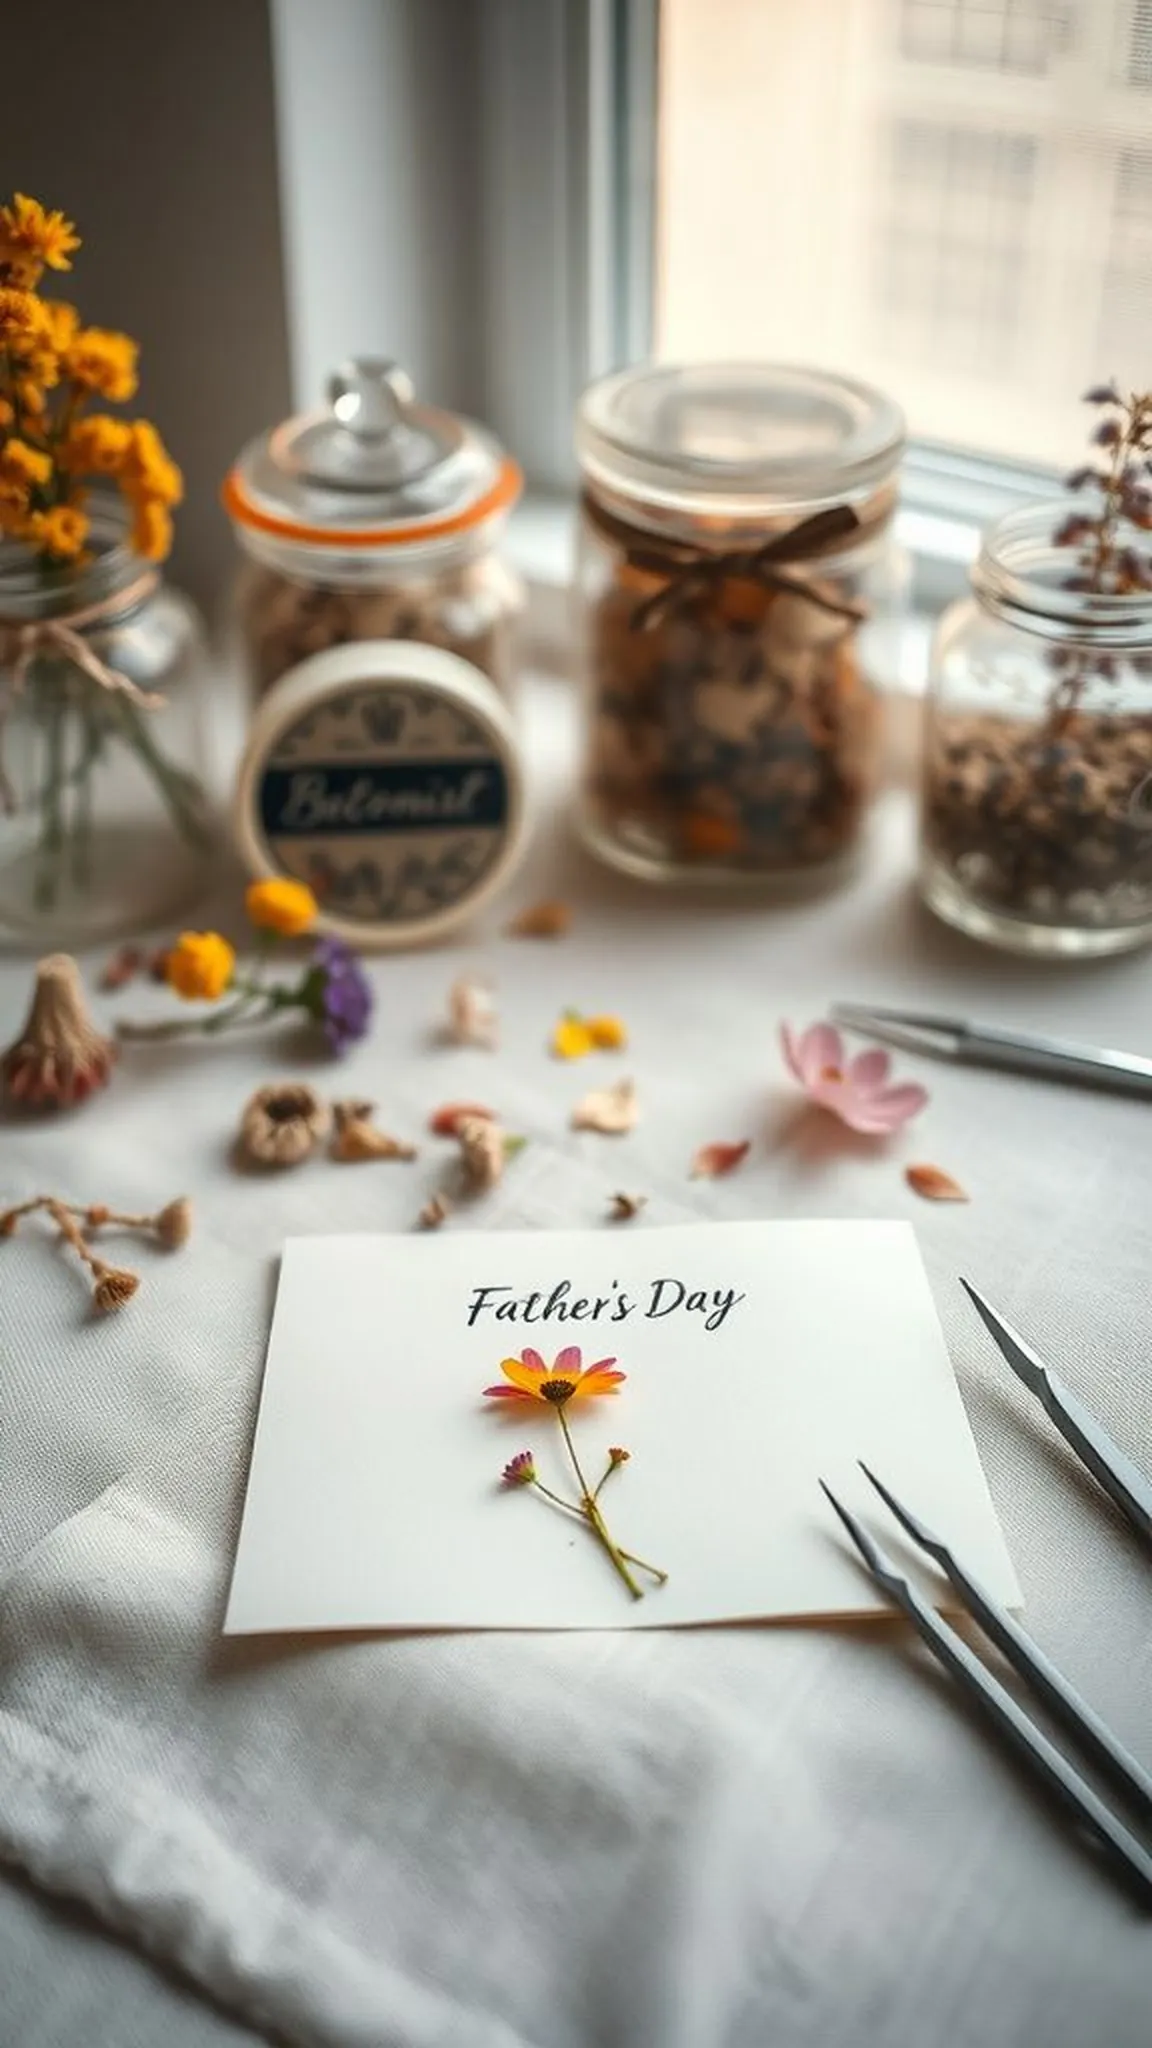
A pressed flower botanical card carries a delicate hush, the flattened petals preserving a tiny summer. A translucent vellum layer softens the colors while the pressed blooms show veins and fragile edges. The card feels like a small herbarium specimen, each petal a quiet testament to a walk or backyard moment.
The contrast between the crisp paper and papery blooms is subtle and satisfying, and the overall tone leans gently sentimental without being overwrought, offering a calm, tactile gift designed to be kept rather than tossed.
📋 How to Make This ▶
- Gather small flowers and press them between absorbent paper with firm weight until fully dry.
- Arrange the pressed blooms on a card base and place a vellum overlay to soften the visual edges.
- Secure the vellum and blooms with discreet adhesive and add a simple caption or botanist-style label.
- Allow several hours for adhesive to set before placing the card in an envelope.
⚠️ Avoid: A common error is using thick, bulky flowers that do not flatten well and can bulge; adhesive placed atop delicate petals can darken or stain them.
🔄 Try Also: Use a single bold bloom for a minimalist look, create a small bouquet cluster, or press foliage for a greener, textured aesthetic.
🛒 Products & Materials ▶
Items Used
- pressed flowers
- vellum sheets
- acid-free adhesive
- textured card base
📌 “Elegant pressed flower card with a soft vellum overlay.”
• • •
Watercolor skyline silhouette with soft washes
⏱️ 1-2 hours · 🟠 Intermediate
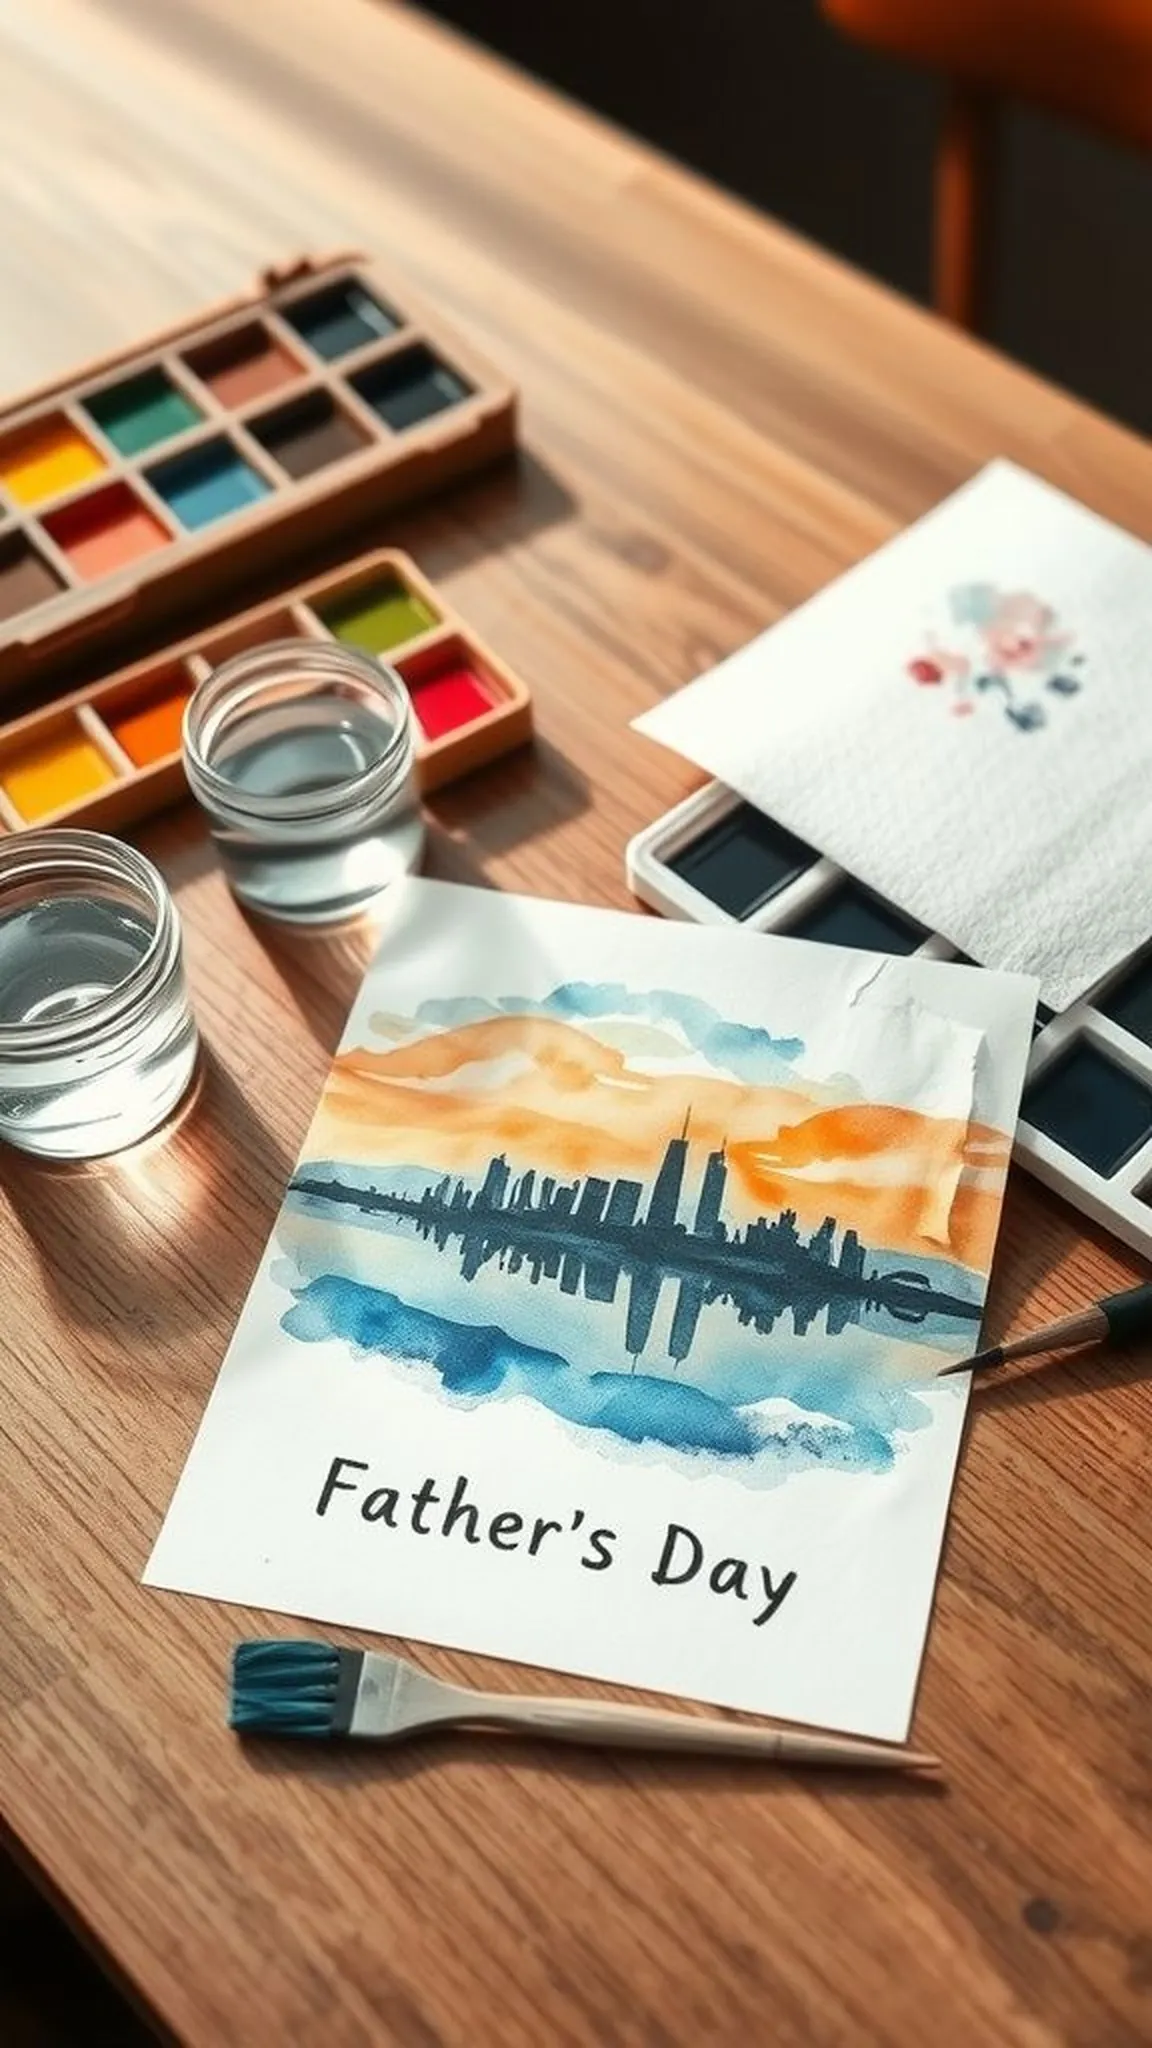
A watercolor skyline silhouette feels airy and meditative, the pigment pooling into soft gradients that recall evening light. The skyline sits as a dark, inked silhouette against gently bleeding washes of color that suggest a dusk or dawn scene. Brush textures and granulation give the horizon life, while the crisp silhouette offers contrast and focus.
The overall aesthetic is quiet and contemplative, the handmade washes bringing an almost cinematic hush to a small square of paper meant to hold a short, sincere note.
📋 How to Make This ▶
- Stretch watercolor paper and apply broad, diluted washes for the sky background, allowing layers to dry.
- Sketch a simple skyline silhouette on a separate sheet and transfer or paint directly with dark pigment.
- Mount the skyline panel onto a card base and add a small handwritten sentiment below the horizon.
⚠️ Avoid: A frequent issue is overworking the watercolor and creating muddy tones; choosing too thin a paper can cause buckling and color pooling.
🔄 Try Also: Make a minimalist single-color wash with a black silhouette, create a hometown skyline, or paint a starry night with a splatter of white pigment.
🛒 Products & Materials ▶
Items Used
- watercolor paper pad
- watercolor paint set
- water brush set
📌 “Soft watercolor skyline card with moody silhouette contrast.”
• • •
Faux leather cover card with rugged twine detail
⏱️ 2 hours · 🔴 Advanced
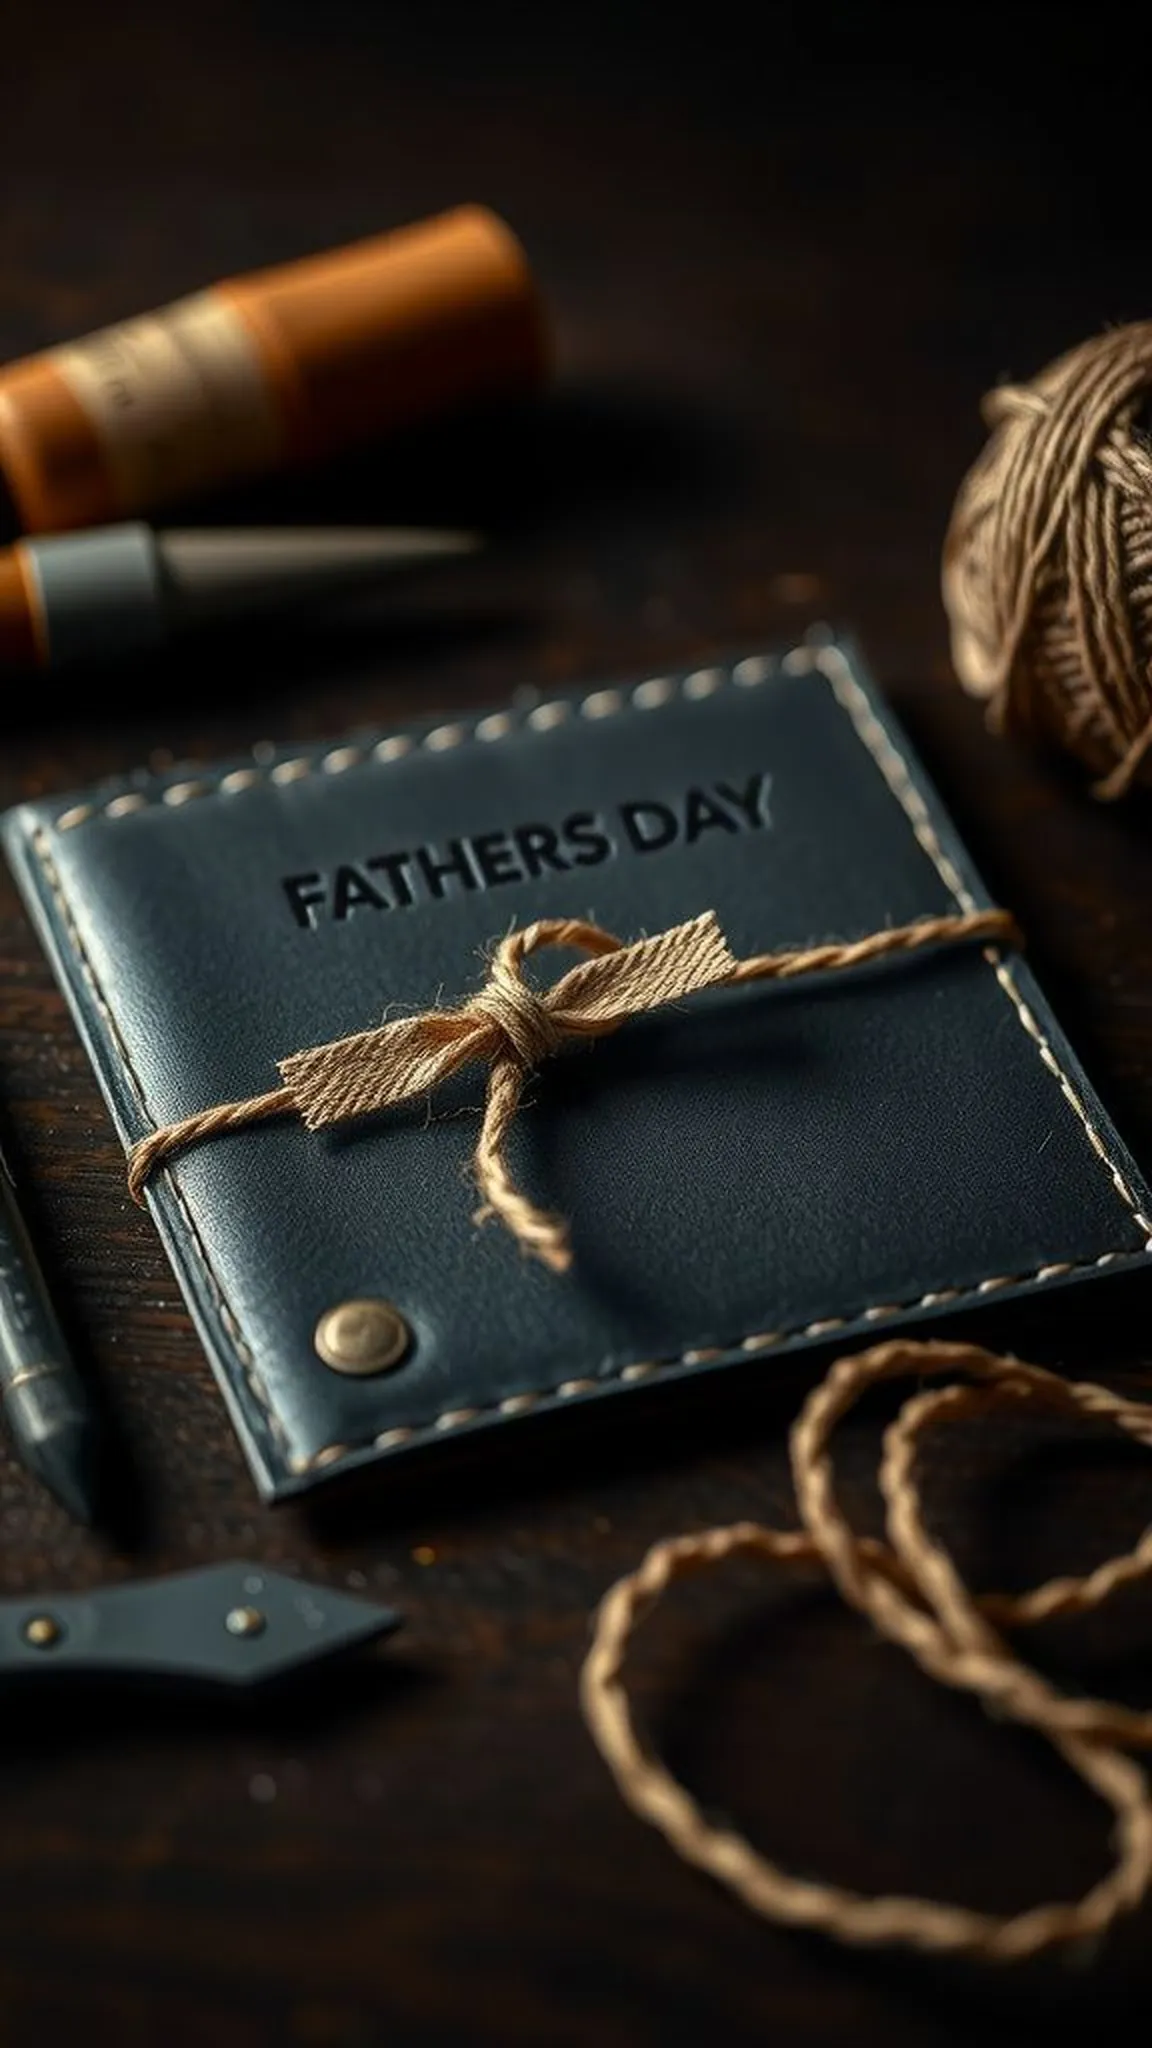
A faux leather cover card carries a tactile weight that reads like a tiny journal, the surface showing subtle grain and a soft matte sheen. The twine wrap adds a crafted, rugged accent with a hint of outdoorsy charm. The edges might show a faint burnish that suggests careful handling, and a stamped or embossed initial gives a personalized touch without being flashy.
The overall effect is utilitarian and warm, suited to a dad who prefers timeworn textures and objects that age with use.
📋 How to Make This ▶
- Cut faux leather to create a wraparound cover and score lightly where the card will fold for a clean bend.
- Wrap twine around the cover and secure it with a small knot or tuck that complements the rustic look.
- Emboss or stamp an initial or short sentiment on the front and mount the card insert inside the cover.
⚠️ Avoid: Using very thin faux leather can wrinkle when folded; tying twine too tightly can warp the cover shape.
🔄 Try Also: Use a darker faux leather for a rugged look, swap twine for waxed cord, or add a small metal charm for extra character.
🛒 Products & Materials ▶
Items Used
- faux leather sheet
- natural twine
- alphabet stamp set
📌 “Rugged faux leather card wrapped with twine for tactile charm.”
• • •
Mini comic strip memory with hand-lettered speech
⏱️ 1-2 hours · 🟠 Intermediate
A mini comic strip memory captures a small scene in sequential panels, the hand-lettered speech bubbles conveying tone and a wink of humor. The inked line work feels lively and slightly imperfect, like an old newspaper cartoon drawn on a tabletop. The panels deliver rhythm, the pacing set by small visual beats and the punchline landing on the last frame.
The textures of pen on paper add whimsy and warmth, and the piece reads like a private joke turned into a keepsake, perfect for a dad with a dry smile and a quick laugh.
📋 How to Make This ▶
- Divide the card face into three or four panels with light pencil lines to plan the comic flow.
- Draw the scene with pen, keeping figures simple and expressive, and add hand-lettered speech in bubbles.
- Erase pencil lines gently after the ink dries and add small inked accents or a caption beneath the panels.
⚠️ Avoid: A common slip is overcrowding panels with too much detail, which makes the visual joke hard to read; rushed lettering can obscure dialogue.
🔄 Try Also: Try a single-panel gag for a quick laugh, create a longer strip for a little story, or use color accents to emphasize punchlines.
🛒 Products & Materials ▶
Items Used
- smooth drawing paper cards
- black fineliner pens set
- non-photo pencil
📌 “Hand-drawn mini comic strip card that tells a tiny personal story.”
• • •
Morse code bead message on rustic card stock
⏱️ 1 hour · 🟠 Intermediate
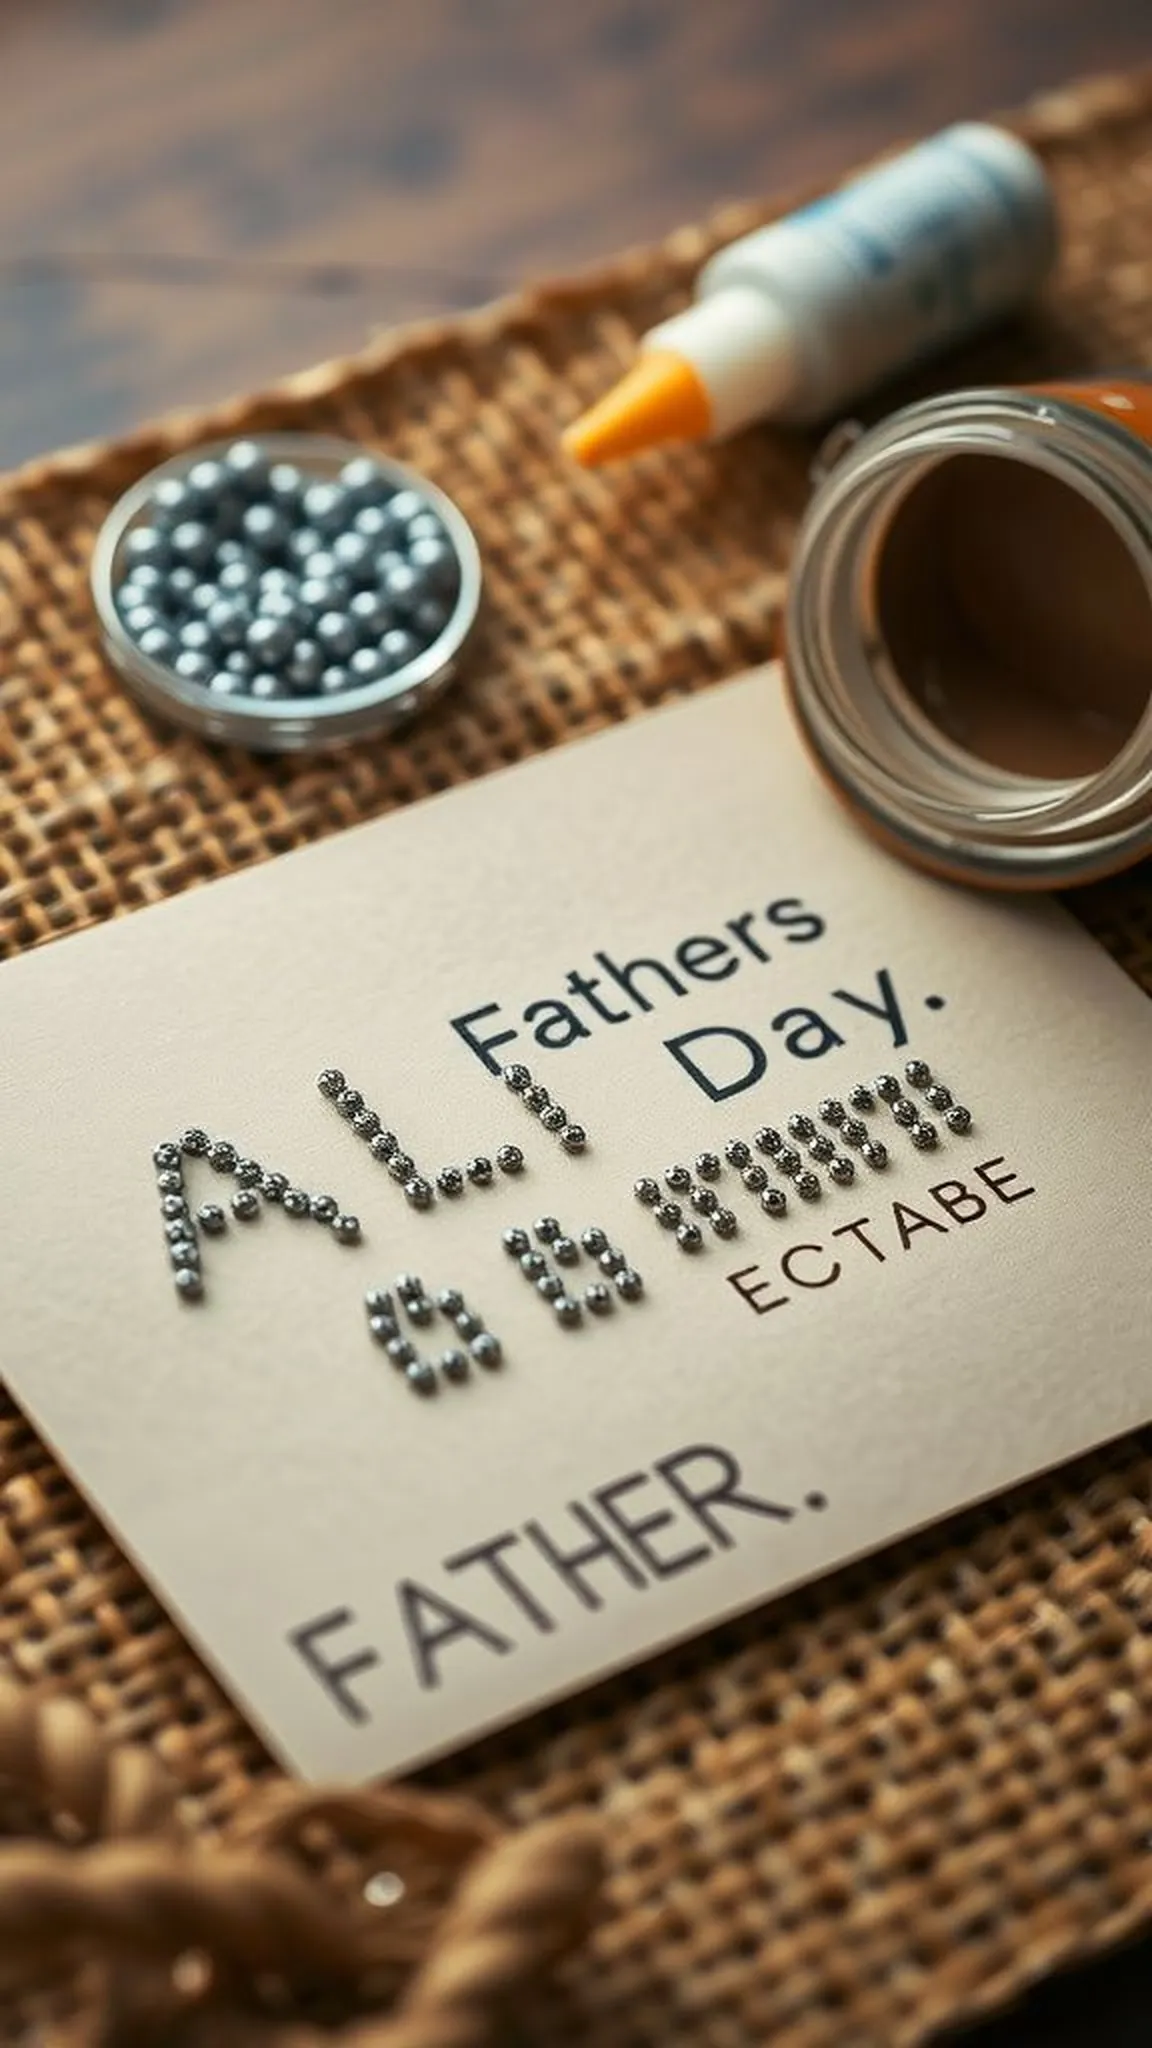
A Morse code bead message reads like a tiny secret, rows of tiny beads forming dots and dashes that translate a short phrase. The beads catch light like tiny notes, and the rustic cardstock provides a strong contrast so the pattern reads clearly. The tactile rhythm of raised beads invites a brief tactile exploration, while the hidden message adds intimacy.
The piece feels thoughtful and slightly mysterious, a quiet way to whisper an inside joke or a short phrase that only the two of them will decode with a grin.
📋 How to Make This ▶
- Map the message into dots and dashes and mark positions lightly on the cardstock for bead placement.
- Apply small dots of adhesive where beads will go and place tiny beads in sequences to form the Morse pattern.
- Let the adhesive set fully and add a short key or decoded phrase inside the card for clarity.
⚠️ Avoid: A common error is crowding beads too closely, which blurs the intended rhythm; excess adhesive can create cloudy spots around beads.
🔄 Try Also: Use metallic beads for a refined look, tiny wooden beads for a rustic feel, or spell initials instead of a full word.
🛒 Products & Materials ▶
Items Used
- tiny glass seed beads
- rustic heavyweight cardstock
- clear craft adhesive
📌 “Secret Morse code bead card with tactile, hidden message.”
• • •
Accordion mini storybook with tiny memories
⏱️ 1-2 hours · 🟠 Intermediate
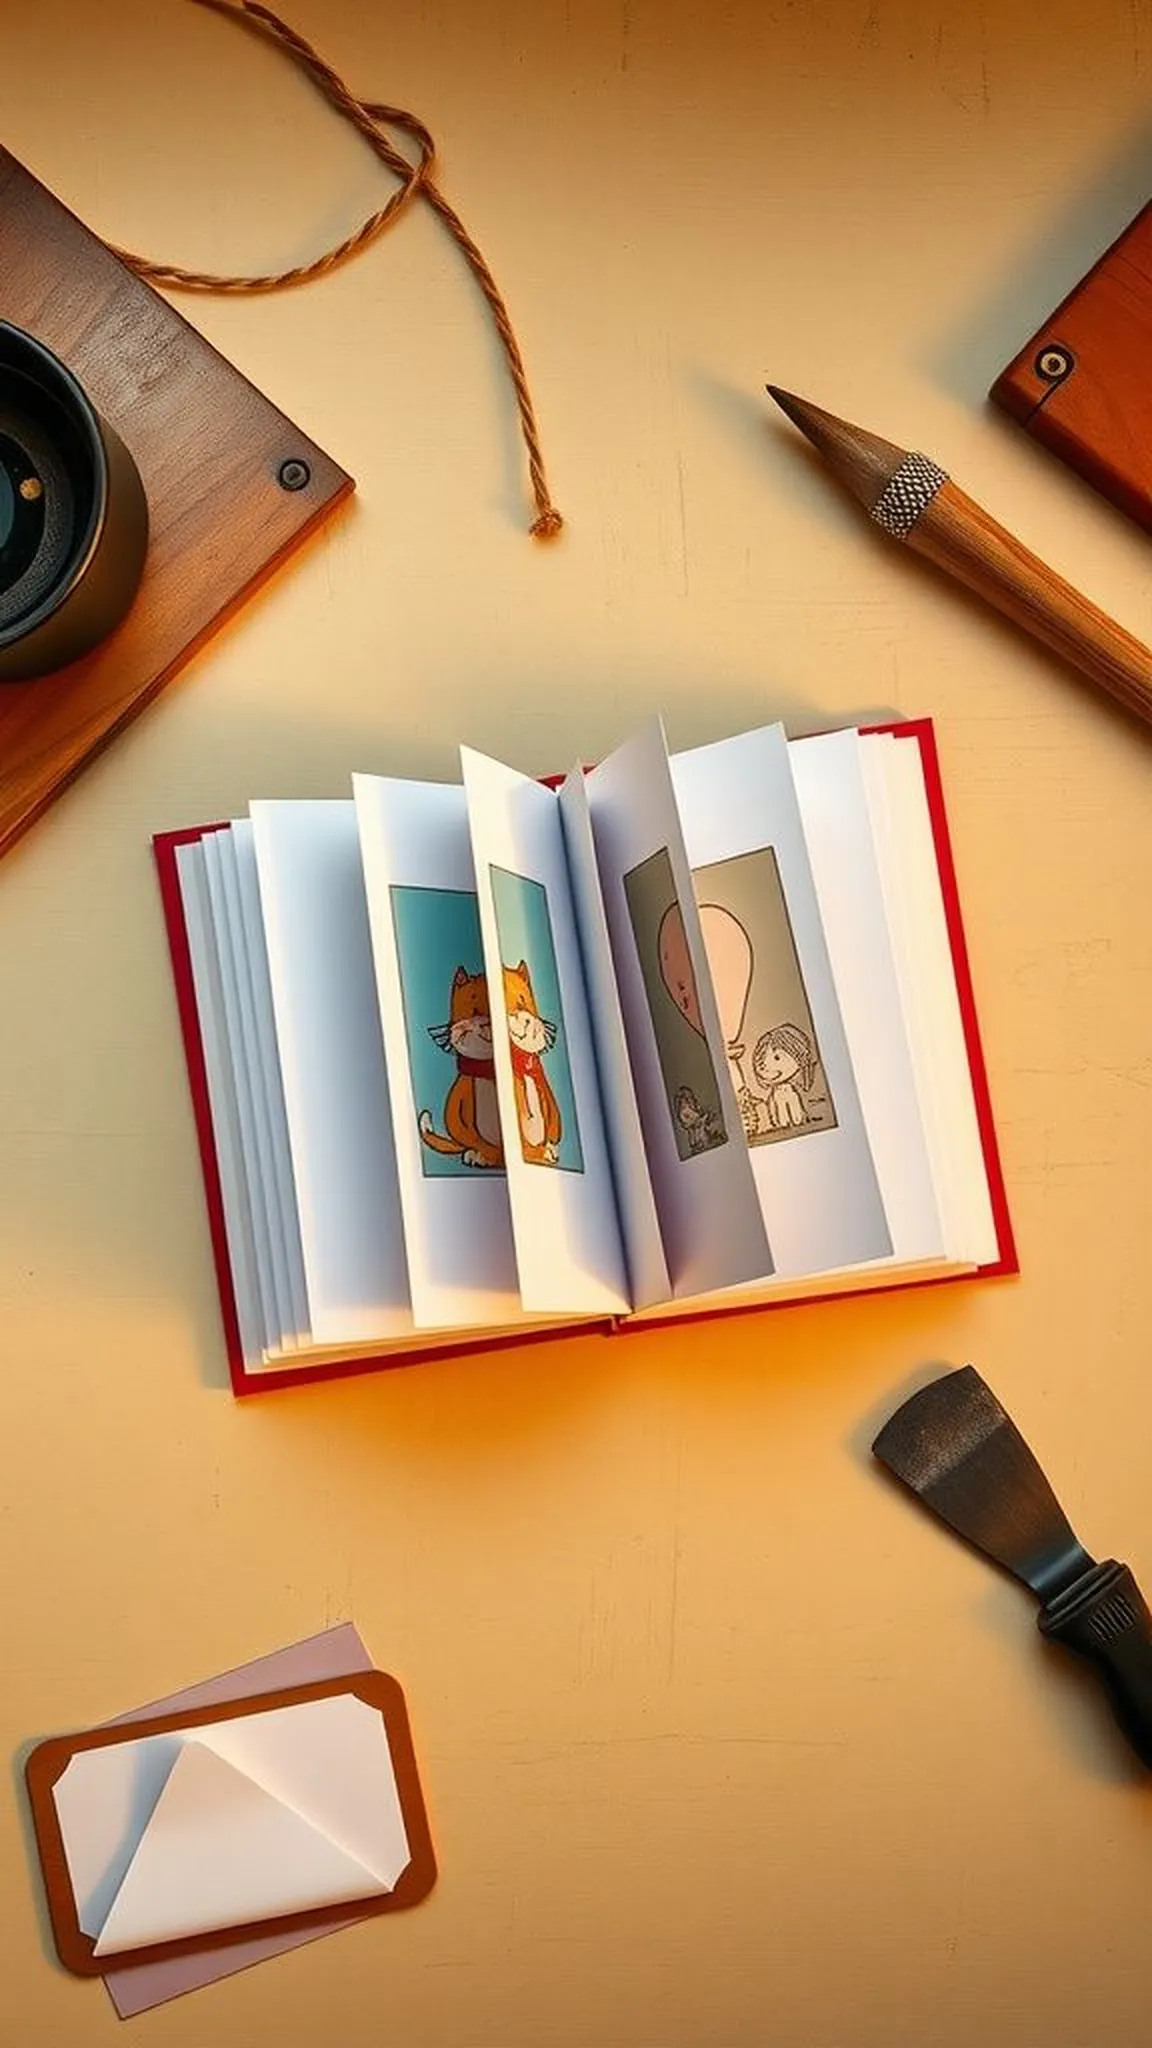
An accordion mini storybook feels like a pocket-sized memoir, panels unfolding into a short sequence of memories illustrated in quick strokes. Each page offers a small vignette: a campsite, a favorite meal, a weekend habit rendered with uncomplicated marks. The paper movement creates a tactile rhythm as the panels expand, the bound edge keeping everything snug.
The overall sensation is intimate and narrative, the booklet serving as a condensed scrapbook that fits in a shirt pocket and invites a slow, affectionate flip through small, shared moments.
📋 How to Make This ▶
- Cut a long strip of cardstock and score evenly to form accordion folds for panels.
- Decorate each panel with a small scene, caption, or photo, keeping imagery bold and legible.
- Attach a cover piece to one end and add a simple tie or closure for presentation.
⚠️ Avoid: A common mistake is scoring too narrowly, which makes panels cramped; overly detailed artwork can vanish at the small scale.
🔄 Try Also: Create a photo accordion with tiny prints, make a comic-style sequence, or craft a themed booklet like ‘Top Ten Dad Moments.’
🛒 Products & Materials ▶
Items Used
- scoring board or bone folder
- photo paper small prints
- thin twine or ribbon
📌 “Tiny accordion storybook filled with mini shared memories.”
• • •
Map coordinates scratch-off keepsake card
⏱️ 2 hours · 🔴 Advanced
A map coordinates scratch-off keepsake feels playful and ceremonious, the coordinates hinting at a shared location and the scratch-off surface offering a small reveal ritual. The glossy scratch surface hides a typed line or short note beneath, and the map motif around it frames the reveal like a treasure map. The tactile act of scratching feels like permission to uncover a memory, and the combination of printed map texture and shiny scratch material creates a pleasing contrast between matte and reflective surfaces.
📋 How to Make This ▶
- Print or draw the coordinates and surrounding map design on the card, leaving a reserved area for the scratch-off element.
- Cover the chosen area with a removable clear sticker and apply a layer of metallic paint mixed with dish soap to form the scratch surface.
- Allow the paint to dry fully and present the card with a coin for the recipient to scratch and reveal the hidden message.
⚠️ Avoid: Applying the scratch layer too thinly can cause premature reveal; using thick glossy paper can prevent paint adhesion and lead to flaking.
🔄 Try Also: Make multiple scratch-off spots each revealing a short memory, use a heart-shaped scratch area, or pair coordinates with a small printed photo.
🛒 Products & Materials ▶
Items Used
- metallic acrylic paint
- clear removable stickers
- heavyweight matte cardstock
📌 “Scratch-off coordinates card for a playful reveal of shared places.”
• • •
Embroidered thread stitched card with subtle texture
⏱️ 2-3 hours · 🔴 Advanced
An embroidered stitched card brings textile craft into stationery, the thread riding softly across paper in tiny raised stitches. The texture is gentle under the fingertips and offers a slow, domestic kind of beauty. Thread colors pop against a neutral background, and the pattern—perhaps initials or a small tool—reads like a quiet badge.
The pierced holes form a delicate rhythm, and the contrast of smooth paper with braided floss creates a pleasing tactile dialogue that rewards careful observation and feels handcrafted in a very literal way.
📋 How to Make This ▶
- Plan a simple design and mark stitch points lightly on the card to guide the needlework.
- Pierce holes at each point with a fine needle or awl and stitch using a short embroidery needle and floss.
- Secure thread ends neatly at the back and consider reinforcing the reverse with a small patch of paper.
⚠️ Avoid: Pushing too thick a needle through paper can cause tearing; using too many floss strands creates bulky, uneven stitches.
🔄 Try Also: Try metallic thread for a refined shimmer, embroider a small monogram, or combine stitching with painted accents.
🛒 Products & Materials ▶
Items Used
- embroidery floss
- paper piercing tool
- thick cardstock
📌 “Delicate embroidered card featuring subtle stitched texture.”
• • •
Button badge collage with twine and metal accents
⏱️ 45 min · 🟢 Beginner
![]()
A button badge collage feels playful and tactile, a scatter of colorful buttons evoking collected moments. The buttons create little islands of color against a neutral background while twine and small metal accents add a homespun, slightly industrial touch. The layered buttons cast tiny shadows and offer texture that begs a closer look.
The overall effect is cheerful and slightly nostalgic, like rummaging through a sewing tin and finding a favorite piece that sparks a memory. It reads as cheerful and handmade rather than overly precious.
📋 How to Make This ▶
- Select an assortment of buttons and arrange them on the card face until the layout feels balanced.
- Secure each button with strong craft adhesive or tiny thread loops, and tuck short lengths of twine between clusters for texture.
- Add a small metal accent like a washer or charm to anchor the composition visually.
⚠️ Avoid: Using too many large buttons can weigh the card down and make mailing difficult; weak adhesive can allow pieces to come loose.
🔄 Try Also: Create a monotone button cluster for a refined look, spell initials with small letter beads, or combine buttons with fabric scraps.
🛒 Products & Materials ▶
Items Used
- assorted buttons pack
- natural jute twine
- strong craft adhesive
📌 “Charming button collage card accented with twine and metal bits.”
