
As an Amazon Associate I earn from qualifying purchases.
Beachy Seashell DIY Crafts bring a sun-warmed shoreline into every corner with Beachy Seashell DIY Crafts that sparkle with nacre and sand-kissed texture. Beachy Seashell DIY Crafts mix driftwood, glossy shells, twine, resin, and soft coastal hues to create shells-turned-decor, seashell DIY projects, and beachy shells for gifts or home. Beachy Seashell DIY Crafts offer simple beach-themed decor like shell garlands, photo frames, and tabletop accents that capture shell shapes and ocean light.
Beachy Seashell DIY Crafts feel like a pocket of summer wherever they are placed.
Small moments of calm can be conjured with Beachy Seashell DIY Crafts that pair weathered texture and gentle colors, making seashell decor projects ideal for relaxed afternoons and handmade coastal charm.
Driftwood and glossy shell wind chime for porch
⏱️ 1-2 hours · 🟠 Intermediate

The wind chime had the easy rhythm of a slow beach afternoon, shells clinking with a soft, hollow tone. Driftwood carried grain and sun-bleached streaks while the shells showed pearly flashes that caught late light. A cluster of short and long strands gave the piece a playful asymmetry, and thin twine loops offered a tactile contrast against the smooth nacre.
Standing nearby felt like hearing tiny sea notes, with sand-gray shadows and the faint scent of salt carried on a warm breeze.
📋 How to Make This ▶
- Gather driftwood pieces, an assortment of durable shells, twine, and a handheld drill or small awl.
- Make tiny holes near shell tops and through driftwood where strands will hang, keeping spacing balanced.
- Thread twine through shells, knot securely, and vary strand lengths for visual interest.
- Tie all strands to the driftwood, adjust spacing until the chime hangs evenly, and create a loop for hanging.
⚠️ Avoid: A frequent beginner mistake is choosing very thin, fragile shells that crack during handling; heavier or thicker shells hold up better and sound more solid.
🔄 Try Also: Paint a few shells in muted coastal colors for contrast, swap twine for clear fishing line for a floating effect, or add small wooden beads between shells for rhythm.
🛒 Products & Materials ▶
Items Used
- natural seashells assortment
- weathered driftwood pieces
- jute twine
- handheld drill or awl
📌 “Sunlit driftwood wind chime with pearly shell music.”
• • •
Seashell photo frame with textured shell border
⏱️ 45 min · 🟢 Beginner
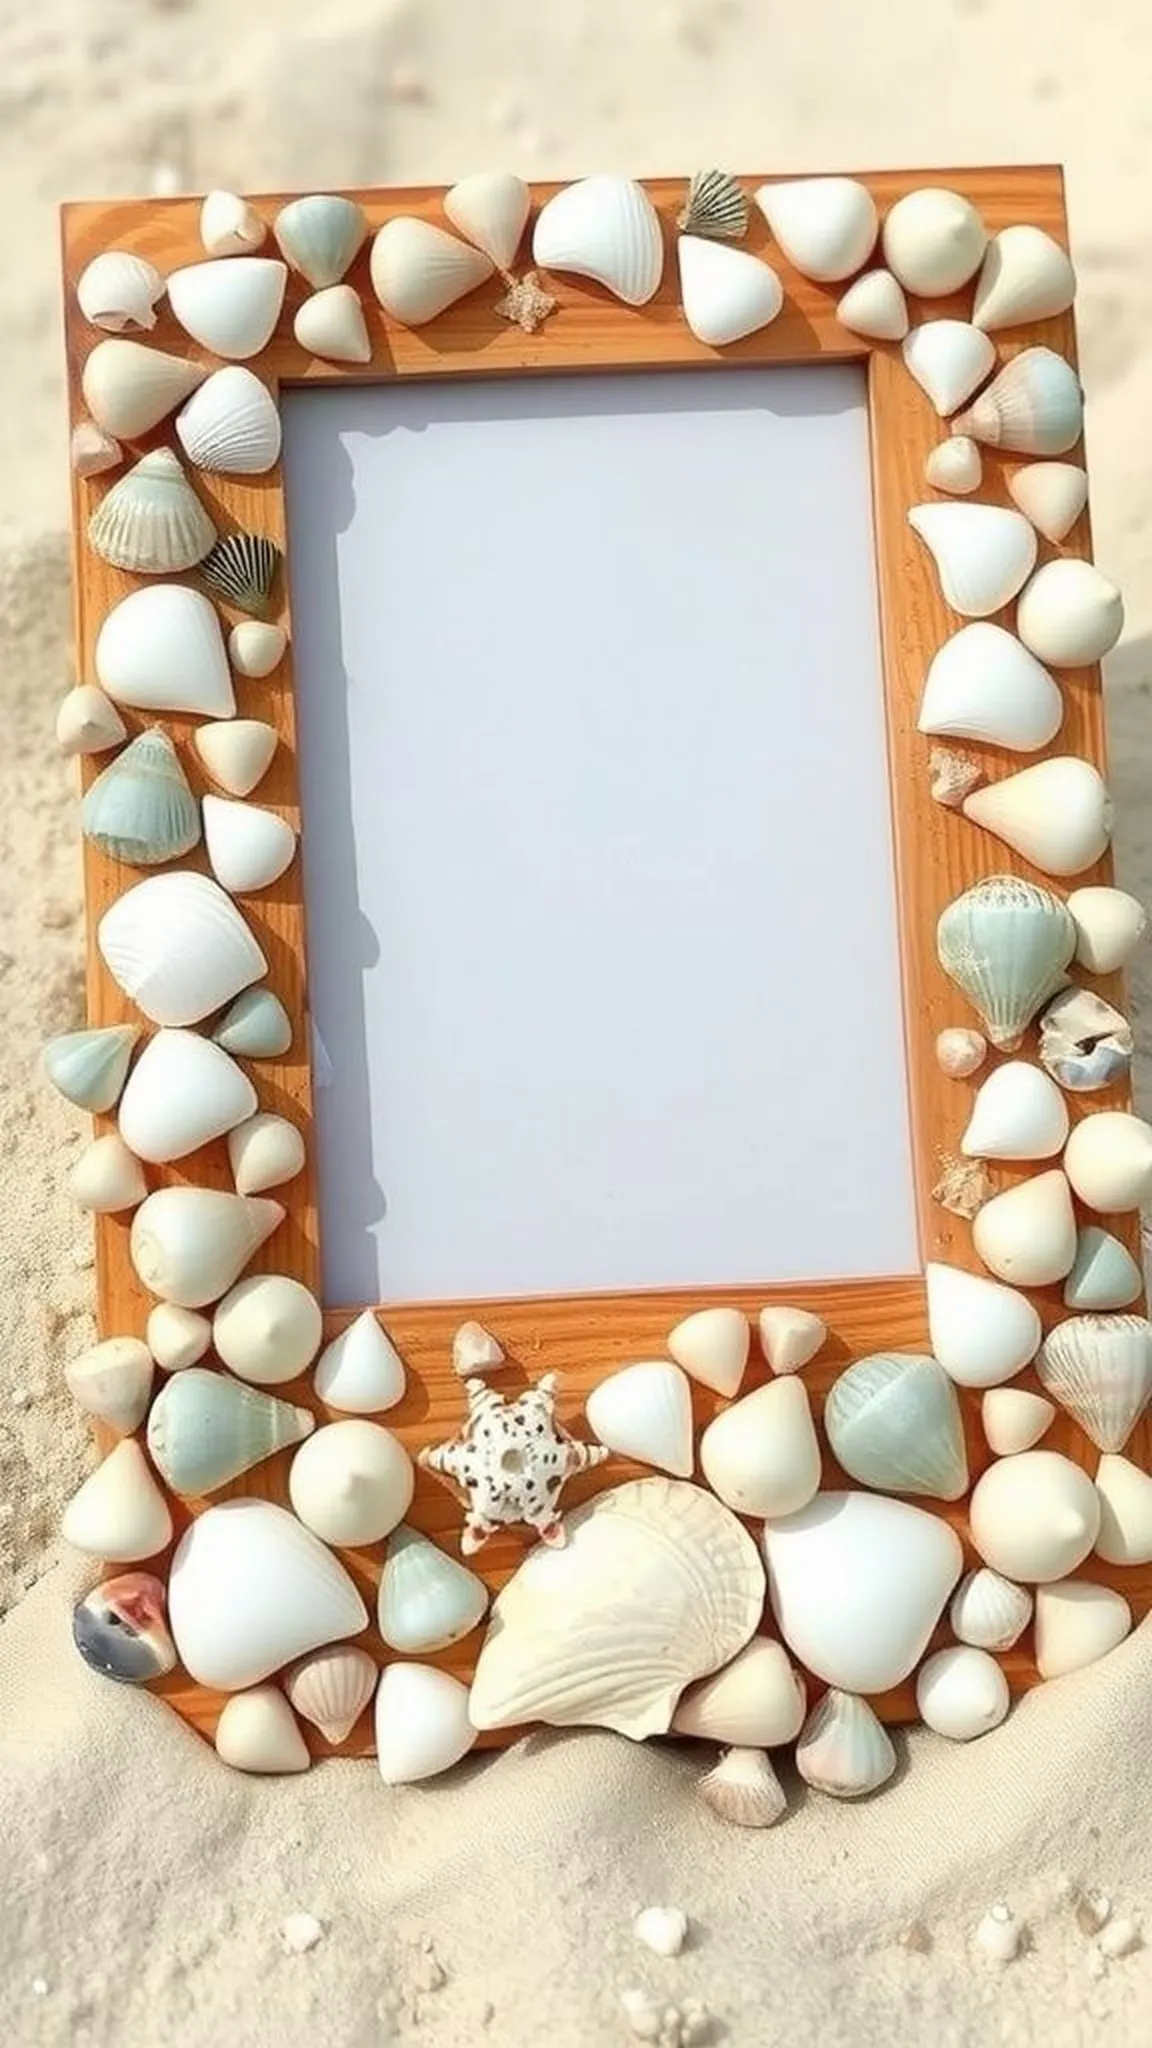
The photo frame felt like a tiny seaside shrine, shells crowded around a memory with scallop ridges and tiny crabshell fragments peeking through. Smooth mother-of-pearl flashes contrasted with rough, matte edges and small clusters created an organic rhythm around the glass. The whole frame borrowed the palette of sand, coral pinks, and soft creams, making the held photograph read like a sun-soaked moment.
Fingers brushing the surface could feel both gritty grain and polished shells, giving the piece comforting handmade warmth.
📋 How to Make This ▶
- Choose a plain wooden or MDF photo frame and an assortment of similarly sized shells.
- Arrange shells around the frame edge to find an appealing pattern before proceeding.
- Secure shells in place with a strong adhesive and let the bond cure fully.
- Wipe any excess residue and allow the frame to rest before inserting the photo.
⚠️ Avoid: A frequent error is crowding the frame with too many tiny fragments that flatten the shell shapes and create a cluttered look.
🔄 Try Also: Try a sparse, asymmetric shell placement for a modern feel, paint backing in sea glass tones for contrast, or mix in tiny starfish and sand dollars.
🛒 Products & Materials ▶
📌 “Seashell-framed memories with sun-bleached coastal charm.”
• • •
Seashell candle holders with embedded coastal texture
⏱️ 1-2 hours · 🟠 Intermediate
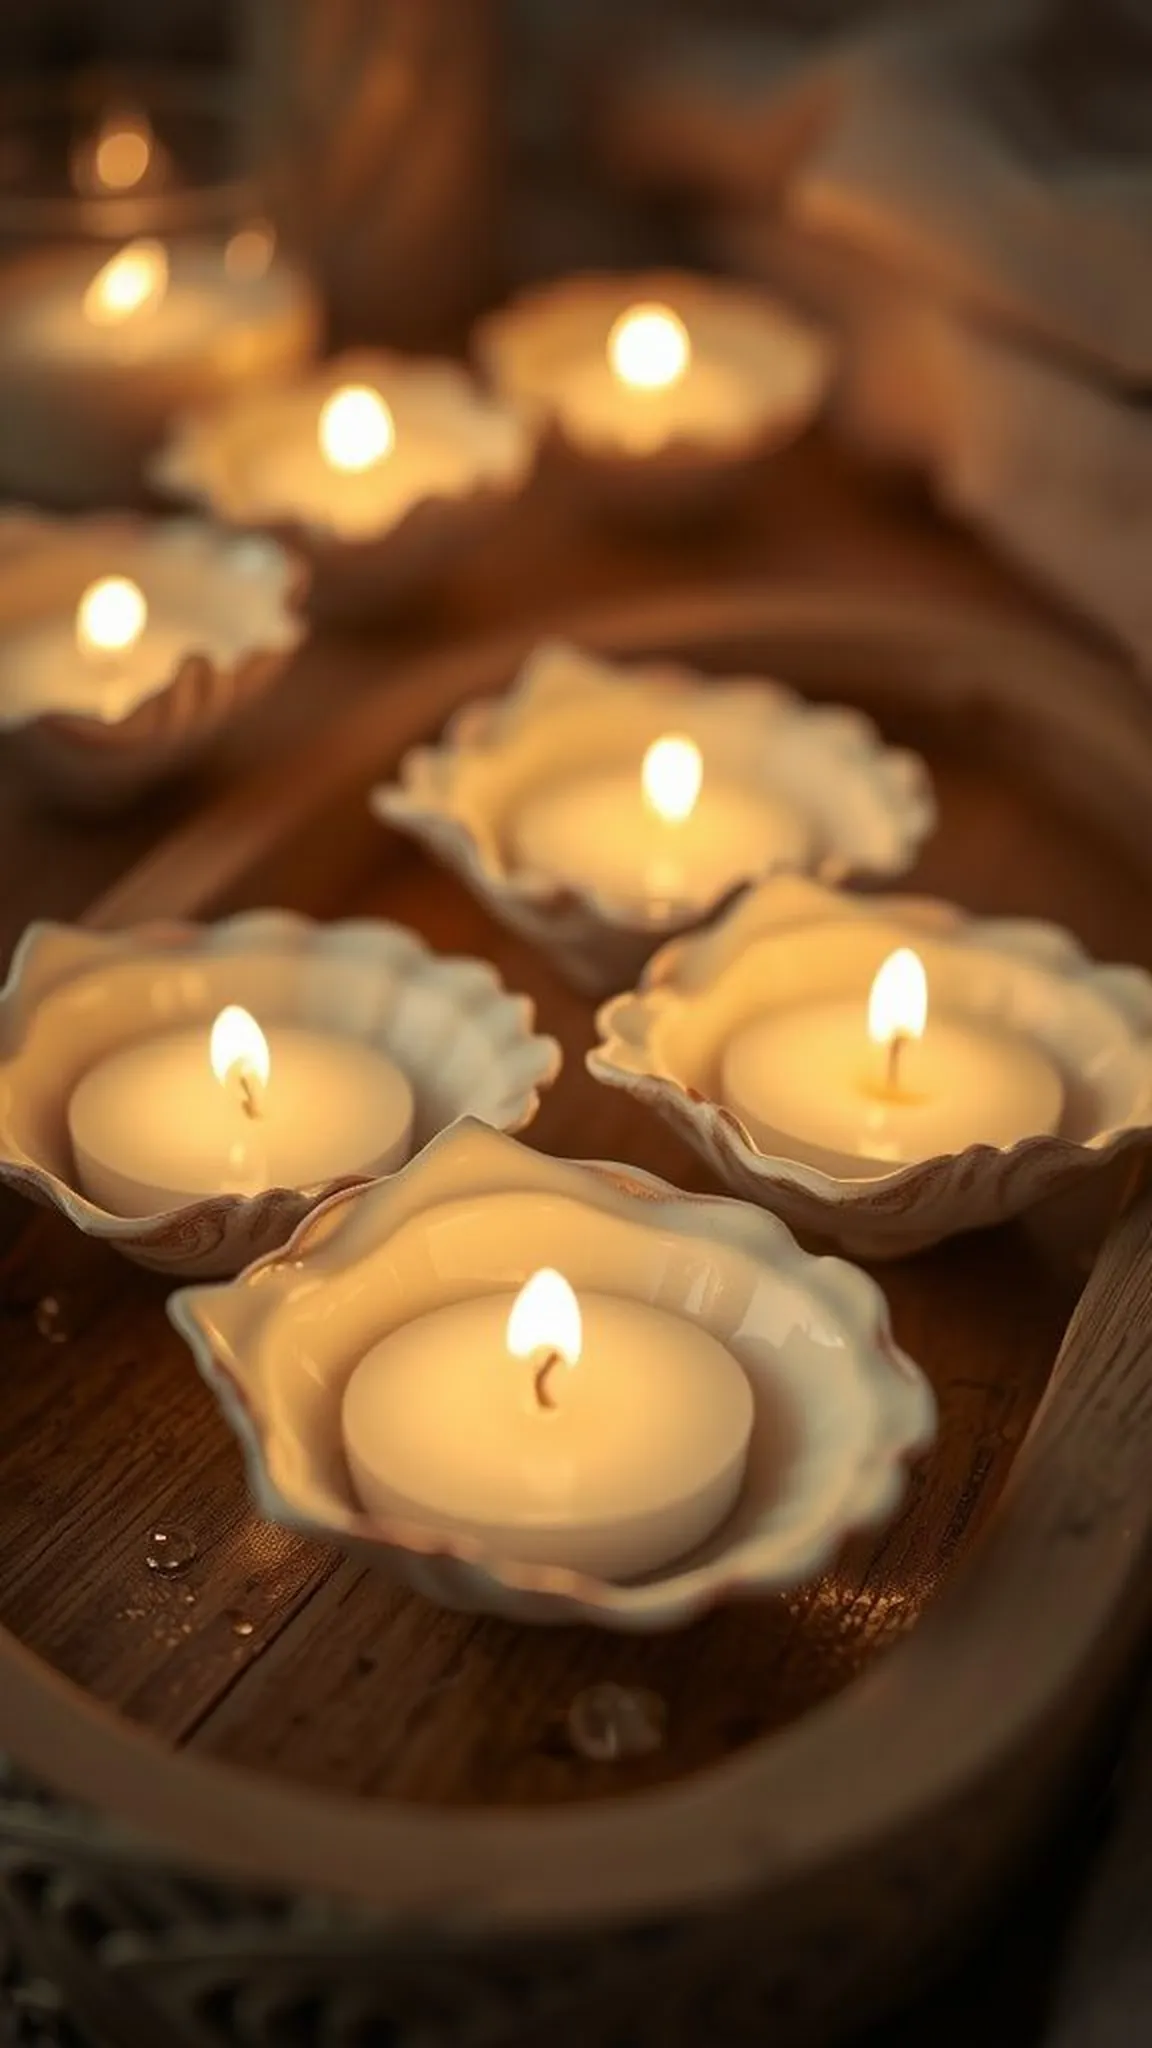
These candle holders carried cozy evening light with shells tucked into warm wax and soft reflections dancing across the room. The shells created tiny, irregular hollows where flame and shadow mingled, and the scent of beeswax or soy blended with a faint ocean suggestion. Edges of shell showed pearly flashes near the candle flame and the overall silhouette read as handcrafted intimacy.
Placing the holders on driftwood trays made the arrangement feel like a collected stack of memories from slow shoreline afternoons.
📋 How to Make This ▶
- Select shallow shells and small candle molds or reservoir cups to hold wax safely.
- Melt wax to the recommended temperature and carefully pour into shells with a wick centered.
- Let wax cool completely and trim the wick before lighting in a safe surface area.
- Place holders on a non-flammable tray away from drafts for best ambiance.
⚠️ Avoid: A frequent mishap is choosing deep or uneven shells that allow the wick to lean; a centered, stable wick prevents smoky burn marks.
🔄 Try Also: Try adding tiny dried lavender sprigs between shells for scent, color the wax lightly with coastal pigments, or nestle shells around votive glasses.
🛒 Products & Materials ▶
Items Used
- shallow seashells suitable for candles
- soy or beeswax candle wax
- candle wicks pre-tabbed
📌 “Pearly seashell candle holders for soft coastal glow.”
• • •
Save time and printer ink with 50+ printable templates and step-by-step instructions in one ad-free guide.

Just $19.99 — lifetime access
Sunburst seashell mirror for beachy wall decor
⏱️ 2-3 hours · 🔴 Advanced
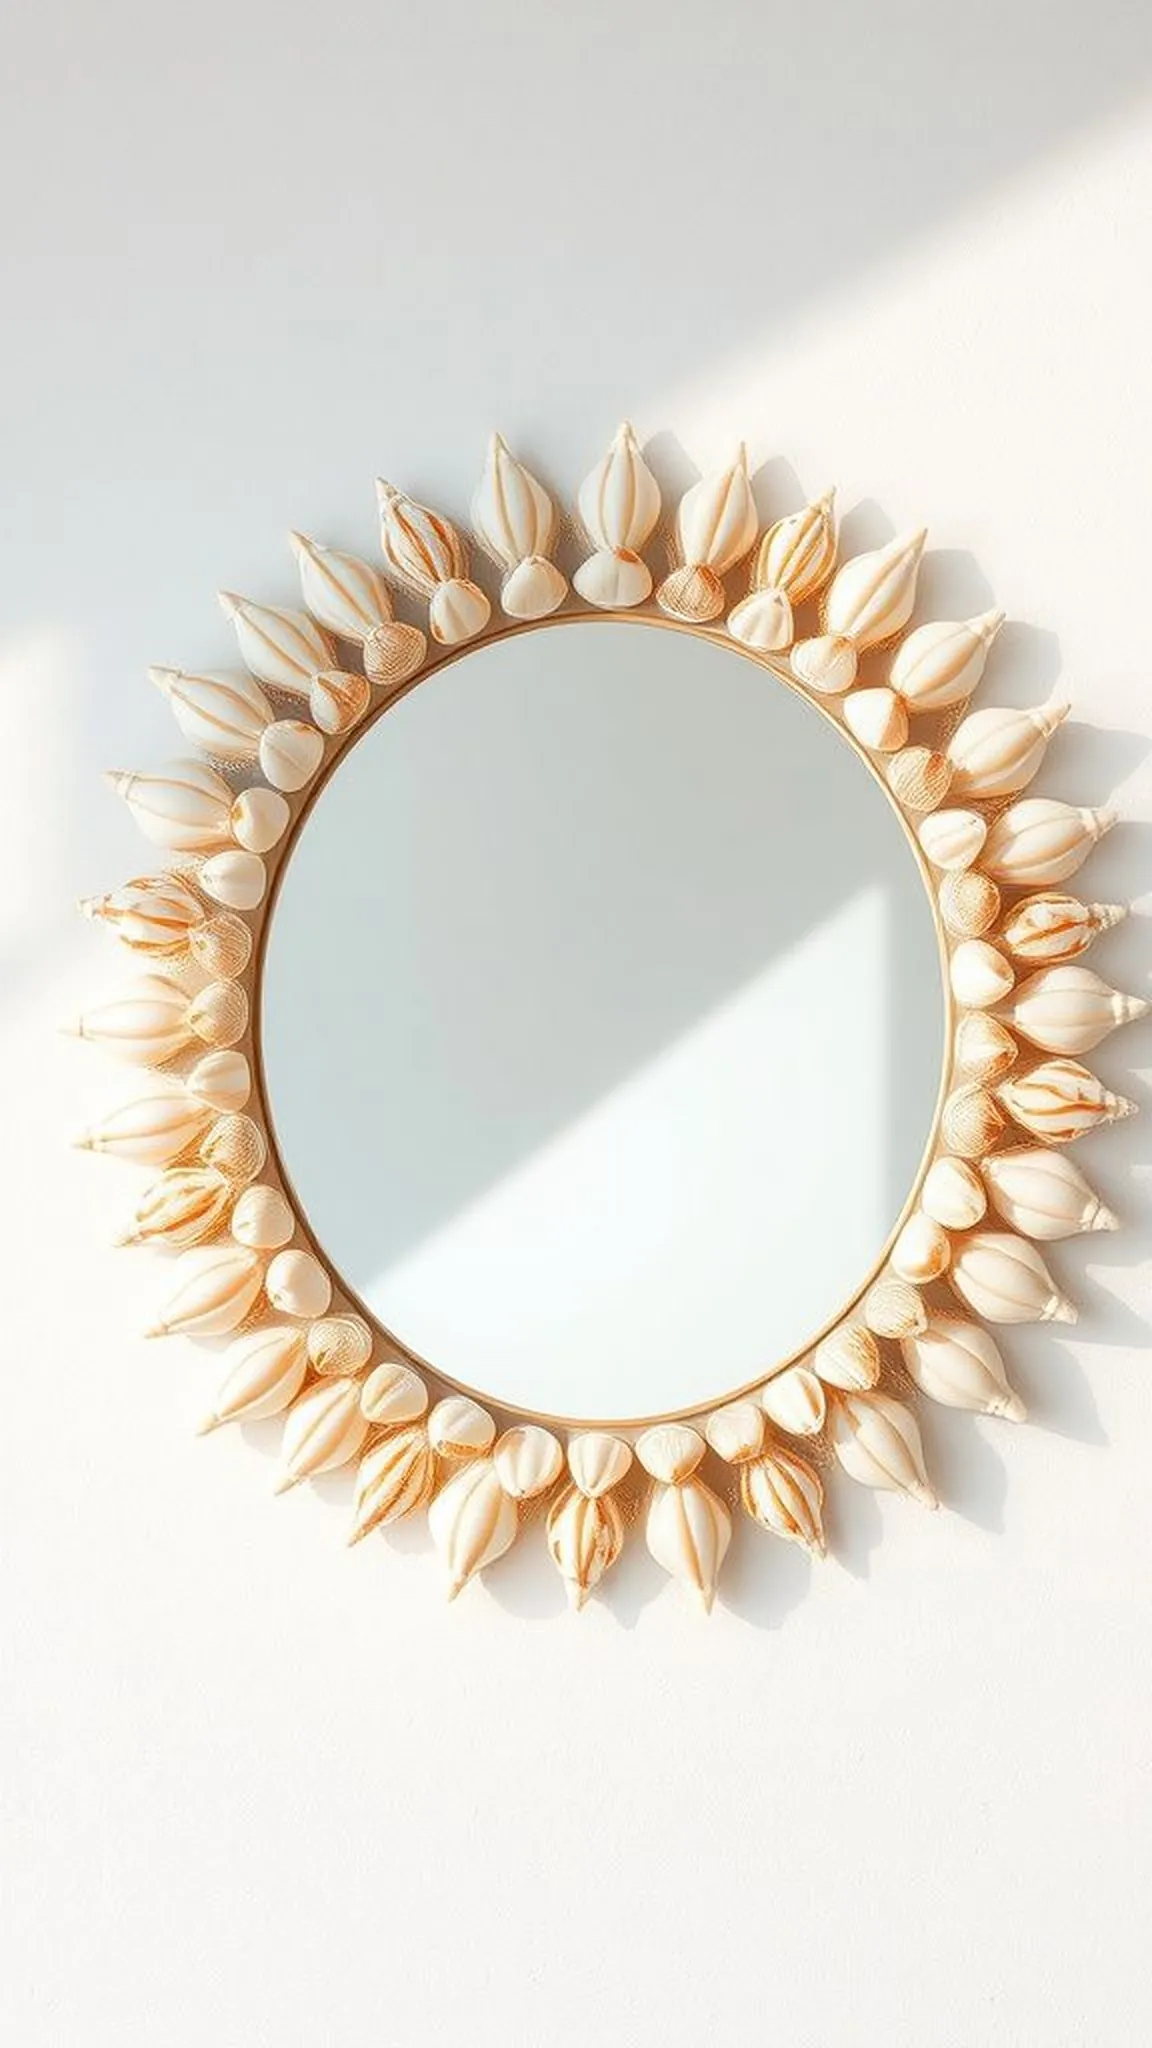
The sunburst mirror felt like a seaside sun captured in reflective glass, with shells radiating outward like tiny tidal rays. Layers of scallops, clam edges, and tapered shells created a textured halo that threw delicate highlights across the wall. Materials had a mix of matte, sand-blasted bits and glossy mother-of-pearl that played differently as light shifted.
The overall composition read as measured yet organic, and standing before it felt like a small pause, a flash of shoreline light caught and kept for the room.
📋 How to Make This ▶
- Select a round mirror base and lay out shells in concentric patterns to test composition.
- Adhere shells in rows radiating outward, working from the mirror edge to the outer rim.
- Allow adhesive to cure fully, then attach hanging hardware rated for the mirror weight.
- Hang the mirror on a secure wall hook and step back to check balance.
⚠️ Avoid: A frequent oversight is placing heavy shells too far from the mirror center, which can make the frame pull away from the wall.
🔄 Try Also: Alternate with small glass beads for sparkle, paint the frame in driftwood gray before shell placement, or create an irregular, wave-like edge instead of a perfect circle.
🛒 Products & Materials ▶
📌 “Sunburst shell mirror capturing coastal light and texture.”
• • •
Seashell fridge magnets with bright coastal paints
⏱️ 30 min · 🟢 Beginner
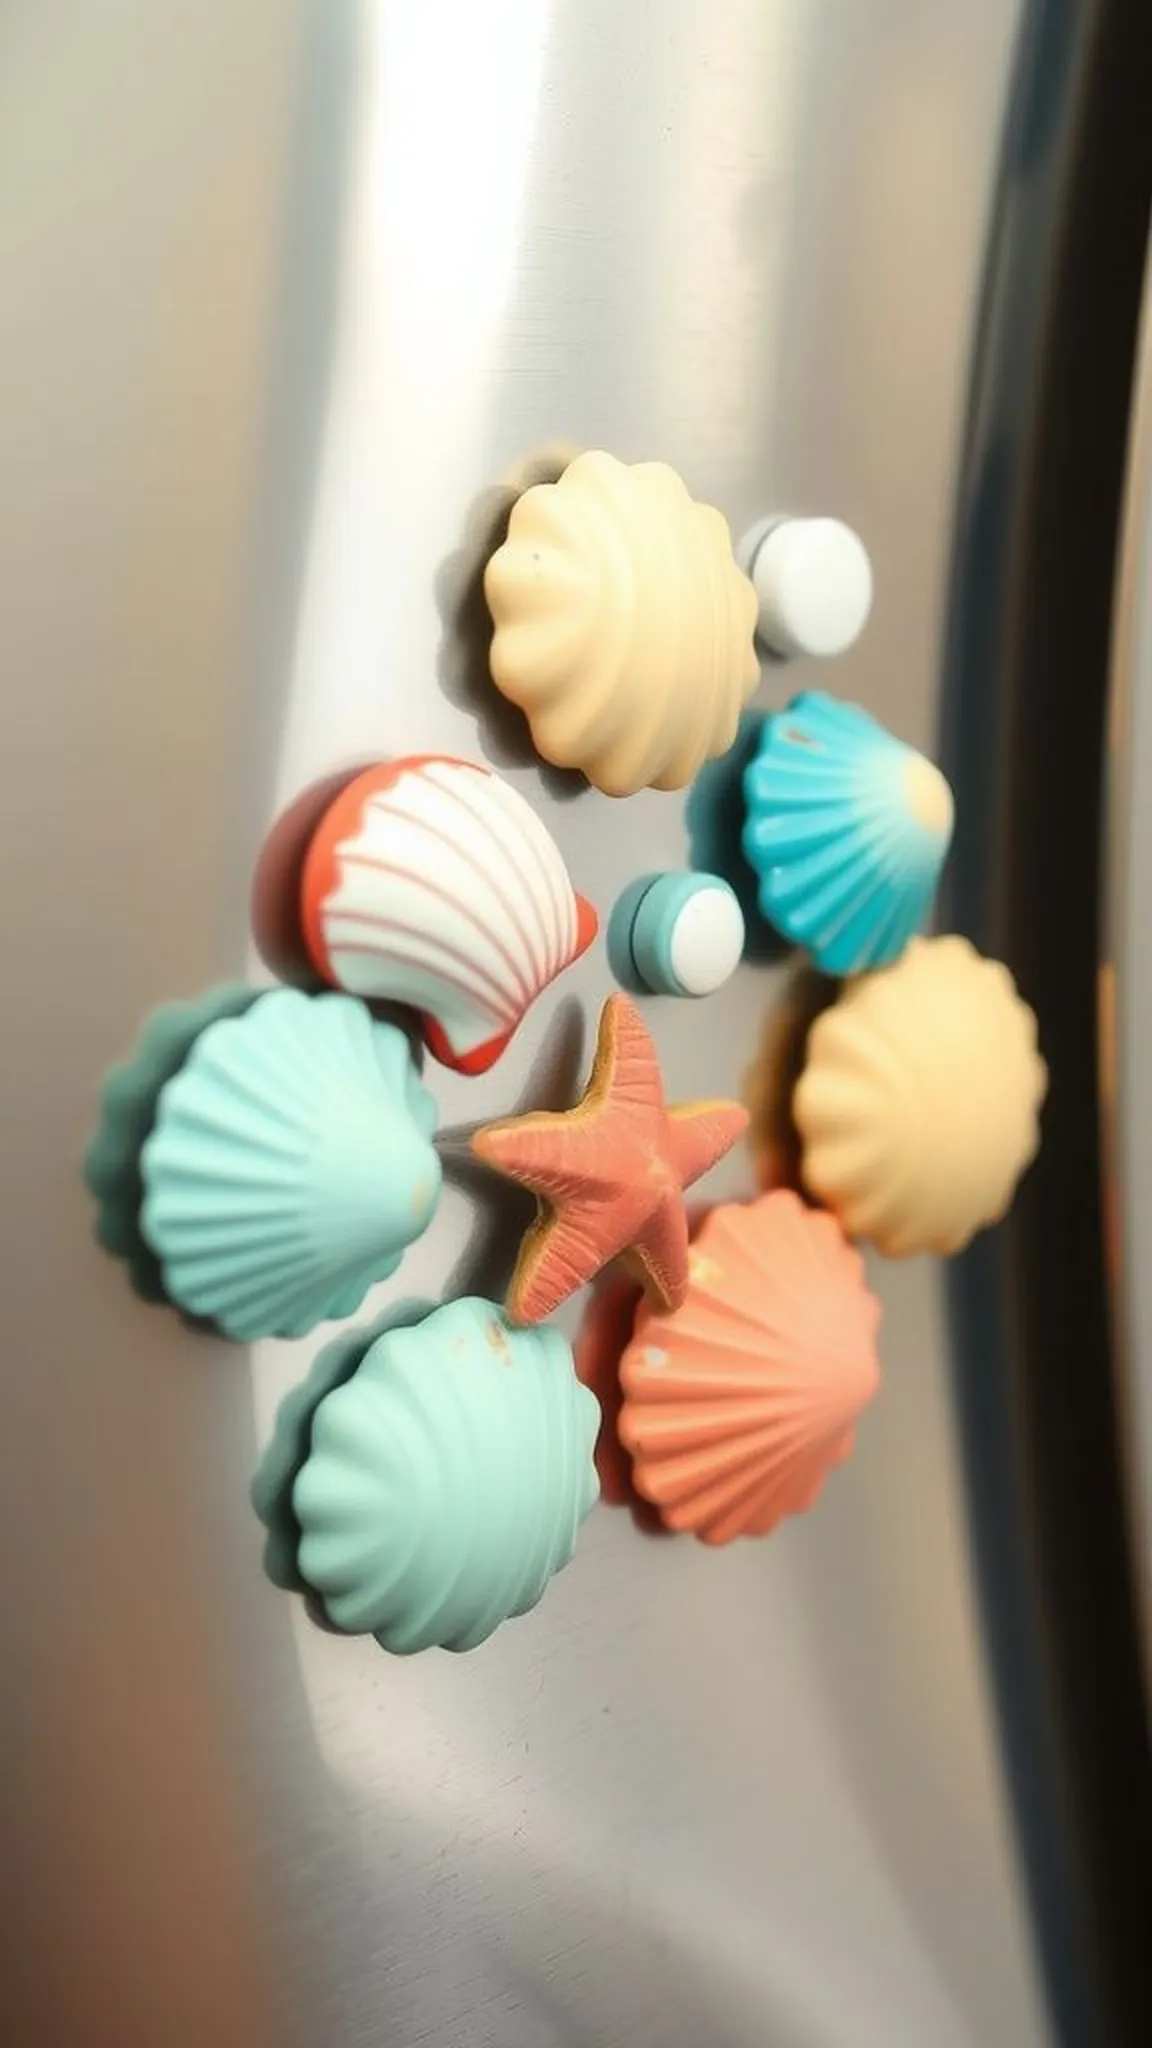
These small magnets carried a playful pop of seaside color, shells painted in soft aqua, coral, and sand tones that sat cheerfully on a refrigerator. The shells were lightweight with pocket-friendly backs and the painted strokes showed handcrafted charm rather than uniform perfection. Little dots of gloss and tiny matte accents gave each magnet personality, and the magnetic pull felt satisfyingly firm against smooth steel.
Grouped in a scattered cluster they read like a small tide pooling across an appliance surface, waking up the kitchen.
📋 How to Make This ▶
- Pick flat-backed shells and small disc magnets suited to the shell size.
- Apply paint accents or seal to the shell tops if desired and let dry thoroughly.
- Attach magnets with a strong adhesive to the shell backs, pressing until secure.
- Allow full cure before placing on a metal surface to ensure hold.
⚠️ Avoid: A frequent slip is opting for weak magnets that fail to hold heavier shells; stronger neodymium discs give a firmer grip.
🔄 Try Also: Try adding tiny name labels for gift magnets, alternate with painted pebble magnets, or pair shells with small glass cabochons for shine.
🛒 Products & Materials ▶
Items Used
- flat-backed seashells
- small disc magnets
- acrylic craft paints set
- clear craft adhesive
📌 “Tiny painted shell magnets brighten kitchen surfaces instantly.”
• • •
Resin seashell jewelry dish with pearly sheen
⏱️ 1-2 hours plus curing · 🟠 Intermediate
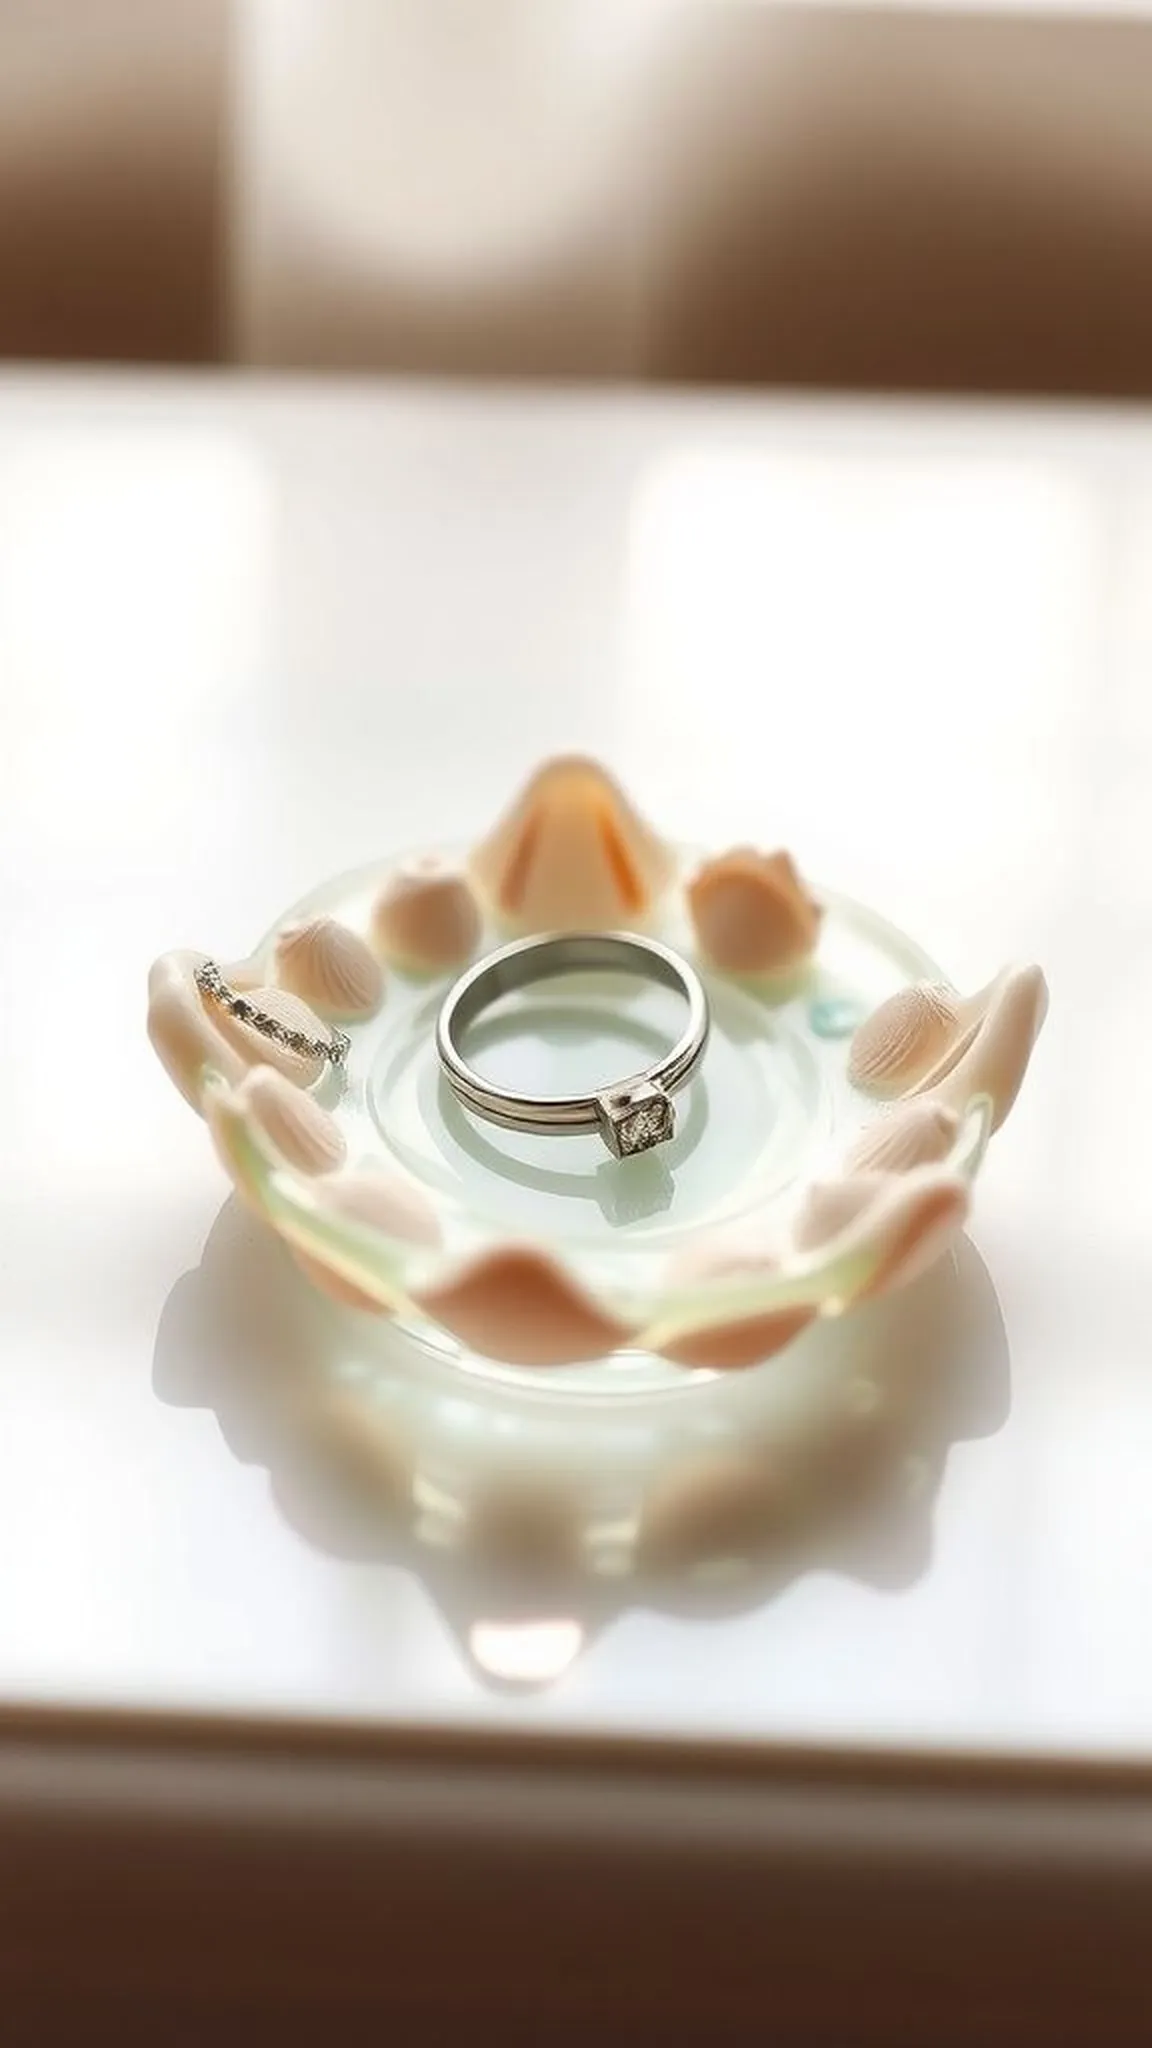
The little dish caught light in a way that felt pocket-sized and precious, shells suspended in glossy resin that magnified their texture. The surface had glassy clarity and the embedded pieces showed depth, like tiny underwater scenes frozen mid-wave. Edges were smooth and cool to the touch, and the dish held rings and tiny treasures with an approachable elegance.
Coastal hues seemed to glow inside the resin, and the overall sensation was of keeping a safe bit of shoreline on the dresser.
📋 How to Make This ▶
- Arrange selected shells in a silicone dish mold and ensure they sit in the desired orientation.
- Mix clear casting resin according to instructions and pour slowly to avoid air bubbles.
- Allow resin to level and cure undisturbed, applying a thin second layer if needed for full coverage.
- Demold carefully once fully cured and buff any rough edge if necessary.
⚠️ Avoid: A frequent mistake is pouring resin too quickly, which traps bubbles near shells; slow pouring and light passes help keep clarity.
🔄 Try Also: Embed tiny gold leaf flecks for warmth, tint the resin slightly with ocean blue dye, or create a set in varying sizes.
🛒 Products & Materials ▶
Items Used
- silicone dish mold small
- clear casting resin kit
- mixed small seashells
📌 “Glossy resin jewelry dish with shells like tiny sea scenes.”
• • •
Driftwood and shell wall hanging with layered texture
⏱️ 1-2 hours · 🟠 Intermediate
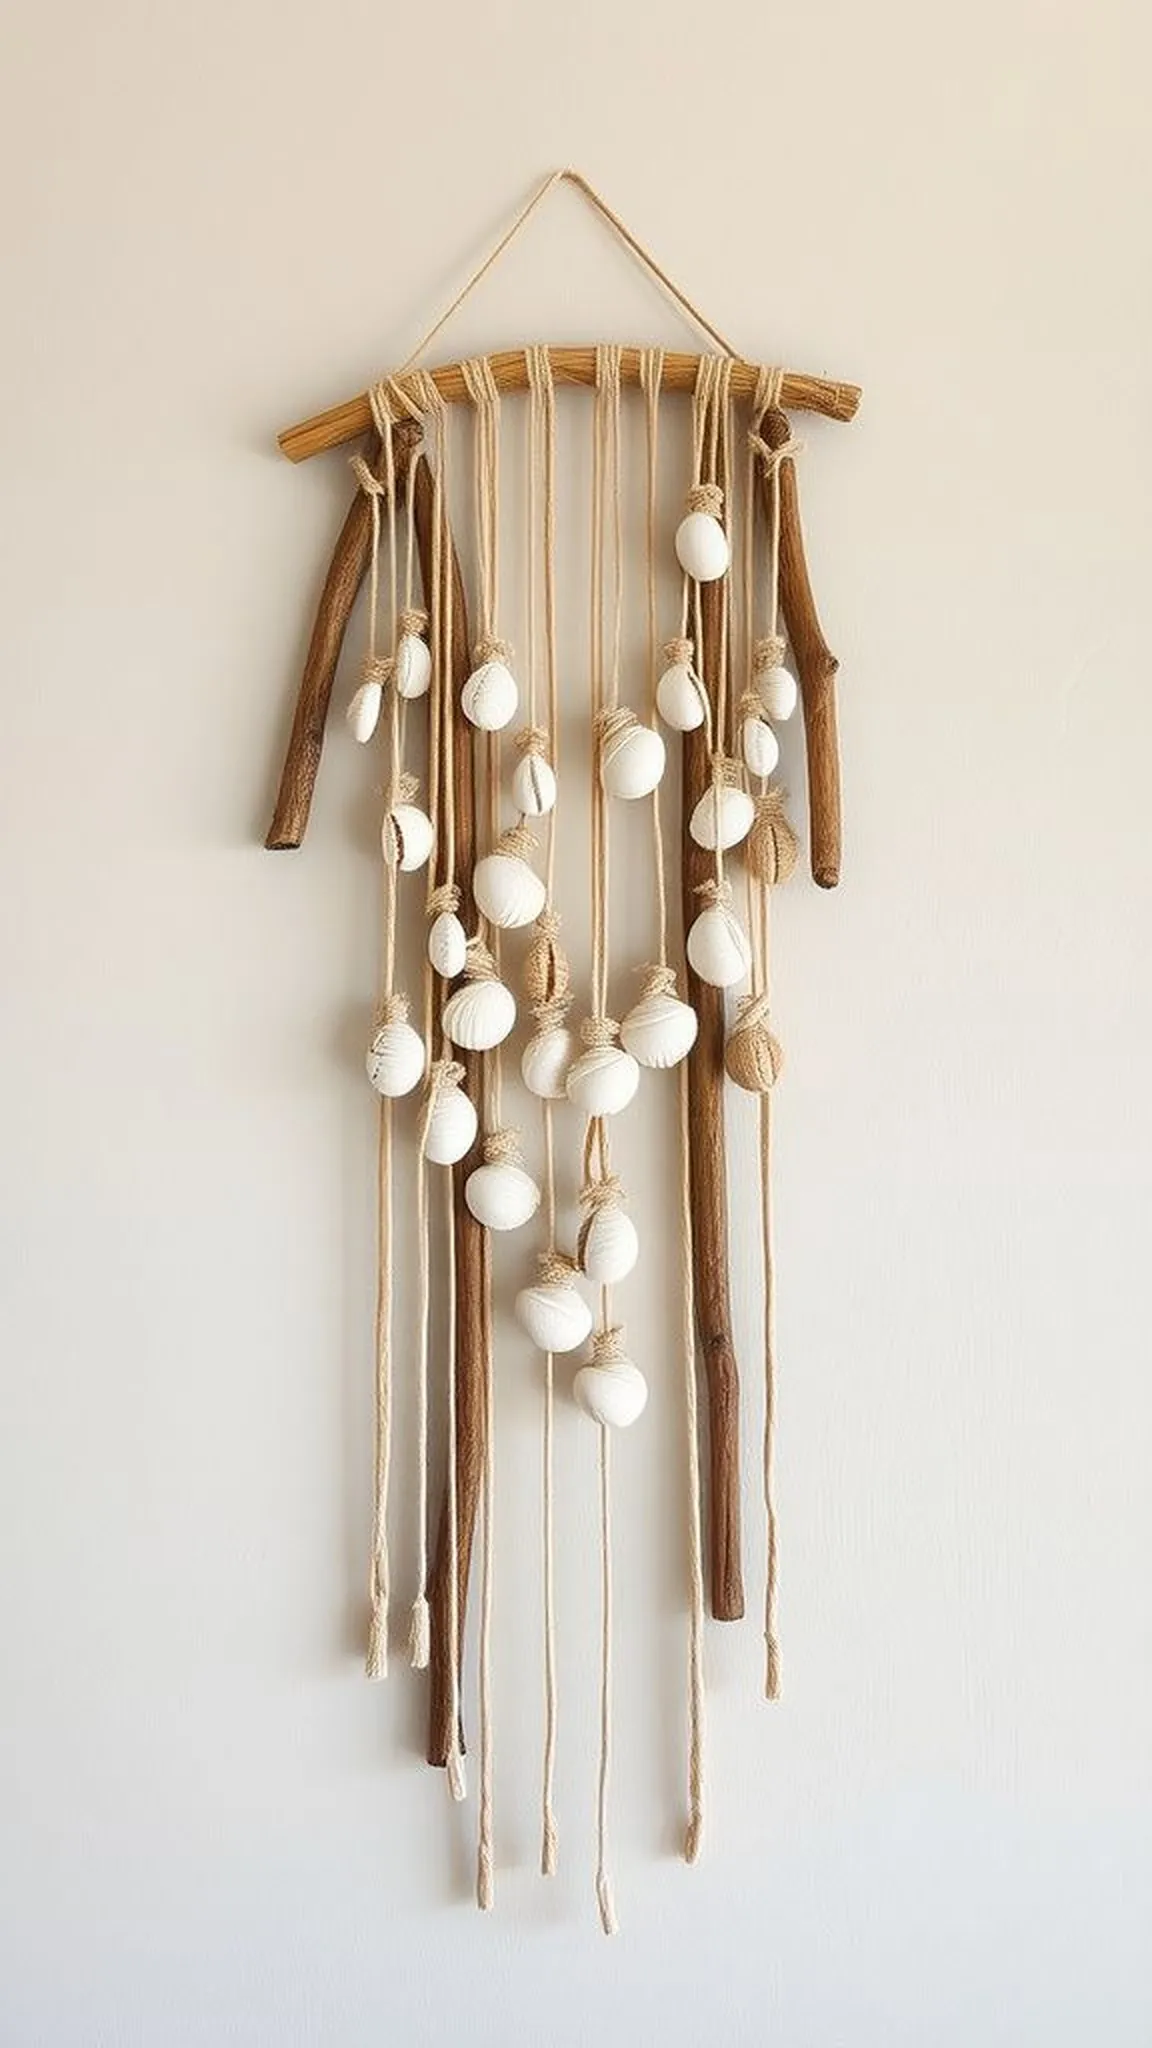
The wall hanging had a relaxed, layered feeling that suggested slow afternoons gathering treasures. Strips of driftwood provided a horizontal spine while shells dangled in staggered rows, creating a gentle vertical motion. Contrasts of sand-scraped wood and glossy shell surfaces introduced tactile richness, and thin cords looped into soft knots that read as handmade strokes.
Hanging against a neutral wall, the piece read as an unforced focal point, gentle enough to recede yet detailed enough to invite a second look from across the room.
📋 How to Make This ▶
- Choose a straight piece of driftwood and plan hanging strand placements across its length.
- Cut cords to varied lengths and thread or fasten shells at intervals along each strand.
- Secure each strand to the driftwood, spacing to achieve a layered silhouette.
- Add a sturdy hanging loop and mount on a wall hook rated for the piece.
⚠️ Avoid: A frequent problem is aligning all strands at identical lengths, which flattens the composition instead of producing layered movement.
🔄 Try Also: Introduce small glass beads between shells for glint, swap cords for leather strips for a rustic twist, or cluster several small hangings together.
🛒 Products & Materials ▶
📌 “Layered driftwood and shell hanging for breezy wall texture.”
• • •
Shell garland for mantel with soft beach tones
⏱️ 30-45 min · 🟢 Beginner
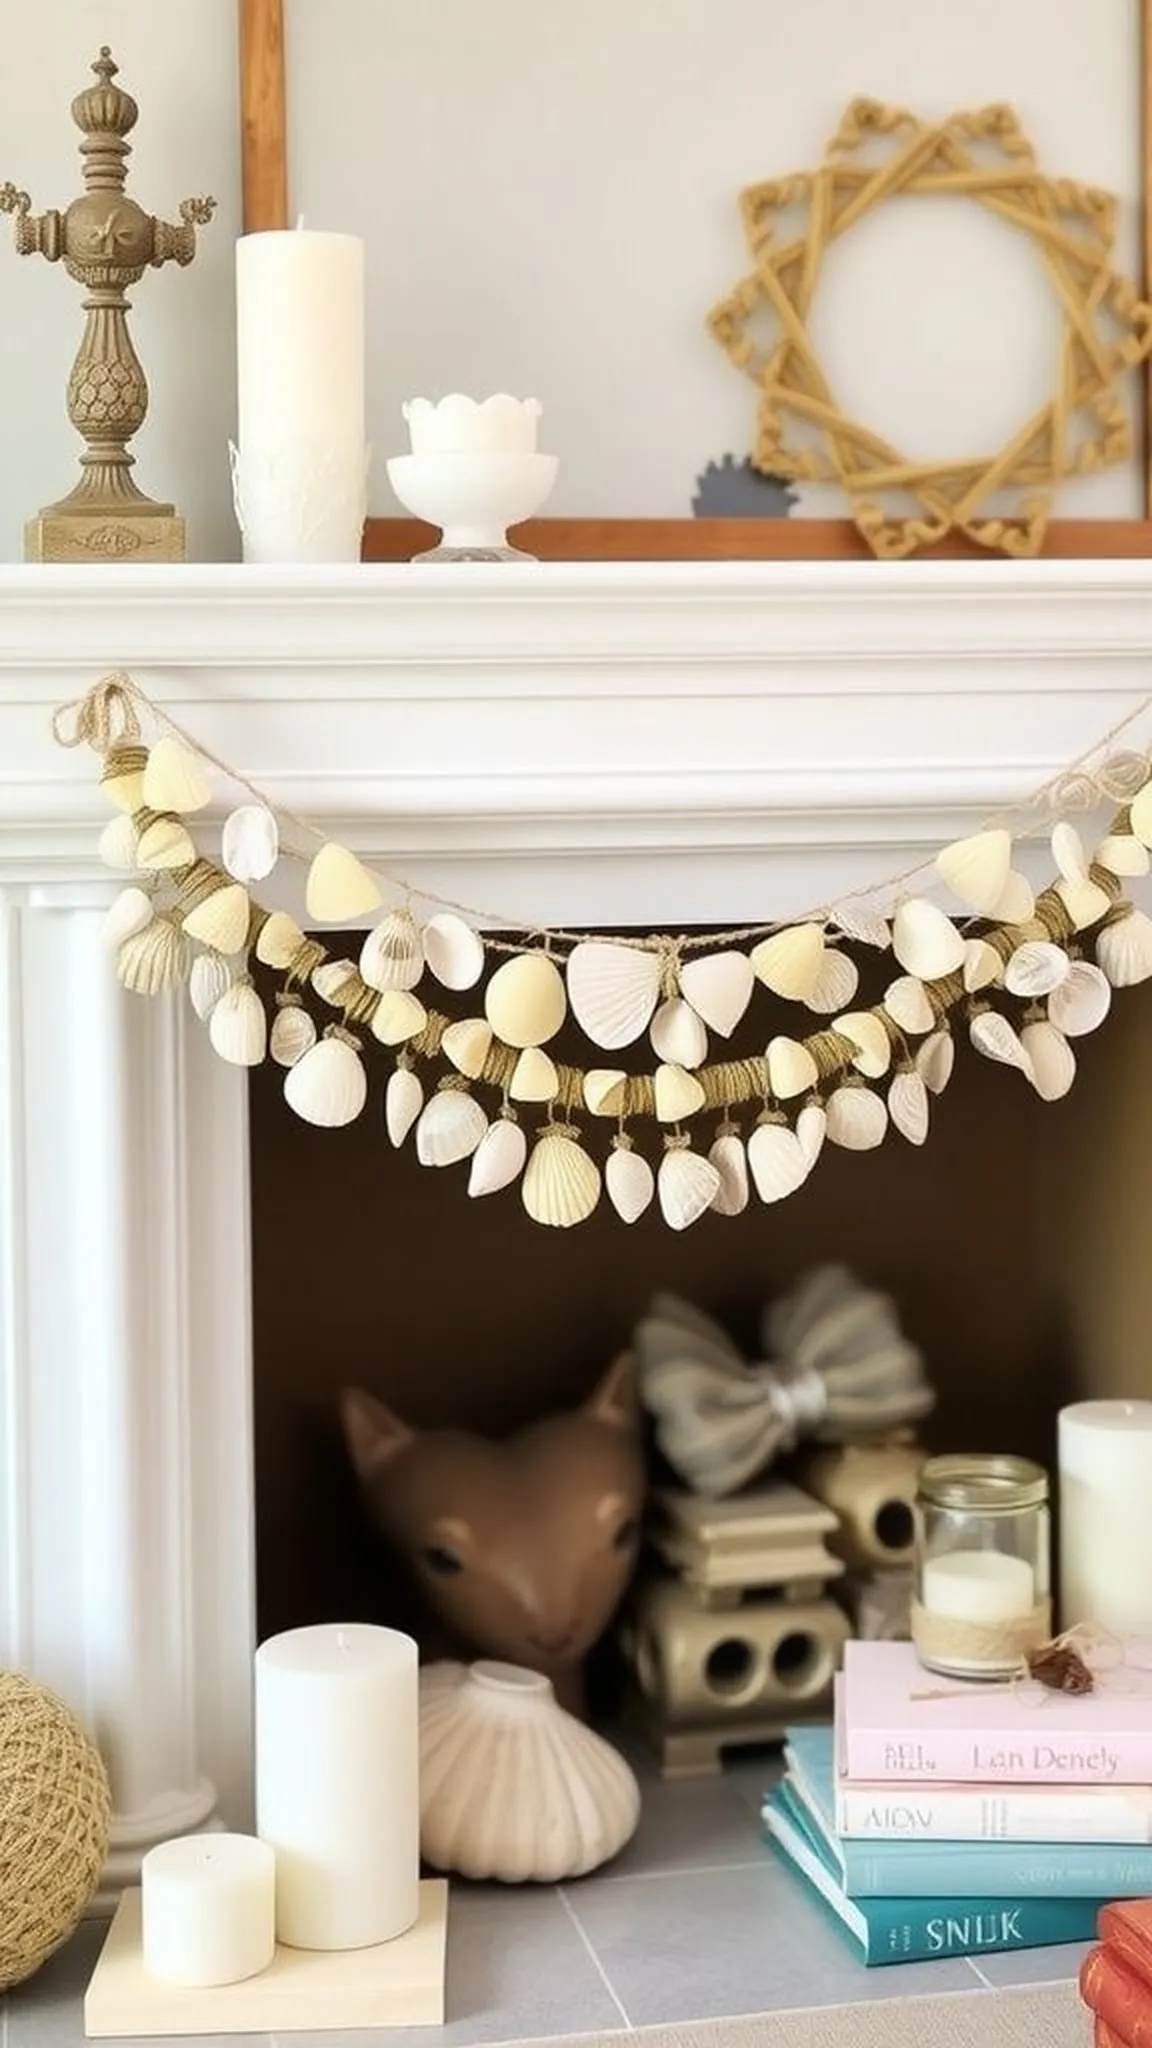
The garland felt light and cheerful across the mantel, shells spaced with small knots that created a slow rhythm. Colors leaned toward muted corals, creams, and seafoam, and the overall silhouette had a casual drape that suggested effortless coastal style. When sunlight hit, tiny pearlescent areas shimmered, and the garland paired well with books and candles without overwhelming them.
The texture of shells against woven rope felt tactile and simple, a small seasonal update that shifted the room toward laid-back seaside mood.
📋 How to Make This ▶
- Select a length of rope or twine and an assortment of small to medium shells.
- Knot shells in place at regular intervals or thread them if holes exist.
- Drape across the mantel and adjust spacing for an even, relaxed look.
- Add a light-weight anchor at each end to keep the garland from sliding.
⚠️ Avoid: A frequent slip is placing oversized shells that force the rope into awkward angles; lighter shells keep the line smooth.
🔄 Try Also: Alternate shells with driftwood beads, weave in fairy lights for evening glow, or make mini garlands for shelf displays.
🛒 Products & Materials ▶
📌 “Delicate shell garland for a laid-back mantel update.”
• • •
Coastal resin coasters with shell inlay set
⏱️ 2-3 hours plus curing · 🔴 Advanced
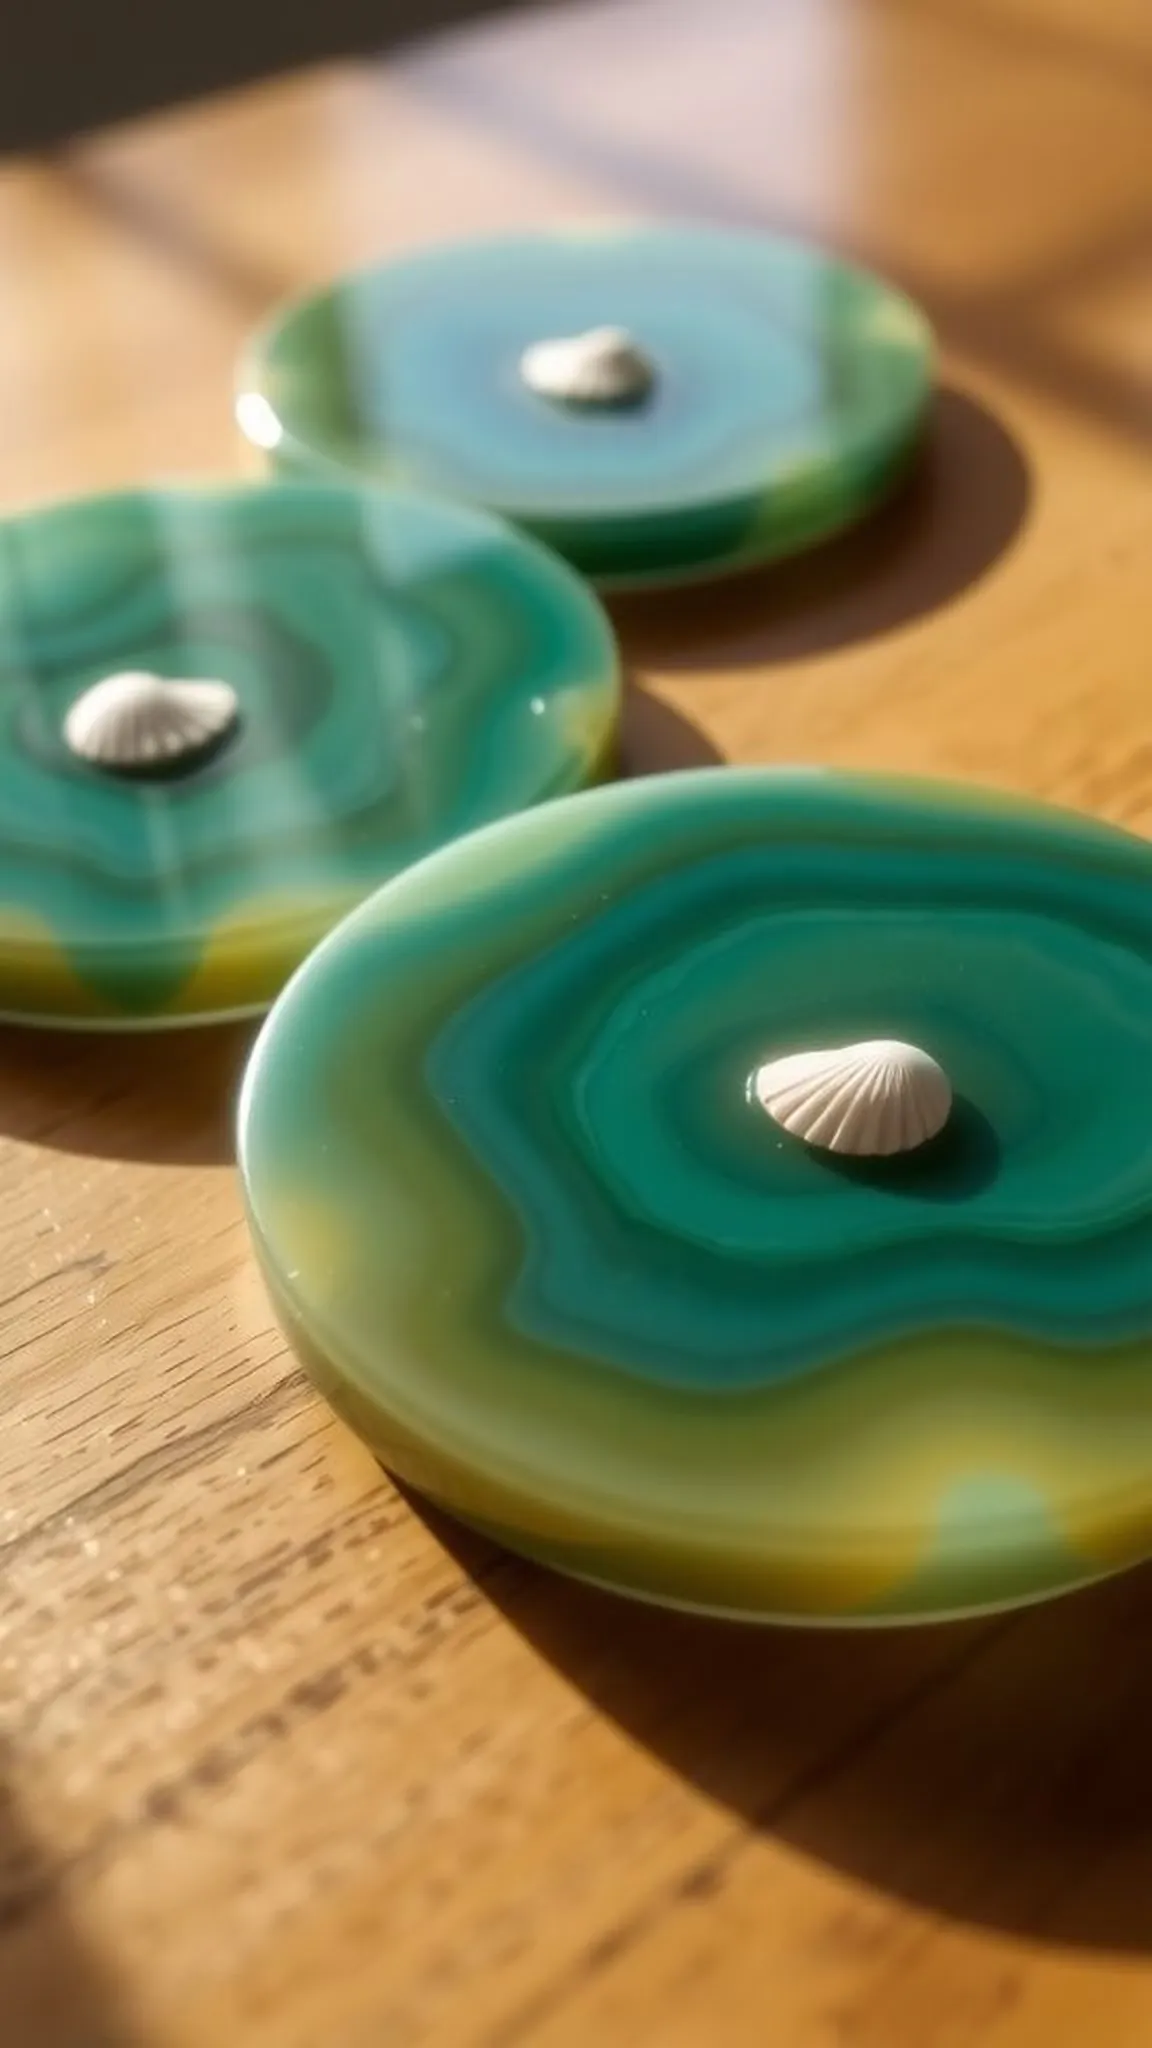
The coaster set felt like miniature shorelines resting by a coffee cup, each piece holding tiny shells frozen under glossy resin. Surfaces were smooth and mirrorlike, and edges caught table light in a subtle way. The embedded shells added micro-topography beneath a glassy plane, while faint color swirls gave a sense of tide.
Placed together, the coasters read as a cohesive collection with enough uniqueness in each to feel handcrafted. The weight had a satisfying heft and the finish invited casual admiration during slow morning routines.
📋 How to Make This ▶
- Prepare silicone coaster molds and arrange small shells and optional color pigments in each cavity.
- Mix resin thoroughly to the recommended ratio, pour slowly into molds, and tap to release air bubbles.
- Allow initial cure then add a thin top layer if needed for full coverage and clarity.
- Demold after full cure and sand edges lightly if any unevenness appears.
⚠️ Avoid: A frequent error is neglecting to degas bubbles, which can leave tiny pits in the finished surface that catch light awkwardly.
🔄 Try Also: Embed small sand deposits for a beachy base, tint edges lightly in ocean blue, or create coaster sets in coordinated color families.
🛒 Products & Materials ▶
📌 “Glossy resin coasters holding tiny shells like mini beaches.”
• • •
Seashell-embedded soap bars for guest bathroom
⏱️ 1 hour plus curing · 🟠 Intermediate
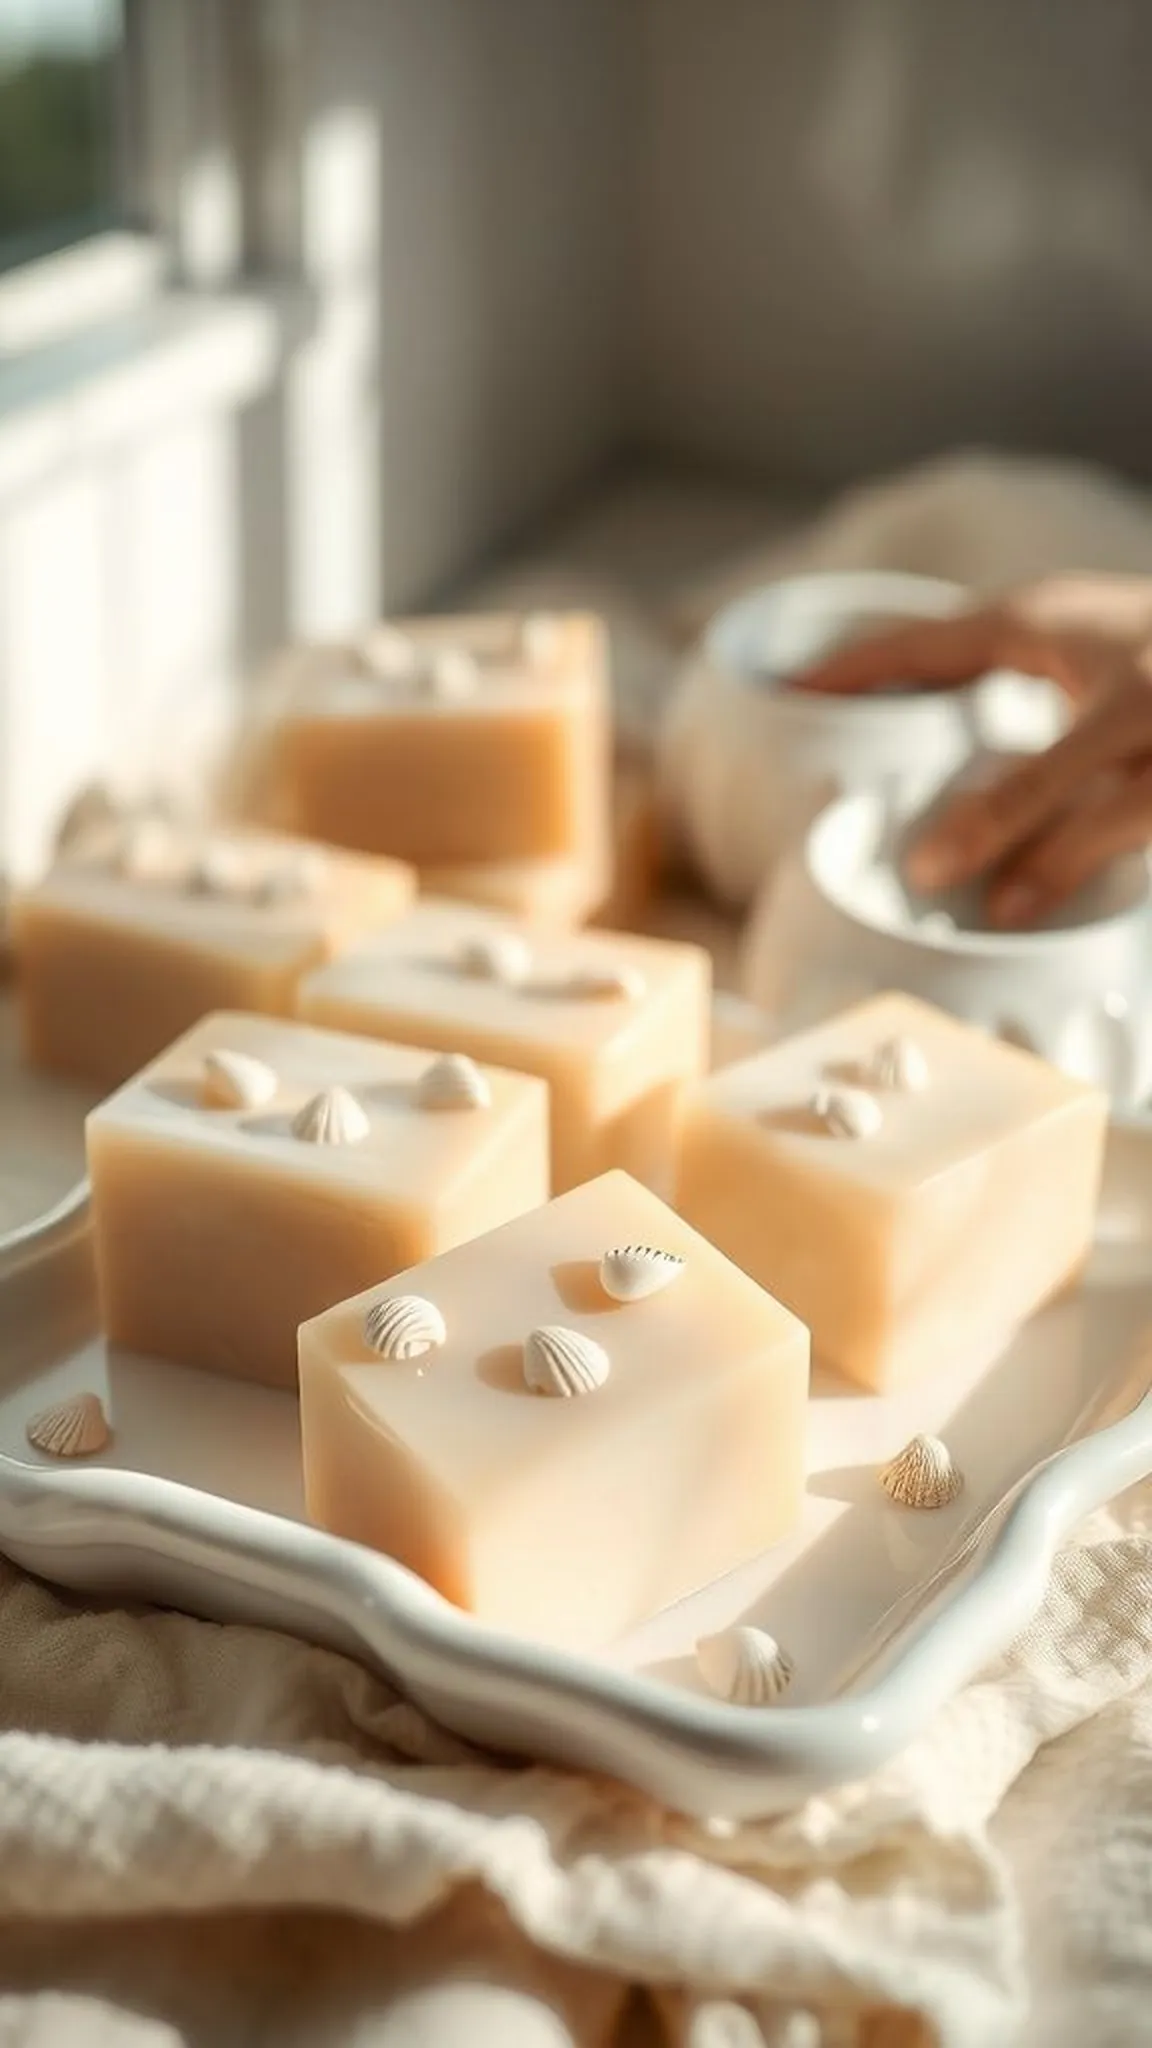
The soap bars smelled faintly of citrus or lavender while holding tiny shell impressions that invited curious fingertips. Shells peeking through translucent soap created a layered look like little tide pools, and the bars rested cleanly on ceramic dishes, giving the guest bathroom a curated feel. Smooth surfaces glowed under bathroom light, and the tactile contrast between slick soap and ridged shell edges was unexpectedly satisfying.
These bars felt like small hospitality gestures, neat enough for a shelf and cheerful for visitors.
📋 How to Make This ▶
- Melt soap base gently and add fragrance or color as desired according to guidelines.
- Place shells in soap molds and pour base slowly to surround shells without trapping air.
- Allow soap to cool fully, then unmold and trim any uneven bits for a neat finish.
⚠️ Avoid: A frequent oversight is embedding large, sharp shells that can irritate the skin; smooth, shallow pieces provide visual interest without discomfort.
🔄 Try Also: Create guest sets wrapped in linen, embed tiny shells near the top only for a peek, or use sea-scented oils for subtle aroma.
🛒 Products & Materials ▶
Items Used
- soap base (glycerin or melt-and-pour)
- small smooth seashells
- soap molds rectangular
📌 “Handmade soap bars with tiny shell impressions for guests.”
• • •
Seashell planter with tiny succulents and coastal charm
⏱️ 45 min · 🟠 Intermediate

The planter read like a tiny seaside garden, succulents tucked into a larger shell bowl and surrounded by pebbles. Textures ranged from smooth shell interiors to rough sand and matte leaf surfaces, and the green of the plants brought a fresh pop against pale nacre. When placed on a sunny sill, the arrangement felt resilient and low-maintenance, radiating a quiet coastal vibe without fuss.
The combination of living growth and static shell created a small living vignette that felt both deliberate and relaxed.
📋 How to Make This ▶
- Select a large shell with a stable base and place a thin layer of small pebbles inside for drainage.
- Add succulent potting mix and nestle small succulents into the shell, firming lightly around stems.
- Top with decorative sand or pebbles and place in bright indirect light for best growth.
⚠️ Avoid: A frequent misstep is overwatering these tiny planters; shallow basins dry quickly so minimal watering keeps plants happy.
🔄 Try Also: Group several shell planters on a driftwood tray, plant small air plants instead of succulents, or mix in tiny sea glass accents.
🛒 Products & Materials ▶
Items Used
- large seashell bowl
- succulent plants small
- mini pebbles for drainage
- cactus and succulent potting mix
📌 “Tiny succulent planter cradled in a pearly seashell.”
• • •
Seashell shadow box memory frame with beach keepsakes
⏱️ 1-1.5 hours · 🟠 Intermediate
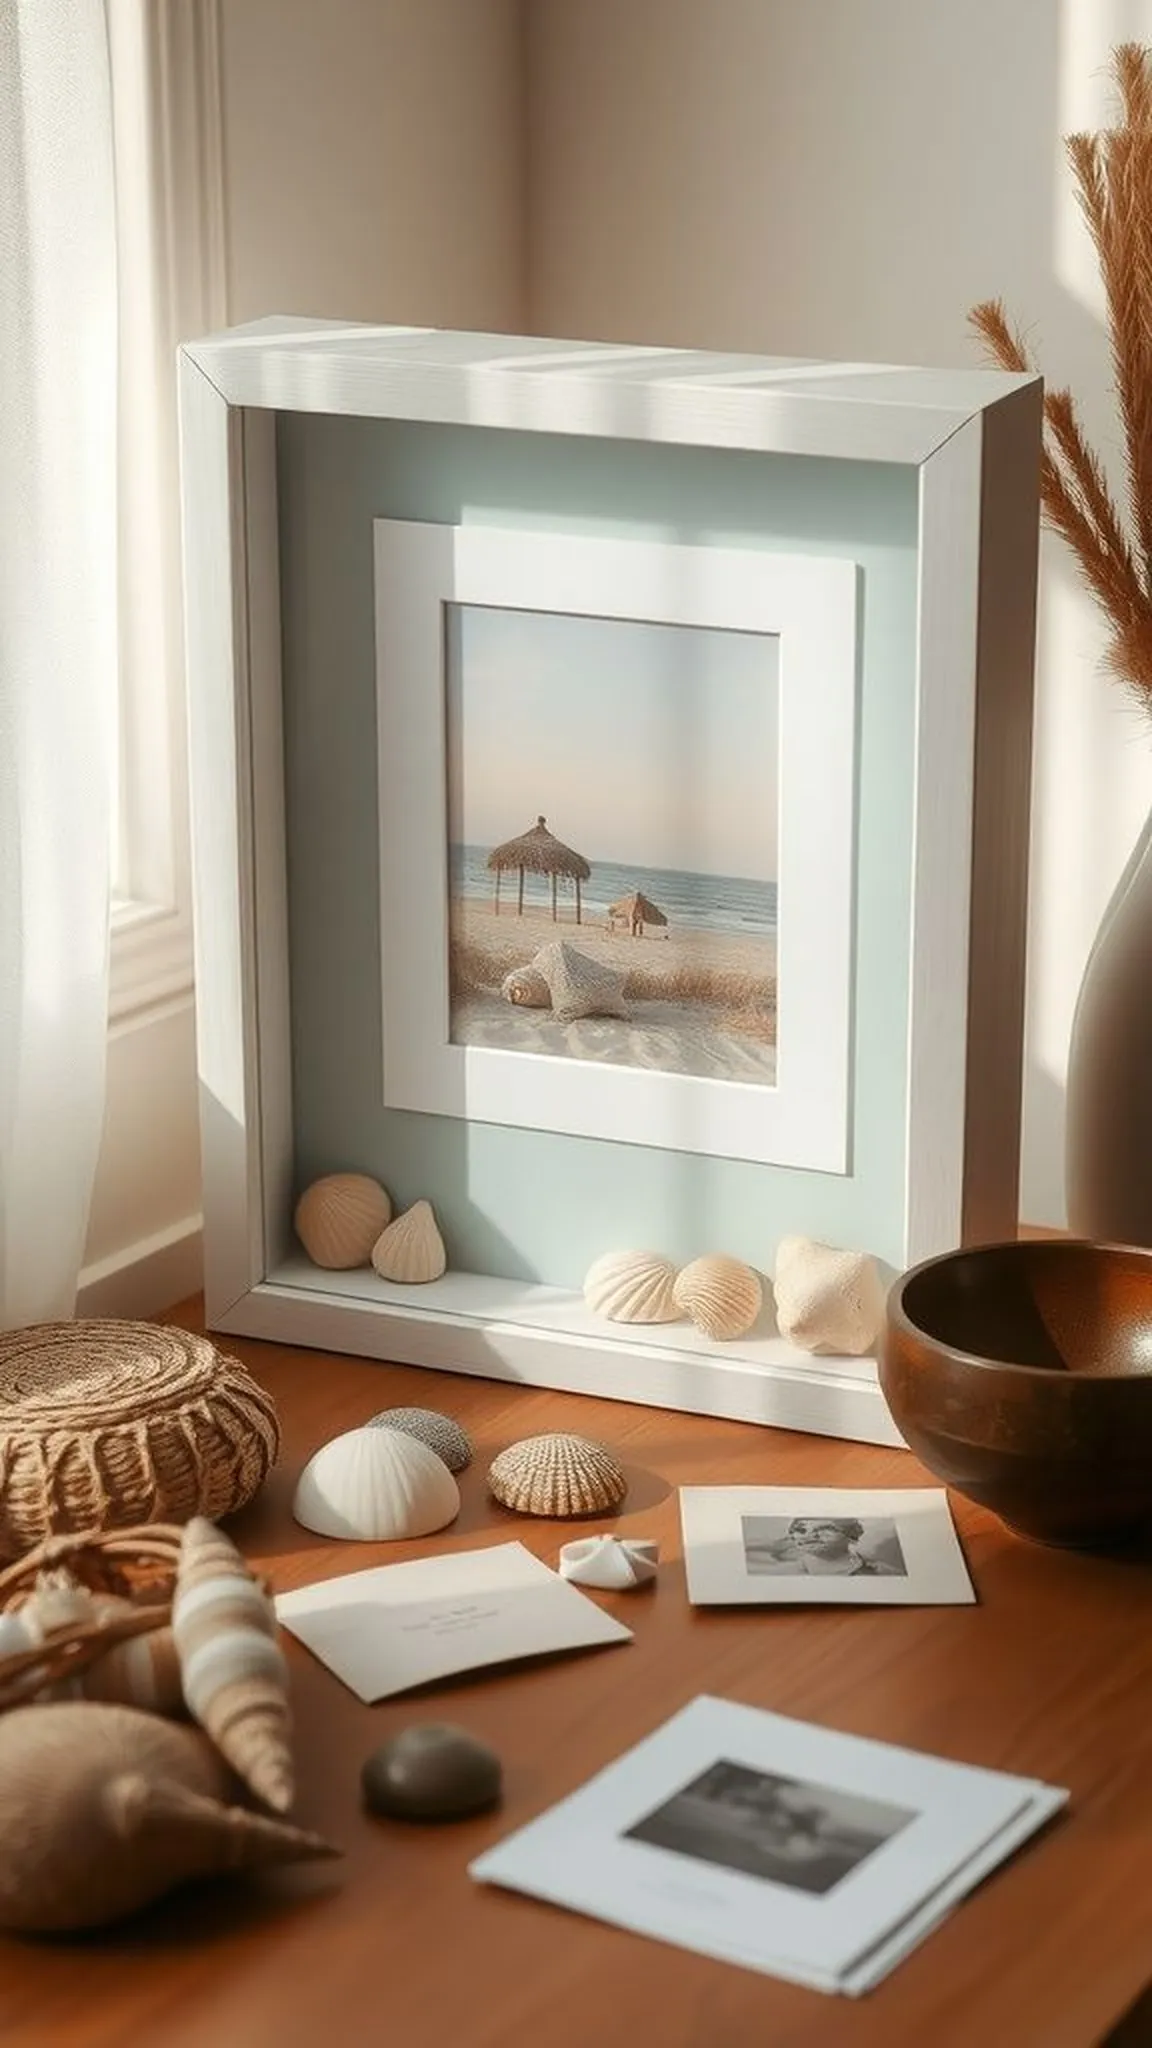
The shadow box felt like a small cabinet of seaside memories, shells arranged around ticket stubs, small notes, and a faded photo. Depth allowed layering so shells could sit above paper keepsakes without flattening them, and the gentle mix of textures read as collected over time. Light falling across the glass cast shell shadows into the backing, adding another layer of mood.
The piece made a single beach day feel archival, a compact display that invited lingering over small details rather than overwhelming a space.
📋 How to Make This ▶
- Lay out keepsakes inside the shadow box to find a pleasing composition before securing anything.
- Attach shells and paper items with archival-safe adhesives or mounting corners to avoid damage.
- Close the frame and hang or stand it in a spot with indirect light to preserve colors.
⚠️ Avoid: A frequent oversight is overcrowding the box with too many items, which can make each piece harder to appreciate.
🔄 Try Also: Create themed boxes like ‘first beach day’ or ‘summer vacation’, add small dried flowers, or mix in tiny map fragments.
🛒 Products & Materials ▶
Items Used
- wooden shadow box frame
- assorted small seashells
- archival mounting corners
📌 “Shadow box of shells and keepsakes for lasting seaside memories.”
• • •
Beachy table centerpiece with shells, sand, and candles
⏱️ 30-45 min · 🟢 Beginner
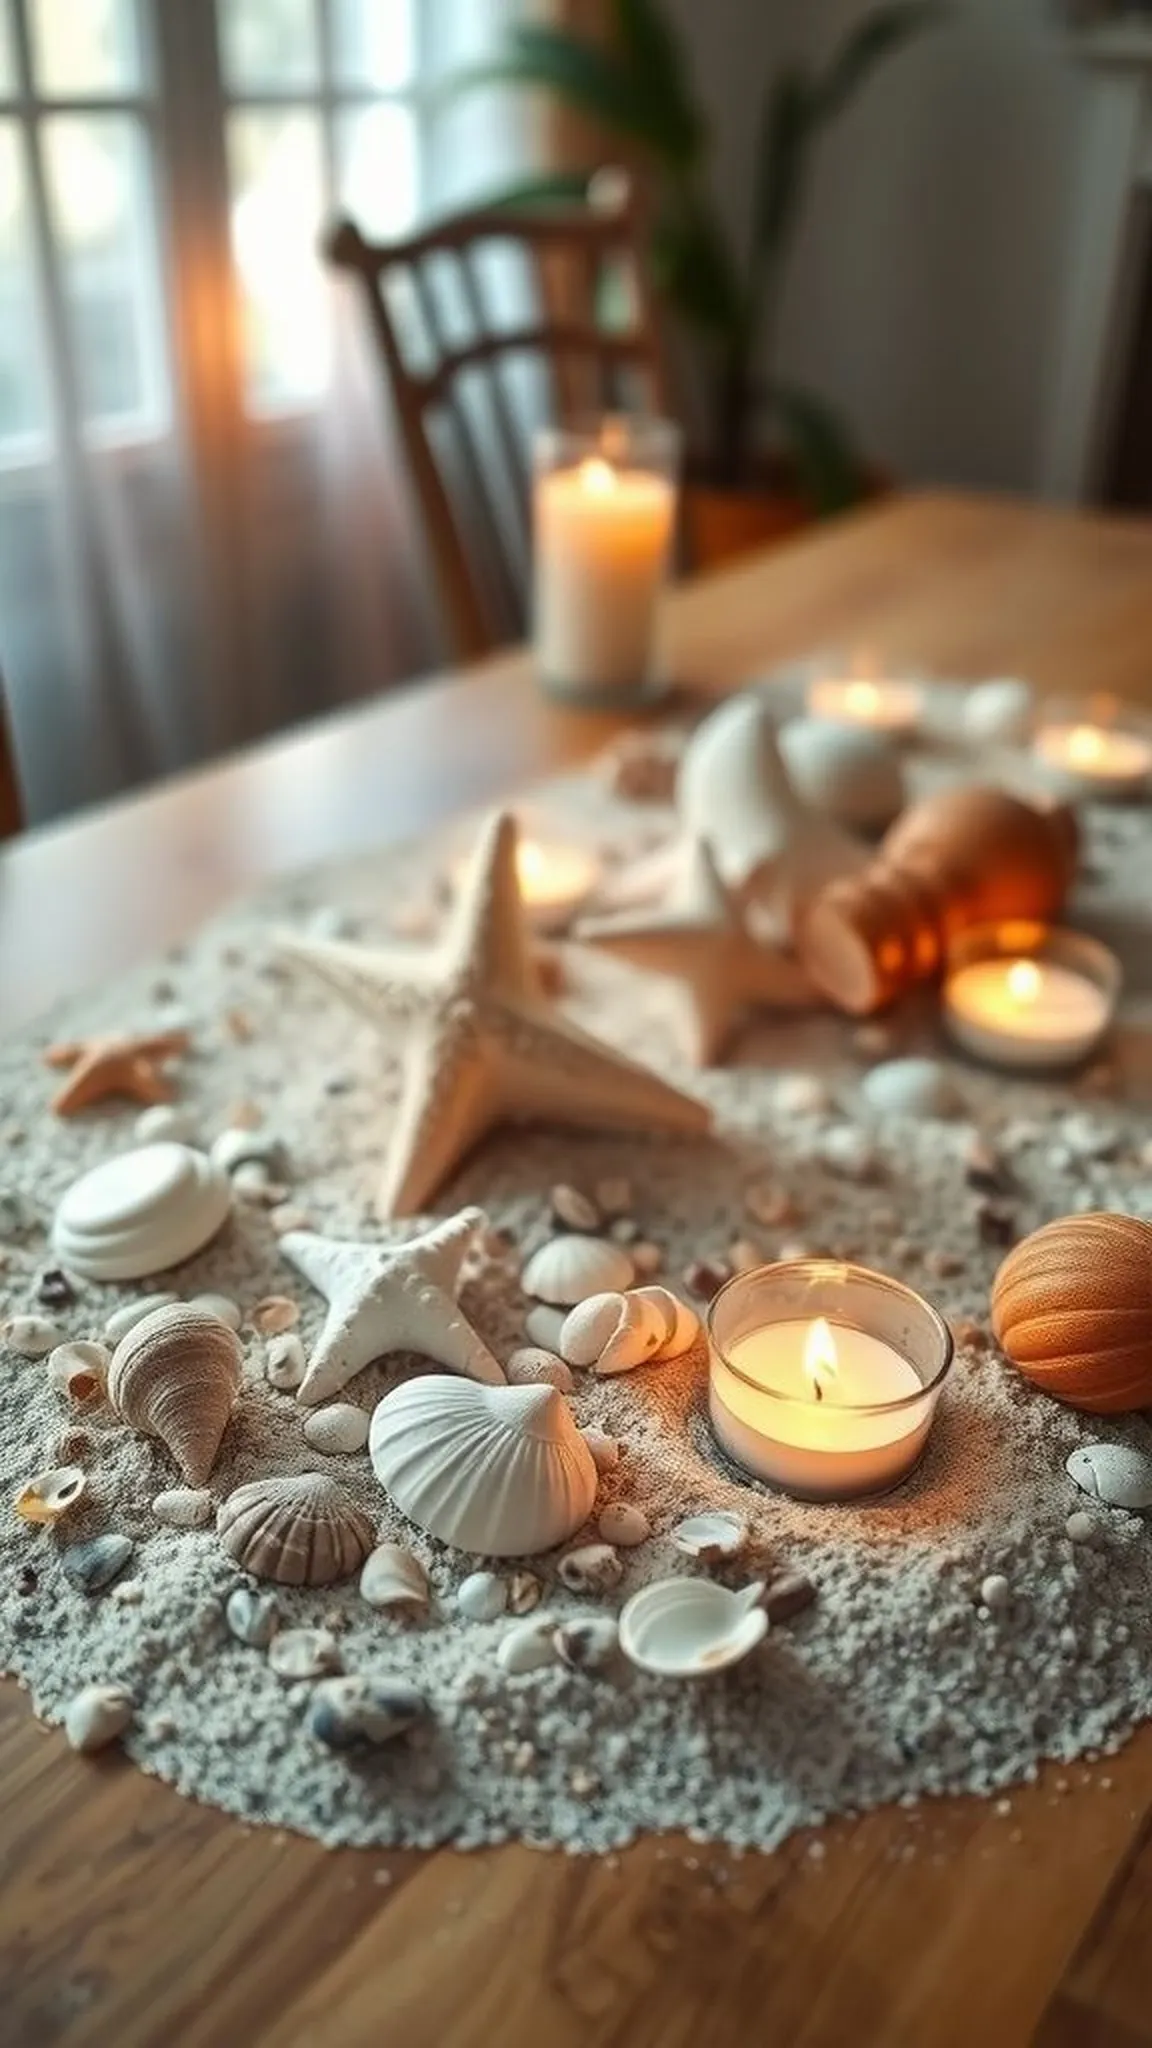
The centerpiece brought a low-key coastal vibe to the table, shallow bowls of sand cradling clusters of shells and tea lights. Warm candlelight played on shell curves and created tiny, flickering reflections, while the sand provided a natural stage that kept everything in place. The color story stayed muted with pale creams and soft blues, and the arrangement felt like a gentle invitation to linger at the table.
Texture and simplicity made the centerpiece feel intentional without demanding attention from other decor.
📋 How to Make This ▶
- Fill shallow ceramic bowls or trays with a thin layer of clean craft sand.
- Nestle an arrangement of shells, driftwood bits, and tea lights into the sand.
- Light candles only when supervised and place the centerpiece away from drafts.
⚠️ Avoid: A frequent fault is setting candles directly on sand without protection, which can shift and cause instability.
🔄 Try Also: Swap tea lights for battery candles for longer displays, add sprigs of dried sea grass, or create three different-height arrangements for a layered look.
🛒 Products & Materials ▶
Items Used
- decorative craft sand
- assorted decorative shells
- small tea light candles
- shallow ceramic bowl or tray
📌 “Simple sand-and-shell centerpiece for charming coastal tables.”
• • •
Nautical bottle display filled with miniature shells
⏱️ 20-30 min · 🟢 Beginner
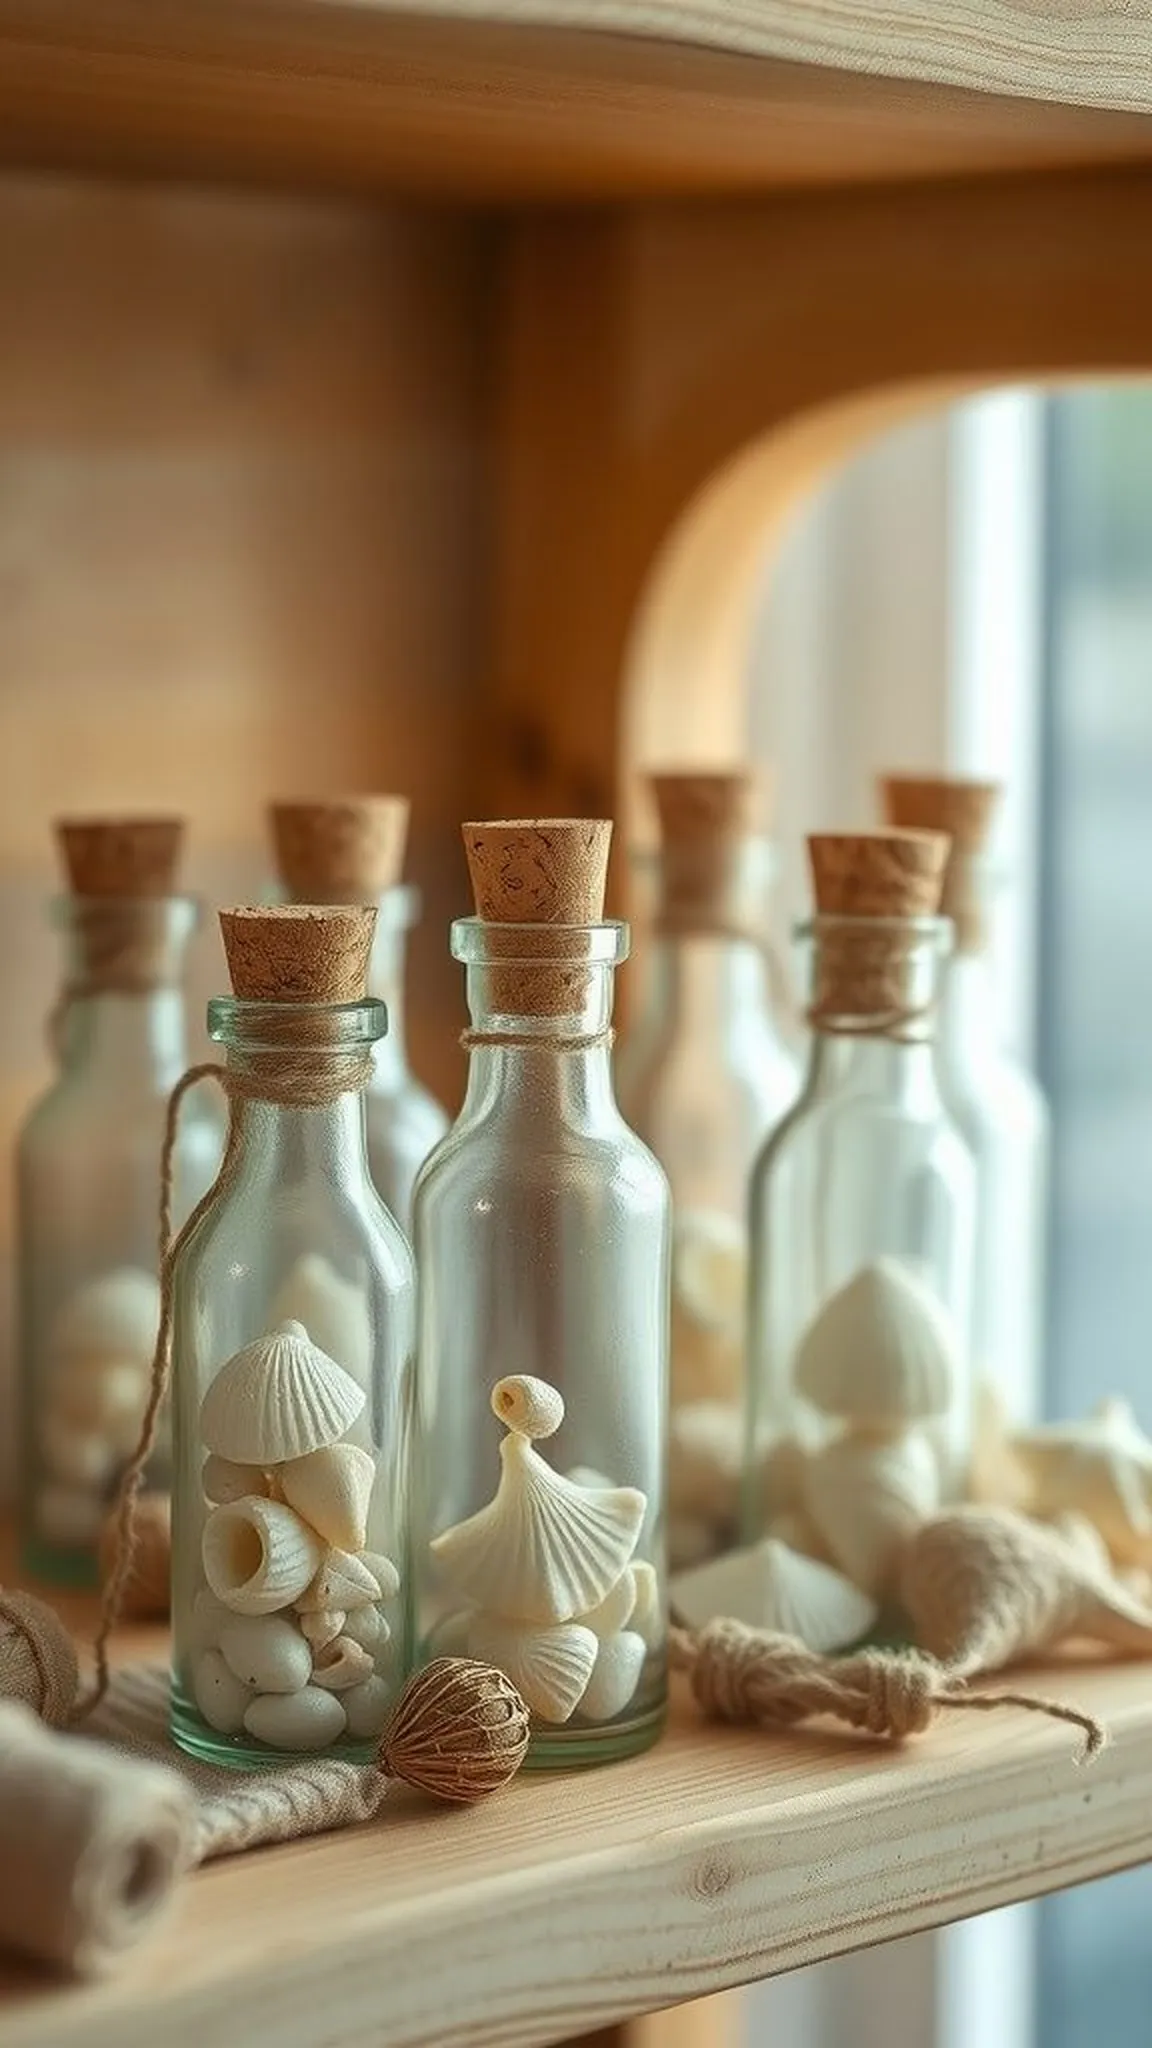
The bottle display had a quiet, almost archival air, tiny shells layered like sediment inside clear glass. Labels and twine around the neck added a nostalgic note while the glass magnified the shells into charming miniature landscapes. The arrangement felt tidy and contemplative on a shelf, small enough to tuck into a vignette with books or a lamp.
Light passing through created little refracted highlights and the whole object read like a small, bottled shore that could be moved around the room with ease.
📋 How to Make This ▶
- Clean and dry small glass bottles thoroughly and choose an assortment of petite shells.
- Layer shells gently inside the bottles, alternating shapes and colors for visual interest.
- Seal bottles with corks or caps and add twine or a small label for a finishing touch.
⚠️ Avoid: A frequent issue is overfilling bottles with oversized shells that create uneven surfaces and make sealing difficult.
🔄 Try Also: Add tiny sand layers between shells for a stratified look, include small notes inside for gifts, or group bottles of different heights.
🛒 Products & Materials ▶
Items Used
- small clear glass bottles with corks
- tiny mixed seashells
- natural jute twine
📌 “Miniature shell landscapes captured inside clear glass bottles.”
• • •
Mini glass terrariums with tiny shell accents
⏱️ 45 min · 🟠 Intermediate

The tiny terrariums felt like pocket worlds, shells peeking through moss and sand beneath dome glass. Living elements added subtle movement while shells anchored each scene with coastal personality. Natural light lent a small luminosity to pearly surfaces and created a layered sense of depth that was calming to study.
The terrariums fit neatly on shelves and felt curated rather than fussy, offering a small, living touch of the shore that complemented indoor greenery and kept the room feeling tethered to the outdoors.
📋 How to Make This ▶
- Choose a small glass terrarium and add a base layer of pebbles for drainage.
- Add a thin layer of soil or sand and nestle small succulents or air plants into place.
- Position tiny shells among the plants and place the terrarium in bright, indirect light.
⚠️ Avoid: A frequent mistake is creating overly humid conditions for succulents; closed terrariums suit air plants better unless ventilation is provided.
🔄 Try Also: Make an open-air bowl for succulents, include tiny driftwood pieces for scale, or create a mini beach scene with sand layers and no plants.
🛒 Products & Materials ▶
📌 “Tiny glass terrariums with shells for living coastal accents.”
