
As an Amazon Associate I earn from qualifying purchases.
Summer Music Festival Hairstyles are all about sun-ready texture, bold braids, and playful accessories that last through dancing. Summer Music Festival Hairstyles mix boho waves, glitter roots, space buns, braided crowns, and clip-in color for a festival-ready finish. Summer Music Festival Hairstyles pair bandanas, flower crowns, scrunchies, and metallic rings so music looks pop in photos.
Try Summer Music Festival Hairstyles with glitter or braids for high-impact vibes. Summer Music Festival Hairstyles work on short, medium, or long hair for carefree summer events.
Boho Flower Crown With Loose Beachy Waves
⏱️ 20 min · 🟢 Beginner
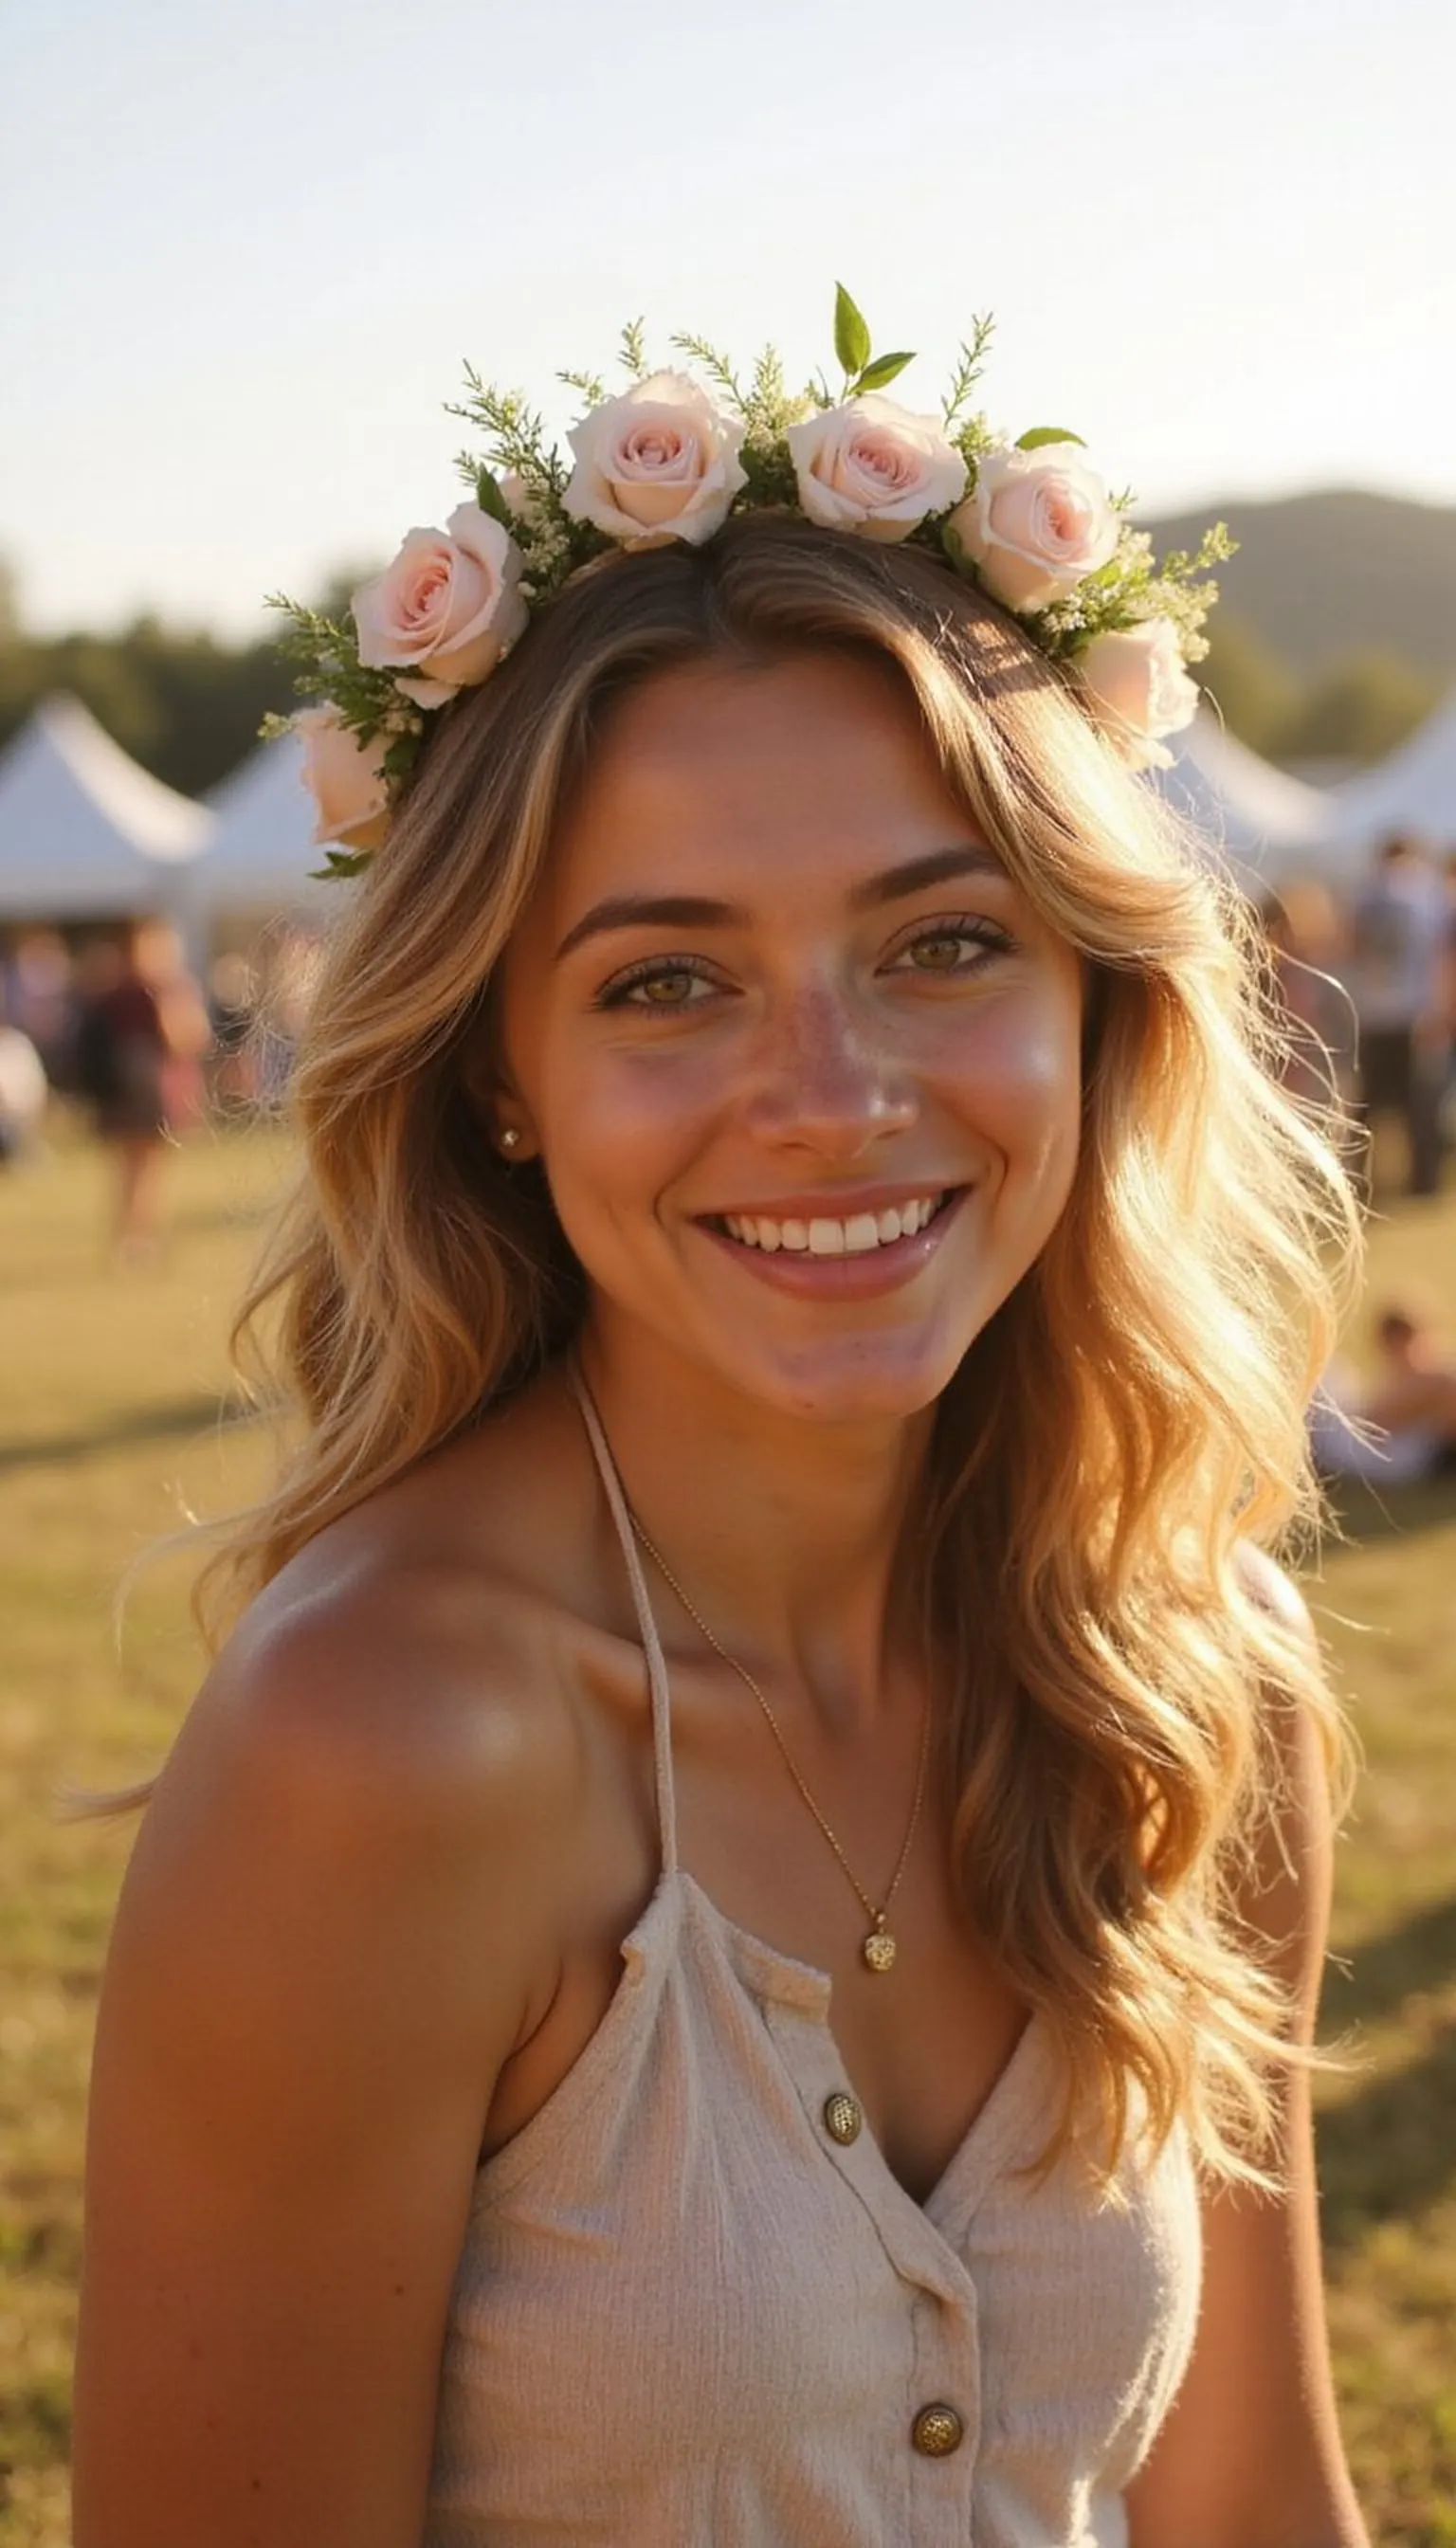
This relaxed festival look pairs loose, beachy waves with a delicate flower crown for instant boho charm. Textured waves give movement while the crown sits above the forehead, framing the face and adding a whimsical touch perfect for daytime sets. Finished with a touch of shine spray and soft teasing at the roots, this style feels effortless but photo-ready. It works on natural waves or hair that’s been lightly curled and finger-combed for that undone finish.
💇 Styling Tips ▶
Styling Tips
- Use a sea salt spray on damp hair for natural texture before air-drying.
- Pin the flower crown at a slight angle with bobby pins for stability.
- Finger-comb waves and mist with light-hold hairspray to keep pieces soft.
⚠️ Avoid: Putting the crown too far back makes the face look disconnected from the style. Avoid over-brushing waves into smoothness.
🔄 Try Also: Swap the flower crown for a jeweled headband or switch to tiny braided accents along the hairline for extra texture.
🛒 Products & Materials ▶
Items Used
- flower crown
- bobby pins
📌 “Effortless boho waves with a dreamy flower crown.”
• • •
Glitter Double Space Buns With Face Gems
⏱️ 25 min · 🟠 Intermediate

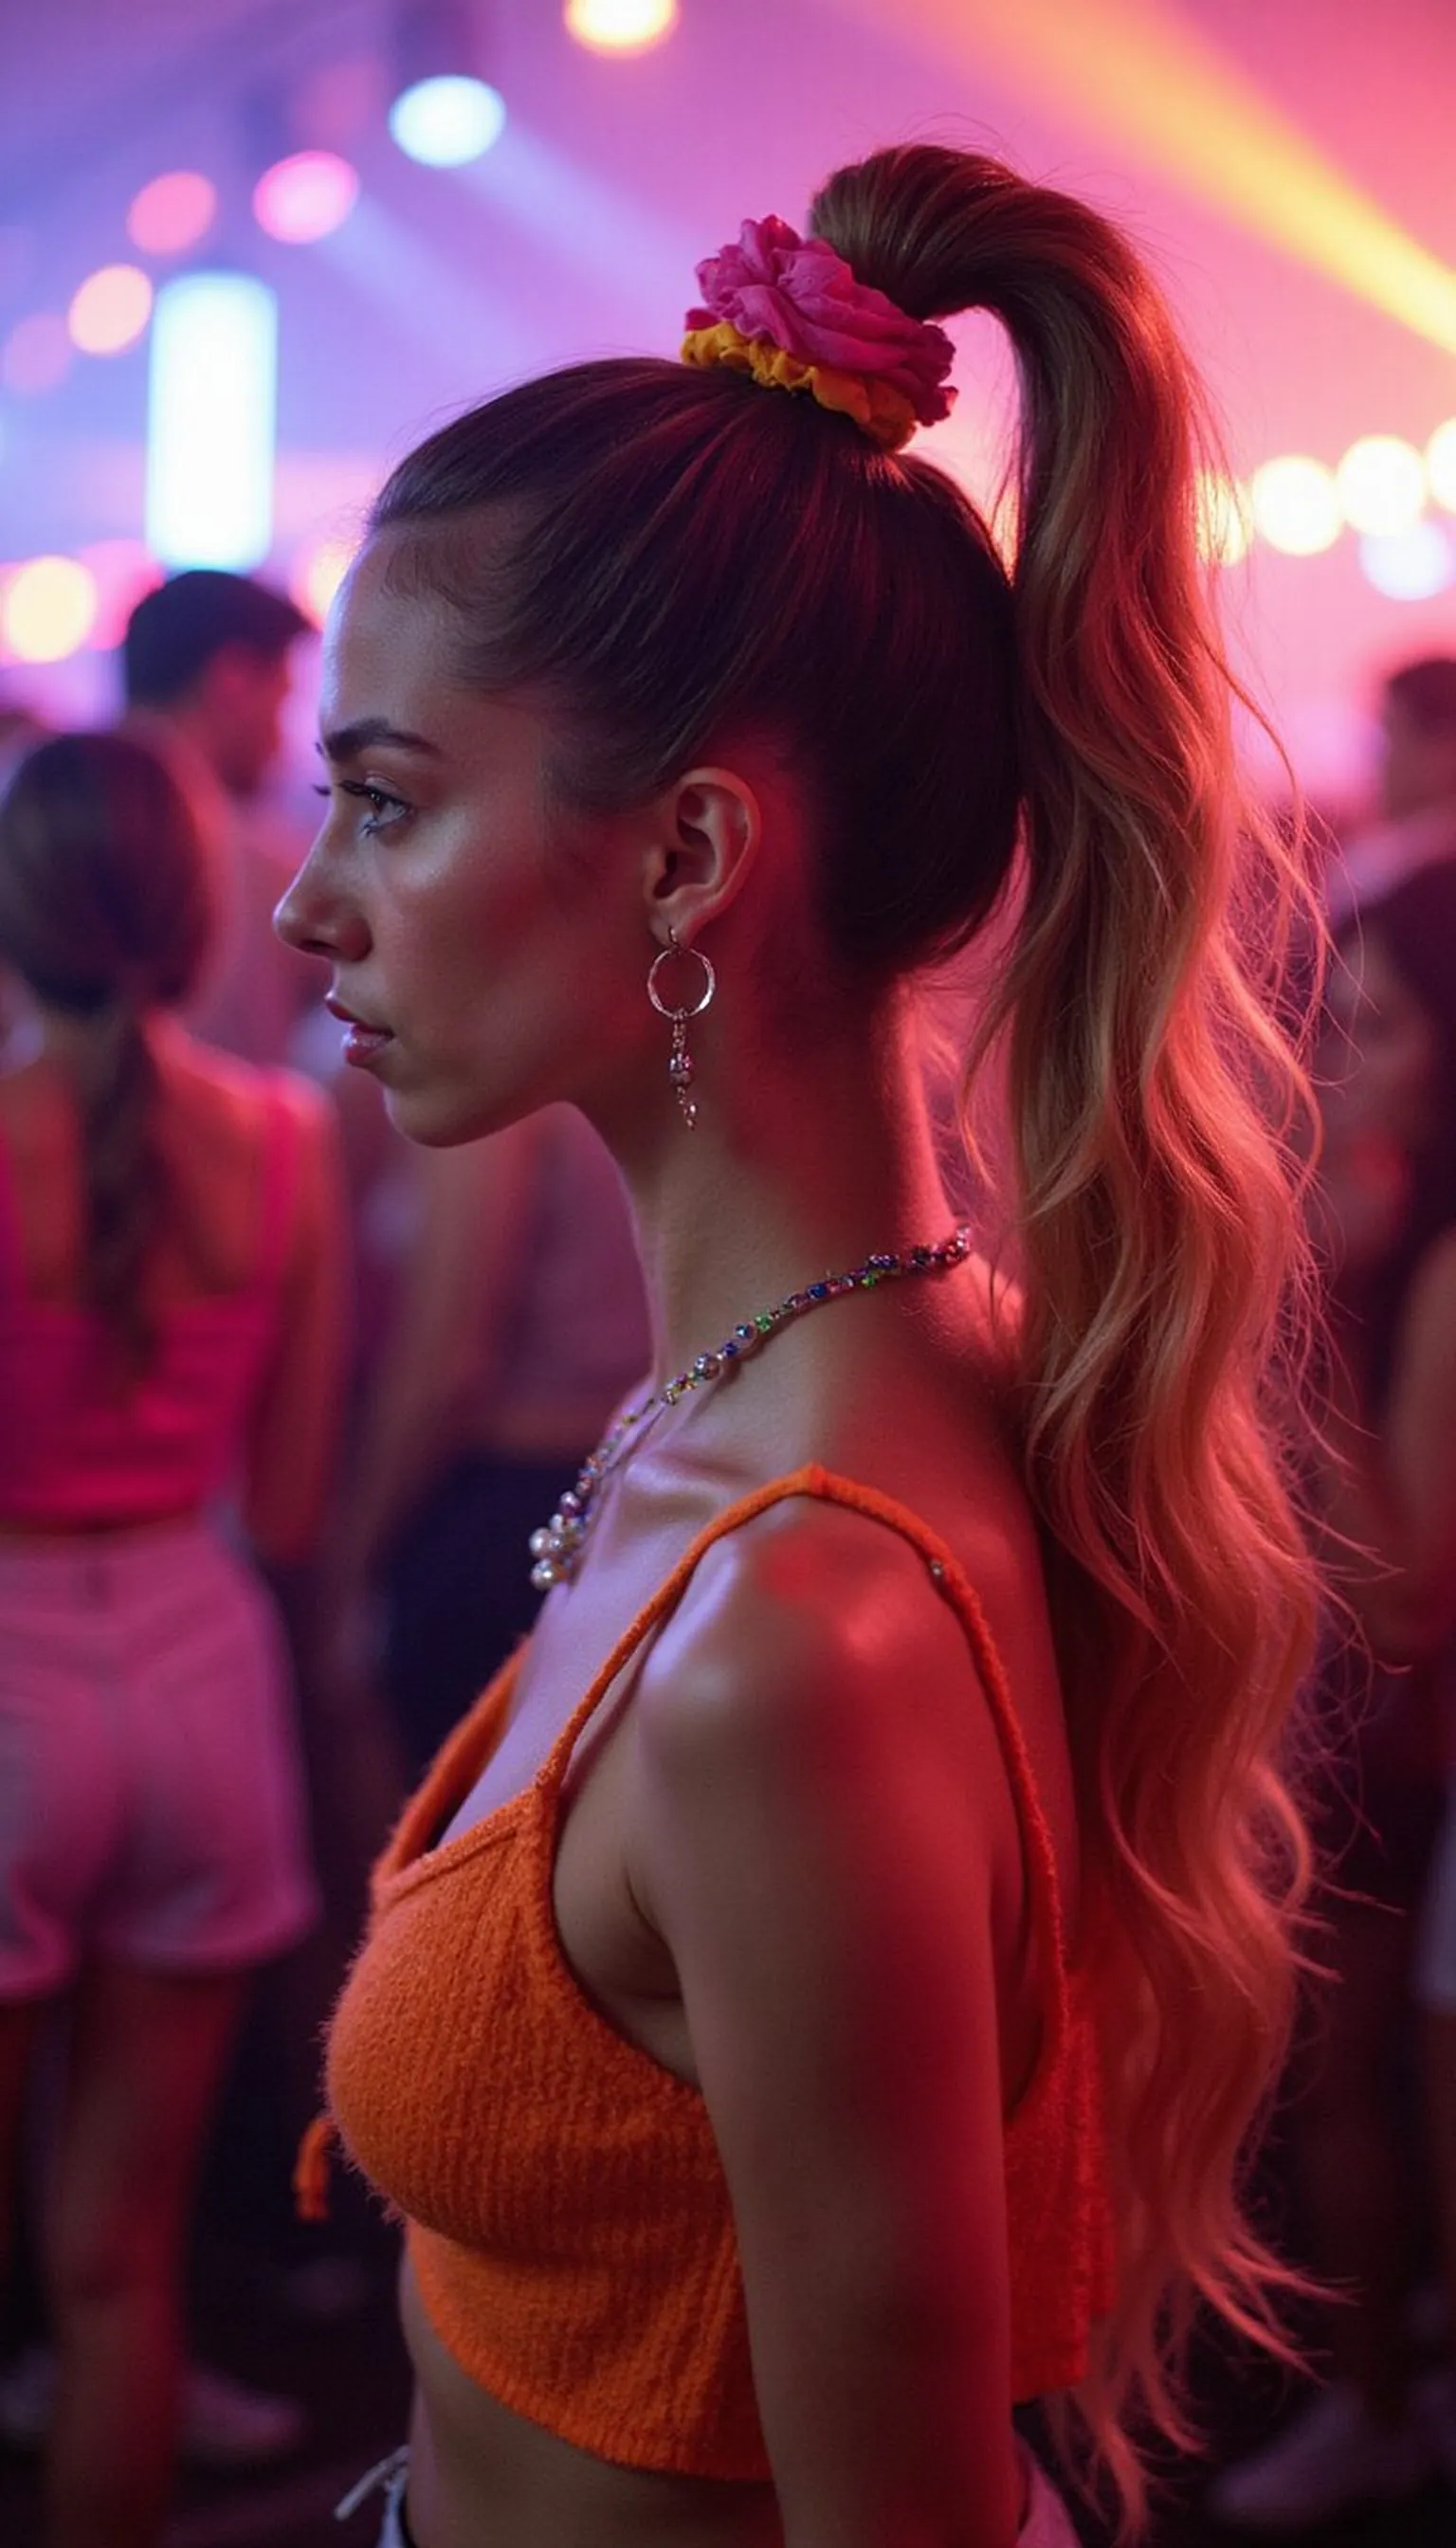
Two high space buns get a festival upgrade with chunky glitter roots and adhesive face gems. Prep hair with a smoothing serum, split into two sections, and twist into tight buns that hold shape through crowds and movement. Glitter is applied around the part and hairline for dramatic sparkle, while face gems accentuate the cheekbones and brow. This playful look pops under lights and pairs well with bold makeup and statement earrings for an all-out festival vibe.
💇 Styling Tips ▶
Styling Tips
- Use gel to slick hair into sleek buns that resist frizz in heat.
- Apply cosmetic glitter with a sticky base for clean adhesion to the roots.
- Place face gems using tweezers for precise placement near the temples and cheeks.
⚠️ Avoid: Overloading glitter causes fallout and mess. Apply in thin layers and tap off excess to avoid spreading everywhere.
🔄 Try Also: Turn buns into low knots with glittered parts, or swap face gems for metallic temporary tattoos around the hairline.
🛒 Products & Materials ▶
Items Used
- cosmetic glitter
- face gems
📌 “Dual space buns with glittered roots and sparkling face gems.”
• • •
Crown Braid Pinned With Tiny Metallic Rings
⏱️ 35 min · 🔴 Advanced
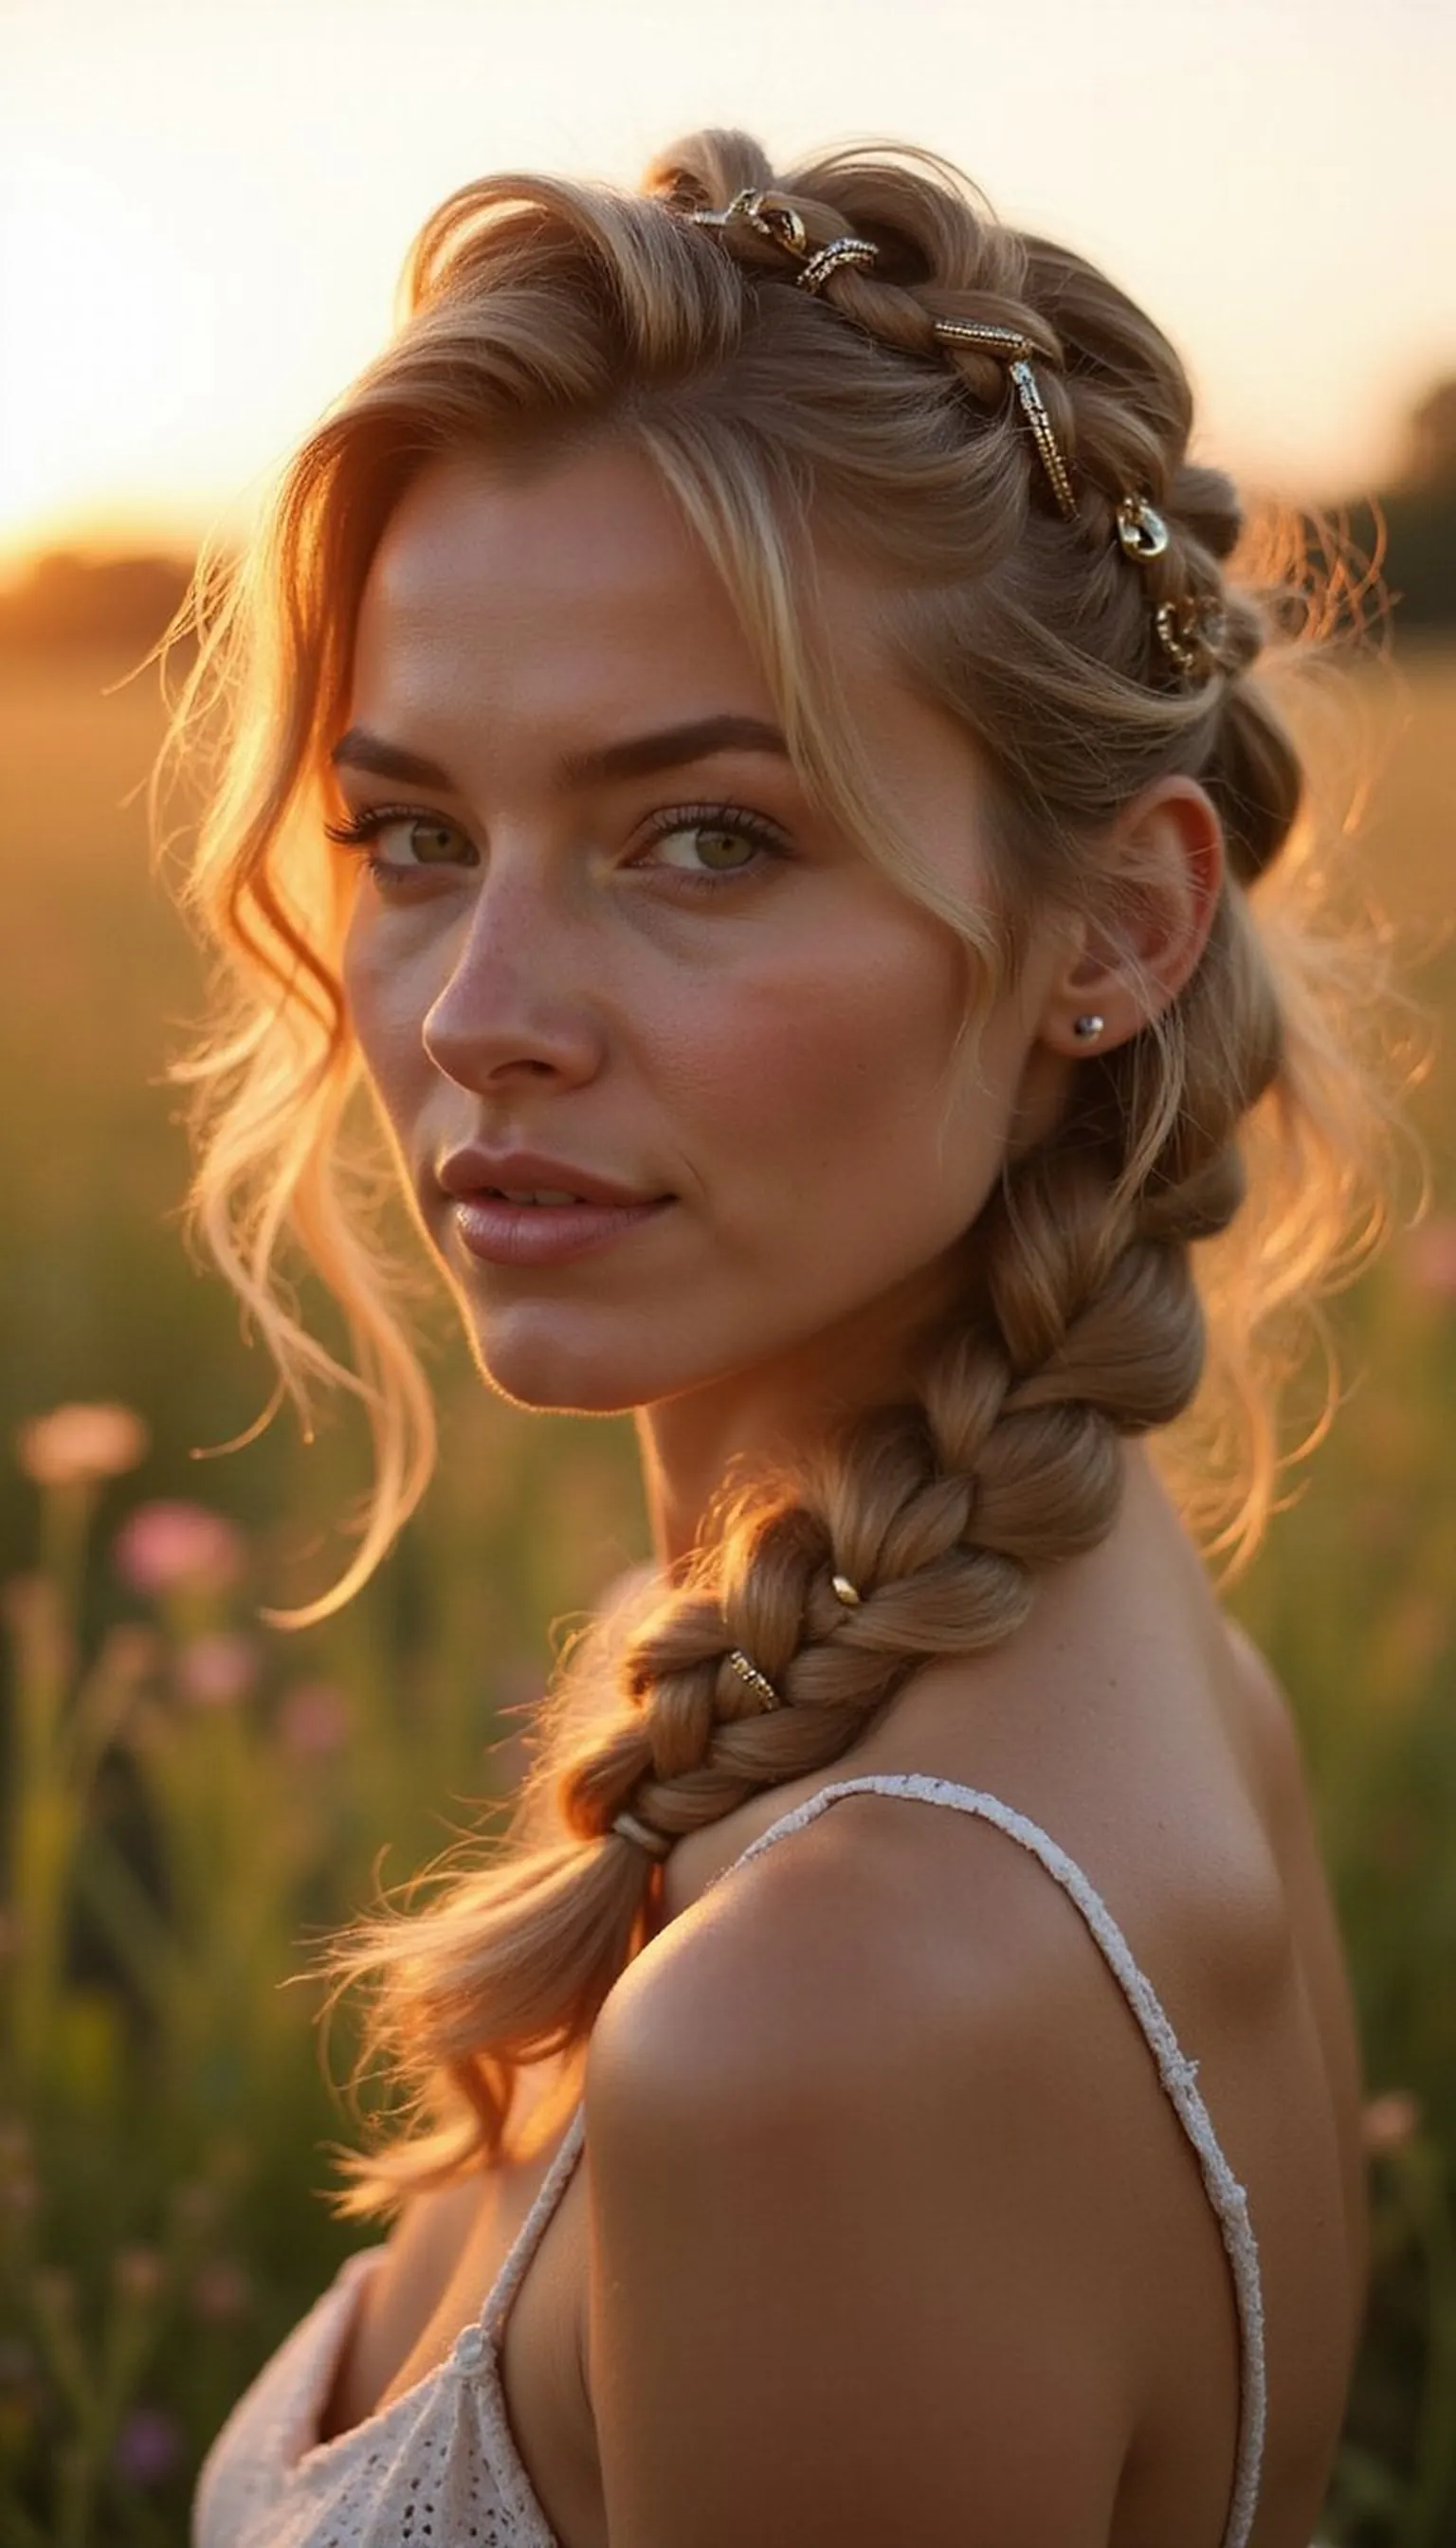
This regal crown braid weaves around the head and is dotted with tiny metallic hair rings for an edgy festival twist. Start with detangled hair, braid along the hairline into a Dutch or French crown, then slip small rings into selected braid sections for shimmer and movement. The result reads both romantic and bold during sunset sets, and keeps hair secure while dancing. Finish with a medium-hold spray to maintain the braid’s structure without stiffness.
💇 Styling Tips ▶
Styling Tips
- Use a lightweight leave-in to smooth flyaways before braiding for clean strands.
- Open small metallic rings with pliers and thread them onto braid sections evenly.
- Tuck braid ends under and pin invisibly to create a seamless crown.
⚠️ Avoid: Using too many rings creates a cluttered look and can pull on the braid. Space rings evenly for balance.
🔄 Try Also: Replace metallic rings with tiny shell charms or colorful thread wraps for a softer or boho feel.
🛒 Products & Materials ▶
Items Used
- metallic hair rings
- hair pins
📌 “Regal crown braid accented with tiny metallic hair rings.”
• • •
Get 75+ ad-free, high-resolution printable tutorials for salon-quality results every single morning.
One printable guide · $19.99 · yours forever
Fishtail Side Braid With Shell Hair Clips
⏱️ 30 min · 🟠 Intermediate
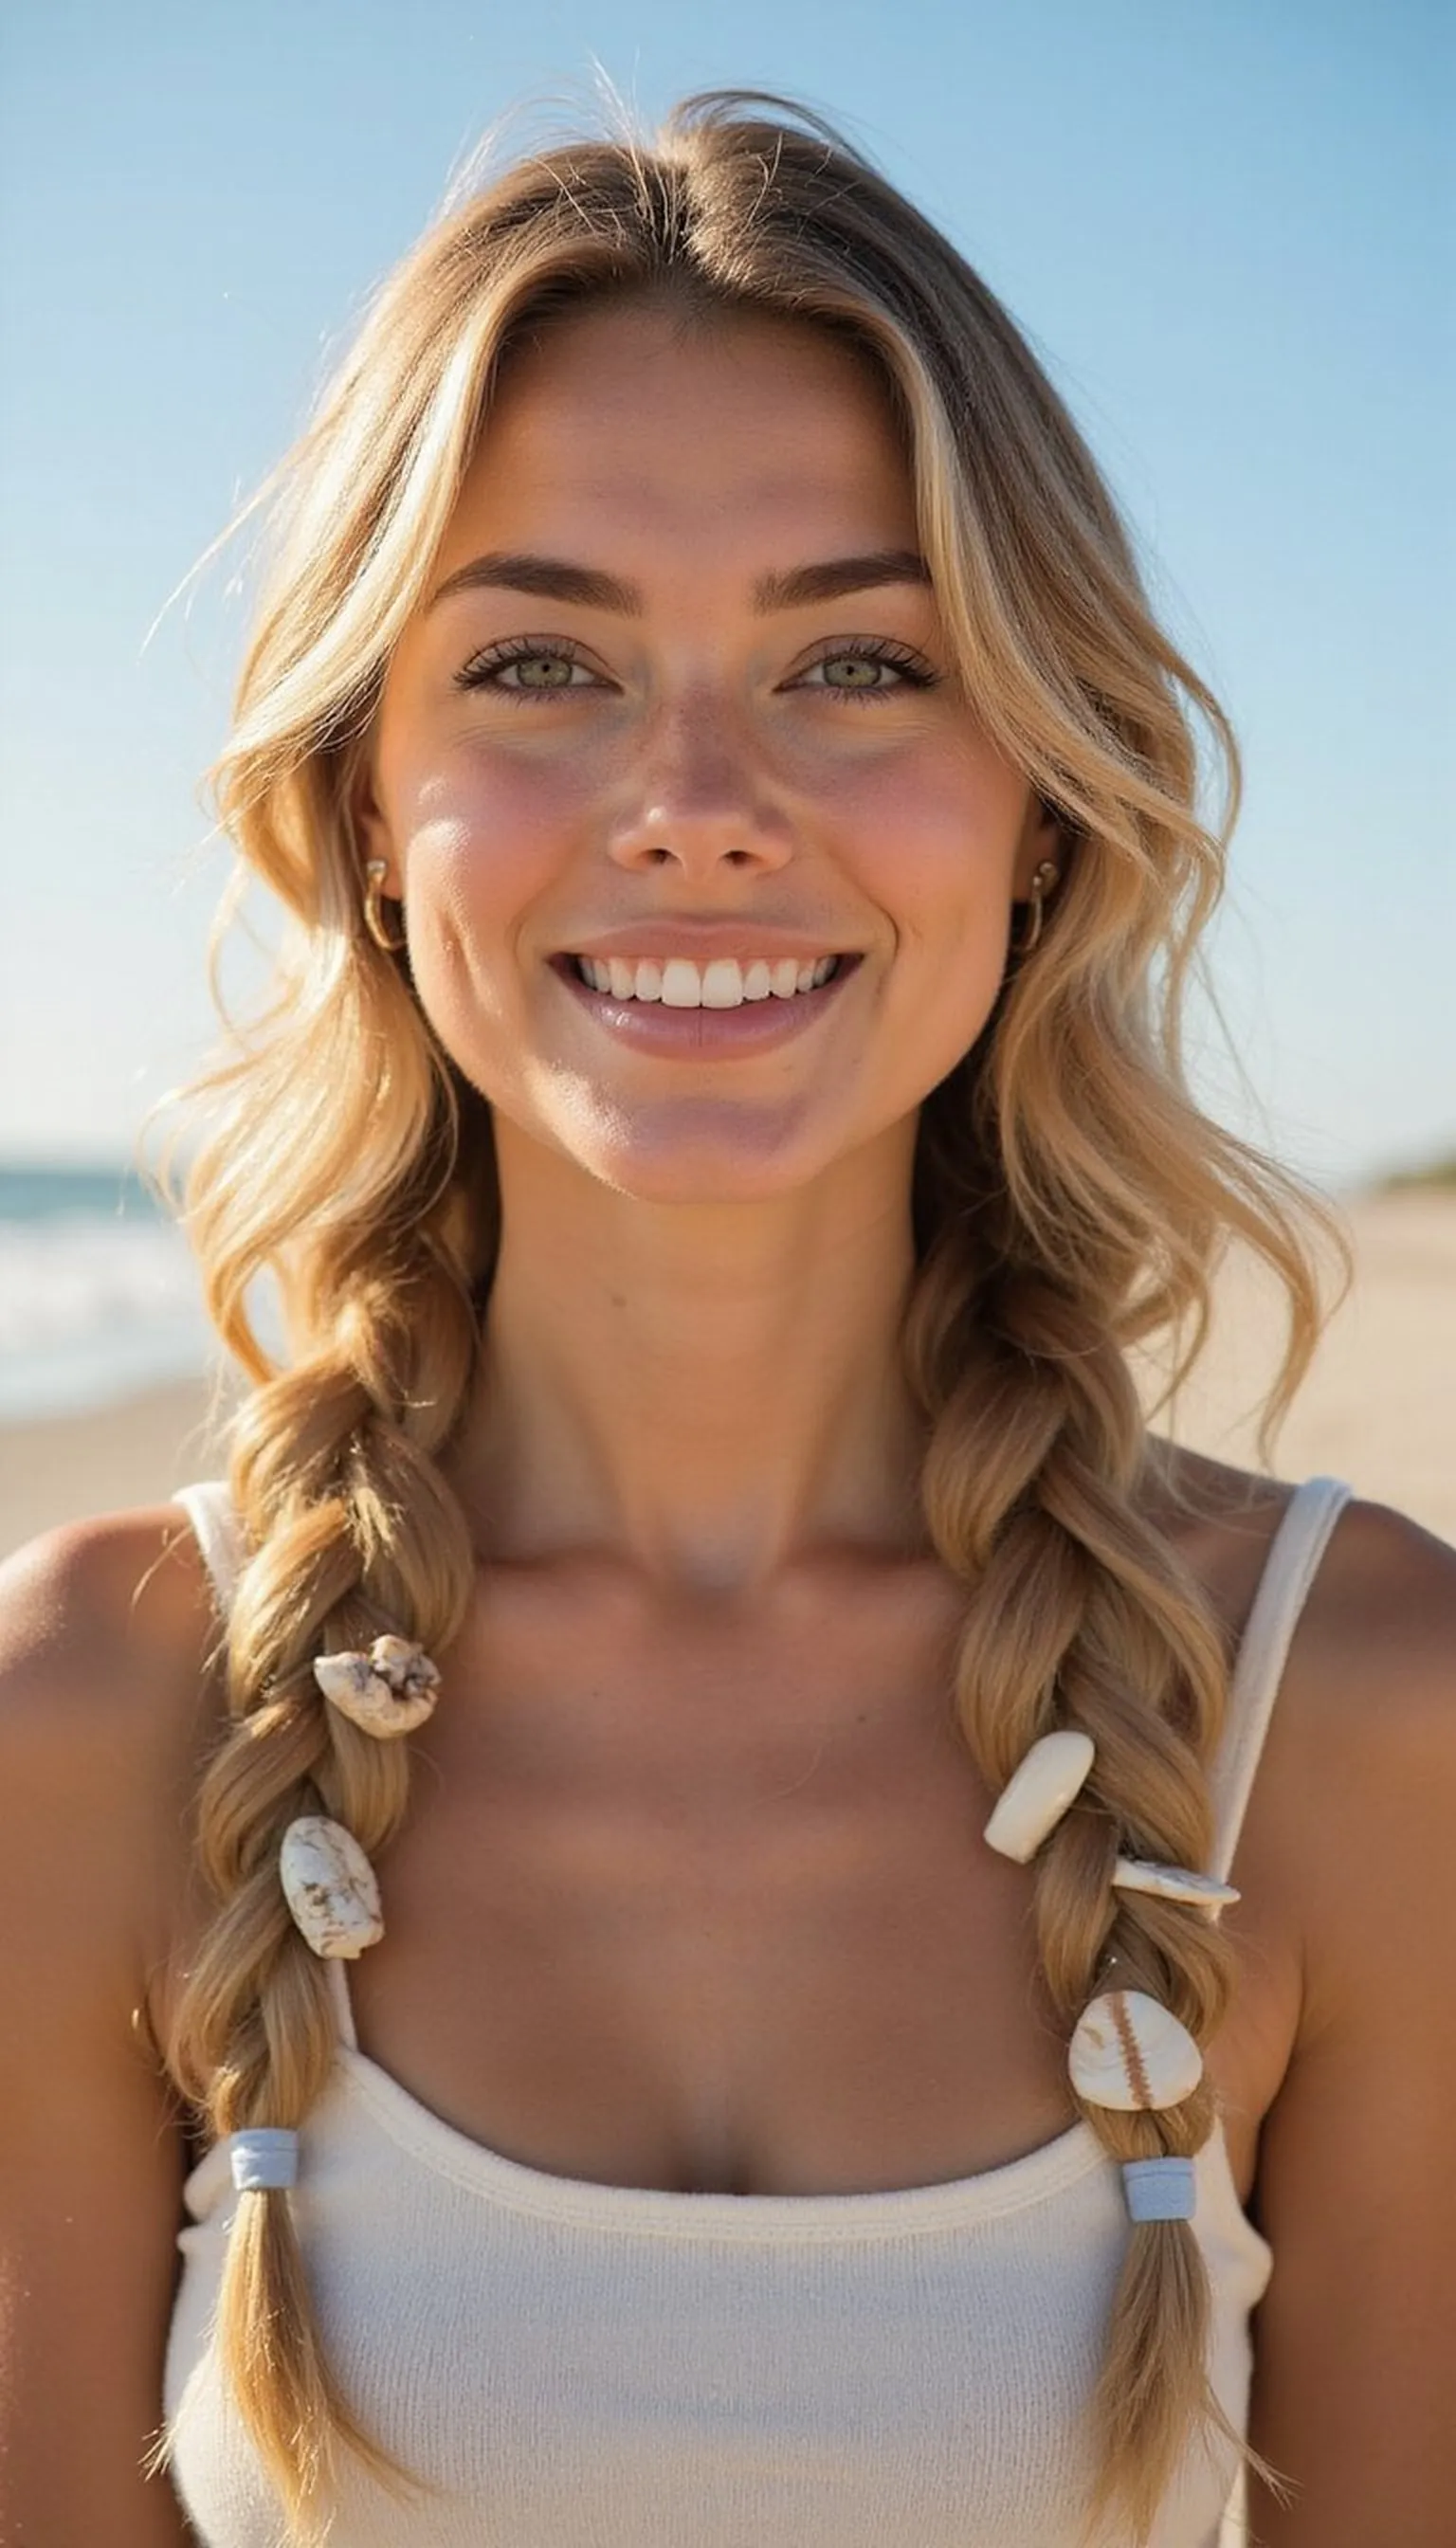
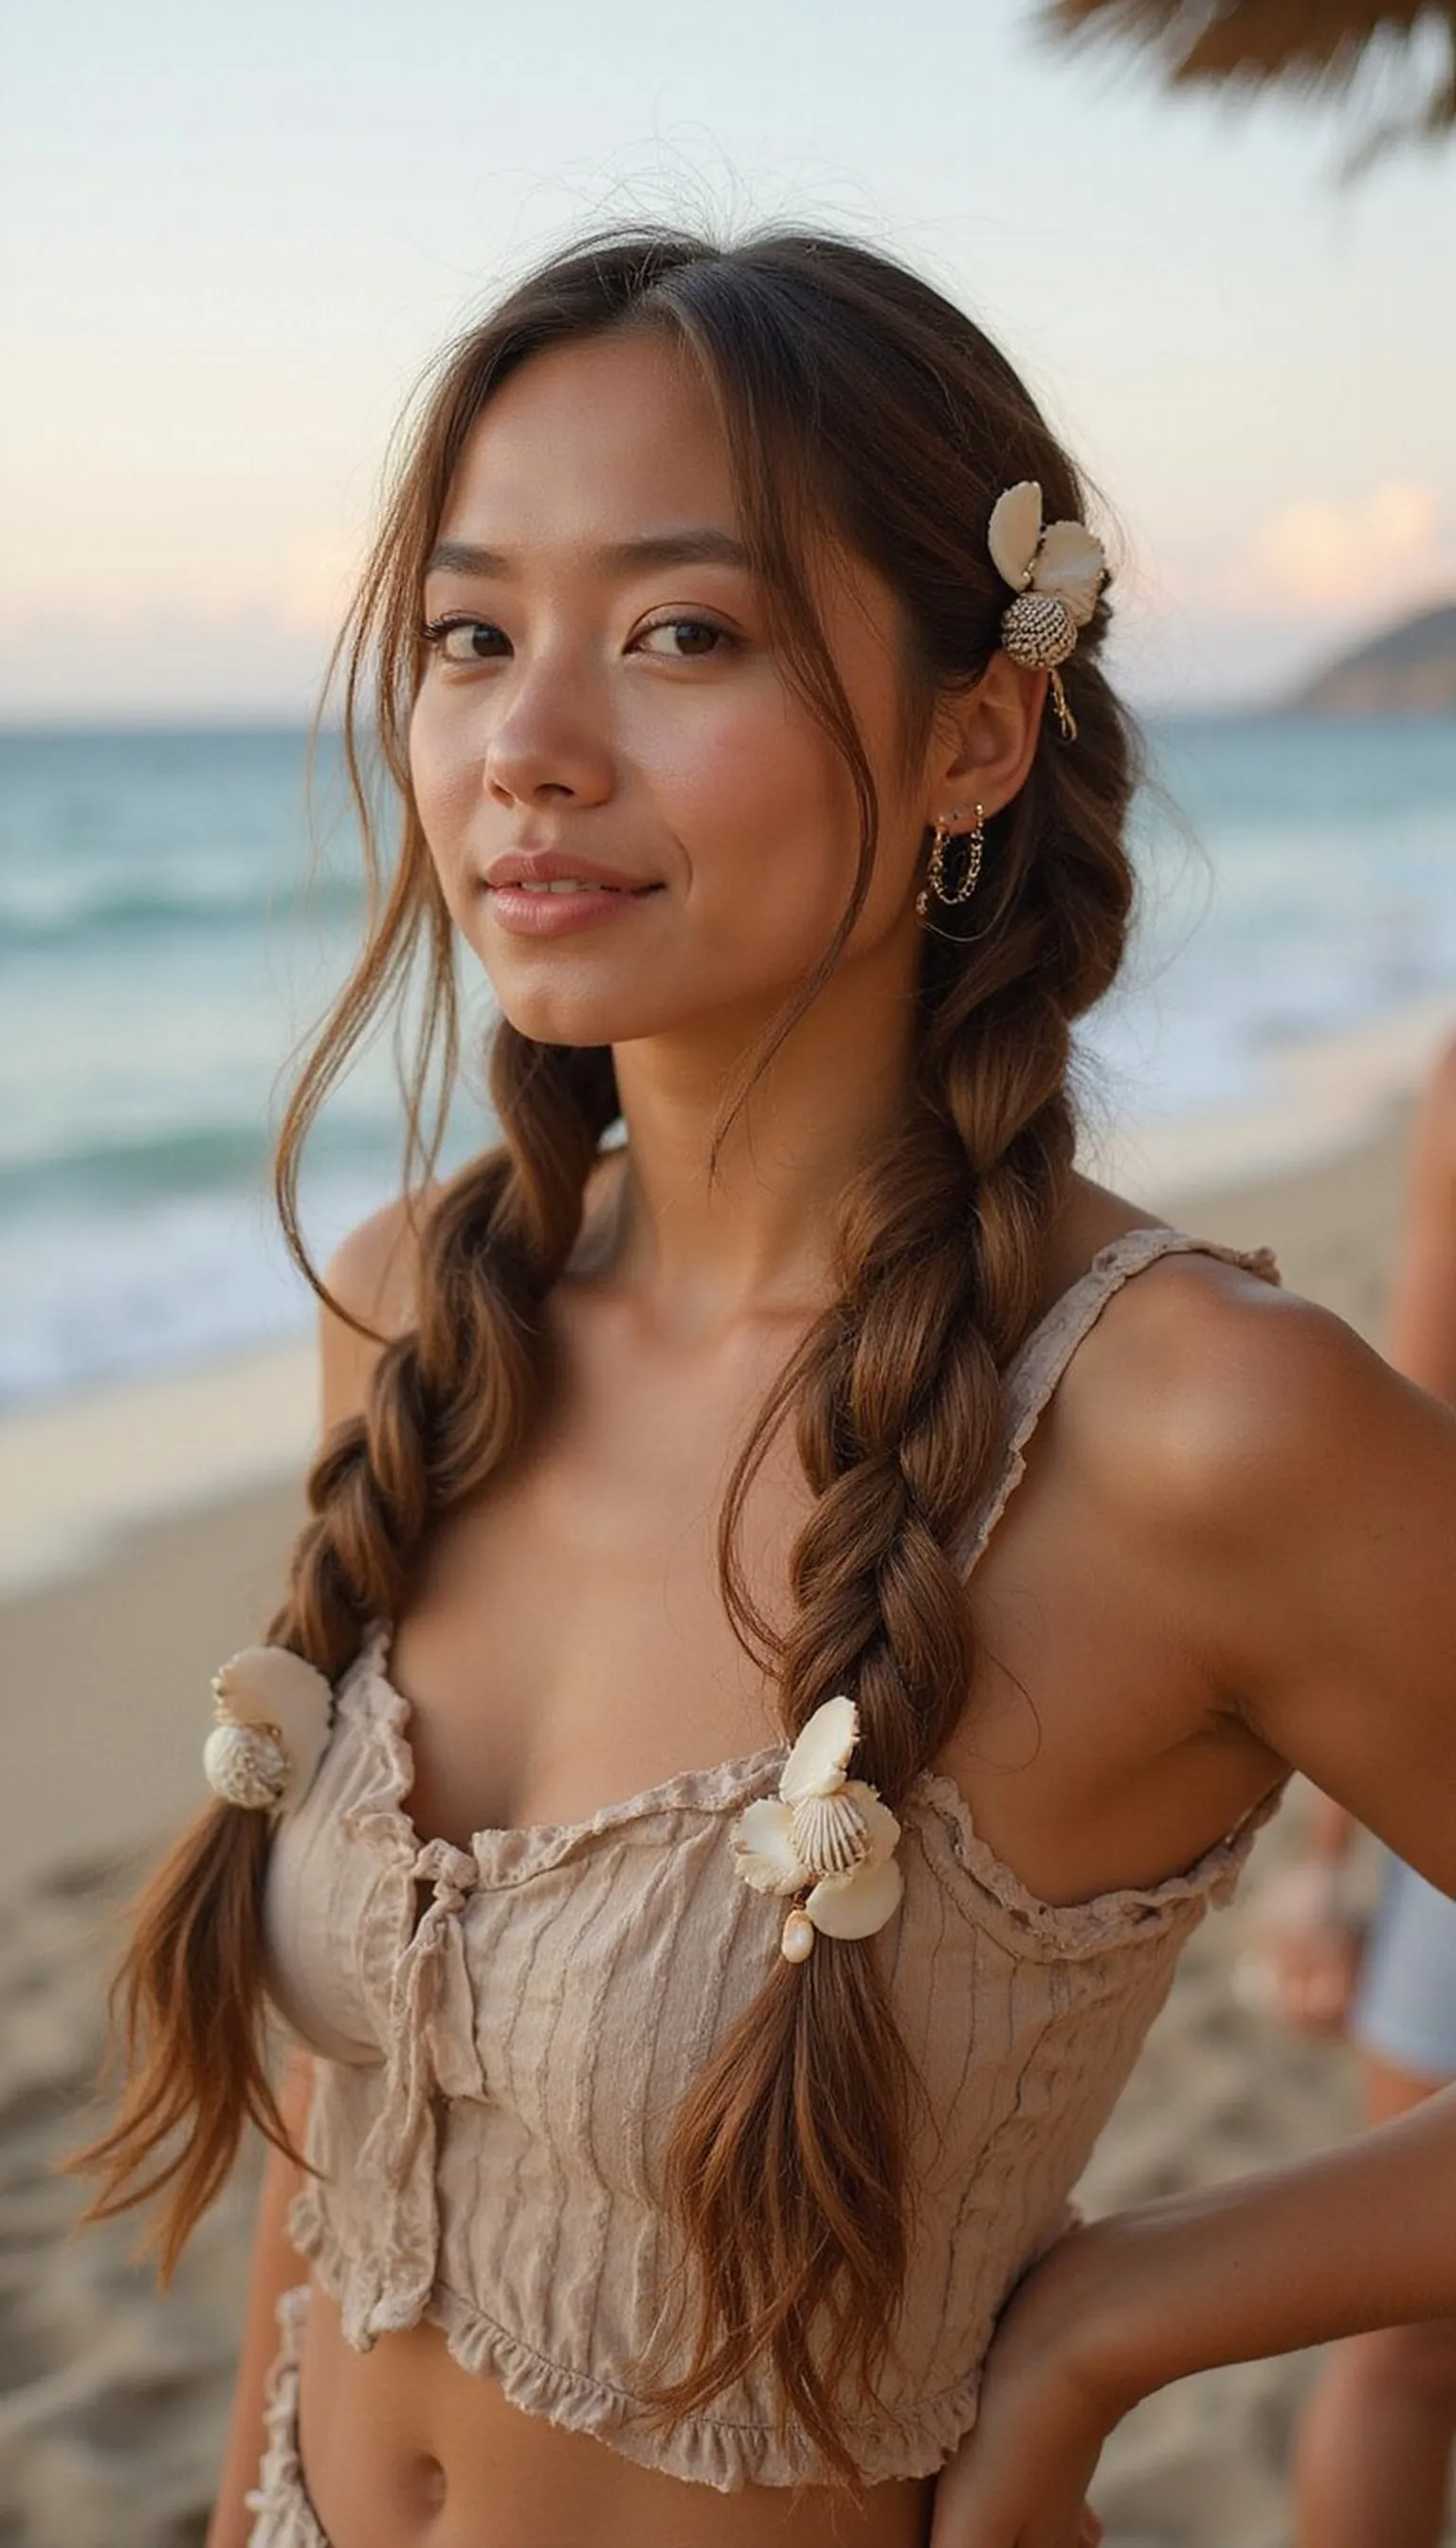
A long fishtail side braid wrapped with tiny shell hair clips makes for a beachy, festival-ready statement. Start by sweeping hair to one side and braiding tightly for defined fishtail texture. Place the shell clips intermittently along the length to catch the light and add coastal charm. This look works especially well for seaside festivals or summer stages, and it keeps hair controlled while allowing playful accessories to shine.
💇 Styling Tips ▶
Styling Tips
- Prep hair with smoothing cream to prevent flyaways during the braid.
- Use small shell clips that clamp securely so they don’t slide out during movement.
- Tie the braid with a clear elastic and hide it with a wrapped strand for a polished finish.
⚠️ Avoid: Braiding too loosely can make the clips slip; keep the fishtail tight enough so clips stay put.
🔄 Try Also: Swap shell clips for pearl pins, or undo the braid slightly for a softer, boho effect with the same accessories.
🛒 Products & Materials ▶
Items Used
- shell hair clips
- clear elastic hair ties
📌 “Coastal fishtail braid accented with delicate shell hair clips.”
• • •
Wet-Look Slicked Back Hair With Statement Clips
⏱️ 15 min · 🟠 Intermediate
Sleek, wet-look hair swept back and held with bold statement clips is modern and sweat-proof for festival heat. Apply a glossy gel through damp hair and comb back, securing with oversized clips at the sides or nape for a runway-ready finish that stays put. The contrast between slick texture and metallic or embellished clips creates visual interest under stage lights. This style works on short or long lengths and keeps hair off the face during energetic sets.
💇 Styling Tips ▶
Styling Tips
- Work gel from roots to ends on damp hair for even sheen without crunch.
- Place statement clips where they can be both decorative and functional.
- Carry a travel-size gel for quick touch-ups if humidity strikes.
⚠️ Avoid: Using too much gel creates a stiff helmet effect; apply sparingly and build up as needed for shine.
🔄 Try Also: Turn the look into a low slick ponytail with clips along the length or add a colorful headscarf at the nape.
🛒 Products & Materials ▶
Items Used
📌 “Sleek wet-look hair pinned back with bold statement clips.”
• • •
Bright Clip-In Extensions For Instant Festival Color
⏱️ 10 min · 🟢 Beginner
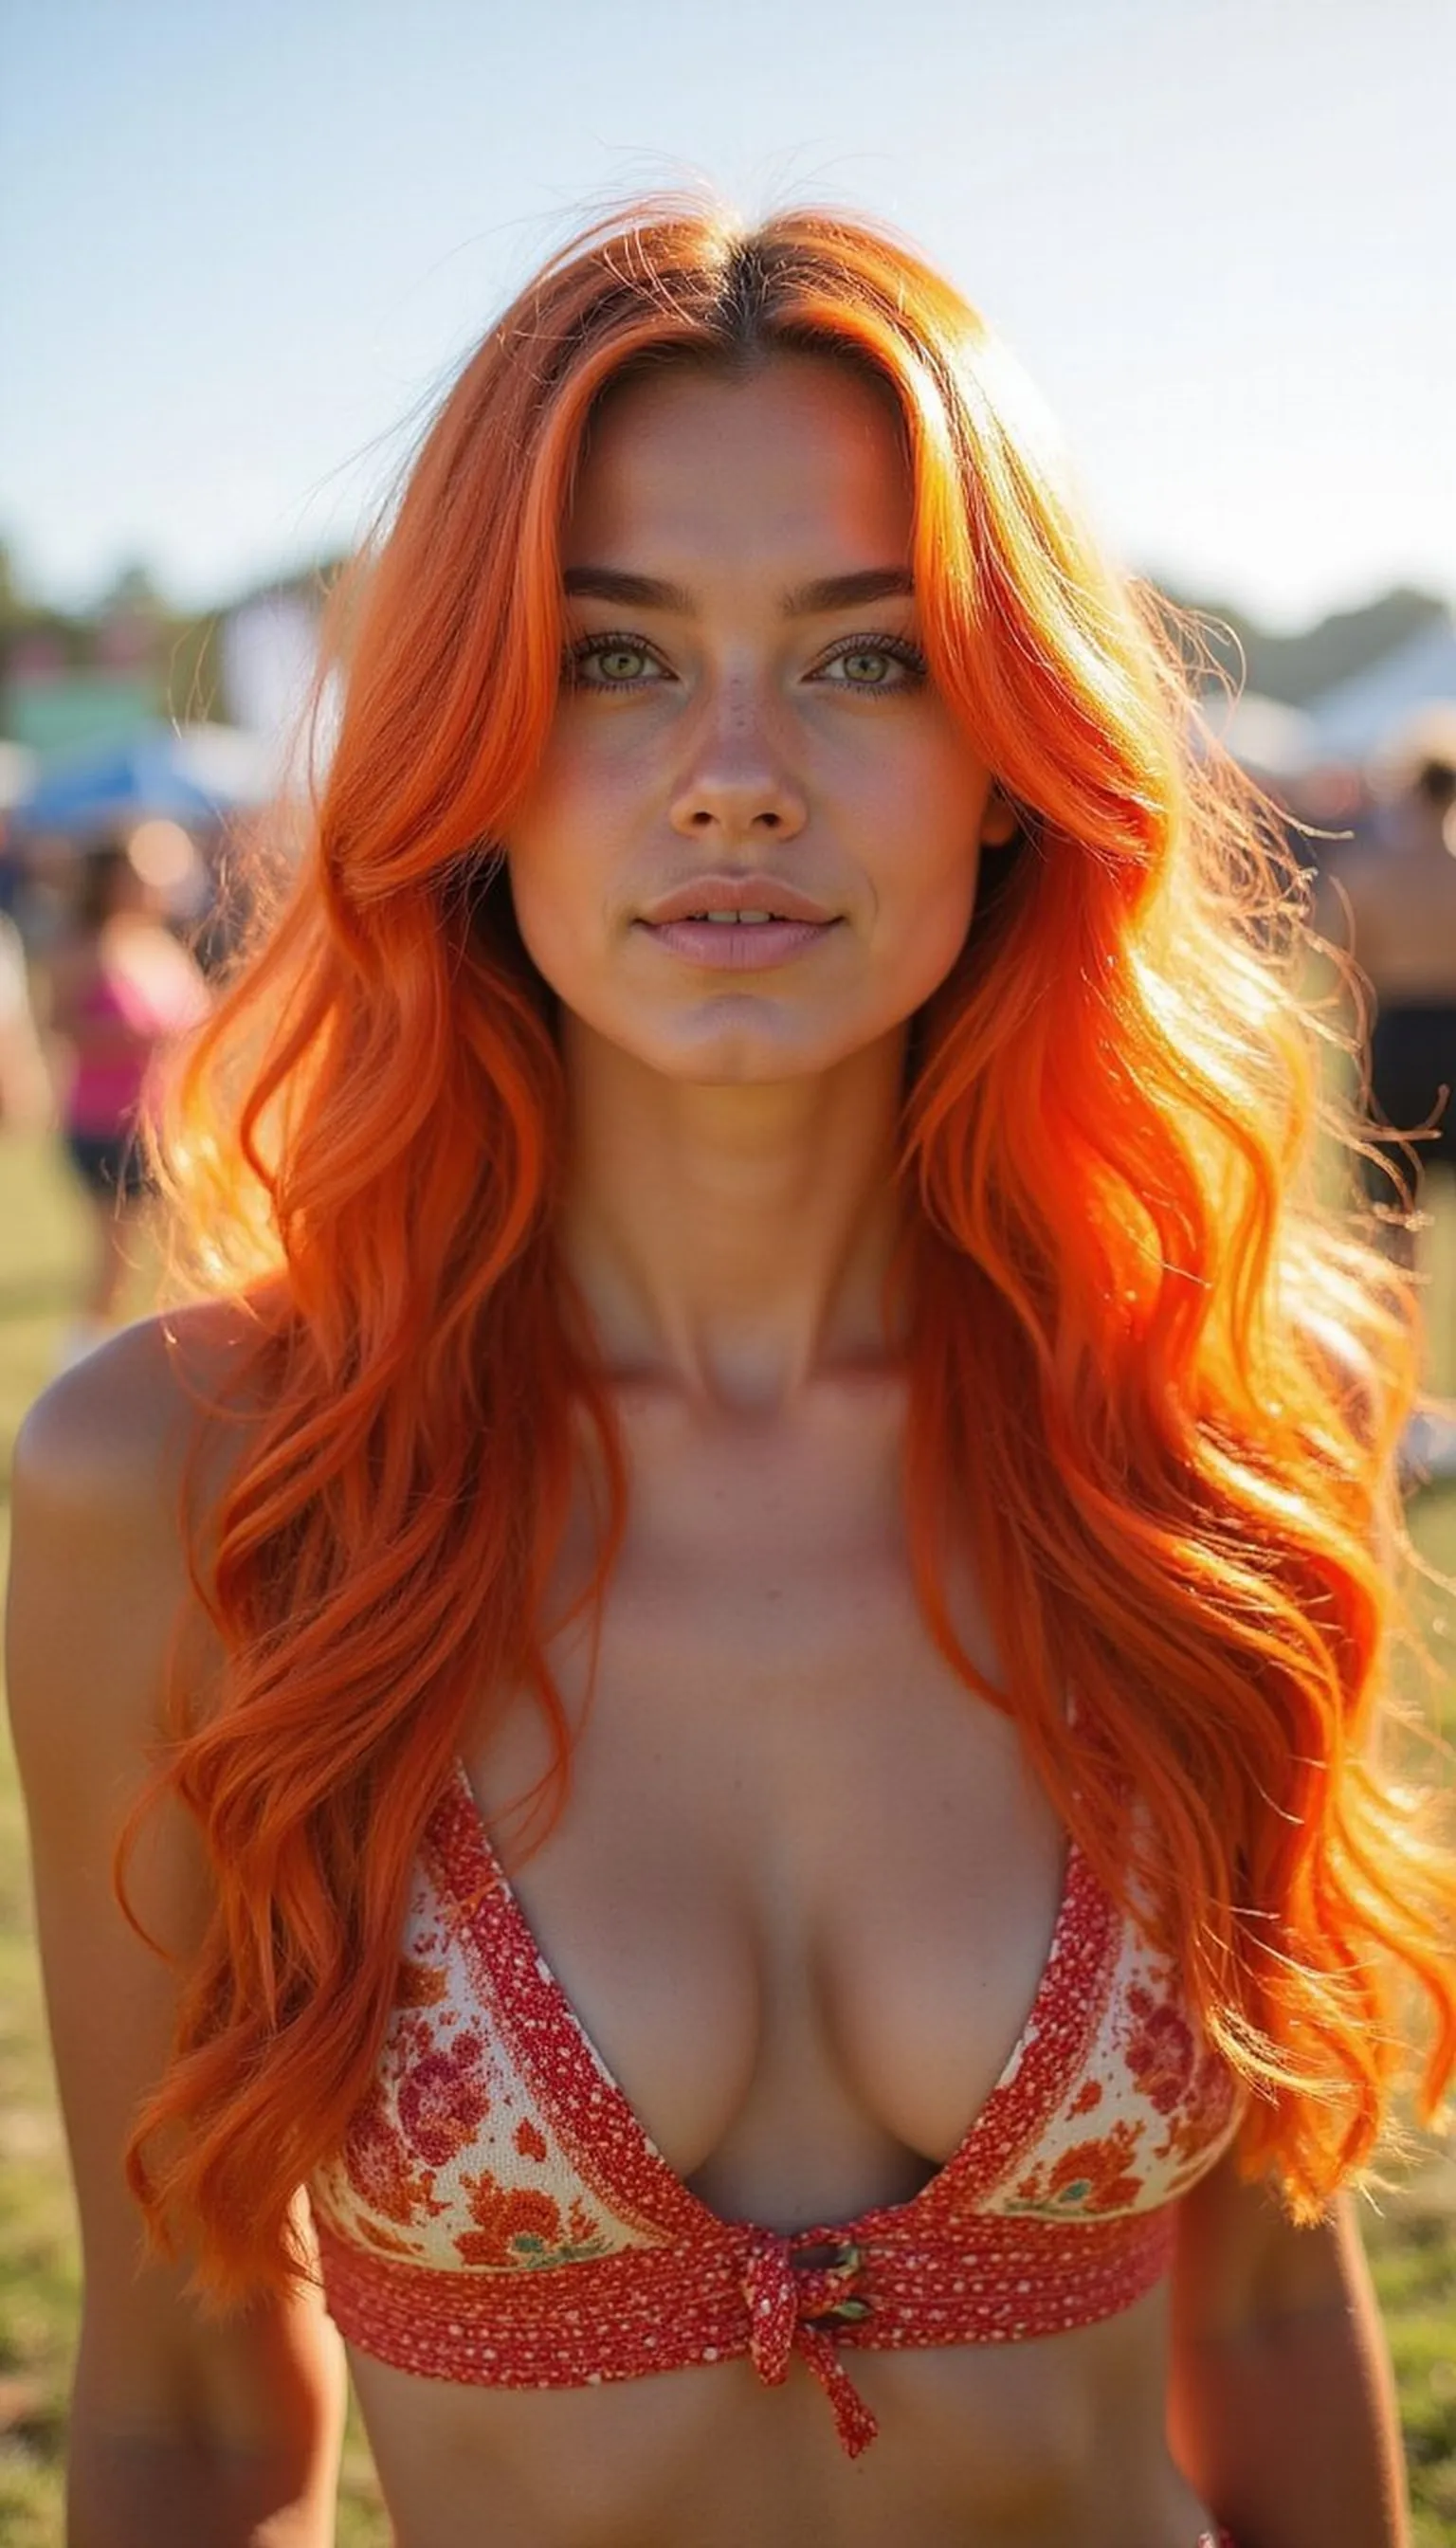
Clip-in extensions in neon or pastel shades add instant festival color without commitment. Section hair and snap bright extensions into place for streaks of color that blend with natural hair or stand out for a bold effect. Mix and match hues for a rainbow look, or place color under layers for subtle pops during movement. Extensions are easy to remove at night and let the wearer experiment with playful palettes without dyeing their hair.
💇 Styling Tips ▶
Styling Tips
- Tease roots slightly where clips will sit for extra grip and stability.
- Clip larger wefts mid-length for peek-a-boo color, smaller ones at the crown for intensity.
- Blend with a curling iron to soften edges between extension and natural hair.
⚠️ Avoid: Clipping extensions too close to the hairline shows the clips; place them a touch lower and hide with top layers.
🔄 Try Also: Use pastel shades for a soft look, neon colors for full-on festival vibes, or metallic tinsel wefts for shimmer.
🛒 Products & Materials ▶
Items Used
📌 “Instant neon color with easy clip-in extensions for festivals.”
• • •
Bandana Half-Up With Loose Curly Ends
⏱️ 12 min · 🟢 Beginner

A classic bandana half-up keeps hair off the face while maintaining bouncy curls at the ends. Fold a colorful bandana into a thin headband, tie it at the crown, and gather the top half of hair into a soft pony or twist, leaving curls loose below. This style feels retro and comfortable, perfect for long festival days and quick touch-ups. Add a few face-framing tendrils and a dash of dry shampoo for volume and grip.
💇 Styling Tips ▶
Styling Tips
- Tie the bandana snug but not too tight to avoid headaches during long wear.
- Create curls with a large-barrel wand and gently separate with fingers for natural bounce.
- Use a little dry shampoo at the crown for lift and to keep the bandana from slipping.
⚠️ Avoid: Tying the bandana too tight causes discomfort and dents in hair; leave room for movement and breathability.
🔄 Try Also: Swap the bandana for a silk scarf, or make the half-up into a braided crown for extra detail.
🛒 Products & Materials ▶
Items Used
📌 “Retro bandana half-up with carefree curly ends.”
• • •
Crimped Hair With Colorful Butterfly Clips
⏱️ 25 min · 🟠 Intermediate
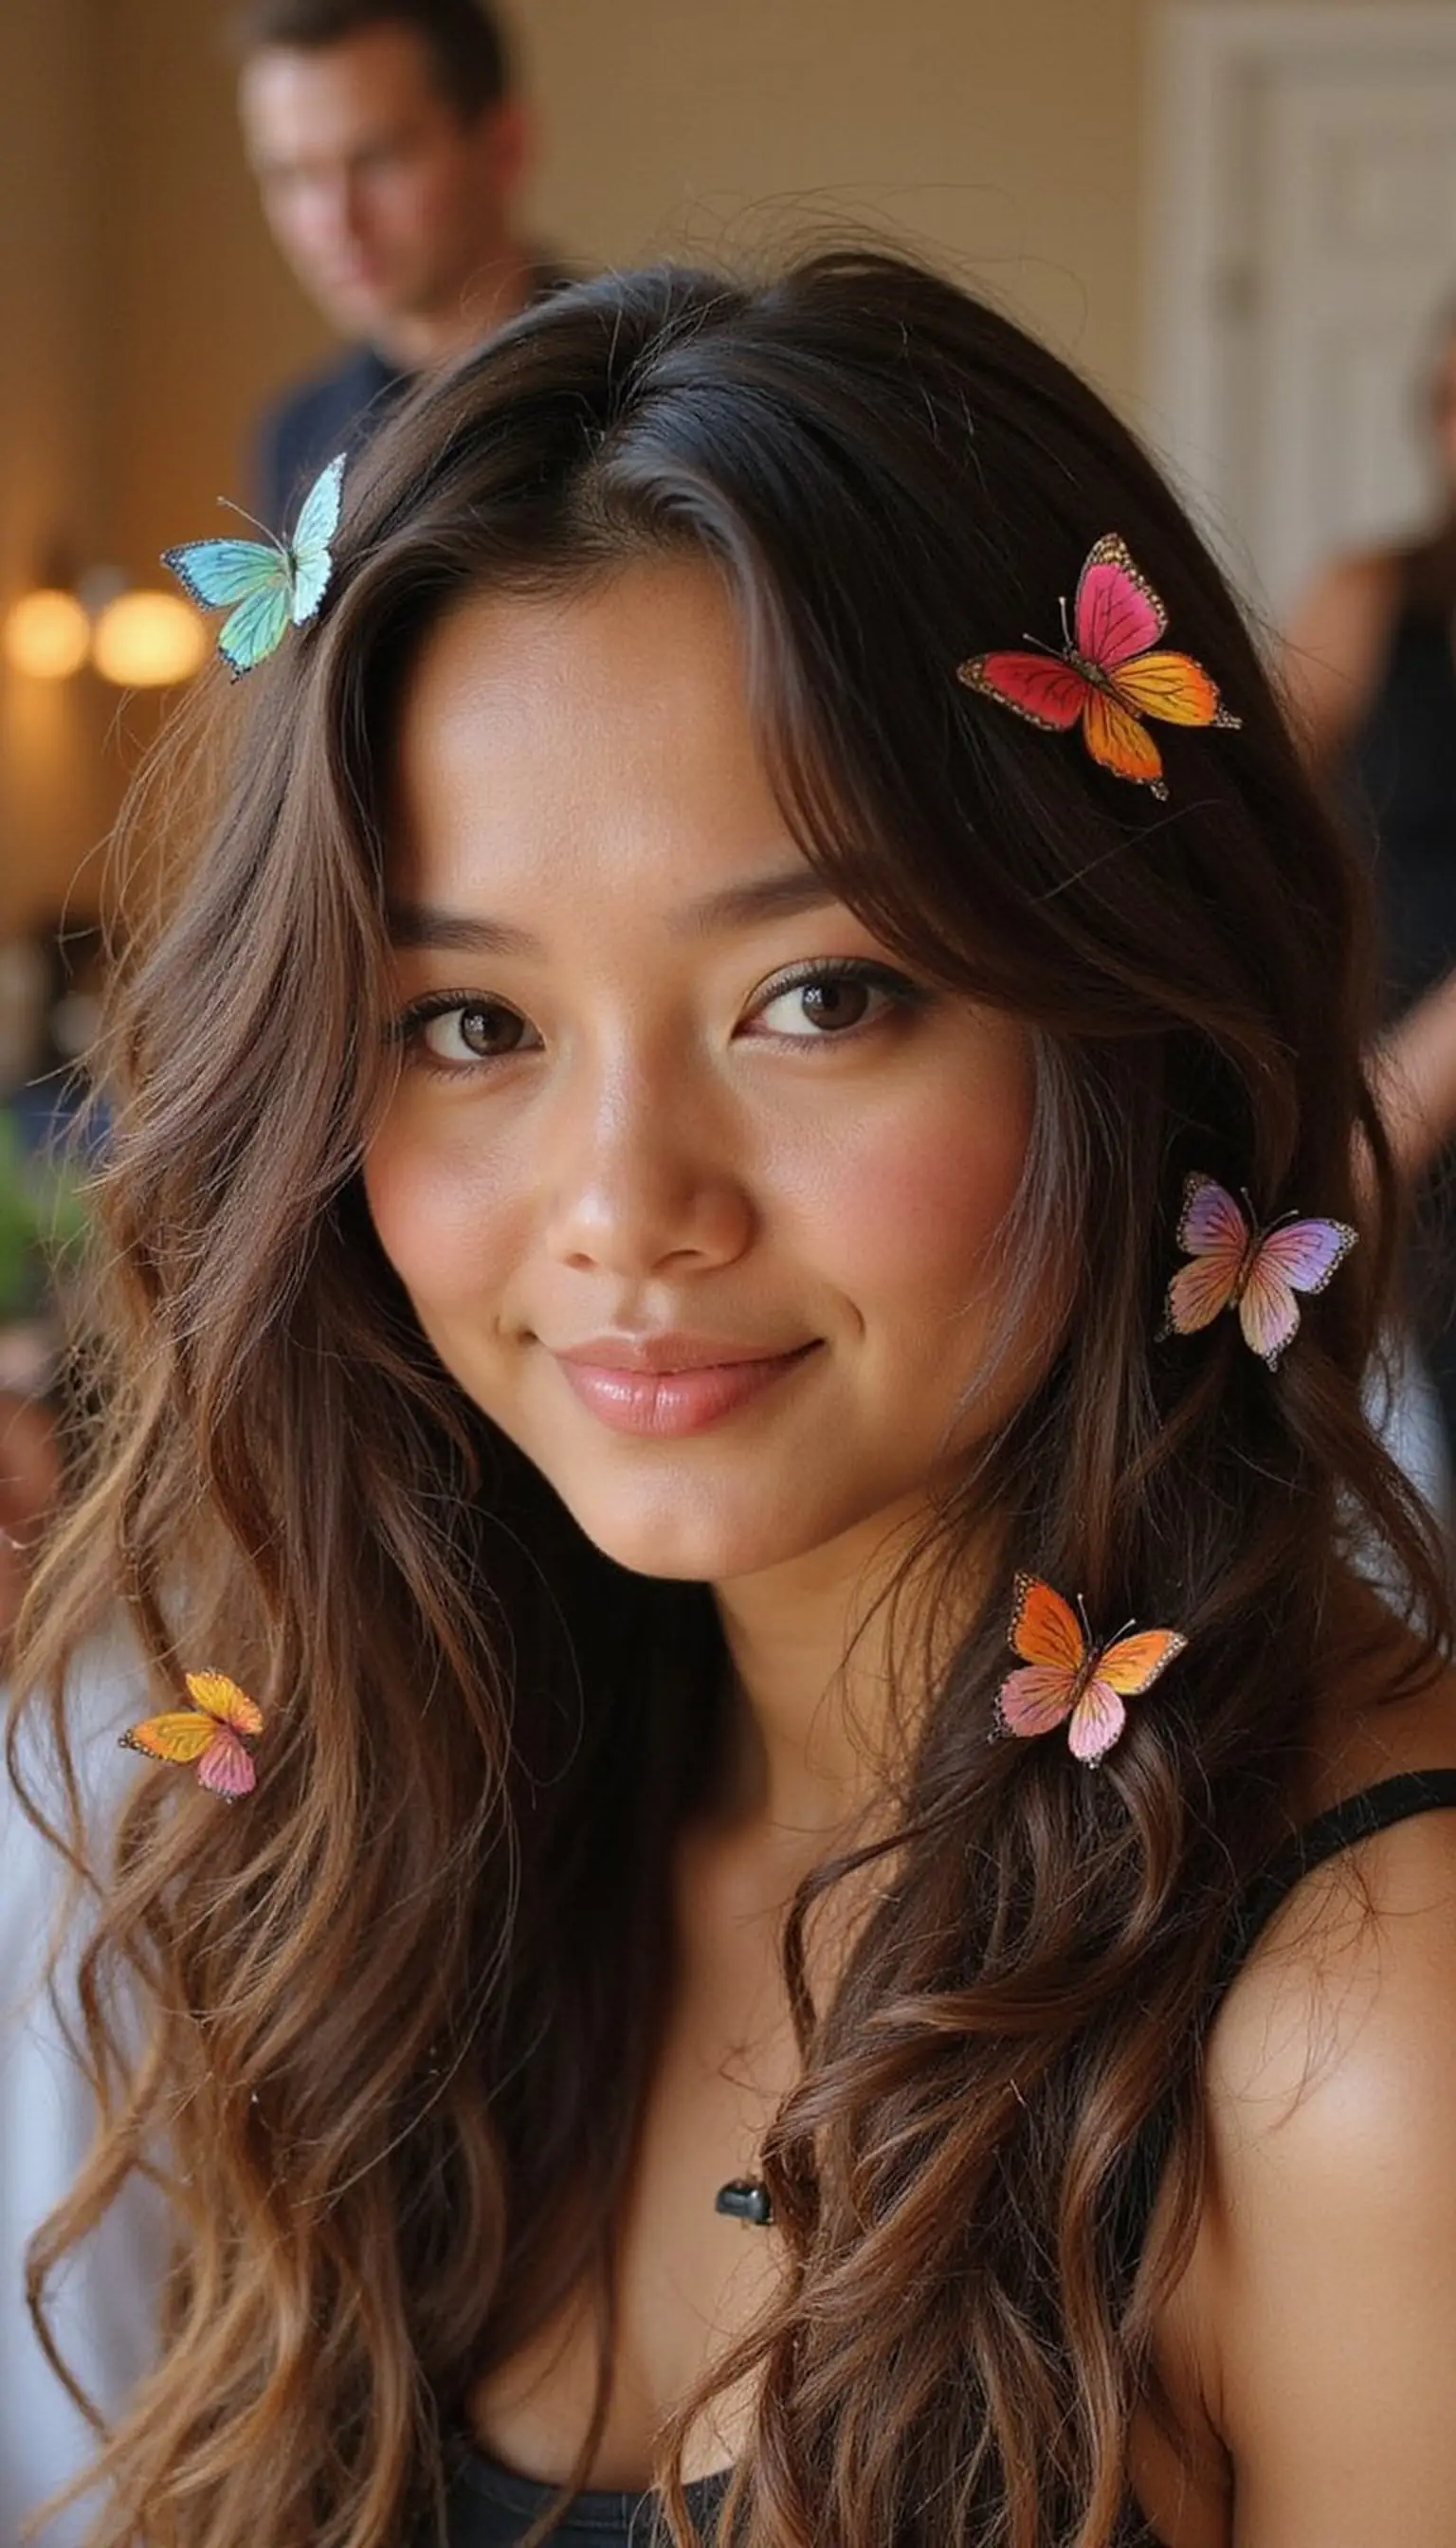
Retro crimped hair paired with colorful butterfly clips is playful and instantly nostalgic for festival sets. Crimp small sections for uniform texture, then scatter vibrant butterfly clips along the sides and near the temples for visual interest. The crimped base adds volume so clips sit proudly without slipping. This style photographs well close-up and from afar, and the clips can be used to secure small braids or twists within the crimped sections for extra detail.
💇 Styling Tips ▶
Styling Tips
- Crimp hair in alternating sections for natural-looking fullness and avoid overheating any single strand.
- Choose butterfly clips with a secure clasp to hold through dancing and humidity.
- Finish with a lightweight hairspray to keep texture defined without stiffness.
⚠️ Avoid: Over-crimping makes hair stiff and frizzy; limit heat passes and protect strands with a thermal spray.
🔄 Try Also: Swap butterfly clips for sparkling claw clips, or add a few tiny braids woven into crimps for contrast.
🛒 Products & Materials ▶
Items Used
- butterfly clips
- crimping iron
📌 “Nostalgic crimped hair accented with colorful butterfly clips.”
• • •
Low Messy Bun Wrapped With Vibrant Scarf
⏱️ 10 min · 🟢 Beginner
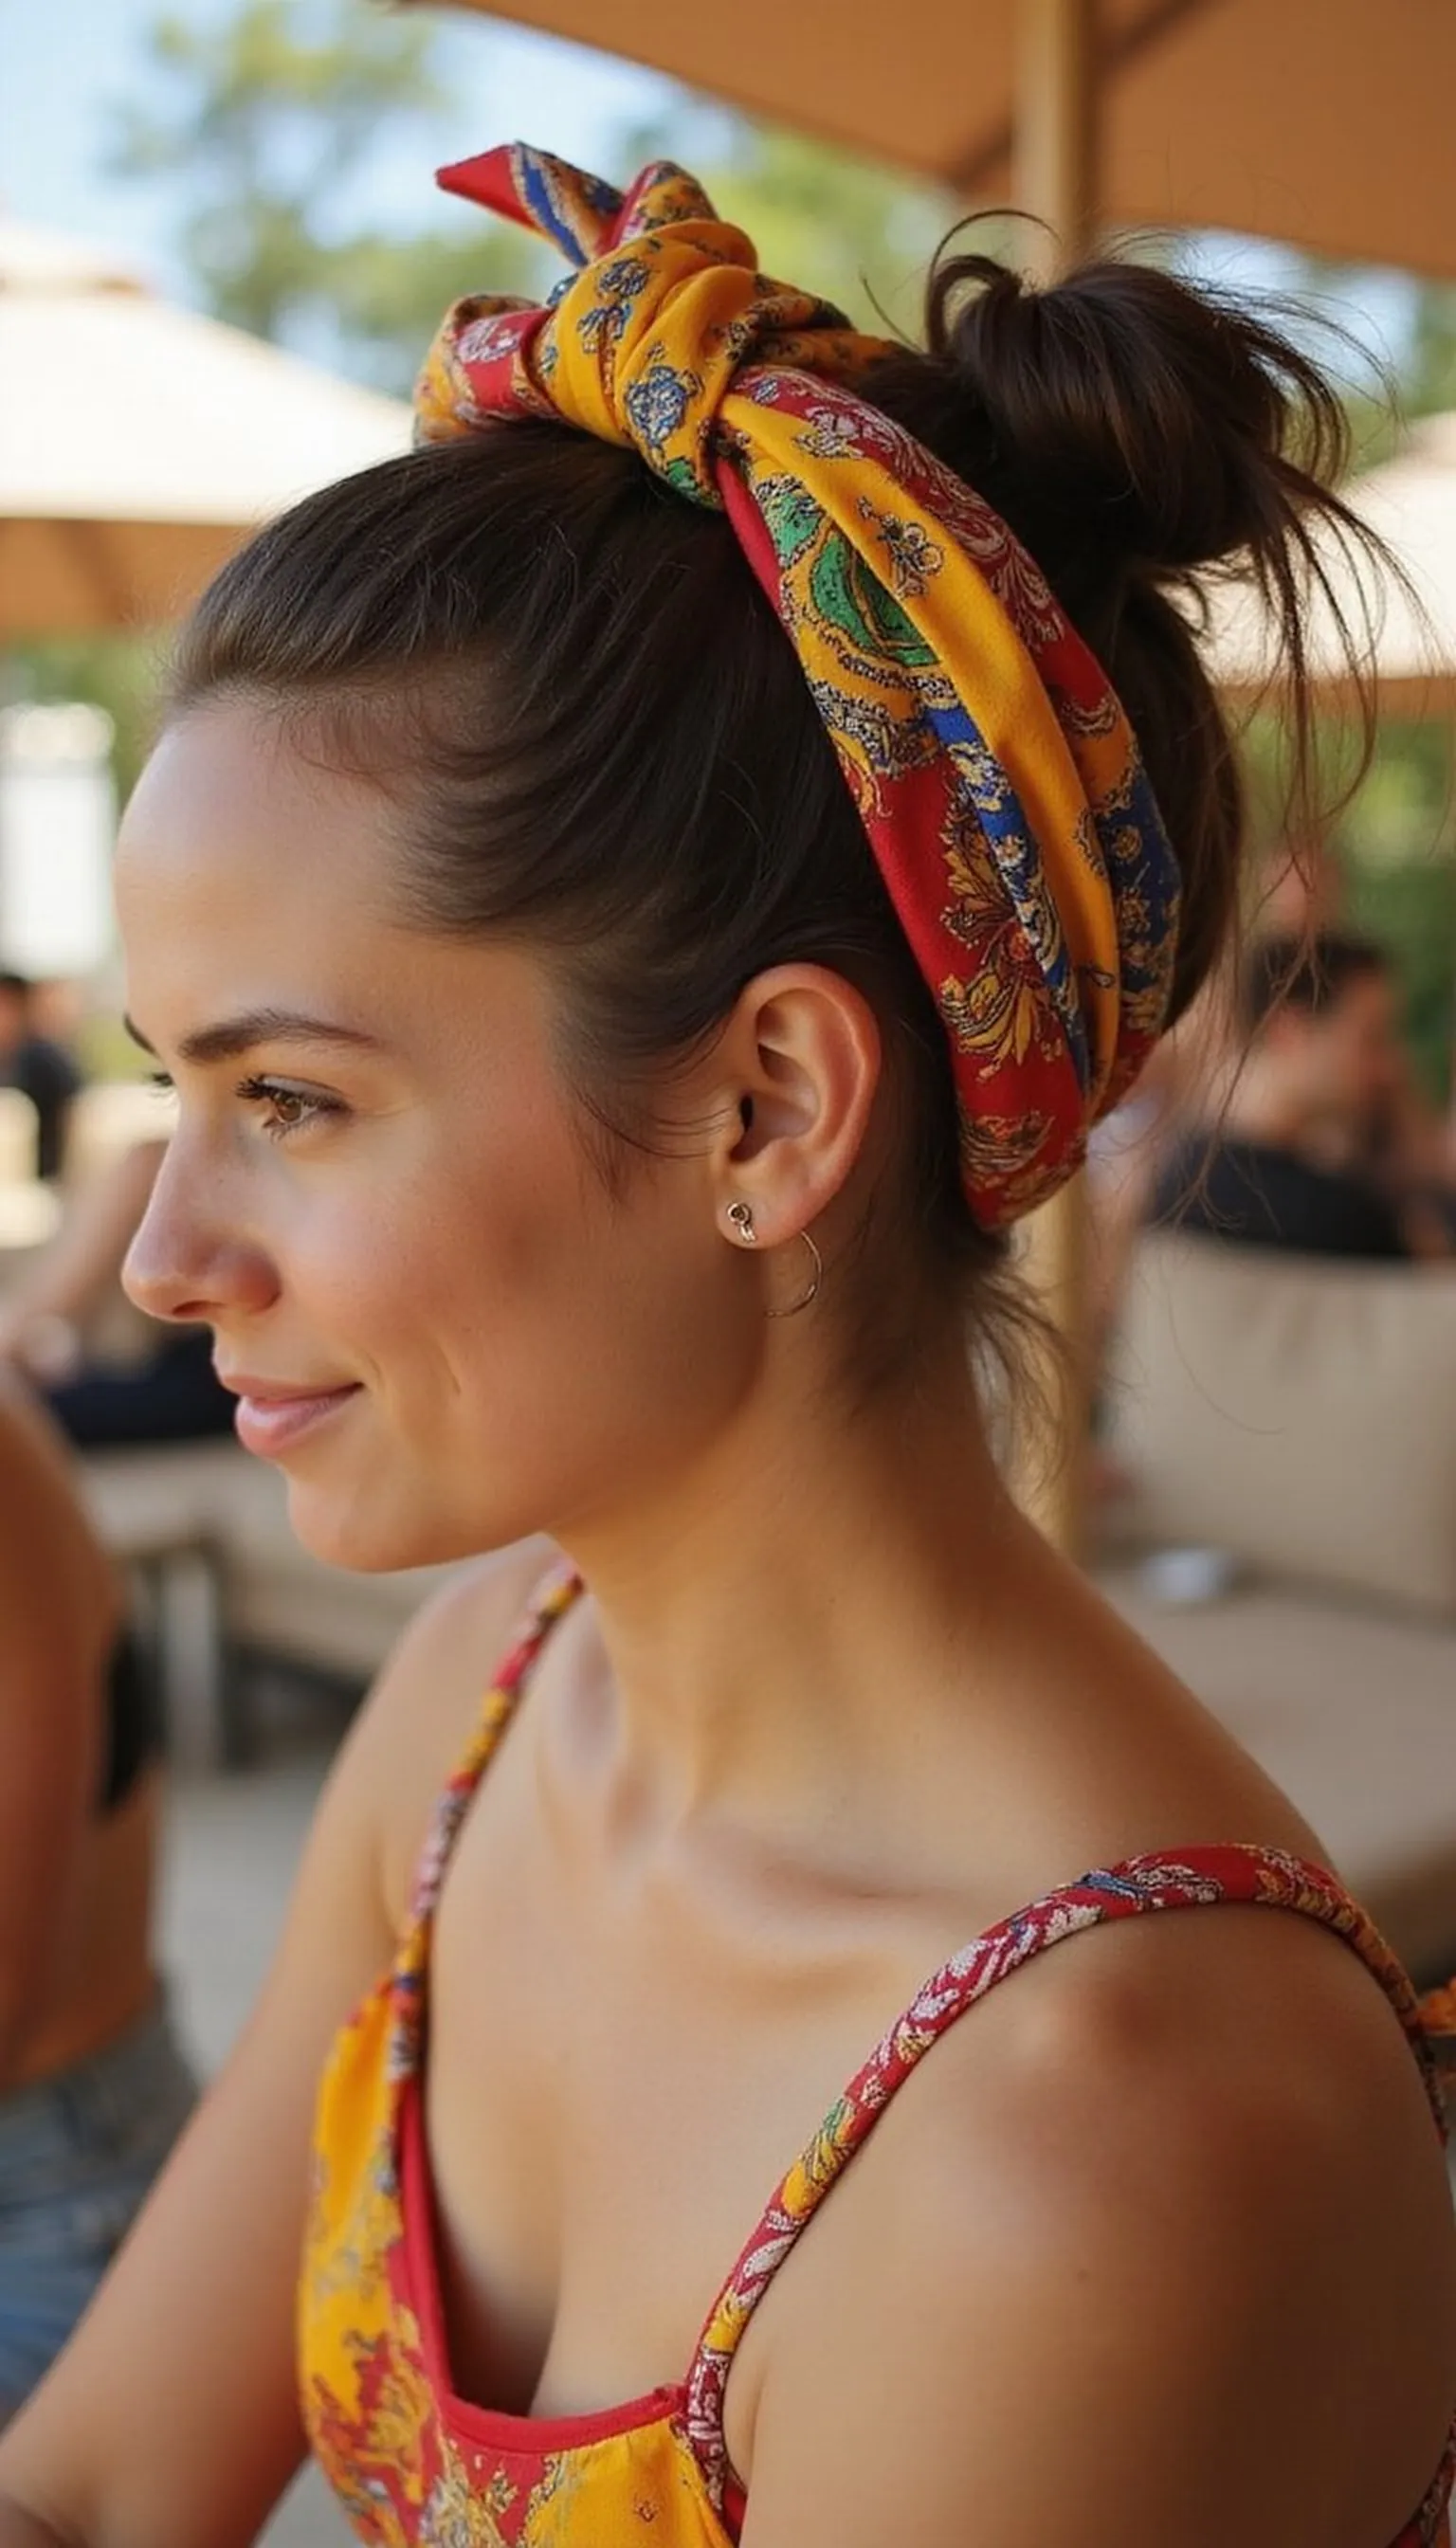
A low messy bun tied and wrapped with a vibrant scarf is chic, comfortable, and keeps hair off the neck during hot festival days. Gather hair low at the nape, twist into a relaxed bun, and wrap a long scarf around the base, knotting at the side or back. The scarf adds color, holds stray hairs, and doubles as a fashion statement. Perfect for shaded lounge areas or for balancing bold makeup looks without fiddly pins.
💇 Styling Tips ▶
Styling Tips
- Create loose texture with fingers before twisting to avoid a perfect, stiff bun.
- Secure the scarf with a discreet pin or tuck to prevent unraveling while dancing.
- Use a light texturizing powder at the roots for extra grip in humid conditions.
⚠️ Avoid: Making the bun too tight removes the relaxed festival vibe; keep tension light for comfort and softness.
🔄 Try Also: Use a patterned hair scarf for boho flair, or swap for a silk ribbon for a more refined look.
🛒 Products & Materials ▶
Items Used
- hair scarf
- hair pins
📌 “Low messy bun dressed up with a colorful scarf wrap.”
• • •
Bubble Ponytail With Neon Scrunchies And Beads
⏱️ 20 min · 🟢 Beginner
The bubble ponytail is playful and practical for festival dancing; add neon scrunchies and beads for extra flair. Create a high pony, then add additional elastics down the length, puffing each section into rounded ‘bubbles.’ Wrap neon scrunchies around the base and thread beads onto the lower bubbles for movement and color. This energetic look is lightweight and keeps hair secure while still feeling fun and youthful under stage lights.
💇 Styling Tips ▶
Styling Tips
- Tie each elastic gently then pull on bubble sections to shape rounded volume.
- Choose scrunchies in contrasting neon colors to make the bubbles pop.
- Use hair beads with small holes so they slide onto sections without tugging.
⚠️ Avoid: Spacing elastics too far apart flattens the bubbles; keep them evenly spaced for a rounded look.
🔄 Try Also: Make a double bubble pony with two braids or add metallic hair rings between bubbles for extra shine.
🛒 Products & Materials ▶
Items Used
📌 “Playful bubble ponytail accented with neon scrunchies and beads.”
• • •
Twisted Pigtails With Micro Braids And Beads
⏱️ 40 min · 🔴 Advanced
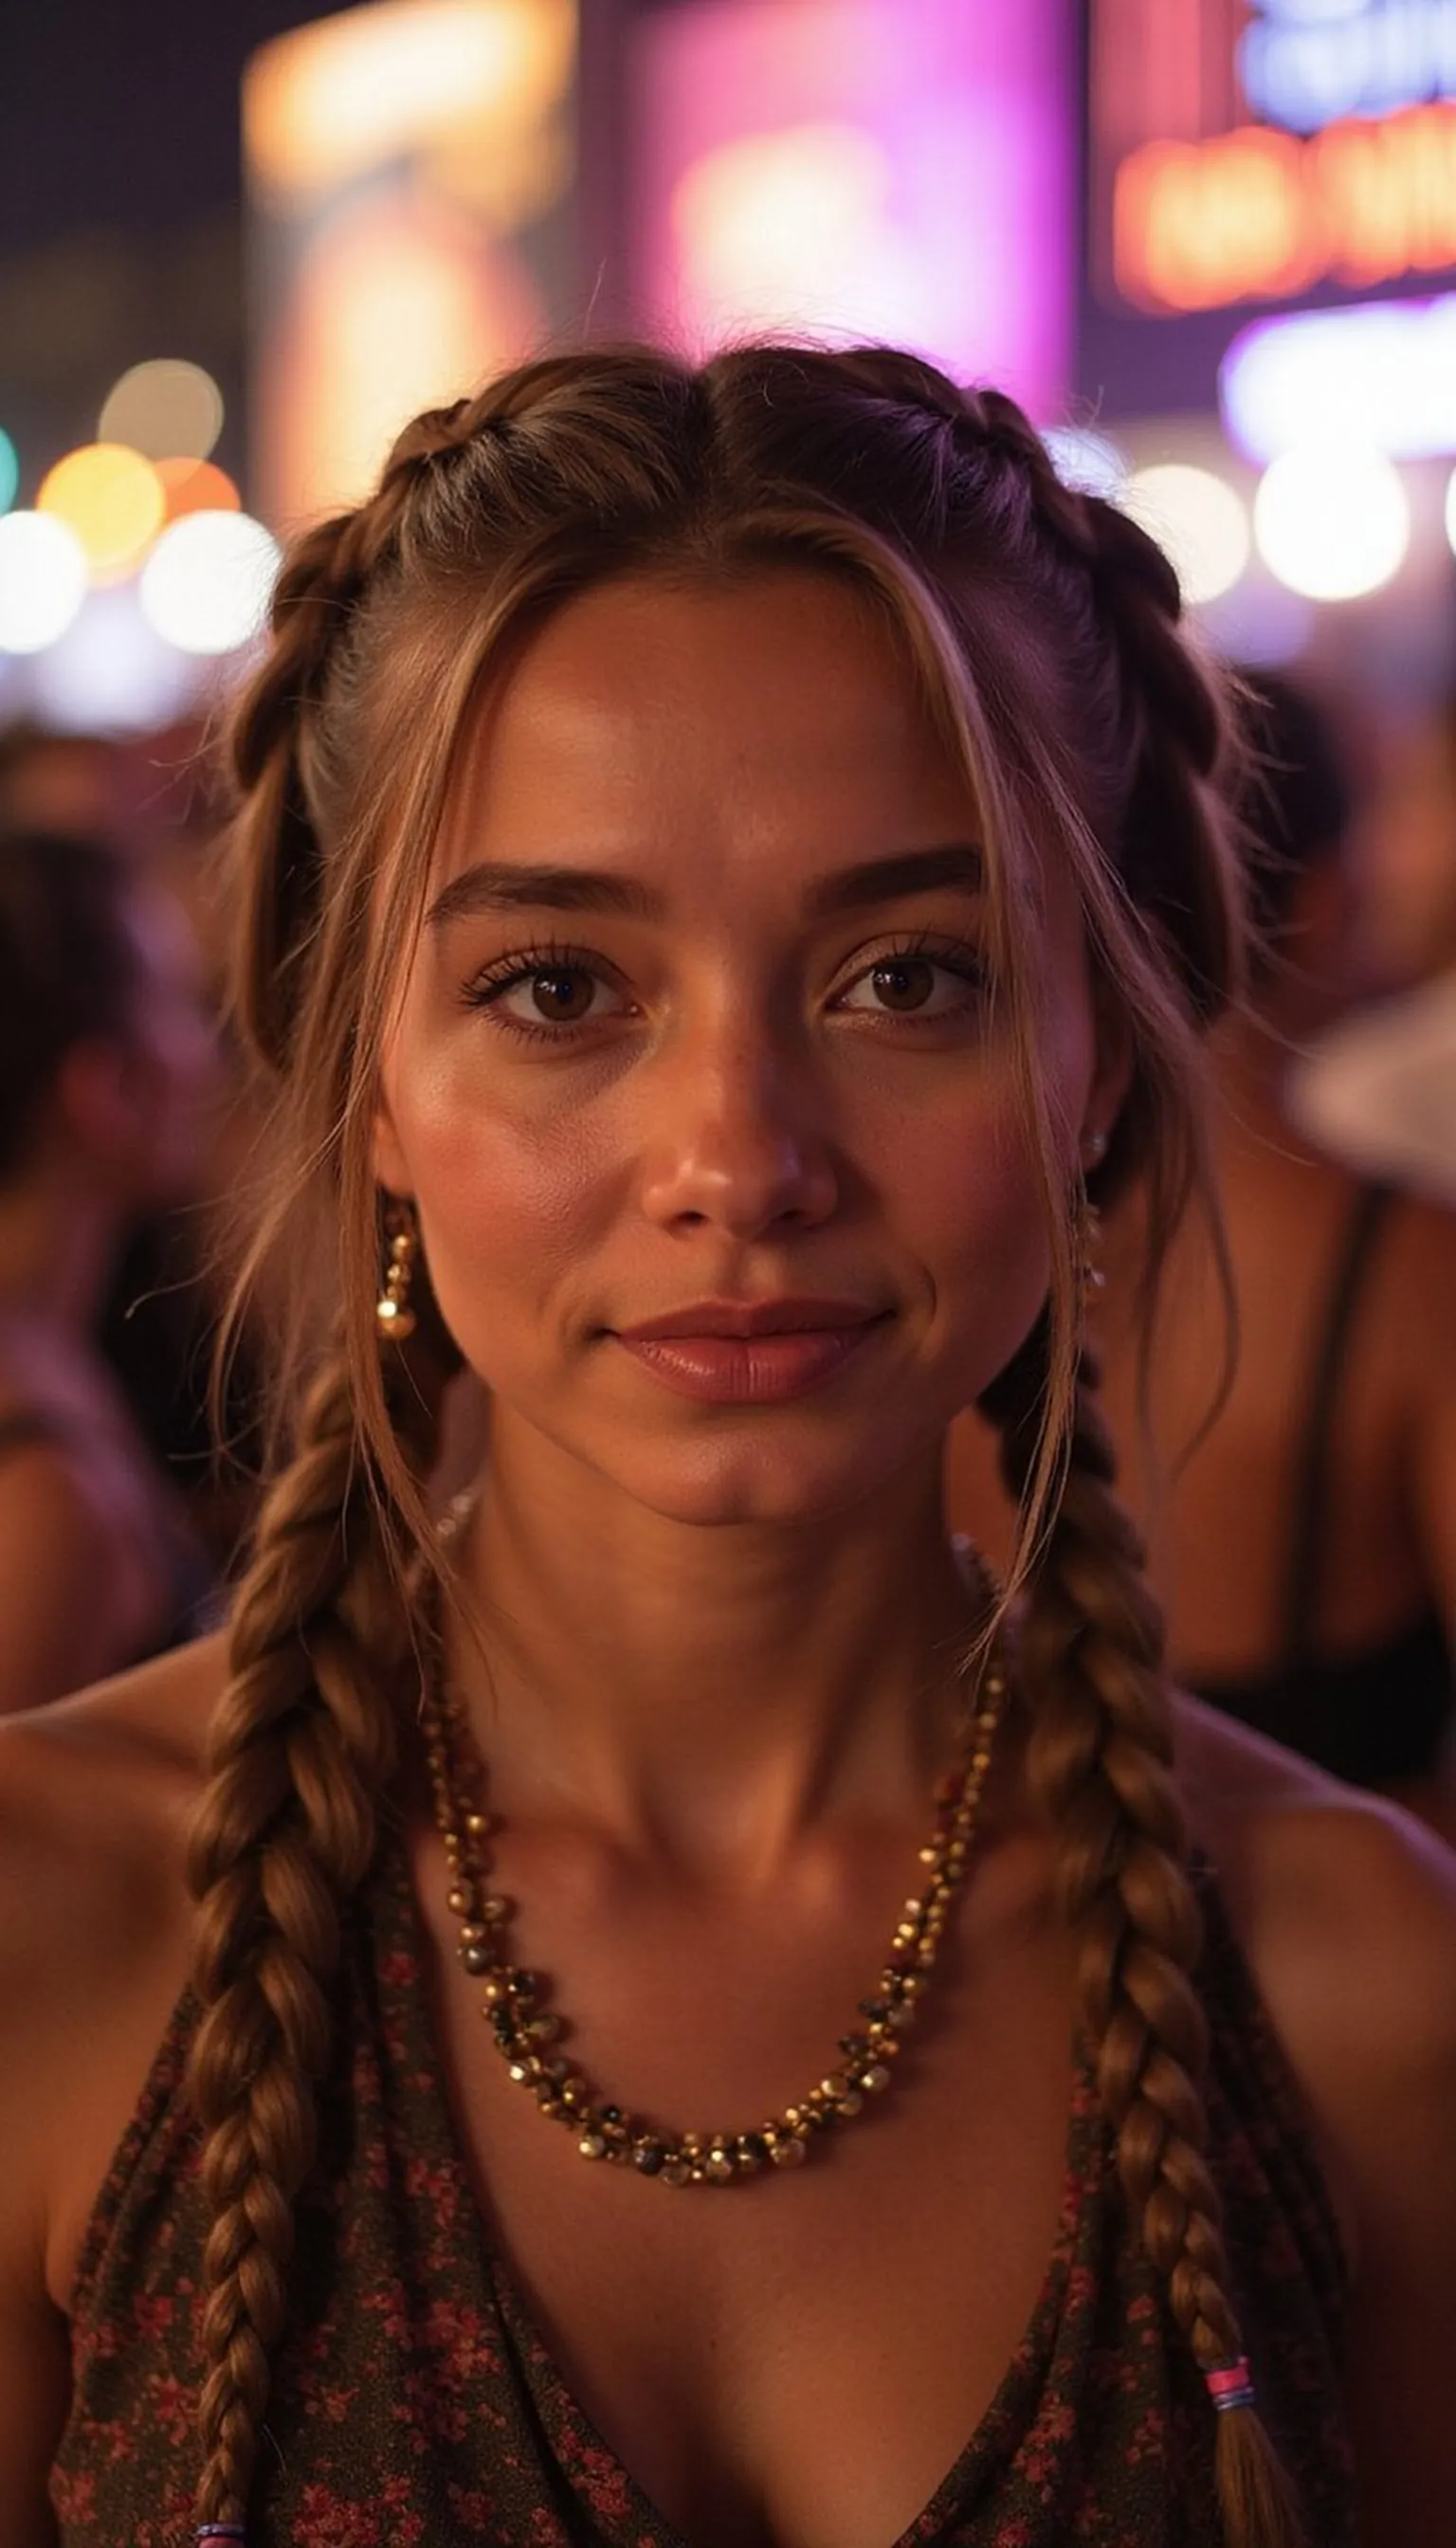
Combining twisted pigtails with tiny micro braids and scattered beads creates a textured festival hairstyle full of detail. Section hair into two low pigtails, twist the larger sections, and weave a few micro braids into each twist, securing beads at the ends for tactile interest. This layered approach gives dimension and holds well through long days, plus the beads add sound and shine when moving. It’s a great choice for someone who wants intricate styling that stands out in selfies and crowd shots.
💇 Styling Tips ▶
Styling Tips
- Braid micro sections tightly and seal ends with small elastics before adding beads.
- Twist larger pigtail sections around the braided pieces for a cohesive look.
- Use a light oil on ends to keep beads sliding on easily and avoid snagging.
⚠️ Avoid: Mixing braid sizes without structure leads to a messy result; plan where micro braids will sit before starting.
🔄 Try Also: Turn twists into low buns with beads trailing, or incorporate colorful thread wraps instead of beads.
🛒 Products & Materials ▶
Items Used
📌 “Textured twisted pigtails with micro braids and shimmering beads.”
• • •
Faux Hawk Braids Pinned With Metallic Clips
⏱️ 45 min · 🔴 Advanced
A row of tight braids down the center forming a faux hawk and pinned with metallic clips is bold and crowd-ready. Cornrow or Dutch braids along the middle section create the hawk shape while sides remain slicked or closely twisted in. Metallic clips along the braid add geometric shine and keep stray hairs contained. This dramatic silhouette is great for evening performances where the angular style reads striking against lights and creates a high-impact profile.
💇 Styling Tips ▶
Styling Tips
- Part sides cleanly and apply gel to the edges for a crisp contrast with the braided center.
- Use small metallic clips spaced out for measured shine without clutter.
- Secure braid ends under and pin to keep the faux hawk looking cohesive all night.
⚠️ Avoid: Making the side sections too loose flattens the hawk effect; keep sides smooth and controlled for contrast.
🔄 Try Also: Make the faux hawk with colored threads woven into braids, or add a pop of glitter along the ridge.
🛒 Products & Materials ▶
Items Used
📌 “Edgy faux hawk braids highlighted with metallic clips.”
• • •
Mermaid Braids Intertwined With Shells And Ribbons
⏱️ 30 min · 🟠 Intermediate
Mermaid braids weaving ribbons and tiny shells look whimsical and perfect for seaside or summer festivals. Braid in loose, romantic three-strand or rope braids, and thread ribbons through sections as you go. Clip on small shells or slide in shell charms to catch sunlight. The combination of soft braiding and ocean-inspired accessories gives an ethereal feel that photographs beautifully in daylight and twilight sets alike.
💇 Styling Tips ▶
Styling Tips
- Choose ribbons that match your outfit for a cohesive festival look.
- Sew or crimp shells onto ends or use small clips so they stay secure while moving.
- Loosen braid loops slightly after braiding for a softer, voluminous mermaid effect.
⚠️ Avoid: Attaching shells without securing them properly causes loss; use crimps or clips to fasten safely.
🔄 Try Also: Add pastel clip-in extensions for color, or swap shells for tiny star charms for celestial flair.
🛒 Products & Materials ▶
Items Used
- shell hair clips
- ribbon
📌 “Mermaid-style braids threaded with ribbons and tiny shells.”
• • •
Bantu Knots With Sparkly Hair Rings And Gems
⏱️ 30 min · 🟠 Intermediate
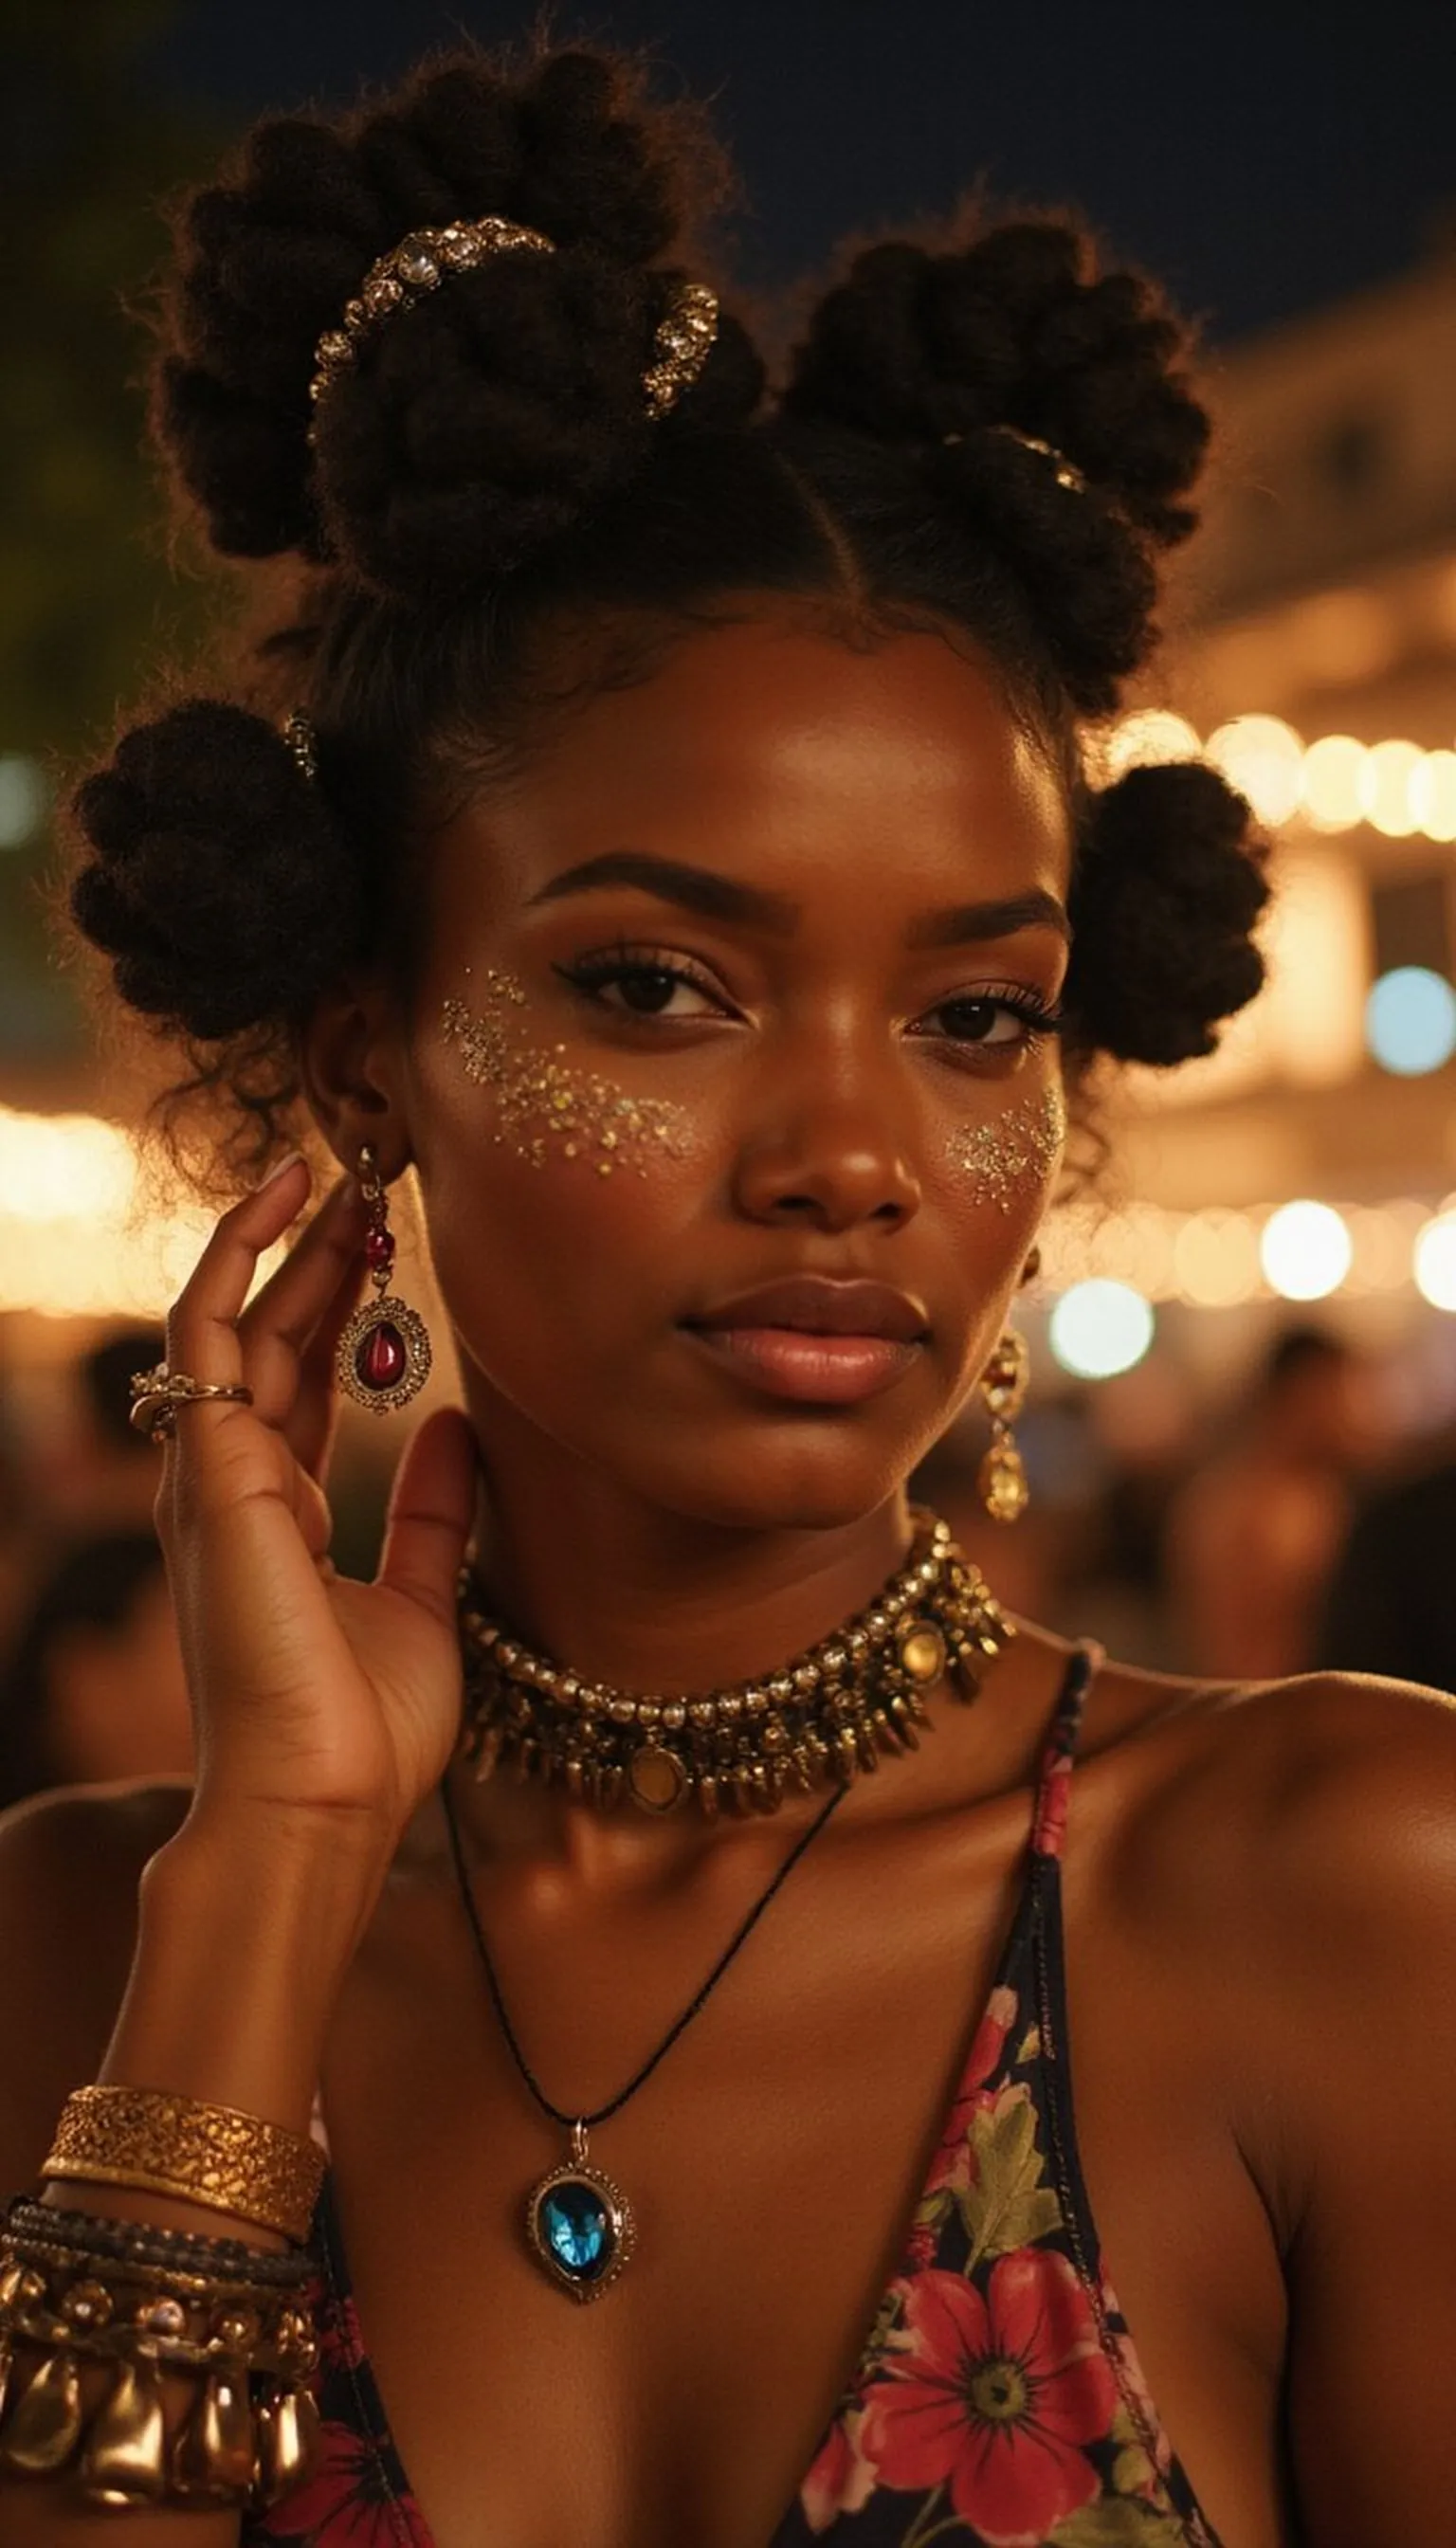
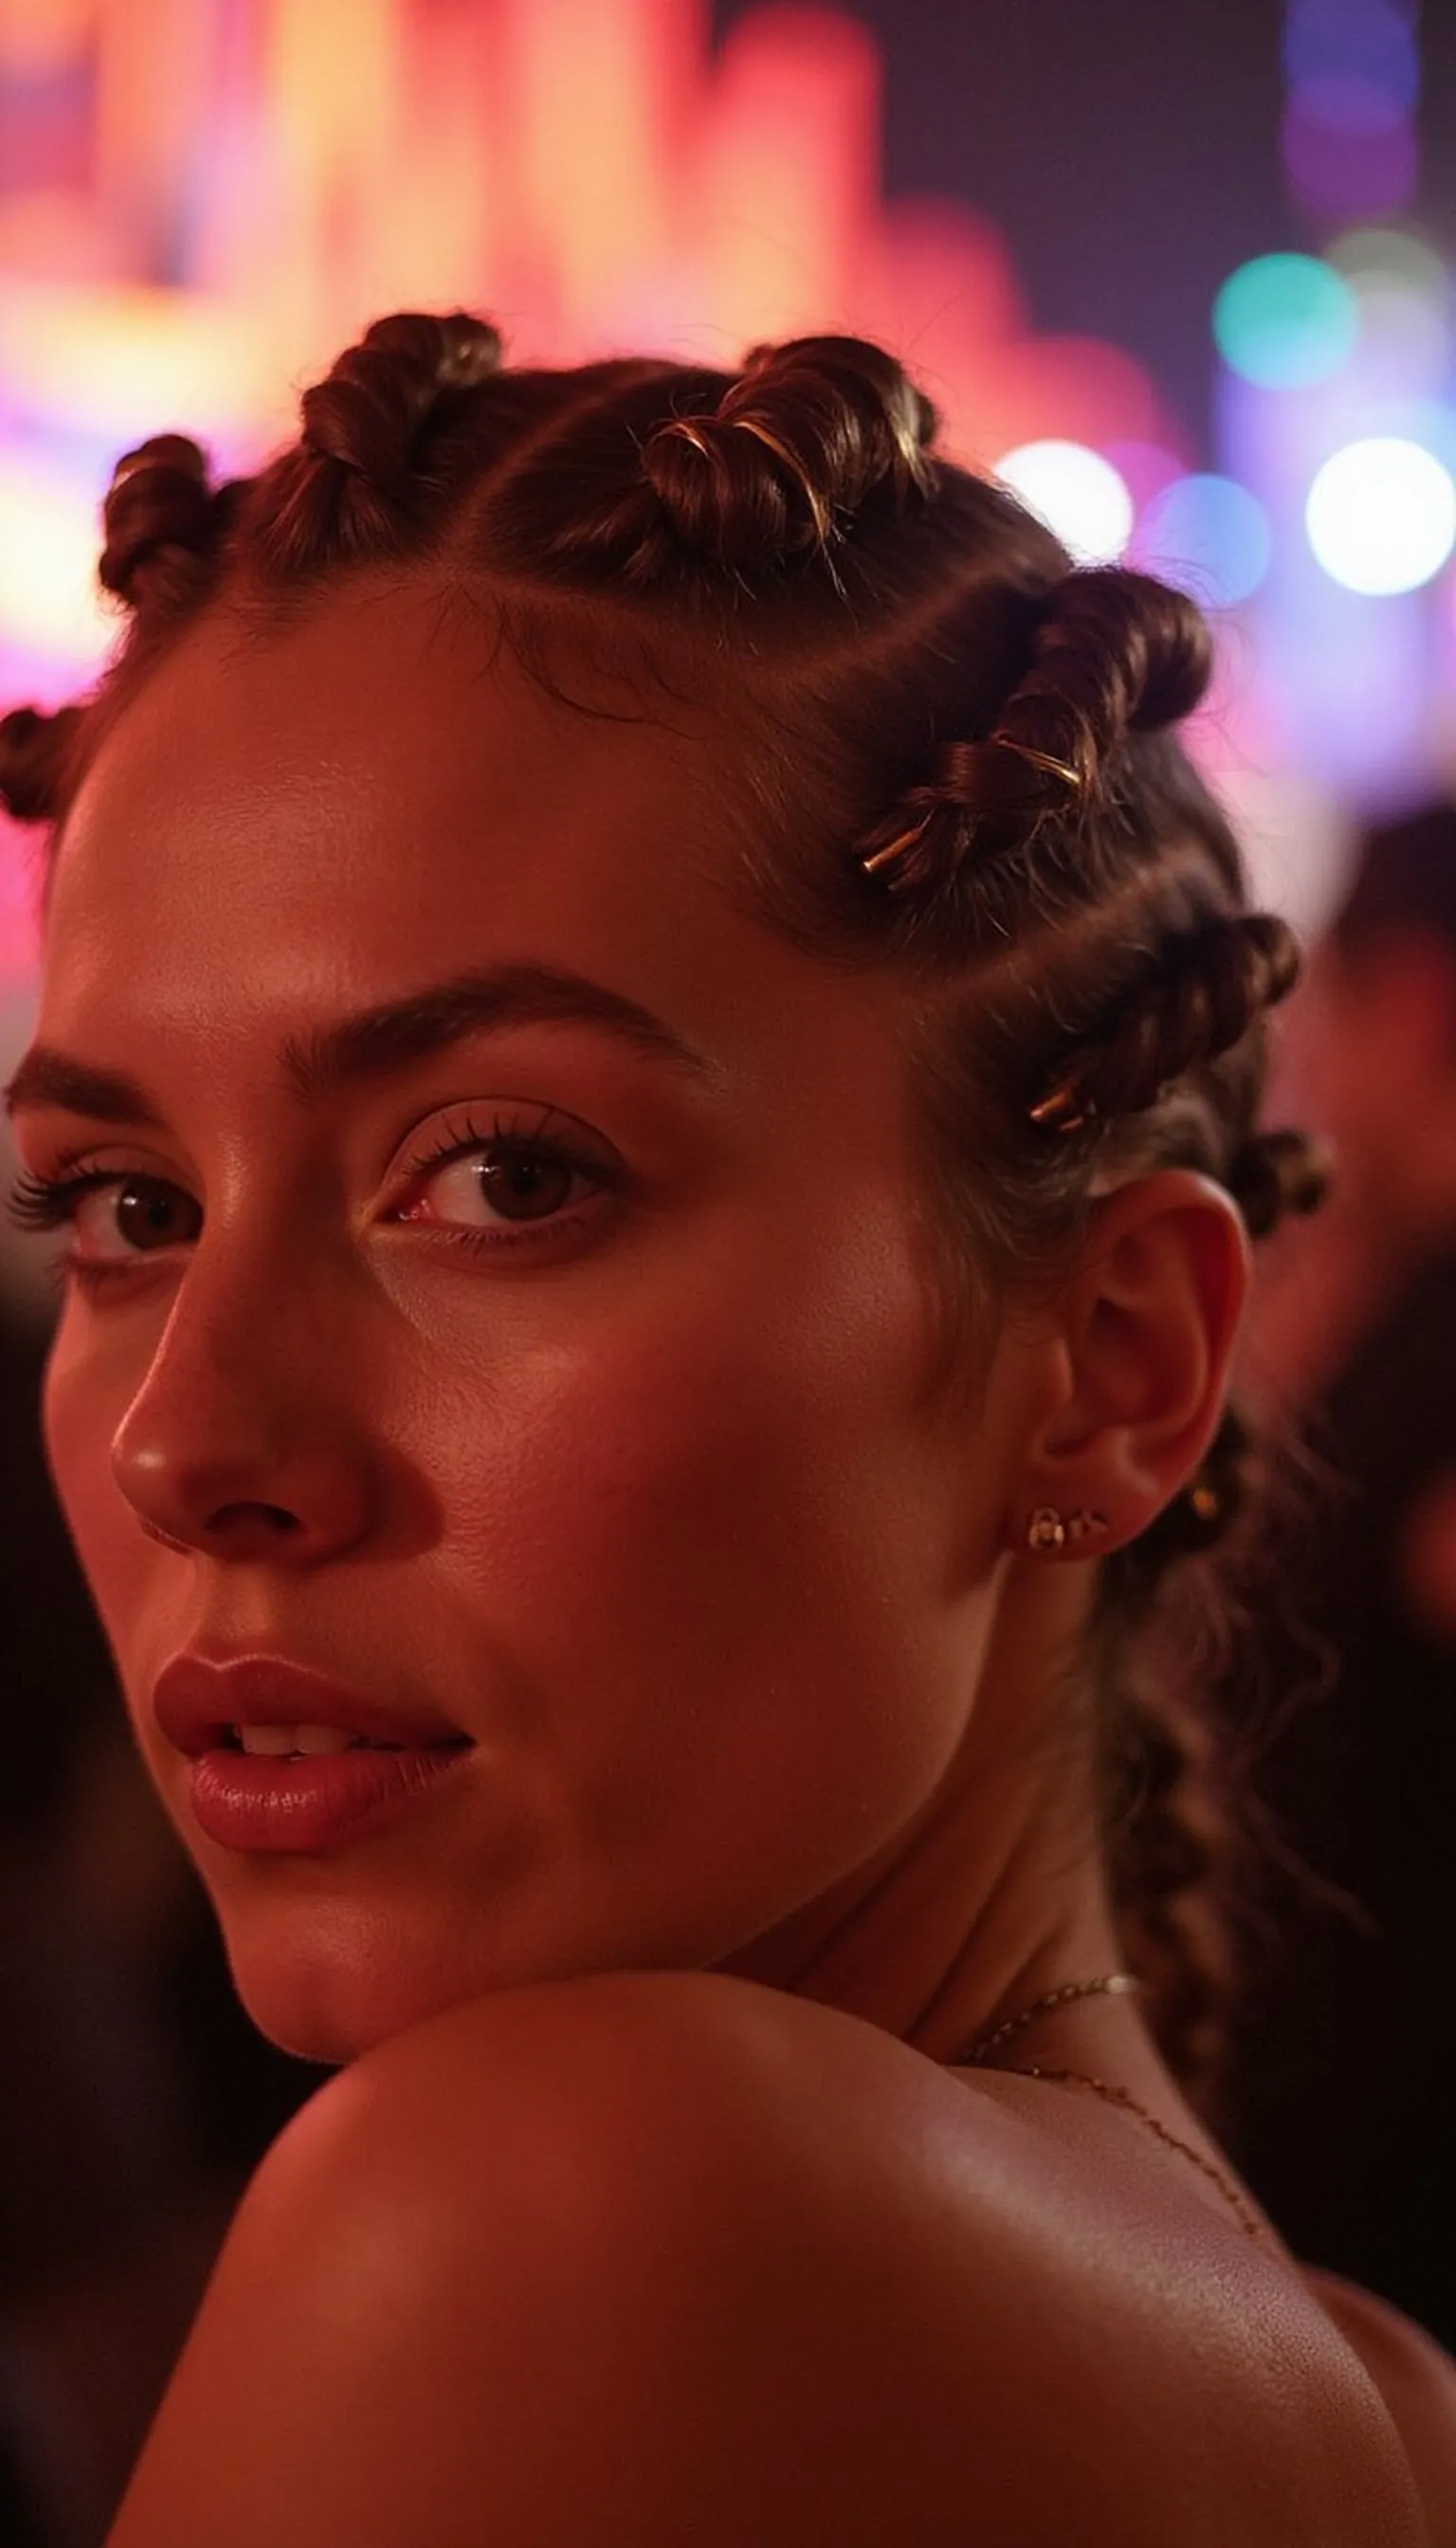
Bantu knots get a glamorous upgrade with sparkly hair rings and face gems for a statement festival look. Create small, even knots across the scalp and decorate the bases or outer loops with tiny metallic rings and a few gems near the hairline. This style is playful, helps with heat management, and looks bold in photos. Leave knots slightly undone at the edges for softness, or keep them tight for a graphic silhouette.
💇 Styling Tips ▶
Styling Tips
- Section hair precisely to make uniform knots that sit symmetrically across the head.
- Add hair rings after forming knots so they clip over twisted sections easily.
- Place gems along the forehead or temples for complementary sparkle to the rings.
⚠️ Avoid: Making knots uneven creates an unbalanced look; use a mirror to check symmetry while styling.
🔄 Try Also: Turn some knots into tiny braids before knotting for mixed texture, or add colored thread around rings.
🛒 Products & Materials ▶
Items Used
📌 “Bold bantu knots accented with metallic rings and face gems.”
• • •
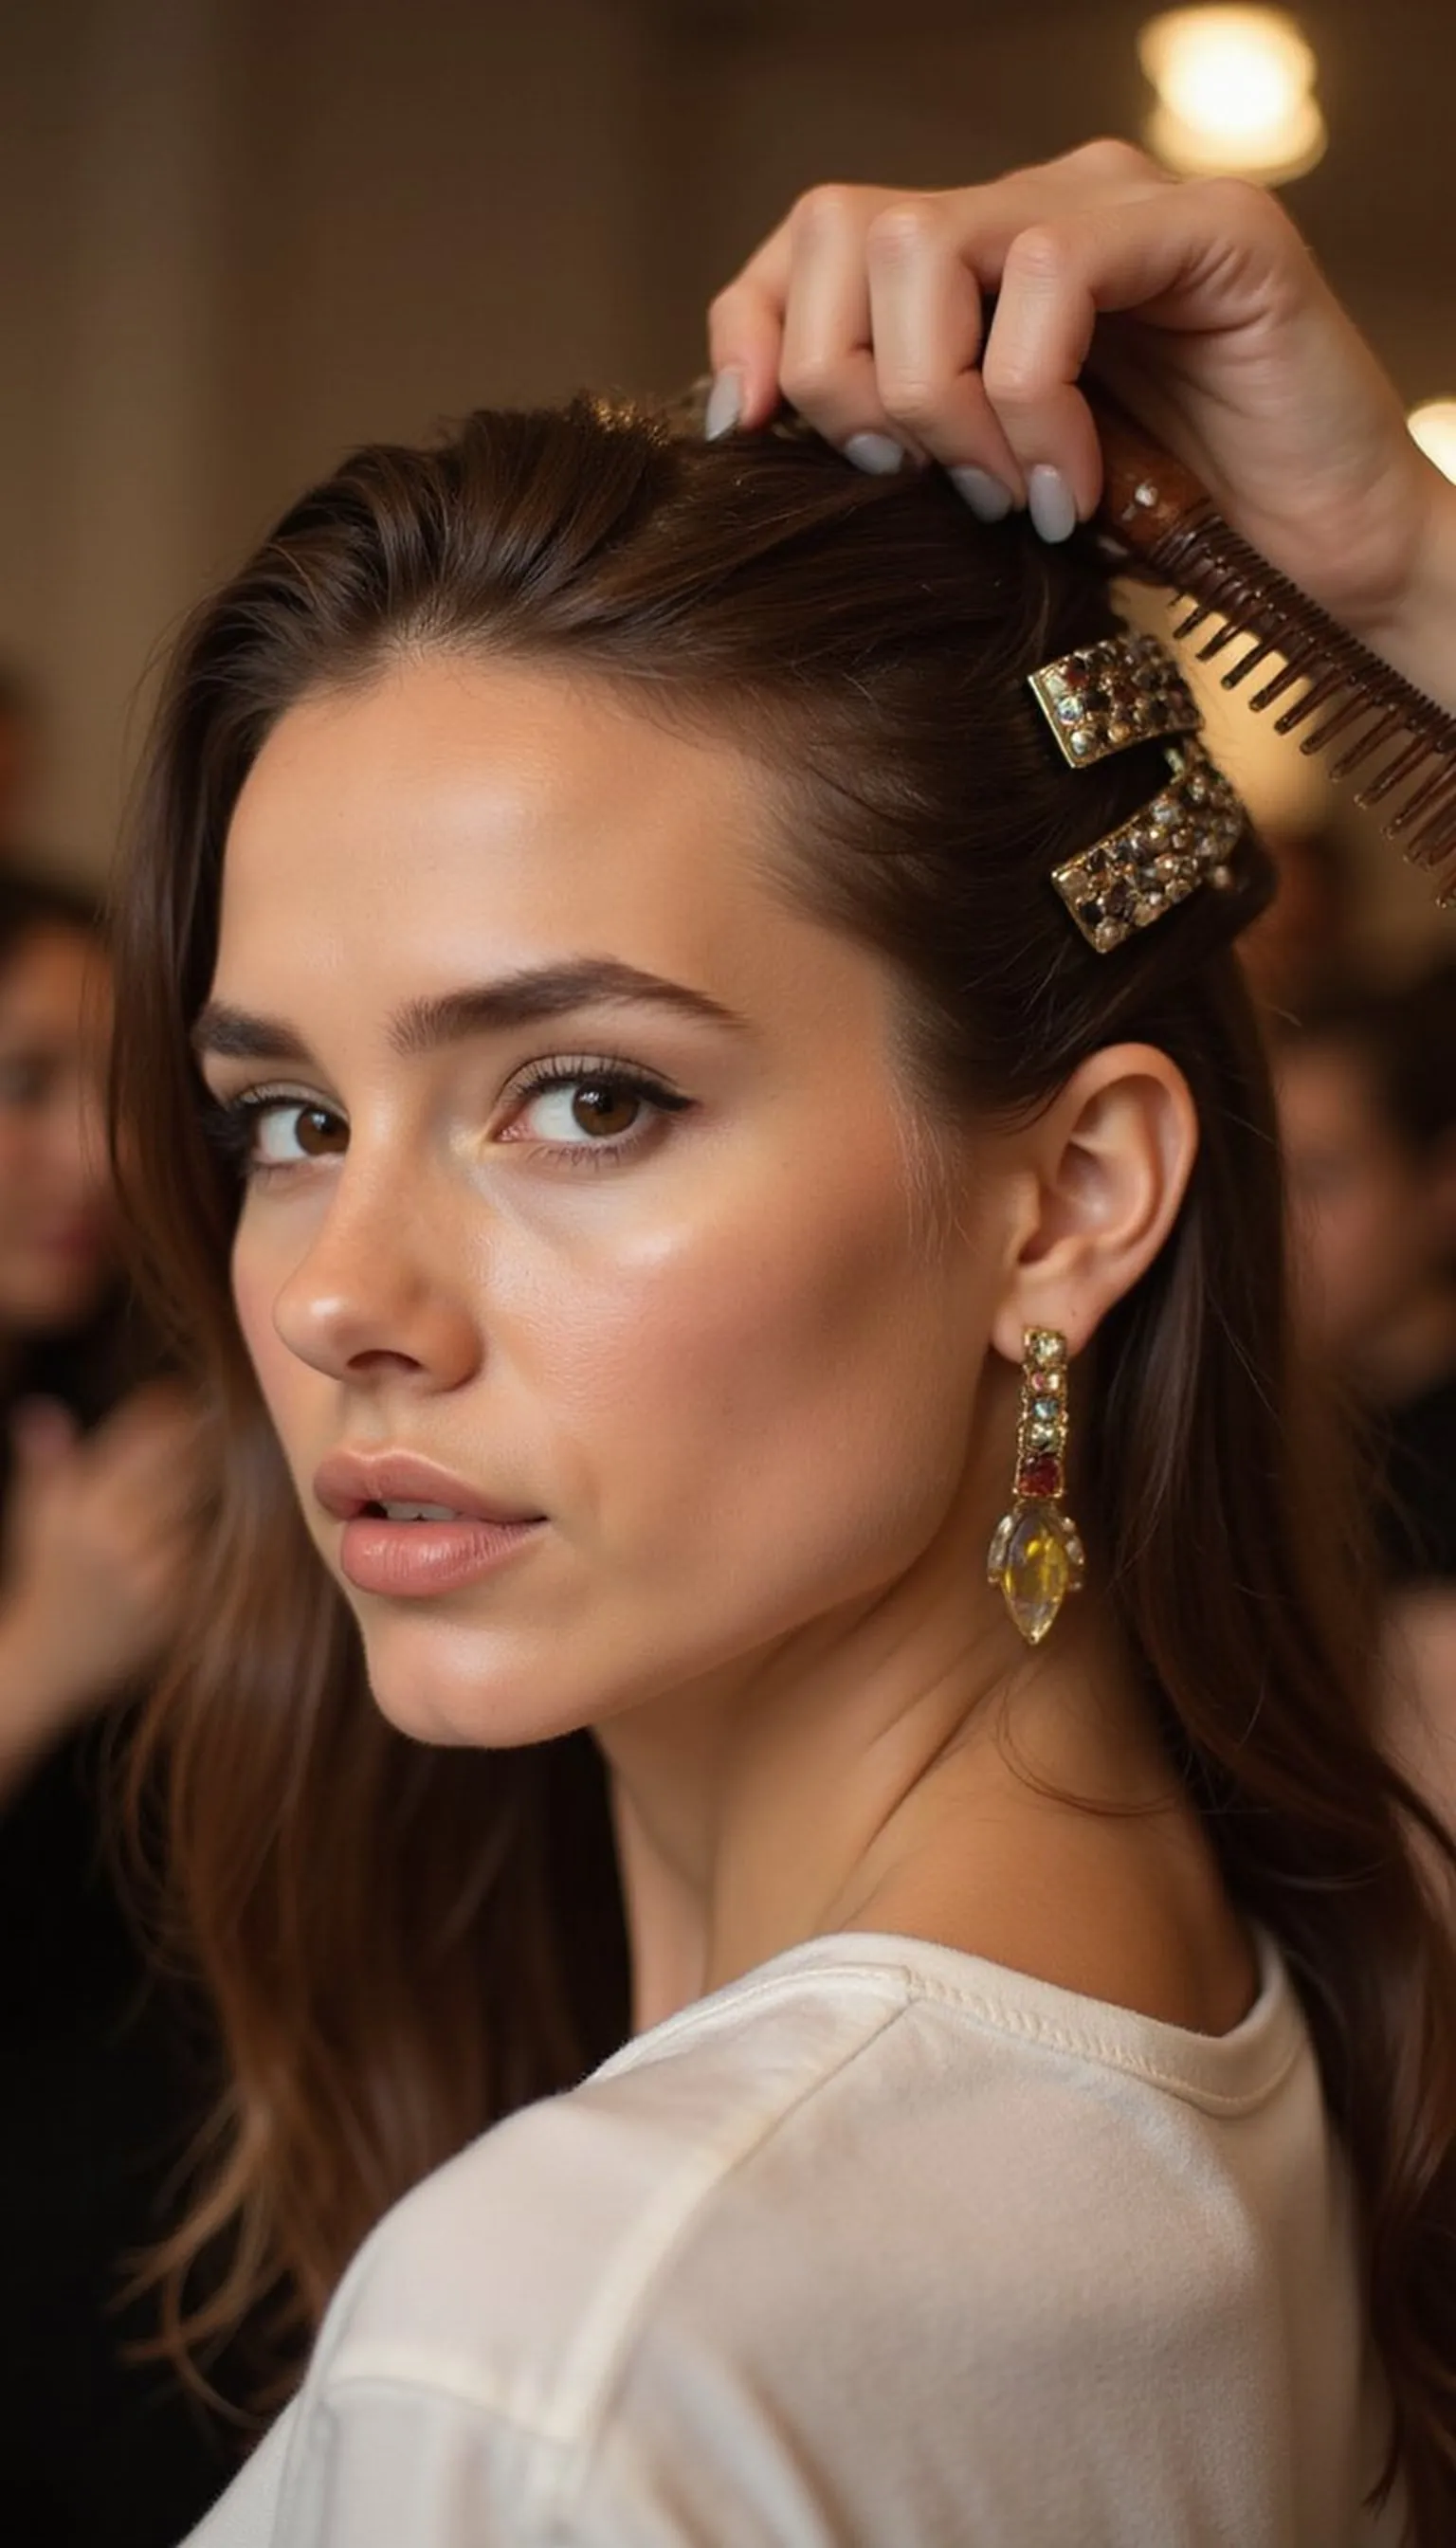
Messy Half-Up Top Knot With Visible Claw Clip
⏱️ 8 min · 🟢 Beginner
A messy half-up top knot held with a visible claw clip is quick, trendy, and keeps hair out of the face between sets. Gather the top half of hair, twist loosely, and secure with a chunky claw clip positioned vertically for secure hold and style impact. Leave some face-framing pieces loose for softness and texture. This look works on most hair types and is perfect for when comfort meets festival fashion.
💇 Styling Tips ▶
Styling Tips
- Use a texturizing spray before twisting to give the knot some grip and volume.
- Position the claw clip so teeth catch both top and some under layers for stability.
- Loosen strands around the face for an airy, effortless finish that photographs well.
⚠️ Avoid: Using a small clip on thick hair causes slipping; choose a larger claw clip for strong hold.
🔄 Try Also: Make it a low half-knot with the claw at the nape or swap the claw for a jeweled barrette for glam.
🛒 Products & Materials ▶
Items Used
📌 “Quick messy half-up top knot secured with a bold claw clip.”
